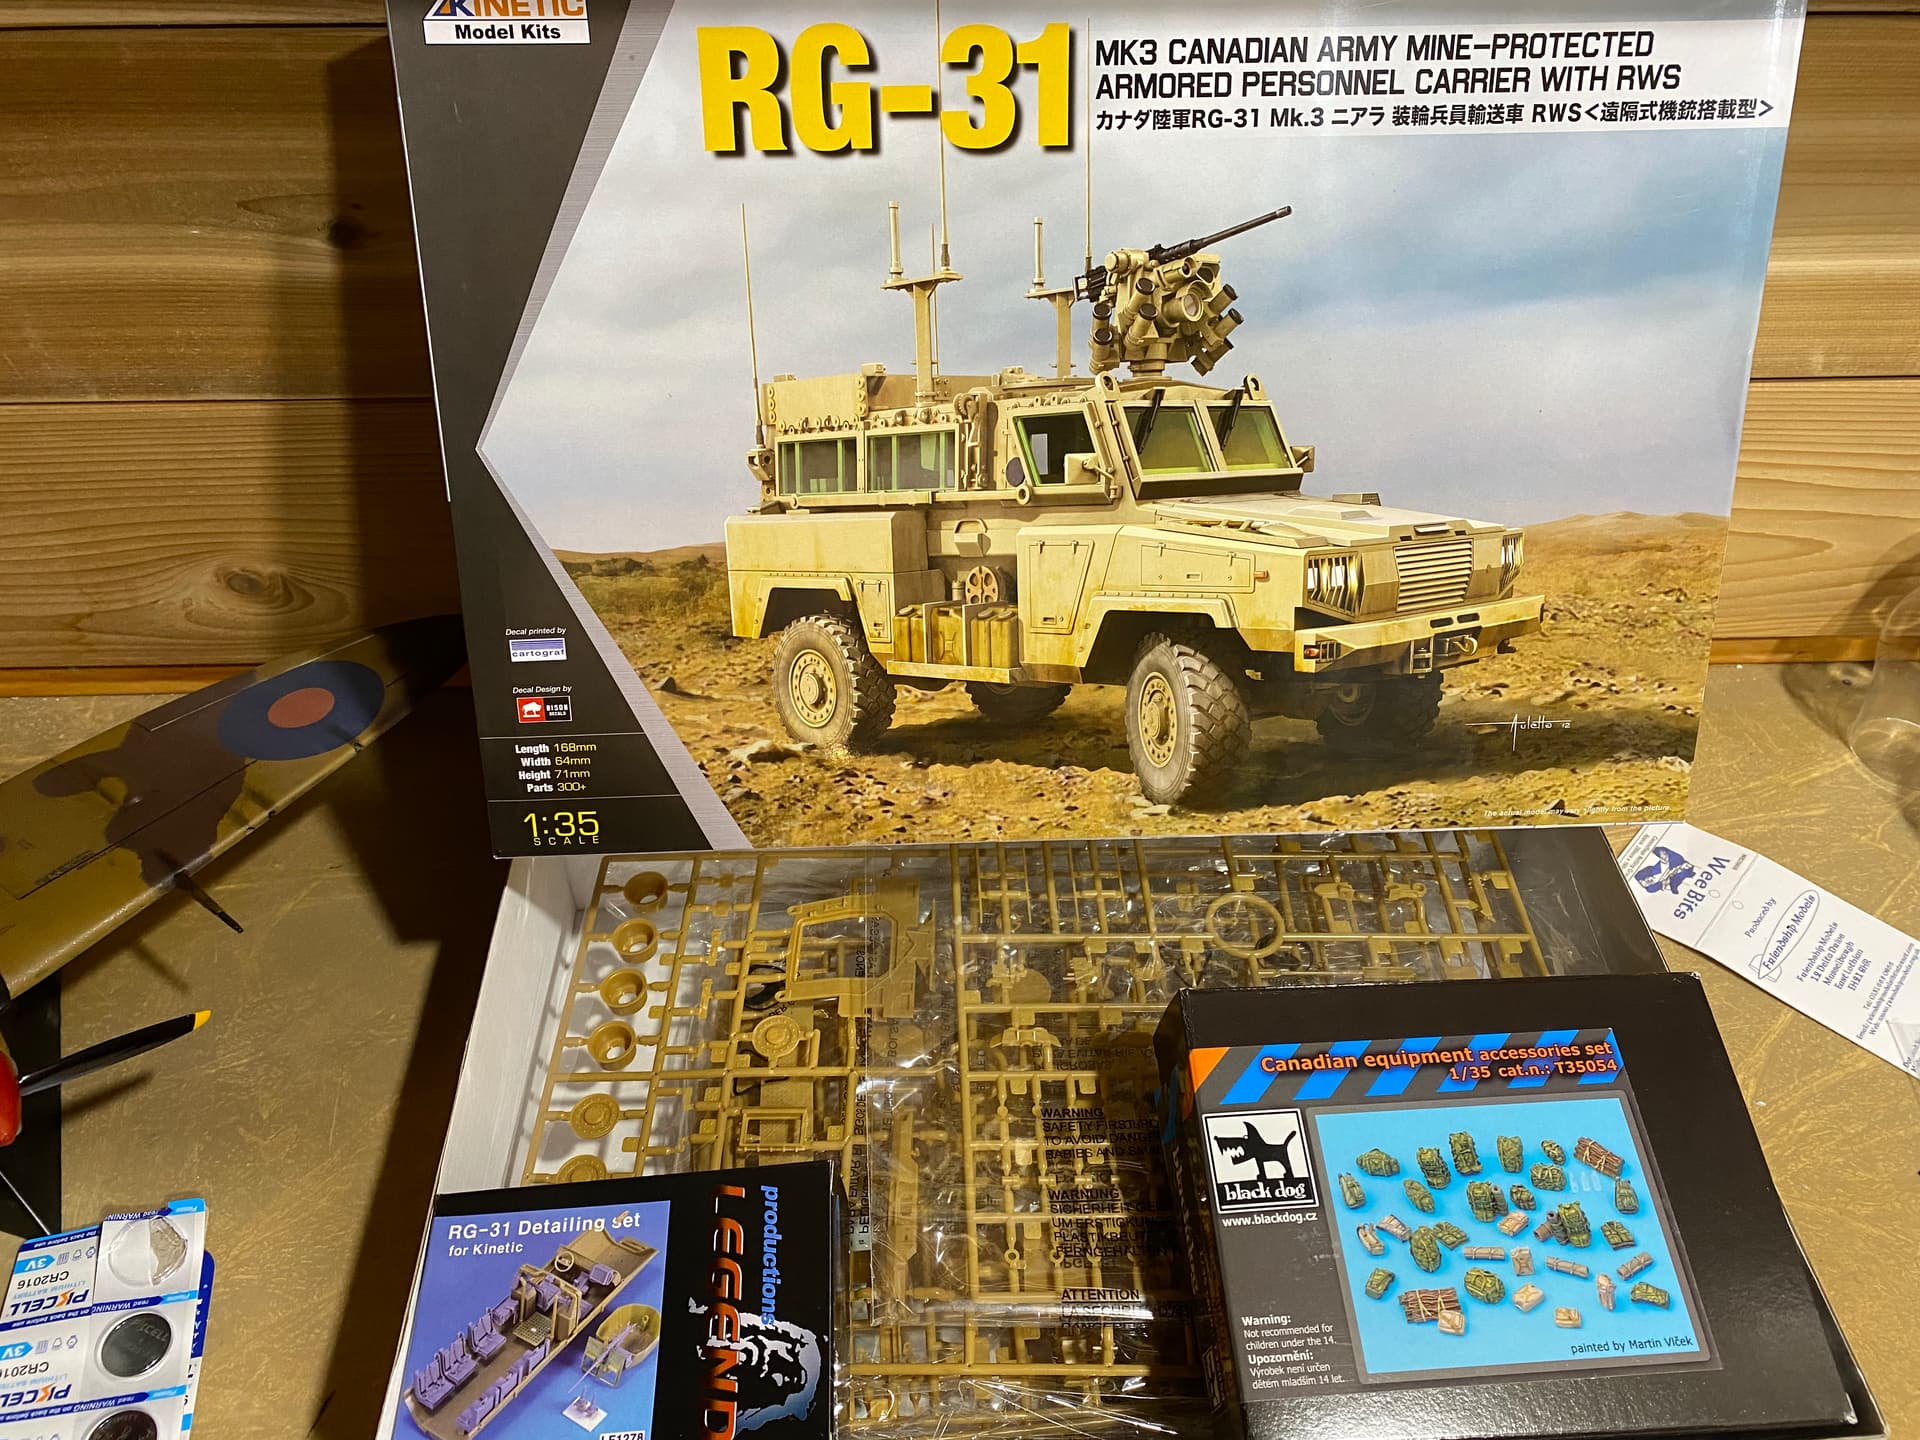
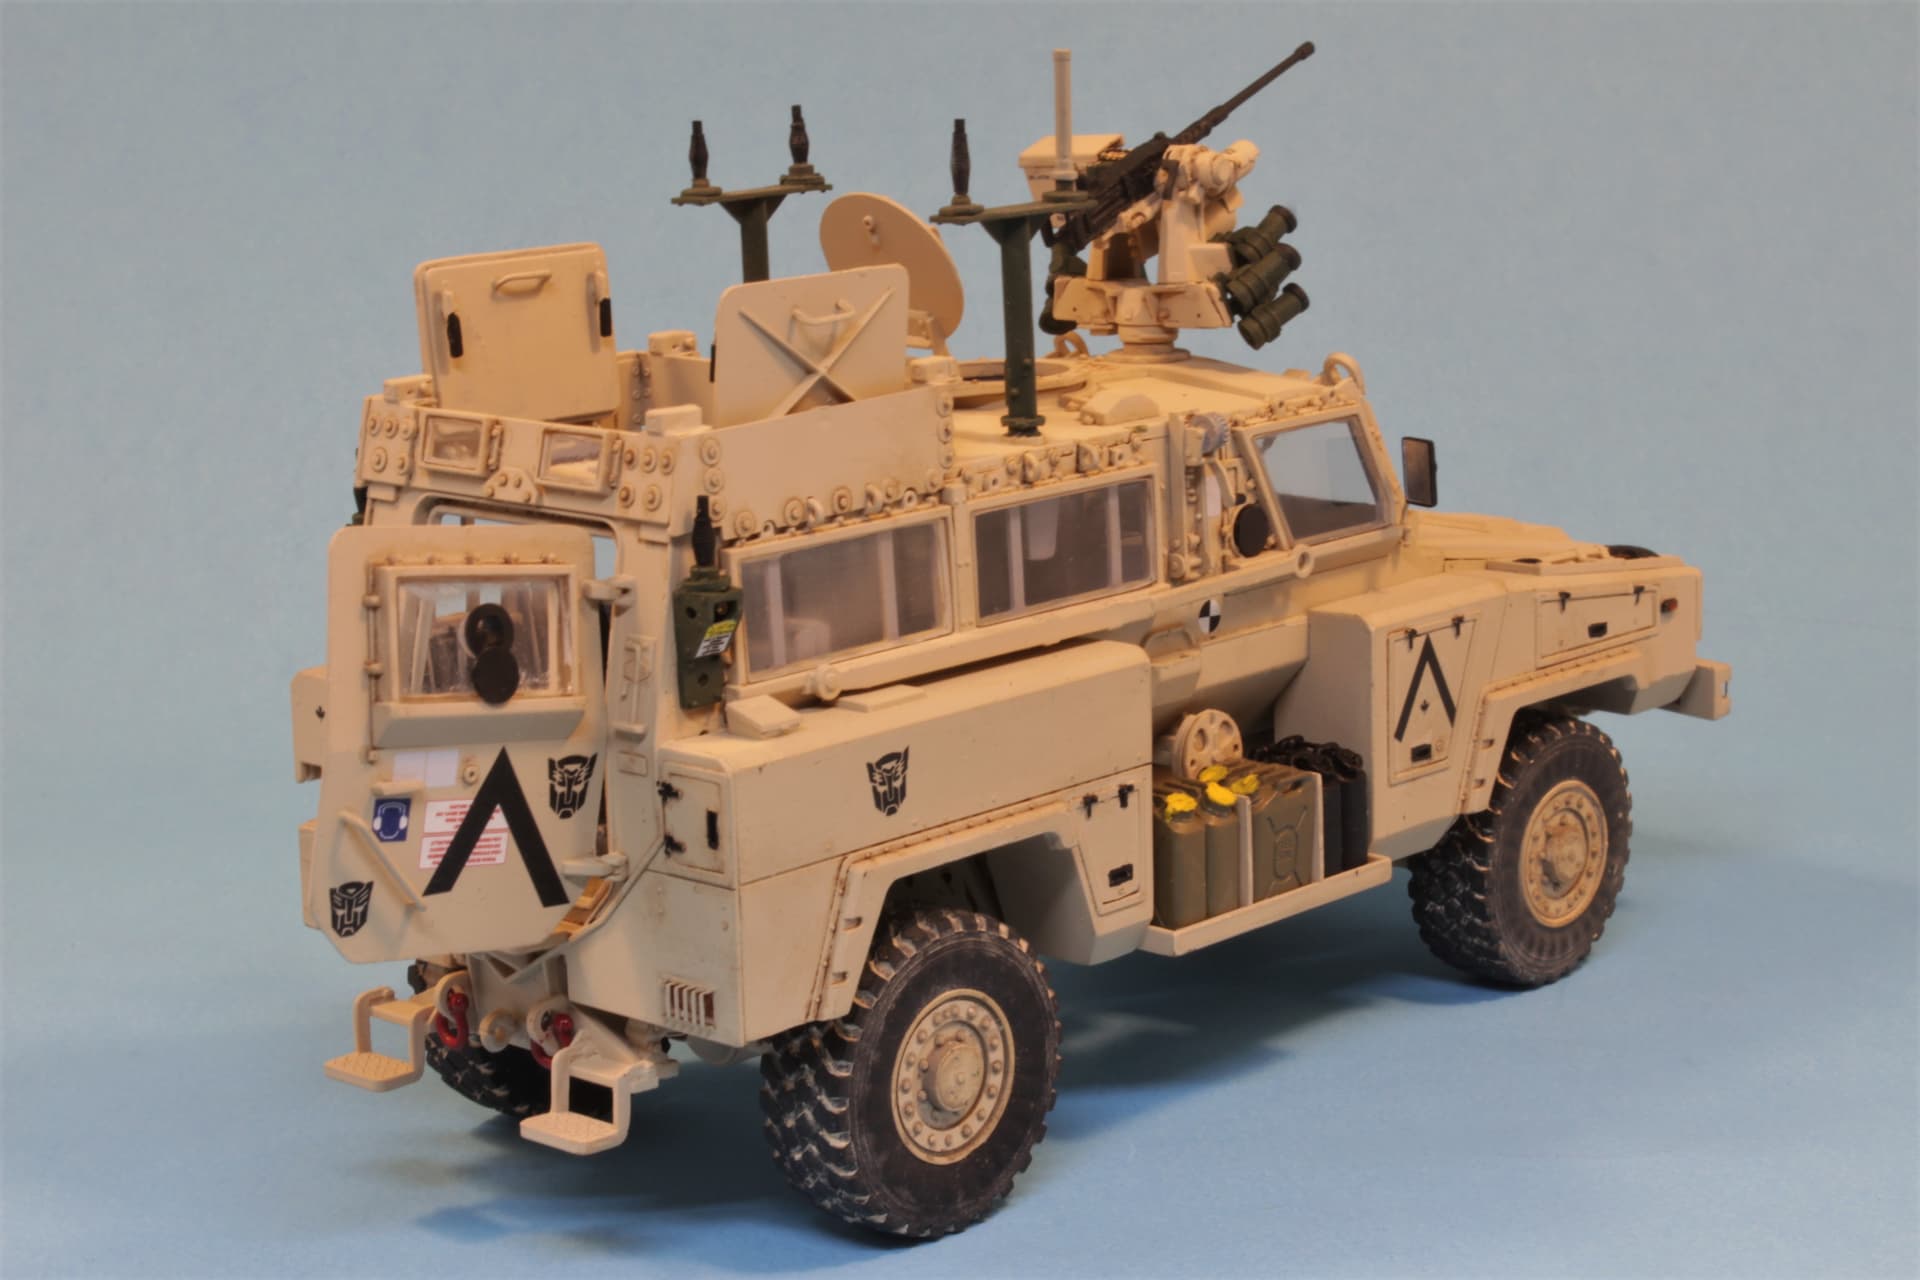
So continuing my mission to build anything and everything ever taken into service with the Canadian Army, we have this RG-31 Nyala from Kinetic.
This is my first model from them and so far so good.
The kit comes with close to a dozen sprues of bits in a horrendous baby poo yellow-brown, a clear sprue for the windows, a set of vinyl tires and a small fret of photo etch. Markings are supplied for three vehicles.
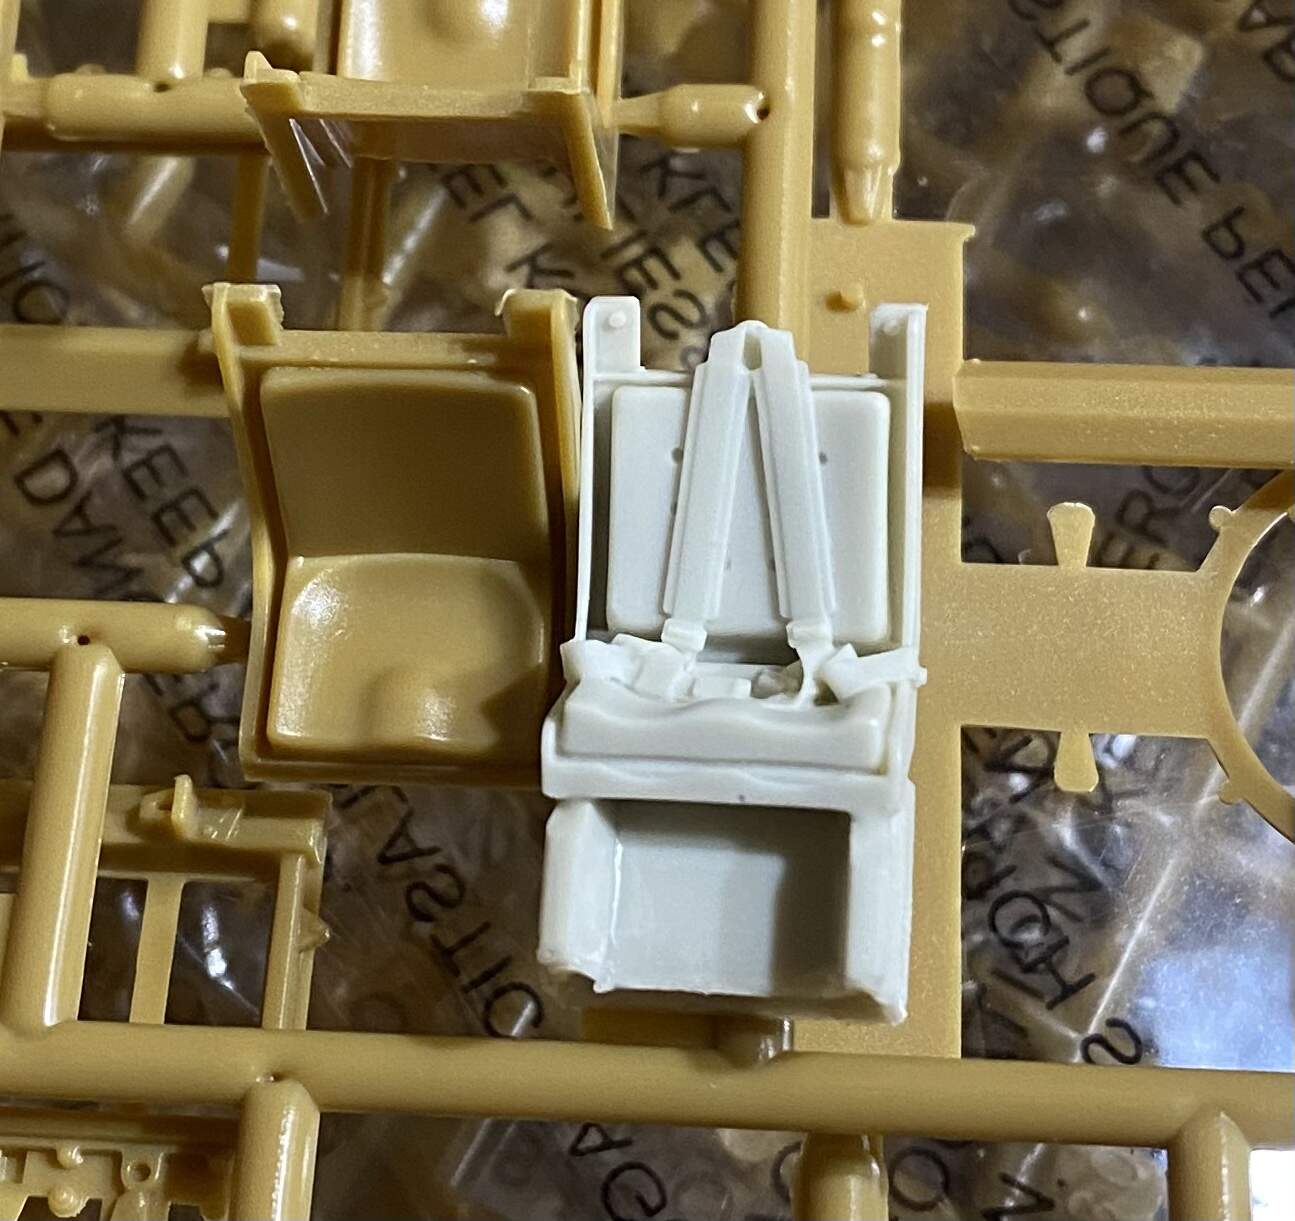
I’ve picked up a set of Canadian equipment from Black Dog and a detail set from Legend. The detail set is for the American version which lacks the Remote Weapon Station, but I mainly wanted it for the seats as the kit supplied ones are not nearly as nice.
I may or may not end up grabbing some nicer tires and some appropriate small arms but we’ll see.
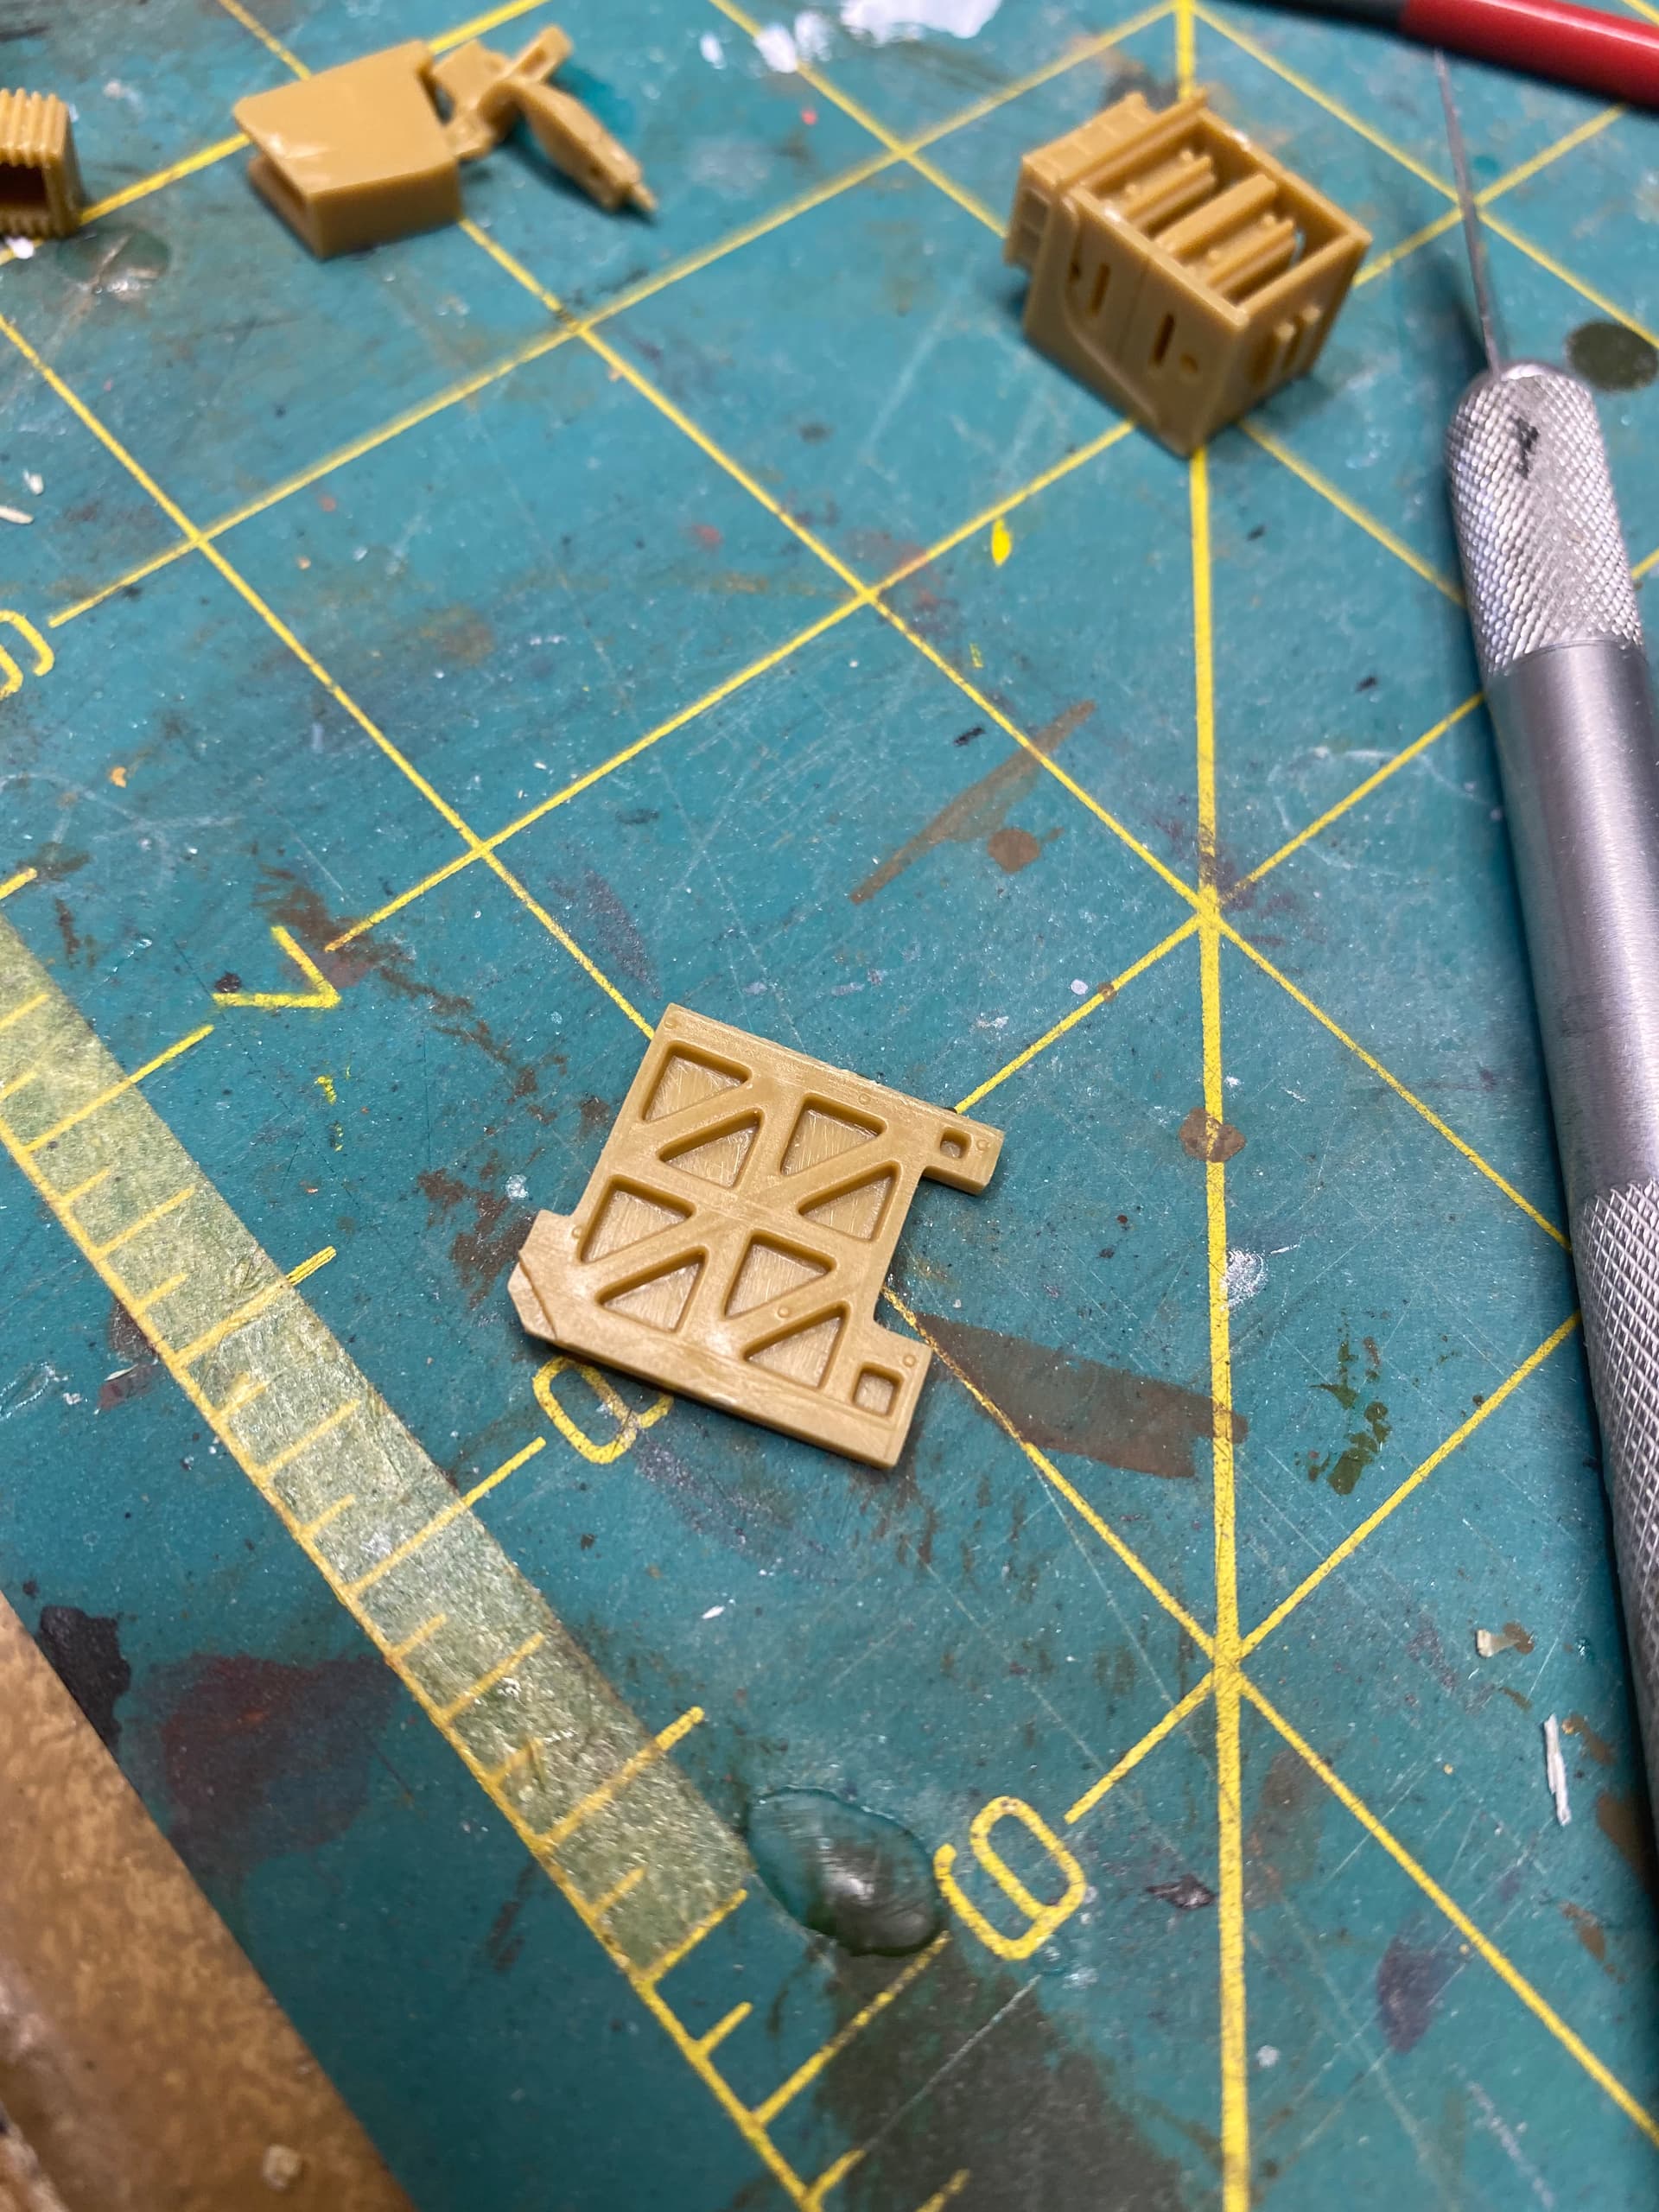
First impressions with the plastic bits are ok. The styrene Kinetic uses is very soft. This leads to some details being a little less than crisp, but it’s making clean up a breeze.
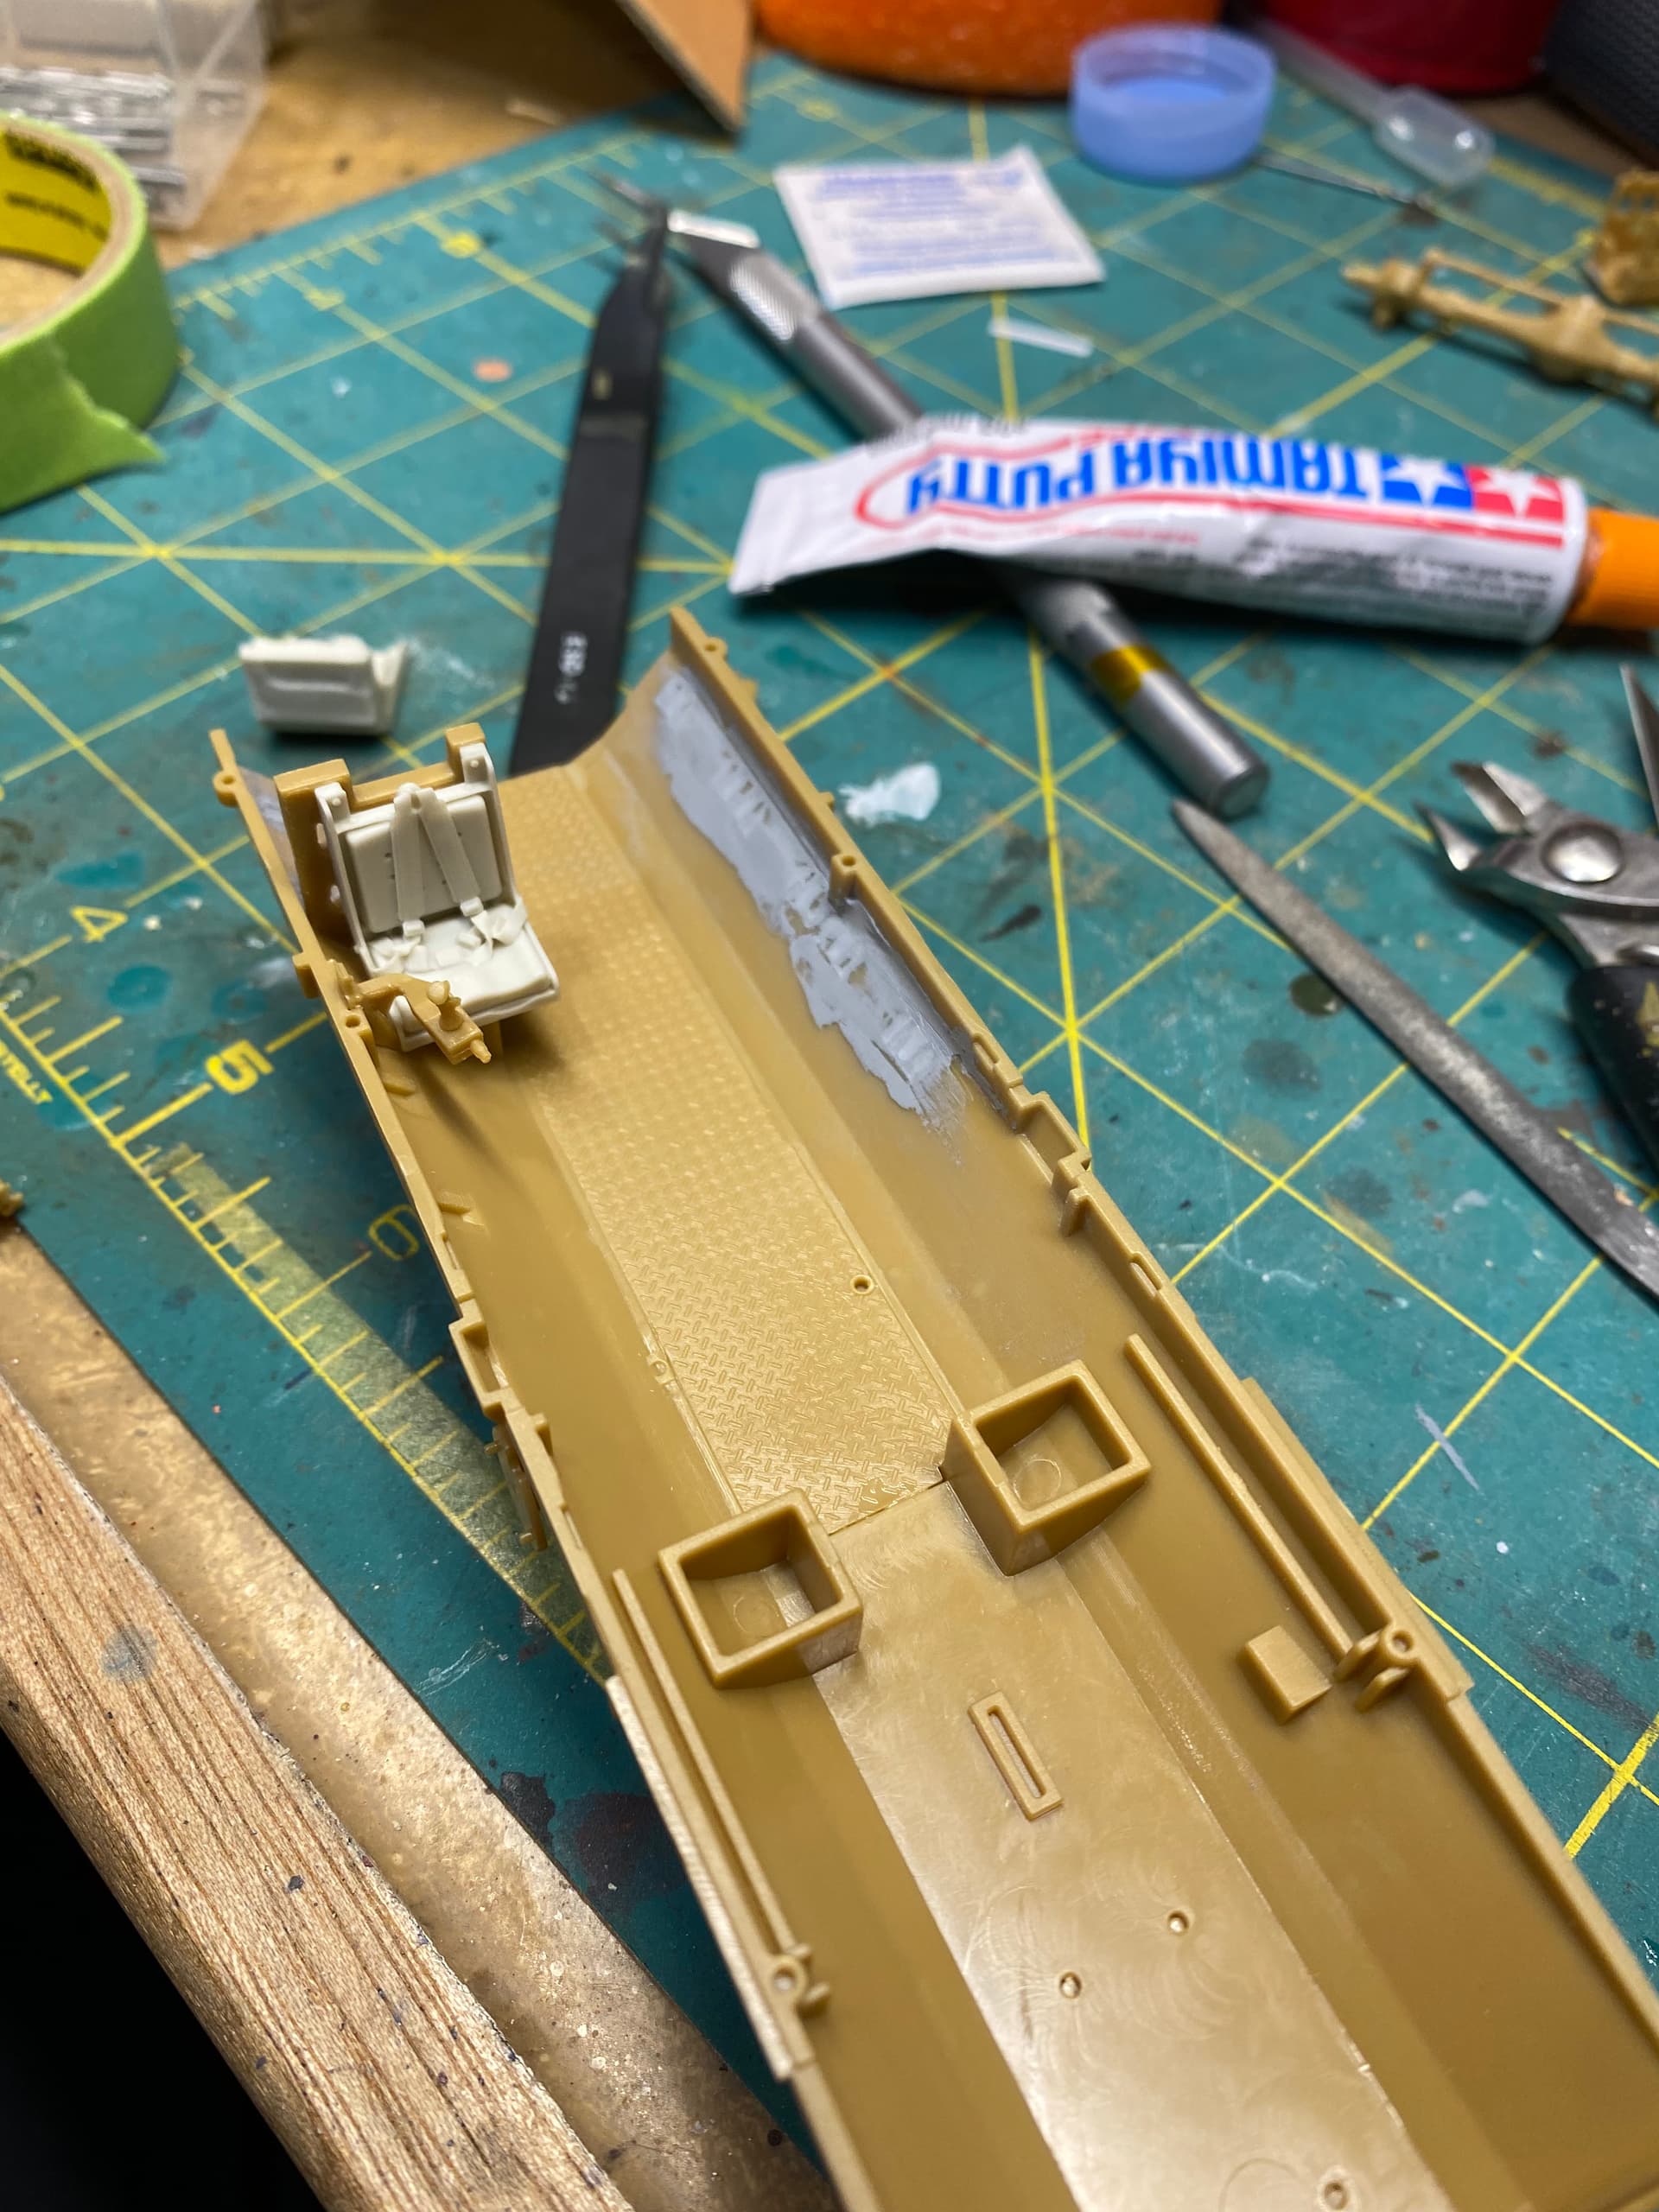
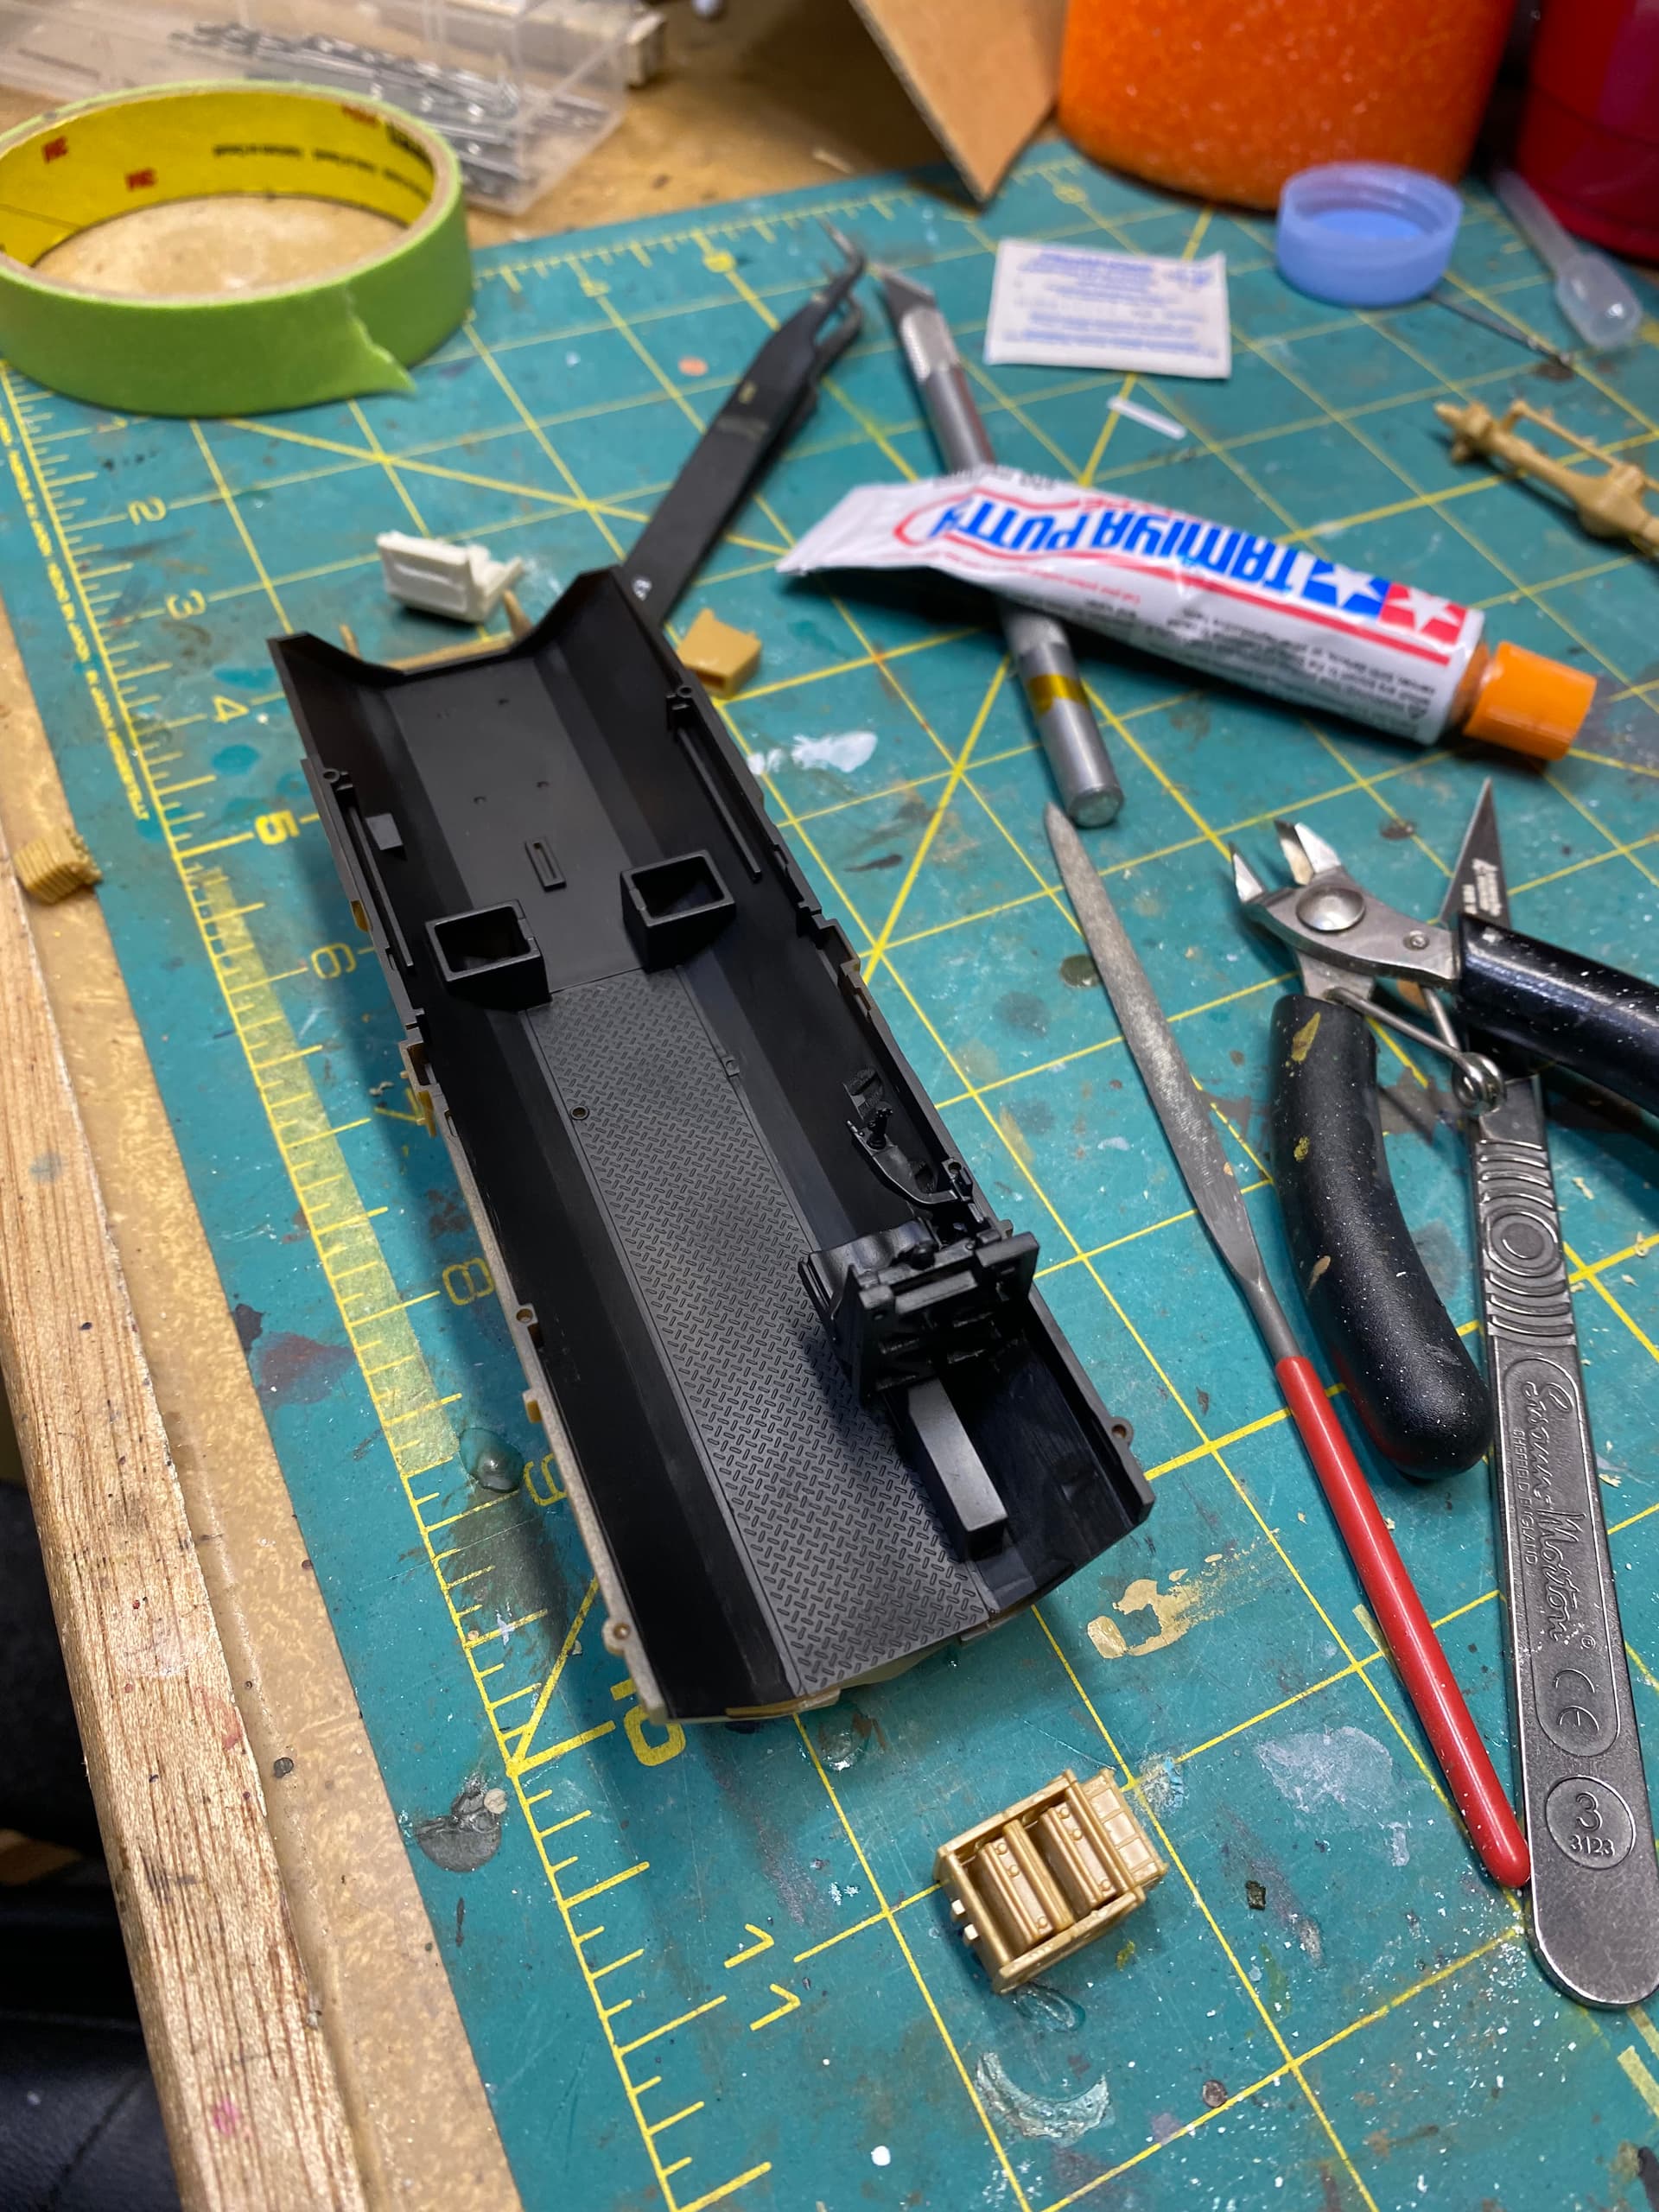
Front differential built up nicely with a little clean up needed. It’s also built in such a way that you can pose the wheels. I managed to melt the ends of the sway bar rather than glue them so the linkage will be flexible at least until I decide how to pose it.
Underside of the hull is shaping up nicely. The tanks for what I assume is the tire inflation system needed some putty work as did the transfer case.
The “walls” that hold the front leaf springs are supposed to slot into some tracks on the underside of the hull. Something just wasn’t quite right with the fit so a little brute force and tape were needed to bring things into alignment.
That’s all we’ve got for now.
1 Like
looks good so far. If I can suggest stop work on the outside and do the interior first. it’ll make it easier to put the halves together as it is a bit tricky.
here’s mine.
3 Likes
Good start. If you’re interested by some feedback you can read the article I posted on my site. I mention a number of areas needing attention.
http://olivier.carneau.free.fr/gb_version/index.htm
Olivier
4 Likes
Thanks for the tip!
@Bison126 , your review is actually what talked me into getting the kit, though I didn’t realize it was yours at the time. I’ll be sure to go through things again before I get too deep into it.
Merci!
1 Like
Glad to read my article has been useful.
Enjoy your build.
Olivier
Nice start on this model. May I ask, are there are parts to build US version out of this box? TiA.
Thanks.
Sadly no. It’s missing the appropriate US radio/electronics set and the parts for the turret mounted .50.
Kinetic does make a US model though. The Legend set I have is also meant for the US version so it’ll let you upgrade a lot more stuff if that’s your jam.
1 Like
@Canmedic Don, thank you for the information. I saw several Canadian version RG-31 for sale on eBay that were cheaper then US variant. Anyway, looking forward to all your updates as I truly want to build one myself in near future.
No worries @Stryker45
And Jesus that is quite the price difference on eBay. I don’t know where you’re located, but my LHS has one and they’ll ship worldwide .
This build is more intricate that I had anticipated and it’s sapping my mojo a little so updates are going to be slow. I’ll probably post some more progress by the weekend.
1 Like
Don, thank you for the link. That is bit more reasonable of a price. No worries on your slow build I know the feeling. Few years back, it took me good few years to finish up a 1/32 A-10 as it sure was not a mojo booster kit but the end result was well worth the effort. Just keep at it and pretty soon it will be worth the time. 
Don, when the mojo starts to wane and it looks like it’s going to be a long build, switch from being goal oriented to being task oriented. Set yourself a task for the day and accomplish it. Break the kit down into many little kits and build them one at a time, accomplishing many small victories. Line up the sub-assemblies at the back of your bench as you finish them so you can observe your tangible progress. You can be proud of what you’ve gotten done and the still to be addressed stack of styrene won’t seem so daunting.
1 Like
That’s exactly the conclusion I came to last night.
It’s not even the amount of plastic with this one. This kit has one of those interiors that needs to be built and painted in layers and I’ve just gotten hung up on it.
Decided I’m going to bang out the rest of the sub assemblies and then go back and start worrying about building it up.
1 Like
Ok! Progress!
As suggested by Ian, I moved onto the interior. He was right as things get fiddly.
Because I’m using the seats from the Legend set, I needed to fill and sand the locating slots in the kit. I’ve also got the seat for the RWS gunner installed which cause me to realize something.
Because the seats don’t fit flush with anything, there’s lots of areas which I know are going to be a pain to paint. So…
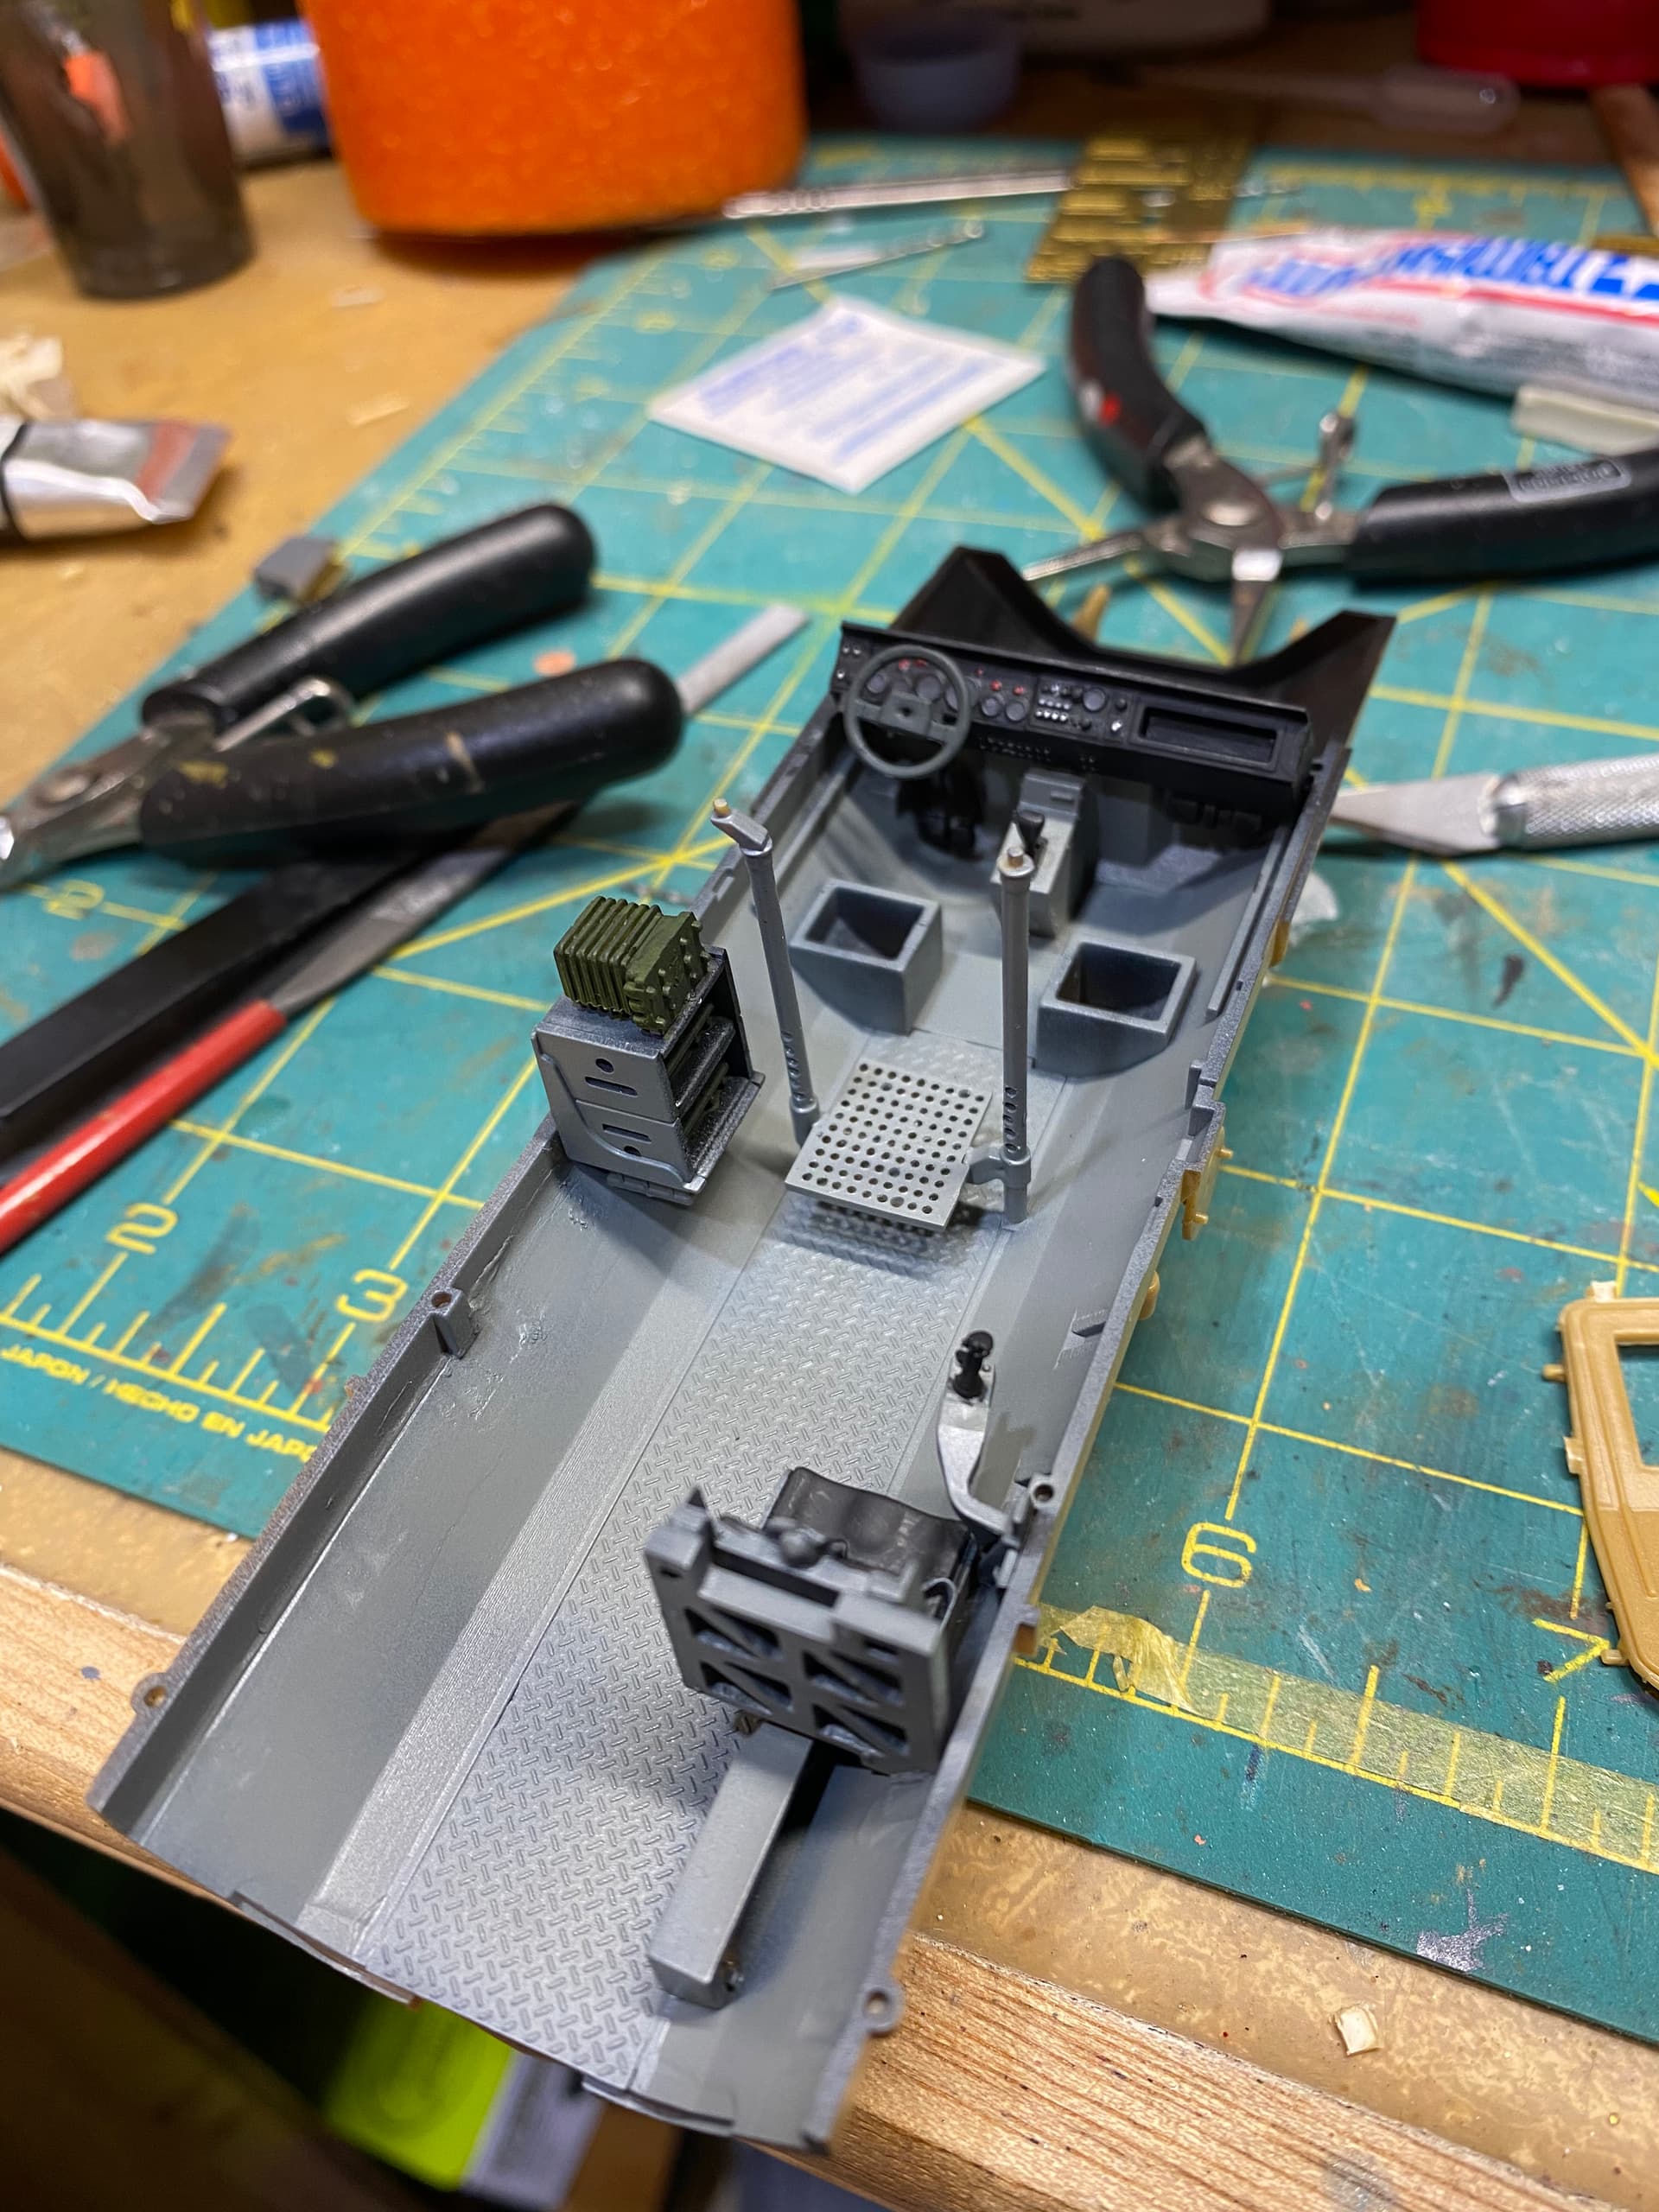
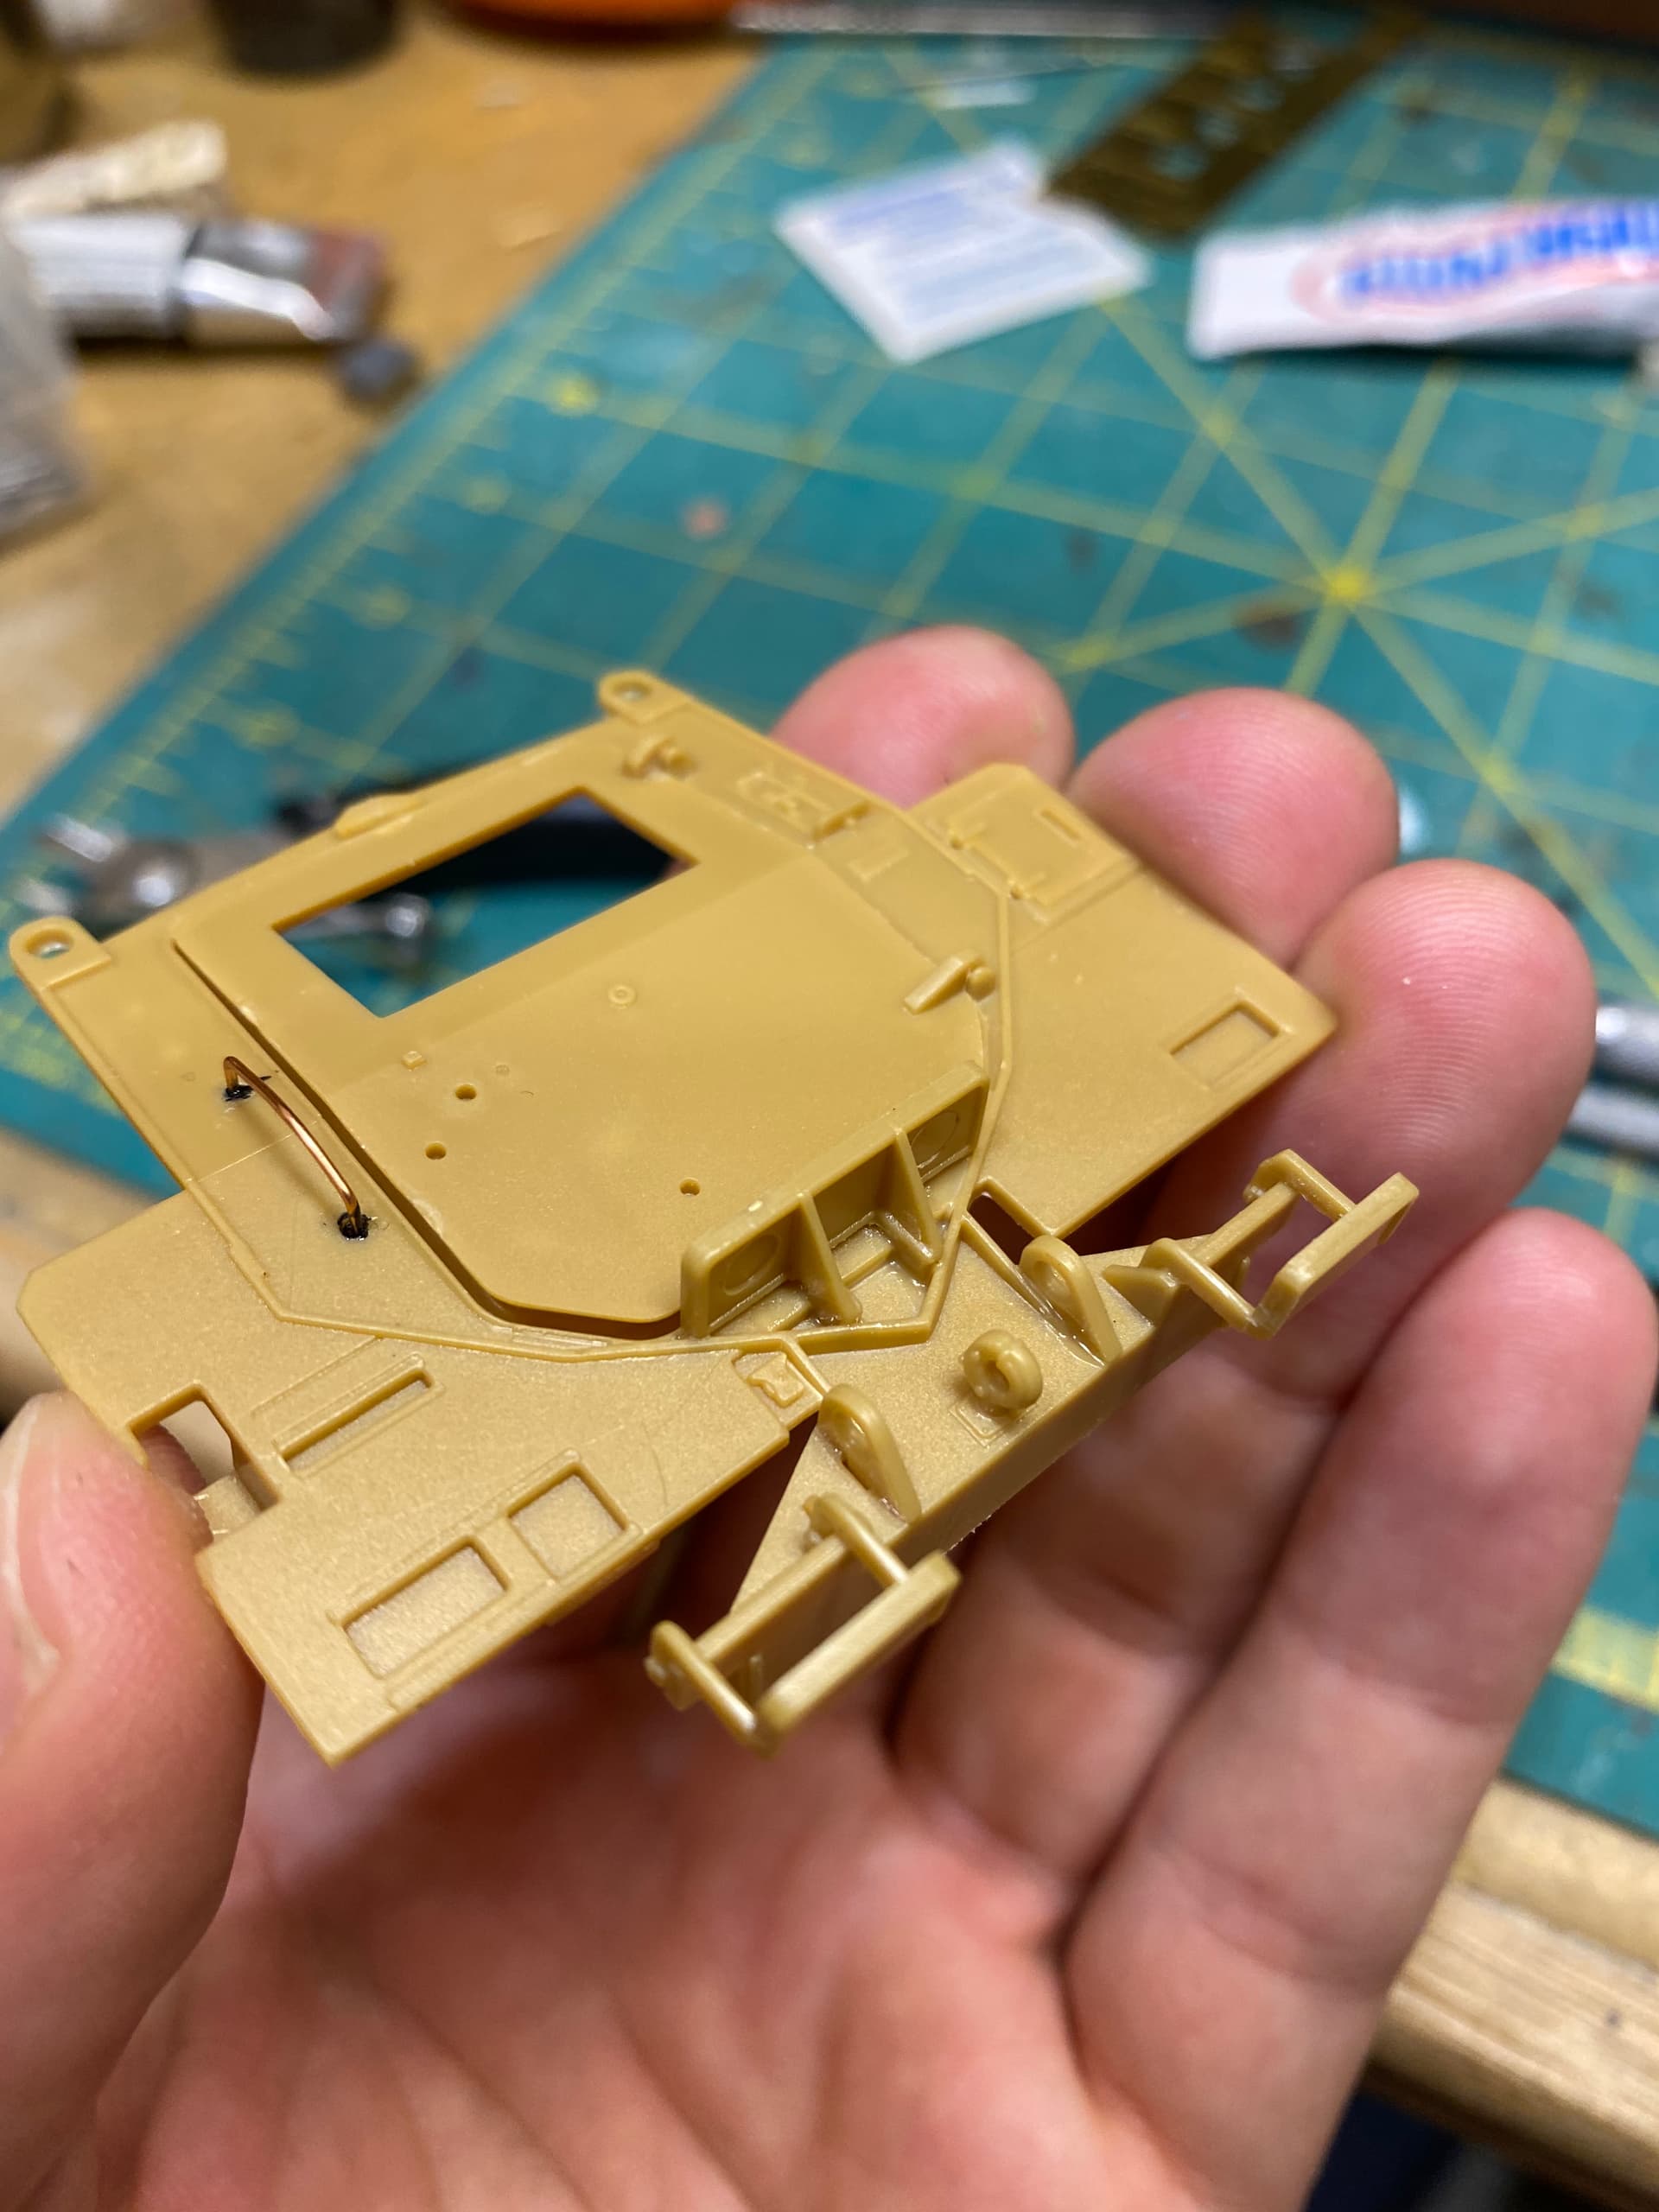
Shadow coat for everything! Also got the rack for the radios and the dash installed.
The mounting plate for the RWS gunner’s seat came as one solid lump. It’s supposed to be an open, honeycomb sort of affair, so some surgery was required.
Before:
After:
I’ve also realized that I need to paint up all the seats, the RWS sight unit and a bunch of other stuff before I can install it for all the same reasons, it’s cramped in here and I’ll make a mess otherwise.
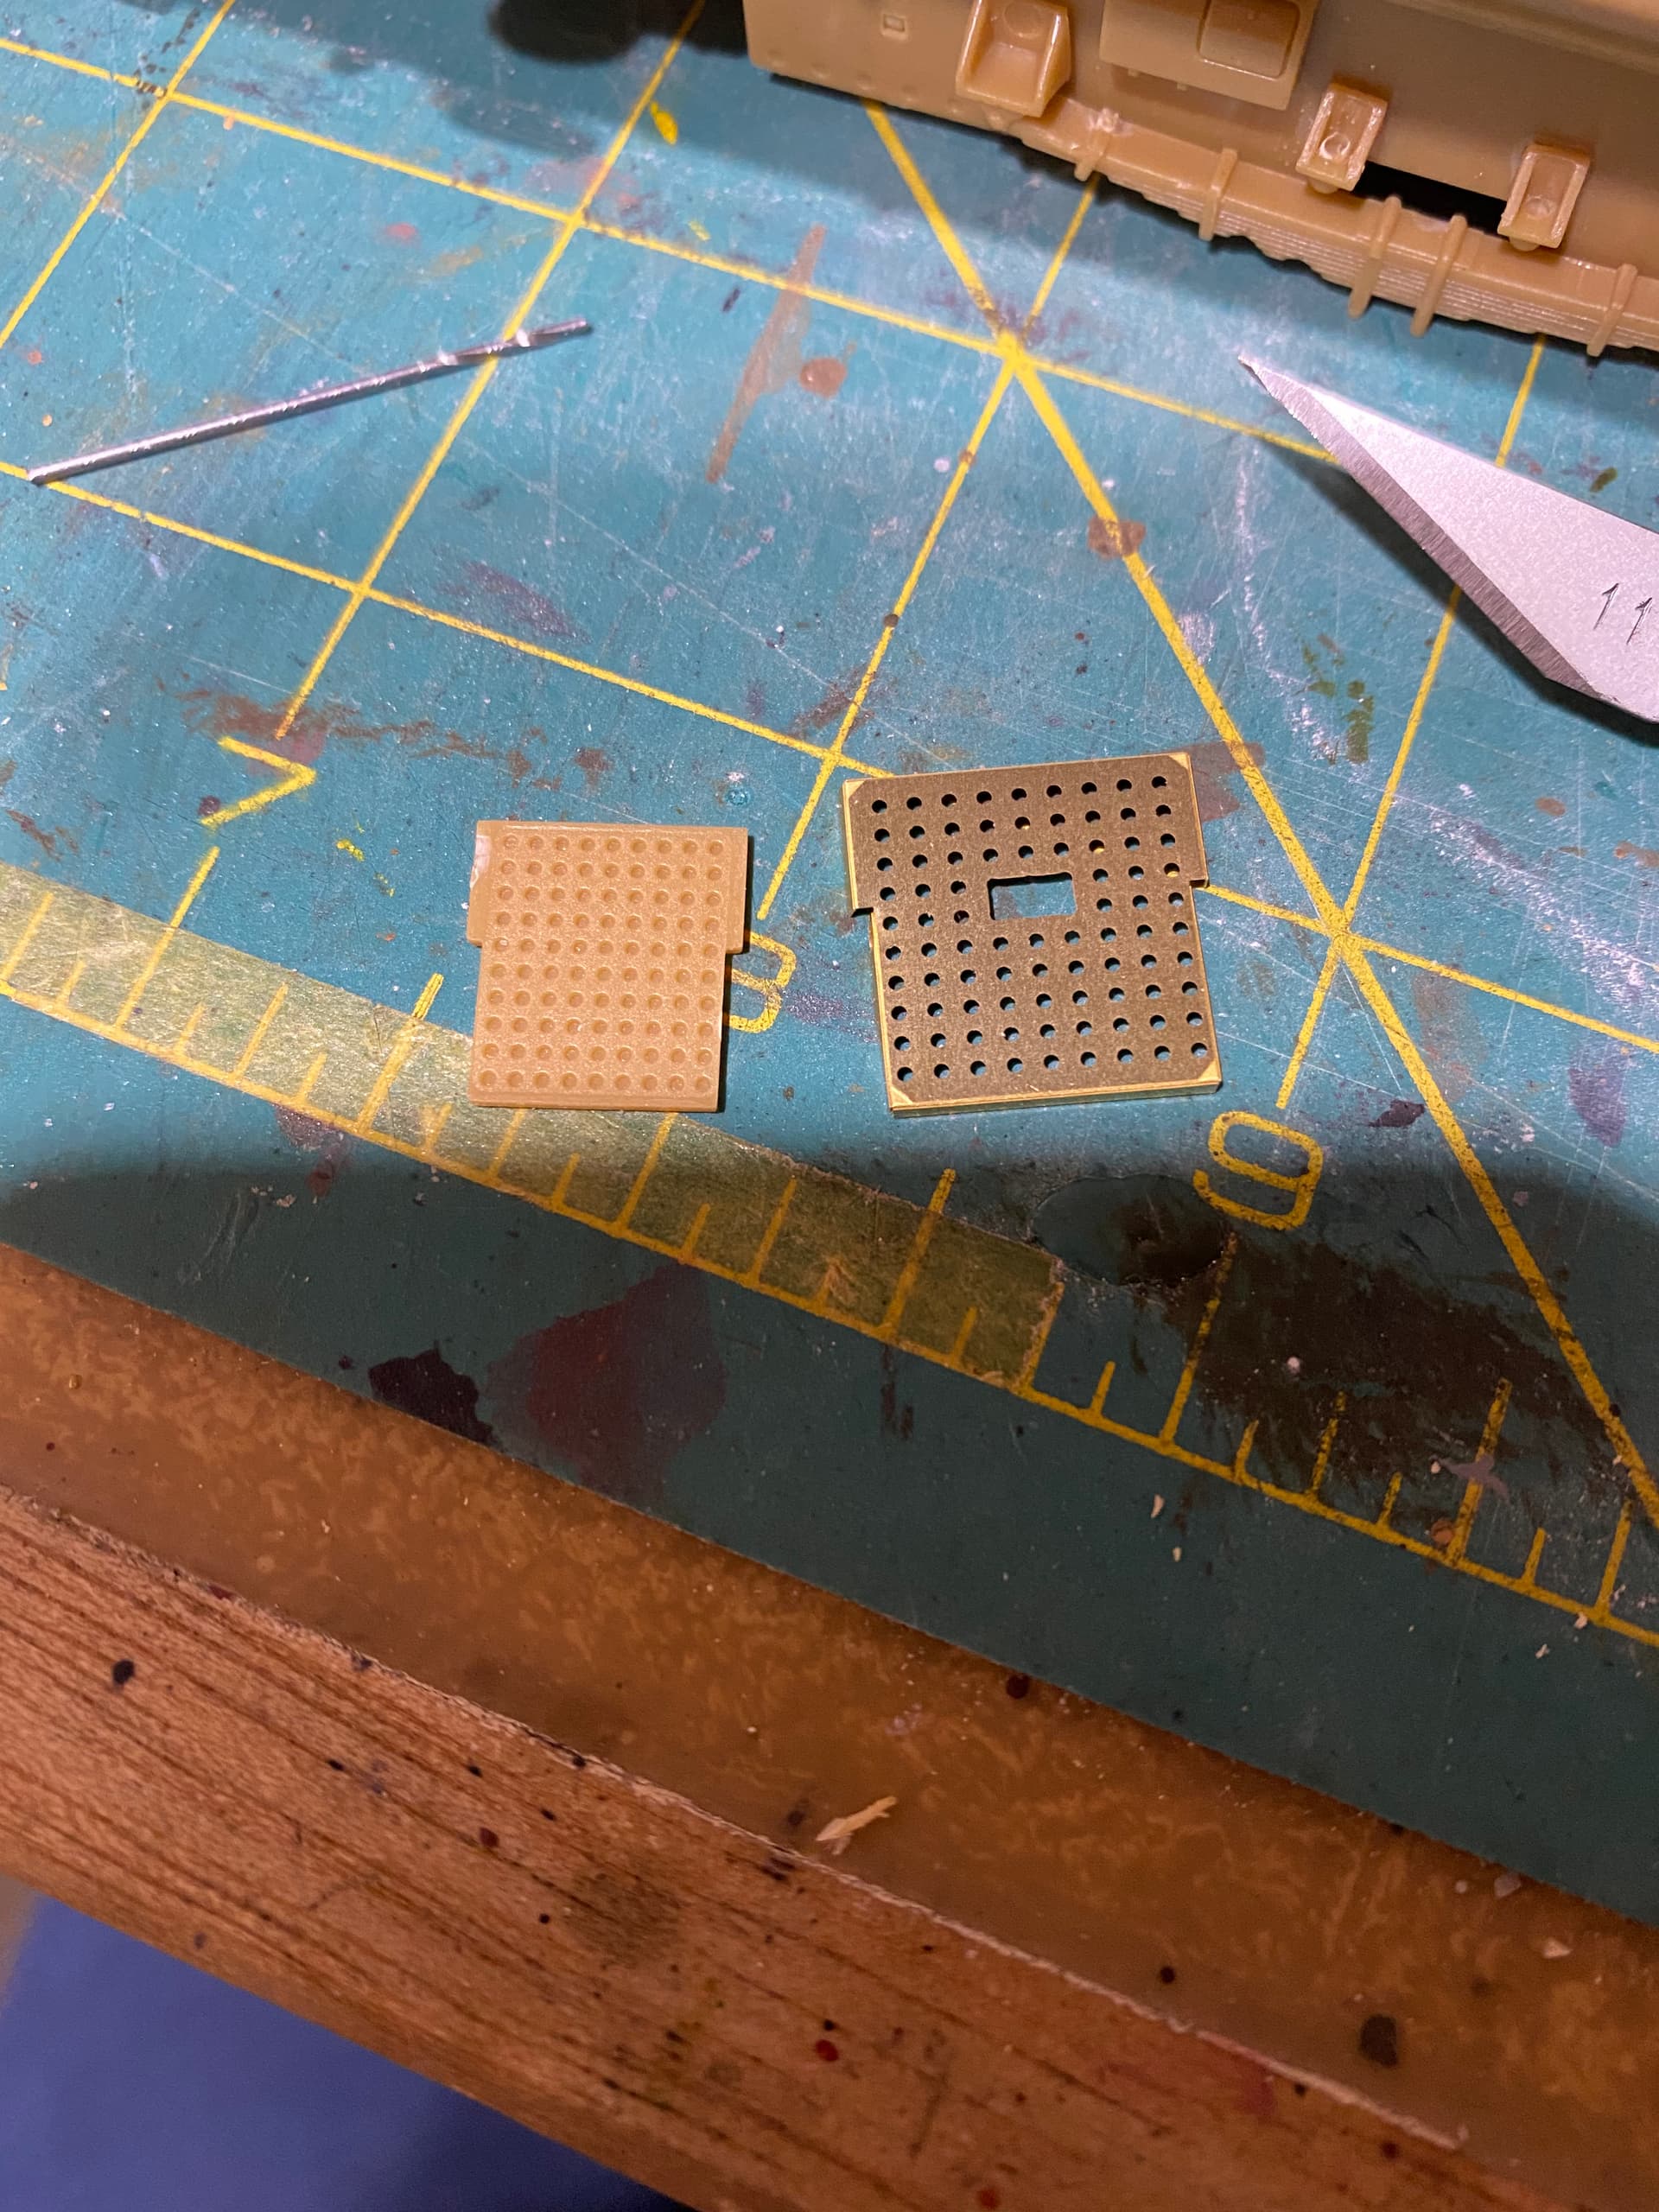
Also got real excited about the PE floor plate for the pass through between cab and passenger areas.
Except it’s too bloody big! It’s meant for the US version which has a different configuration in the back. So, some time, 3 broken bits and 90 holes later I drilled them all out. You can see below.
Here it is with the base coat of grey and some work started on the dash. I’ve only found one good set of interior reference photos for the version I’m building. They show what I think are ceramic armour panels along the lower hull sides which aren’t modelled in the kit. Rather than scratch them because it’ll throw off the spacing of everything inside, I’m just going to paint the appropriate areas off white as they appear and see if I can’t scribe some panel lines in.
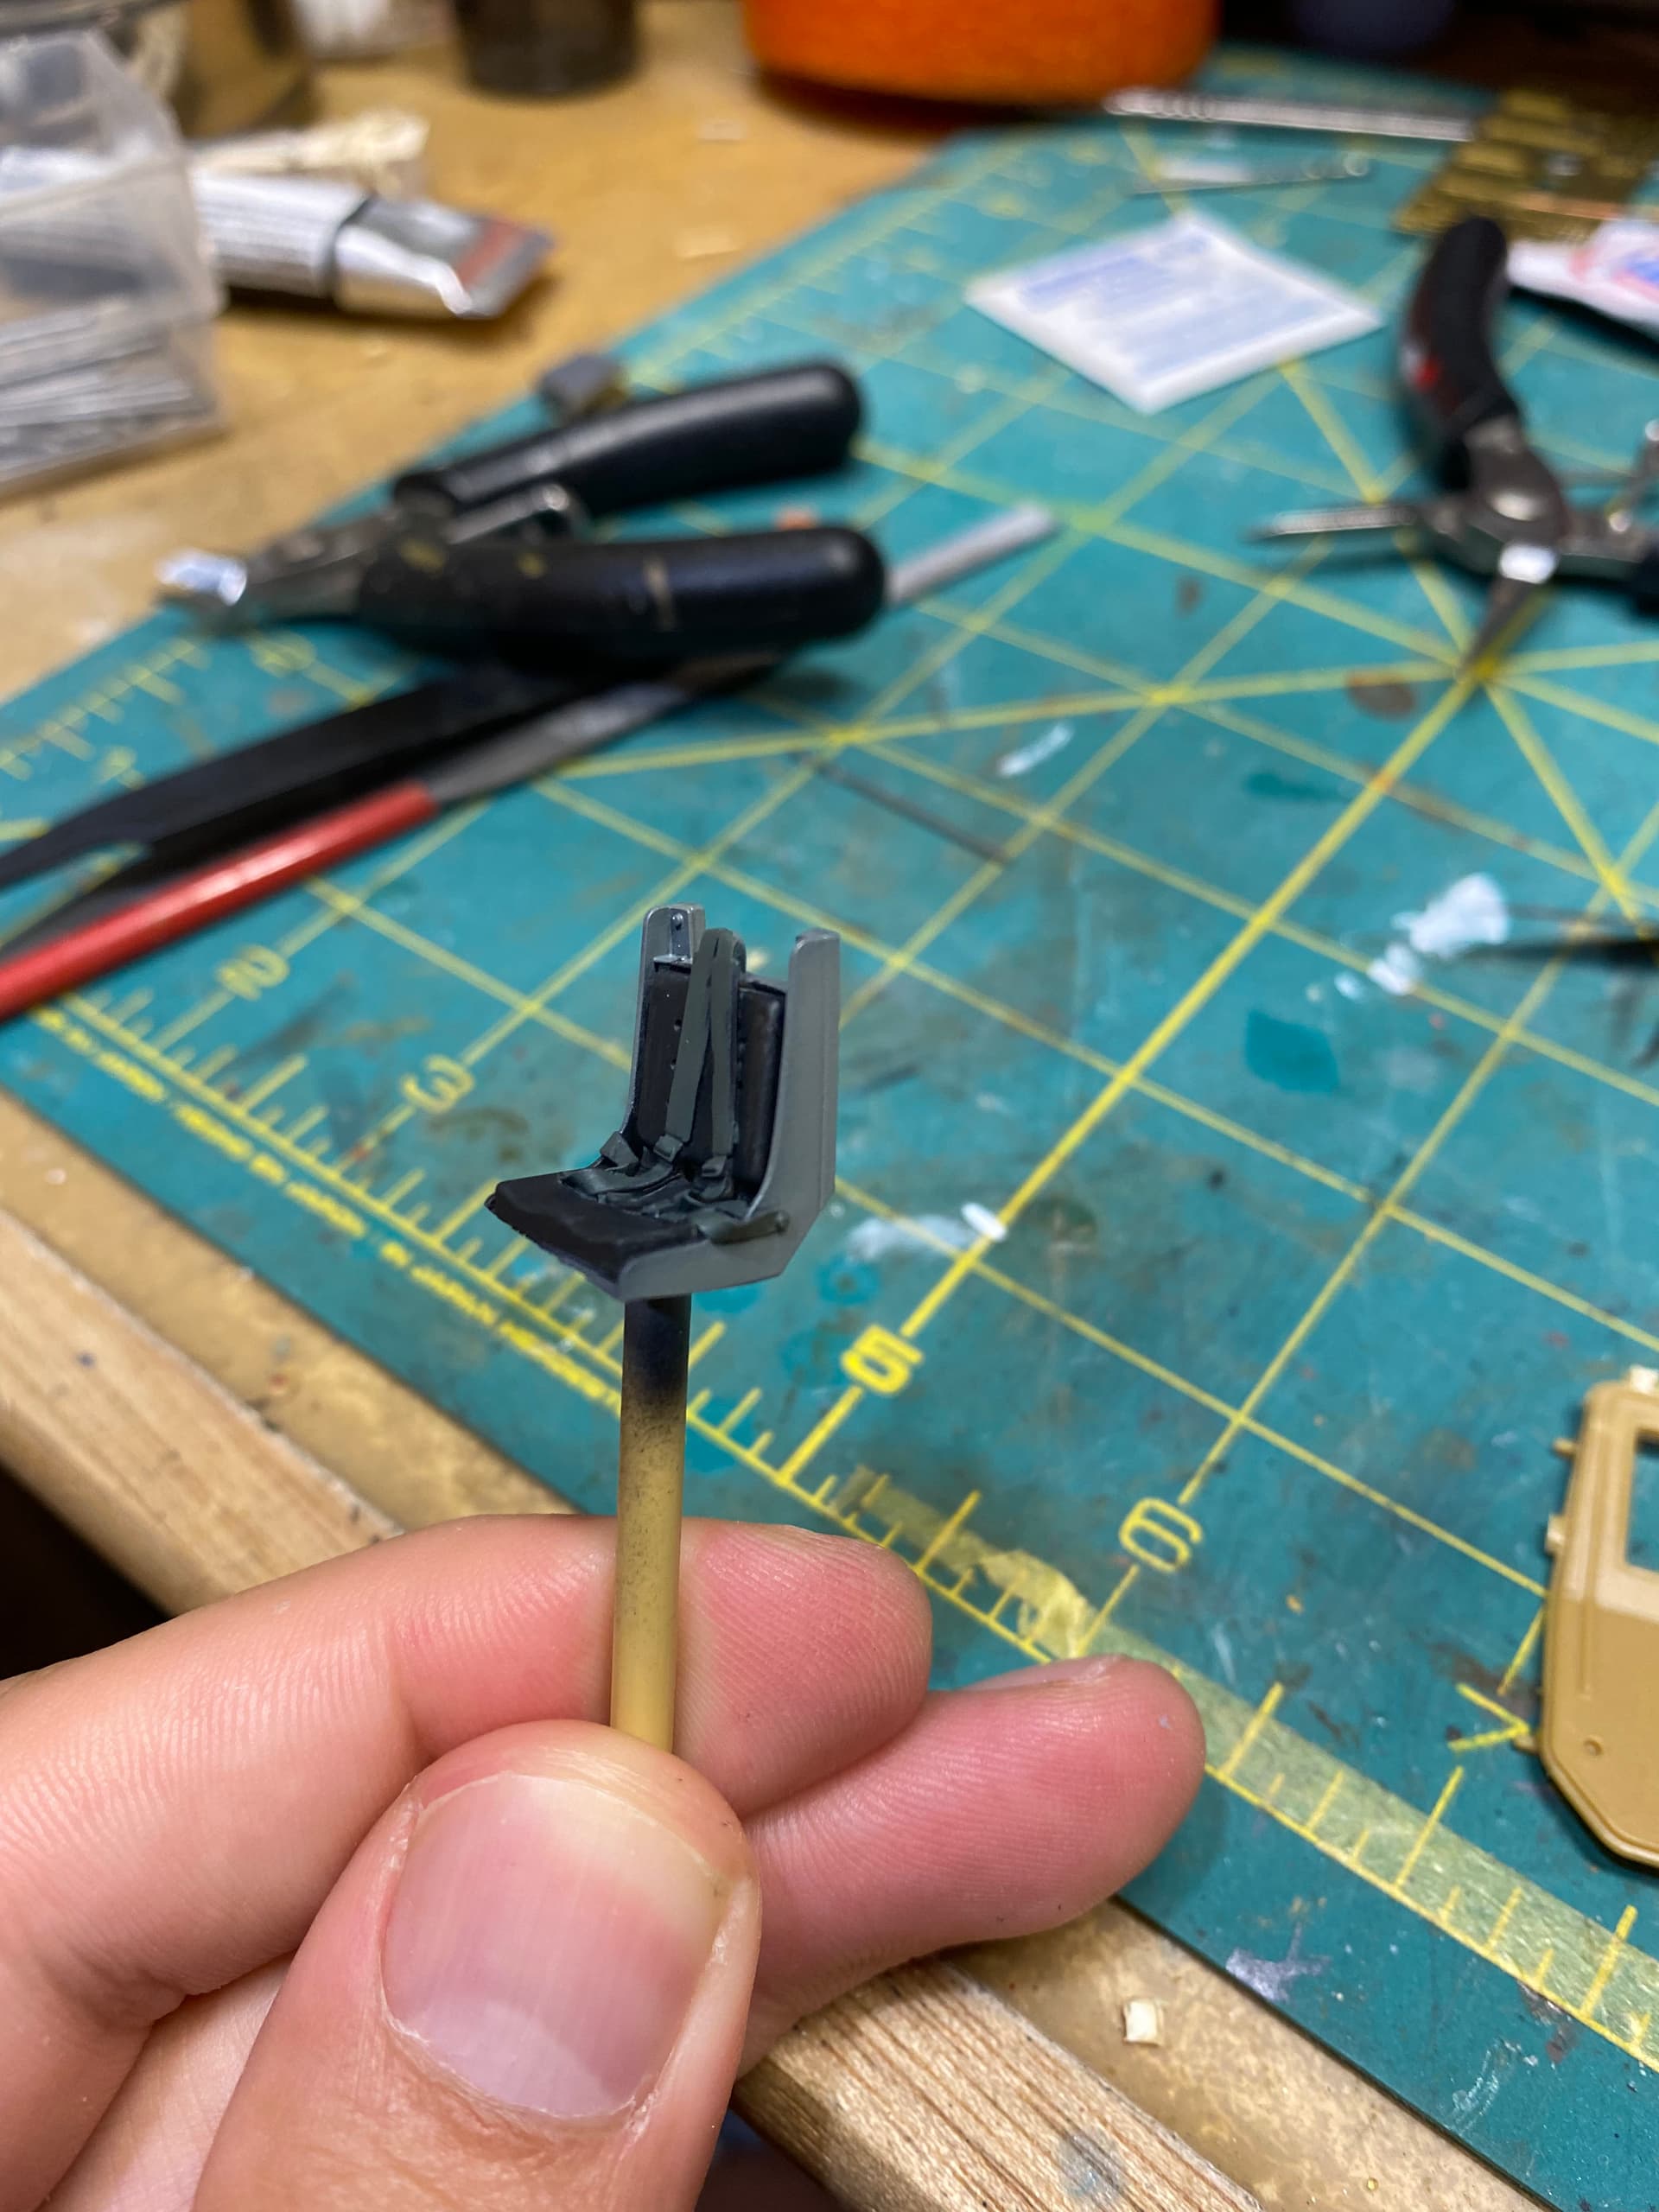
Here’s the gorgeous seats from the detail set.
That’s all I’ve got for now. Stay tuned.
4 Likes
Good job on the interior.
Here is a link to some interior pics. Warwheels Canadian RG31
Olivier
Don,
So it’s going to be a fix-then paint-then glue in-type of assembly. That’s okay . We’ve all been there too, especially with interiors. There’s just some stuff you can’t paint once it’s installed, no matter what Tony Greenland says. Seems like you’re having a spell where the only easy day was yesterday. However, I see several major victories in this post. You’ve got this, it’s obvious.
1 Like
Hey @Stryker45, remember when I said this kit doesn’t come with the parts for the US version? Well it comes with some of them. Specifically the window mounts for the armoured glass.
Guess which version I glued to mine because I didn’t actually read the instructions.
I was about to go all Bob Ross, call it a happy accident and live with it but then realized that what the kit does not come with is the appropriate sized US glass.
Thankfully I did an embarrassingly bad job of gluing them in and managed to get things apart without drawing blood. I did manage to jack up the track they sit in though so the fit is t as nice as it was. Oh well, lesson learned and I’ll pay more attention to the call outs from now on.
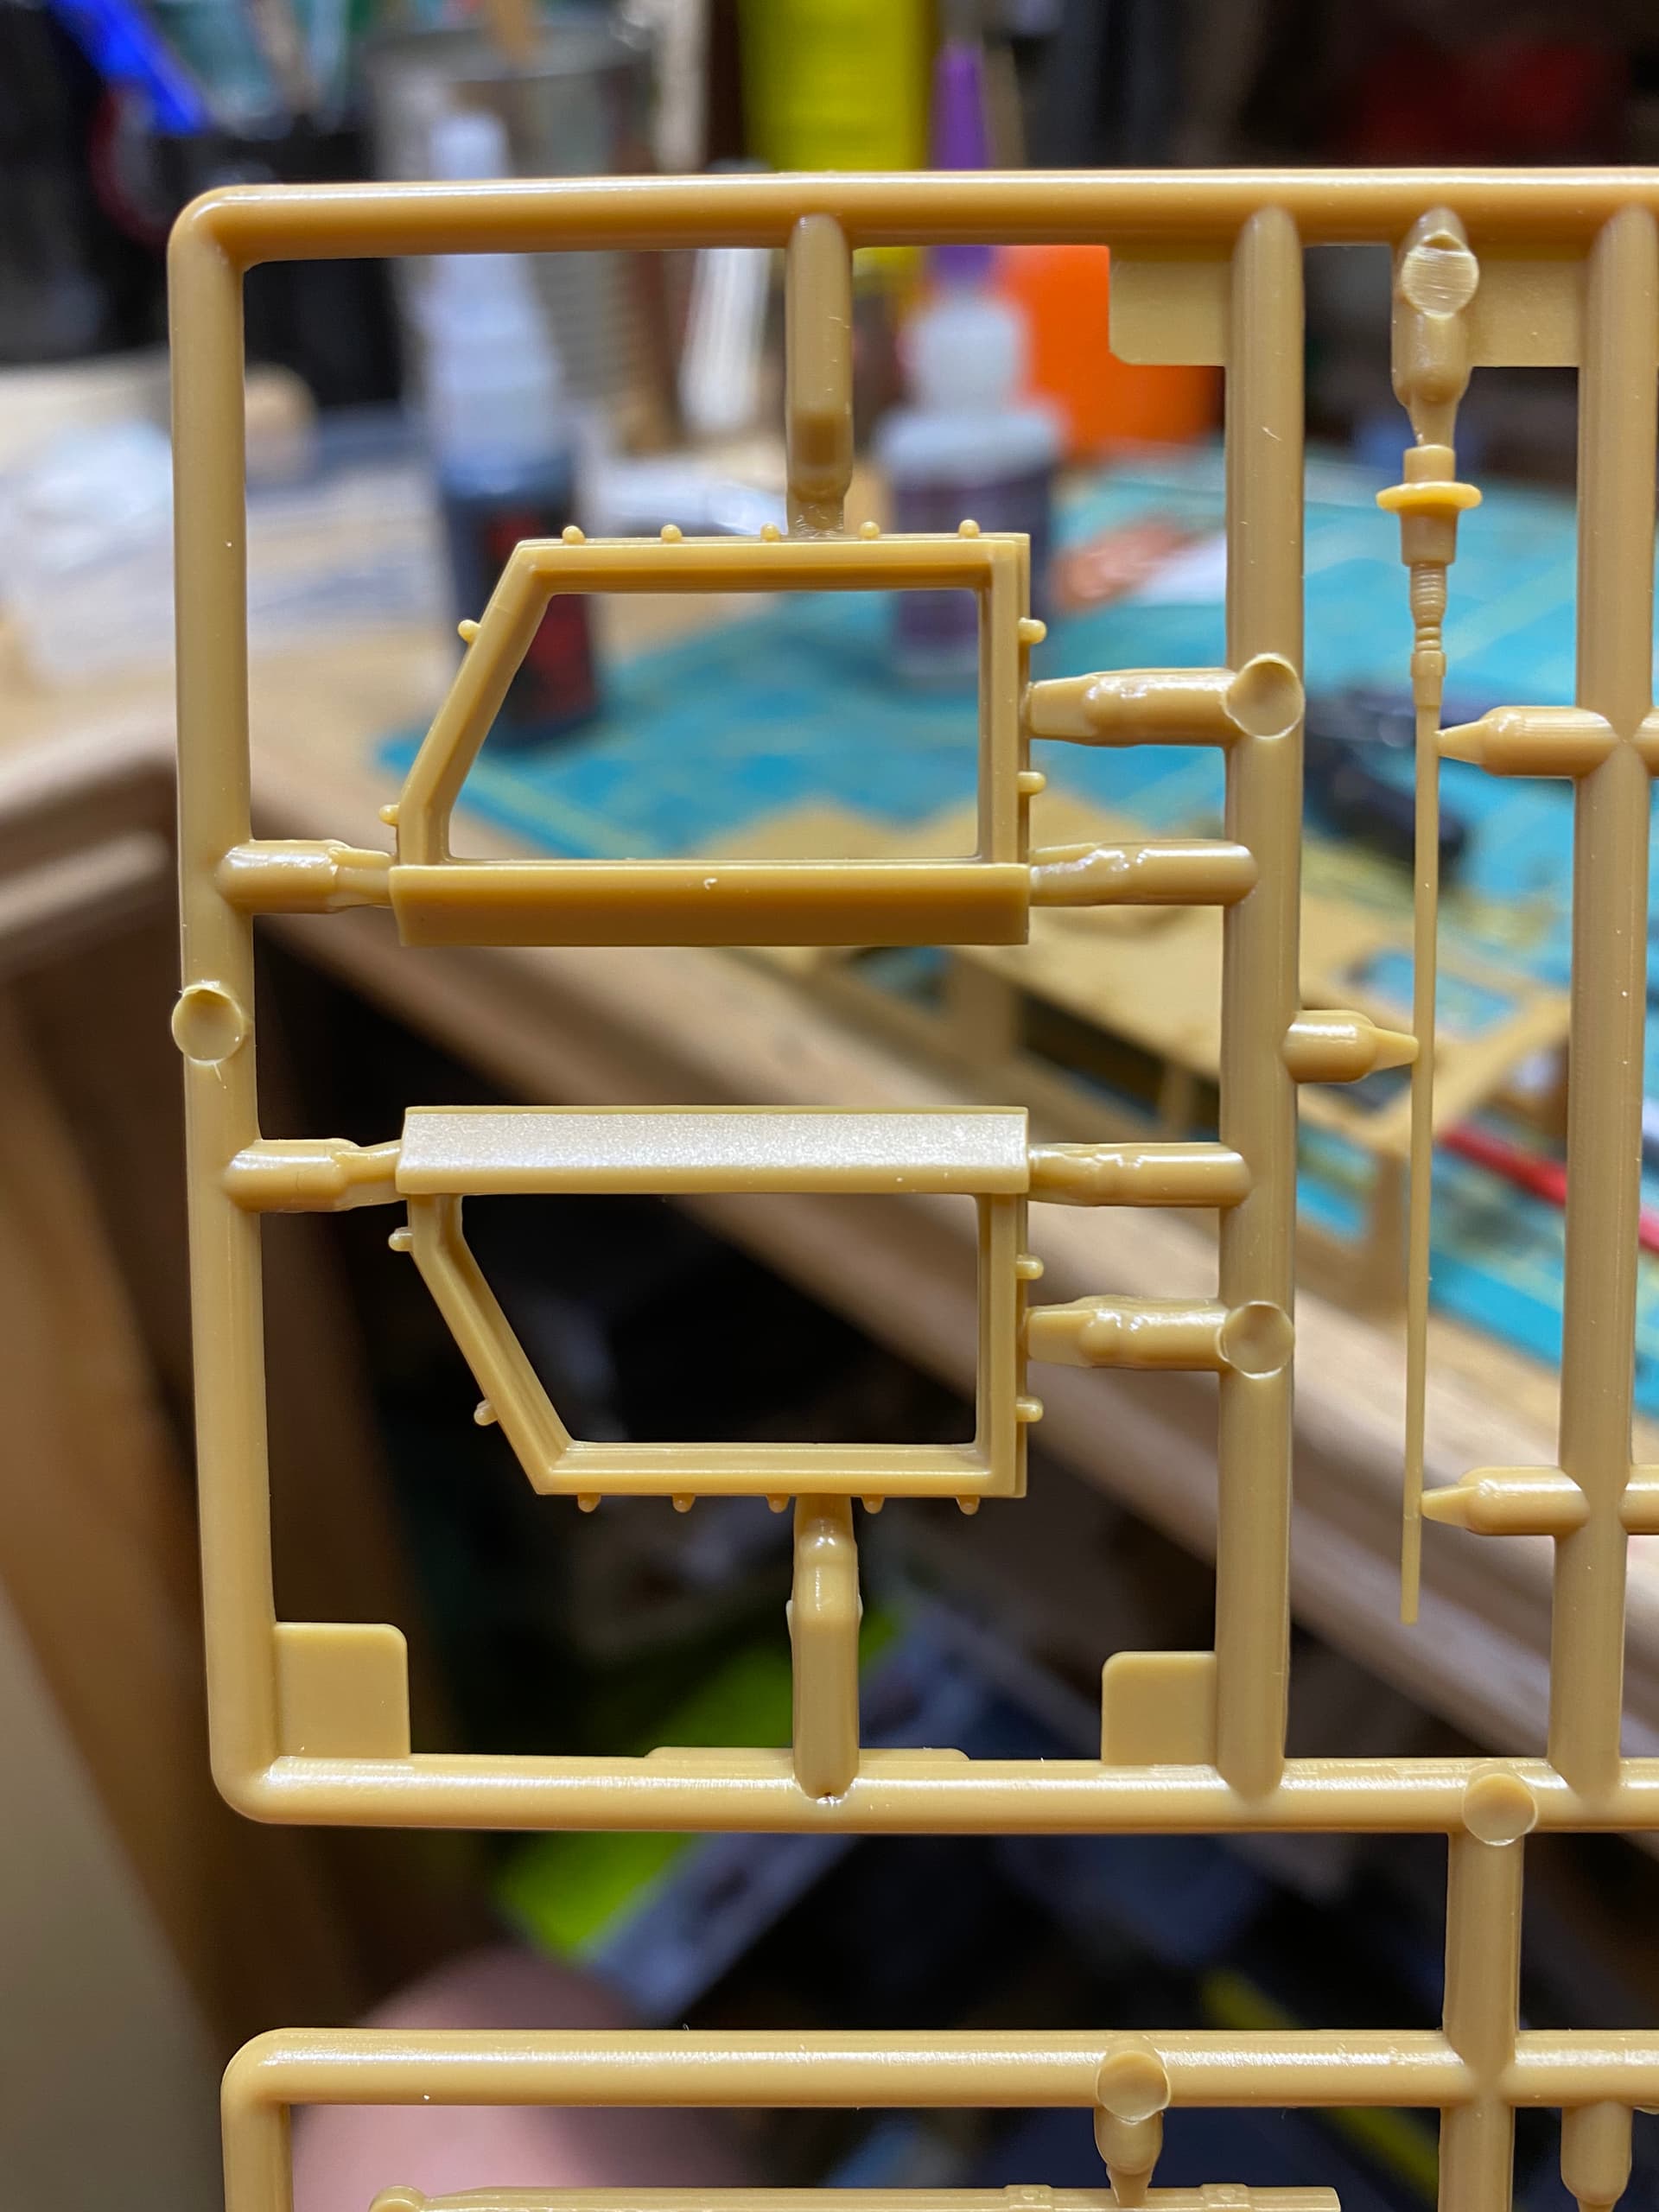
I also found the first thing that I dislike about the quality of this kit.
Some of the sprue gates on this thing are absolute monsters. Worse, it seems to be the ones connected to delicate and/or round objects.
Those aren’t even the worst offenders, it just happens to be what I took a picture of. There is zero excuse for this Victorian level of engineering in 2021. Actually, that’s not fair to the Victorians. I’m now stuck with some nasty stress marks and some divots from trying to clean these up.
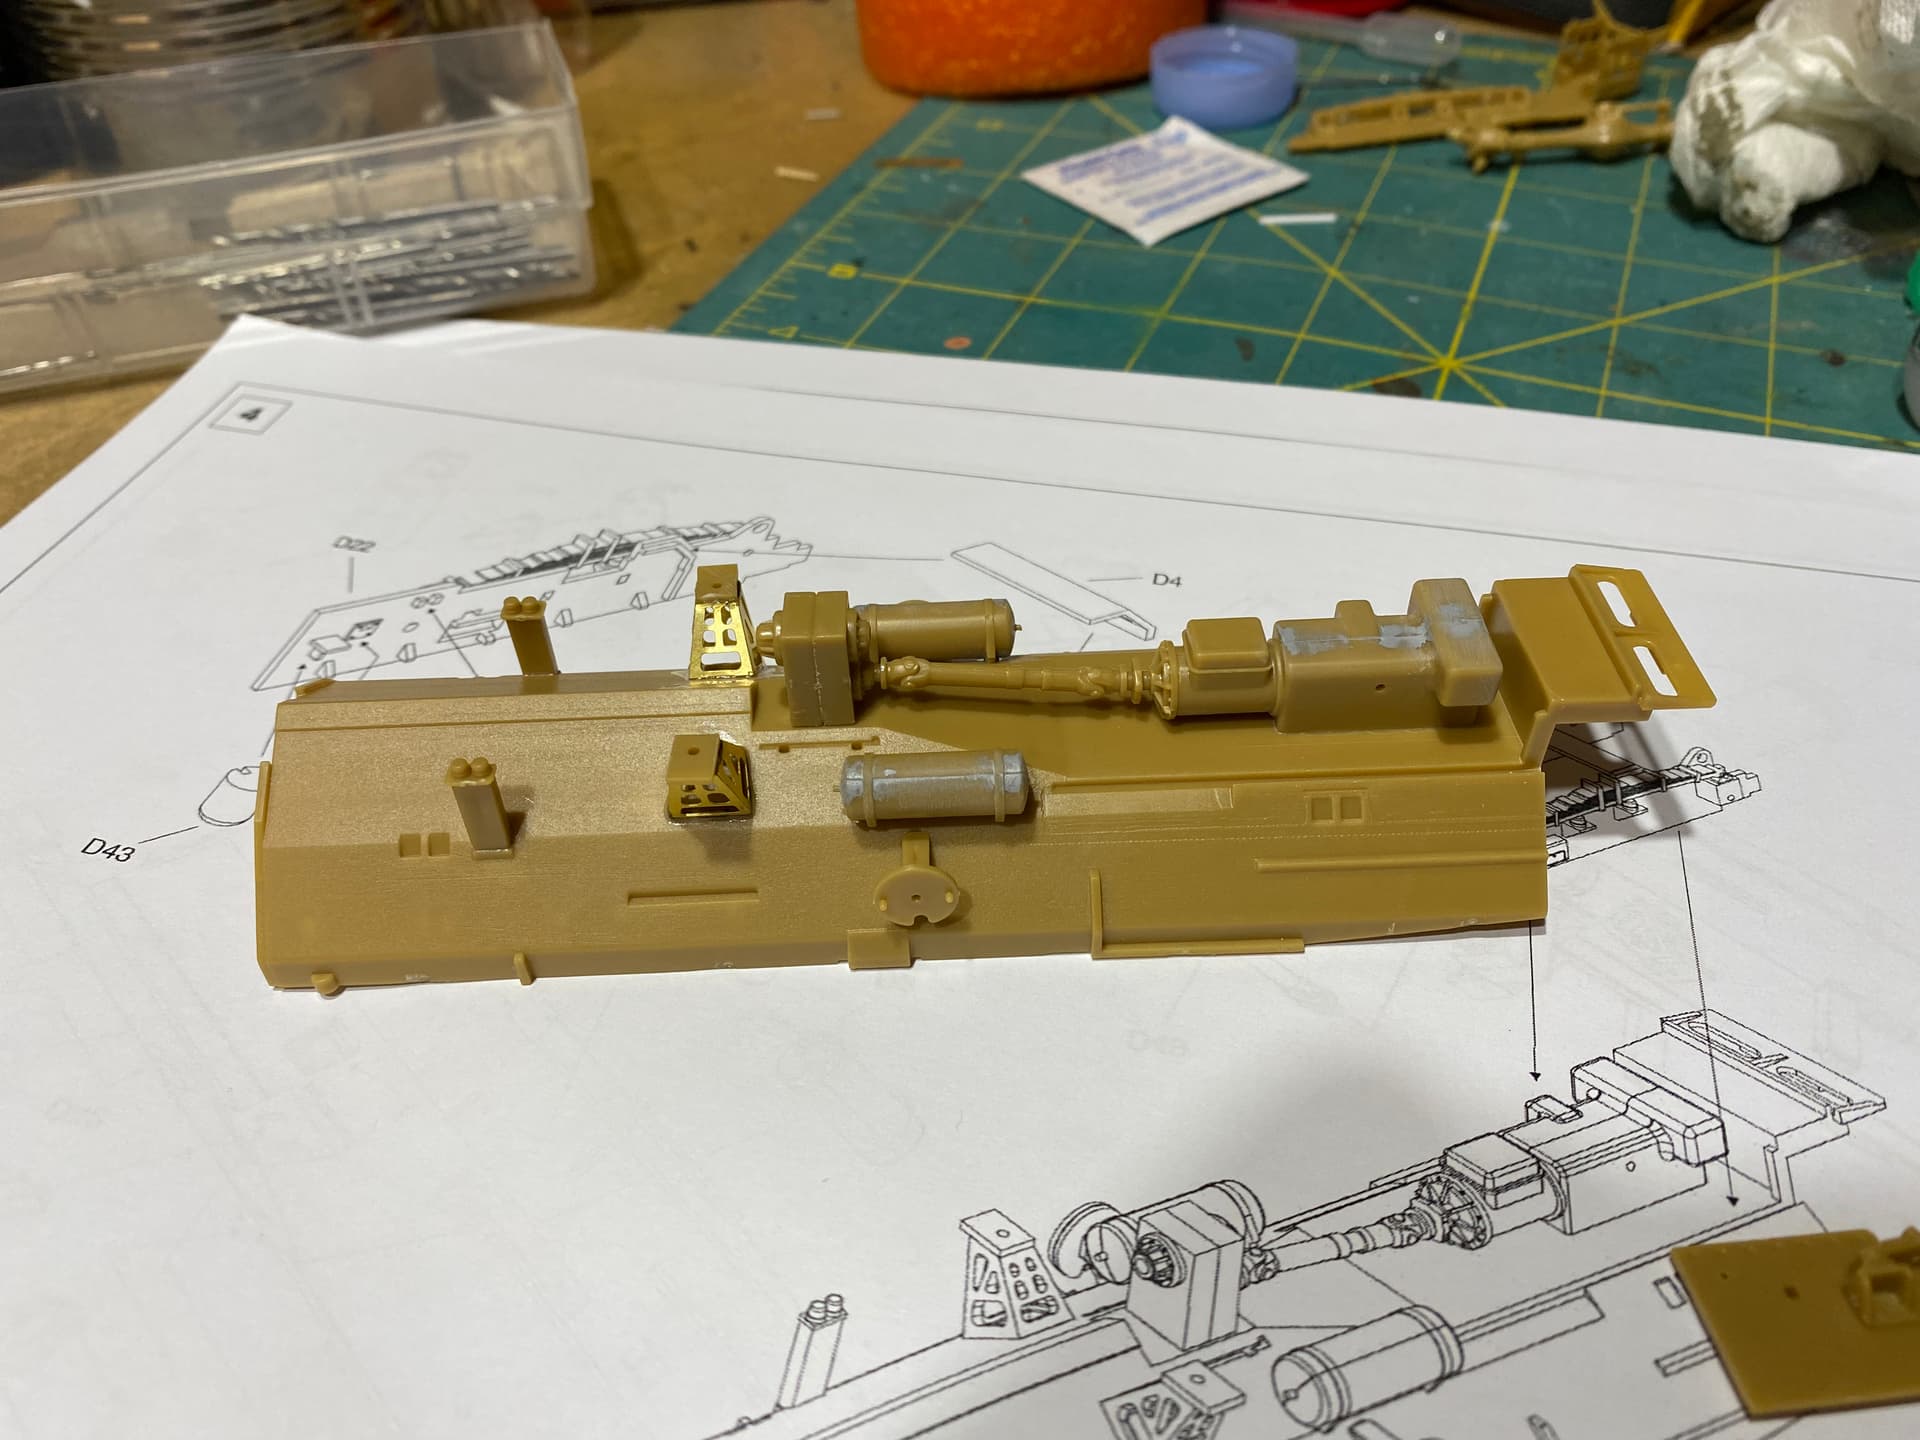
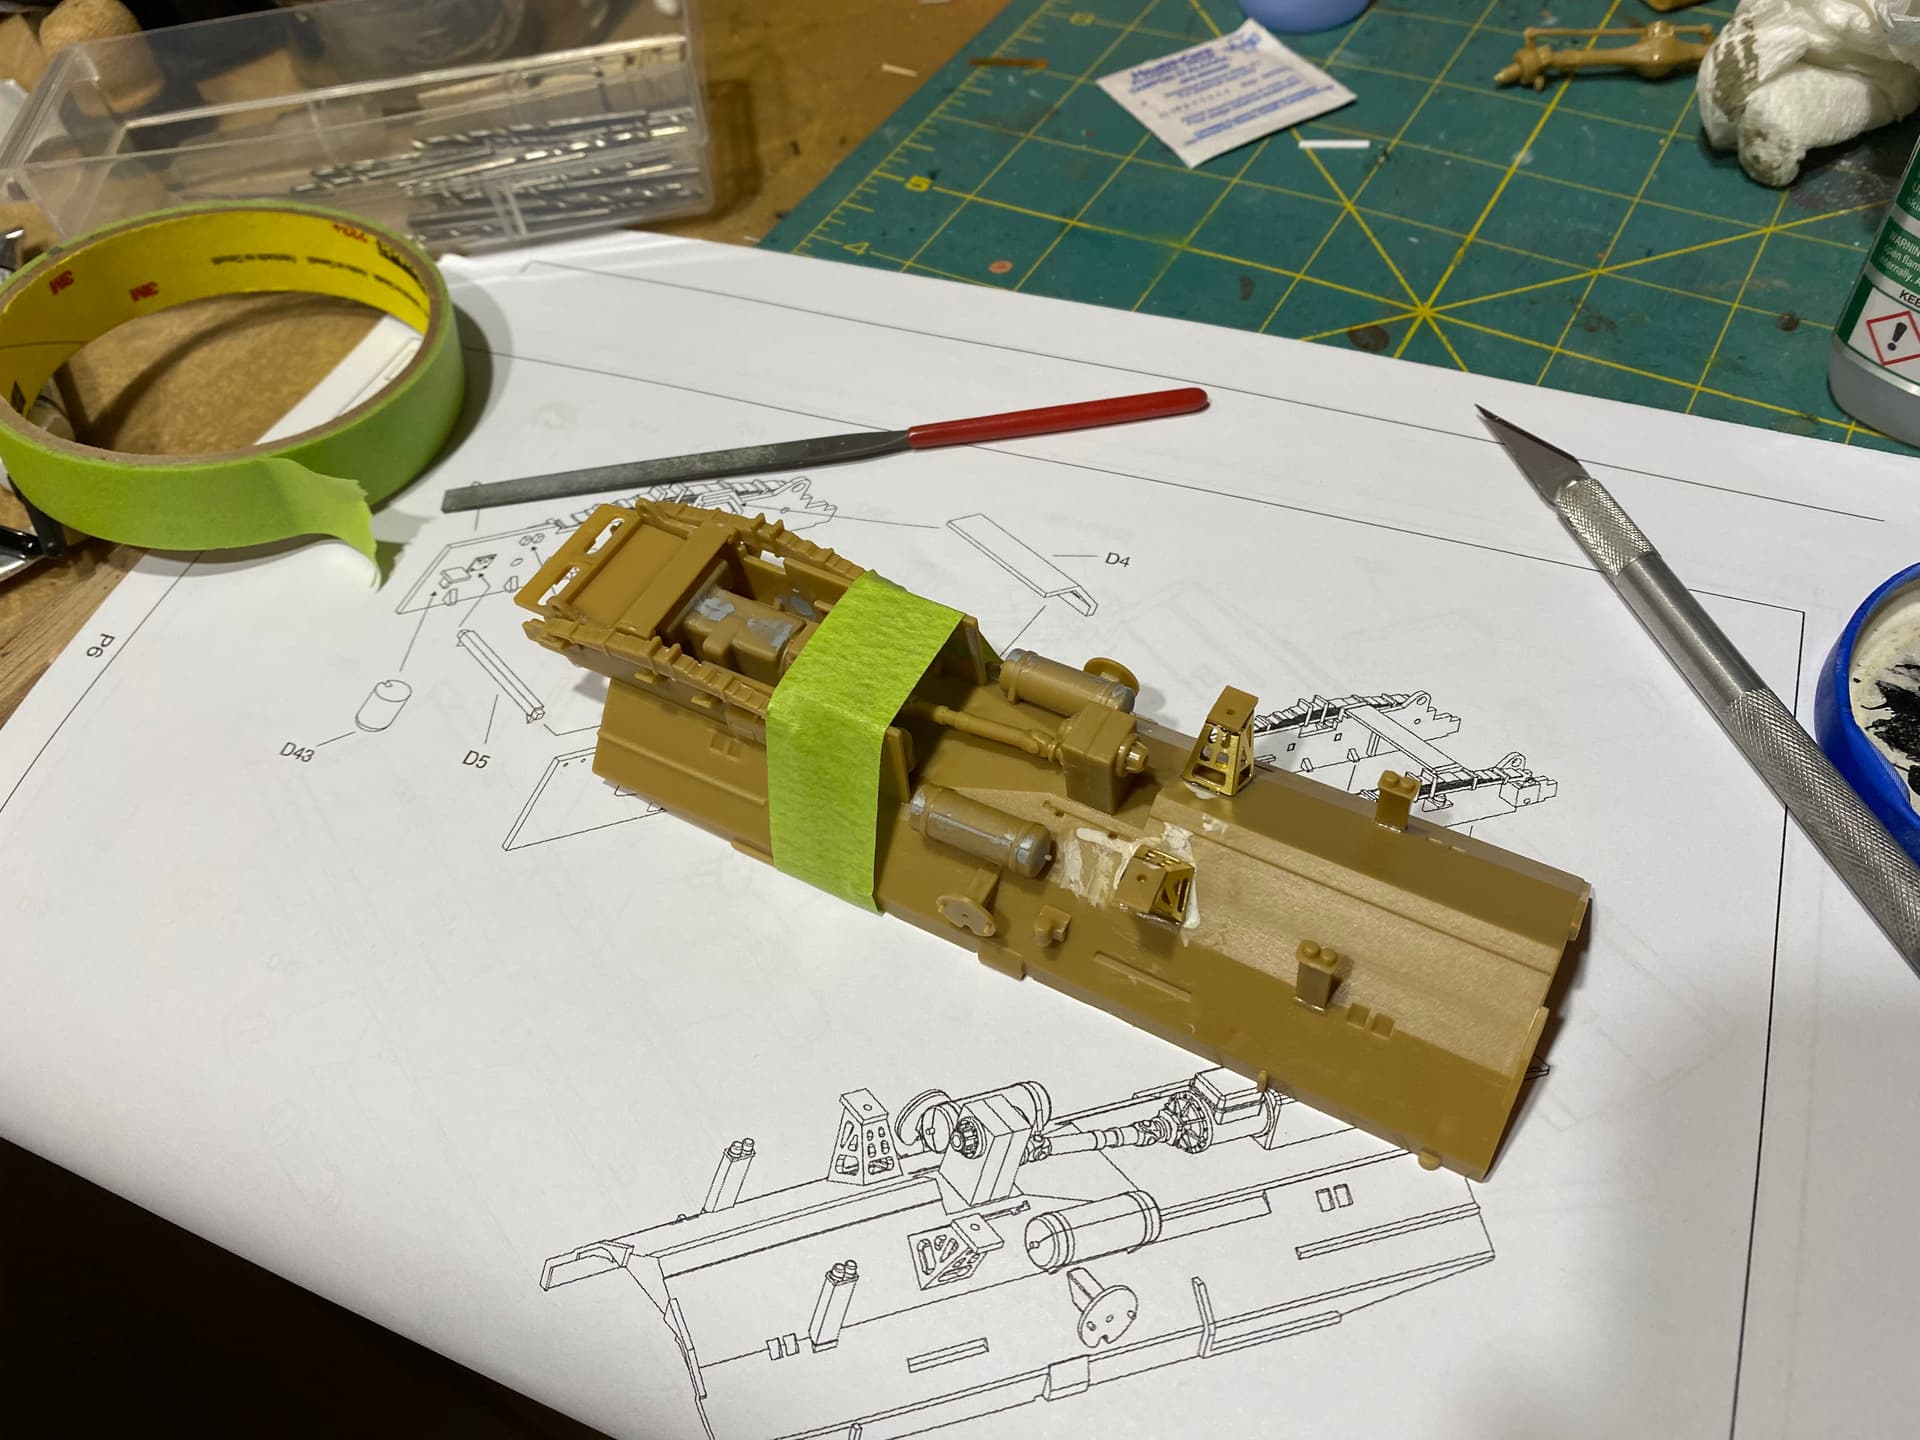
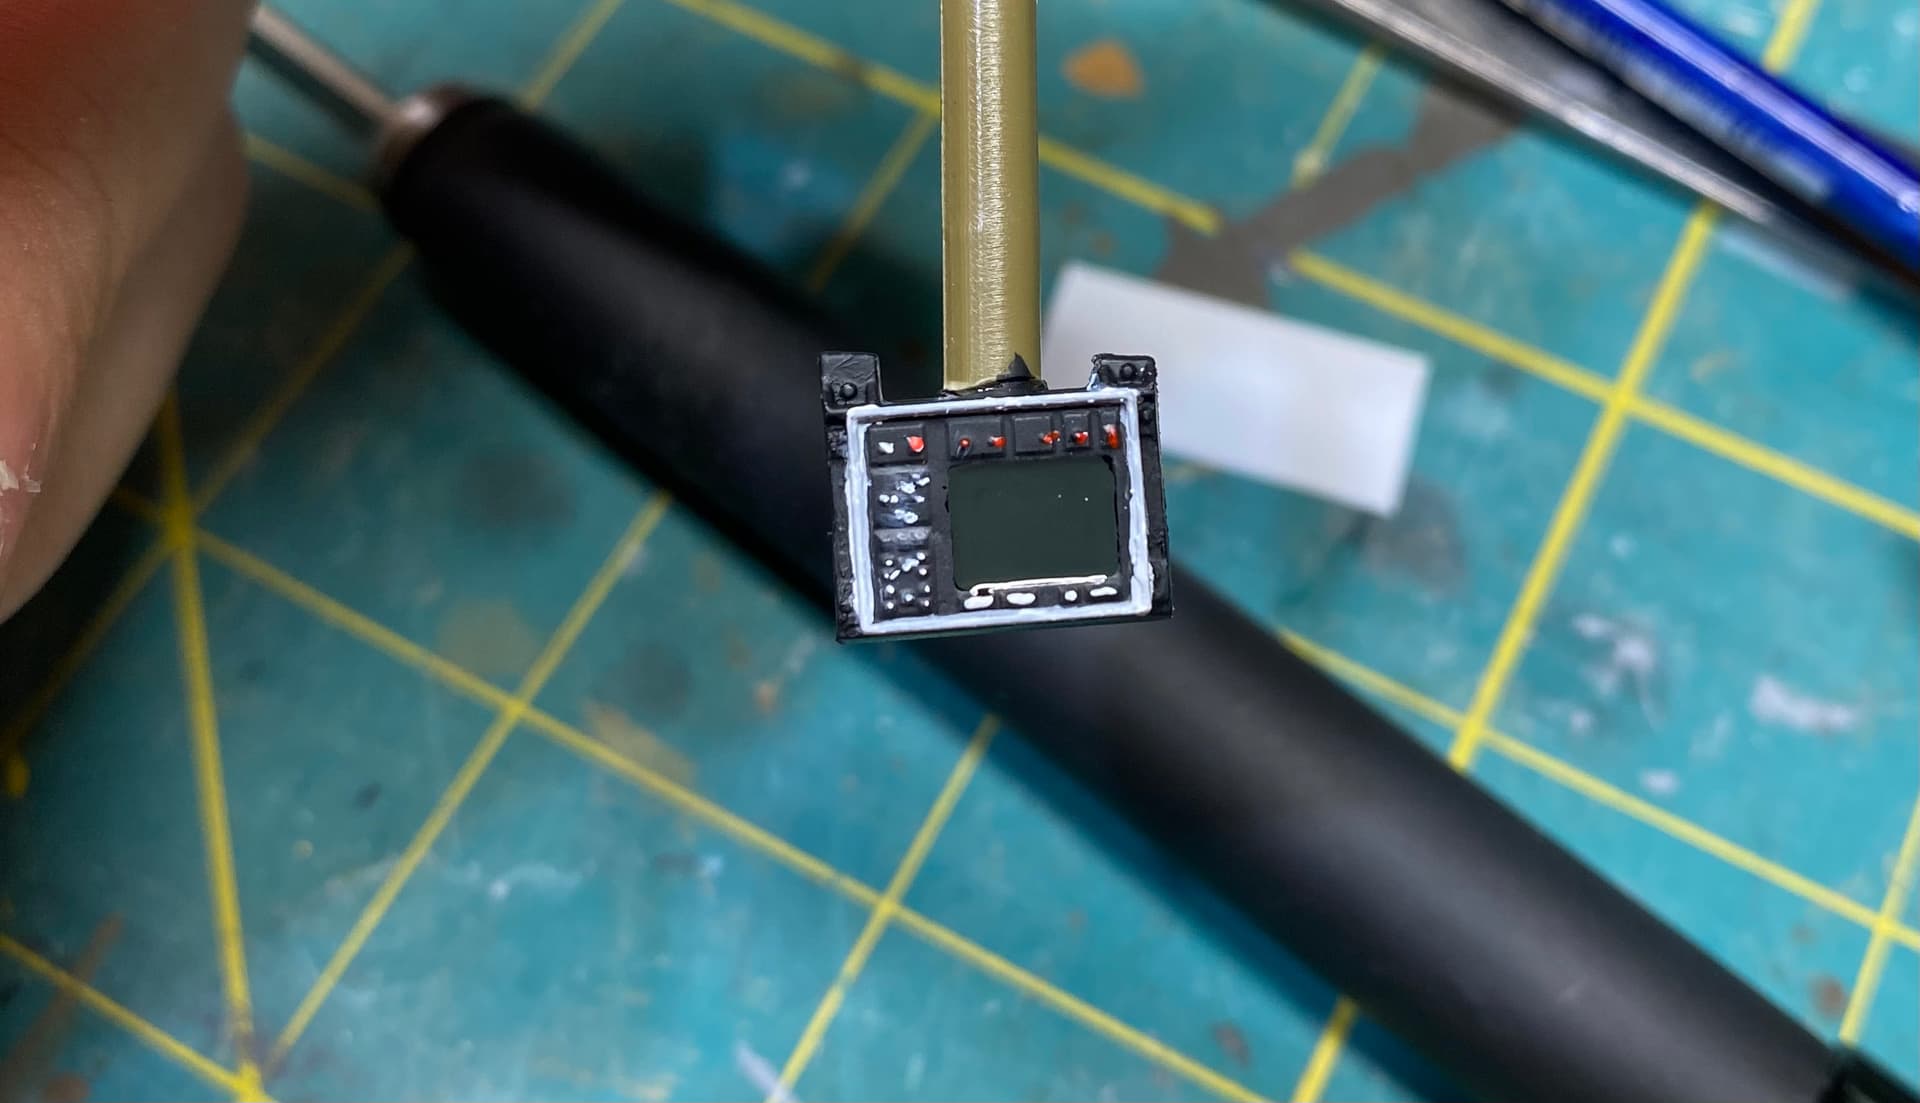
On the good news front, fairly happy with how my. RWS control station turned out.
5 Likes
Wow wow, hold on speedy Gonzalas…
Can’t go long without reading instructions and start wrecking things 
No serious, good save and interesting to see they added US windows but not glass. I guess the glass sprue must be completely different thus missing US style clear parts. And, boy you aren’t kidding about hose mold gates. Looking at that hatch you will need to not only sand it into shape to match that curve but slide top and bottom to match it’s thickness. I have seen similar things on their others kits in both modeling companies Panda and Kitty Hawk. Funny thing, it reminds me of their old M-ATV kit. 
Not a lot of progress this week as work has been an absolute bastard.
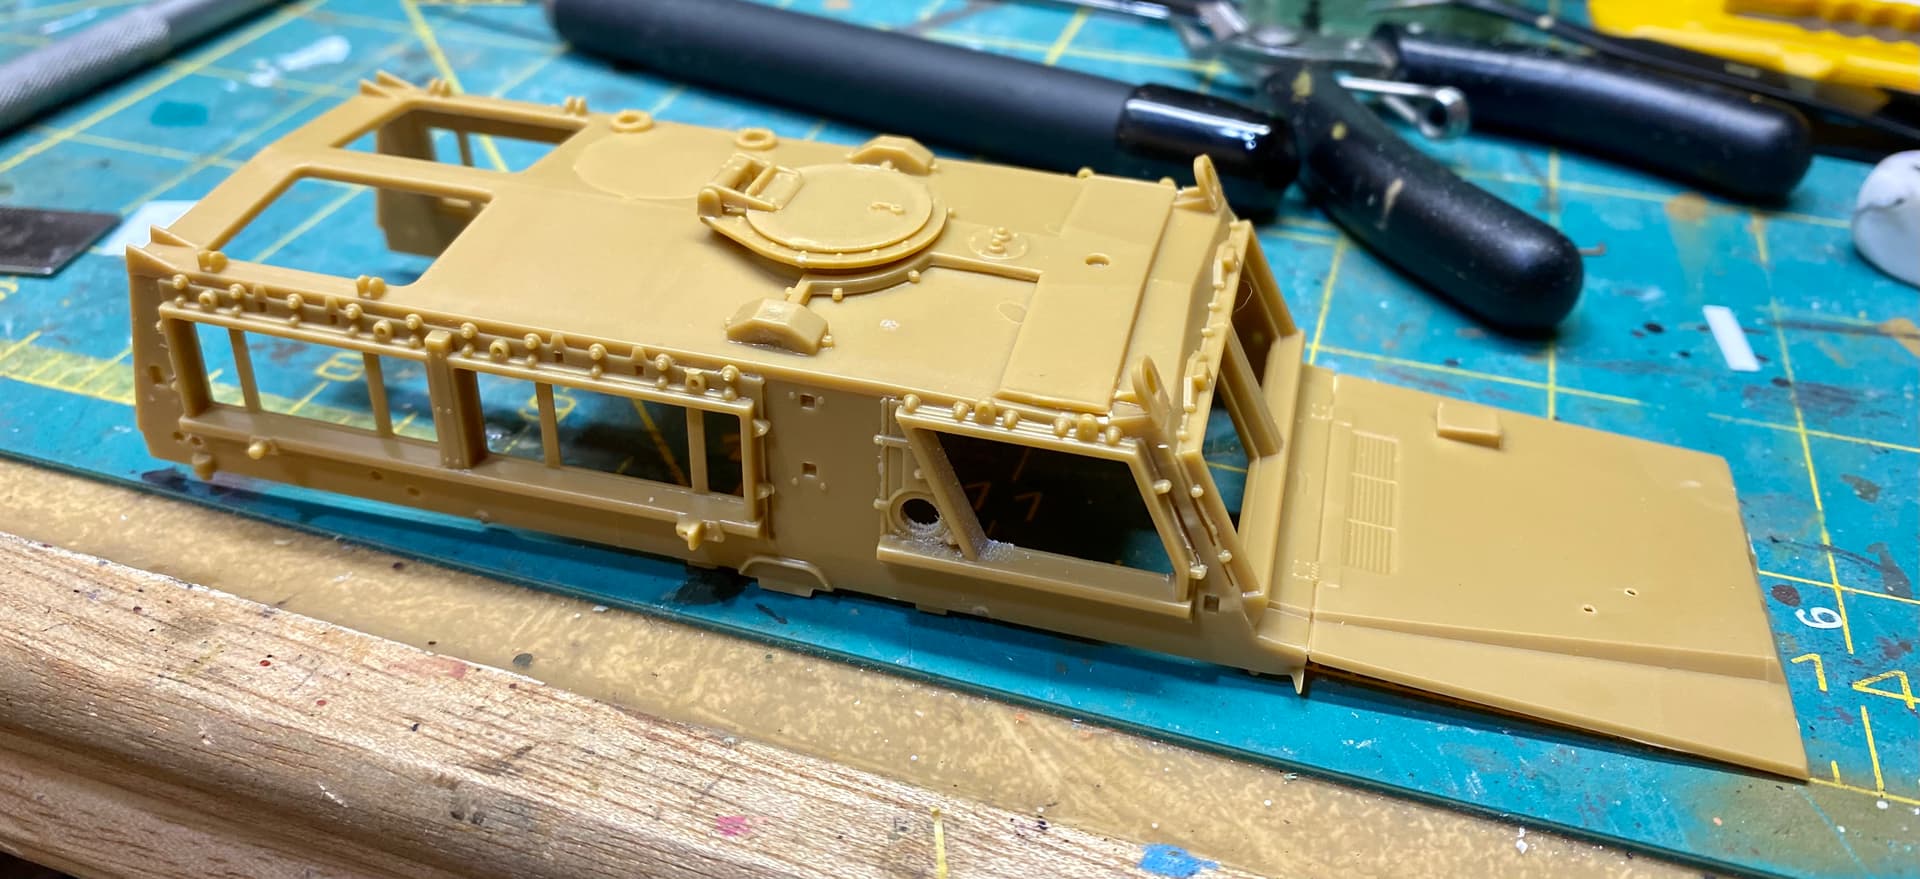
Got most of the major sub assemblies done and I’ve started priming the hard to reach places.
Next step is going to be to finish up the interior so I can get everything together for painting.
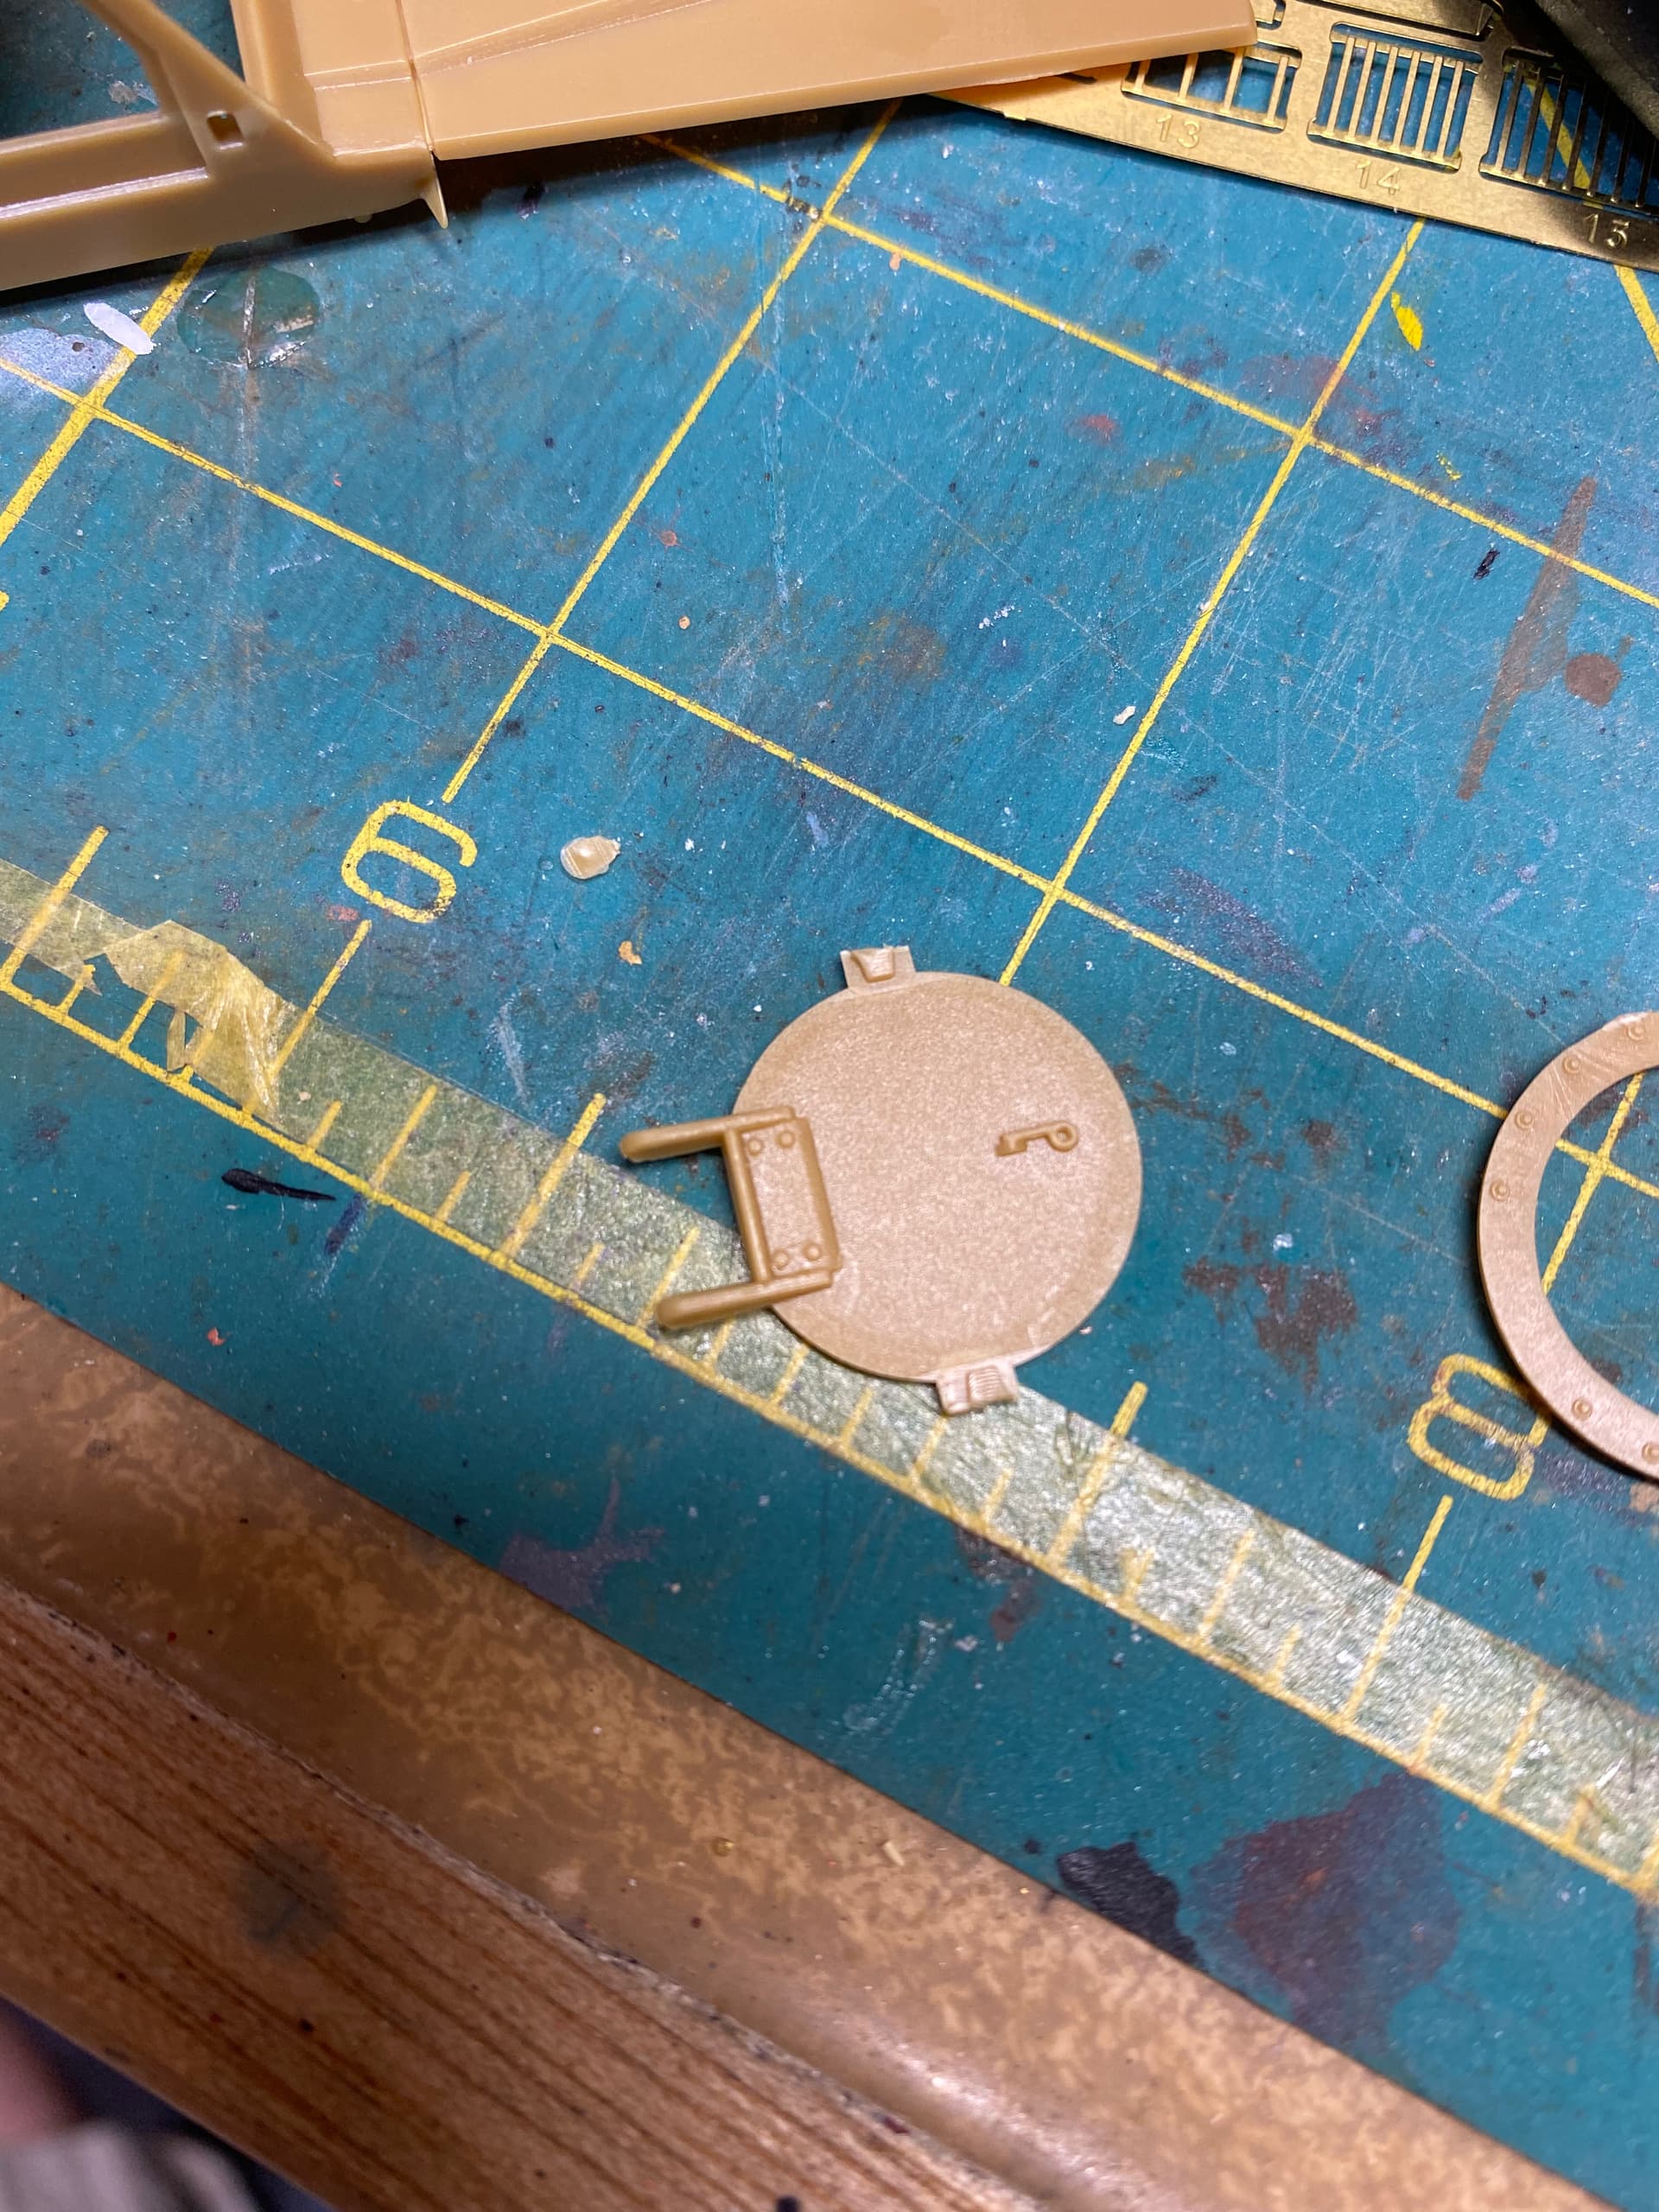
One other minor construction hiccup. I was originally going to build with the rear door closed for shelf space reasons but the way Kinetic have sculpted the door, it won’t close unless you scrape off a lot of the locking mechanism detail.
This part here conflicts with the lip of the door frame.
I took this as the universe’s way of telling me to stop being so boring and building all my models buttoned up, especially with this nice an interior. So open it shall be!
5 Likes
Nice job.
Two points though, I’ve never seen the configuration of aerials that Kinetic propose. You have either the aerials on the T brackets on the roof or the standard aerials disposition on the rear sides. I did the mistake myself when following the instructions but didn’t add the antennas at the rear.
Second point concerns the fit of the kind of arch in the cabin (left of the wheel arches on your first picture). I had to trim it so the part fits the upper hull.
Olivier
Looks excellent Don and It’s moving right along!