Thanks Oliver. You’re right as always. I have one pic which seemed to show both antenna but looking at it again, I think it’s two vehicles parked next to each other.
As for the wheel arch, I’ll keep it in mind when it comes to assembly.
Thanks Oliver. You’re right as always. I have one pic which seemed to show both antenna but looking at it again, I think it’s two vehicles parked next to each other.
As for the wheel arch, I’ll keep it in mind when it comes to assembly.
Don, it is not the wheel arch, it is the part on the left of the wheel arches on your first picture. It is inside the cabin between the troop compartment and the driver compartment. You have air conditioning/ heating outlets molded on it.
Olivier
I knew that I swear!
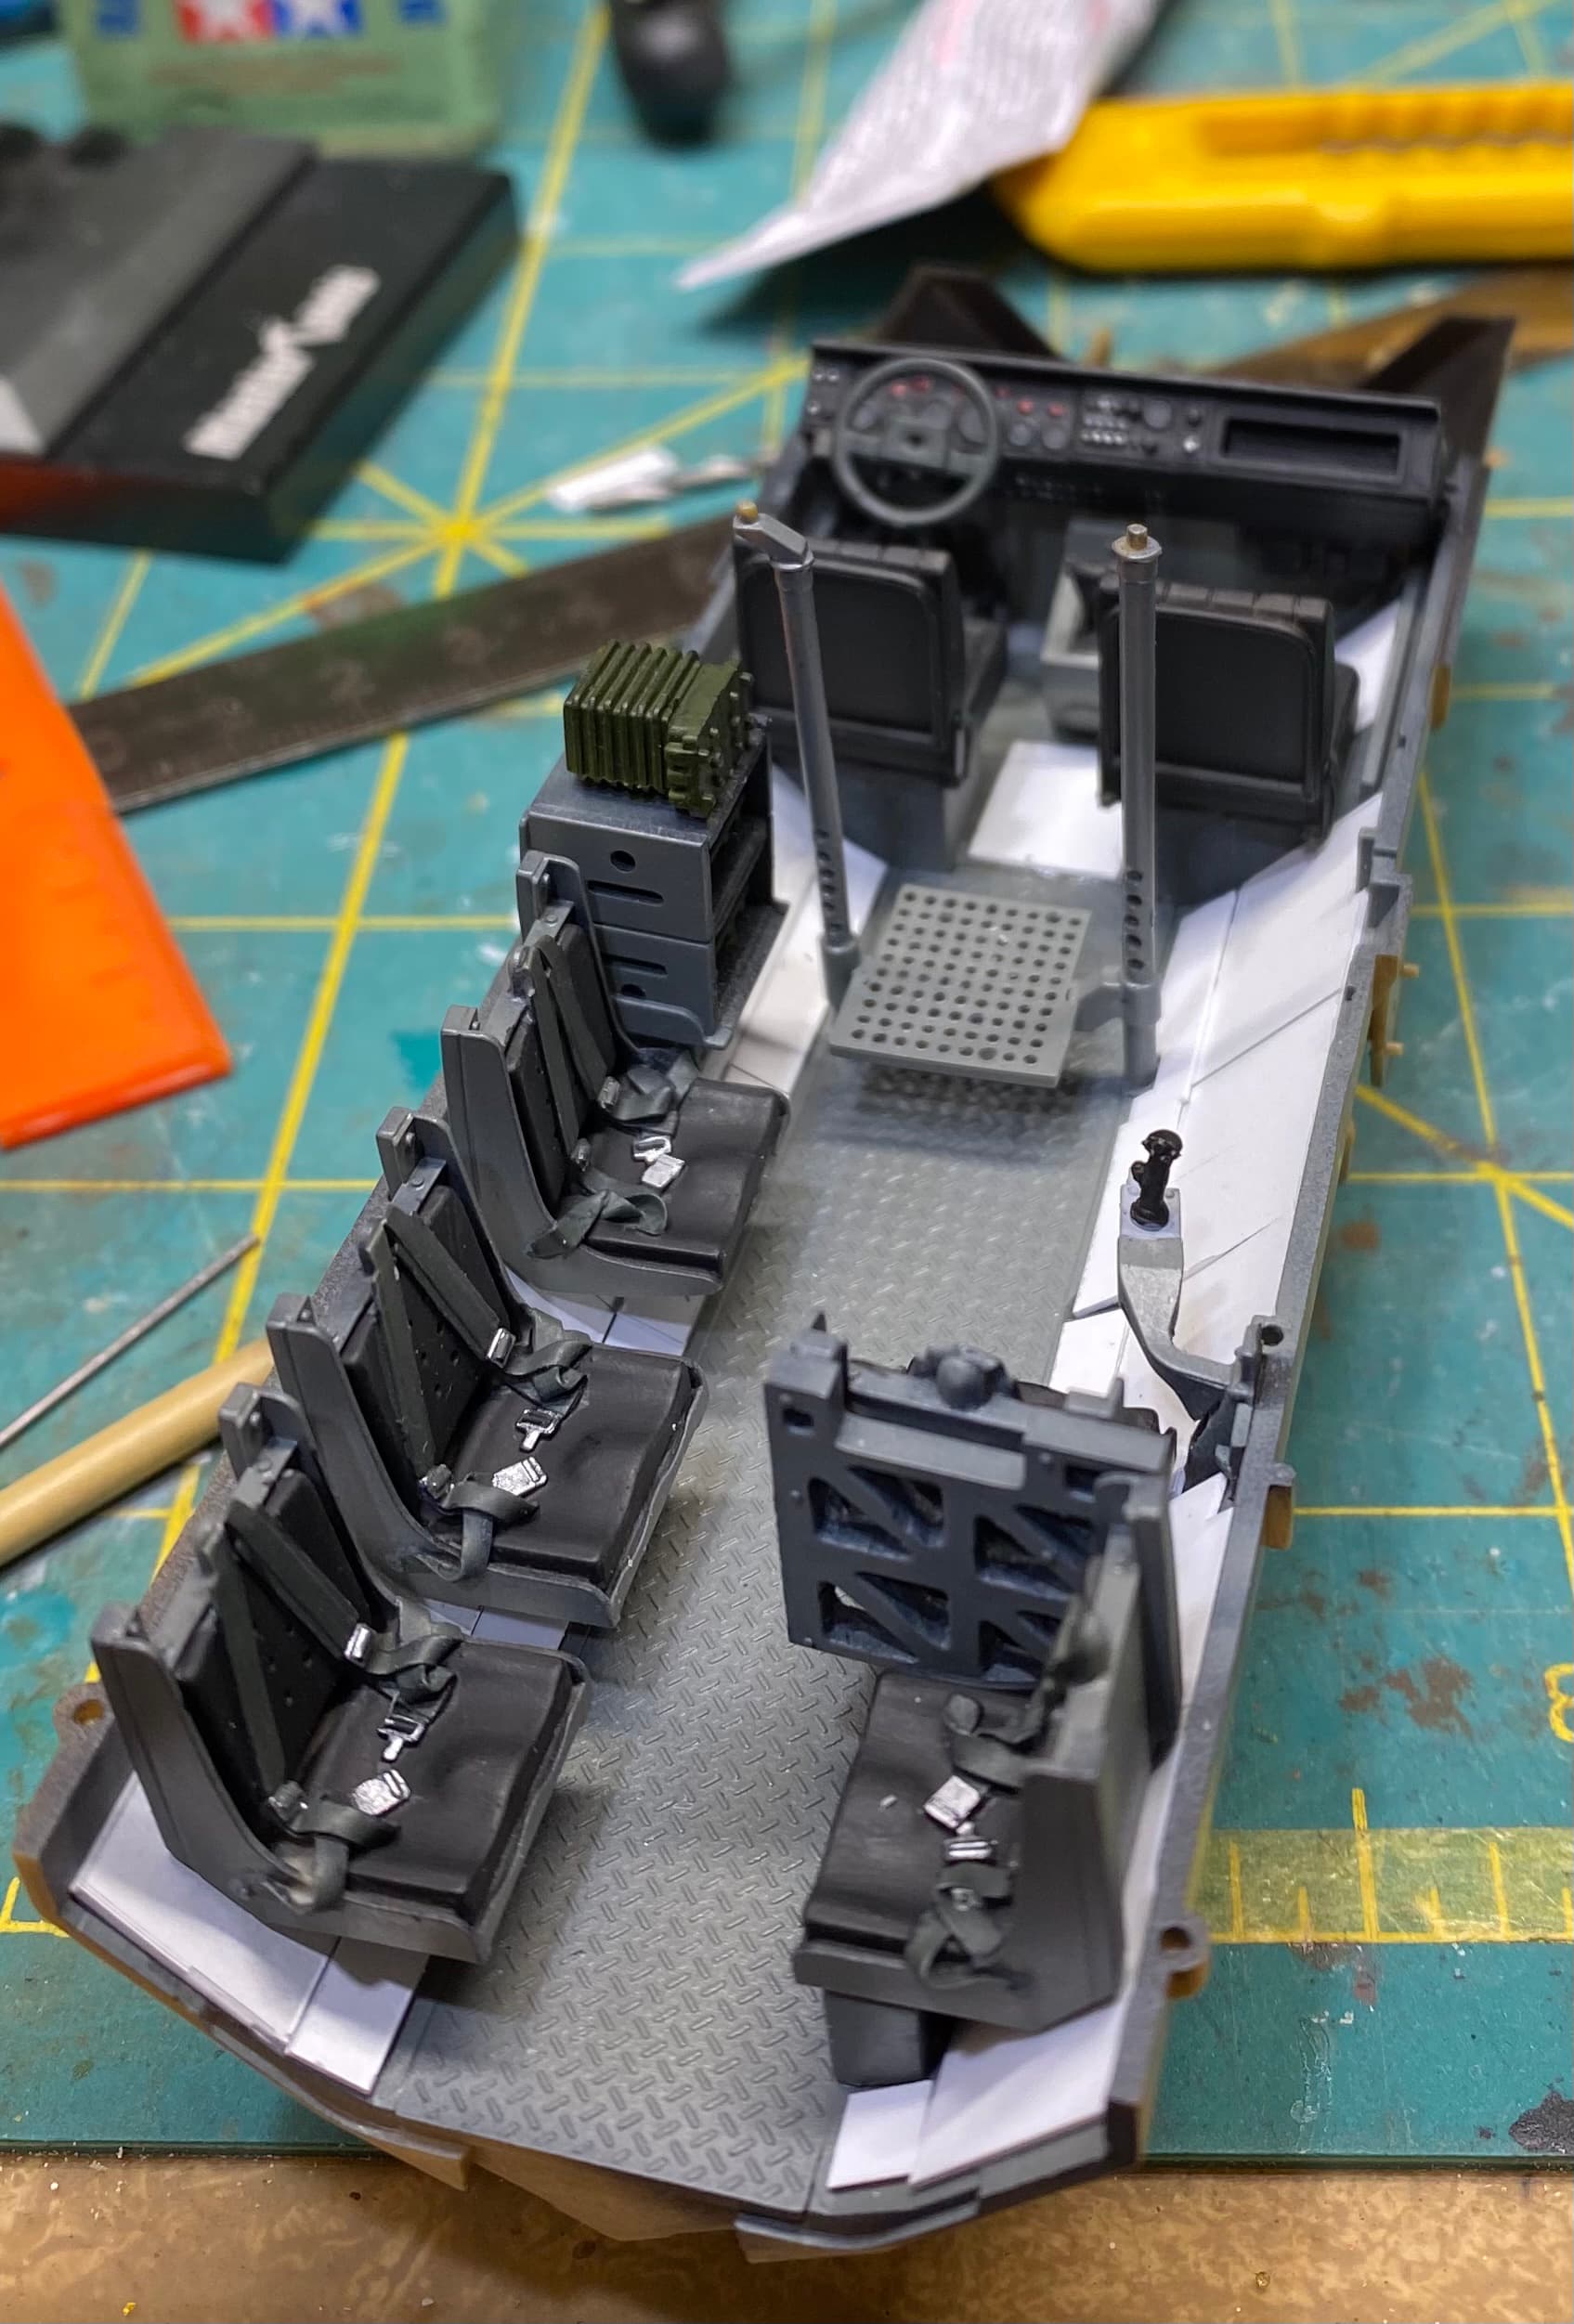
Got the interior done(ish).
Despite my earlier hesitation, I ended up trying to scratch the ceramic armour panels. They’re nothing special, especially since I have nothing to mock up the bolts that should mount them to the walls. It does help break up the interior though and with the top of the body shell on you really can’t see how rough it is.
The interior looks great. Job well done!
Olivier
Very nicely done!
Nice work.
Not the most flattering photo, but I want to get this thing off my bench and out of sight for a while.
I broke the cardinal rule and, rather than just take a break and walk away, I got angry. @ArtyG37B you were right about the body halves being a pain to get mated up. Between my ham fistedness and some imprecise moulding, and I think the modifications I made to the interior, things just wouldn’t cooperate and I ended up brute forcing some stuff into alignment.
As such, I’ve got a pretty nasty seam/gap/step thing going on that thankfully is mostly hidden by the fenders and the spare tire on the driver side.
Passenger side is a different story and will need some attention
It is a solid looking kit however despite my amateurish assembly and once it gets a lick of paint on it I think I’ll be quite pleased.
sorry to hear you’re having problems as well. It’s looking real good, though. BTW are you going to add the blast armour for the rear hatches?
I’m on the fence but leaning to no. The fit again isn’t great. Not sure if that’s something I screwed up with the window frames or it’s just poor overall. And to be honest, I think I like the look better without. It’ll give me more room to pile crap on top.
I got the issue of hull halves not cooperating to close the cabin. Fortunately the boxes, fenders and spare wheels came to my rescue as well as a bit of sanding here and there.
Olivier
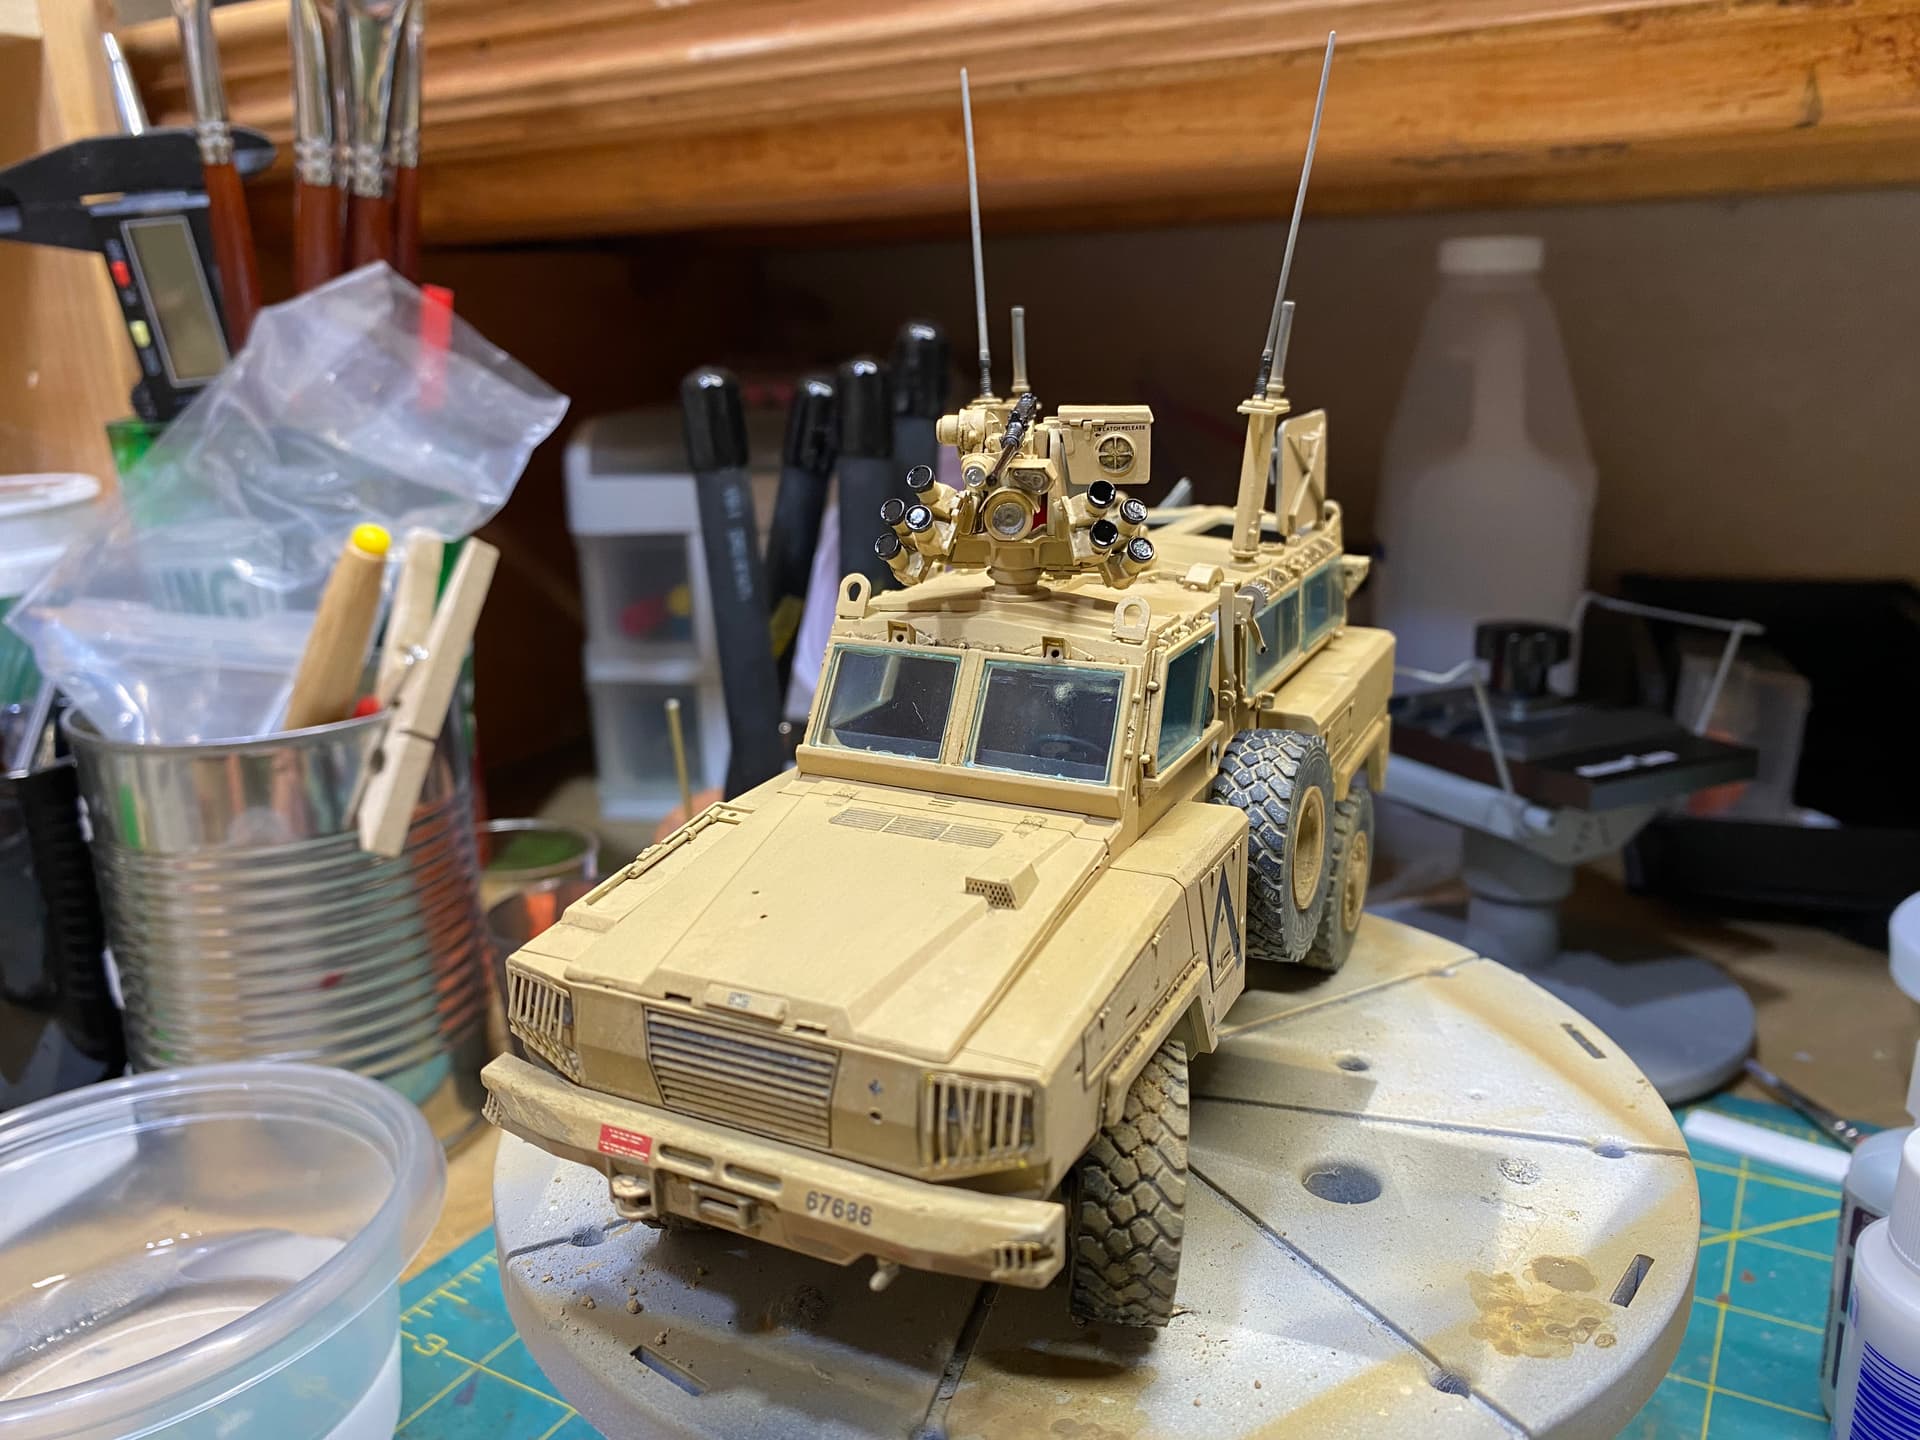
Pulled this out of the dungeon and managed to get a base coat down and a few of the details picked out. It’s a home brew of AK RC CARC Tan and British Desert Sand.
Naturally this revealed a whole bunch of flaws including a glue spill I missed and some finger prints which at this point I’m loathe to deal with.
I’m going to finish this because I refuse to let kits sit idle for too long, but I’m honestly out of love at this point (if I ever was in the first place).
Looks great!
If your all out of love for it I bet anyone on here would love to take it off your hands… 
Nope. This is getting finished and it’s gonna look purdy!
I don’t hate it anymore! So no @Panzer_modeler you may not have it.
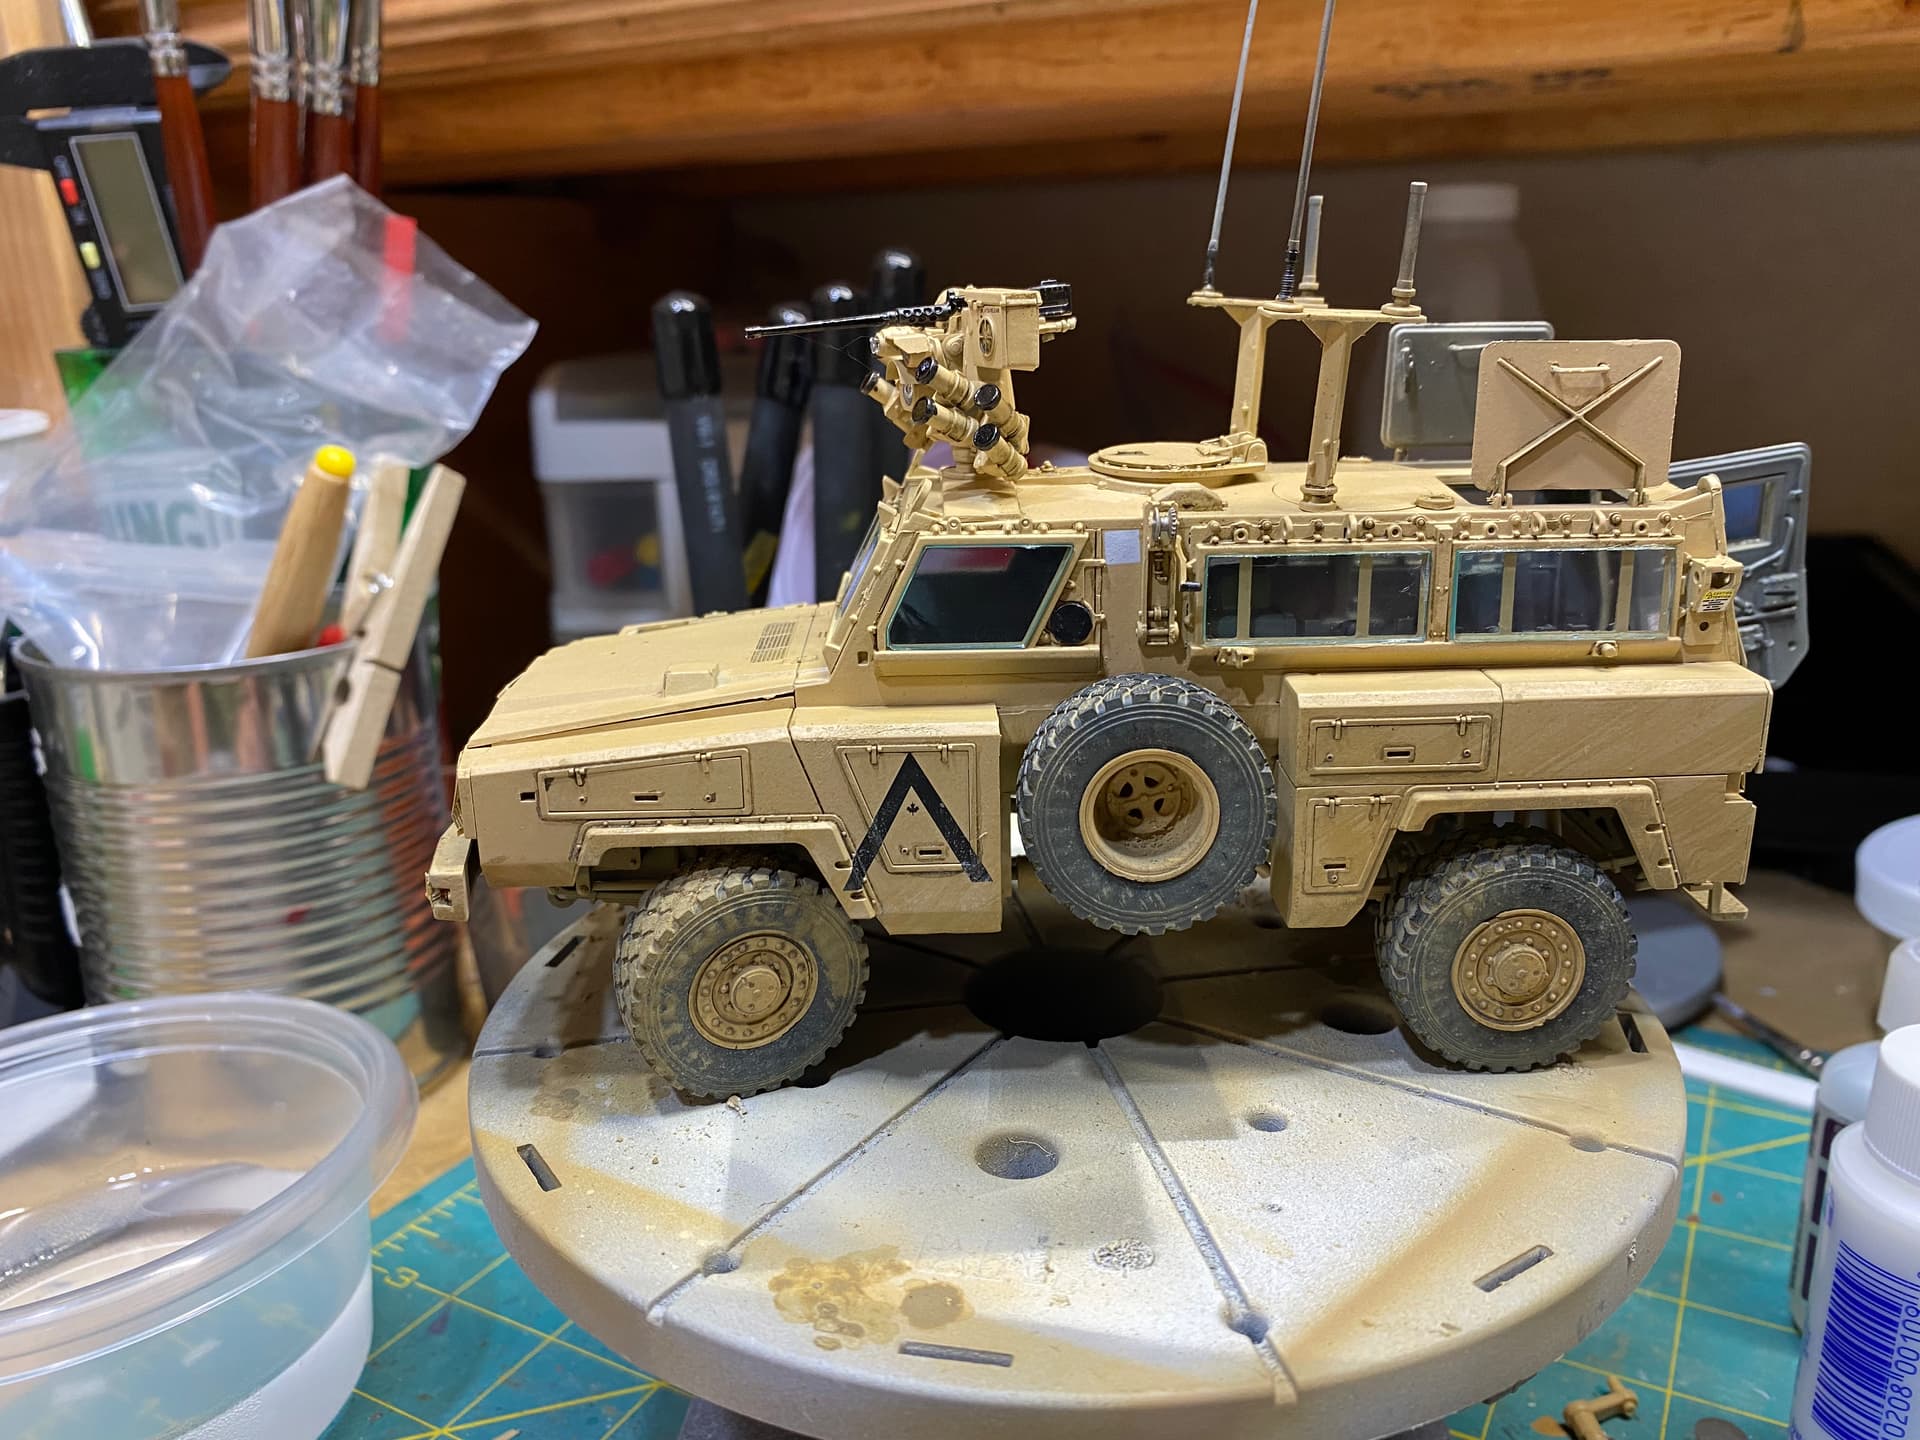
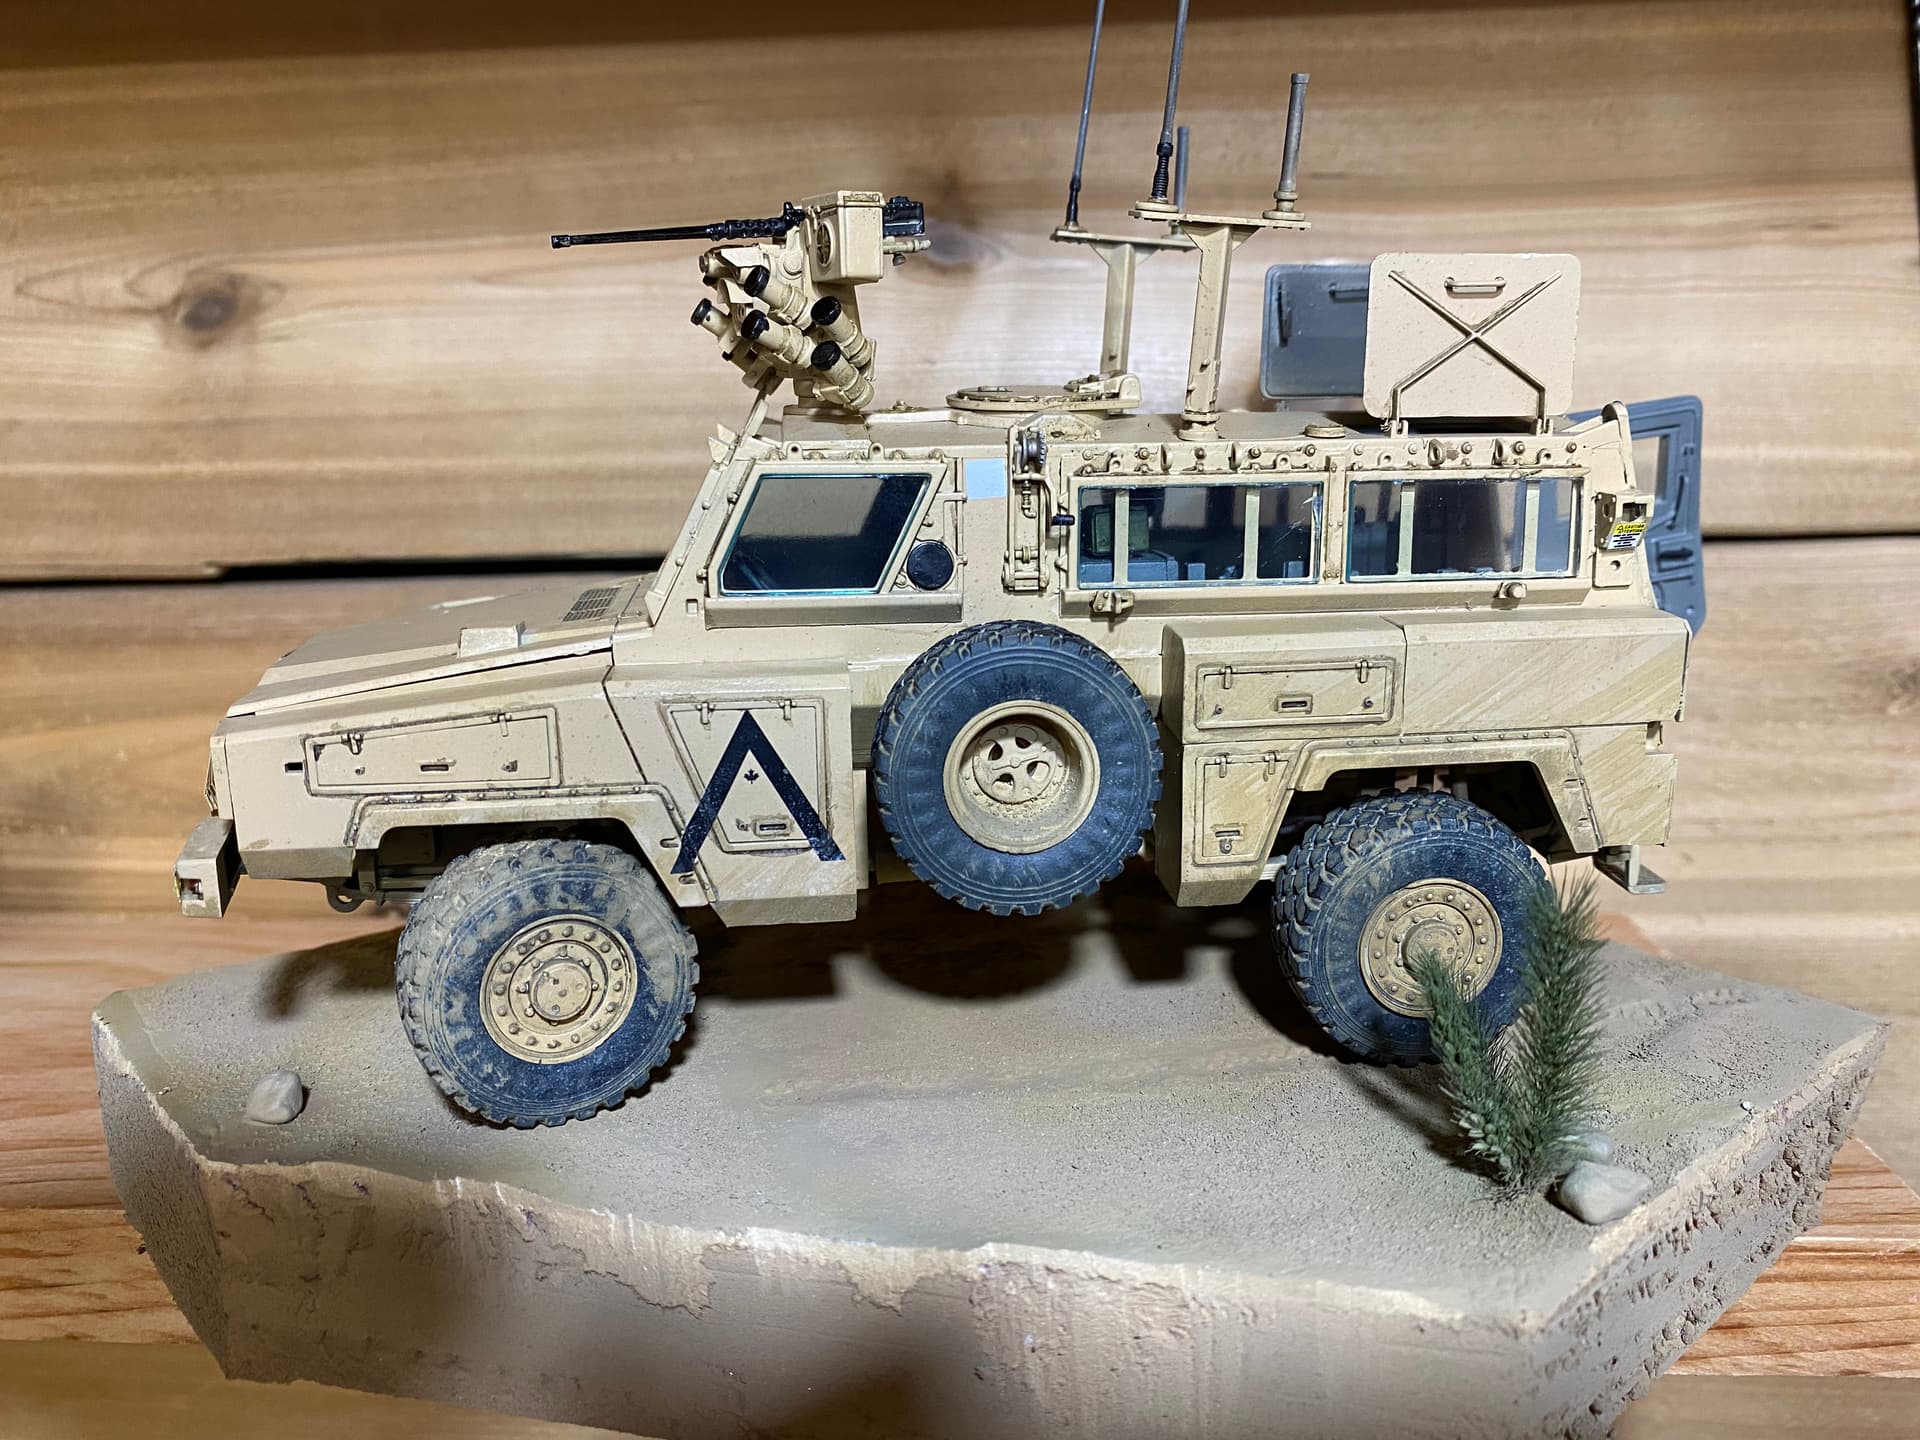
Got it painted up and some dirt on it and I’m actually starting to warm up to this pig again.
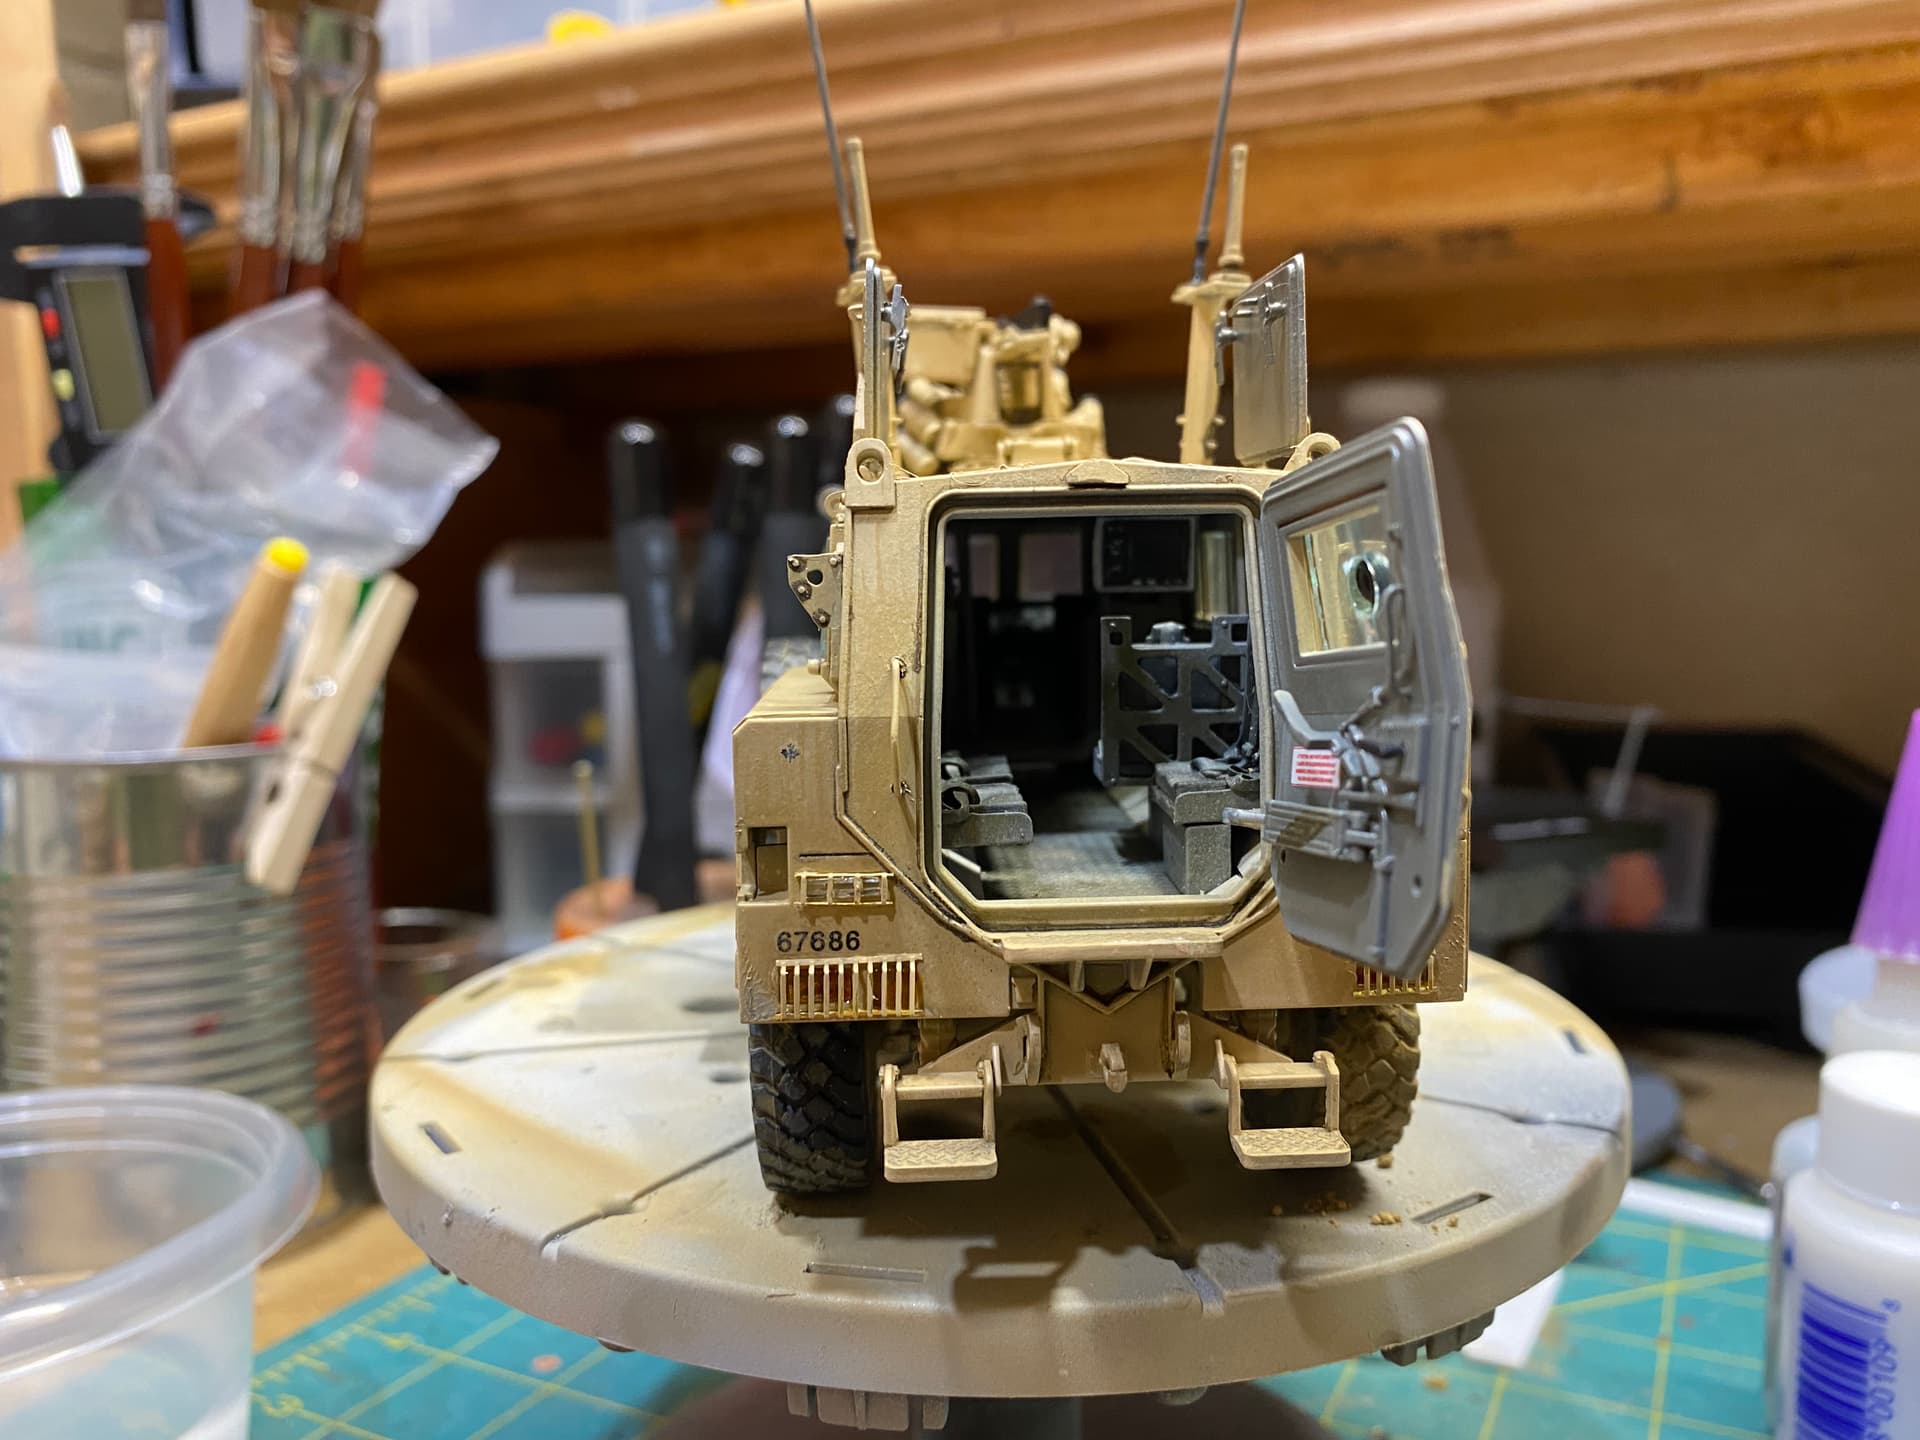
Ran into a few more hiccups. I left the glass until the end to save worrying about masking and such. Sadly the blocks don’t fit well into their frames and it’s too late to do any major corrections. You can only tell from up close though.
Also I lost the barrel for the resin .50 and the water/fuel cans. I was cleaning up and reorganizing my spares bins a few weeks ago and I think I accidentally pitched the box they were in  .
.
Barrel was Frankenstein’d off a styrene one I had. Jerry cans will have to be sourced from somewhere else. I have need of a bunch of modern ones for some upcoming builds so I’ll see what’s out in the market.
Next step is to paint up some equipment and bits of external stowage. I may not get to that for a while but at least this is now in shelf worthy condition and I can get it off my bench.
I hated … HATED … riding in the RG-31. Uncomfortable to ride in and impossible to fight from. That and they are kinda slow to manuevre. However (and this is a big however), this build looks fantastic. Well done indeed. Subtle weathering and a crisp interior. I look forward to seeing what stowage you include to make it looks “live in.” This kit has been on my list for while. Thanks for sharing!
Thanks @Four9erAlpha
I’m all ears for stowage. I’ve got a rack of cots, some reasonably solid looking rucks and some dodgy looking IMP cases. Any must haves I should be shooting for in terms of kit?
When you say “rucks” do you mean the large rucksacks? Depending on the unit, the large rucksacks rarely left the FOBs. Instead, I think day-packs, tactical vests, and small arms would be a good start … maybe make up some Tim Hortons cups and have a large black garbage bag hanging somewhere inside. The cup can be made with some styrene rod and some careful painting. But yeah, cots and IMP cases are a must … same with a case or two of “Oasis” water bottles. Here’s a shot of one my attempts at a “Timmies” cup as well as the Oasis cases …
That looks really good.
I’ve got the Canadian Equipment set from Black Dog.
I agree the big rucks wouldn’t work for day to day but I’ve got some small packs, bed rolls and camelbacks. I’m not sold on their LBVs as they’ve very flat but I might make it work.
The Tim’s cups are a great idea that I hadn’t thought about.
I have exactly one Vietnam era M16A1 in my stash that could look like a C7 if you squint and it’s inside the vehicle.
I find a tiny bit of epoxy putty rolled up and mounted on the M16 can turn it into a semi-convincing C7 if you’re willing to sculpt some detail onto the pseudo-C79!