Mr setter and Mr softener work well on older thicker decals, it is hot though, don’t let it bead on paint or it can ruin it (ask me how I know)
1 Like

I usually apply the setter, give it 30 seconds or so and gently press it down with a lint free cloth. I then brush some softer on top and wick up any on the paint right away. I’ll then let the decal sit for about 15-30 and minutes and repeat the softer as necessary. Absolutely. Do not touch the decal while the softer is working or it will distort
1 Like
Thanks, I will try that.
1 Like
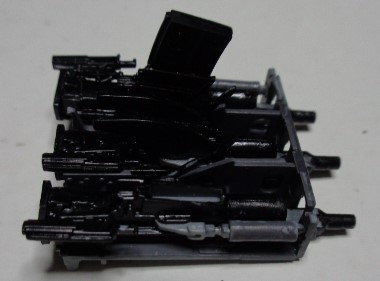

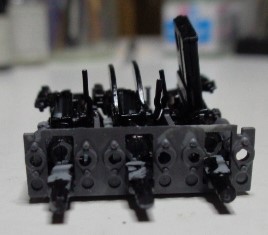
Finally fitted the starboard recuperators to the other two guns. Fitting them into the gun platform to make sure they aligned with the holes in the front plate. Will do the same for the port recuperators, then touch up with Semi-Gloss Black.
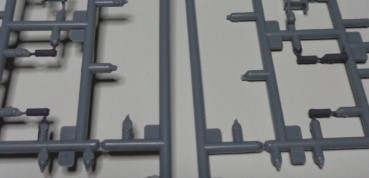
Put more Sasebo Grey on more parts.
5 Likes
I see there are already answers but here is my two drops worth. Microsol and microset are still my go-to’s. So all the set is the nuclear option and has really failed me. About the only time it ever failed me was that it was too strong and it dissolved a decal. With all the set, I would not dare touch the decal while it is wet as I am sometimes willing to do with microsol or mi4croset. There are a couple of other brands but I can’t find them anymore and I haven’t used any.
I can’t wait to see your “demon queller”. Ki-44 is one of my favorites (I’ve realized that my favorite Japanese fighter is usually the one that I’m talking about at the moment) but judging by the number of kids I have for Shoki, Shoki is one of my top three favorite. Very excited that you’re building one.
I went to Aviation of Japan to look up some Ki-44 info and found a few years ago he had a “Shoki-fest”, which I think this link will take you to. There are several logs about the old kits from the sixties as well as hasselgow was newer ones. But there are lots of neat things about the units and some interesting comments about Army paints and colors.
1 Like
Real close to finishing the Jill. Just need to
- Touch up one exhaust that fought me while attaching it stripping some paint.
- weather the exhaust with rust tones and add exhaust stains
- add some fuel stains to the wing tops
- add Pitot tube and flaps
- clear satin
- add and paint navagiation lights
- weather torpedo tail fin


I had added the decals to the landing gear doors but they were quite thick so I remove and sprayed them
10 Likes
Mead what is your technique for adding fuel stains? i always have problems getting it to look real.
Joe
Thanks for all the inputs, guys! Very helpful!
In the end I used several different solutions and got a decent setting of the decals - more to follow ![]()

12 Likes
Nice work!! Looks great!
2 Likes
Good question! I’ve never done it before! I have done grease and oil stains but not fuel. For oil and grease I’ll put a little out of mineral spirits down then a small dot of oil paint. After a minute or so I’ll start to drag it in the direction of air flow. I’ll then blend it with a soft bristle brush. More blending can simulate older worn staining and less blending more recent fresh oil streaking
1 Like
be looking forward to see how you go about it.
1 Like
excelent work. they look painted on!!!
2 Likes
Thanks for the comments. Now a gloss coat and then some light weathering.
More to follow soon ![]()
Calling her done! Really nice kit aside from the wings but they are easy enough to fix. Need to remove some mask residue on the canopy and add the pitot tube.


The flap attachments are very fragile and make me nervous
13 Likes
I might just finish this thing.


All the faint and weathering completed, sealed under an unreasonably glossy coat of flat paint.
I tried to fake in a landing gear bay, didn’t work so well, but the exhaust staining looks OK.
Just the fiddly bits to go.
11 Likes
Well done. It looks great.
Cheers!
chuck
Stunning work, Mead. Absolutely bourgeois and impressive build. Love that all your work on the cockpit is still visible to a great extent.
1 Like
Mark, great work on the Reisen! Love the faded/weathering look of the paint job on the wings!
1 Like