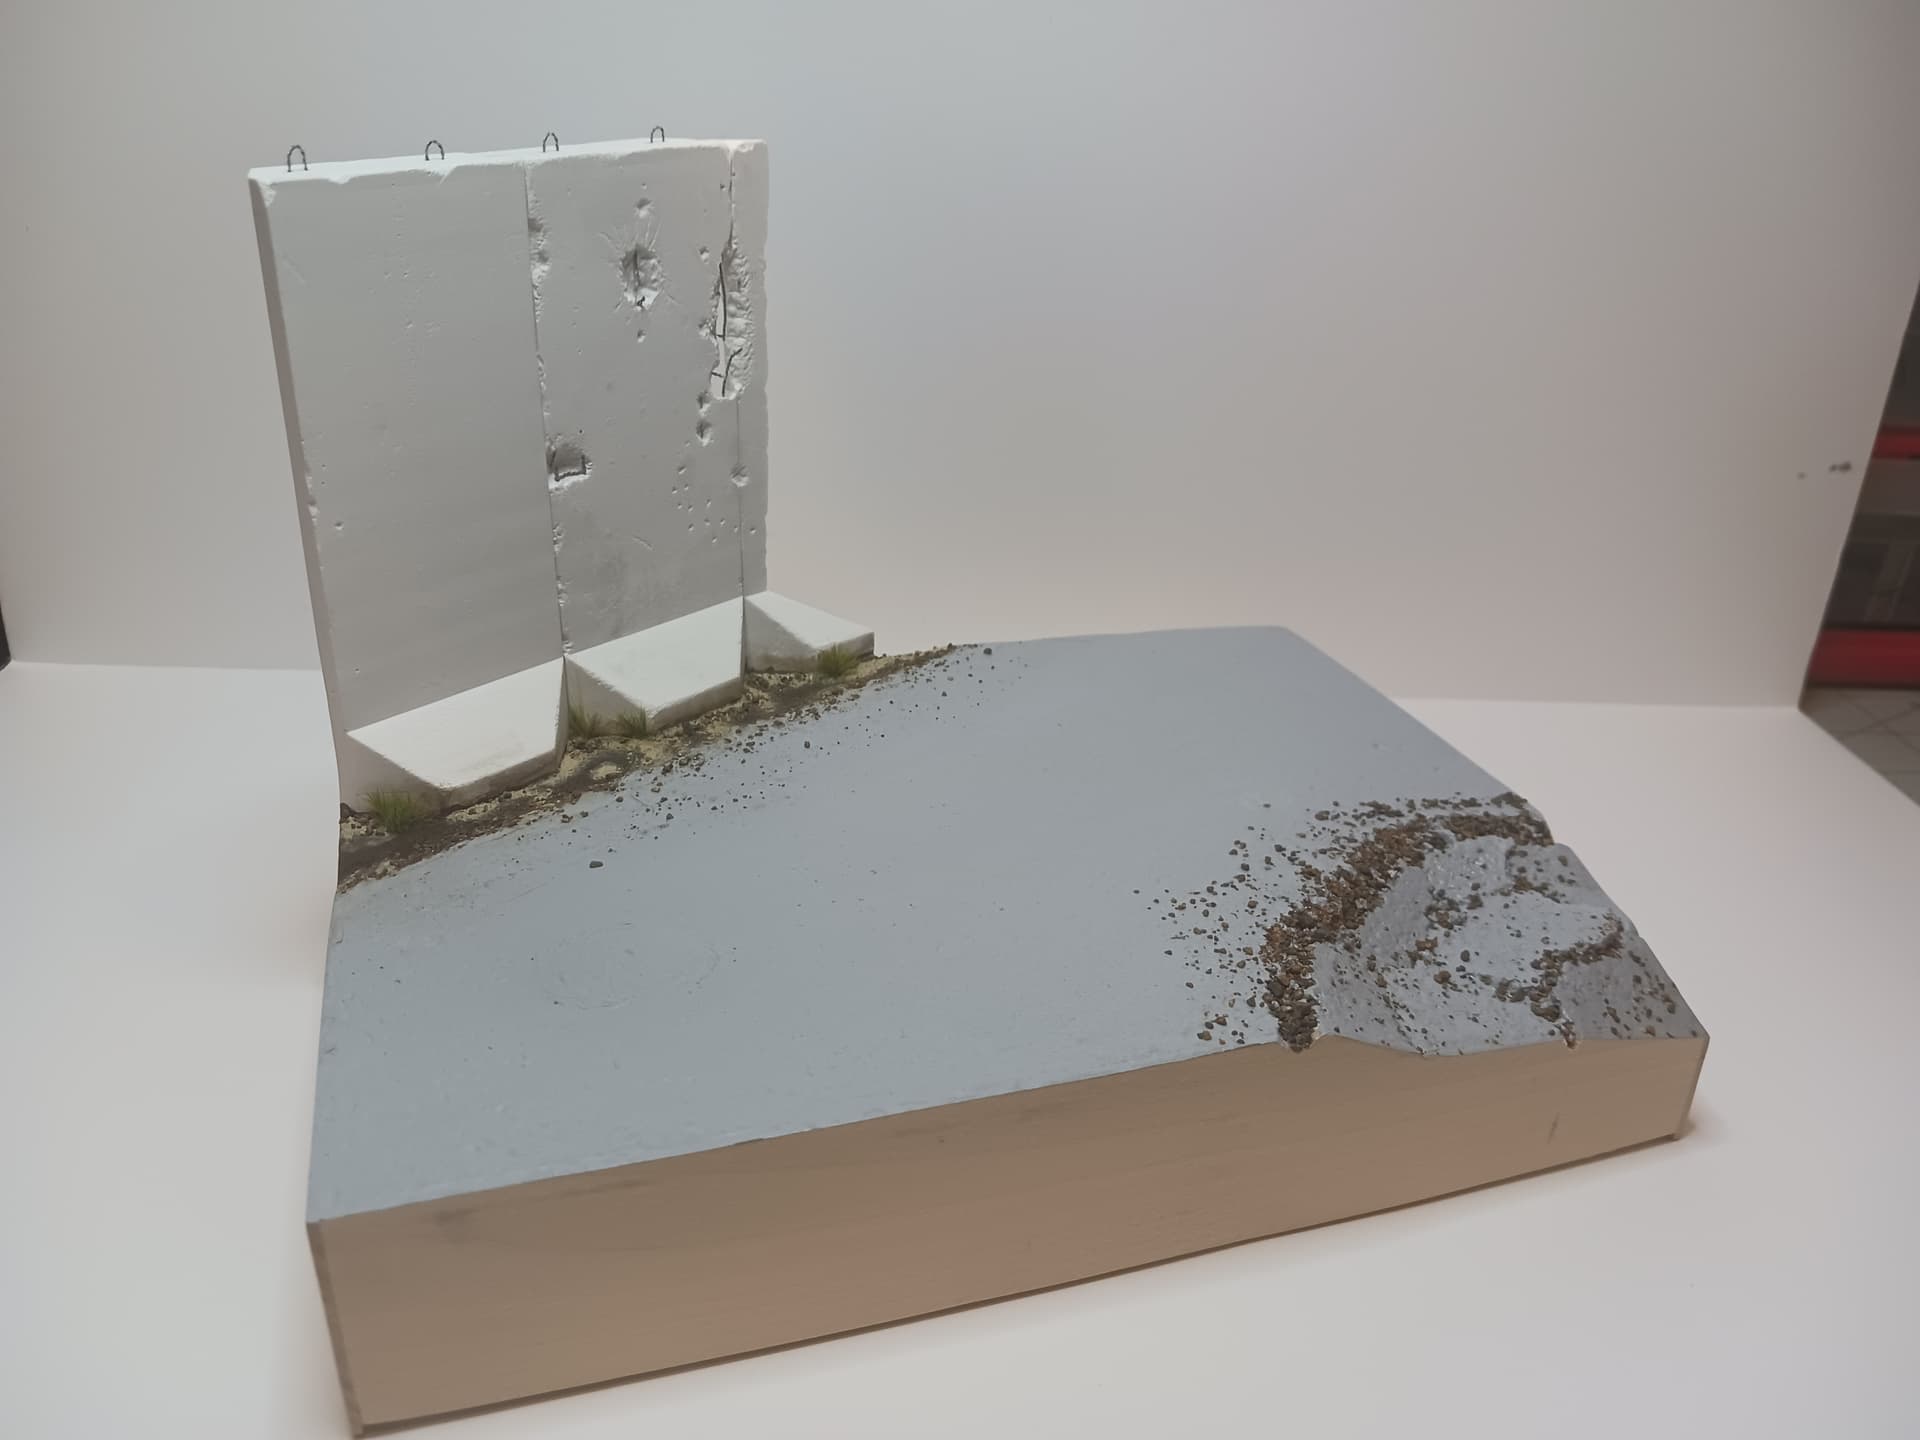
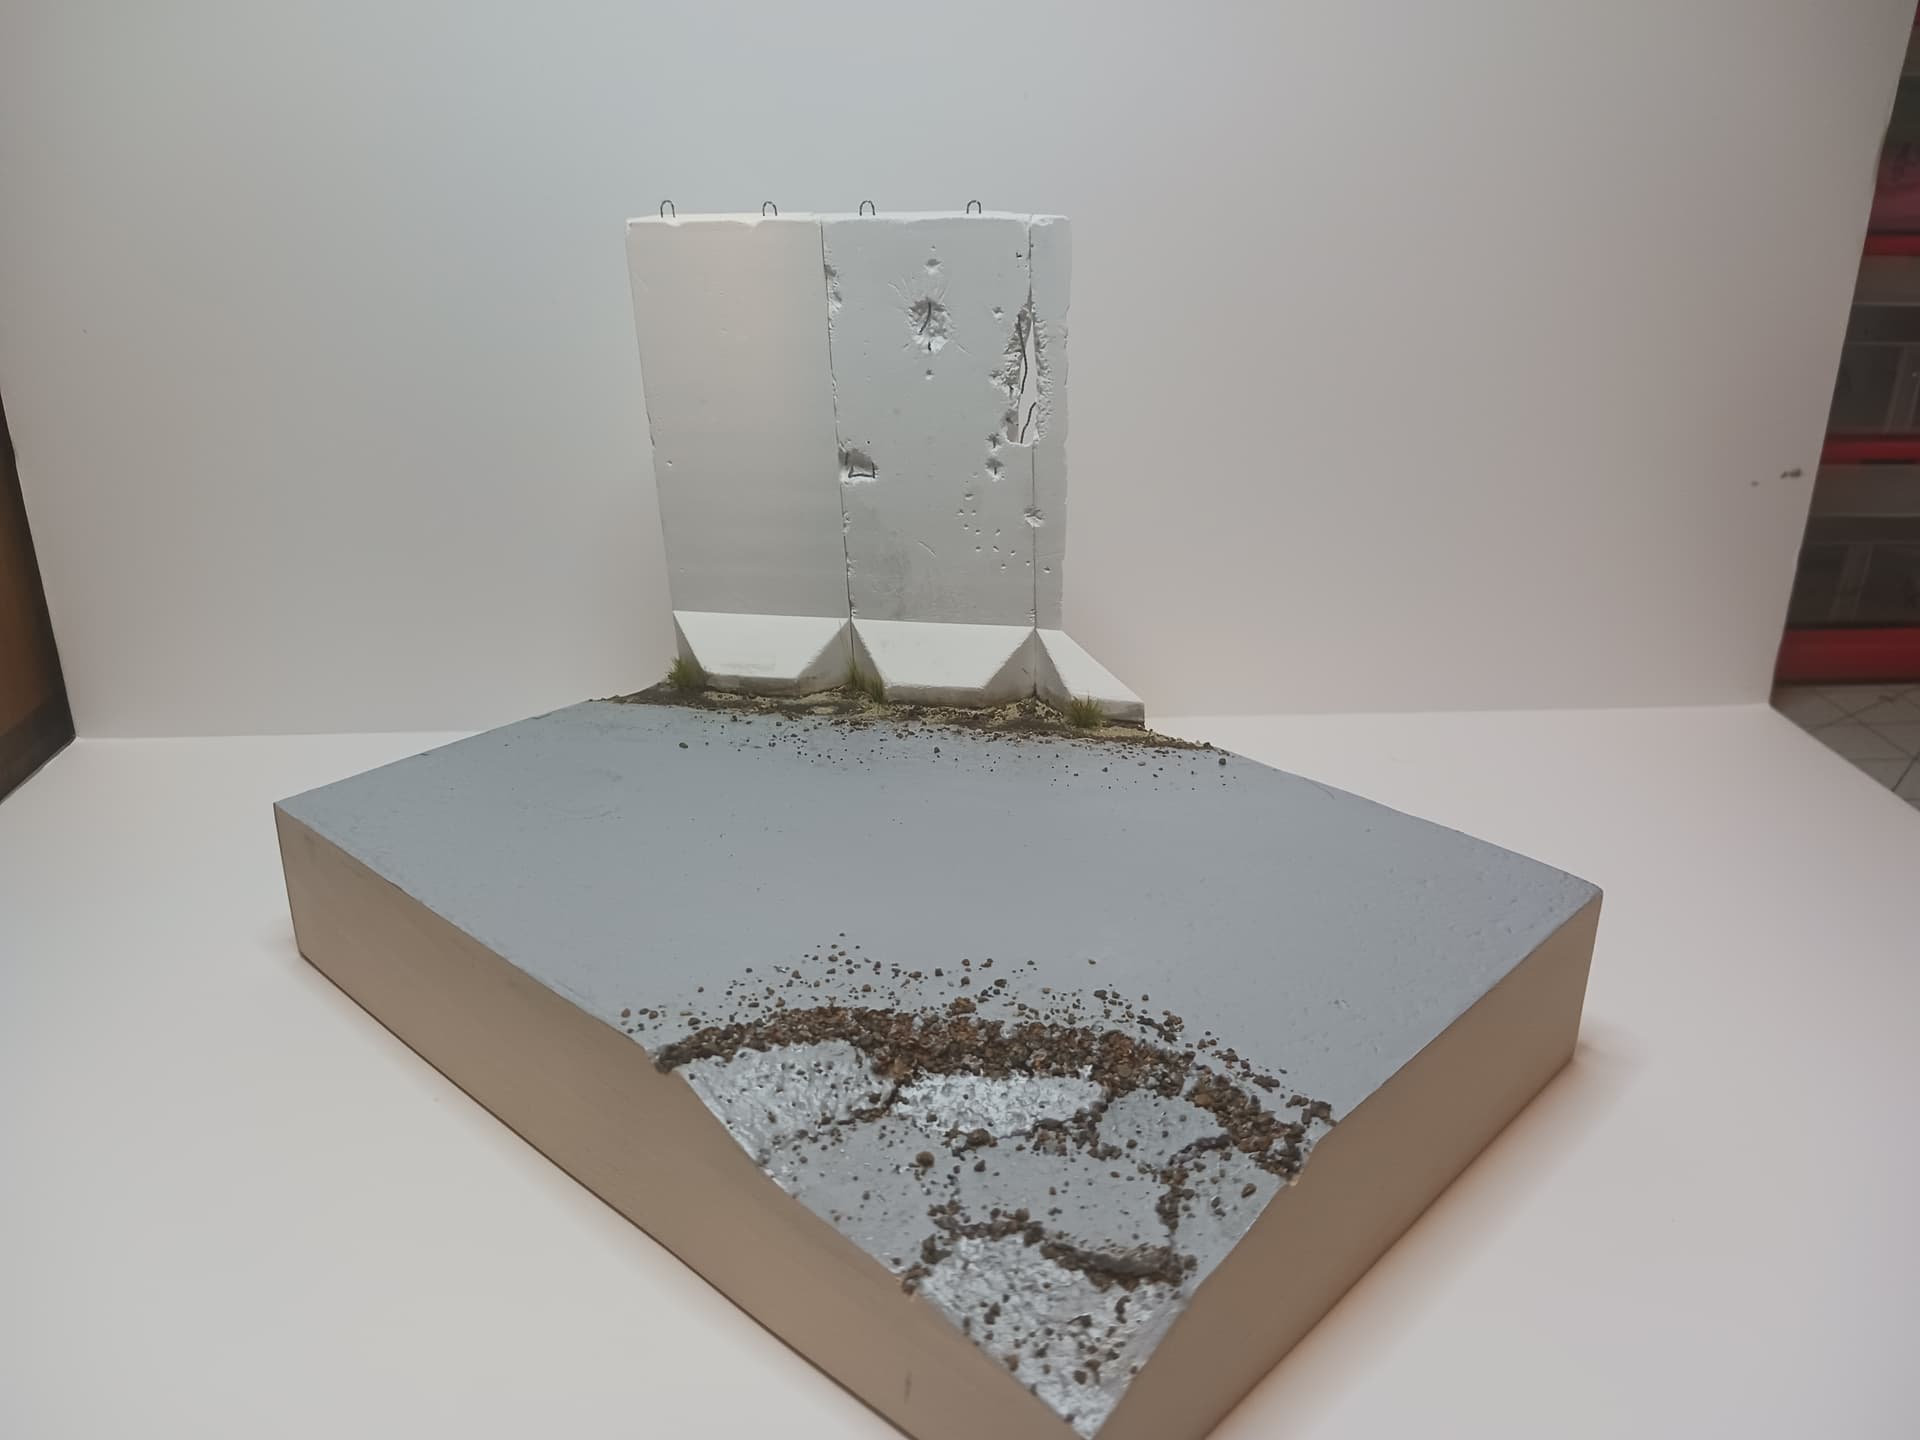
Here is the (hopefully) completed basic layout and built scenic base for my LAV 3 model. I would love any feedback or suggestions before I prime the whole thing.
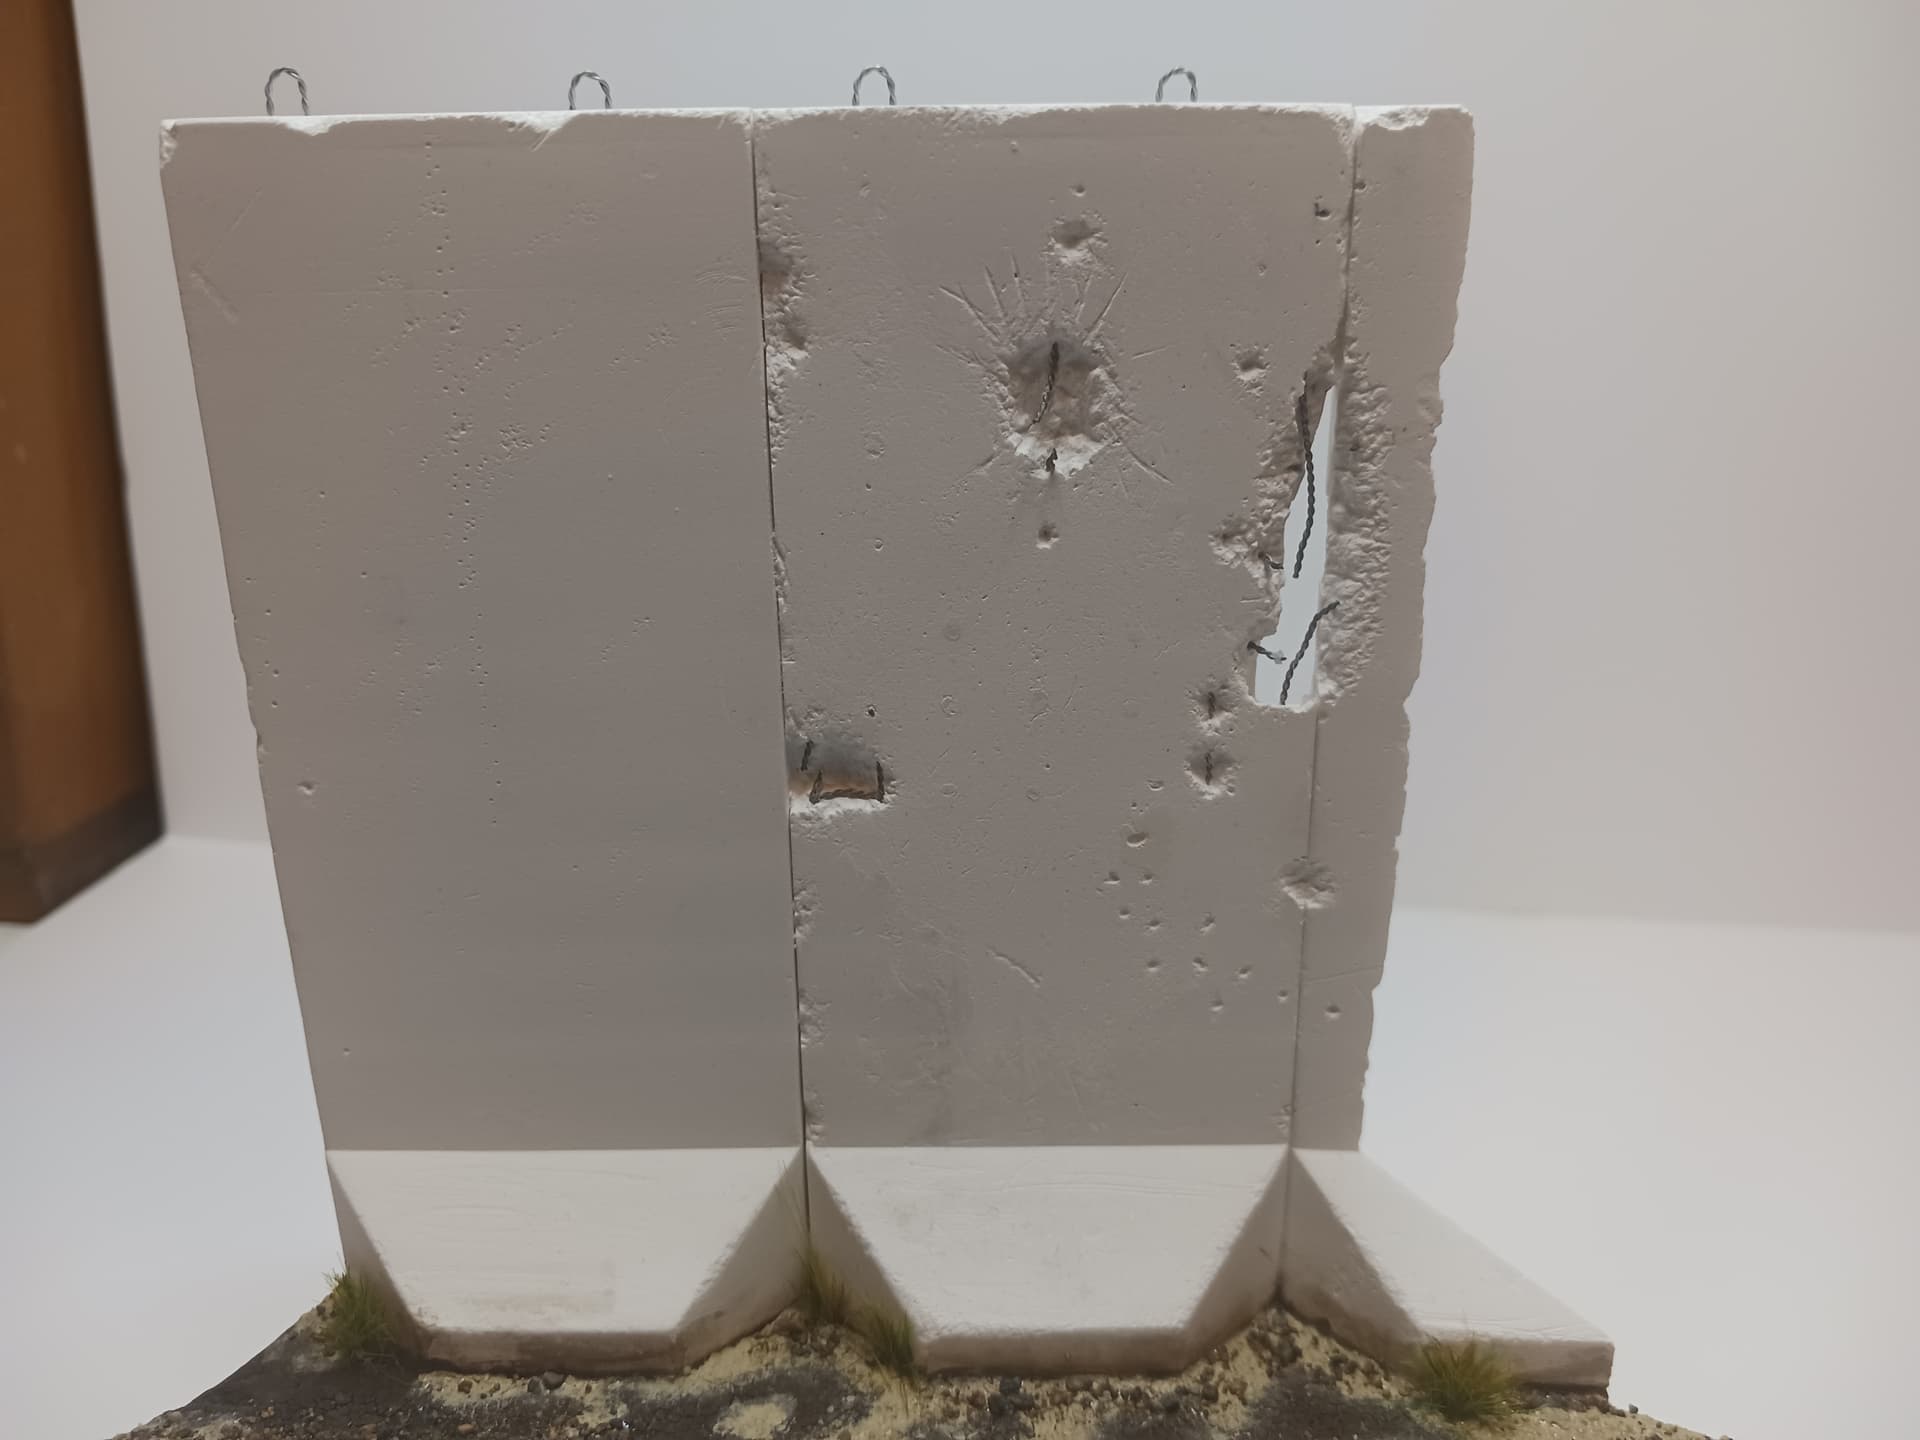
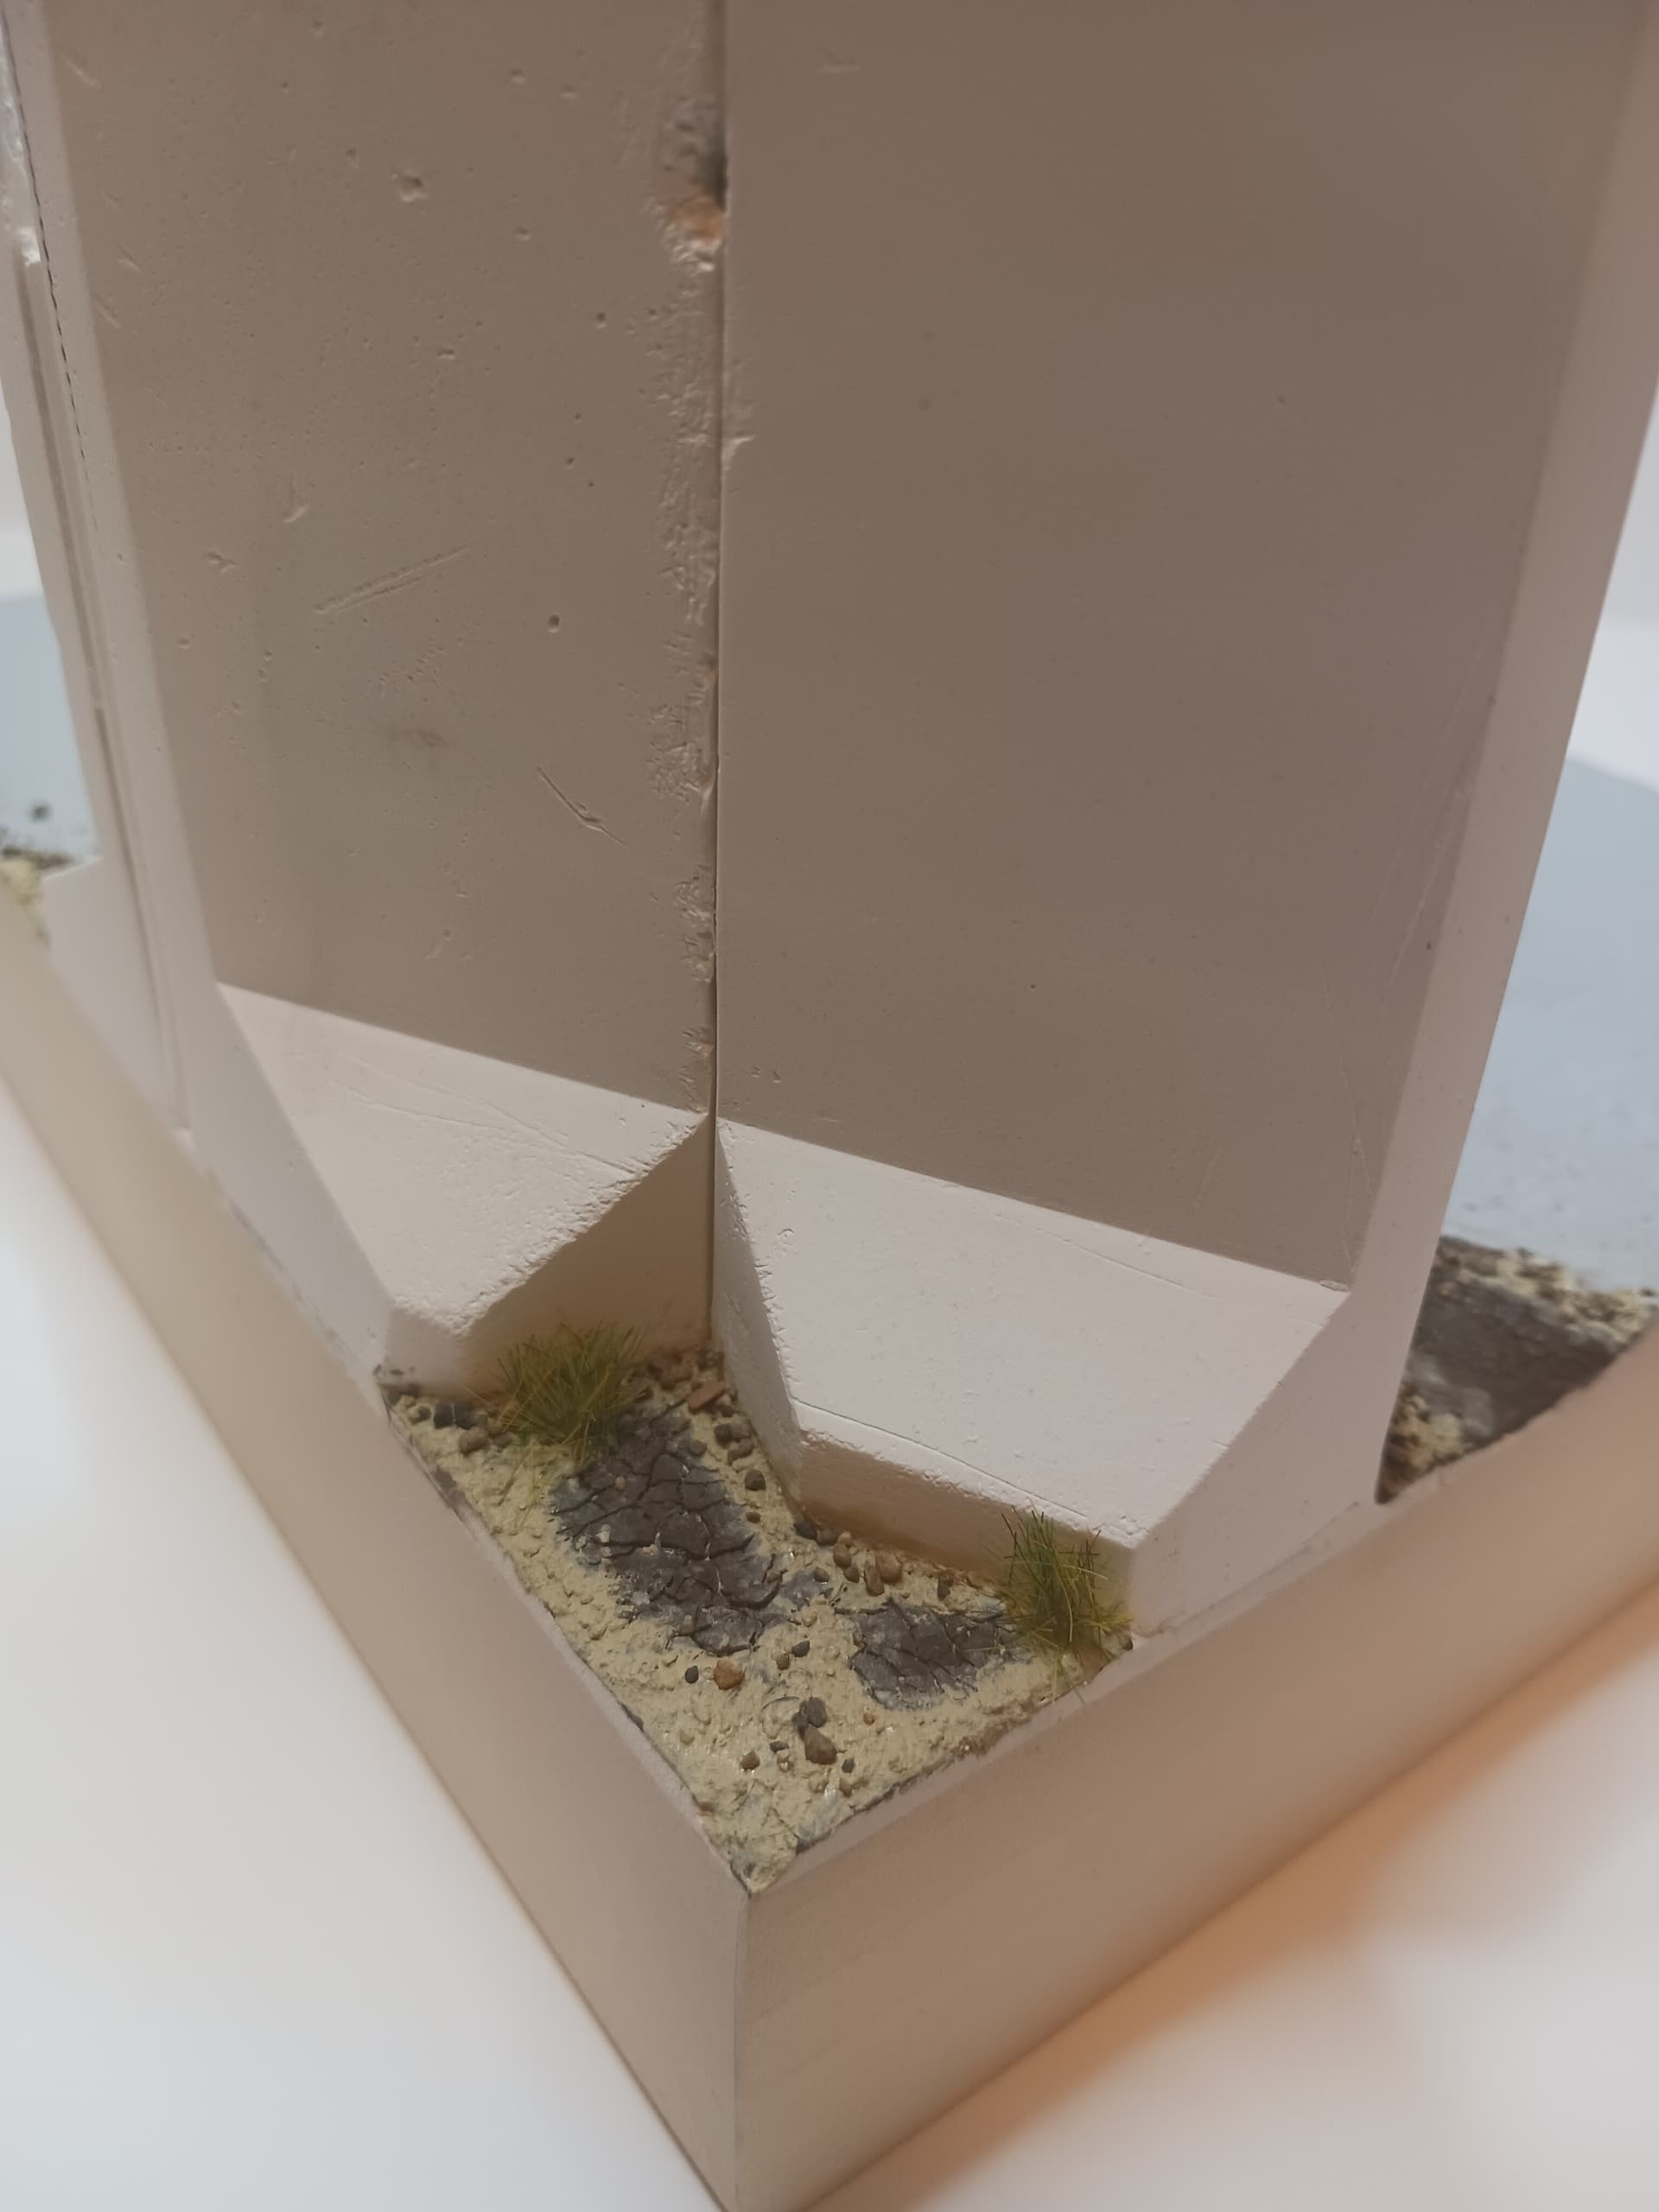
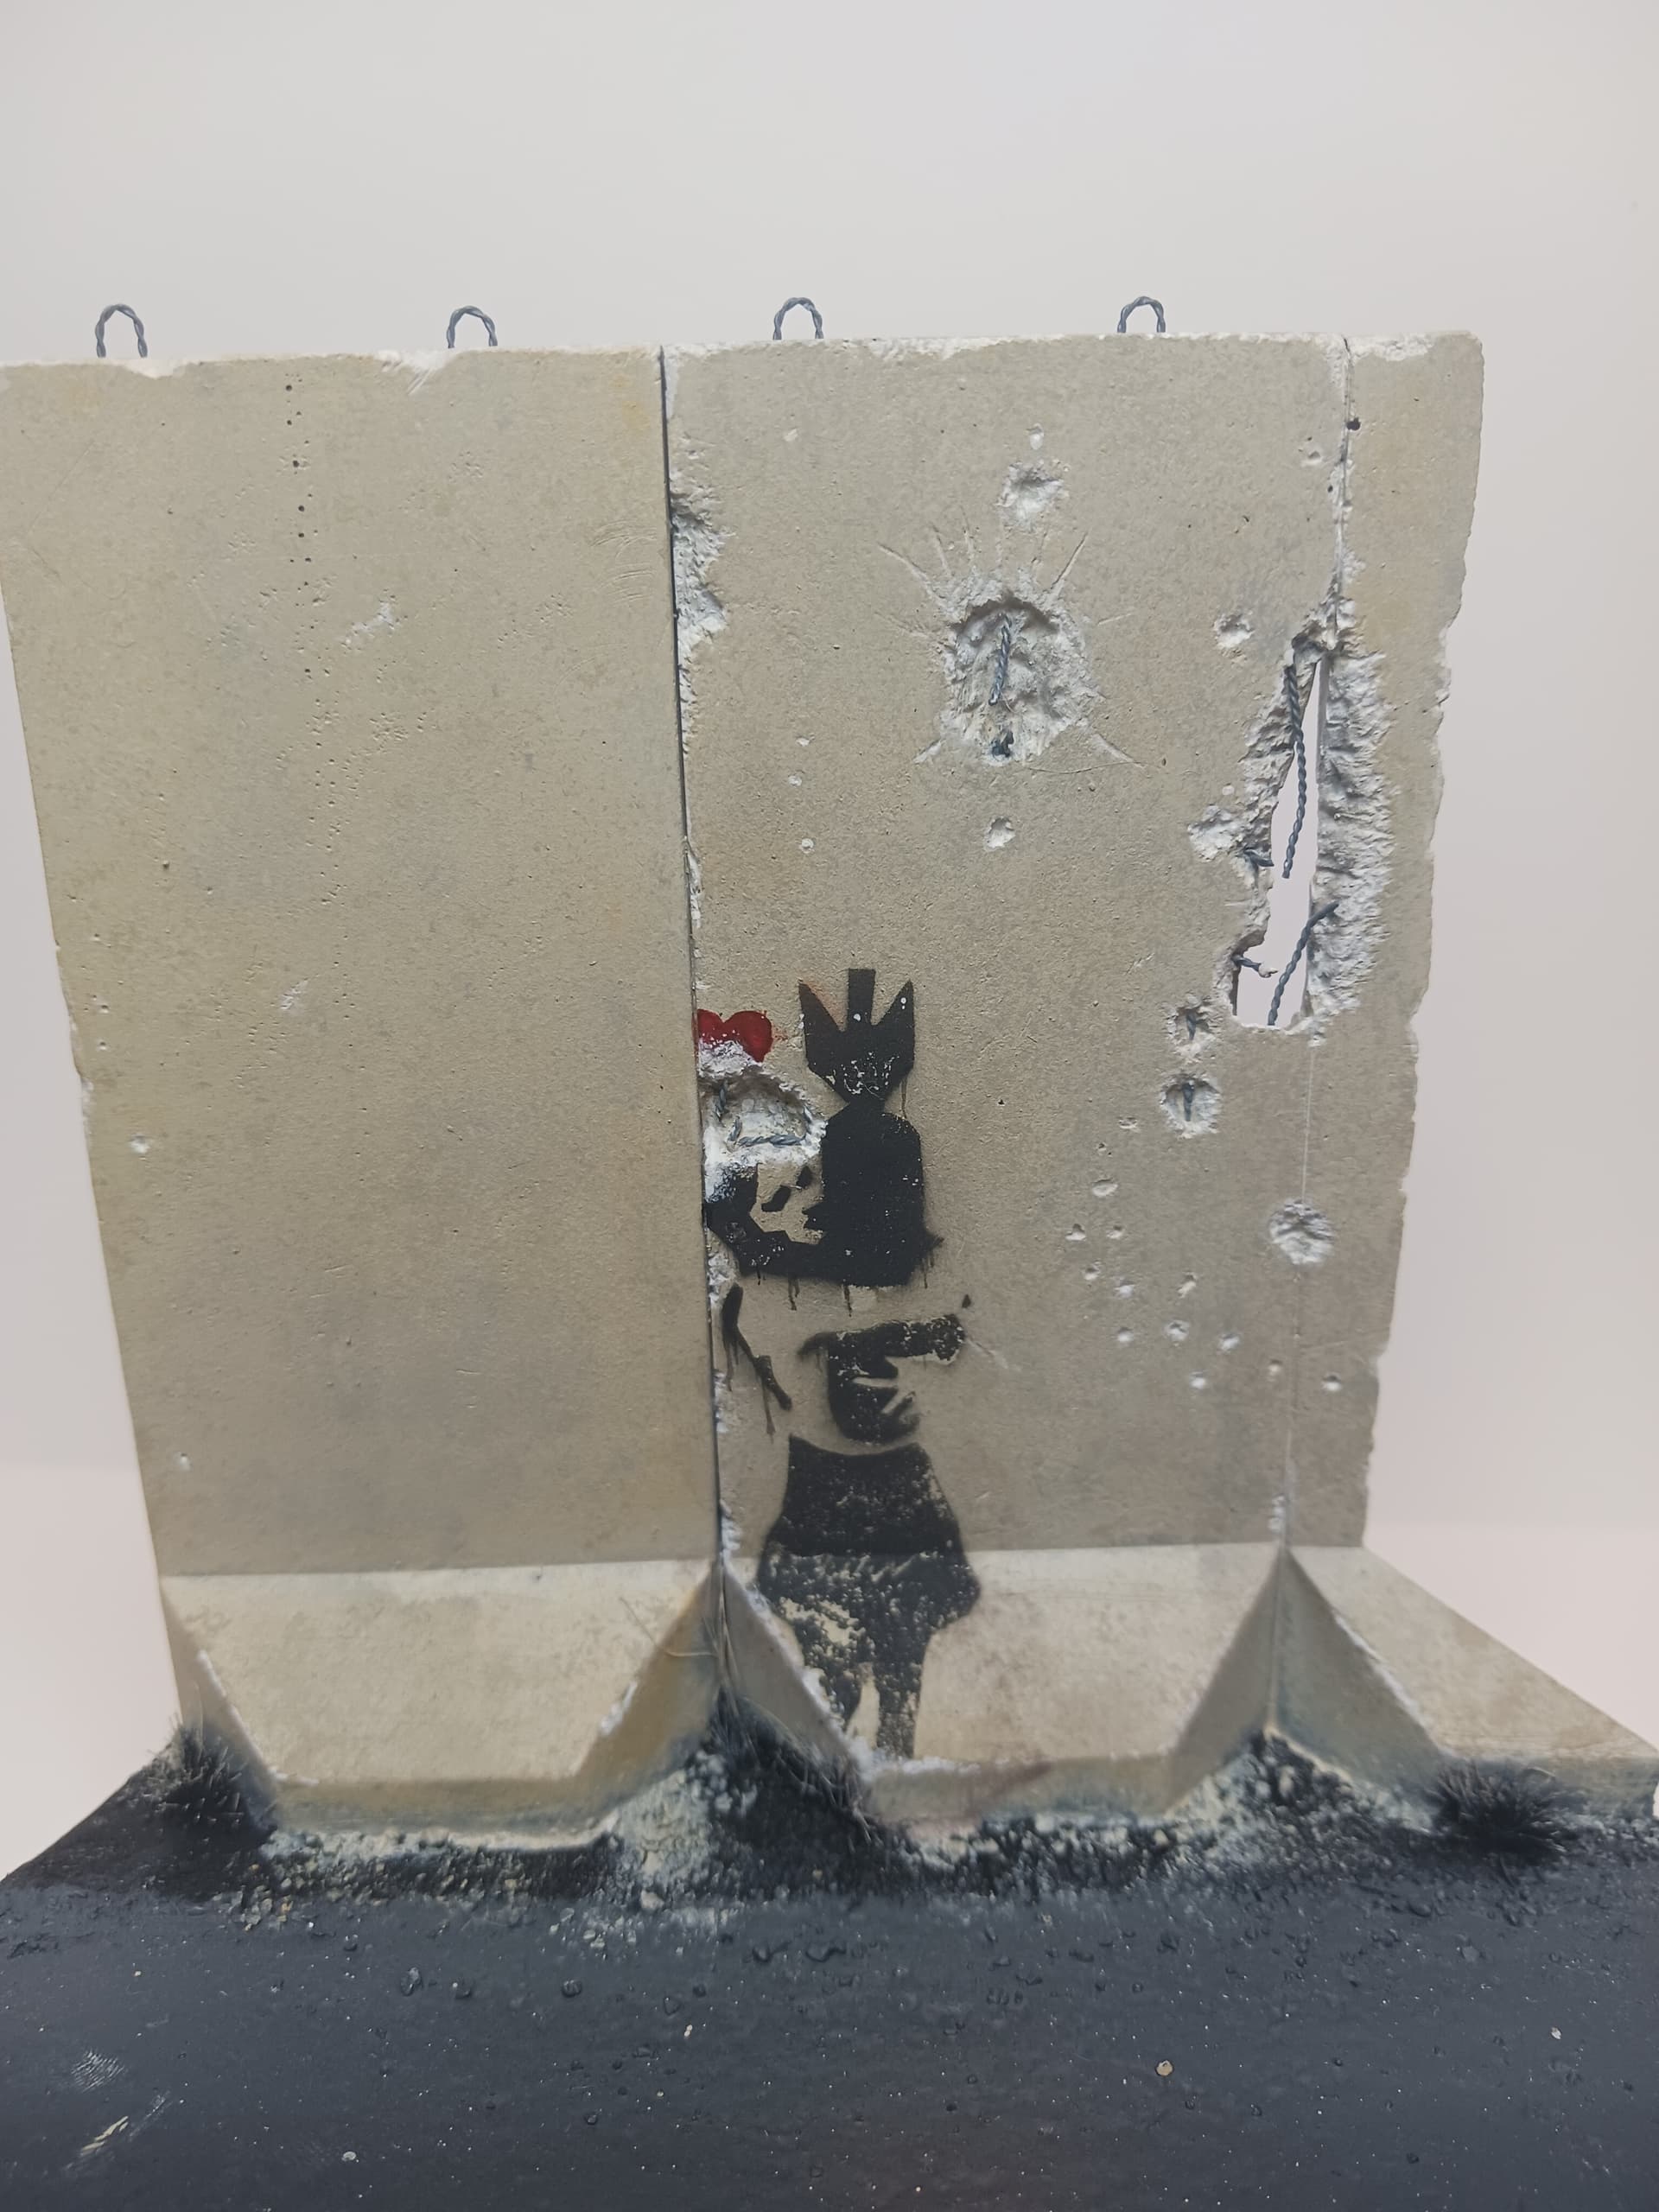
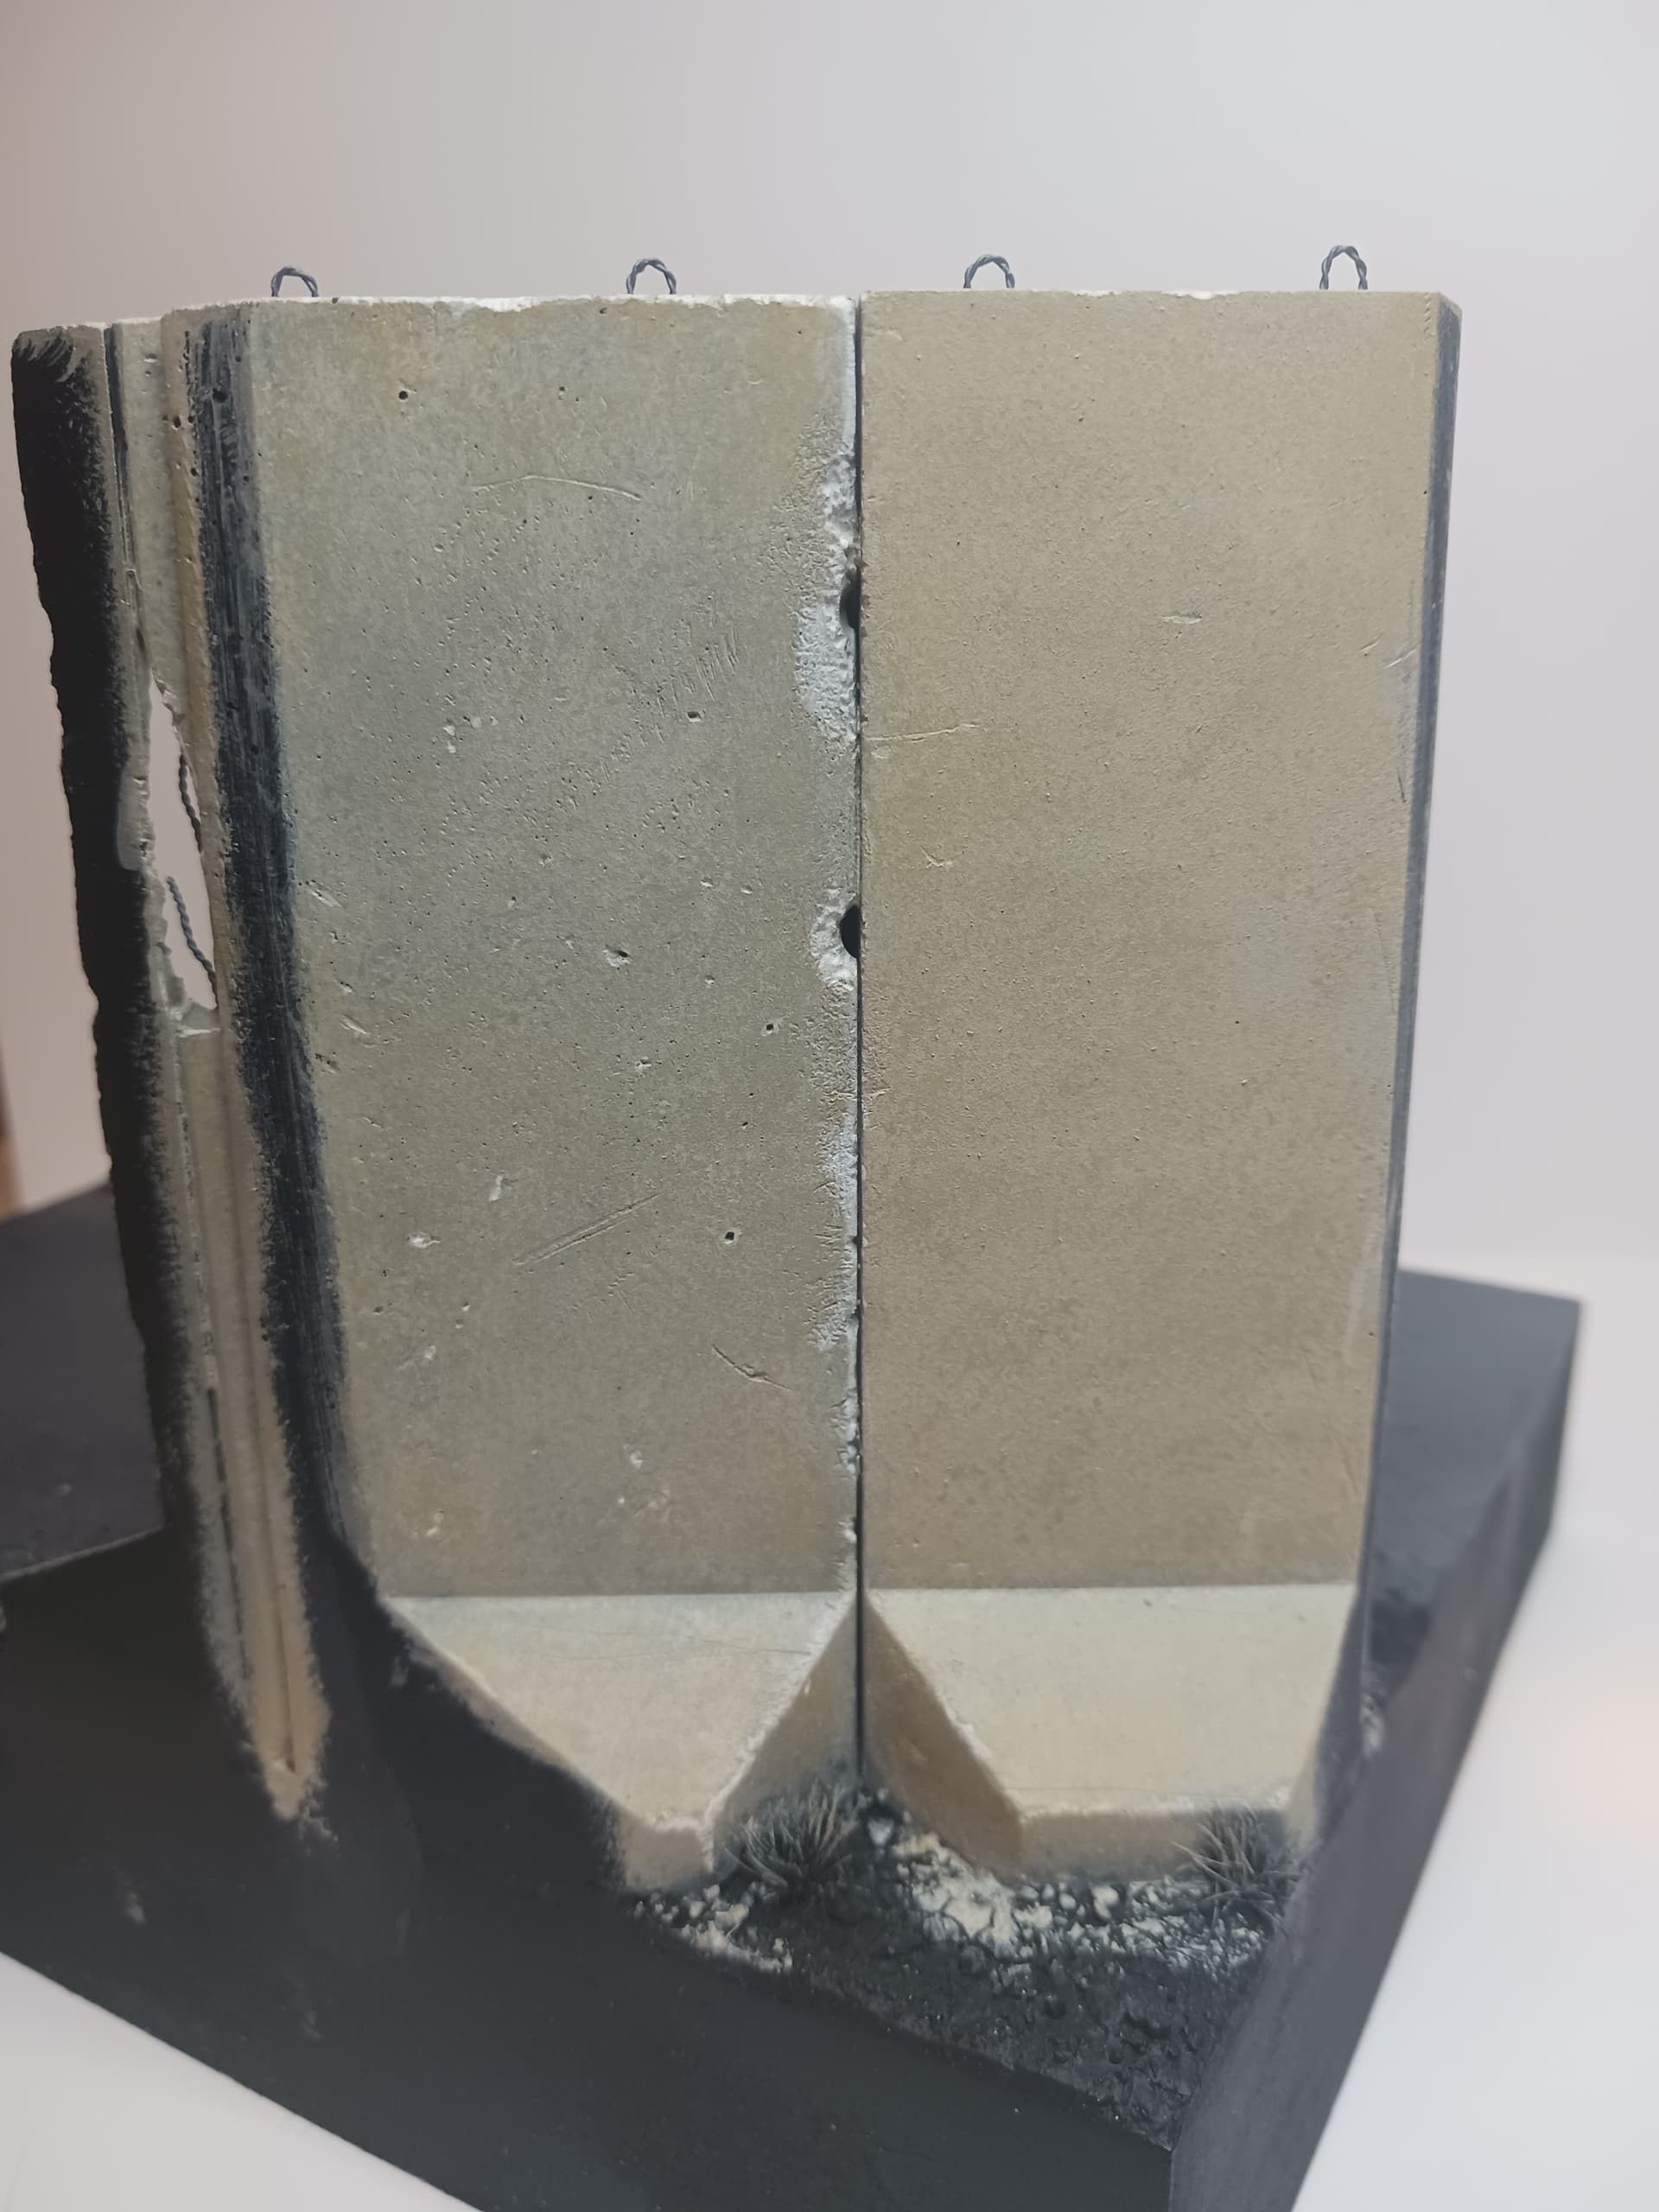
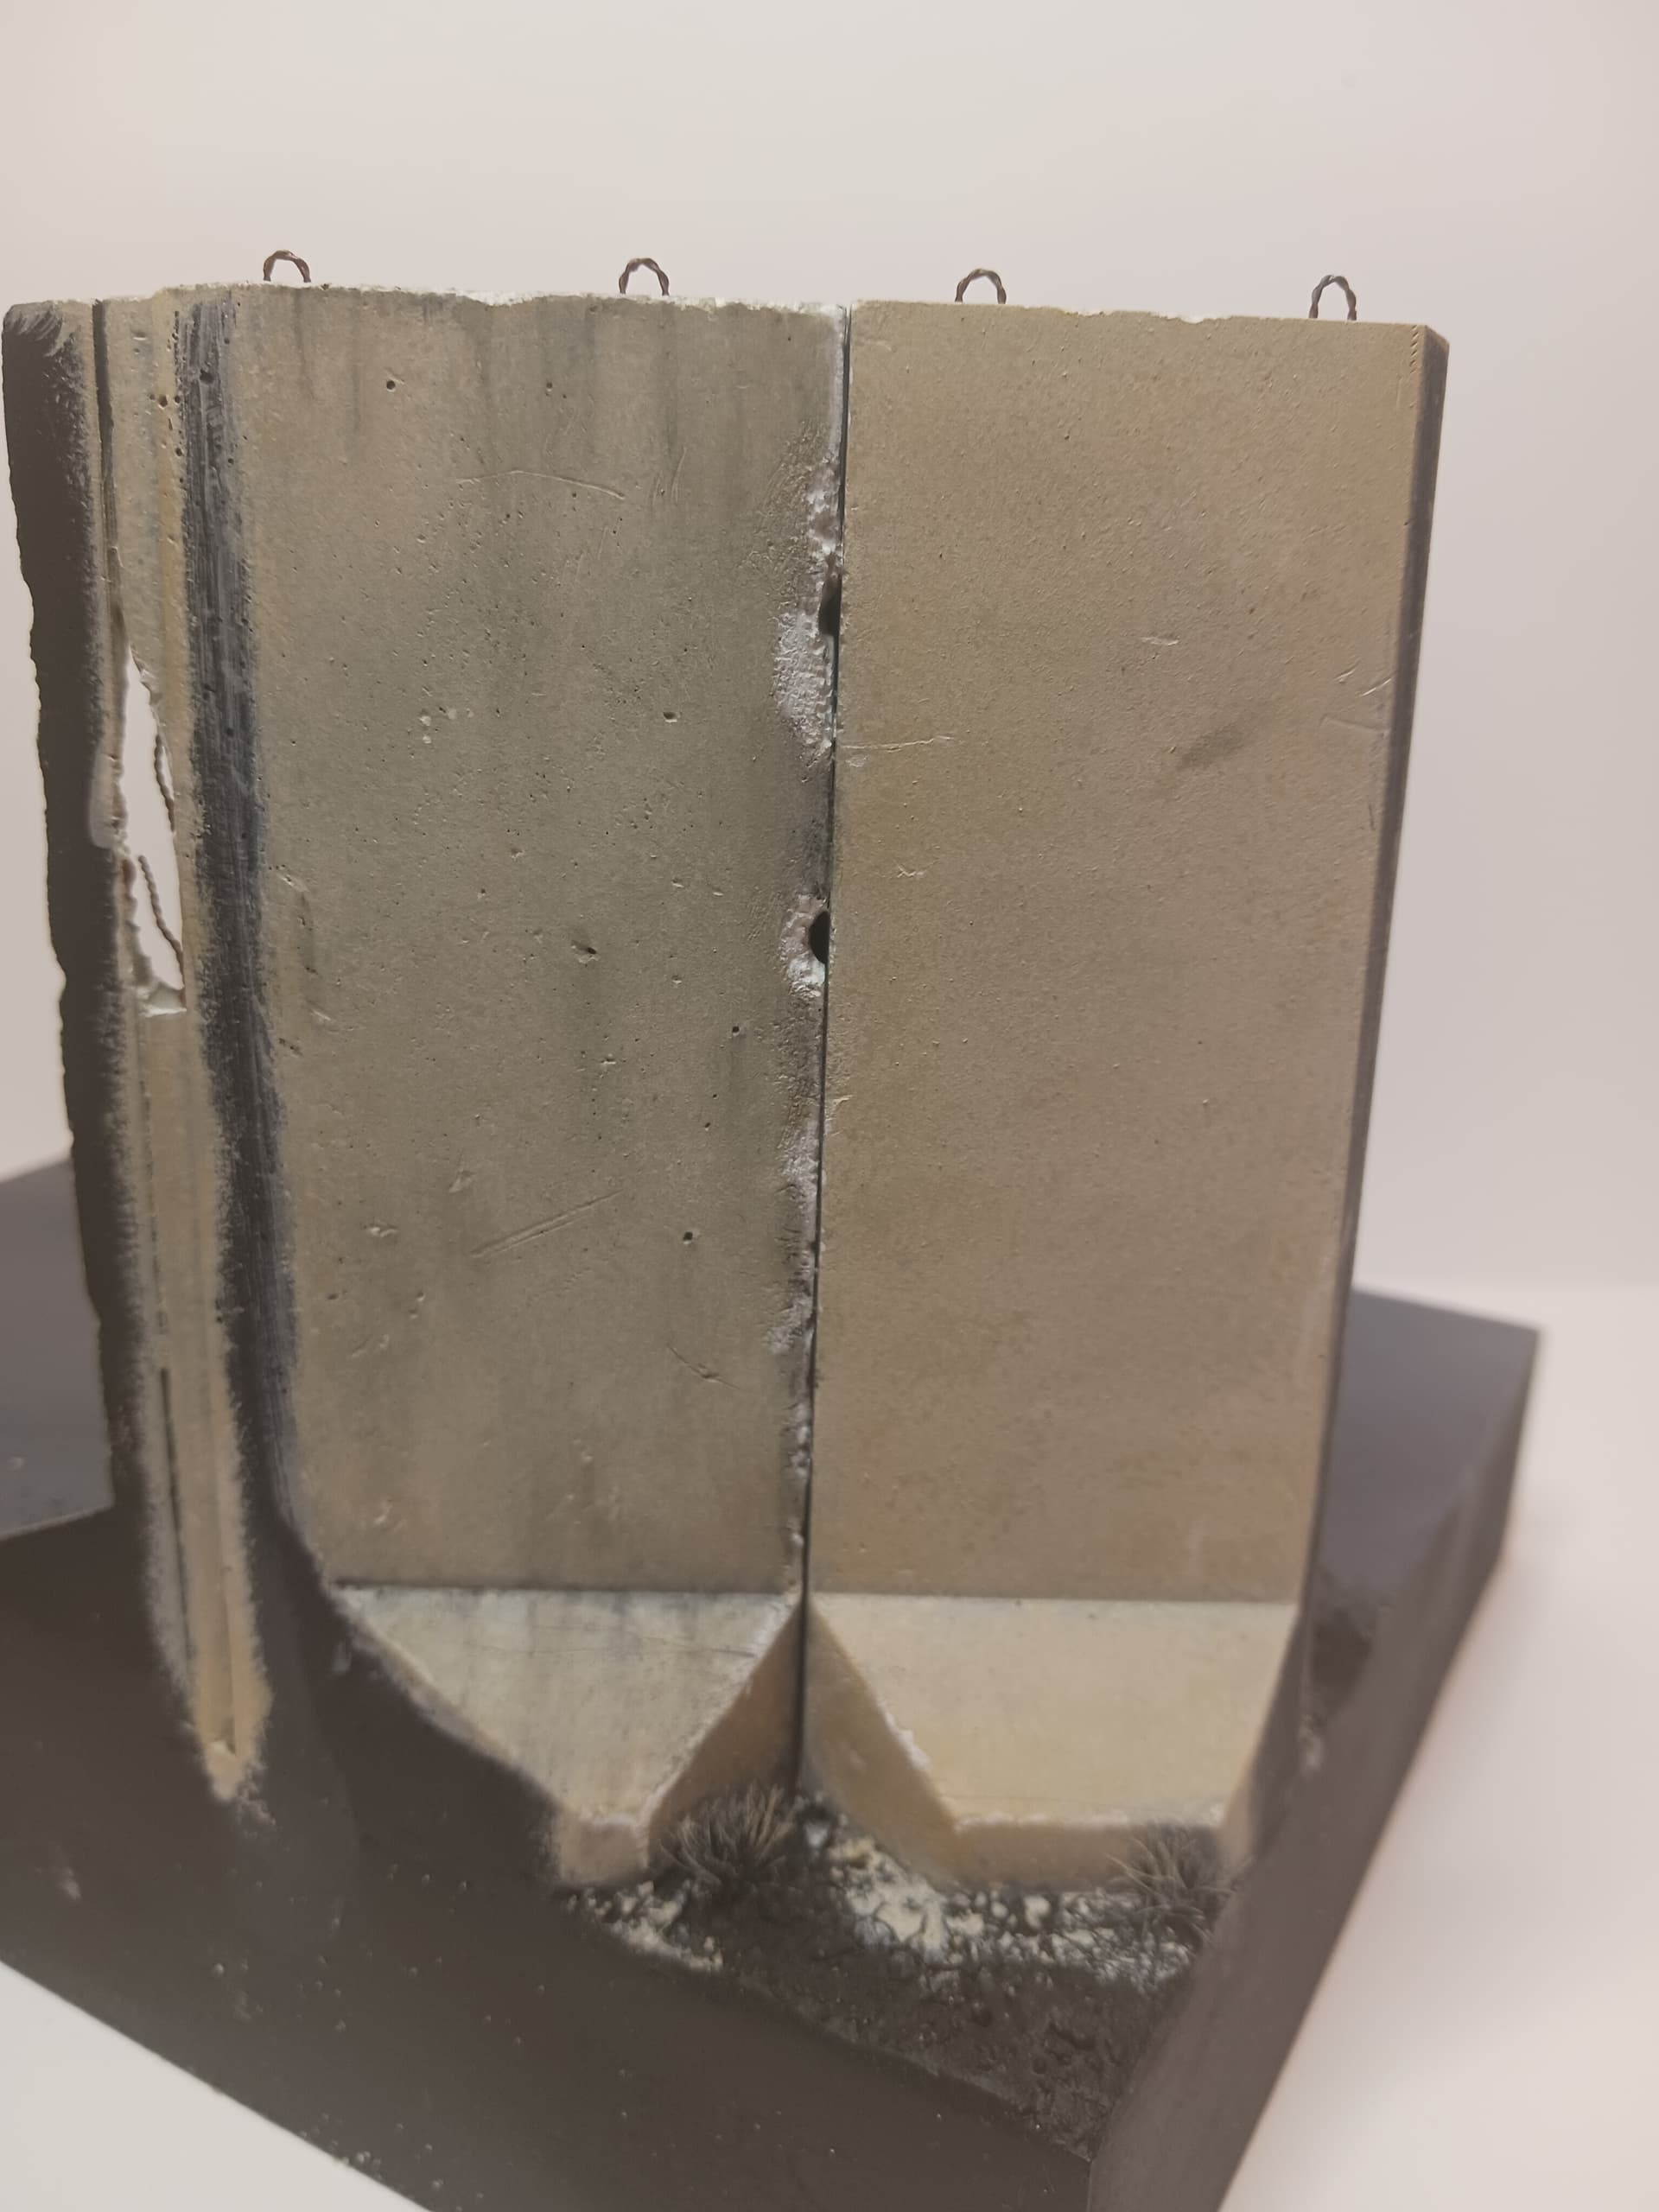
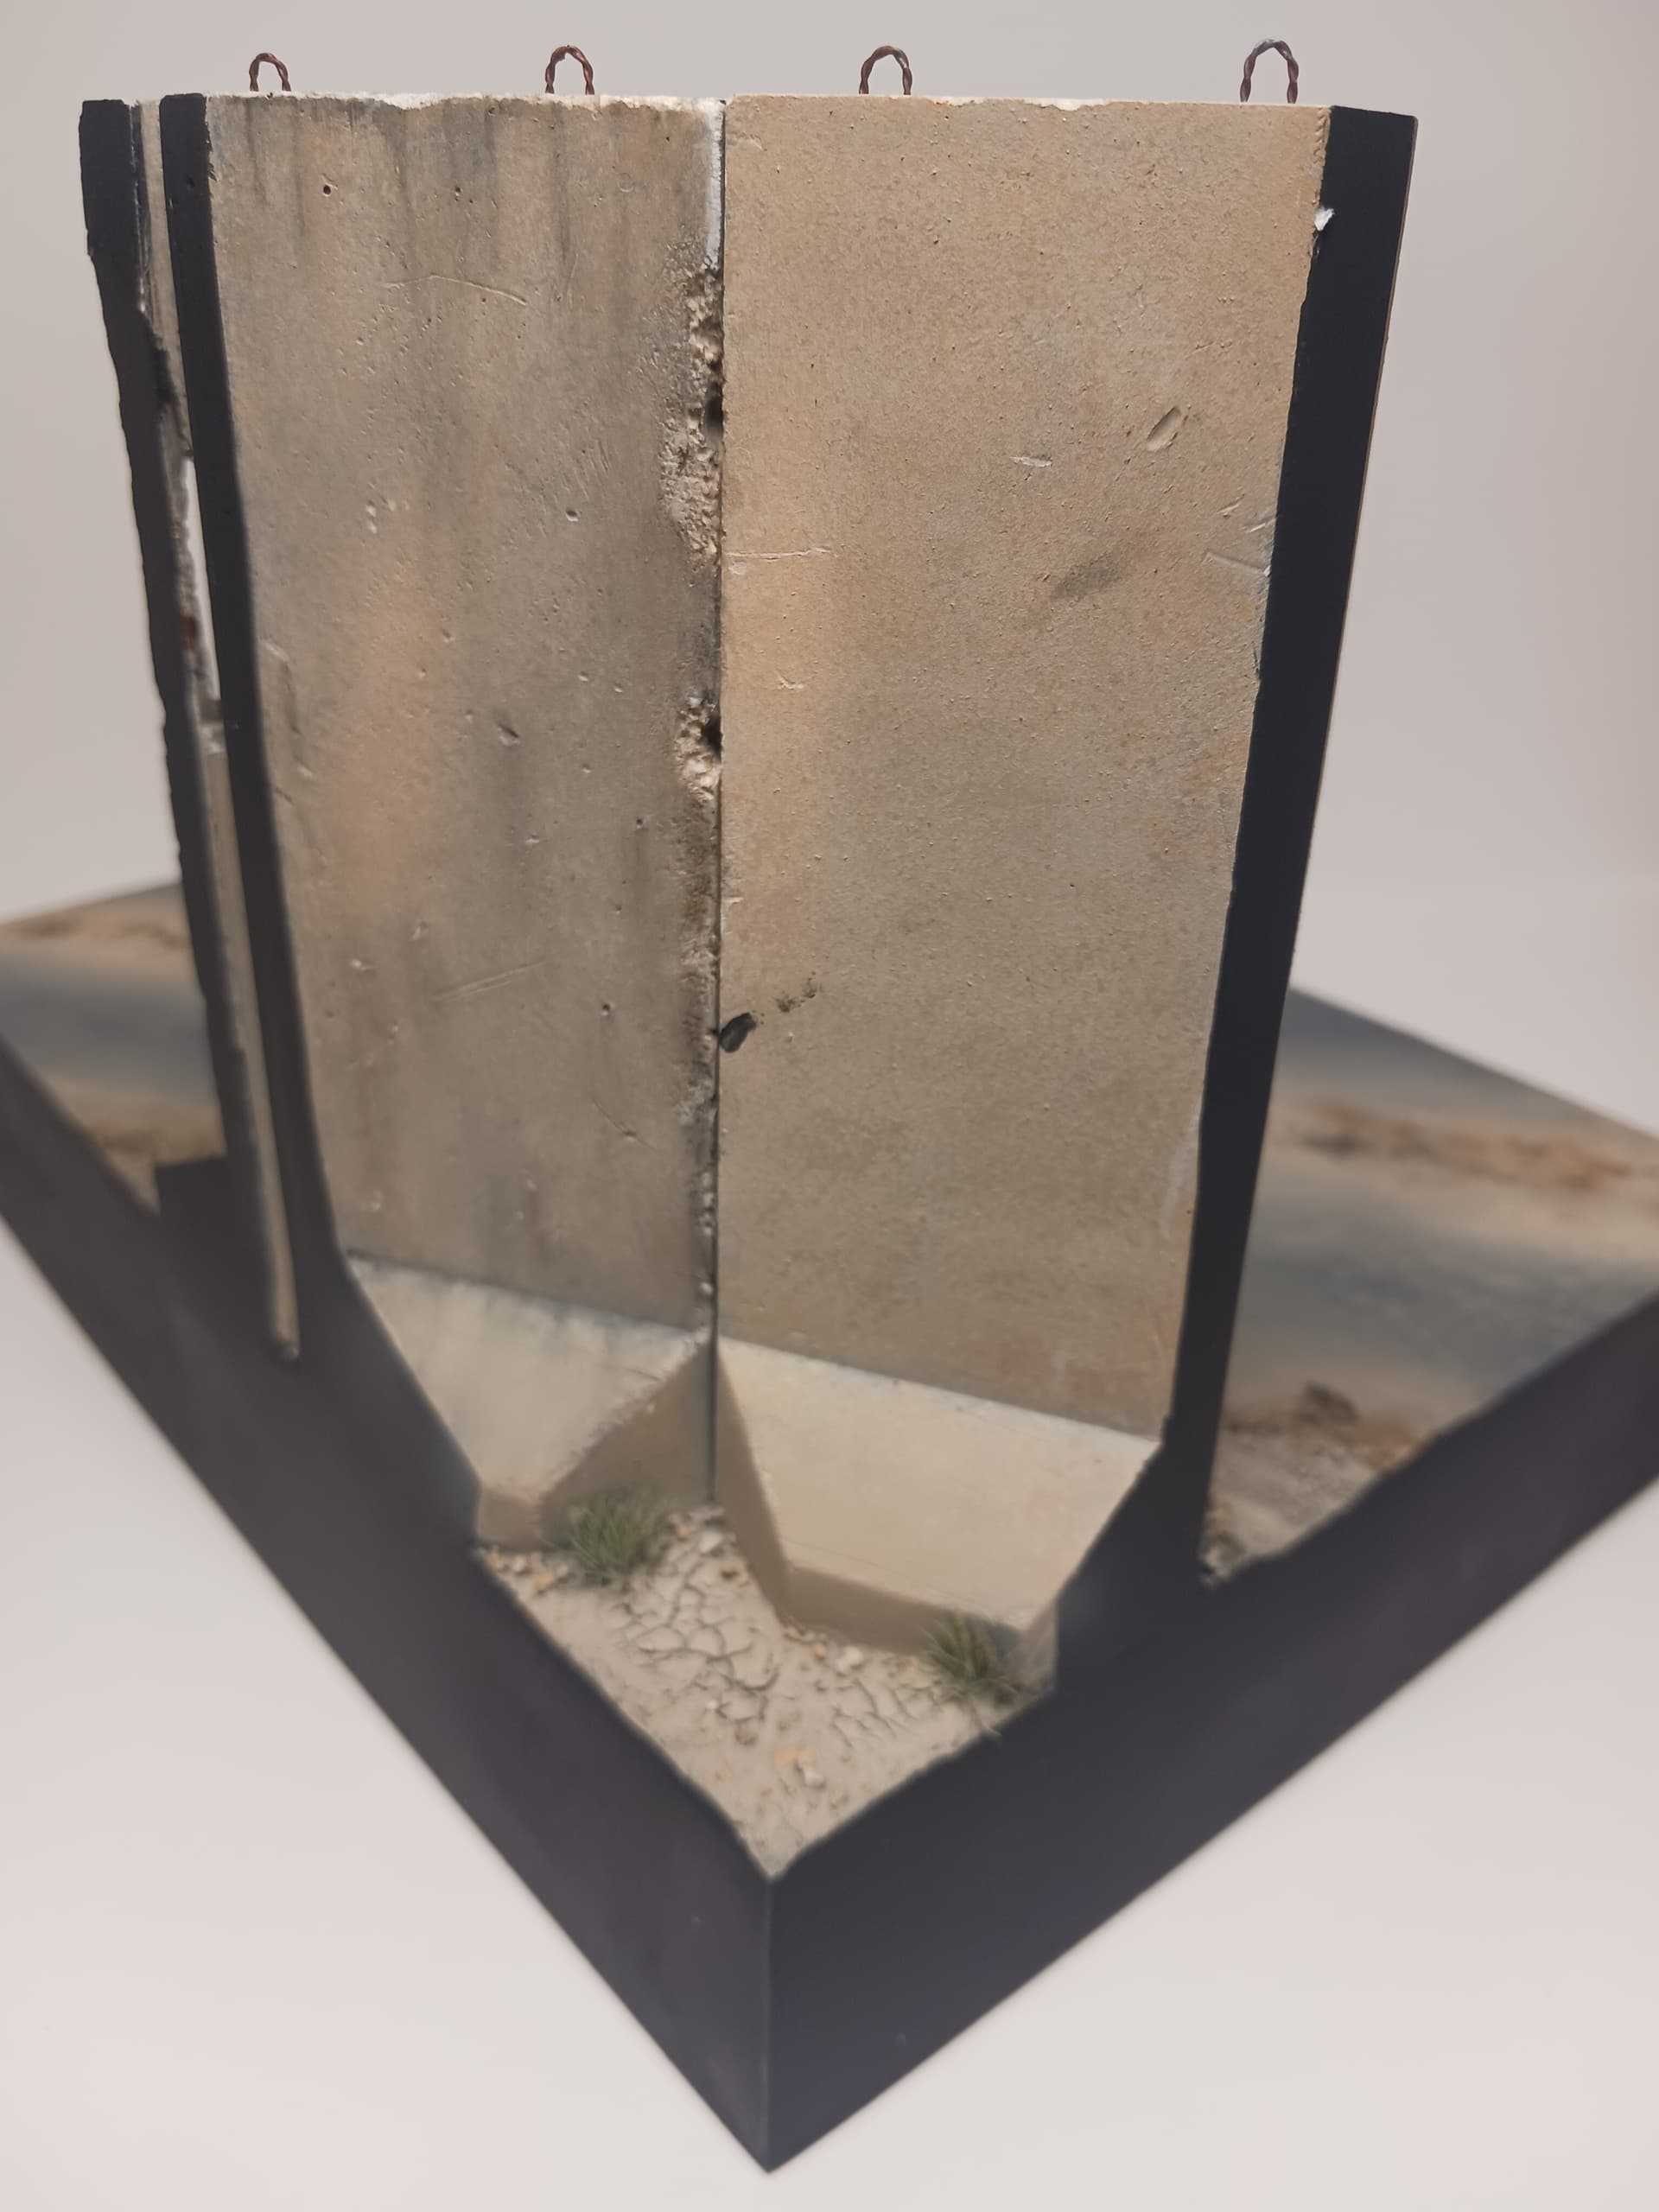
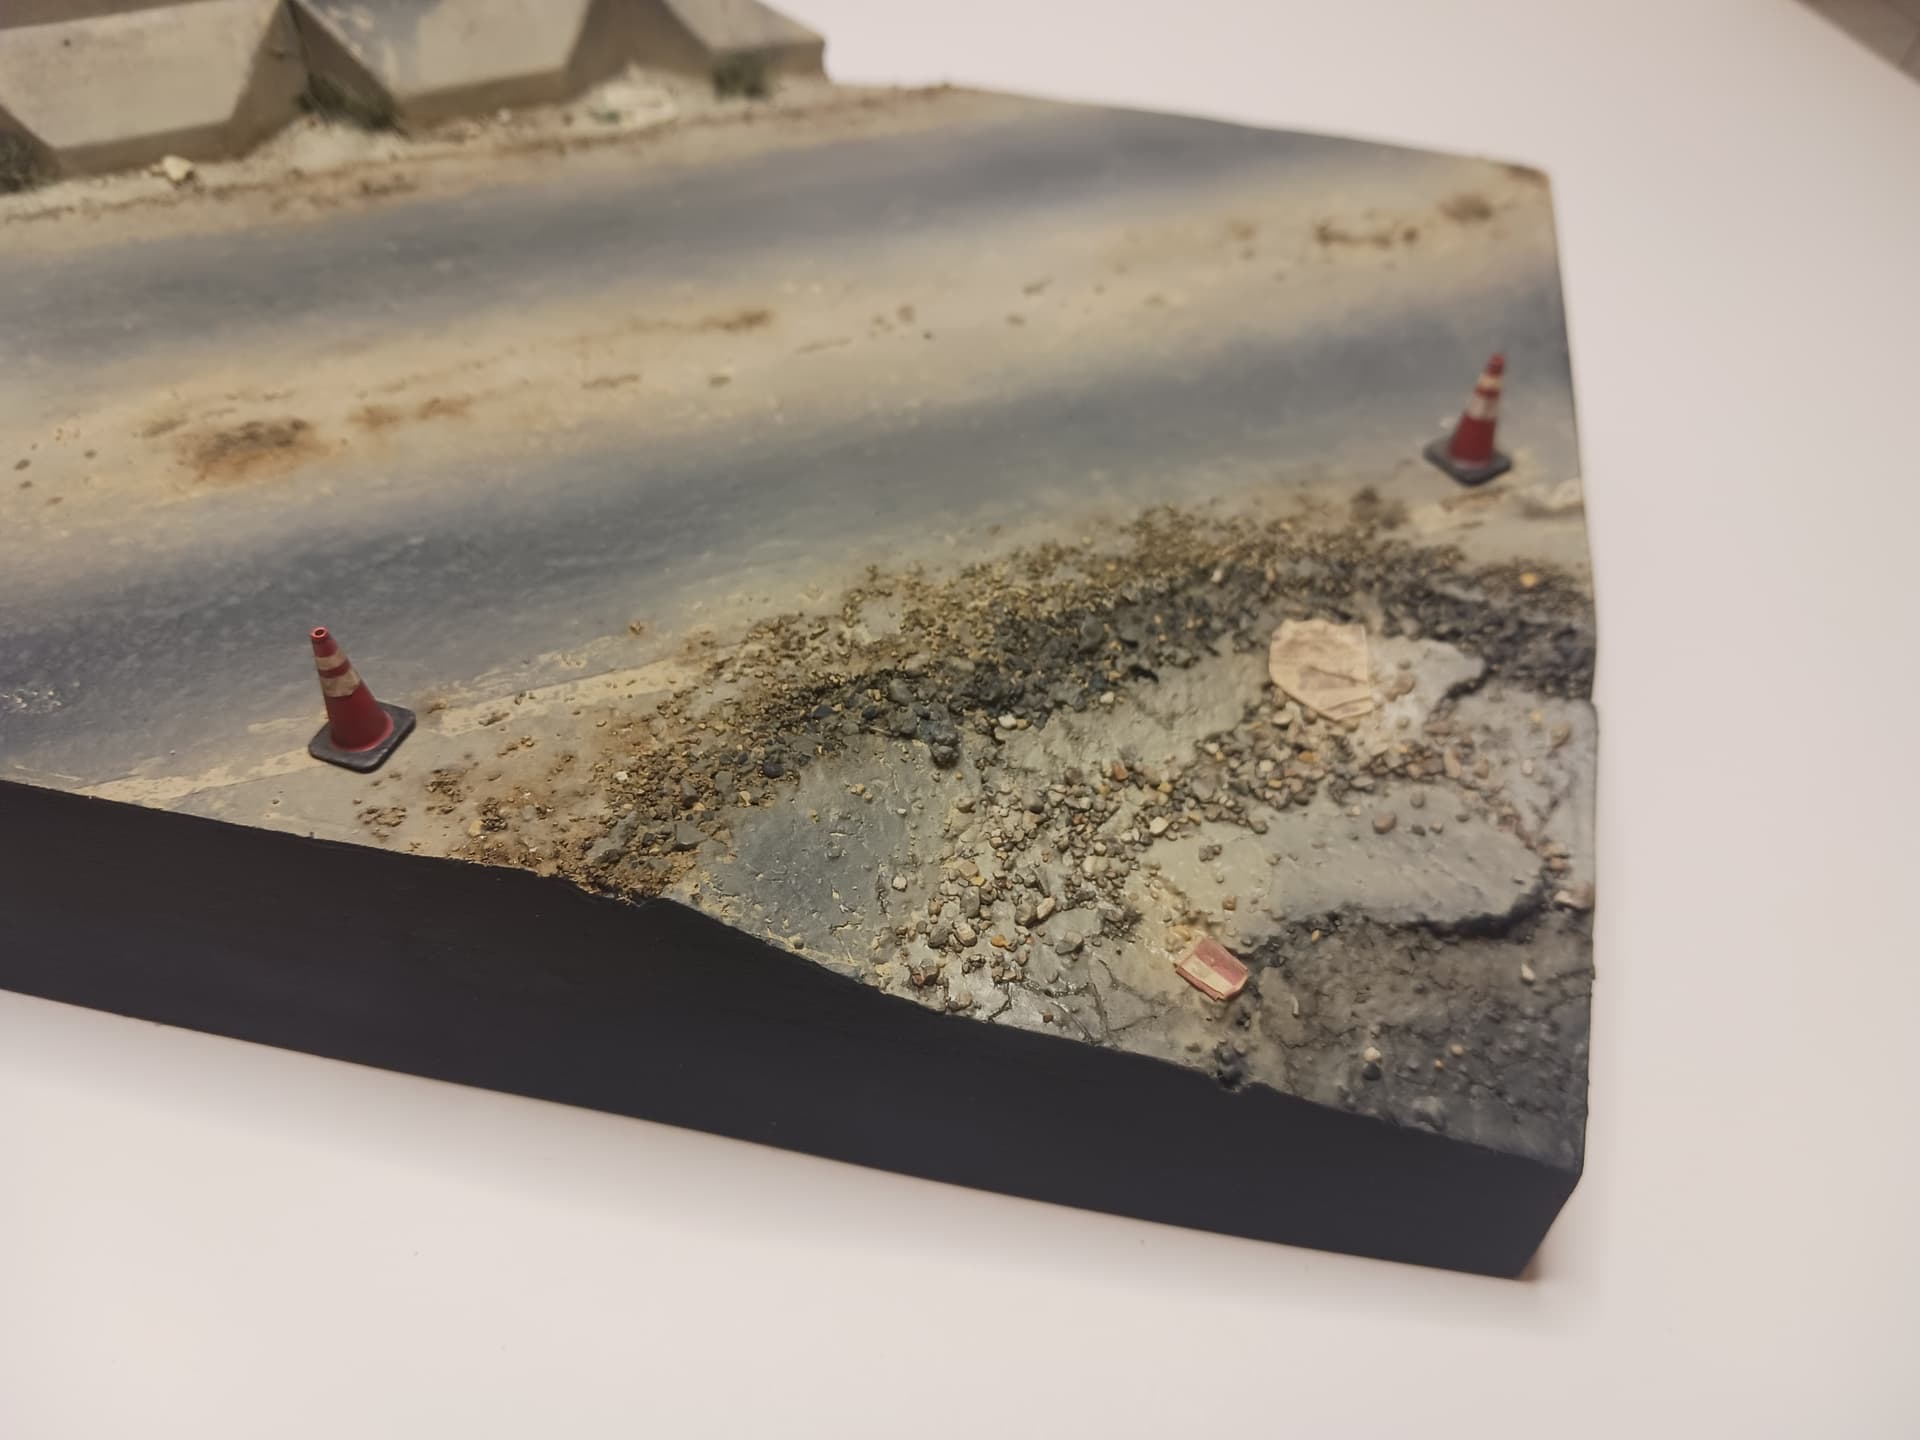
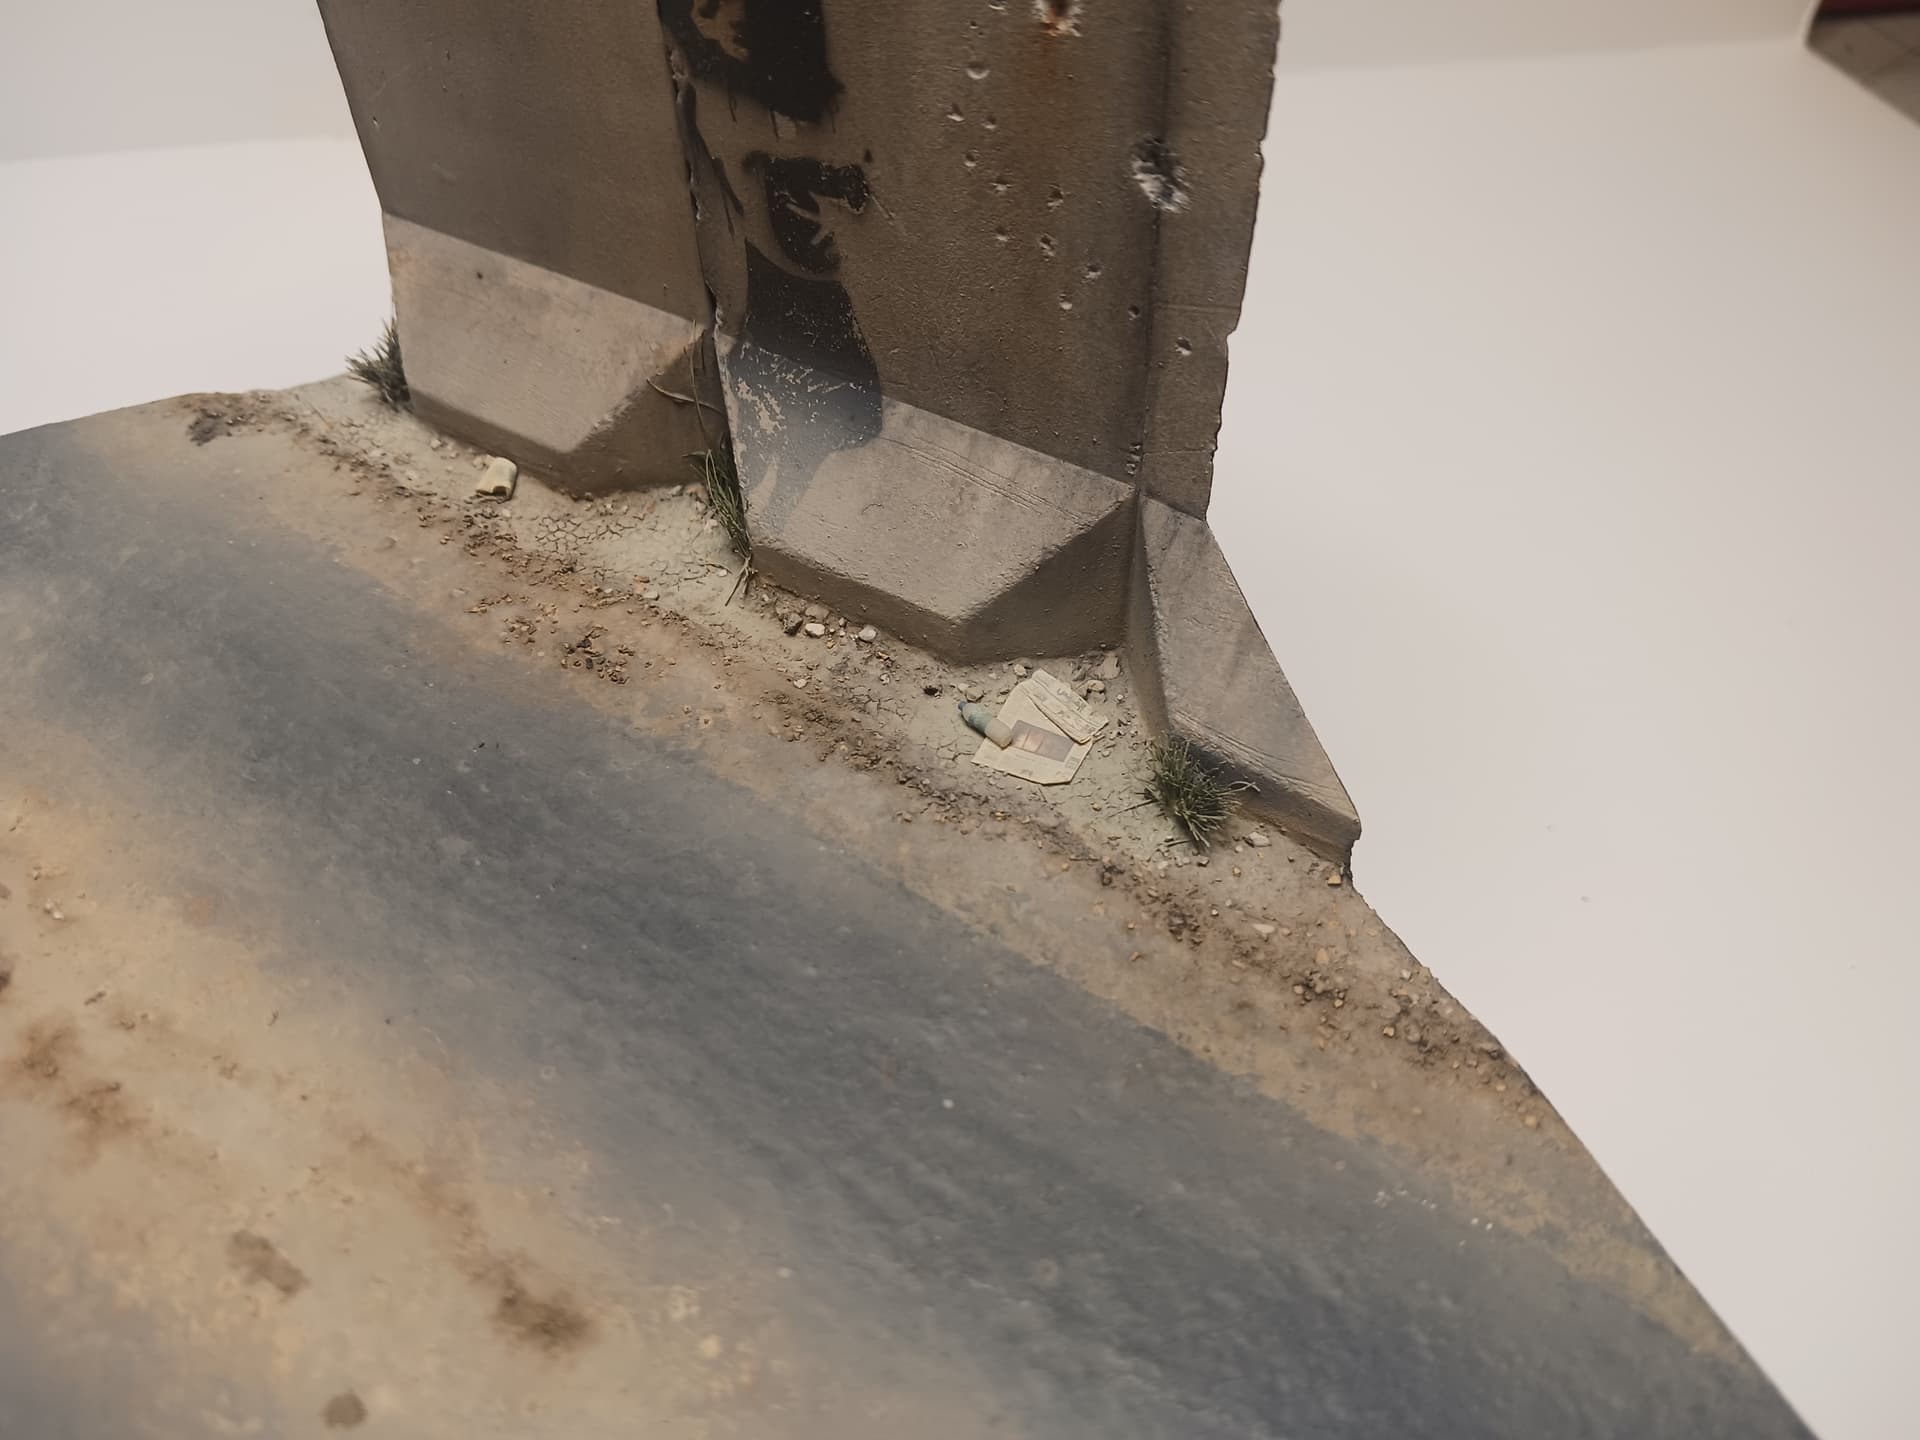
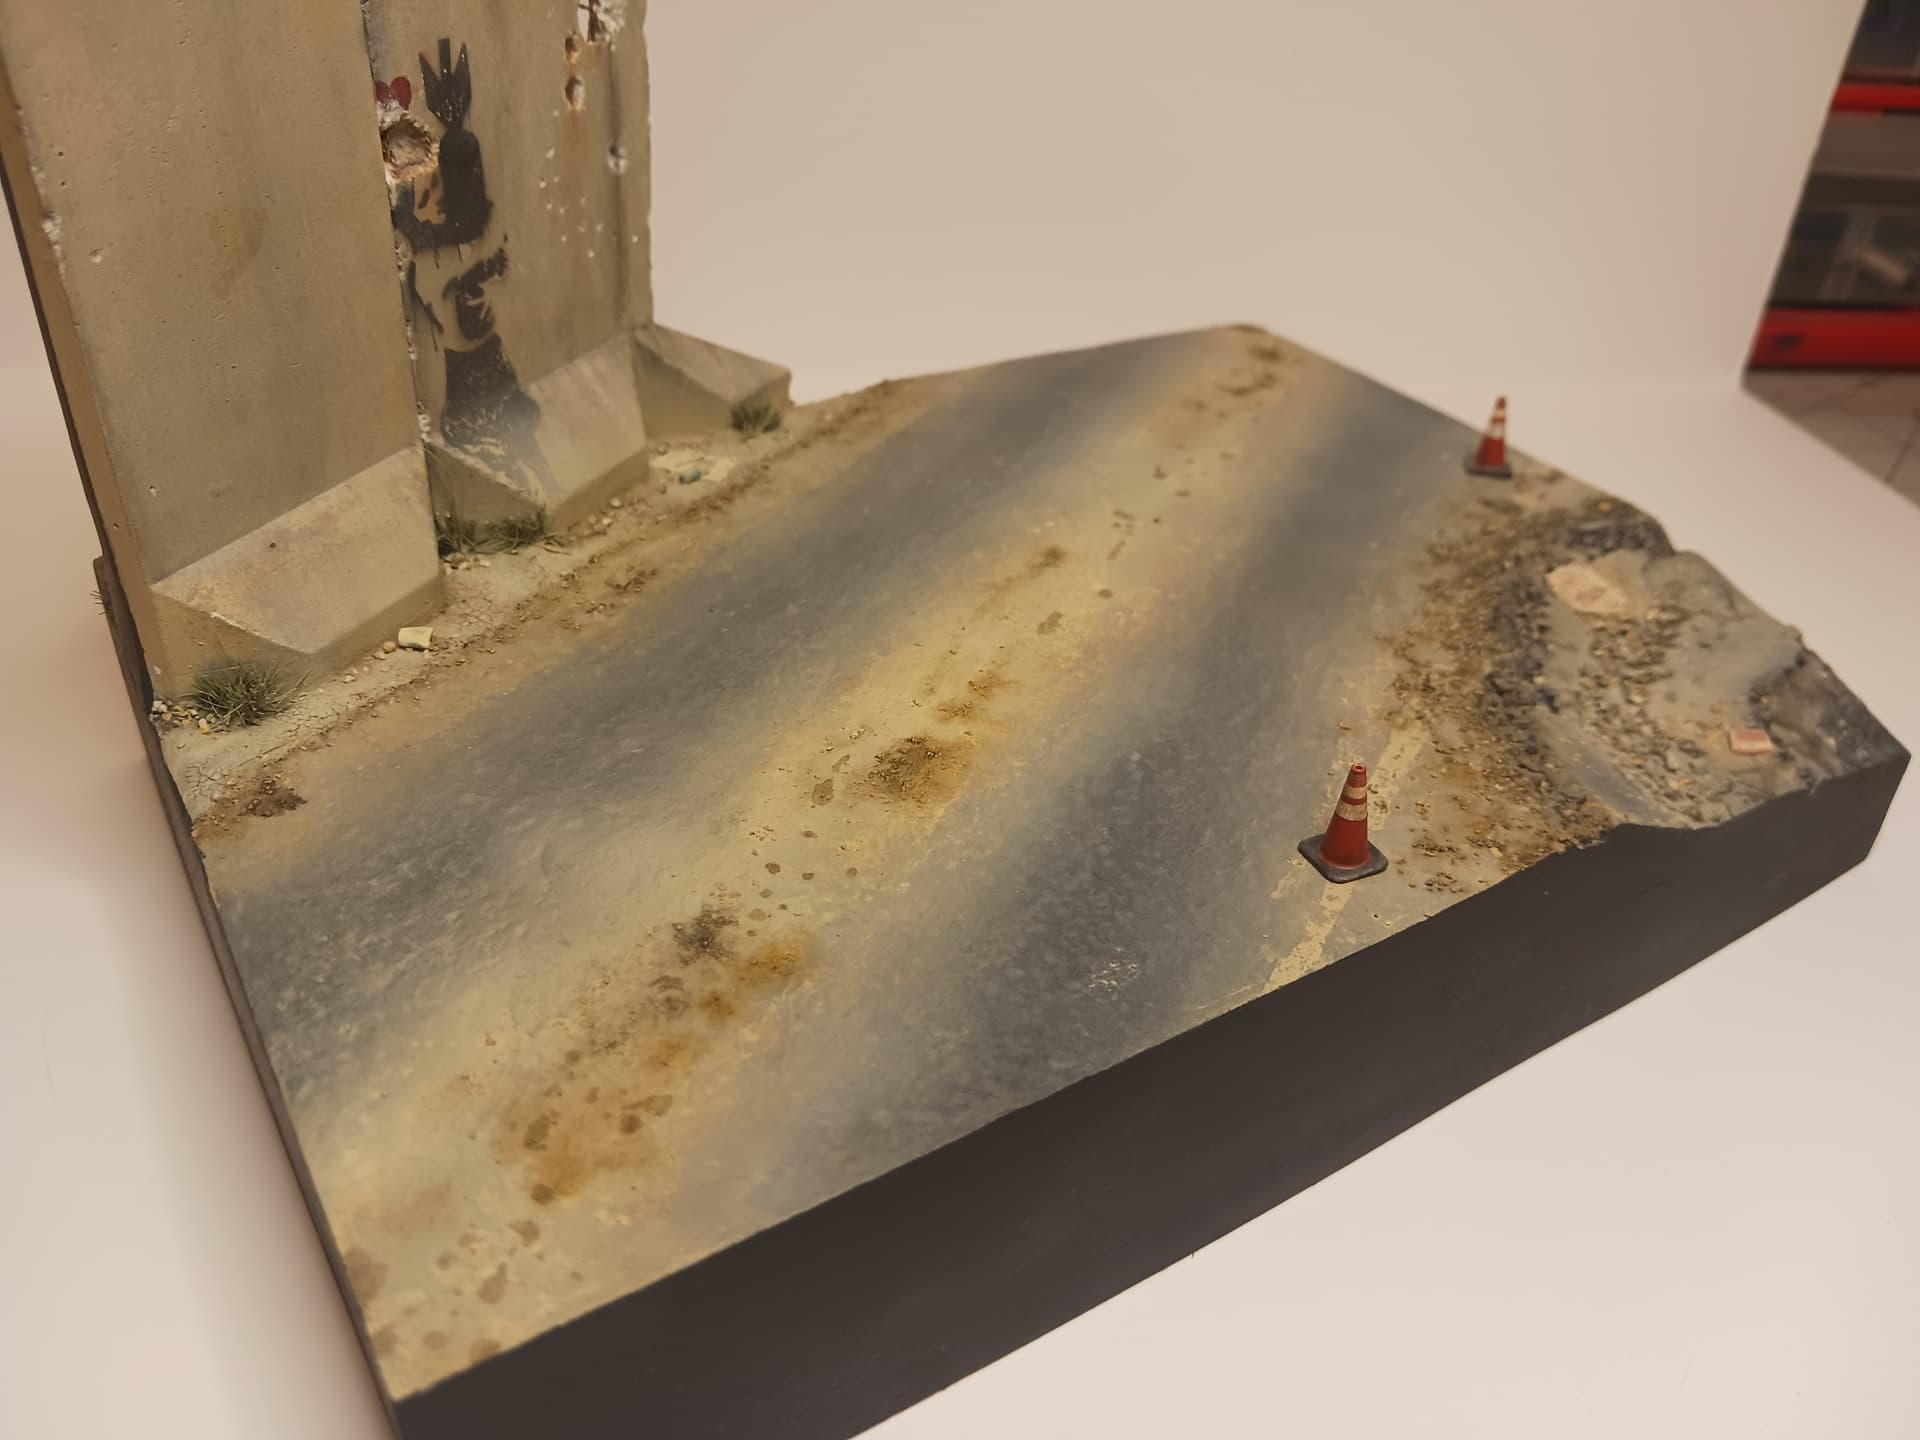
It is meant to be a road busted by an explosion in Kandahar province, Afghanistan with some damaged and one replaced Alaska barrier. Most of the scene will be occupied by the model itself, so there is not much room to cramp things in, but I would love feedback and suggestions.
I plan to put some graffiti on the barriers and further rocks and scatter on the road itself as well as maybe some chunks of the barriers by their base. Maybe some newspapers and trash as well.
What do you guys think so far?
9 Likes
Nice start and looks good so far. Trick will be giving the crater a decent uneven and rough finish. Barriers look nice how they are positioned, and will you be go 2 different tones… one being new and the other being old and faded with battle damage ?
1 Like
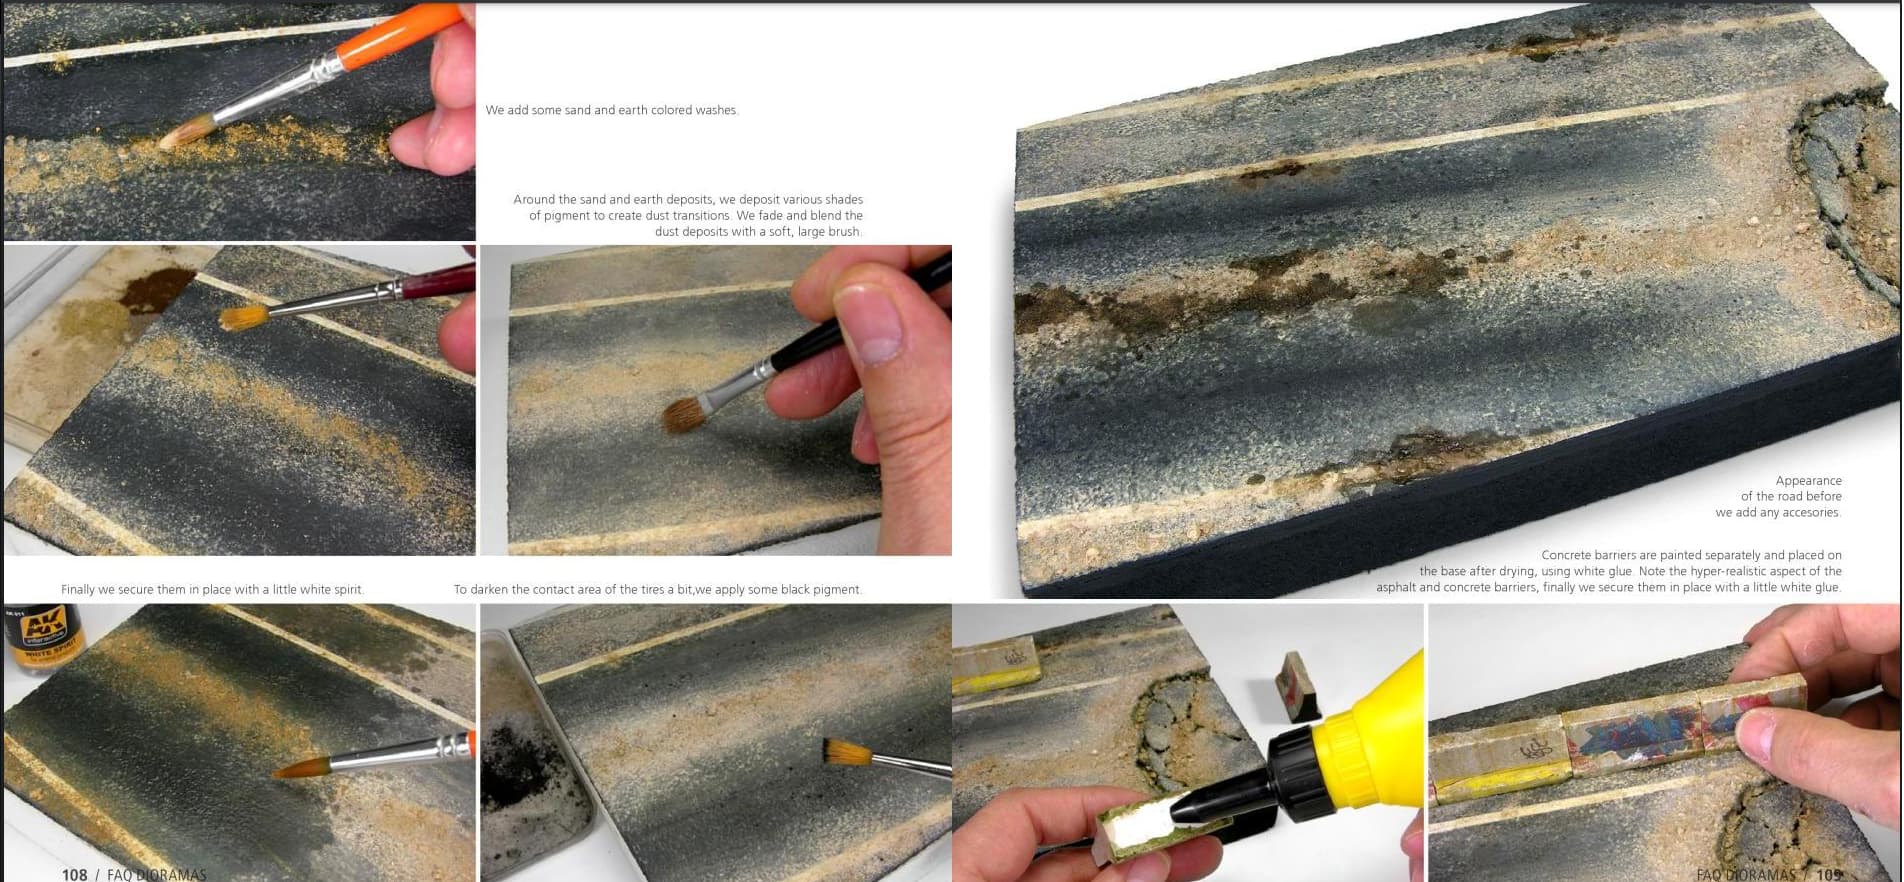
Yes, with the barriers I was going with one was replaced kinda look. The others will have some graffiti as well that will be “cut” by the other barrier being replaced. The crater will be the hardest part to nail, I agree. I am currently trying to go off of FAQ diorama book when it comes to the crater and road and plan to add the majority of the texture after the road is painted.
6 Likes
You are off to a great start 
Beautiful work so far. Yes, since it a small dio so it will be difficult to not overdo the with clutter. I’d say little trash like crushed soda cans or bottles with maybe dirty shirt that was used as a rag at one time and tossed in the corner will add some internet. Maybe couple off trashed bags of potato chips. If you can find any.
Btw, is this being modeled for a magazine article? From the photos it seems such.
I like the T-shirt suggestion, I never thought to add clothing. And no, definitely not for a magazine lol.
1 Like
@Vstobinskii well we sure can use more photographs of your beautiful work. And in large format to see all the detail clearly 
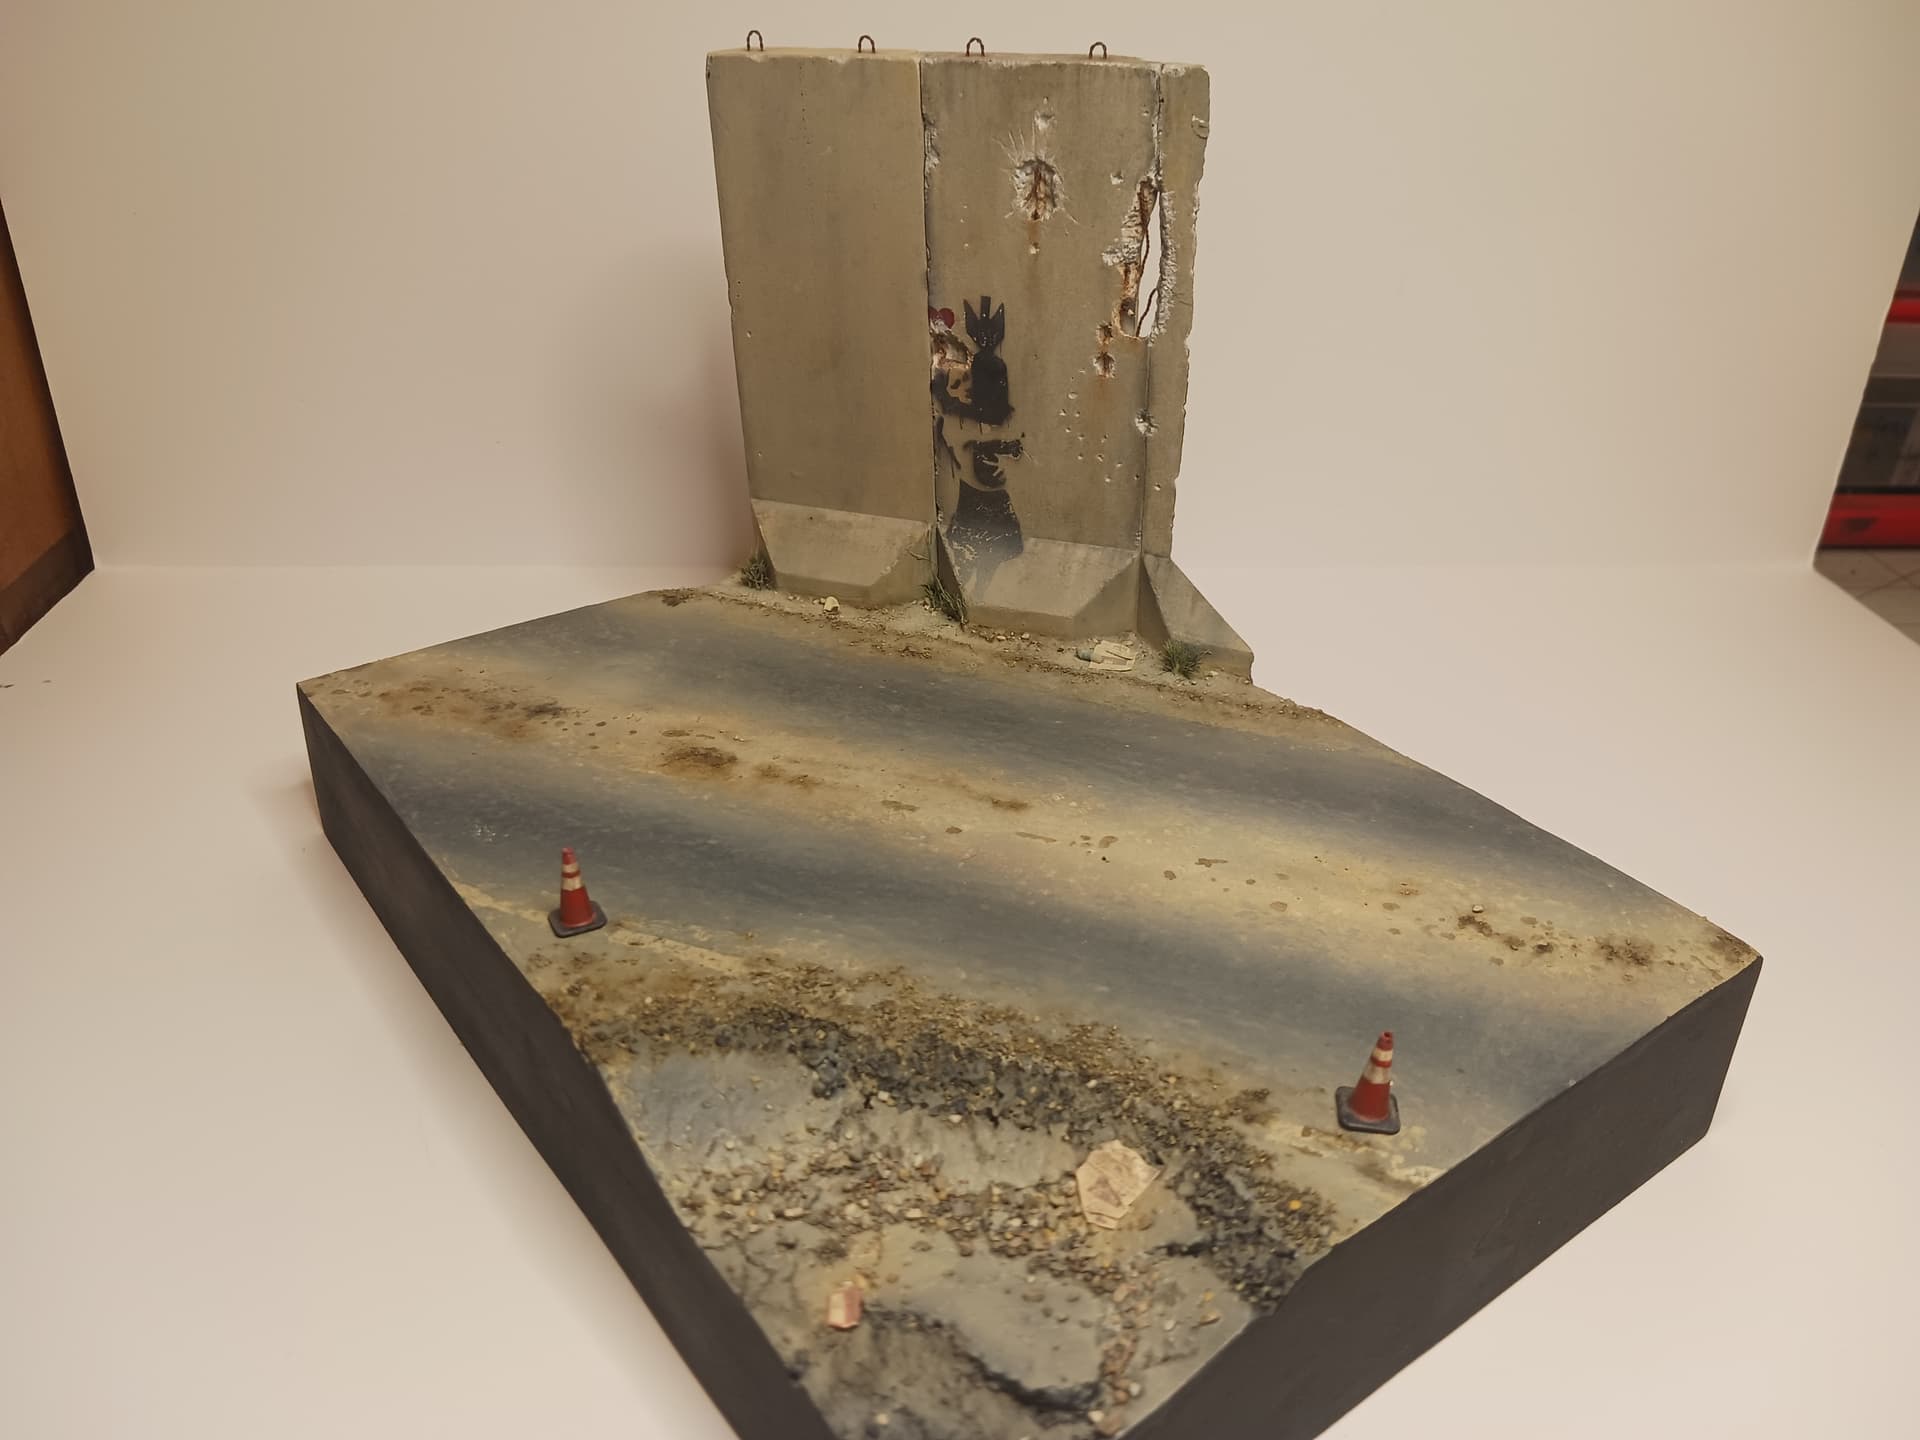
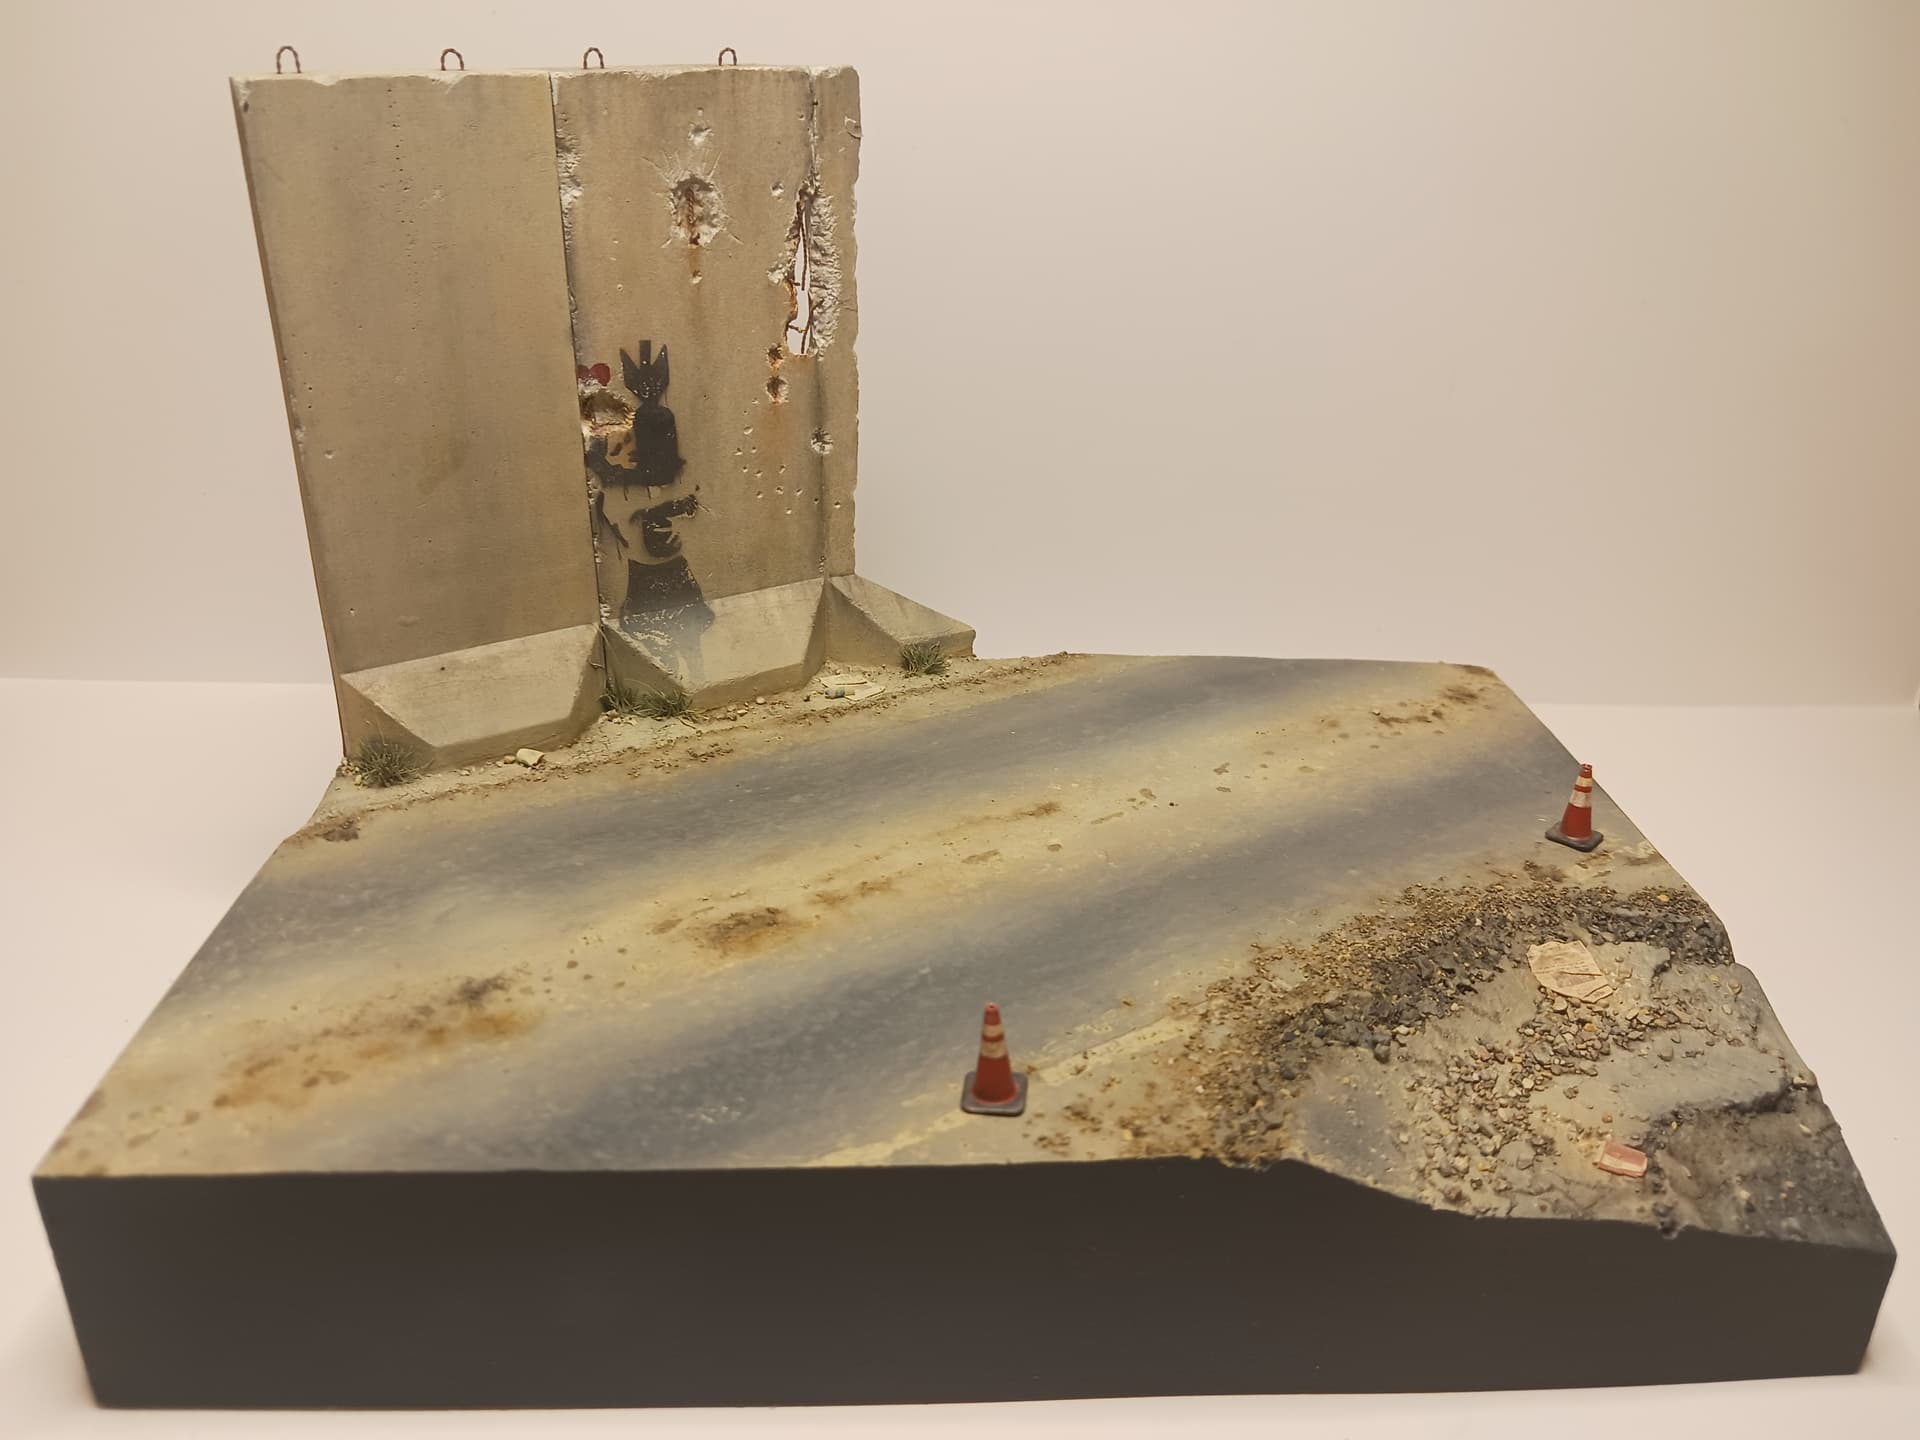
Here is an update on the barriers. This is all done with acrylic work and now I am getting ready to start with oils and enamels.
I tried to make the leftmost barrier newer looking and have a yellowish tone and you can see I succeeded in the back but they look basically the same from the front. I plan to make them look more weathered with enamels and oils and distinguish them more that way. I am also planning to add more texture to the road itself because it is just too smooth right now; maybe add some cracks and holes while I am at it.
5 Likes
Maybe do half a piece of graffiti on the older block and nothing on the new one so it stands out more as new ?
Also when you rust the rebar that will age it a lot … Looks great so far
1 Like
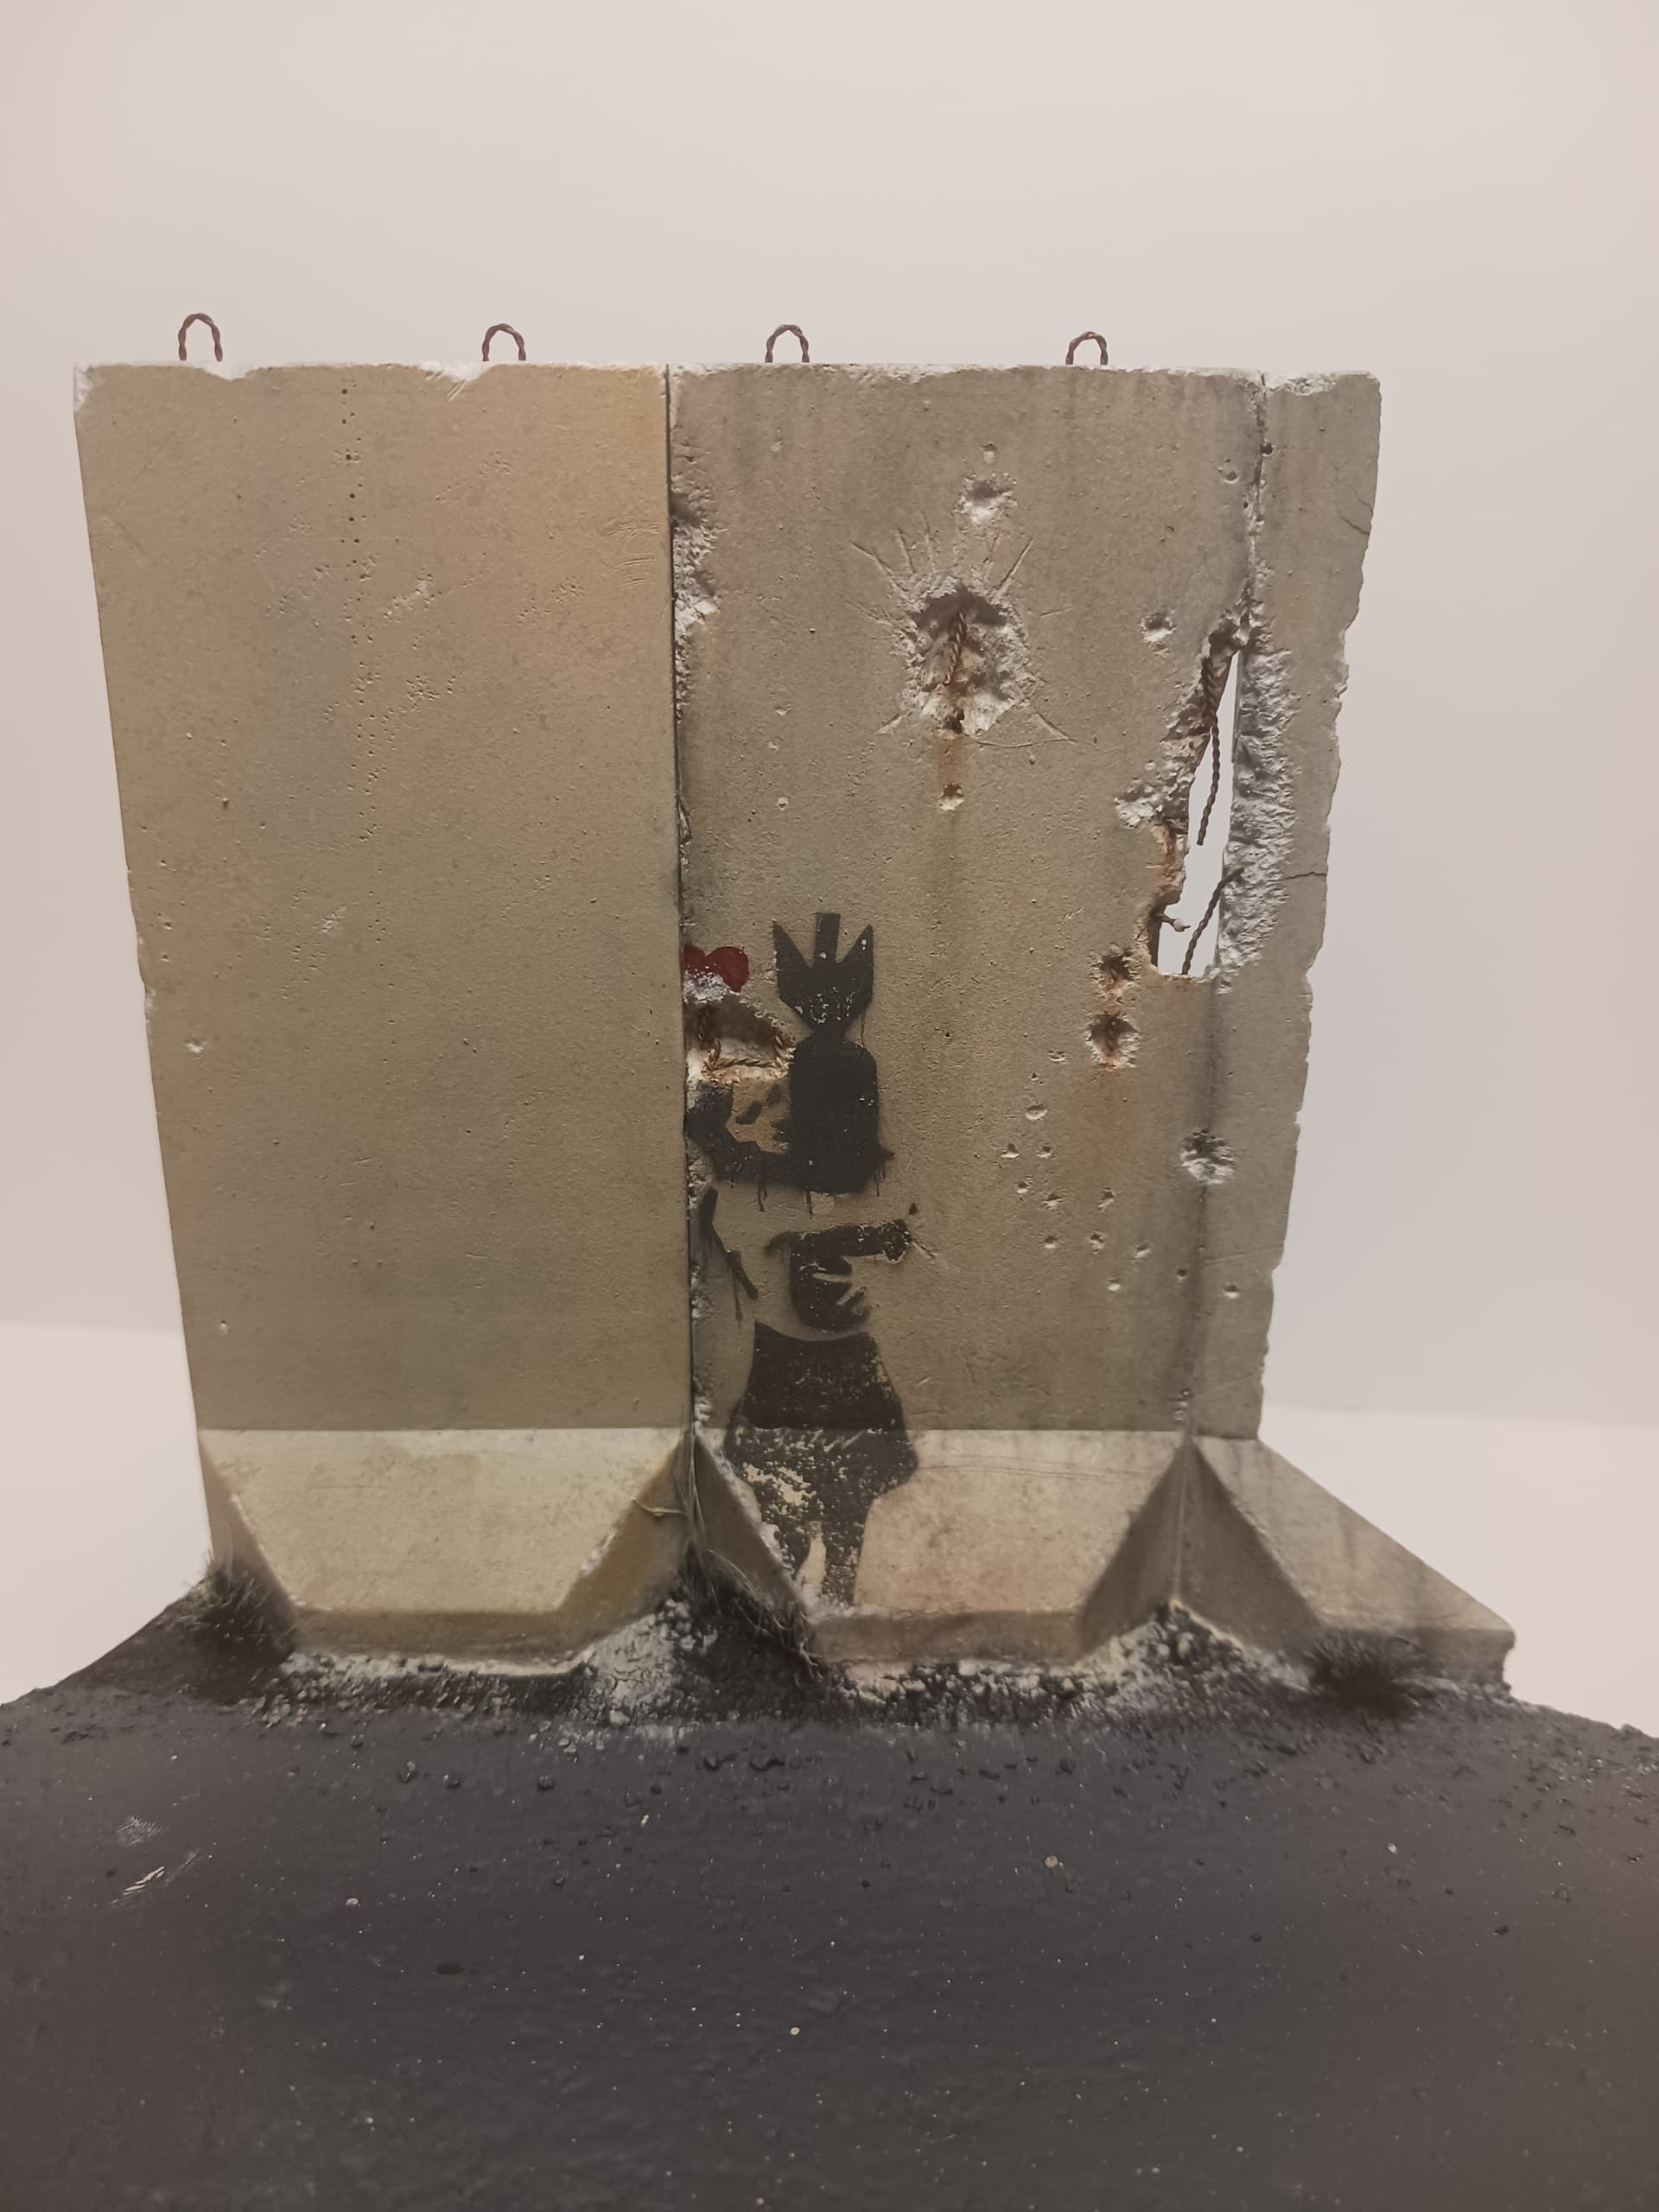
Rust is coming up in the plans as well as some dark streaking and maybe other enamel and dust effects to fade things a bit more. The graffiti is a bit cut off but I agree that it is not that noticeable. Unfortunately, it was a decision I had to make to keep most of the graffiti intact because while positioning the stencil I found that it just would look too good cut off. I did give more thought to maybe placing other graffiti on the wall but decided against it.
1 Like
Did some work with oils and enamels and am feeling pretty happy so far. My only contemplation is whether I should do some light weathering on the left barrier since it is supposed to be “new”.
I plan to add some dust weathering on the bottom of the barrier and some dark washes in the cracks to make them pop more but is there anything else that can be done to these?
5 Likes
It’s tricky as to weather the new one or not. Even one as a replacement wouldn’t necessarily be new, they usually keep a load in a compound somewhere open to the elements so it may well have a light weathering and even the top lifting eyes may have a bit of rust. I would probably weather the older one a lot more and go easy on the new one, maybe some light streaks on it ?
Forgot to say, Accurate Armour do a selection of crisp/snack bars and pop cans etc if you were looking for things to use as litter.
Hello,
Been a long time since I posted an update but here it is. I have been beyond busy but I finally got time to work on the project. I think it is done but honestly, it might feel a little empty, especially by the crater. The LAV III takes up most of the space, but what do you think so far? Should I try adding more trash in the crater?
Would love any feedback and suggestions.
20 Likes
Forgot all about this. Groundwork looks very good. Nice you have built up the dirt/dust and general crap that gets thrown to the side of the roads etc … Very nice work
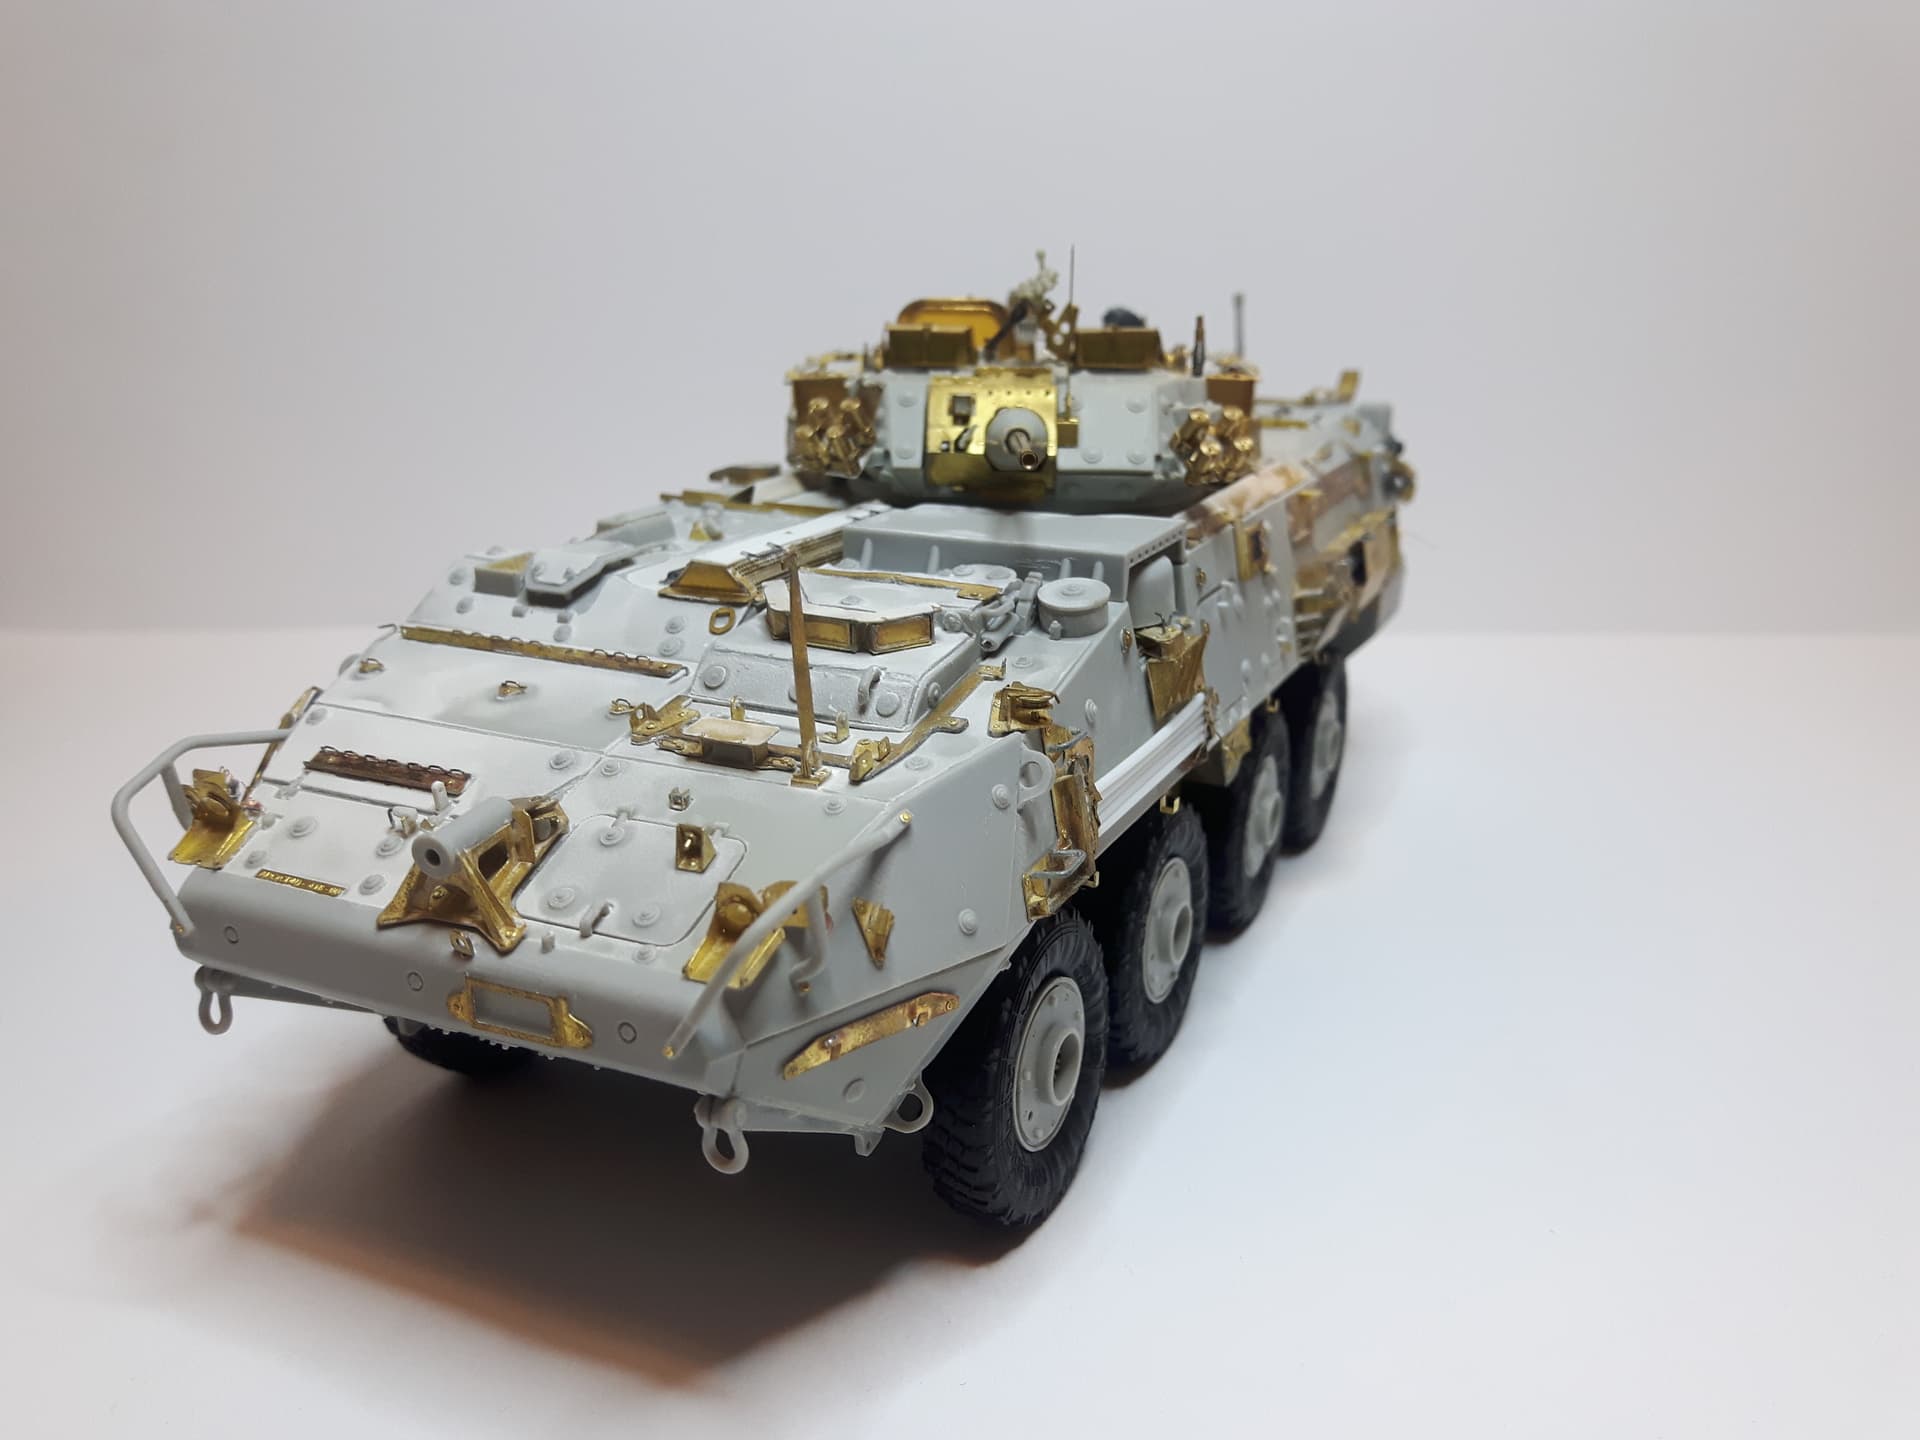
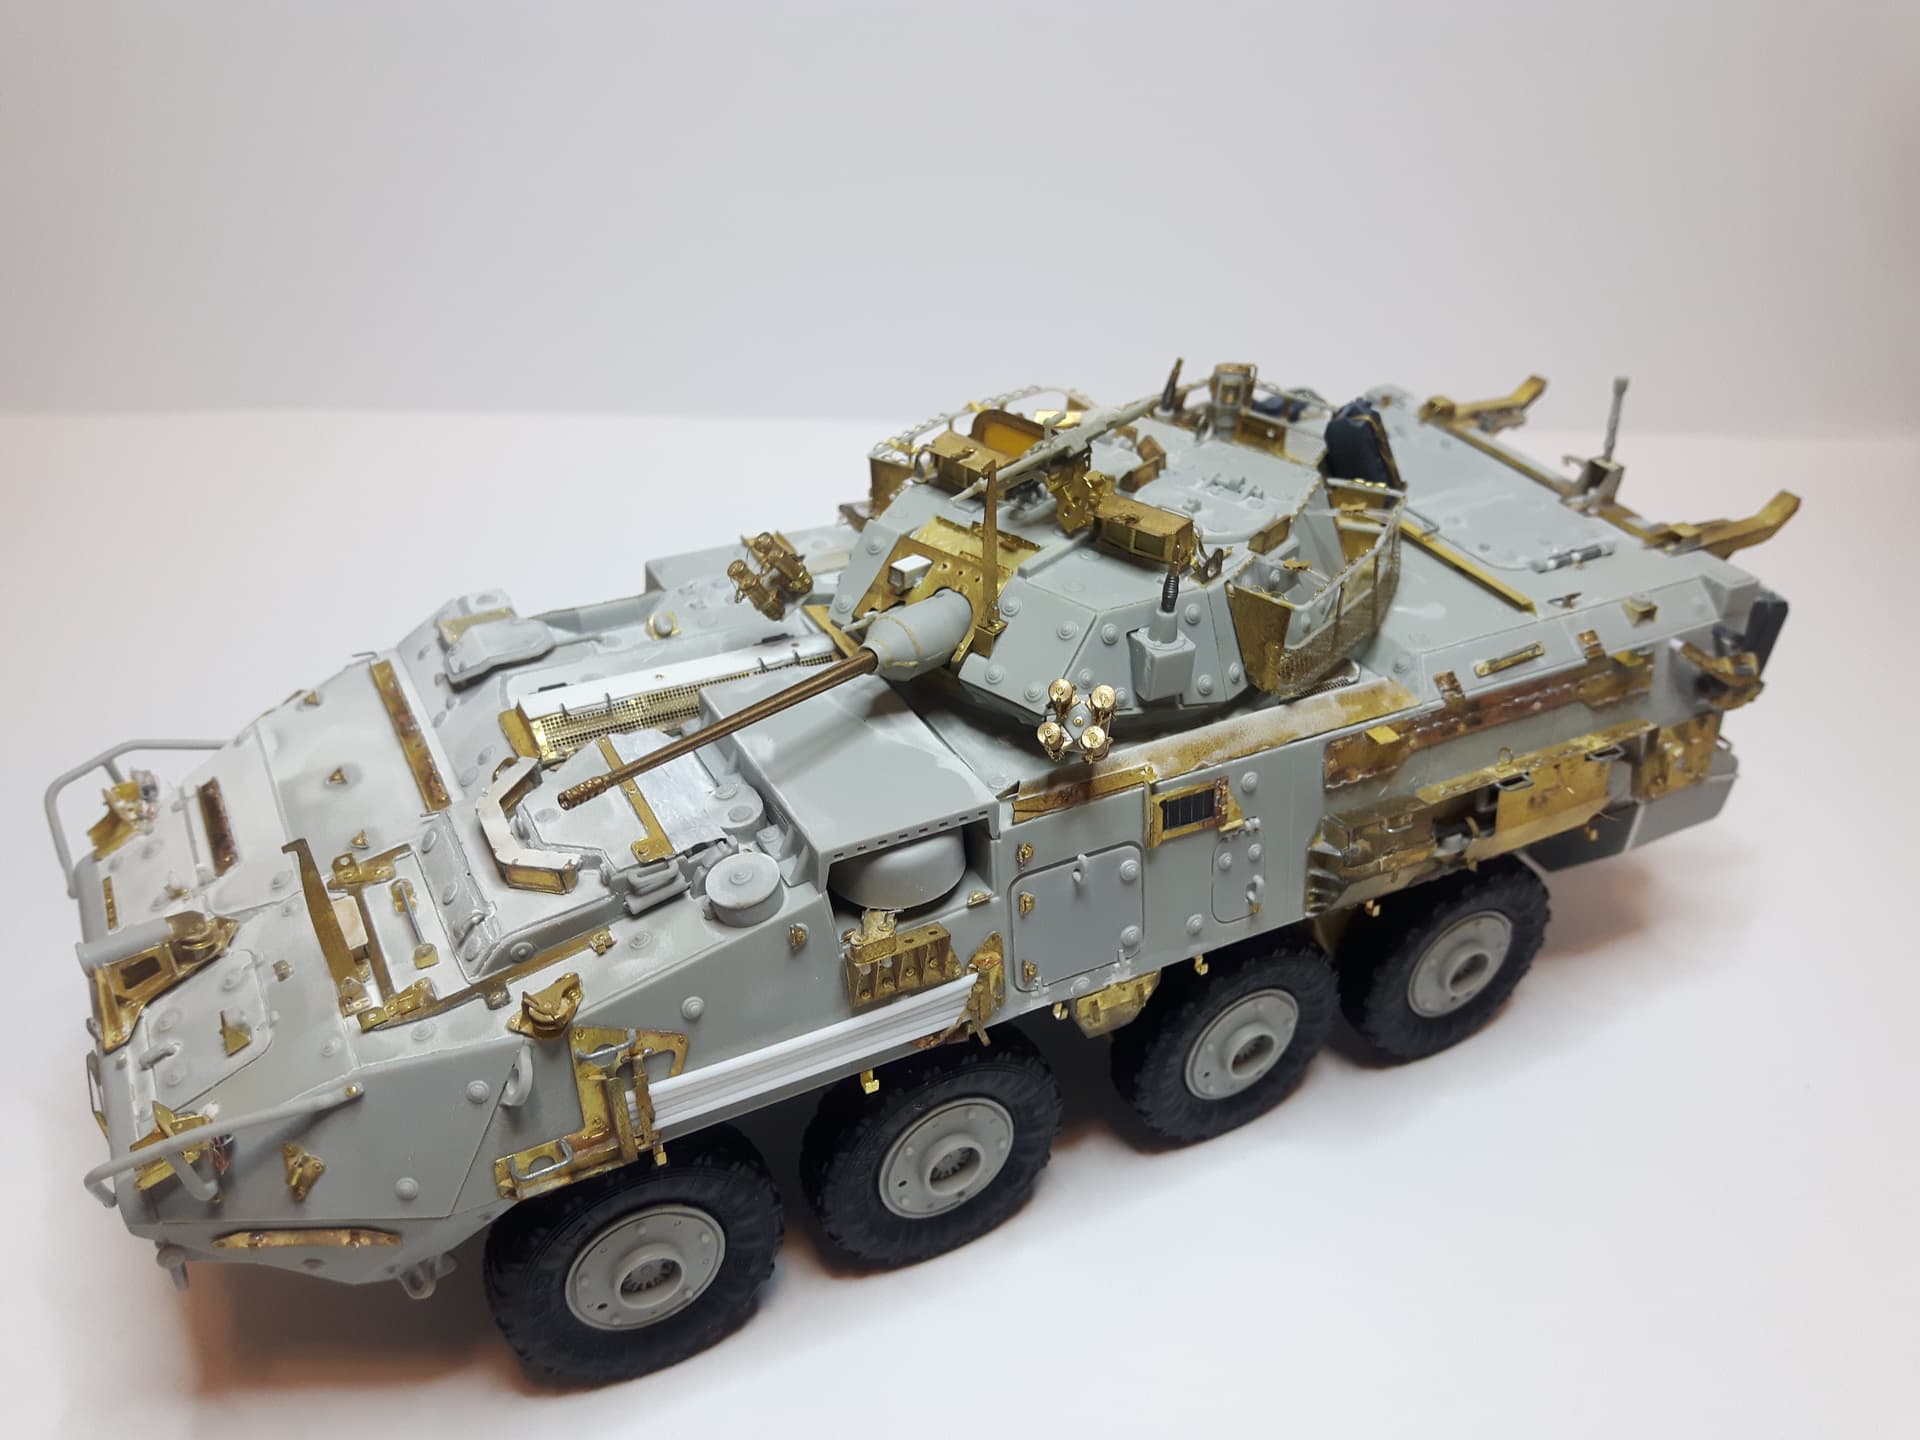
I might as well post the subject itself here now. It is very much still WIP but I would love some input.
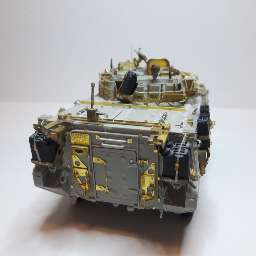
I was building this on and off for like a solid year as I kept changing and adding things as well as this being a very challenging and unusual subject for me. SO many firsts on the build itself like plenty of my own 3d printed parts. (anything in black) as well as some other plastic and metal scratch-build parts and a couple of aftermarket products. Even sculpted the canvas cover behind the mantlet.
Lastly, the white stuff is a non-slip texture.
14 Likes
That is an impressive build… No matter the time it took, it’s worth it see it so well detailed… Some great PE on it as well. Lovely build
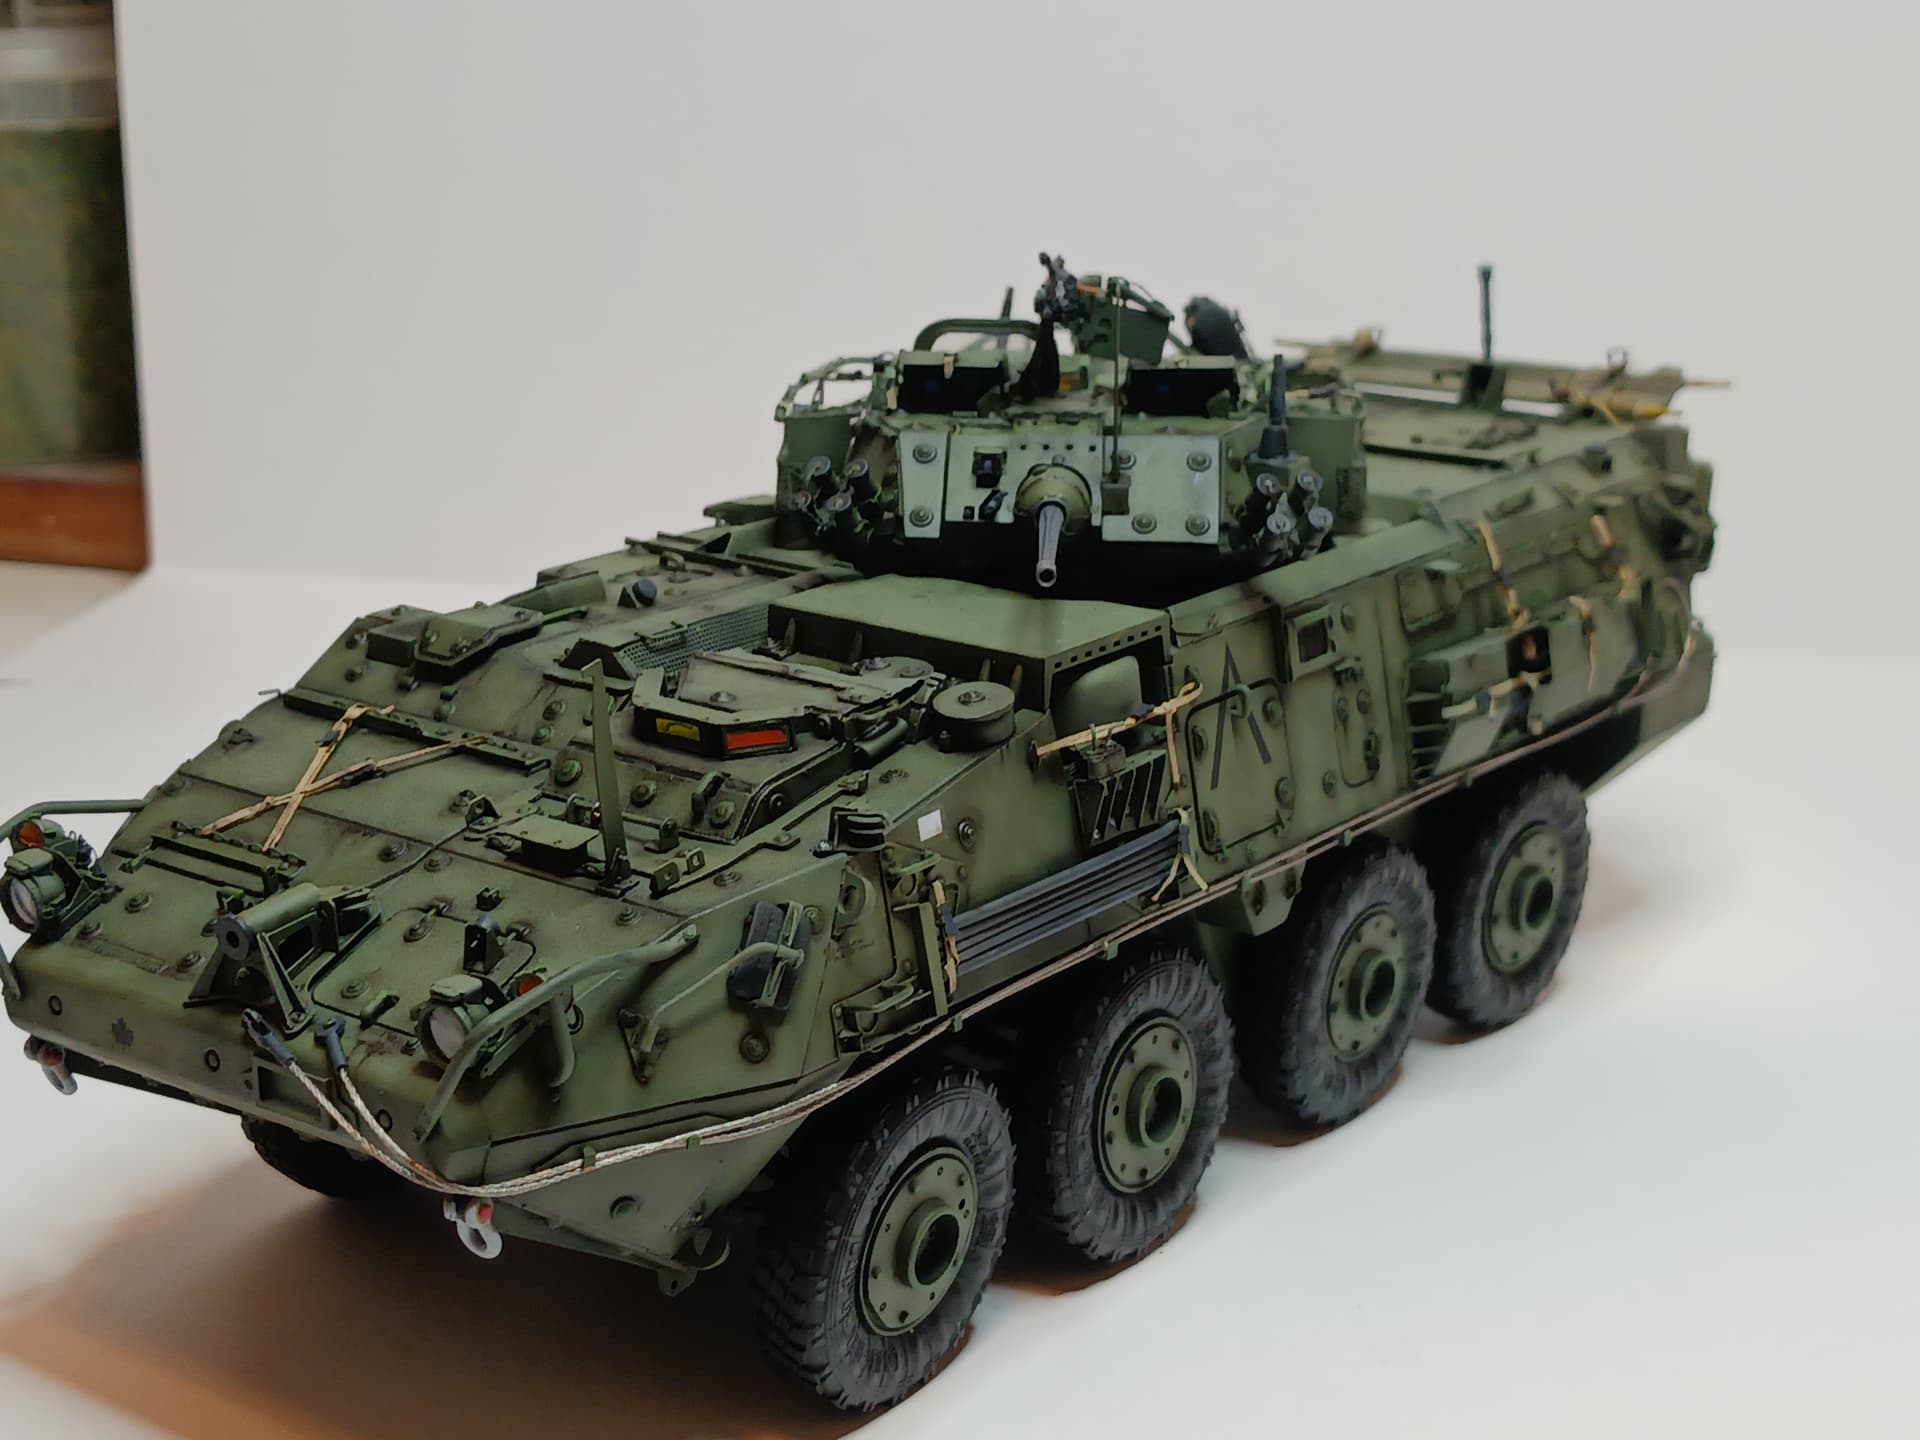
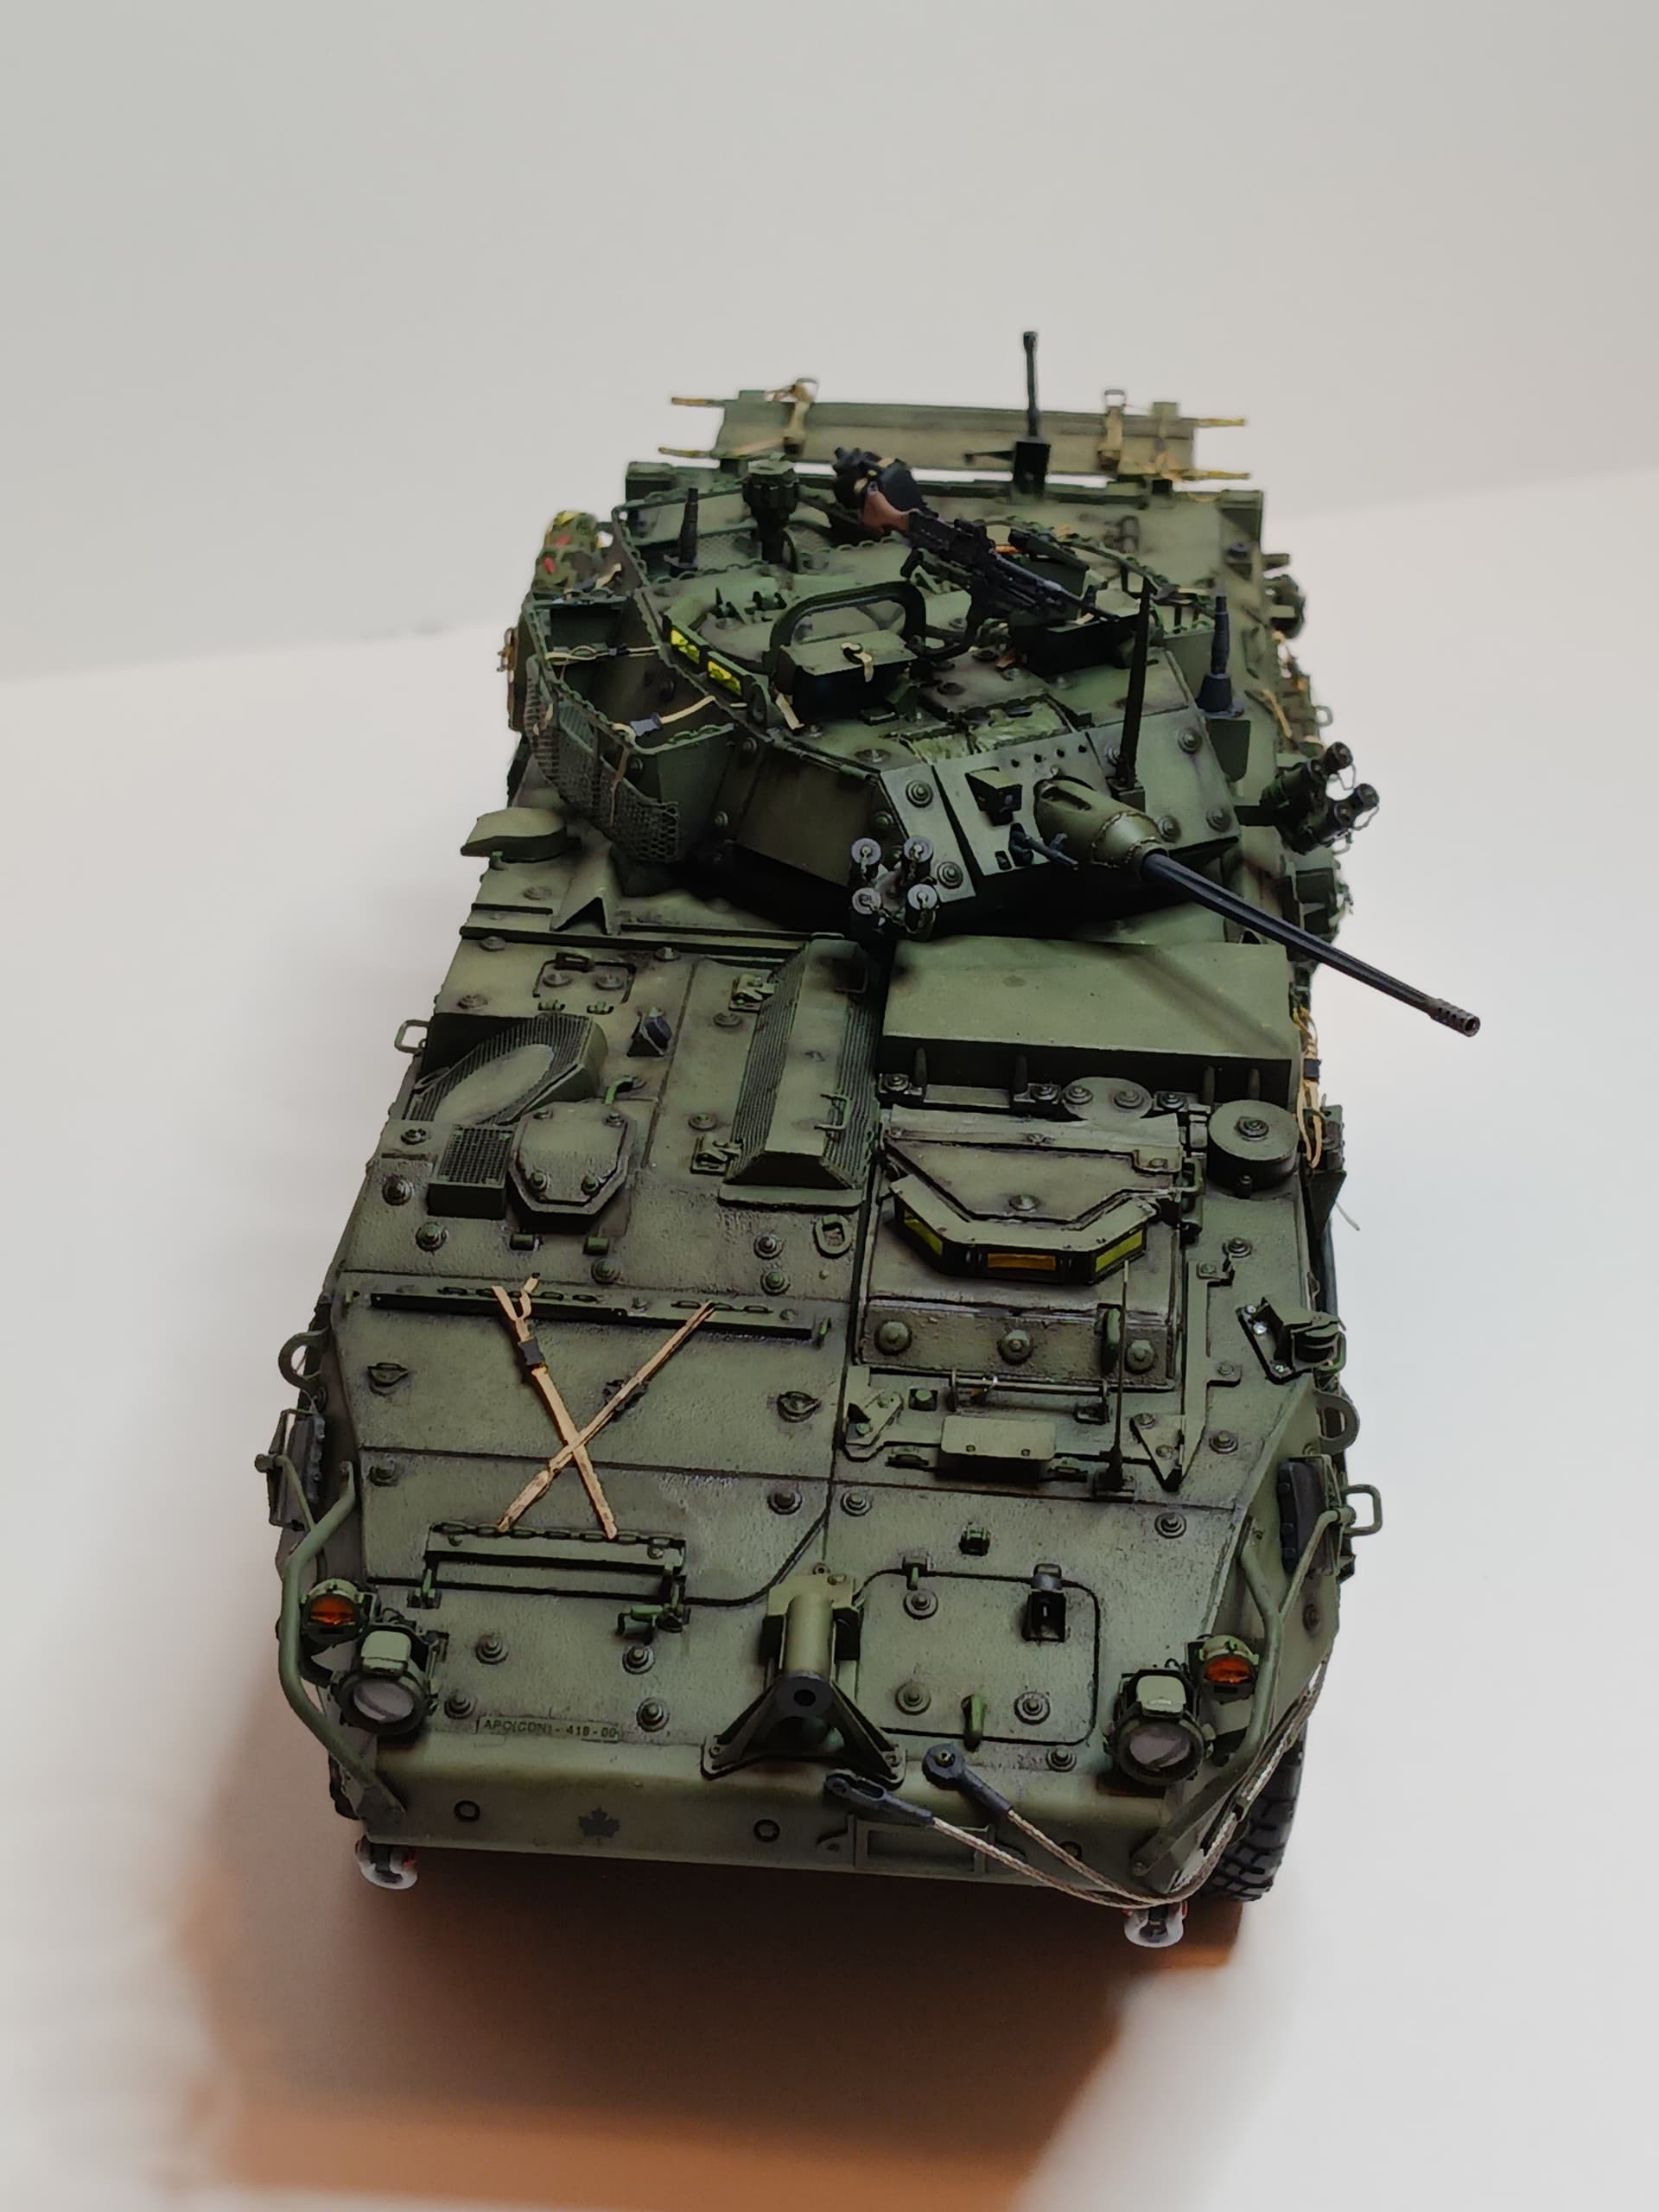
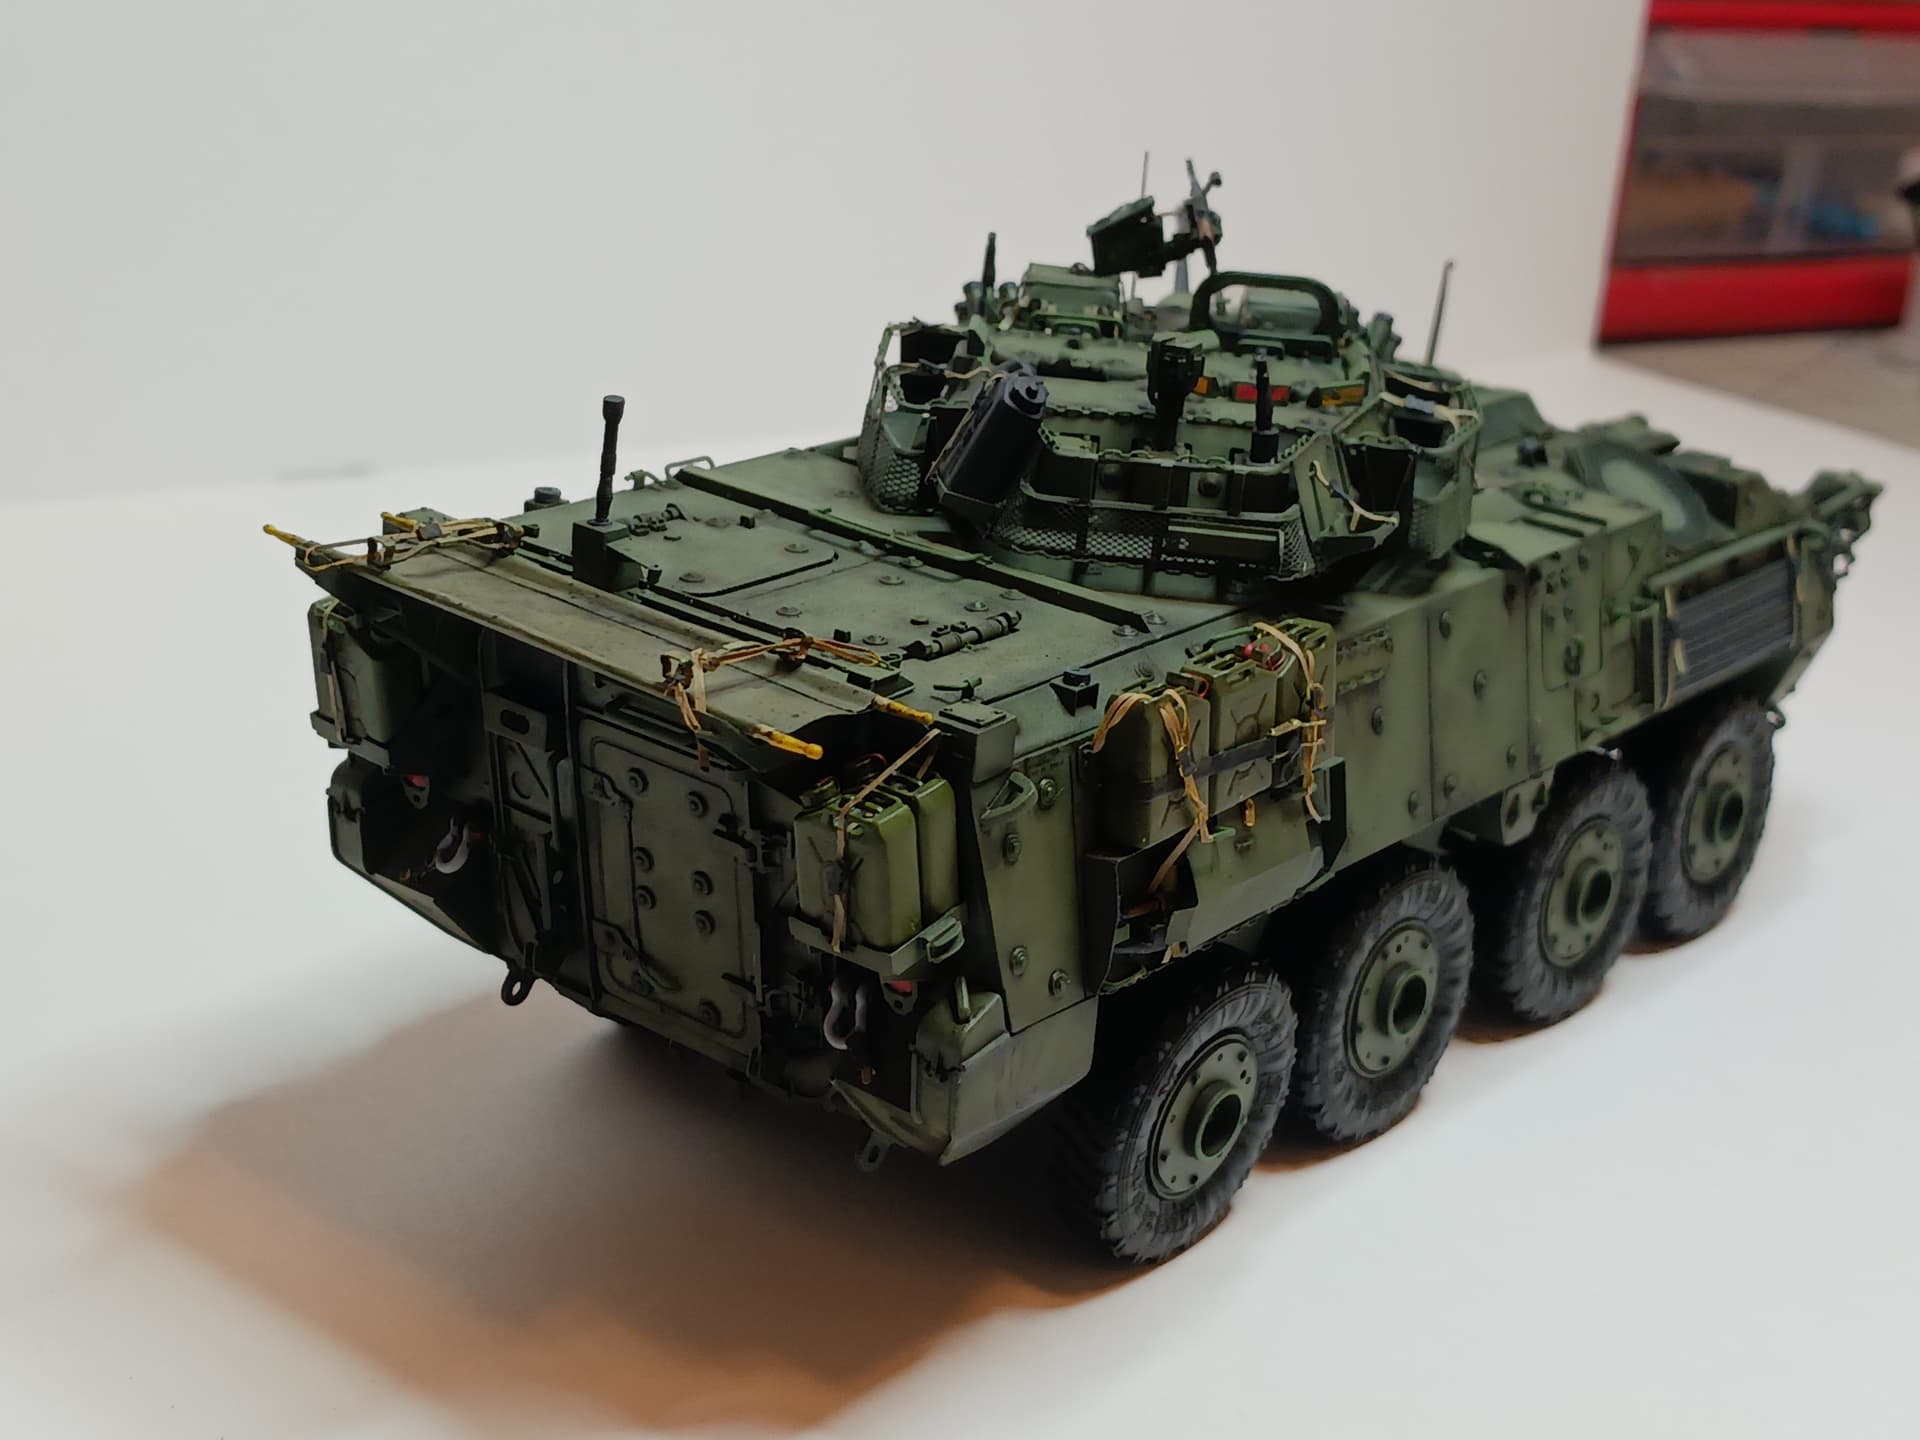
I don’t have very nice photos and the LAV is actually getting close to being done.
Here is what it looked like painted.’
20 Likes
Both the vehicle and diorama look great.
Fantastic colours on it… It looks great