Lifting the Fog of War: Command and Control

Today I added the clamps to the generator frame and ran a chain with locks through the fuel cans. Red was for MOGAS and yellow was for Diesel.

The little bit of PE fret at the bottom right is for the clamps for “hootch” supports. That’ll get done later today or tomorrow if I’m up to it. That’s the last of the PE (other than add the headlights. I’ve also realized the metal of the spare tracks is too light, so I’ll redo those with some “dark iron.” Hmmm, 6 weeks until the end? Oh boy…

I have a whole lot of compressed discs in my lumbar region and now a pinched nerve that brings FIRE down my right leg. Unfortunately, good pain killers don’t touch the leg bit at all. Getting old and broken…I have to use a cane now until, maybe, an epidural helps.

Mike

9 Likes

I do like those “big nosed” birds with fixed landing gear. It’s looking nice!

Mike

1 Like

Thanks Radek, your kit is coming along nicely, too!
Peter :raising_hand_man:

1 Like

The M577 looks great. Nice job so far.

1 Like

Base painting done.

I hope it all comes together. I like it so much I bought two more…

6 Likes

Alright, Progress. Got the pilots painted and the office is almost ready.


Well at full size, the pilots are among the best I’ve ever done, the zoom tells a different story. Tried to custom mix the yellow orange flight suits, looks a bit more like orange yellow. :roll_eyes: I stole the office idea from someone on the web. They undercoated with white, covered everything in the gray, masked off the gray and shot the flat black. When that was all done, they lightly sanded the panels to knock off the black and gray, leaving all the raised details in white. Looks fairly good with minimal brushwork. Should be able get the Black Bird buttoned up by this weekend. :wave:

8 Likes

A little more progress on my C&C IDF Zelda. Still some details to fix. Then weathering can begin :slightly_smiling_face:

More to follow :slightly_smiling_face:

10 Likes

Looks great Jesper. A really busy feel to it, just like the real deal.

2 Likes

The upper decks painted


The planes painted. I added 2 from a Pit Road accessories kit

The upper decks attached to their support structure. The structure looks light as it should not bulky and overscale

The mast structure. which also supports the deck structure added

The upper decks added. They are a little tricky to get alligned so the support struts reach the main deck and not hang up on the ship’s bulwarks

4 Likes

I am at about round 10 of trying to get a smooth finish between casemate and hull. It is a fight to a knockout…made all the harder as I have assembled everything and applied primer and first layer of paint. I should have just left the incorrect weld bead there…

Thoughts, opinions, feedback of the “streaking” on the track’s side??

Mike

9 Likes

Floatplanes painted

6 Likes

I really like it, Mike! :+1:

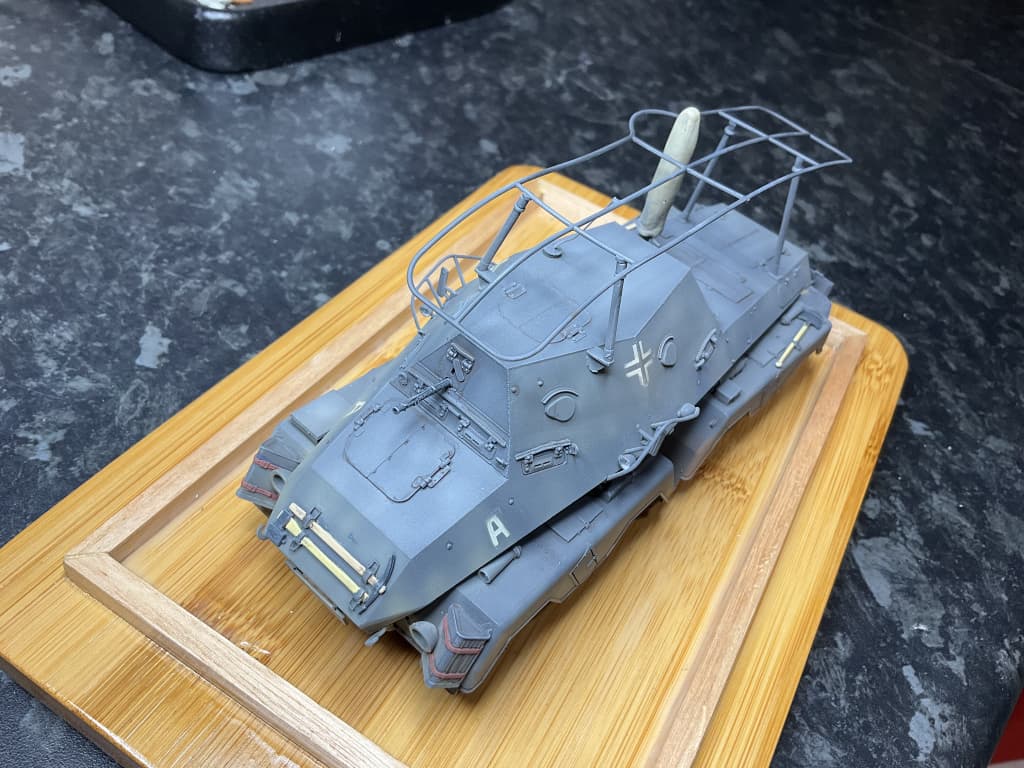
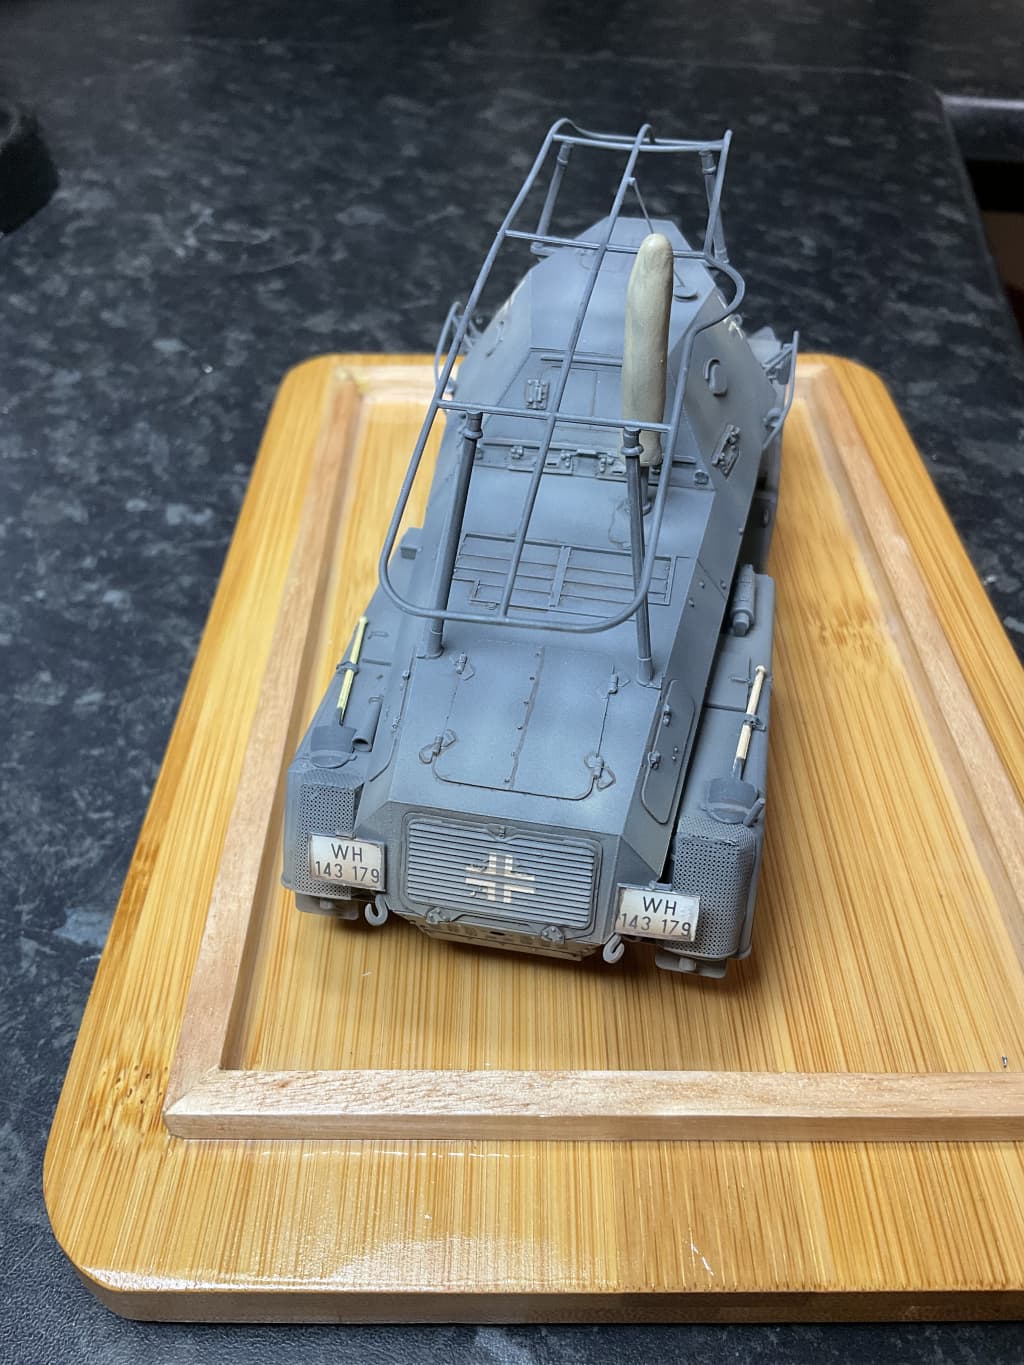
Mike, as you have asked for feedback, I take it you are open to suggestions. Firstly though, I am going to say this off the top - I have never liked the ‘zebra’ streaking effect myself. This is just my view but in no way am I an authority on weathering. So with that admission, please take the following comments as positive, not negative, or disregard them altogether as you wish. There is not a microgram of malicious intent here.

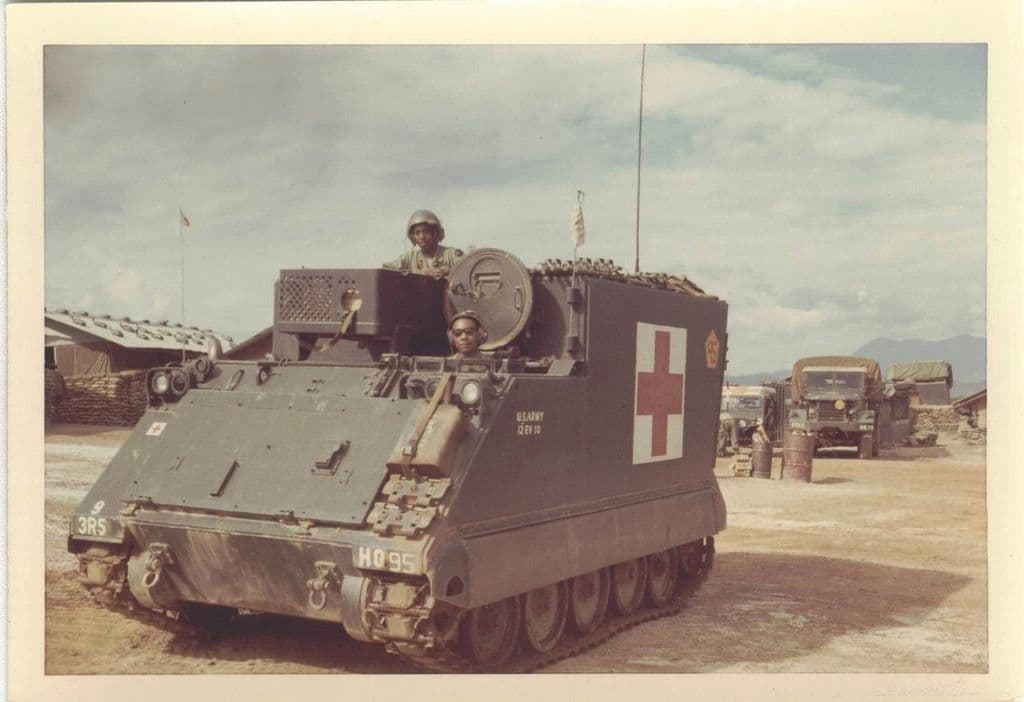
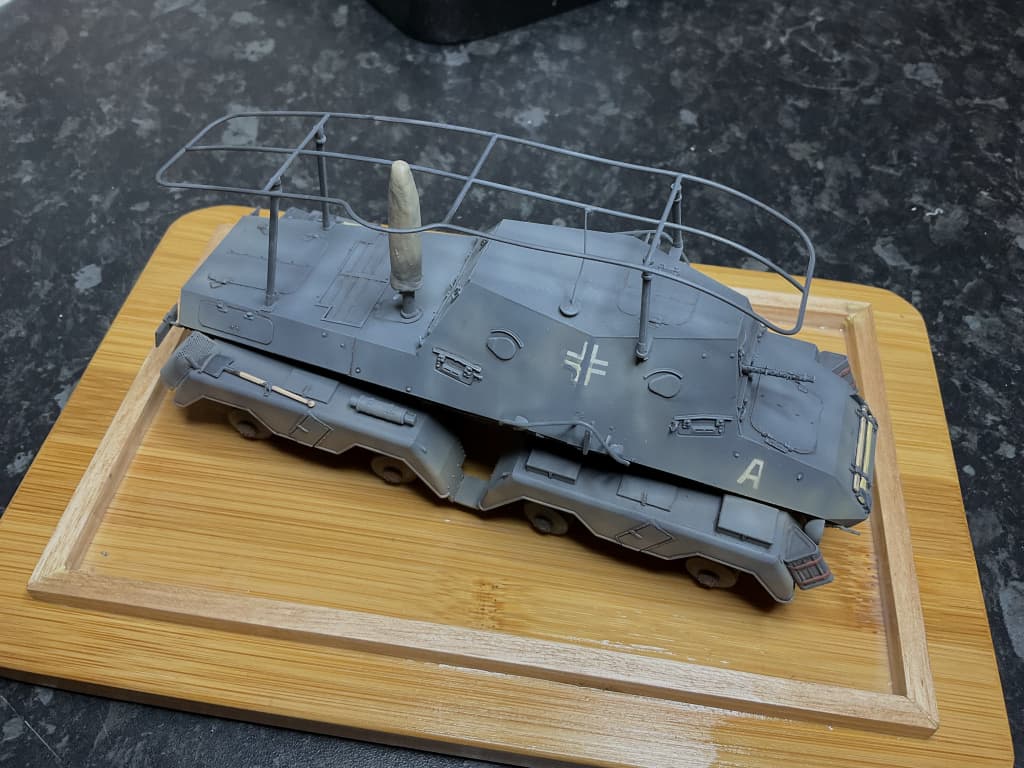
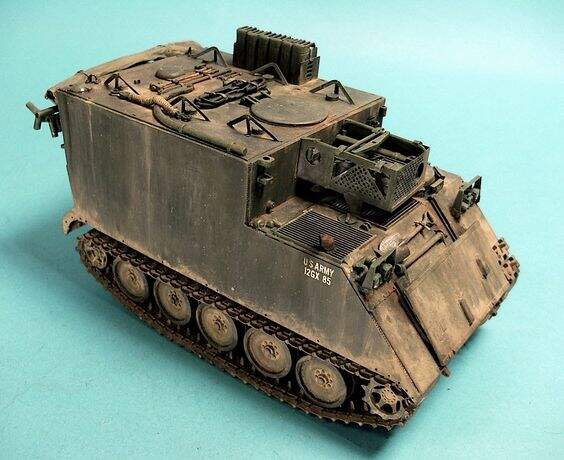
To my eye, the streaking from top to bottom all the way along appears a little too uniform. Vehicles tend to gather more dust lower down, whether military or civilian, so there is more dust covering there. This usually results in more colour variation in the lower area, especially on a vehicle this tall. Here is a pic showing what I mean, more dust lower down.

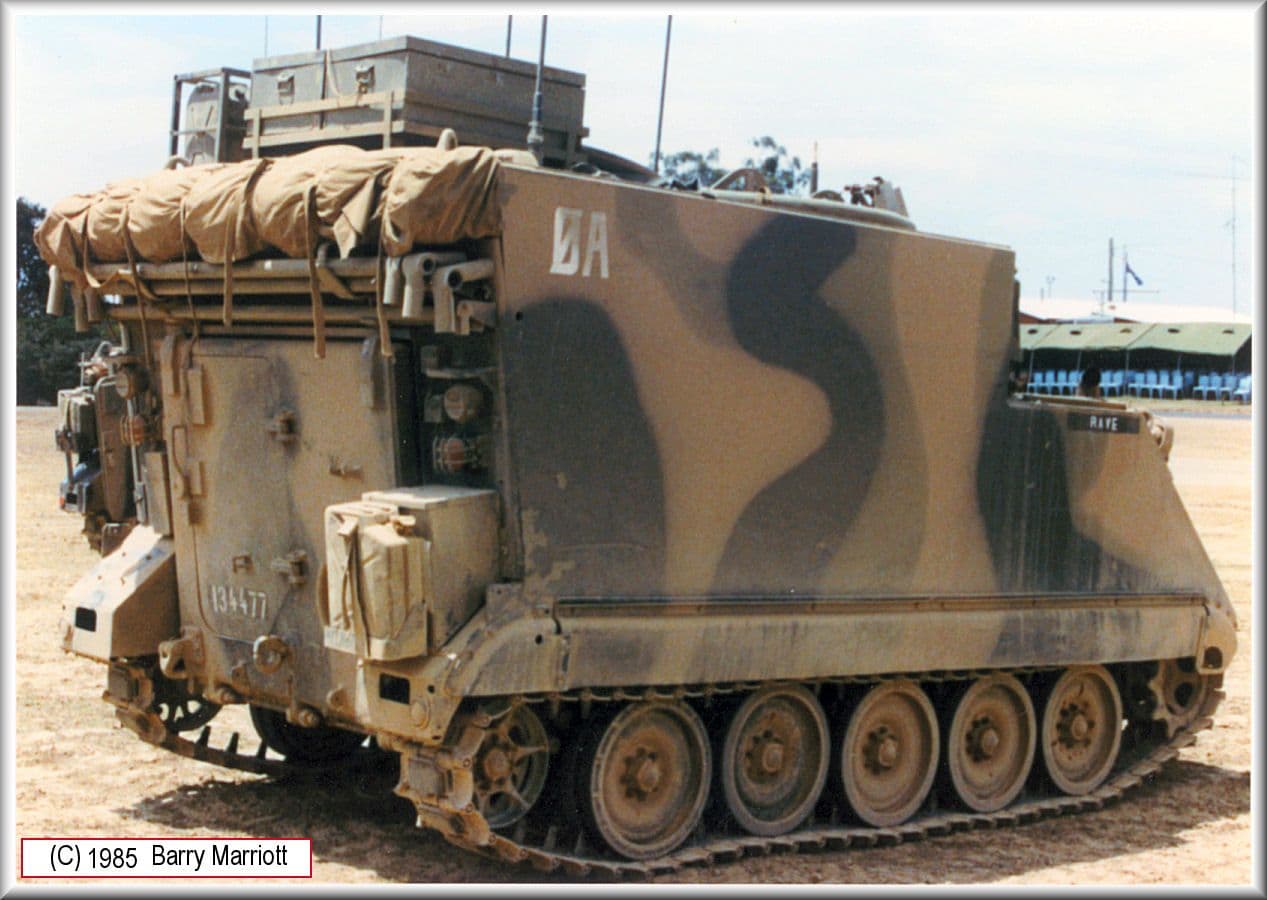
Then, the streaking is caused by rain washing through the dust layer. To form a long streak, it needs to have pooled and been forced in a stream down for some reason, e.g. water on the driver compartment turns muddy as it mixes with dust and, then it flows back to the rear cabin wall when the vehicle starts to move, and that then runs down the side. Here is an example of that:

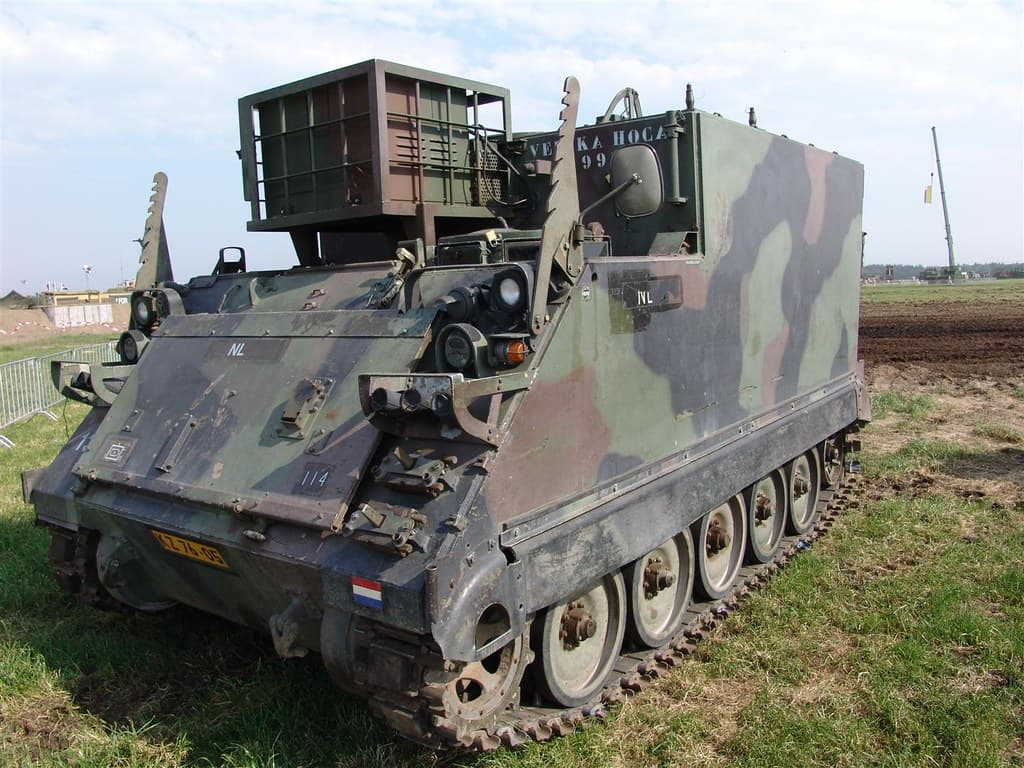
This pic shows a more patchy rain effect:


Rain by itself would cause the dust to mix and run down patchy, not a thin stream. So the end effect is more patchy covering than streaky. Do a google search and see if you can find a vehicle with the streaky lines.

This modeller has represented what I think is a truer effect.

image

All this said, I do like what you have done, but for my taste, less is more.

Please do not be offended. Again, this is my view and there are many, many better modellers out there than me.

3 Likes

And the Notoro is done. Planes decaled and positioned on and around the ship. Tho they all may find their way on to a base at some time


5 Likes

Very nice. The float planes add that pop of colour to grab the eye.

Makes sense @petbat. It’s been on for a bit, so hopefully I can tone it down some. Thank you very much for the input. :slight_smile:

Mike

1 Like

Okay. Finally got the sanding marks out of the filler. What a job.

Laid down base paint and some initial weathering to break up the grey. Photos are a little on the bright side sorry:


Top pic shows a terrible decal result. The AFV Club decals are super thin, so thin that they curl over the edge and on to the decal backing when you try and slide them off. These balkencreuz were a nightmare, curling in at the sides. I had thought they were down okay, until next morning I saw they had lifted and curled. After all the issues getting it here, I decided to leave it. Maybe I will cover it with something.

10 Likes

Bummer about the decals lifting, but other than that, its a great build and the base grey paint looks great with the start of the weathering. Mast cover came out nice as well.

2 Likes

Thanks John

1 Like