The only marking aside the registration number is a yellow 3.
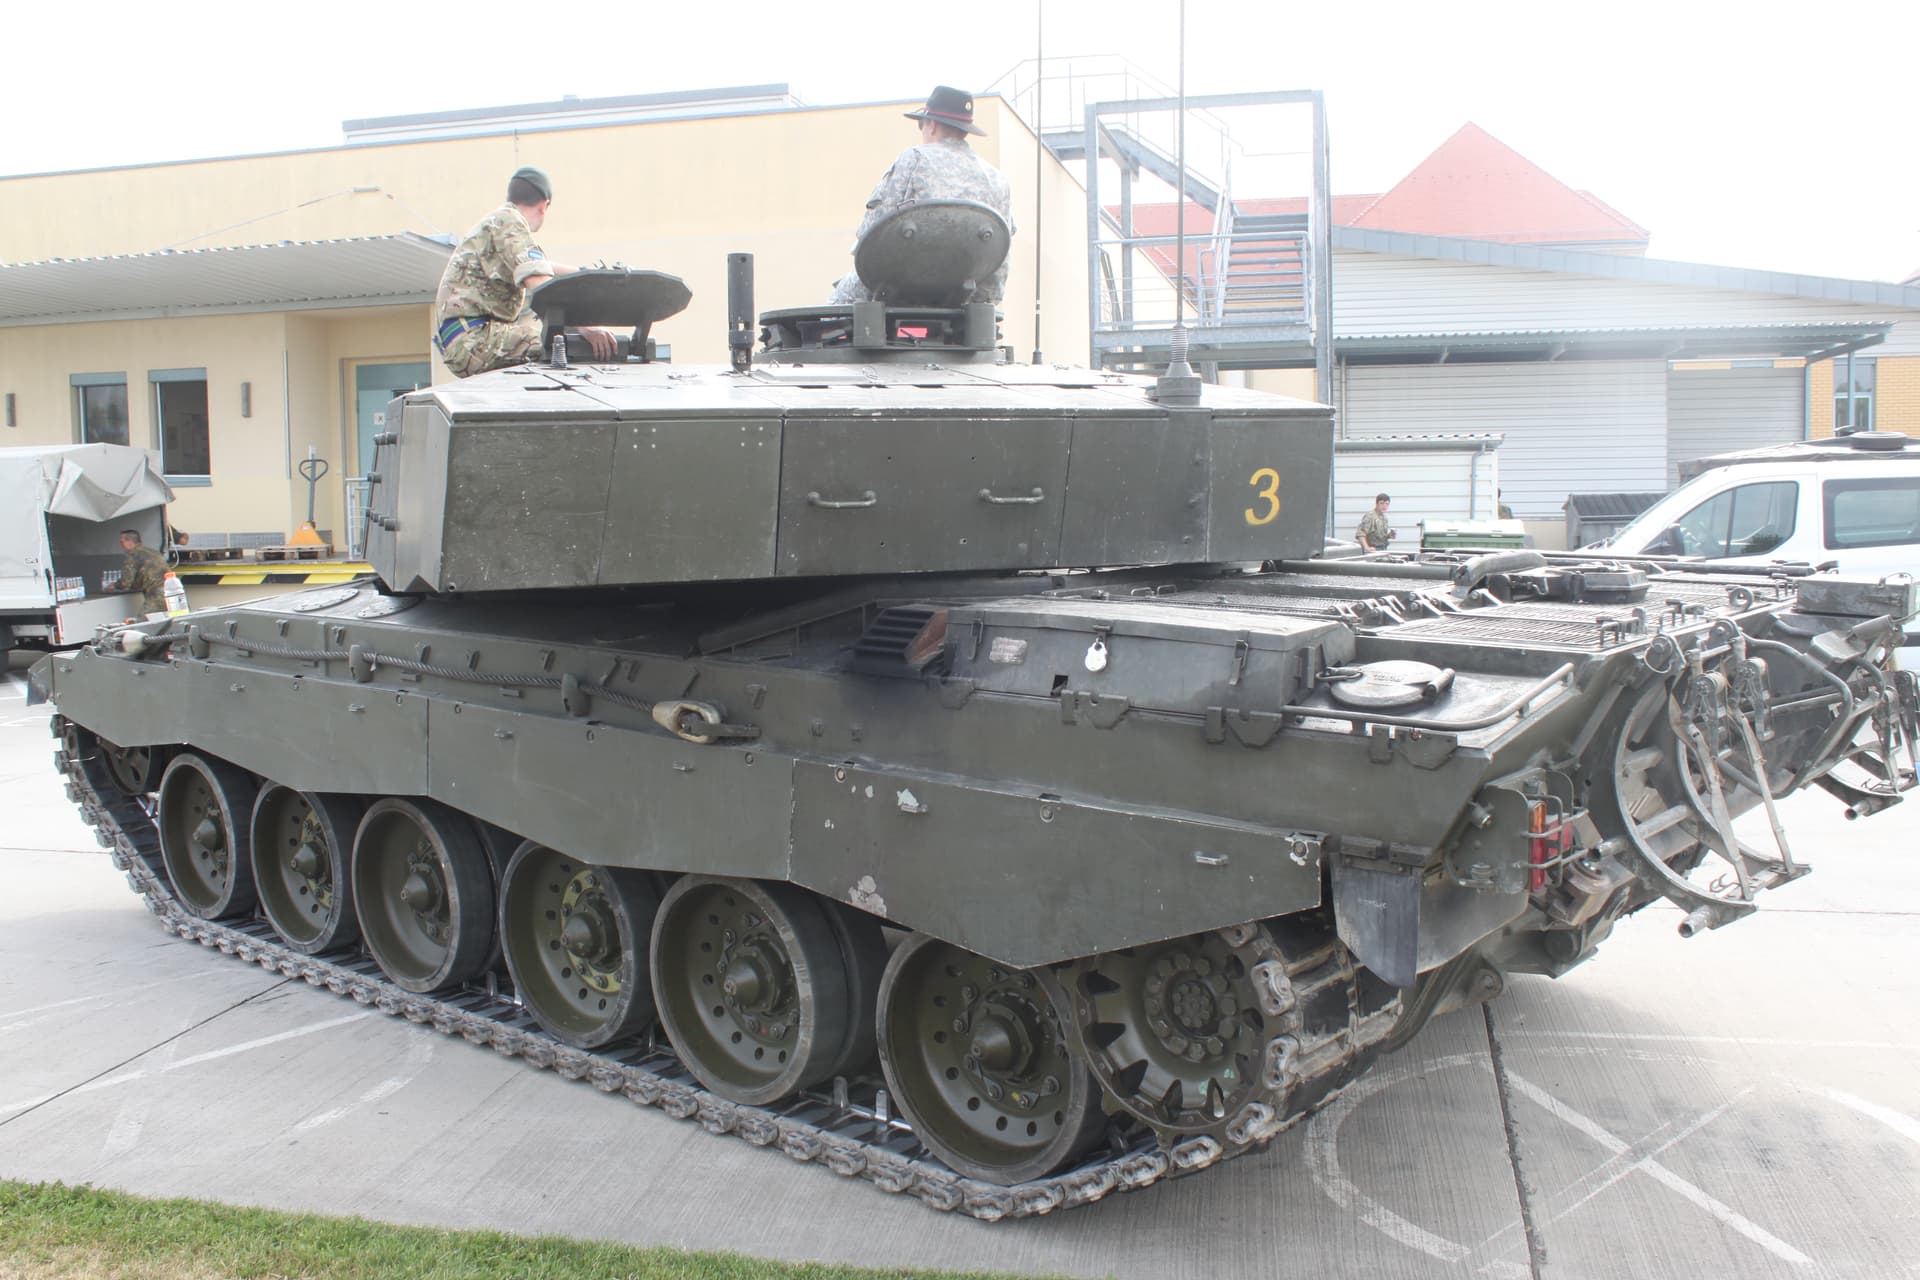
I was inside the turret but was not allowed to take pics. Very cramped inside…
The only marking aside the registration number is a yellow 3.
Roof and hatches are roughly modelled. Pins and brackets to come to show where the hatches would rotate forward, but I need to get the spacing on those braces set first.
I have no actual shot of the top to work from, so all of this is guess work and speculation.
Question is, do I get ballsy and try and show one of these bad boys open? I think the answer needs to be yes.
When were you there HB ? No idea about the 3… Maybe a 3 troop wagon but removed the 0, 1 or 2 ? Or just for the display ?
If you went in the turret its standard form not to take any images… I imagine German and US practices are the same.
If it was an SHQ command you wouldn’t of been inside it… Nice pictures though.
You can see the 3rd ABA under the LH side of the loaders hatch.
Looks good Don. Do you have anything to work on for what’s inside the turret ? Or you going to hide it with a figure ?
I will try and get some plastic cut tonight on the Ch2 once I re-touch some areas of the figure I’m doing for the other campaign.
I’d say open but with figures Don; I always try and populate my models even if only to accentuate the scale.
I’ve got one figure planned. I found a half decent representation for Gen. Rockingham. Might try and cobble together a driver figure or something, we’ll see.
And no @Johnnych01, I’m clueless as to what interior modifications were made. I re-read my book and apparently the mods were made at Ft. Lewis, WA where 25 CIB worked up prior to going overseas.
This means things may be slightly less field expedient as I first imagined, but at the same time, there isn’t a whole lot of room in that turret to begin with. I might try for a small desk/map board area, but I may leave that till towards then end when I know how the whole thing works together.
In 2015 at Leipzig.
Hi Don, I’d assume they removed everything to do with the main gun, cradle, ammo storage, and maybe even the traversing gear. I’d expect them to remove the turret basket too as it eats up a lot of interior space, but those two guys in the pic must be standing on something…
(But if they spot-welded the turret and removed the floor, they might have added seats for them, on which they are standing?)
I was just combing through interior shots of M8s wondering them same thing.
I think I’m going to go on the assumption that the gun and ammo racks were removed but the basket left in place, if for nothing else than the seating.
I might scratch up a shelf for a map and something to hold a couple Bren mags but the figure I have is meant to sit in an open hatch I don’t think you’ll see much if anything once he’s in place anyway.
Those big ol’ hatches look like great al-fresco map tables! And with a fig in each hatch nobody will see inside…
Here’s where I stand today. Need to let things cure and give the brain some time to contemplate next steps (I’m also told I have a backlog of laundry to clear…).
Only opened up the one hatch for now. If I really want to I can always cut out the other one later but tbh it’s providing some significant structural support as it is.
Need to craft the support arms for the lids when they’re in the open position as well as some basic detail for the inside of the open hatch. I’m thinking a simple grab handle and a hatch dog would be about all I’d need.
Also need to sculpt/sand/putty/pray that sheet over the mantlet opening into something. What that something will be is a question yet to be answered.
Got started with some cutting …1st RFM kit… Here we go…
Began putting the bottom hull together.
There were some mild irritations within a few steps …
Where the rear hull joins the side walls are 2 lugs which go into 2 slots in the side walls
Blue arrows. Lugs
And the cocktail stick. And above it, the recesses.
This seems to be classic case of over thinking a problem that isn’t there. The lugs are to thick (at least mine were) and began to force apart the recesses. That meant I needed to very gently cut and sand them down. Totally unneeded both in time to do it, and being there in the first place.
Eventually got them sorted and everything slotted in ok.
The tape is just support the sides while the glue takes.
Had a quick look through the instructions, to find out what parts won’t be going on. Rear extra fuel drums for one, and possibly the 2 Jerry cans and D10 reel on the rear plate.
The kit also comes with a correction sheet for mislabeled parts on the main instruction book. I was already aware of a couple thanks to Jim @iwatajim when he did his. It is nice to see them address the issue though. ![]()
Yeah John I had the same issue in my build, forget to mention it in the thread. But as you say some finessing and all is good. Just remember to watch the alignment of those road wheels. Best to have the upper hull attached before gluing the wheel stub attachment points in place.
Still a great kit though!
And fantastic to see another one being brought to life @Johnnych01
@Canmedic, was able to purchase said needed Humvee. Still need parts for either build plus this is behind the two LAV’s for Johnny’s two campaigns I need to get move on with soon.
Best get cracking then ![]()
I know I know….need to finish the R35 first, hopefully this week, nlt 5/15. Then a double build with both I hope.
More on (moron?) my rendition of HQ 1st (British) Corps in the field: if you’re bored by office trucks/BBVs (Box Bodied Vehicles) look away now.
I’ve been working on more BBVs and modifying them slightly to depict tailboards; not too onerous a task in this scale:
I’ve also sketched out how I will model them on a base which is one of my 12mm MDF bases cut to the dimensions of A3 – the international (well, to most) paper-size. The attached pic isn’t really great but hopefully you’ll get the idea:
The plan shows - not readily discernible but I’ll describe it as I go - a German road to the left of the base with a track leading off into a meadow (trees to follow) and the edge of a forest. The whole is really bisected by the track which will be the “circuit” into the HQ ie a one-way route. At the top-left I’ll depict a couple of Royal Signals specialist vehicles to depict the Communications Centre (COMCEN). Down from that and to the right will be 2 x complexes known in the then HQ parlance as “Diamonds”. These will be the respective HQ Staff branches of Artillery and Engineers, consisting of, surprise, surprise, BBVs, tentage and probably some Land Rovers. Further to the right I may include a helipad.
Moving to the bottom of the base will be, you guessed it, even more office trucks and tents. Bottom left will be a couple of BBVs representing the RDC - Receipt and Despatch Centre; again, I’ll add a couple of tents and may include the Postal & Courier Det of the Royal Engineers. Moving right again will be Diamond 2 – the Command Group (ie the Staff functions of G Branch (the British Army Staff system back then was based on the historical system of G, A and Q - which I’ll explain another time) Ops, Plans, Int, Security and I think I Nuclear), with the only armoured vehicle in the whole, the ACV as mentioned earlier; as this is arguably the most interesting vehicle of the lot, here it is again:
To the right of Diamond 2 will be another Diamond which may have been Army Aviation; I can’t quite remember – it was some 50 years ago!
I will sort of landscape the base with some slight contours and probably add the trees I have amassed after I’ve installed the models; I don’t think it would work the other way around. I’ve still some vehicles to acquire, especially Land Rovers, and also need a helicopter, a couple of generators and lots of trailers. I recall that back then practically every vehicle towed something.
And that folks, is my plan for a (partial) model of a Corps HQ – can’t get much more Command & Control than that perhaps.
Brian I am absolutely giddy with anticipation!
Here’s the little bit of progress I’ve made today.
After cocking about yesterday with some more evergreen and milliput… I ripped the whole lot off and started again. Milliput wouldn’t cure and I don’t like the shape I ended up with anyway.
Made a better attempt today with Tamiya putty. Much more symmetrical.
Here it is mocked up on the hull top
Good news is, now that I have a shape I’m happy with, I can get on with the rest of the build!
Why not try it in 1:300 Don? Highly recommended - nearly everything’s easy (mind you, I haven’t started on the figures yet).


