Agree with @HeavyArty go with what you have looks very convincing. 
1 Like
I’m with the others, hold at this point. You’ve got the look just right!
2 Likes
Exactly … less is more in this case
1 Like
thank you guys,then I stop with weathering, one thing I didn’t do is chipping, honestly I have no idea how much “worn out” they could have been at the time, so I preferred to avoid
Honestly, chipping is way overdone in most cases. Especially for a vehicle owned in peacetime by a first line professional army, like your Abrams. US vehicles have pretty good durable paint, and the armor does not flex to cause chipping, except in a few select areas prone to damage such as fenders. When your start looking at photos of the real vehicles, you’re gonna have to look hard for examples of actual operational vehicles that are as chipped as the “artistic” builders like to do.
5 Likes
unfortunately I have never had the opportunity to see a modern tank, only vehicles of the second conflict in museums, so unfortunately I have never had the opportunity to ascertain how they really look even after the heavy exercises
1 Like
@Merki4 Lucio, I am very impressed by your fuel, oil, mud, dirt and dust stains on the upper hull. What materials did you use and how exactly did you apply them to achieve these effects? Could you please give us a detailed step-by-step instruction? I have never seen such a realistic application.
3 Likes
Thanks, so as I previously said I used the liquid pigments of the (I hope we can say without violating any rules, otherwise please delete) Lifecolor, really useful and effective, they have the advantage of not being particularly opaque so they are easy to treat, once dried they can be treated again simply by moistening a brush. So back to us, I wet the surface of the model as instruction and spread the pigments in the area to be dirty, I let it dry and then with a slightly moistened flat brush I began to texturize the surface very lightly, practically just placing the bristles on the surface, I think to have repeated the operation two or three times, possibly adding product in the shade that I think is suitable, while for the various drips and halos I simply used very small brushes, W&N tip 0000 and a tip 2 respectively .
Uh I forgot, for fuel and oil stains I have always used Lifecolor products, in this case precisely Tensocrome oil by moistening the surface first, but moistened, not wet and given the product in a couple of hands
2 Likes
Thanks Lucio! I have these Lifecolor liquid pigments but have never done much with them. I’ll have to crack open the box and get going! The results are amazing!
I like to use this product, it is obvious that I do not use only these and I often integrate them with others
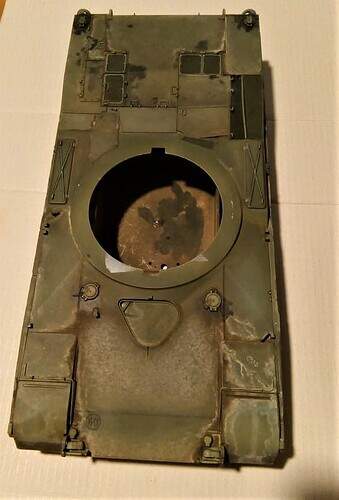
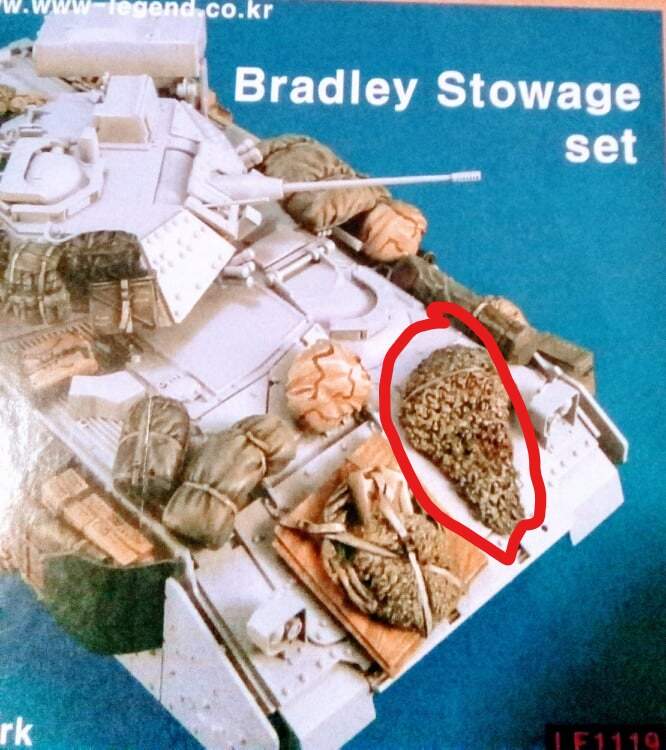
Ok, i’m looking for the rear turret load, and now a pair of question about it, it is possible to have a came net folded on the rear turret top but out of its bag? I have found a resin part in a Legend set and i was thinking to use it but I need of your “go, no go” to proceed.
Second question, starting to paint the crew equipment I noticed that Tamiya suggests to paint the sleeping mats in gray, is that the right color?

2 Likes
All the issue Isomats I ever saw were a light OD. Stuff guys purchased on their own might have been a different color, but the vast majority were the issue mats from CIF. Especially in the 80’s. So far as the camo net goes, I honestly don’t remember - I know we rode around Iraq in 03 with one unbagged and rolled/draped around the front and sides of the hull of the LAV-25 I was on. Hopefully someone with a better memory than me can give you a more definite answer.
2 Likes
As White4doc said, the sleeping matts were OD. I never saw any grey or black matts. As for the stowage, I never saw a vehicle with that much stowage on the front. Usually the only stowage was plywood for overhead cover, wire and maybe a bagged cammo net. First some that stowage would prevent the gun from depressing, secondly some of it may obscure the drivers already limited vision to the right and lastly, the engine and transmission access is hydraulic via a hand pump and all that weight on the hatch would definitely shorten the pump life.
ok, i was referring only to the camouflage net, i was wondering if this could be placed on the turret of the abrams without its case.
So ok for the sleeping mat in OD, thanks
You can. It was more common for them to be in their case, but nets could be unwrapped on the turret.
Ken
2 Likes
If you’re in a hurry, the camo nets would just be rolled up and stowed enough to where it would not snag and foul any operations. They’re in the covers pretty much on the way to the field and on the way out of the field.
As far as the sleeping mats go, I vaguely remember in the 80’s when they first came out, they were a darker and more grayish tone. Later on before the Thermarest pad came along around 2000, they were lighter and more olive in color.
1 Like
Uh, good news, so tamiya was right about sleeping mat, they were grey.
And about the came net, the Legend resin part is usable
Thanks a lot
Not really. They got lucky that some of the original ones might have been grey. However, the set is supposed to represent post '03 Iraq invasion. By then, there were no grey sleeping pads left. They were all OD to medium green.
Never saw a grey one. Mine were all light green.
Ken
Ok, now I’m a bit confused, so in 1983 the sleeping mat were light green?