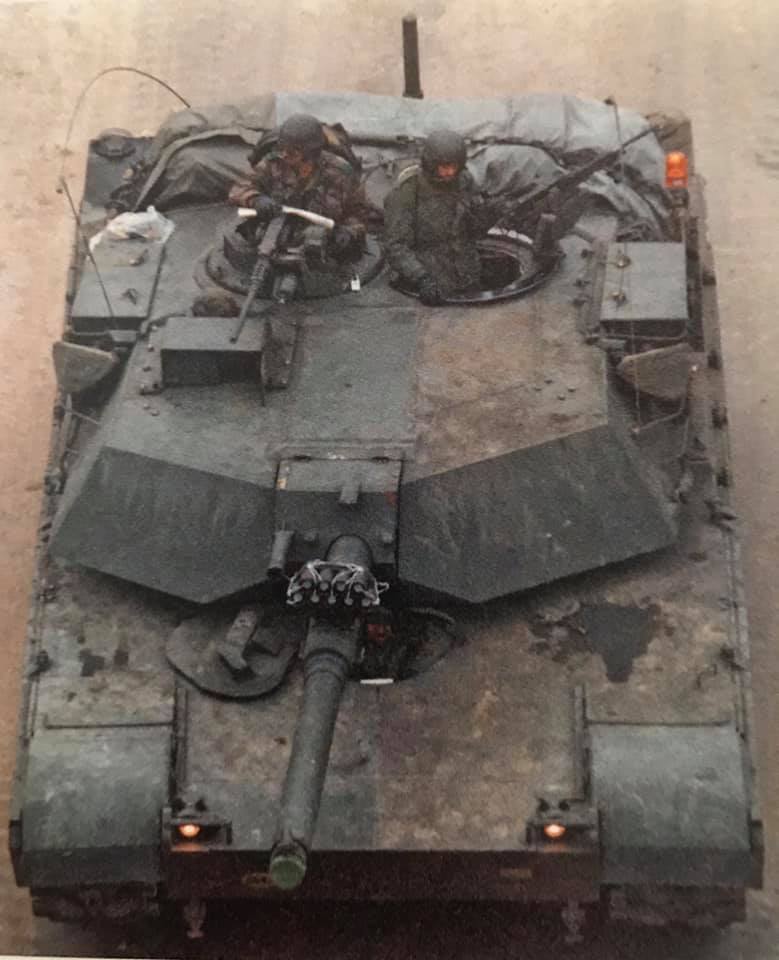
oh i’m sorry, i was referring at the cal.50 and loader’s mg ammo holder, sorry for my mistake
Always mounted. Depends on the unit were it was mounted as these light mounts were unit made.
1 Like
Only mounted when the vehicle was training.
1 Like
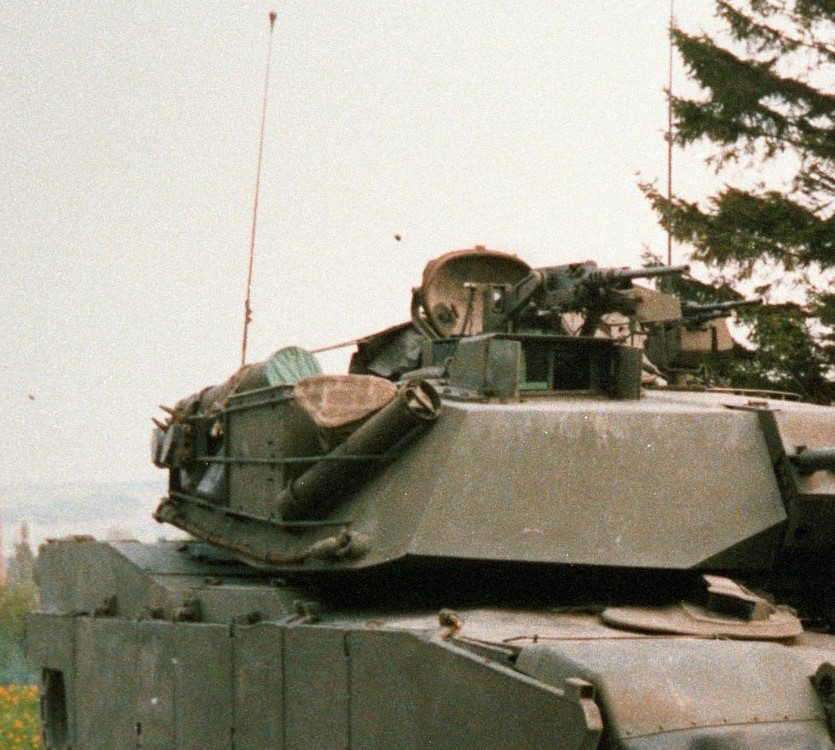
The ammo can holders on the machine gun mounts were usually empty.
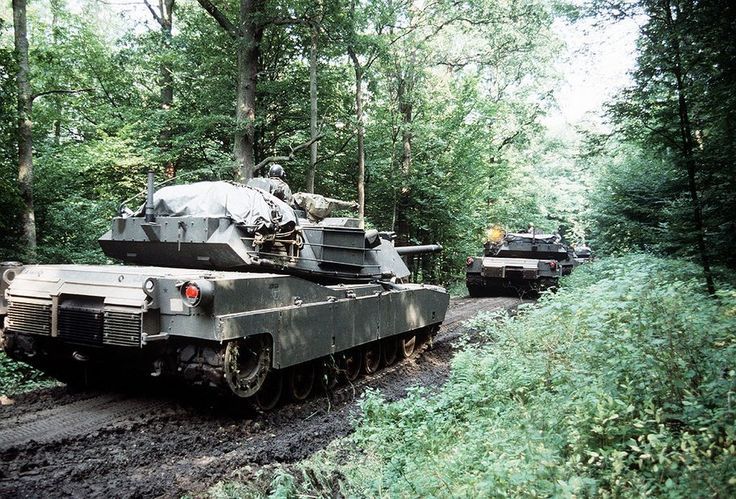
The whoopie lights varied considerably by style and location, based on unit policy and individual vehicle. On tanks they were usually, but not always, removable. They could be turned on or off, or unplugged, as needed. During a big exercise in the German countryside, like a Reforger, the lights were usually left in place for the duration of the event, and turned on when on the roads. As mentioned earlier, they were required by German law whenever driving or operating on German roads.
Ken

4 Likes
Thanks a lot for usefull info, where the whoopie light was electrically connected to the tank?
This thread is a treasuretrove of info!
And the build is cool too. Very well thought out and executed.
1 Like
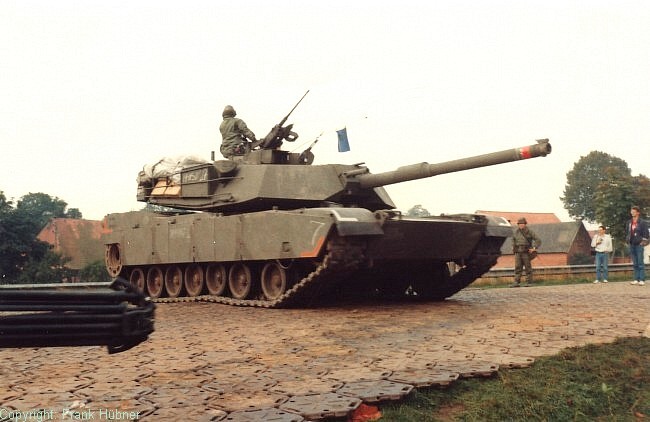
That depends on the tank. All the tanks I was on, the light was mounted on the turret, and the wire went in through the loaders hatch and connected inside. Other tanks just routed the wire wherever it was convenient. In the bottom photo I posted, it is probably wired into the tail light. German law required that lights be on when driving on German roads, so turning the lights on would also turn the whoopie light on.
Another thing you will notice in that bottom photo, along with many others, are the strips of reflective tape. These were also required by German law. They were placed at all four corners of the vehicle. Over the years these stickers evolved in size and color, by the late 80s they were large red and yellow panels mounted on the rear. Many kits include these in their decals, but you don’t need them for 1983.
Ken
1 Like
…but in that way the loader can’t close his hatch without cutting the wire, or am i wrong?
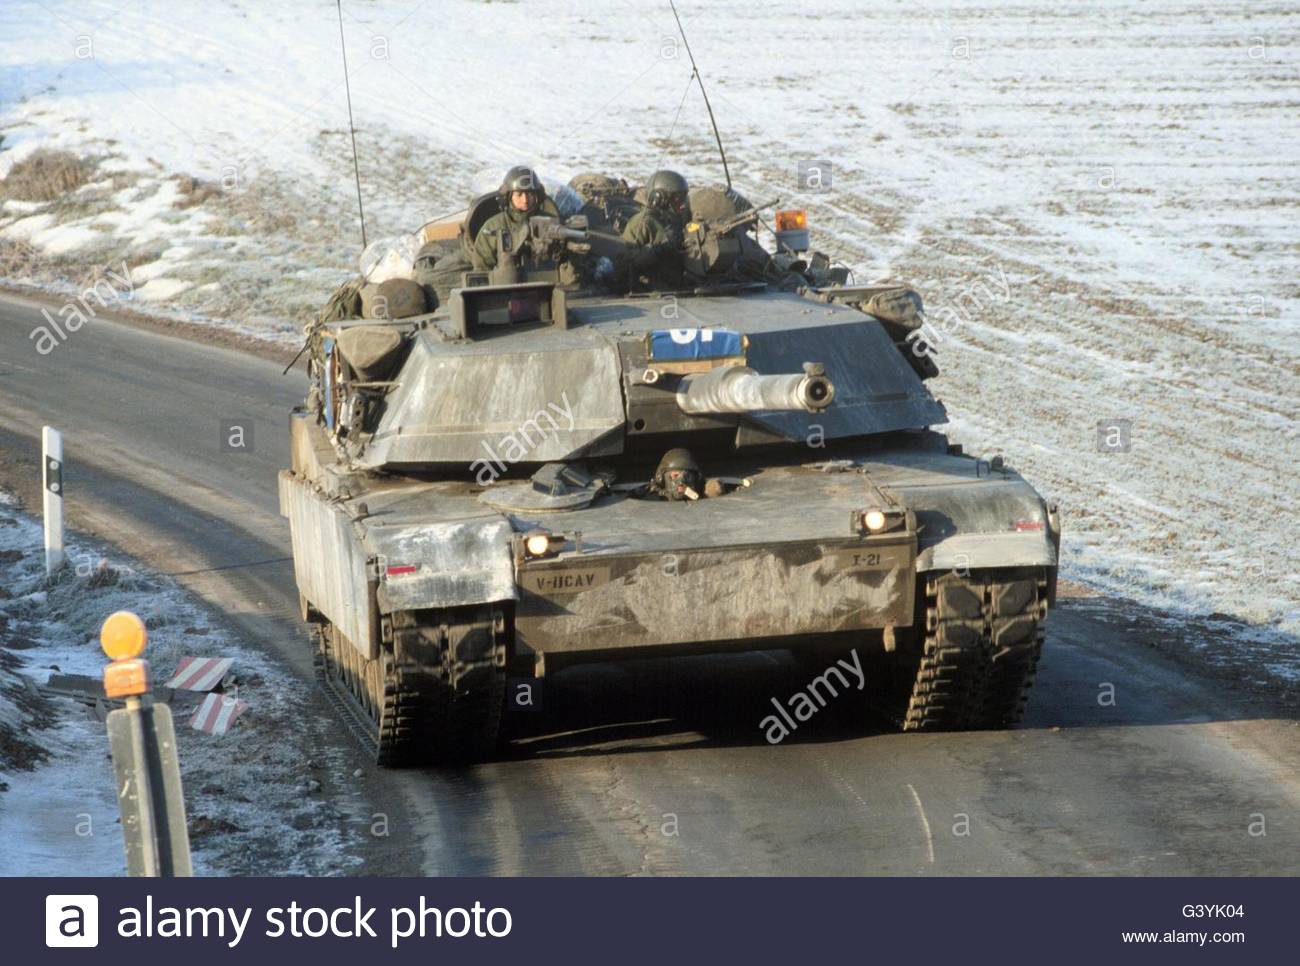
You are correct, but when driving the loader was usually standing in his hatch, keeping a lookout for crazy German drivers, so his hatch was open. And he did have to remember to disconnect the wire before he closed his hatch. Some loaders would run the wire through the periscope mount to avoid this problem.
Ken
2 Likes
undestand, very usefull info, what was the color of the flashing bracket?
and was the flashing light fixed to the tower or just wedged between the equipment?
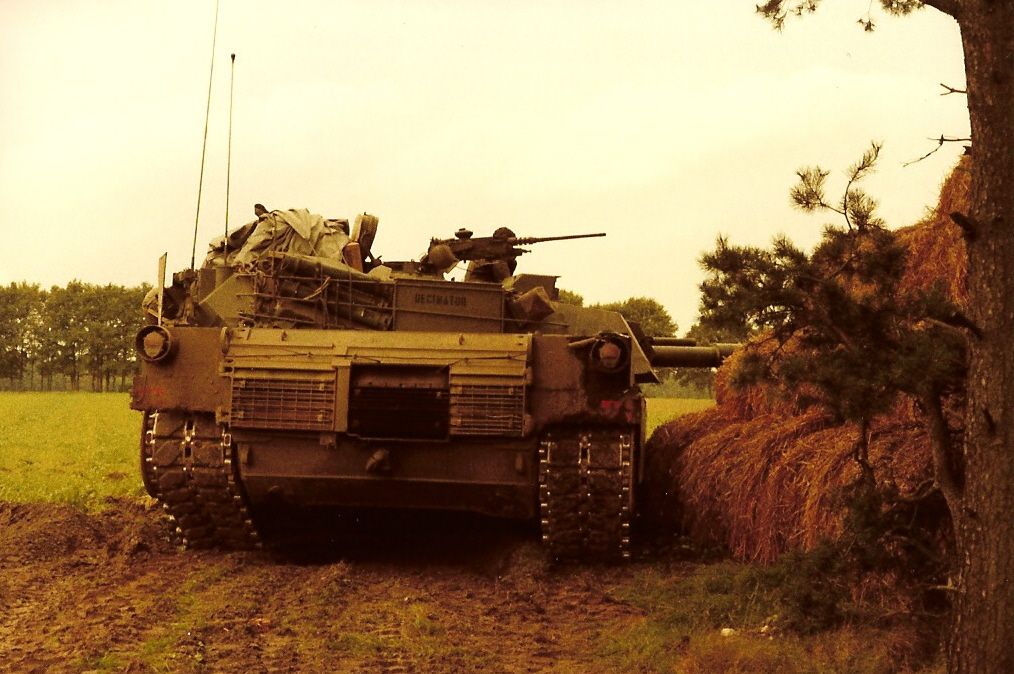
If you look at the photos (and there are lots more on the web) the light itself is yellow/amber, the base is bare metal. When mounted on the turret, it was usually on a pole or rod, which would then be clamped to something: a lift hook, grab rail, bustle rack, etc. If the tank would only be on the road for a few minutes, it could be wedged in the equipment, but usually it was clamped to something. When mounted to the hull, it was bolted in place. In the photos above, the top photo has it clamped to the side bustle rack, while the bottom photo has it bolted to the rear mudguard.
Ken
2 Likes
On some tanks it was wired to the headlights-turn the headlights on and the warning light came on
1 Like
what I mean is: it is true that we are talking about the 1:35 scale but in your opinion the fixing hook of the flashing light was / is large therefore replicable or was it small and therefore, a drop of glue and that’s it?
If you mount it to the hull, you can just glue it in place. If you put it on the turret, you should mount it on a short rod, then glue that wherever you want to put it. a small bit of wire or even left over photo-etch can serve as the clamp.
Ken
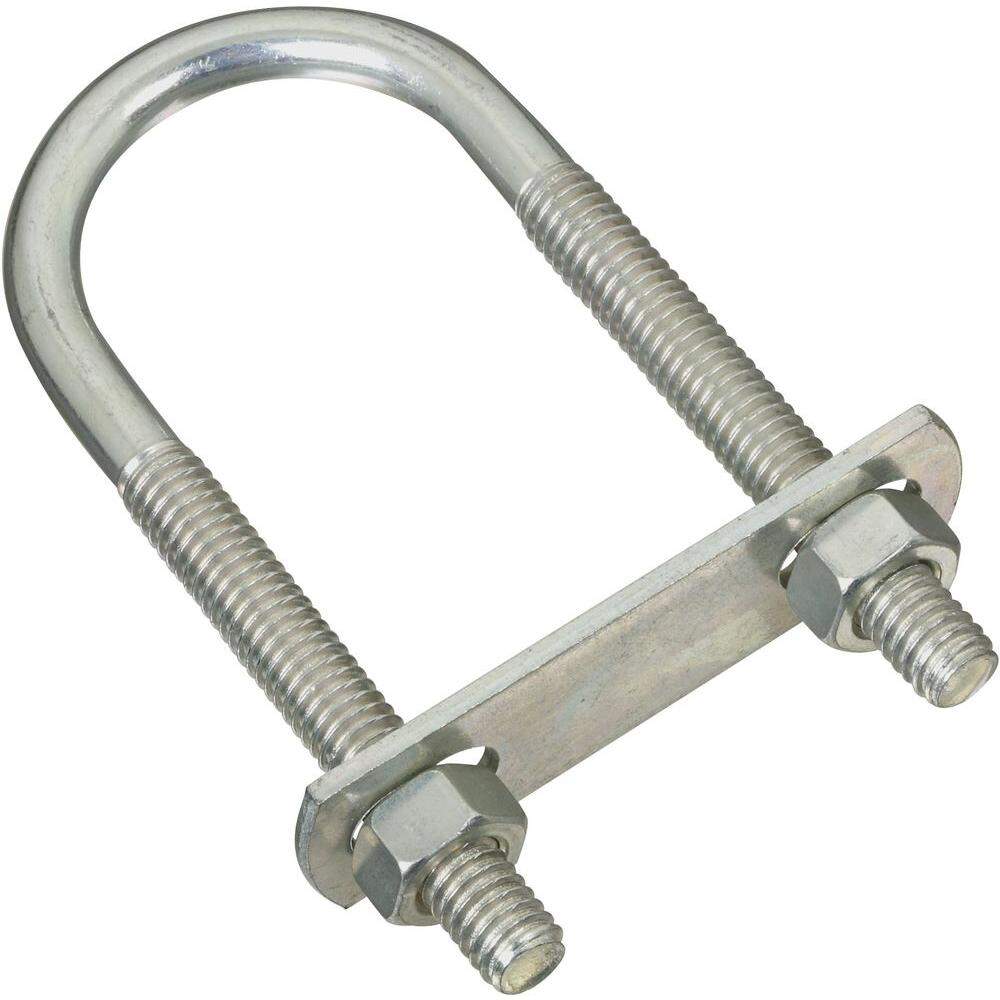
Edit: The most common clamp used is a “u-bolt” seen here: U-bolt - Wikipedia and here:
Hose clamps are also used:
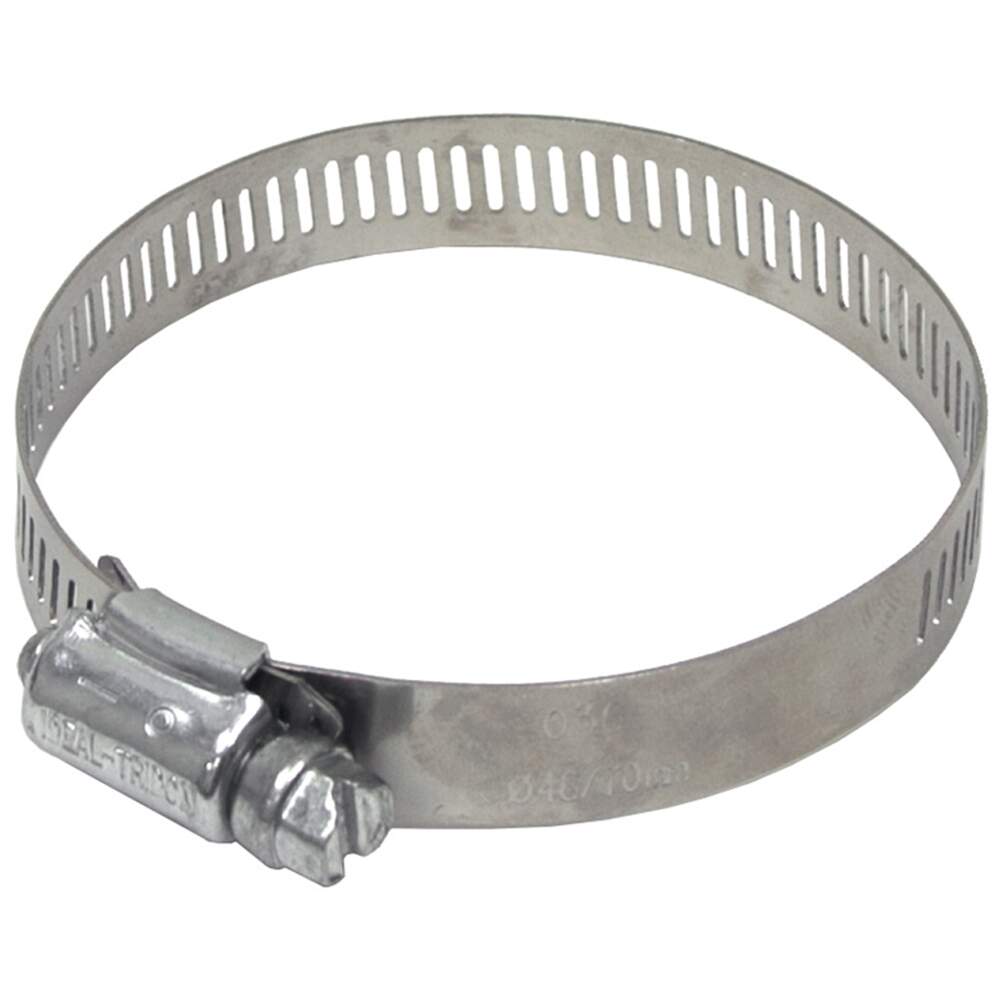
Both of these come in a variety of sizes, just wrap it around the rod and whatever you are attaching it to, and tighten it up.
3 Likes
ok, i added the strap as suggested, although most of the photos show the use of common ropes.
Honestly it does not convince me very much, it must also be said that the reference photo does not show any strap for what we can see, but here we go into the poetic license, in our personal interpretation of reality, the strap is not glued but only actually hooked as in reality, if it decides that I don’t … like it, I can remove it and replace it with ropes
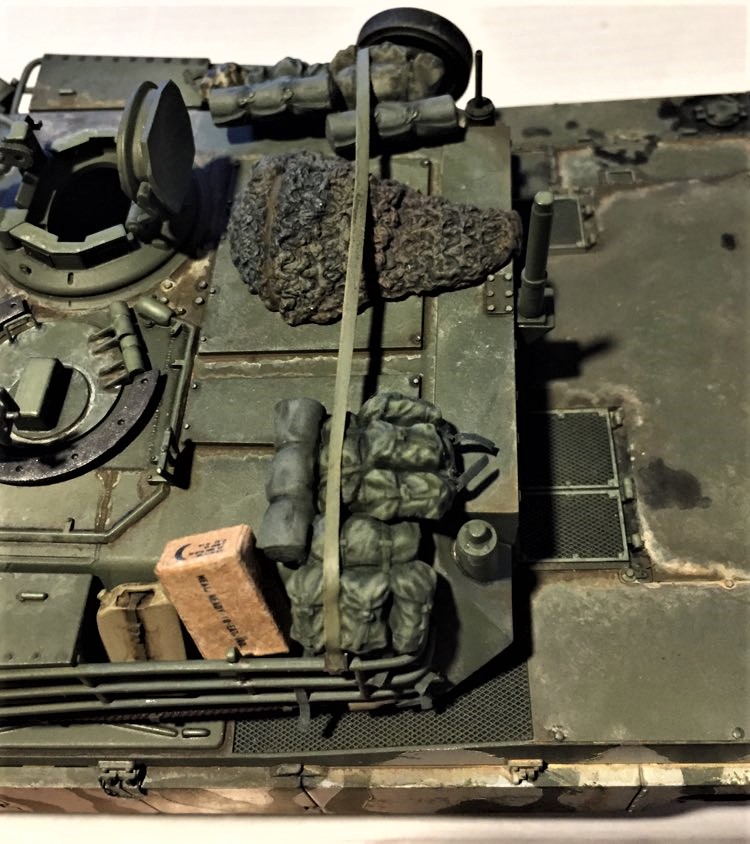
here the strap
here what appears to be a chain, perhaps due to its own weight
here again a strap
here a rope
here some ropes
3 Likes
You are correct, all of those methods work, and all of them were/are used. Unless you have a photo of the specific vehicle you are modeling, or other vehicles from the same unit, then feel free to use whatever you like best.
Ken
1 Like
Nicely done bro!
2 Likes
hey, question (because there seem to be a lot of armor-smart people here)
when did the M1A2 SEP V1 “come out”? I’m working on an M1 right now, and thought I might be able to use some of these tricks, but wouldn’t want to use M1A1 facts and tricks on an M1A2.
Cheers!
L