Still think you should put RANGE CONTROL markings on the truck.
You’re an old Artilleryman, so you probably drove a CUCV around a time or two while on RO detail; right?
Still think you should put RANGE CONTROL markings on the truck.
You’re an old Artilleryman, so you probably drove a CUCV around a time or two while on RO detail; right?
I have used them for range duties in the past. Not sure how I will finish it yet. We’ll see.
Just my .2 cents; good old-fashioned tri-color woodland is the way i remember the old CUCVs.
With the amber colored “Bubblegum machine” light and the yellow RANGE CONTROL placard tied to the front brush guard.
Gino as usual excellent job. I have always liked your builds.
Cheers,
Ralph
Thanks Mech.
Sensational the way you fitted the chassis to the vehicle. It works so well. The added detail is also great. Looking forward to seeing more.
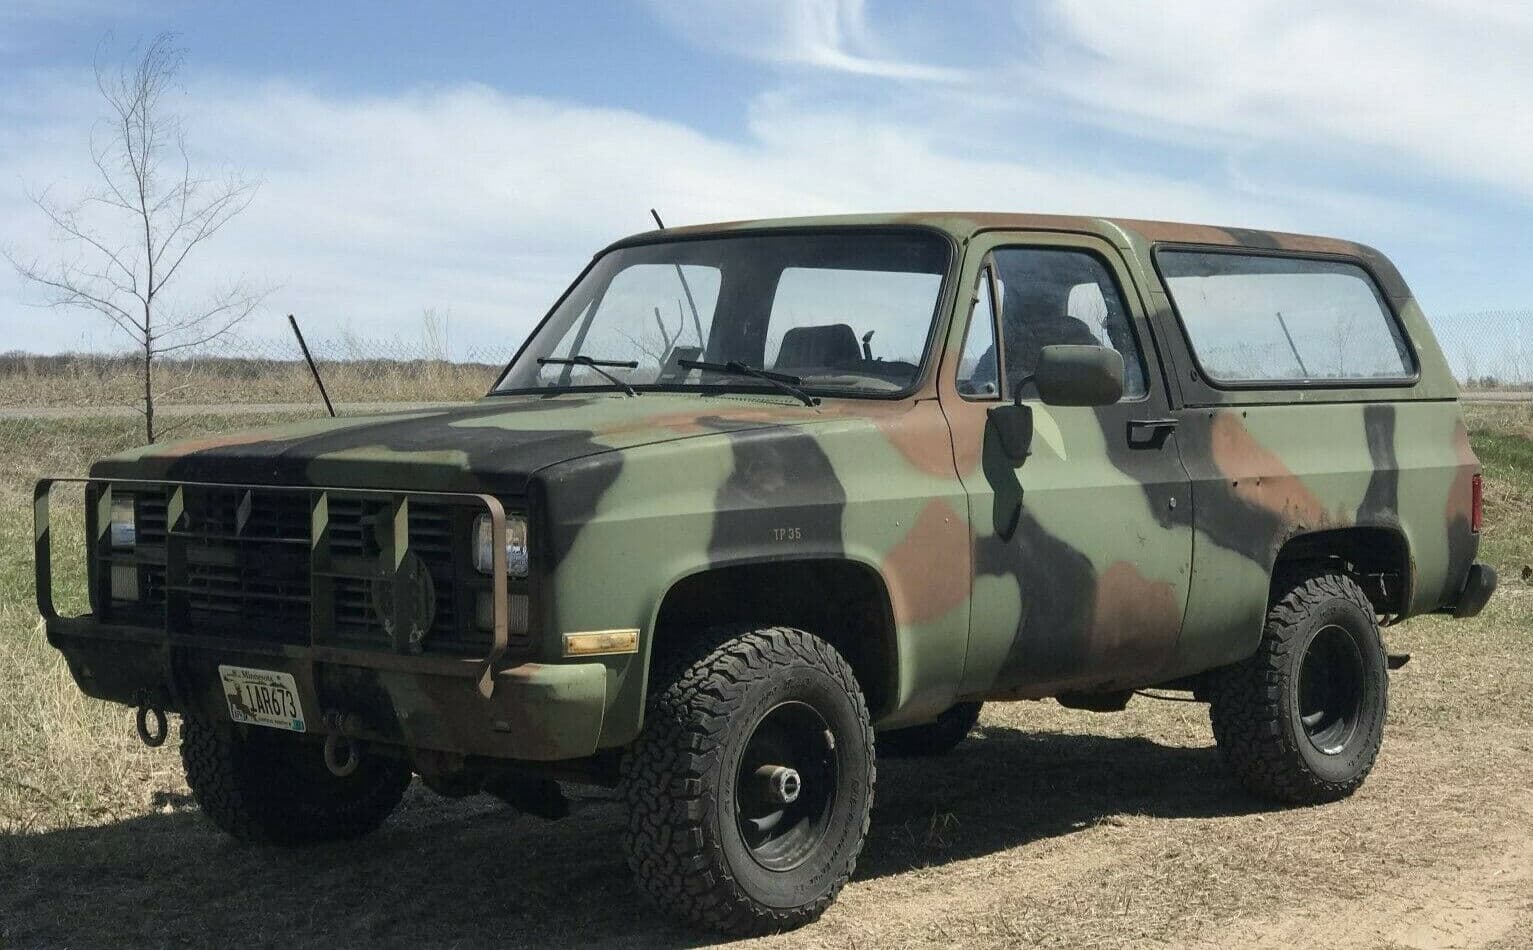
The only shots I seem to have of the Patton Museum’s CUCV:
Something you may not want to hear but . . .
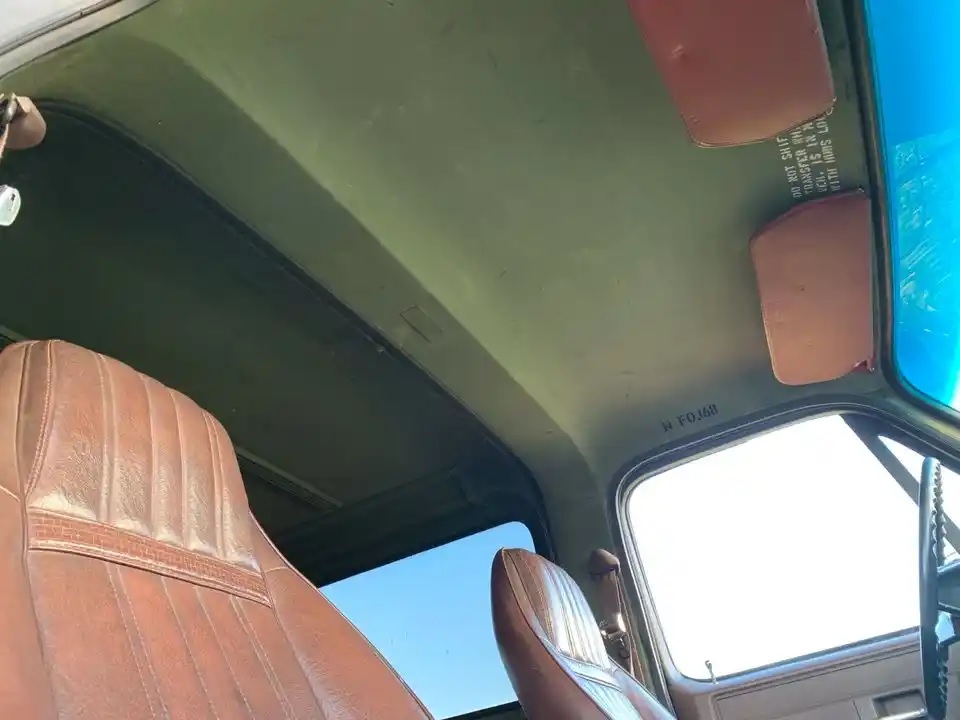
The roof on the Chevy Blazer/CUCV is metal and non removable until a cross line somewhere a few inches behind the driver’s head. (Like a pickup cab just with the rear window removed.) After that point the roof is all moulded fiberglass and removable. This roof design is intended to work as a built-in roll bar.
That was the major difference between the Chevy Blazer and the Dodge Ramcharger 4x4s. The Dodge had a full double layered, all metal top with internal strengthening ribs and an insulating 1 1/4 inch air space between the inner and outer metal skin layers. This design was much more substantial and much safer in a rollover, PLUS the entire top was removable not just the rear 2/3rds.
I regretted the purchase later, as the Dodge was a mechanical piece of junk but that all metal top was a great piece of work!
Thanks guys. I know all about the top/roll bar Mike. You can see it in your pic above and below.
I added it to my roof section as well.
Hope to get some done on it today. Holiday activities are really cutting into my bench time.
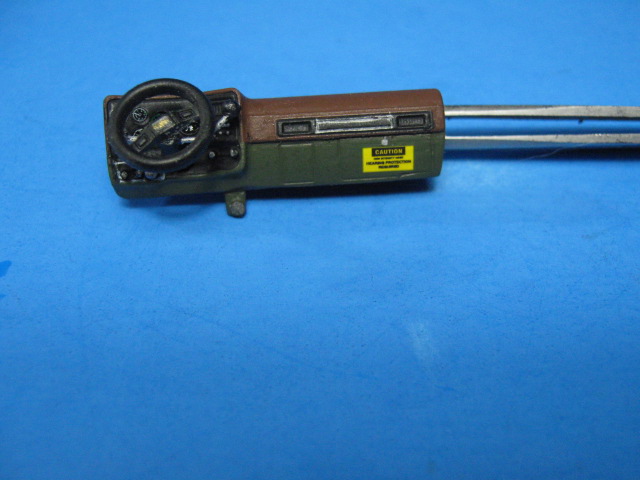
Work continues on the CUCV. I have been able to lay some paint on it. I painted it inside and out w/Tamiya TS-61 NATO Green.
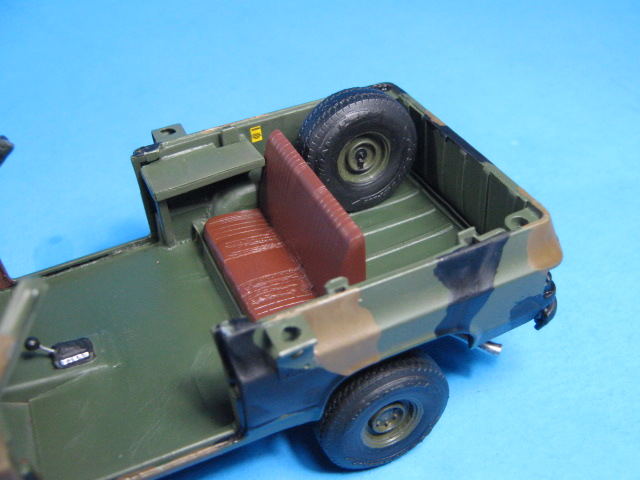
Here are some of the interior details so far.
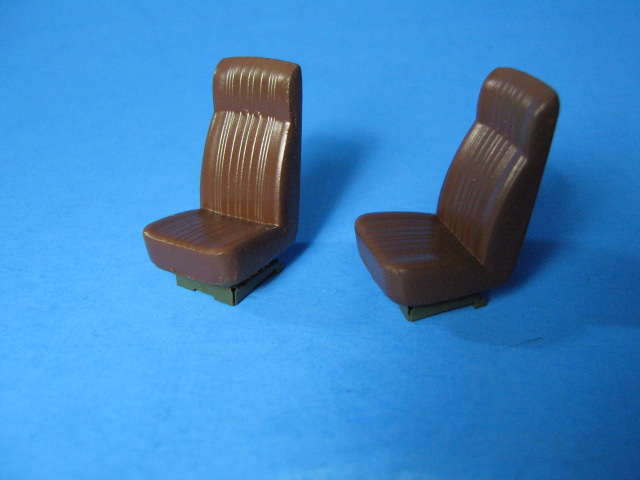
The seats were painted w/a red-brown spray can. The bases are left over PE from a Stryker kit. I think they were originally the rear jerry can racks, which were also in plastic and looked just fine.
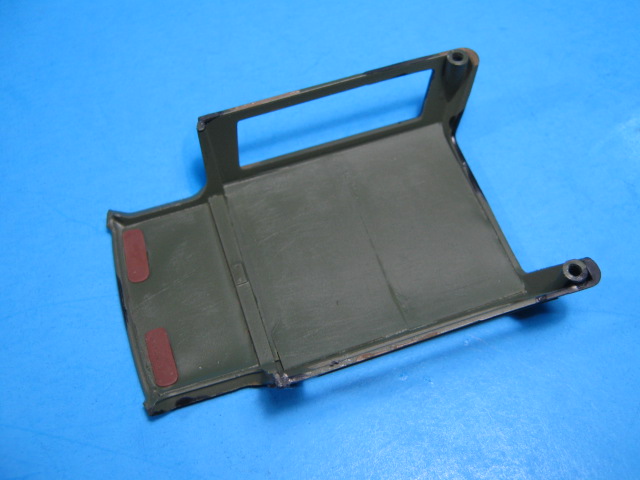
I also scratched up a spare wheel mount and radio rack using sheet and rod styrene.
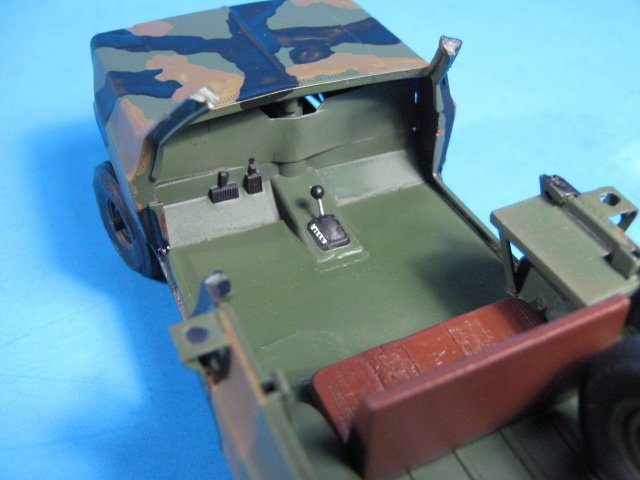
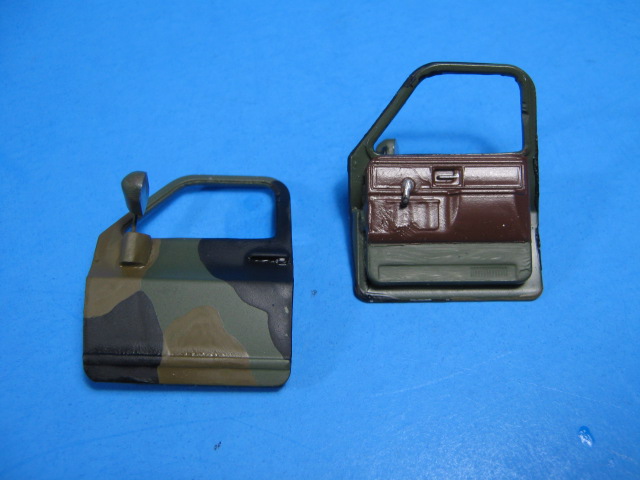
The same brown was used on the inside of the doors as well.
I added the sun visors from sheet styrene as well, also sprayed the same red/brown.
The dash board. I used 1/32 generic airplane decals for the instruments.
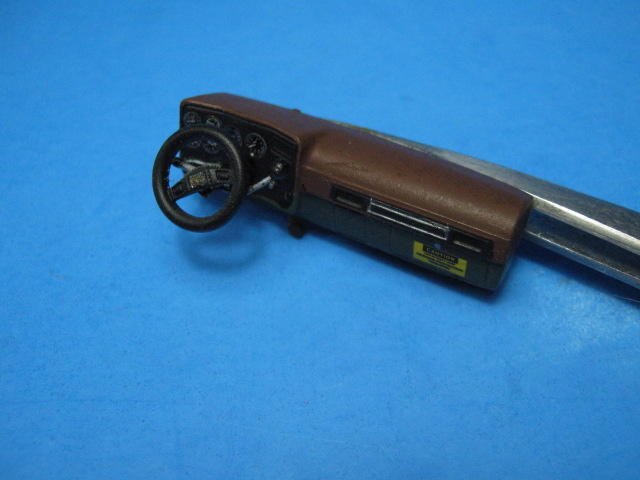
I hand-painted the brown and black camo on the exterior. I still need to blend it with a coat of dullcoat and them some weathering.

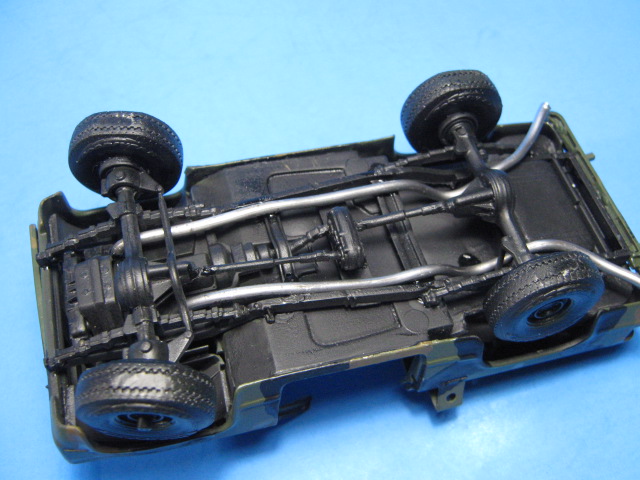
Lastly, here is a look at the underside. I added the dual exhaust from solder with the ends drilled out.
That’s some excellent scratchbuilding and paint Gino. You have really turned this model into an outstanding example of the real truck.
Looks like a hot rodder in the motor pool did a cat & muffler delete when he added the 3.5 inch stainless exhaust.
Looks excellent.
Nice. Looks good
What a great use of a diecast model!!
Thanks guys. Yeah, I put on a little bigger straight pipes. It should sound good.
Haha, yeah totally
In 1977 I commanded C troop 2/1 Cav 2nd Armored Division at Hood. My 2nd platoon leader 2LT Bill Horten had a test project for non-tactical vehicles and we had three of these things to test for usability. One was the Blazer, one was a Dodge Ram and the other I think was a Jeep Cherokee?
Worthless in an Armored Cav Troop but nice to ride around in on tank trails. I don’t recall if it was a MAASTER test or what but later the CUCV shows up. As I recall they were not camouflaged but Army OD green. Radio mounts, antennas and speaker boxes were as presented in these photos. During that period we turned in our M114’s (I loved them) for M151 recon jeeps (death traps!) and had Infantry and mortar sections in M113’s and the tank section were M551’s. Our Tow sections had M113 TOW on a stand in back, no armor protection. M578 and Gam Goats round out the mix. Gama Goats never ran, 113’s were bullet Proof and on the M551 you only h ad one fire Missiles and never conventional ammo. You just couldn’t keep a Sheridan working if you fired both in the same turret. I loved the ACT and the flexibility you had as a commander. I normally batteried up the Mortars at Troop level unless the platoon was detached for some reason… Model at 70’s ACT and you’ve got 7-8 different vehicles!
Thanks for the insight Hugh. Sounds like it was an interesting time.
As far as stripping the paint, you can try oven cleaner or Purple Power degreaser spray. If these dont work, try “Aircraft Remover” sold at Autozone, etc
The PP is also good for removing the chrome if needed.
Thanks Jeff; I’m not too sure how far I’ll pursue that. I might just scrub off the gloss with a fibre-glass pen and then apply primer. We’ll see. When? I have no idea - regrettably I have such a backlog of half-started/completed projects, I’m probably in double figures. Time for a New Year’s resolution or two!.