It’s building up into a monster rig… Nice work on the bonnet tilt as well. ![]()
1 Like
Hello guys,
Work and related problems have been keeping me busy, so can only get some time here and there. But have made some progress.
@Tank_1812 Hi Ryan, I think you know this problem - add lots of tedious detail, then close it in! It was fun to do - and yes, when the time comes, I’ll paint it up. It’s too bad, as the engine is pretty nice - a big Detroit Diesel, that would otherwise be cool to see. I suppose if a guy really wanted to see it, you could use it in a dio, maybe in a shop, with the doors open and dog house removed? Still tho, a lot of work and well, not much to see. Thanks for leaving a note -
@SSGToms Hi Matt, yes, plenty going on there and it does seem to have all the parts the real truck has - tho, as I mentioned to Ryan, I’m sure you too are familiar with this problem! Add all the parts, and never see them again!
@bwilt , thanks for leaving a note - you know, if you like scratch building you might just give it a go. I wouldn’t suggest you start with a full on project, just try and add things you feel good about trying. Maybe even think about the materials you are using and imagine if they will appear to fit in, once it’s done and you get it painted up.
I can assure you, I didn’t start scratch work with big projects - instead tried to open up panels and hoods/bonnets so that you could see what’s inside. While this might sound pretty easy, it was good practice for me to learn how to scribe in clean cuts that are square and not out of scale, and then to figure out how to rehang the parts to look like they’re operable.
@Johnnych01, well, yes - it’s getting big and heavy! And thanks! after the work under the bonnet I want to be sure and be able to see what of it I can!
For today’s update, work on the winches. The kit comes with two 30k winches, and an operators position, which makes sense as they were used to assist with equipment and material loading on a trailer. Bed trucks though, function a bit differently as the winches are pulling objects directly onto the bed. Some of the bigger trucks also have three winches, two smaller and one larger, and operation from in the cab, or at the side of the truck.
For this, I kept the two kit winches and reworked the deck to include a big winch (representing something between 50k and 70k lbs) and the rack that goes with it:

Above, you can see the kit winch, my scratch winch, hydraulic valve block, protection racks, and storage bin, and from another angle:


And from full bed length:

The rack surrounding the winches is for safety - keeping people and things out of the drums/spools, and serving to provide some cab protection if the cables snap while pulling:

There’s a cab “headache rack” using evergreen and mesh, and the tubing, made from sprue remnants.
I almost forgot, a picture of as much of the scratch built winch as you can still see:

This is a bit of a junk box special - some remnant wheels cut up, various other parts, and some evergreen.
Next up will be either the bed, or various chassis mounted parts like fuel tanks and tool boxes. I might build the bed first, then add the other parts to be sure they fit.
Ok, thanks for having a look and have a good weekend,
Cheers,
Nick
7 Likes
Nice rack! ![]()
My spotlights are up here. ![]()
—mike
2 Likes
This does indeed have quite a rack! ![]()
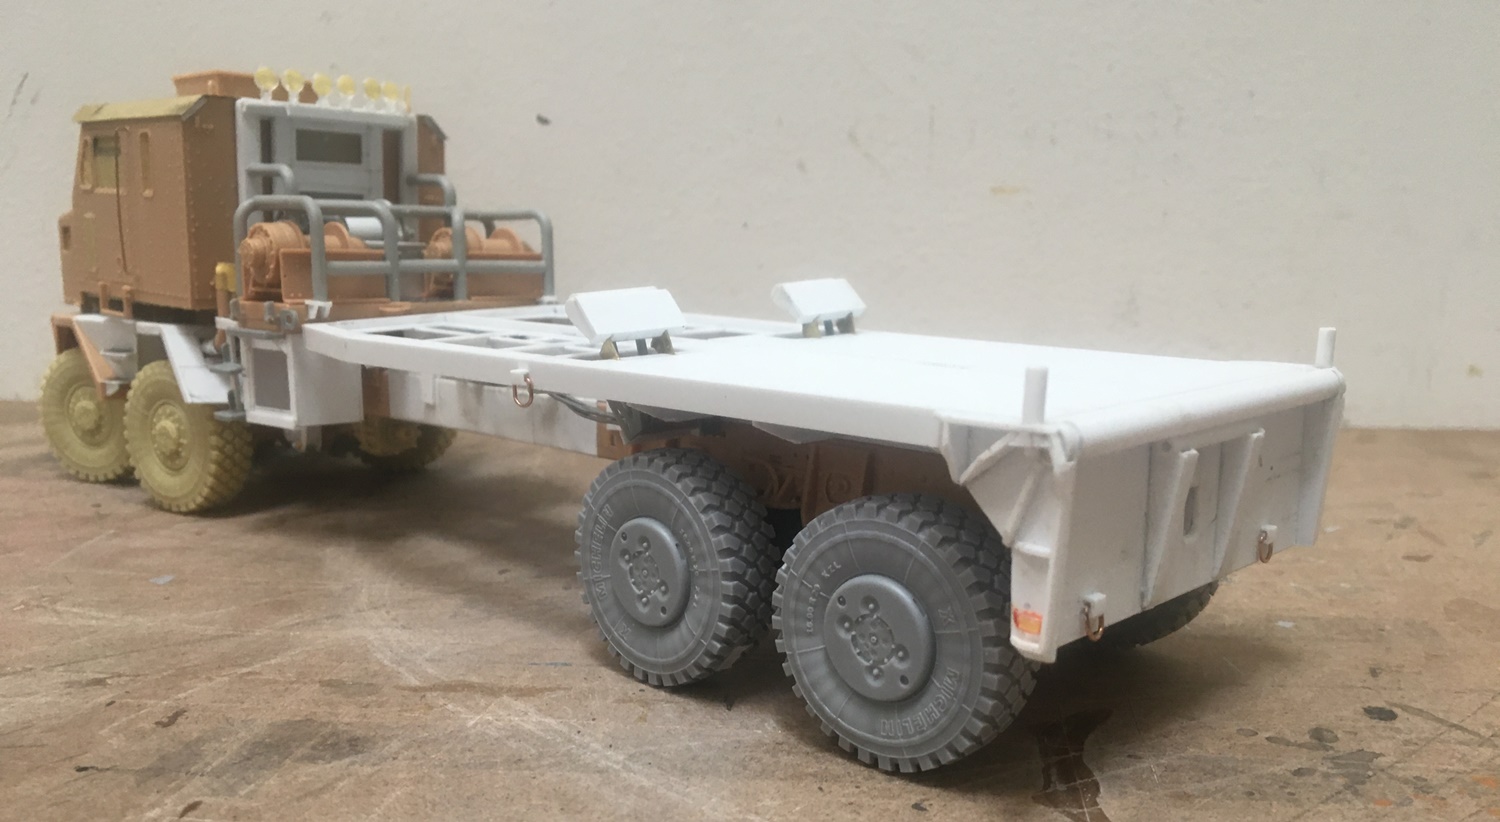
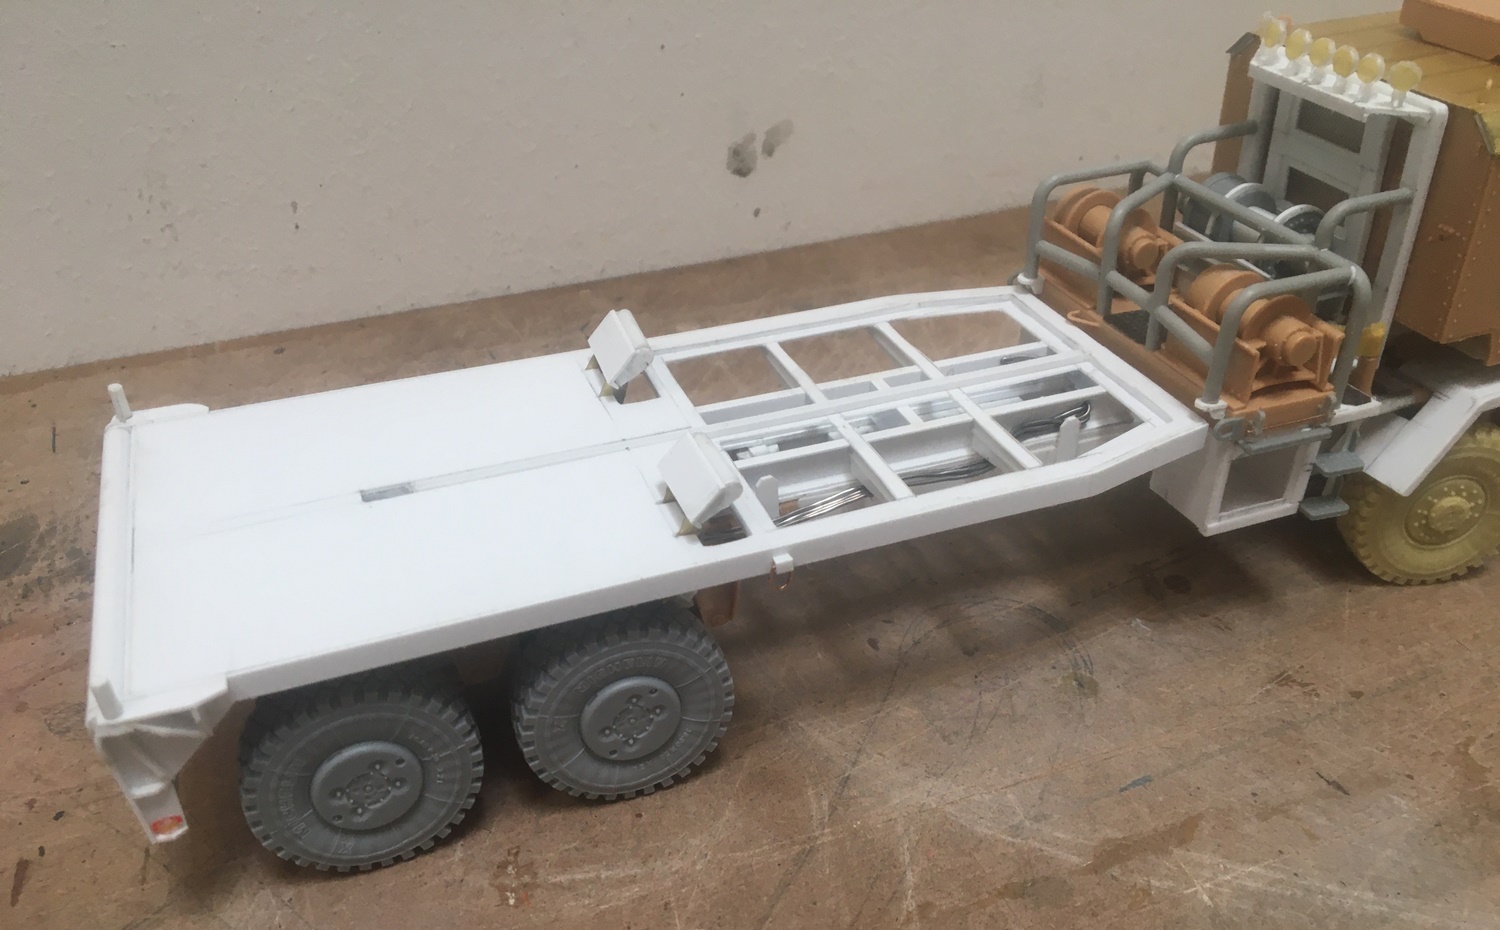
And now, it has a bed too:

Sorry the images are hurting a bit because of low lighting. Nonetheless, here they are.
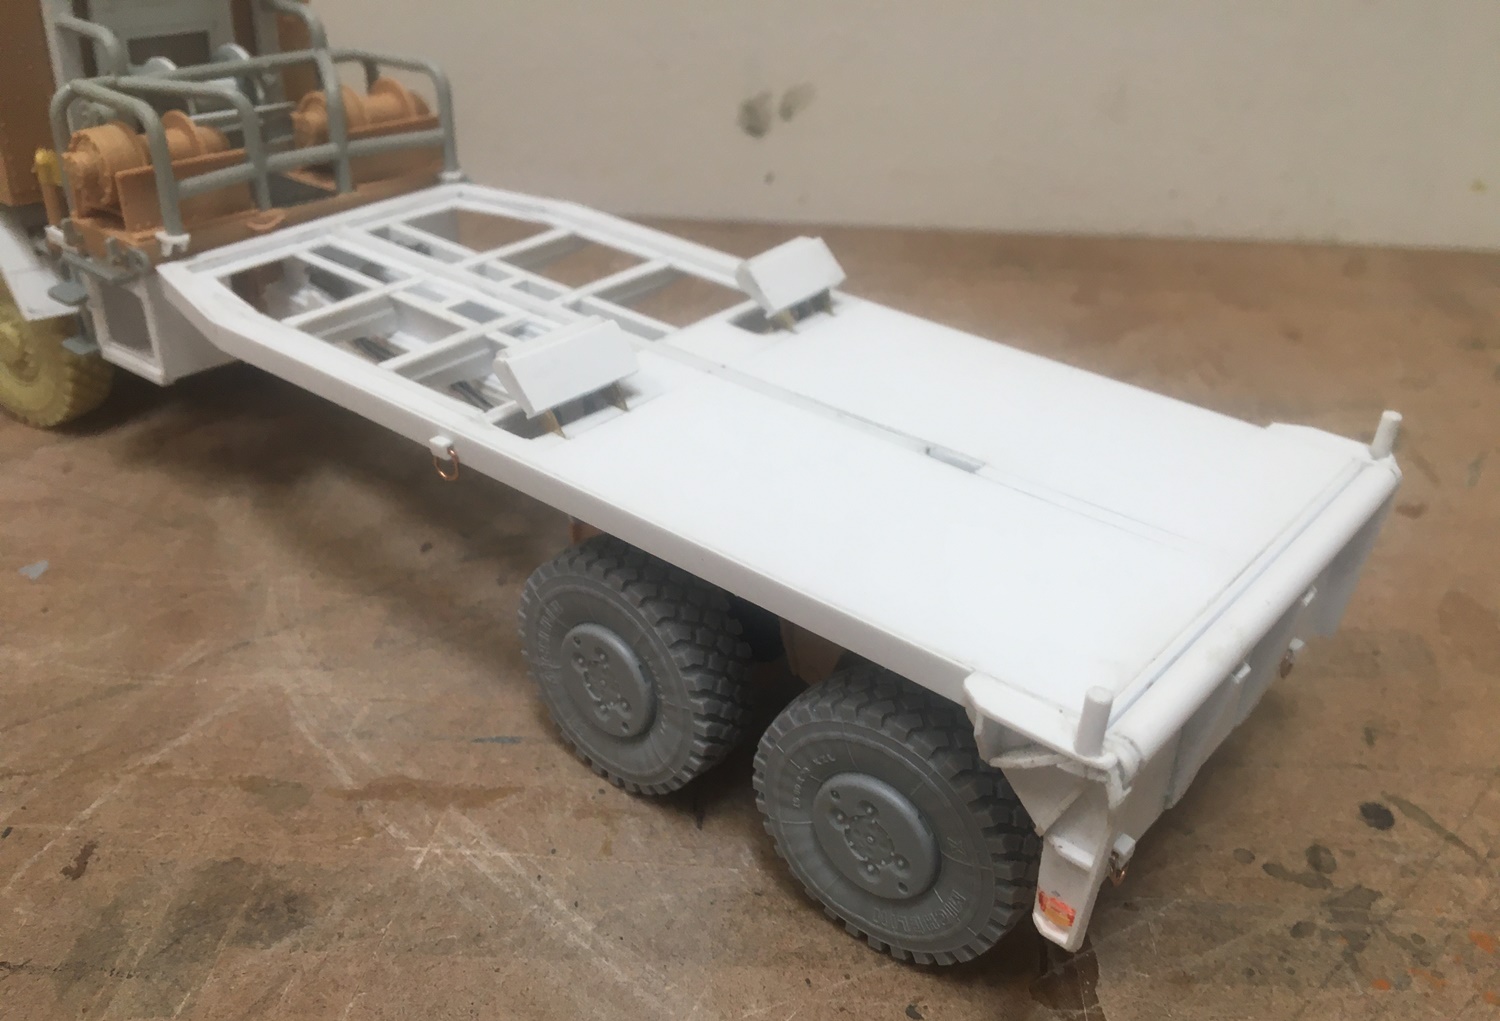
The bed is close to being done:
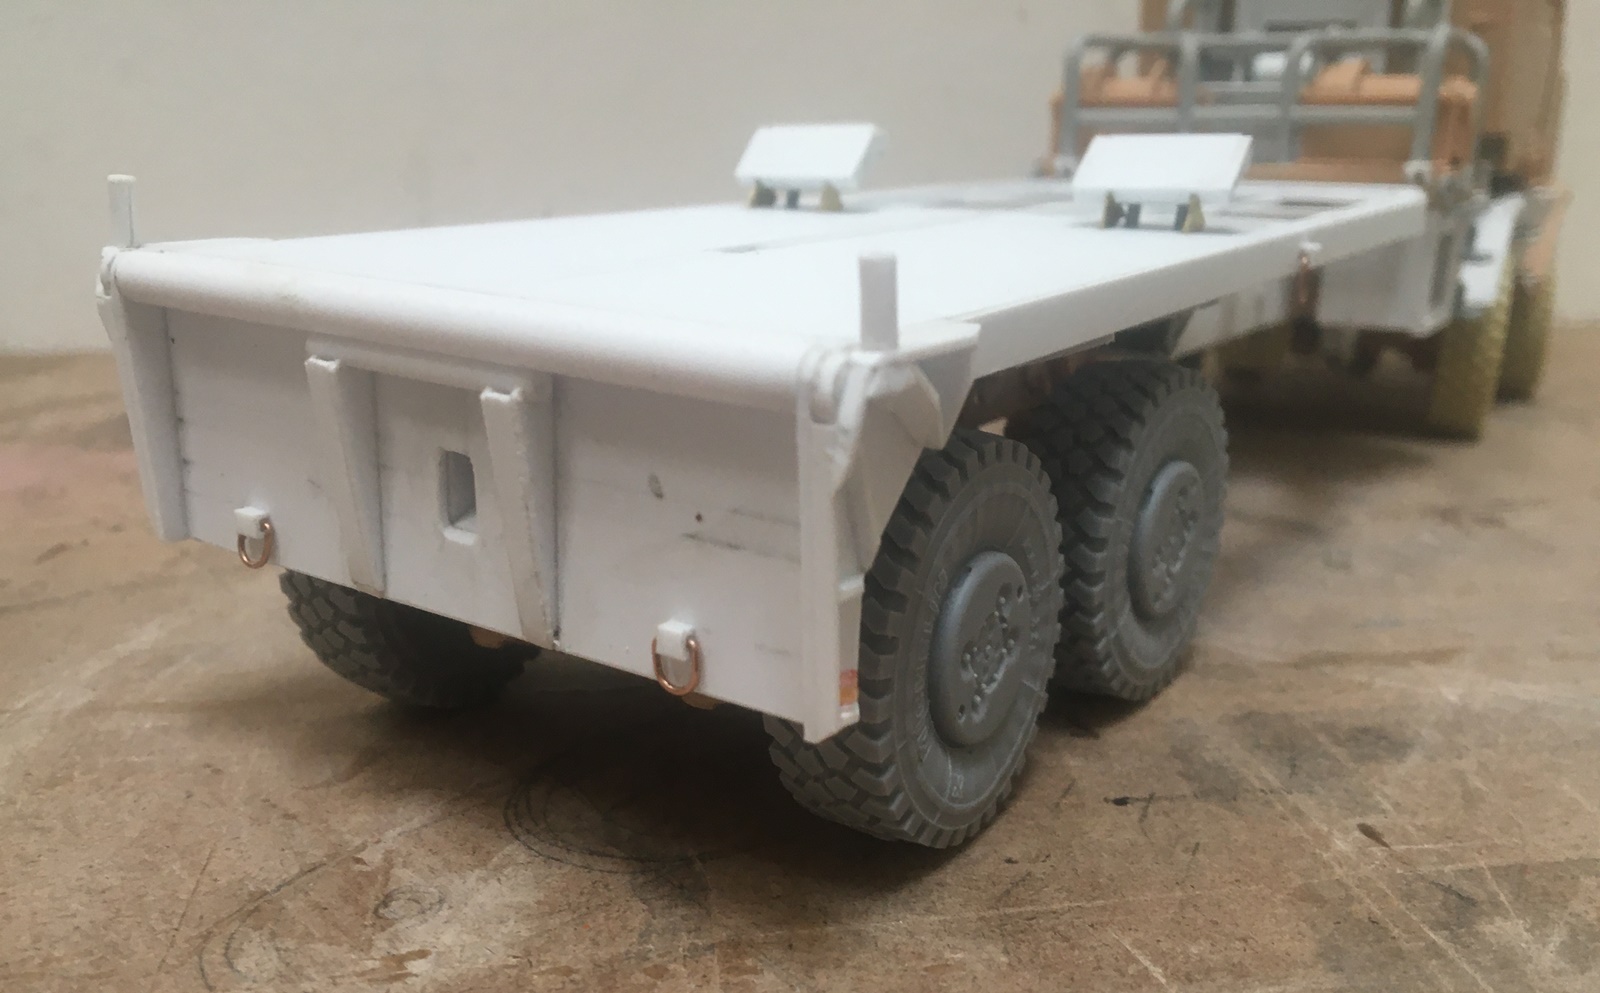
And as is often the case, there is more to this than a sheet of evergreen. The bed tapers toward the front, and in that area will be wood deck fill, and what’s hard to see is a trough for wire cable in the center, which drops down and opens again in the rear. And a few “D” rings. The rear has a full width bed roller and fairly elaborate sides.
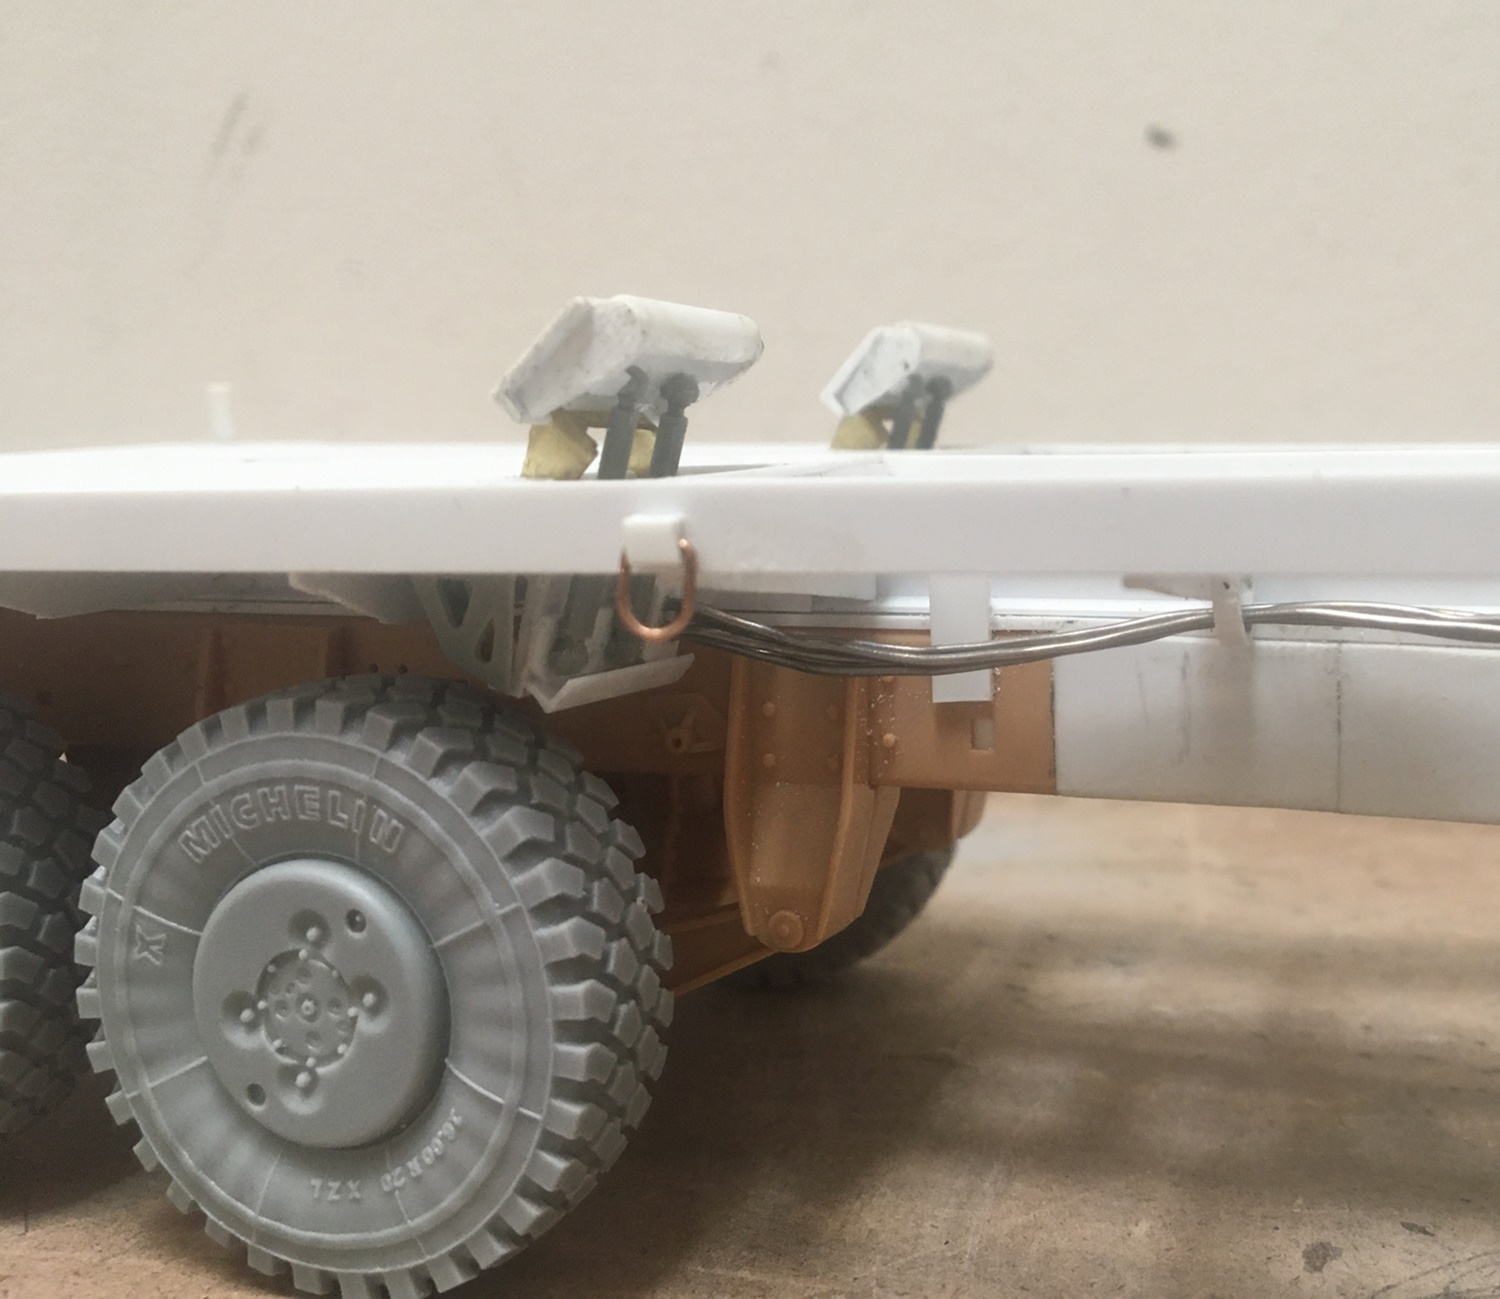
Toward the middle are two hydraulically activated risers - which are evidently used for leverage, and balance when loading. These use brass brackets, remnant kit parts, old sprue, and evergreen - perfect. Alas, I never did all that well with physics, so I won’t over-postulate on the roll of these mid deck rollers! ![]() The picture above has two sets of these rollers - rear and mid - and, no, I don’t know why??? The type I’m using are based on some I saw on Western Start 8x8 truck - beyond that…
The picture above has two sets of these rollers - rear and mid - and, no, I don’t know why??? The type I’m using are based on some I saw on Western Start 8x8 truck - beyond that… ![]() who knows?
who knows?
So here we are - thanks for having a look and happy model building,
Cheers
Nick
7 Likes
I really must have strong words with the butler about why I’ve only just seen this thread, you just can’t get good staff nowadays. This latest showcase/showstopping creation is already doing my head in (again…maybe the butler was taking pity on me), especially the white-work. Simply brilliant Nick ![]()
![]()
![]()
4 Likes
Proper craftsmanship !
2 Likes
I’m running out of superlatives Nick. My mind is blown. Incredible scratchbuilding talent.
3 Likes
The mid deck rollers are not for loading, but for unloading.
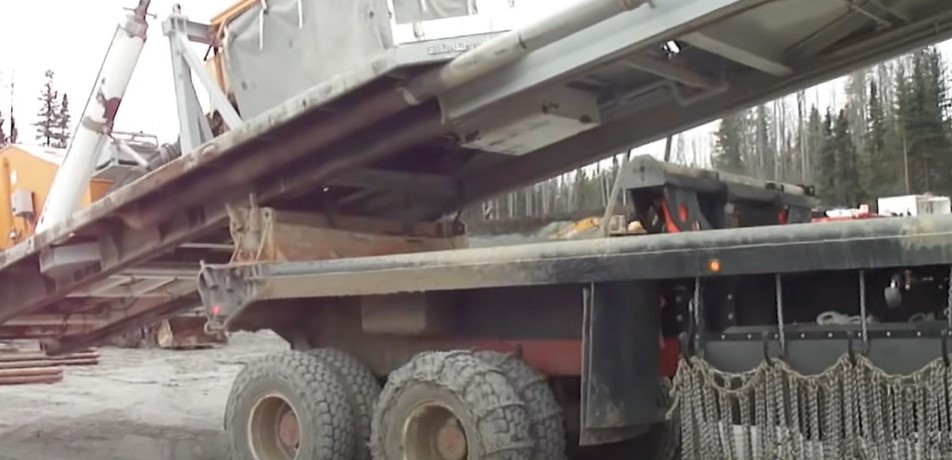
Some bed truck information:
Bed trucks are typically used on the lease to move the loads to positions where other trucks can load them on to their trailers to haul them to the next site, since the leases are typically congested. For this, they usually just leave the load suspended on the rear roller like a pendulum so it’s easy to drop, similar to your photo.
If they do suck the load onto the bed fully (usually for short moves that don’t involve main road travel), typically the only way to get it off is to slack off the winch line, drive forward, and hit the brakes, hoping it slides. This usually takes a couple of tries and worst case another truck has to latch on to the back end to help pull it off. The mid deck rollers avoid all this by lifting up the skid off the bed to help get it moving. They are most commonly seen on trailers meant to haul skid shacks since these trucks usually work alone (and trees are not always readily available to latch on to! Lol!). Not too common on bed trucks around here but they are a safer way to unload and are becoming more so.
2 Likes
Looking Good! I like the bed you have! Can’t wait to see the fin ished model.
2 Likes
Hello gents, thanks for having a look.
@Dioramartin, hi Tim, well maybe the butler didn’t want to clog your inbox with somewhat obscure projects ![]() Unlike the high tech effort you are in the middle of this the opposite - raw and scrap materials, assembled with no instructions, some basic understanding of the subject - and several leaps of faith! fingers crossed! thanks!
Unlike the high tech effort you are in the middle of this the opposite - raw and scrap materials, assembled with no instructions, some basic understanding of the subject - and several leaps of faith! fingers crossed! thanks!
@Johnnych01, hi John, well, thanks I’m trying. I thought about you along the way, when I was working on the cab. As I recall, you hade lost either the window frame or the protective support that surrounded it on a recent build. I noticed, the overall geometry of this cab windshield/screen, appears to be very similar to the design of the same on the HEMTT. I hadn’t noticed before, tho I suppose it makes some sense as the manufacturer is the same.
@SSGToms, hi Matt, thanks very much - you add to the pressure of not wanting to screw it up! ![]()
@jfeenstra, thank you for this summary. I was having a hard time imaging that elevating something would make it easier to lift! Your explanation makes perfect sense, and I appreciate you sharing this info!
@Bigred69, thanks! I’m working on this as I can find the time. I want to add a few bits to the bed, and have started assembling tanks and boxes for the chassis. I’ve also begun thinking about painting this. For now, I’m planning a good paint job, without much weather, but as this is an older truck (production began in the early 90s), who knows? Maybe this will look somewhat used? or, not - a clean truck might be fun too -
OK, thanks again for having a look,
Cheers
Nick
4 Likes
Hi model builders,
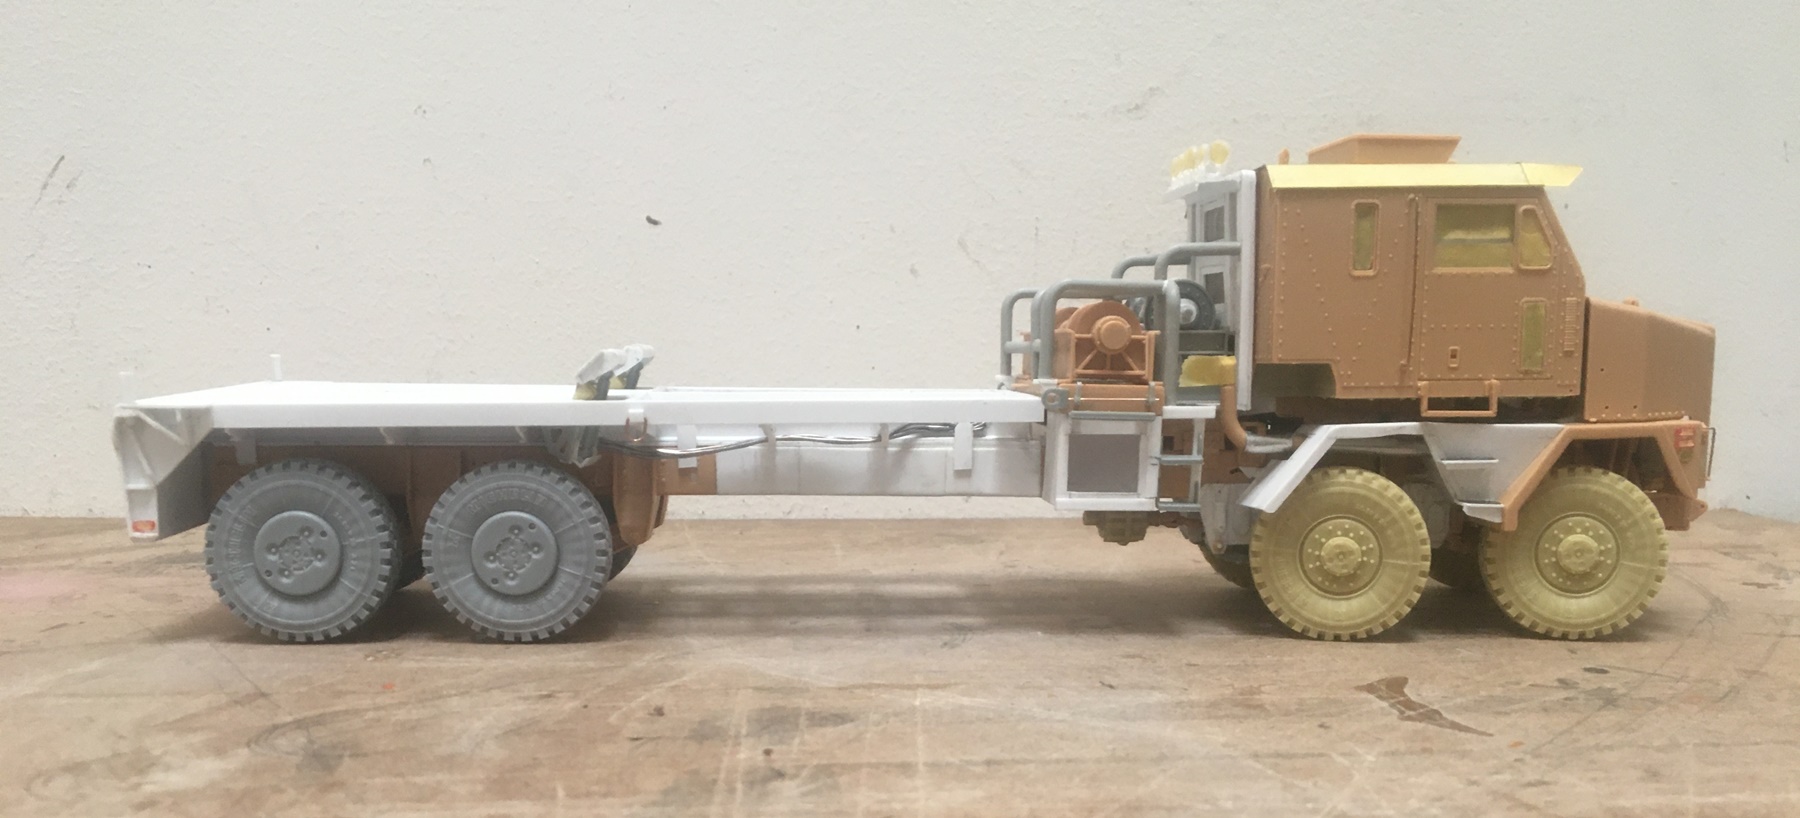
Only a brief update today. I’ve kept after this truck, and have added the rear long driveshaft, carrier bearing, tanks and boxes to the chassis, and a front bumper. Please have a look:


Despite there being a pretty big grill guard, there is still enough room for the hood/bonnet to tilt forward enough to see what you can of the engine. The only real hang up I had was seeing that my left front fender was installed too low, as it didn’t match the height of the other side, and it was obvious that it didn’t because the bumper sits level. Out came the knife and the two are now set at about the same height. I’ll add some bolt heads and so on next.
So it’s coming along - mostly small details here and there. I thought about adding more hoses/lines to the area under the bed, but, as it will be nearly impossible to see once done, maybe not .
OK, thanks for having a look,
Nick
8 Likes
Looking good. It is coming along nicely.
3 Likes
This monster is looking fantastic Nick!
4 Likes
I’m in real awe of how people can achieve builds like this … It’s spectacular ![]()
4 Likes
Looking great. like the scratch building.
Cheers,
Ralph
2 Likes
Hello gents,
I’m close to wrapping this up. It’s painted now, and I hope to get going on adding some light weather, then, outside for some photos! The 49ers start playing in about 45 minutes, so a perfect time to add a few details and start adding a light touch of weathering.
As of now, the wheels are glued on, and the rest just dryfit:


I decided the colors should look like something of a big company - not fancy, but pretty clean - I had to use the alu wheels up front! I’m assuming the big hubs up front house planetary gear ends on the axle - which are fairly common on heavy off road trucks.


Threading those winches was a PITA and took forever!! I like the wood insert in the bed - this came from a Western Star 8 x 8 example.

I’m pleased with the bumper - these heavy, off-highway vocational trucks don’t have crumple zones - just a strong bumpers and this does the trick.


As for the big Detroit Diesel, well, it’s in there - just not visible! I thought about adding some wires etc on the firewall, but nah - not on this one. I set the hood up to be operable, so once installed, even less of this will be visible…
And for a scale comparison:

You can see this is indeed a big truck -
Ok, the plan is to finish a few details like adding straight pipes, marker lights tie off the steel cables, and so on, then weathering and to take it out for some pics
Thanks for having a look
Cheers
Nick
14 Likes
That looks awesome. The finish is perfect. You can’t see any of the additions. Great job.
2 Likes
Superb build Nick. Love that blue livery you have given it … ![]()
![]()
2 Likes
OK I love this build and am jealous of your scratch building abilities, but how did you get an MRV and if you scratch built that I really want to see that process.
2 Likes
Wow, that’s the first time I’ve seen a M1070 built in to a Bed truck! Love the details you put in to the build! Well Done!
2 Likes