M1070 Conversion

Hi model builders,

Thanks for having a look. I hope to have this finished today, and have final pictures posted this weekend.

@HeavyArty hi Gino, thanks very much, I appreciate your comment about not being able to see the addition. I find that to be almost as hard as building whatever modification you’re trying to make. Your builds usually succeed at it!

@Johnnych01 hi Johnny, that’s great to hear. I wondered about colors for too long, and eventually just went ahead and painted it - with fingers crossed. I think a touch of light weather will push over the finish line.

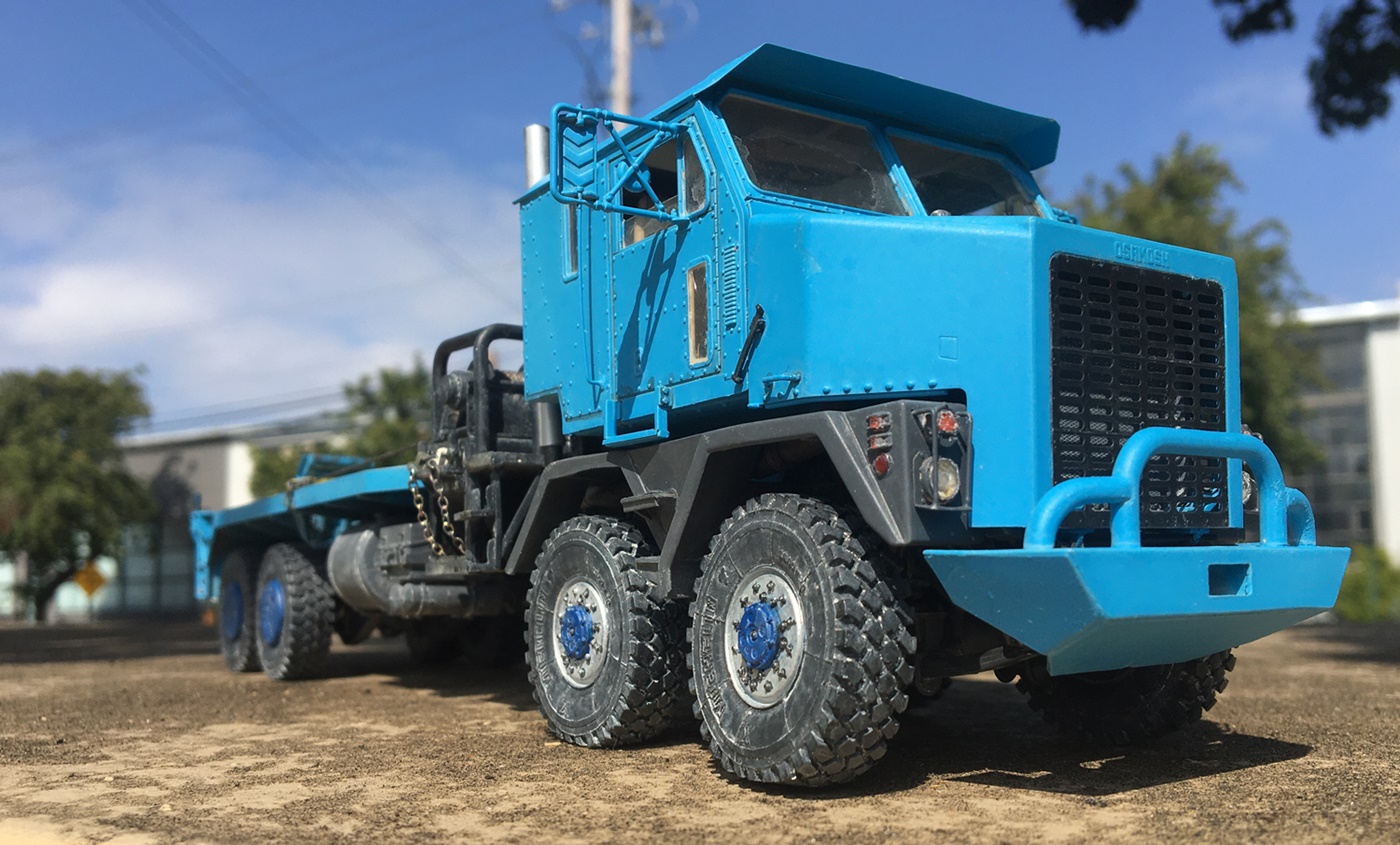
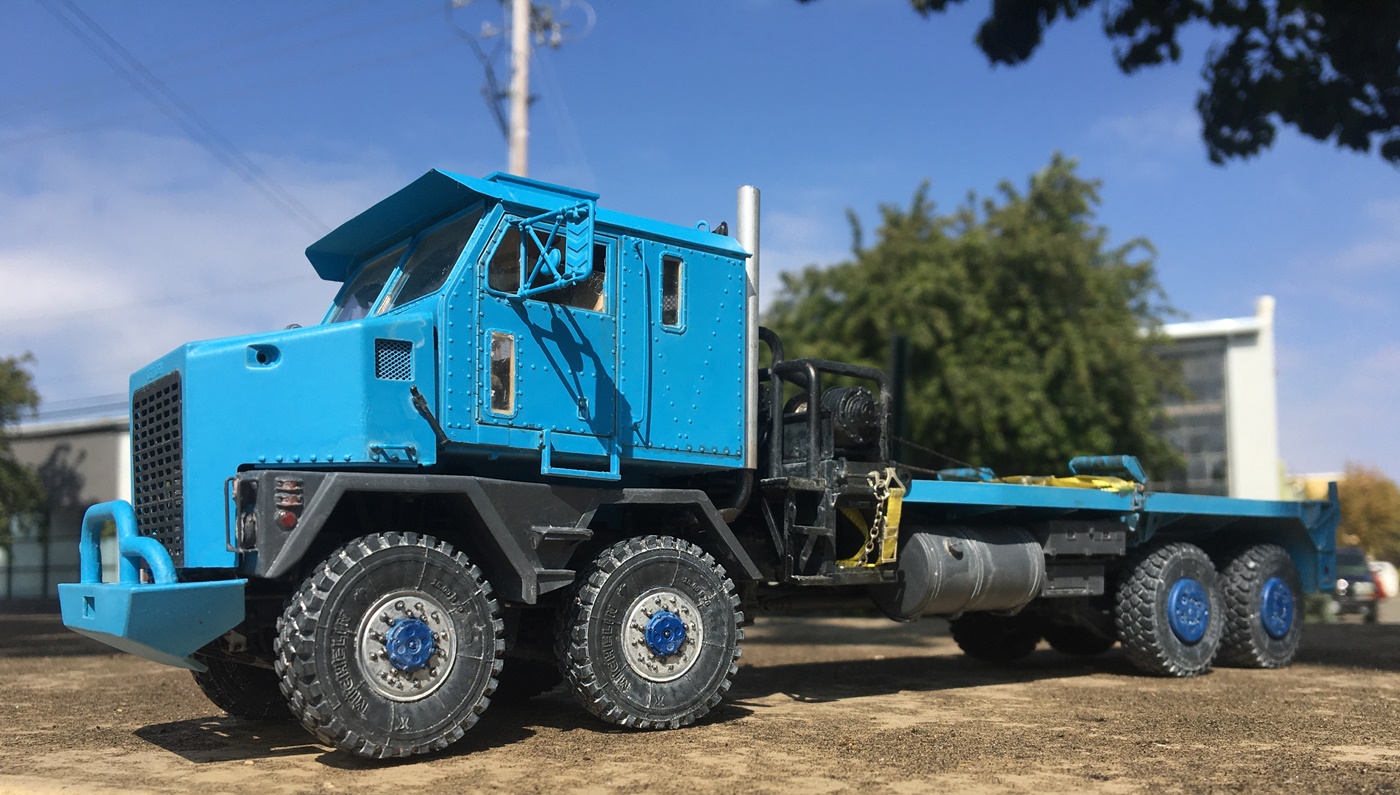
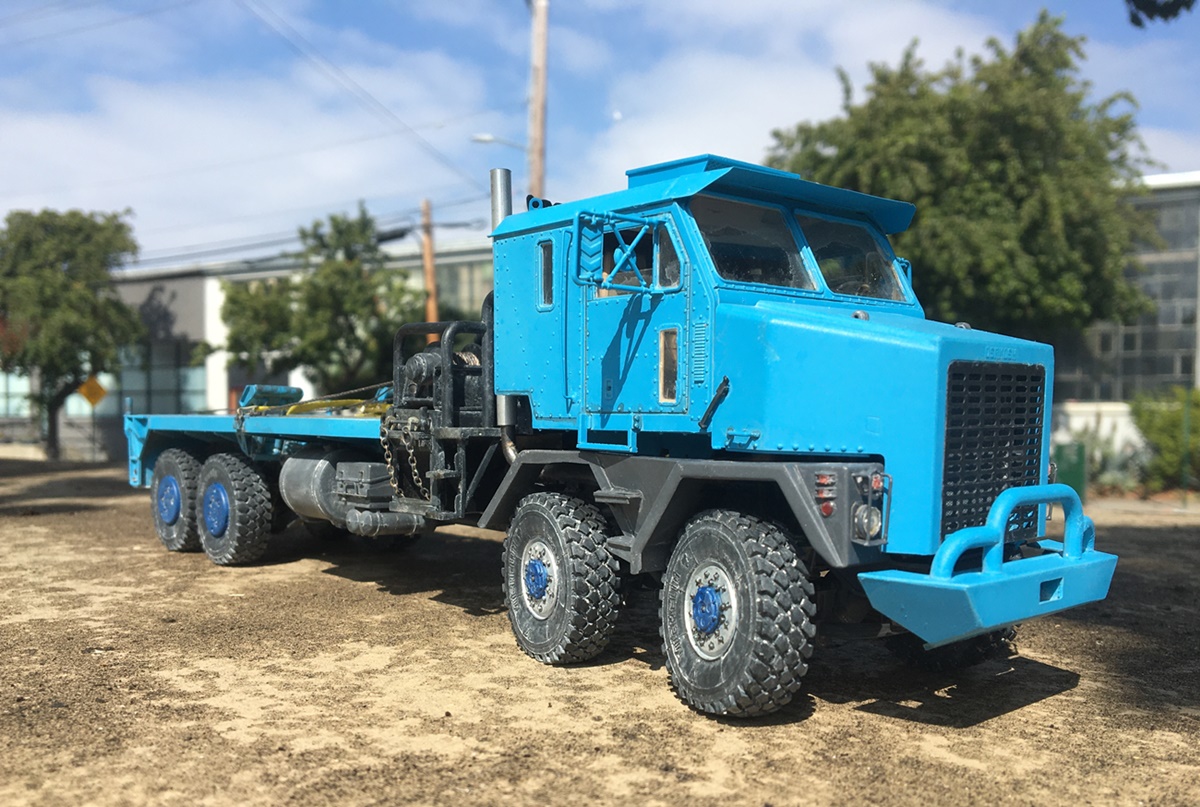
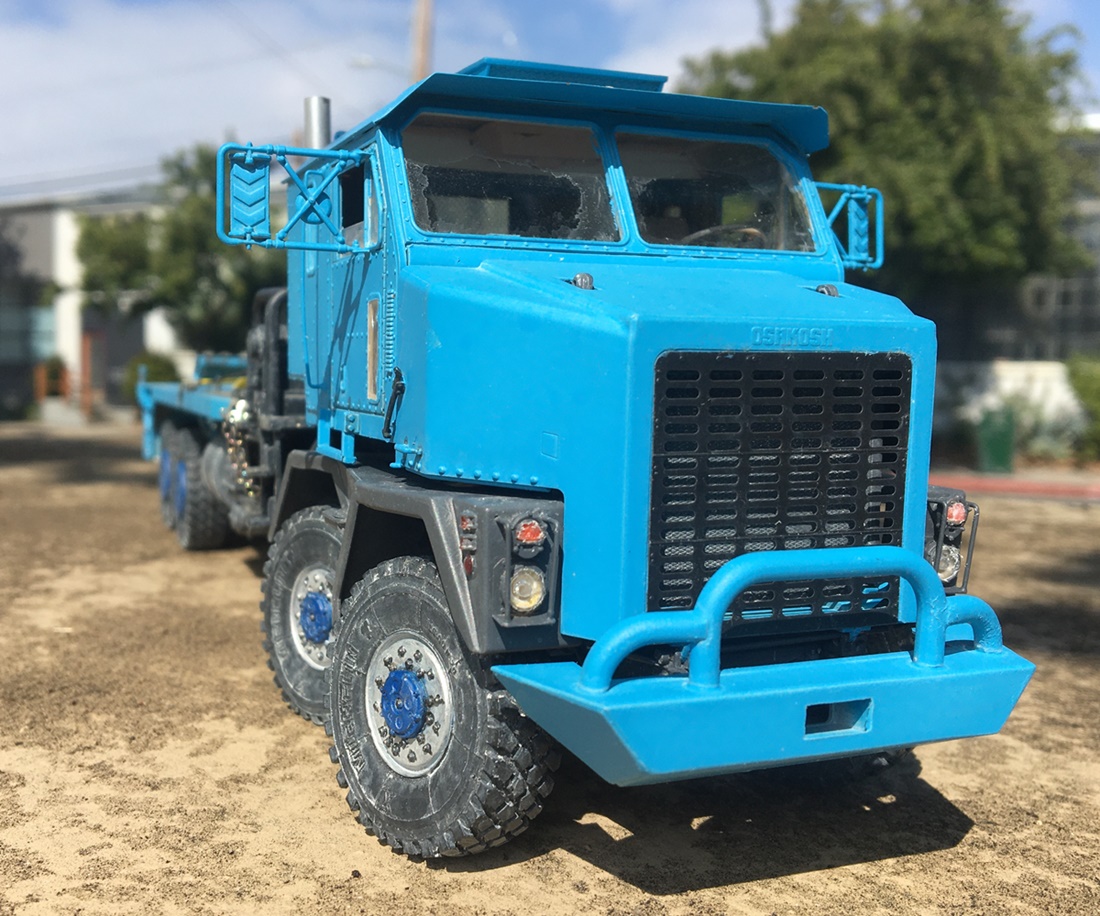
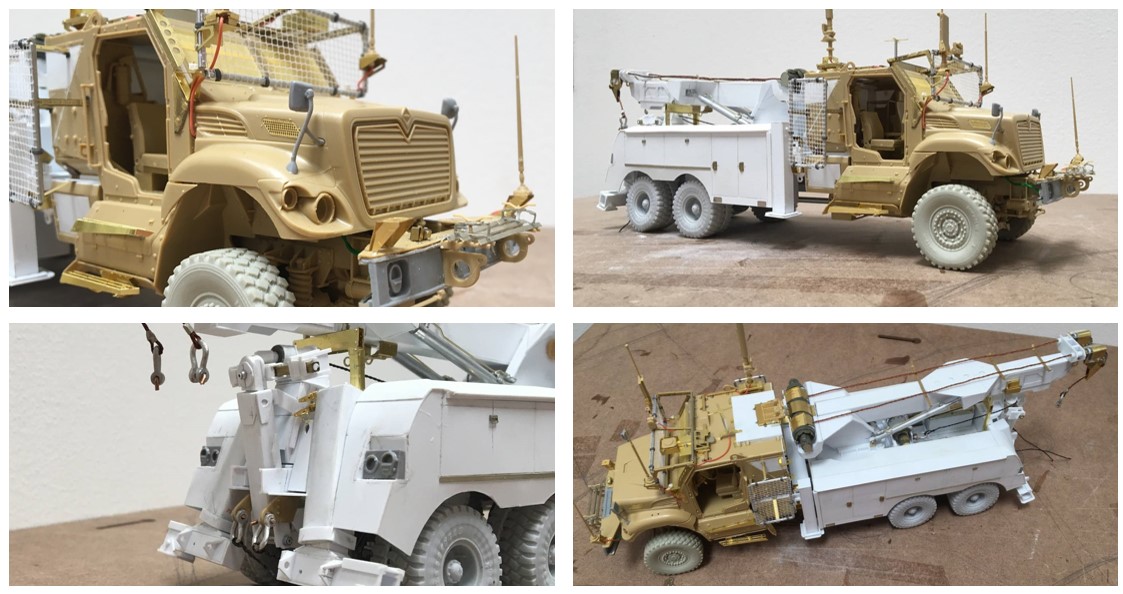
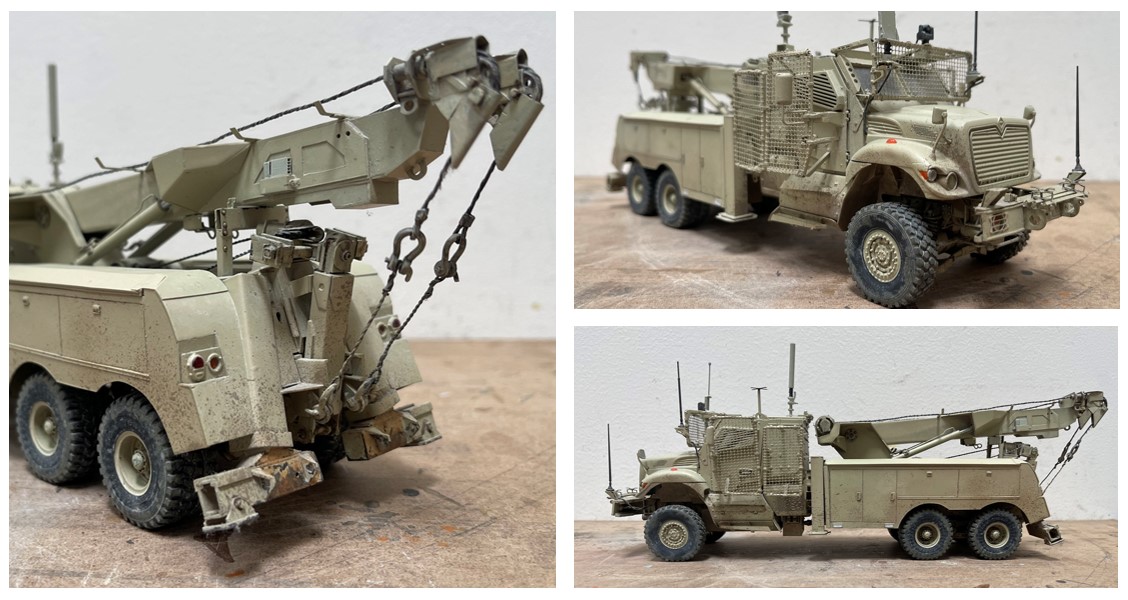
@Brantwoodboy, thanks - glad you like it so far, and yes, you have a good eye. That is an MRV I built for an Armorama scratch build campaign a few years ago. The cab and front suspension is from the Kinetic MAXXPRO kit.

I can’t remember what the rear chassis is though? Maybe an M1083? Whatever kit was, it has a walking beam, which the real truck uses. Writing this made me wonder what I actually did, so went back and looked.

It appears the axles might be from the M1083, but the leaf springs and walking beams don’t appear to be the same - it has all sorts of mods - the leaf springs and walking beams look heavier, and there are helper air ride parts! Hmmm, I seem to have really gone for it back there :smile:

Thinking about this more, for another project I did a lot of searching for info on MAXXPRO suspension - live/solid axle on the older trucks, and independent axles on the newer versions, so had many pics of what the parts looked like, so likely used them as a resource.

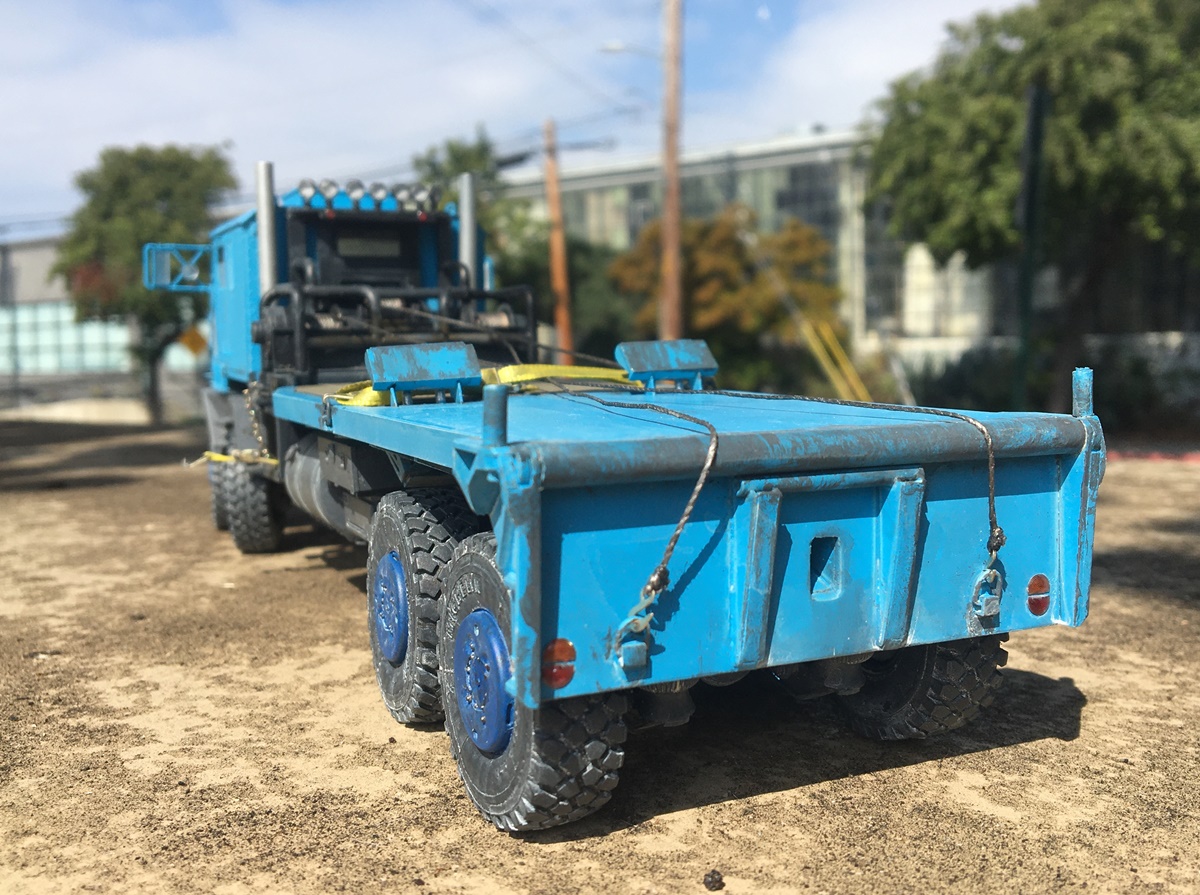
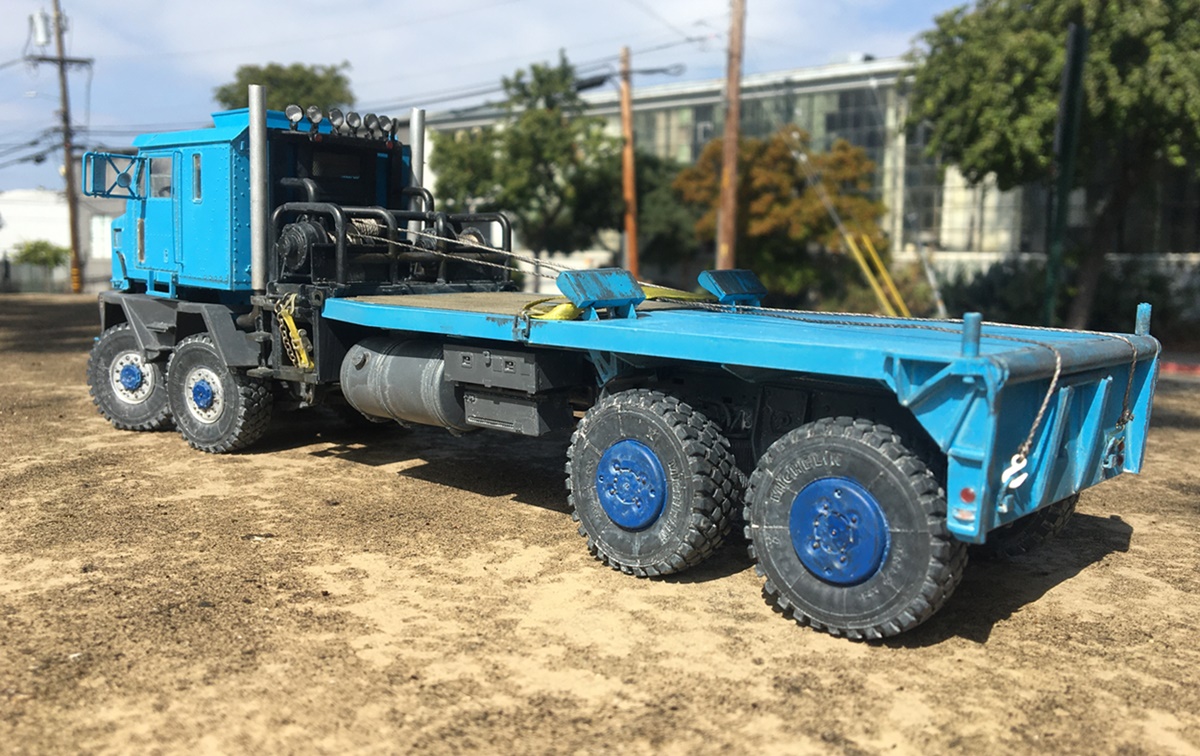
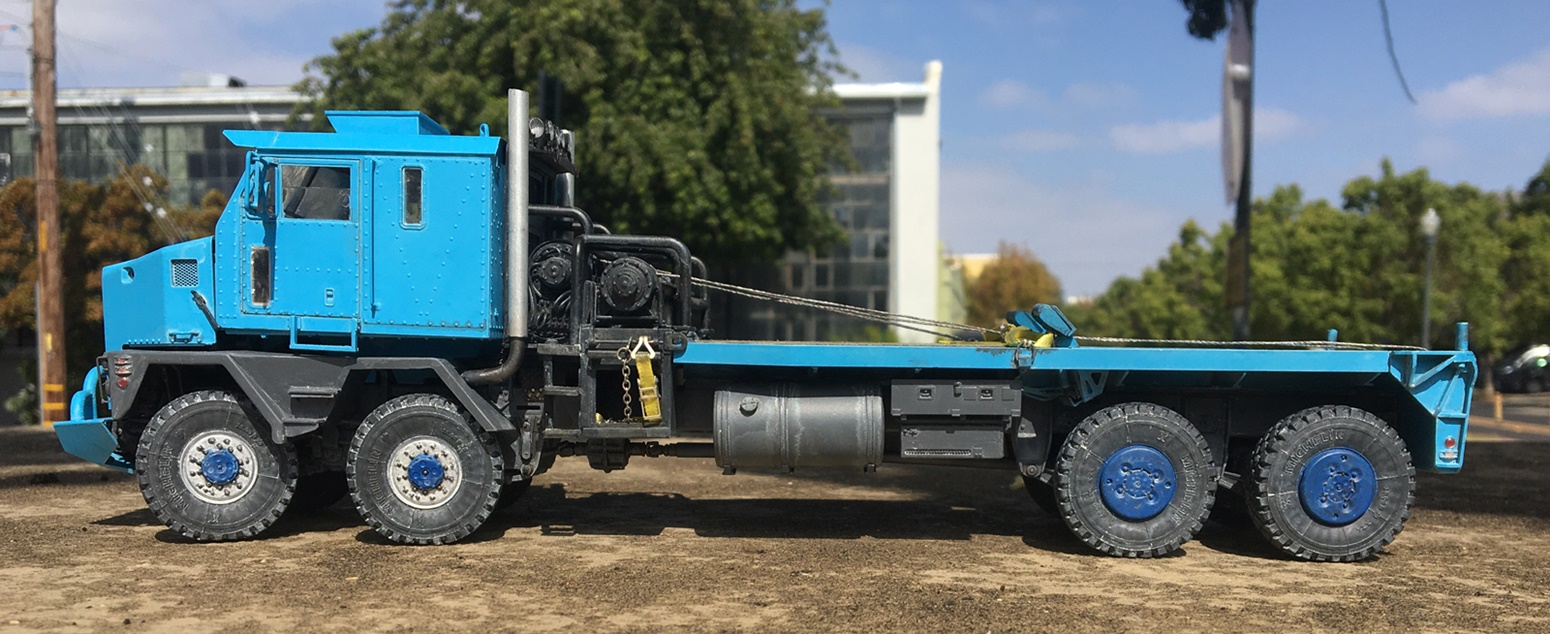
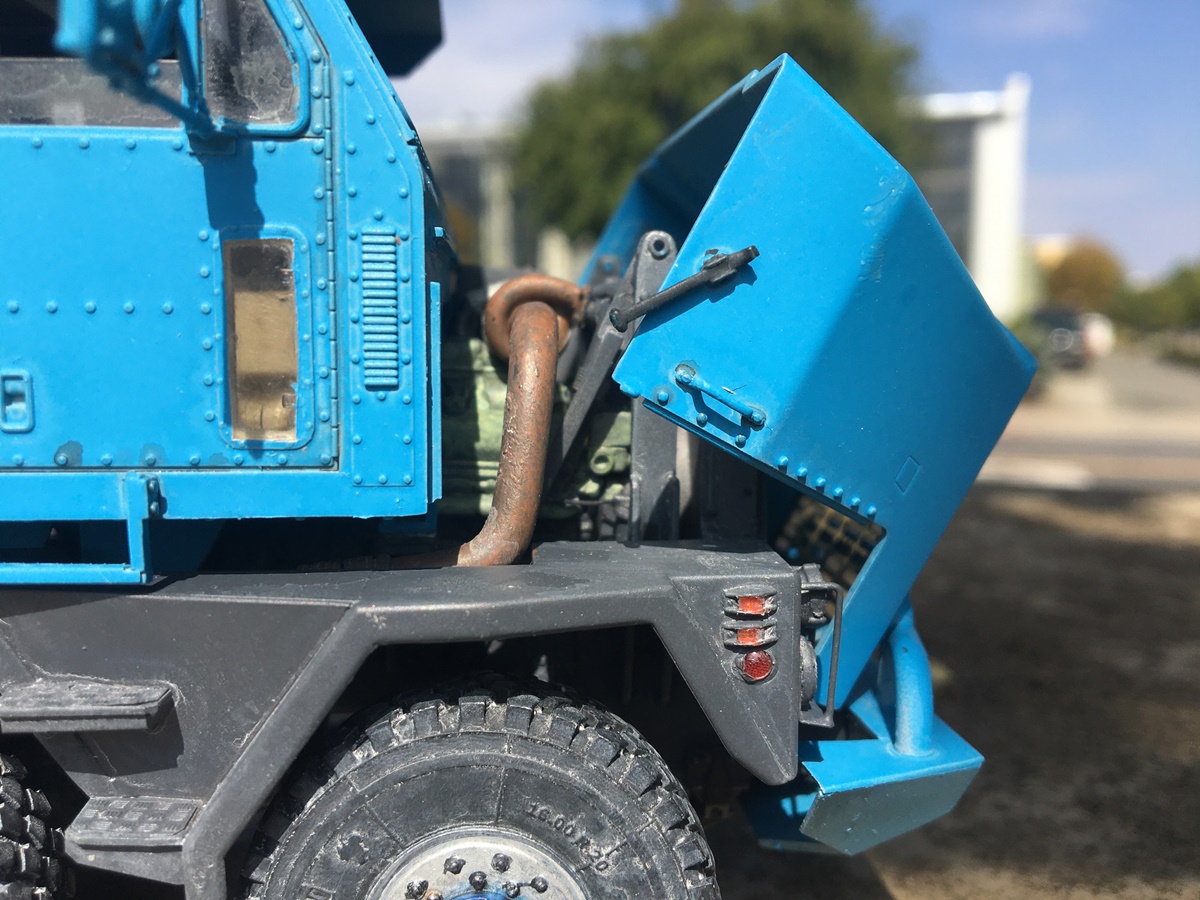
A big part of the challenge is mating the two, as the MRAP (cab) has a V-hull, versus traditional frame rails (which are under the bed), which the M1083 (and most other) 6x6s use, while keeping the axle centerlines the same height. The good news is all six tires/wheels sit level on the ground. The rest is evergreen and junk box extras.

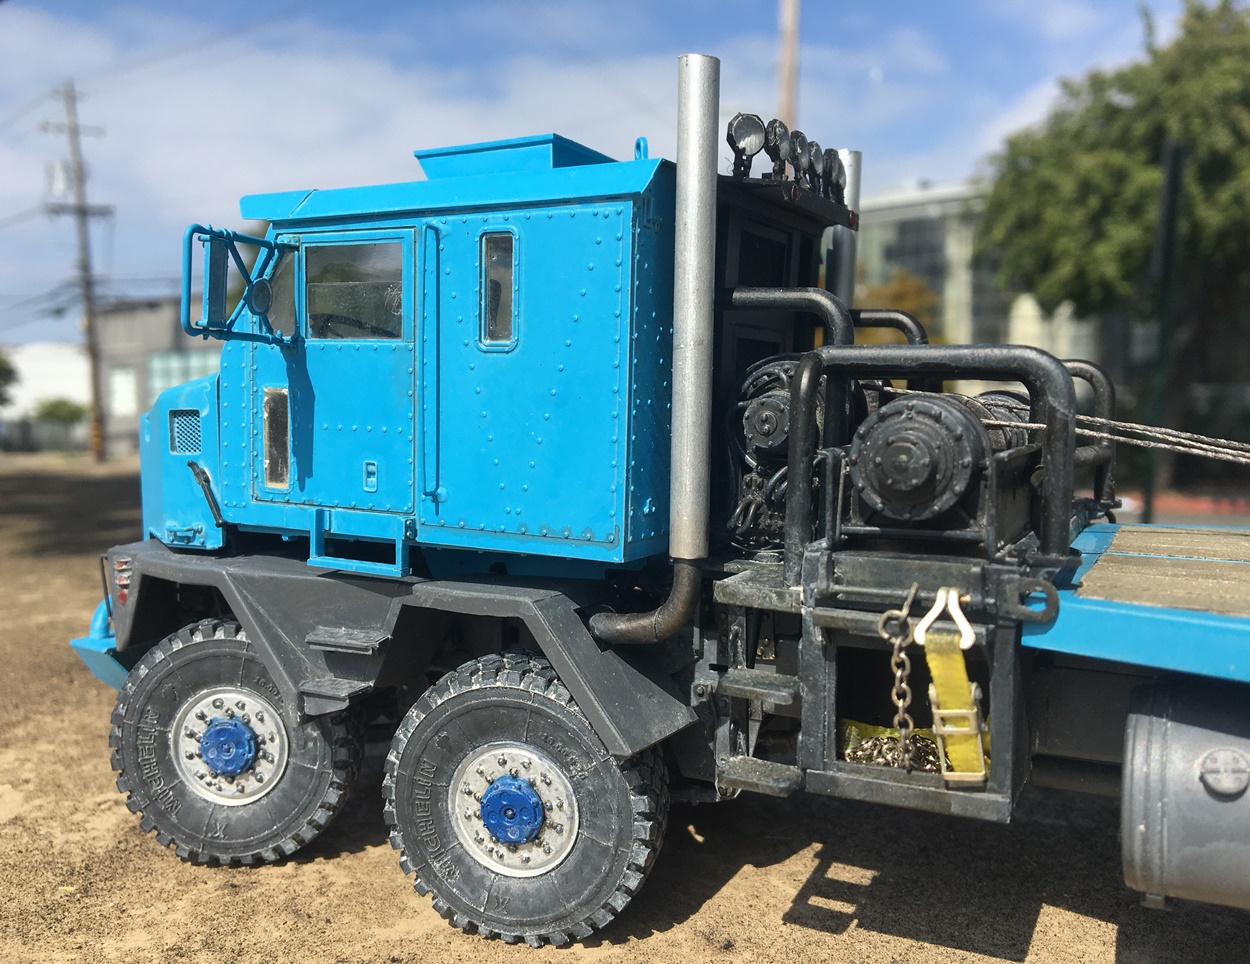
The rear tires are super singles, so not the typical doubles. I think those are DEF Models M923 A1 Big Foot tires which are pretty wide but not wide enough. To solve that problem, I cut them down the center and added styrene spacers to make them wider.

While that might sound fairly straight forward, I can say that it was a headache - as I don’t have a band saw, and instead used a razor saw! Awful process to cut and reassemble!..the front wheels are from a MAXXPRO resin set.
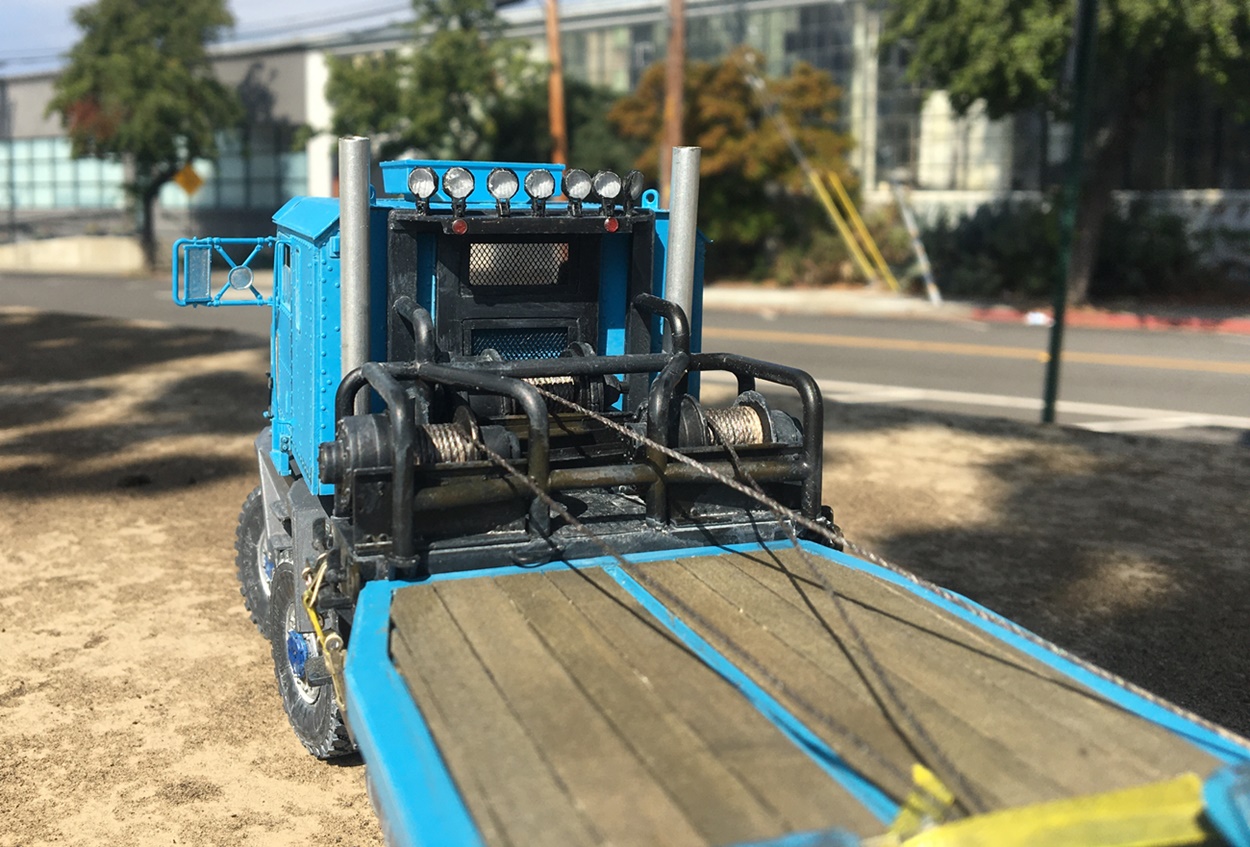
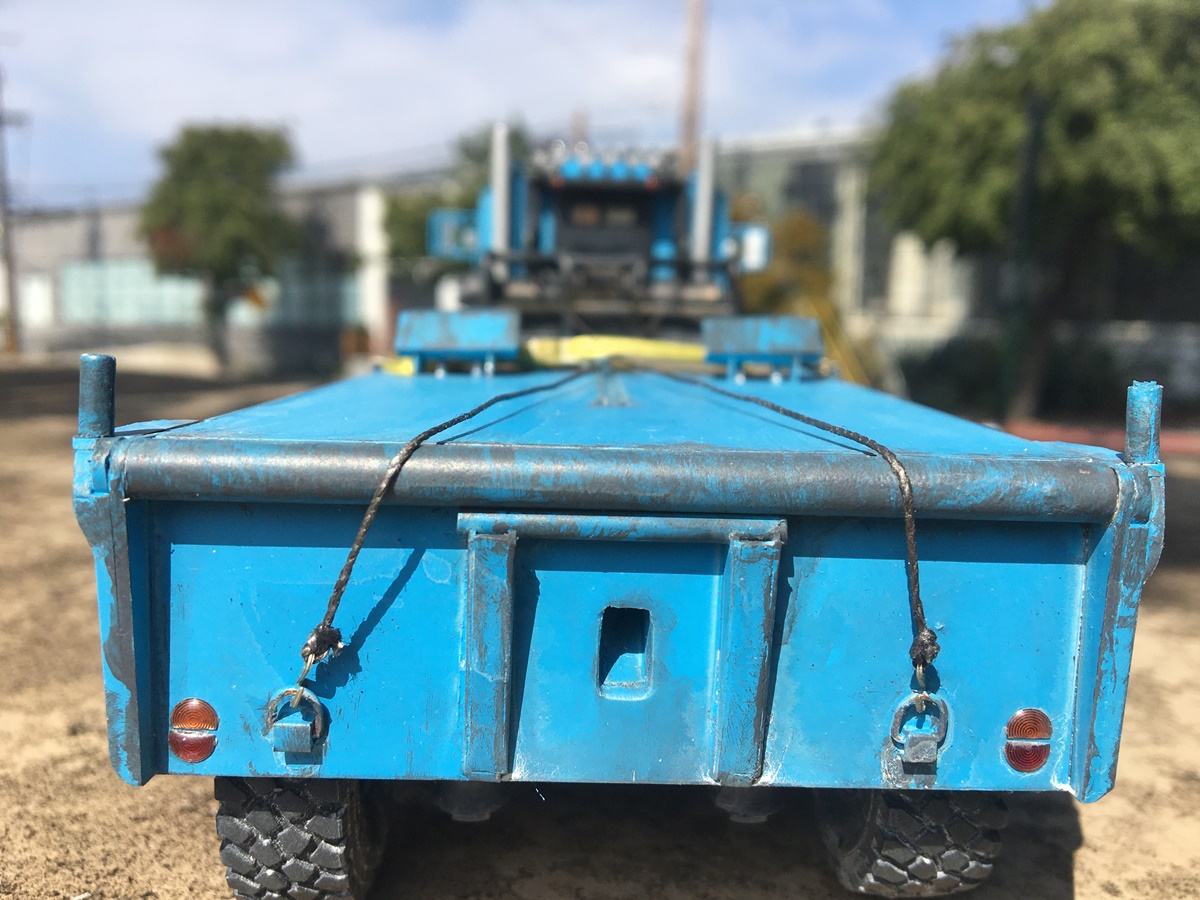
Here are some pics:

In conclusion, I don’t think I would suggest trying this if you are fairly new to scratch work, as there is a lot going on. That said, if you have the initiative, time, and patience? why not? you have to start with something and if it doesn’t work immediately - that’s fine!

@Bigred69, thanks - you know, your comment is why I tried this project. The M1070 is quite a truck and the post-service versions have made me wonder if they are the best use for this rig - an 8x8 dump truck or short flatbed seem like overkill, so why not a bed truck?? Tho I realize the cost and effort of actually doing this…would be ridiculous! Especially on what is now a pretty old truck :smile:

Thanks for having a look

Cheers
Nick

7 Likes

Nick, Love the build of your Navistar Wrecker! You must of had some good pictures or blueprints to build the vehicle! Well done.

2 Likes

Thank you so much for the info and there is no way that I could ever get that done as well as u did. I just want somebody to make both of those trucks that you scratch built.

2 Likes

Hello model builders,

I was supposed to have a call with a client this AM and he couldn’t make it, so, out in the mostly sunny day I went and got some photos of this - calling it done:

Ok, had to start with some dramatic pics - lol

I like this image - the flood lights, cables, wood in the deck, and winches look the part

Ahh…the engine, it’s in there…looking back at this, I should have paid more attention weathering the hood - adding some grit around the bold heads would help.

The winch on the other hand, more visible - I added some chains and straps - I should have painted the straight pipes bright chrome - maybe next time… :smile:

If I were to try this again, I’d get after the cab, and either make it a traditional long nose, or a proper cabover -

@Bigred69, grad you like the MRV - Unhappily for me, no plans, but I have figured out a few tricks for scaling photos to get it to the point that the build looks convincing.

@Brantwoodboy, well, you know the old saying, as soon as somebody scratch builds it, out comes a kit! :smile: Or, as I said, give it a go - why not?

Maybe start with something more straight forward - maybe convert the MAXXPRO to a cab, and make a regular flatbed out of it? The Kinetic kit isn’t perfect - so, don’t feel too bad about cutting it up, in fact, maybe cut the cab down and see if you can make a convincing flatbed out of what’s left. As the body/cab is oddly shaped, there would be a variety of challenges to make it into something else.

I’m sure it would be a handful - a sheet of styrene over the cut up V hull for a bed won’t be it - you’ll need to build it up to look believable.

My first few scratch builds weren’t that complicated at first glance, but for a first time project, that’s another story - :smile:

OK, thanks for having a look

Nick

7 Likes

Well your client’s loss was our gain – another stunner from The ‘frame, everywhere I look I get drawn into the detail within detail. Ideal photography too , “4_winch” is my new desktop background. :trophy:

2 Likes

Outstanding build and paintwork Nick! And as usual, best outdoor pics in the house. :thinking: Uhhh… I mean outside the house! :sunglasses:

—mike :sunny:

2 Likes

Nick, your scratchbuilding talent knows no bounds. Unbelievable detail on top of perfect fabrication, augmented by stunning photography. Another masterpiece.

3 Likes

Hi guys,

@Dioramartin, well Tim - on the hobby side worked just fine, on the “when will I get paid?”, well, let’s just stick with the hobby fun! :smile:

@justsendit you know Mike, I think I like the results of the outdoor pics as much as the rest of the project. I took these pictures with the model on top of a transformer vault, a few blocks from here. In addition to the pictures, it’s always interesting to hear what people have to say about the build, no matter what it is. People seem to get a kick out of seeing these.

@SSGToms hey Matt, thanks very much, especially because this was sort of an unusual build :smile: You might try taking outdoor pics of your projects at some point, as I think your paintwork is generally better than mine! You might get some really nice results!

Cheers
Nick

4 Likes

Beautiful build Nick !!!
Love the color choice and the subliminal weathering and wear .
Lol , I took the 49ers giving 10 1/2 and won !!!

1 Like

Bummer, in days of yore the cheque/check used to be in the mail. Now it’s aww sorry my internet’s down and I run my business from a log cabin 400 miles from the nearest bank.

I’d go further about daylight photography, I think many excellent models/dioramas don’t get the credit they deserve under indoor conditions…and some might reveal their faults :face_with_hand_over_mouth: When I come to power I’ll pass legislation that all work must be photographed out in the real world. Only then can we gauge accuracy if we’re trying to replicate 1:1 in er miniature :laughing:

3 Likes

…and the Diorama Police will be knocking down doors to drag everyone’s models outside!

4 Likes

Incredibly real, all of them! Great work, Nick, as always.

1 Like

That came out real nice. Great job. I really like all the scratch building and finishes on the tow truck.

Cheers,
Ralph

1 Like