How hot exactly is a hoochie coochie anyway?
1 Like
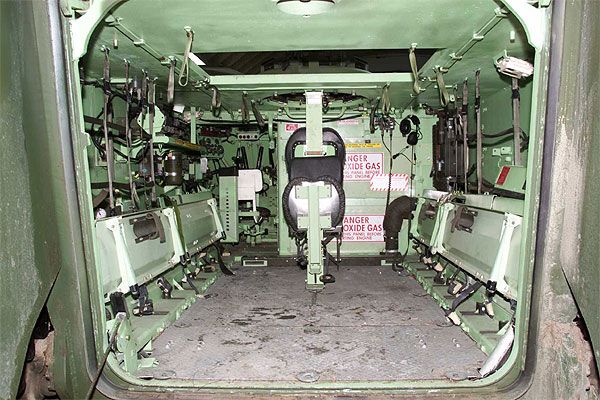
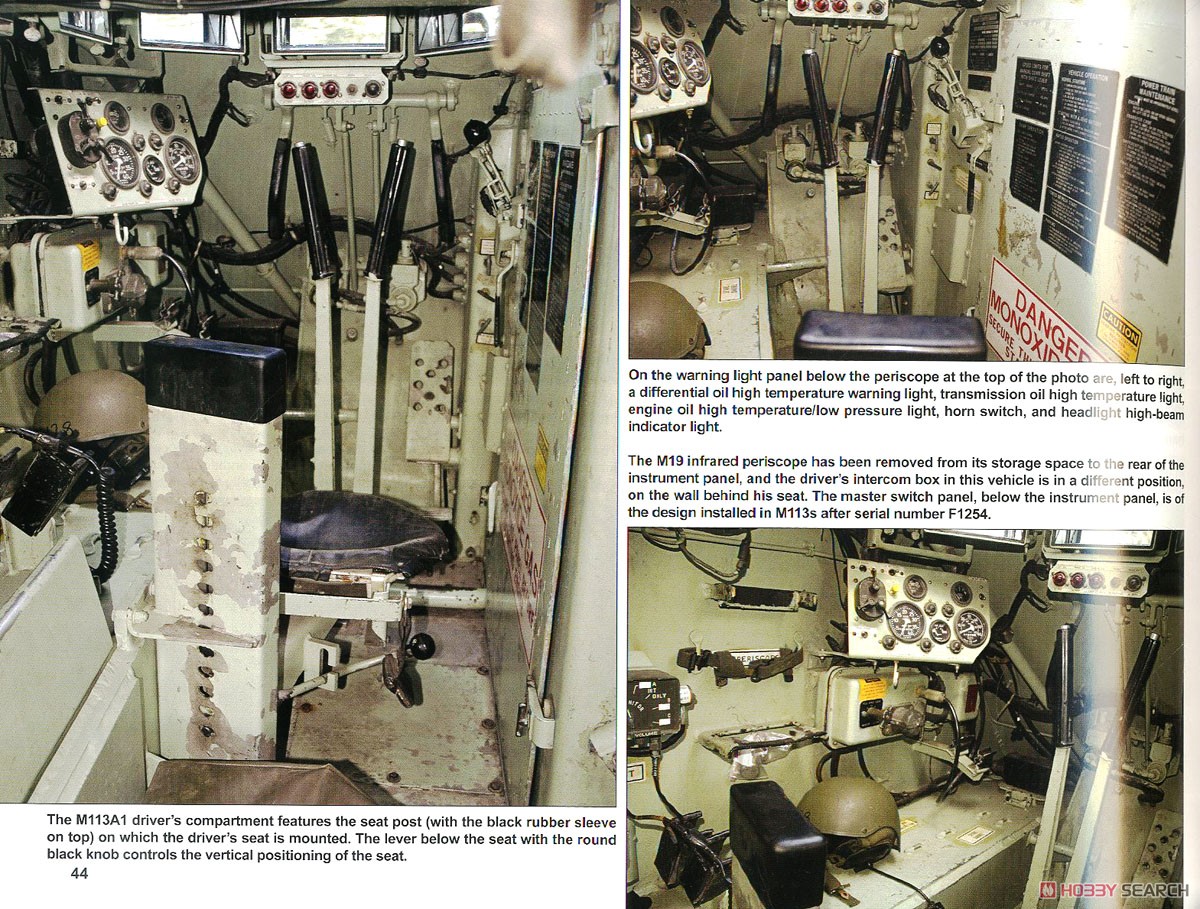
Hi Guys busy with my AHHQ 1/16th M113 and have a question for those better in the know. I’m looking for images of the right side interior with the seats in an upright position as thats how I’m intending doing it. I just want some detail of what is actually hidden by the folding seats when they are raised. I’ve oogled and googled for days and find nothing. Just hope someone can help
Many thanks. I will try to post some progress pics later too.
Keith
1 Like
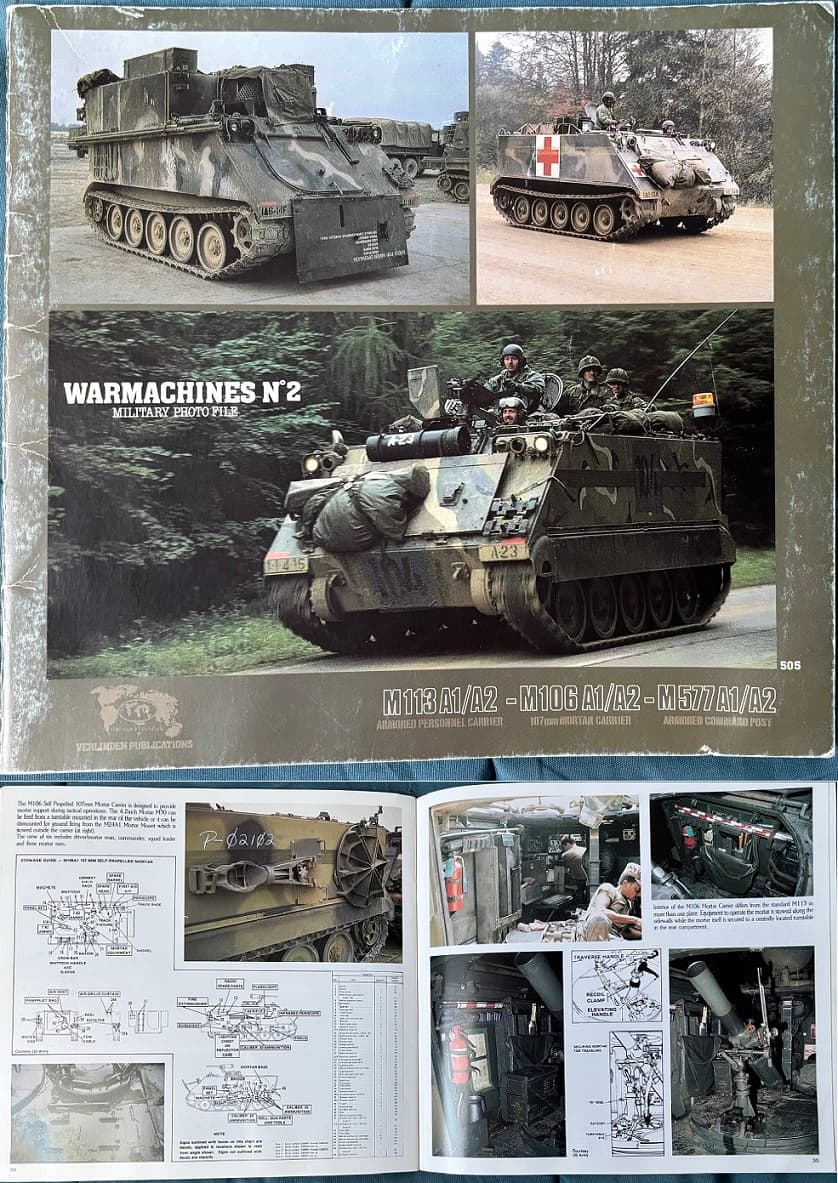
Today I found my Warnachines 2 book with great photos about various M113 variant. My pleasure is that it has lots of photos about MERDC camo as well as some pics about the M106 I planned to build.
5 Likes
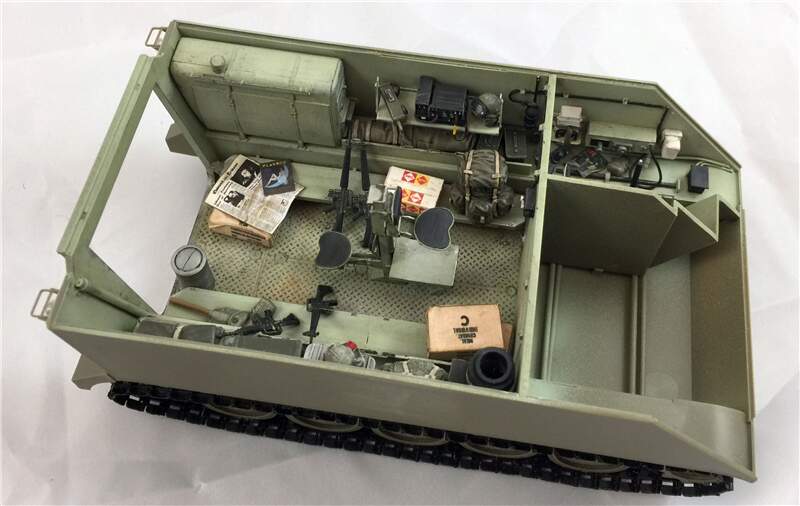
I got stuck in and carried away, I’m sure I will regret it in the very near future…
As always I read through the instructions and chose to ignore most of them. I took a lot of infor from Donald’s (Old Warlock) build that he is doing right now.
First bugbear was the exhaust! Why on earth AHHQ chose to mould it as one solid blob as opposed to two halves that could show it correctly I won’t ask. Any way with lots of drilling and hand grinding out with cutting bits I achieved this and I’m highly delighted.
Moving on to the drivers seat. mucho carving and grinding to get that clinical shape something more organic and real looking. Not overly happy with the AK paint pen, supposed to be matt rubber black and came out like shiny Latex… LOL
Once I had dry fitted a lot of the equipment boxes and so on I started just removing the ends of the cast on wiring off the hull sides as I wasnt happy with the fact they came near to the points they were meant to connect to. I soon got carried away of course. Instead of completing each section before hand I decided to assemble all the main hull leaving out the slip in parts of the sponsons.
So I’ve tackled much more but will update those as I get closer to completing the individual sections. I’ve ordered some Duck egg green paint and need to shoot the interior before continuing further.
All comments and advice is always welcome. I’d rather someone tell me I buggered something up than let it run with a glaring booboo
Keith
6 Likes
This weekend I worked on suspension, roadwheels and track.
DEF parts are nicely done and look great.
7 Likes
In case anybody interested for loading out their 113 build, this is the US Army load plan lifted from the -10 manual for internal and external stowage.
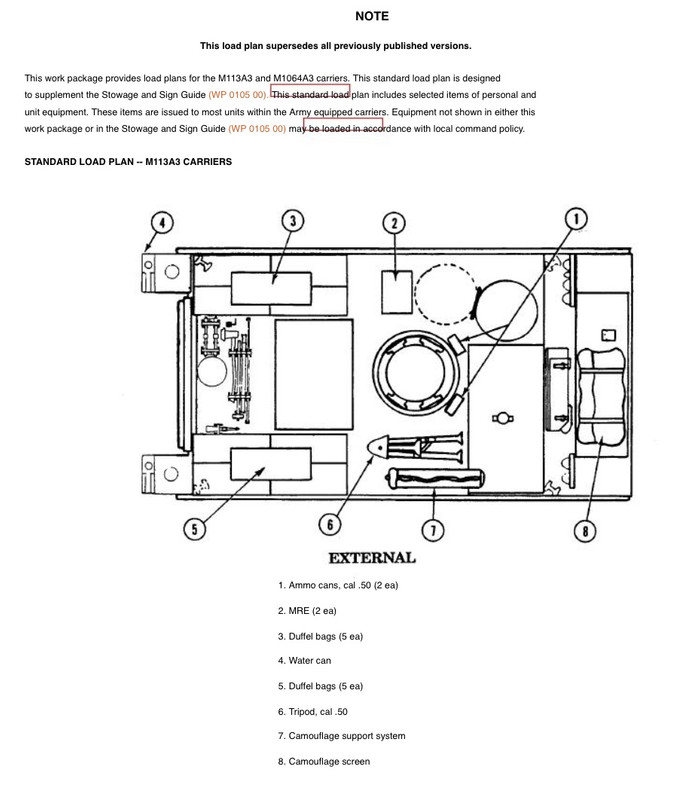
external
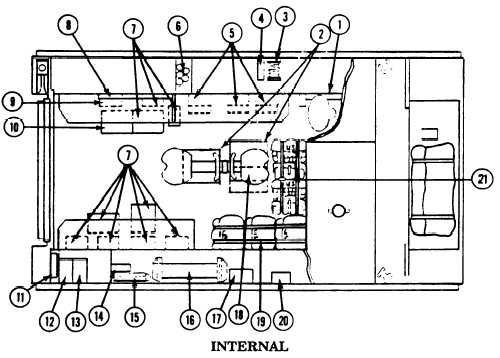
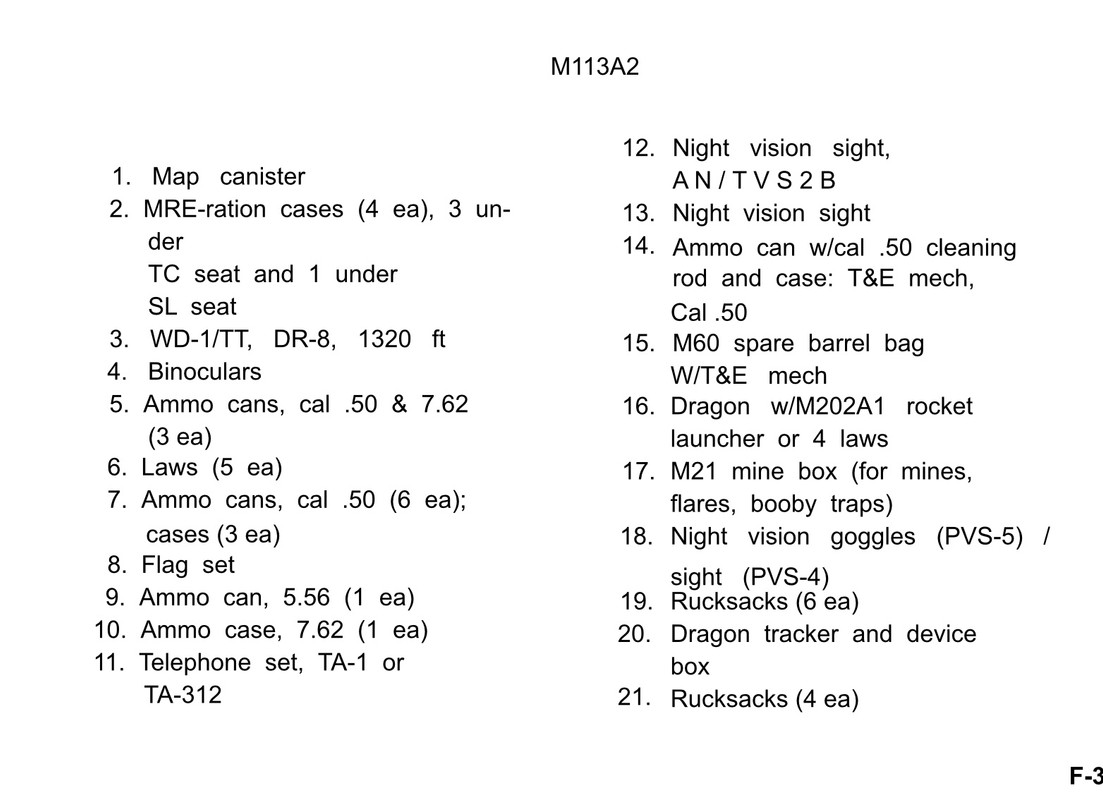
internal…
just a note from what I saw in service on this part… rucksacks were never stowed in this manner but were instead strapped to the sides or top deck. As shown on the load plan here they would interfere with daily maintenance checks for removing the engine access panels. Usually some sort of cargo strap would be draped along each side of the track from the brush guards or lift rings and rucks attached to that…
6 Likes
a very useful guide indeed, thanks for posting this.
1 Like
Been working on the M132 the past couple weeks, cleaning up the resin parts and filling pinholes in the tanks . . .
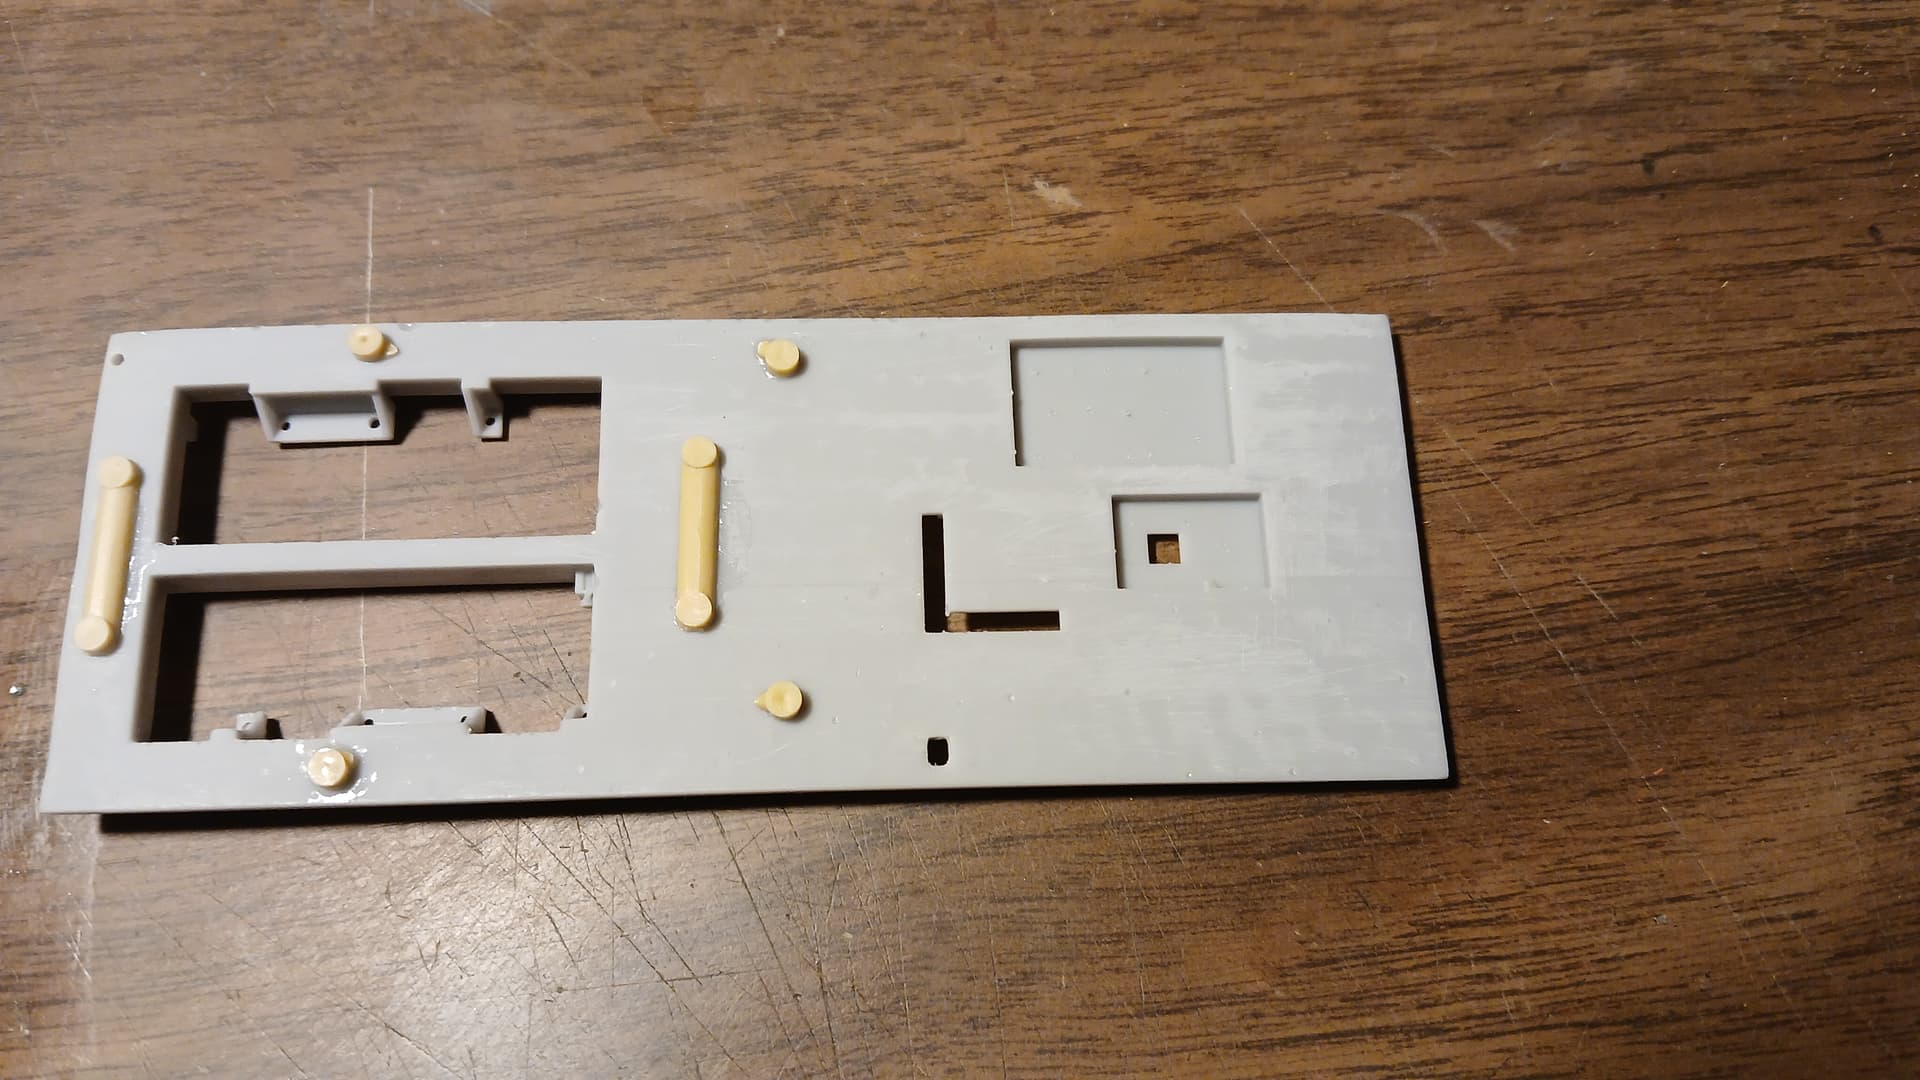
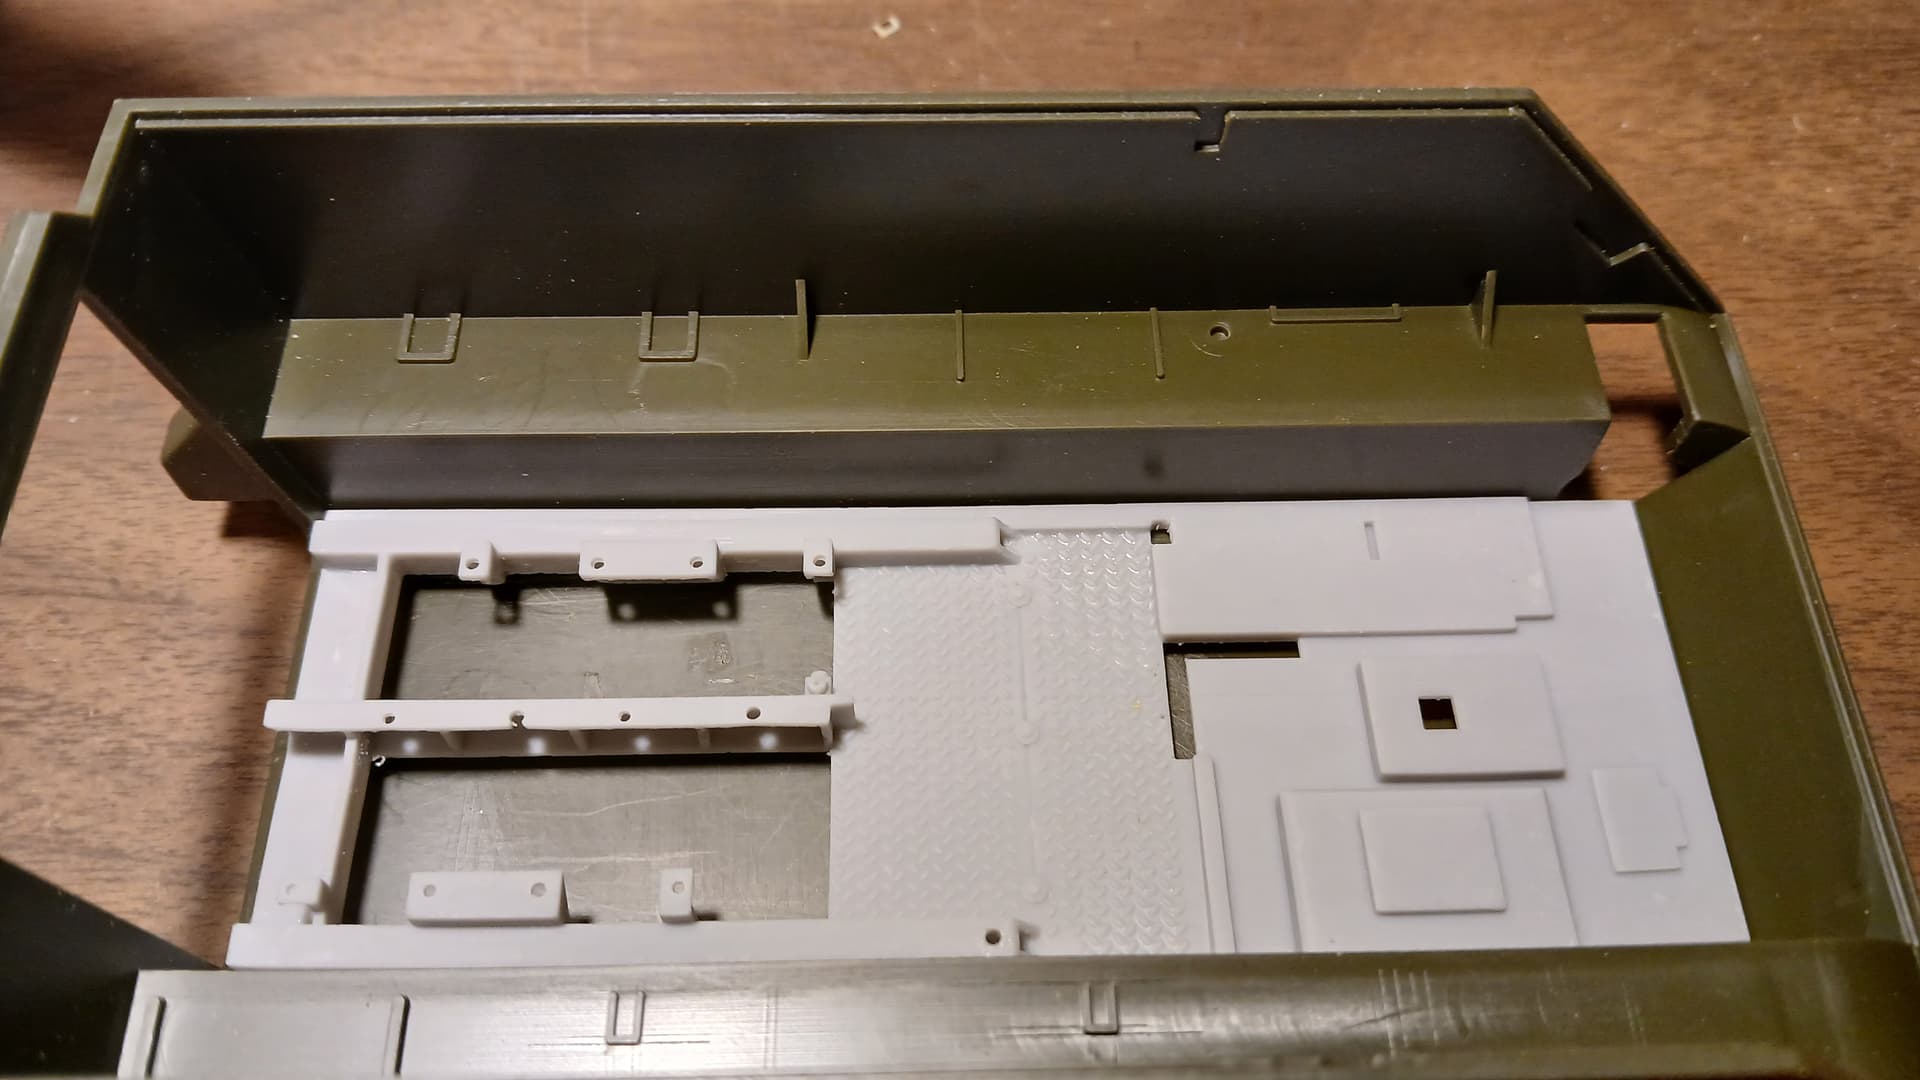
One of the first things to do that I always forget was to finish out the underside of the rear fender wells . . .
A question here, is the fender well completely blocked off or half blocked to allow water to channel out the port on the back of the fenders?
Another mod was to fix a couple of spacers to the underside of the floor plate, the kit hull has two risers each side of the hull front , this addition will level the whole floor . . .
I’m grappling with adding some torsion bars beneath tthe tank sled skids, if so (or not) is the hull’s sub-floor painted or natural/unfinished aluminum?
Still just studying the kit parts for ejector punches and sinkhole and dimples on various parts.
I’d love to trick out the driver’s “cockpit” but it’s barely visible as is and seems pointless.
That’s all for now, y’all keep up the good work 
Cajun 
7 Likes
Tamiya kit? Looks almost identical to the Academy hull.
1 Like
It’s an Academy, my first for an M113. Something I’m unsure of is the cabinet the radio sits on, is this correct for an -A1 or something Academy came up with?
Cajun
1 Like
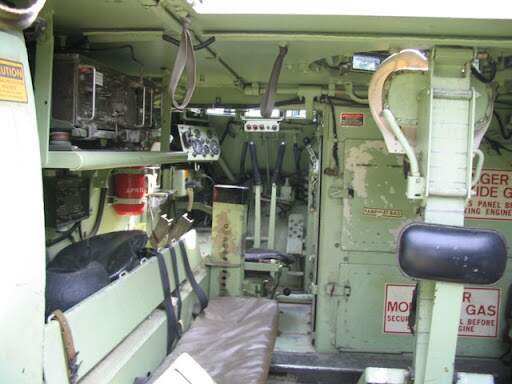
Mine is a Zelda IDF version and the closest type interior I have seen to the kit is a Vietnam style setup without side seating.
Here are some interior photo’s if it is helpful.
7 Likes
Interesting. There’s that non-red exinguisher bottle again.
I agree about going wild on the driver’s station - so much of it remains unseen. I’m not a “But I know it’s there” kind of guy.
4 Likes
I remember in the mid 80’s we started getting fire extinguishers that were painted in CARC green or some similar shade. We still had plenty of the red ones, but the green ones multiplied as the red ones were swapped out for expiration dates or some similar reason.
3 Likes
Help Please.
Academy uses the same roof top for several different versions and so they mold on mounting identifiers. As an example the triangle at the rear is where the mattock head mounts. (I will remove this before mounting the mattock head. However there are other mounting points on the roof and I do not know which are for most M113’s and which are special ones I need to remove.
Near the outer edges of the side are some small L brackets molded on. I don’t know what they are for. There are also some small square ones on the outer edges also. If they are for some out of the ordinary version and not normally used, I will sand them off.
What the heck is the thing just to the right of the commander’s location. it is molded on and looks bad. Do not know why that was not molded separately. Any other hints or advice will be welcomed.
2 Likes
The square ones are for the side rails. The L shaped ones are spaced the same as the square ones, but placed more inborad - presumably for a different variant (Australian) where the rails are placed differently.
2 Likes
That’s a prop to keep the entire engine deck open when you have to remove the entire power pack out for replacement (above).
On an M113A3.
3 Likes