Cool, thanks !
@agincajun The Mig FS24087 OD most closely resembles the olive drab of my dependent childhood in 1960s Germany.
Although my all time favorite OD was the long out of production Model Master enamel OD.
@Seanmcandrews Be aware that the stand only comes with 2 clips. One padded clip on a metal rod and one alligator clip on a wooden stick. You have to buy them separately…,
Sean @Seanmcandrews , the paint clip sticks are an easy do, you can get alligator clips and sticks from the local Wally World in the crafts dept, or try any craft store.
Cajun ![]()
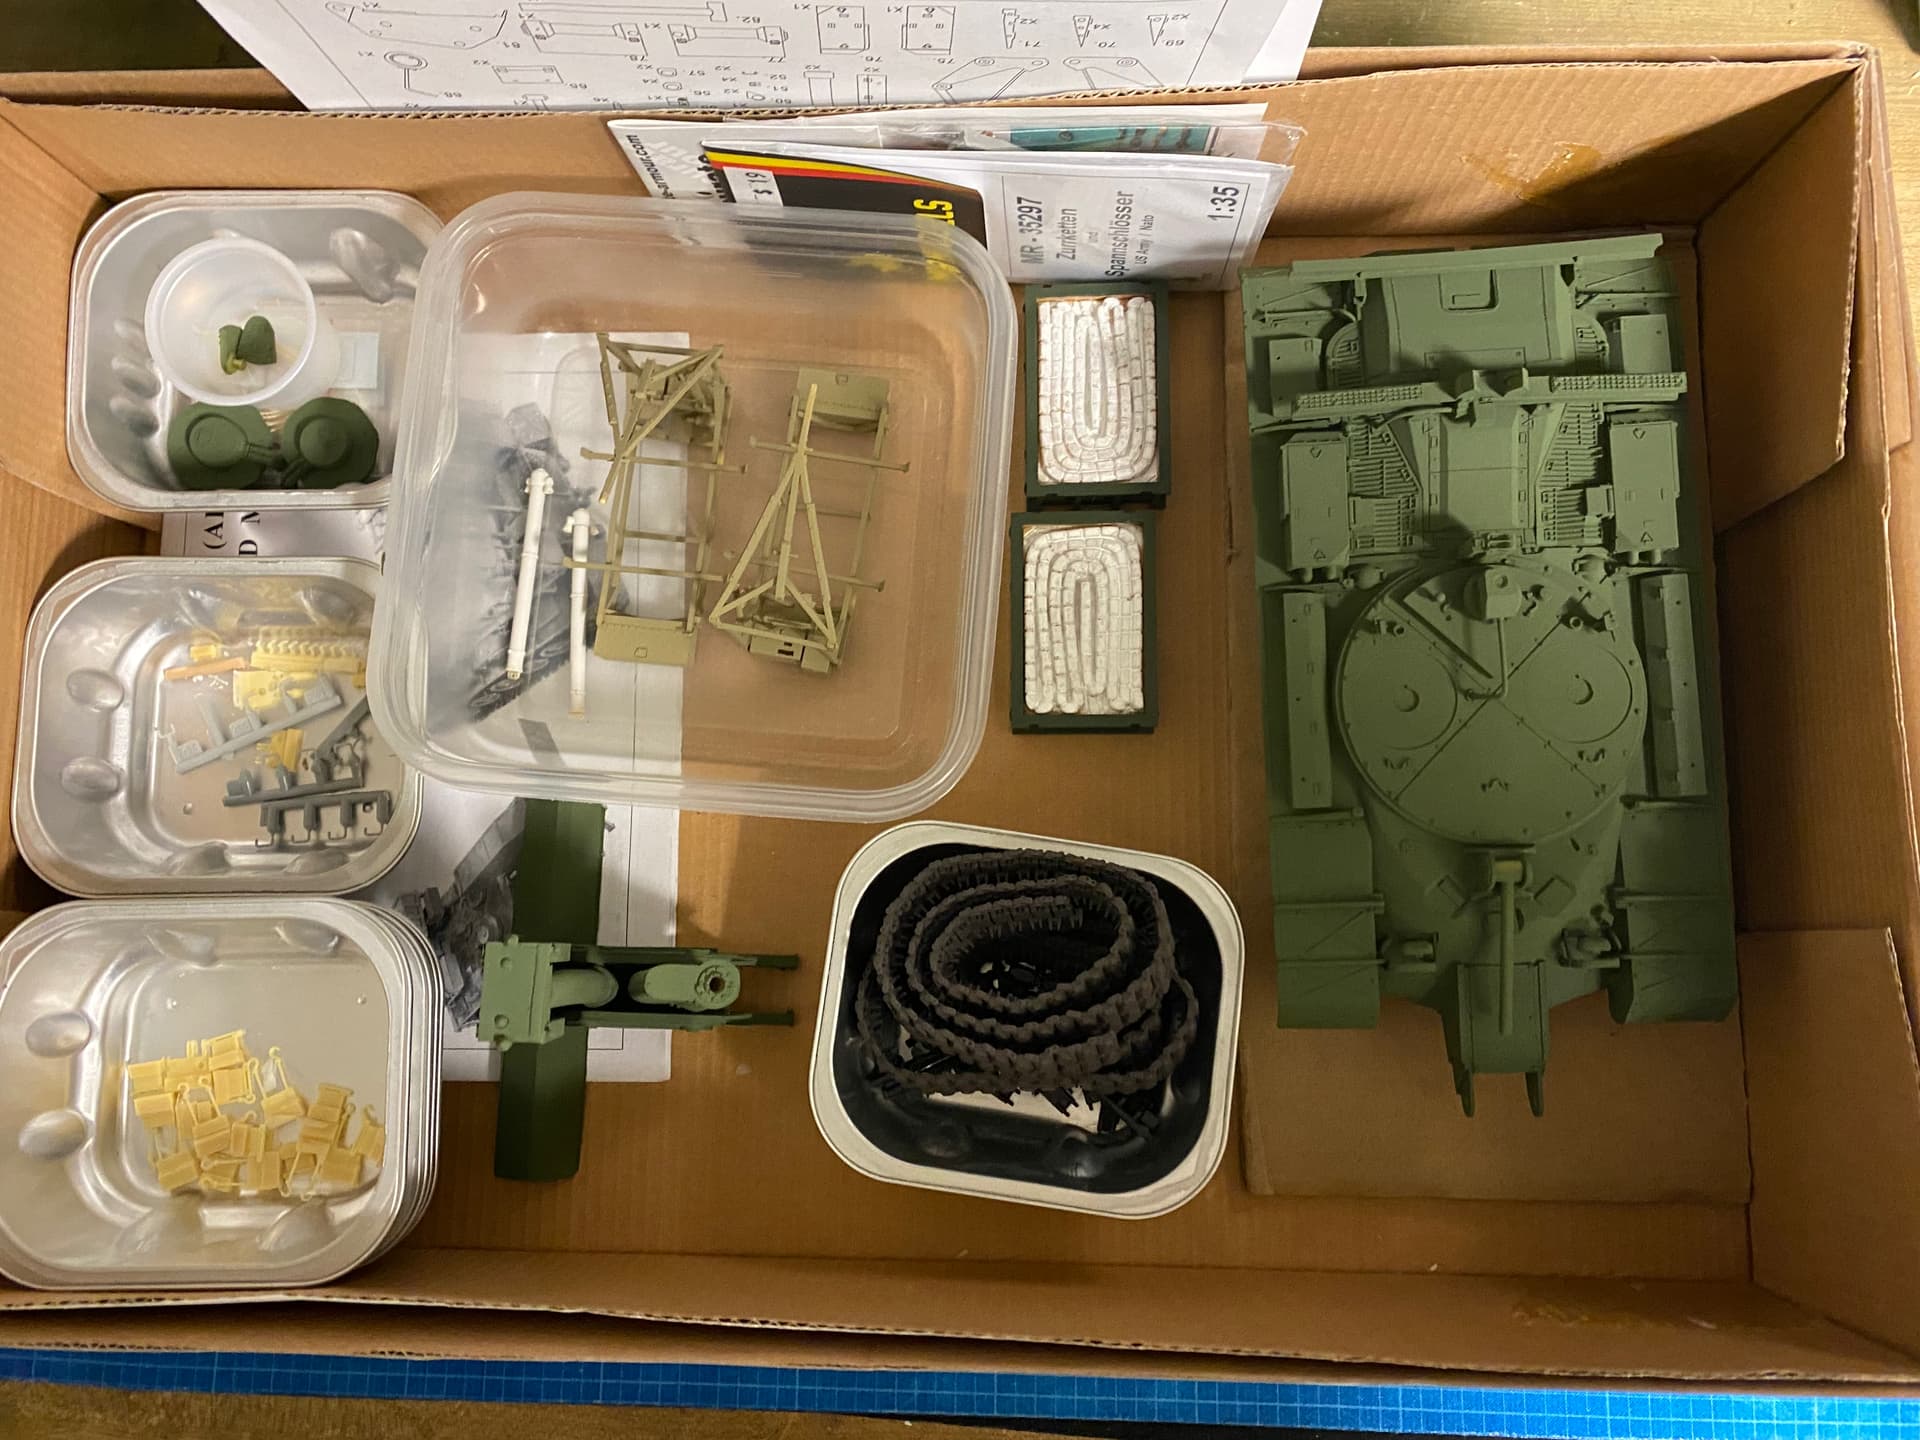
make nice stuff from what I can see. My daughter is buying me the M52 for my birthday and I plan to make an M818 with it. As AS has said, cant see me getting to the resin kits of this and others any time soon.
1 Like
I have the same plan. Just got the M52 set the other day. It is really nice.
1 Like
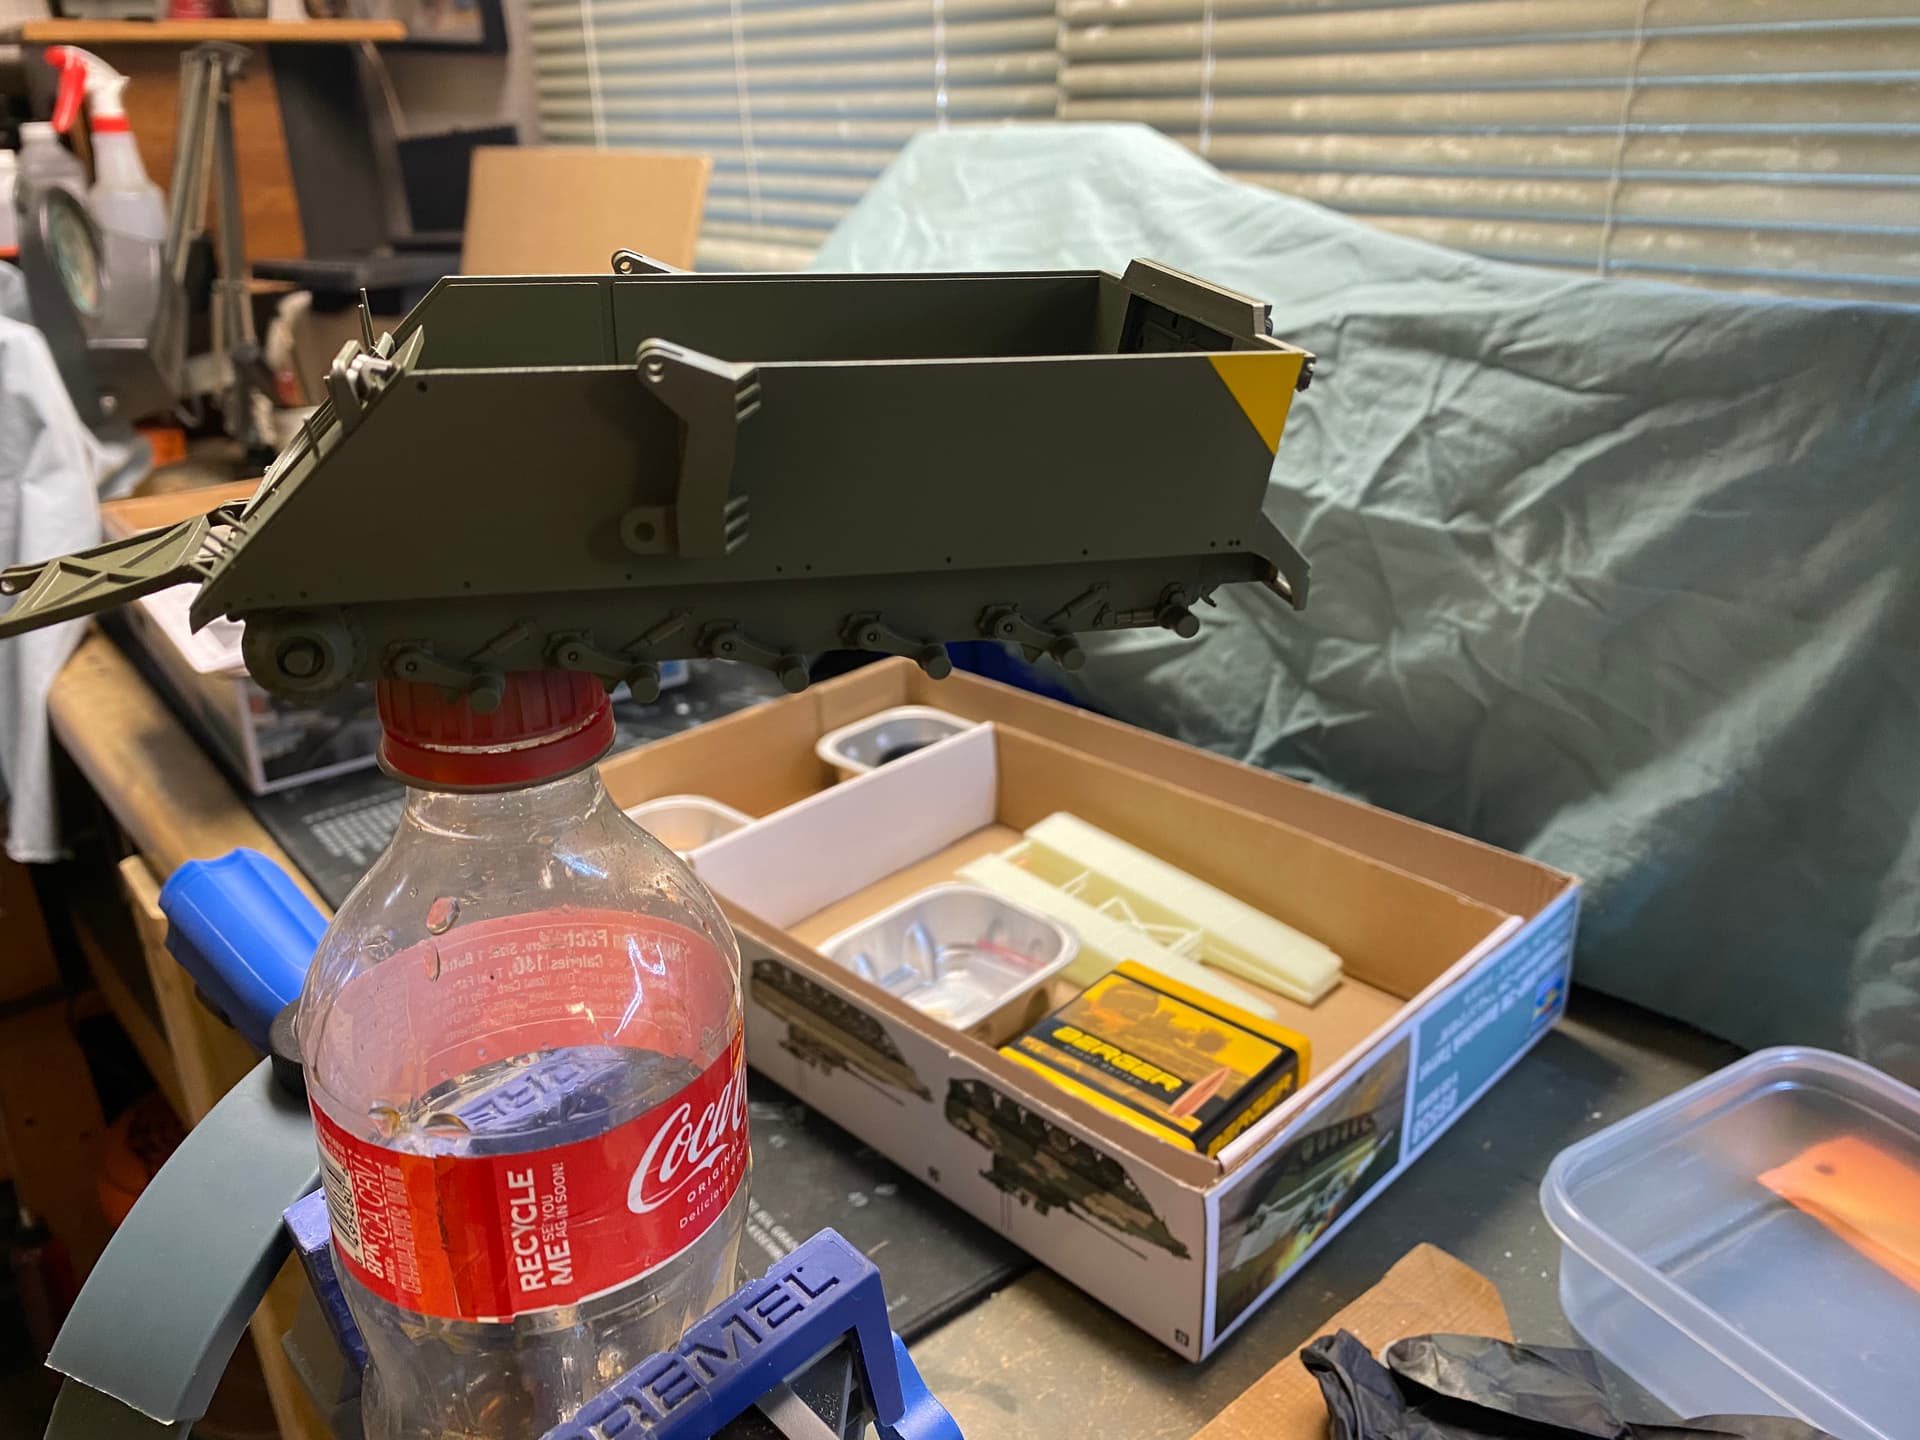
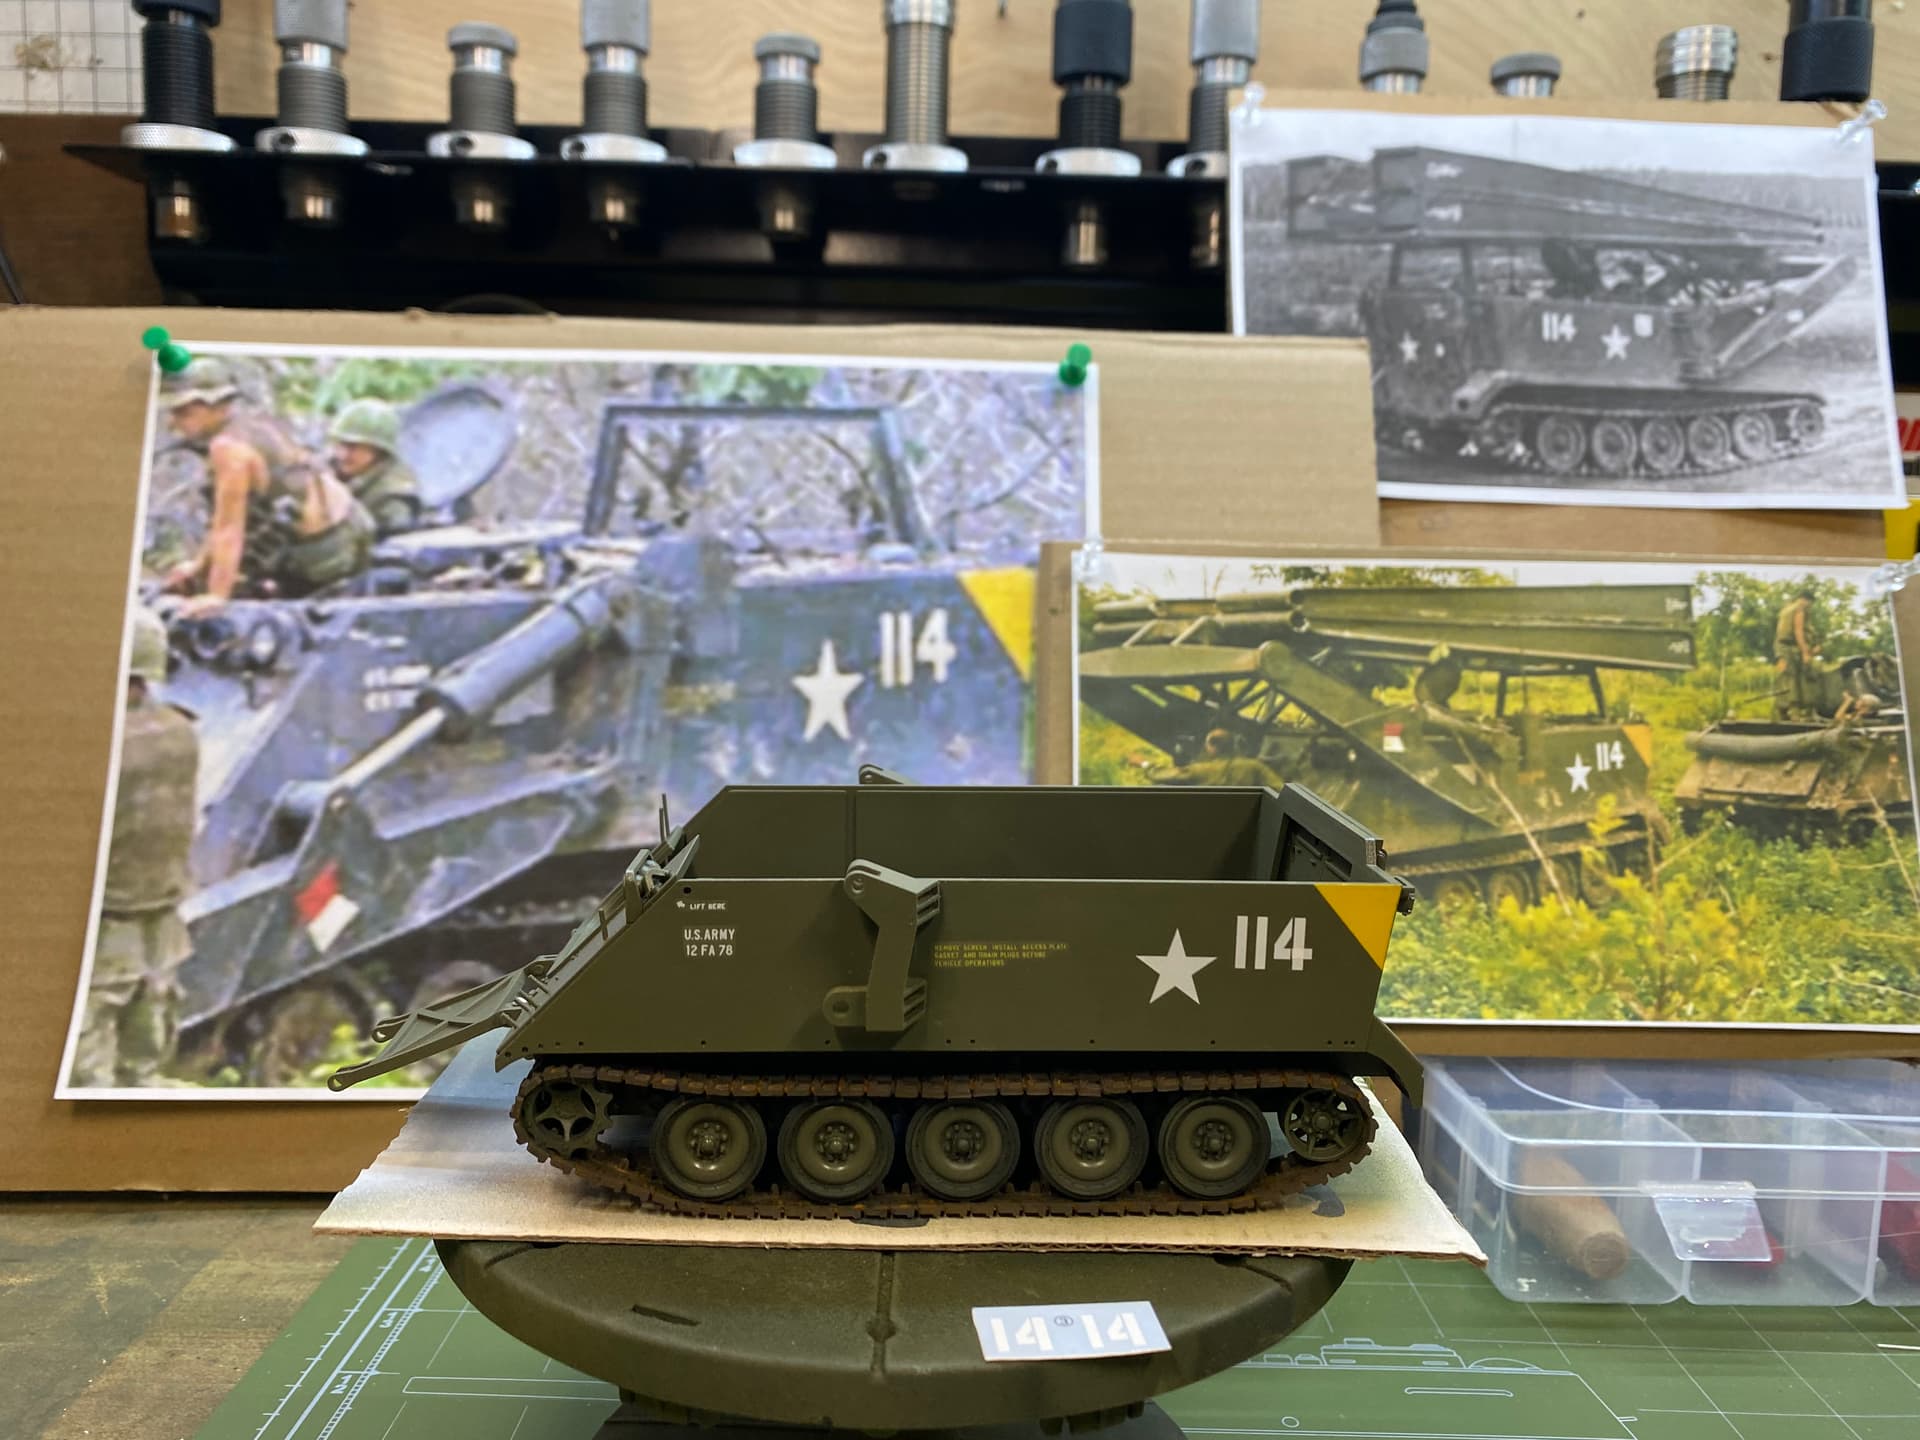
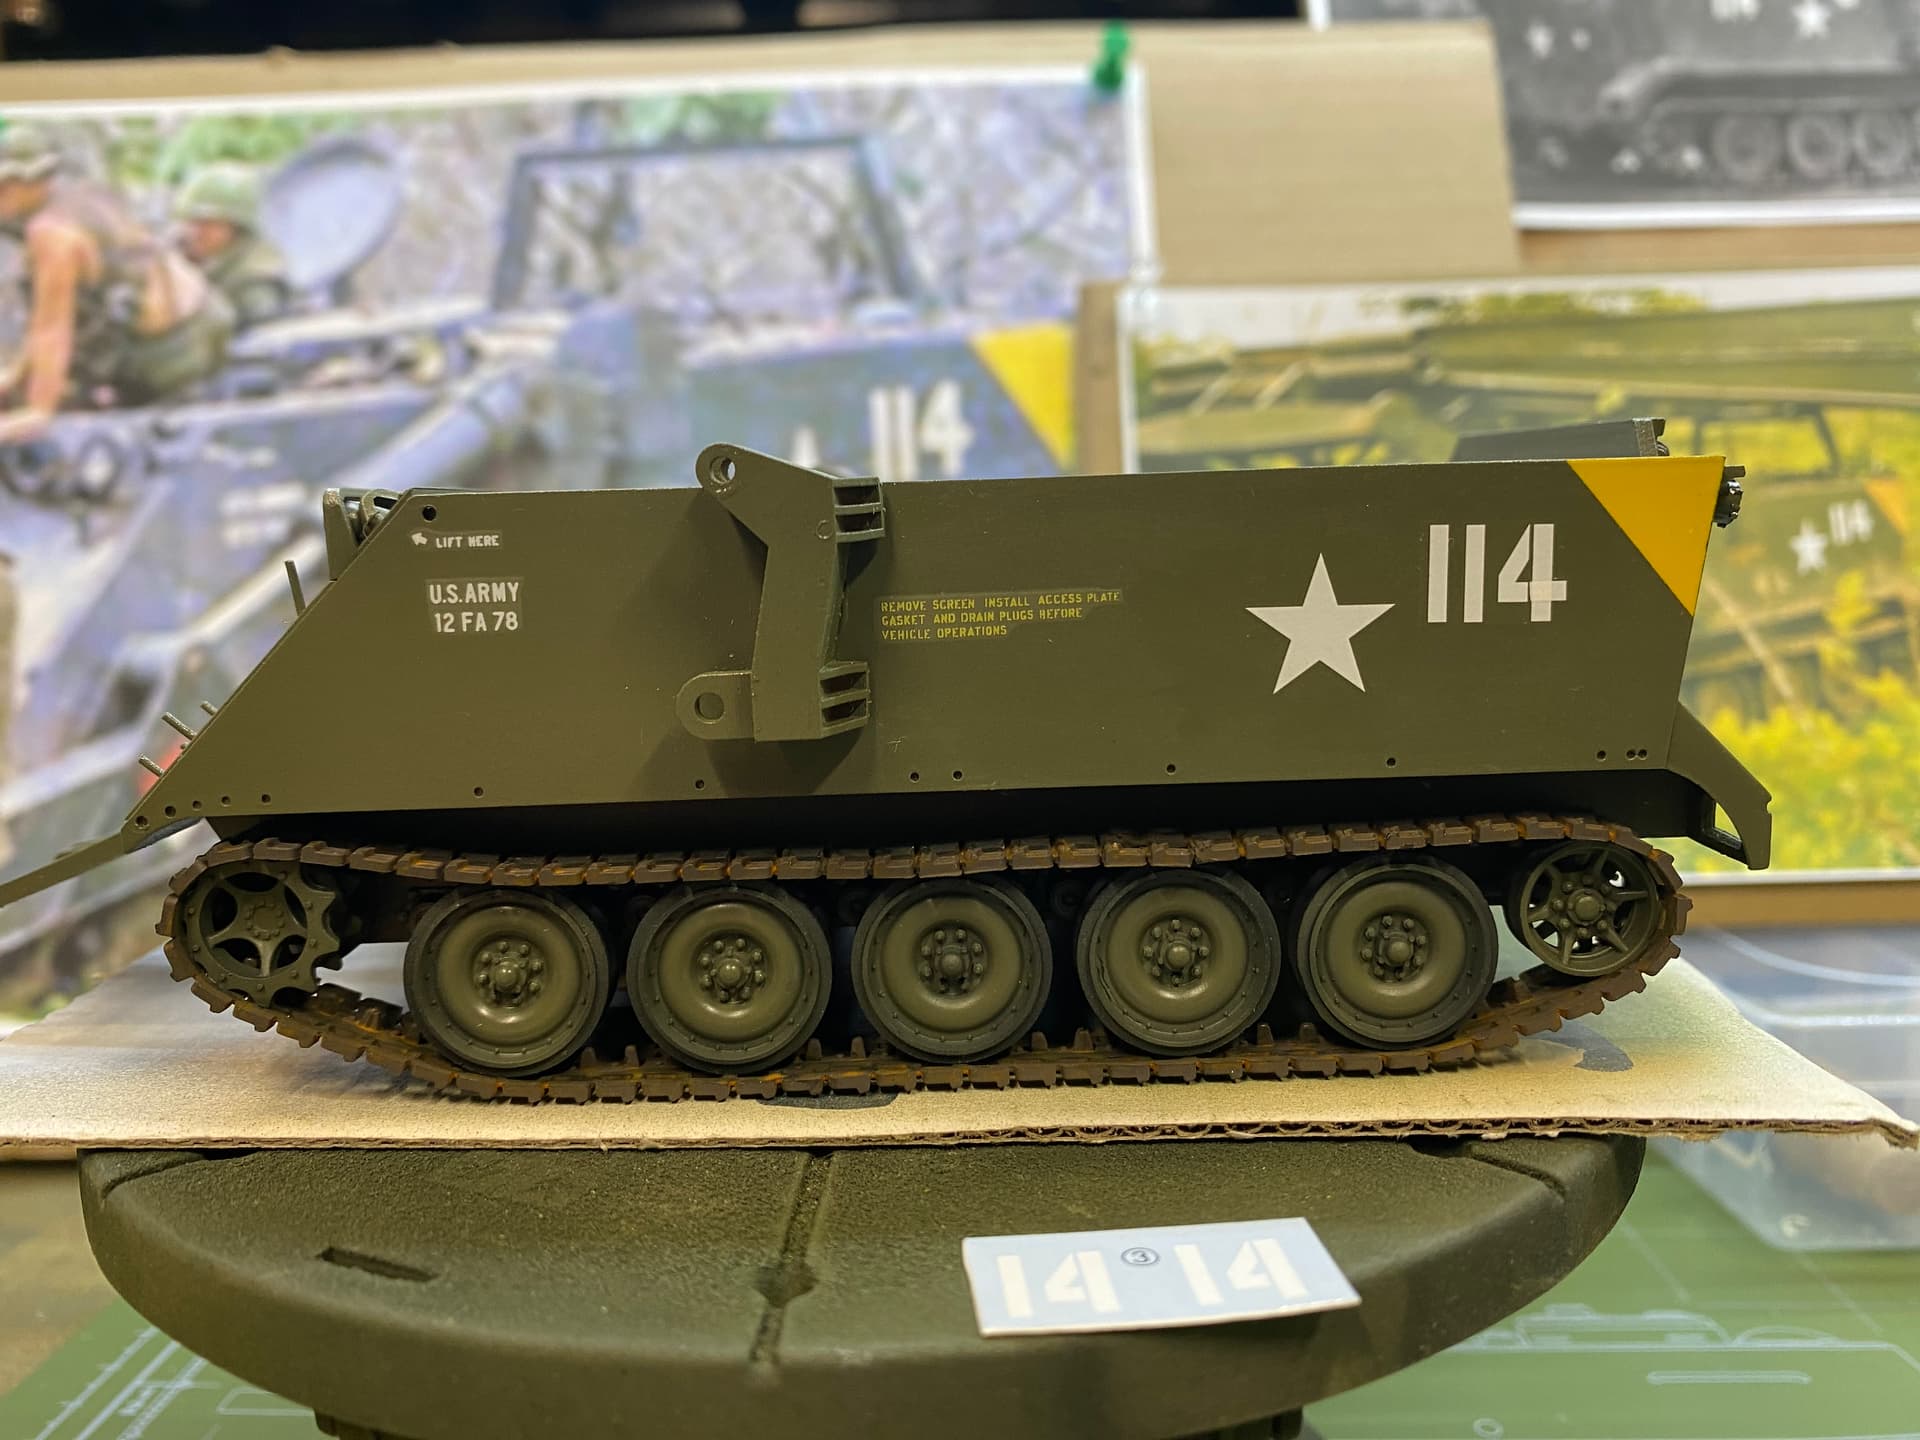
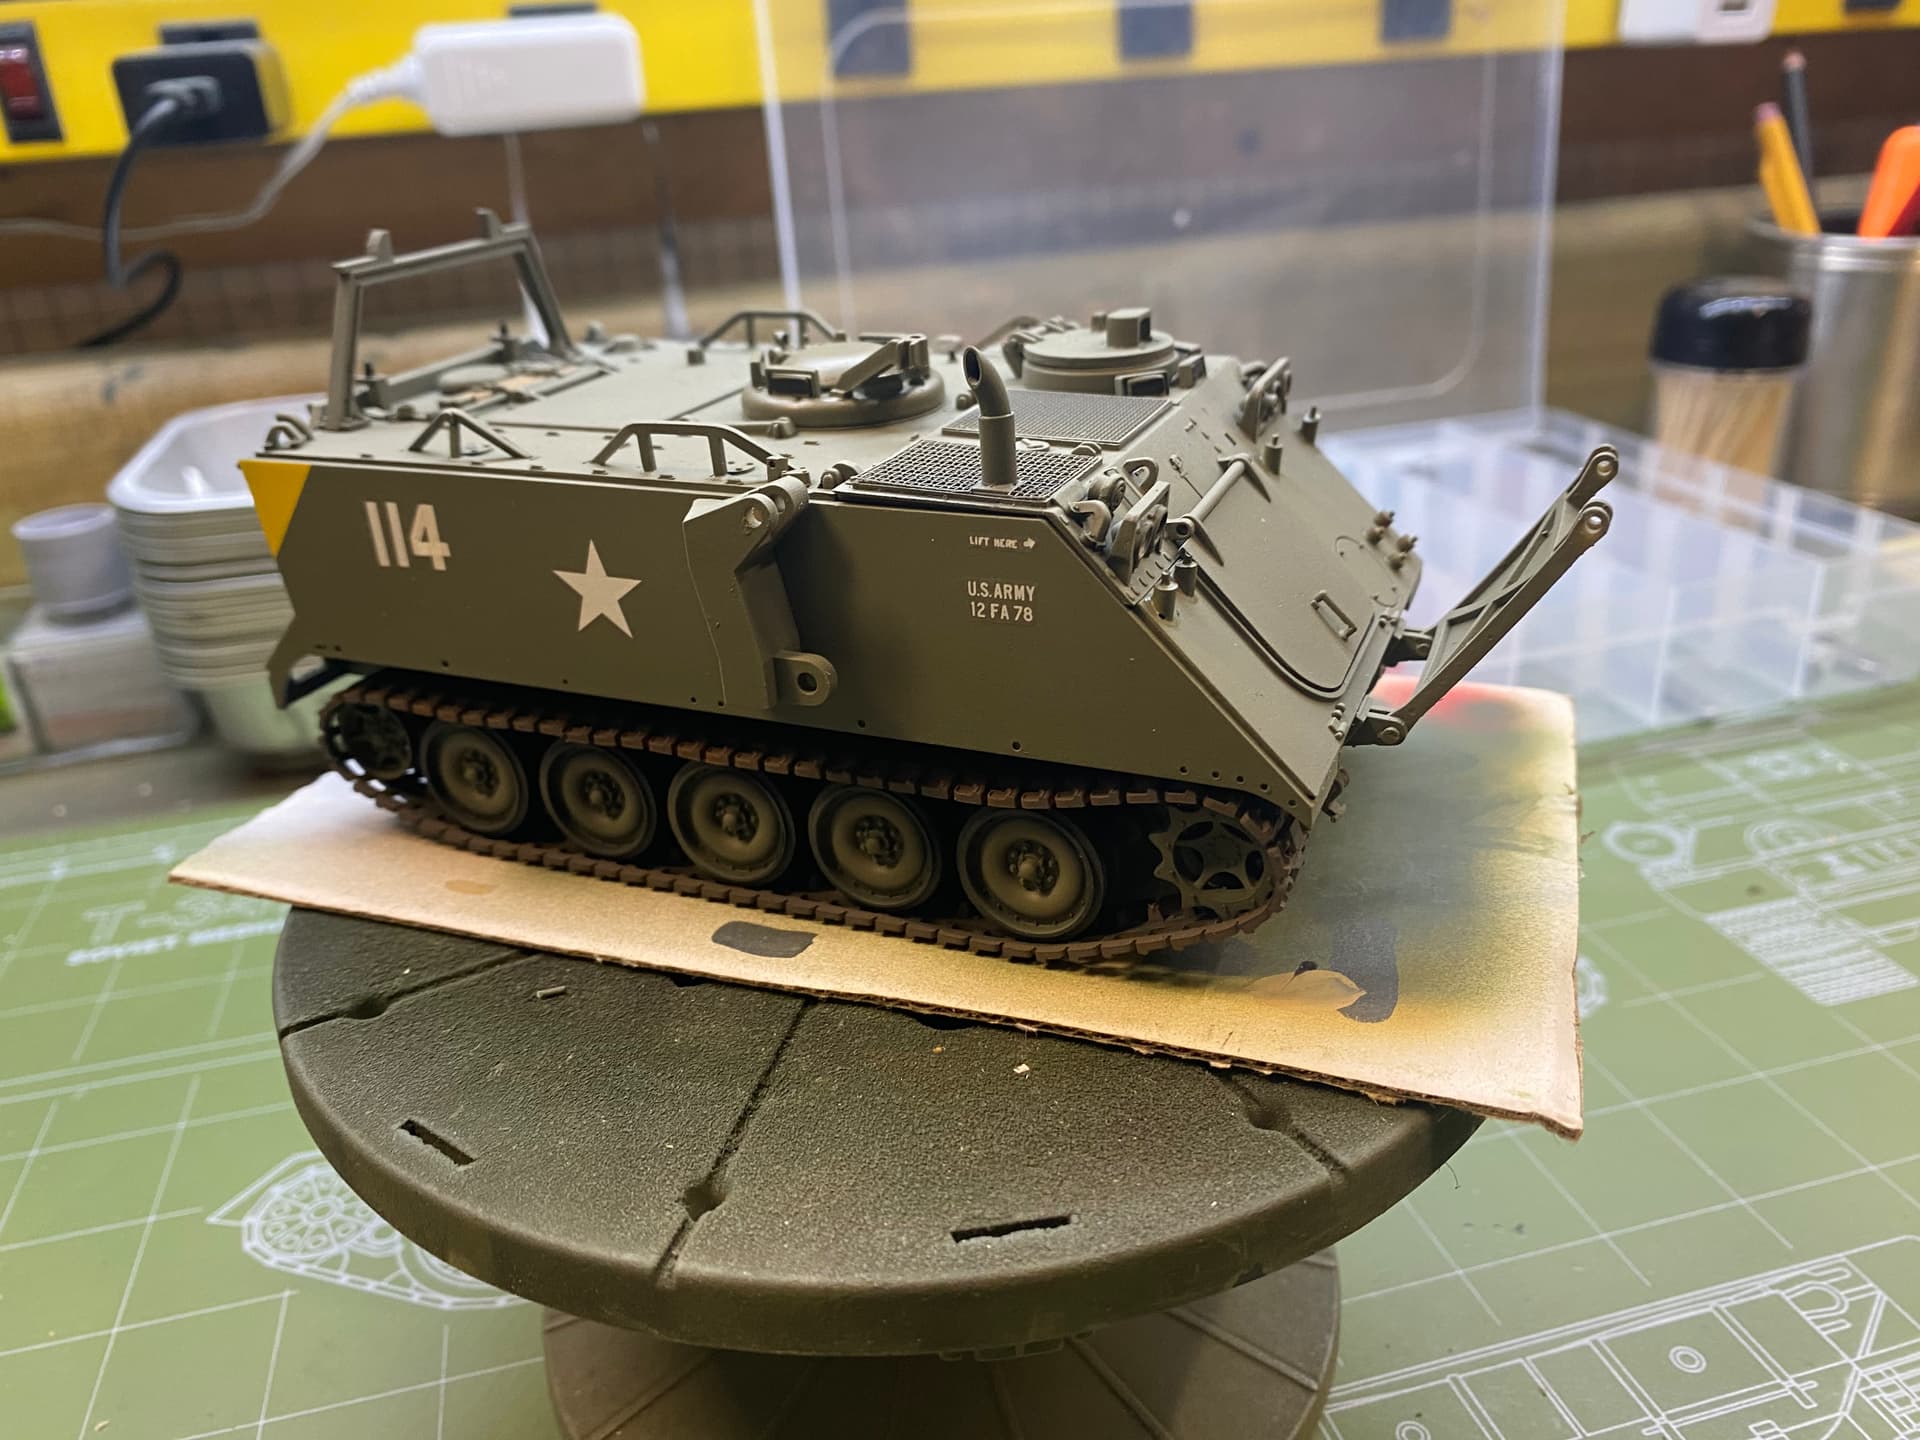
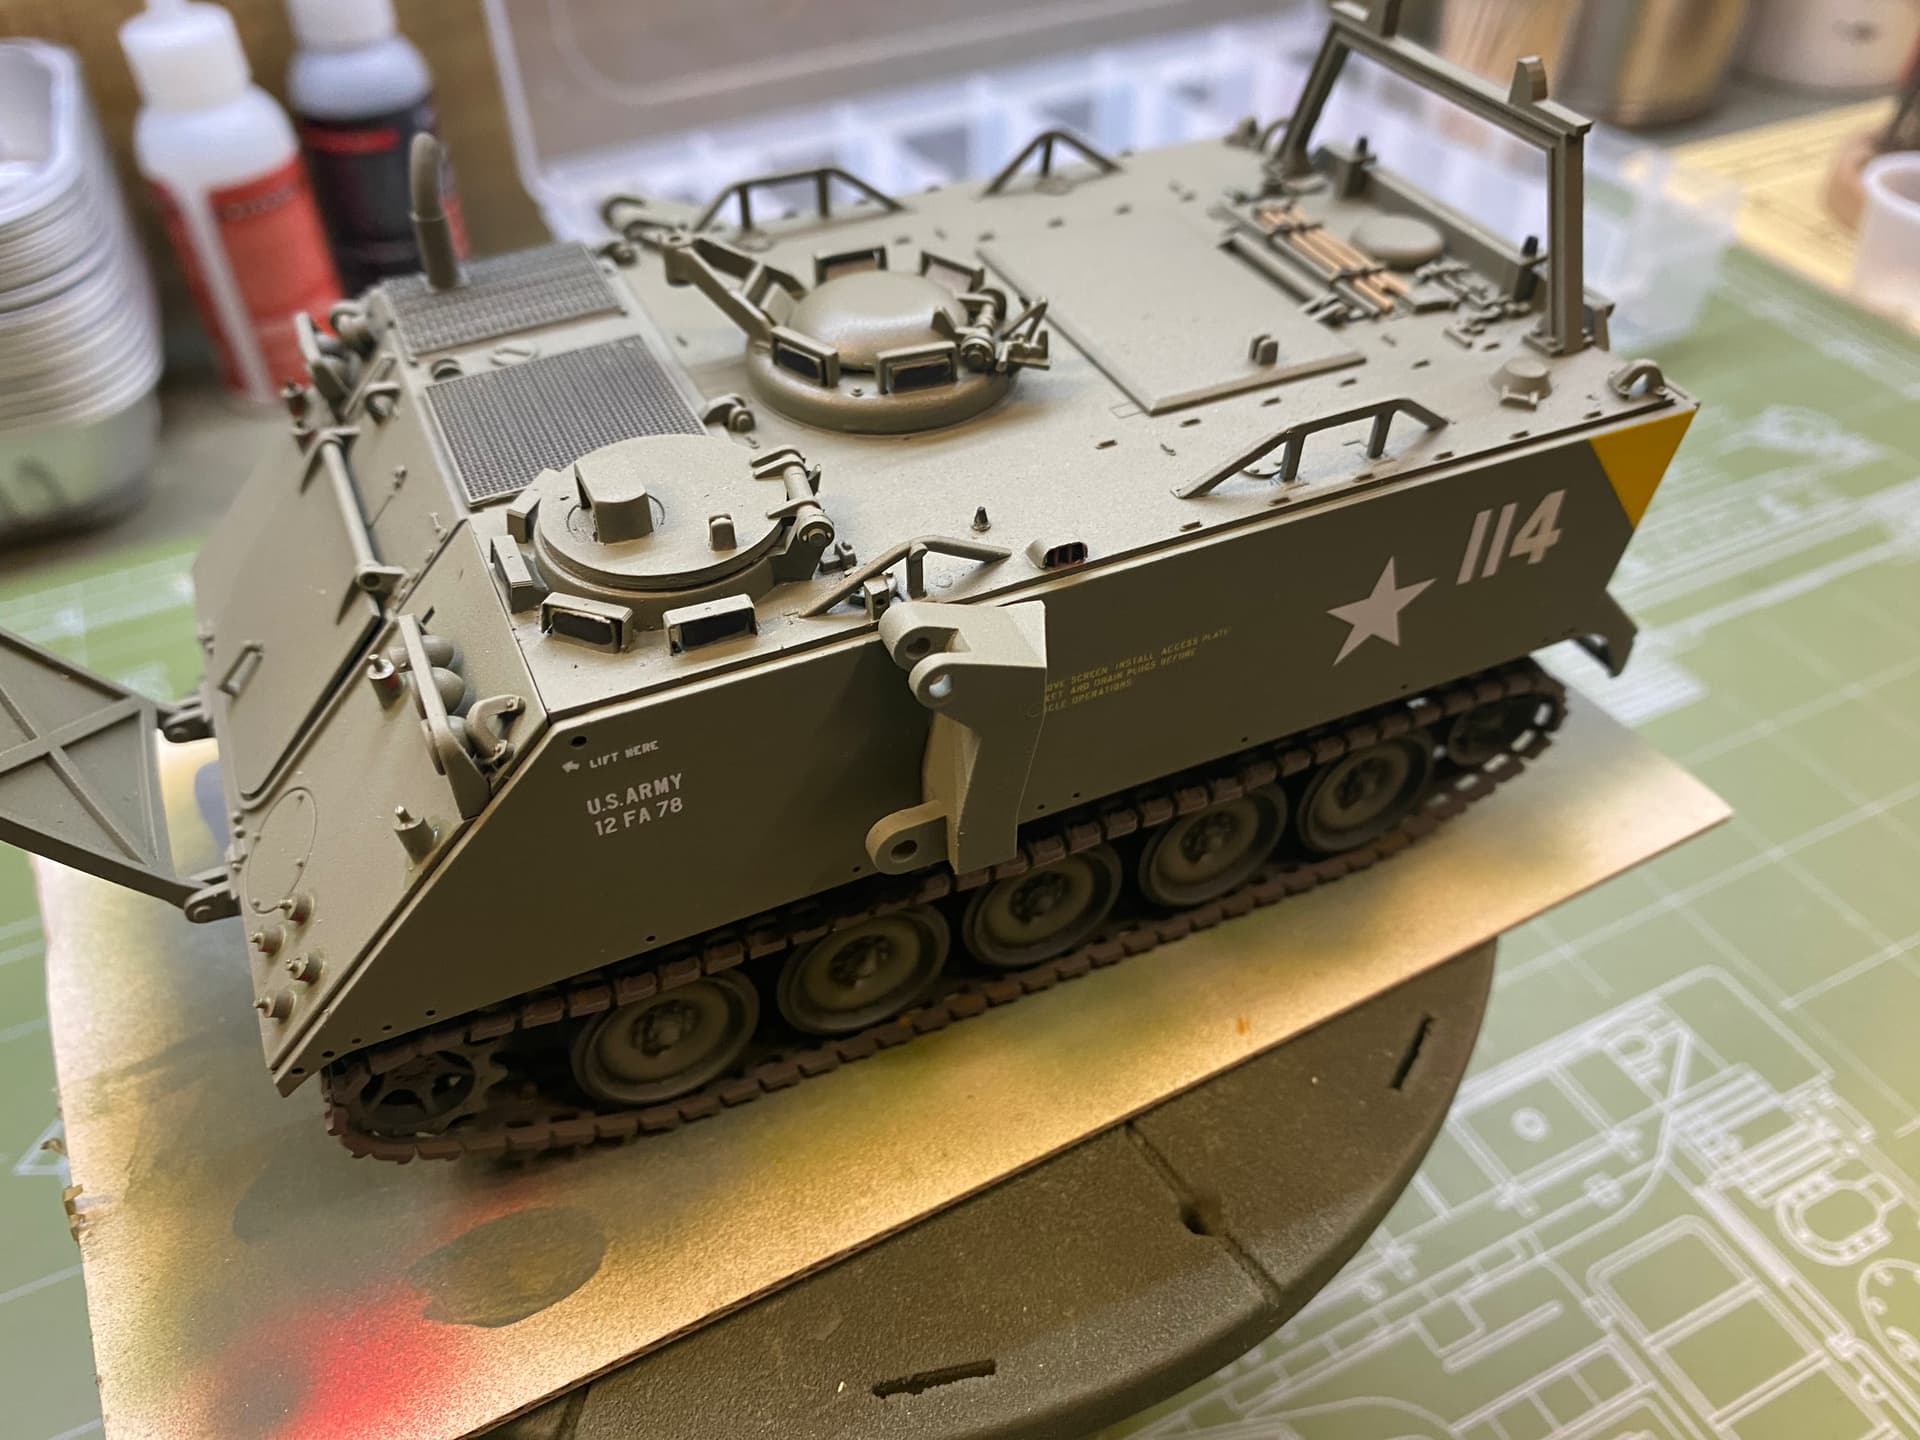
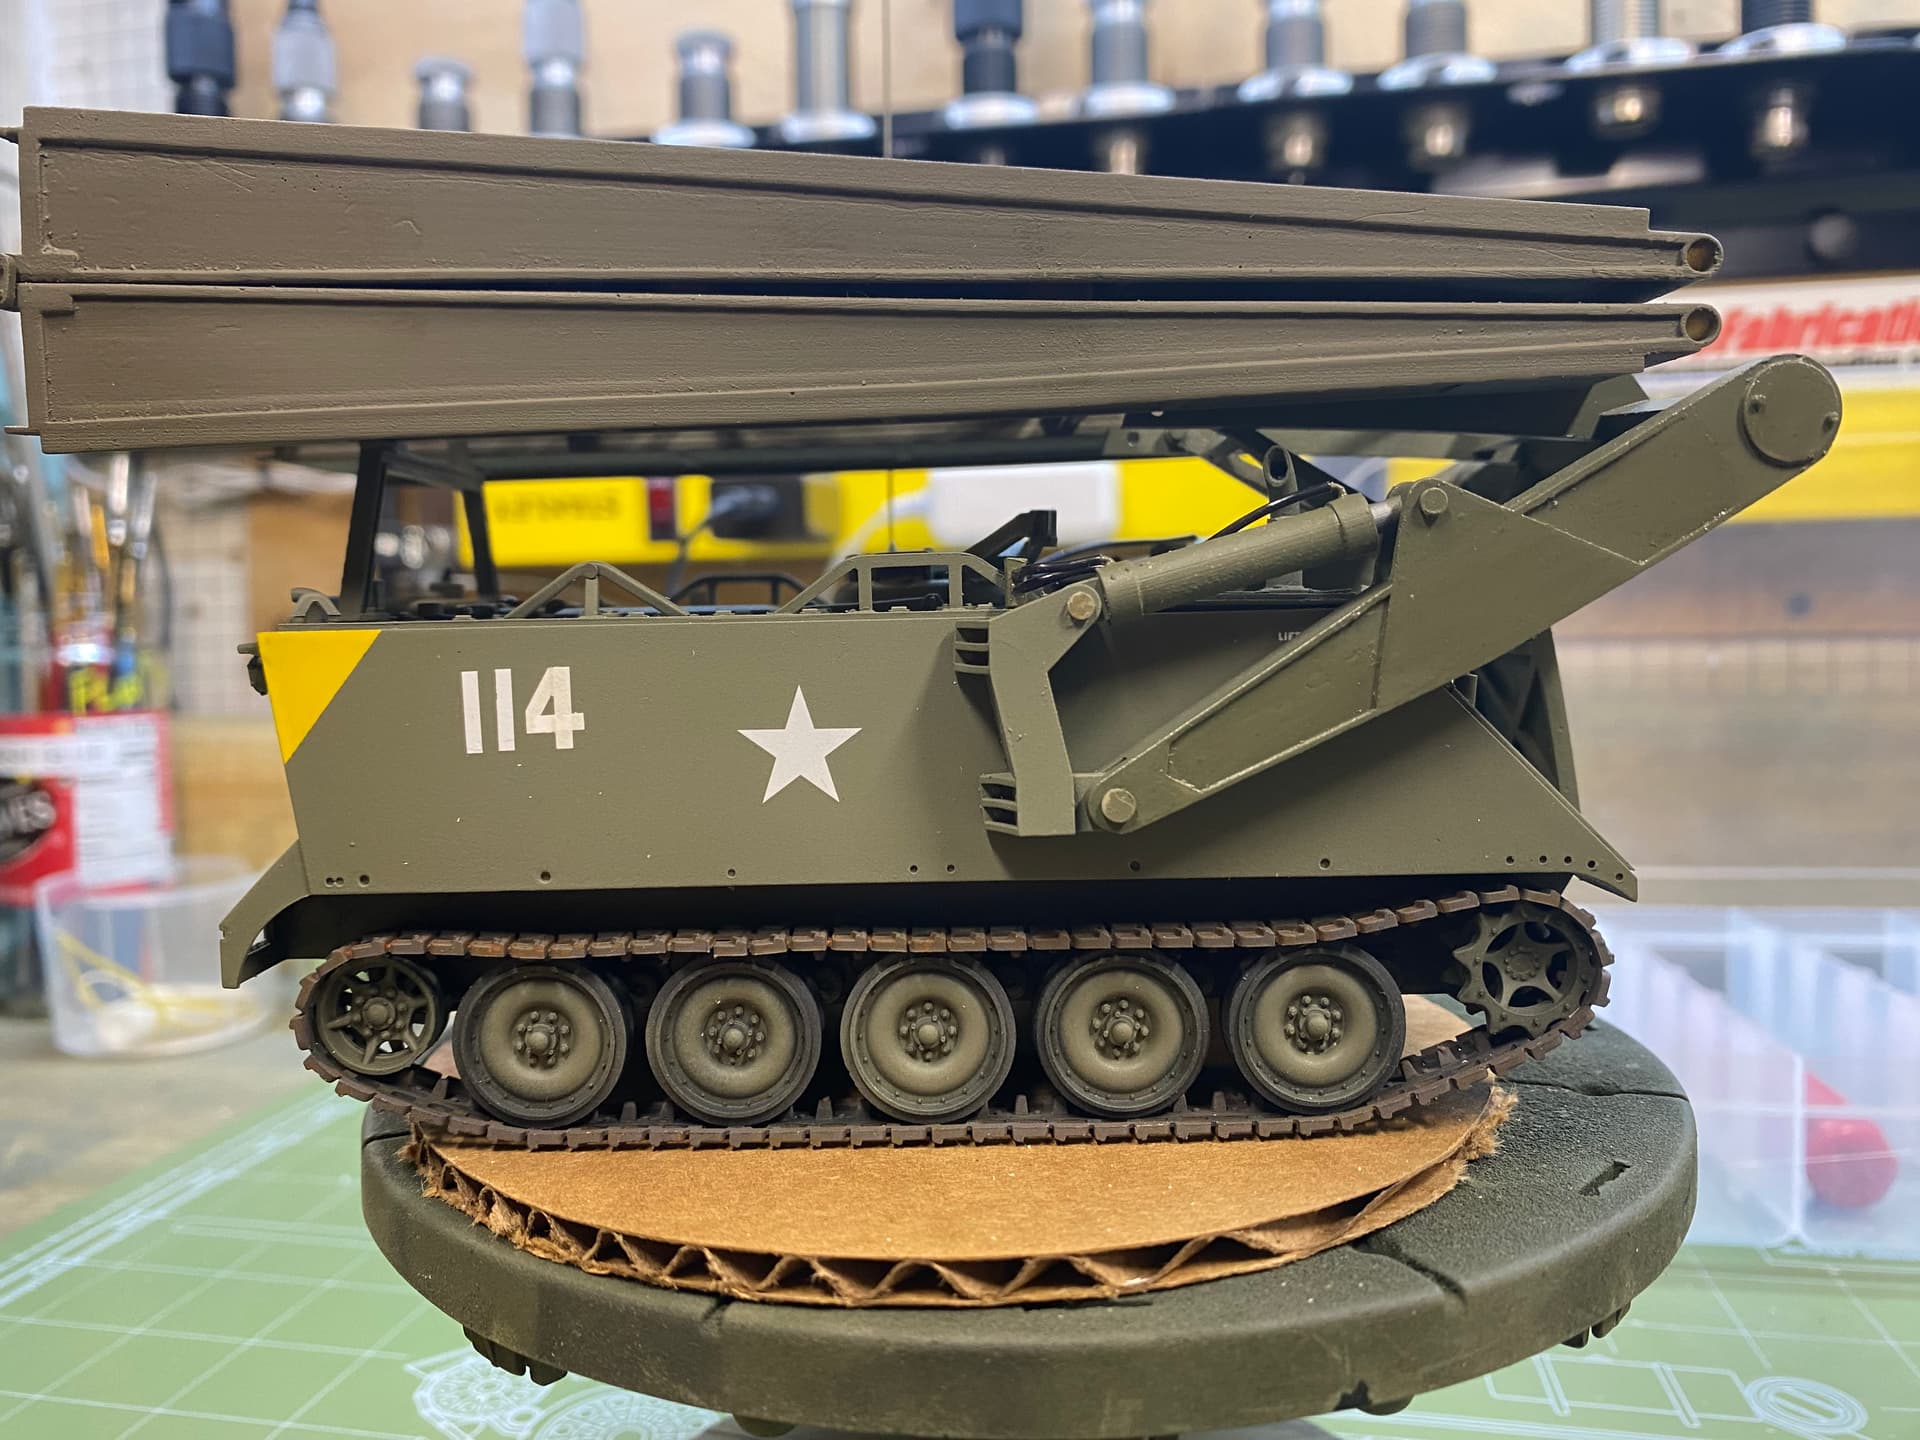
Decals this morning. I’ll use a pinstripe brush to fill the stencil on the “4”, which is a modified Tamiya “14” decal form the ACAV kit.
I don’t have a clue what the registration number of this thing is so I used one from the spares….
5 Likes
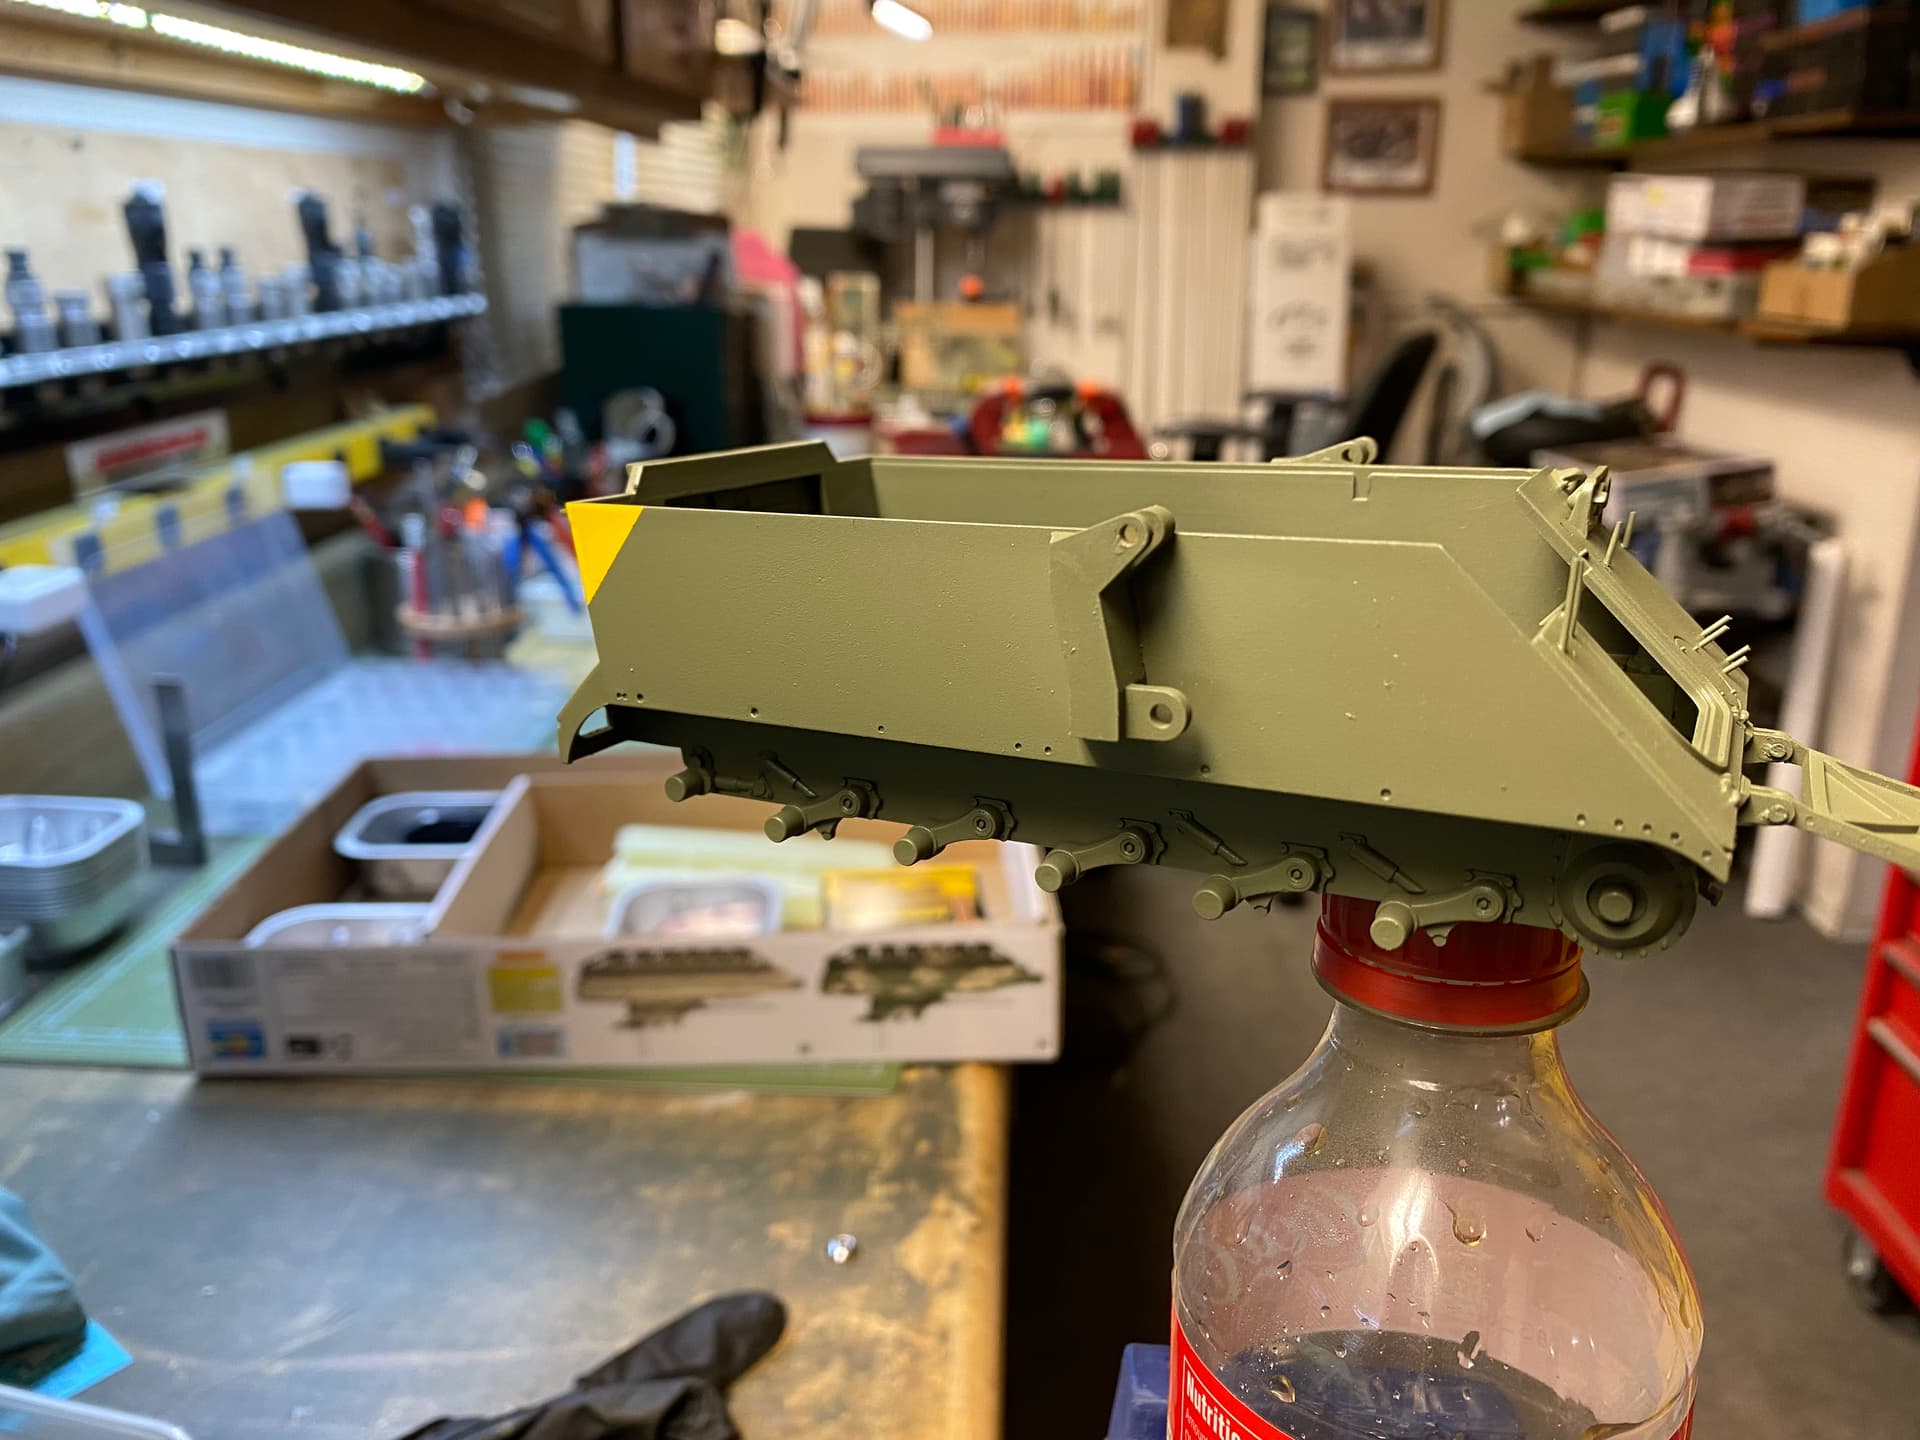
When I primed the bridge with AK OD primer my first impression was that I had forgotten to strain the primer (again) but then I realized there were hundreds of tiny dots from the printing process that I could neither see or feel prior to priming. But that’s what primer’s for.
I’m still not finished sanding; this is primer coat number two.
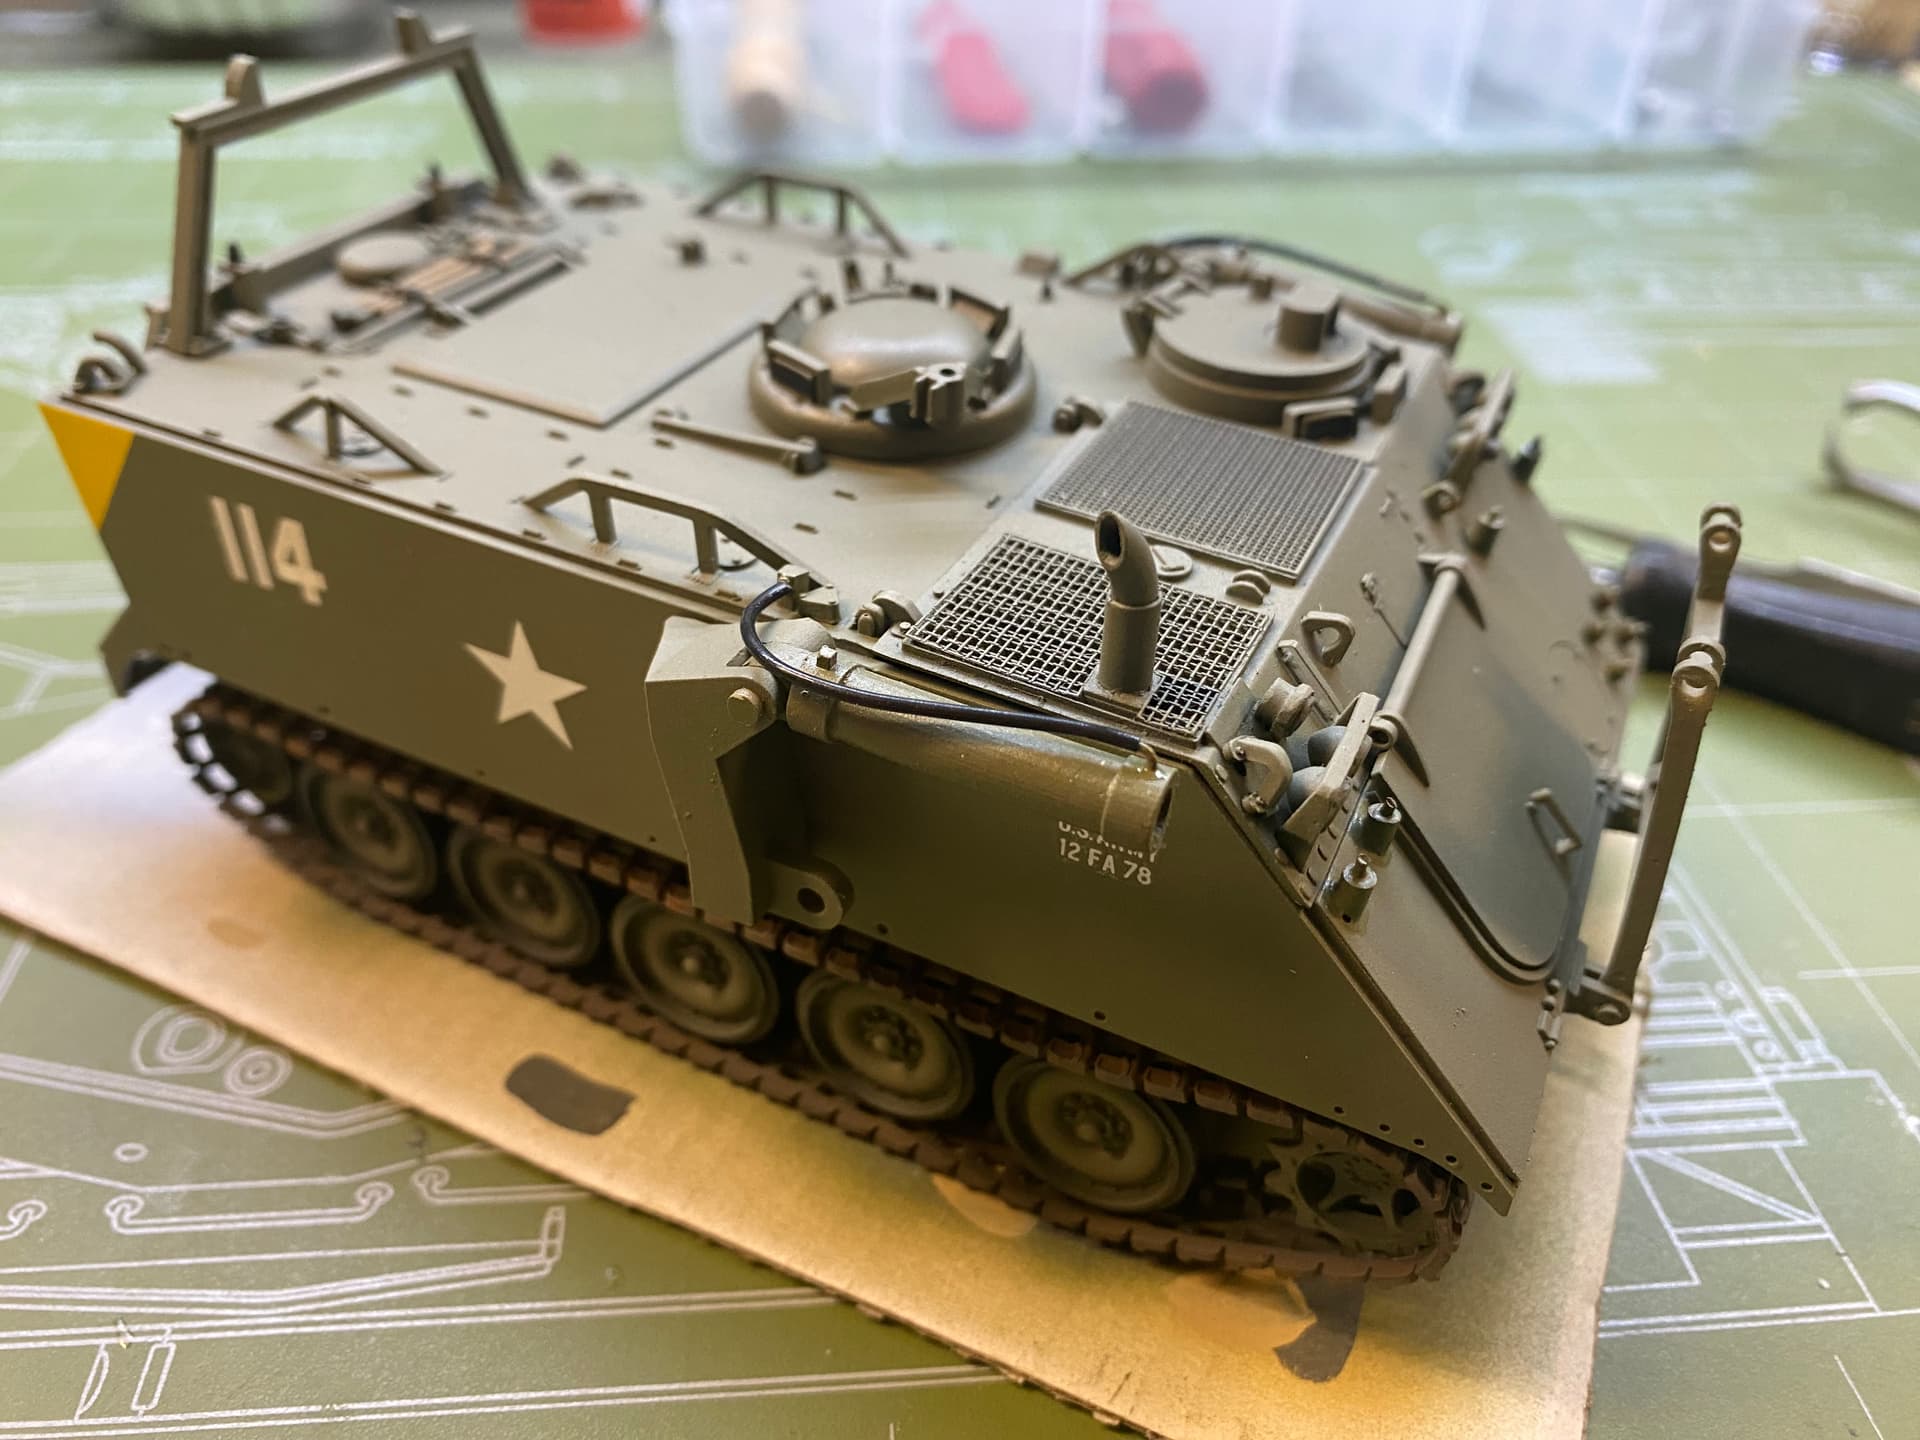
Fussed with both of the “4” some more. It’s looking better, but I’ll probably screw around with them some more.
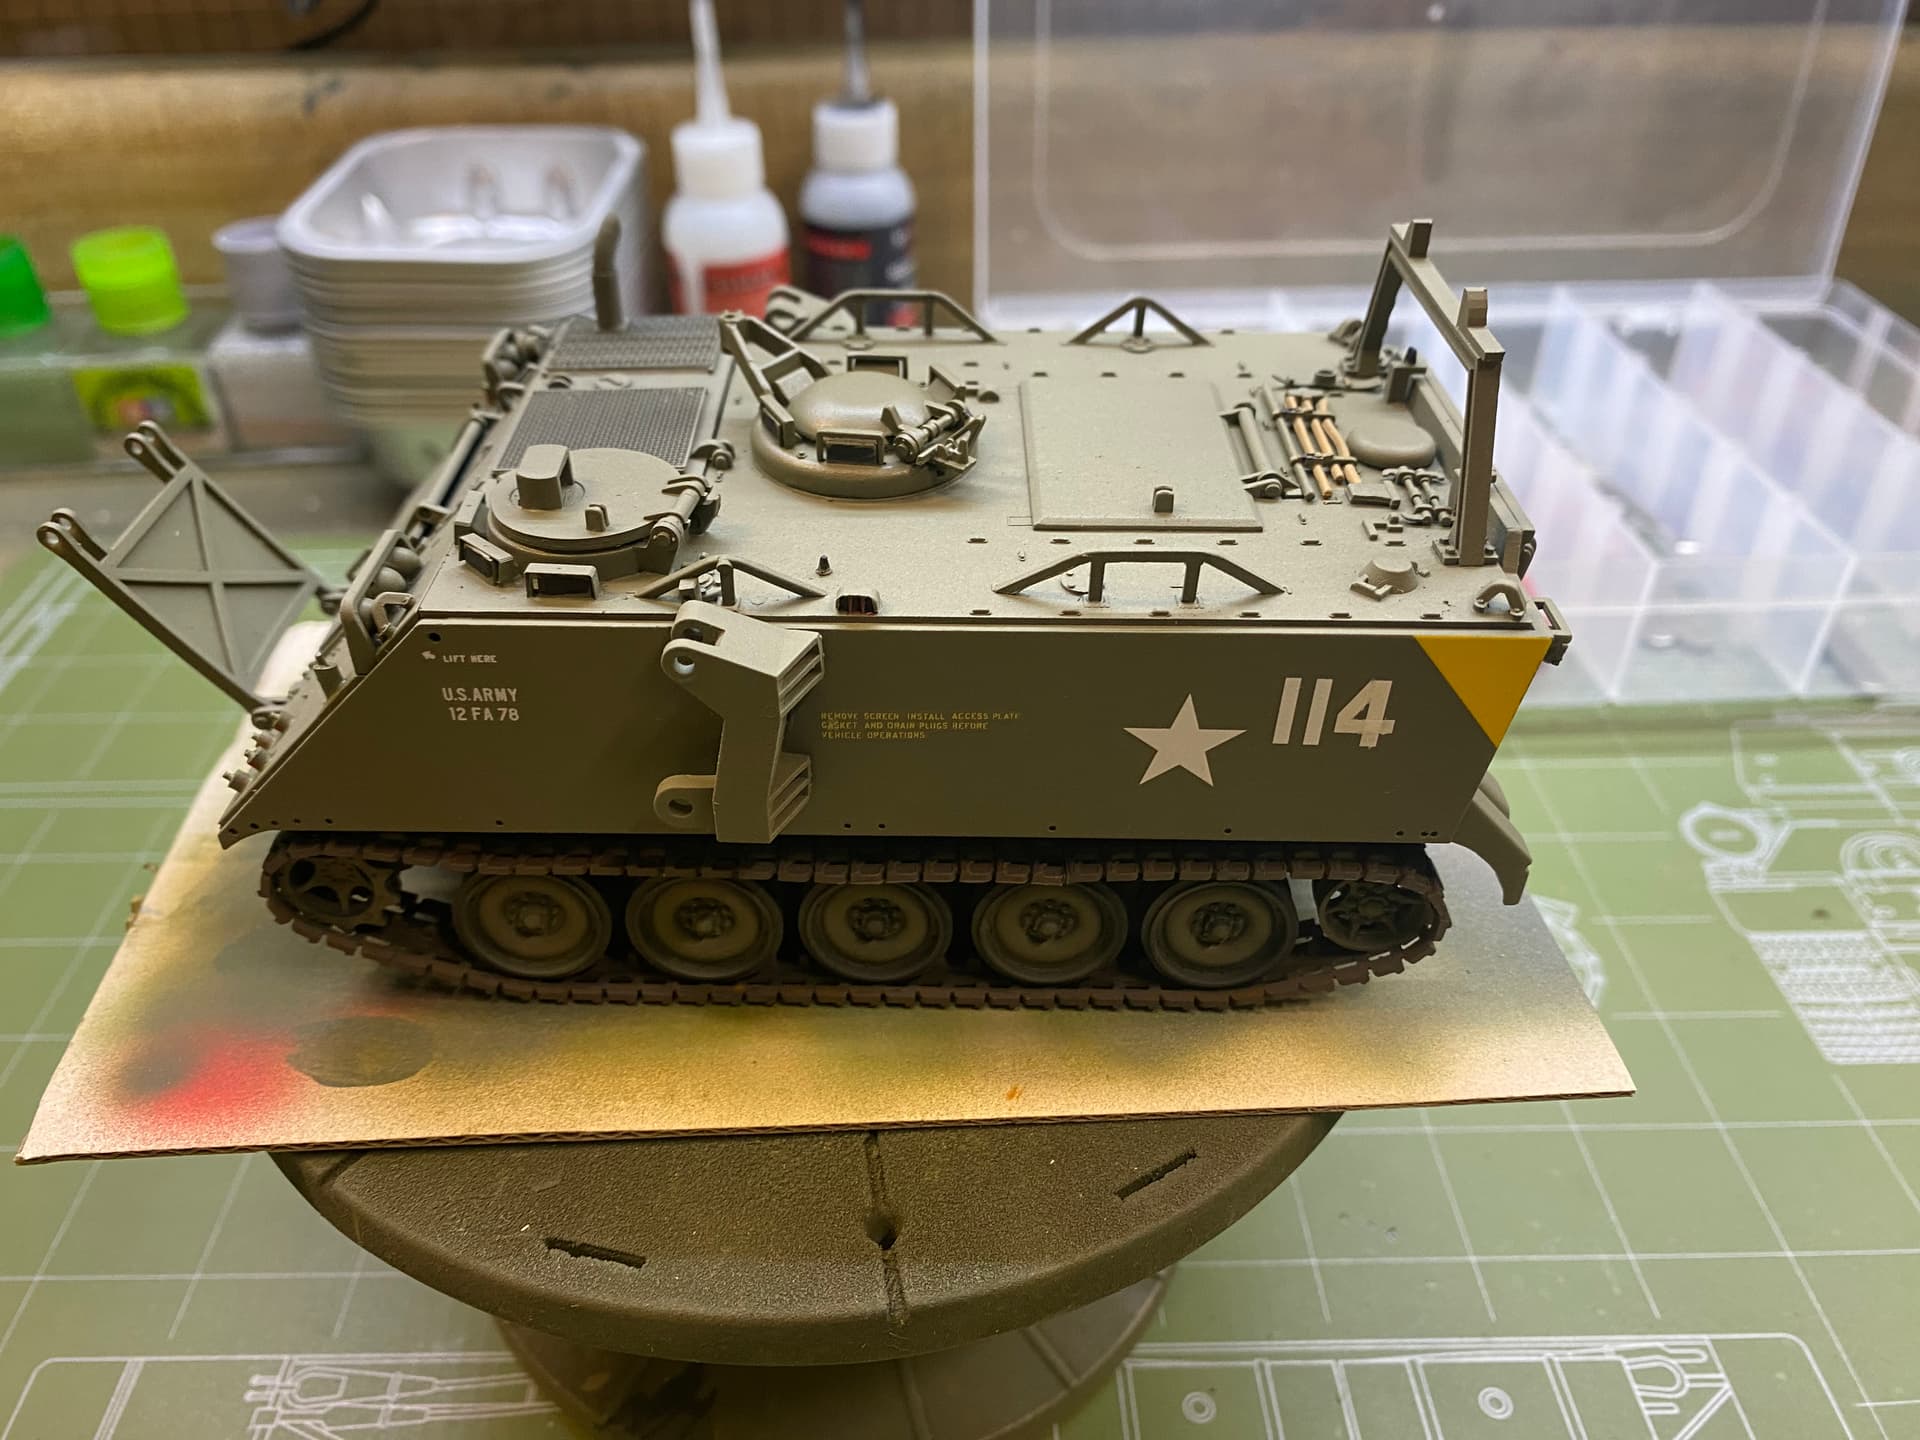
This is a dead flat finish. I still have a couple of cans of Model Master lacquer dull coat that I haven’t used in years so I used some this morning while the wife was out of the house for a few hours.
The plan is to try a Citadel shader first- I found some that has a reddish tint. It’s called Reikin something Skelton shade, or something equally ridiculous. I’ve been following along with @165thspc for his shading techniques so I figured I give it a try. I’ve even gotten the special technical Citadel thinner… this is new to me so I’m open to suggestions.
I’ve also got some Vietnam pigments coming for this project- I’ve never used them before so I’m gonna’ need some guidance there, too.
In the past, I’d use a red-orange tinted oil wash with some pin washes and dry brushing and call it done. I’m looking to do something different here.
9 Likes
This is looking GOOD!
Again i would remind: give vehicle a good dry coat of matte clear before using water based shaders. Would not want you stains to start forming ulgy pools of color rather than flowing out smoothly.
1 Like
Personally I would use the shaders on the road wheels and tracks to brind out detail but then switch to oil pastels for the main body giving it a dusty, used appearance.
1 Like
Thanks for chiming in @165thspc
It’s dead dead dead flat lacquer finish now. I will do the road wheels and tracks as per your suggestion. I already did a light orange oil wash on them prior to assembly.
Thanks again!
1 Like
High temp was 22F today. Pretty busy most of the day with holiday prep and eating.
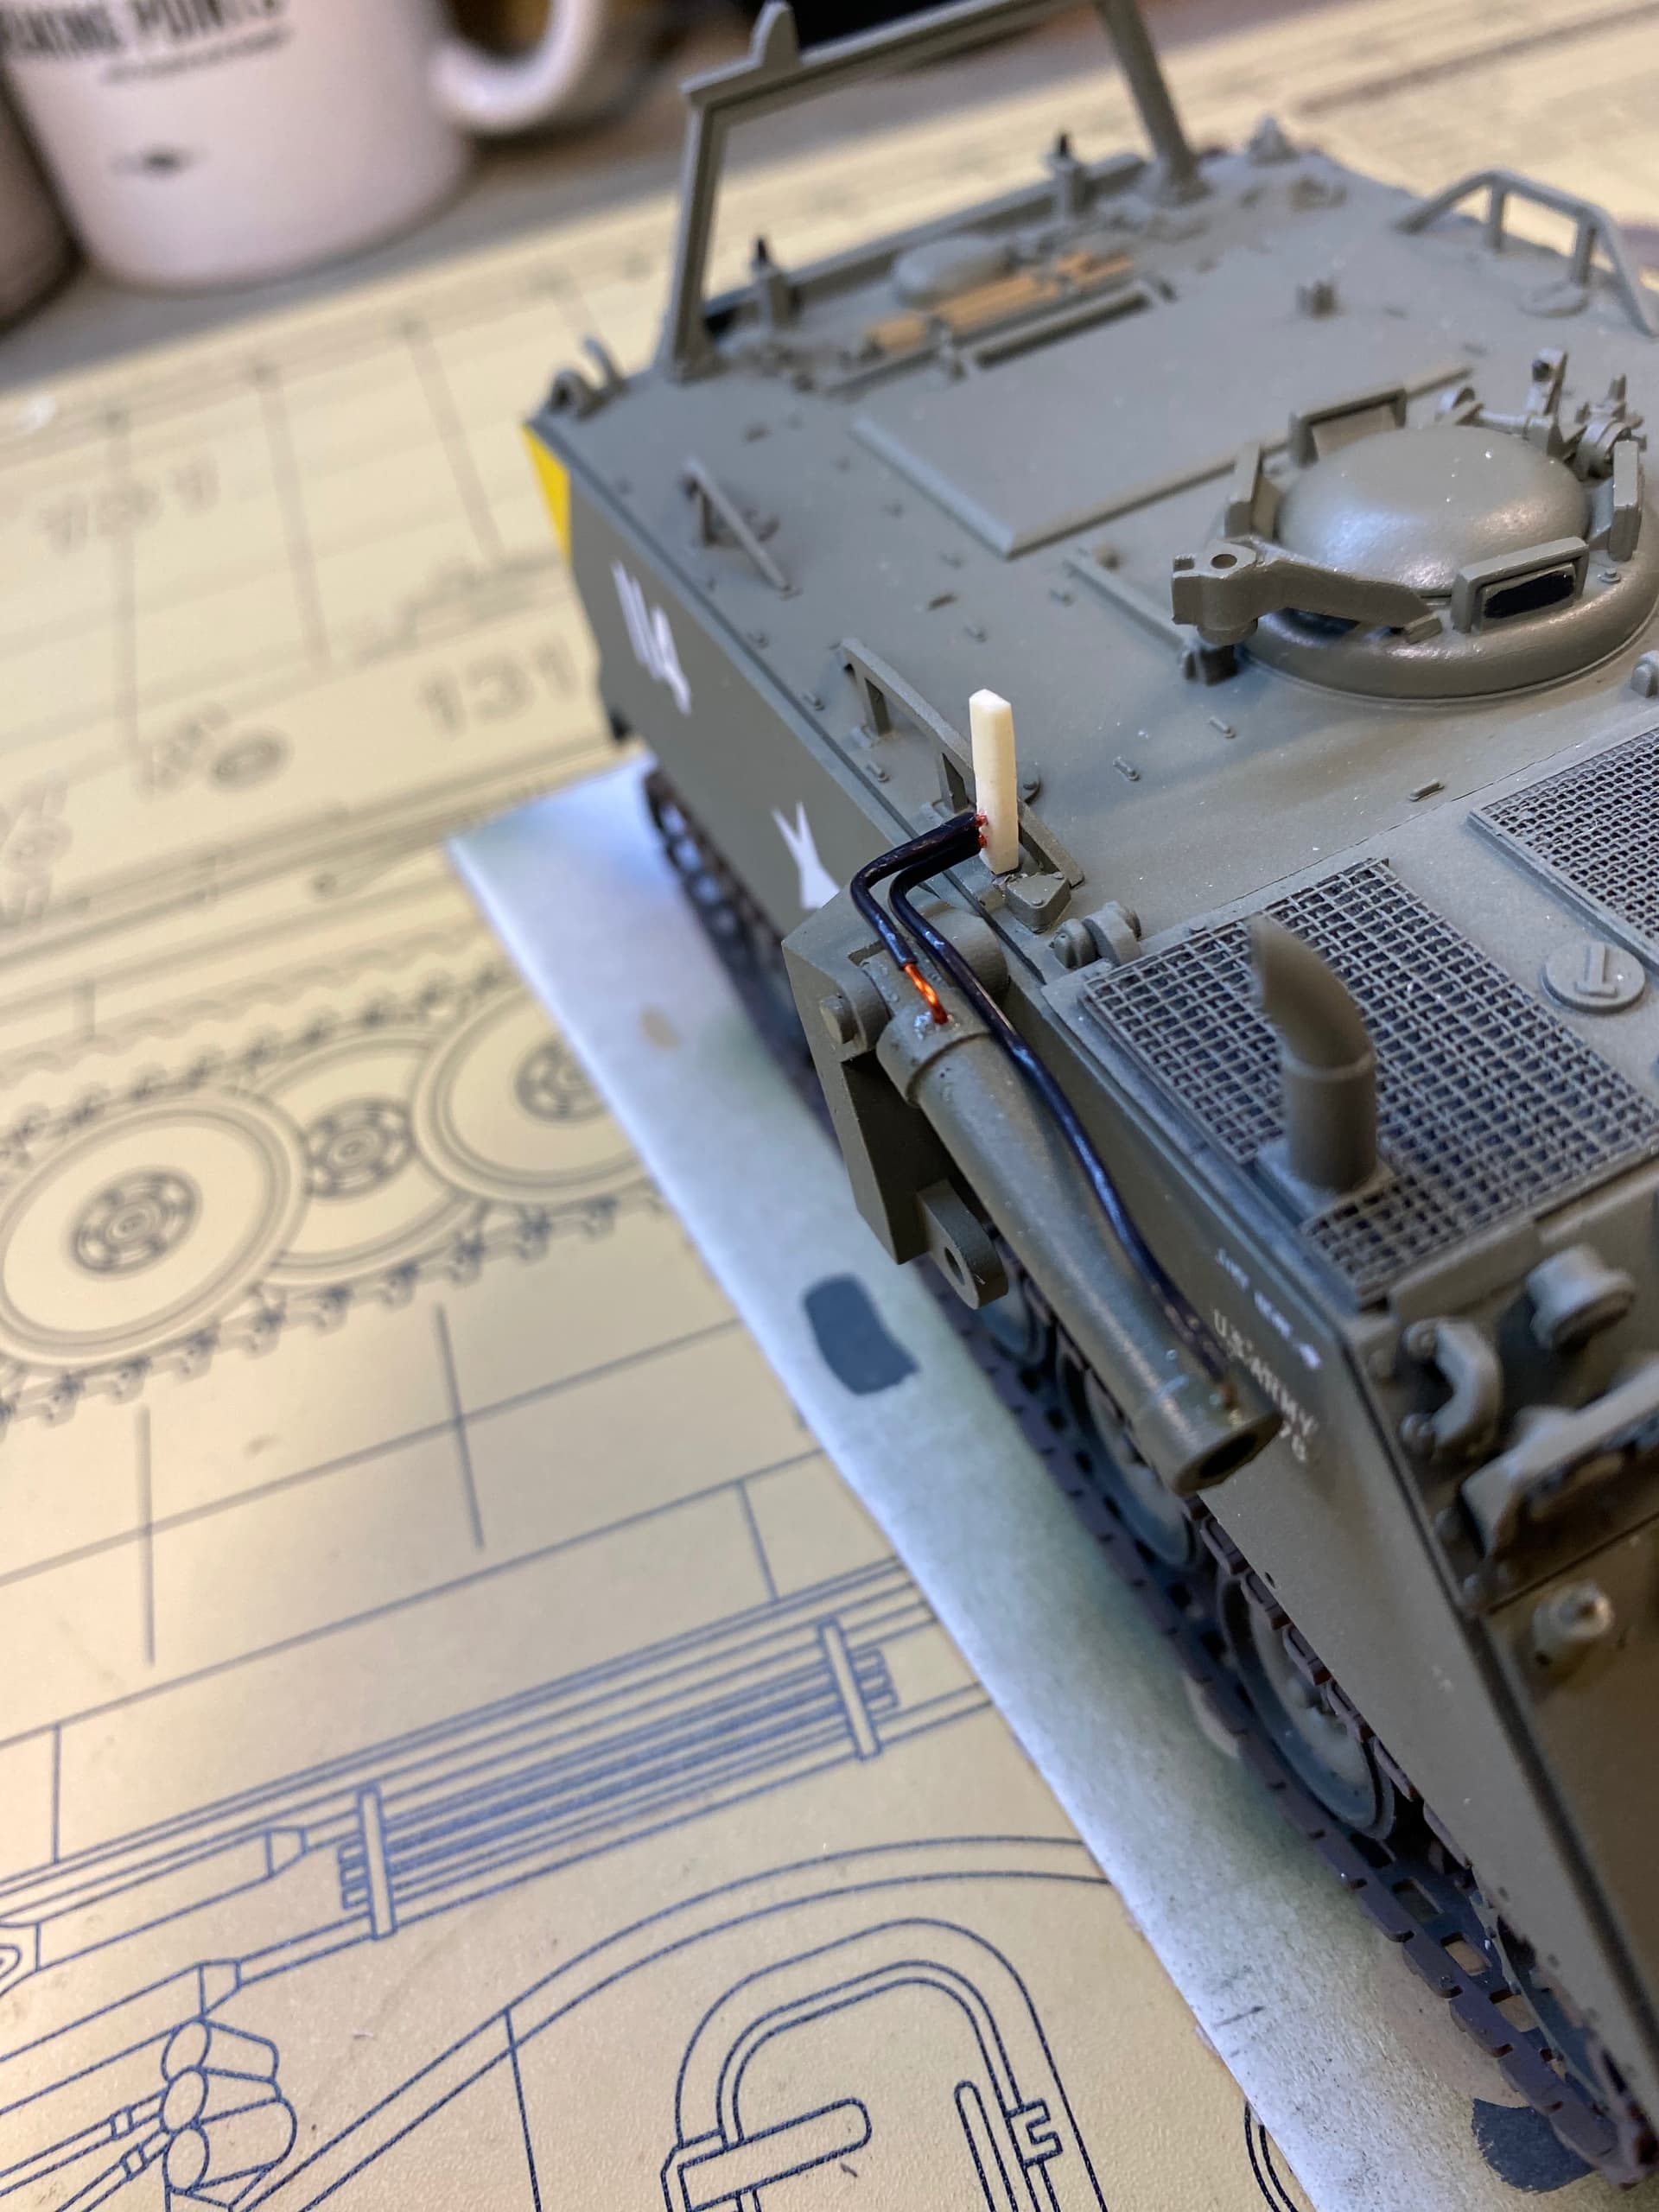
Had a chance to screw around with hydraulic hoses and a couple other little things. Nothing permanent on the hoses yet.
Merry Christmas, everybody.
6 Likes
Very nice detail touch with the hydraulic lines
1 Like
Had a chance a while back to get some base colors on the M48 AVLM. Green is AK primer Russian green. Looks pretty close to NATO green…
Waiting for the petition from God dude to send me some road wheels and sprockets….
2 Likes
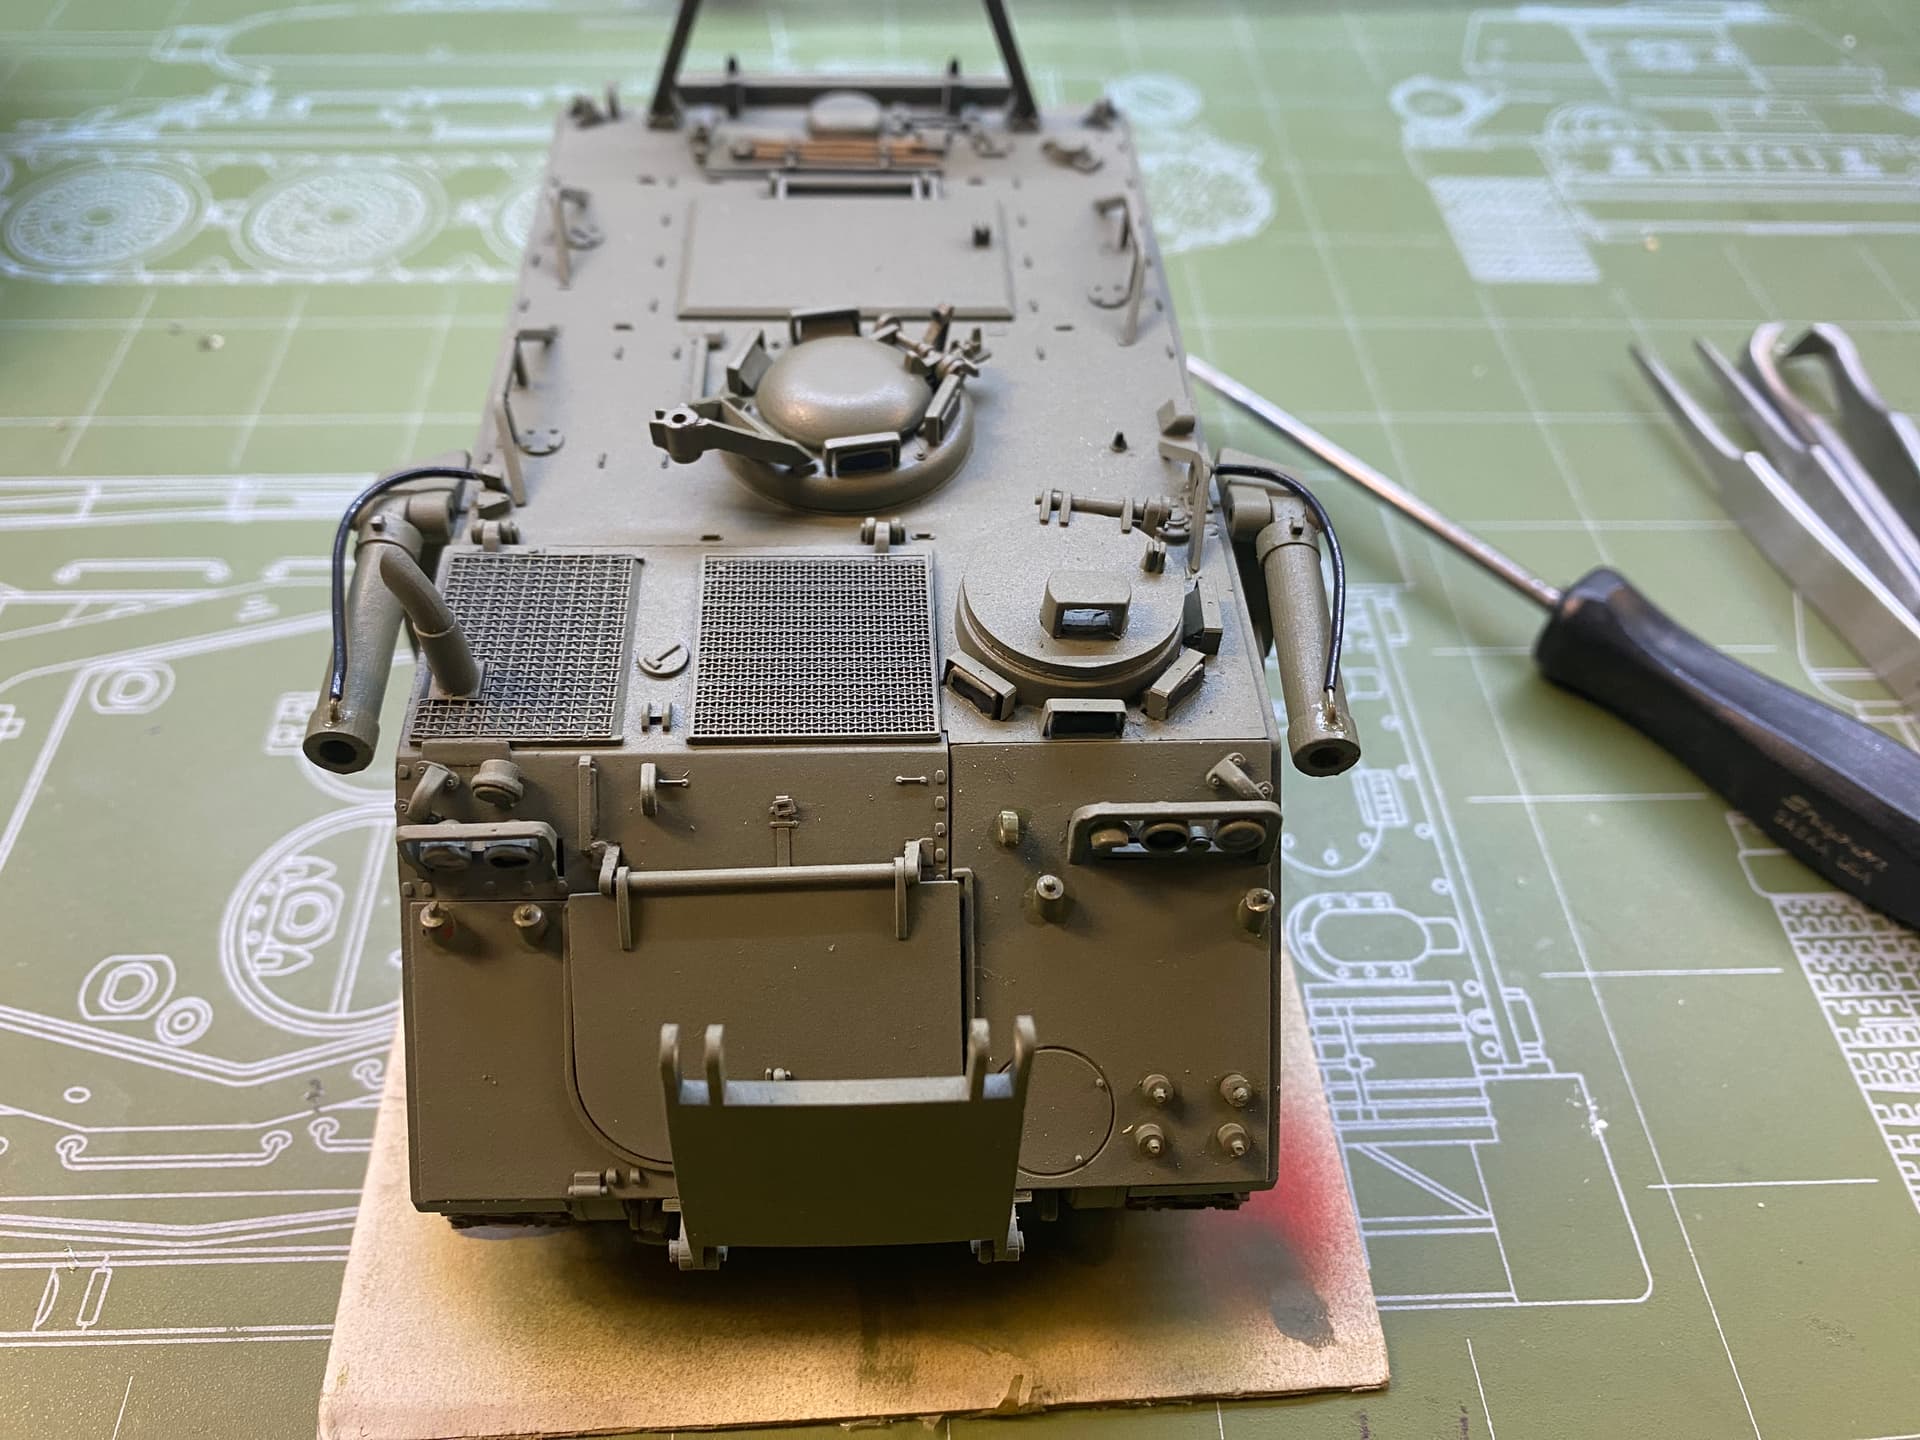
If I’m gonna’ do the hydraulic lines, I might as well do the pressure and return lines for these cylinders.
Problem is that vinyl tubing this size kinks if you bend it without a generous radius so….
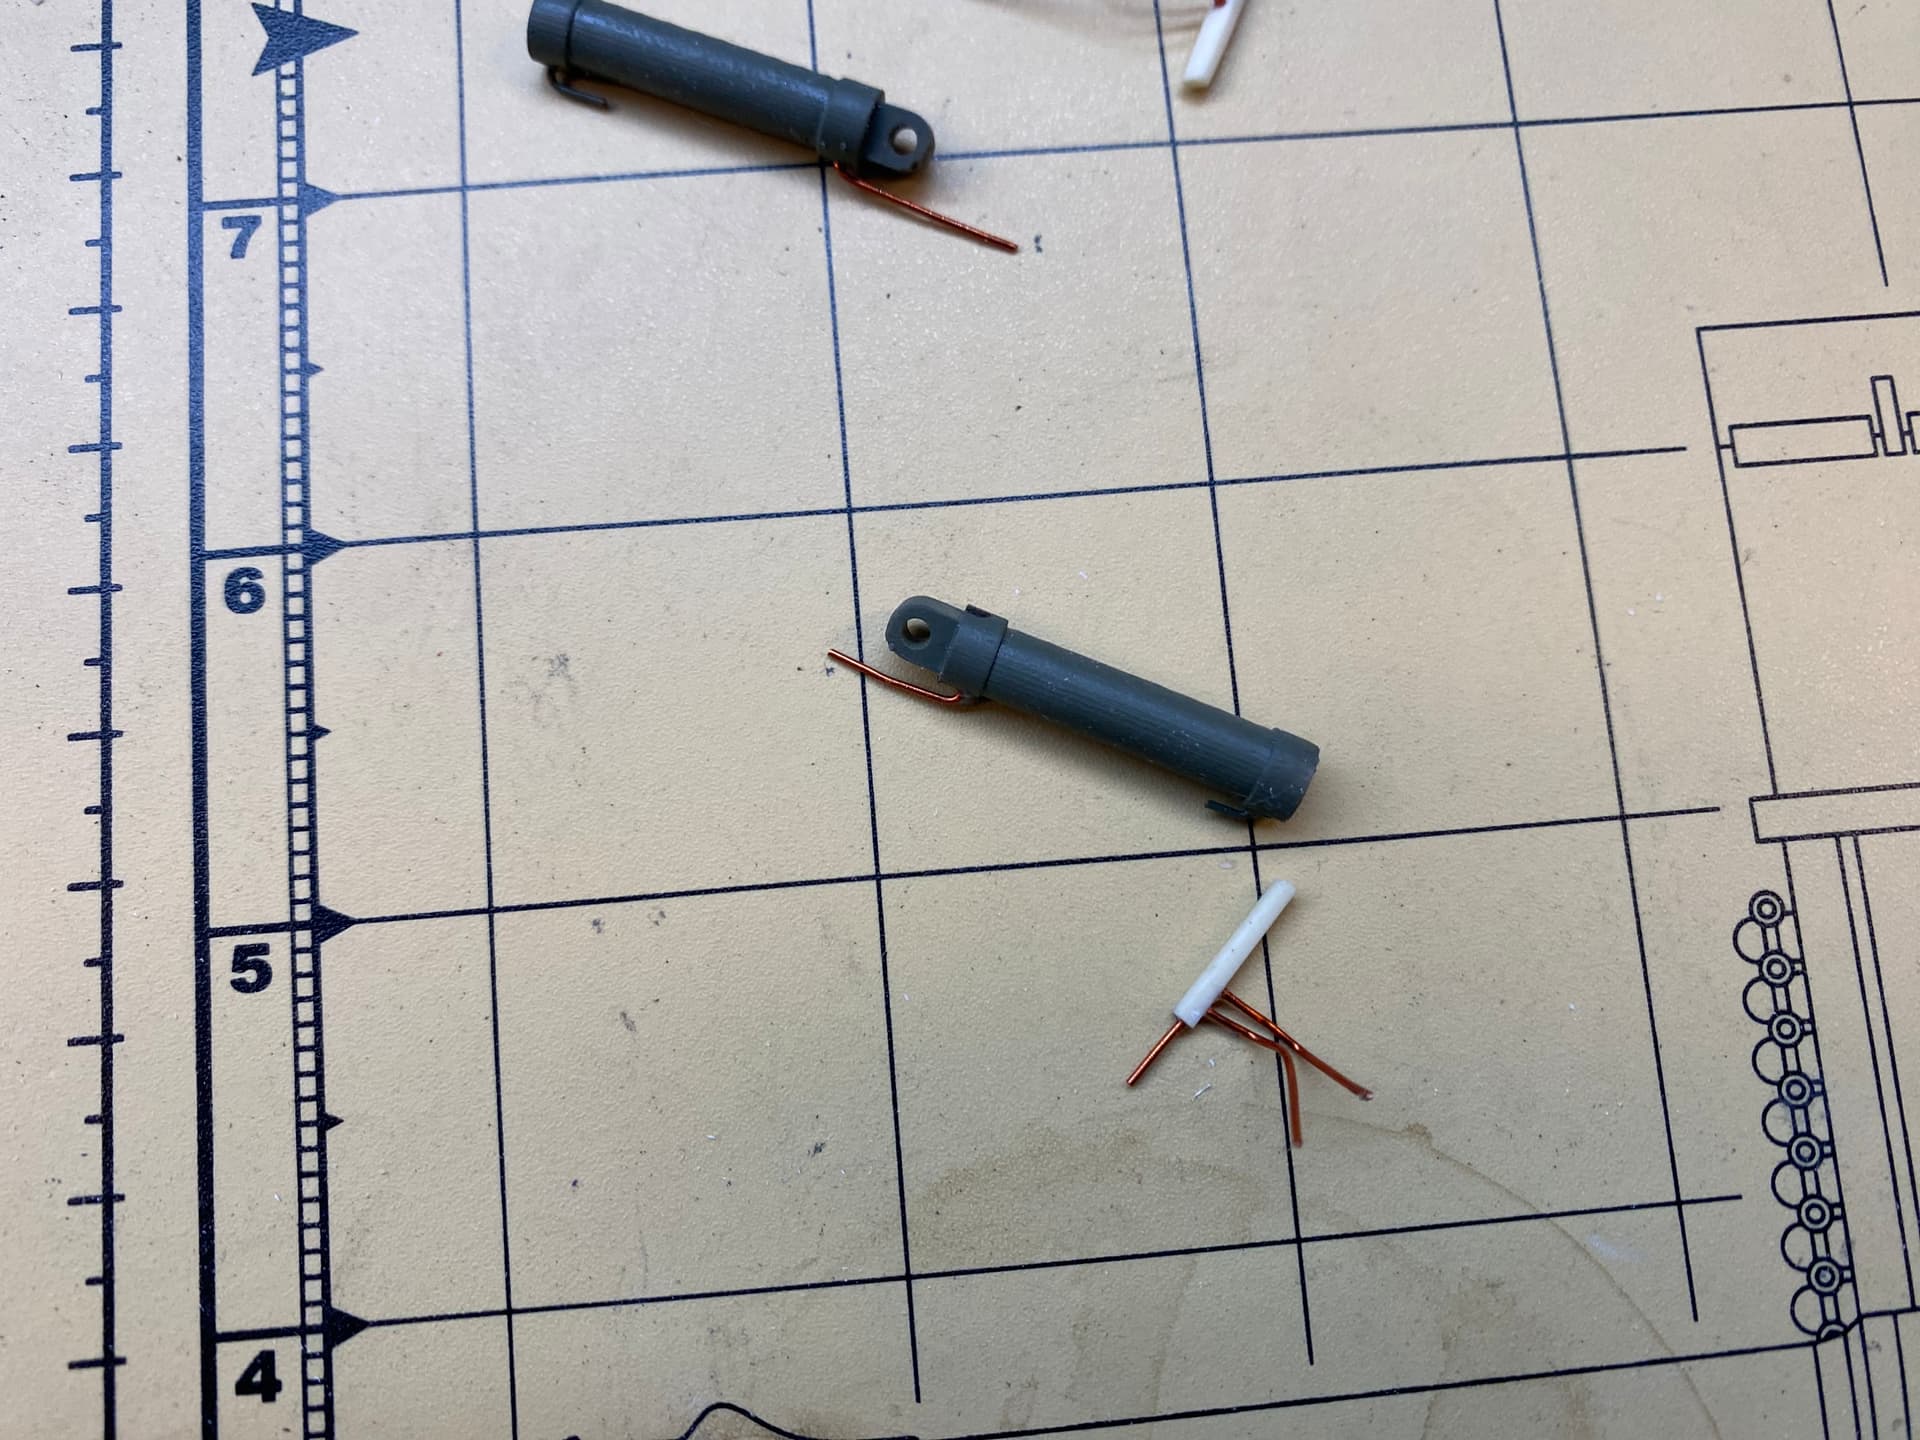
I used .060 copper wire inside of the tubing for all the bends. I whittled a manifold block out of a scrap piece of resin and put an .060 pin on the bottom of it for corresponding holes in the roof.
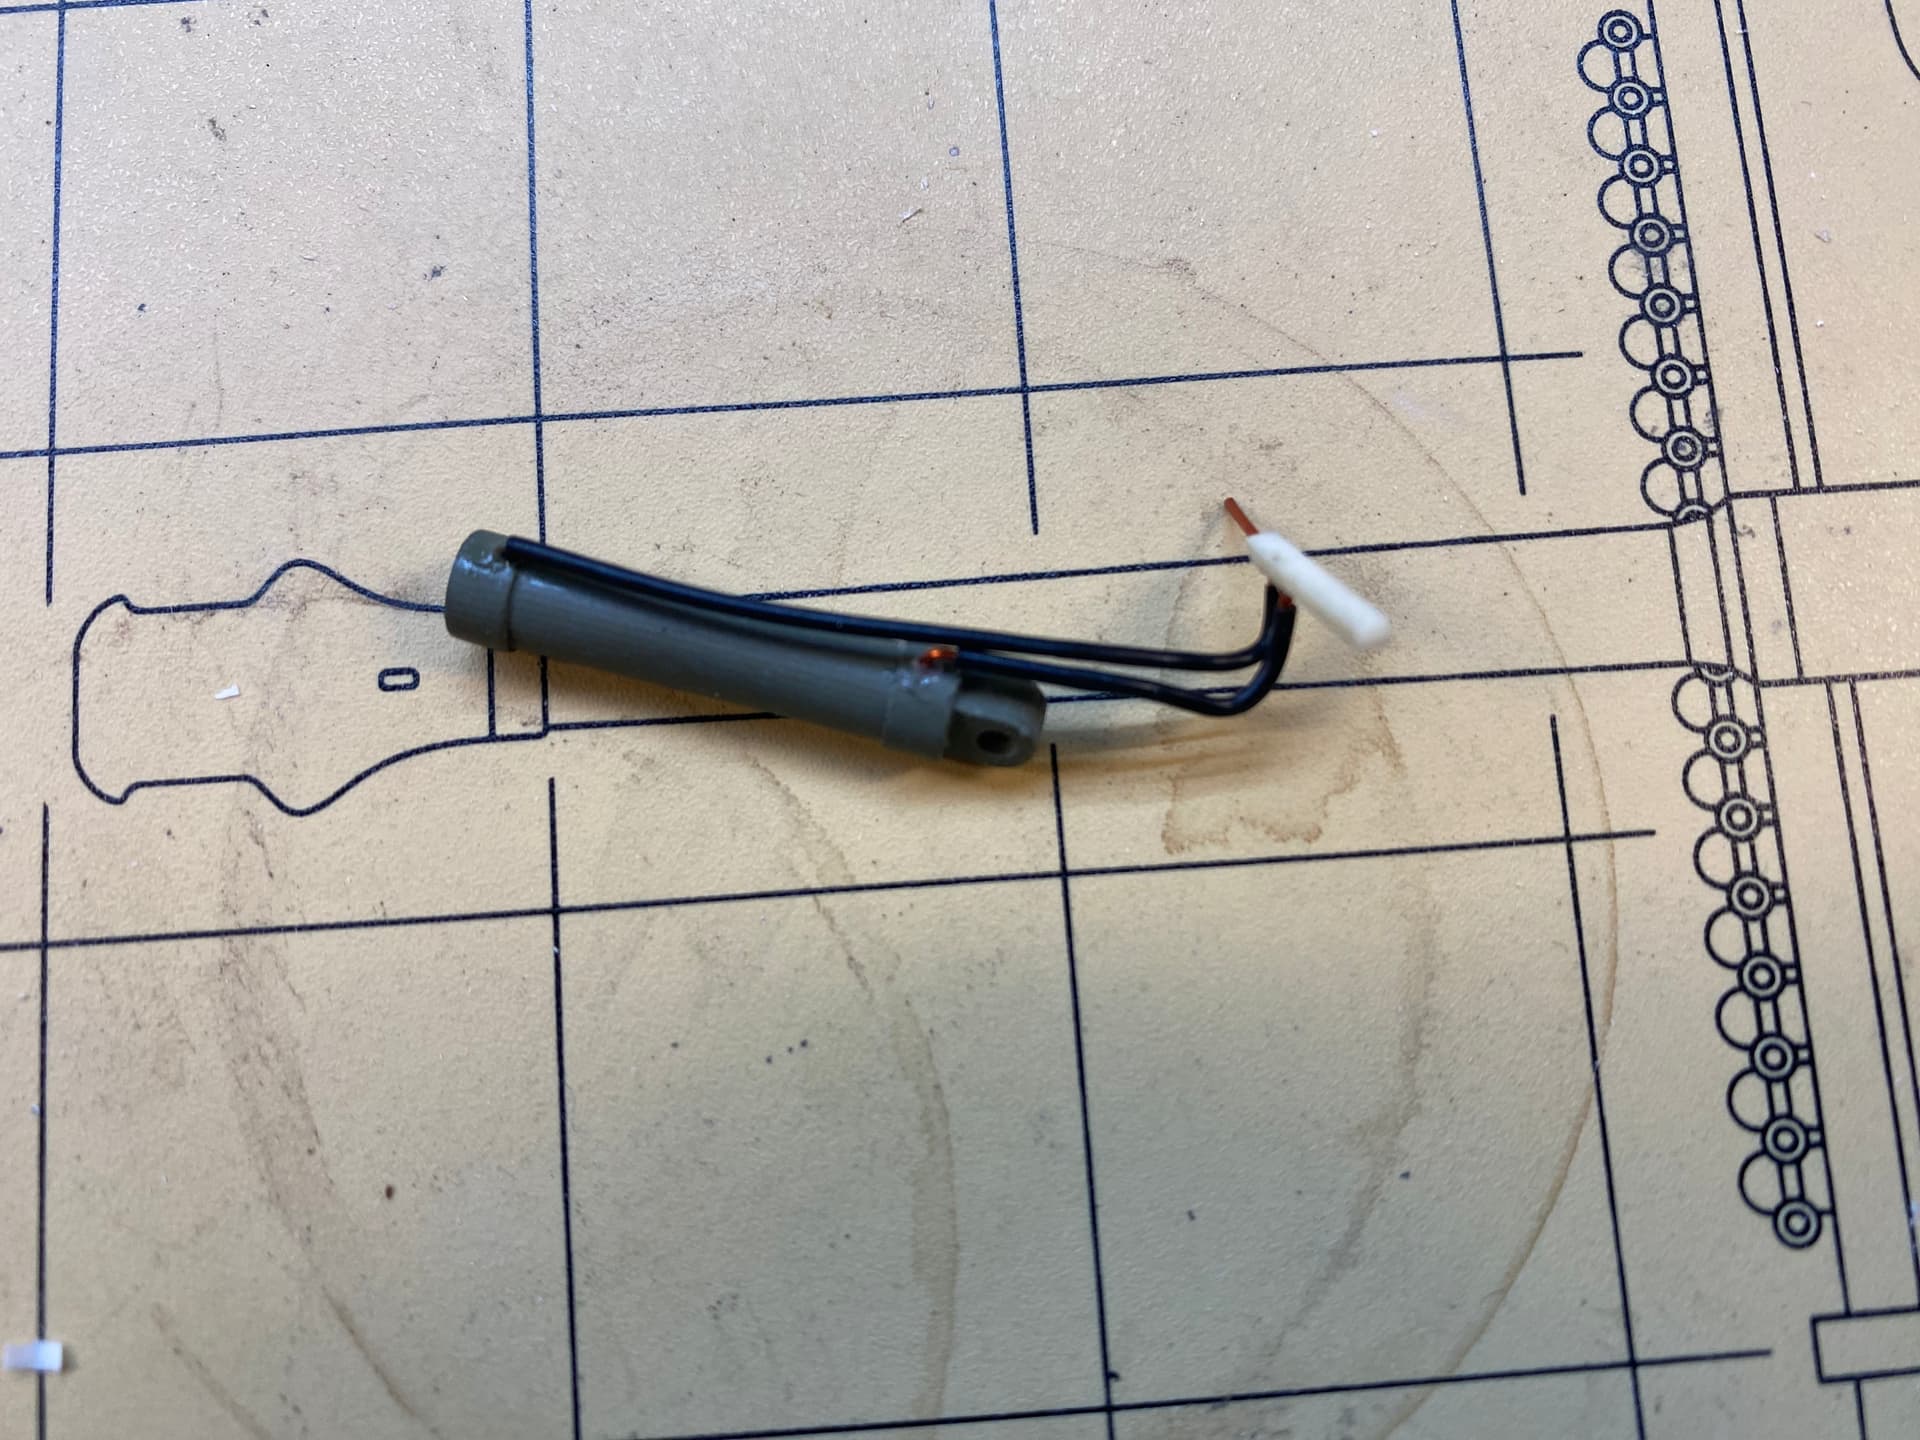
I left the “manifold block” long so it’s easier to handle. I’ll paint everything black or OD it and when it’s time to glue it in place, I’ll cut the excess off and touch it up.

I’m going blind. That’s enough for today. Time to eat some leftovers.
6 Likes
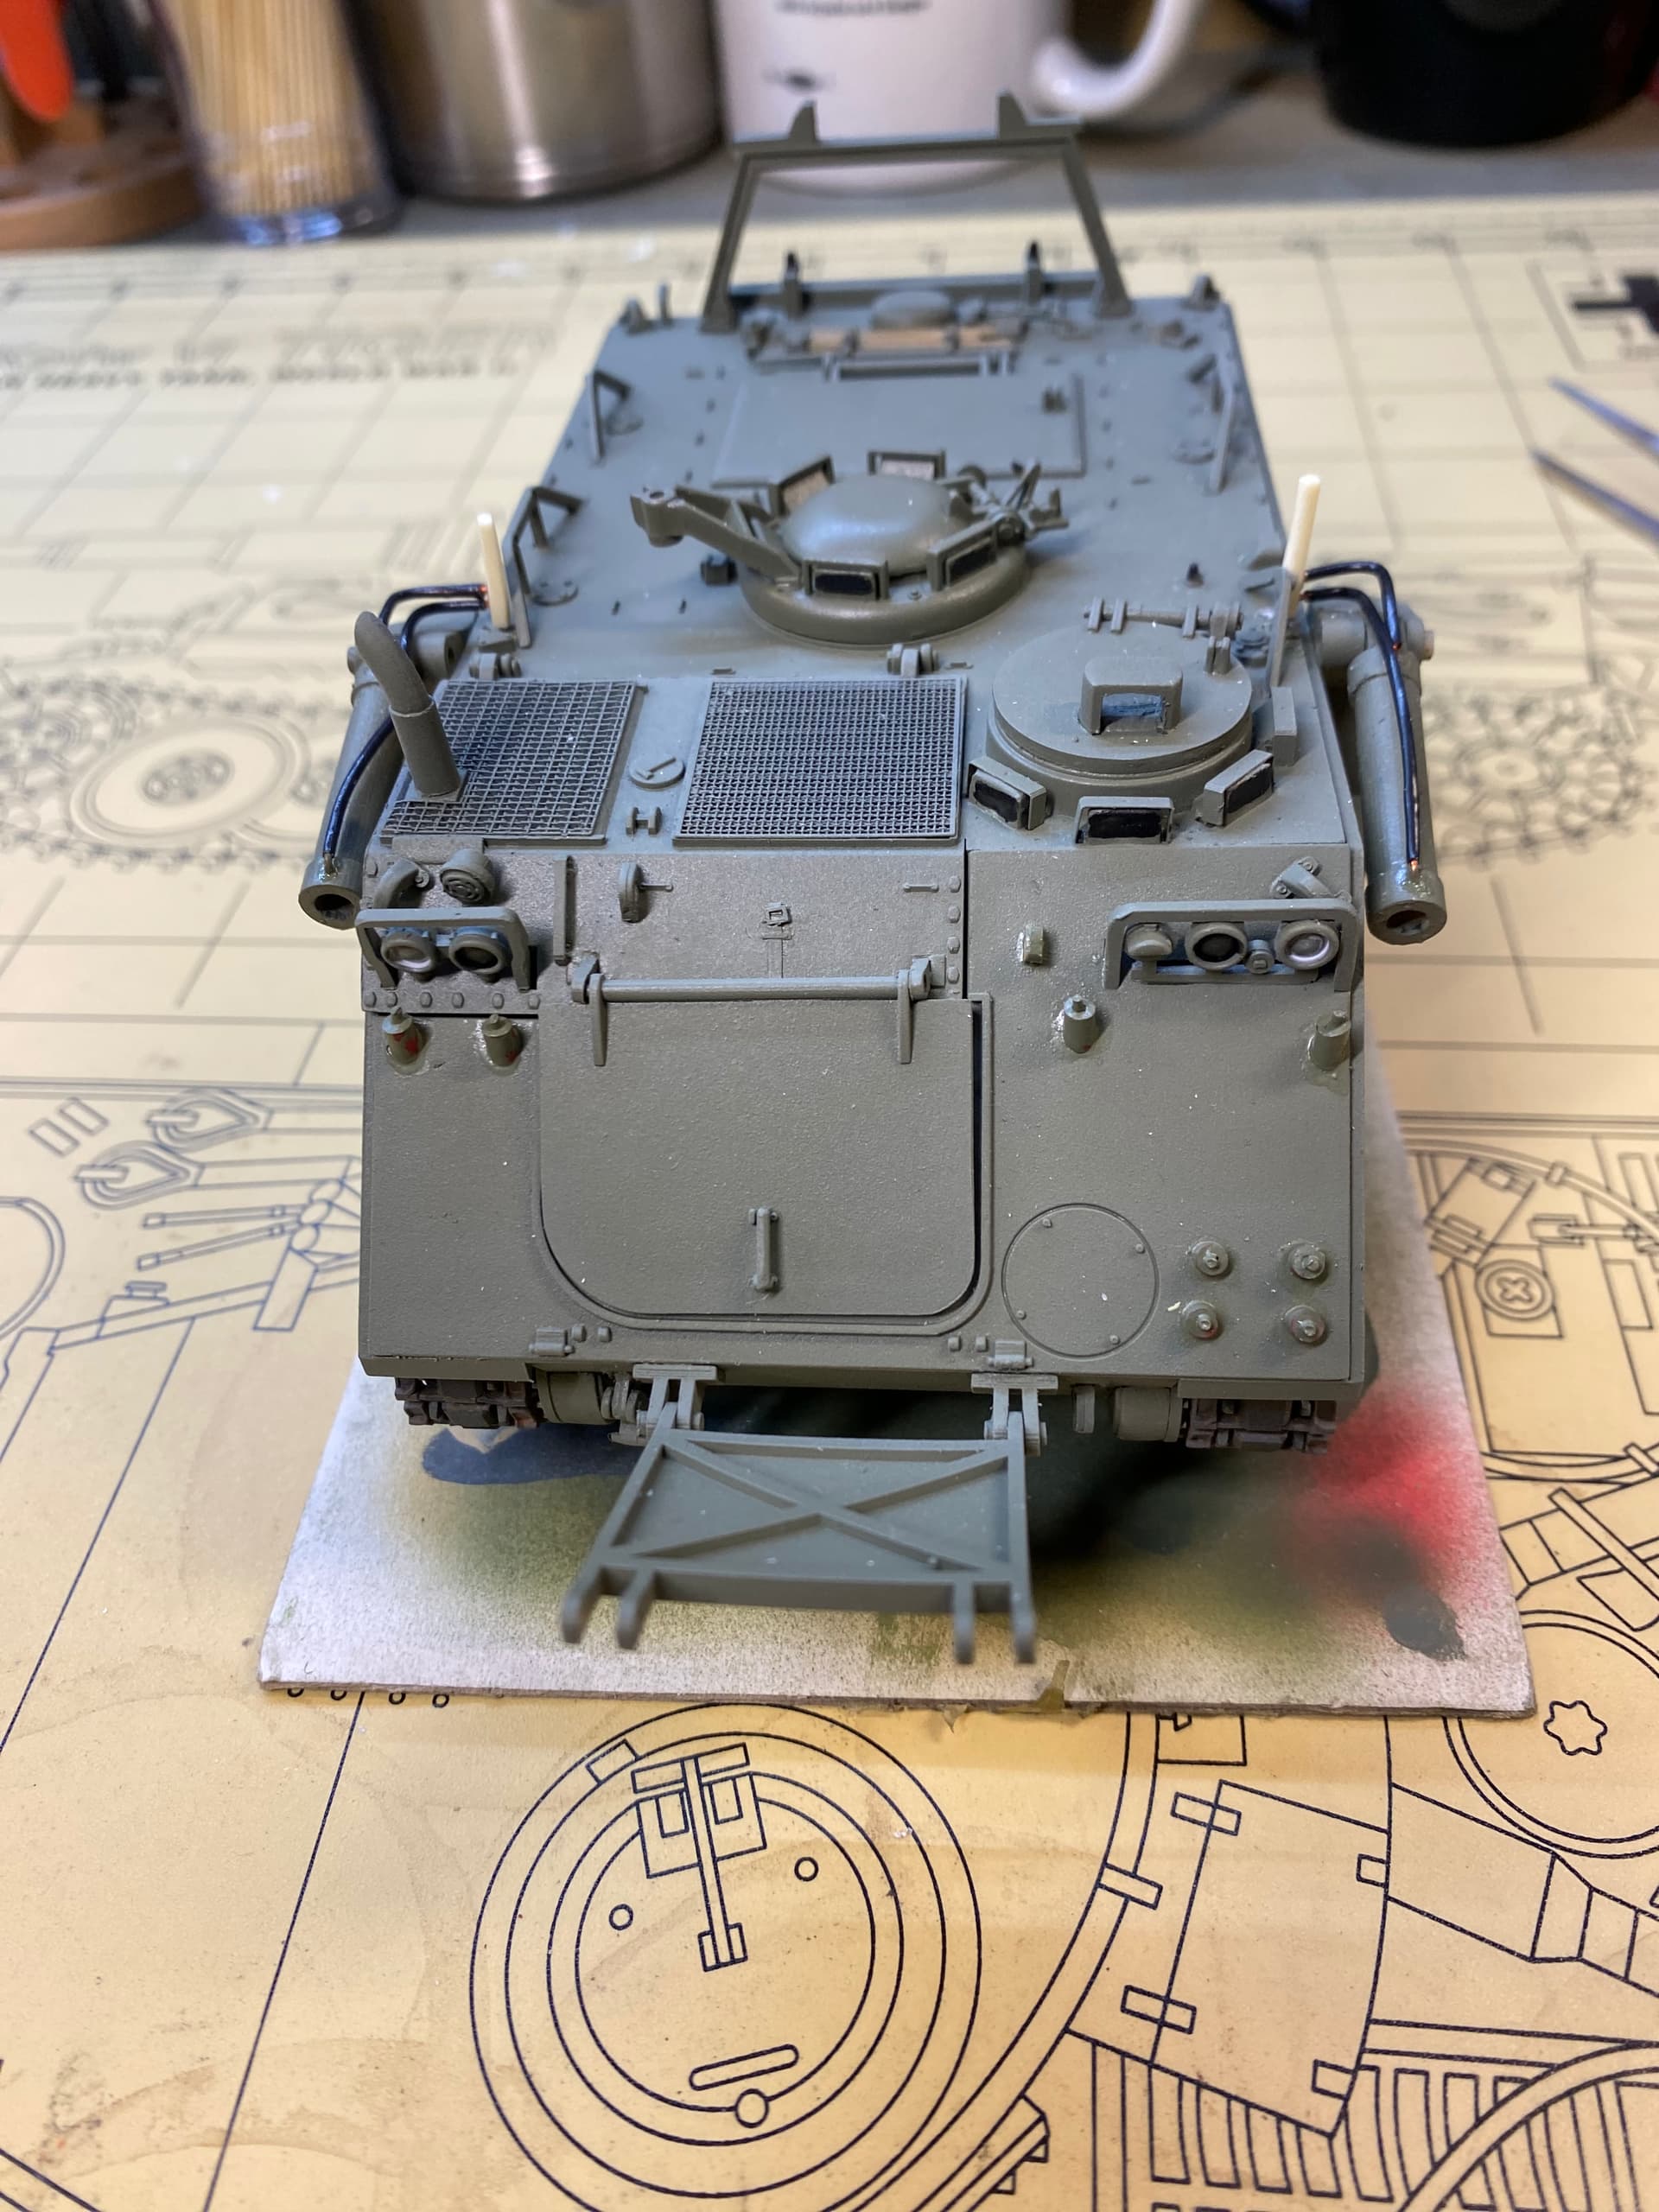
Need to make my cavalry guidons for the swing arms.
I can really see the difference between the dead flat finish on the hull and the gloss on the swing arms.
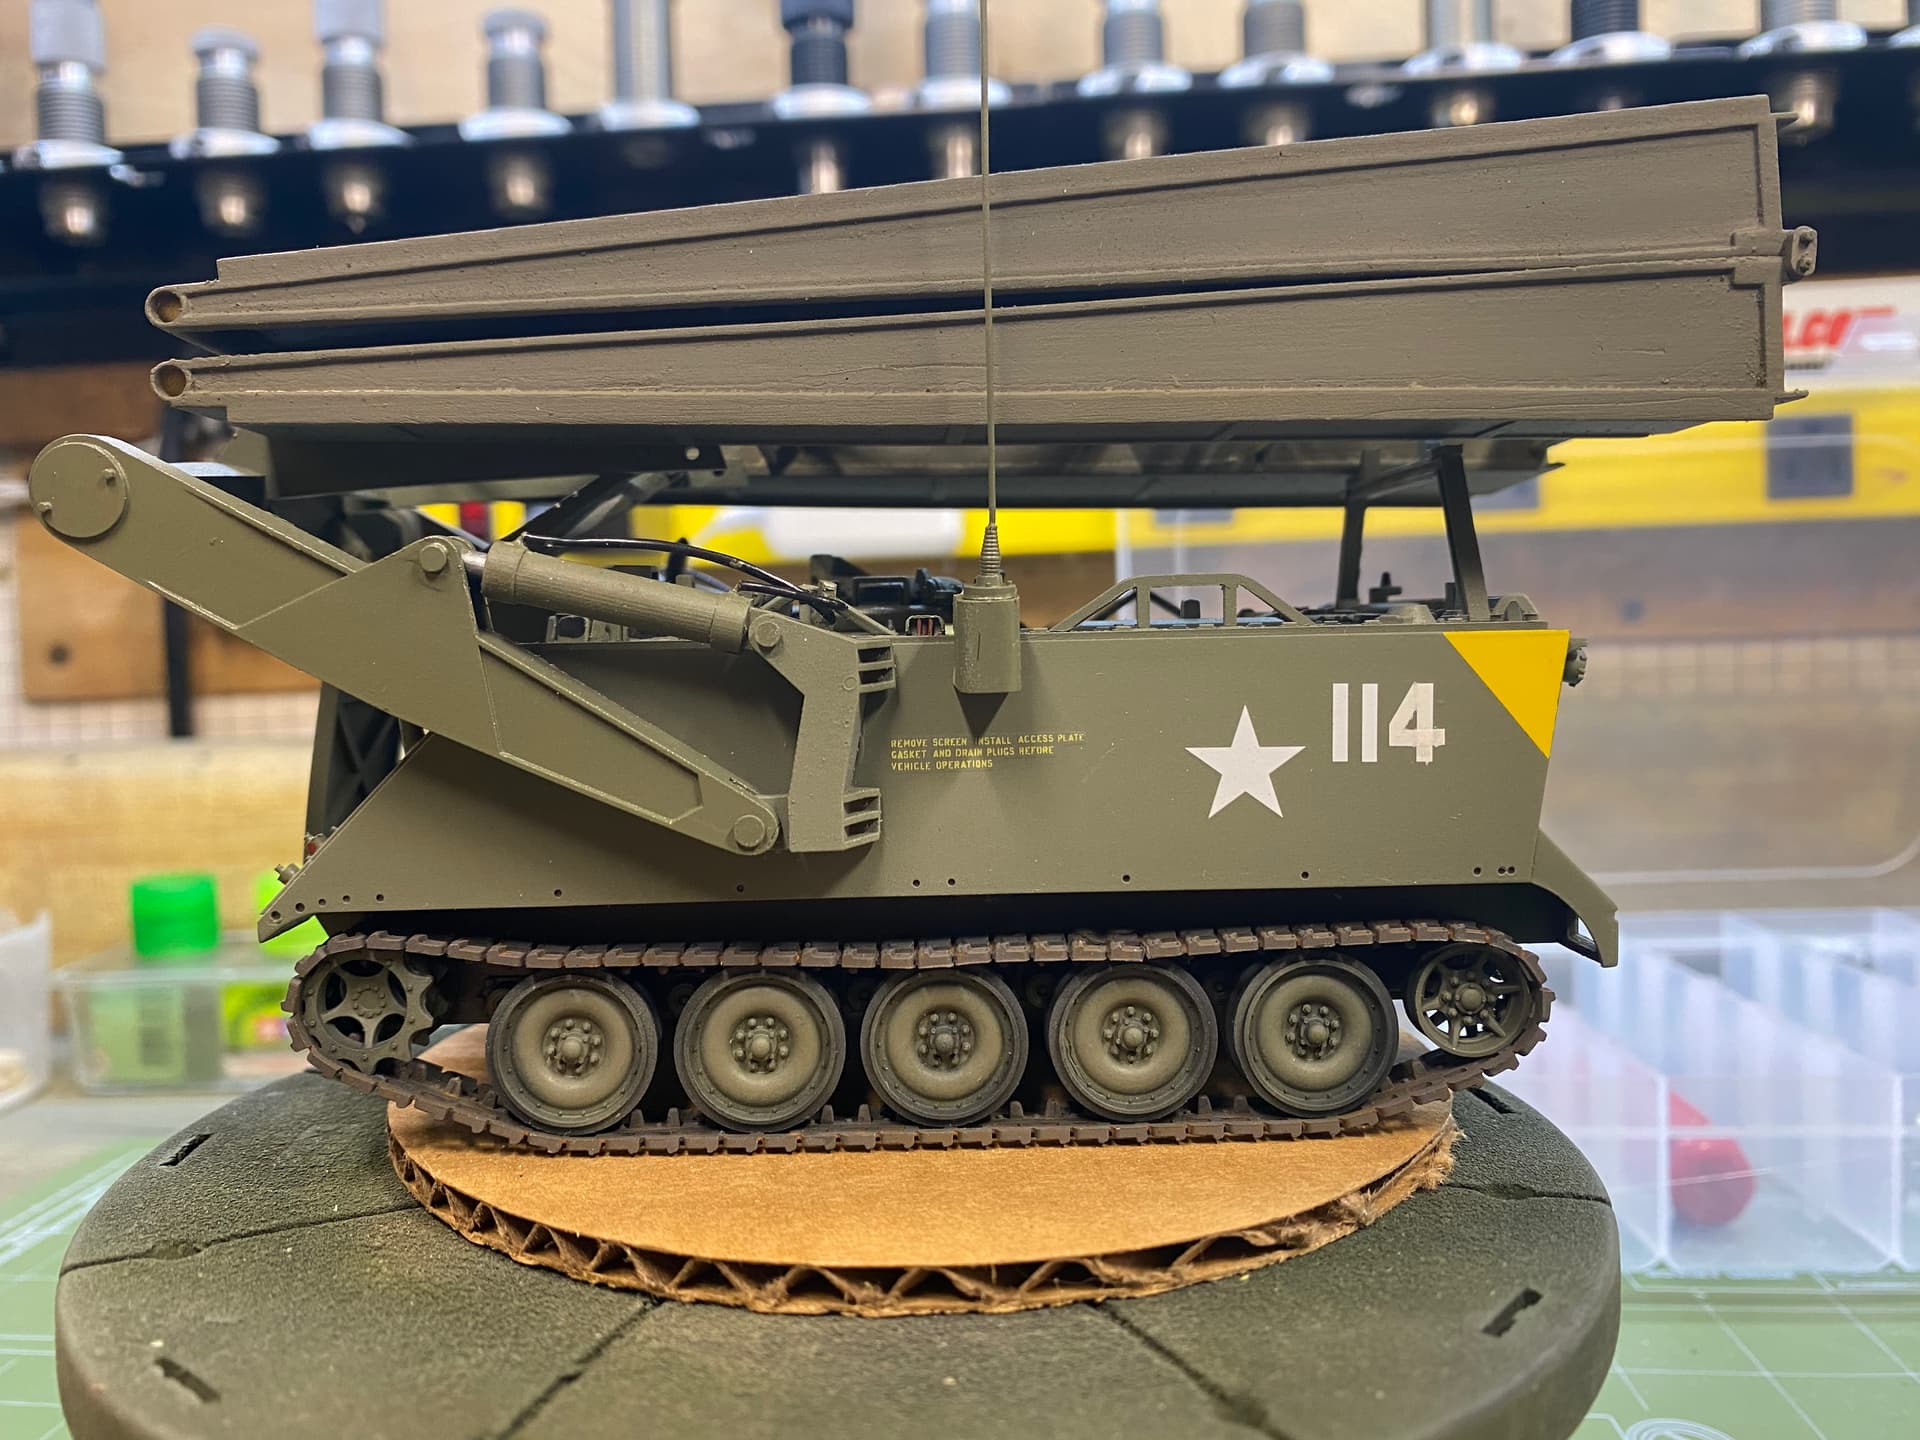
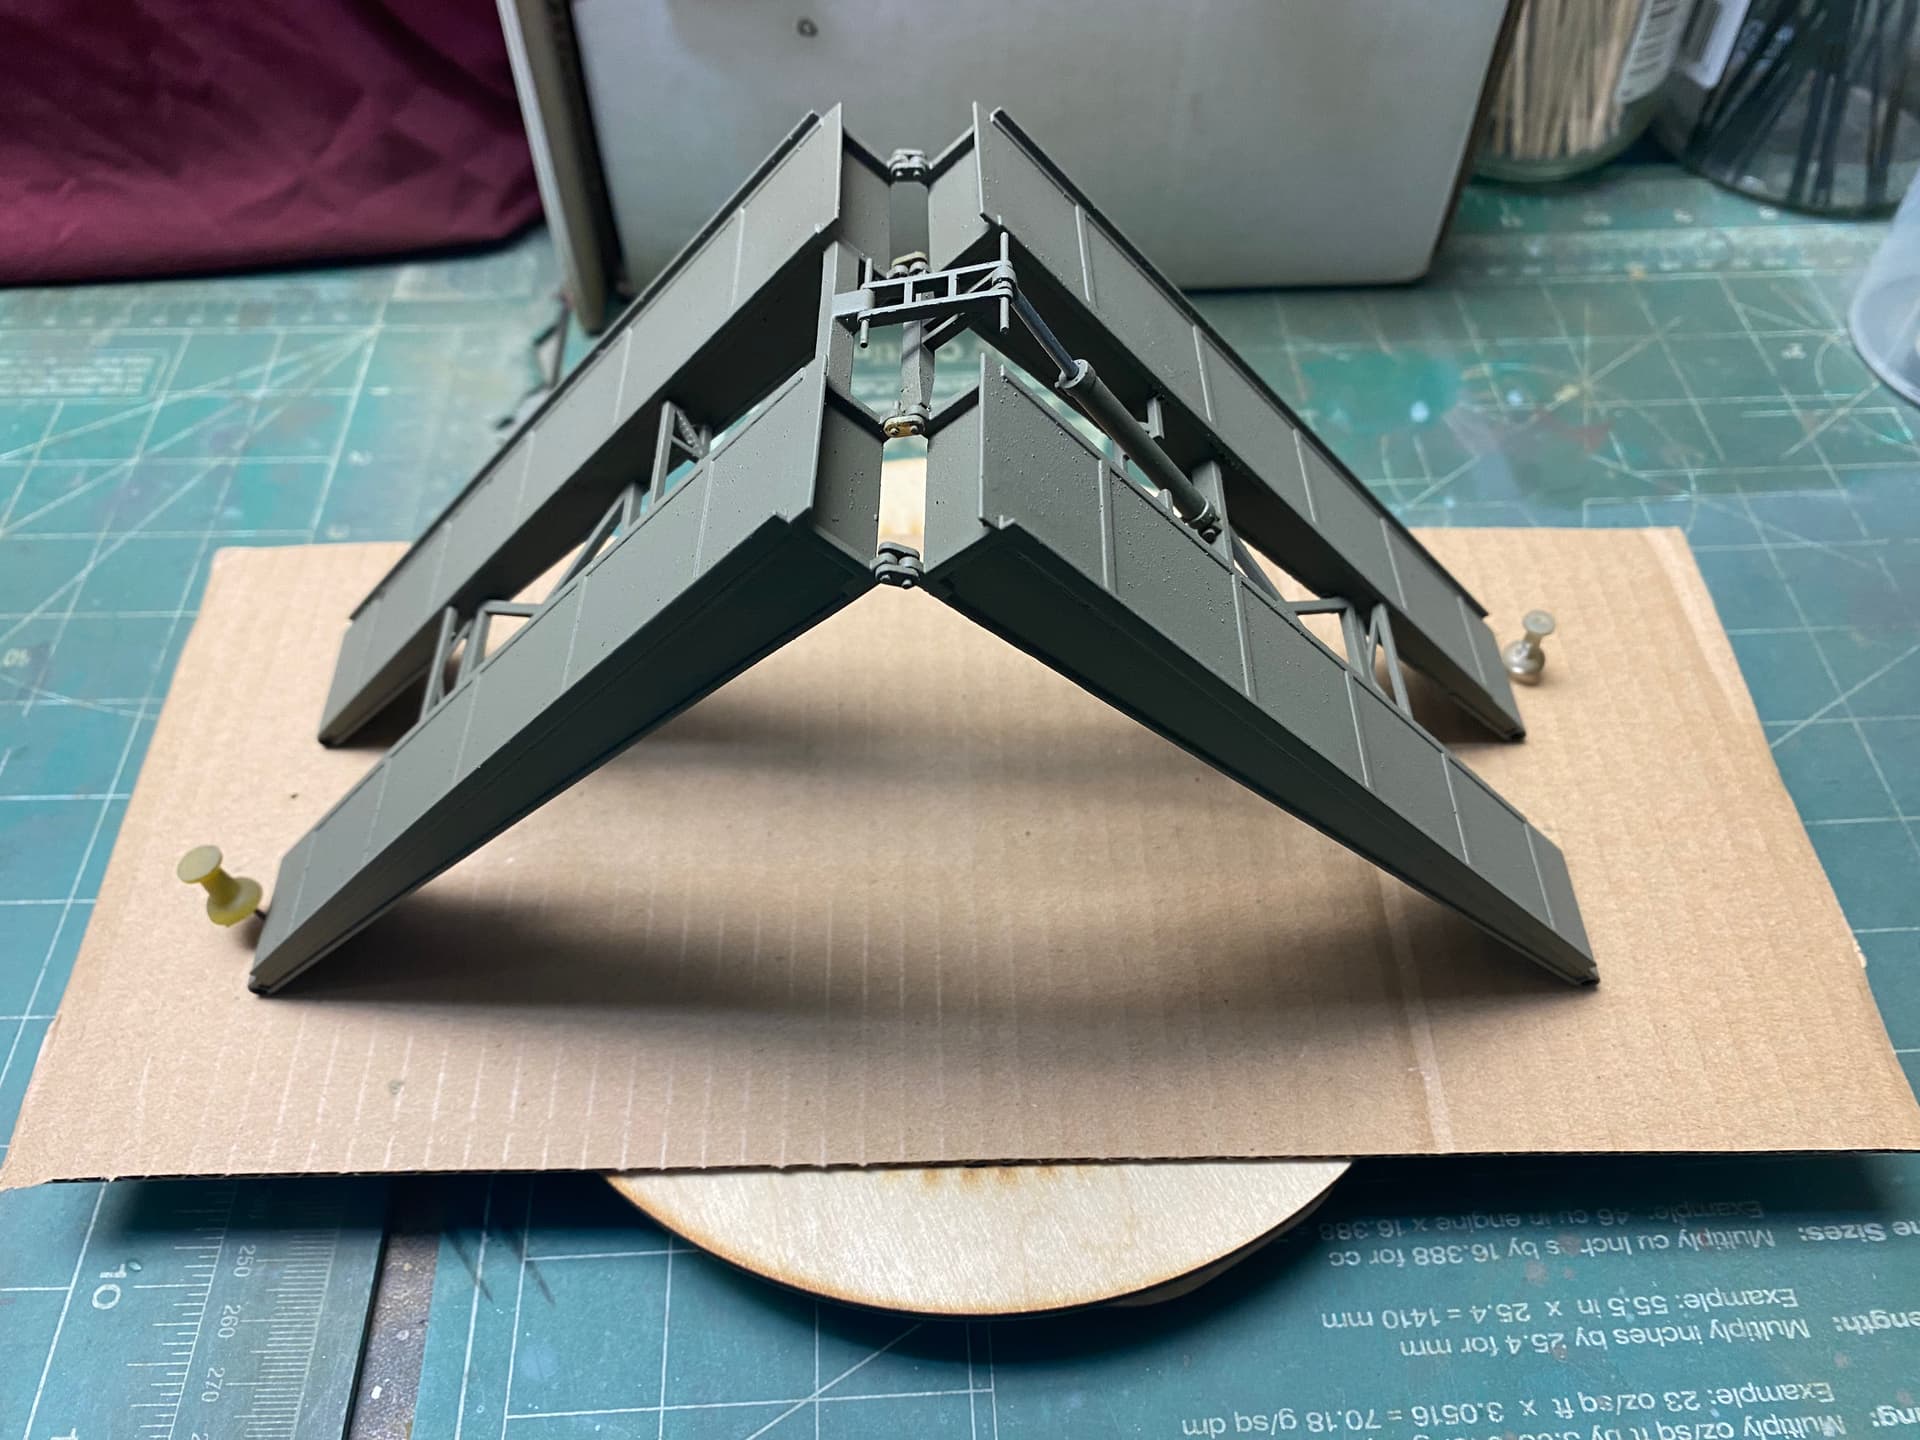
Antenna mount is temporarily taped to hull and bridge is not mounted.
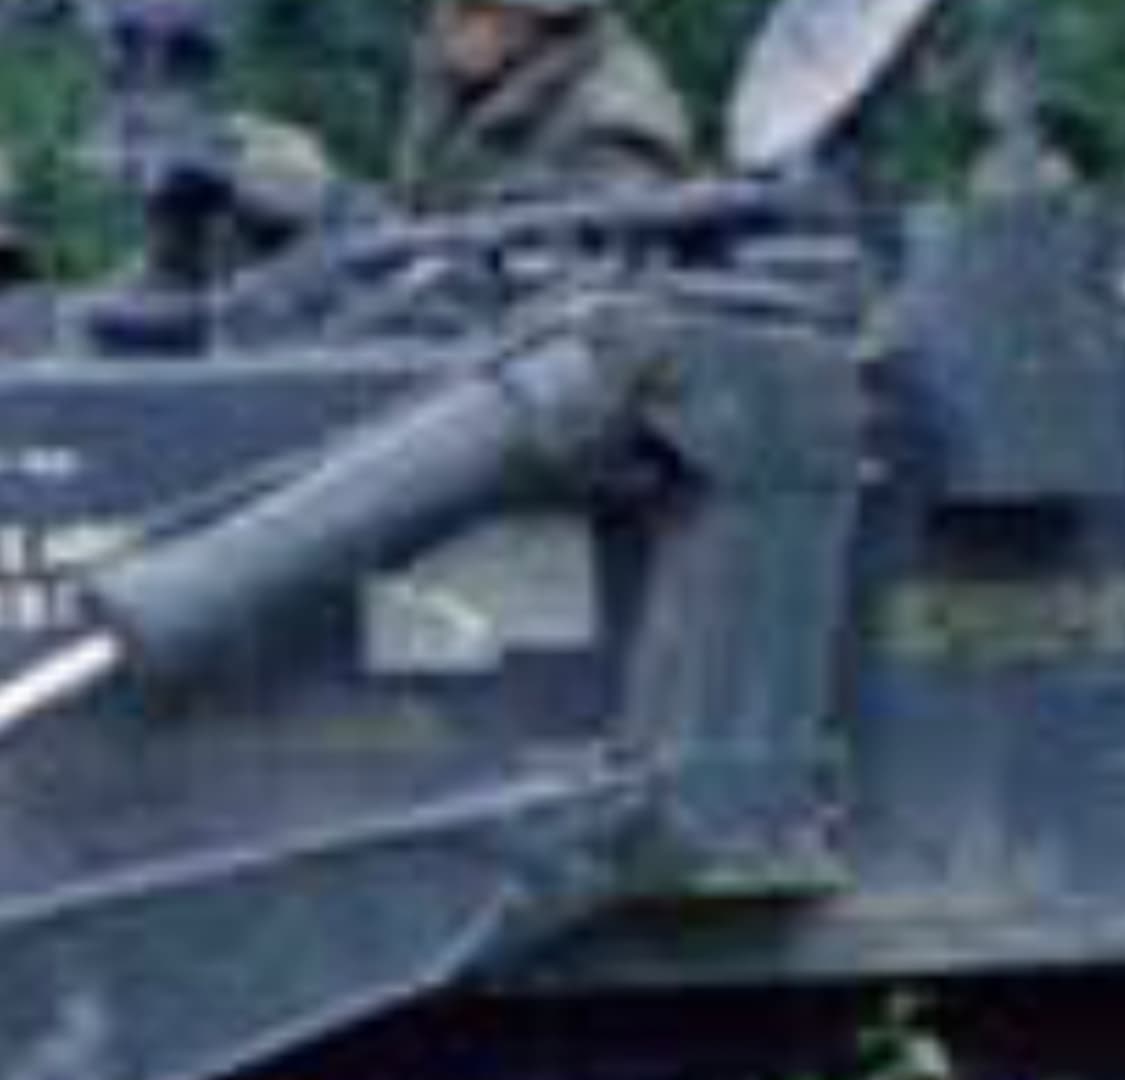
Bridge is still in primer. I’m gonna’ use 26 gauge black wire to give the impression of the bridge hydraulic hoses.
6 Likes
It’s coming along very nicely. Great job.
1 Like
The vehicle is looking really good. Great job.
Cheers,
Ralph
1 Like
Thanks guys. I really appreciate it.
Ralph & @HeavyArty ,
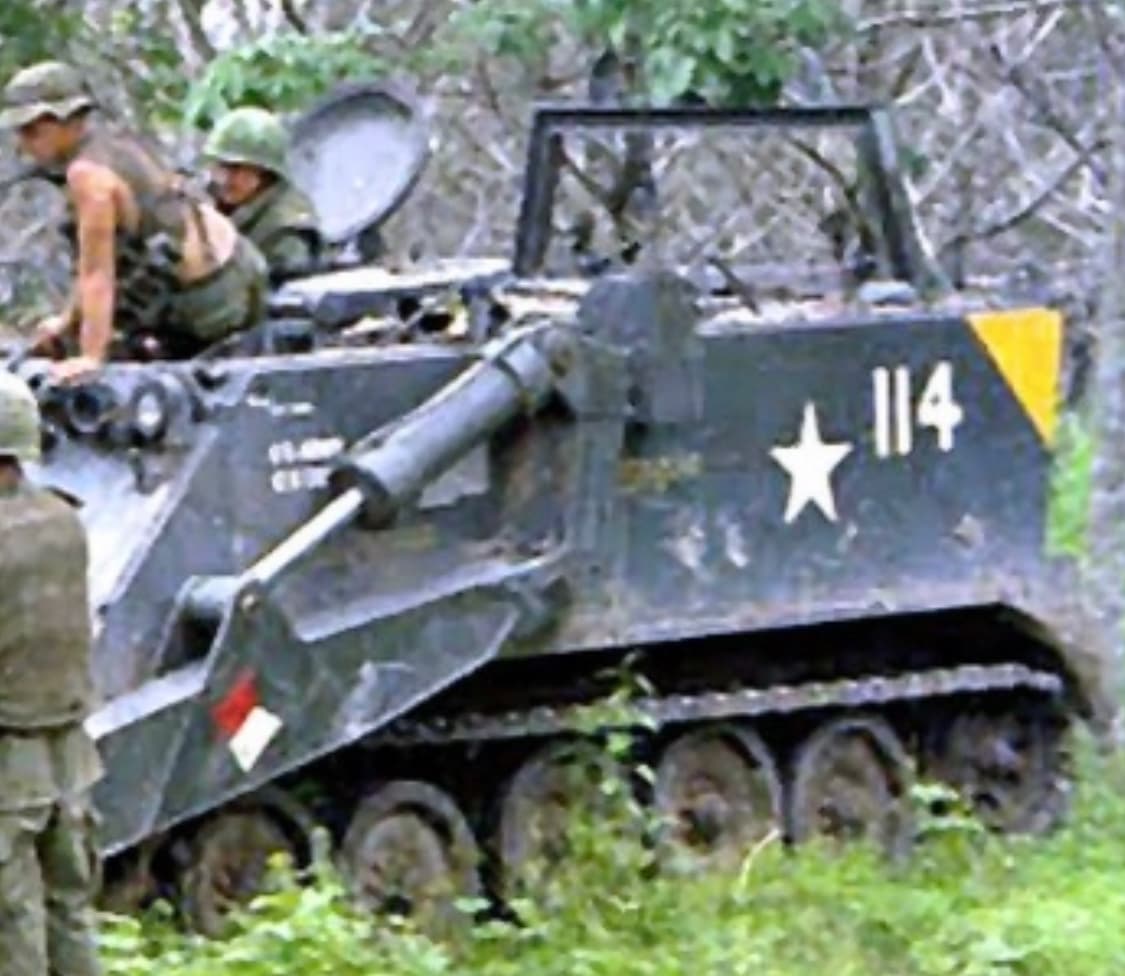
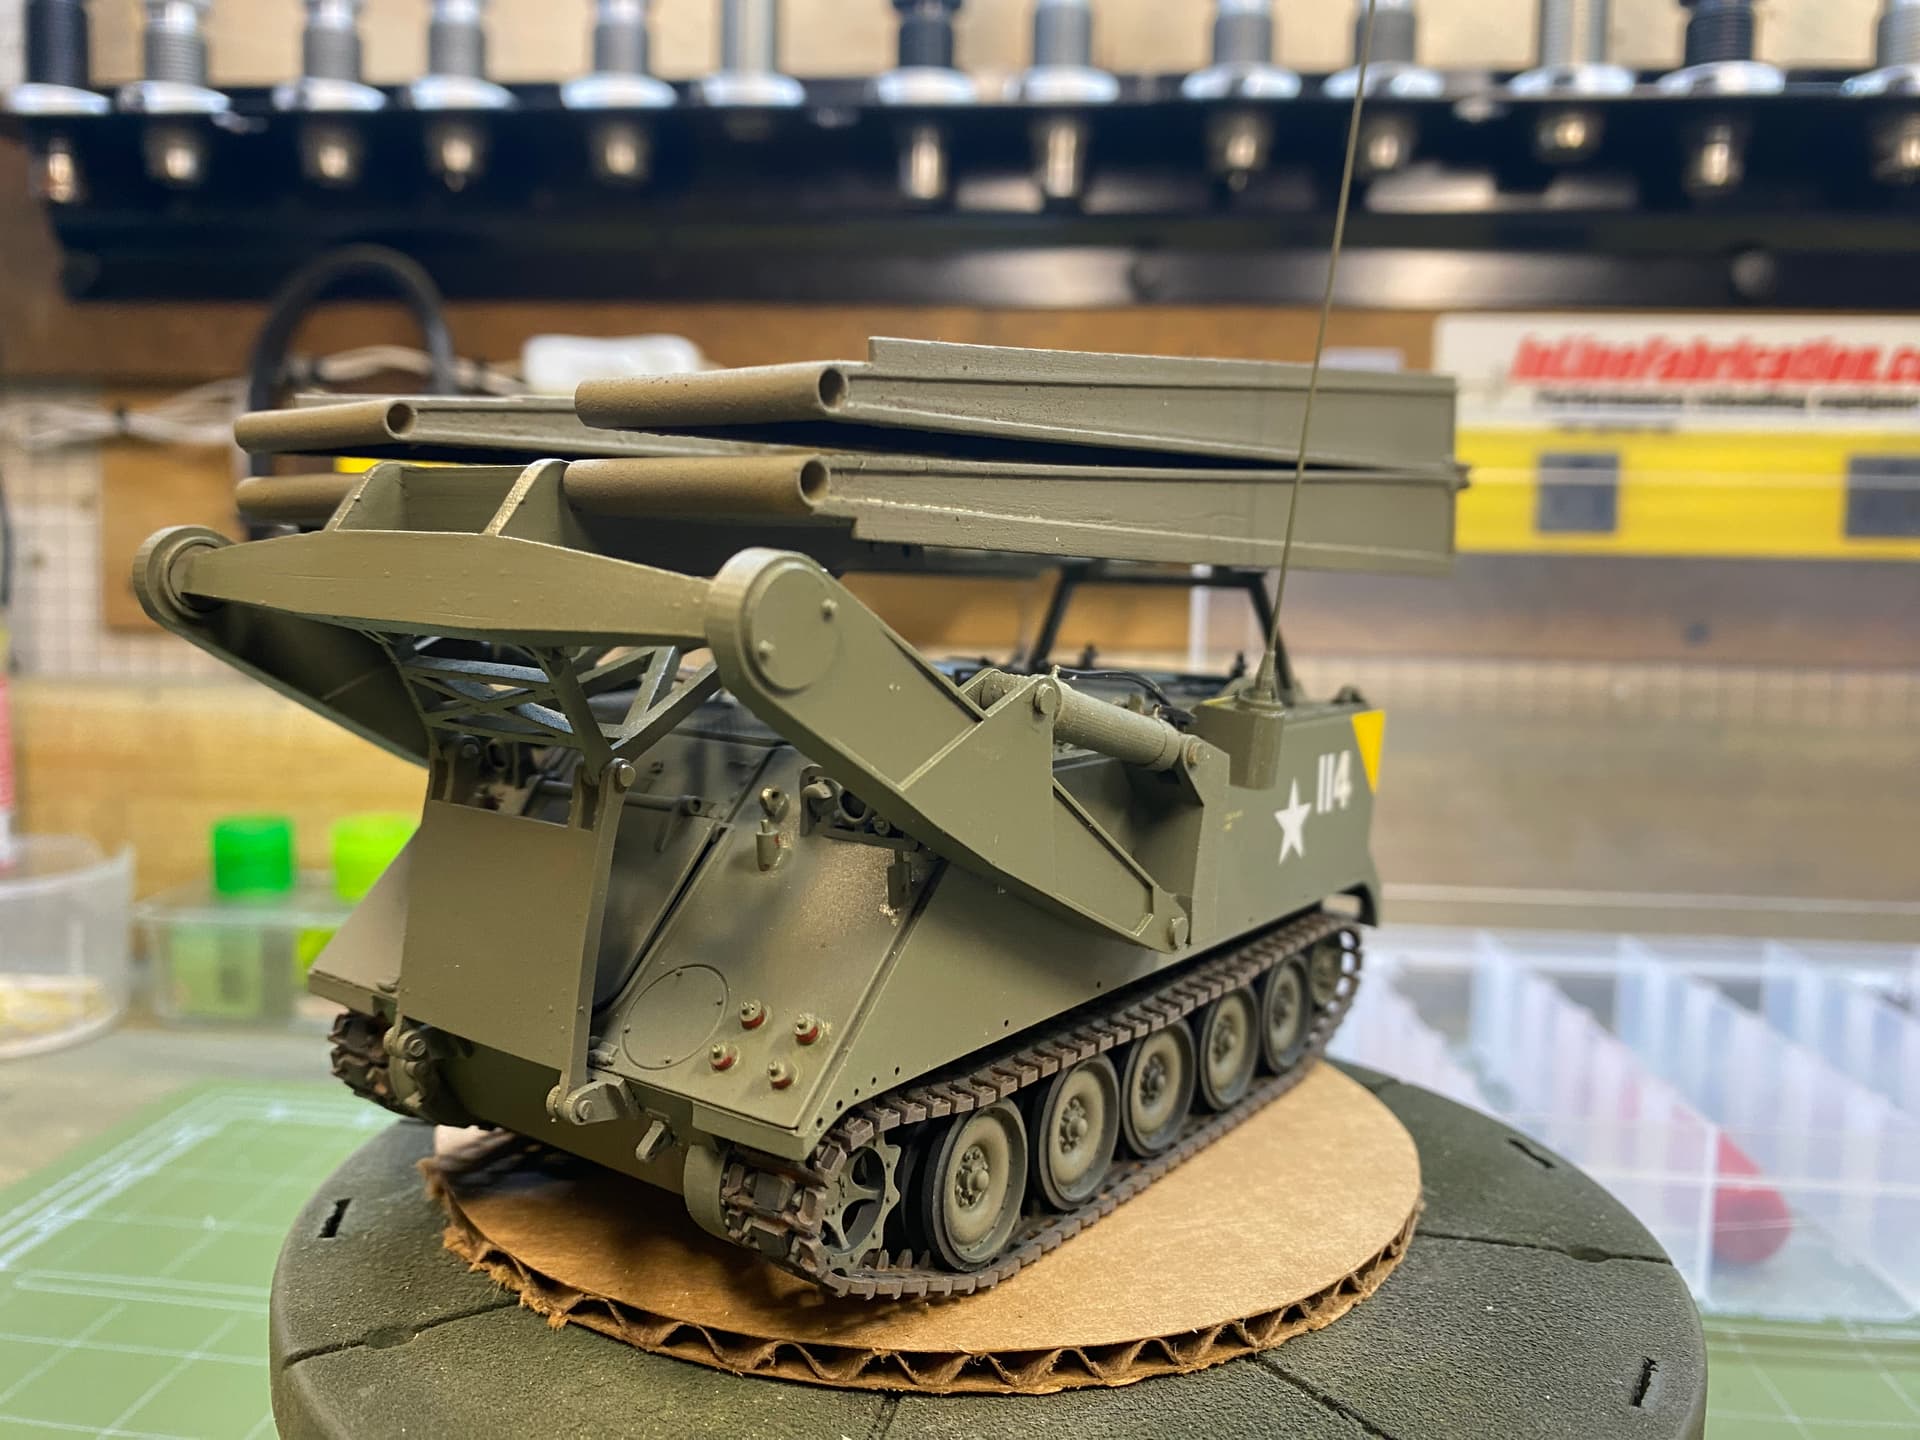
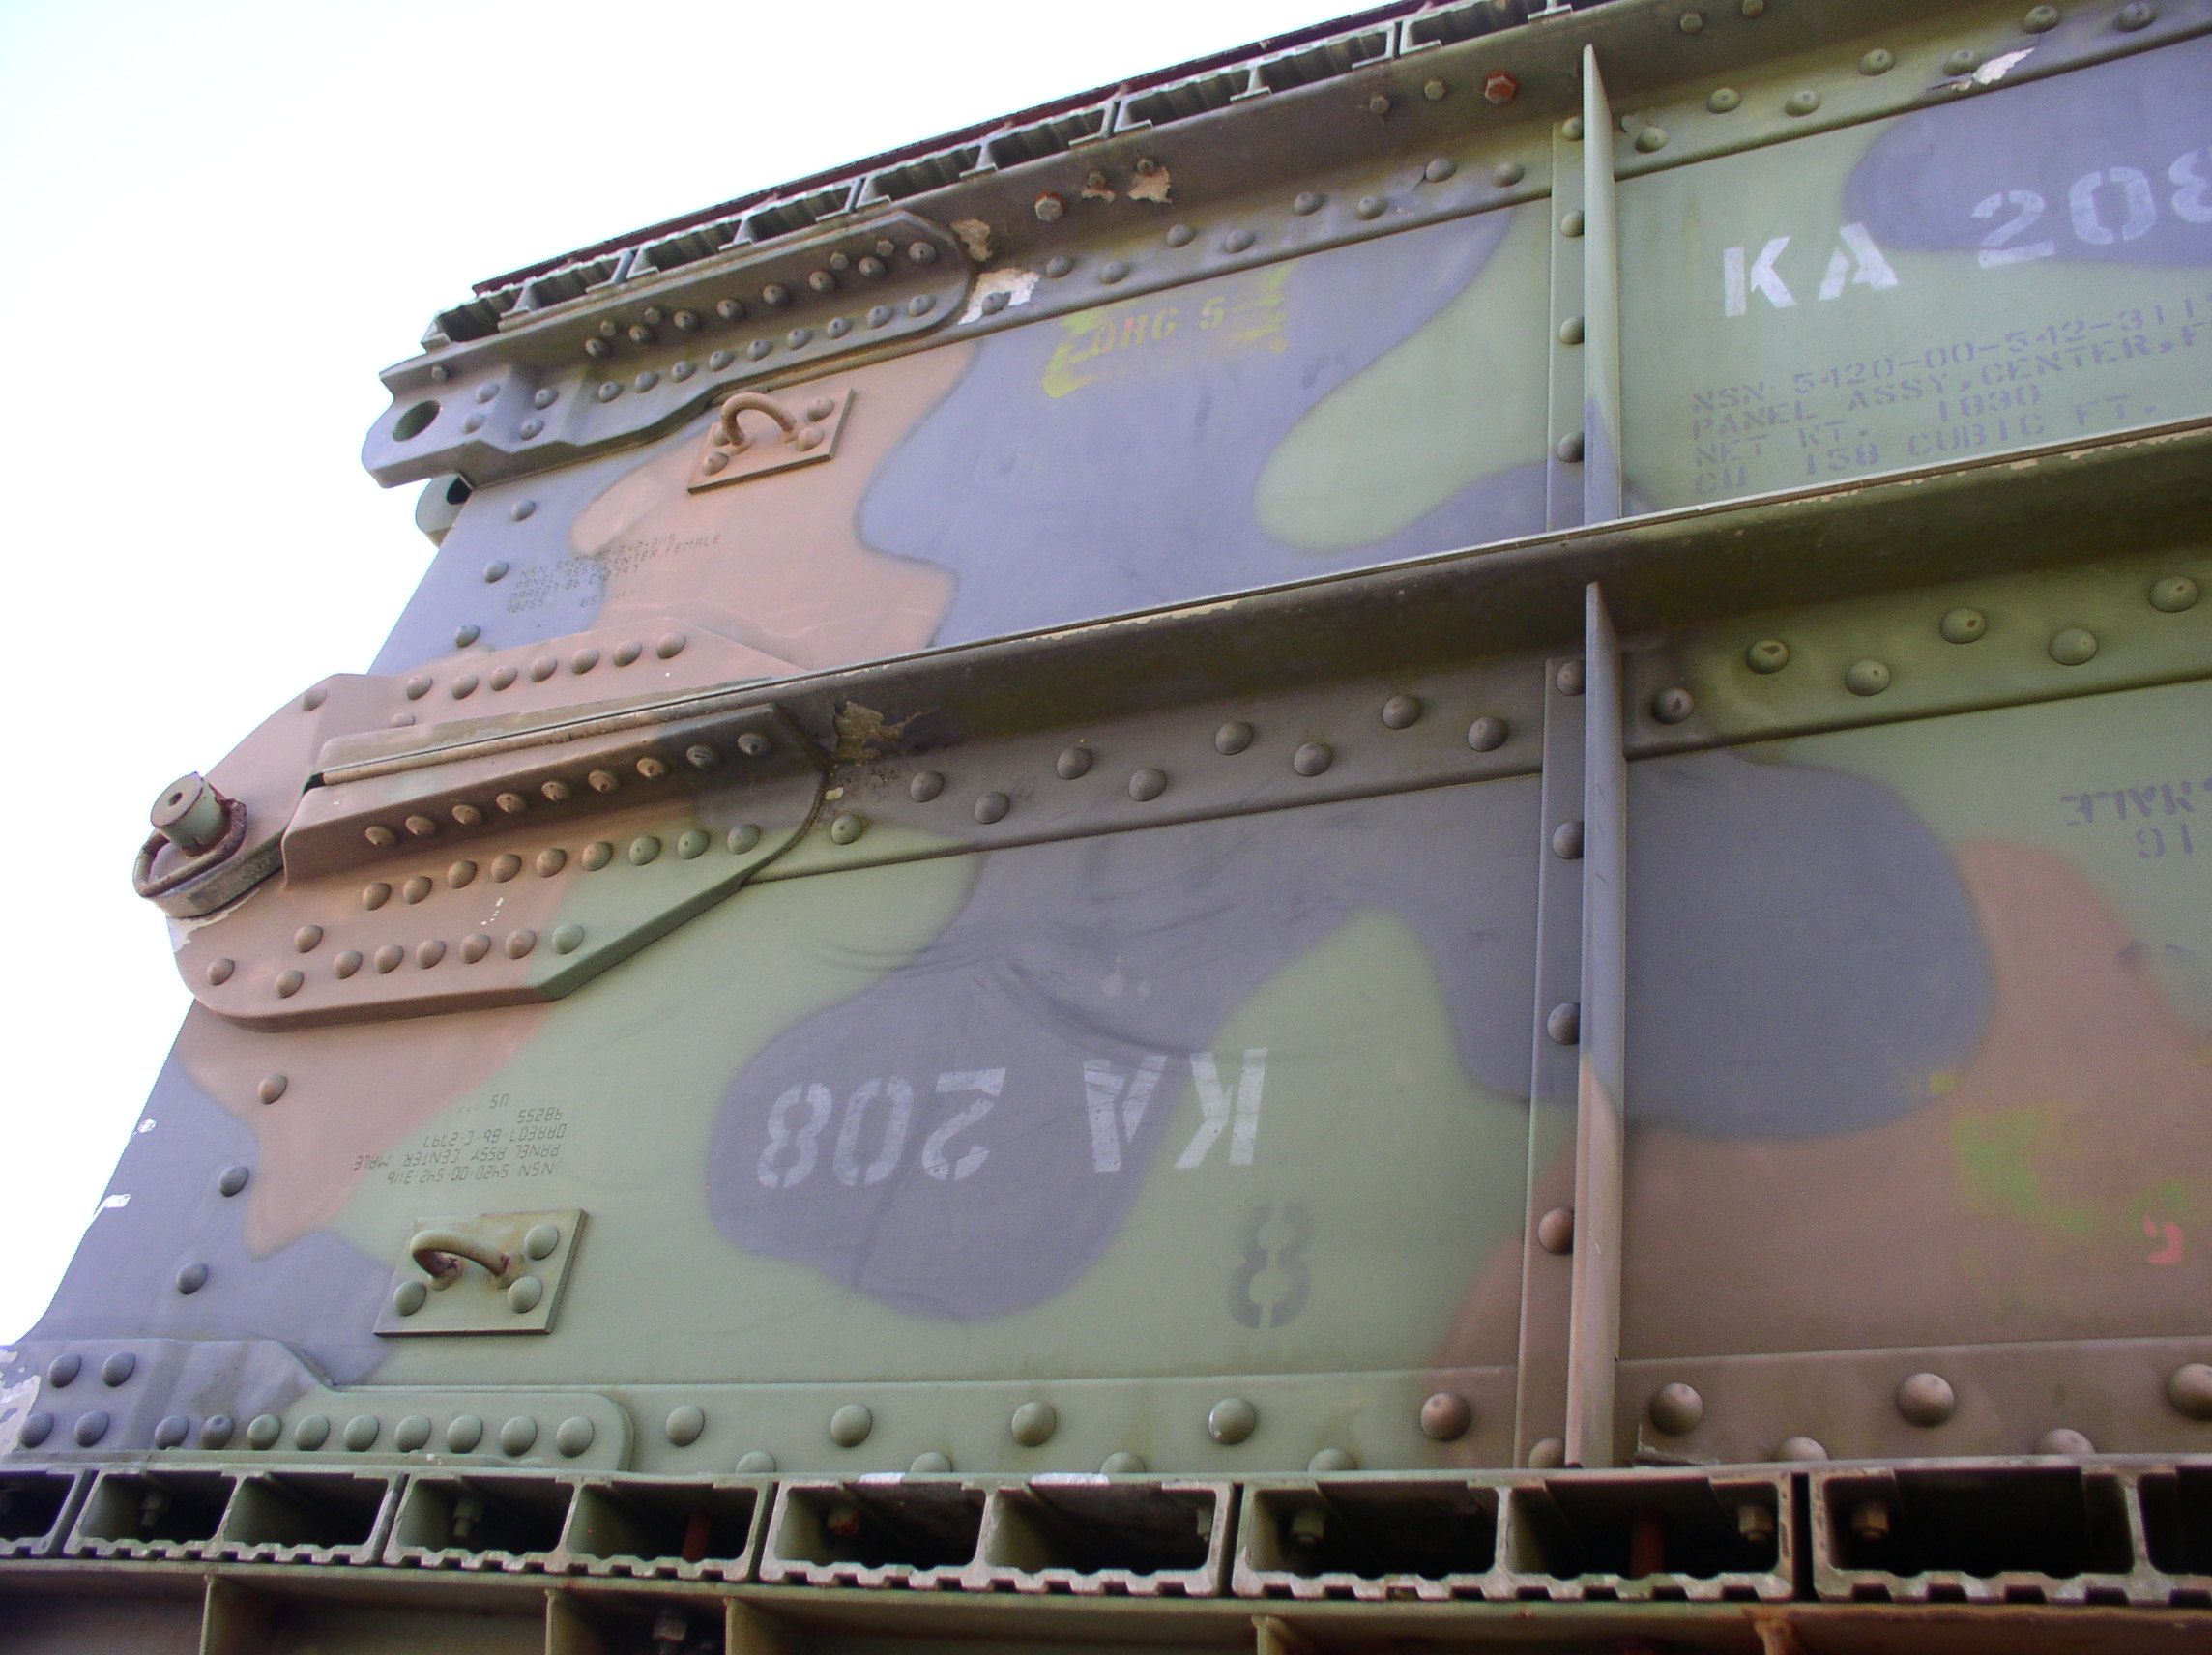
Do either of you have any ideas about what this stencil on the bridge halves might say?
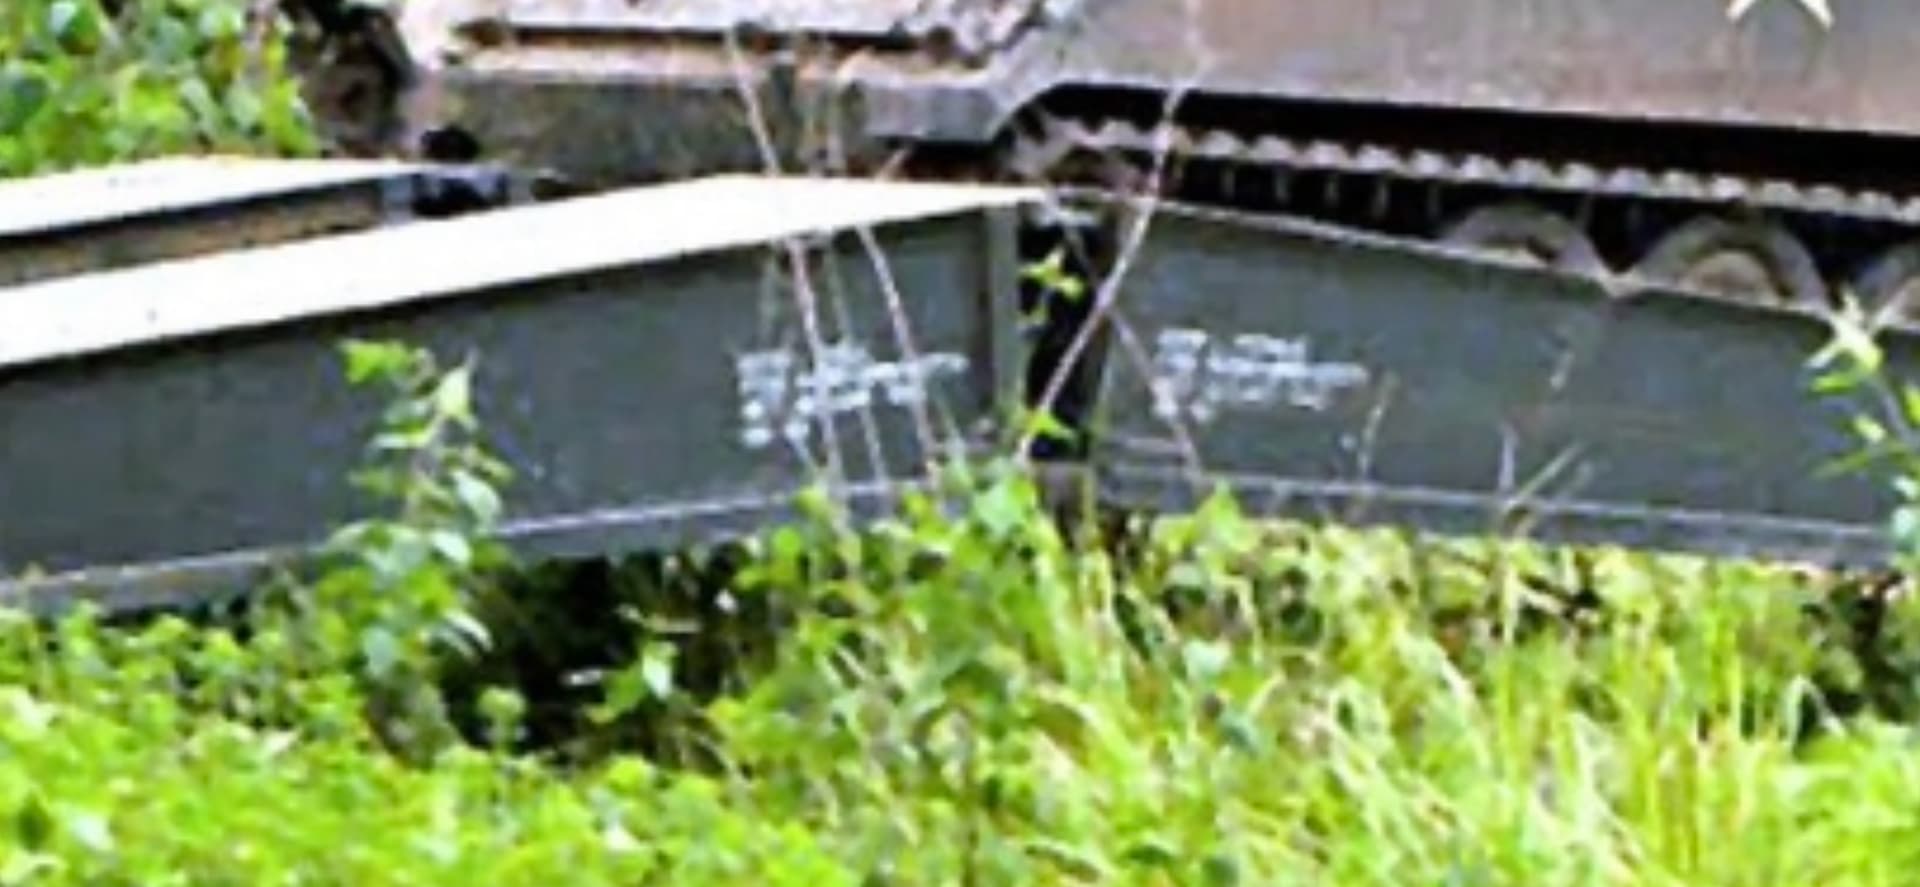
And what this placard or maybe loading/transport sticker is under the hydraulic cylinder? Looks torn in this picture.
It’s on both sides in all the pictures of this vehicle I’ve seen although on the right side its behind the mount ….,
1 Like
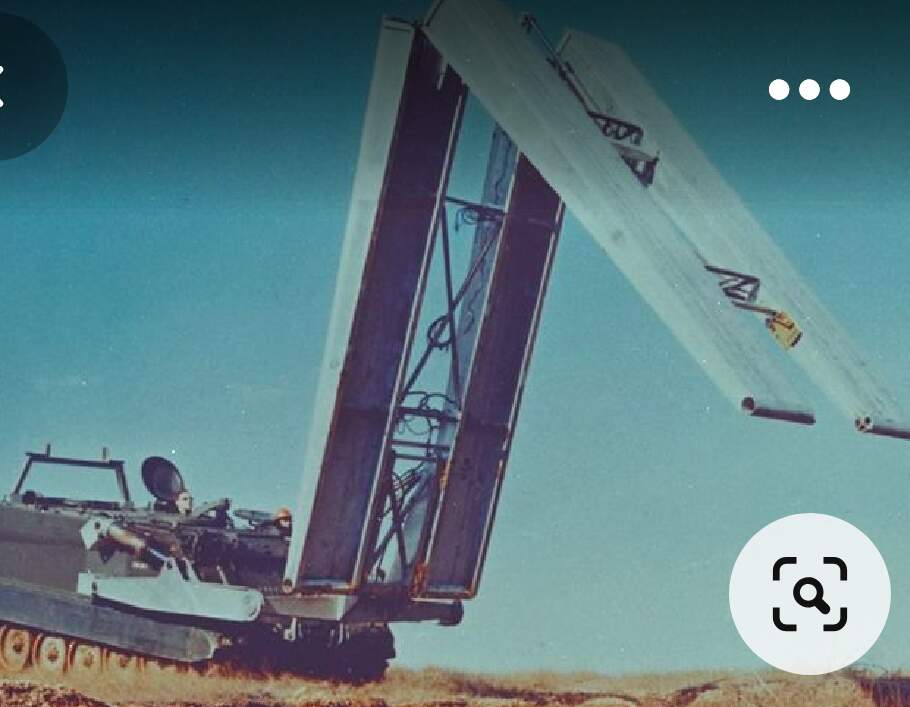
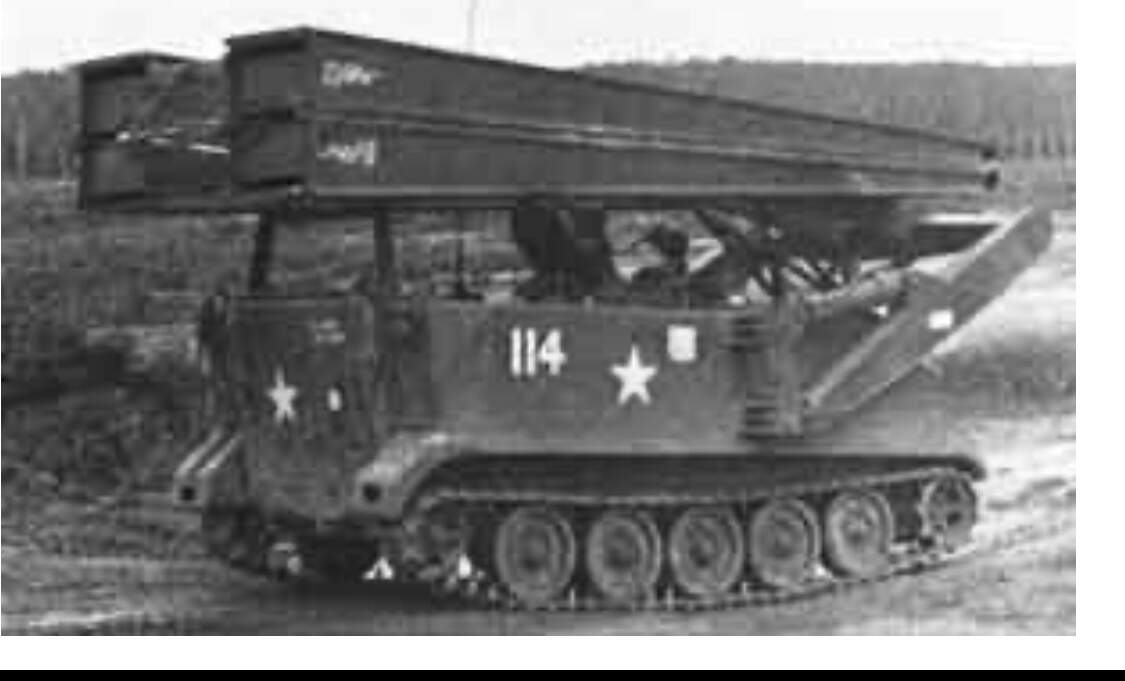
Maybe something similar to what the stencils found on the M60 AVLB bridge halves say ? ![]()
http://data3.primeportal.net/tanks/jeff_nelson/m60a1_avlb/images/m60a1_avlb_13_of_38.jpg
H.P.
1 Like