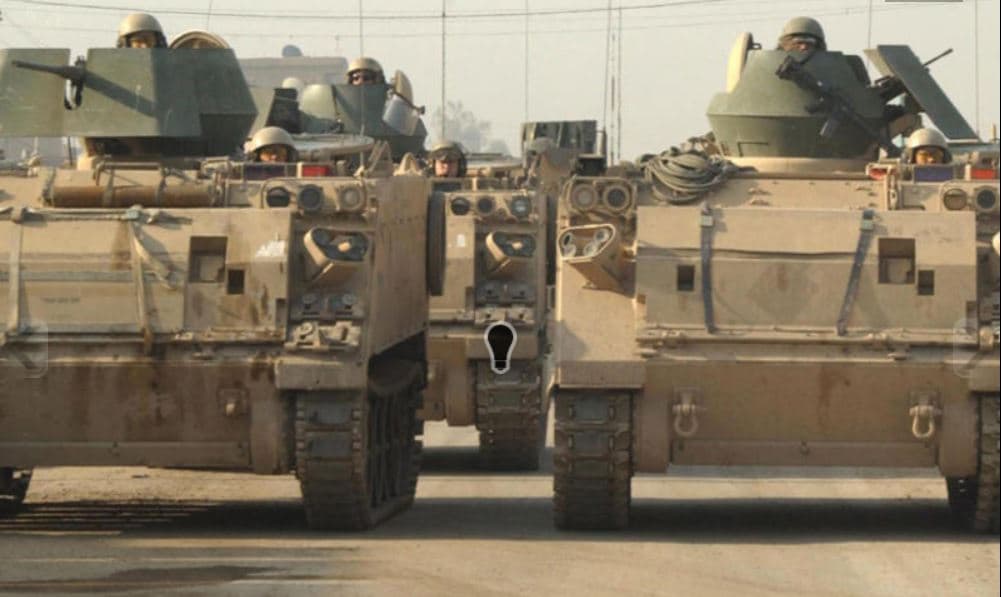
My eyes aren’t the best, but I think I spot a gas tube on the gun on the right.
2 Likes
It took me a while but that one is the commander’s shield. The cupola is turned to the right. Looks like he has an M249 mounted to it. There is also an M4 hanging from the cupola shield.
1 Like
I found this image showing one of the BMG shields with an M240 mounted to it. Would anyone know if it is mounted the same way as the M60 did or did they use a different mount? Is that a different cupola shield? It looks like it has more of a curve at the rear than the standard ones.

Here is the one from Academy. Looks like the Academy one doesn’t curve as much.

Image of the real one was found on LinkedIn.
2 Likes
The Academy M113A3 kit has a lot of ejector pin marks that need filling. Most are on the smallest of parts.

1 Like
CA. You’ll be done in five minutes, including filing and sanding.
2 Likes
Filled them with putty. Waiting for it to cure so I can sand them flush. CA would be faster but I only have thin CA right now and it doesn’t fill in as good as medium.
1 Like
The rear upper hull part of the Academy kit also has a huge gap that needs filling in. I will use thin plastic strips instead of putty.

The Tamiya kit fits much nicer. There is still a very slight gap as seen on the bottom of the image.

Got the Academy rear gap filled with plastic strip.

5 Likes
Very nice work so far
2 Likes
Thank you! The Tamiya is a little more enjoyable build over the Academy so far but both have their own parts and fit problems.
1 Like
Moving along with the Academy M113A3. Test fitting the cupola and shields. The upper hull, cupola and glacis are only dry fitted for now. Still deciding if I want to do the interior or not. More than likely though, as I want the troop hatch open.

I found this very tiny image of an M113 in overall sand but with green shields and looks like green track guards. It also has the BMG shields. Does anyone have any better images of this vehicle or similar to it?

3 Likes
I would say the track shrouds are black, they’re just thick rubber, unless you’re just talking about the end pieces, they do look green
2 Likes
Thanks!
On the M113A3, would you know how the M240 or M249 are mounted to the BMG shields?
Would the ammo belt be fed from the holder shown on the left of this image or were those ammo holders removed when the M240 or M249 was fitted? This is one representative of one used with the M60.

Would the M240 or M249 use a mount similar to this one with the ammo can mount attached to the gun mount? Images found on EBay.


Here’s an M113 with the BMG shields fitted. Looks like this one has an M249 mounted. Looks like an M240 mounted on the commander’s cupola.

2 Likes
I was looking over the instructions for the Tamiya M113 ACAV, Academy M113A1 Vietnam and the Academy M113A2 kits. I noticed the Tamiya M113 ACAV kit has a different internal fuel tank from the Academy M113A1 Vietnam kit. Were there different internal fuel tanks? Which is correct?


I also noticed that the Academy M113A2 internal fuel tank is the same as in the Academy M113A1 Vietnam kit. According to Academy, the M113A1 and A2 internal fuel tanks are the same. Is this correct?

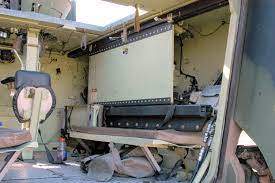
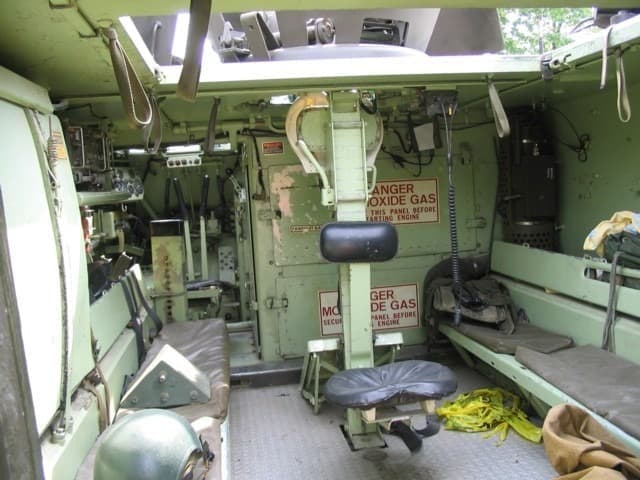
Also, I am making an M113A2 with the M47 Dragon from Panama, Just Cause. Would anyone have any interior photos showing where the extra M47 rounds would be stored?

1 Like
Yes, the Tamiya one has the early, permanently mounted (welded in place) fuel tank, which was also smaller. Later model M113A1s and M113A2s have a removable, larger fuel tank. Academy’s tank is close, but a little too long. It is the correct type for an M113A2 as in your pic from Panama though.
Elefant Corporation make a replacement fuel tank that is proper size.
Armorama :: Elefant Model Accessories 1:35 Fuel Tank for M113 Family Review
Also, for an M113A2 in Panama with the new fuel tank, you also want to use the left rear fender without a channel in it (B34). The channel was for an external drain plug on the welded-in fuel tank.

4 Likes
Great, thanks for the reply!
I have the Tamiya M113A2 with no interior, I am actually building it as an M113A3, yes, I know it is not exactly an A3 version but could I use the Tamiya M113 ACAV interior and just leave out the internal fuel tank?
1 Like
Yes, the A3 version with external fuel tanks does not have an internal fuel tank. The A3 also has sliding Kevlar panels on the interior sides that are easy to add with sheet styrene.

3 Likes
Thanks again, greatly appreciated!
I also have the Academy M113A3 with the interior. I can copy the kevlar panels from the Academy kit.
You mentioned the M113A2 I want to do from Panama doesn’t have the channel in the left rear fender. Do you mean that specific vehicle I showed doesn’t have it?
I found this image showing some M113’s from Panama showing both with the channel and without.

Image was found on FB.
1 Like
Both types were seen. It depended on when the vehicle was originally made. New M113A2s were built w/out the channel. Older M113A1s that were upgraded to A2s could still have the channel. I prefer to show a newer M113A2, but either is correct.
Additionally, M113A2s and A3s have a different engine access panel at the front of the troop compartment. A2 forward have two panels for engine access. Academy has the correct panel. Tamiya has the older one-piece panel.
You can represent the newer panel by adding a strip of styrene across the single panel or sand a groove across it to depict two panels.
3 Likes
Thanks for all the quick replies. Very helpful!
1 Like
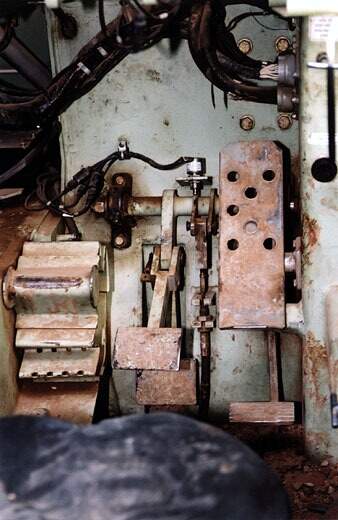
One last point on the M113A3. It no longer has laterals (like the Tamiya interior). It has a steering yoke instead. It is easy to replicate with a piece of wire bent into a “W” shape and added to a piece of styrene for the center part. Add a couple bolt heads to it and an old gearbox behind it and mount it to the front wall in front of the driver.
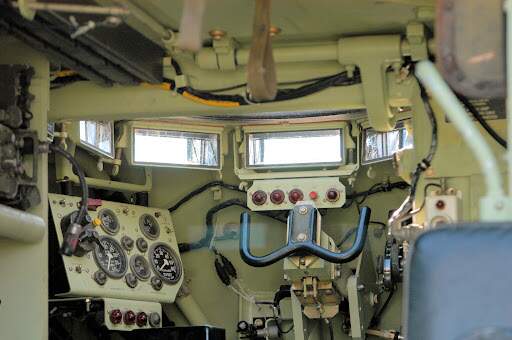
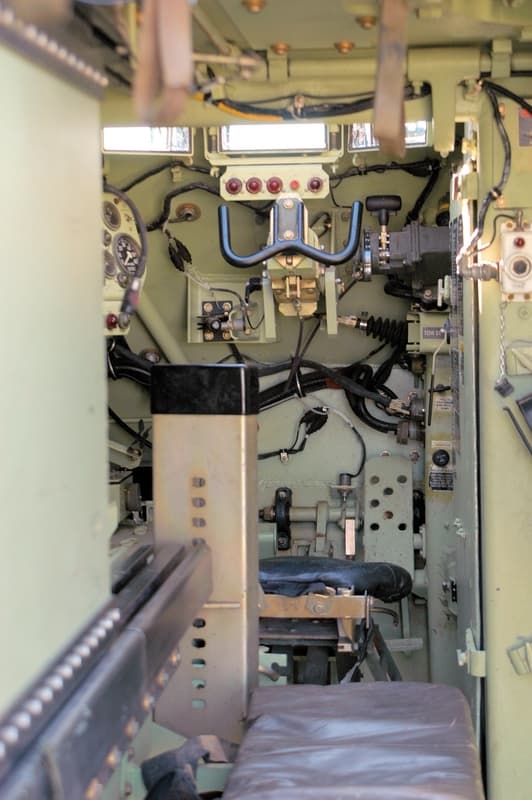
There is also a brake pedal on the floor to the left of the gas pedal.
3 Likes