Thanks.
A boom box was in my thoughts. It’s no uncommon in commercial aftermarket stowage sets but I’m always wary of how representative of real stowage those sets are. Something else to scratchbuild.
Thanks.
A boom box was in my thoughts. It’s no uncommon in commercial aftermarket stowage sets but I’m always wary of how representative of real stowage those sets are. Something else to scratchbuild.
I was on ITV’s in the 80’s and we had a whole campsite in the back of the track. We had a boombox, a couple of coolers, lawn chairs, a Coleman stove, a map board, D&D stuff, and lots of MRE’s and Pogie Bait. If you lower the ramp on a 5 gallon can it rests perfectly level. That was our patio that we’d set up the lawn chairs on. Then we’d play D&D on the map board in times we were off the line. We had a pretty good setup.
Now there is a tempting idea. During a similar time period, I used to play D&D almost every lunchtime at high school. A group of us used to gather in one of the classrooms (with permission) and work through the latest scenarios for both D&D and Traveller. It’s the sort of personal touch I like to add to a model. Time to start surfing the net for imagery of the old D&D boxes (and hopefully not disappear down a rabbit hole of reminiscences).
Y’know what surprises me? Nobody has 3D printed miscellaneous stuff like glow sticks, or steering wheel chains, or boxes of Oreo cookies, or CDs, or modern boom boxes, or cigarette boxes, or cell phones. All the stuff modern troopies have to make vehicles comfy.
There are companies who make some of these items.
We used to play alot of AH’s “MBT” game when we were in cantonment in Graf.
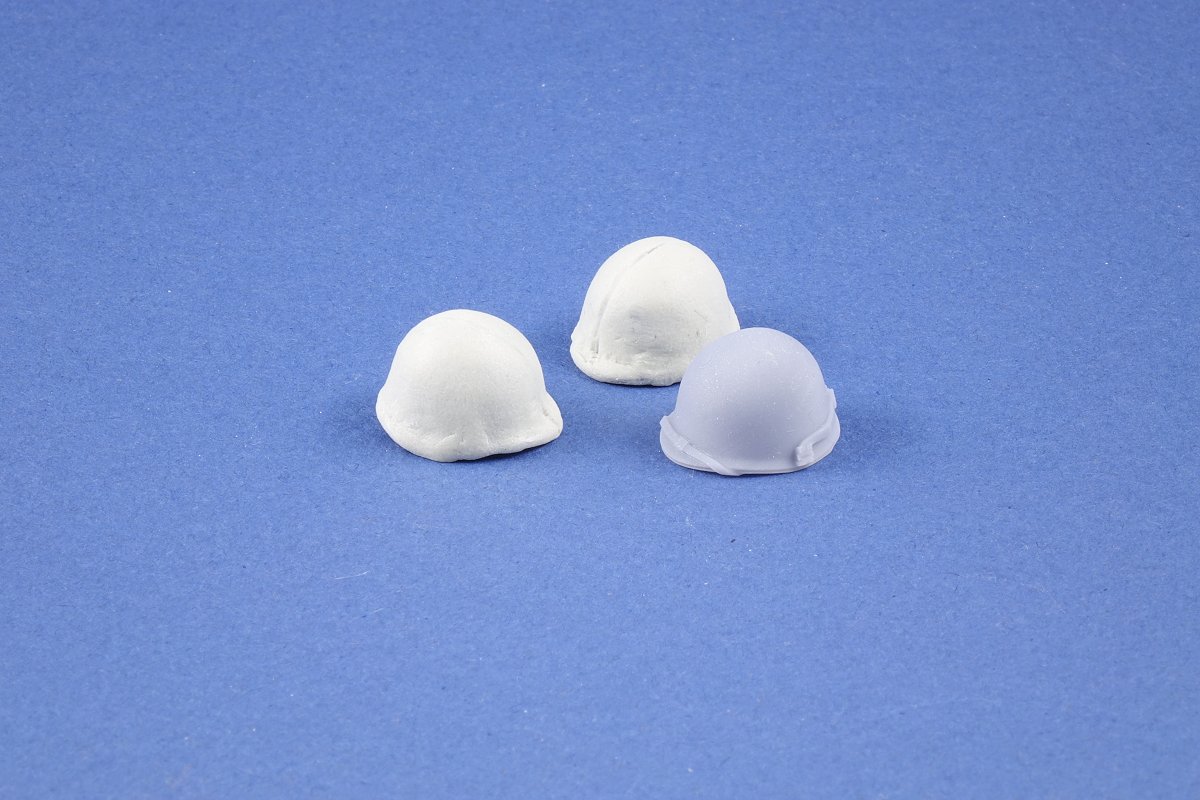
I’m back off vacation so it’s time to do more work on the M113. Whilst i was away, I added covers to the plain helmets I had, using epoxy putty. I’m reasonably happy with the results but they need a bit more detailing yet.
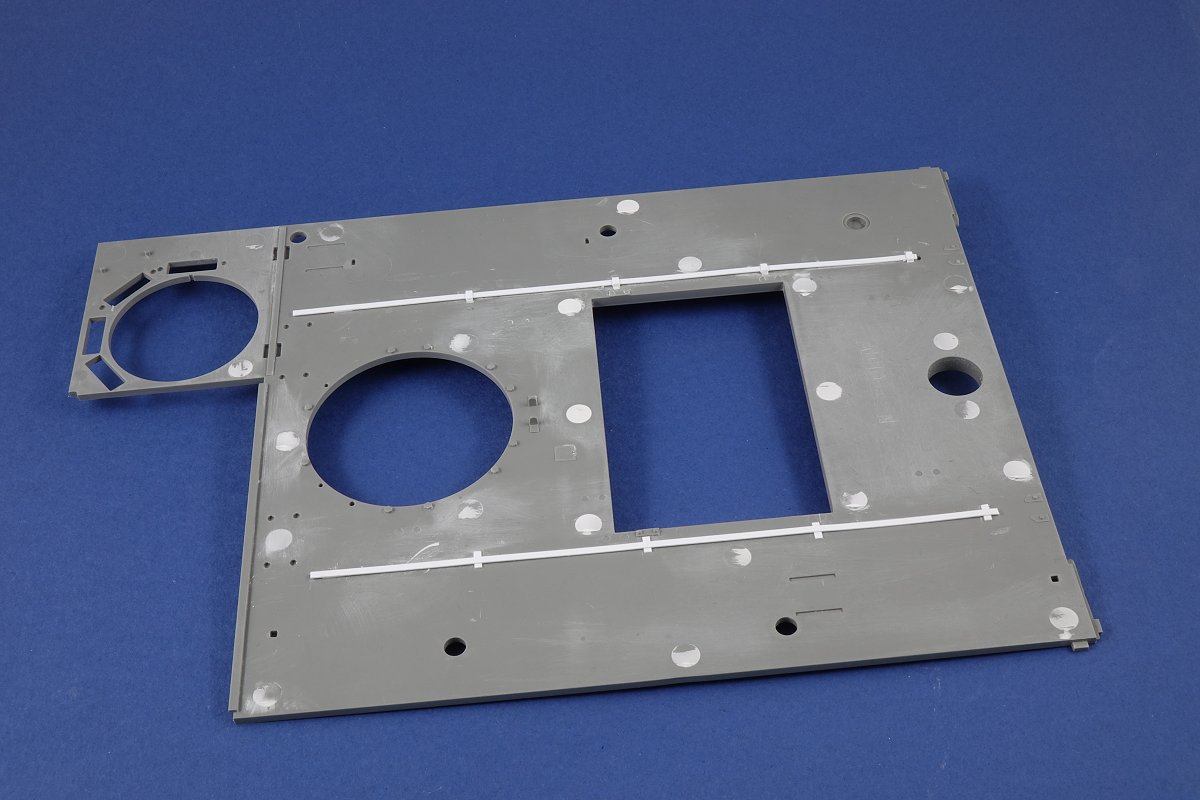
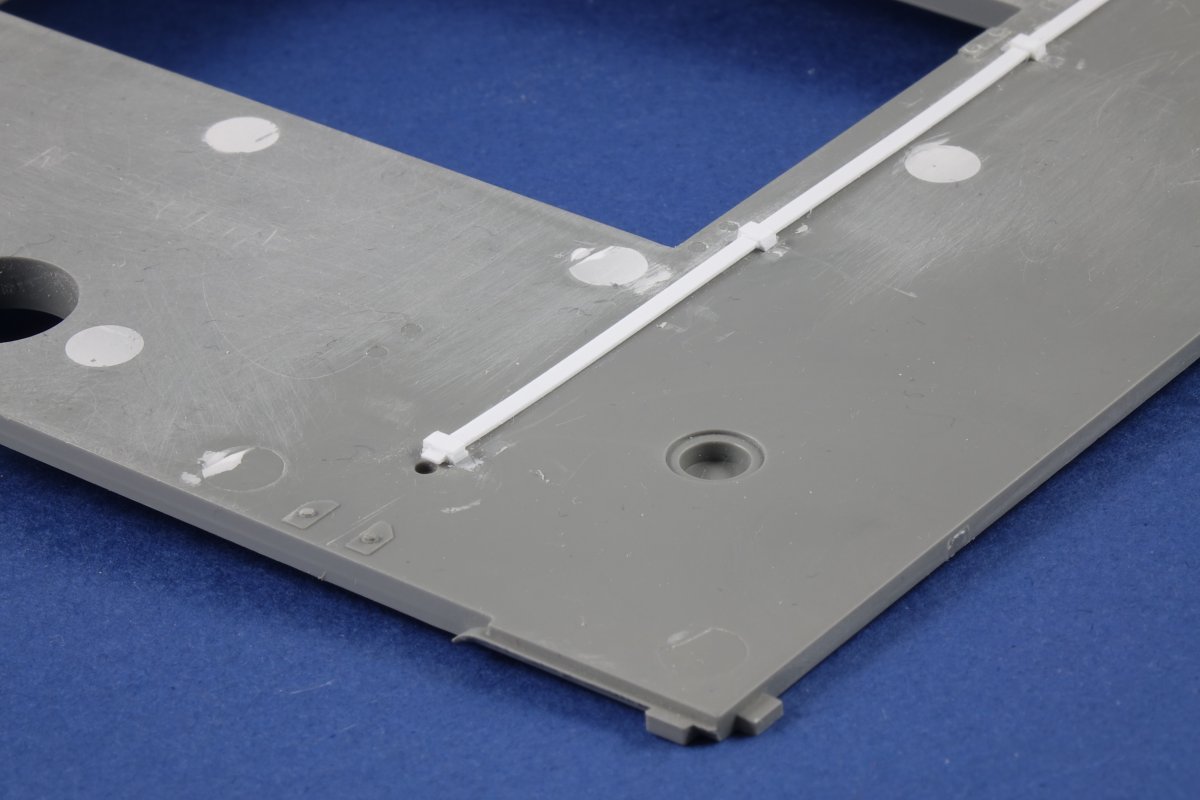
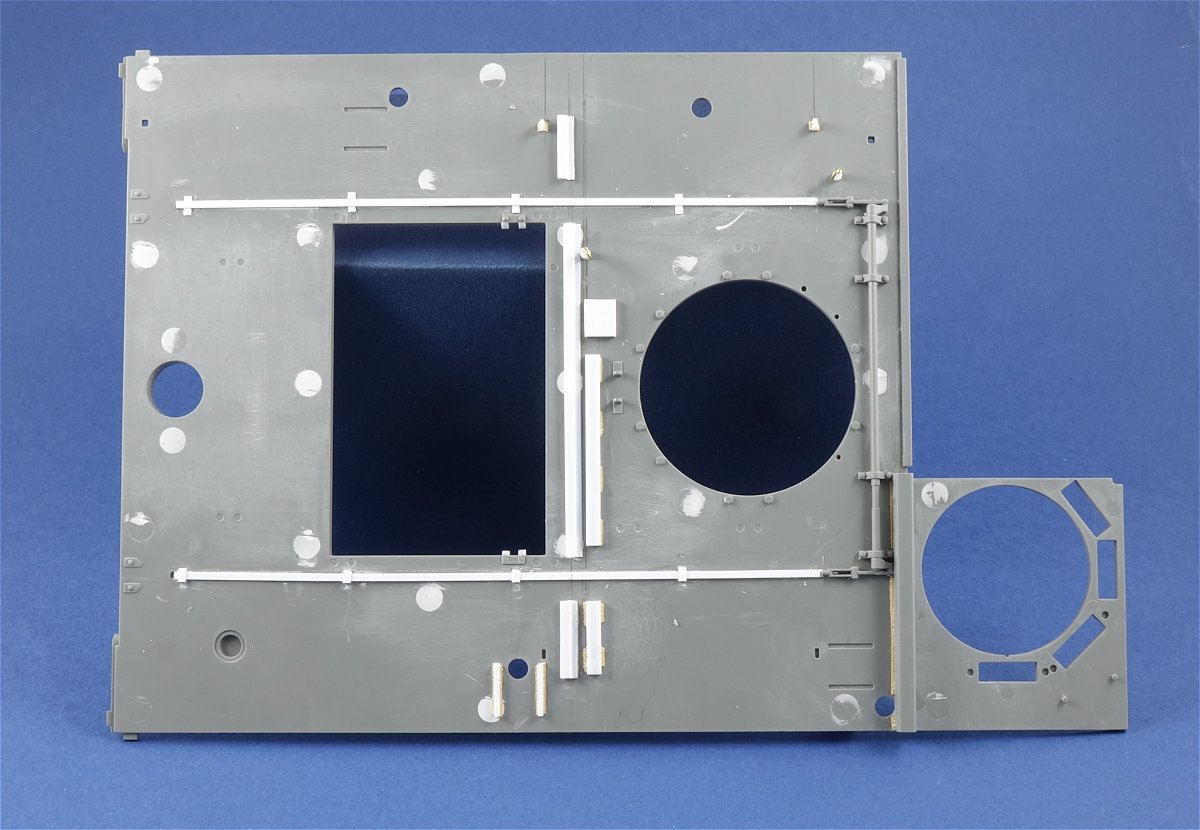
Now I’m back, I’ve been focusing on the underside of the roof. There is still a bit more detail to add but it makes the roof a lot busier than the plain kit part. The pieces across the panel are cable ducts made from Evergreen profile.
I’ve added a raised base for the crew intercom (it doesn’t sit flush on the roof).
There are a couple of generic equipment hooks added as per my reference photos and a random pair of welded bars either side of one of the aerial sockets (they were on the photos, so they got added).
I also added the latch guides on either side of the troop hatch.
Finally, all the weld seams were done old-school with textured stretched sprue. I always use different coloured sprue from another kit so that the welds show up in photos but that’s the only reason.
Doing a great job John.Will you bring the model to Telford in November?,Might be tempted to buy one myself!!.
Richard
Hi Richard - yes I hope to have a partialy built M113 on the club display at Telford in November. It won’t be anywhere near finished and I have no intention of rushing it ![]()
I’m putting a lot of extra work into it but as always there is that careful balance between adding everything you can and accepting that you need to finish the project before you run out of steam.
I like the kit - it has its challenges but there is great scope for extra detail. Whilst I could resolve several of those challenges by buying expensive aftermarket parts, I’m trying to do as much of the work myself as I can. After all, my stock of plastic sheet and Evergreen strip is extensive and it needs to be used on something!
Nothing like doing it yourself. It doesn’t have to be to 100% accurate as long as you’re happy. Doing great work and waiting to see every update.
Hi John.
Look forward to seeing the 113.I shall look out for her on your club stand.Im.usually wandering around the hall tempted by all the model temptations.Im hoping to bring some Churchills for the interest group.The show will soon be upon us as the weeks race on relentlessly.
Time for a brief update on last week’s progress.
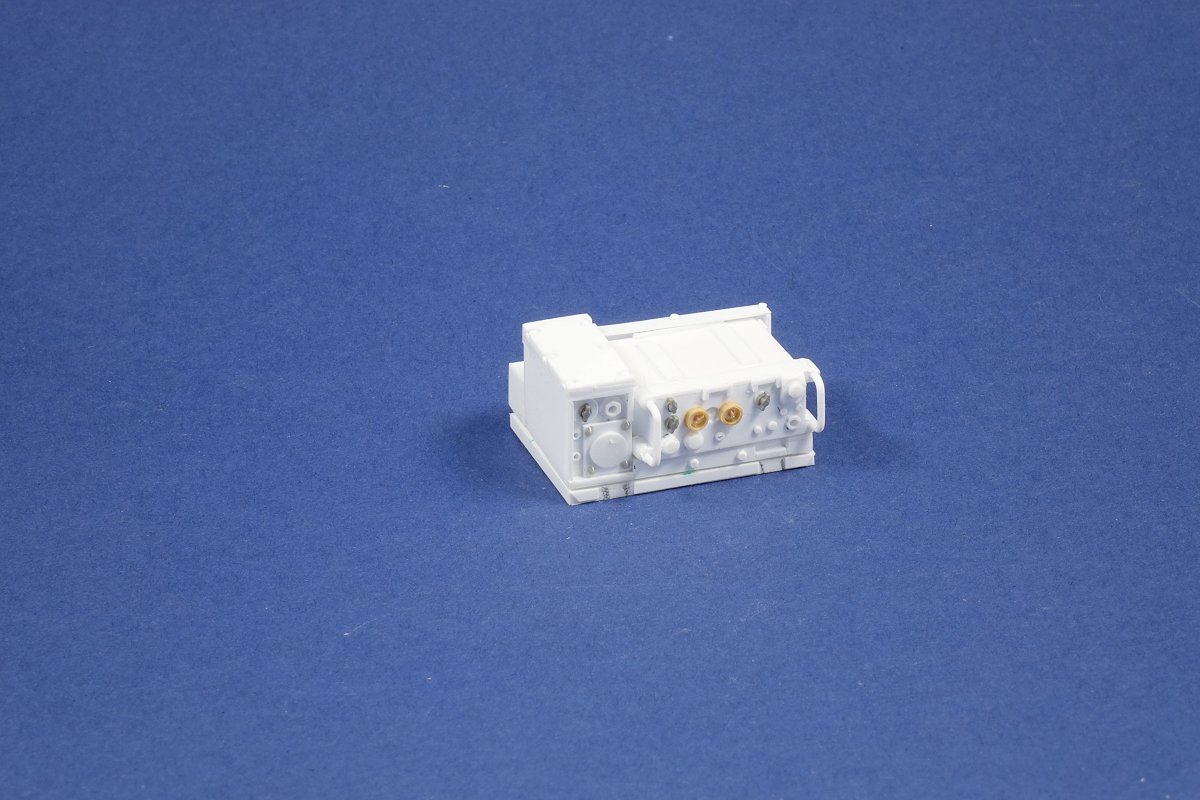
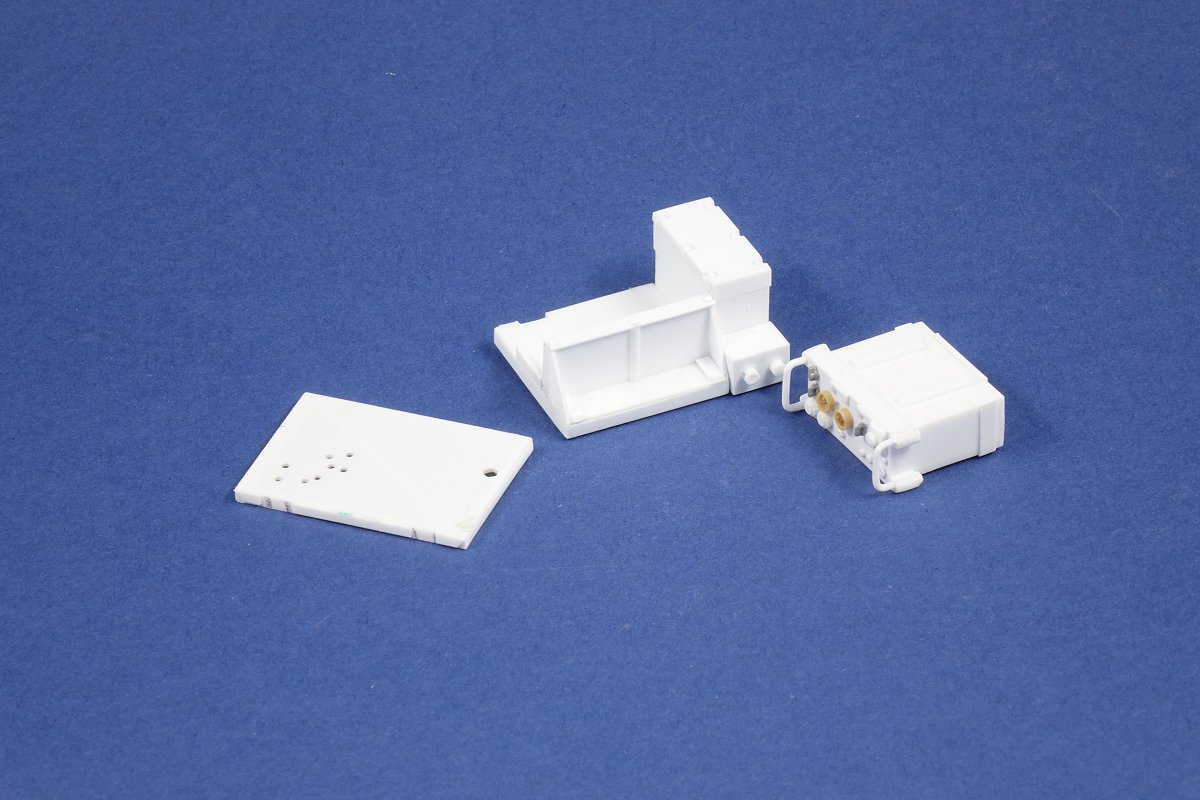
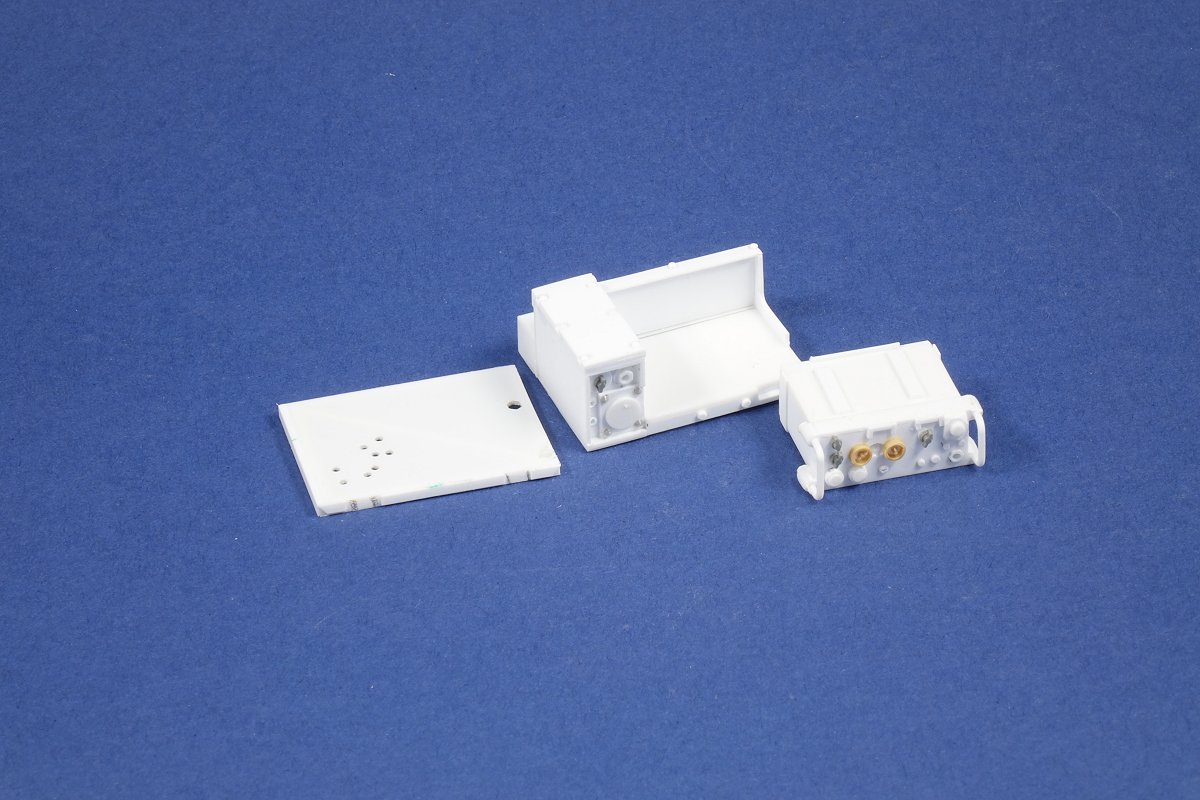
The radio in the kit is ideal for a Vietnam era vehicle but not for a 1980s beast. Therefore I needed to source an AN/VRC64 radio. There is at least one 3d file that I could have purchased but I don’t have a printer and besides, I like a challenge.
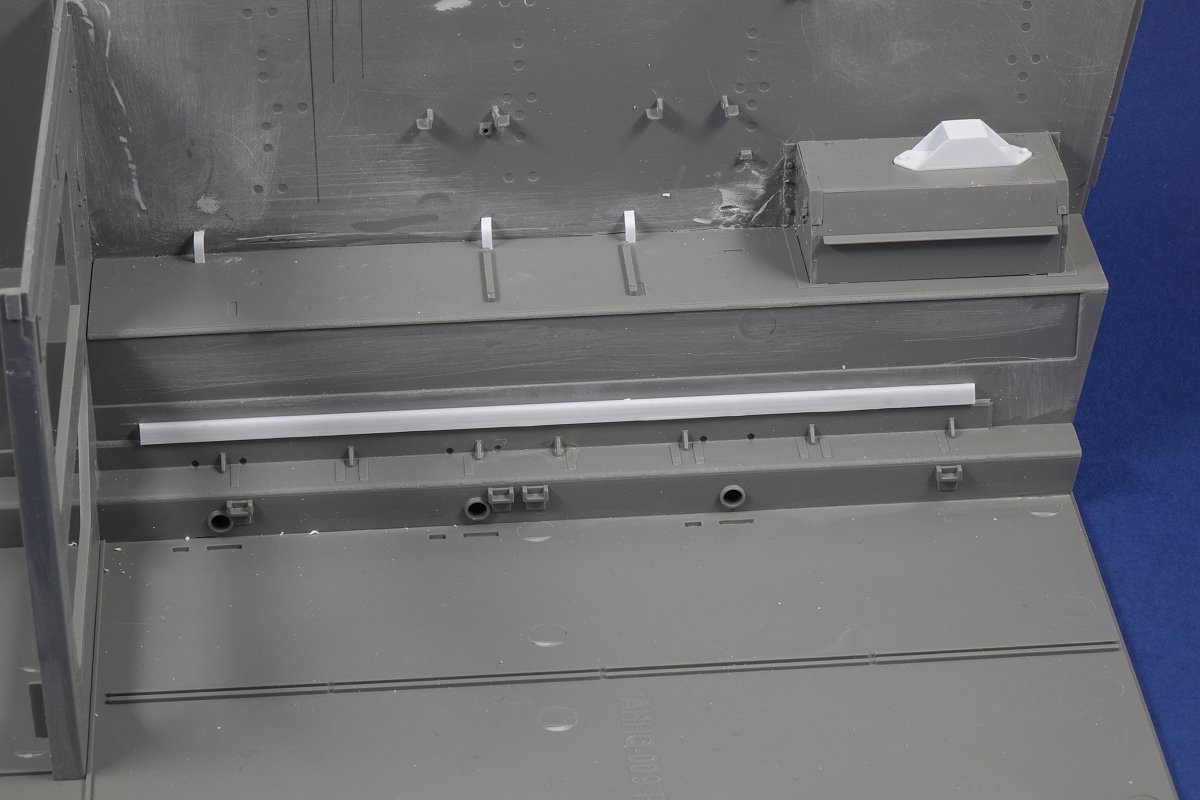
I therefore present to you my scratchbuilt radio and amplifier unit. There are still a number of small details to add, but probably not until after I’ve painted it. The other thing I’ve been doing is adding the internal brackets for the M8 CBR detector unit carried by some M113 scout vehicles in 7th Army. I will build the external sensor mount later.
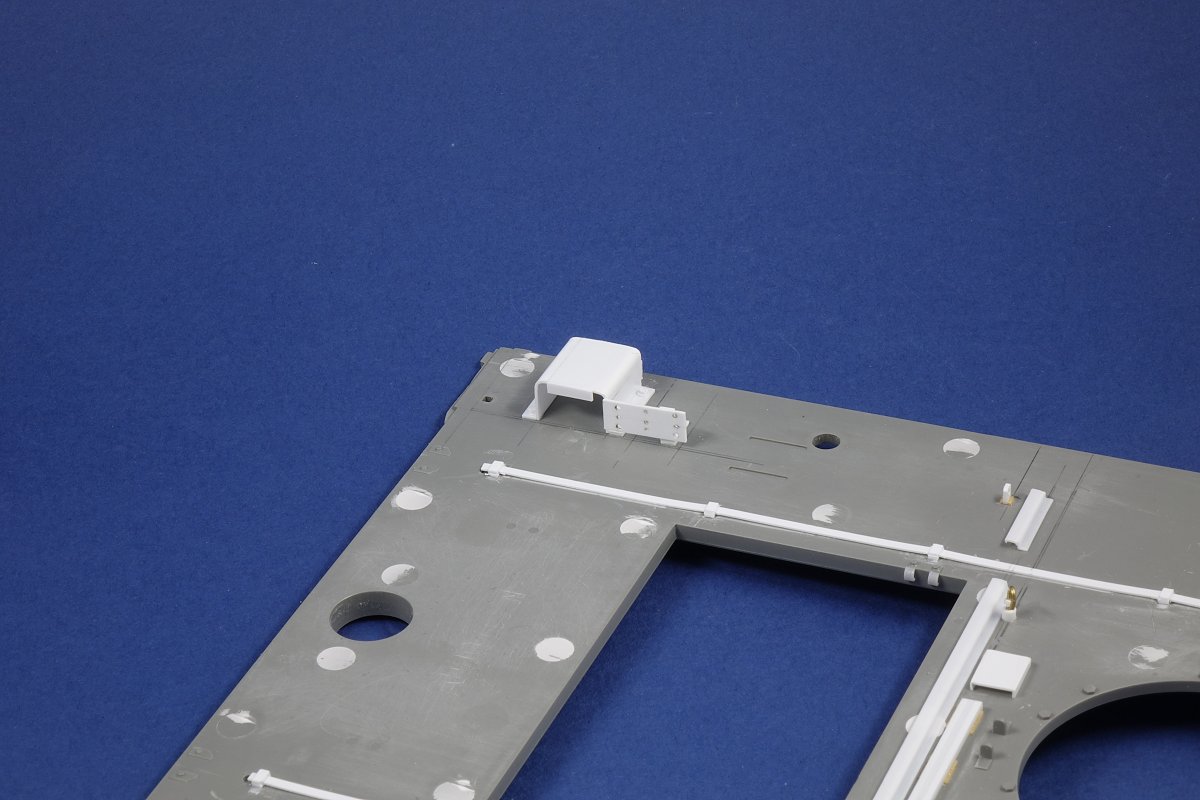
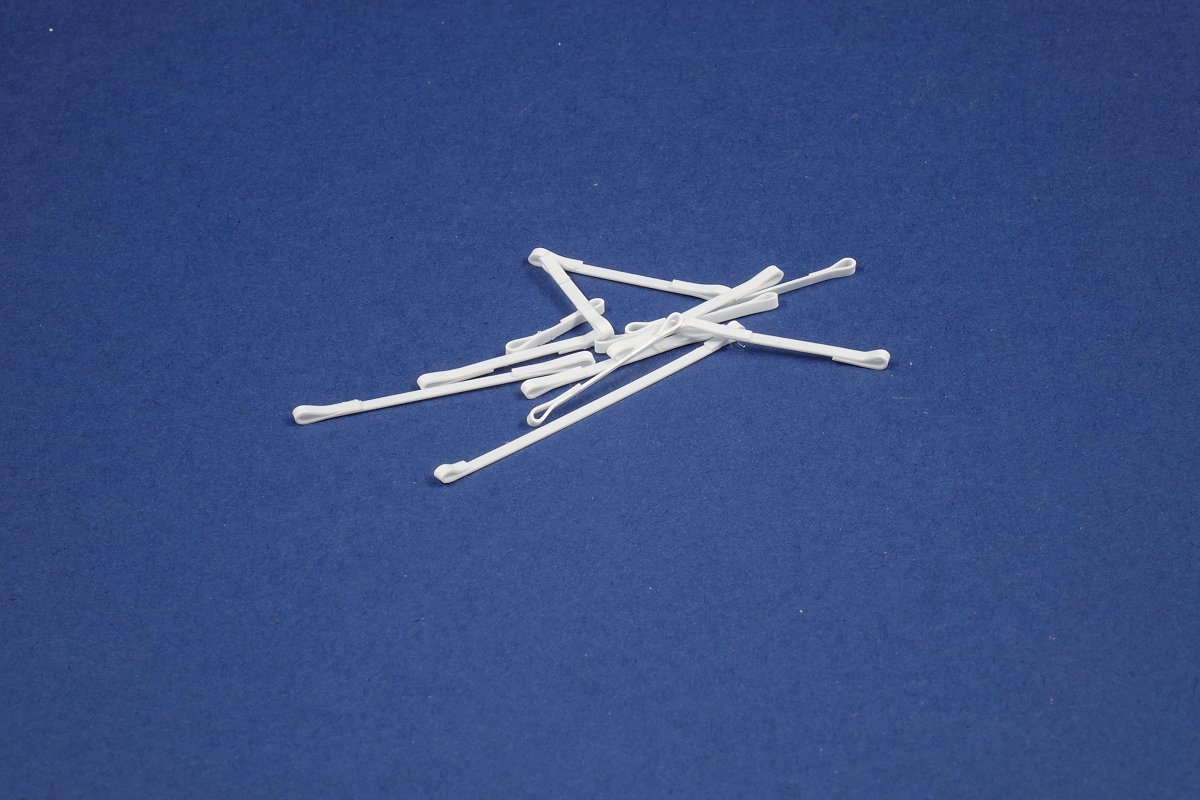
Finally there is one job that is tedious but that I can do between other little tasks. I need to construct cable clips for the internal wires. They are simple to do but I need quite a few, so I do a handful whenever I’m waiting for cement on other parts to cure. Each strip has two clips, one at either end. I will separate them and add a bolt head to each one in due course.
Nice clean scratch work, well done !
Glad that you changed the radio-the kit radio ‘s set up bugged me. ![]()
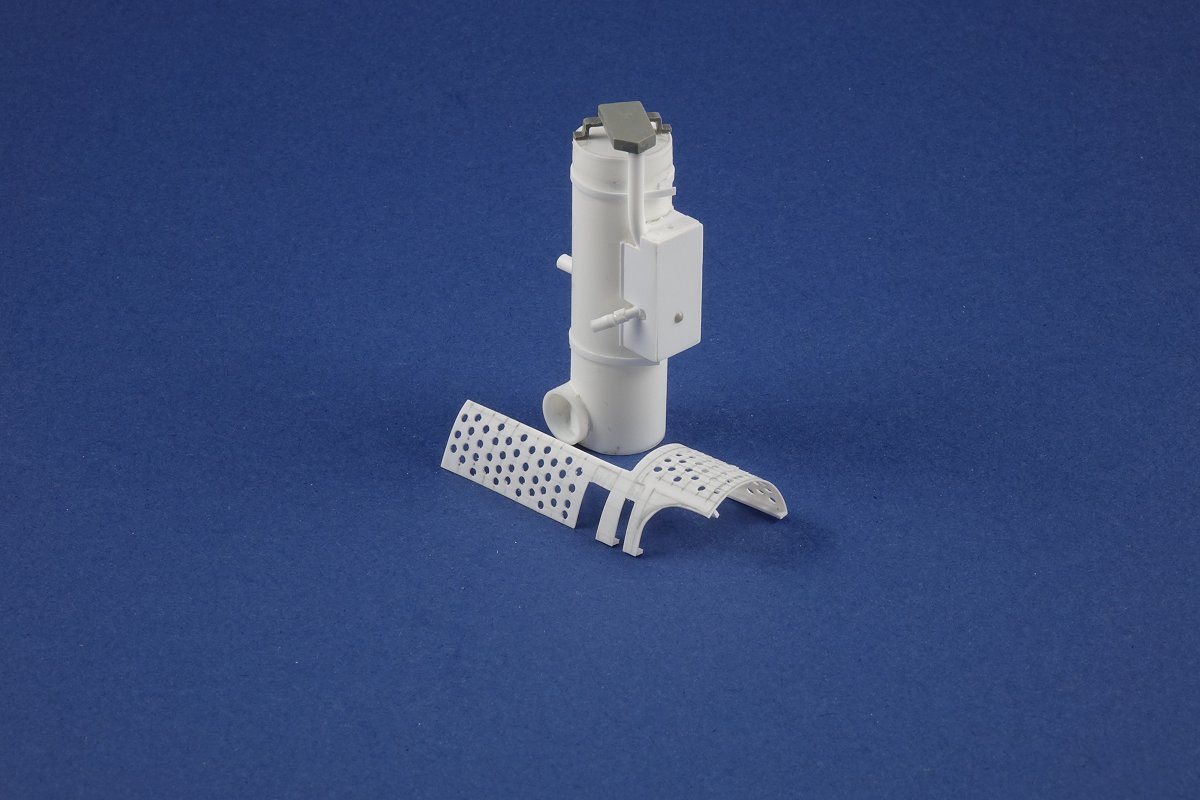
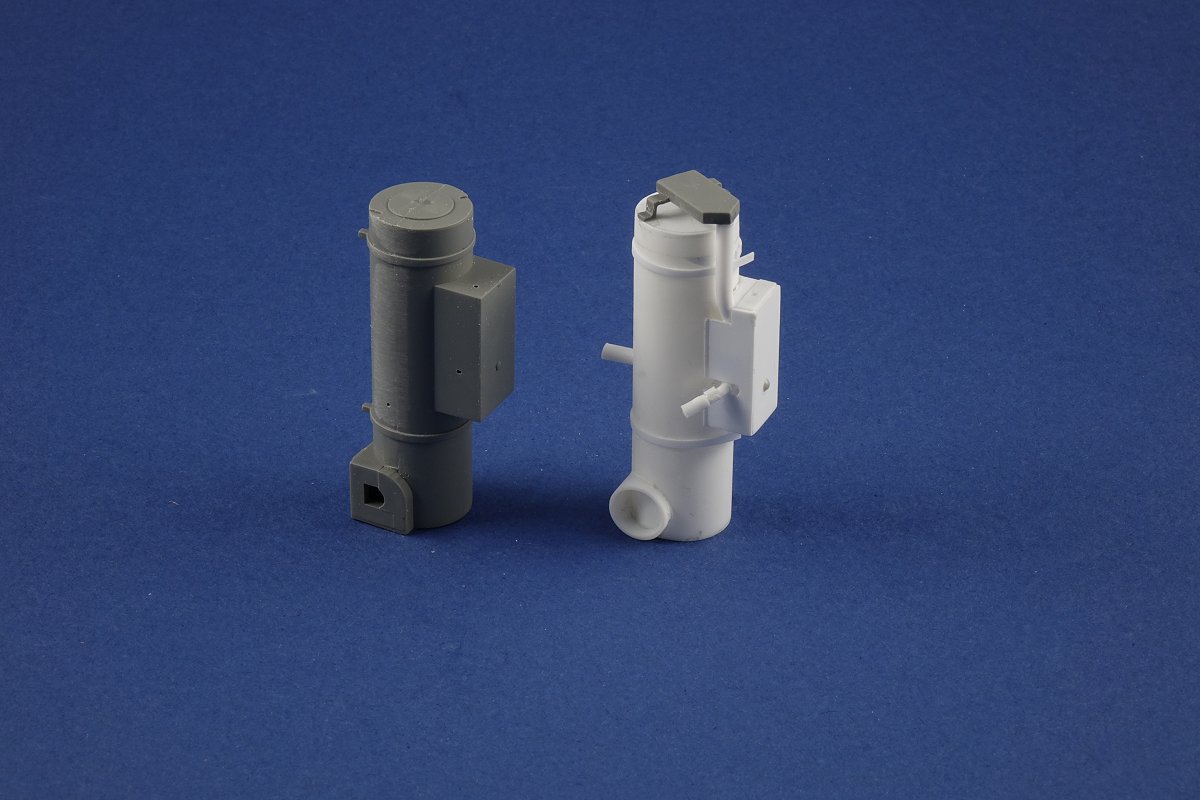
Another week gone and another update to publish. This week I’ve mostly been working on the personnel heater. I was originally just going to add extra detail to the kit unit, but the more I studied photos, the more unhappy I was with the look of it. Therefore I’ve scratchbuilt a replacement (Evergreen 12.7mm tube is pretty much a perfect match for the diameter). The heater now has a fuel line, an air intake pipe and an exhaust pipe that I will plumb into the vehicle once some of the internal painting has been done. The big challenge was trying to replicate the perforated heater guard. This one is version 2. The first one didn’t work out but I learnt a lot from the process so it wasn’t a wasted effort. The engine firewall now has the fitting for the fuel line and holes for the air intake to the heater - the upper one takes the pipe into the engine compartment and the lower one brings it back out and into the heater unit. The kit conveniently provides the blanking plates moulded onto the firewall.
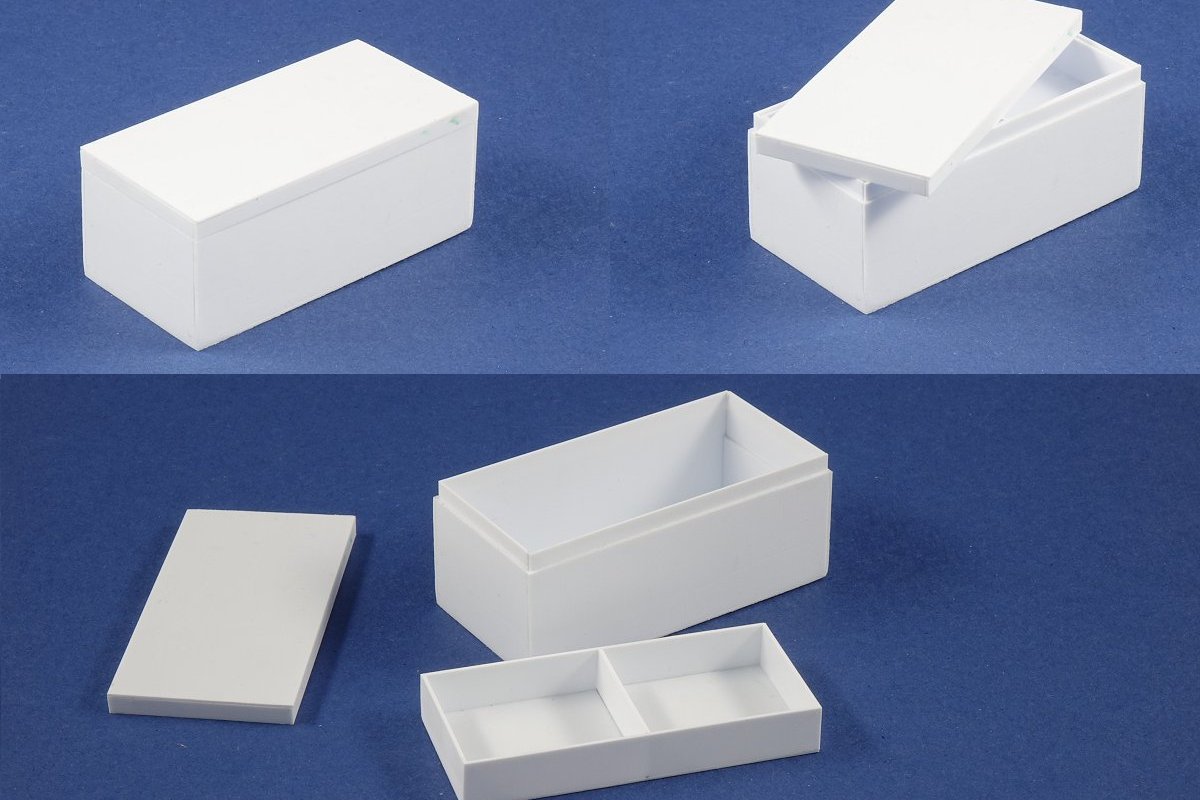
Next I built the day tracker storage box for the M47 Dragon system - not sure yet whether I’ll fit the Dragon mount but I probably will.
Then - as a little bit of light relief I decided to build a footlocker, just because I wanted to.
And finally for this week, I changed the location of the aerial base directly behind the engine compartment because it sits in the wrong place. I realised this when I was working out the correct location for the day tracker box. I moved it forwards to level with the front guard rail post. The old hole was filled with some scrap sprue from the kit - the larger diameter sprue plugs the aerial socket nicely if you sand down the sprue very slightly.
Nice extra work.
You are doing a ton of great work John, and pointing out what I will need to do for my builds. I really wish I had sent you some of my footmans loops, I really dropped the ball on that. ![]()
Great additions John.Really neat scratchbuilding wizardry.I look forward to seeing her at Telford.You are certainly inspiring me to maybe get the kit at said show.Im not sure what my wife will say tho!!.
Happy modelling from Richard
Hi Jacques,
Thank you sir - a pleasure to be of service ![]()
Funny you should mention the footman loops. I debated long and hard about ordering some from you and then decided - nah, I’ll be OK with the kit items.
Then two reasons arose that made me regret that decision.
Reason 1 is that having started to clean up the kit items on the sprues I’ve realised just how fragile they are. I’ve trashed two of the three that I’ve removed from the sprues (and that’s with taking extreme care).
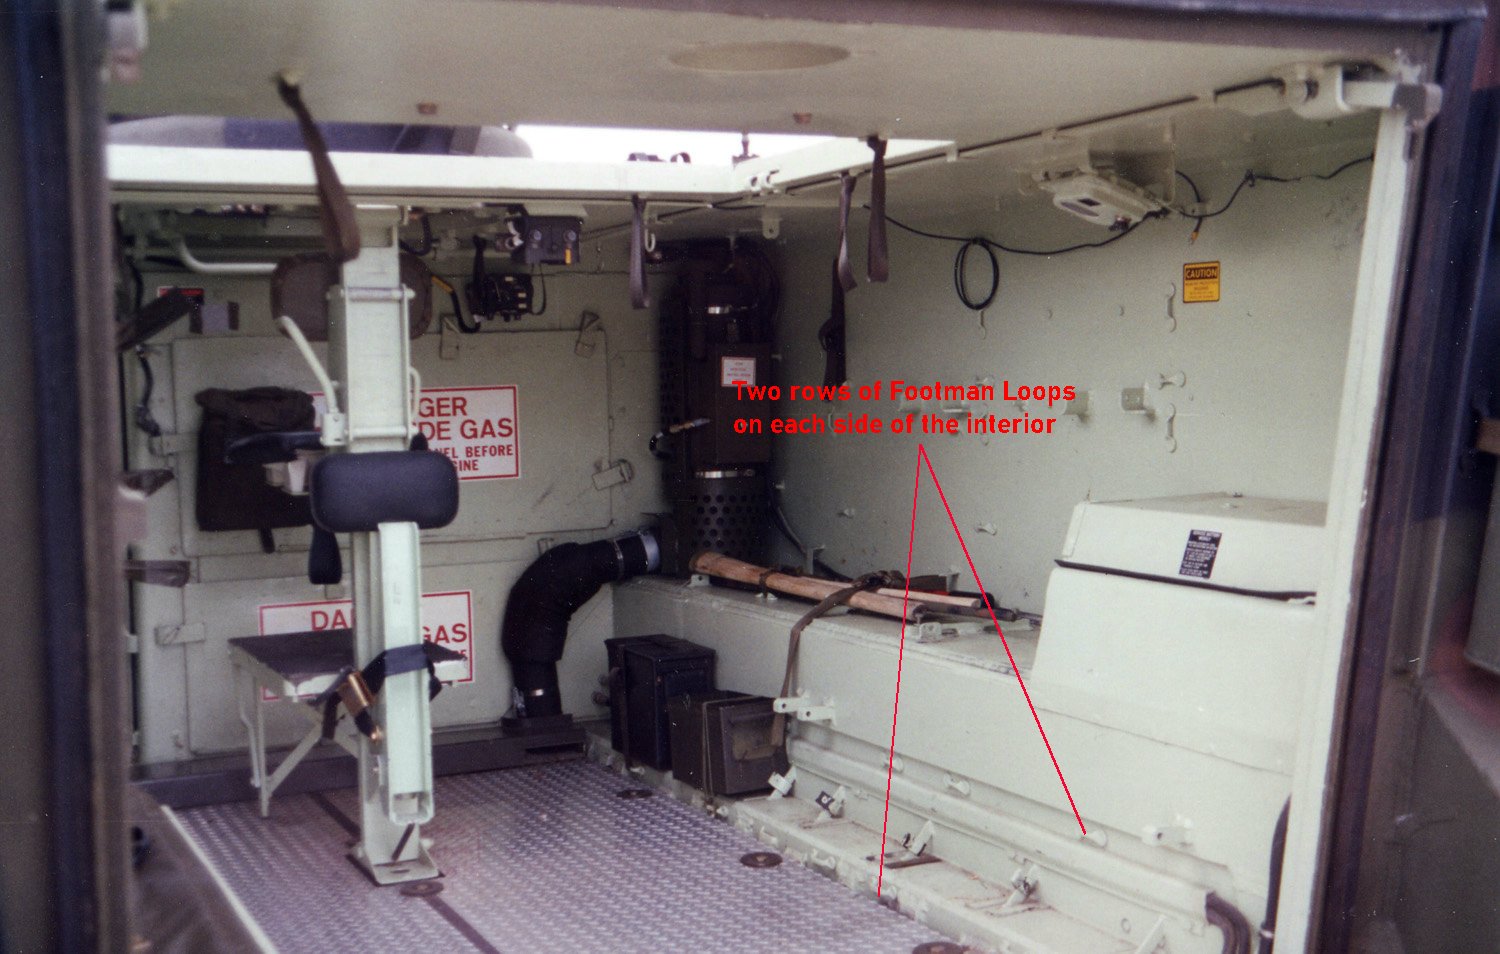
Reason 2 is that the kit provides 120 of the little beggars, but I’ve counted perhaps another 25-30 around the interior alone that the kit does not provide. On each side, there is a row of about six at floor level and then another matching row just below the bench hinge points. My plan at present is to present the interior with both of the forward bench units folded and just the rear ones open, so the extra loops will be visible. (photo below is from Prime Portal, annotated to show the extra rows). I think I’ll be revisiting that decision soon.
Hey John, no regrets. So you need more footmans loops than those provided in the kit…how many more would you say? The kit has 60 for interior and 60 for exterior.