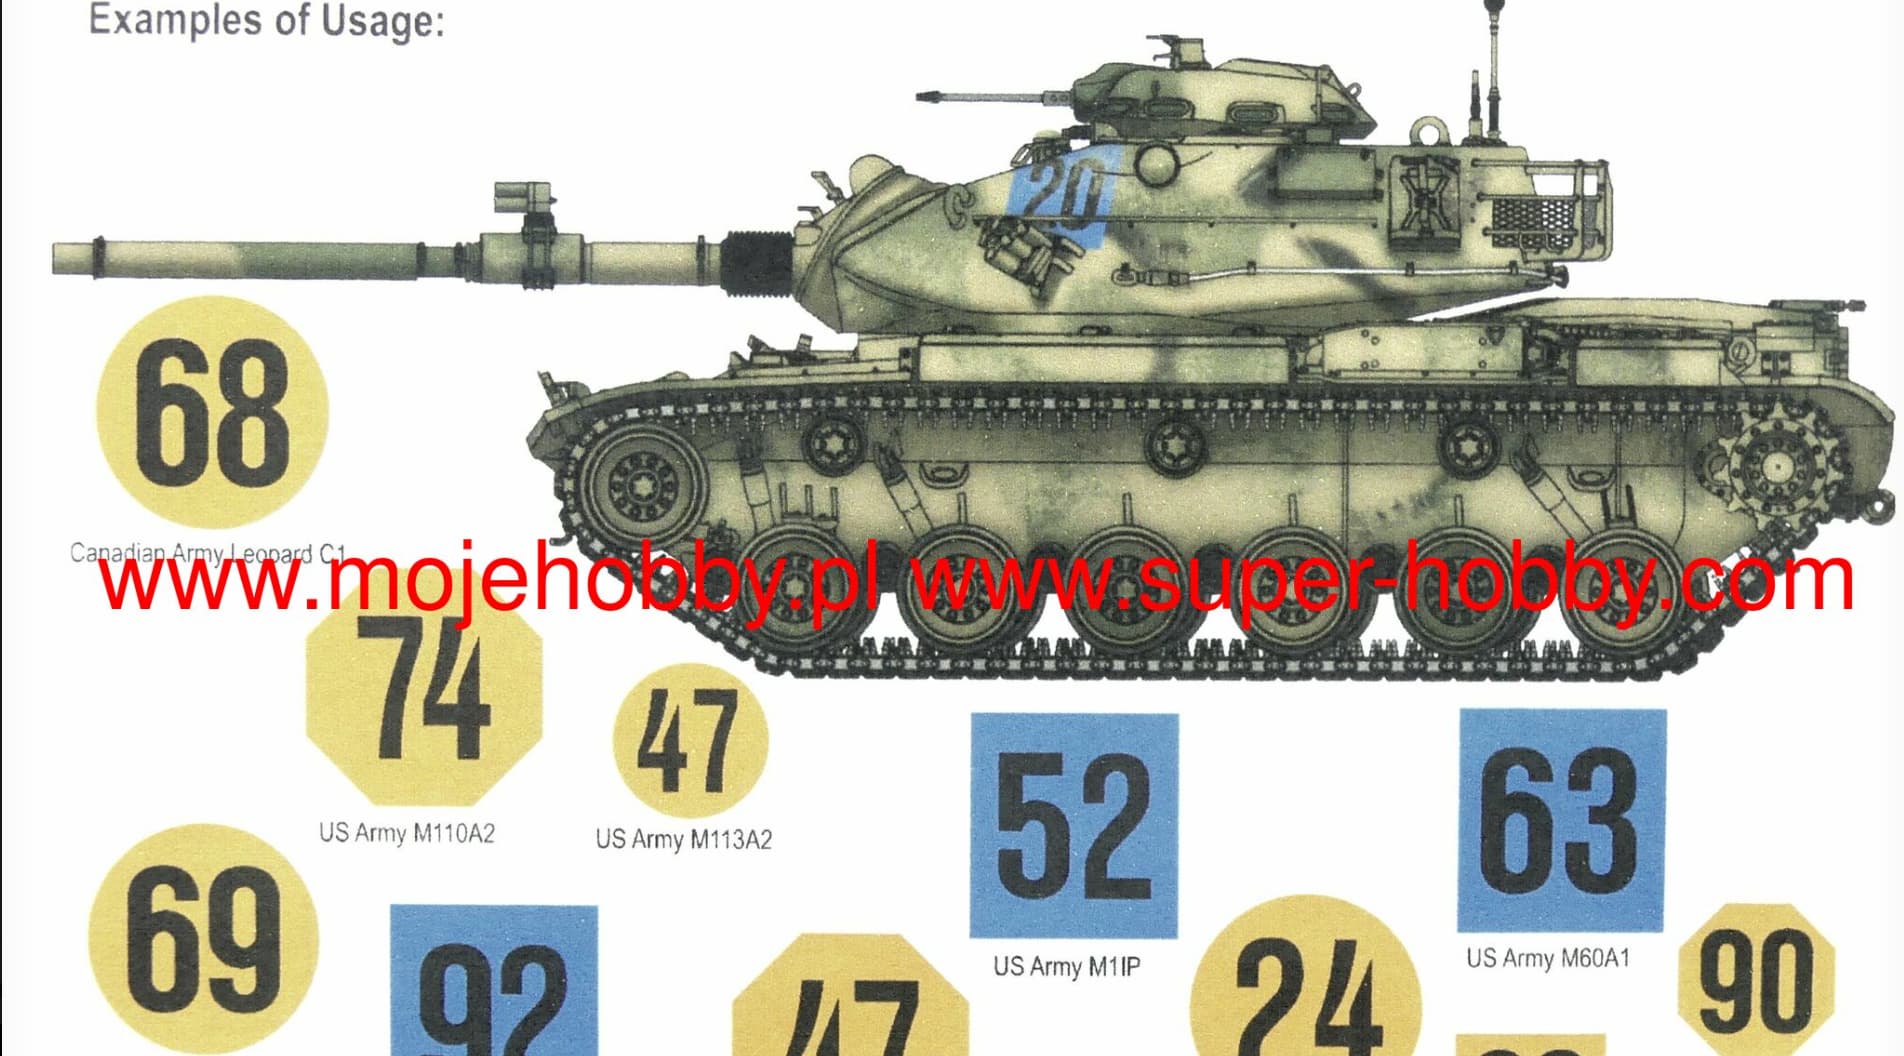
I am building a kit of M-113A2 of Academy. It is a kit rich of options, but there are very approximative painting instructions and references to the decals sheet.
The sheet itself includes three blue rectangles and numbers 1,2,3,4,5,0 to insert at own pleasure (?), some small orange rectangles with 1-I 1-7-I, A13, 1-14-15-I, HQ-6; small black inscriptions ‘the holy diver’ and ‘pegasus’.
There is no relation between these numbers and the optional parts as the cupola with or without armoured shields, or rear outer tanks, or the Dragon missile on the cupola, or the smoke dischargers or other options.
Besides the camouflage pattern of the instructions sheet (Nato, 3 colors) has a different pattern if compared to a photo shown on another recent thread.
Could anyone help me to make good use of the decals and options of this kit, please? Or suggest alternatives not including the use of aftermarket?
Thank you for any help.
Those blue rectangles and numbers are for ID purposes during REFORGER. Unless modeling a vehicle during that exercise (or any other) you can disregard.
As for the other markings such as the bumper codes, you’ll probably find you want to make your own once you’ve decided when/where you want your vehicle to be. Now comes the fun part - scrolling through scores of photos until you find the build you like, and then trying to replicate it.
Another note, if building a US Army M113A2, do not use the external fuel tanks. They were not used on US M113A2s with the exception of the M981A2 FISTV. The US started adding them on M113A3 versions. Other countries, such as Canada and Israel, did use the external fuel tanks on M113A2s.
For the decals, as Rob says, the colored square with numbers is an exercise marking to show which “team” the vehicle was part of.
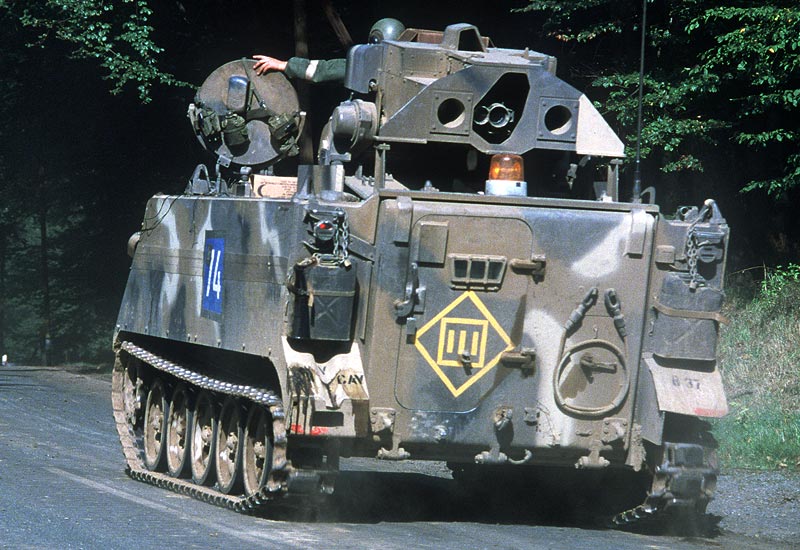
The bumper numbers are both 1st Infantry Division. The first you listed is from 1-7 Infantry Bn, and the second one from 4-15 Infantry Bn. HQ 6 is the Battalion Commander’s vehicle.
The gunshields and Dragon launcher are all time and location dependent. Your best bet is to find a picture of an M113A2 you like and copy it.
That part is easy enough:
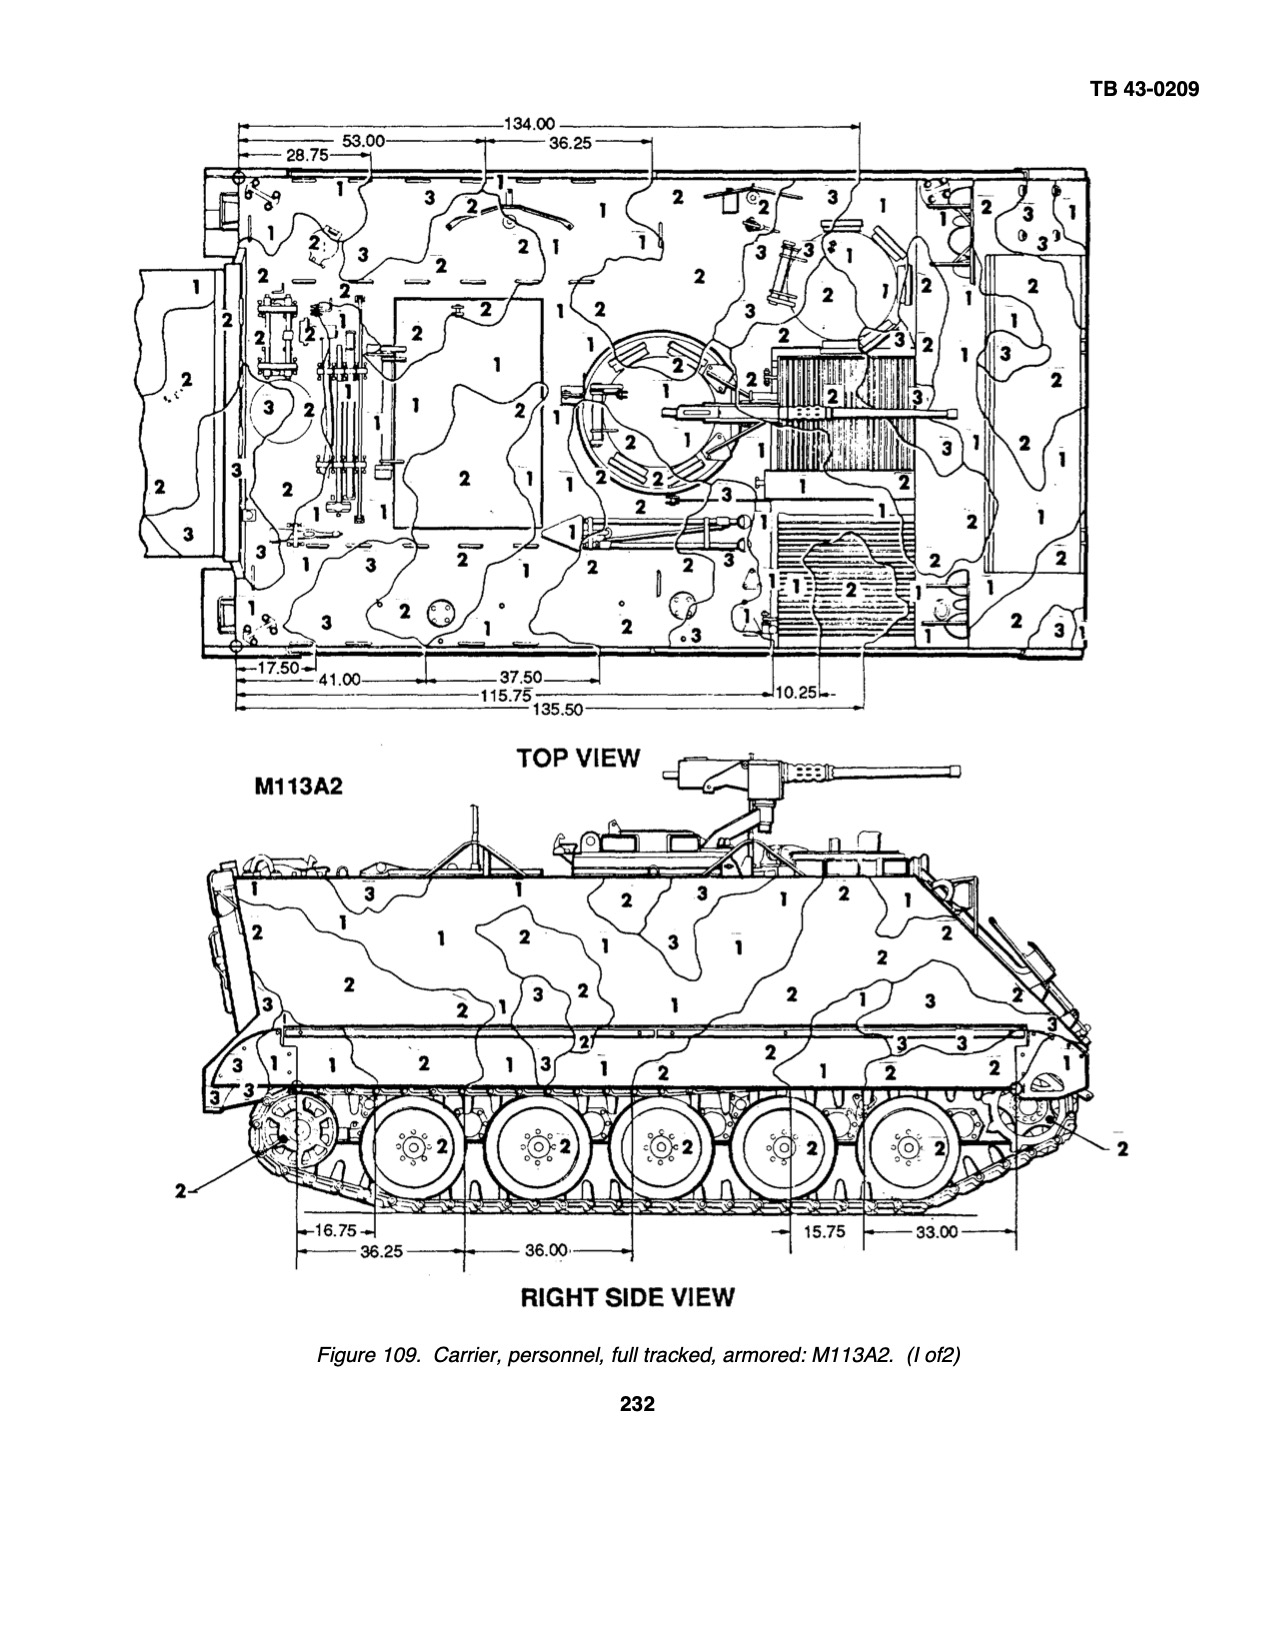

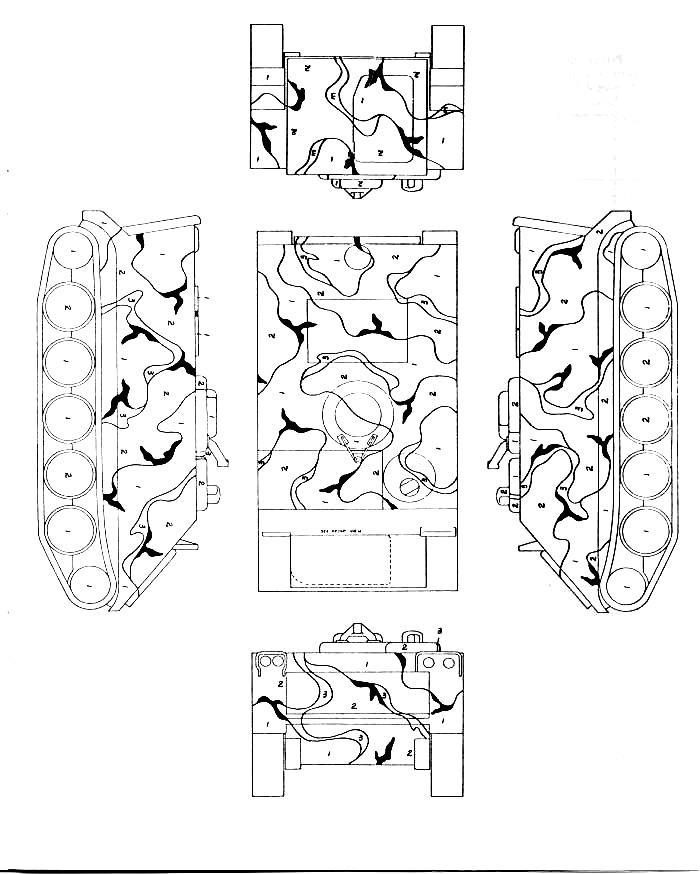
These are the official patterns from US Army Technical Bulletin 43-0209 of 31 October 1990, and they were meant to be followed quite strictly. Off the top of my head, the points indicated by measurements (which are in inches, of course ![]() ) must be at those distances, with very little deviation allowed.
) must be at those distances, with very little deviation allowed.
Thank you for your suggestion.
I had a look to photos by googling, and there is a big variety but it seems difficult to find one close to the boxing.
One thing is that most photos of recent and interesting M113A2 show them without the side skirts. But i would prefer to keep them because the wheels and tracks are not that good, and I would avoid to spend on aftermarket.
Most photos of plain M-113A2 with shirts show them without shields of the mg, without flotation box on the front and without any of the interesting options included into the kit. I’ll continue to search, hoping to find a suitable image.
I’ve also taken into consideration to use the kit for a resin turret of Verlinden that is lying on my stash, that was put on an Israelian prototype only. But iI would be displeased if my only M113 built till now was so poorly representative.
The 1-7 and 4-15 are obviously excluding each other. Is HQ6 excluding other marks?
Which one is that? The 60 mm gun?
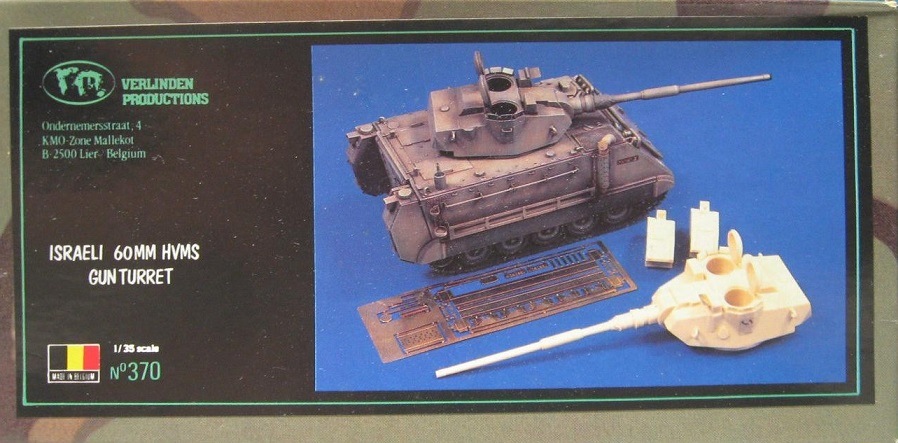
AFAIK that was no more than a prototype, yes. But you could use the rear fuel tanks for it ![]()
The Bumper numbers go on the two sides of the front and rear. The Division and Bn go on the left (when looking at it) 1I 1-7I and 1I 4-15I go on the left. The Company and vehicle number go on the right, HQ 6. HQ 6 would be in both Bns.
The IDF turreted version probably had the external tanks since most IDF M113A2s had them, but I have no clue as the IDF is not my area.
Thank you, not the use of decals is clear at least for one example. It’s just a pity that it is not clear if I can utilize any of the optional parts of the kit. The few photos with skirts don’t seem associated with any interesting optional part.
In real life the skirts are easily removed and replaced, they are held on by just a few bolts. I would not worry too much about them either way.
Ken
A little more on the Reforger markings - decal set for illustration purposes.
https://www.super-hobby.com/products/Reforger-Markings.html
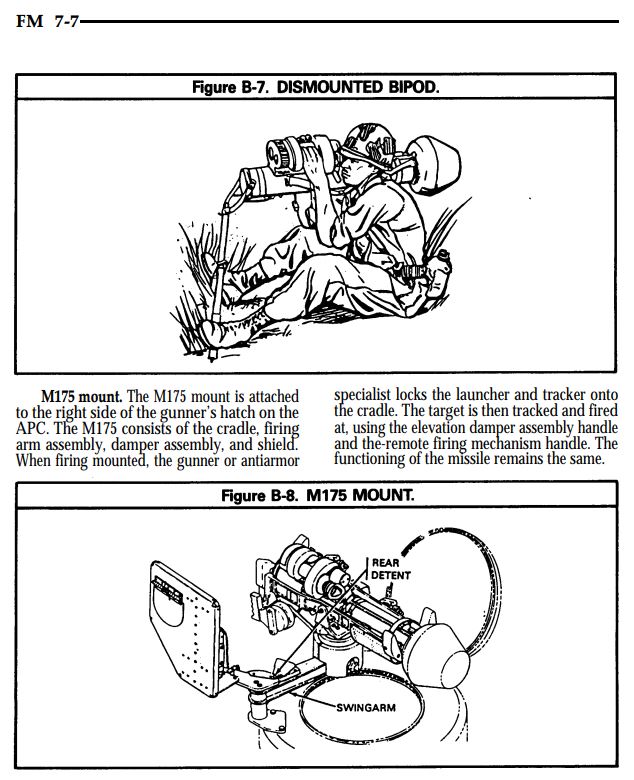
Last one, I promise. Everything you ever wanted to know about firing the Dragon from an APC: TC 23-24-1 FIRING THE M47 DRAGON FROM THE M113
One option is to paint the vehicle in MERDC rather than NATO camouflage:
(Or something vaguely approaching that, since application of this pattern was very loose.)
This will give you at least the option of putting the M47 Dragon launcher on the commander’s hatch like @GruntDoc showed above, as well as put on the side skirts.
A plain green shield for the .50-calibre machine gun — but without the round shields on the cupola — is also an option for either type of camouflage.
In M113 in U.S. Service by Michael Green and YvesDebay (Hong Kong: Concord, 1991; ISBN 962-361-021-1) there is a photo in the colour section of the book, of an M113 with the M47 Dragon launcher but also the floatation cell on the trim vane and smoke launchers to either side of it, and skirts over the tracks. It looks to have bumper codes I△1-22F and HQ. 92.
Some M113A2’s in the 1990’s were also just straight Forest Green. It is a little darker and browner than NATO green.
And there is also the Winter Cammo version for the NATO-flague. Replace brown with white.
Exercise markings, REFORGER ‘84.
Thank you all for your suggestions.
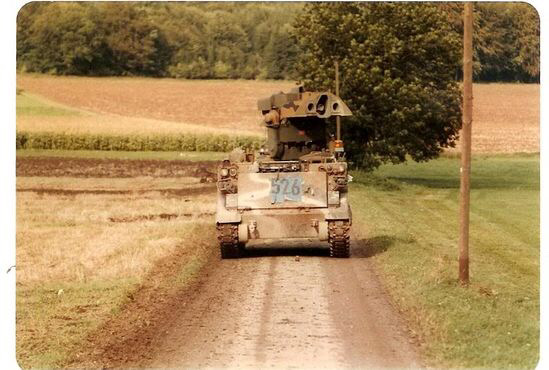
About the tracks: in some photos they appear rusty, on other photos they appear surprisingly bright and clean. What metal were they made of? Steel or aluminum alloy?
AFAIK, they’re made of steel…
%20(Large).JPG)

H.P.
They’re steel. Drive through fields and woodlands, and they’ll take on the brown patina of @Frenchy’s photos. Drive through desert and sand, and they’ll buff up to shiny steel.