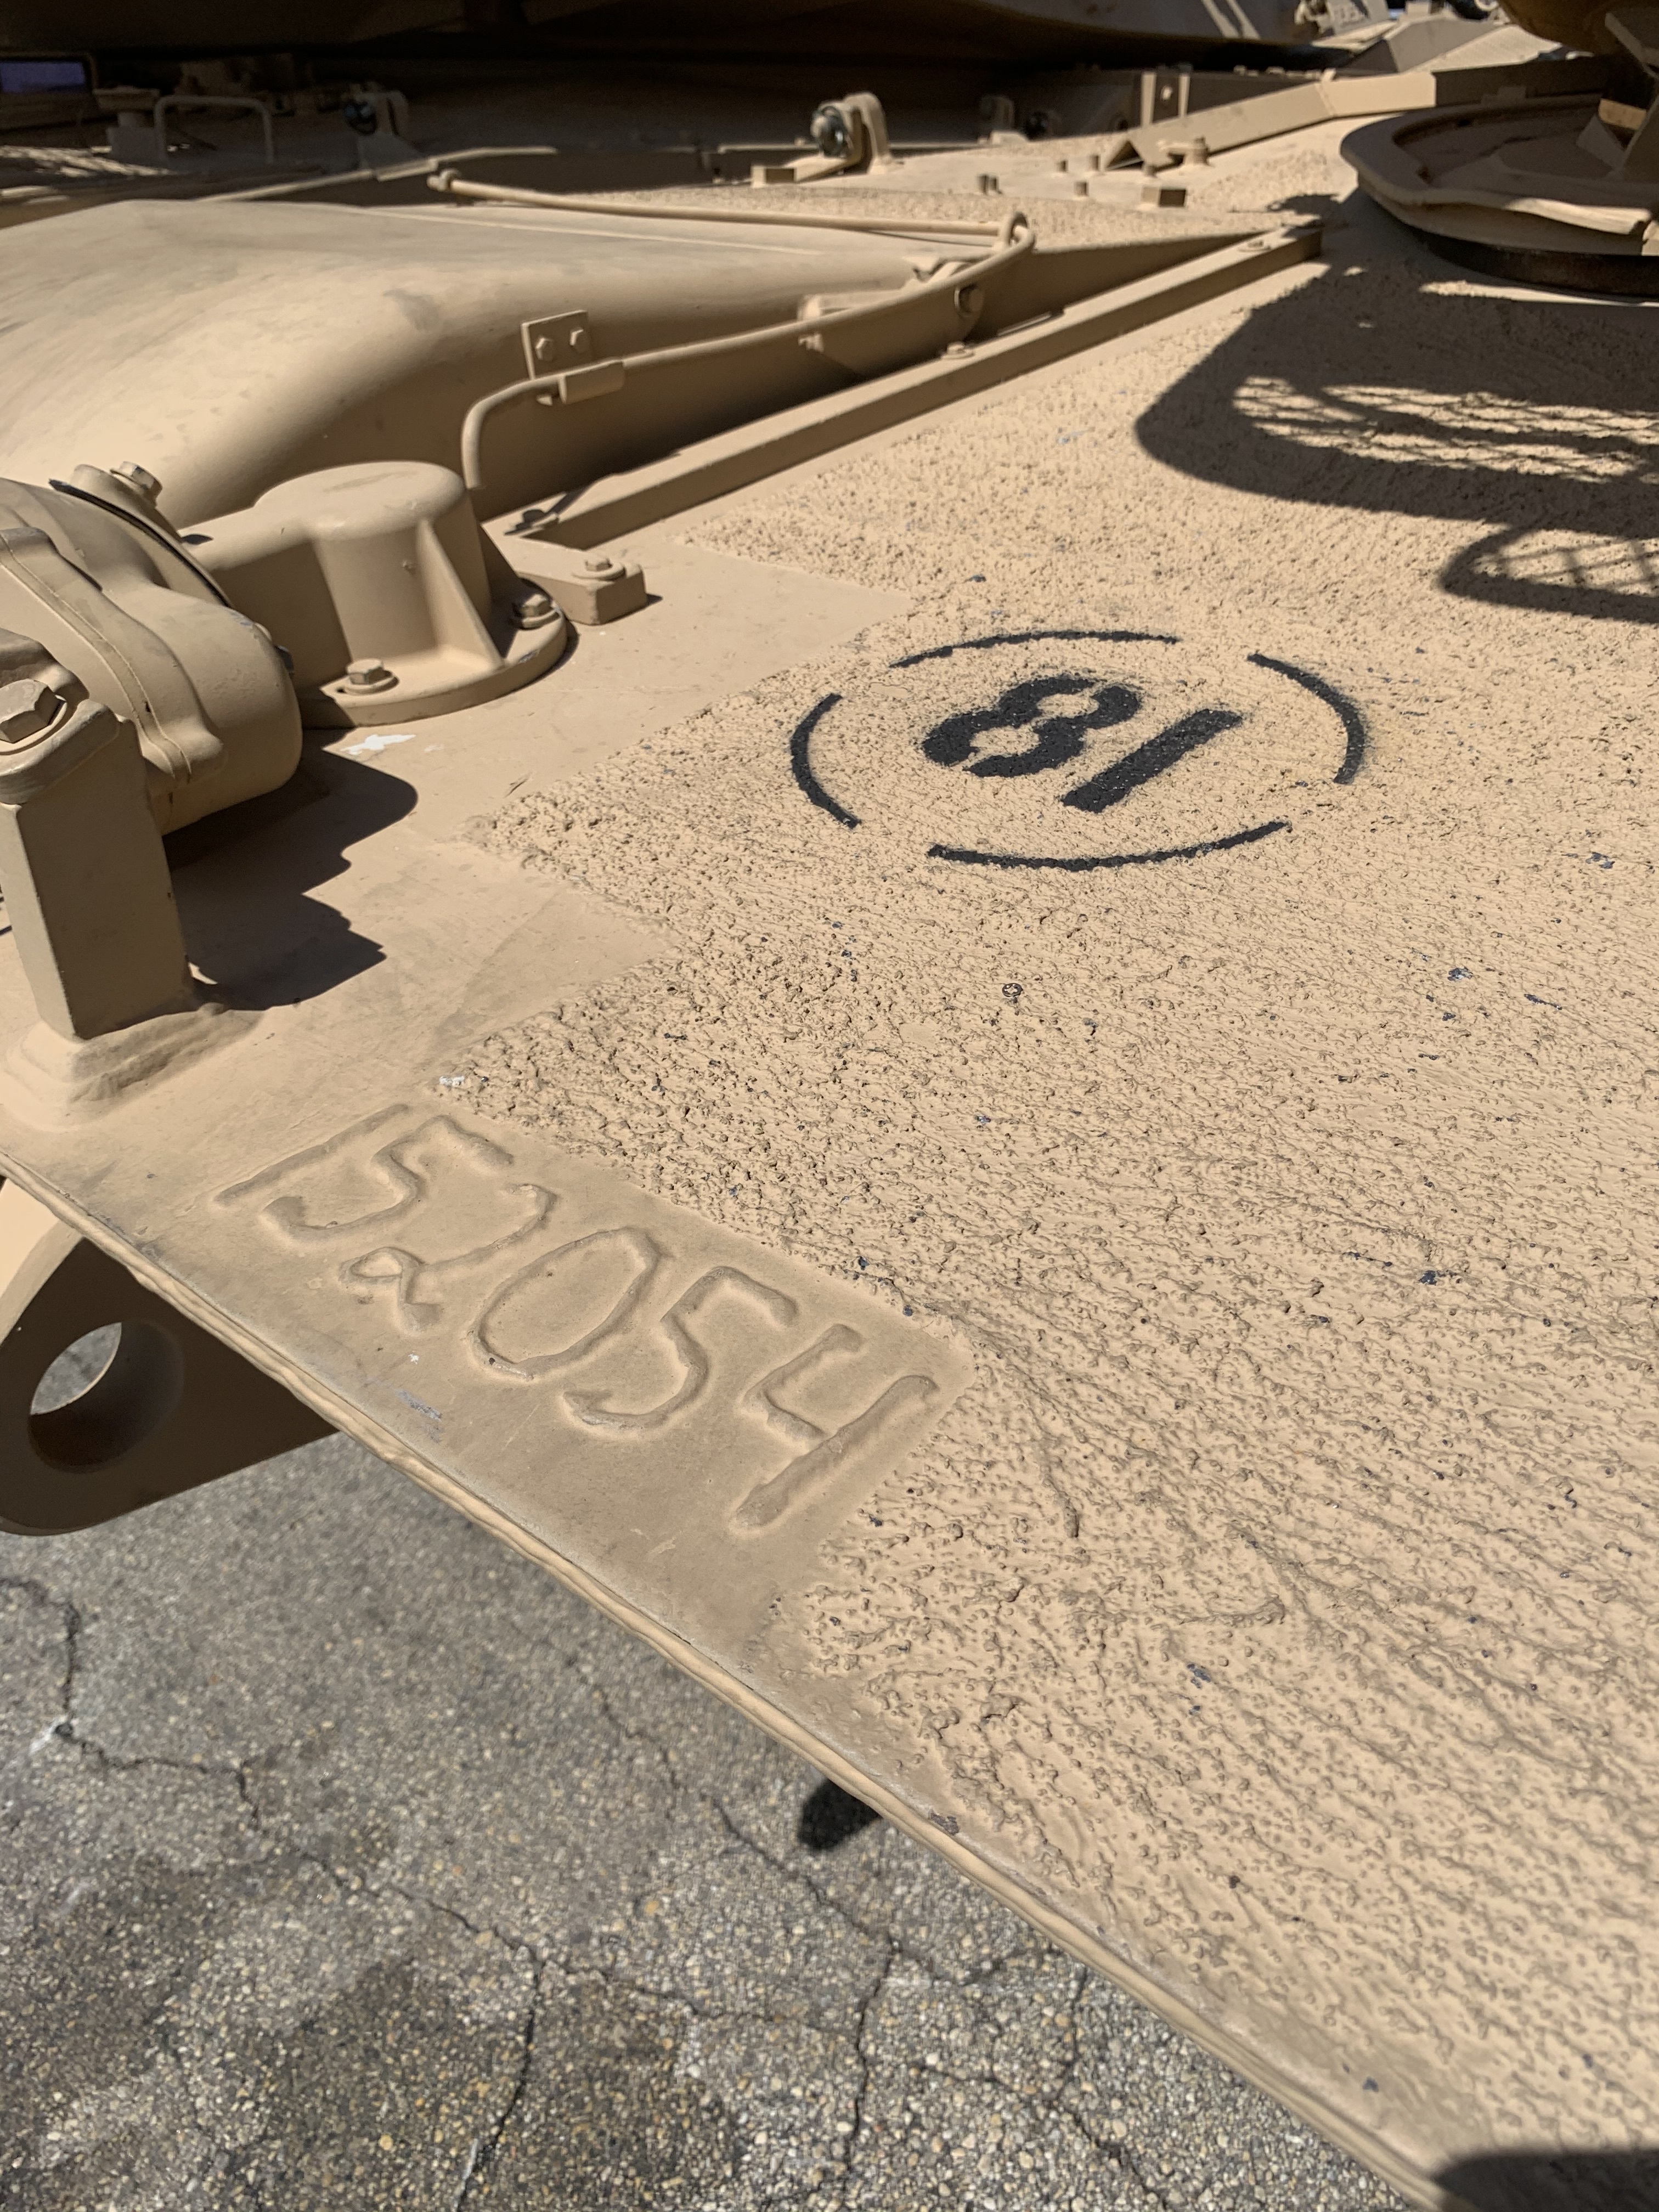
I’m not so sure the hull armor is thicker. If you pick a reference point common to all variants, say the headlight guards, it looks to me the front edge is the same distance from them.
3 Likes
The point I’m using is the mudguards as the light guards are different.
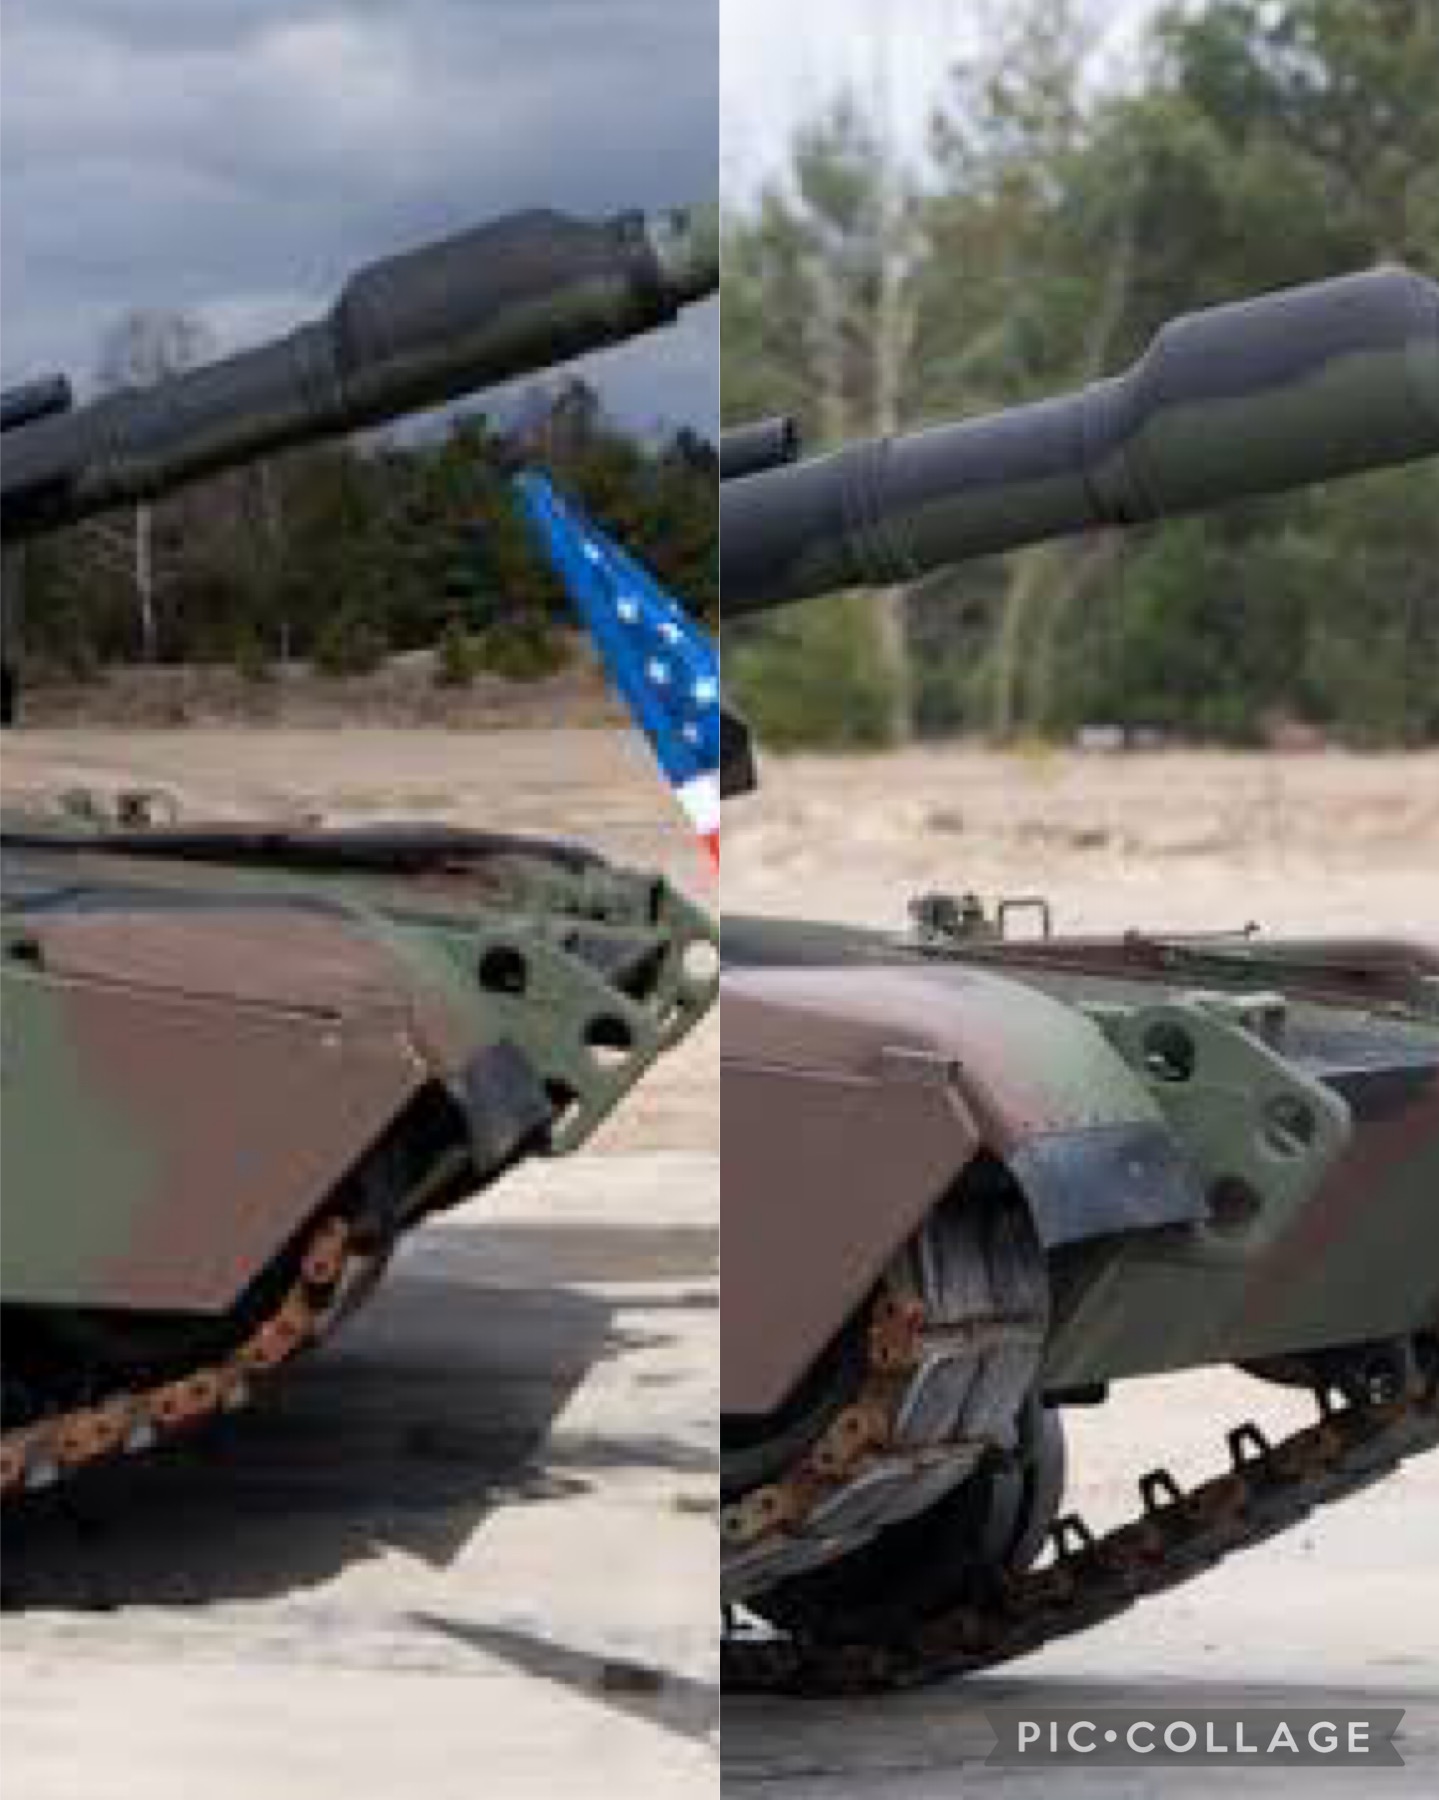
The corner of the armour seems further forward that the v2 and earlier.
2 Likes
Fortunately these are still on my phone from Fort Cervezas. There is no weld indicating a new plate being added .

5 Likes
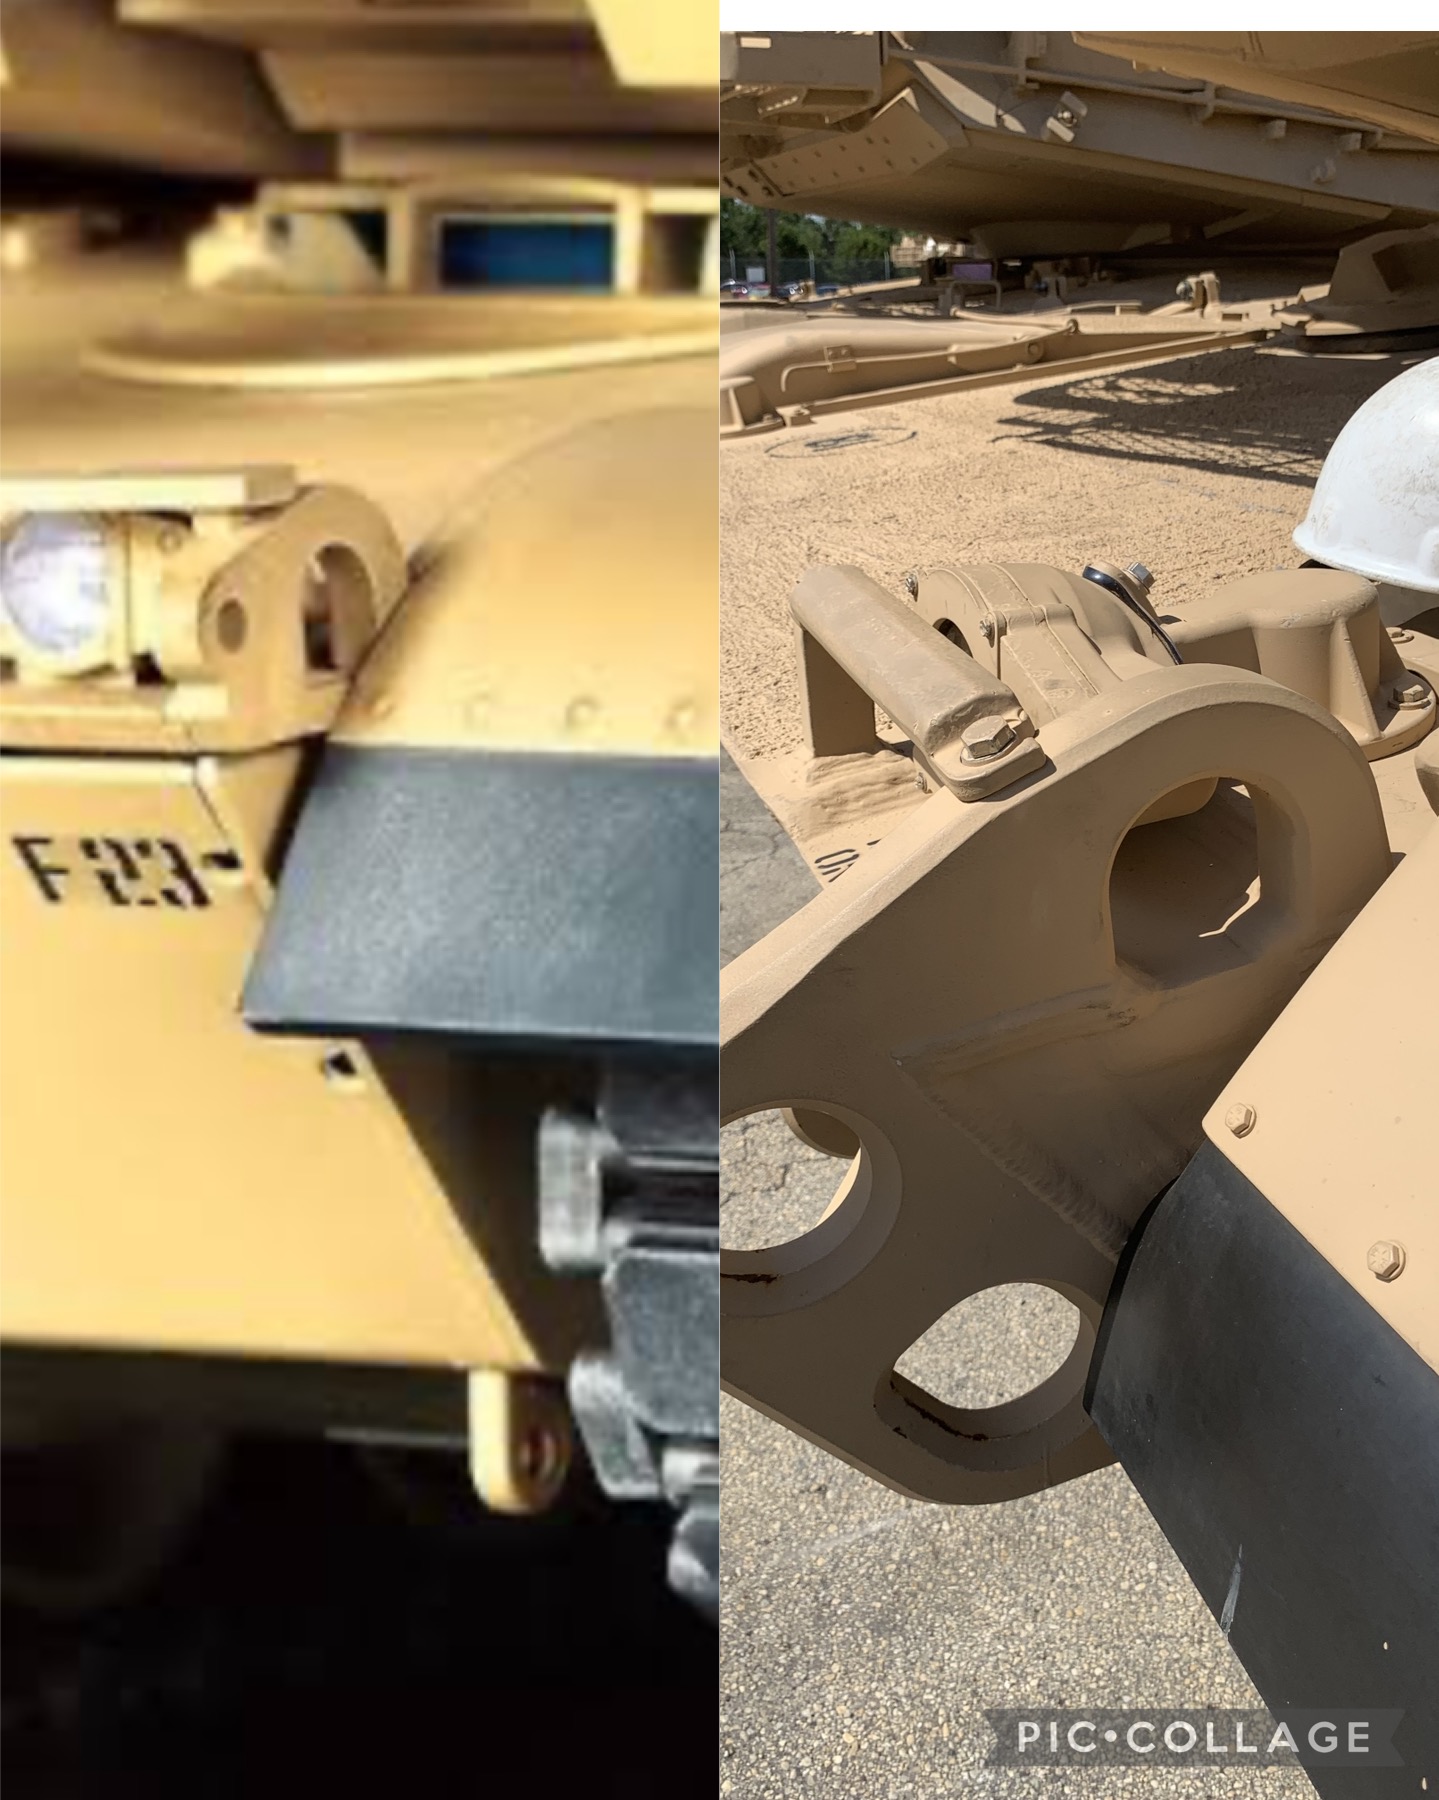
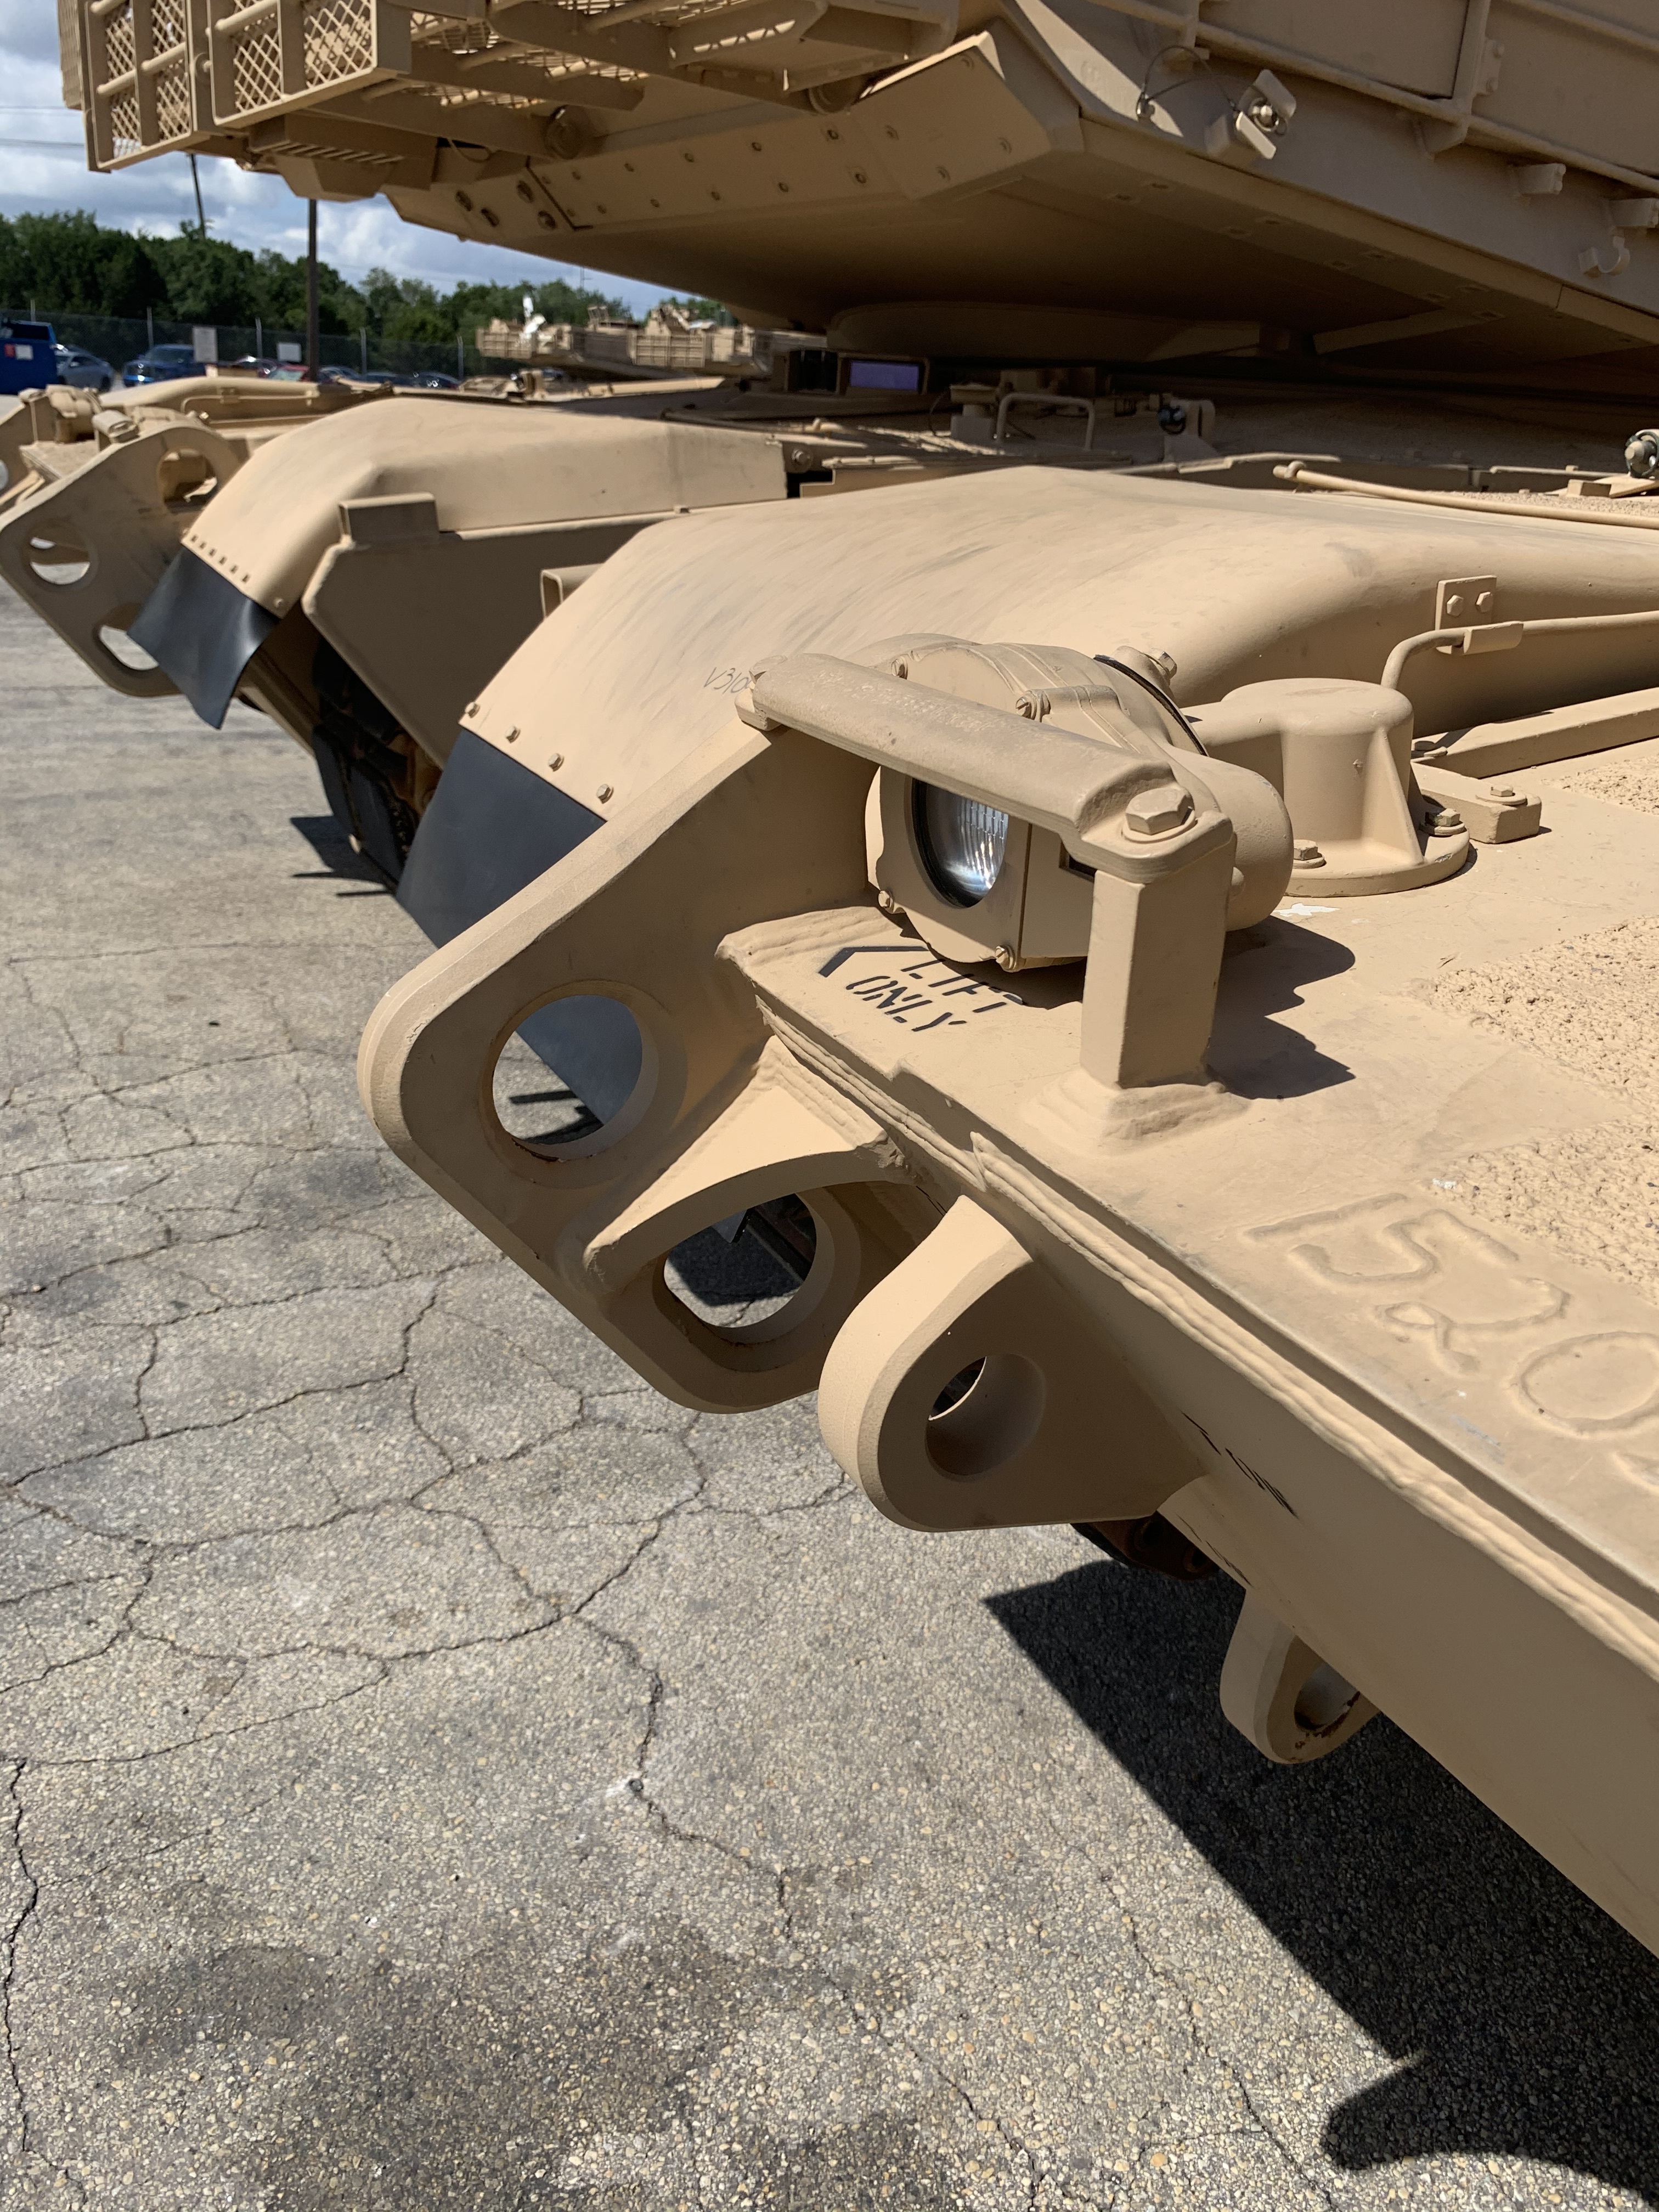
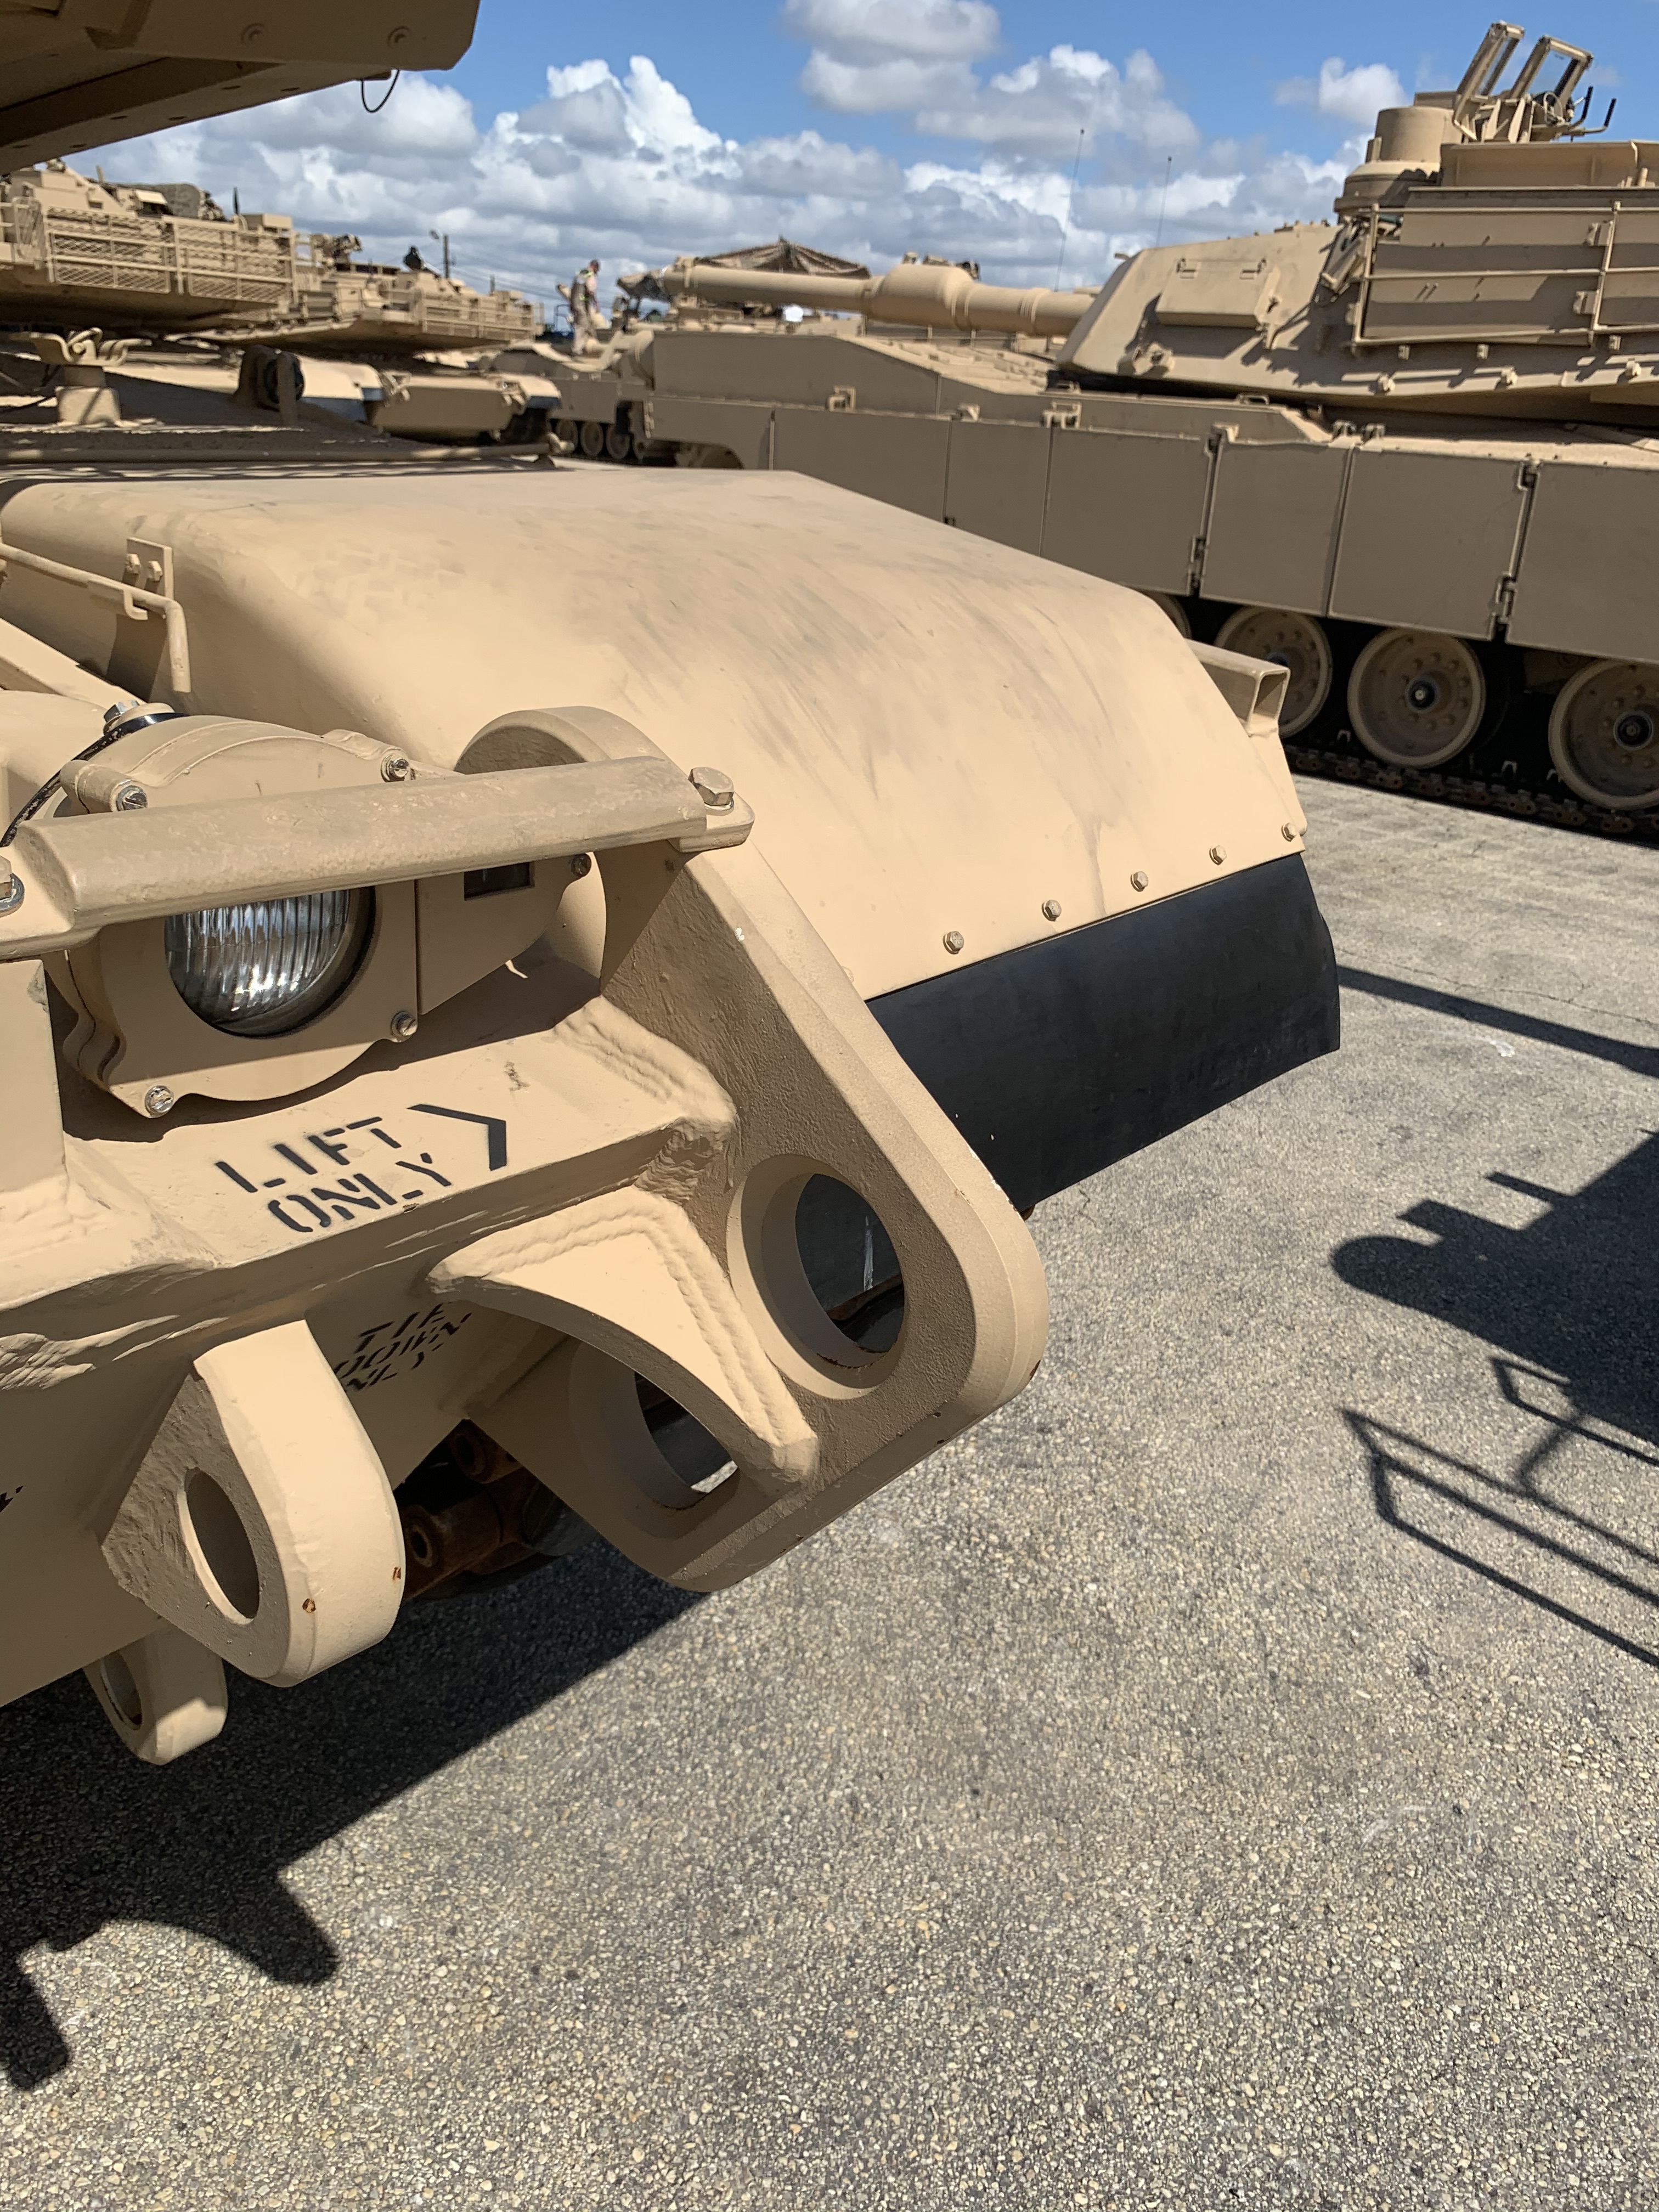
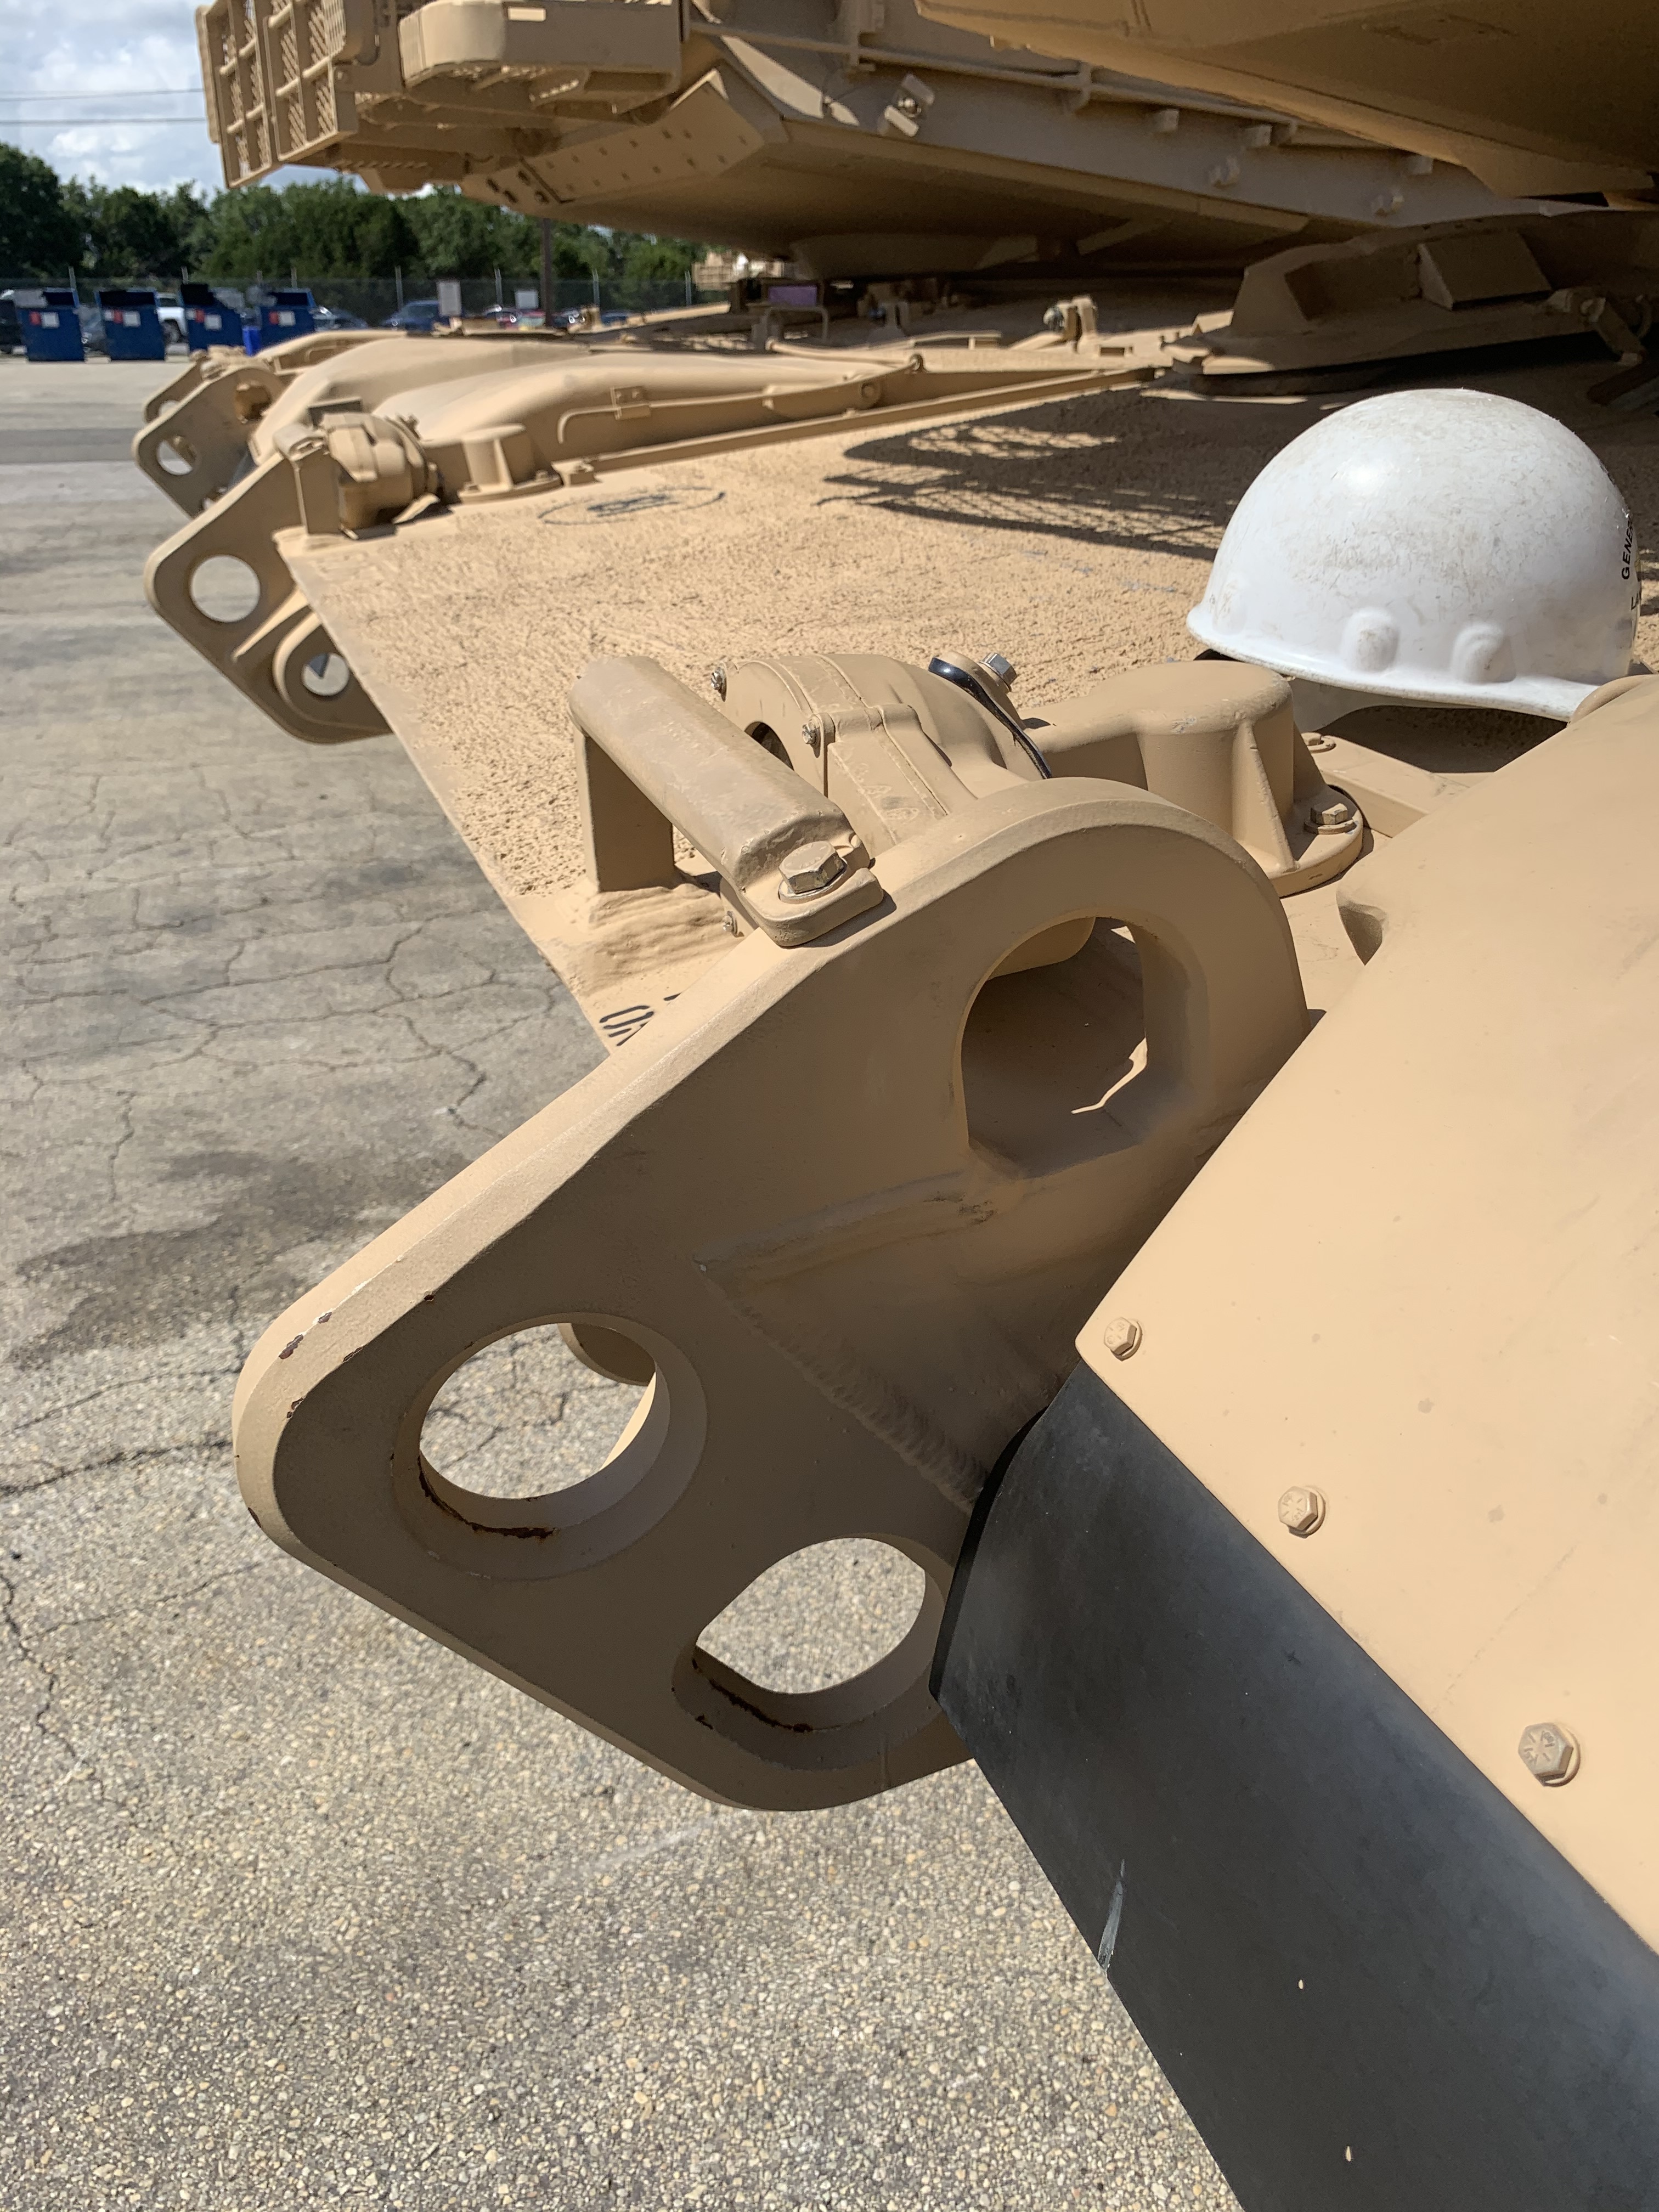
I’ve started to update the front tow points without a thickened hull.
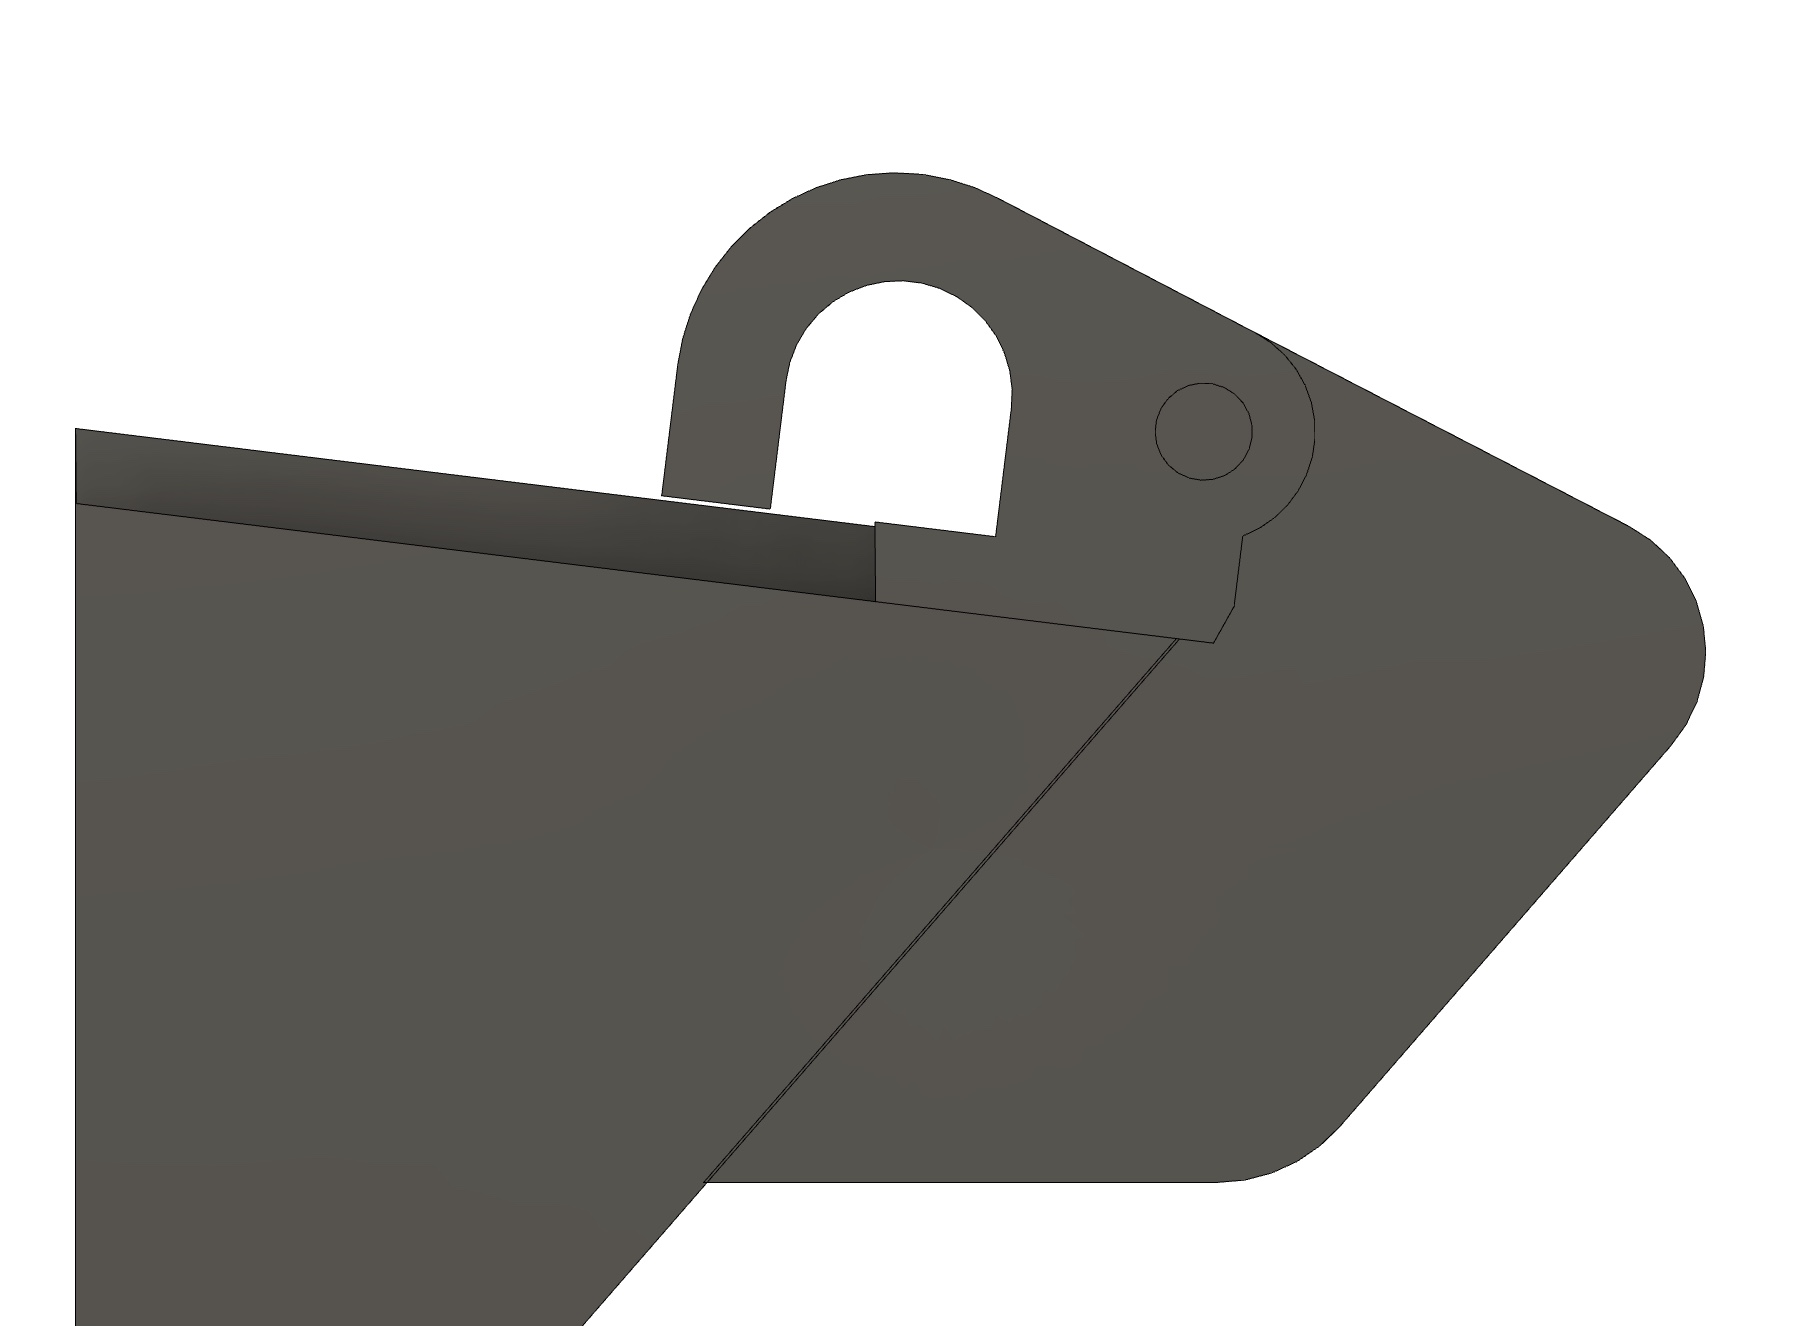
Step one was to replicate the kit part, with step two using that mockup as a point of departure for the new piece. Once successfully integrated with the physical model, the new part will be detailed.
5 Likes
“Fort Cervezas”… Snappy. ![]()
1 Like
It will always be Ft. Hood to me ![]()
3 Likes
Some unique Australian mods to our SEP v3, what appear to be brush guards around the lower mounting points for APS + TUSK/ARAT 2.
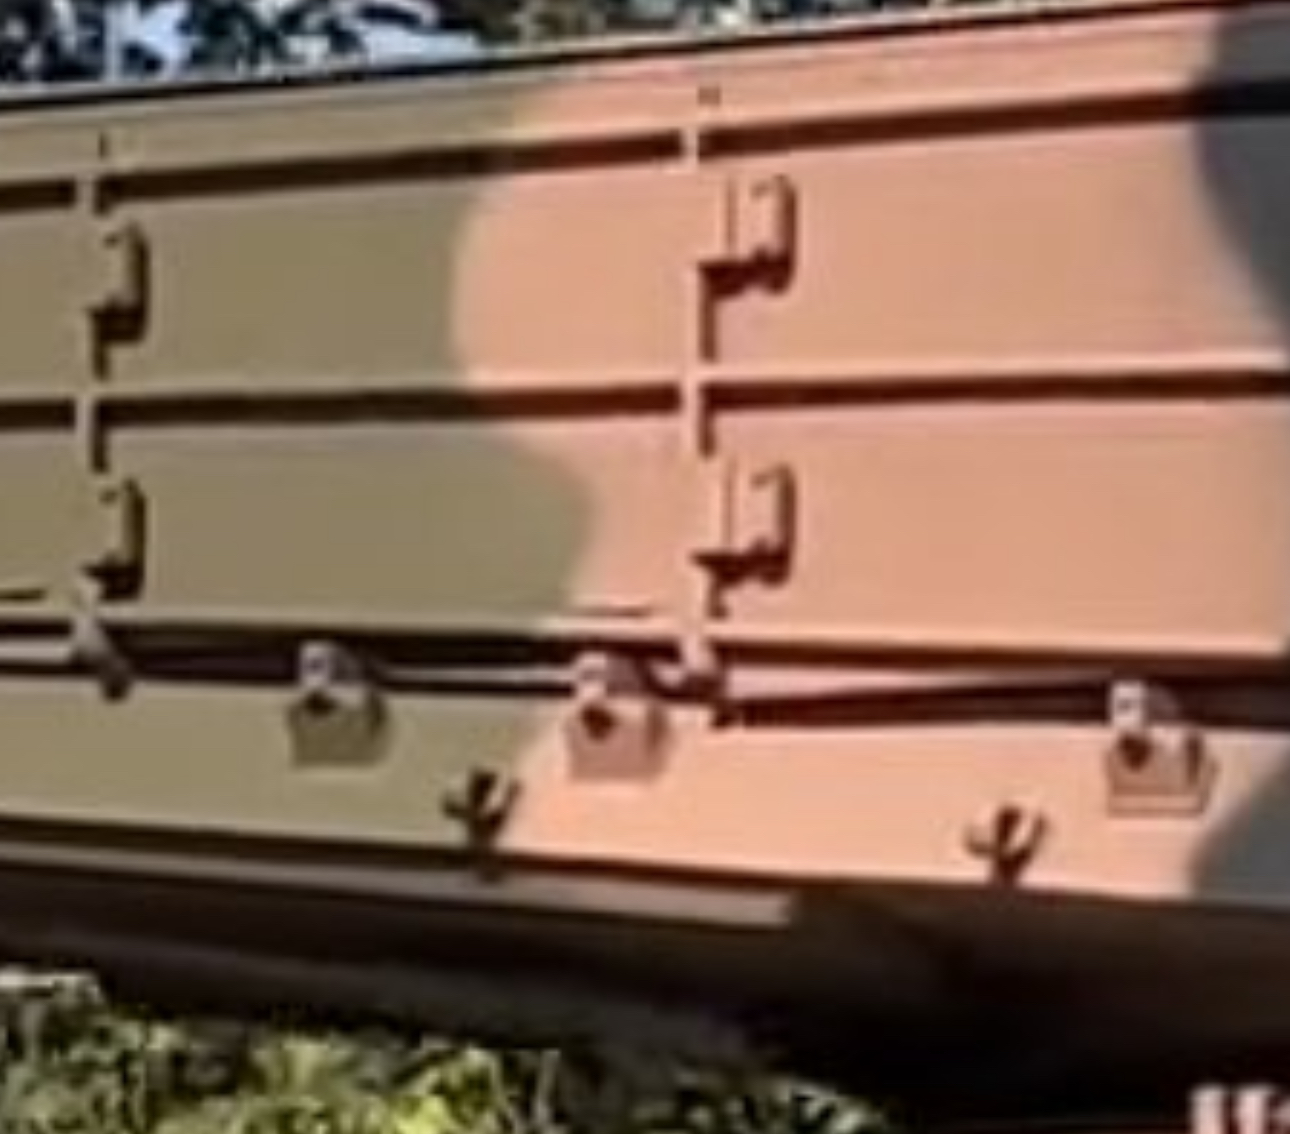
I’ve had a go at replicating as part of the general upgrades.

As always, thanks for looking in.
3 Likes
Not quite happy with my rendition of the lower ARAT mounts’ Australian-unique brush guards. Here’s version 2.

Looking forward to seeing Australia’s ones in the flesh, hopefully soon.
4 Likes
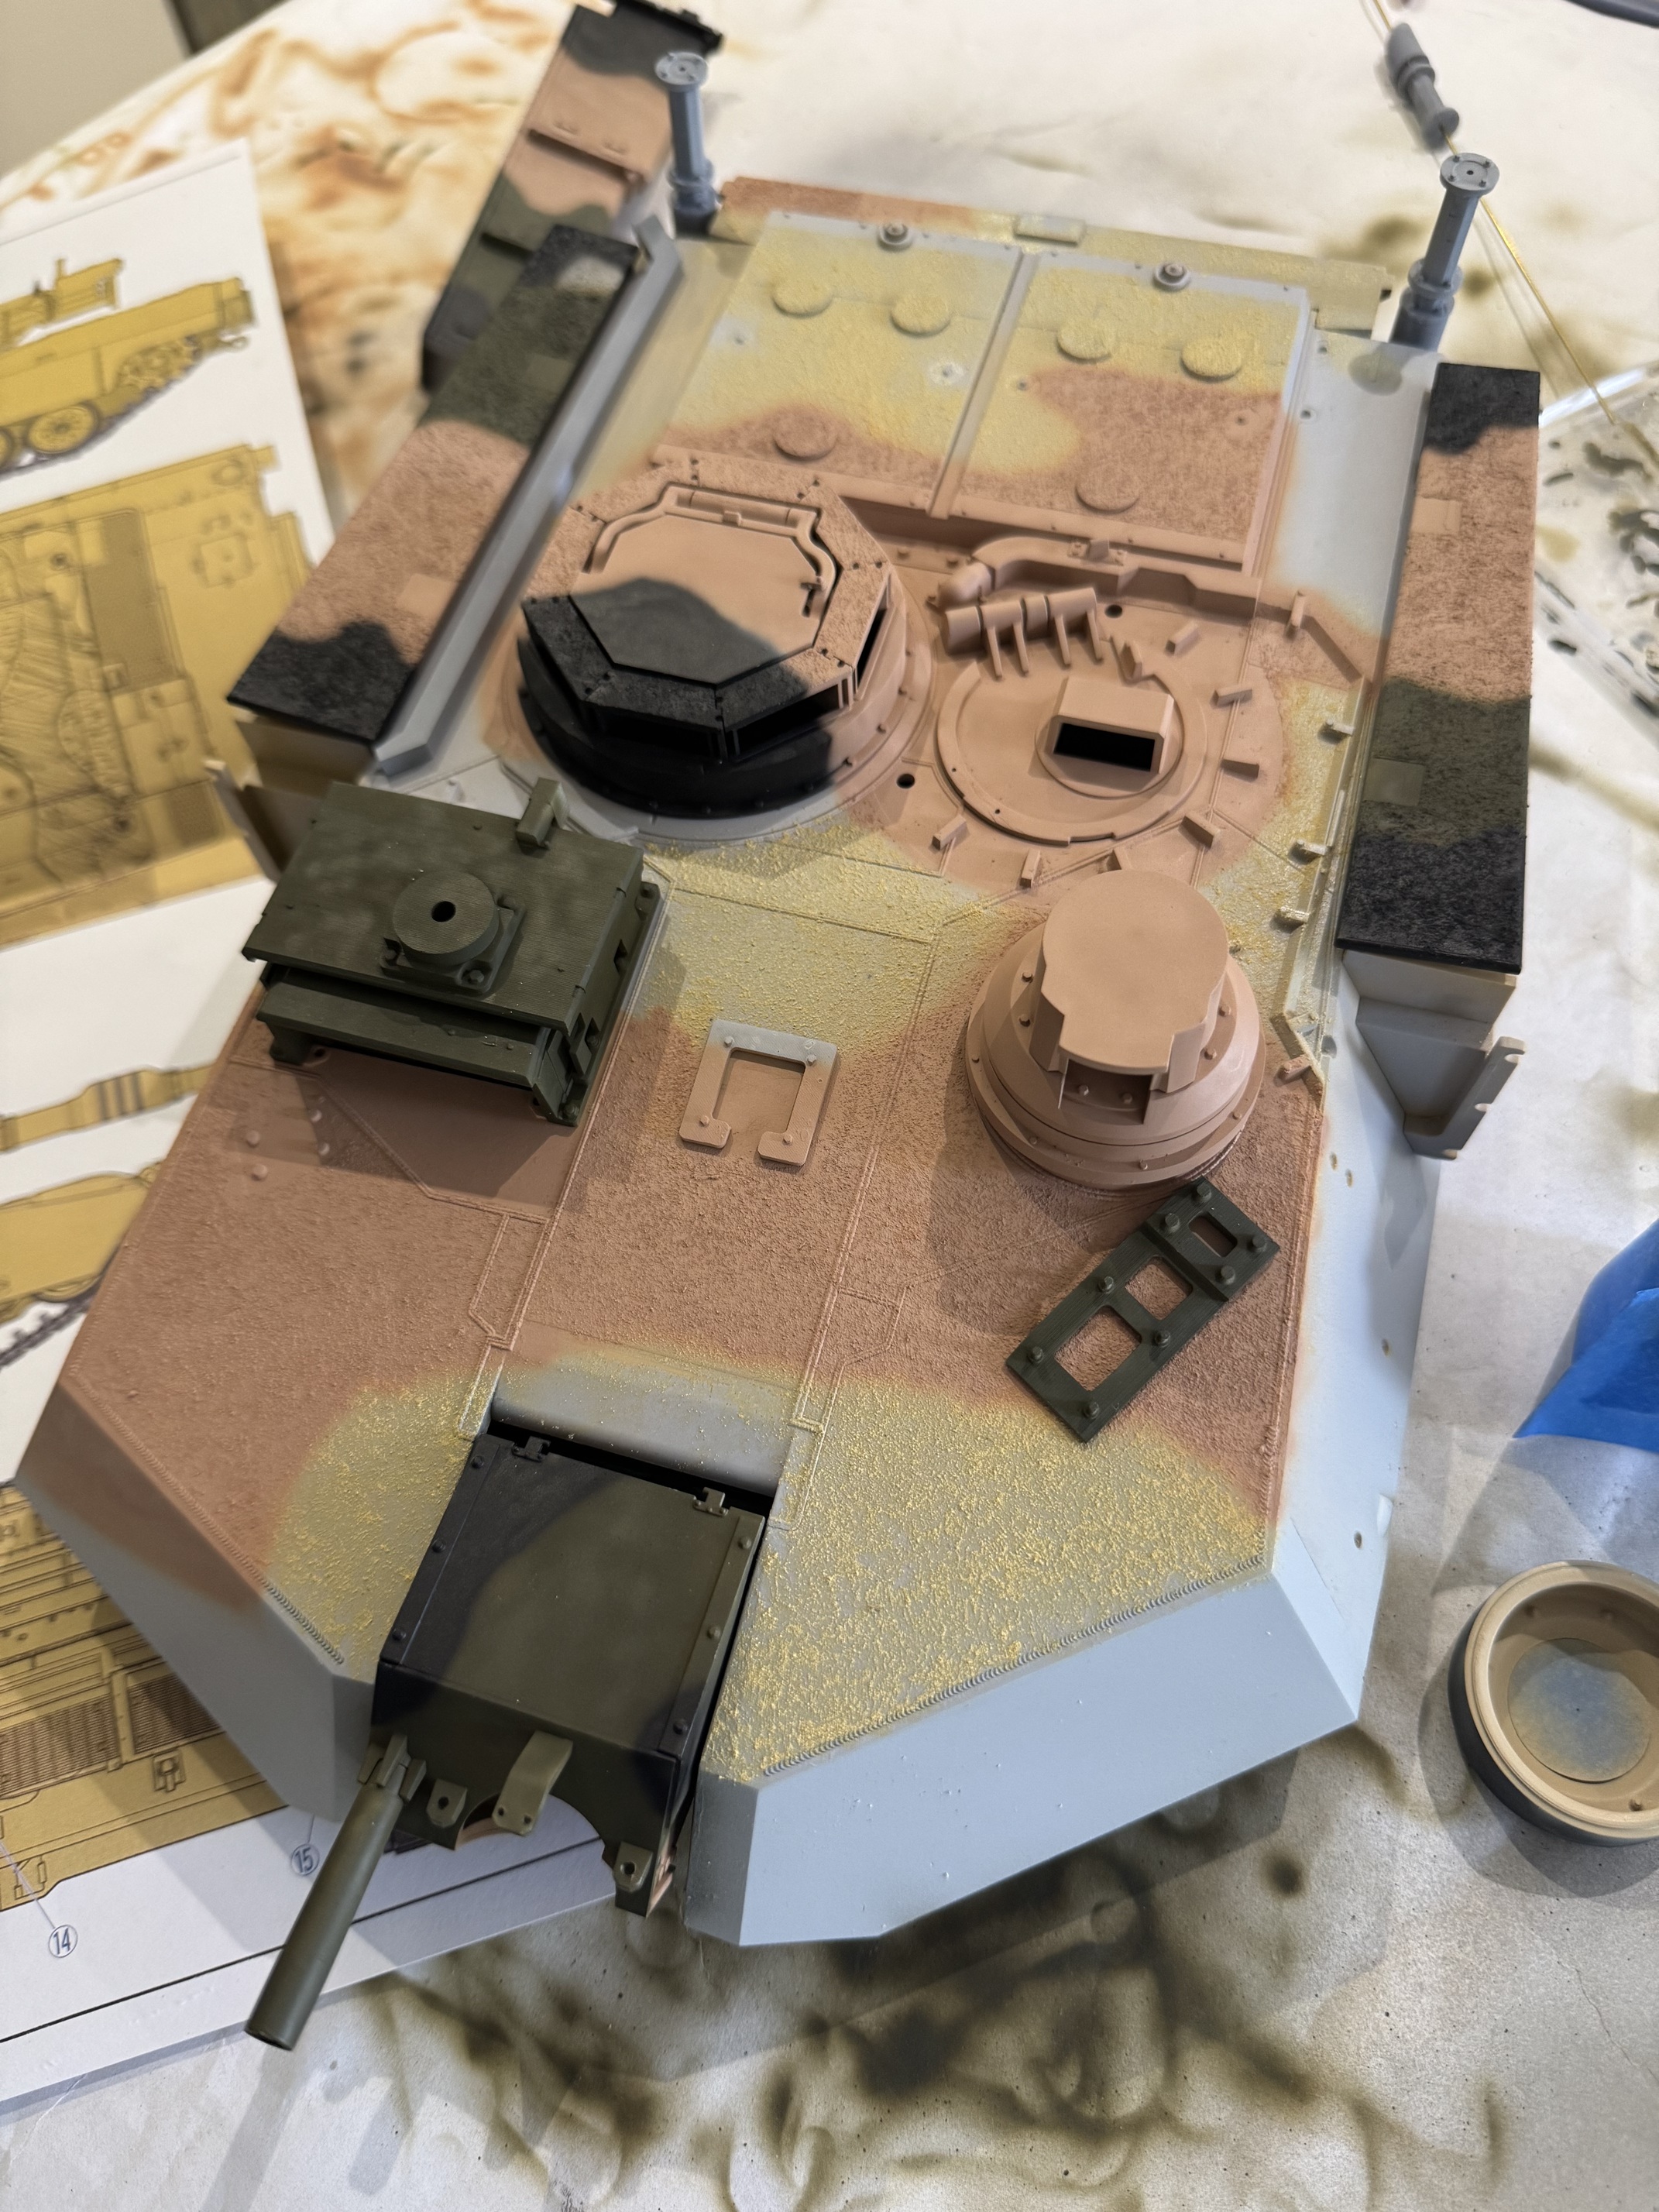
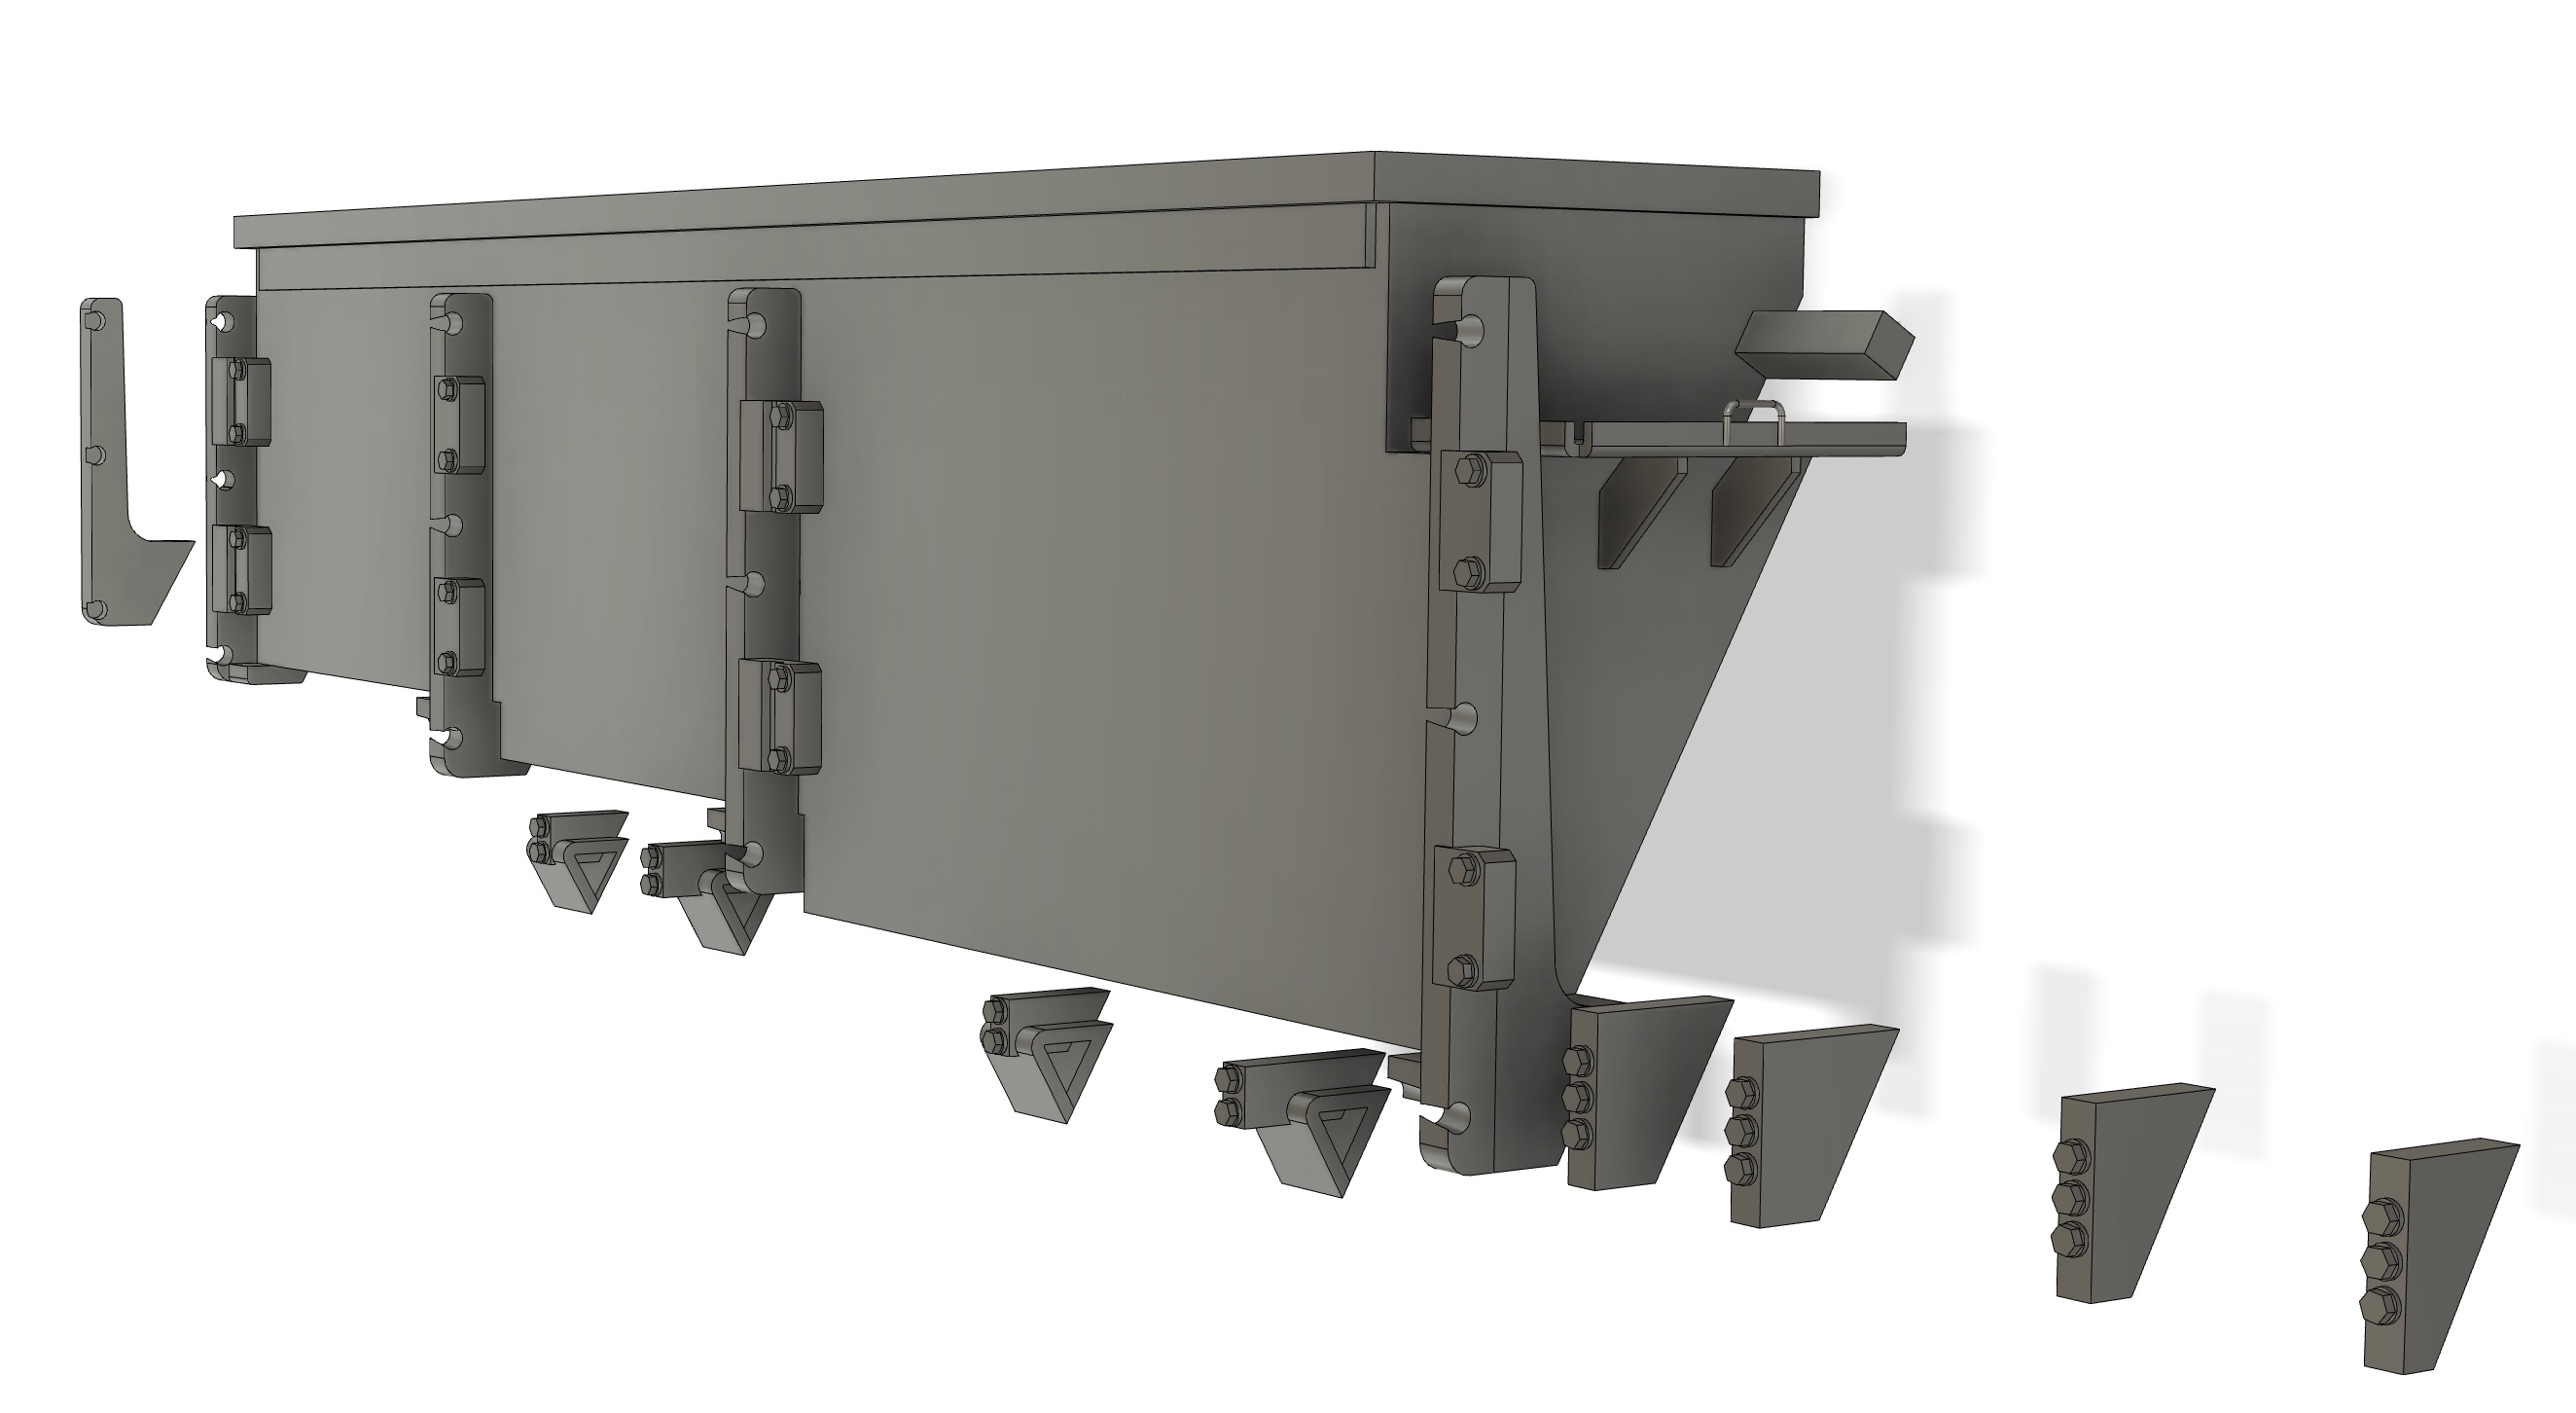
Hopefully this’ll be the last digital update for the turret stowage bins.
After drafting & printing the shelves for .50 cal ammunition liners/cans located on the front of the turret stowage bins, I did a quick test fit using Grey Fox Concept’s 50 cal ammunition liners.
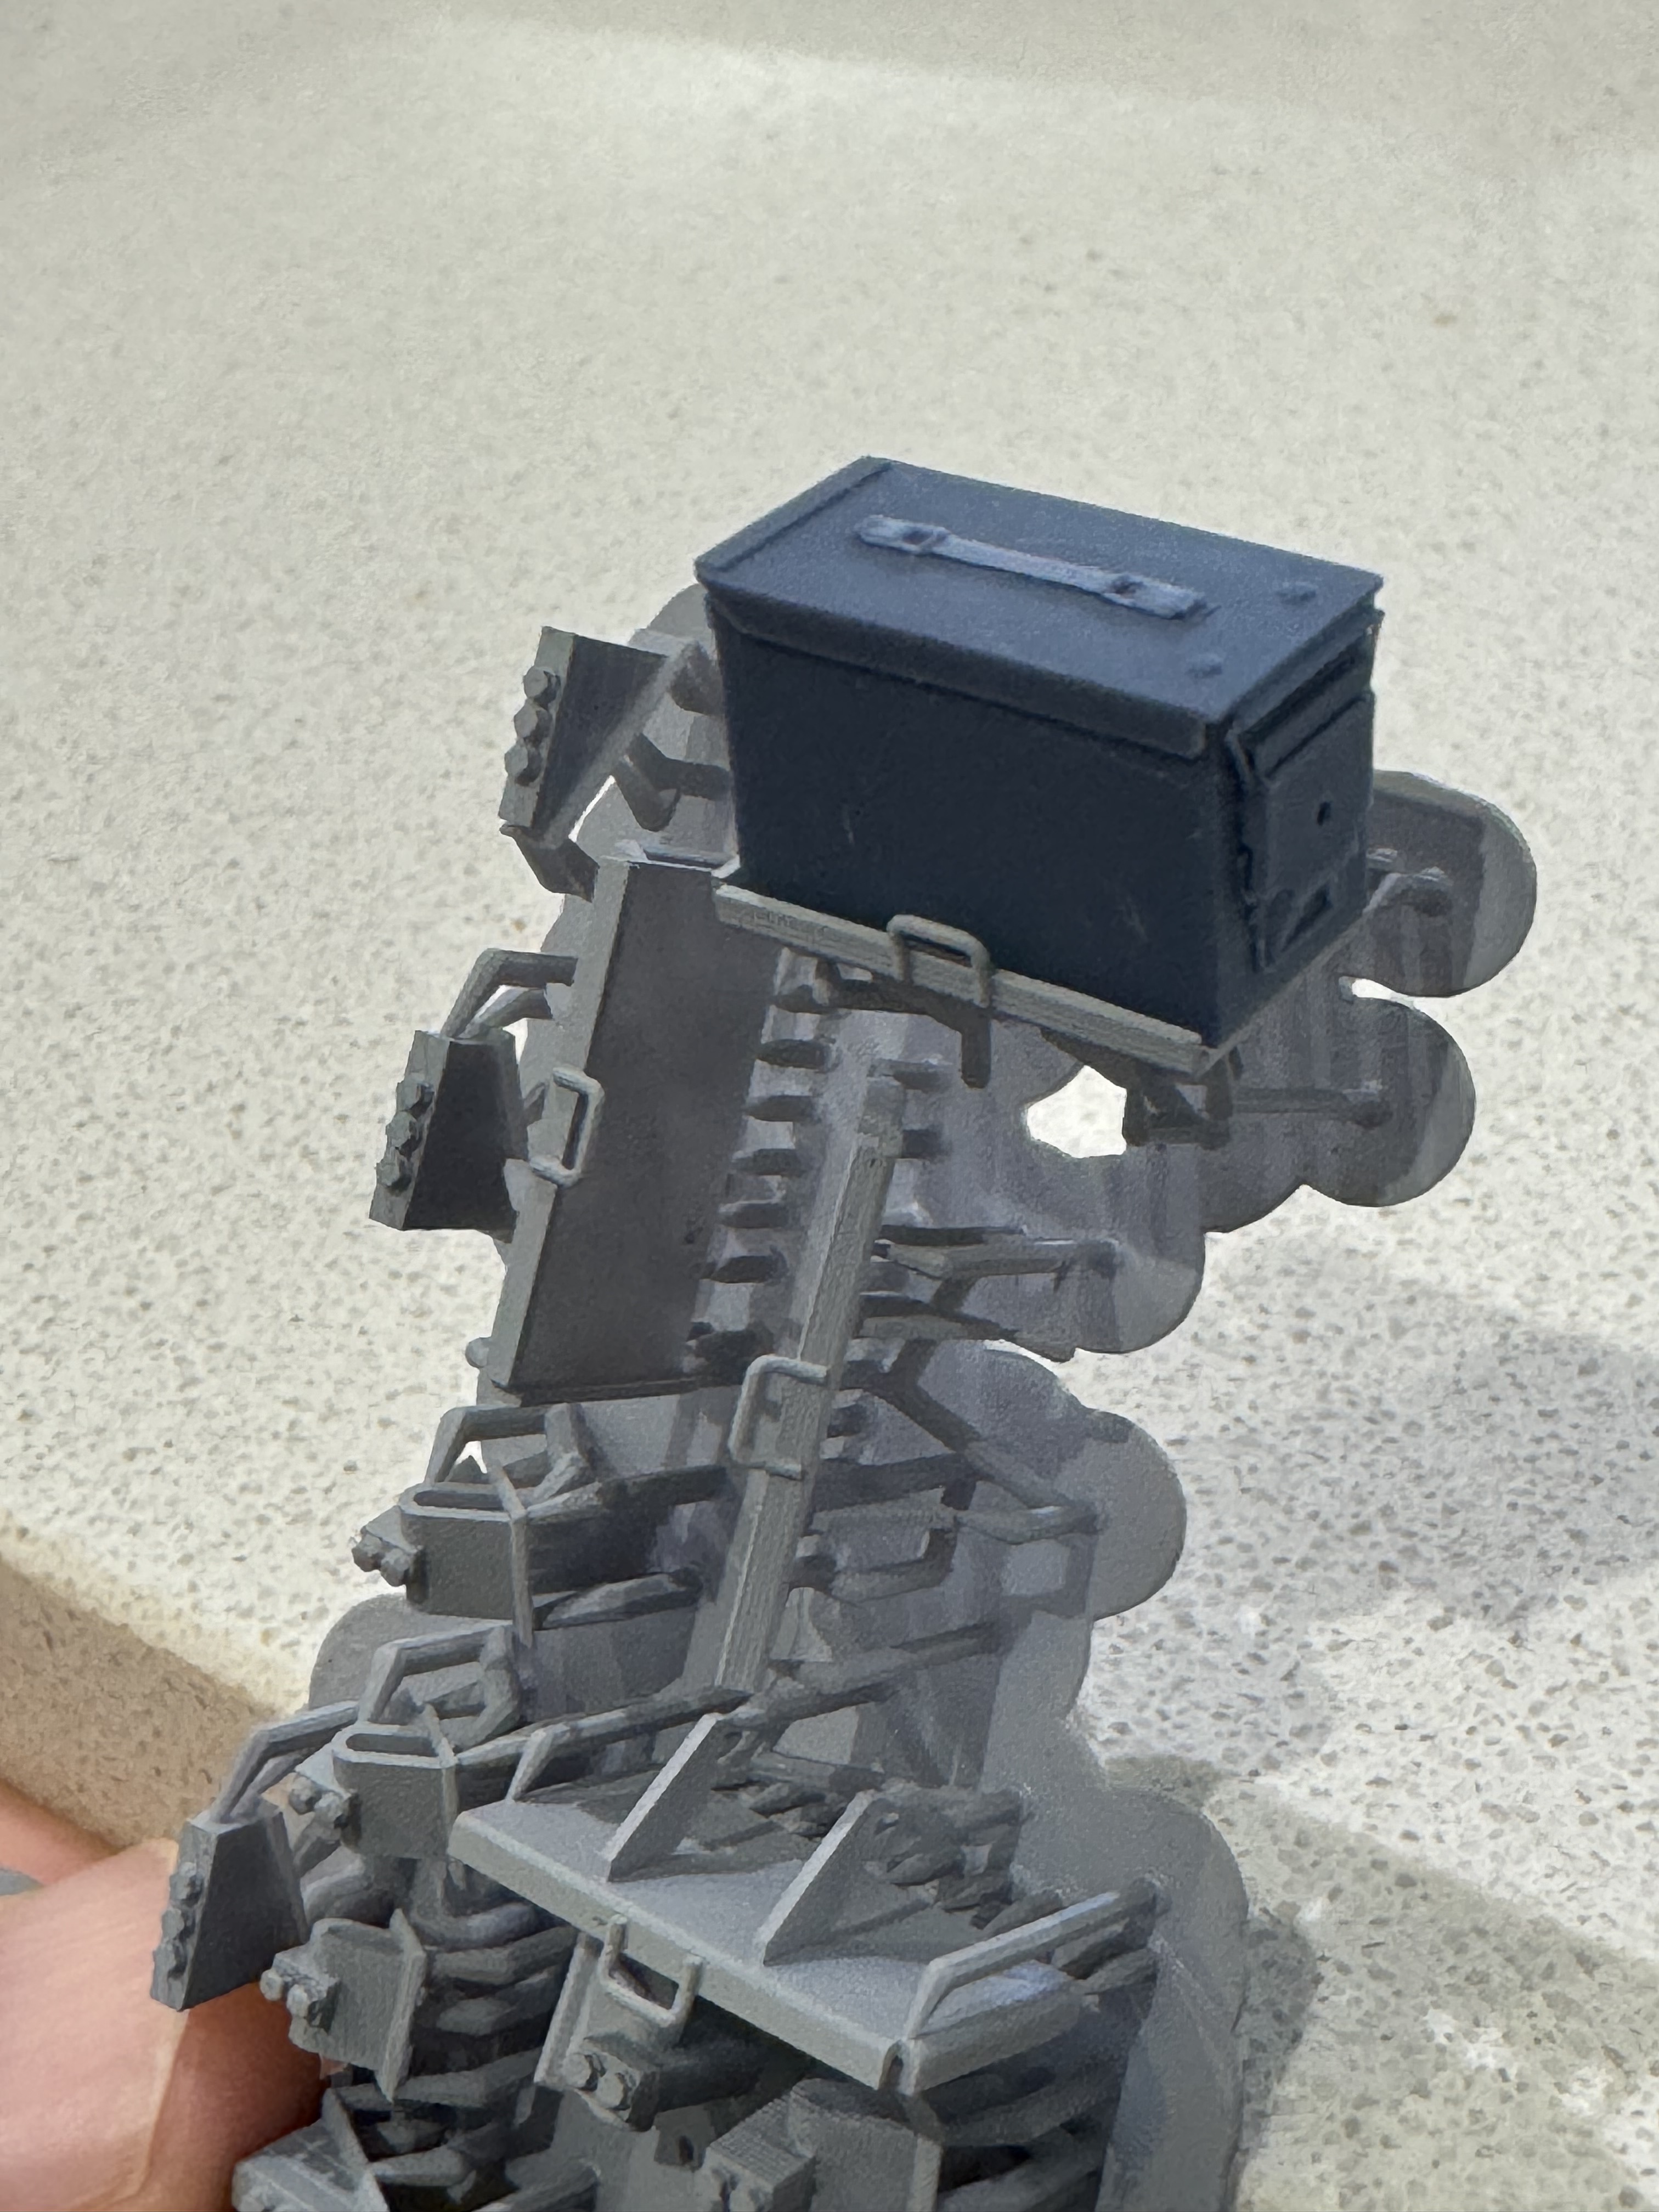
GFC is a company run by a mate - even with that relationship, I can wholeheartedly recommend their products without feeling like a shill. See the review section for more details & products.
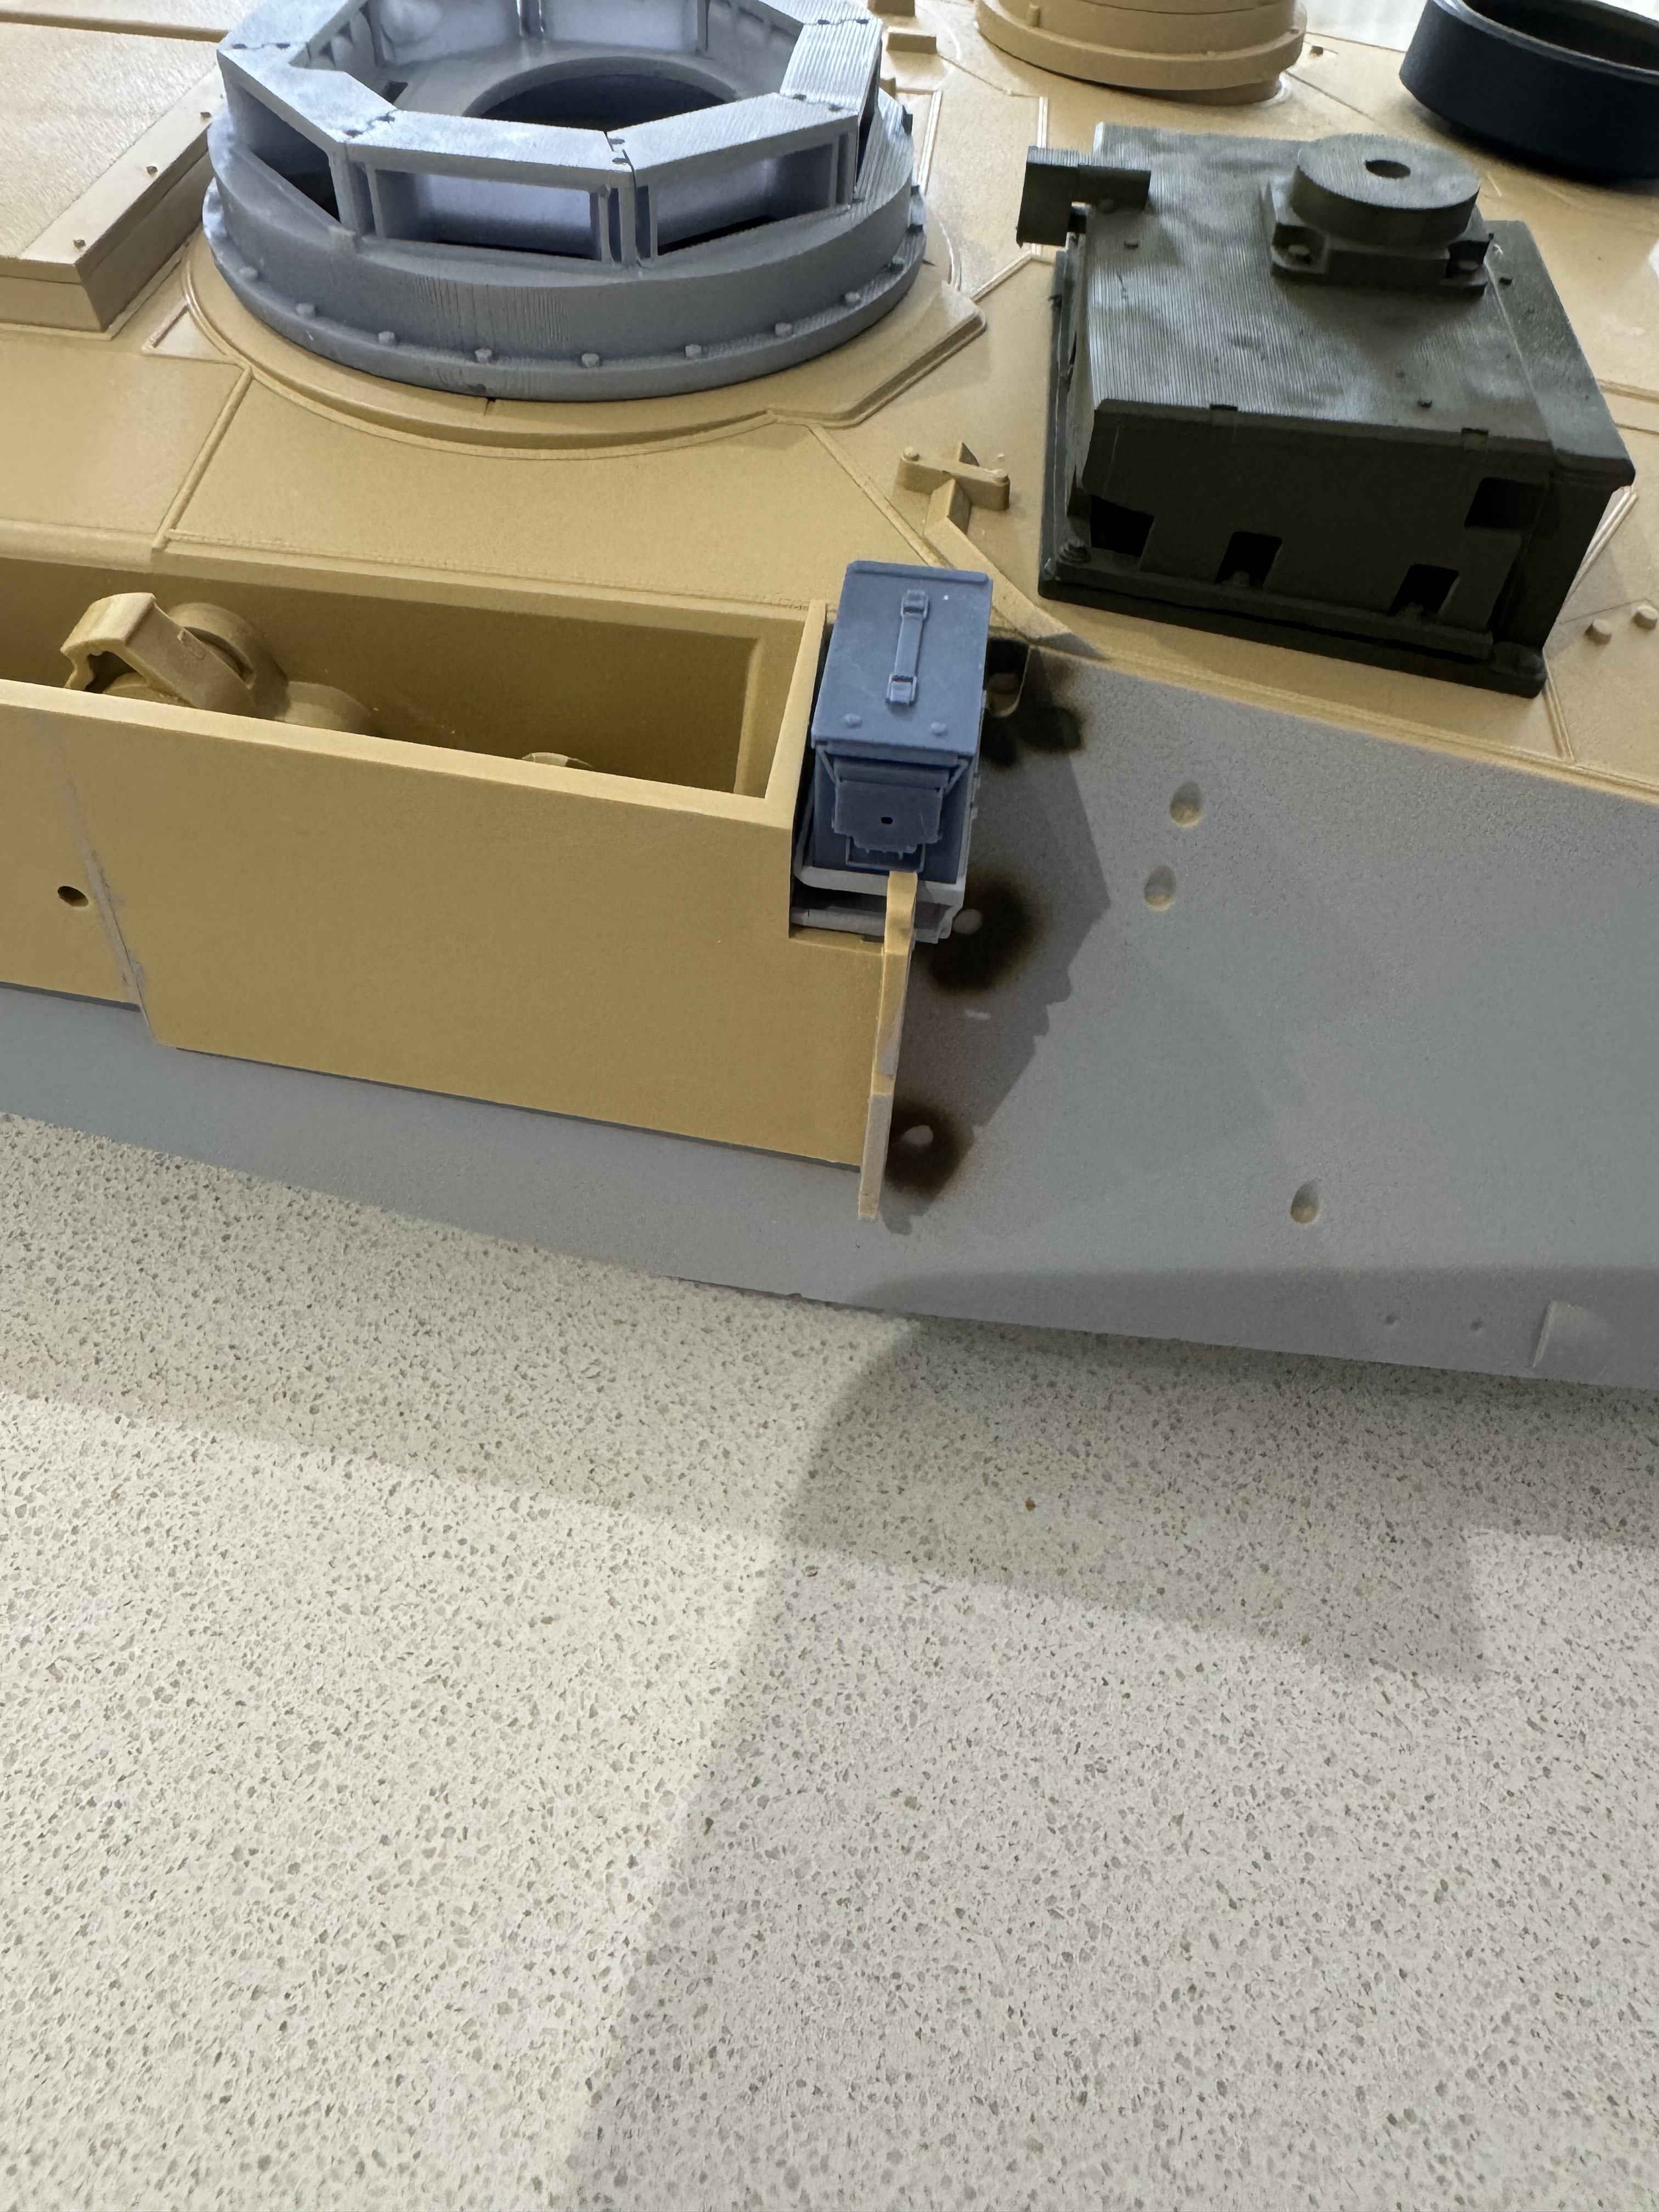
The last pieces of the puzzle are the mounting bosses for the bins themselves & the hinges for the lids.

SEP v3 also incorporates changes to the stowage points for the tow cables. The brush guard “wedge” is visible under the forward ARAT mounting point.
I believe I may be getting access to a 1:1 SEPv3 Australian Abrams this coming week, so fingers crossed.
As always, thanks for looking in.
5 Likes
The actual tow cables themselves are different too
3 Likes
Thanks - tracking that one. Haven’t figured out yet how to handle that one.
2 Likes
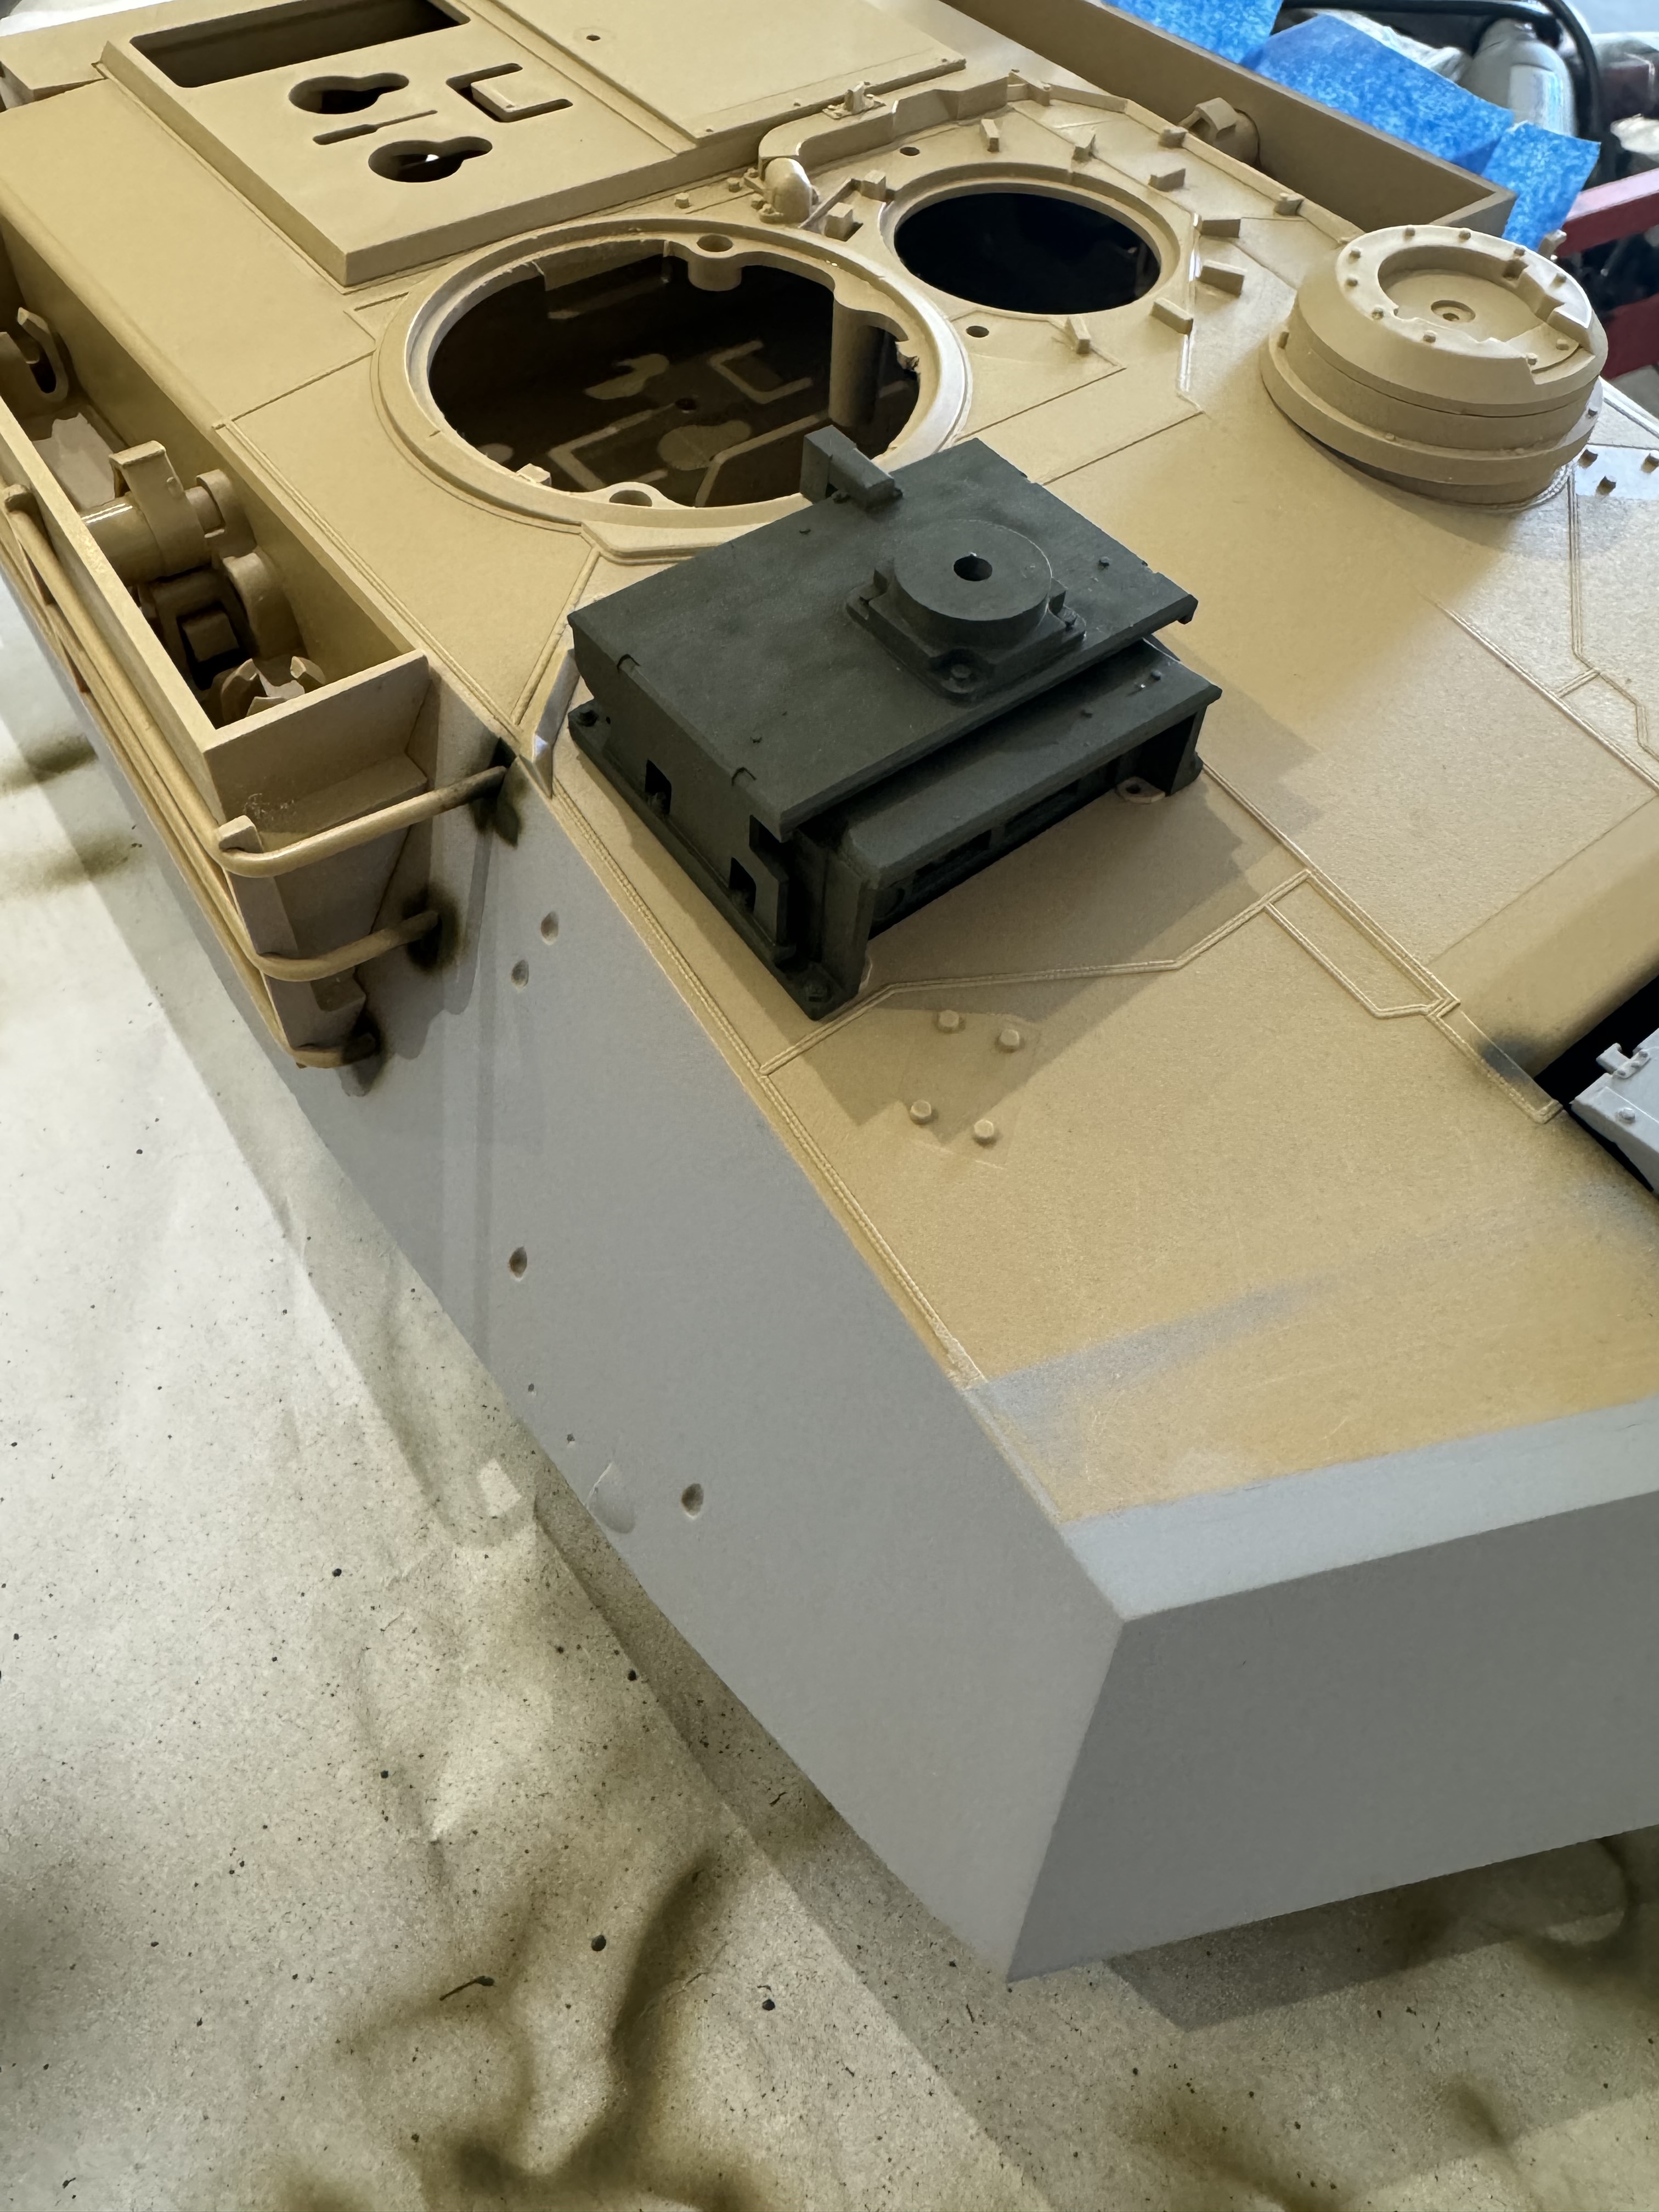
More work on the turret stowage bins.

Also have done some work on the Gunner’s Primary Sight doghouse & the CROWS-LP mount.
Thanks for looking in.
6 Likes

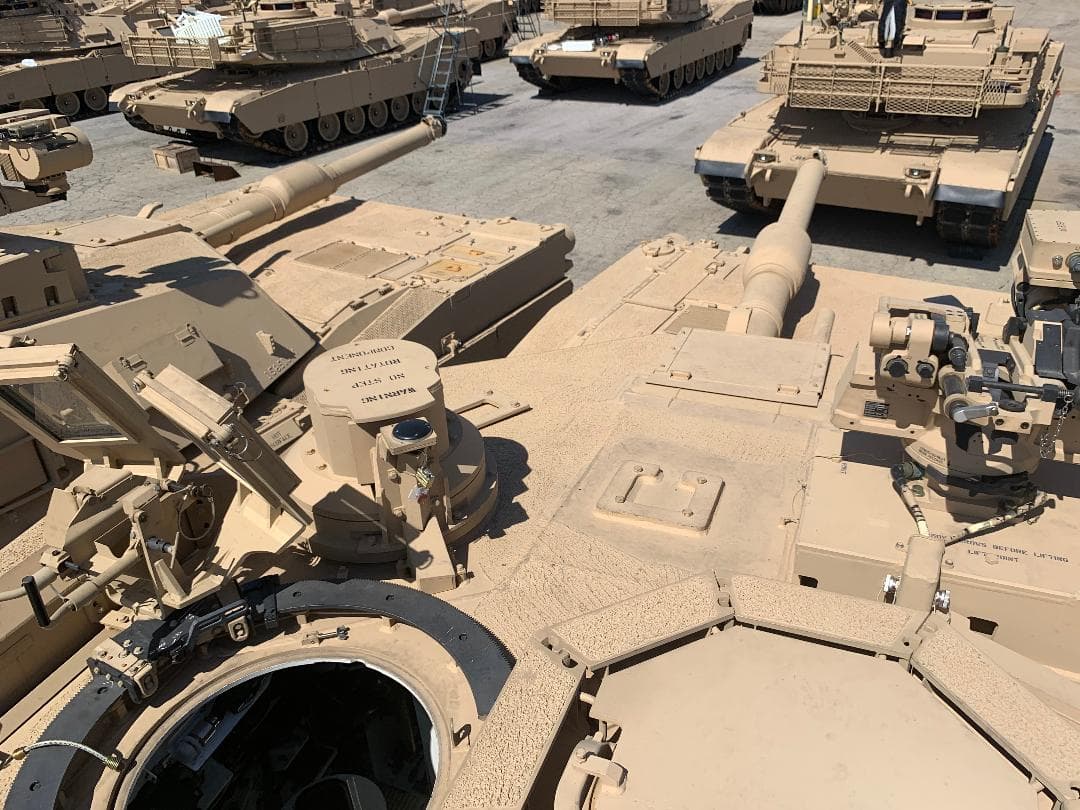
A bit bittersweet getting hands on with the first Australian SEP v3 to be exhibited publicly last week. Turns out most of the external modifications that are unique to Australian tanks are around the hull stowage bins…which is where I’d been investing my efforts in the week prior!
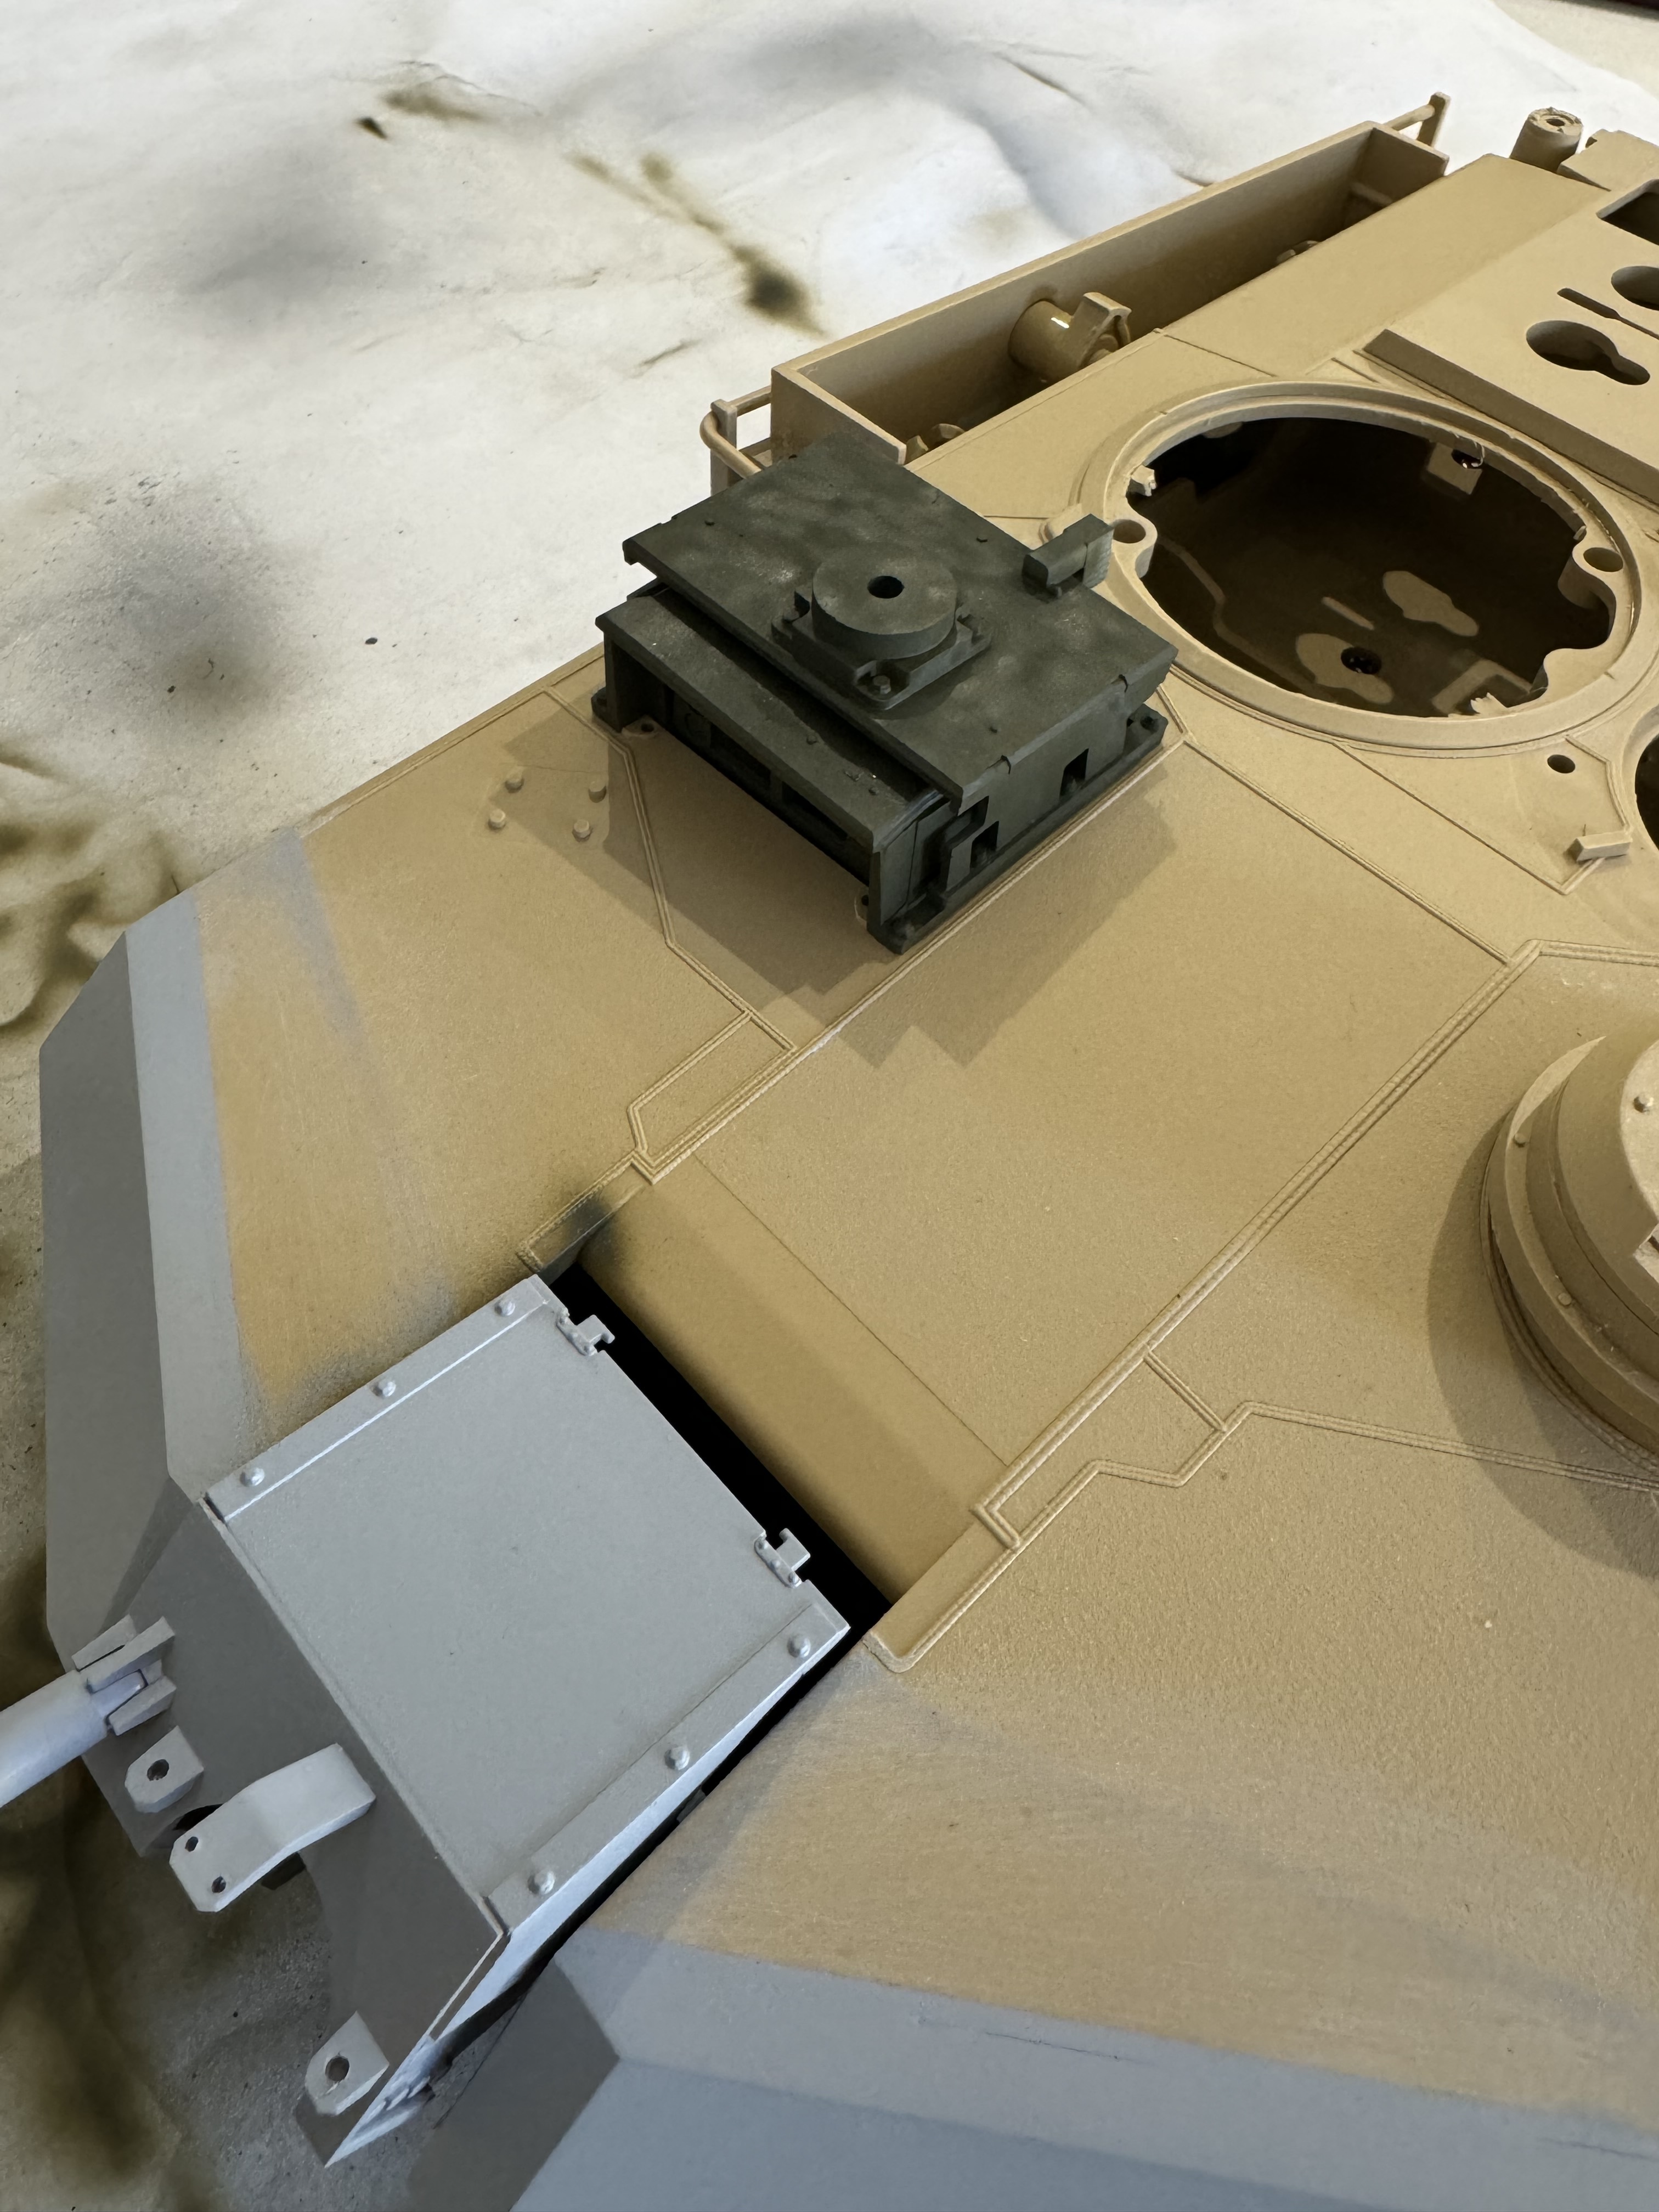
First part is the spacer that raises the spare liner/ammunition can for the .50 calibre MG, located at the front of the bins.

Here’s my first go of it, will adjust from here.
5 Likes
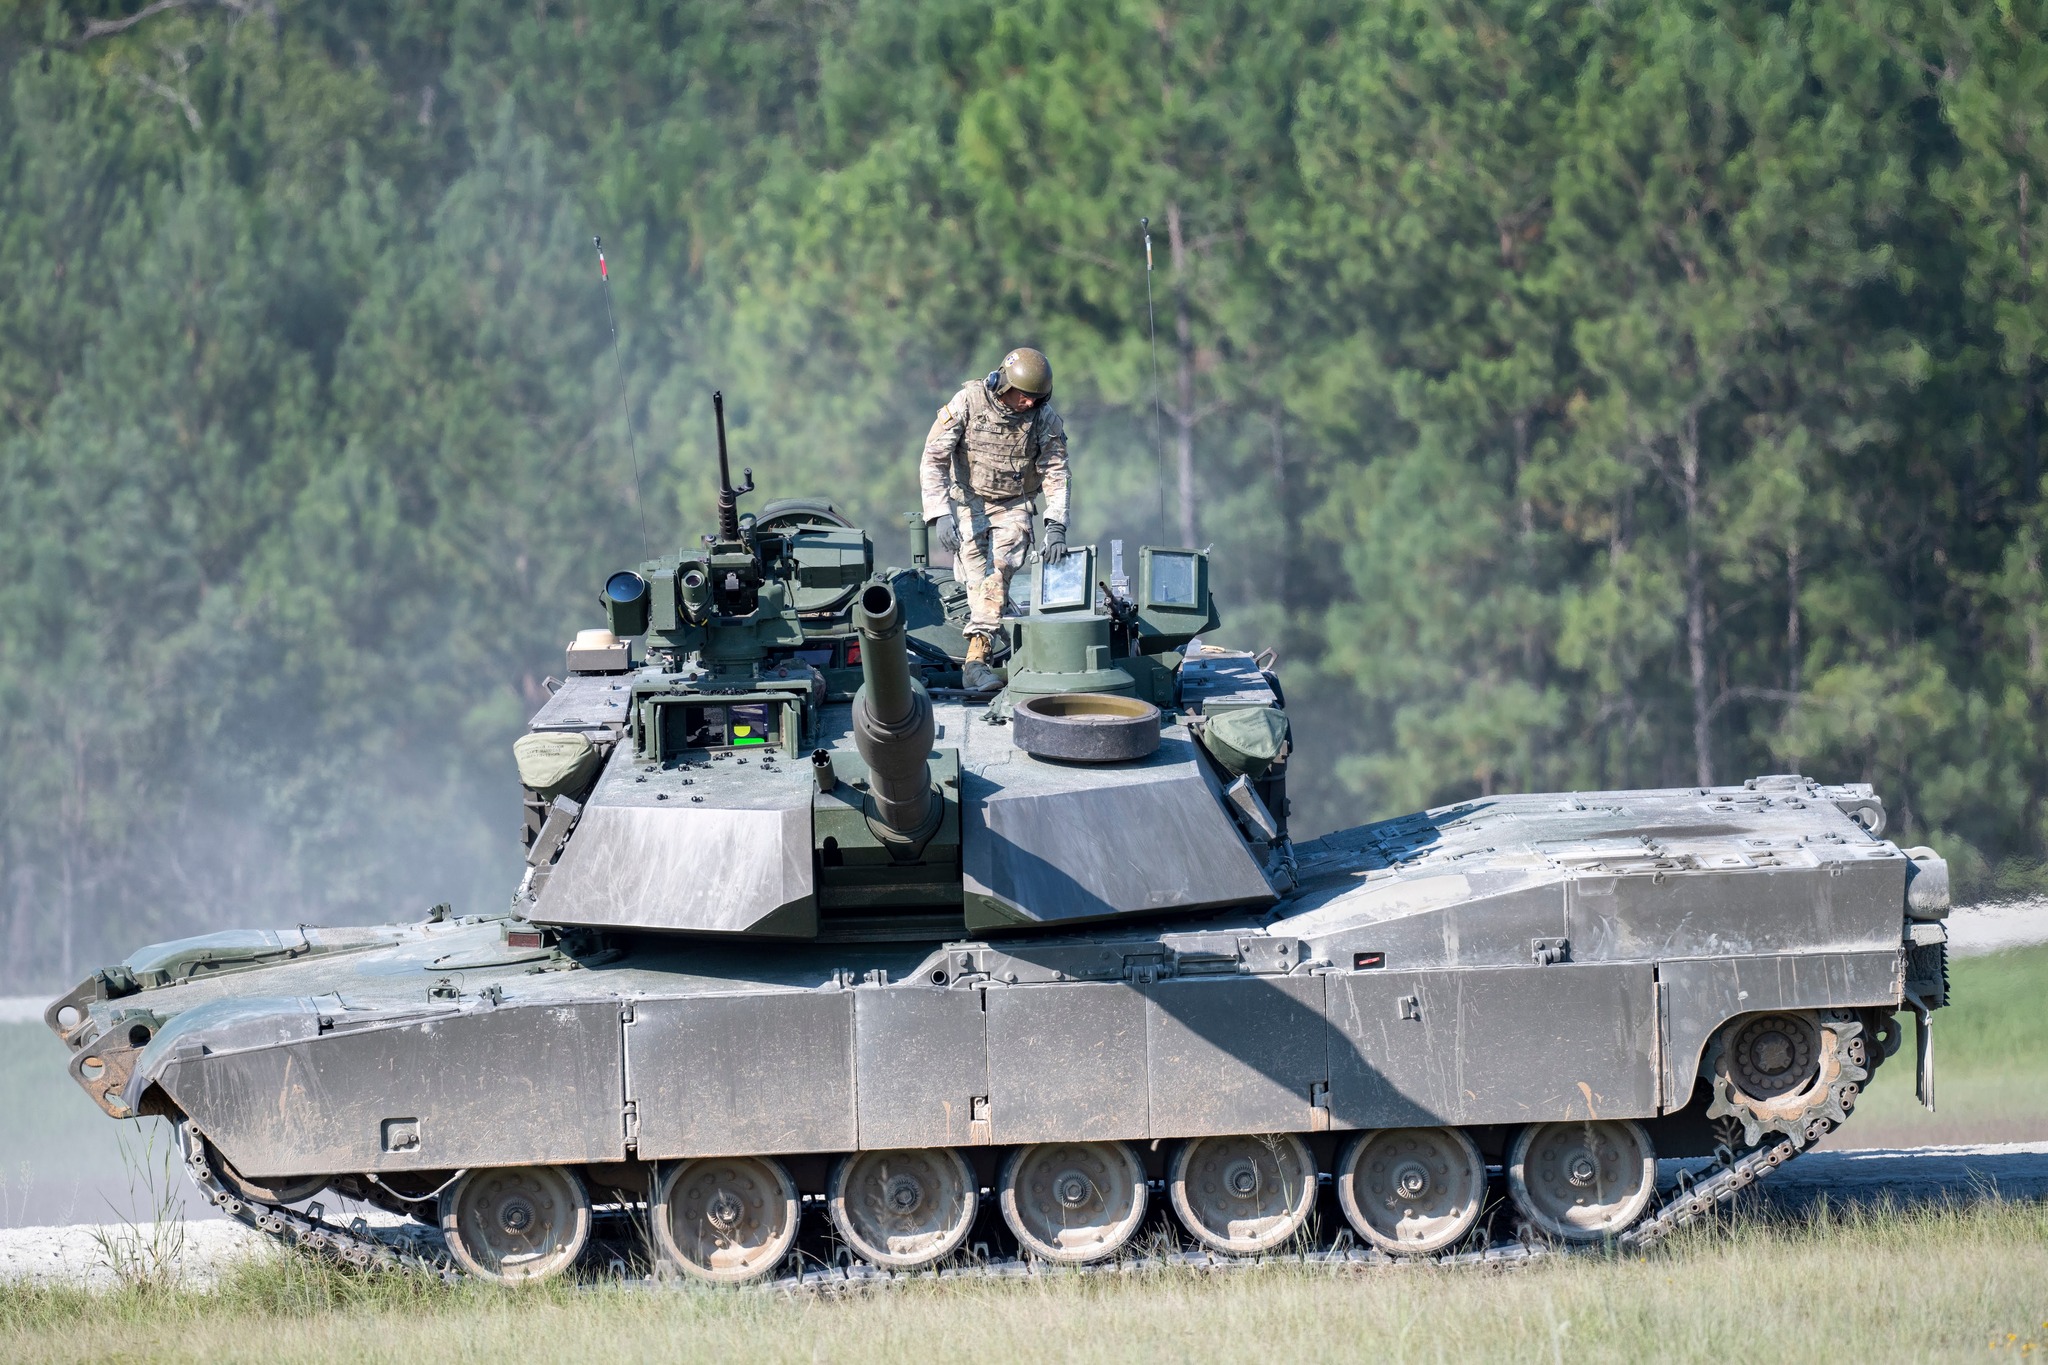
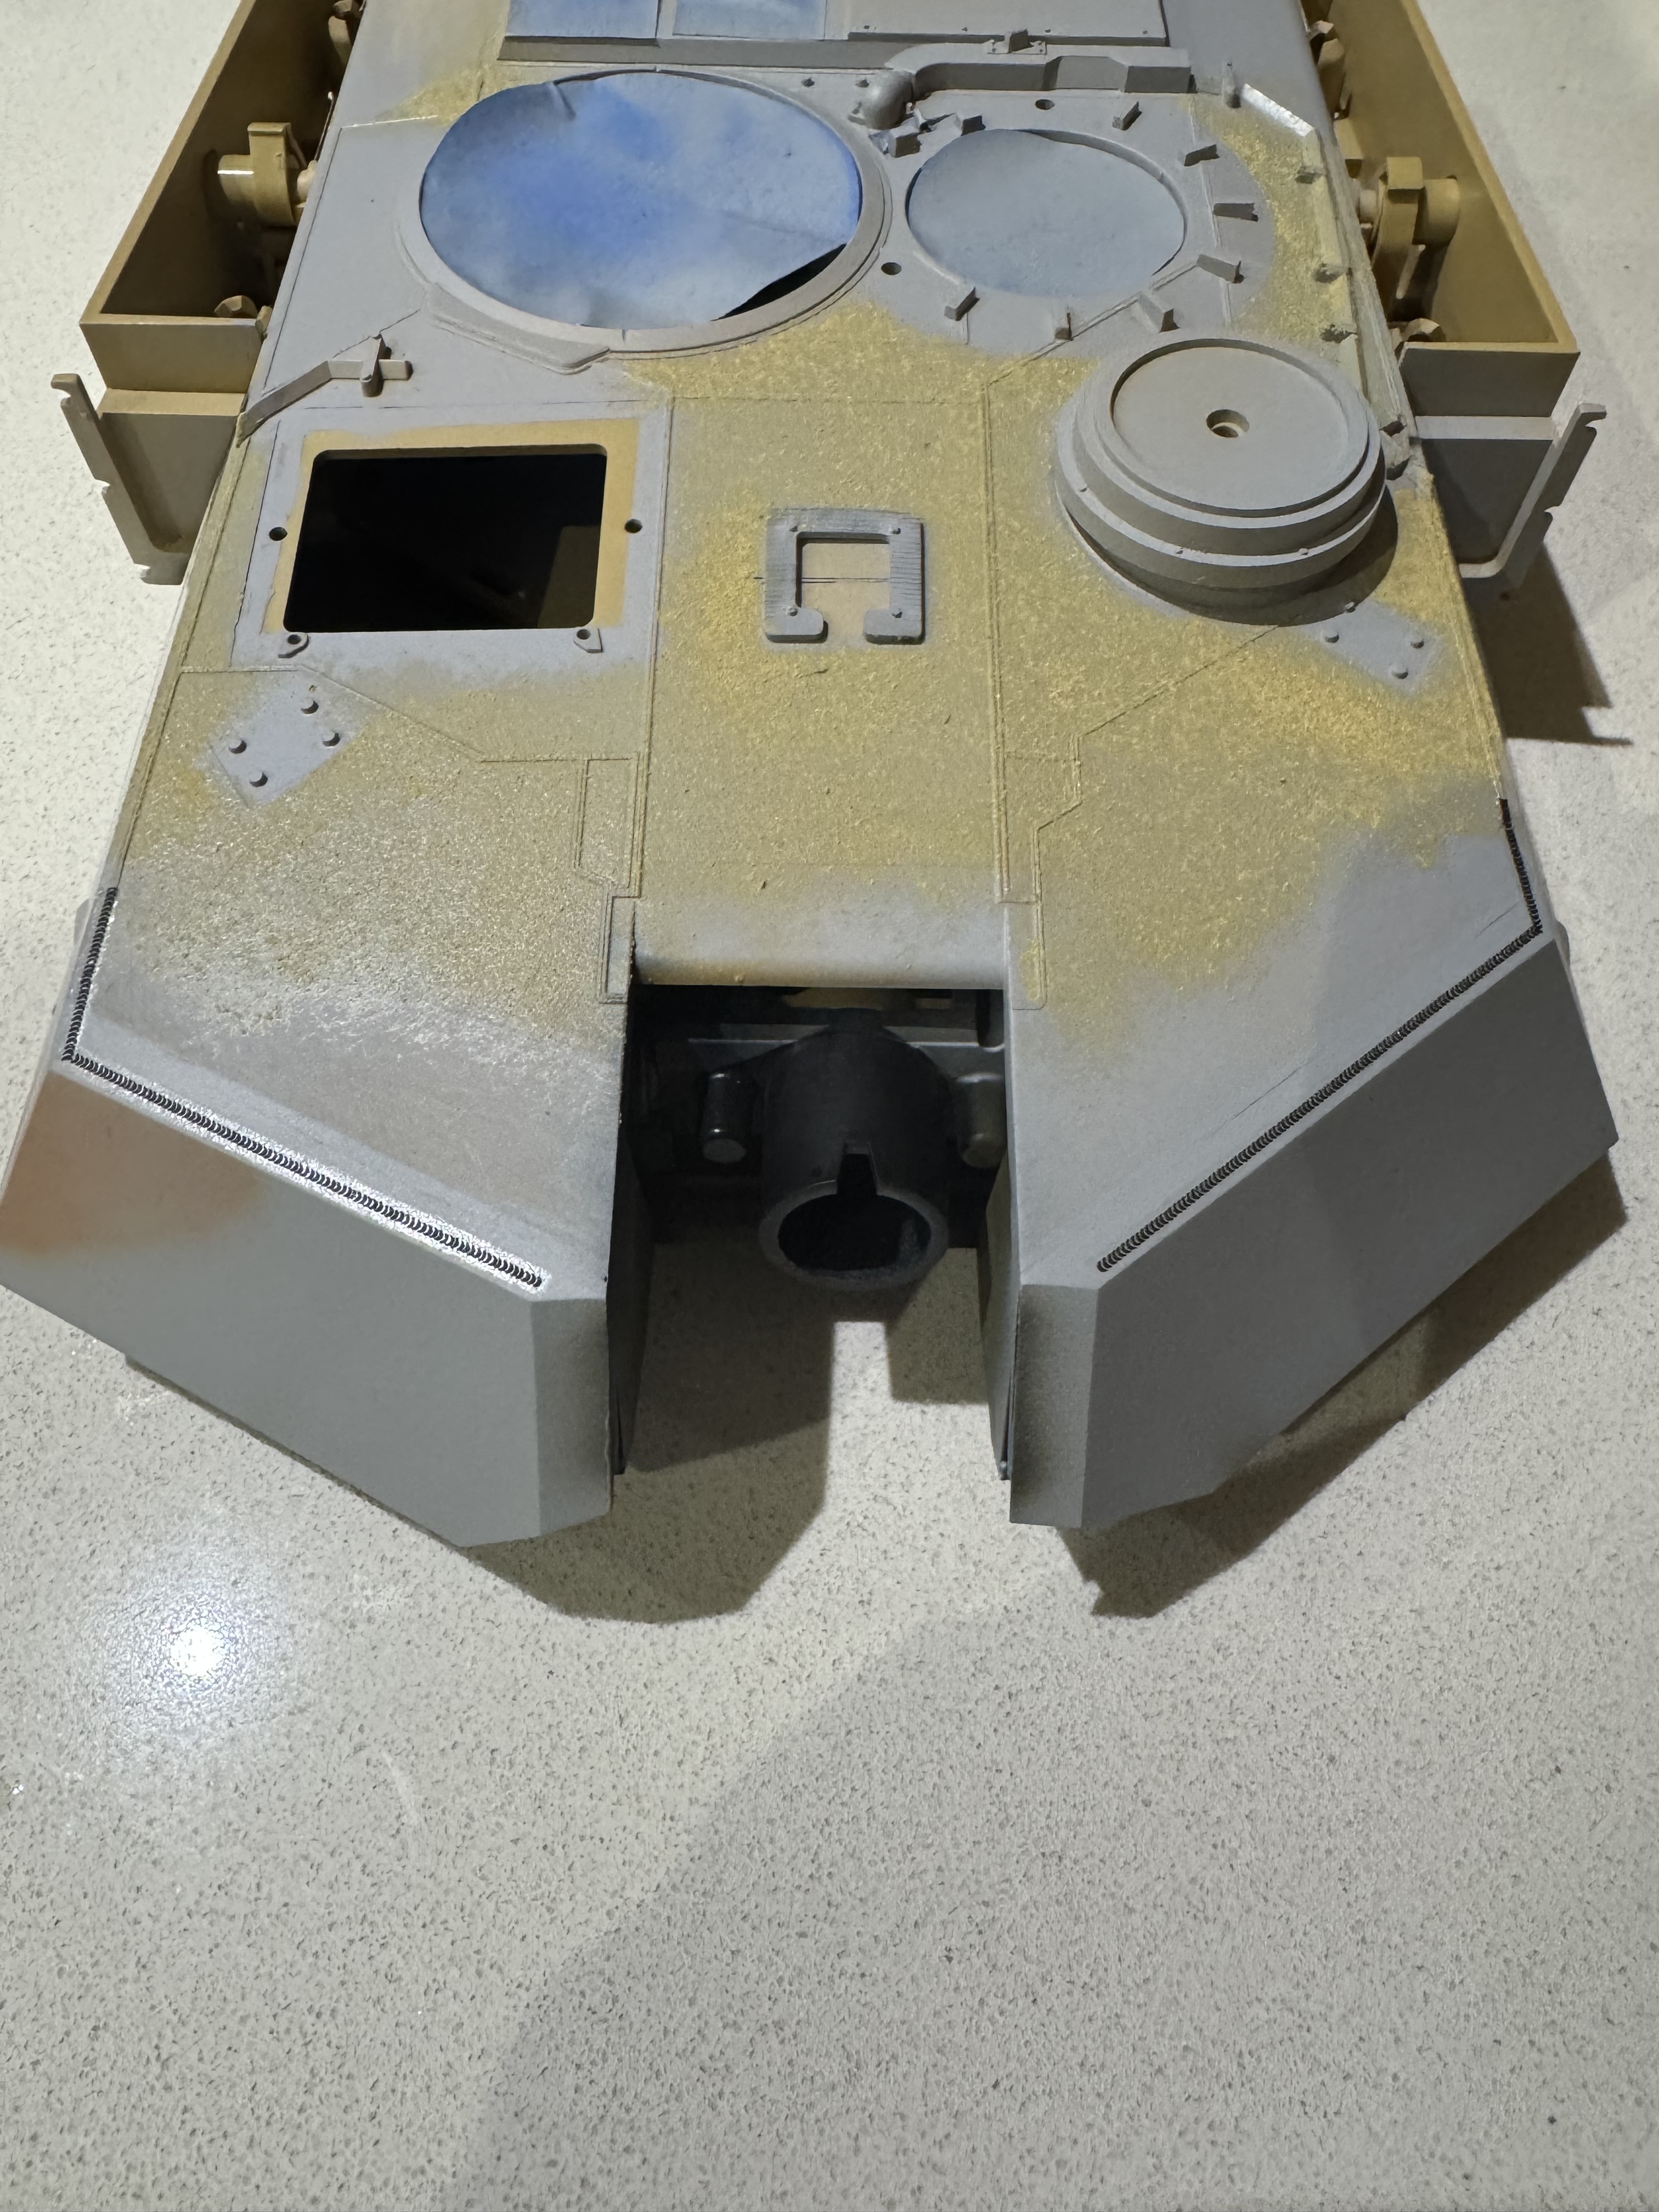
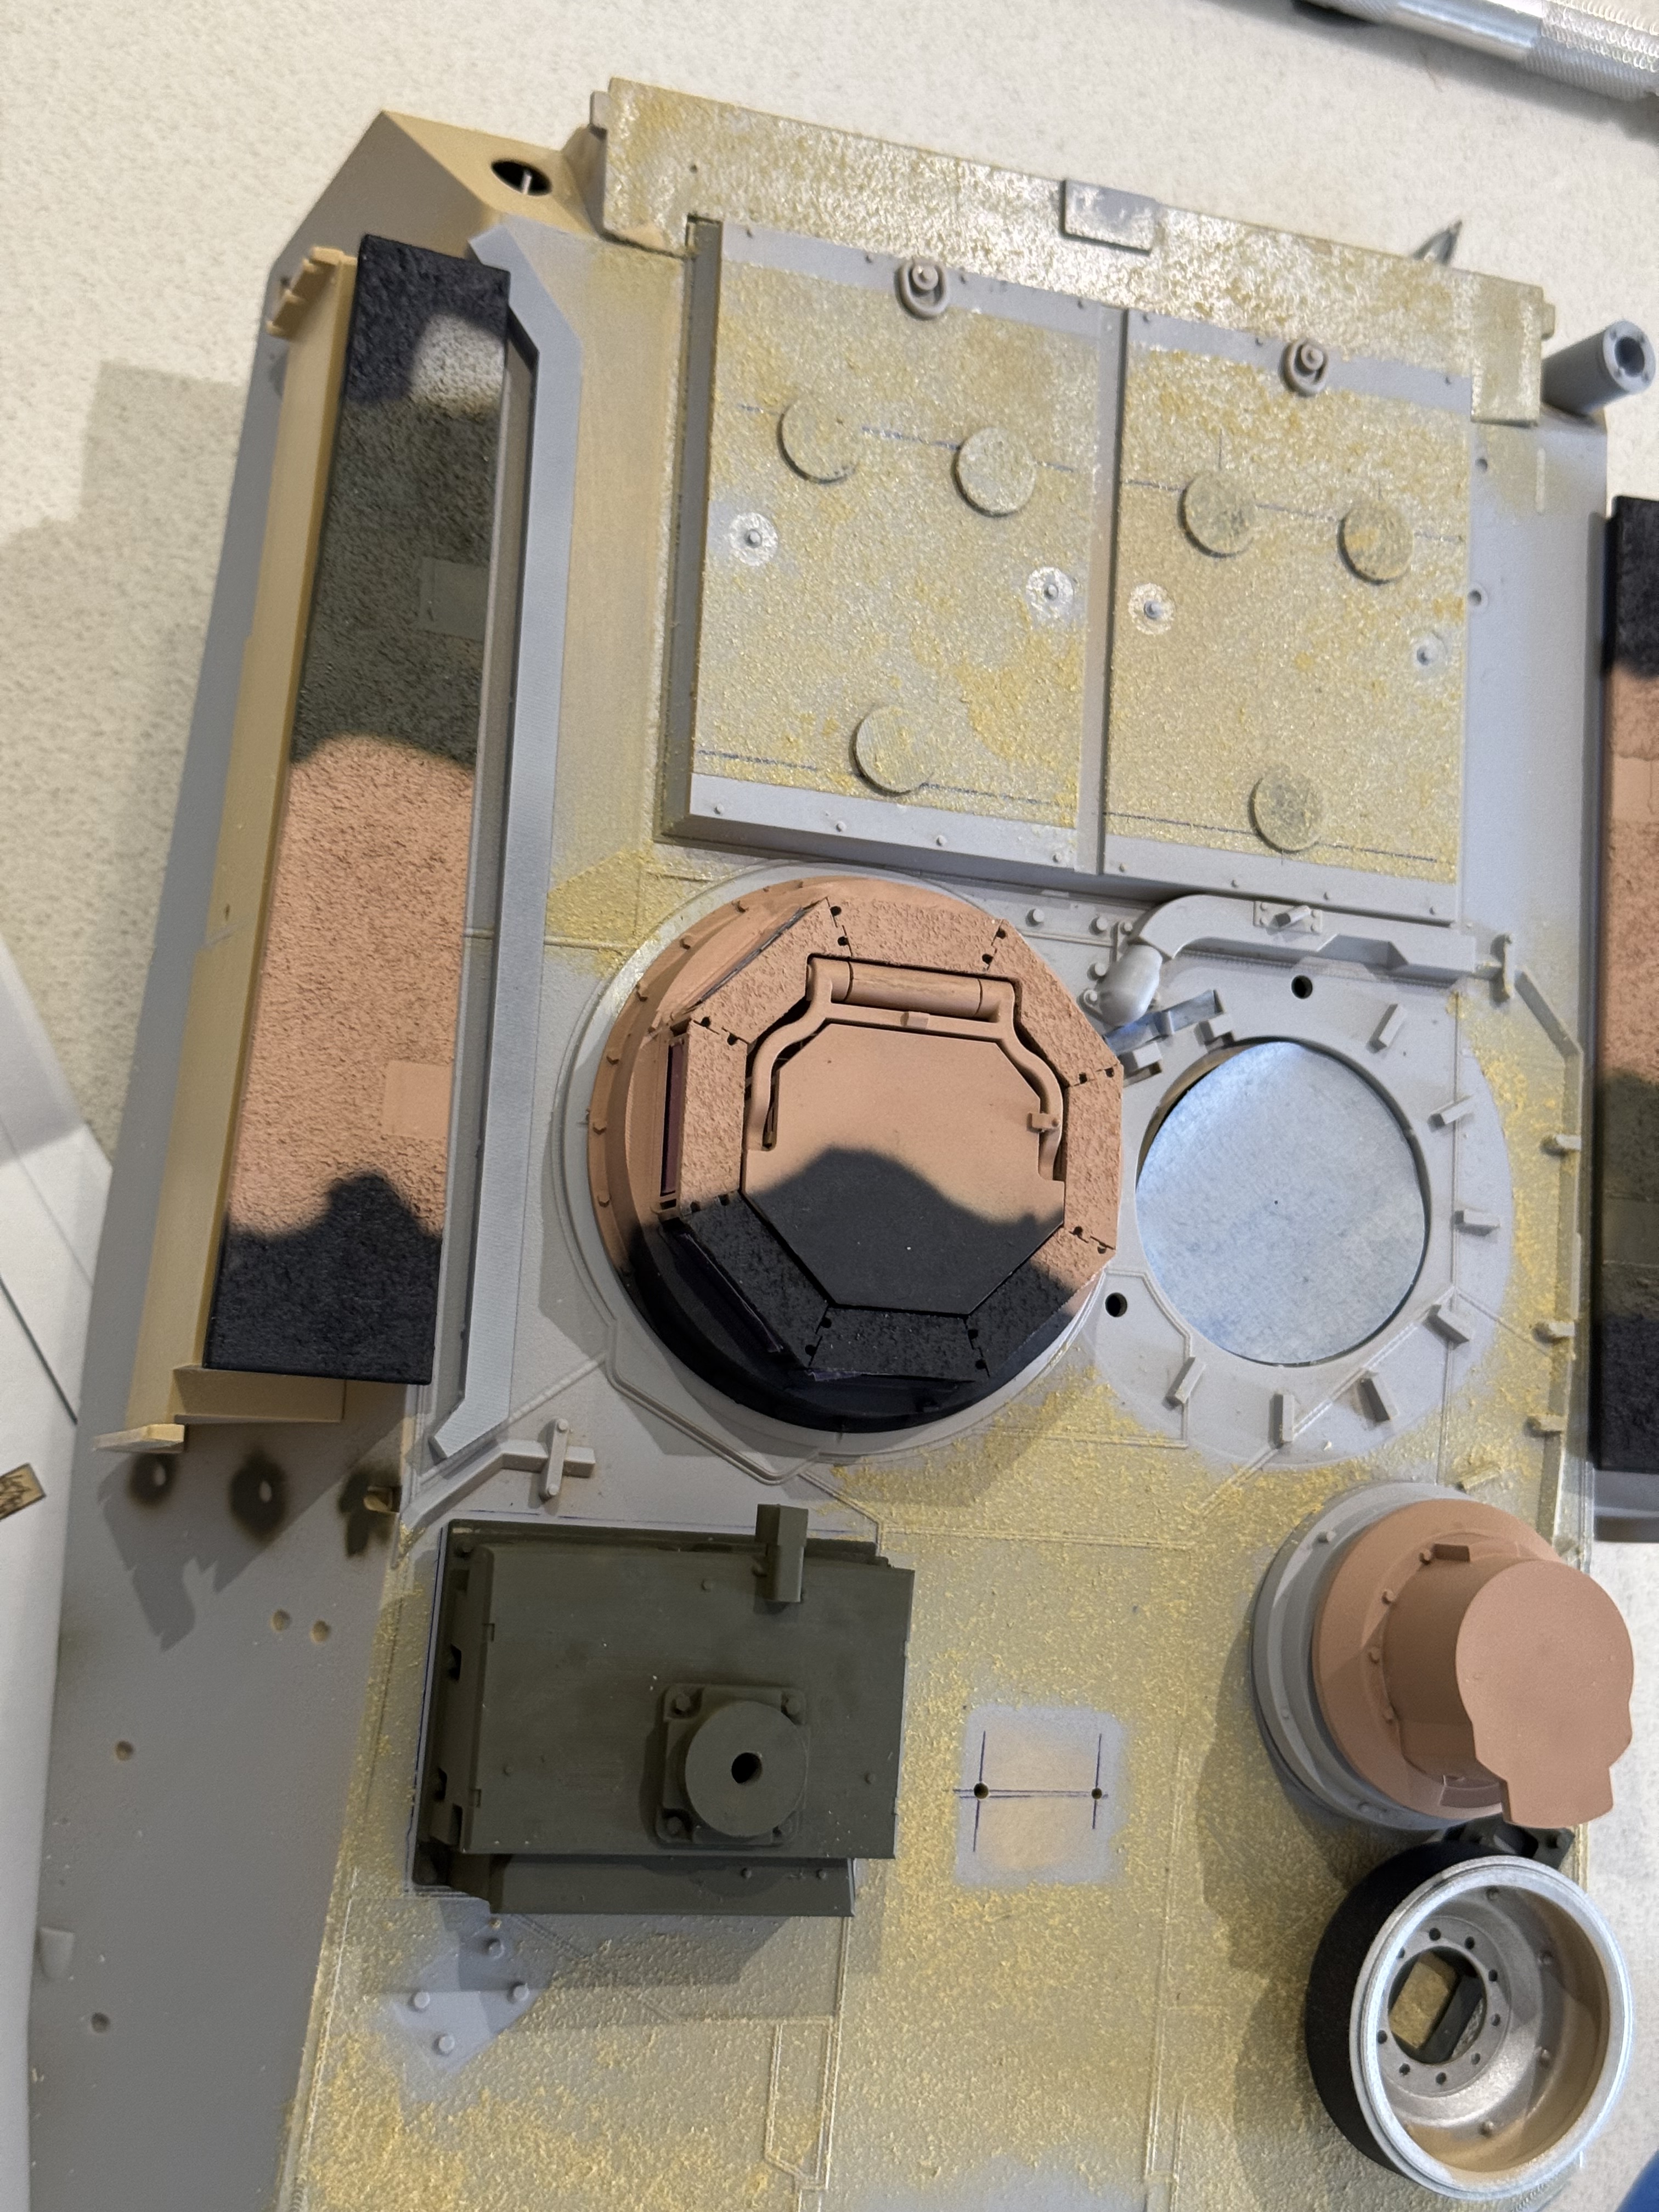
Making some progress on the turret. Assuming most of the features on the Australian SEP v3 are common to the US Army ones, the RFM SEP v3 kit has some inaccuracies & simplifications when it comes to the fittings & fixtures on the turret roof. Understandable, I guess as they’re not very visible from the ground.
Thanks for looking in.
10 Likes
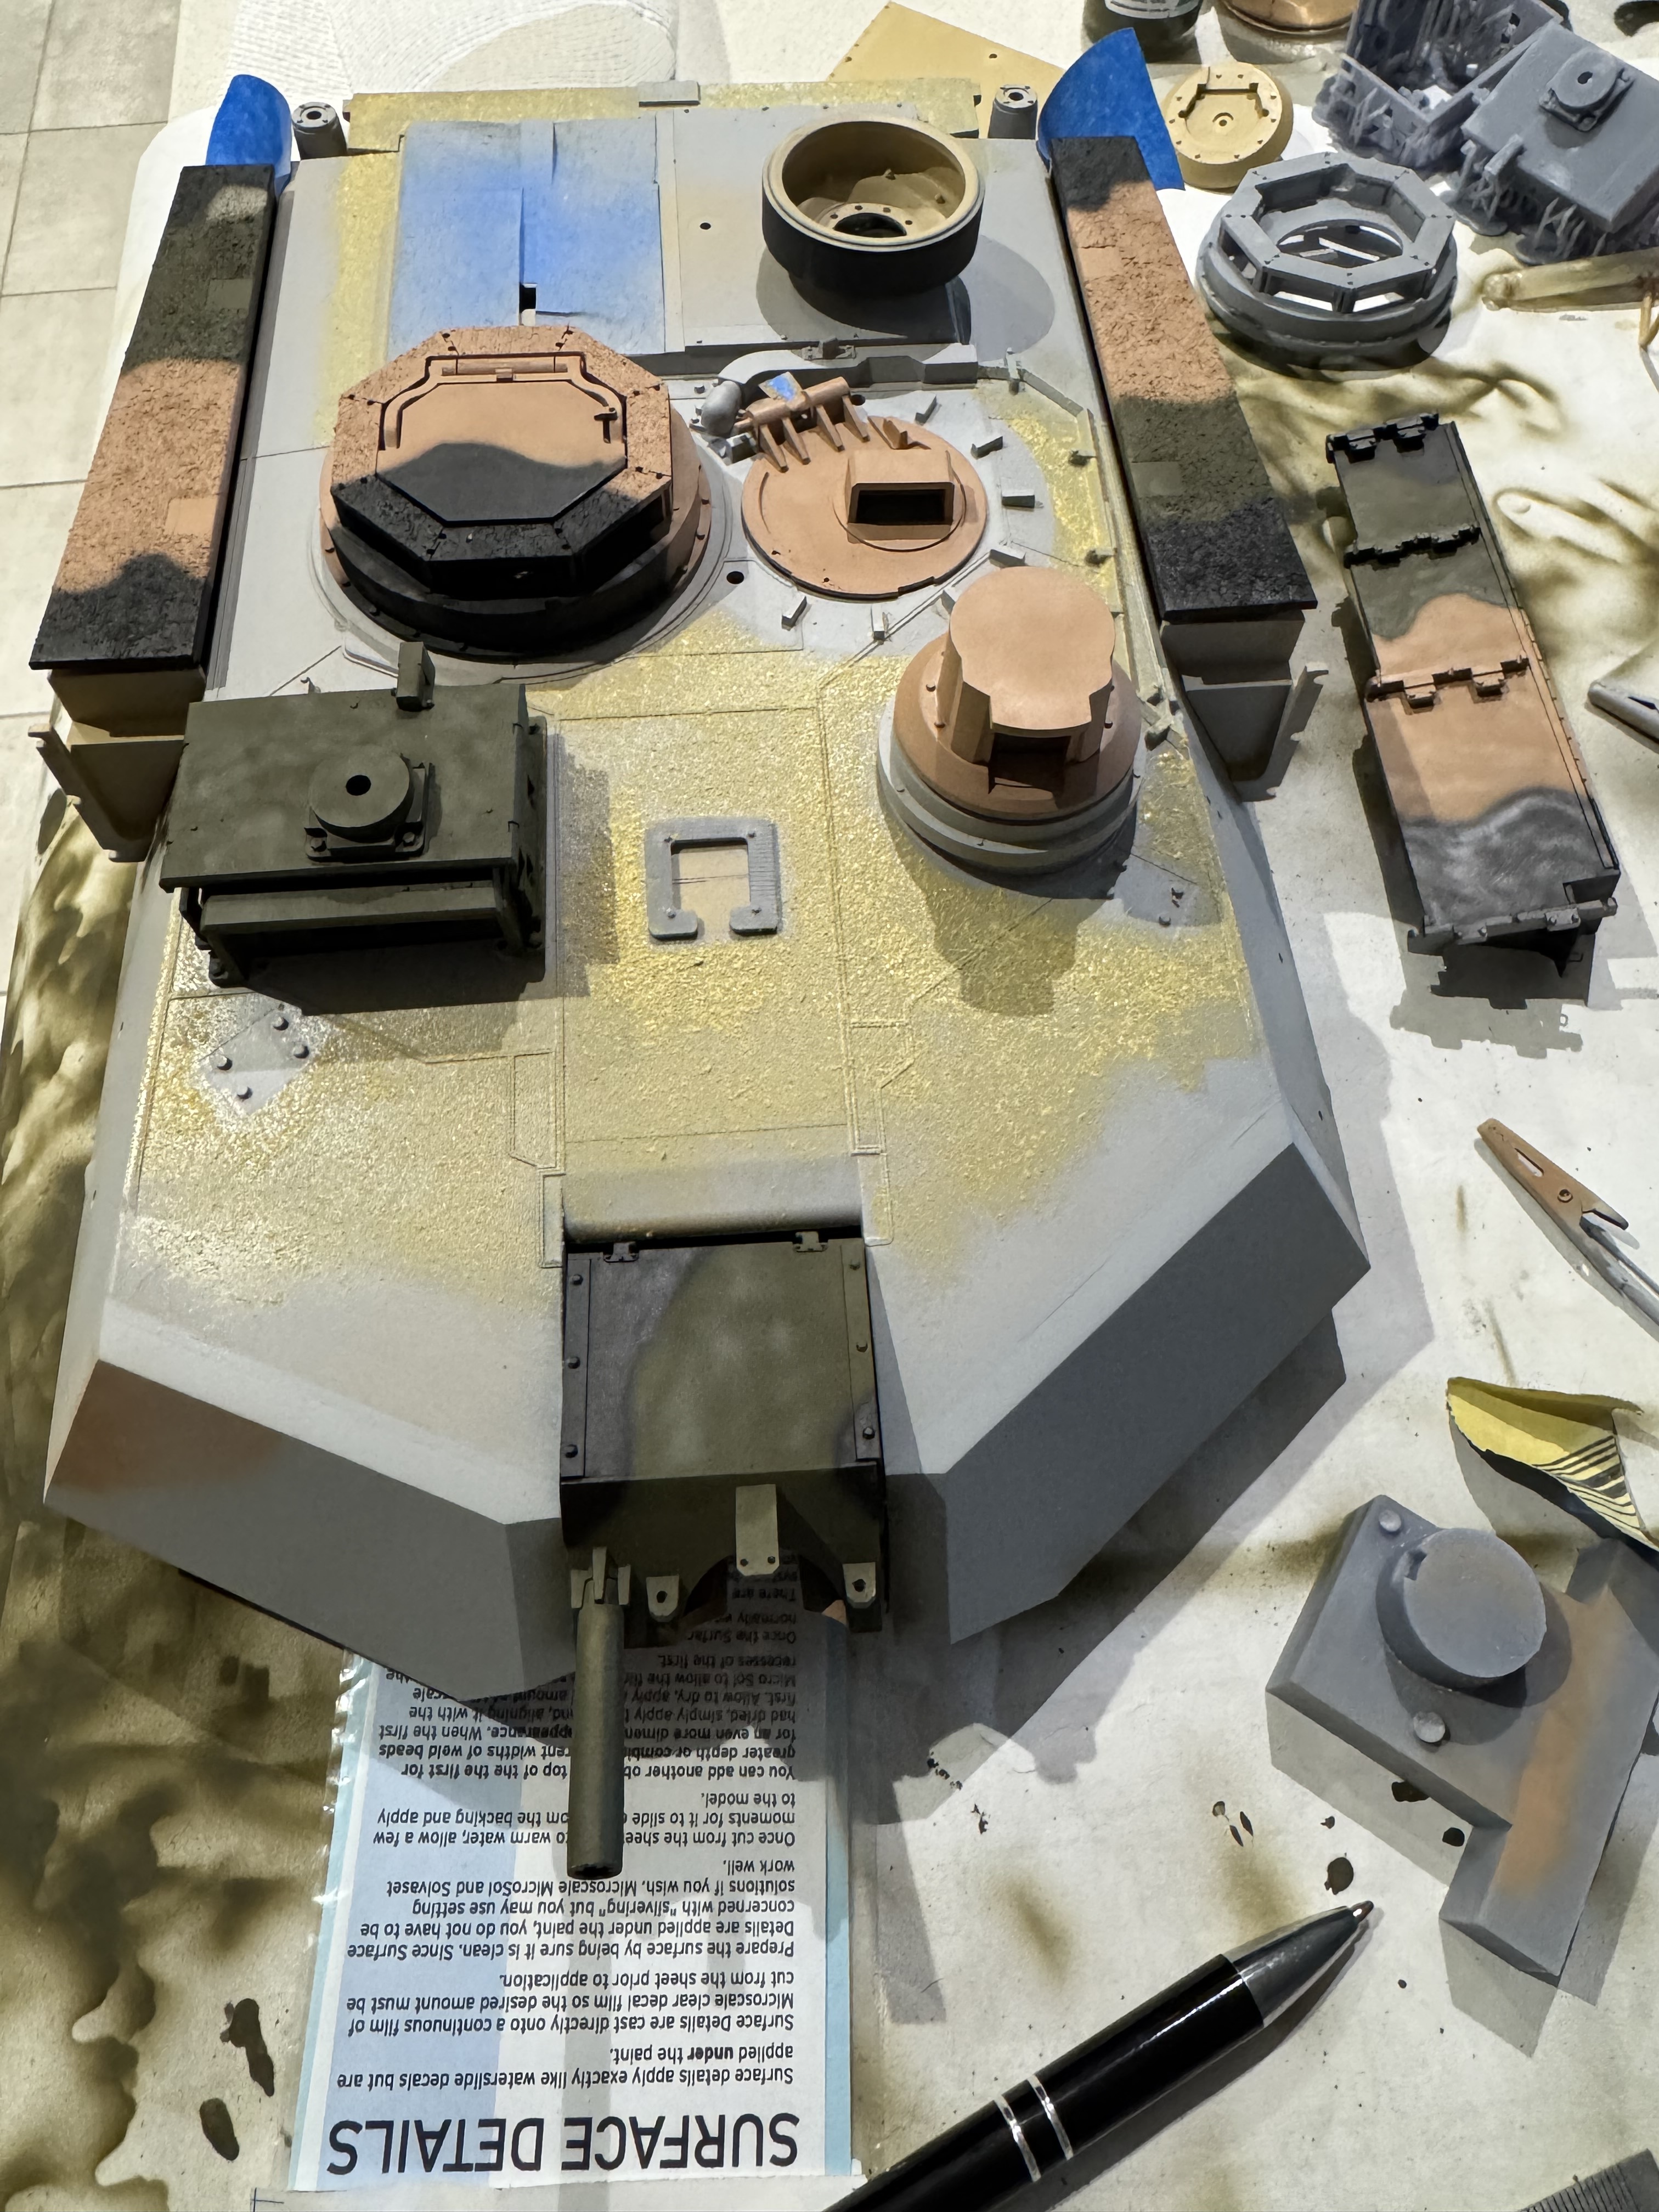
More work on the turret roof using the +250 reference pics I took last week to correct the RFM-inspired updates.
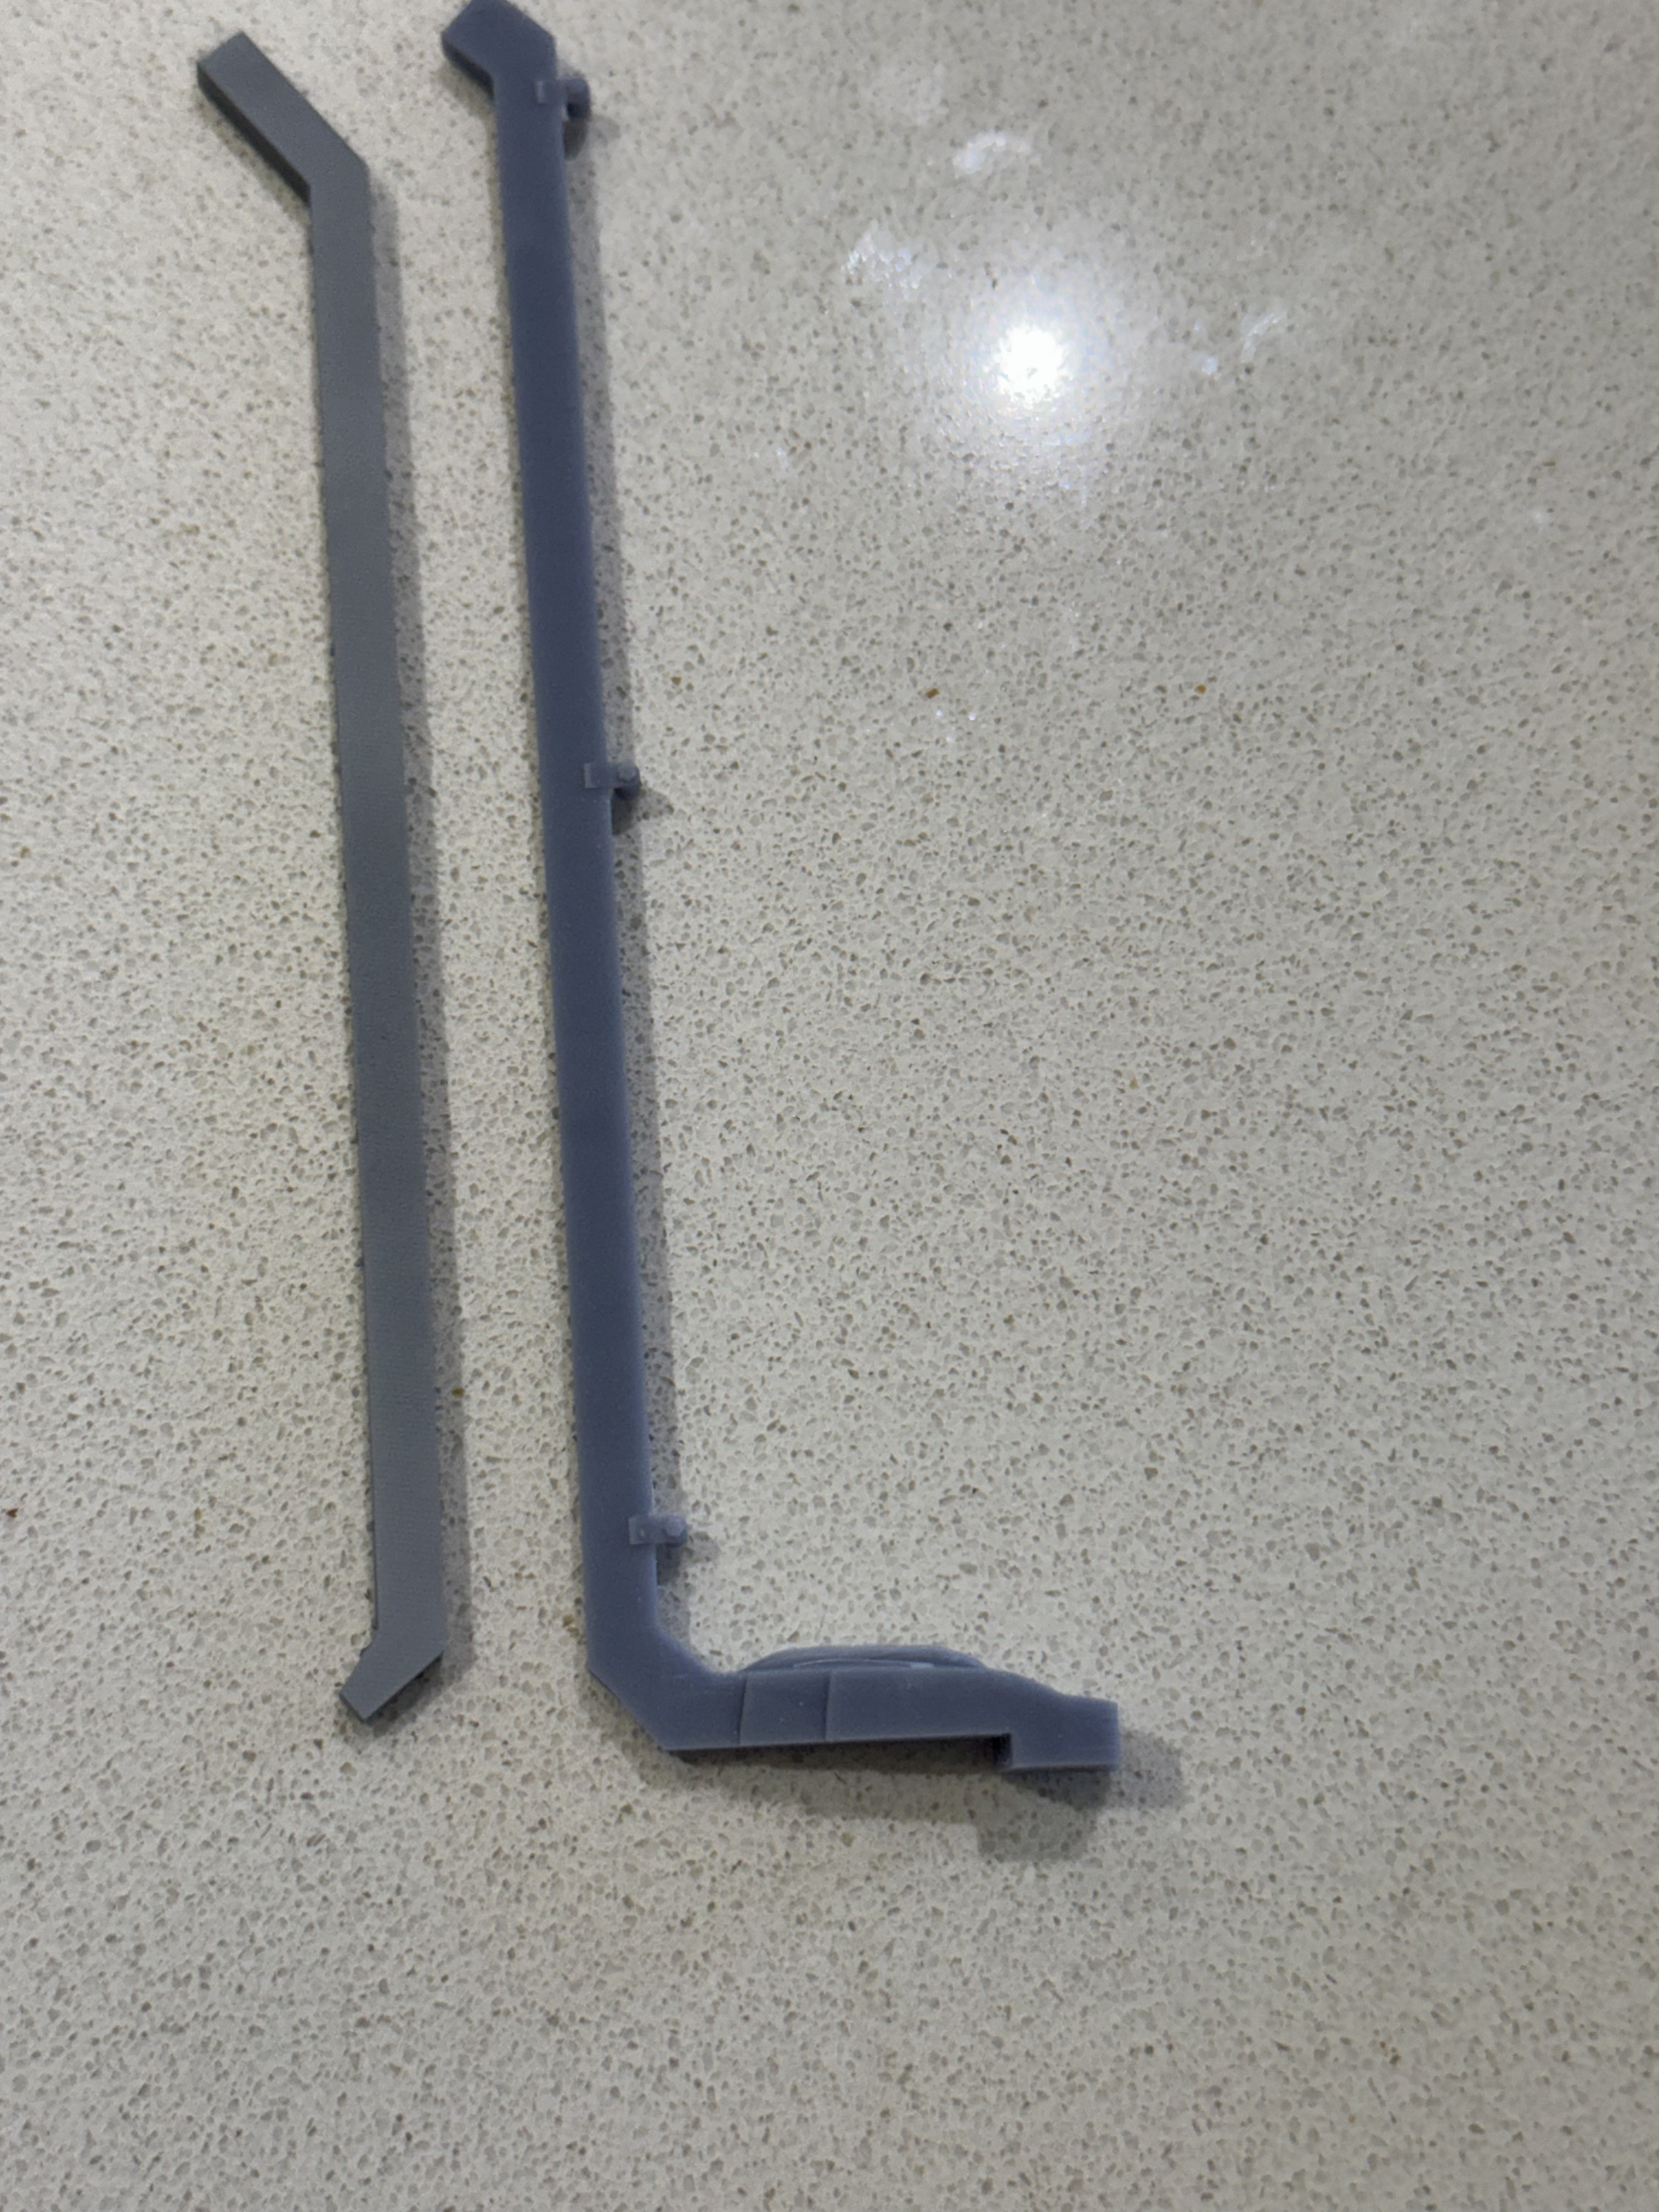
First is the conduit running from the Common Remotely Operated Weapons Station - Low Profile mounted on the Gunner’s Primary Sight housing (aka “doghouse”) to the rear-quarter mounted Blue Force Tracker (BFT) mount. The longer conduit on the right is derived from RFM kit, & is wrong in both outline & detail.
I’ve added weld seams & started the antislip on the turret roof. Need to correct some parts as I got ahead of my references.
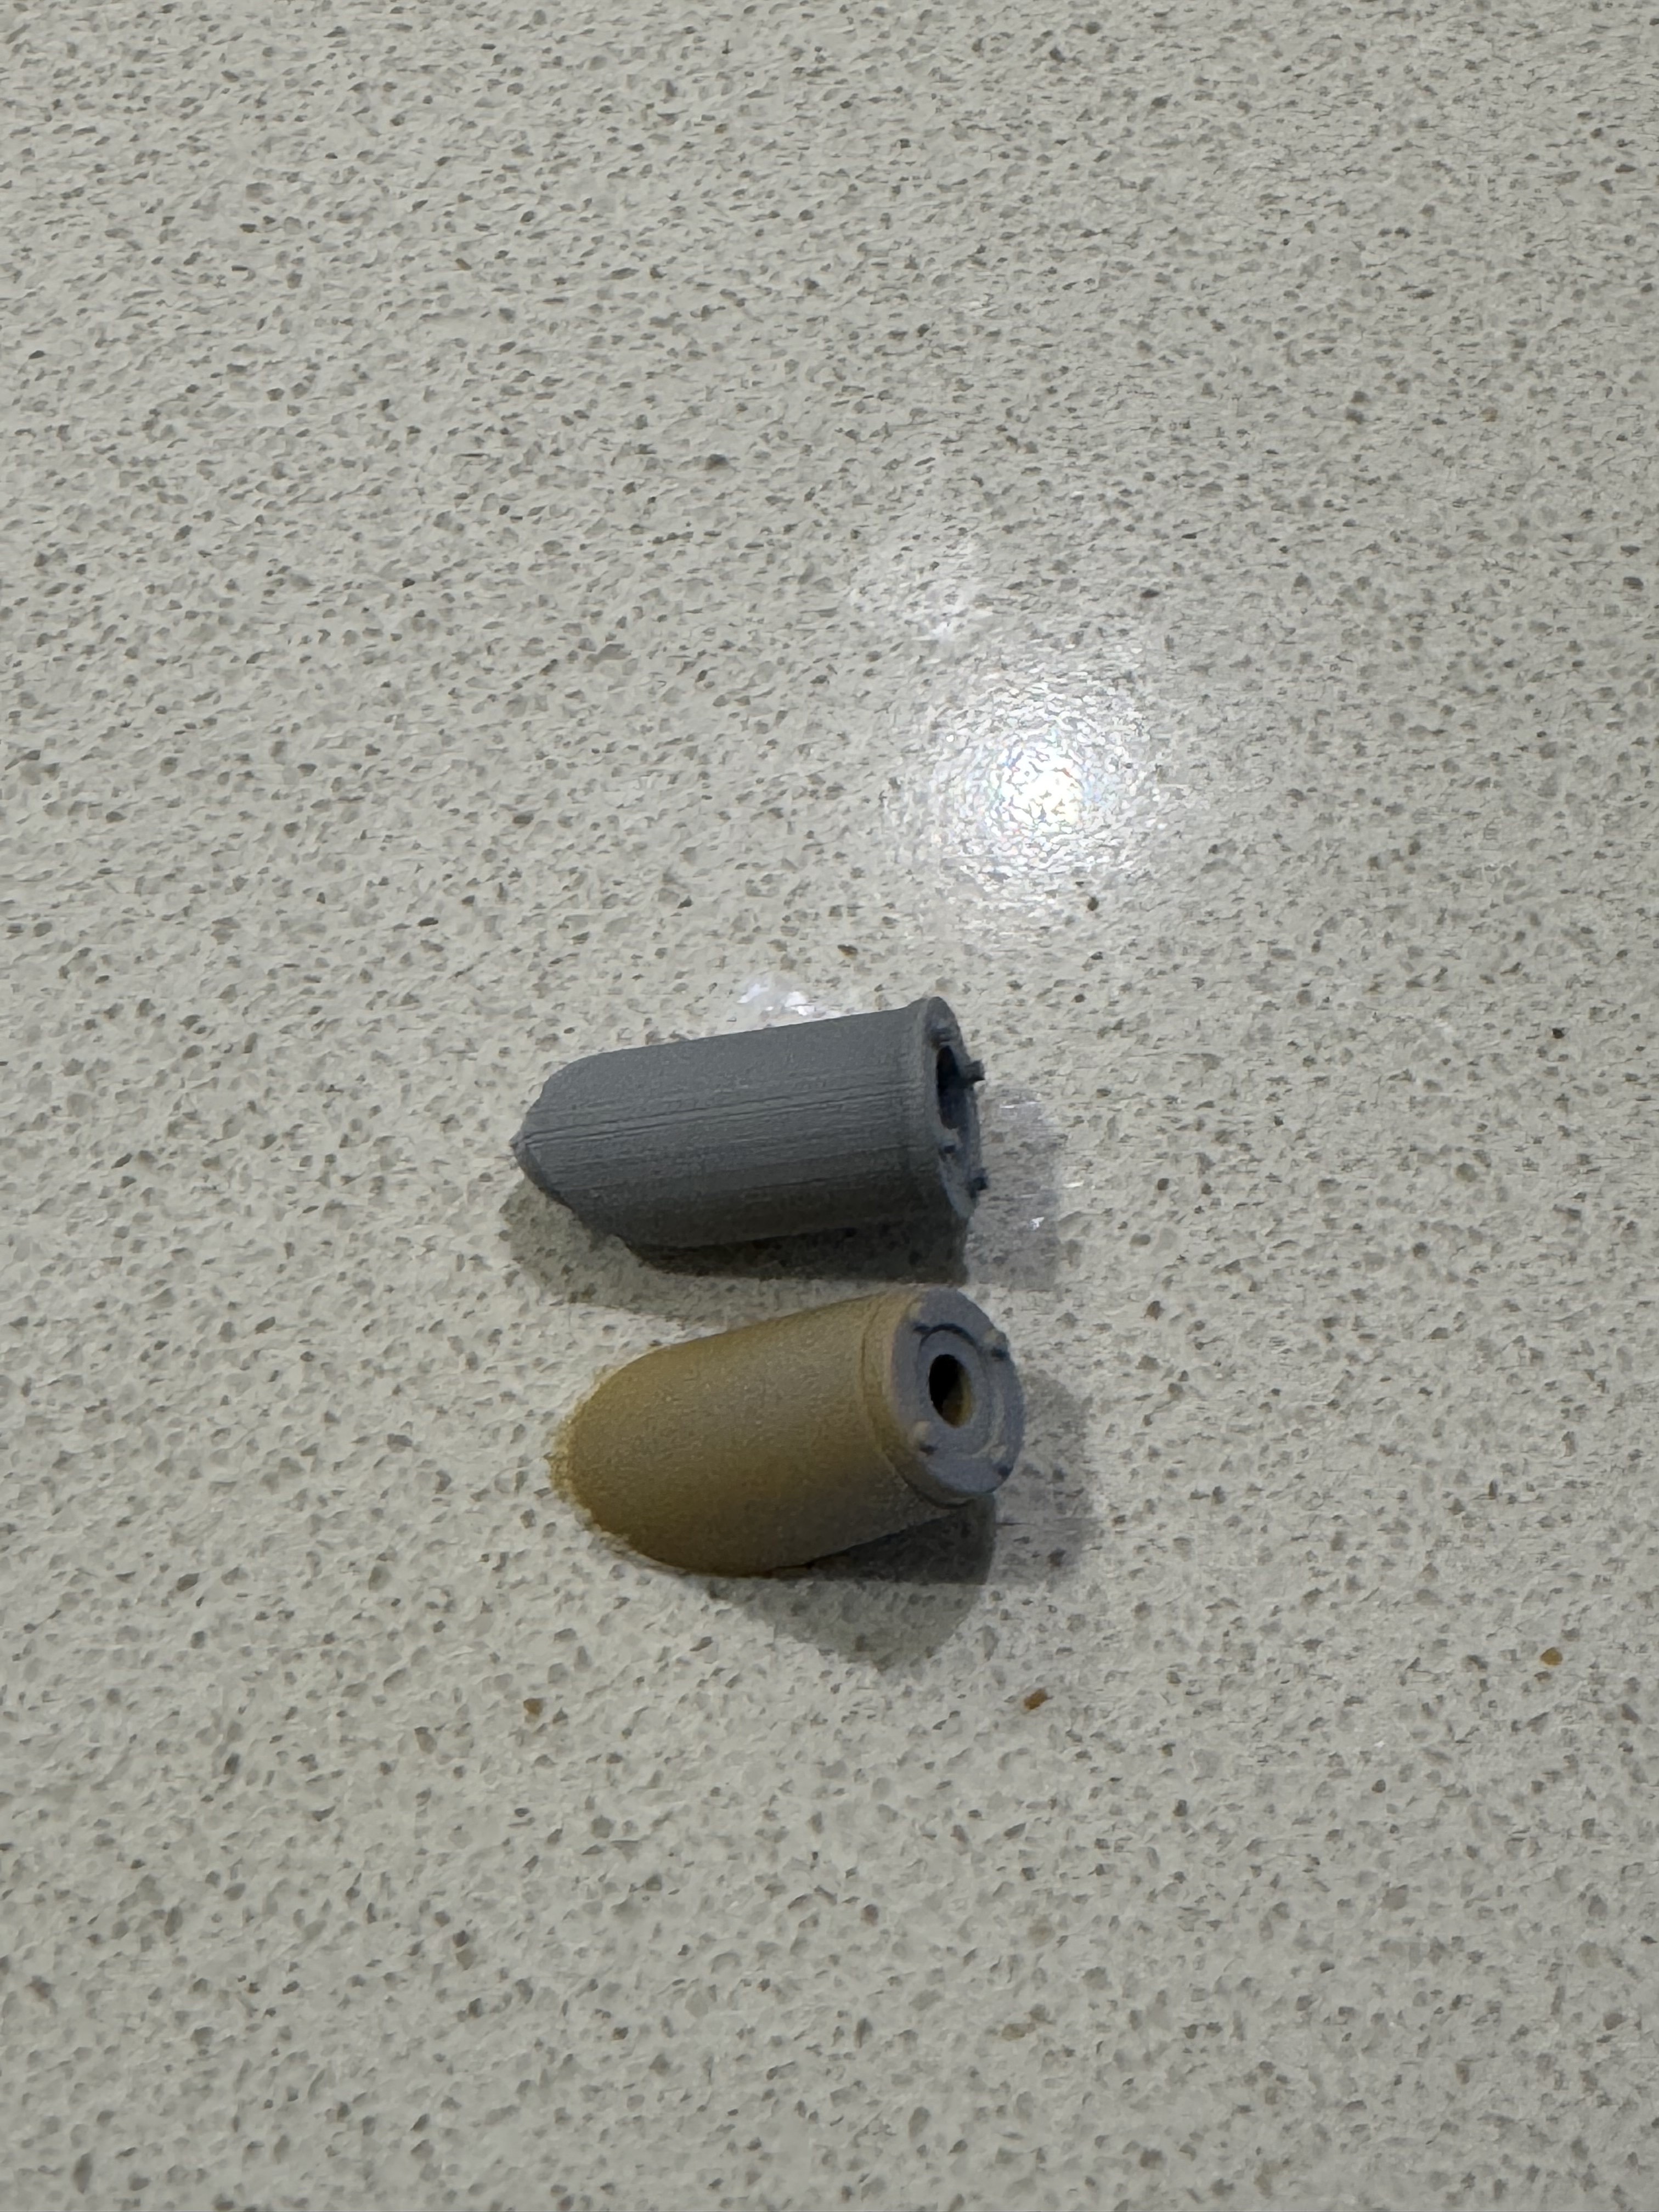
Also removed the molded-on antenna bases from the back of the turret as the kit ones weren’t straight-sided due to injection moulding constraints. The corrected & extended mounts are on the printer.
Lastly, I detailed the blow-off panels & have started painting sub-assemblies. Feels good to see progress!
As always, thanks for looking in.
7 Likes