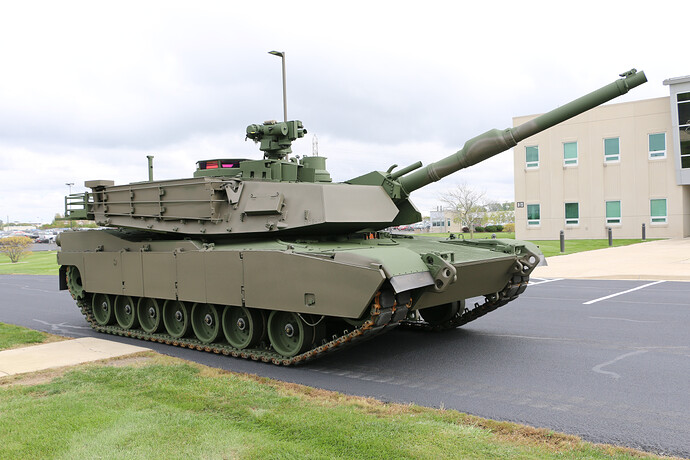
I always like to say that the best builds come from the best references. Yours are clearly very good, Ergo, very fine build. And all false modesty aside, dozens of fine builds on this site are based on the walk arounds I have sold to the builders.
@18bravo 's walkarounds are the best in the business and less expensive than any photo book. If it’s modern, just send him a message and he probably has an extensive walkaround on it. Satisfied customer here.
Agreed on @18bravo being an excellent source of references for USian kit.
Also, thanks for the kind words @18bravo
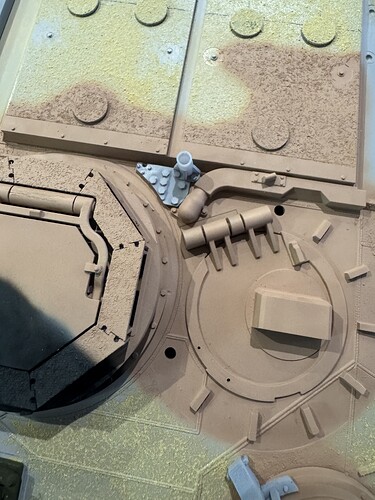
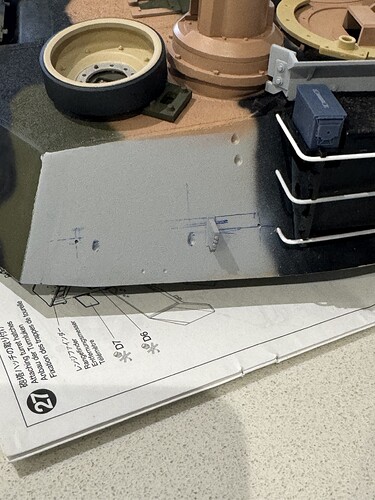
Fit check on the base of what Australians call the umbrella holder. This is different to that fitted to the soon-to-be retired A1s.
Need to widen the relief holes for the kit bolt heads so it fits flush.
Thanks for looking in.
A bit more progress.
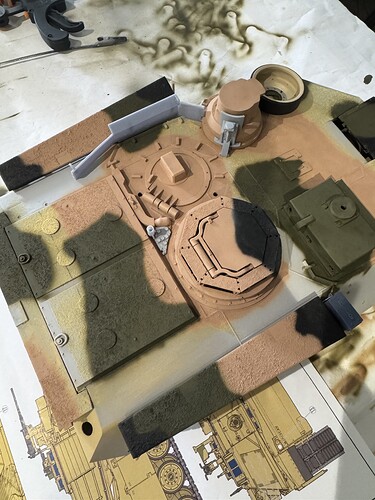
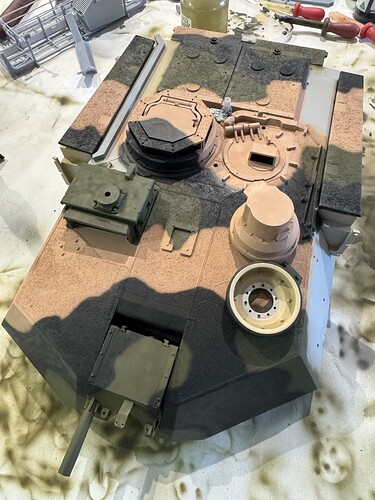
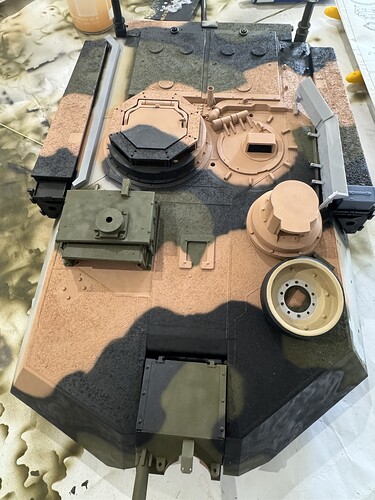
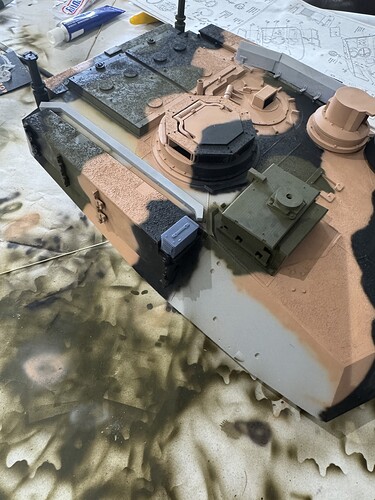
Test fitting & adjustment of the loader’s splashguard/ballistic shield, as well as the GPS antenna puck & mount adjacent the Commander’s Independent Thermal Viewer. Also added a bit more of the upper surface camouflage pattern.
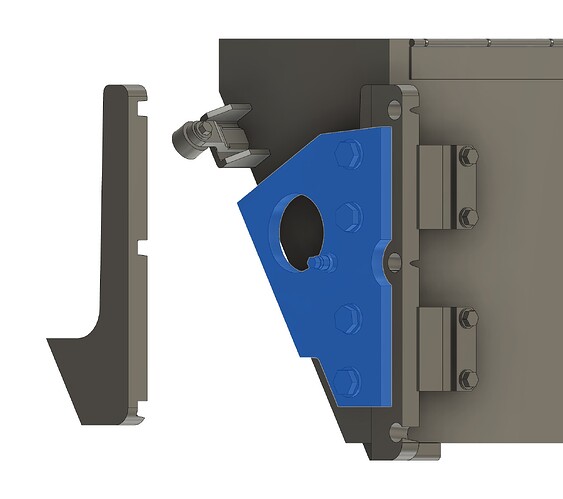
The biggest externally visible difference between US & Australian SEP v3 is the reinforcements added to the front & rear of the turret stowage bins, the ARAT 2 mounting points, & the riser added to the 50.cal ammunition stowage.
EDIT: after some more research, the reinforcements to the front & rear of the turret stowage bins appear to be part of the Trophy Active Protection System (APS) “A” kit. These aren’t present in the RFM kit.
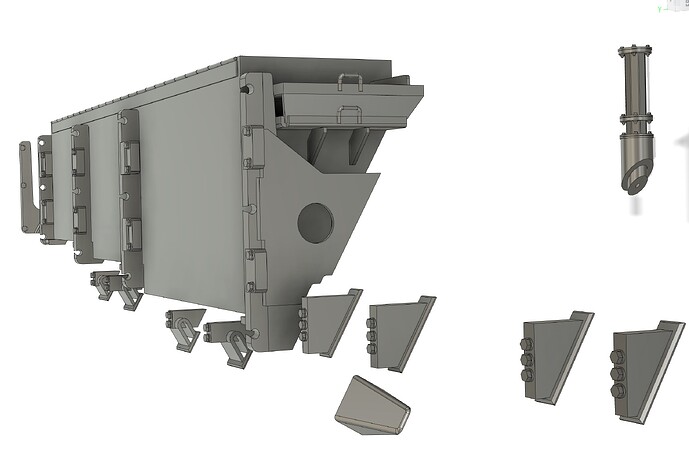
Here’s my first stab at the front reinforcement to the stowage bins.
Still need to correct the ARAT 2 mounting points & the brush guard for the tow cable.
Thanks for looking in.
EDIT: after some more research, the reinforcements to the front & rear of the turret stowage bins appear to be part of the Trophy Active Protection System (APS) “A” kit. These aren’t present in the RFM kit.
You’re right: A quick check shows the same mods visible on US Trophy-equipped M1A2 SEP V2s, including the raised ammo box holders.
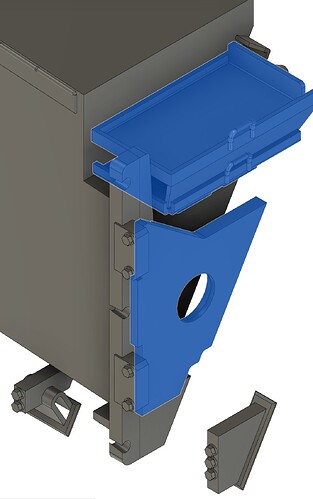
First cut of the front & rear reinforcement points are on the printer.
Here’s what they look like, highlighted in blue.
Front, plus ammunition risers:
Rear:
I need to do the very rear of the railings as well.
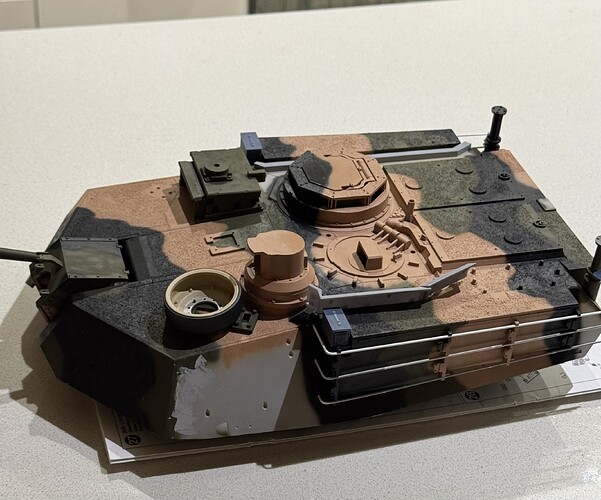
Overall turret as at now:
Thanks for looking in.
Will you be offering those blue parts in 1 35 scale as well as the umbrella mount ?
They’re really specific, fit-wise, to the Tamiya 1/16 kit. They’re also at close to scale thickness, so they’d be very fragile if just dropped in scale.
Not sure they’d work in 1/35. I think Arms Corps may have a go if their 1/35 A1 kit is anything to go by.
One feature present on the CITV is an undercut at the 3.30-5.30 o’clock position, when viewed from above. This rebate gives the CITV cover mount enough space to be bolted down.
I’ve added it to a newly CAD-ed part & will replace the kit offering.
That’s one massive Aussie v3. It’ll look amazing.
The contract drawings for Trophy are exceptionally useful to accurately locate the mounting points. The Tamiya 1/16 M1A2 is a perfect plain Jane Abrams, so there’s a lot to convert to bring it to M1A2 SEP v3 standard.
The modified turret stowage bins have been fitted and the location holes for the mounts have been drilled into the turret sides.
The loader’s crowsnest continues to evolve, but should be able to finish the design, print, paint, & fit this weekend.
You can see how the 50 cal ammunition risers really do put the handles of the cans in easier reach.
About 40 days before an annual show, so I’ll aim to finish it by then.
Thanks for looking in.
I find it quite odd that the tow shackles and cable chains are straight. Since my time loading MBTs in Europe, the chains and turnbuckles crossed ( X ) to prevent lateral shifts on the car. Bad juju when 70 tons slips sideways on the curve!
I was of the opinion that all the rebuilds came from Anniston or JSMC (Lima) in ODG or the current Sand. Odd, that.
I was at the Collection when the SEP v3 was pulled in early this year. The hull seemed the same length to me (driver’s hole to lip). What the Regimental CO told me what’s this: “they moved the pedals back 8”, and extended the box for the armor array into the void”. I got into the position and confirmed the move. The turret suite is also extended aft, and the weld seams on the roof exterior seemed to conform to the new locations. All in all, a rather new take, and ~6+ tons of mass in those spaces.
The turret cheek “cheeks” were extended forward (as you have represented) and are nearly flush with the gun rotor shield. Nearly. I didn’t take pics, but the SEP was parked adjacent to another M1. The difference was remarkable.
US Army M1A2 SEP v3 seem be being delivered in either sand or CARC-X two-tone green/brown.
Australian contract SEP v3 are delivered in three-tone disruptive pattern camouflage of FS30219 tan, FS34088 green, & black.
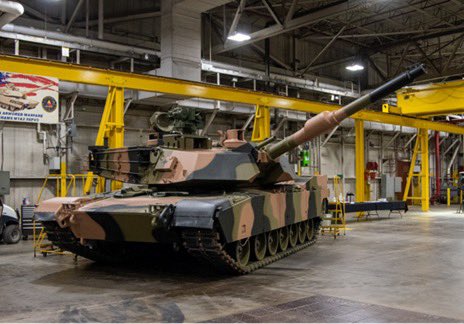
Glad I posted about the hull front here - the response saved me from a huge mistake!
More progress on the turret. Need to sort the VCSU ducting sorted out.
Thanks for looking in.
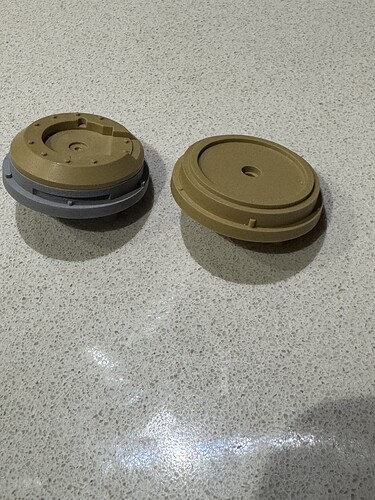
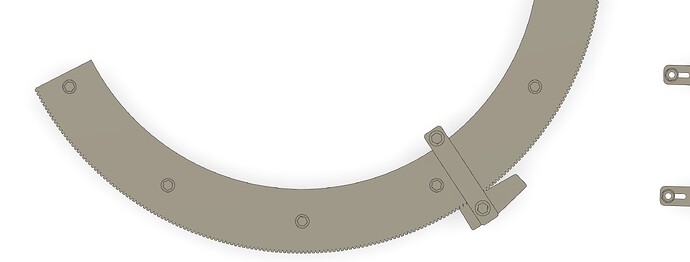
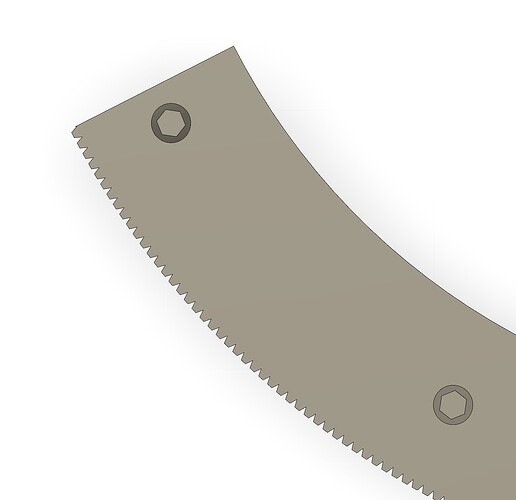
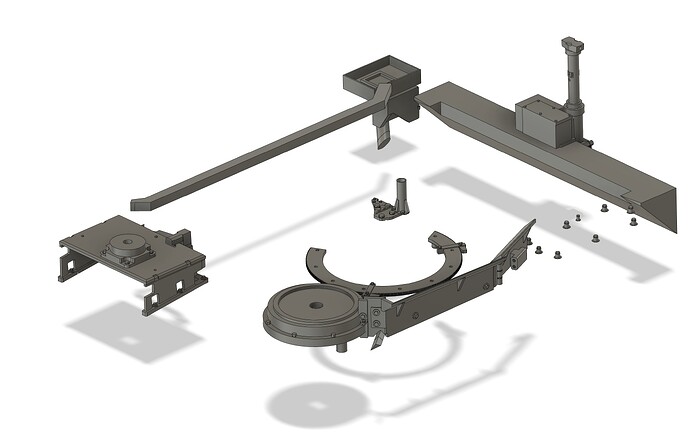
The SEP v3’s loader’s skate ring differs from the kit item as it’s toothed & is fitted with traverse stops.
Drawing up the teeth was pretty tedious! Still it’s on the printer now & hope it’ll print okay.
Close up of the teeth.
The loader’s machine gun mount in the SEP v3 is different to earlier models, so I’ll have to sort that out.
Started locating the forward ARAT 2 mounts on the left side of the turret. Still have to relocate the smoke grenade stowage boxes, tow cable mounts, & brush guard for the tow cable left to complete.
Thanks for looking in.
Those teeth must get full of dirt on the real deal. Nice work.
Looking great and I really like all the 3D parts that you are making.
Cheers,
Ralph
Thanks, Ralph. It’s taking a bit longer than I was hoping, but at least there is progress.
