Nice kit bashing it looks great.
Cheers,
Ralph
Nice kit bashing it looks great.
Cheers,
Ralph
Excellent job Jakko . You’re making great progress. Those sand bags look excellent as well! I’ll probably be making some for my M4 also. Very inspiring work!
Thanks. The sandbags are easy enough to make: just roll some epoxy putty into a sausage of maybe 5–6 mm diameter, then cut it into lengths of perhaps 8–10 mm long. Knead those into rectangular blocks and press them onto the model. I make the openings with wide tweezers, by using those to pull the putty together into a blob at one end of the bag, and then opening it out with a sharp sculpting tool or knife tip. I use the same to scratch a seam into the side, and done.
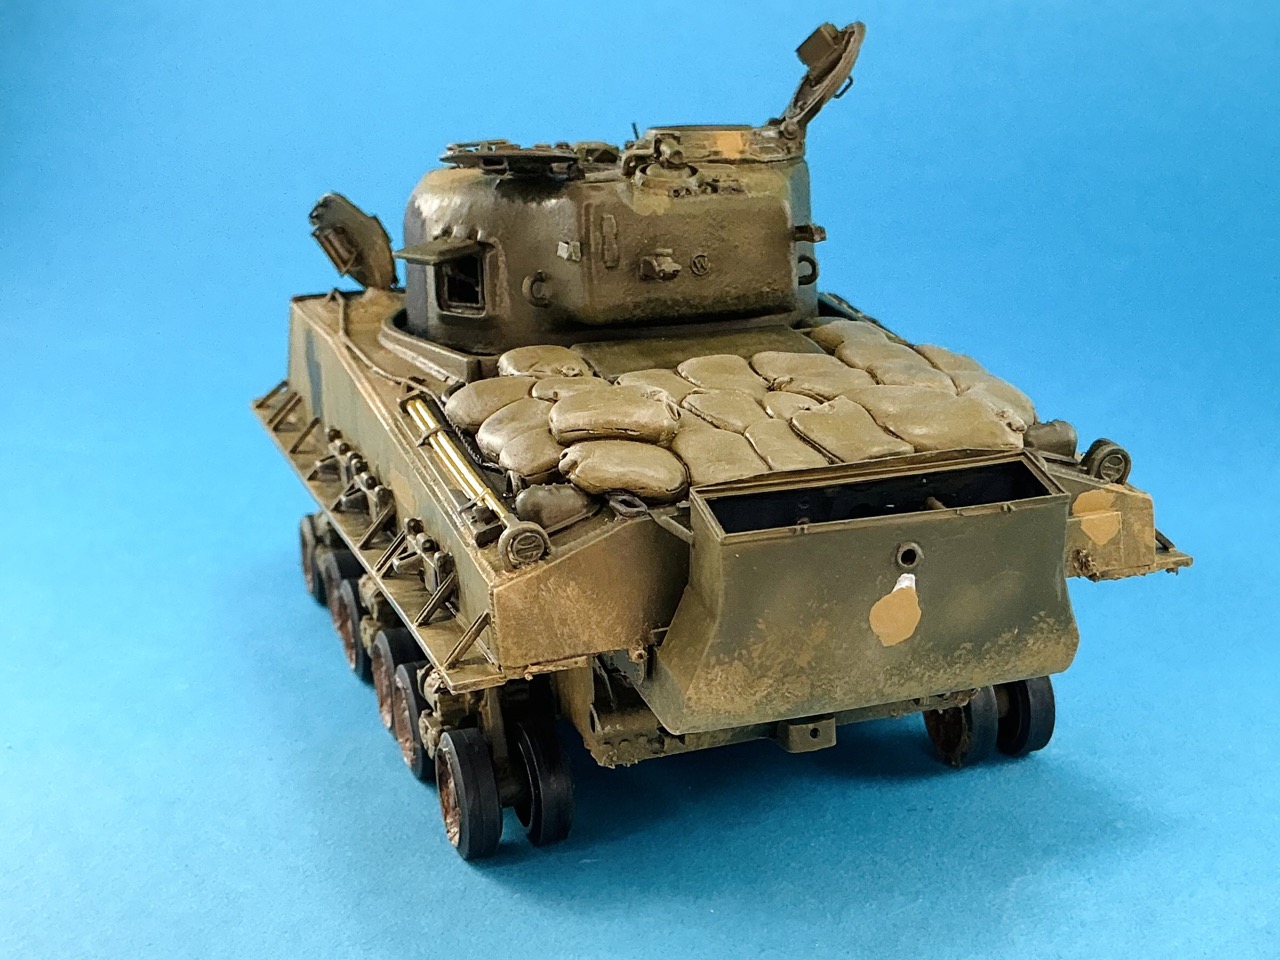
The final stretch. On the glacis plate, I added mirrors, I think from an Italeri Sherman (I’m sure about the Italeri bit, not about that they came from a Sherman) and also the barrel support:
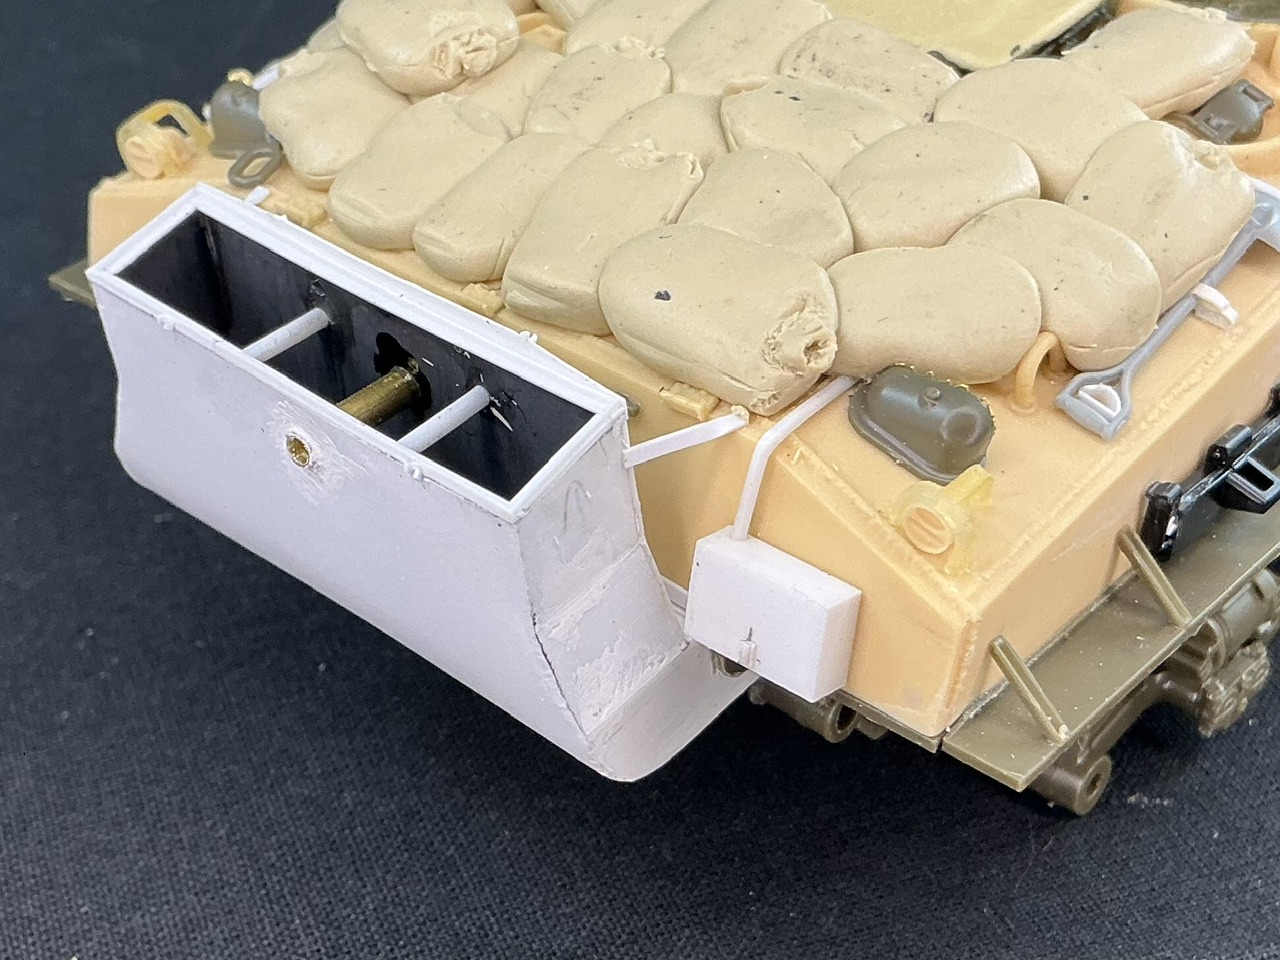
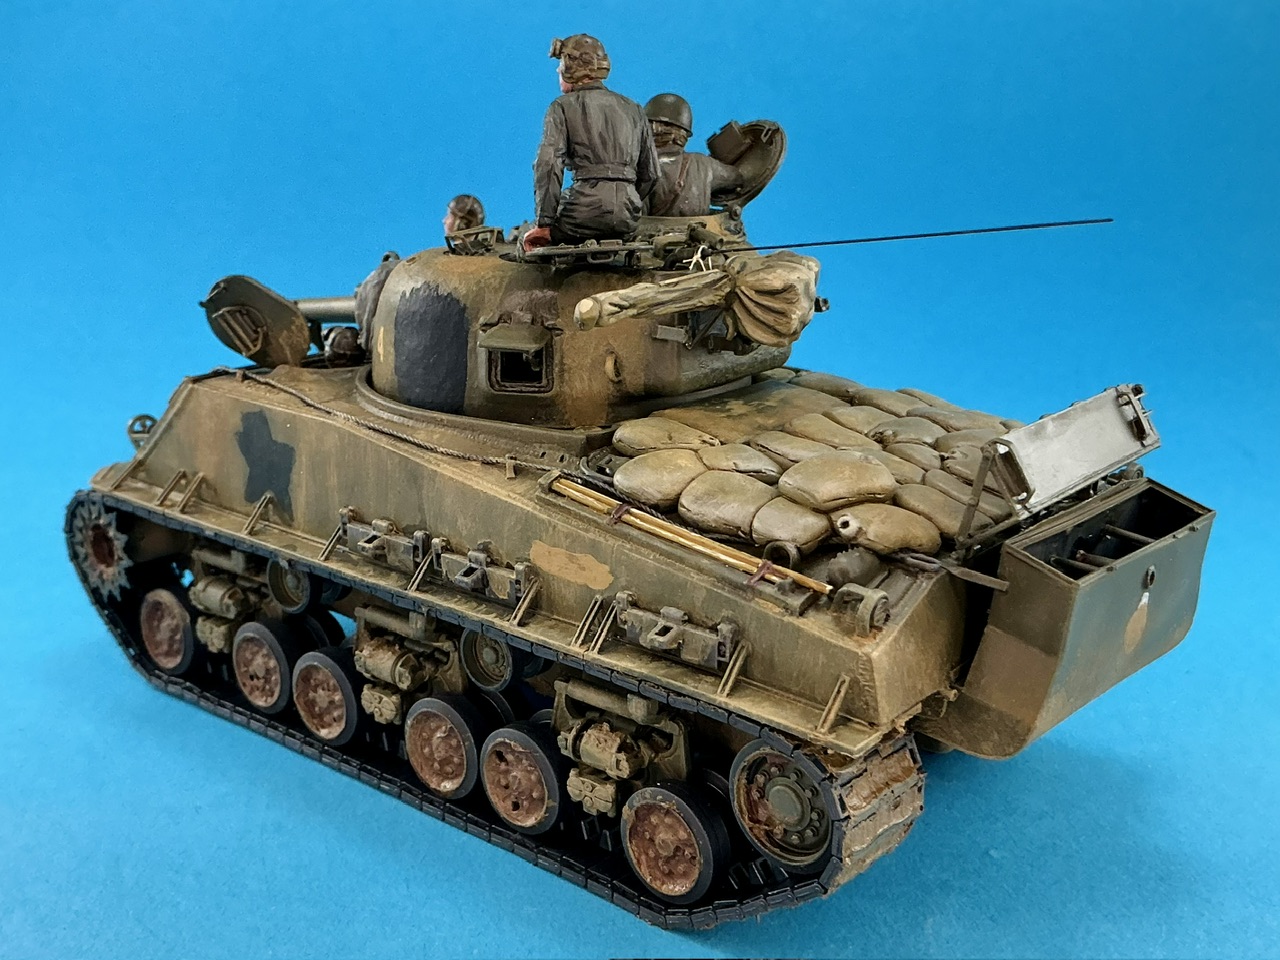
In the main photo I’ve been basing this model on, I noticed there was a box on the right rear plate, most likely for an infantry telephone, and from shadows etc. I could make a reasonable estimate of its size:
This one is made from rectangular plastic tube with plastic card ends and a bit of plastic rod to represent the tube for the lead to connect it to the tank’s intercom system. That tube is completely speculative, because you can’t see it in the photo at all due to being obscured by the wading trunk, but something like it must have been there.
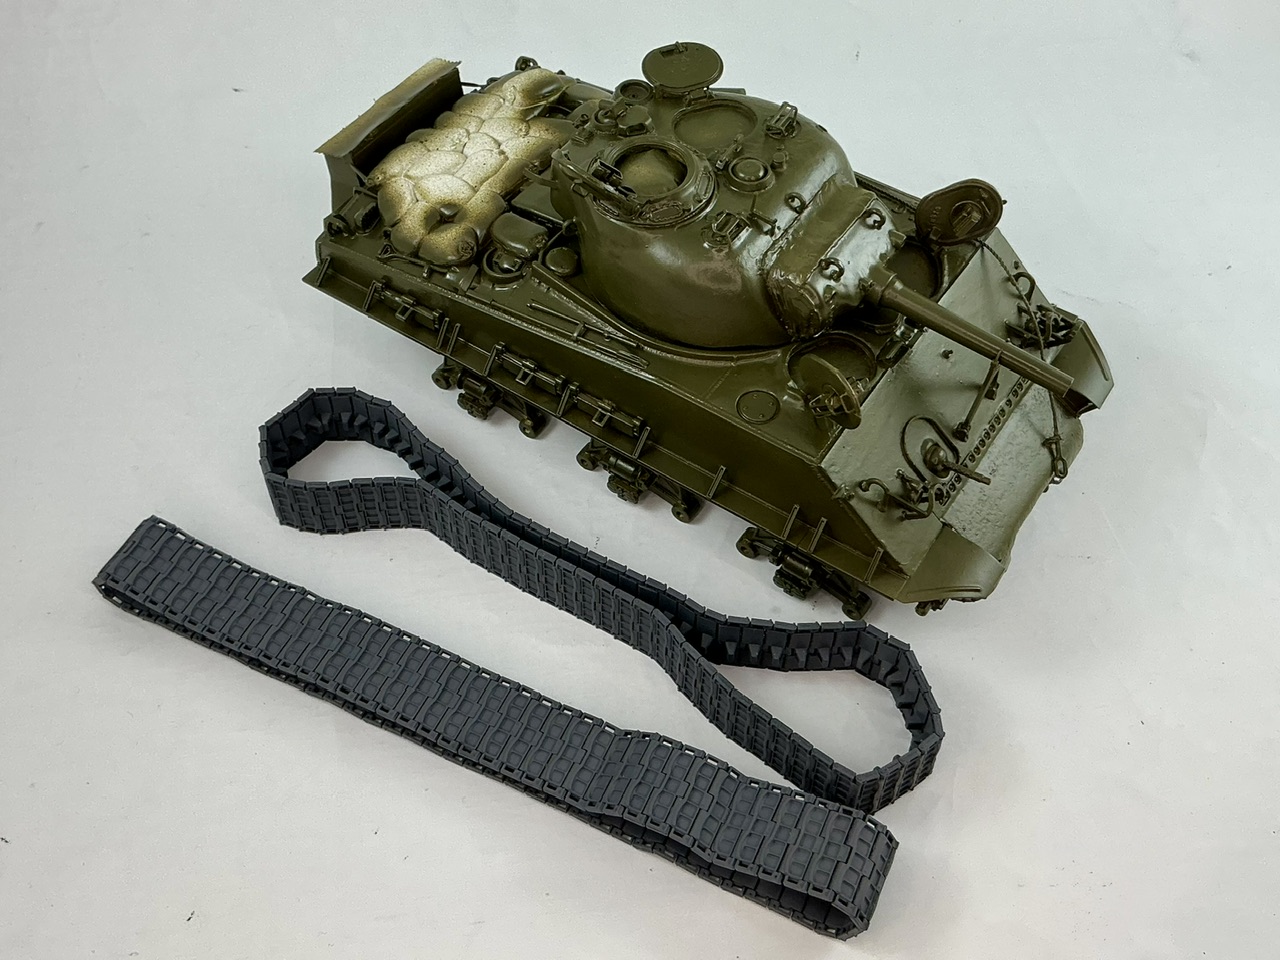
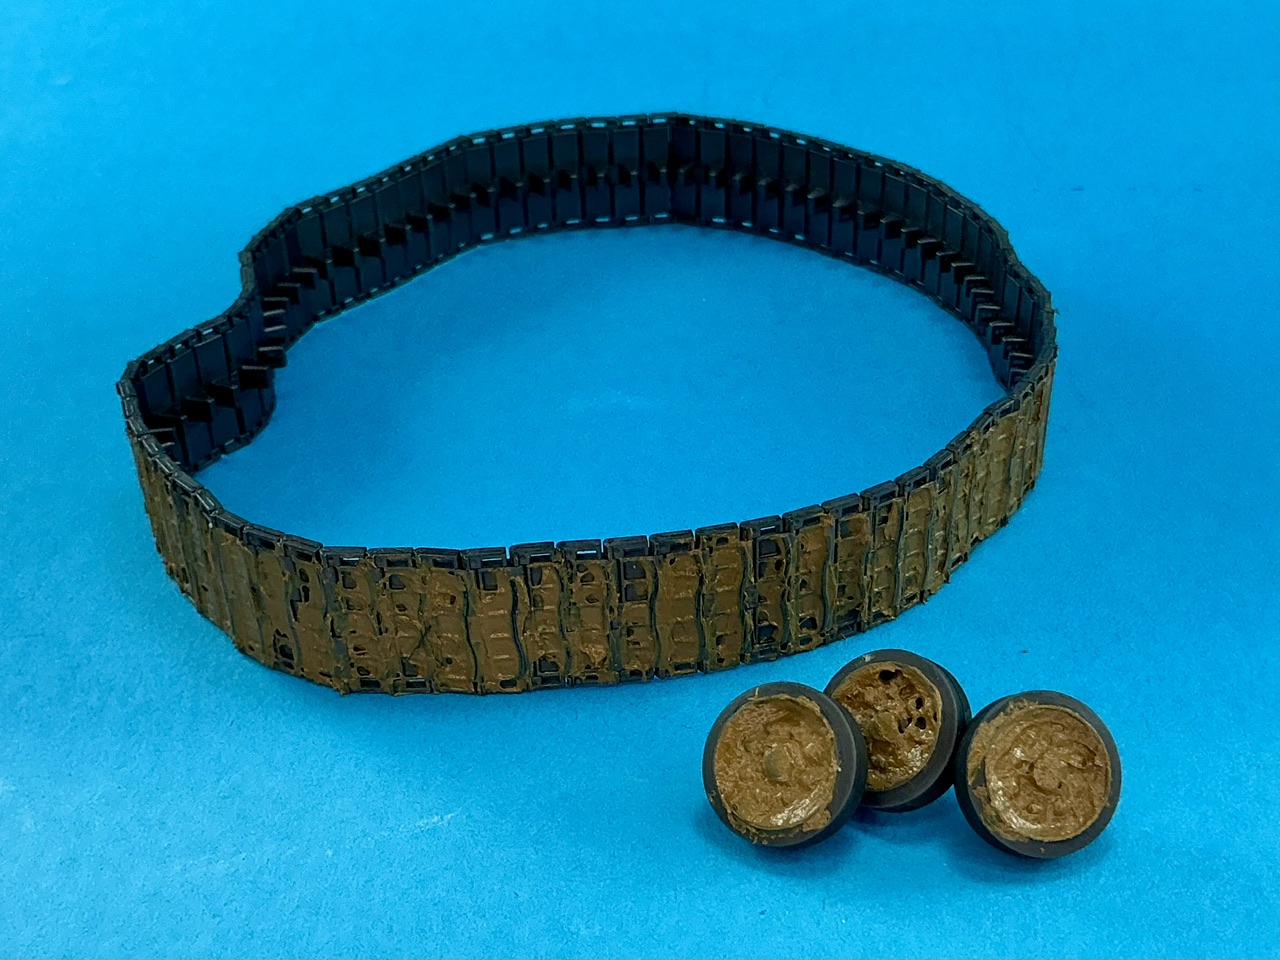
And I finished one track:
77 links, Asuka tells you you need in the instructions for one of the kits that includes these, and that seems to be correct. I did have to glue two roadwheels onto their axles and stick them onto the tank temporarily to work this out, though. Now I just need to make the other one, but the links go together well, so it shouldn’t take too much time and effort.
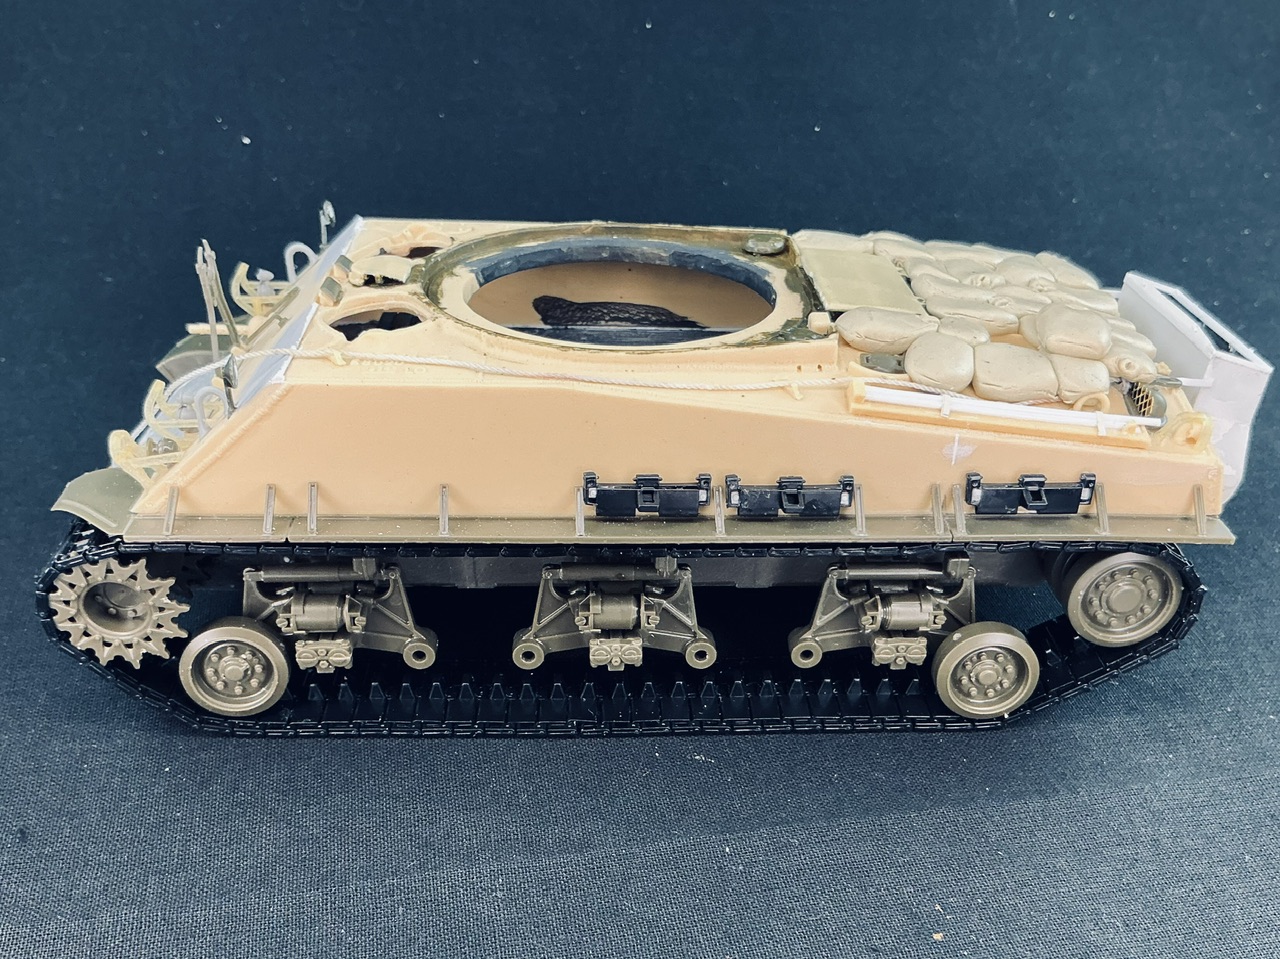
At long last, I’ve done some more work on this model. I put a coat of primer on it yesterday, once more cheap but cheerful stuff from an aerosol can from a discount store, but now white instead of grey. I must say I prefer the grey one, as it covers better. Then today, I sprayed H78 olive drab (2) by Mr. Aqueous over the whole tank:
I had already sprayed the tracks grey some time ago.
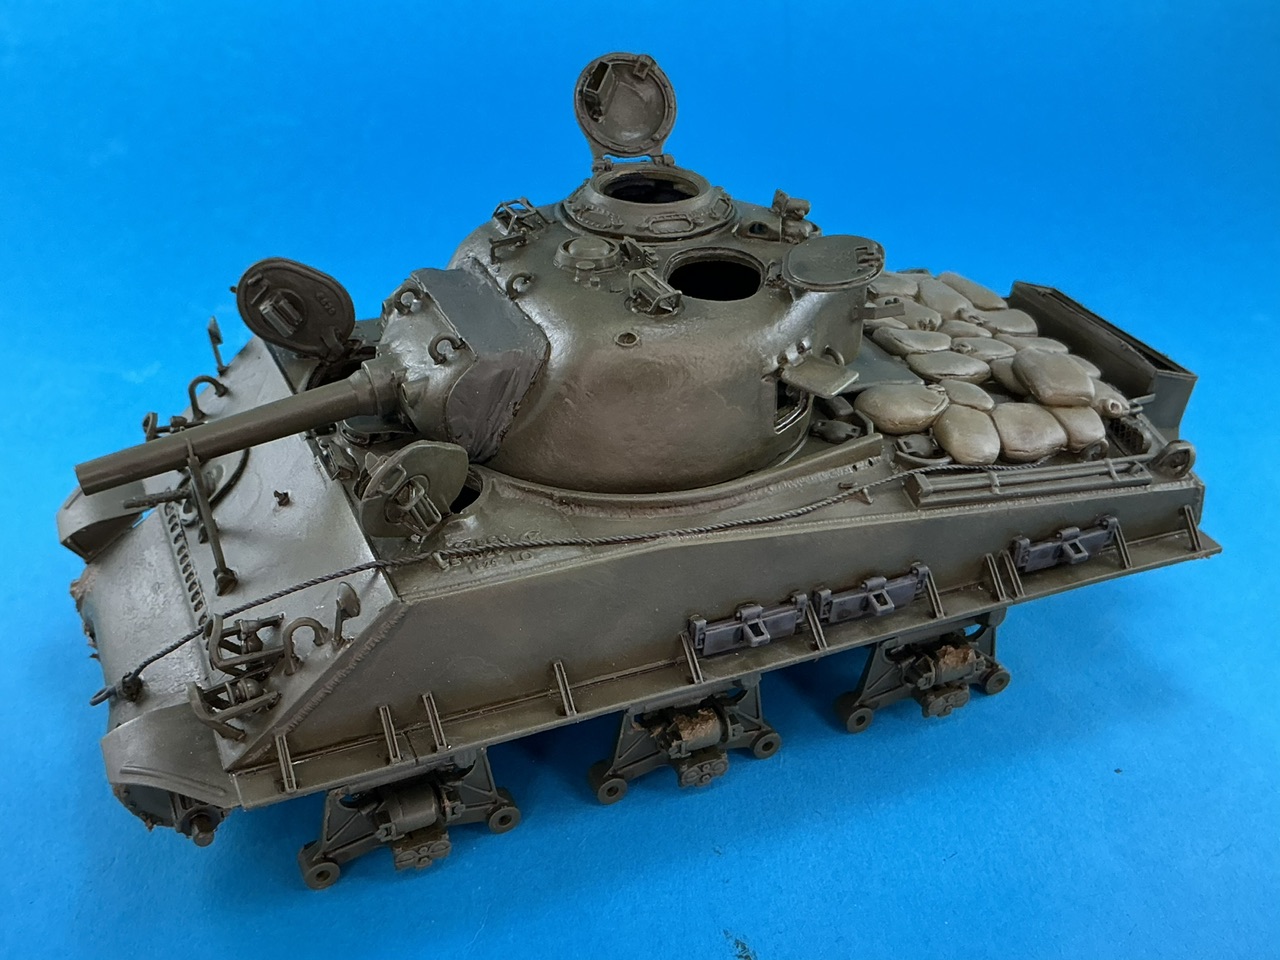
This model has been very much on the back burner, but now the K2 Black Panther is nearing completion, I also continued with this one. After the last photo, I had given the model a wash and drybrush for the usual shadowing and highlighting, and then painted the sandbags and spare track links, and things then languished for a long time.
I had been unhappy with the highlights for a while — they were the wrong shade (Revell 45 Light Olive) and too pale, which meant the tank’s colour no longer looked like olive drab. The other day, I re-drybrushed the model with Humbrol 159 Khaki Drab, which makes the tank look brown-green again instead of grey-green.
Then today, I treated the wheels and tracks to some peanut butter:
Or, well, it certainly gives that impression ![]() It’s actually acrylic gel medium mixed with Revell 82 Dark Earth — some research last year into the soil colours on Okinawa has given me the impression that this is a reasonably good match for that, straight from the bottle. But once you’ve mixed it and start smearing it onto your model, it’s just like peanut butter (other than the smell).
It’s actually acrylic gel medium mixed with Revell 82 Dark Earth — some research last year into the soil colours on Okinawa has given me the impression that this is a reasonably good match for that, straight from the bottle. But once you’ve mixed it and start smearing it onto your model, it’s just like peanut butter (other than the smell).
Jakko, I love it. Are you going t try and do the slathered on mud camo? I did something similar about 5 years ago. I used the dragon M4 105 and a leftover lower hull and suspension from an M-51 (not recommended) with scratch wading trunk as well. Now if I could just figure out how to attach photos…
Jeff
Very nice job Jakko
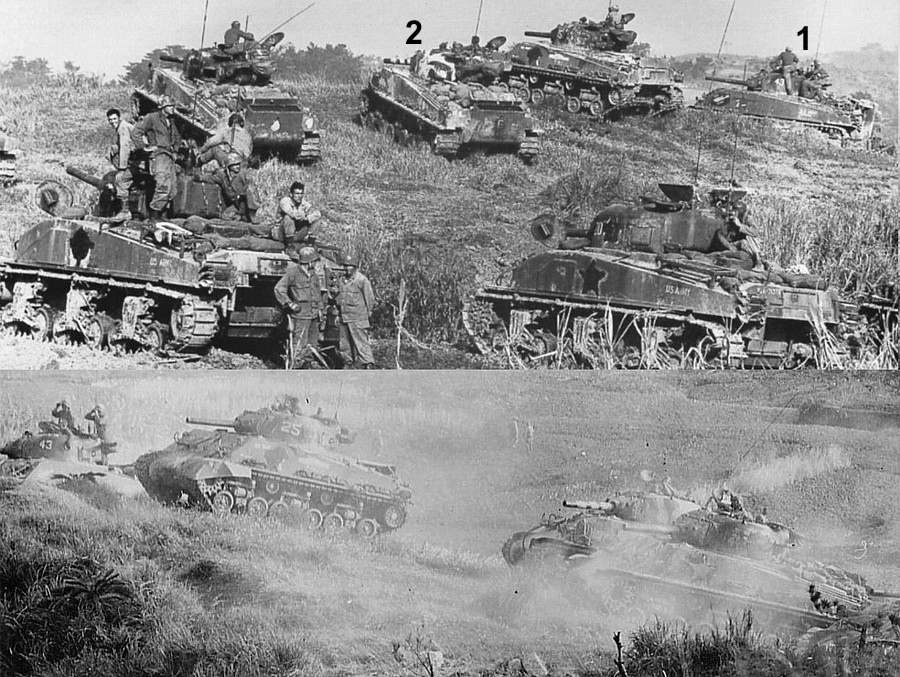
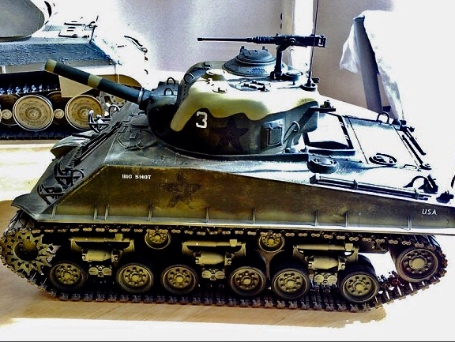
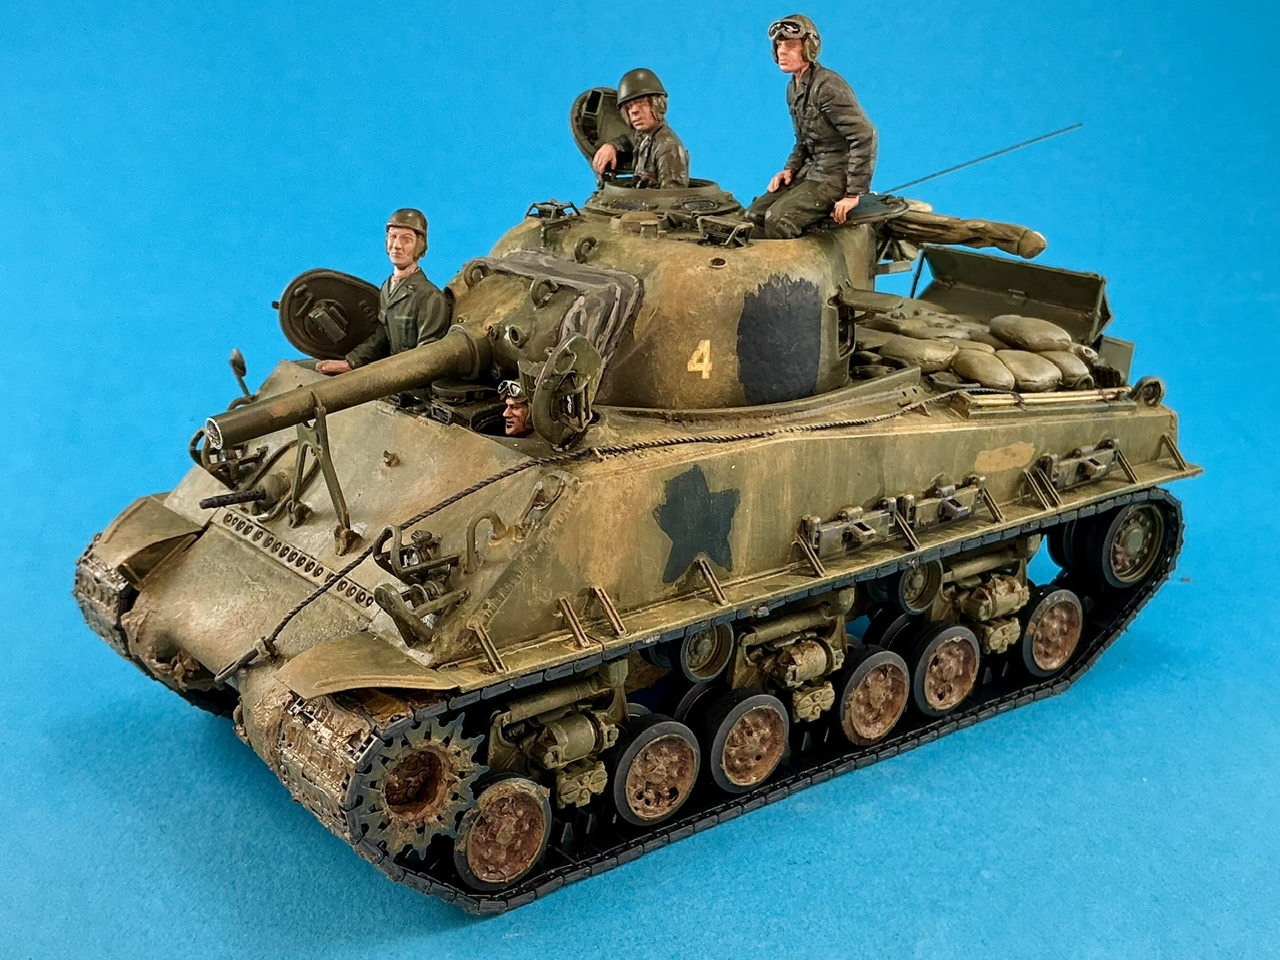
No ![]() I’m building the second 105 mm tank from left in the top one of these photos:
I’m building the second 105 mm tank from left in the top one of these photos:
So not the one marked with a 2, but the one to the left of that. It’s also the first tank from the right (not counting the one partially visible) in the lower picture.
This one doesn’t appear have the deliberate mud camouflage of the one marked 2, but it does have a good amount of mud over the hull. One thing that’s puzzling me is that the hull star looks like it’s been painted out with black in the upper photo, but with mud in the lower one …
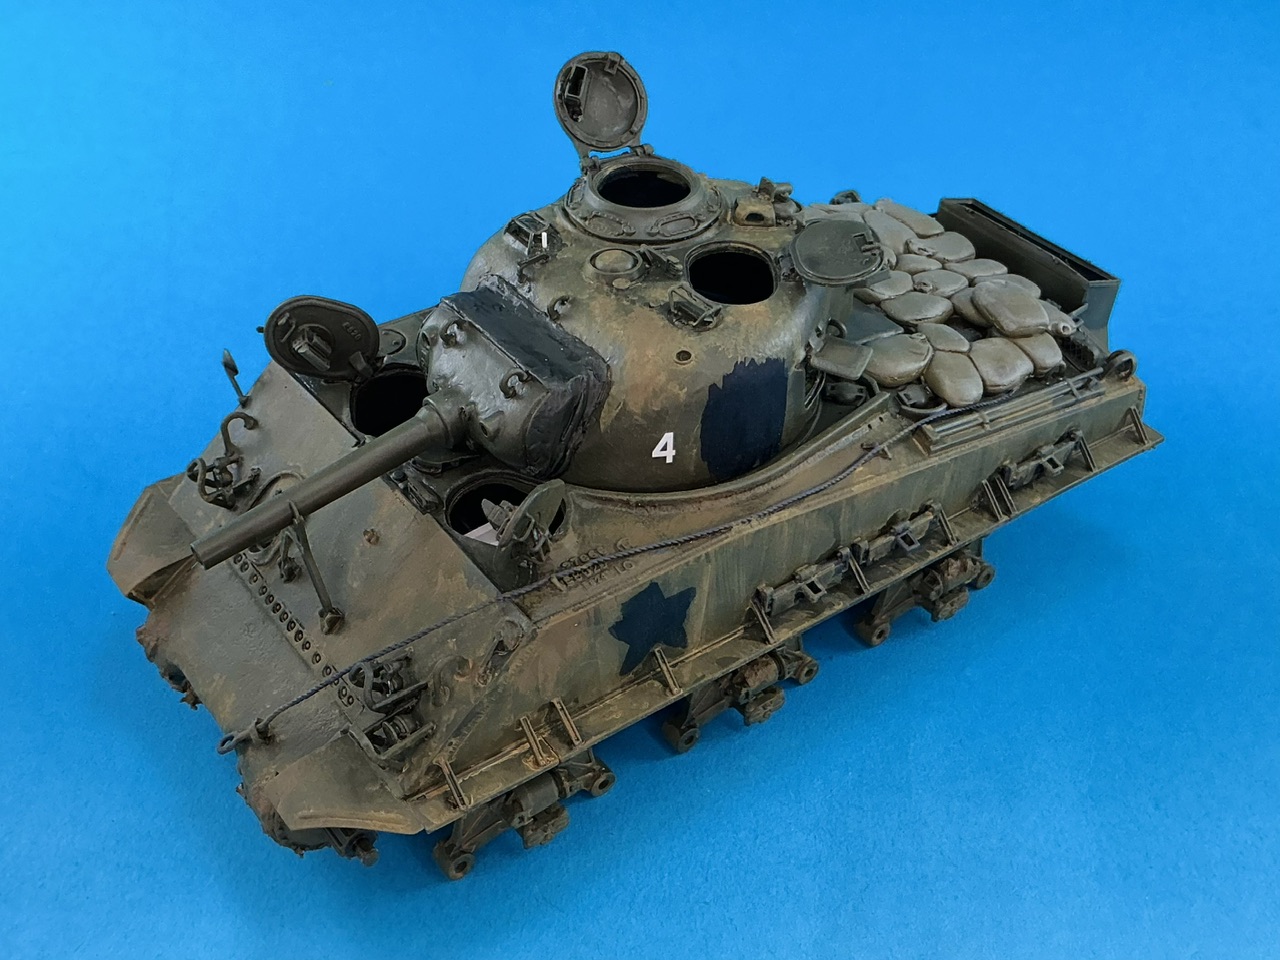
More mud over the whole tank. I first applied Revell Dark Earth with a big brush (something like 7–8 mm diameter, but with the bristles cut at an angle), mainly in the places where you can see mud on the real tank in the photos:
I also added black blotches where the stars should be, and found a suitable number 4 in my box of spare markings. Once all that had dried, I added a wash of the same Dark Earth:
We’re not there yet by a long shot, the mud looks fairly pale in colour on the real tank, so this needs lighter colours added. I’m not sure how yet, but as always when dirtying up a model, it’s something I’ll work out as I go along ![]()
This process is always a trial and error thing for me, looks like for you too. Thankfully, the real things usually get dirtied up the same way, layers on layers. I’m making the Magach dirty right now and it’s starting to get close, but same as you it’s a process.
I like your start so far, keep at it.
I often look at the model and wonder how on earth I should go on. Then I put it away, come back later, and either repeat or just do something that then generally turns out OK ![]() I maintain that when dirtying up a model, you can’t really go wrong, because of how dirty AFVs get in real life.
I maintain that when dirtying up a model, you can’t really go wrong, because of how dirty AFVs get in real life.
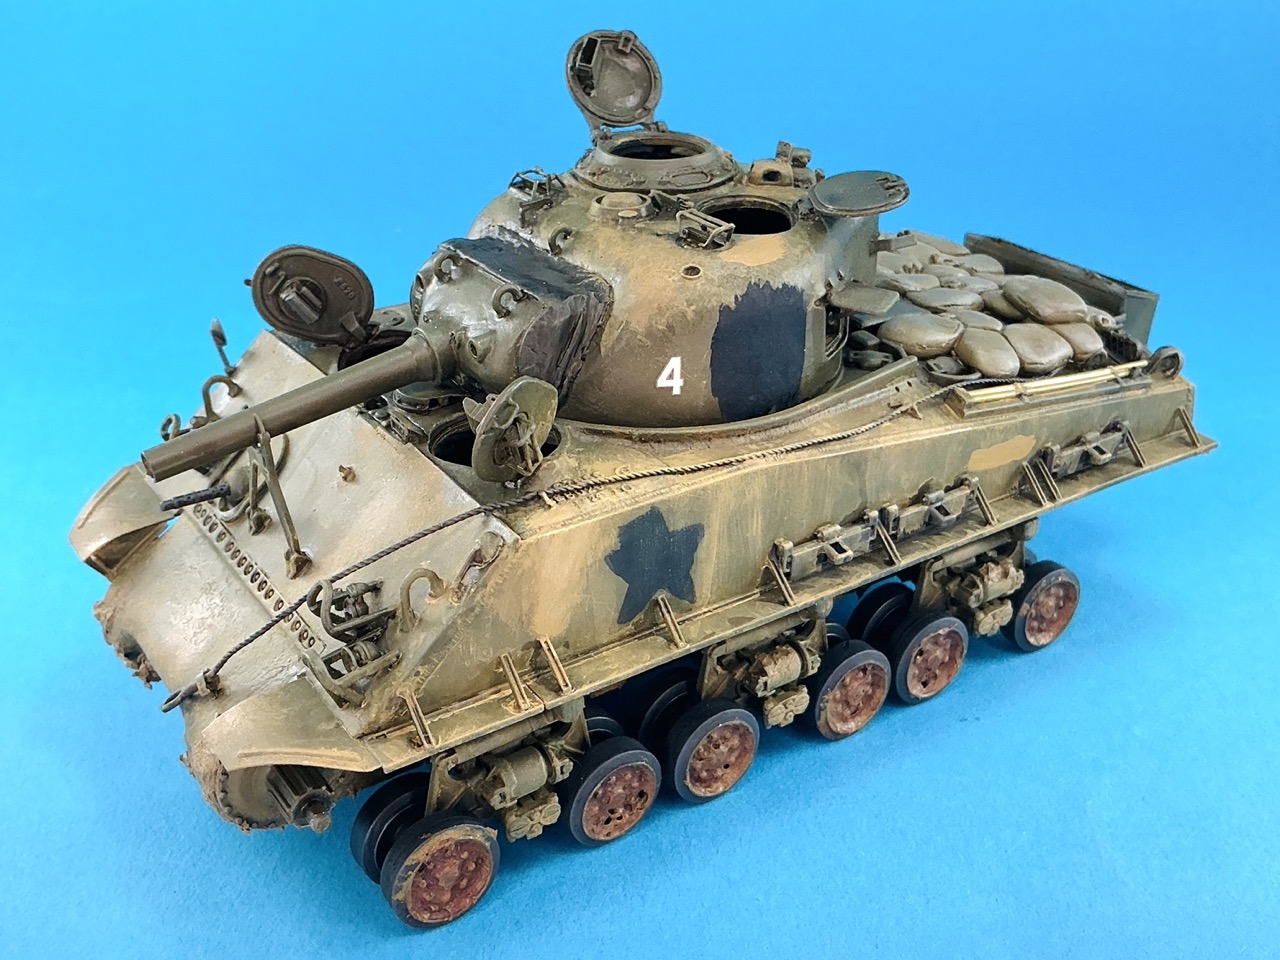
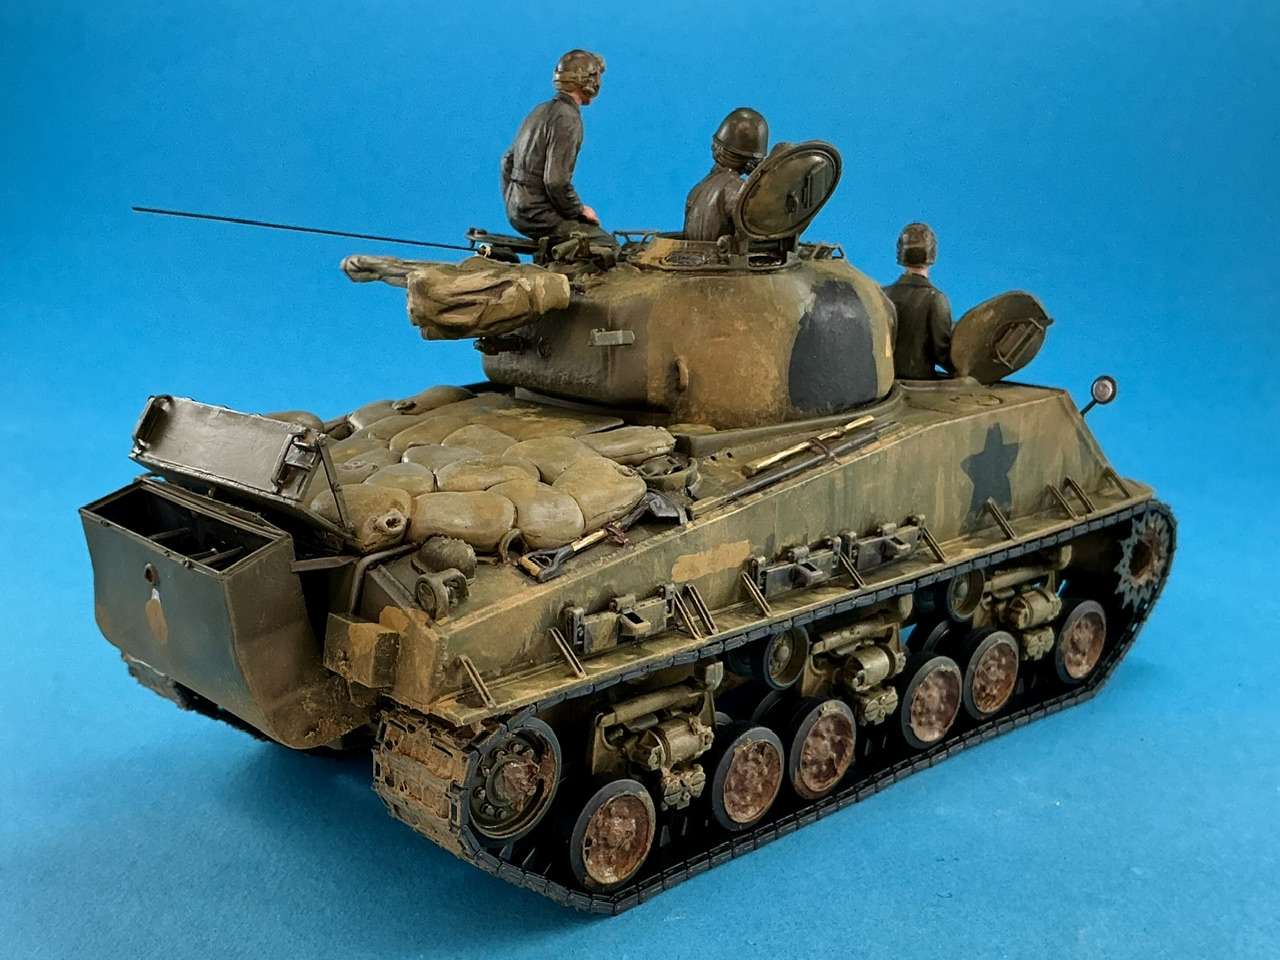
I enhanced the mud stains with two lighter shades of yellow-brown: first AK 3d Gen RAL 8000 Gelbbraun (yes, Afrikakorps sand colour) and then Italeri Giallo Mimetico 3 (an Italian aircraft colour) which noticeably lightened the mud and makes the model look much dirtier. I also installed the roadwheels, after giving them a wash with Army Painter Oak Brown, which is a dark red-brown. This because the mud inside the wheels in the photos of the real tanks seems much darker than that on the rest of the tank. I also used the RAL 8000 to paint blotches on the rear and stripes on the sides where it looks like mud was put over markings.
Same basic tank, yep ![]() I remember a big diorama with it in an old Tamiya Catalog. But looking at your photo, some of the shapes on that model seem seriously off …
I remember a big diorama with it in an old Tamiya Catalog. But looking at your photo, some of the shapes on that model seem seriously off …
The kit is from the 70s and back then they didn’t
Really make accurate models, I made that in the
80s it’s had a couple of paint jobs in its time.
The tanks in the photo are Army tanks from the
Armoured Division
In which photo? The ones I posted of the real tanks I’m using as a reference? The 105 mm tanks in that are (probably) of 711th Tank Battalion, US Army, the flamethrower tanks at the front are from 713th Tank Battalion.
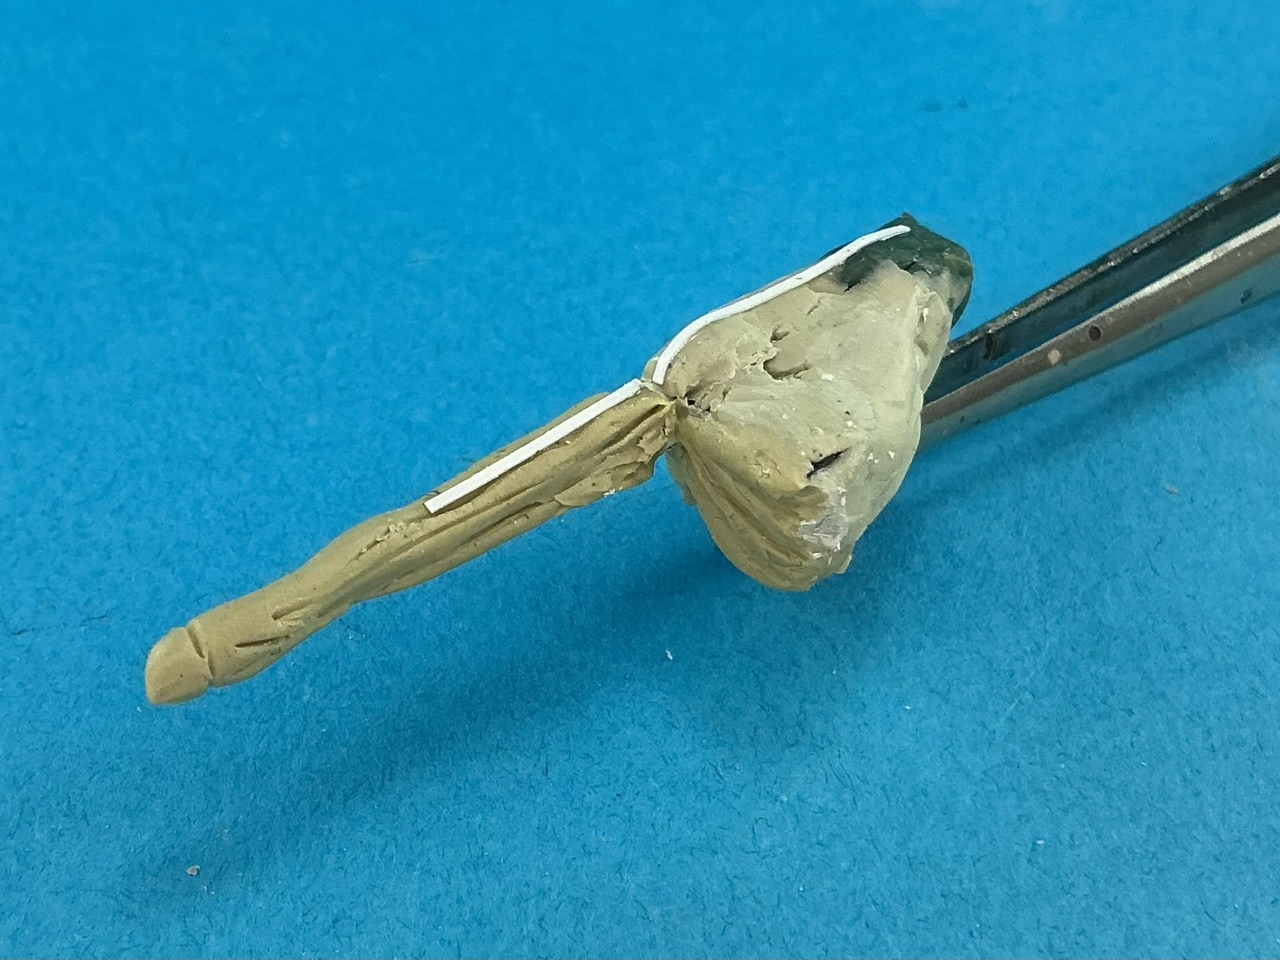
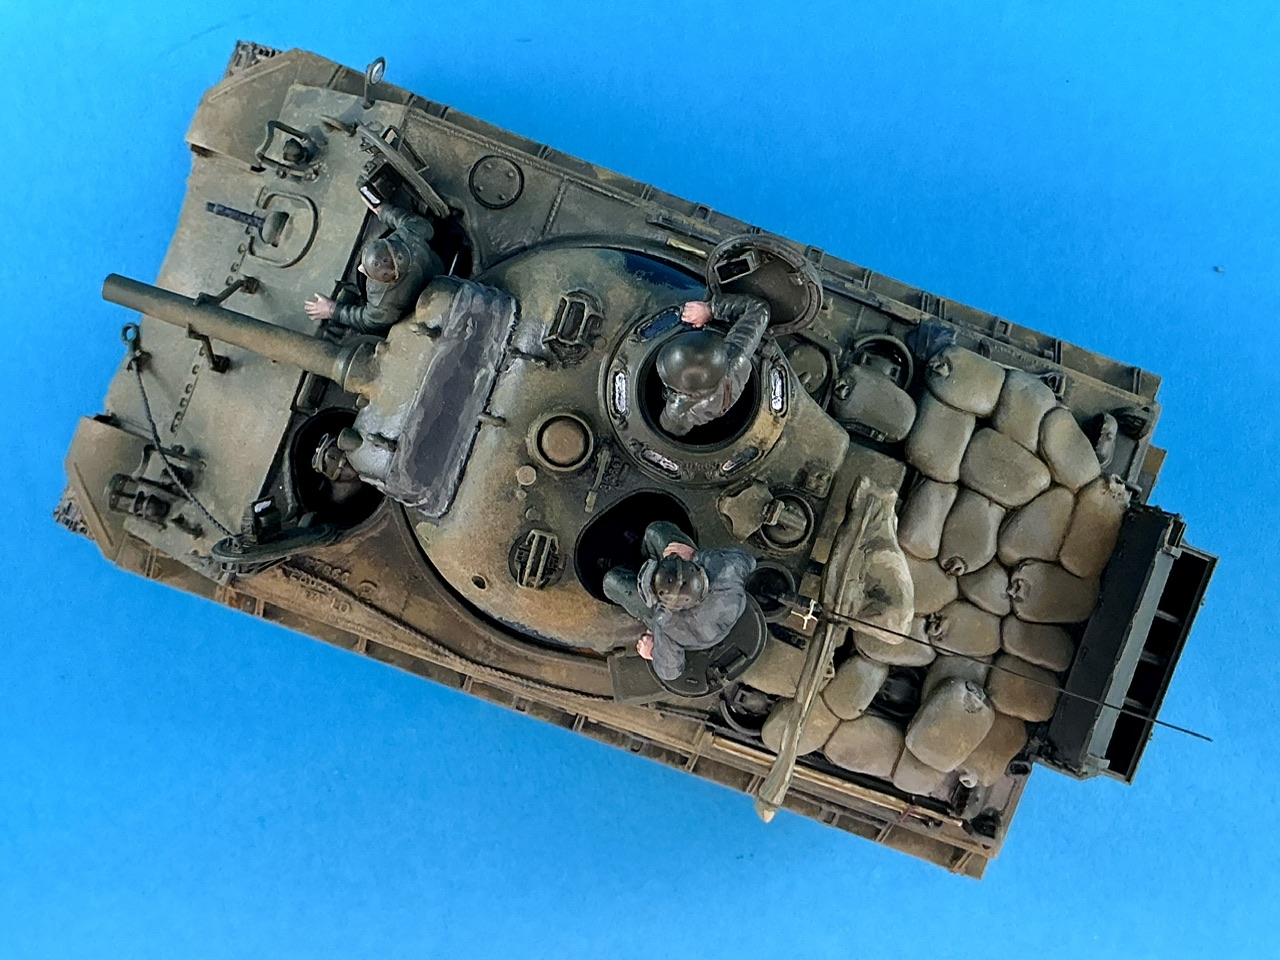
Almost done, only one real job left, which I’ve been putting off for a year or so:
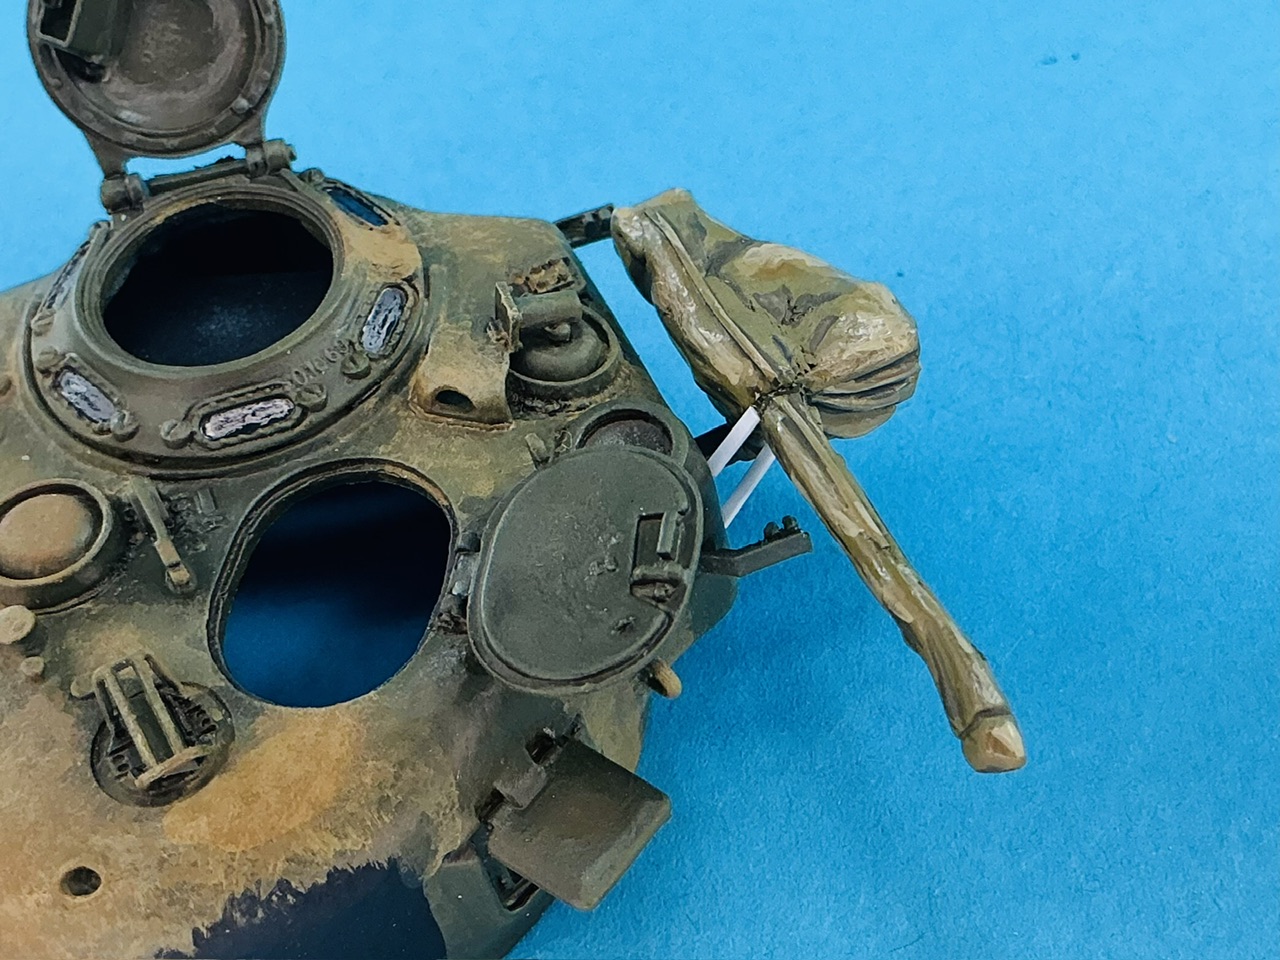
Making the cover over the machine gun. Sometime last year I made a first attempt with Green Stuff, but that didn’t work out at all. I don’t get why people are so enthusiastic about that green chewing gum, as it didn’t work well for me at all — I find it very hard to sculpt with. I had made the part that goes over the barrel and put the bit I had left over on the spade grips, but later cut the bit over the barrel off again because it looked like crap. Using Magic Sculp now, it went much better — still not exactly world-class, but certainly better than the first attempt. The day before yesterday, I put the sleeve around the barrel, yesterday did the rest of the gun, and then added a bit of plastic strip on top to represent the zip that closes the cover.
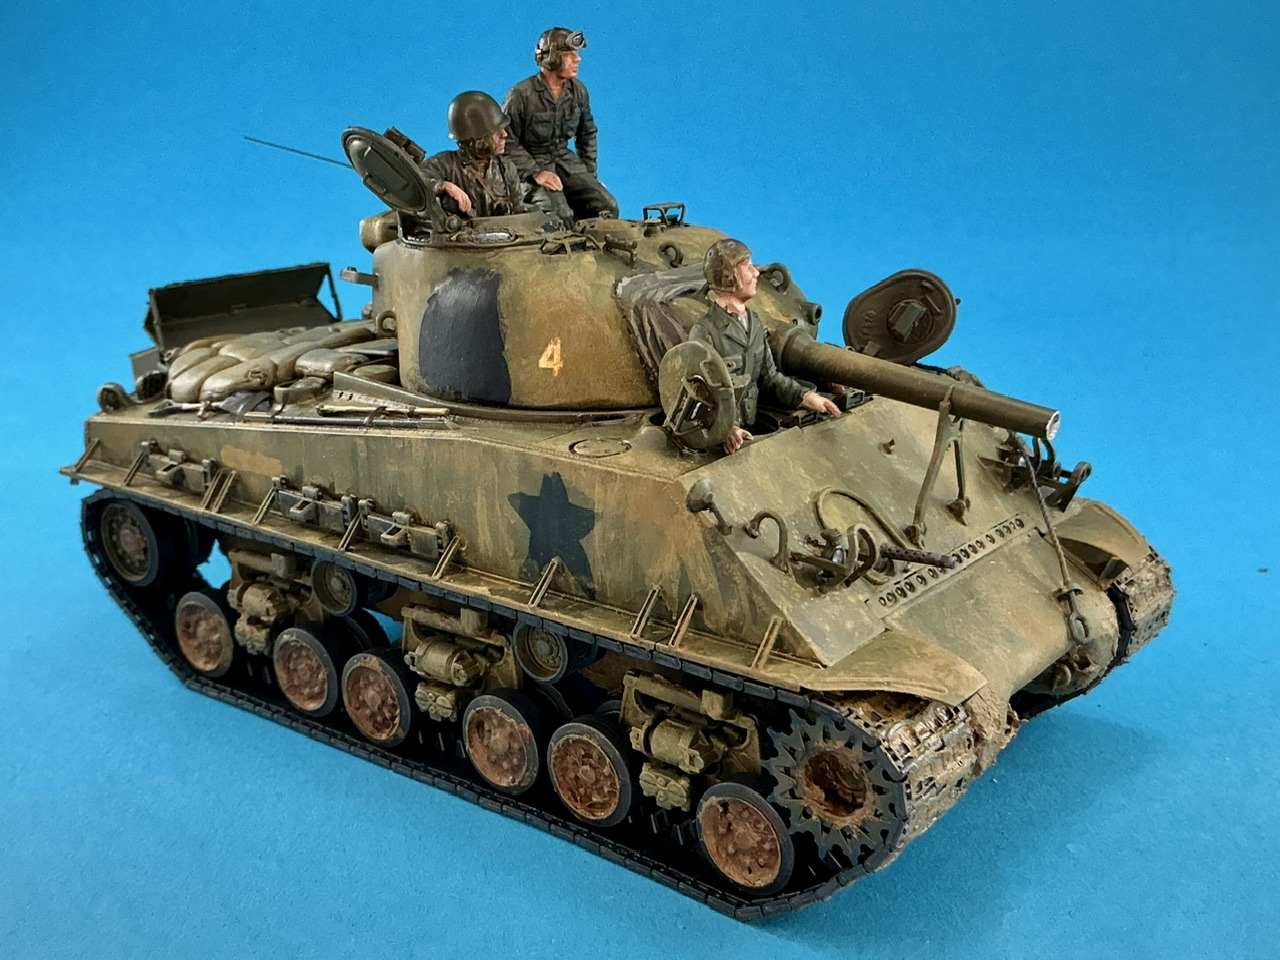
Today, I painted it and stuck it to the model:
The two bits of white strip are the (still unpainted) supports for the ring that goes around the gun’s cooling mantle.
In the mean time, I was also painting the crew, but I didn’t take any pictures of that.
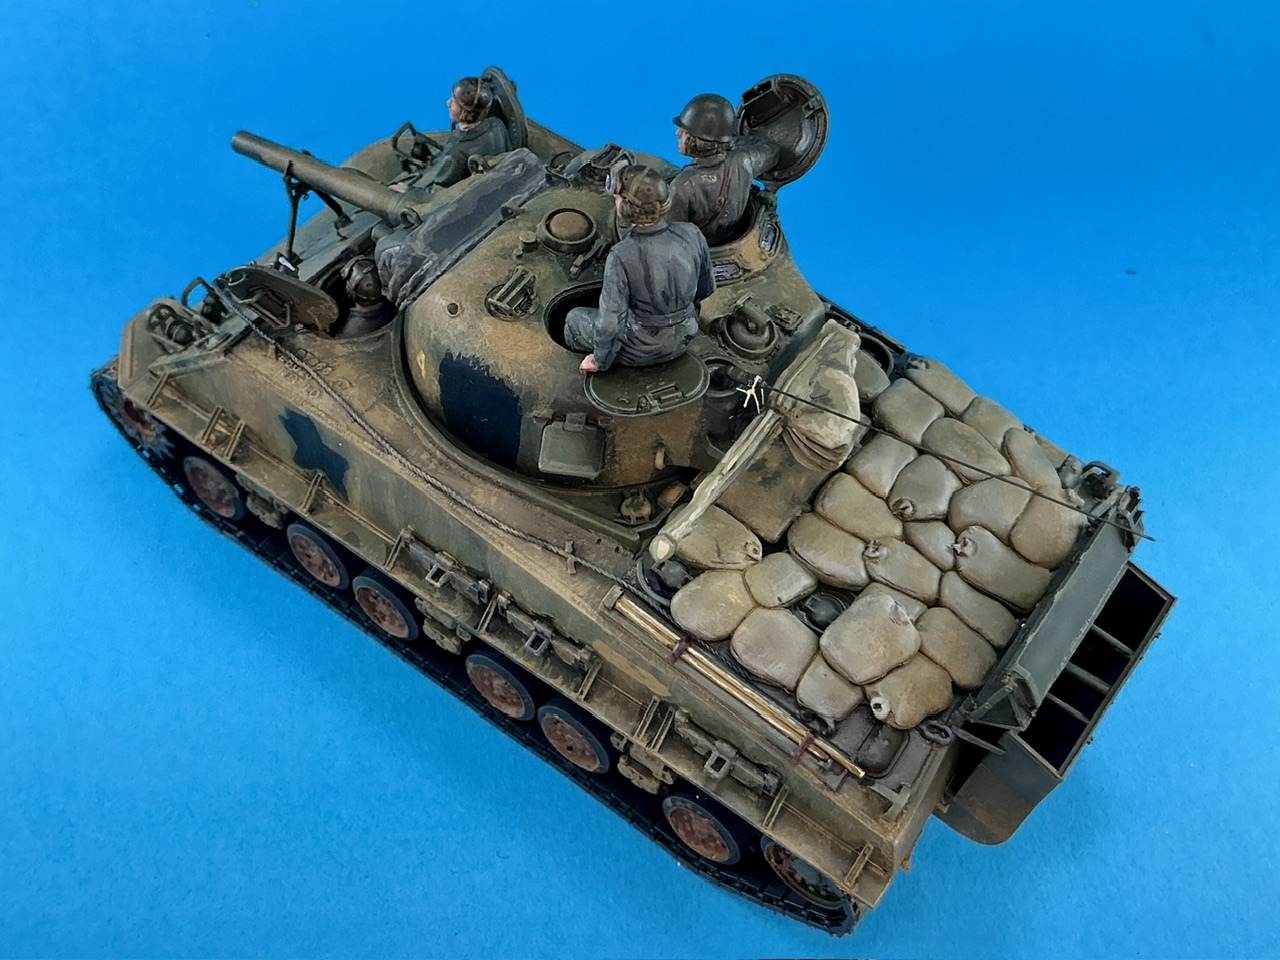
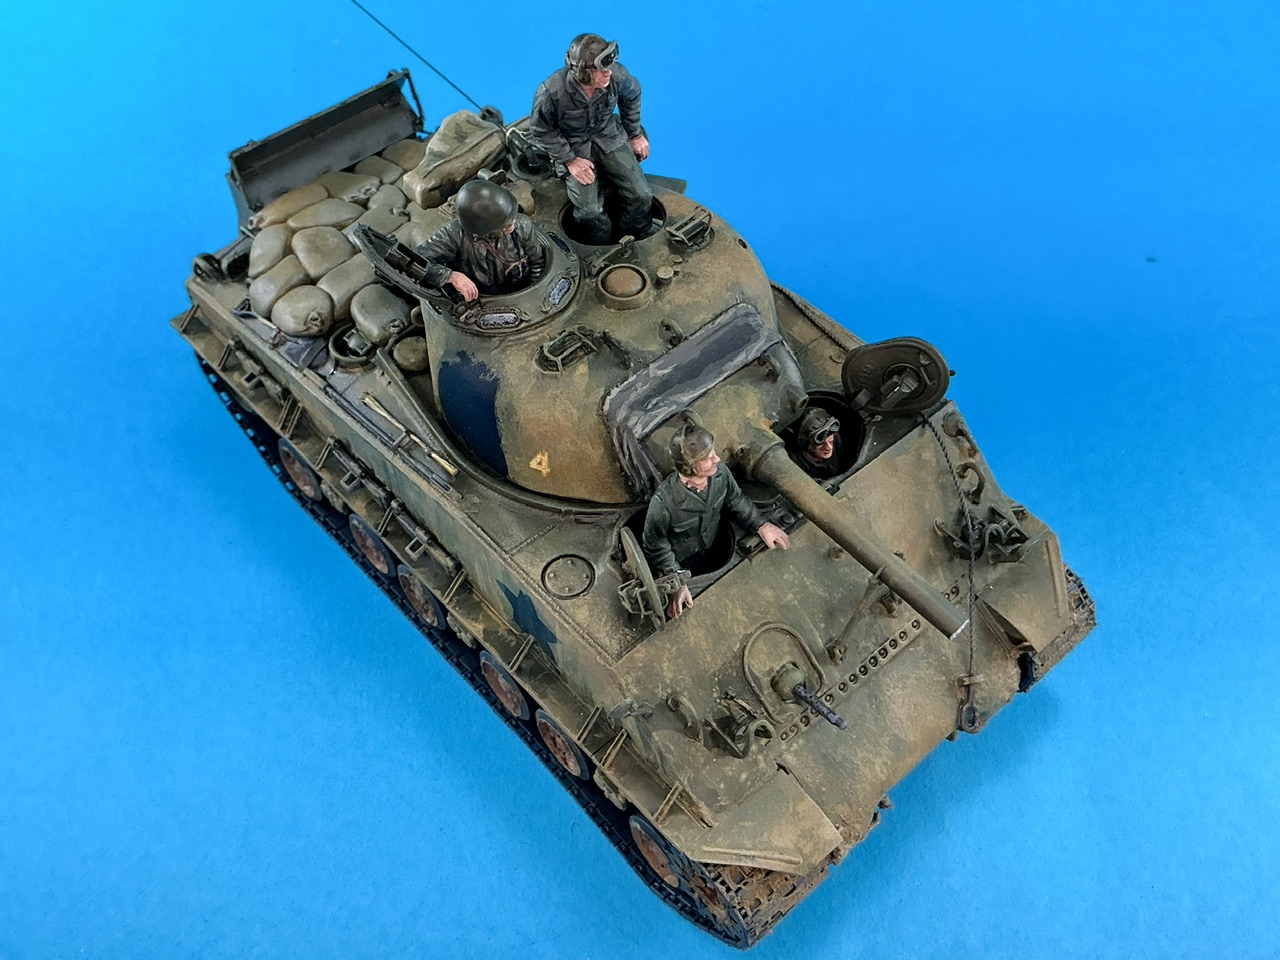
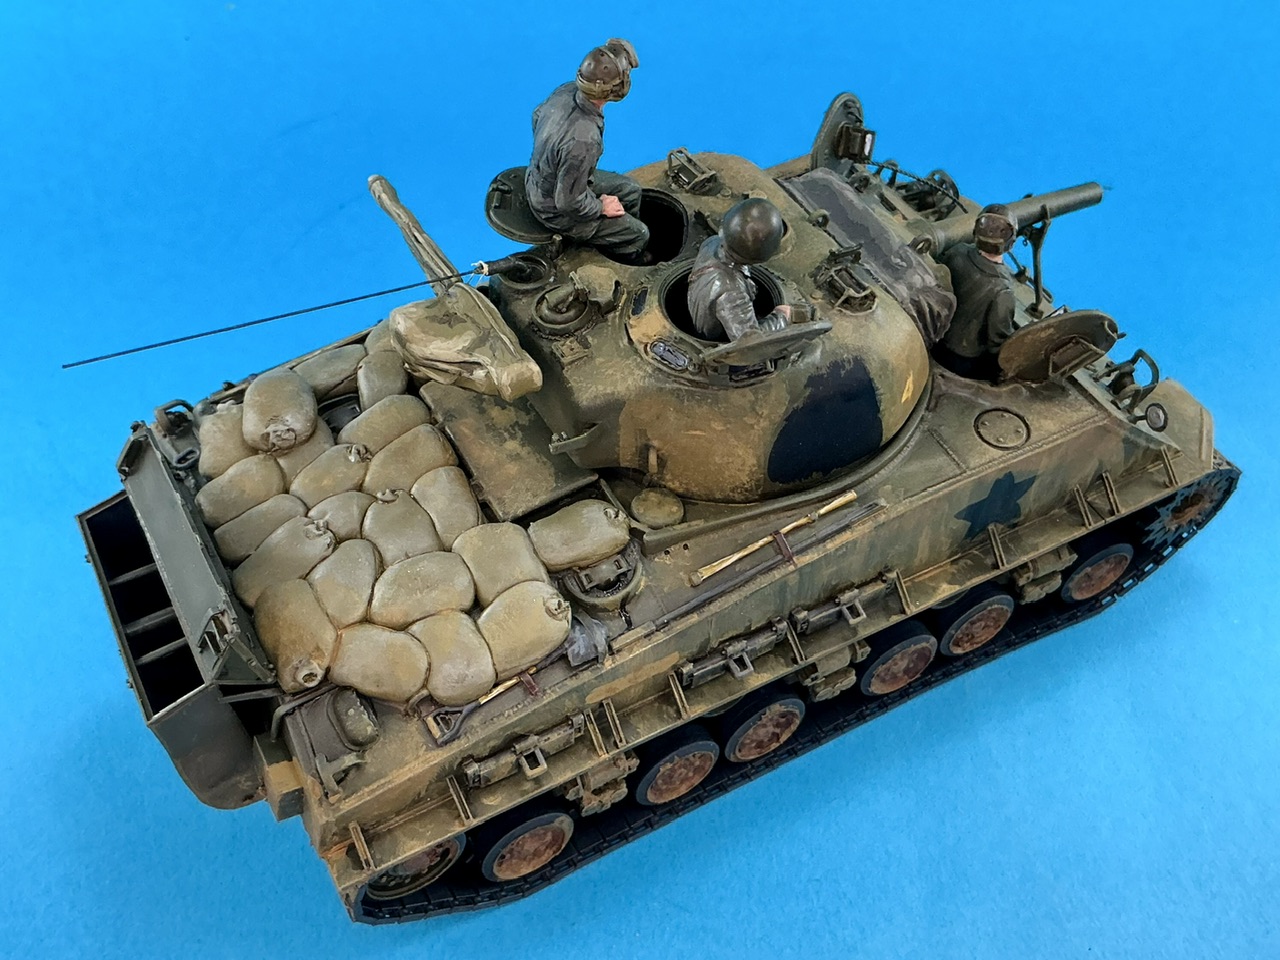
Then all that remained as to bring everything together!
Just in time for the big model show in Goes, the Netherlands, this weekend — if anyone reading this happens to be going there, drop by the TWENOT stand to see this model (and many others) in the flesh ![]()
Wow Jakko, fantastic. Excellent build and paint.