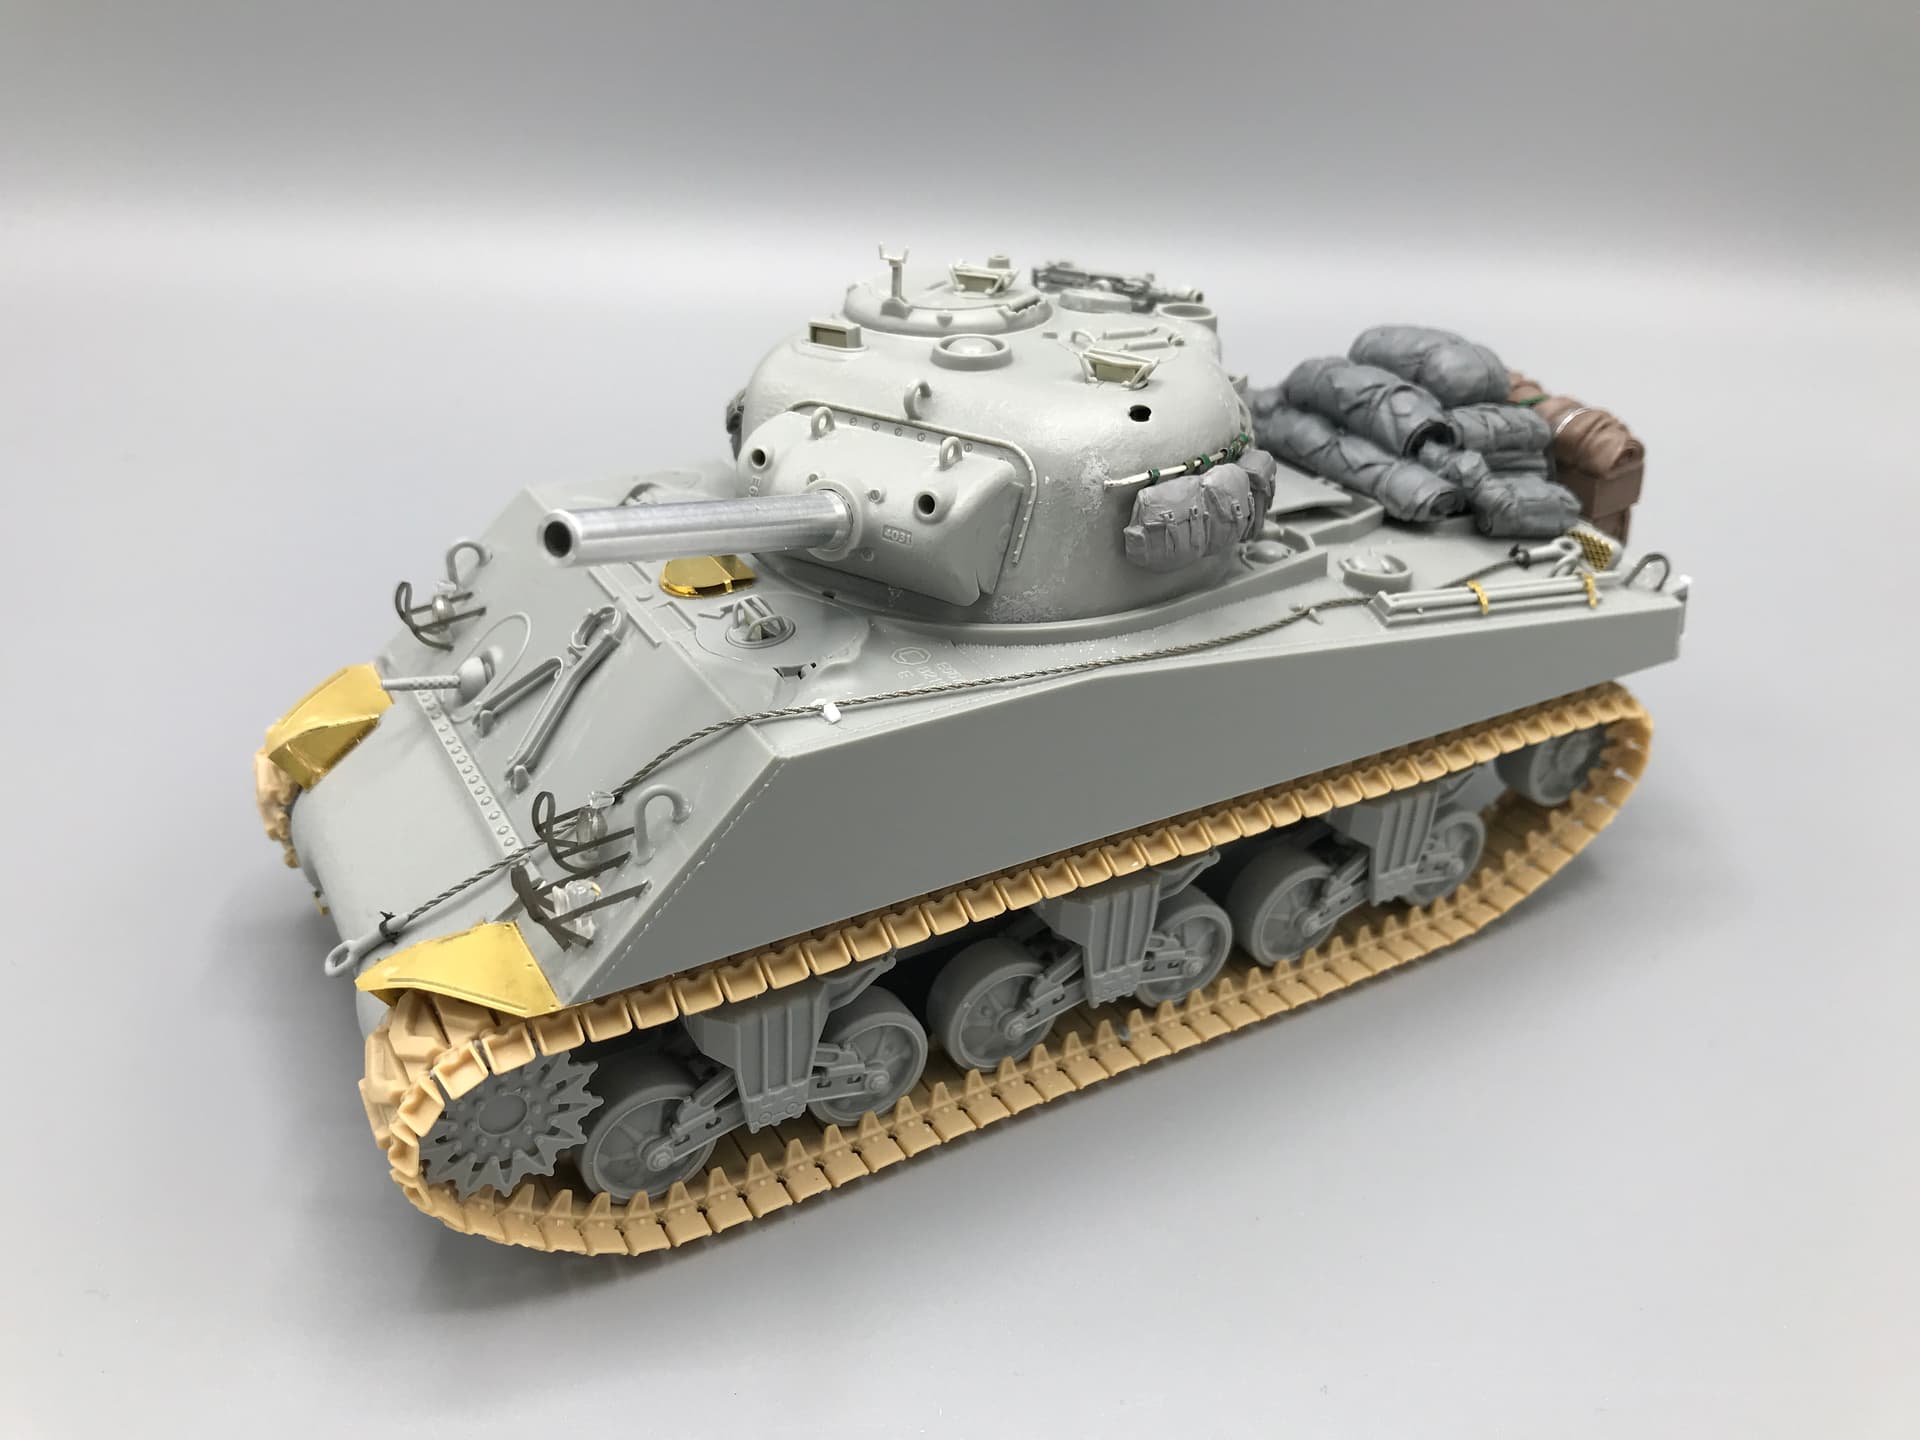
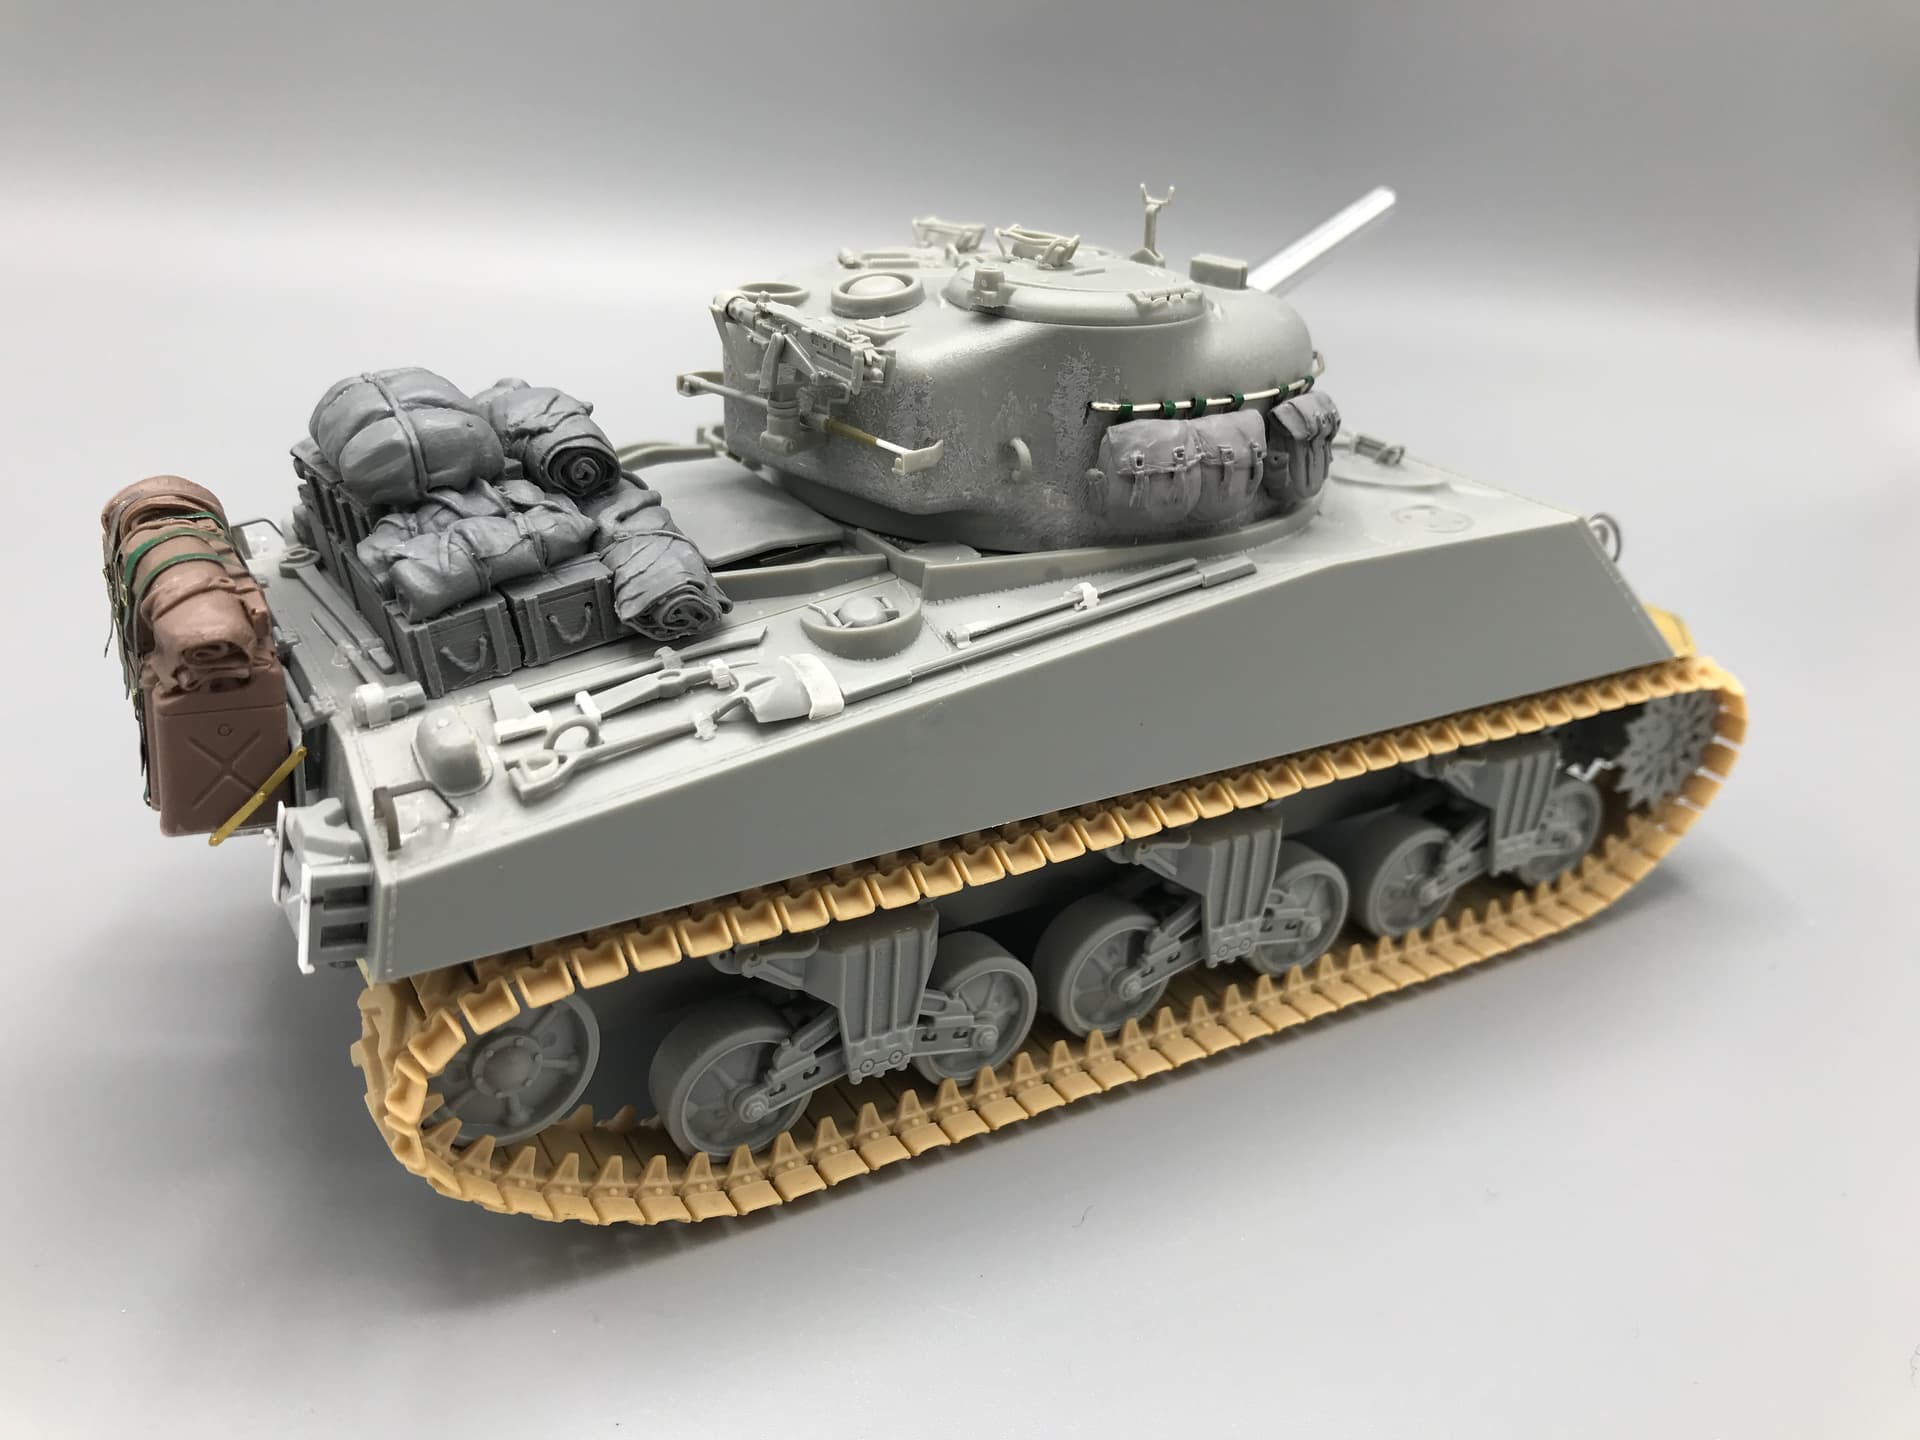
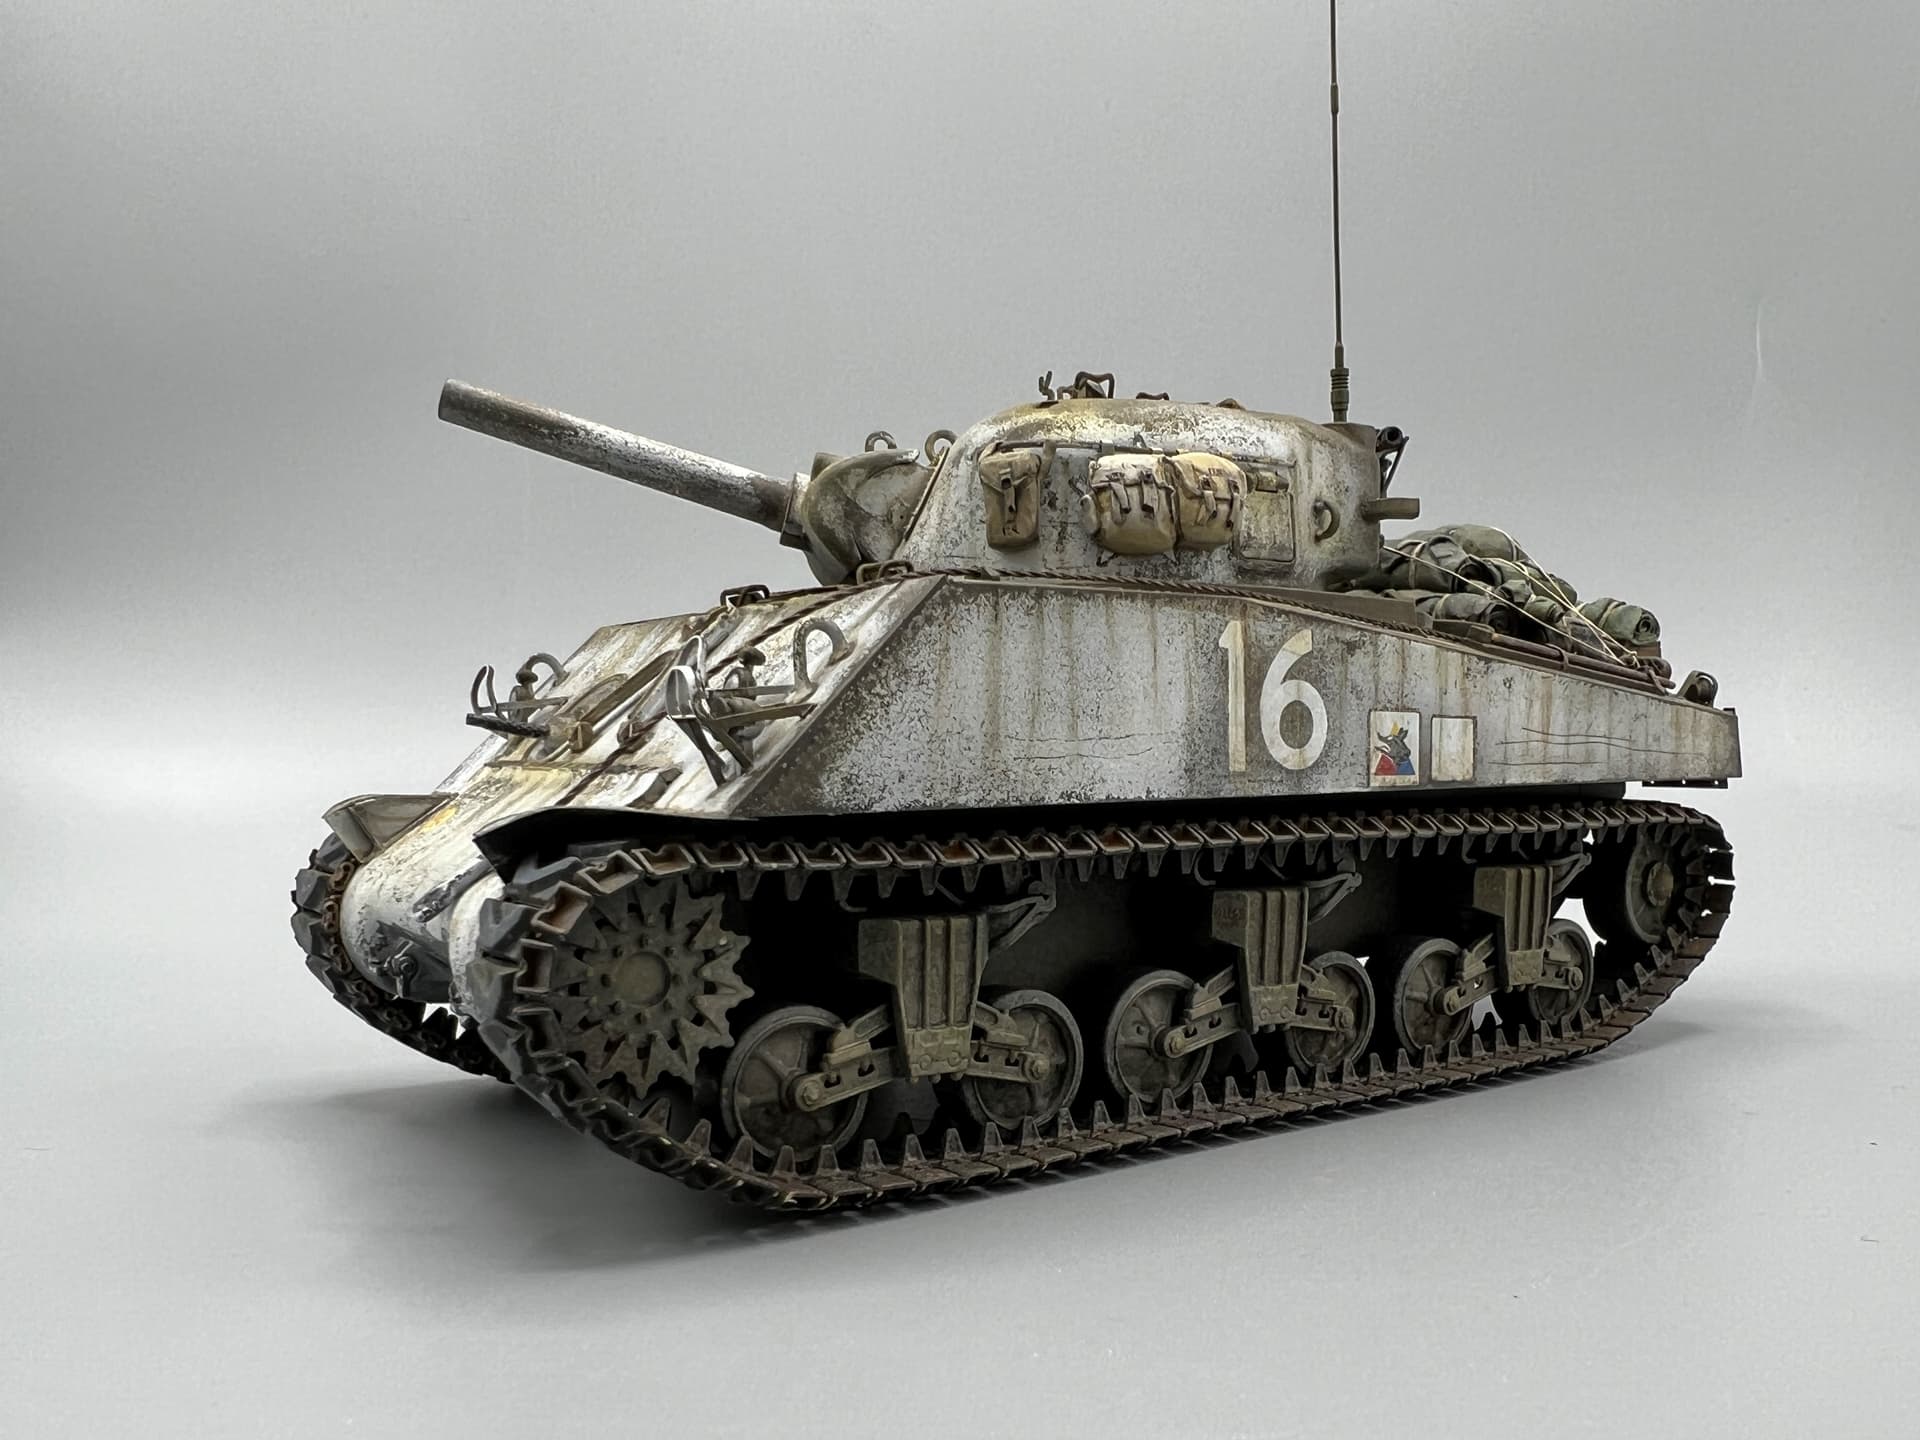
In WW2, US Armored Battalions were equipped with six howitzers for direct support of the battalion. As the war progressed, these evolved from 75mm pack howitzers mounted in halftracks (T30 75mm HMC) to 105mm howitzers in halftracks (T19 105mm HMC) to M7 Priests to the M4 (105). The M4 (105) greatly reduced the maintenance burden by virtue of its shared automotives with the other Shermans in the battalion. The downside of it being a Sherman in a tank battalion, is that folks wanted to use it as a tank instead of its intended role as indirect fire support. There are a couple of excellent photos of M4 (105)s from the 15th Tank Battalion of the 6th Armored Division during the Battle of the Bulge. I decided to model one of those vehicles.
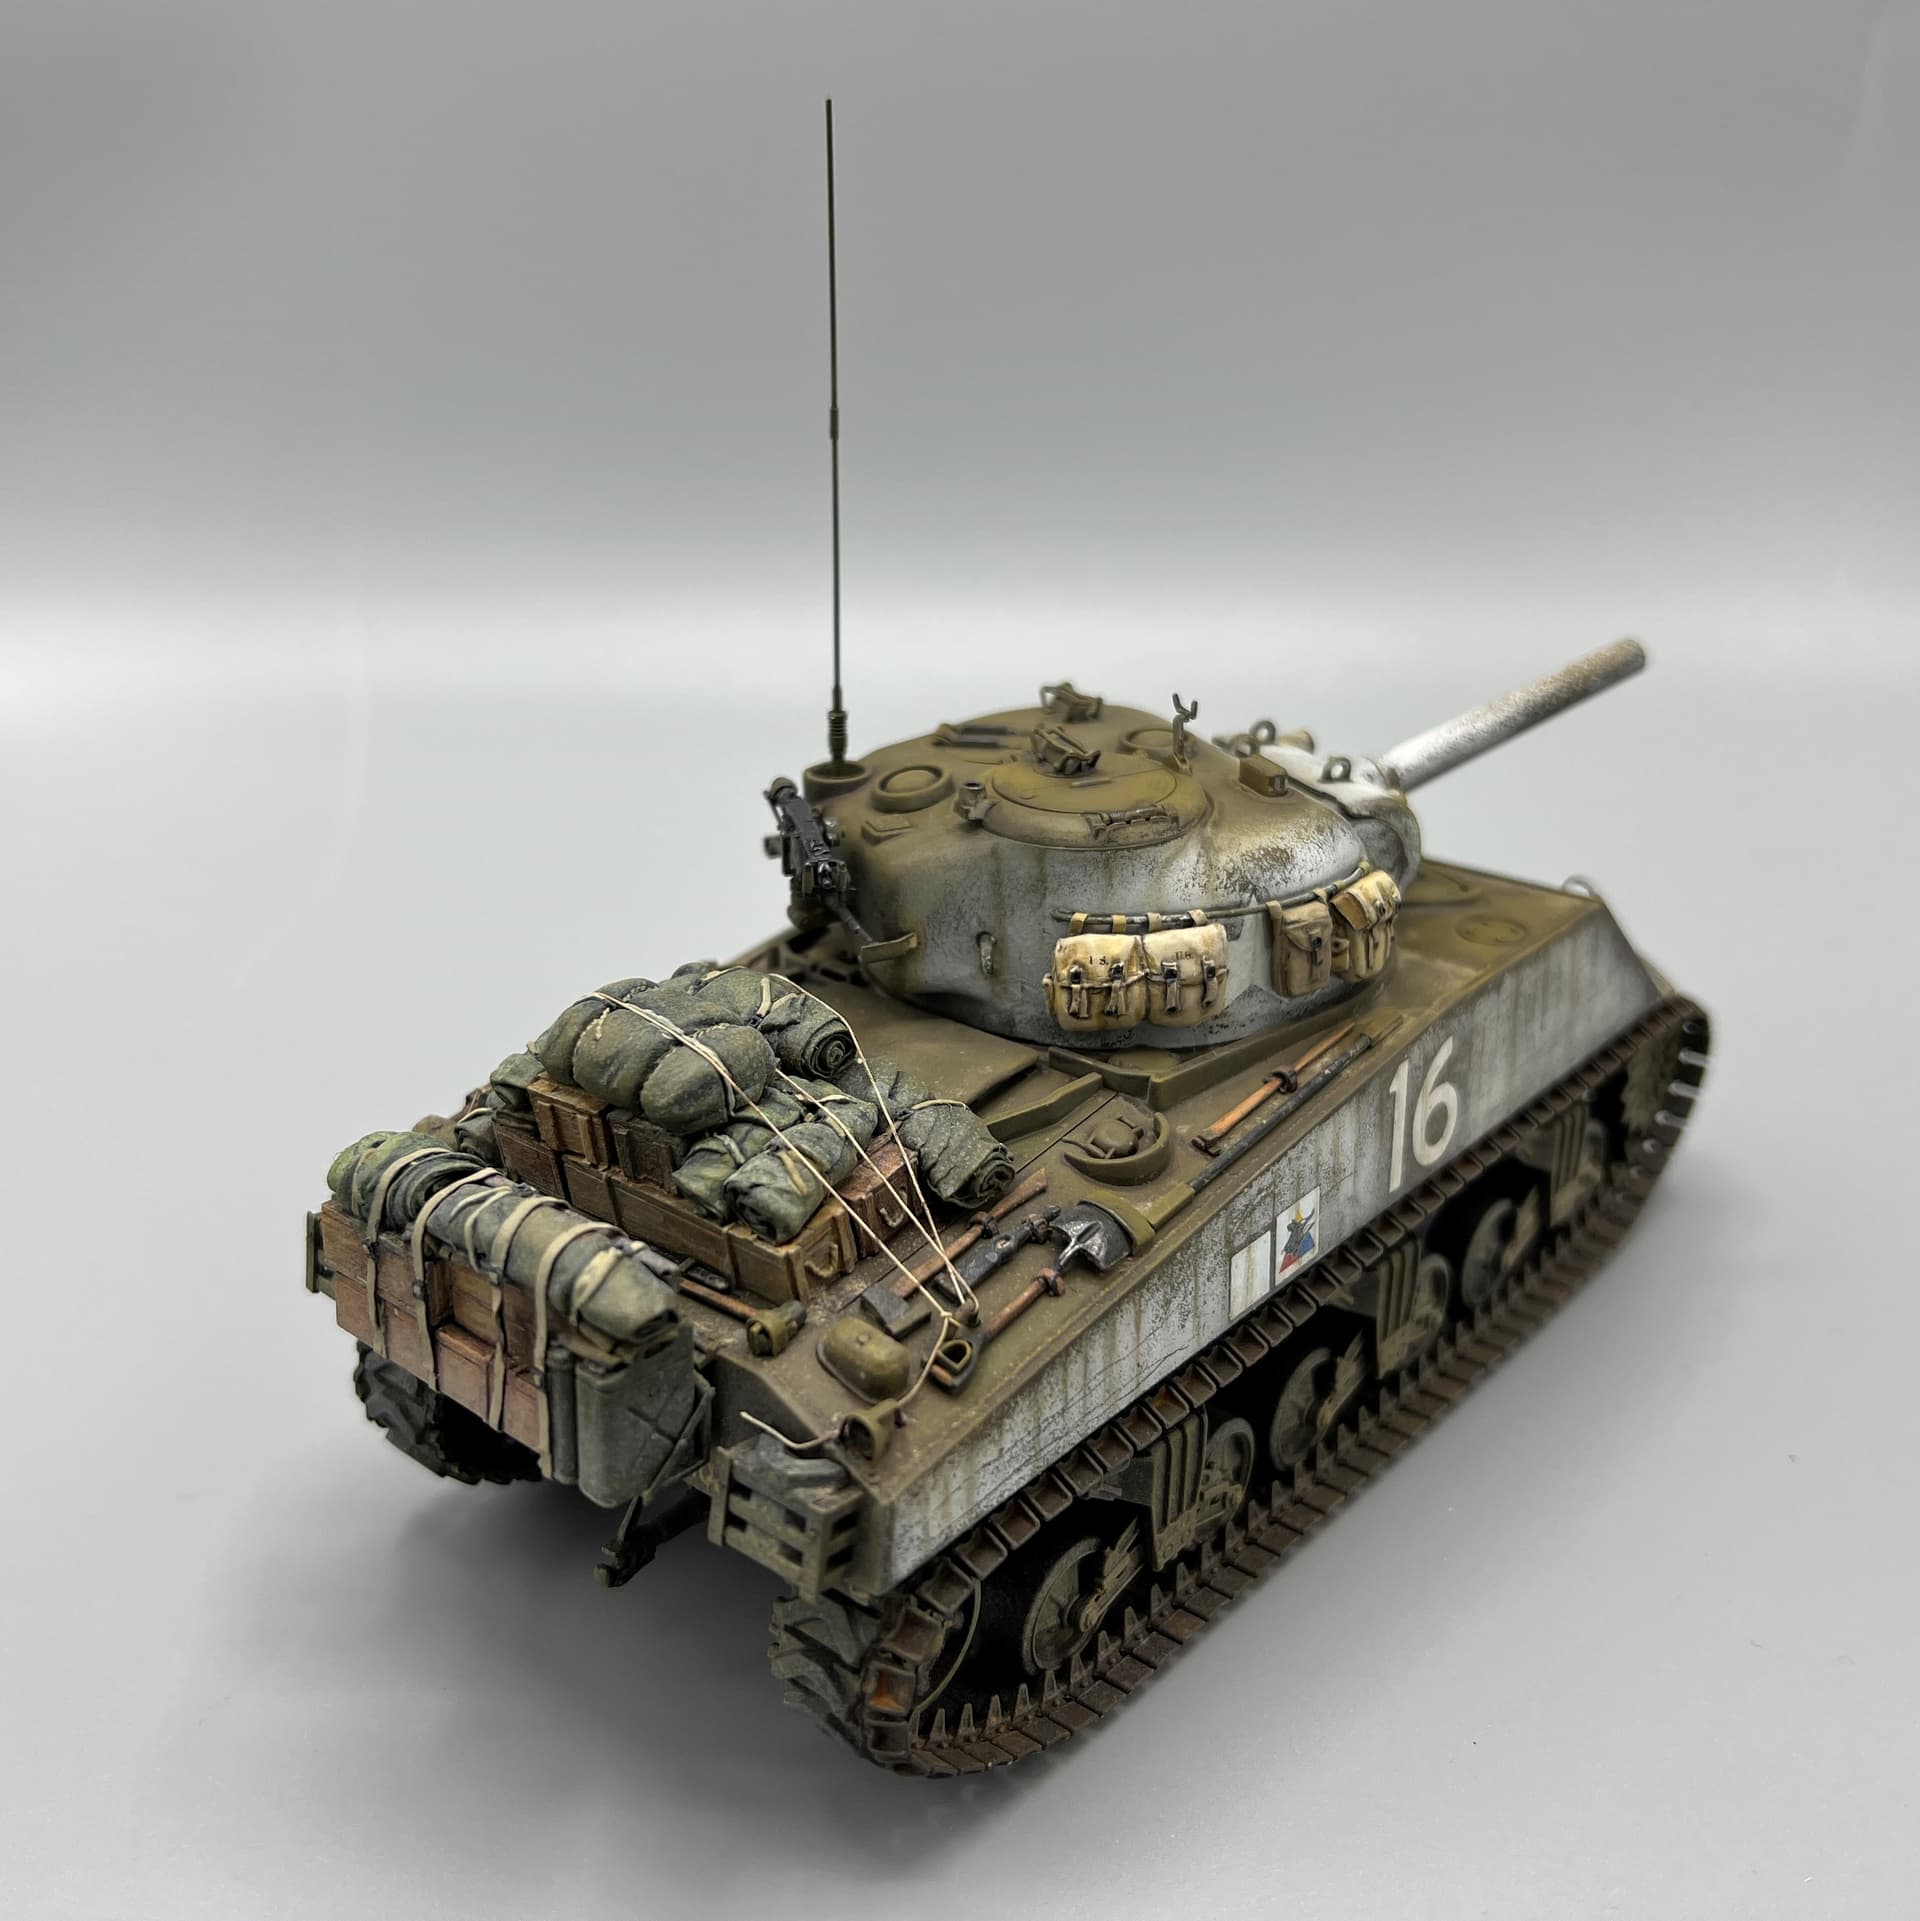
This was my oldest shelf queen. It built pretty quickly; but, bogged down with the finish. I decided to use the kit DS tracks. I used the Aber metal barrel, and the new MJ Miniatures light and periscope guards. These are MUCH better and faster than PE and will be used on all future Sherman/Lee builds. I used stowage from a couple different Value Gear sets. I added straps made from lead foil to the musette bags and ammo pouches on the turret.
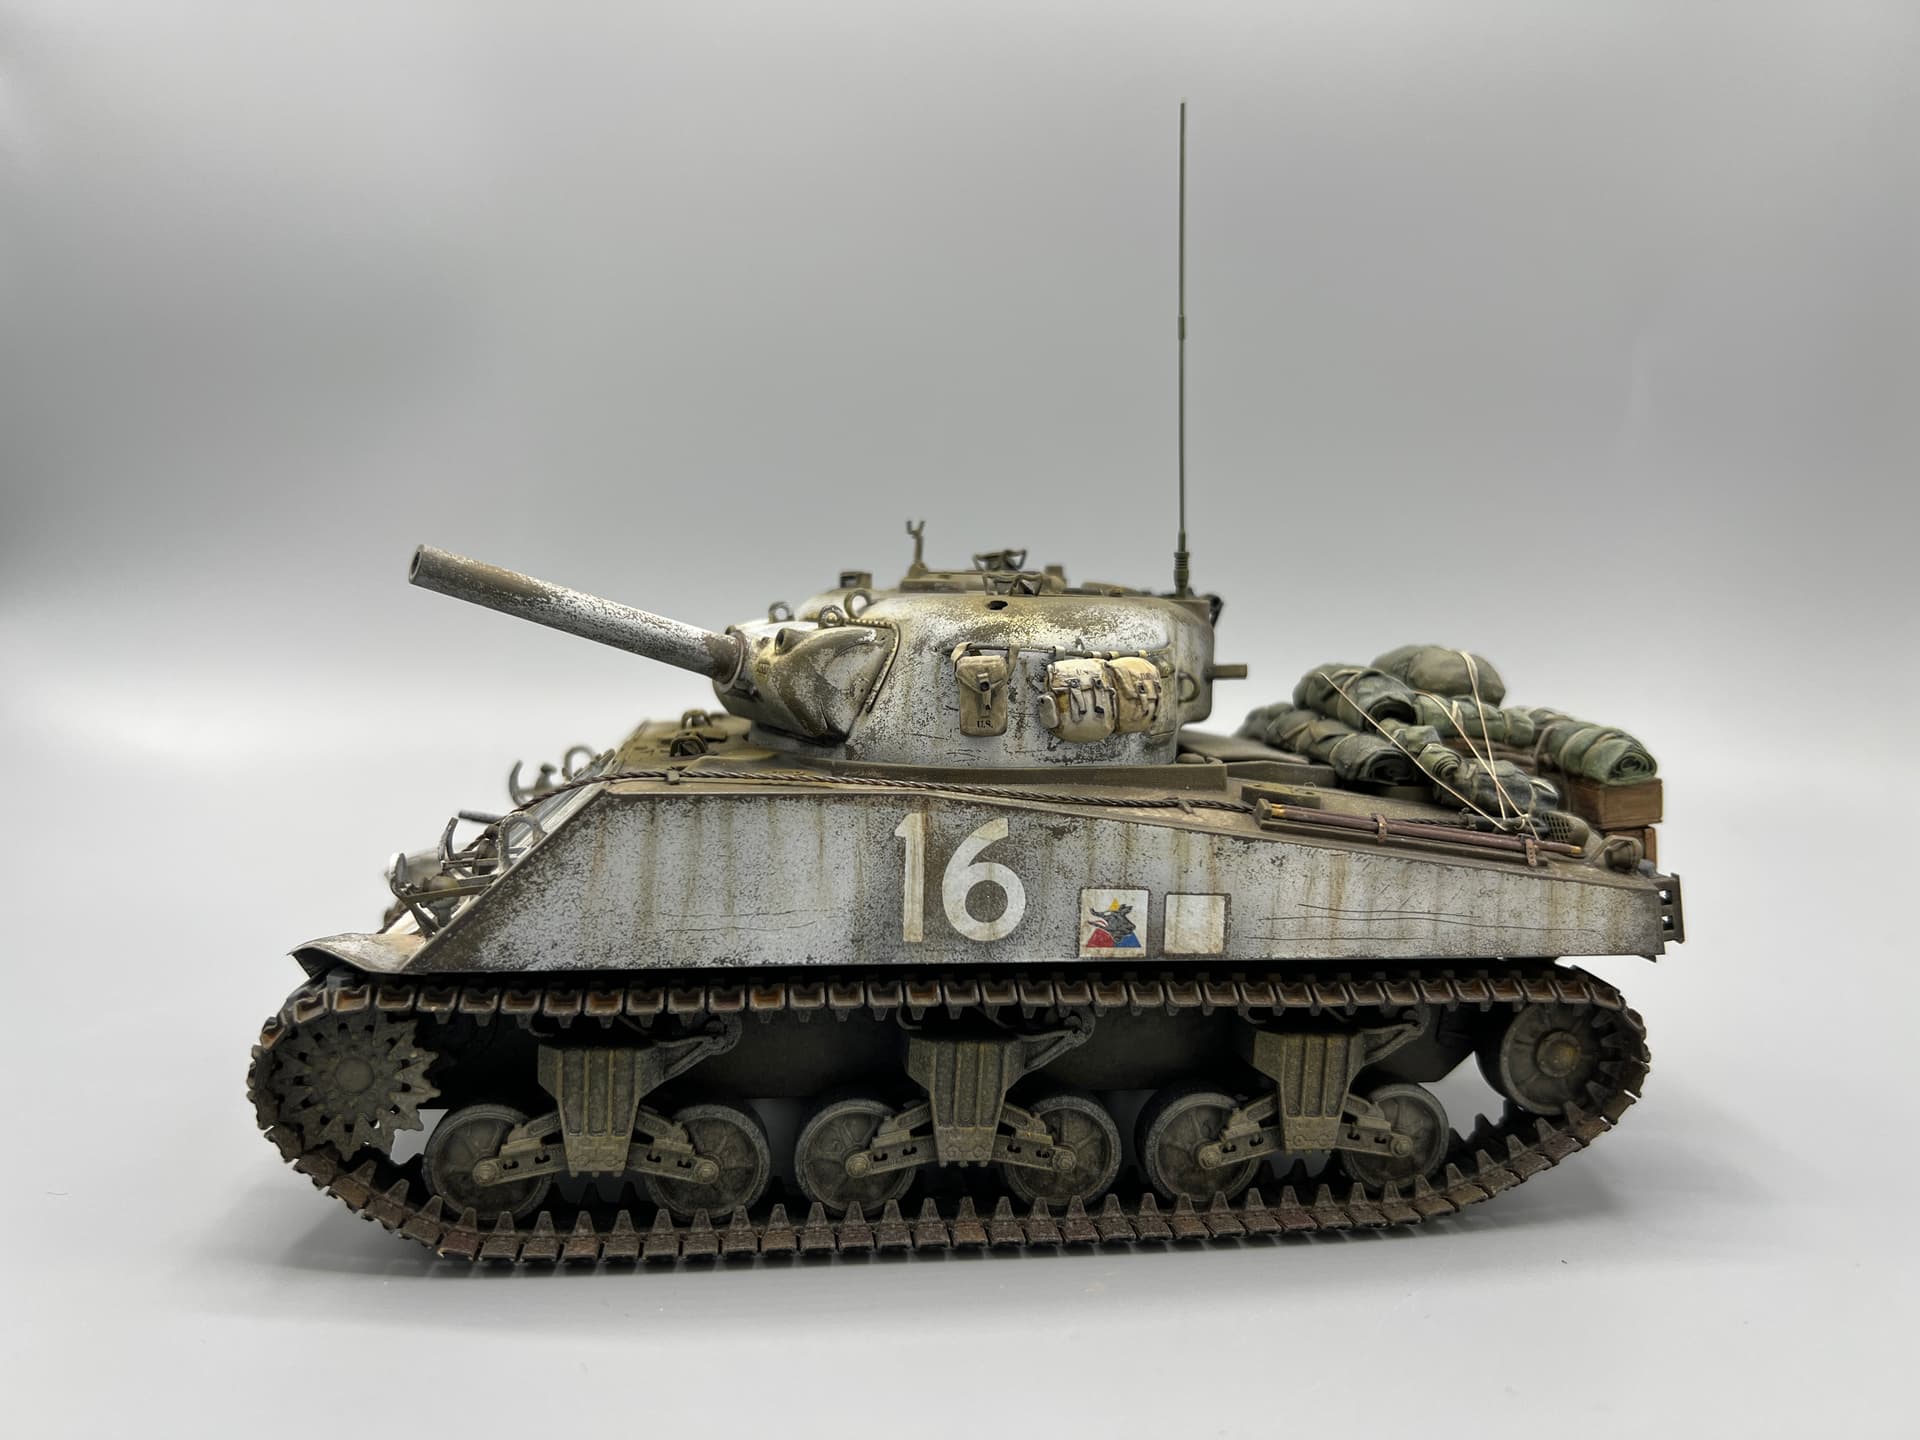
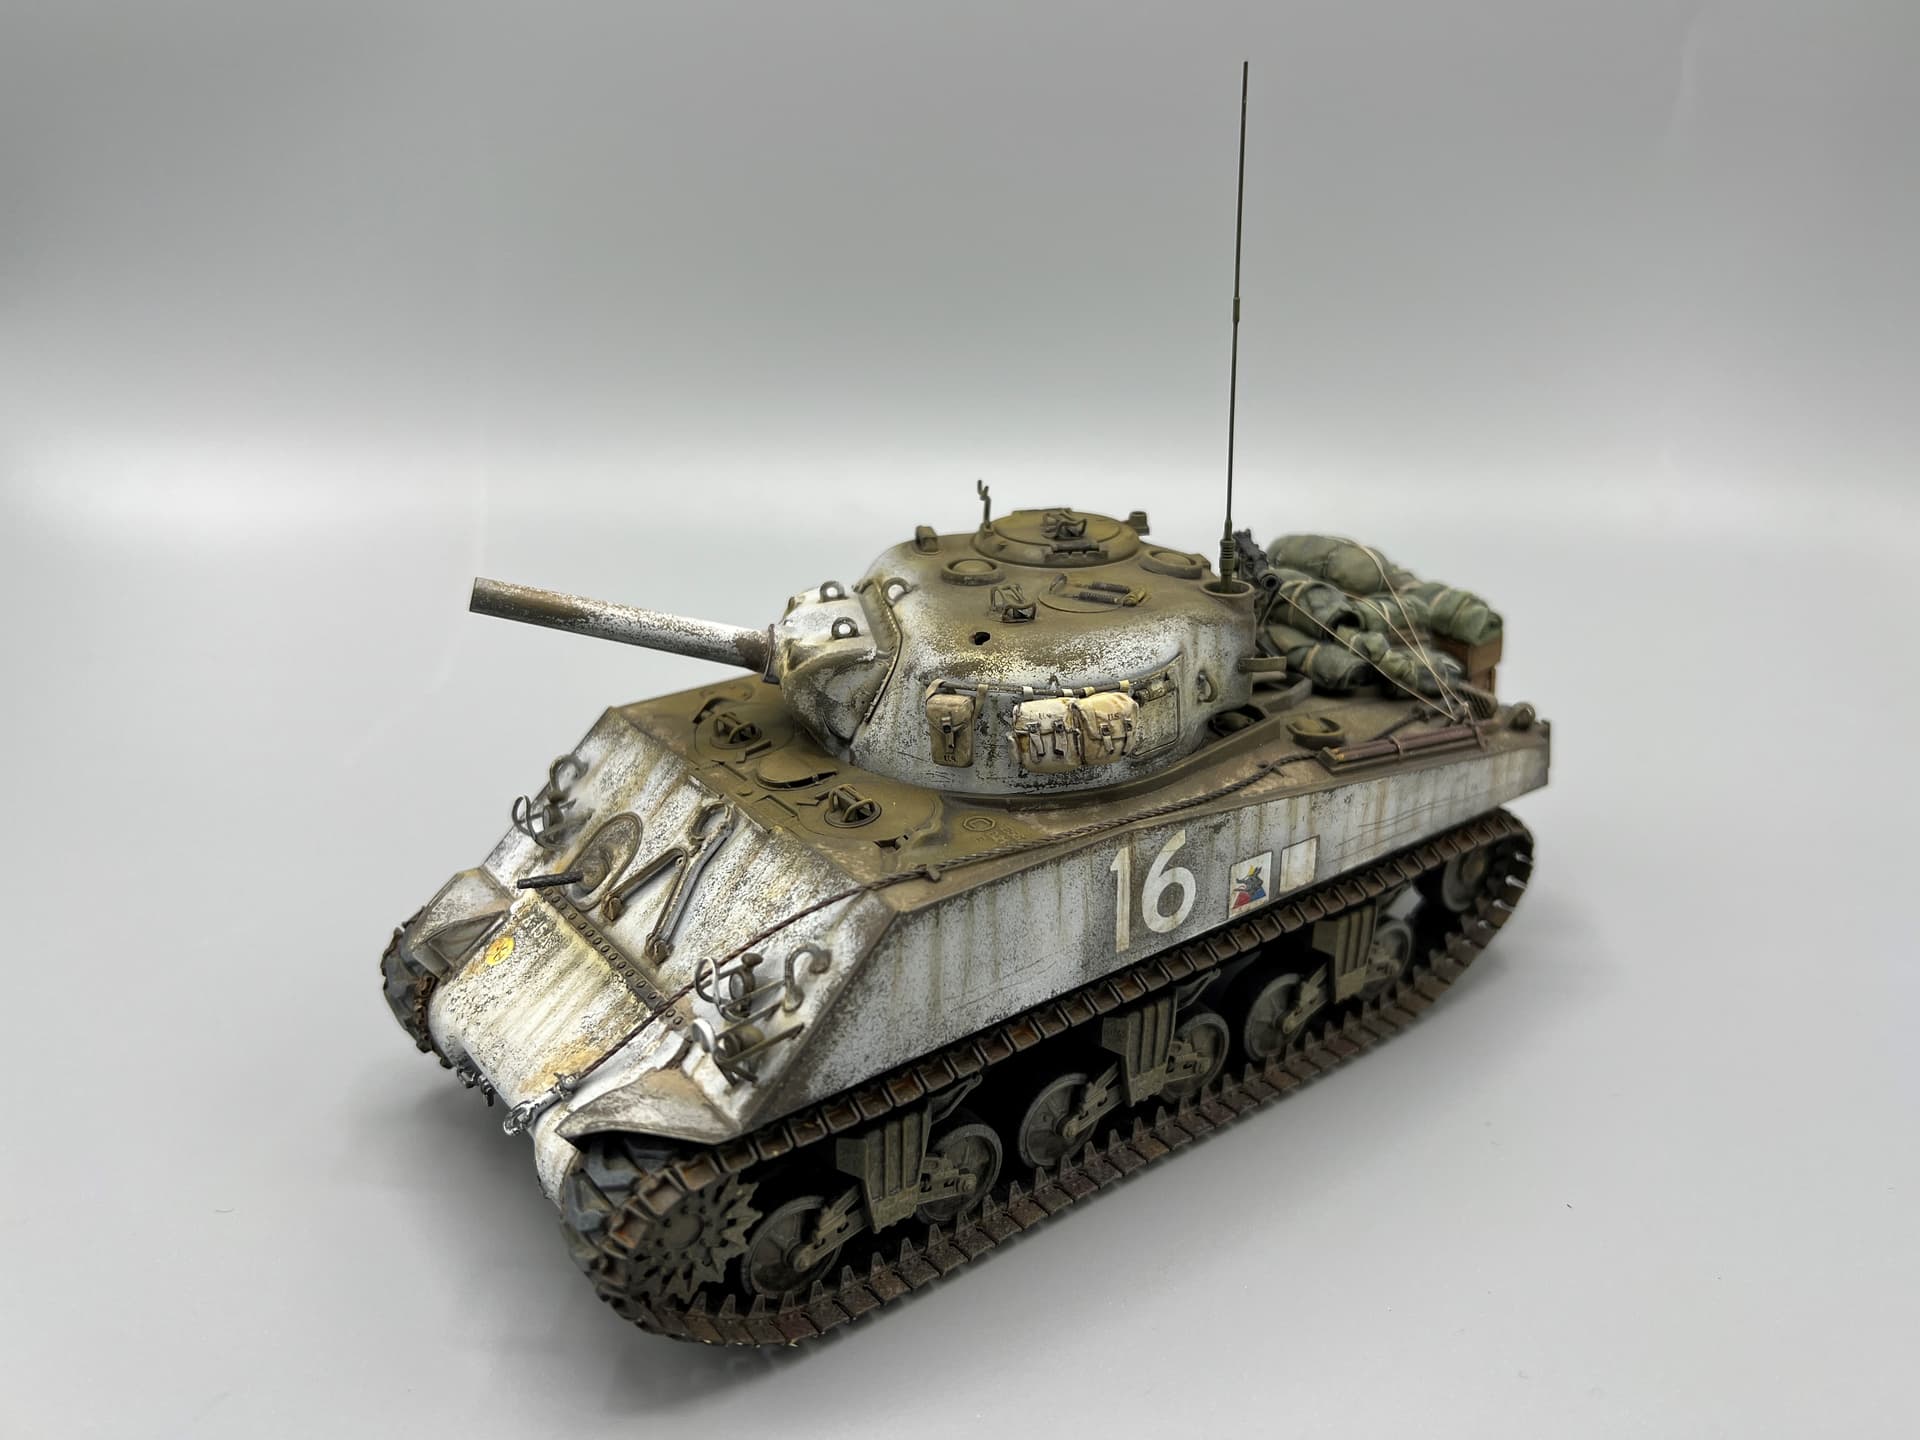
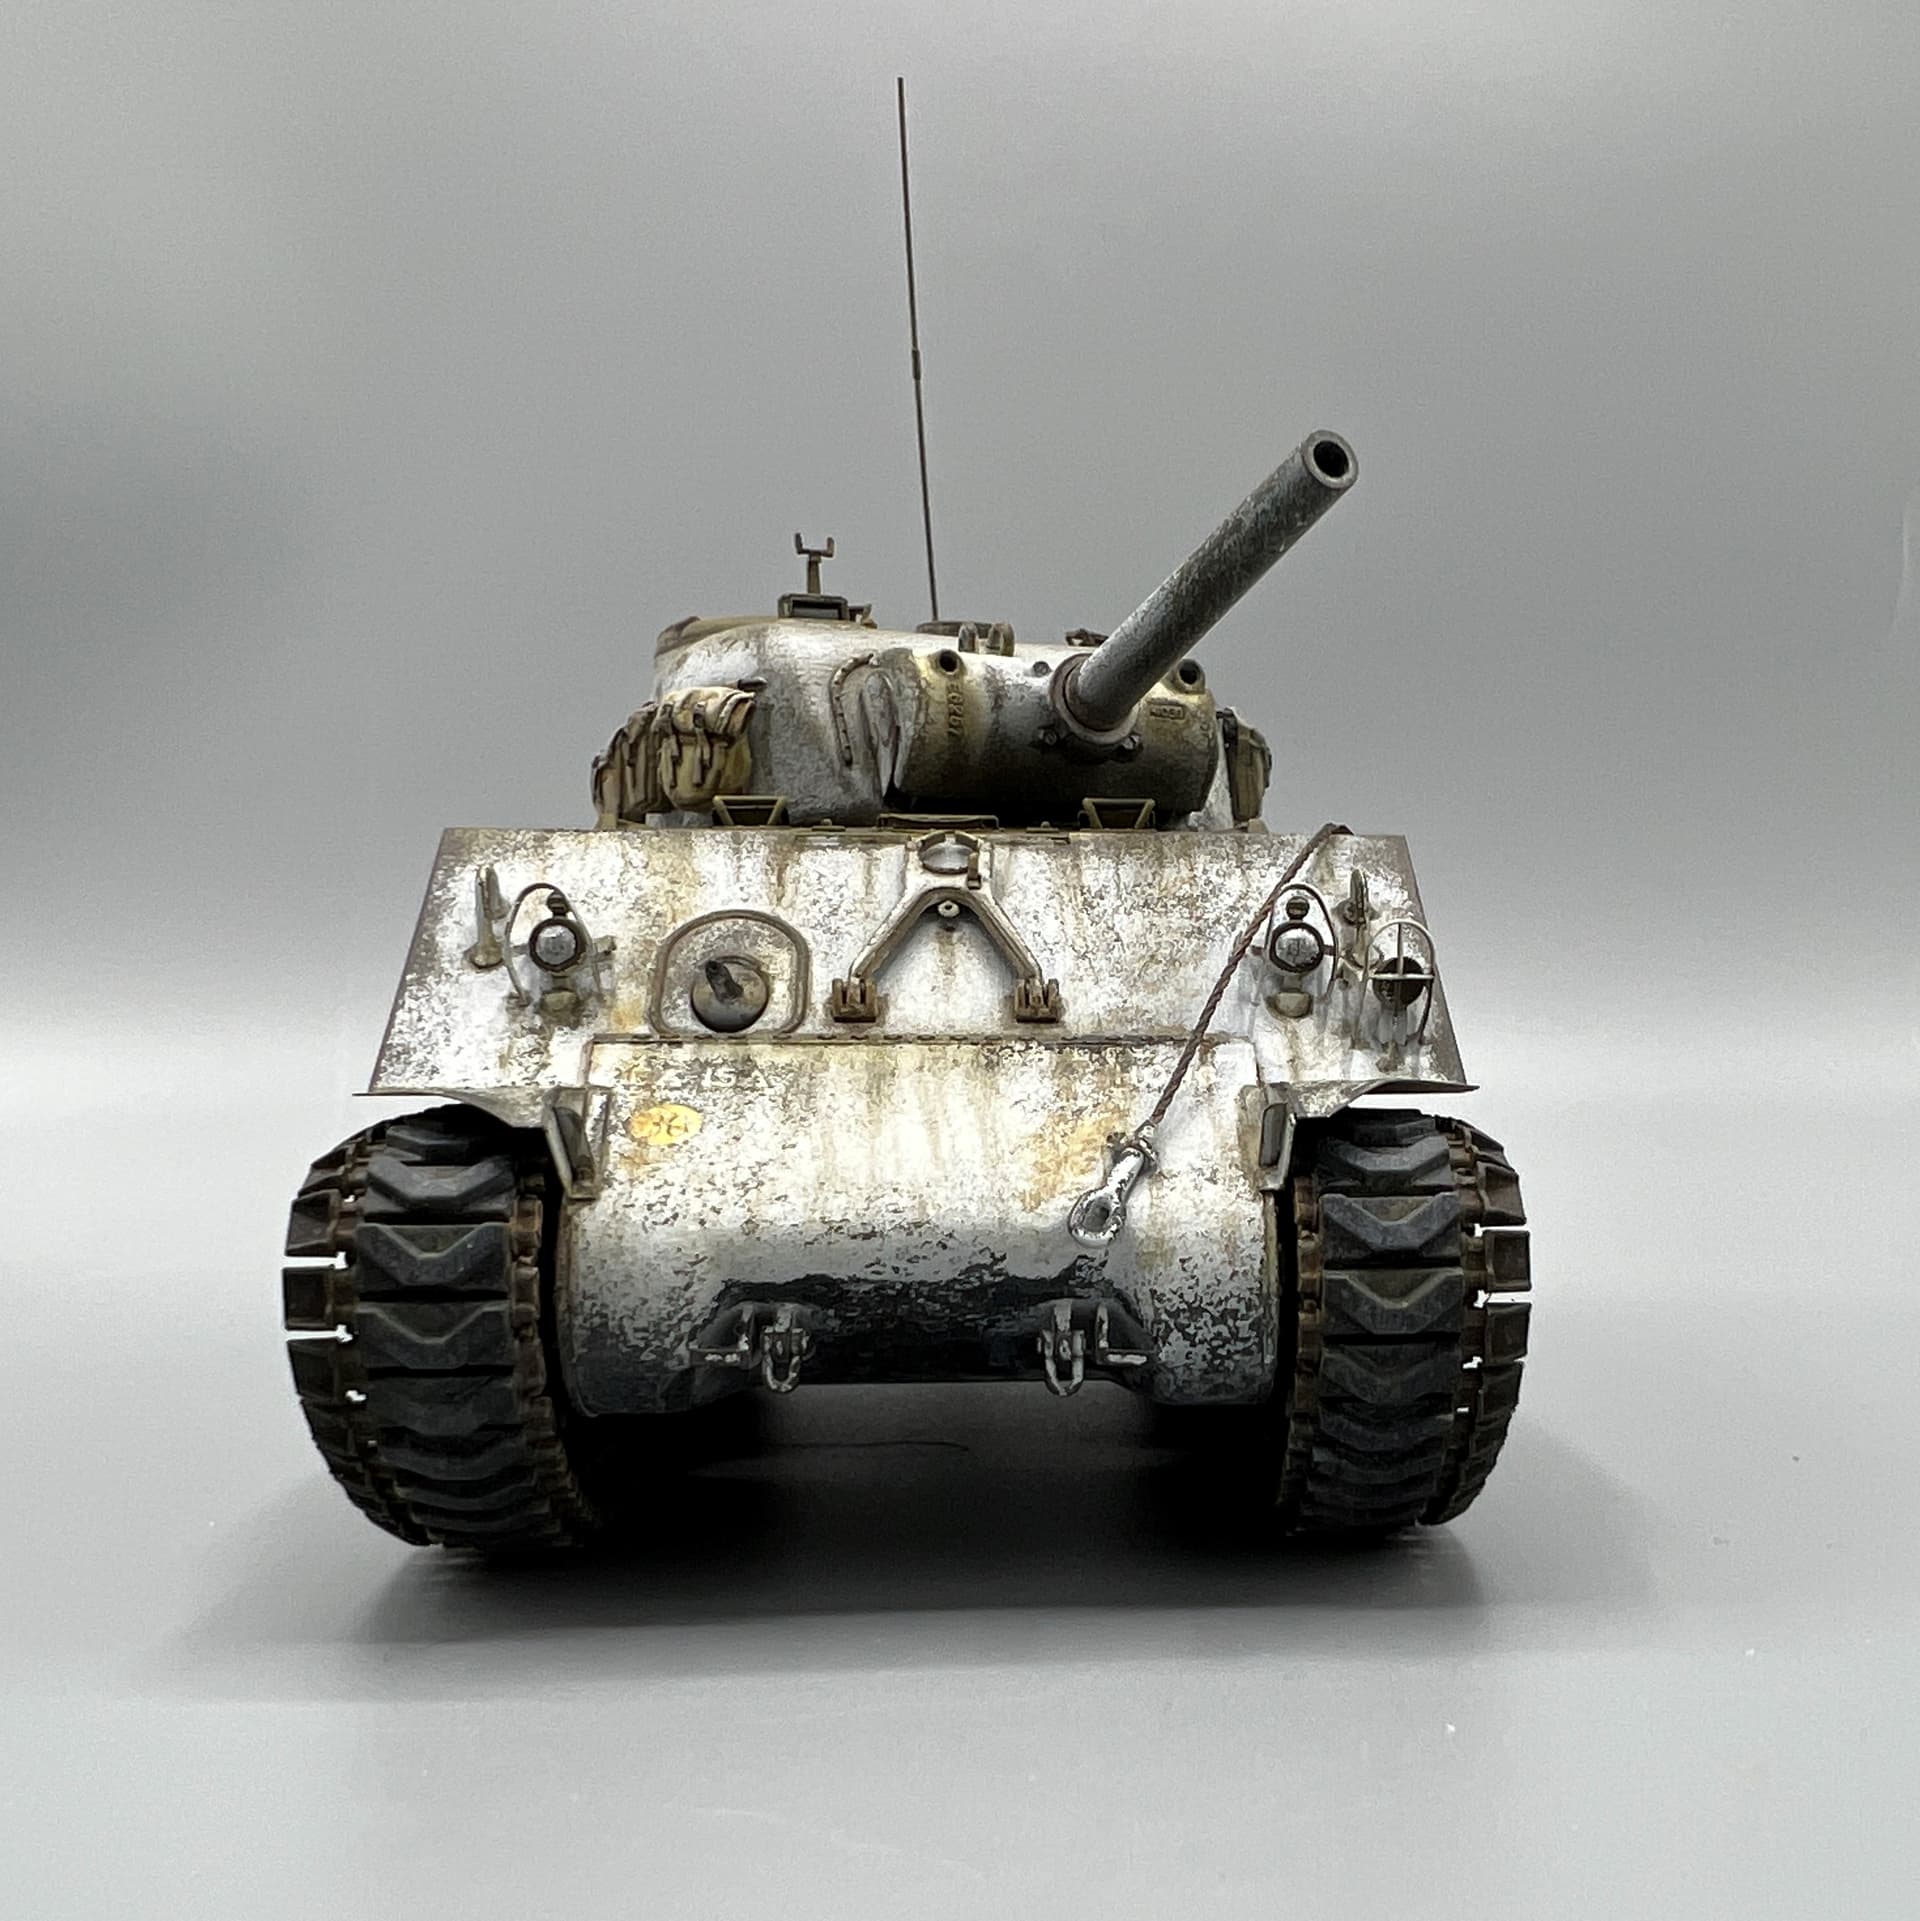
This was my first use of AK Real Colors. I didn’t have them thinned properly and had too much air resulting in a rough surface on the base coat. So, it sat on the shelf for a while. This rough surface made decaling a real challenge when I picked it up again. The Star decals are excellent, but It took MANY coats of various decal potions and lots of picking tiny bubbles to finally get them looking good on my rough finish. This was to be my first attempt at a winter camo scheme. So, it sat on the shelf again for a few months. After doing some tests of various products and techniques for achieving the winter camo scheme it was ready to move off the shelf and back to the bench. I went with the hairspray technique and good old Tamiya XF-2 White for the camo. It scrubbed up nicely and gave me the worn affect that I was looking for. I weathered the beast with AK’s enamel products and Winsor & Newton oils.
Well Rick, you had me fooled at first, I thought it was a tank, not a piece of artillery. Looks great! Love the Value Gear bits, they really add some life to the model.
I really like it. The finish looks great to me, rough or not. And while I understand what Ron and Piotr say about the white, to me it looks pretty good. Like its come through the winter and going into the thaw … stowage looks just right and well done as well. The straps for the kit look spot on as well.
Ron @RonW - Ref the DS tracks, ricks look great as they are in the pics, and I just did a pair for my DML Tiger 3 in 1 and I found them fine. no issues, fitted fine around the sprockets etc and took the primer and paint really well. They were about 1 link to long but this was easily sorted by removing a section from each end and they then fitted perfectly with.
Ron @RonW there have been other reports where people had issues though …
I think it’s friggin beautiful !!!
Sorry but I think the white wash is a perfect representation of weathered white wash , something that is very hard to replicate .
I understand what folks are saying about the white wash, it doesn’t match the same day as the photo but it very very nice for sometime in near future from that photo. Congratulations Rick on a great looking build.
Excellent job on it Rick. Love the finish, you did a great job. I have an old kit bash sitting in a box with an old upper hull and turret from Panzer Concepts. It will use a Tamiya lower hull, Dragon running gear and lots of other stuff. The tracks I have are from a company called RHPS. I too have wanted to do a winter scheme like yours and you have inspired me greatly! I haven’t tried the hairspray technique yet and I’m curious- which brand did you use. I hear they all react differently to the process.
@PiotrK . After the many hours and all of the MicroSol, Markfit, and Solvaset, I decided to let more of the decals show. So maybe I should describe this as after the Battle of the Bulge.
@RonW Thank you. I usually do indy link tracks; but these DS tracks looked really good, and I didn’t have to worry about breaking the duckbills during the weathering process. They are a tab long but ok. I glued them down to the road wheels and return rollers. I primed and painted them in place. With the primer, I had no issues with paint adhesion.
I read and tried TresSomme Extrahold, grab it at Target. I used it on. M2 Bradley where I wanted the NATO green to be scratched and showing thru the desert sand that I settled on. It activated just fine and I went weeks before I started chipping the tan. Look. I’m bald, I use zero hair products but
@metalhead85 The hairspray technique can be a bit tricky as there are multiple factors that impact the results. I’ve experimented with the technique quite a bit and use it in one form or another on most of my models now. Here is my “formula” for success.
Hairspray: I use TRESemme Tre Two Spray with a 3 hold in an aerosol can. I lay down two light coats of the TRESemme at an arm’s length. The environmentally friendly pump cans do not work for this technique. I’ve tried to use the AK Chipping Fluid and Worn Effects but have trouble getting consistent results.
Paint: This technique doesn’t work with all paint types. It works well with acrylic lacquers like Tamiya and AK Real Colors. These are what I use. Vinyl acrylics like Vallejo, AK, Mig, Mission Models, etc. don’t chip well. These paints chip off in BIG chunks due to the way in which the vinyl acrylics dry.
Thinner: I normally thin my Tamiya and AK Real Colors with Mr Surfacer Leveling Thinner 2:1 thinner to paint. Thinning with water gives better chipping effects; but, the paints don’t spray well.
Thin coat: Thinner coats of paint chip off better.
Timing: I get the best results when I do the hairspray, paint, and chipping in one session. The hairspray is dry to the touch in just a couple of minutes. I apply the paint then. By the time I’ve got the airbrush clean, the paint is dry to the touch, and I move from the paint booth to the bench to begin chipping. I have successfully chipped the next day after paint application, but it took a lot of scrubbing, and I lost some control over the results.
Warm water: Just like decals, chipping works better with warm water. I use a big soft flat brush to dampen the panel to be chipped. After 15-20 seconds I use old, shortened brushes and stabbing brushstroke to chip off the paint.
This was a much longer answer than you were looking for; but each of these factors impact the results. Do some experimenting on a paint mule or a test panel and see how it works.
That pretty much sums it up , thanks for the explanation. I have the products you mention in your post excerpt the hair spray. My M4 howitzer project is a way off yet as I’m still working on my panzer iv e which will be a DAK vehicle and I think I’ll just do a slight chipping here and there with dark grey with a very small paint brush.