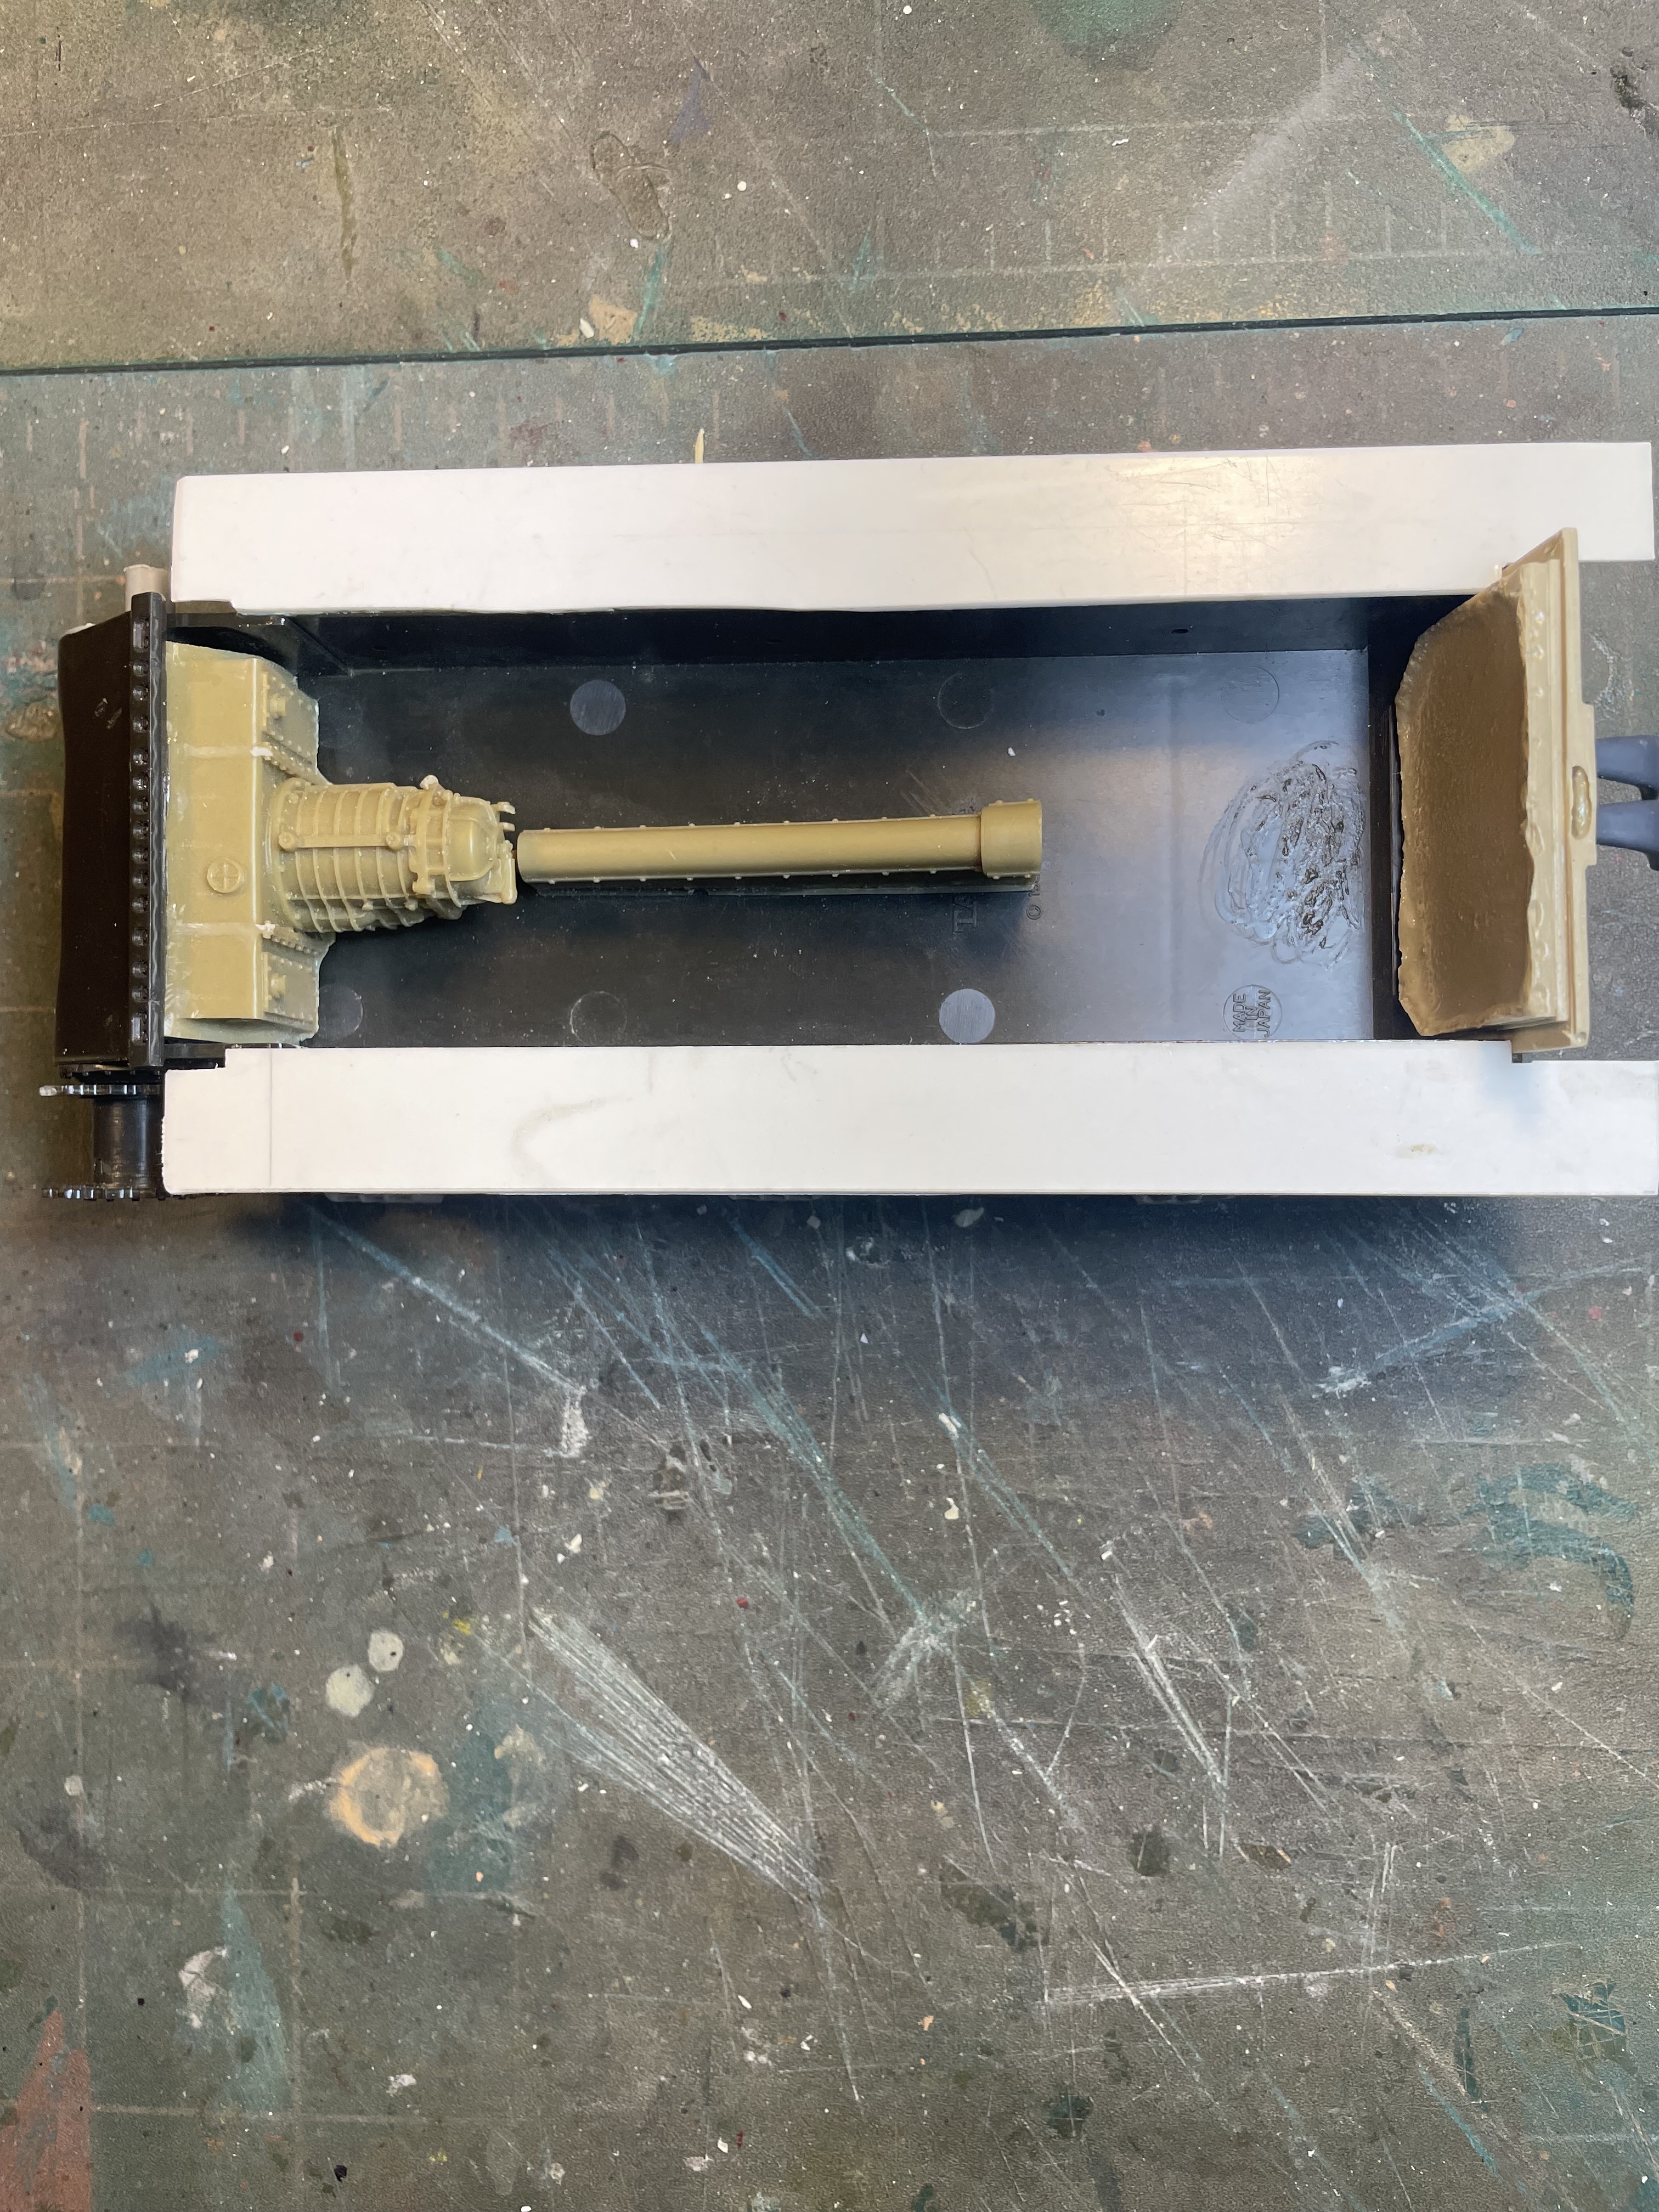
So I decided to take this project off the shelf after starting it about 10-12 years ago if my memory serves me correctly. It’s an old Panzer concepts hull and turret with aluminum barrel designed for the Tamiya M4 Sherman. My goal as to use only what I had in my stash. I gathered tons of extra parts (especially suspension elements) from Dragon, Tamiya, Academy, initially an interior set for an M3 from Verlinden, an interior set from Tank Workshop, tracks from RHPS and an M34/M34A1 set from Resicast. I don’t have a breech for the 105mm do I will try to scratch build one (suggested by 18Bravo ) and just attach it to the Resicast gun somehow. I’m not going for accuracy. I will be leaving the hatches open I think, not sure. I might be putting it in a diorama.The only thing I purchased was a set of decals from Star, set #35-991. I was looking for some different markings that would add interest to this kit and when I saw them while browsing I just bought them. I plan on doing a winter white wash scheme and will be trying the hairspray method for the first time. I’ll be experimenting on an old model first of course.
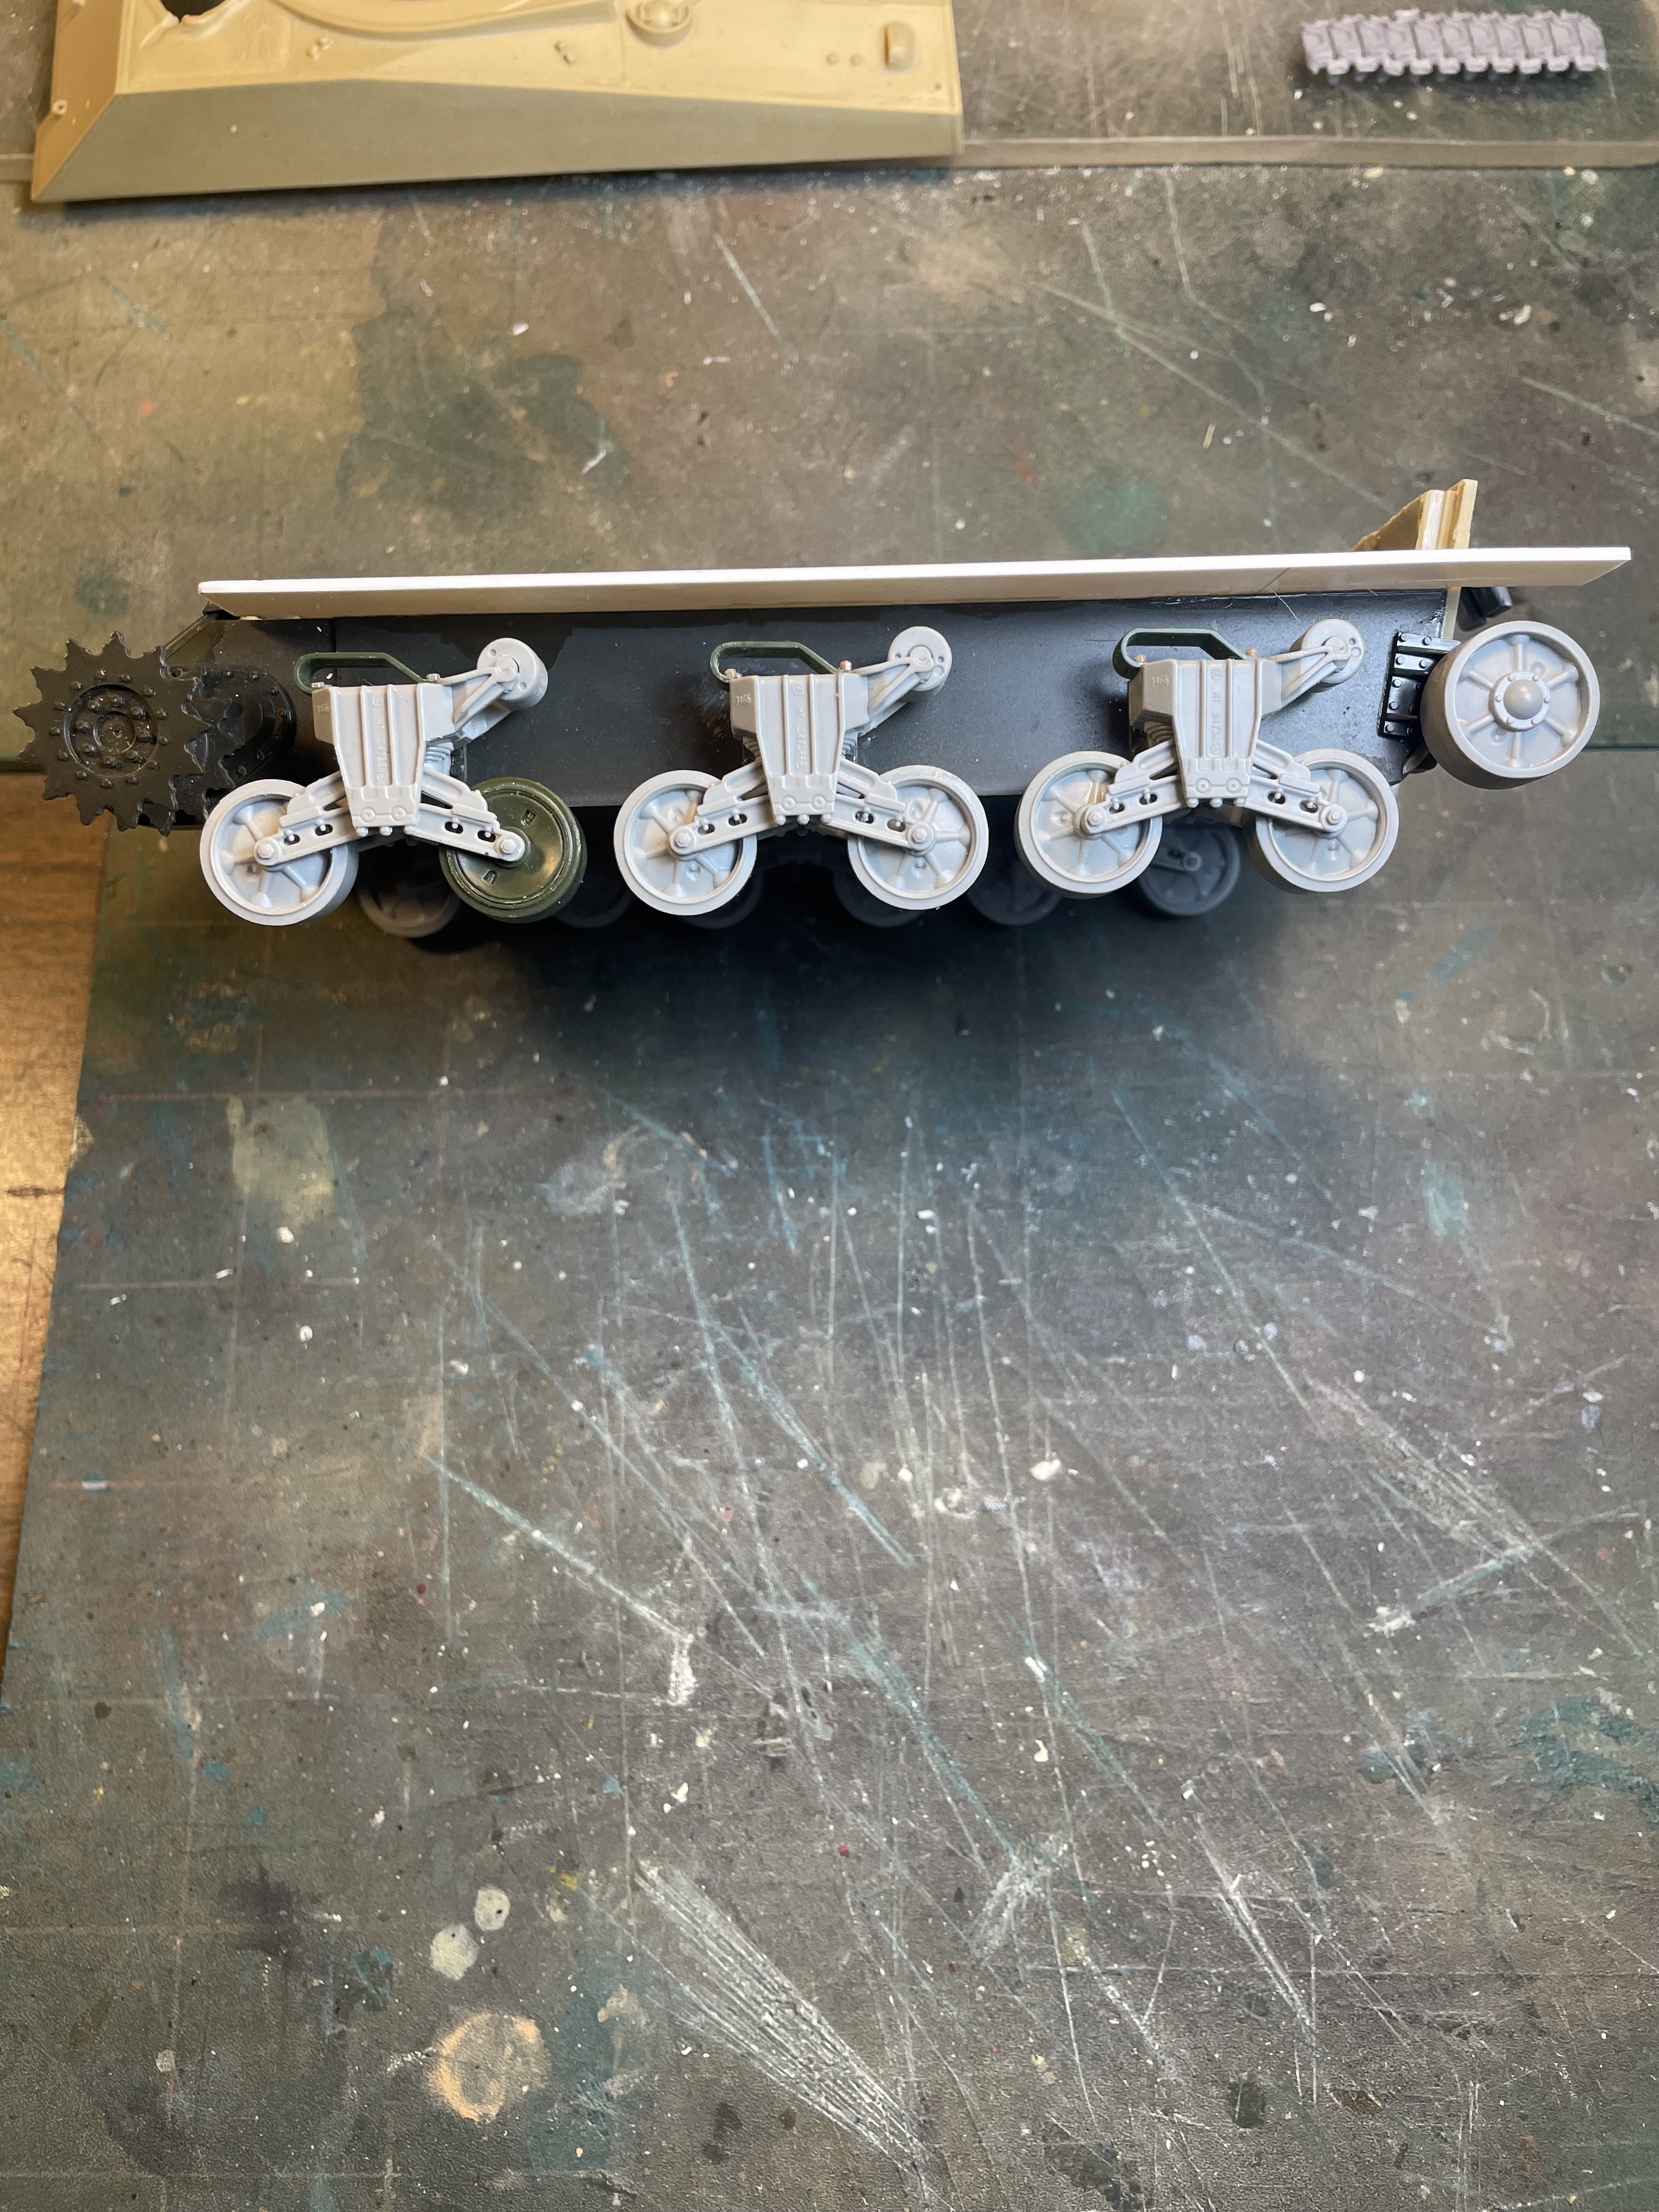
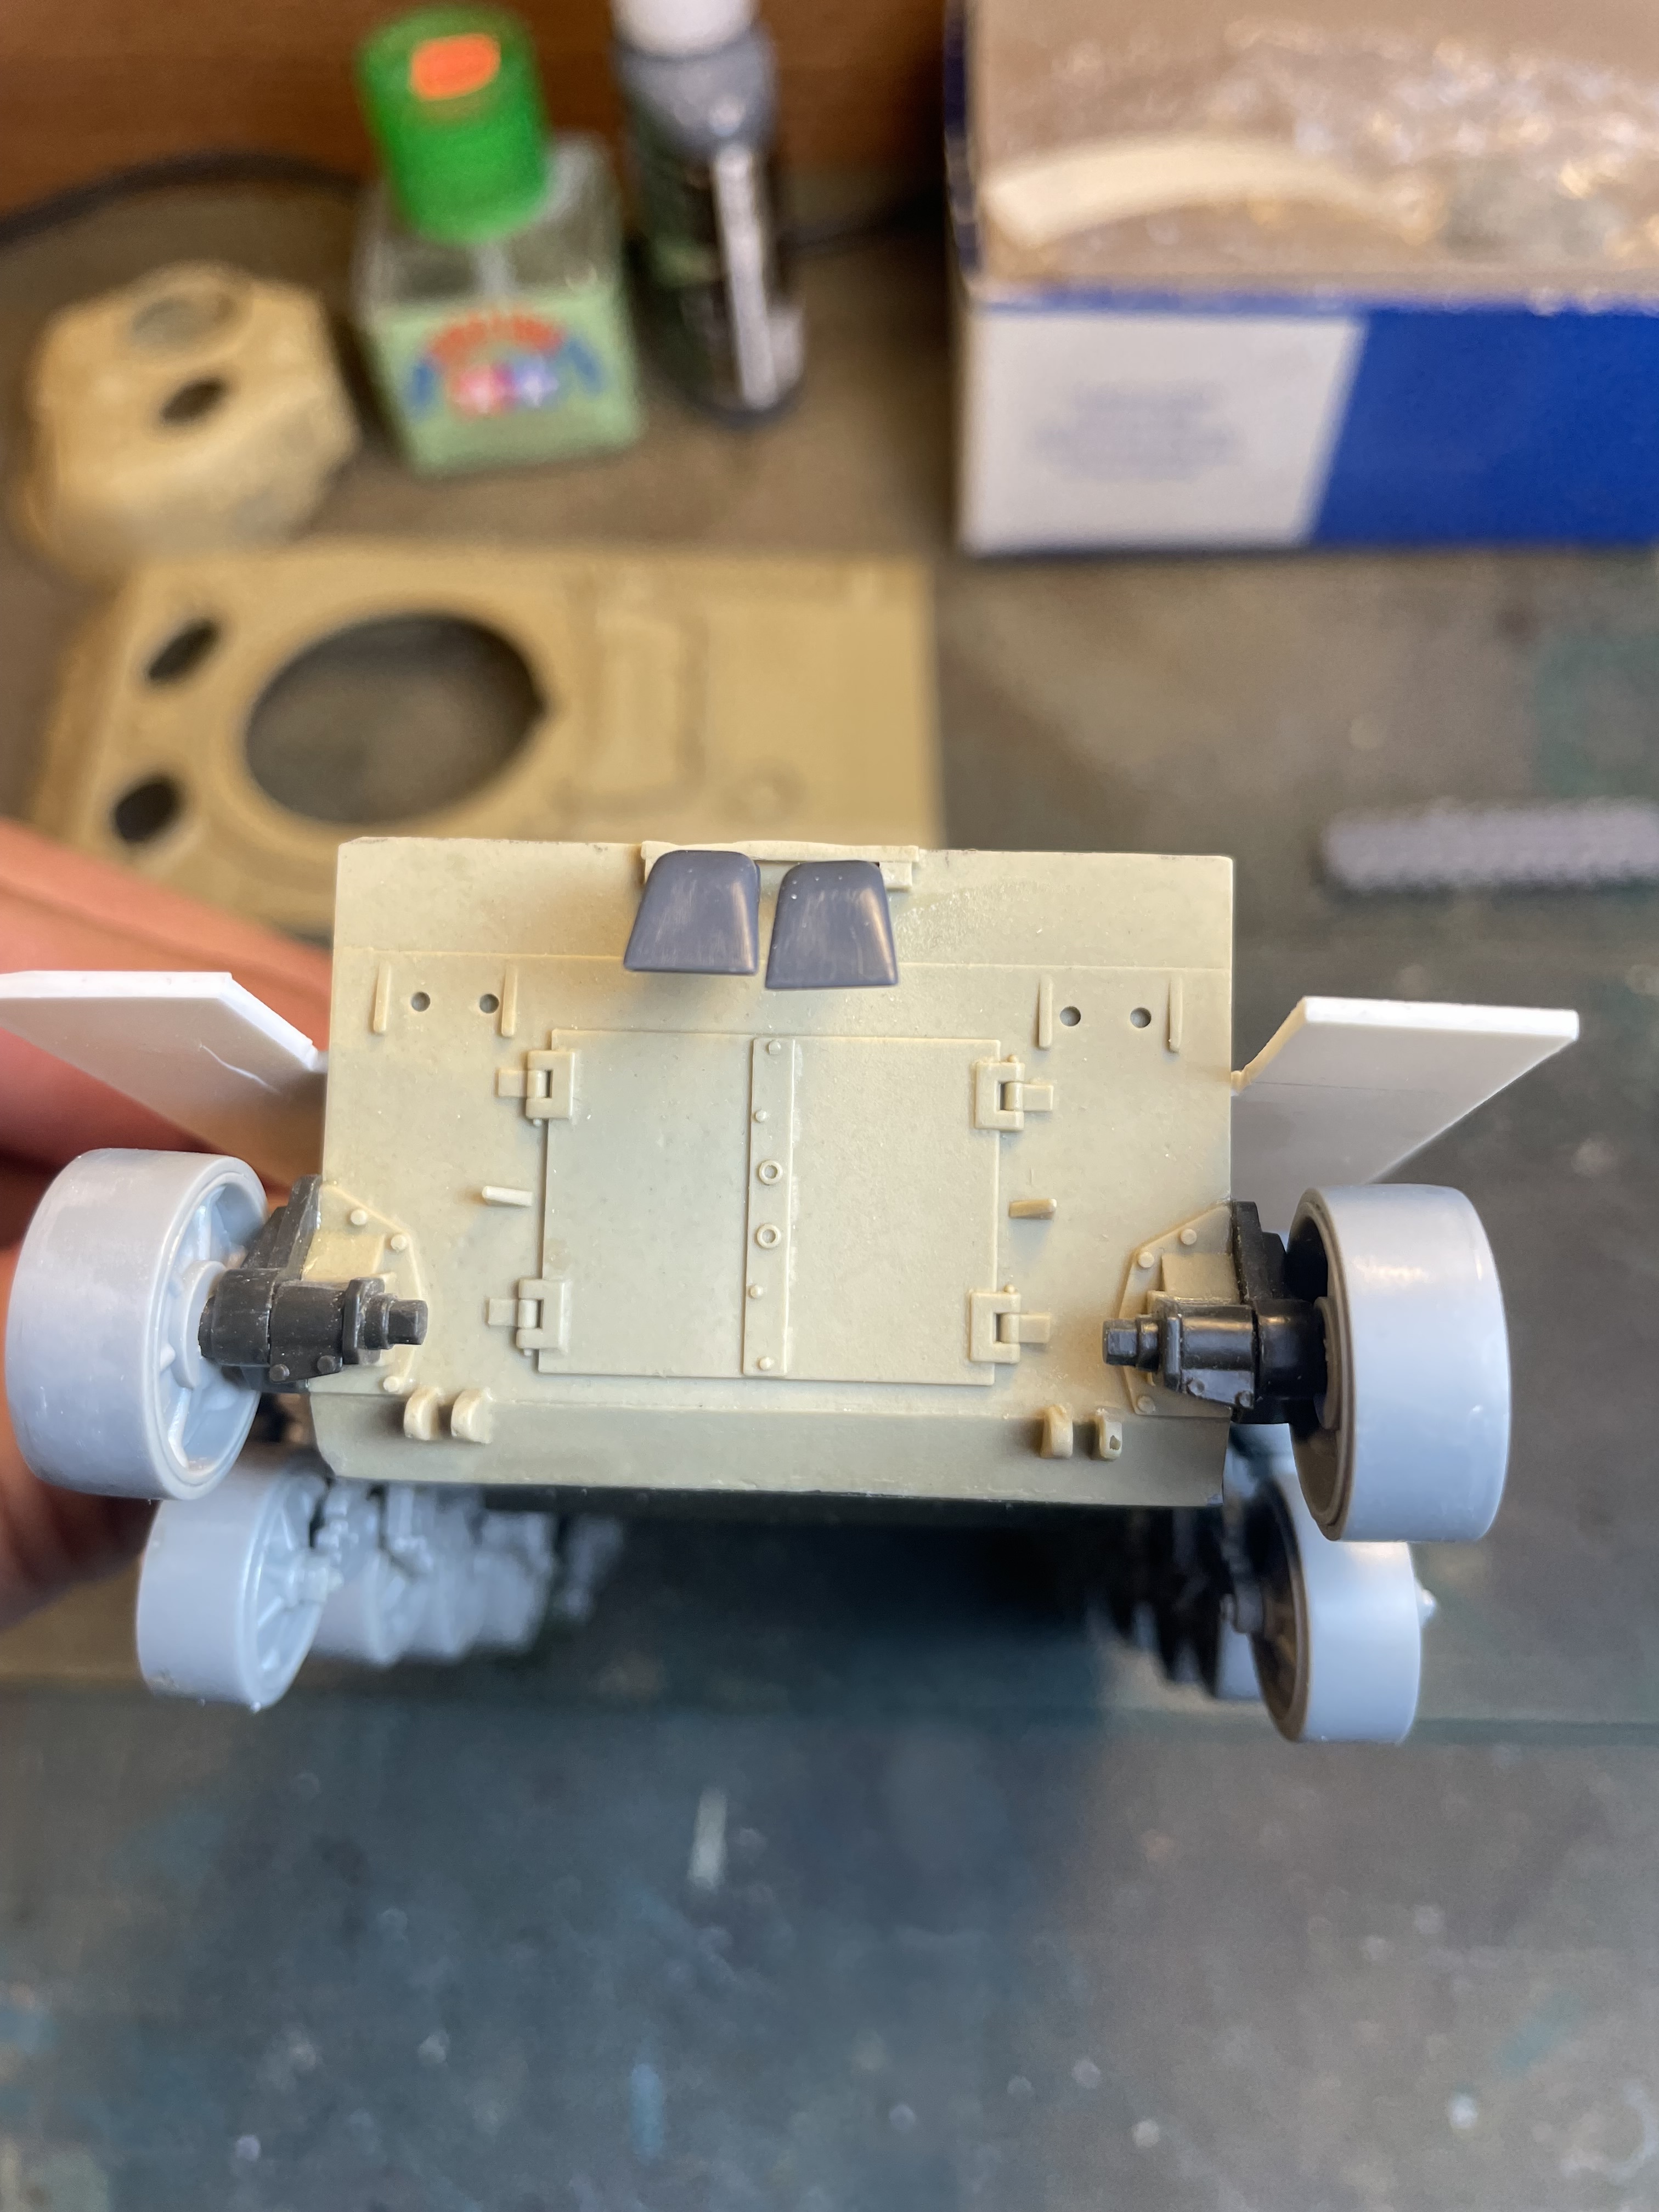
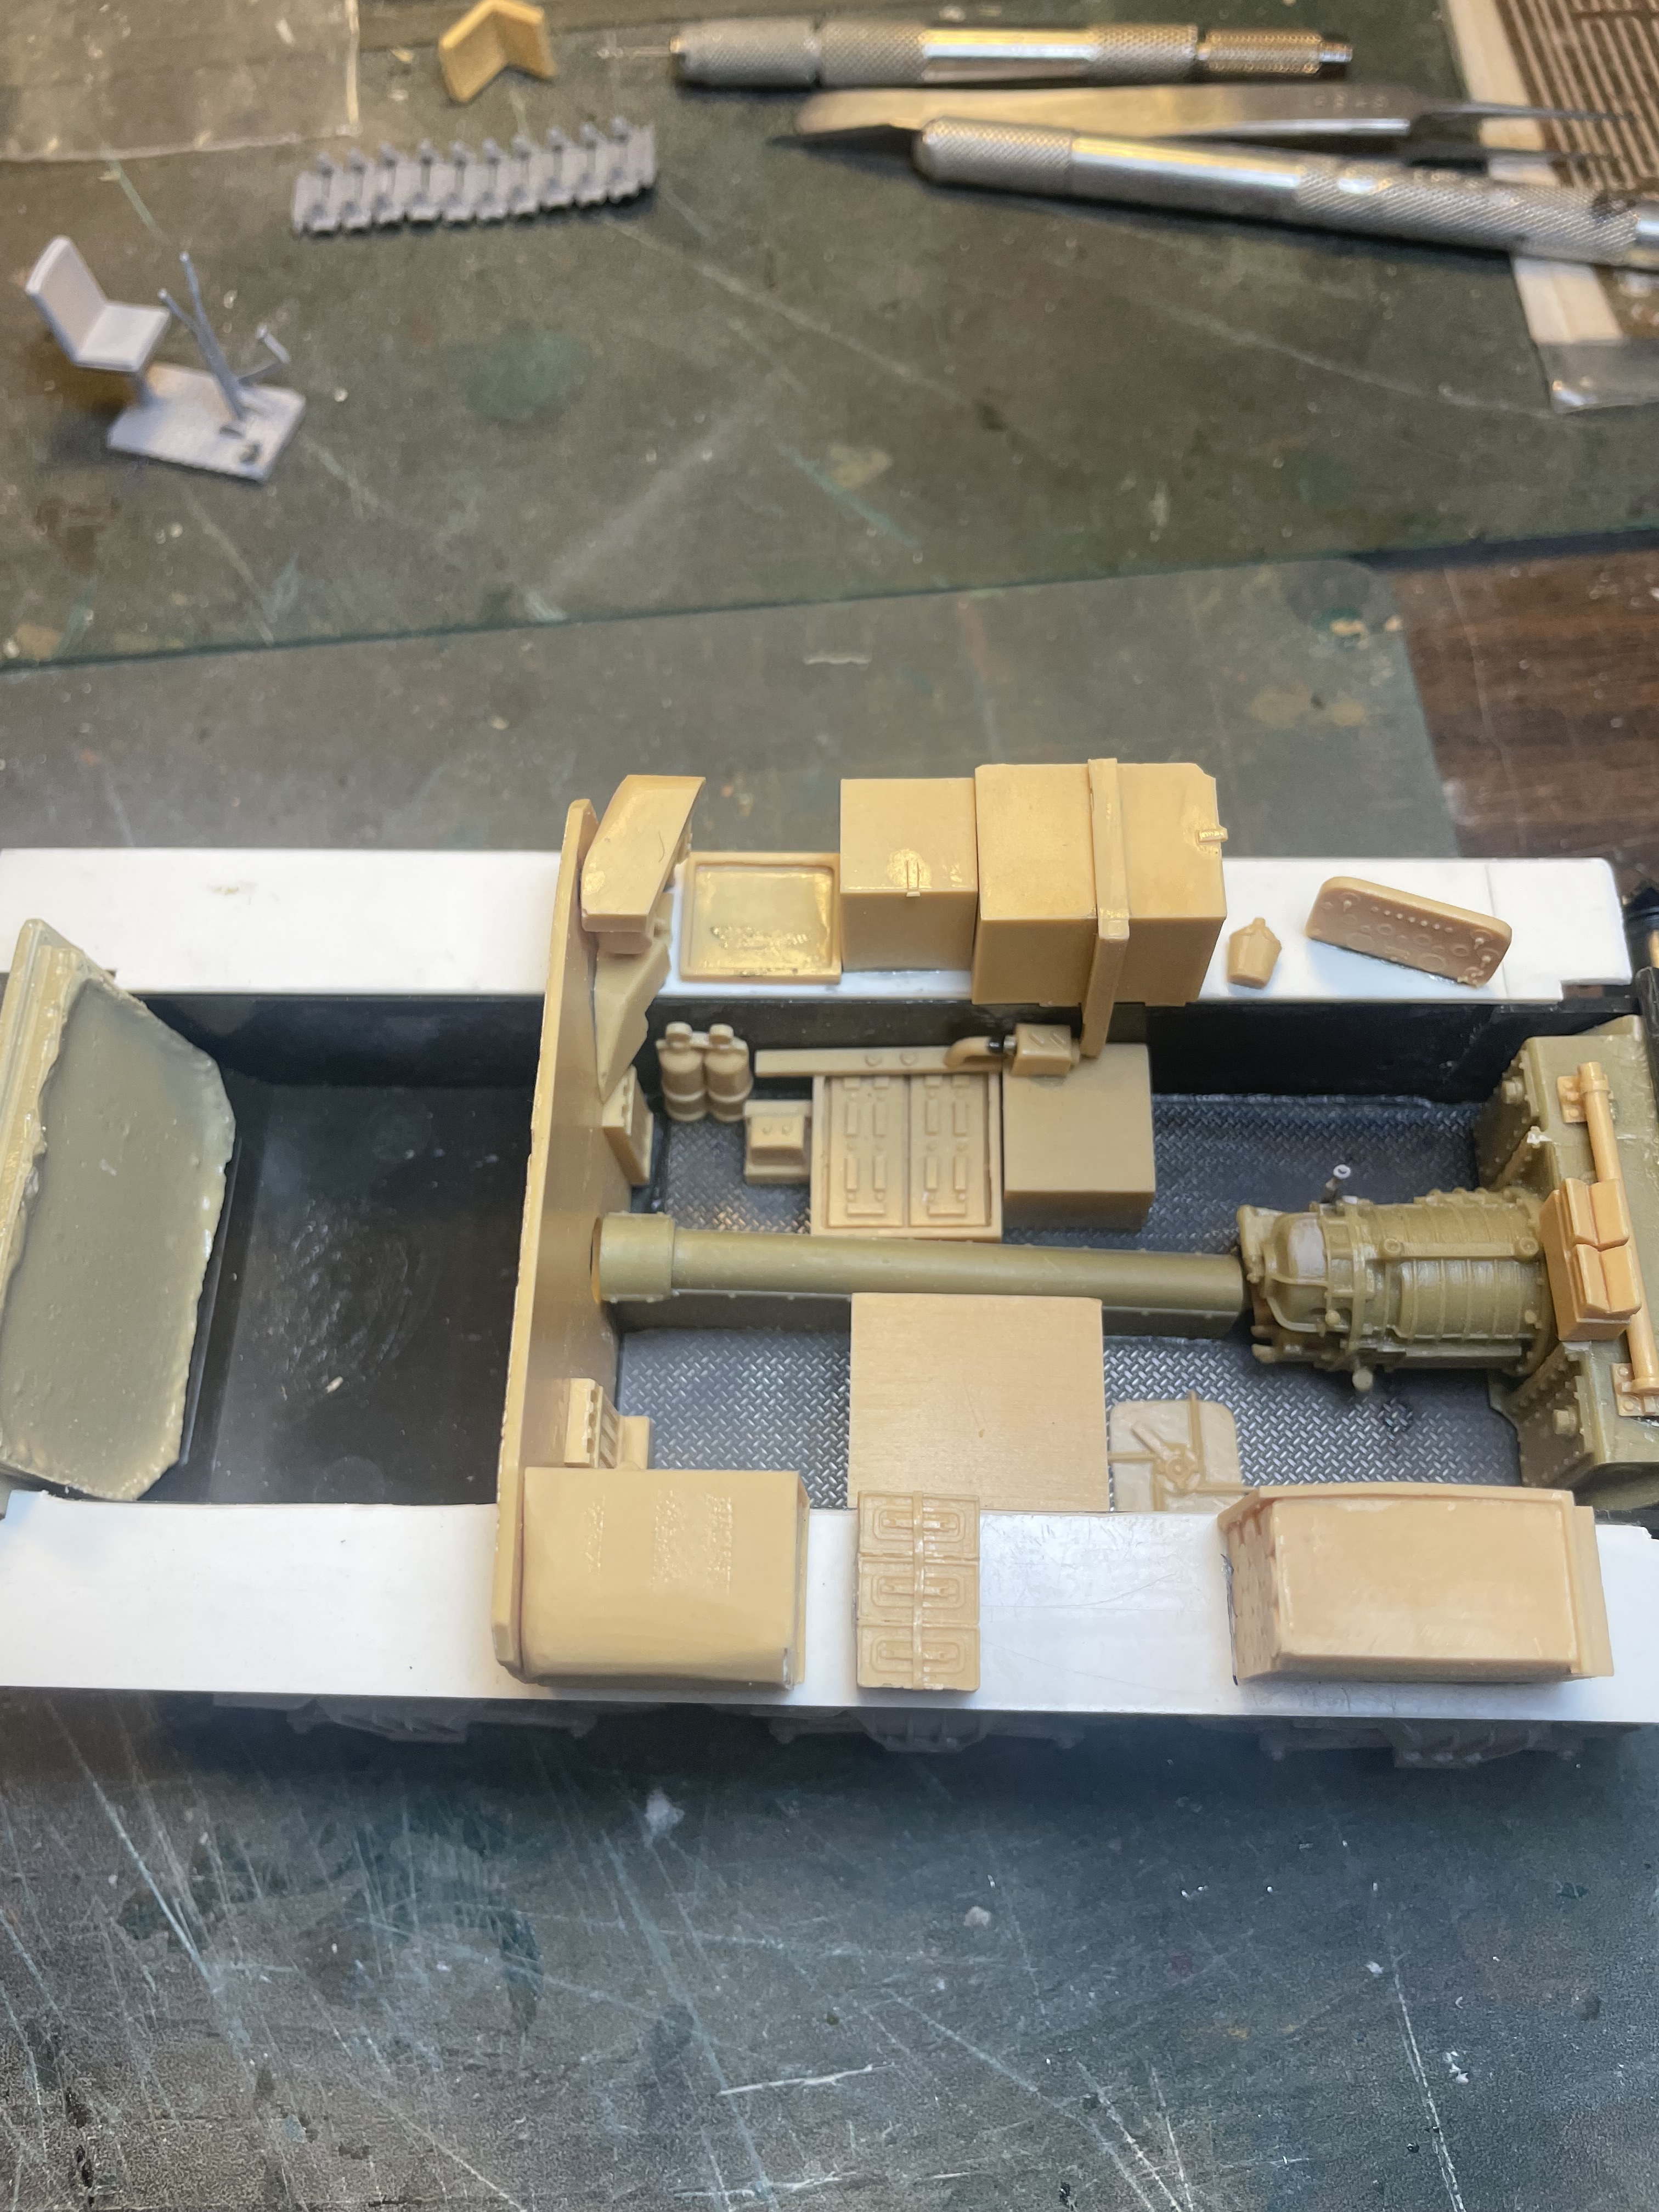
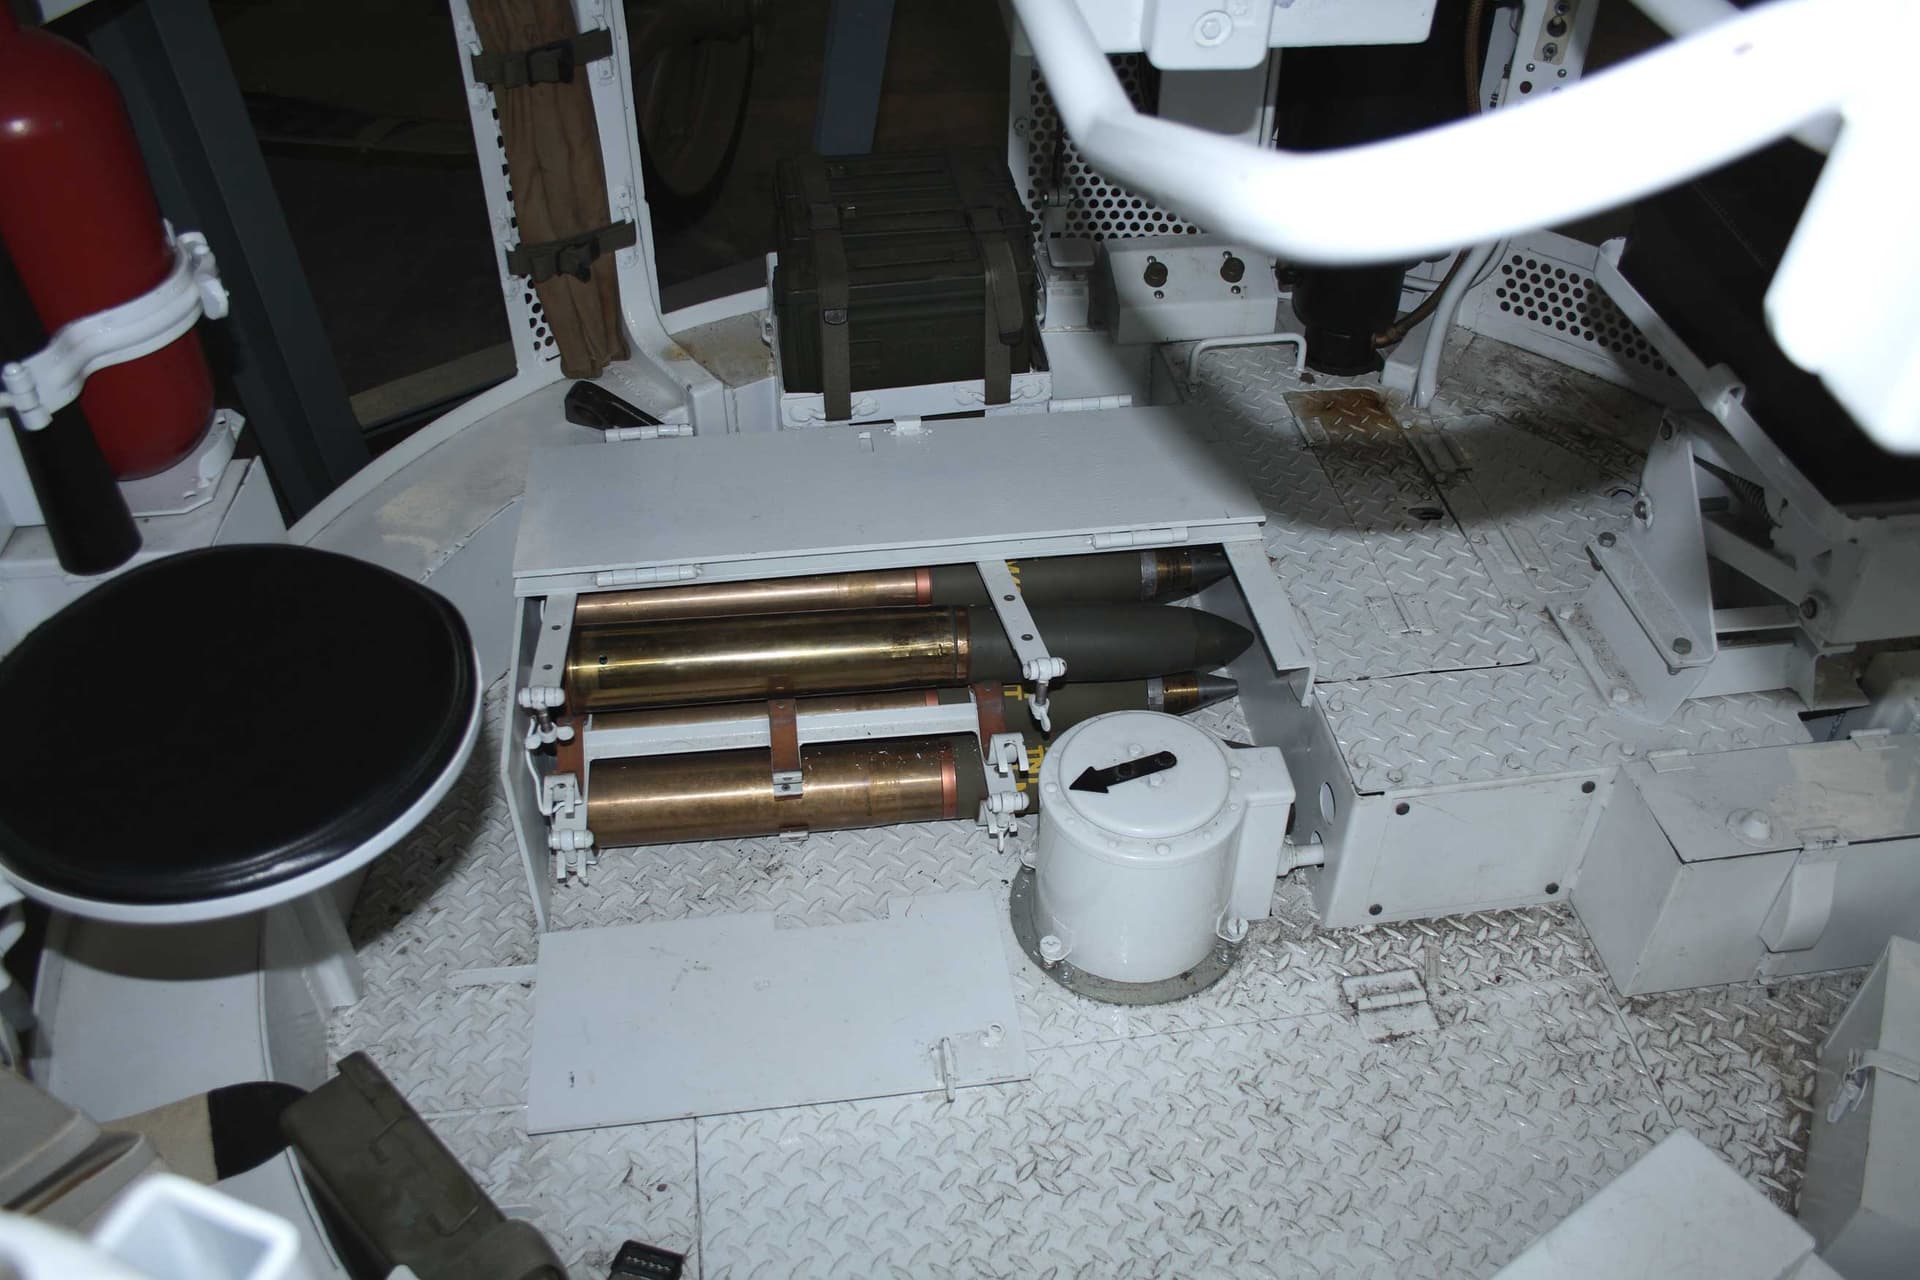
The suspension came mostly from dragon, except for the skids which came from an academy kit. I used bolts from Meng on them. Sone are from Modelkasten. I think they are a tad too big but to hell with it. I started with the Verlinden M3 transmission and drive shaft. Not sure if it’s identical to the M4 but too late to rip anything out. I then used the Tank Workshop interior. The quality wasn’t great as some of the parts were not cast well, some levers are completely missing for the drivers station and I did have to do some cutting and sanding to get everything to fit. I don’t have ammo storage for the 105 rounds so just used the ones that came with the kit. Most of it won’t be seen anyway. Sponsons were made from plastic card of course. The air cleaners were from the Panzer concepts kit as well as the rear hull plate. I added rods from plastic and wing nuts from a Verlinden PE set. Here are some pics, comments welcome.
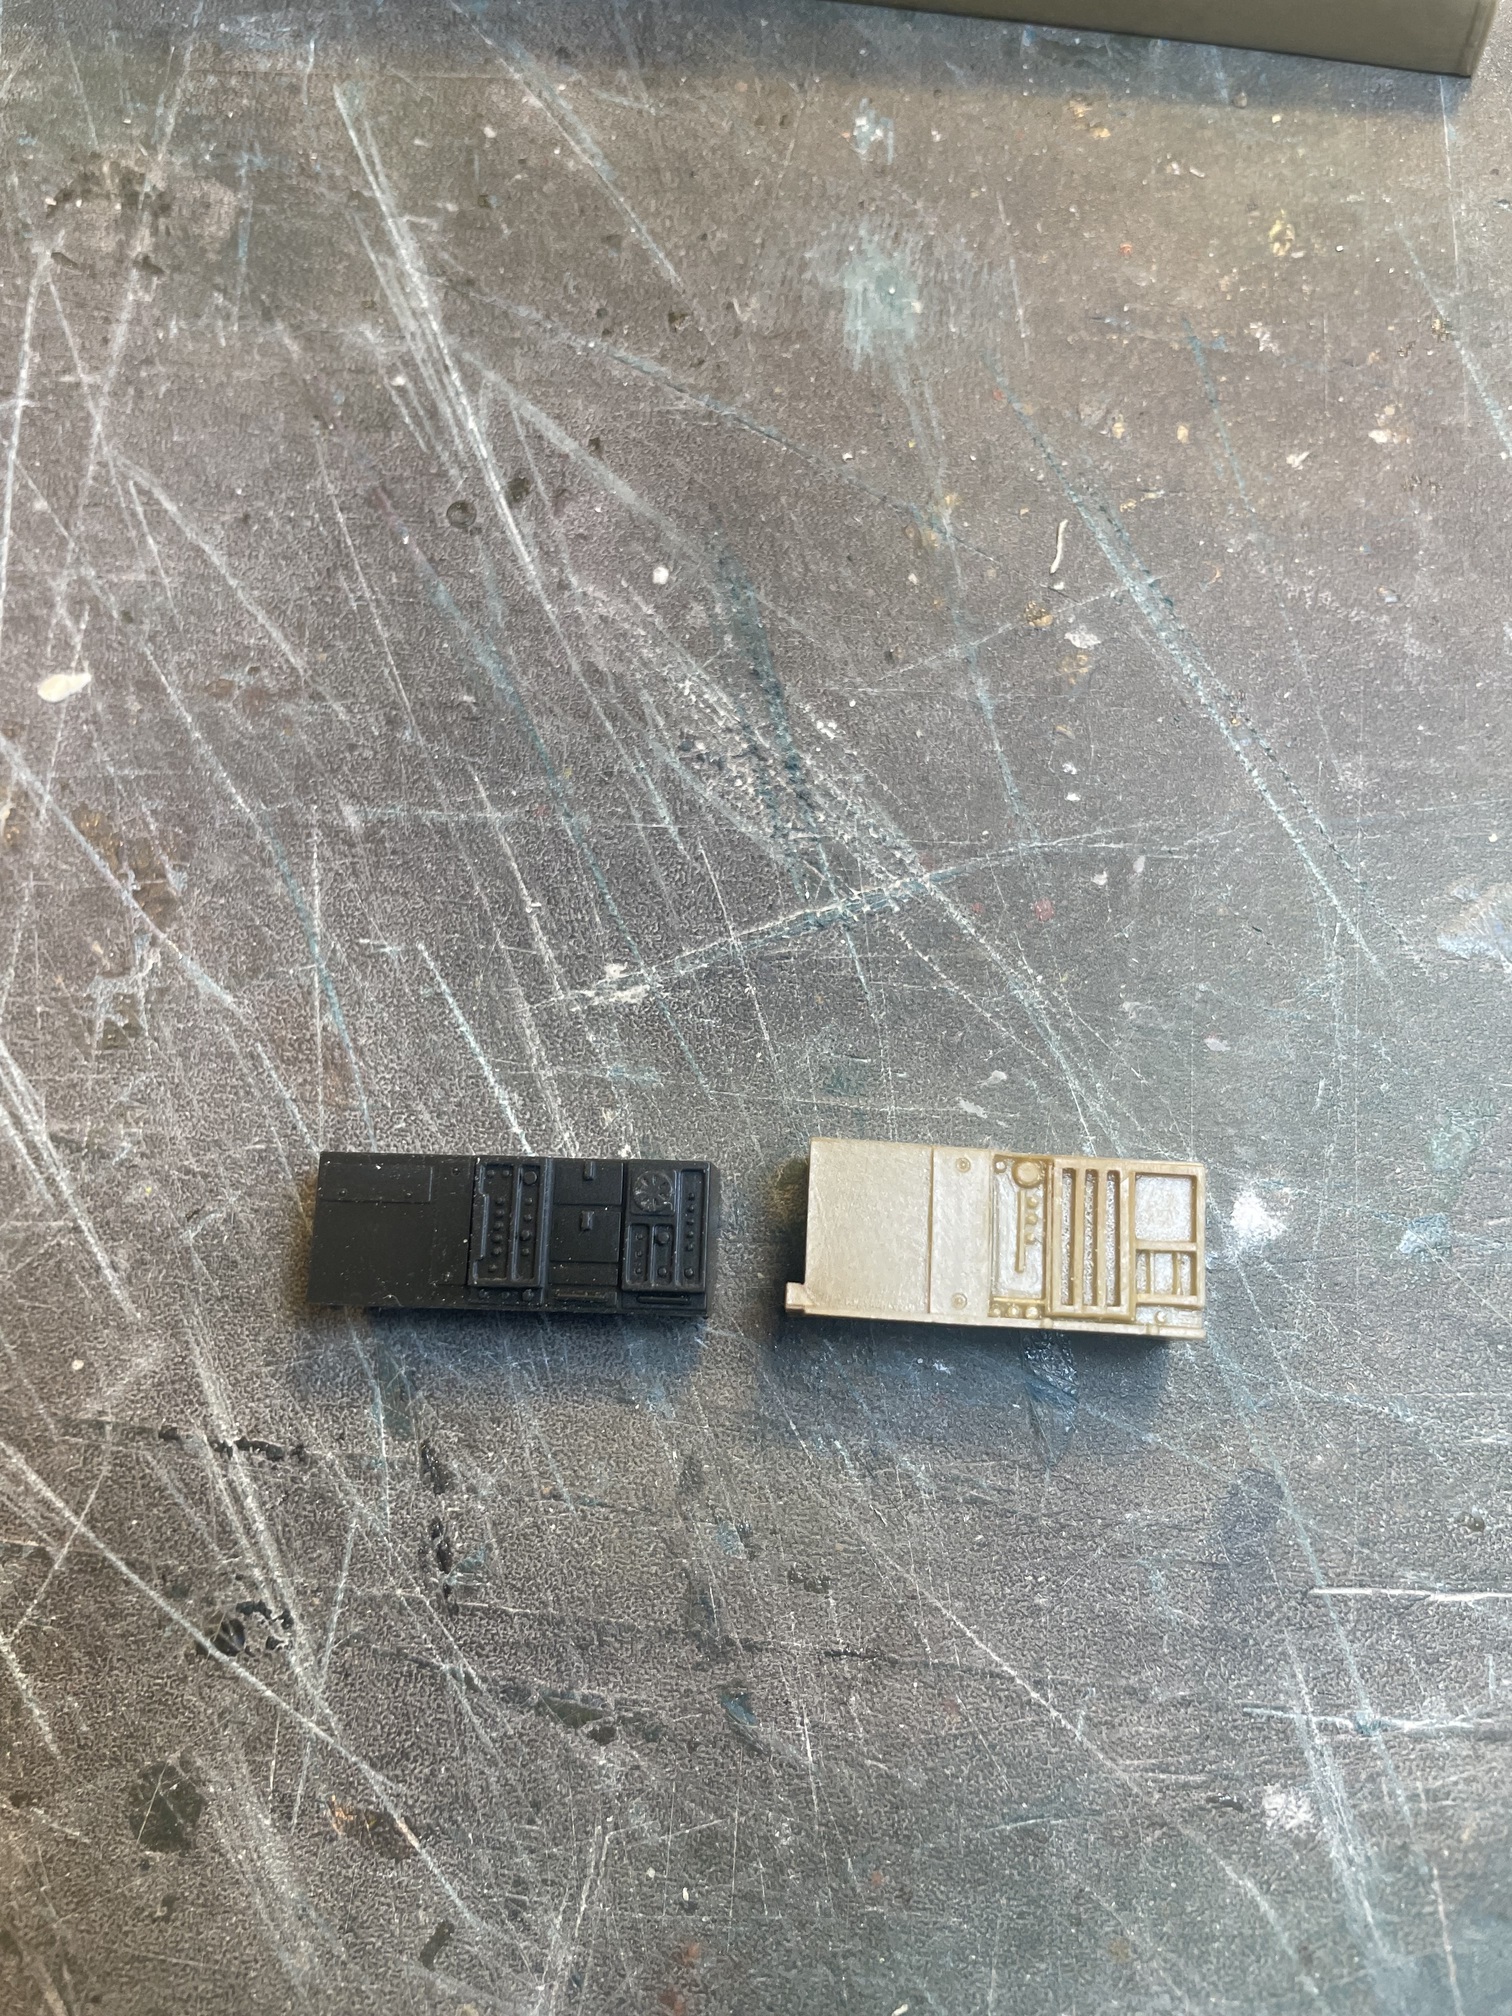
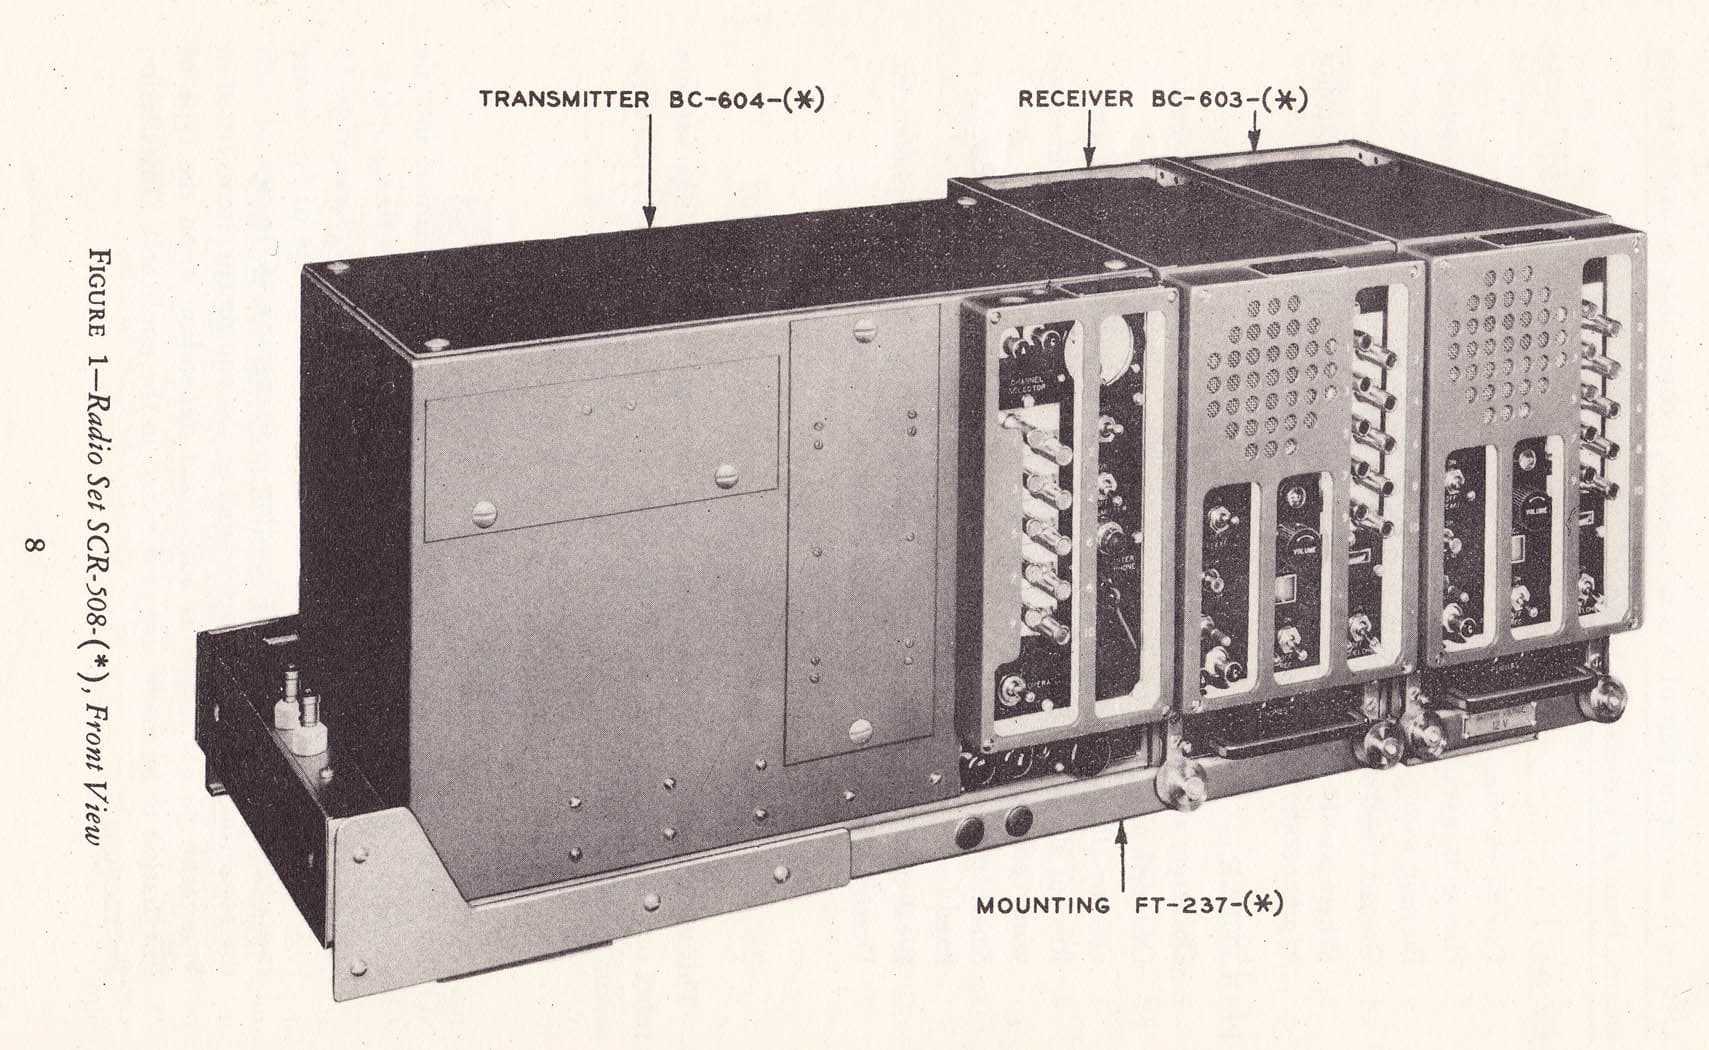
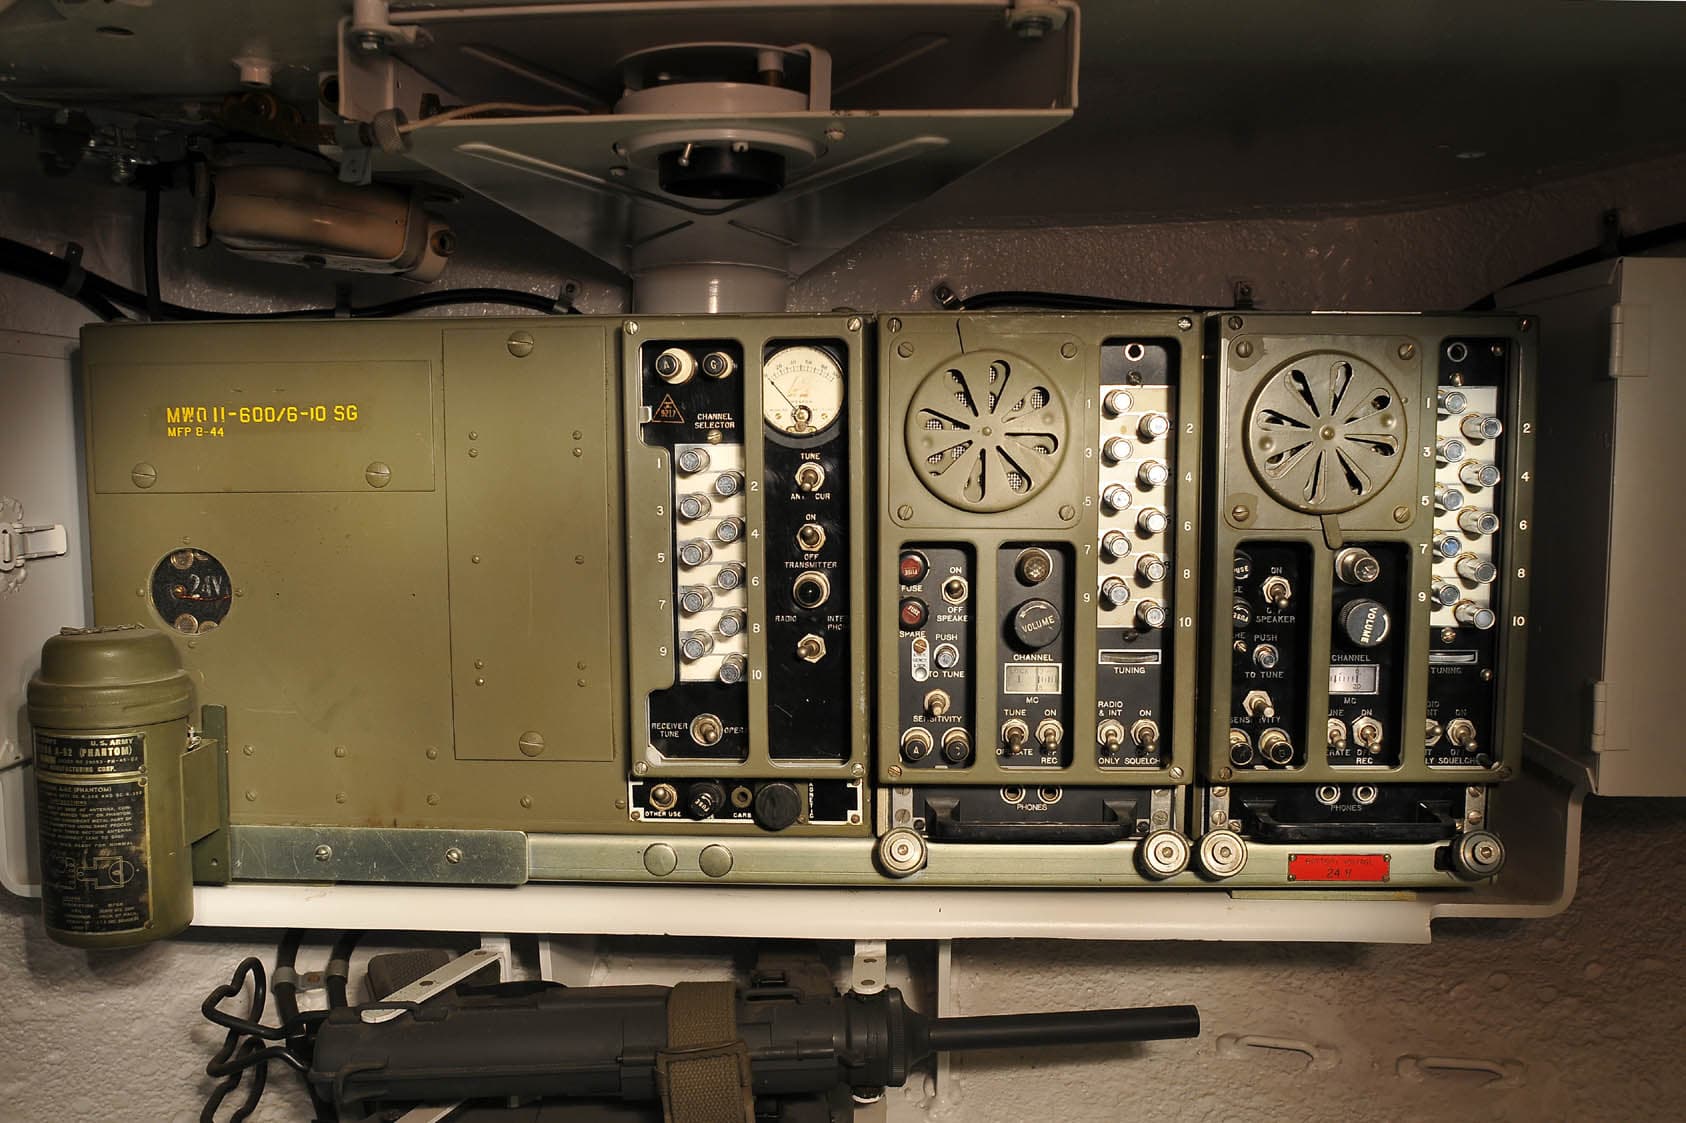
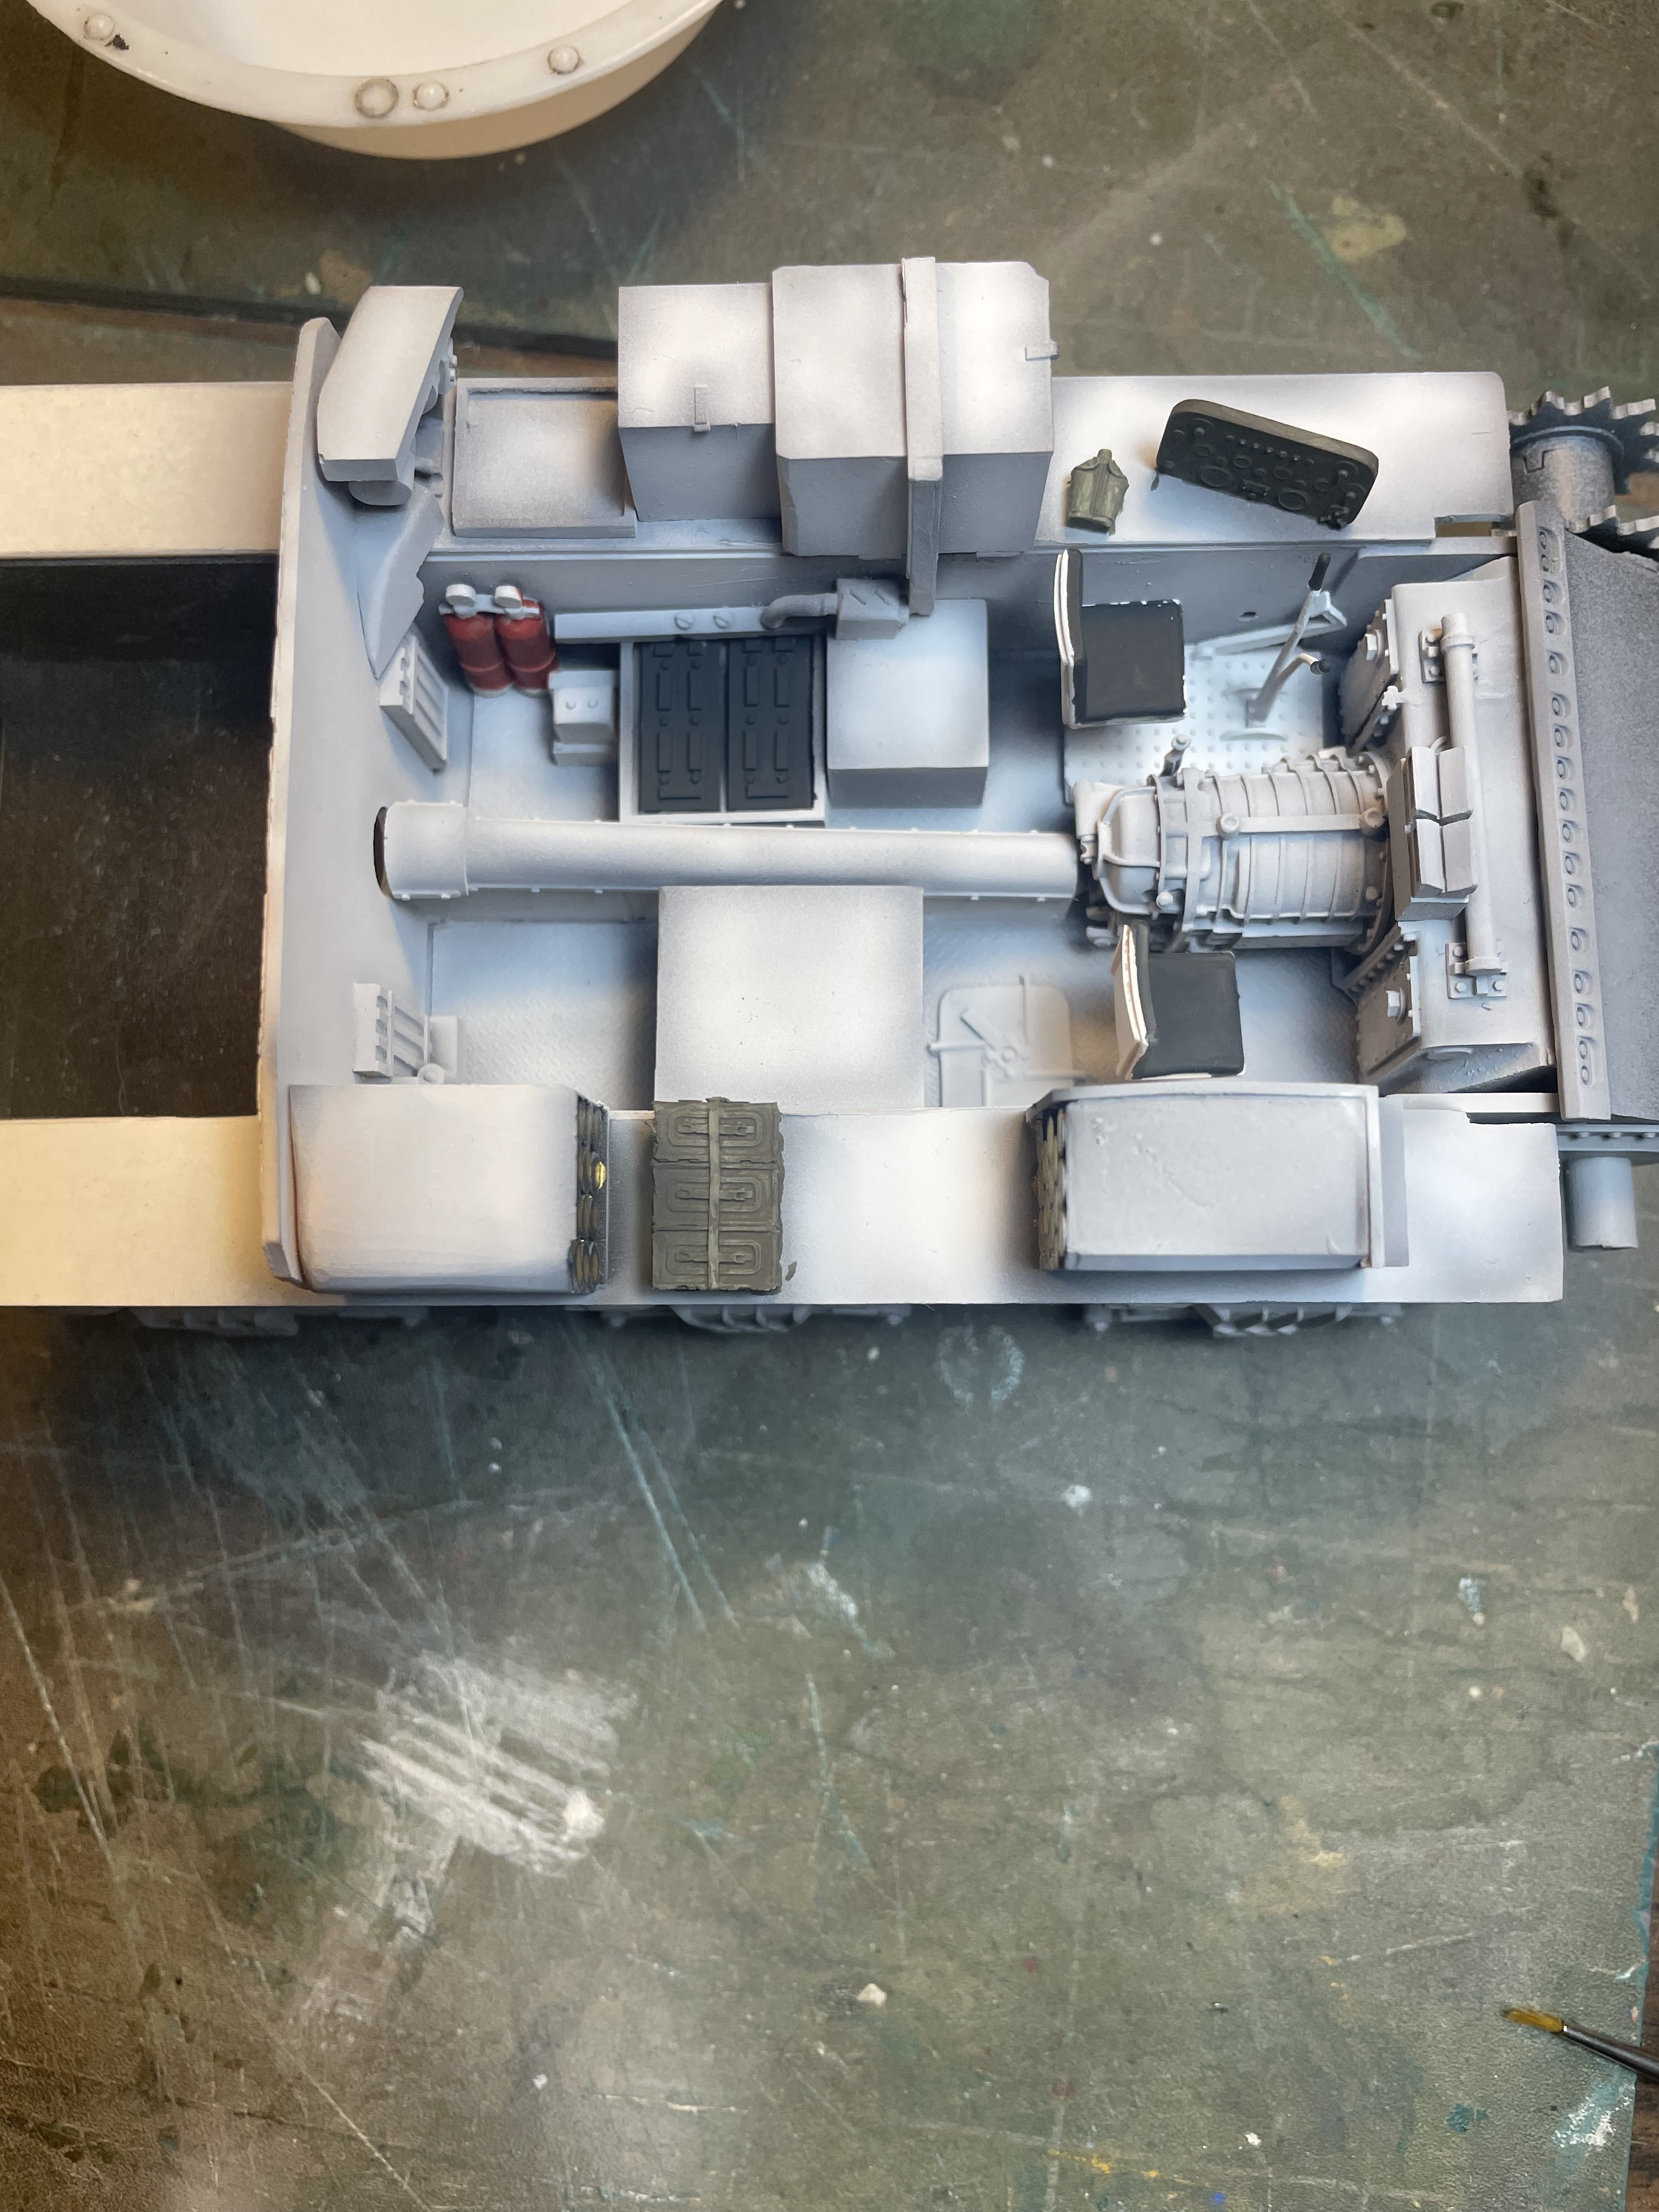
I have a question about the radios. The one on the left is from the Tamiya kit, Verlinden on the right. I can’t figure out which radio they’re supposed to be : SCR - 508, 528, or 538.
7 Likes
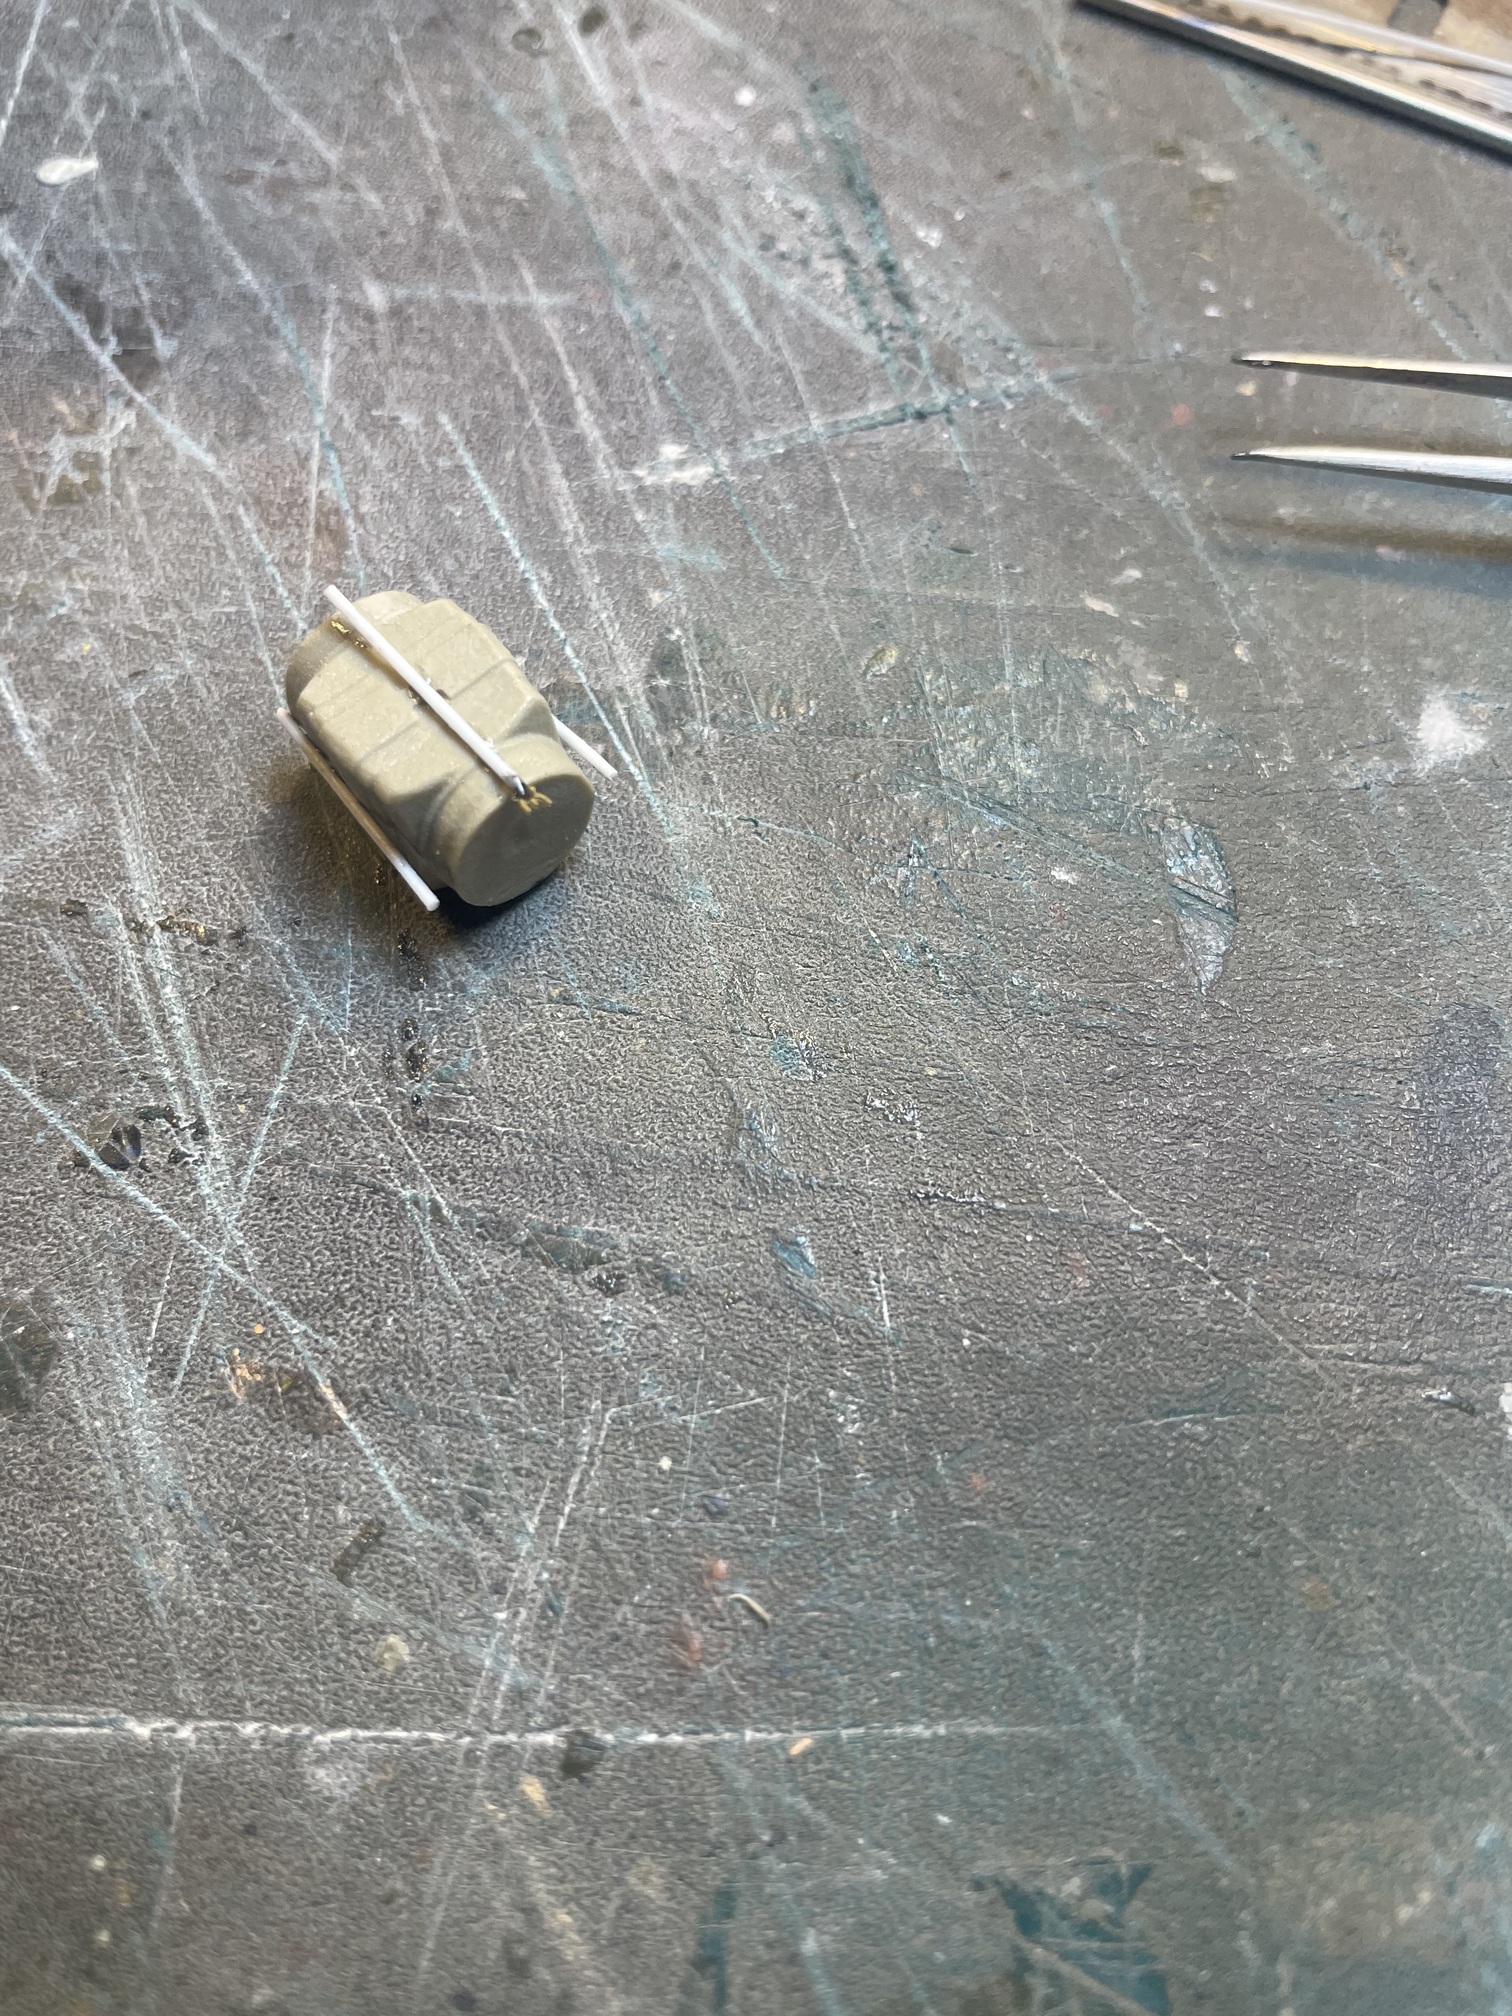
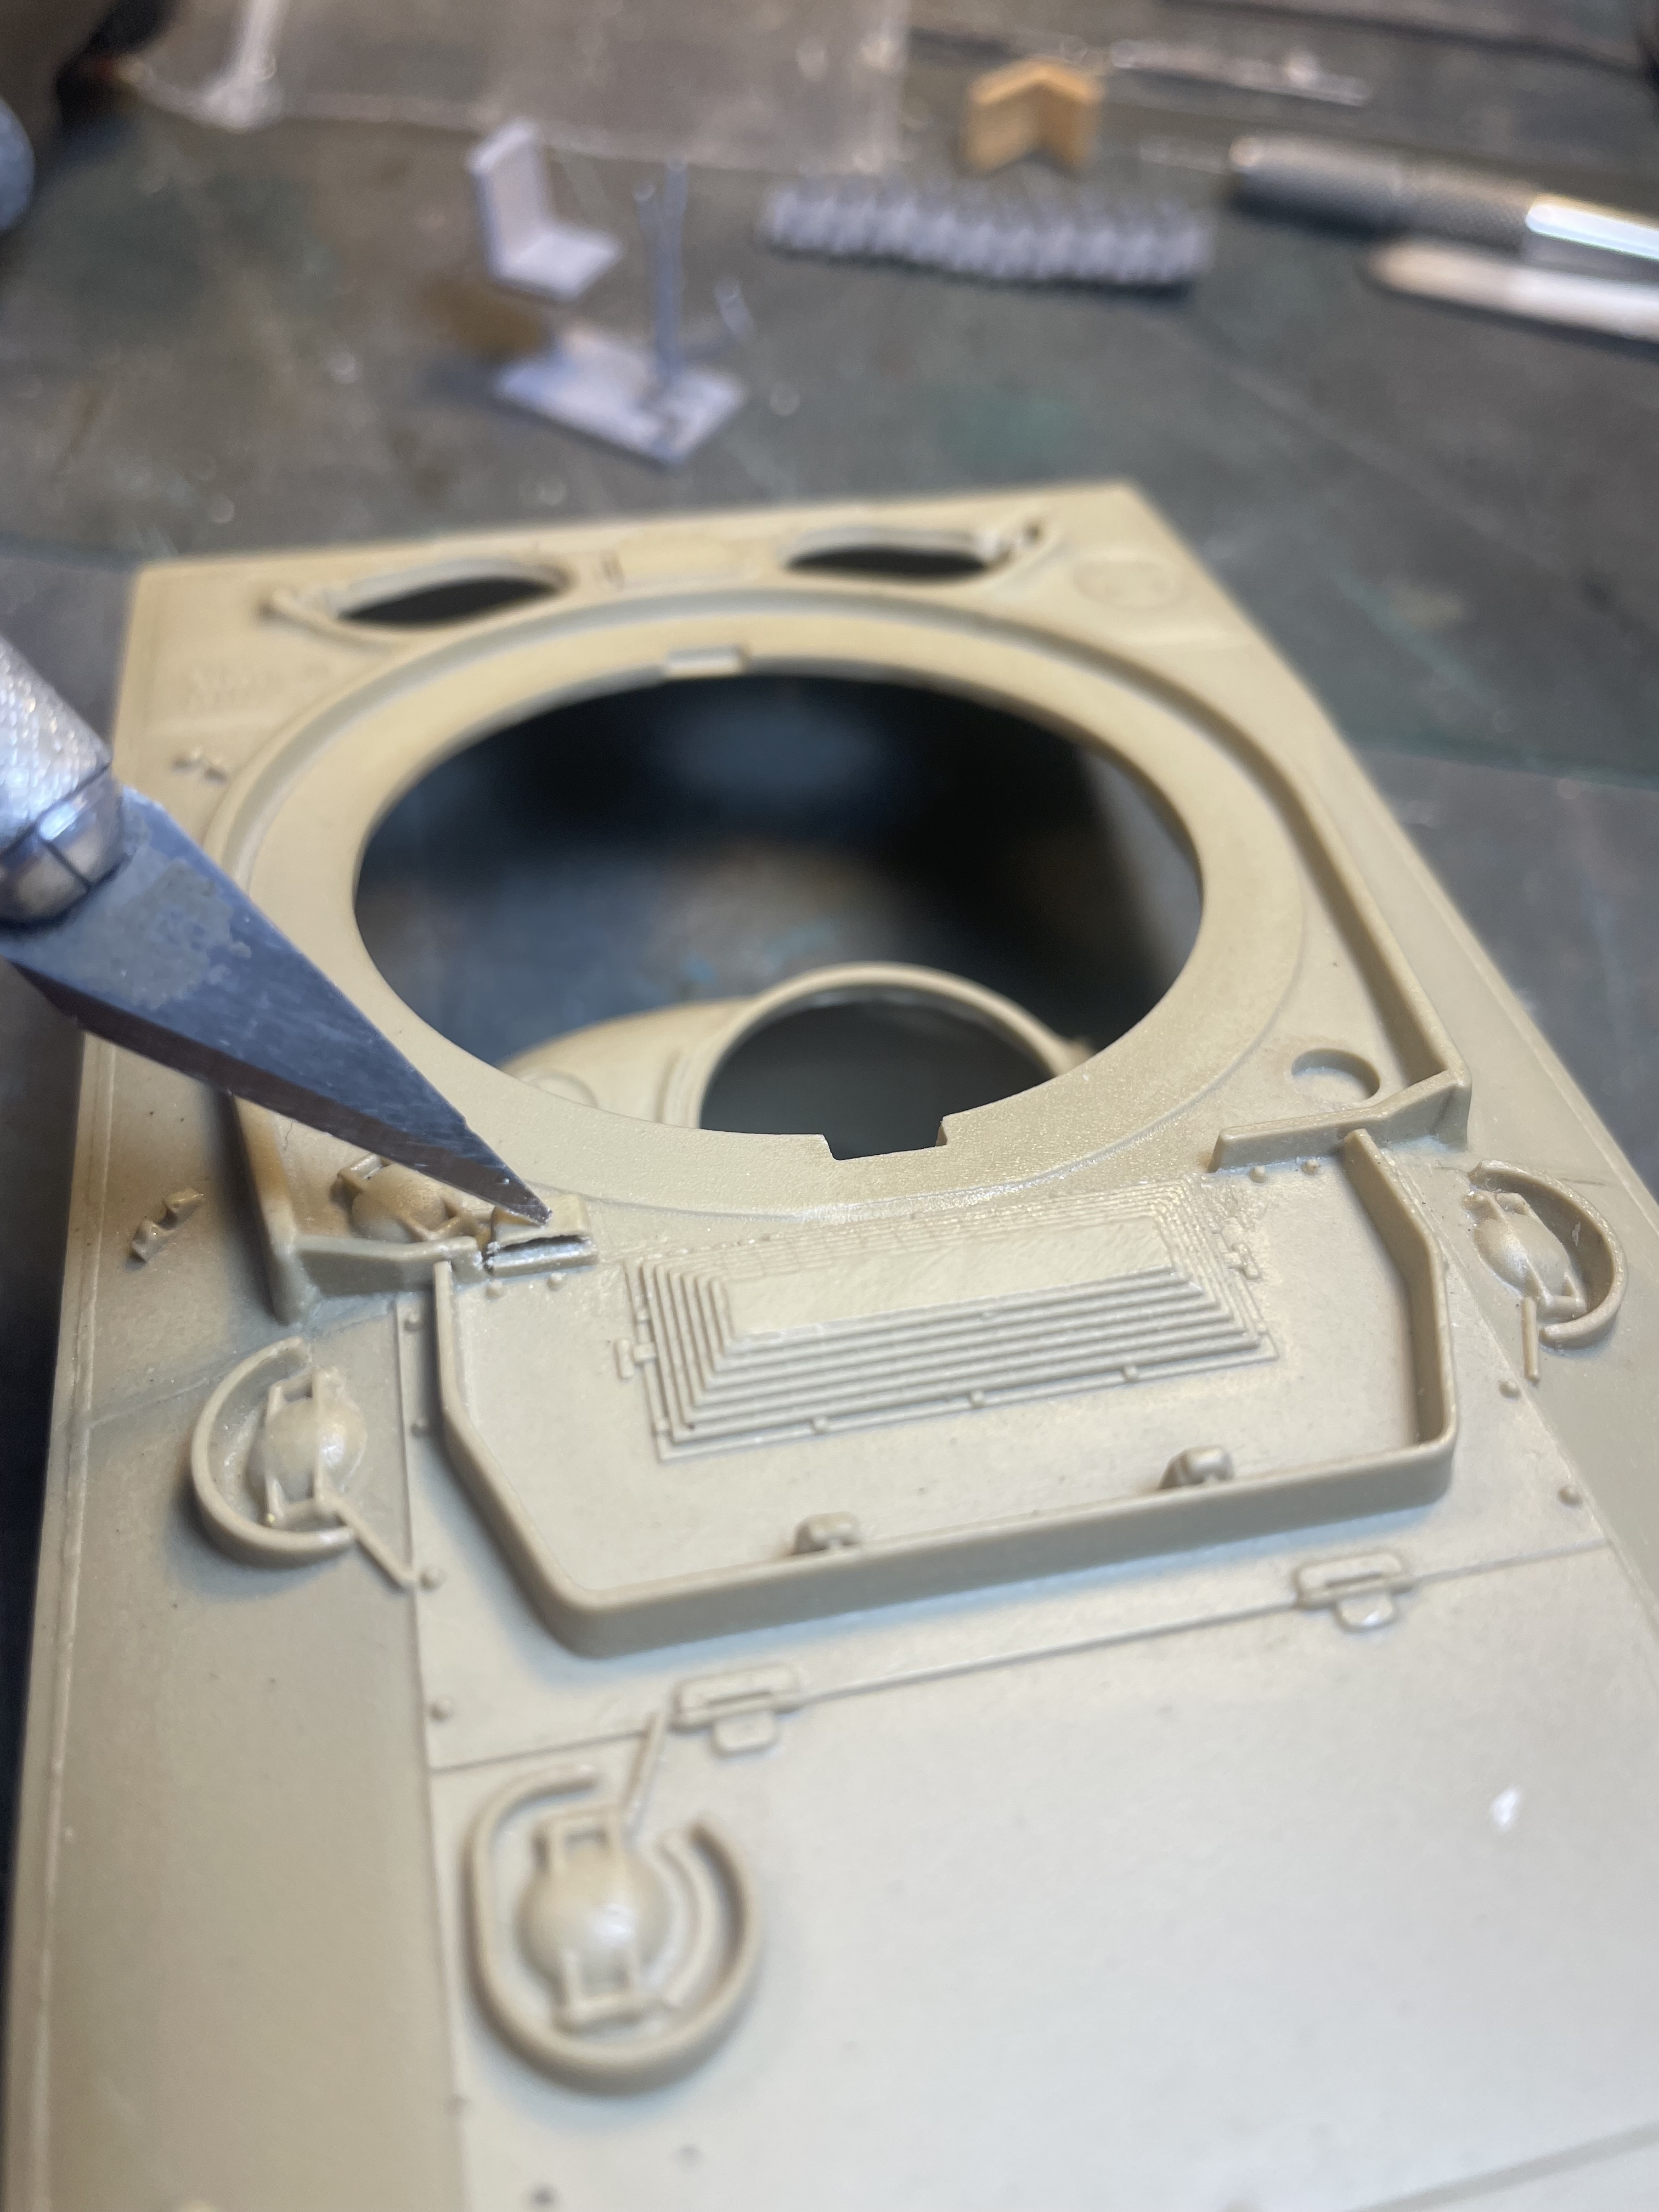
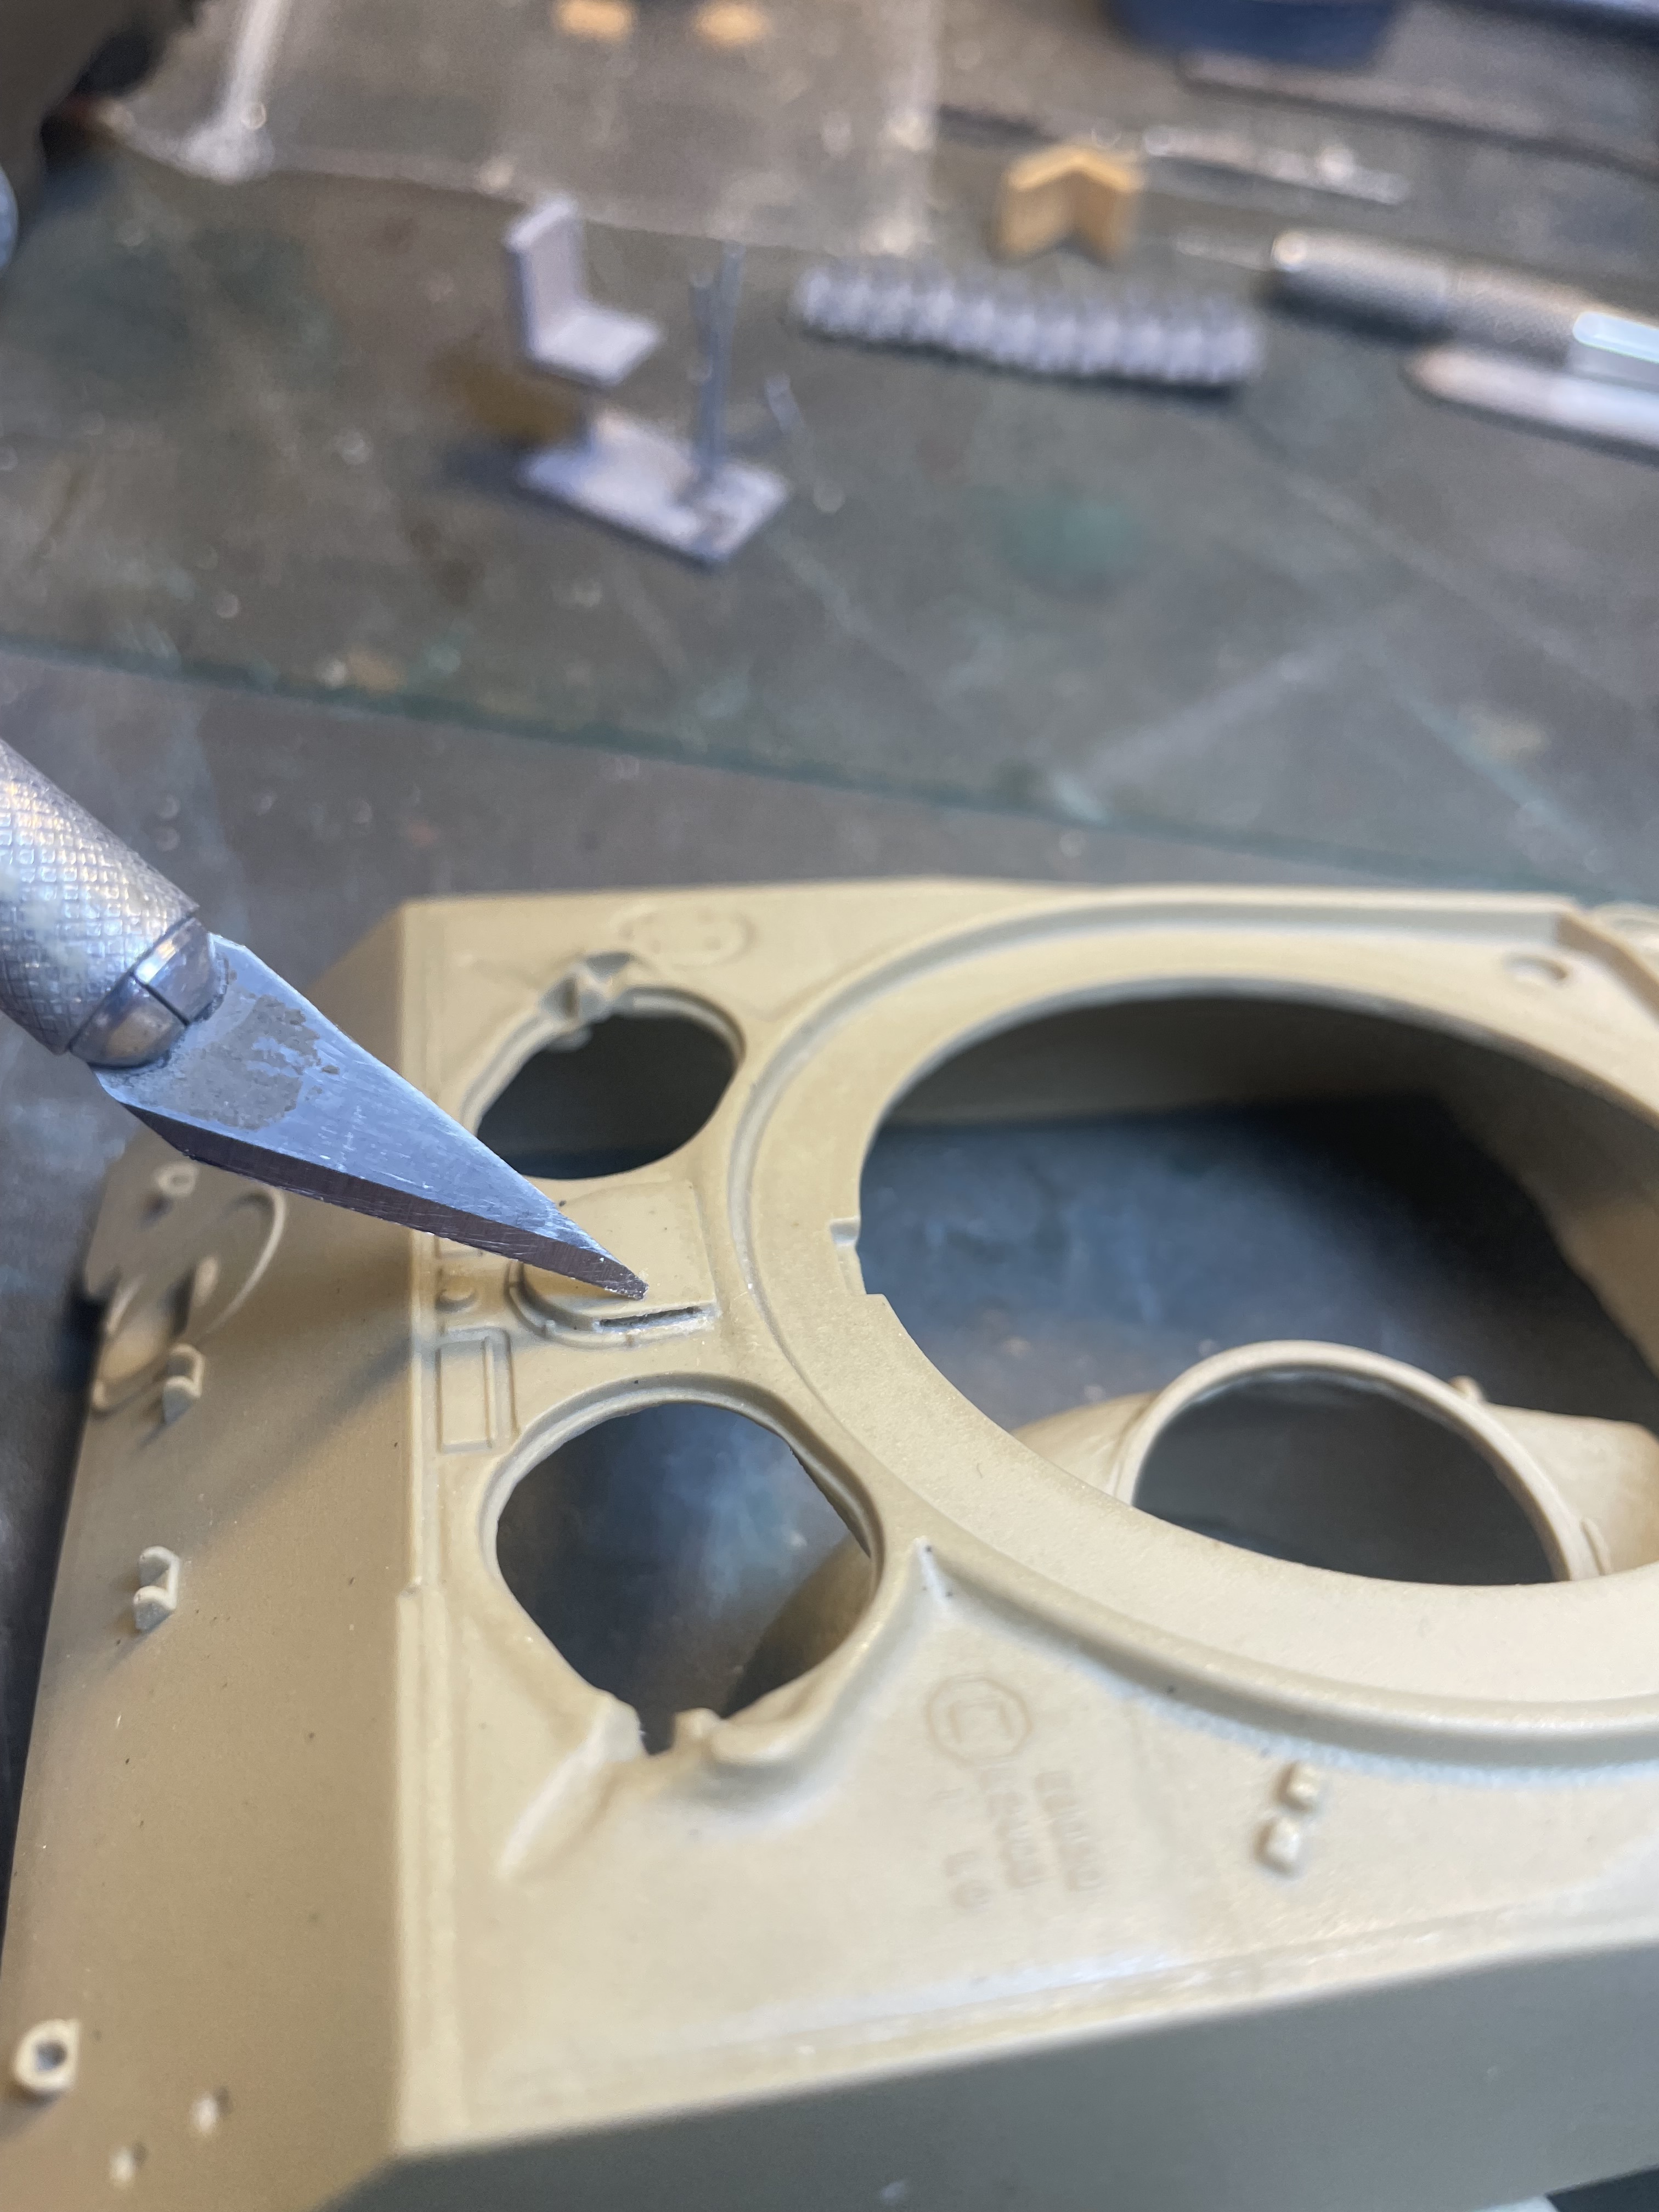
Oh I had to carve out the fire extinguisher pull handle area on the engine deck and the blower exhaust area between the hull hatches. Just gotta add t handles and a piece on either side of the blower cover.
1 Like
SCR-508 Radio System.
SCR-508 on an M4A3E2 Jumbo Sherman.
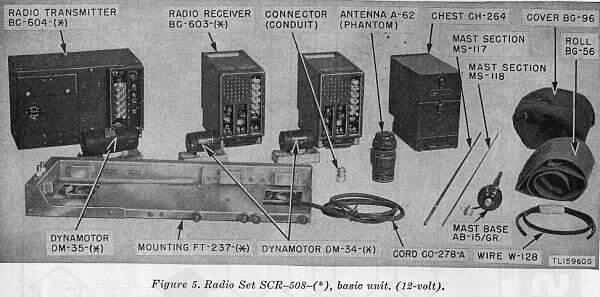
US Army manual illustration of the SCR-508 Radio System and its components.
4 Likes
Thank you Reynier . I find radios very confusing at times especially since some of them look so similar.
3 Likes
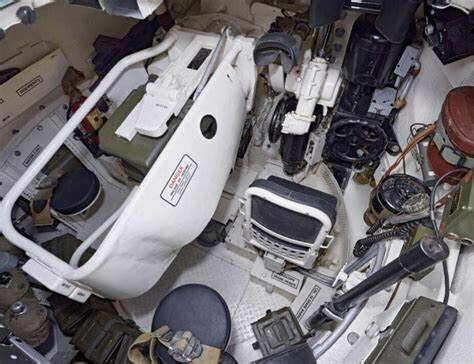
Anyone know what color the floor should be? White like the rest of the interior or OD, or was it left in it’s metal color?
Interior is definitely white in color.; except for the inside of the hatches, which are painted OD.
3 Likes
Looking great so far. keep it up.
Cheers,
Ralph
1 Like
Thanks Ralph!
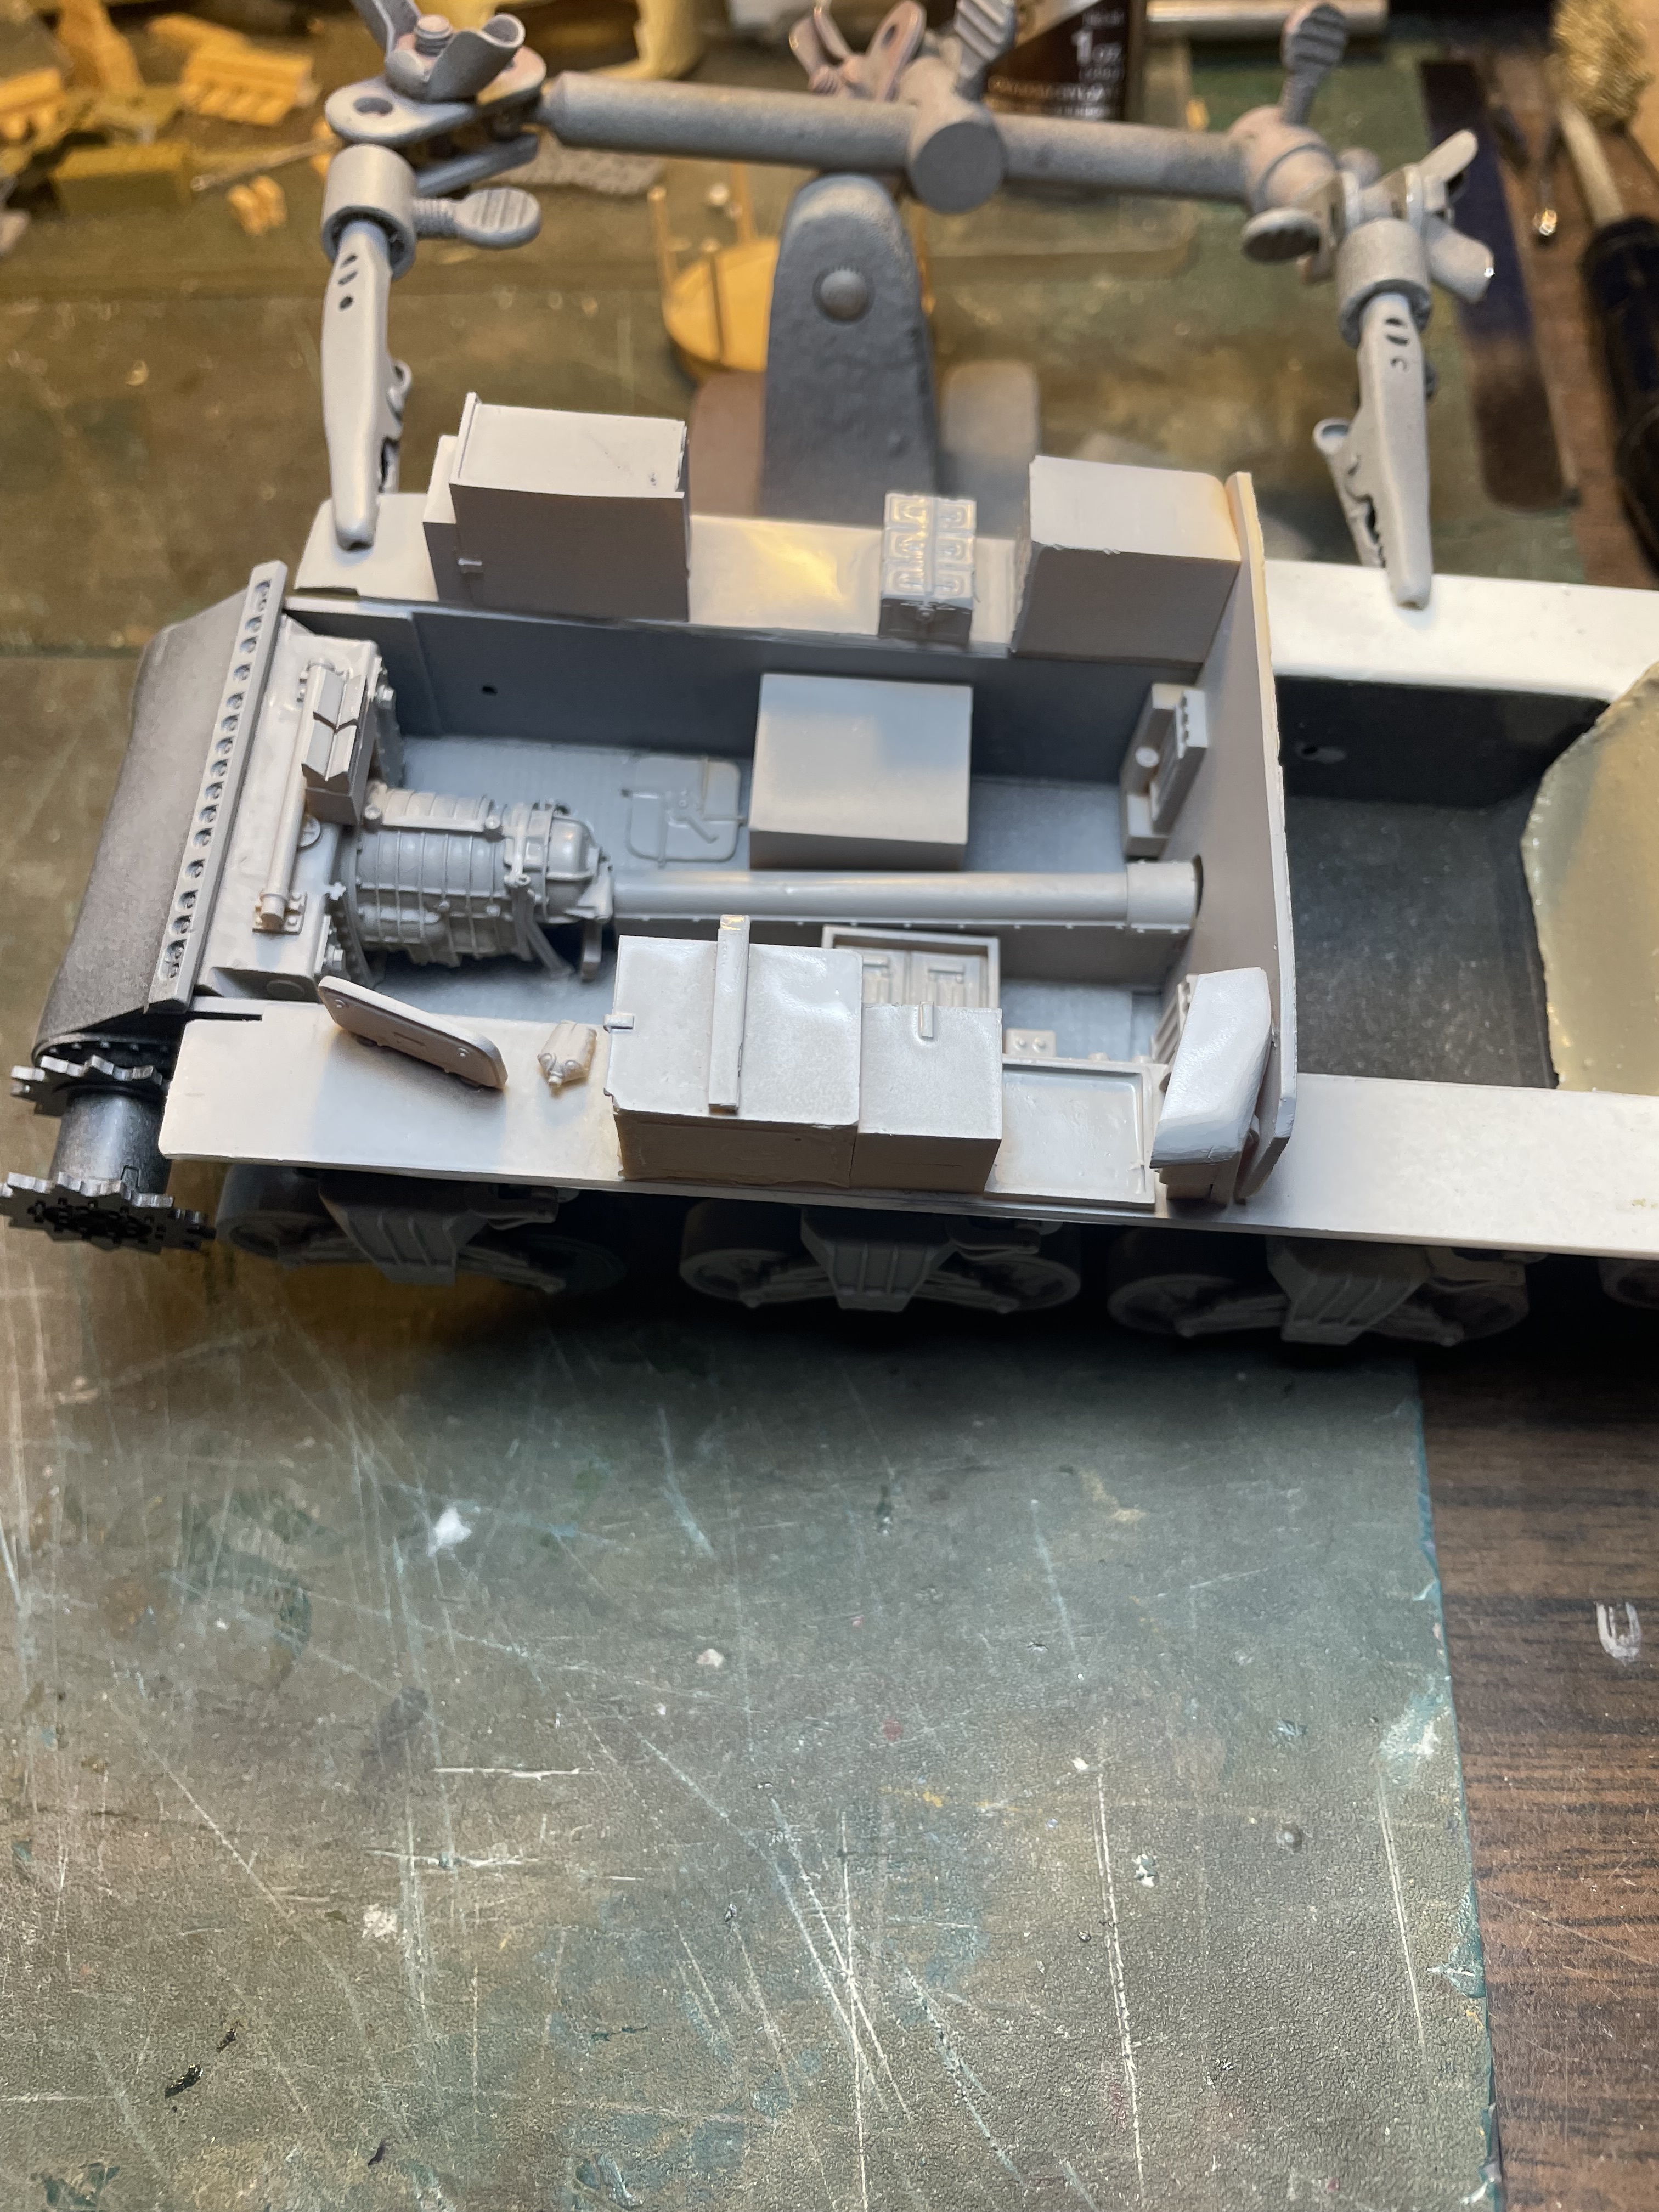
I base coated the lower hull interior. Gonna start washes and scratch it up a bit.
5 Likes
Excellent job on the interior !!!
Looking forward to more .
1 Like
Thanks so much Glenn.
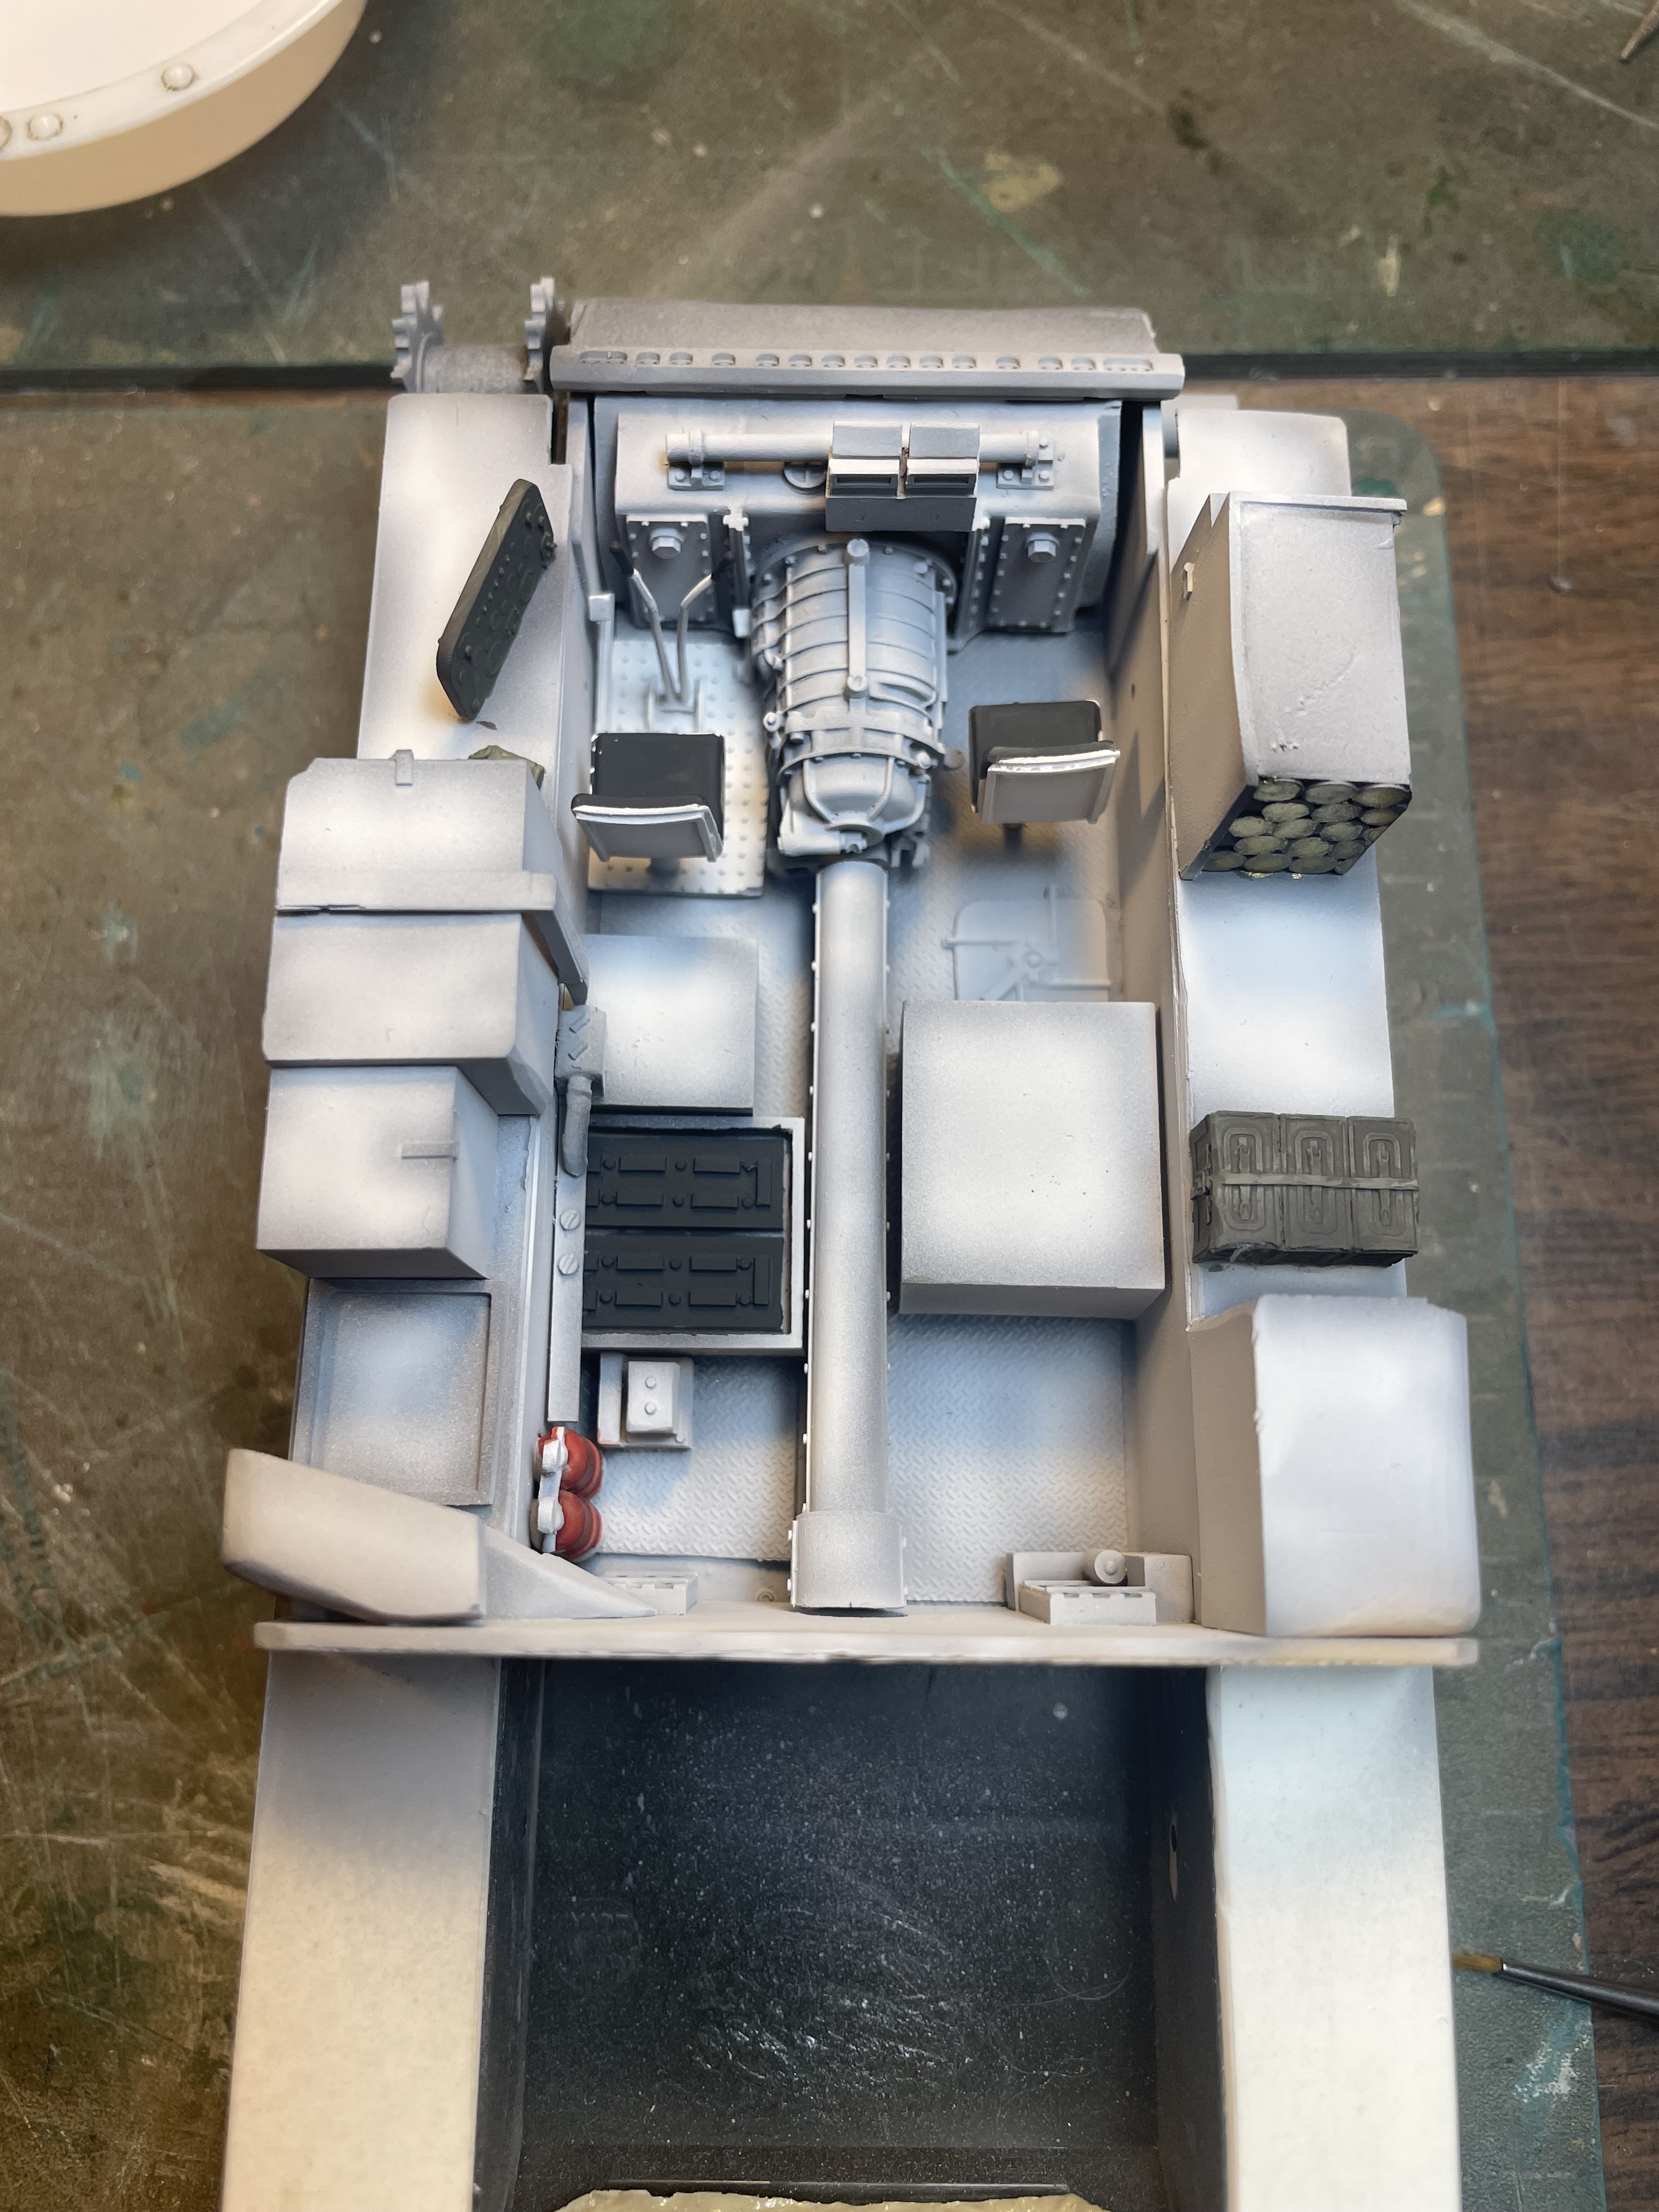
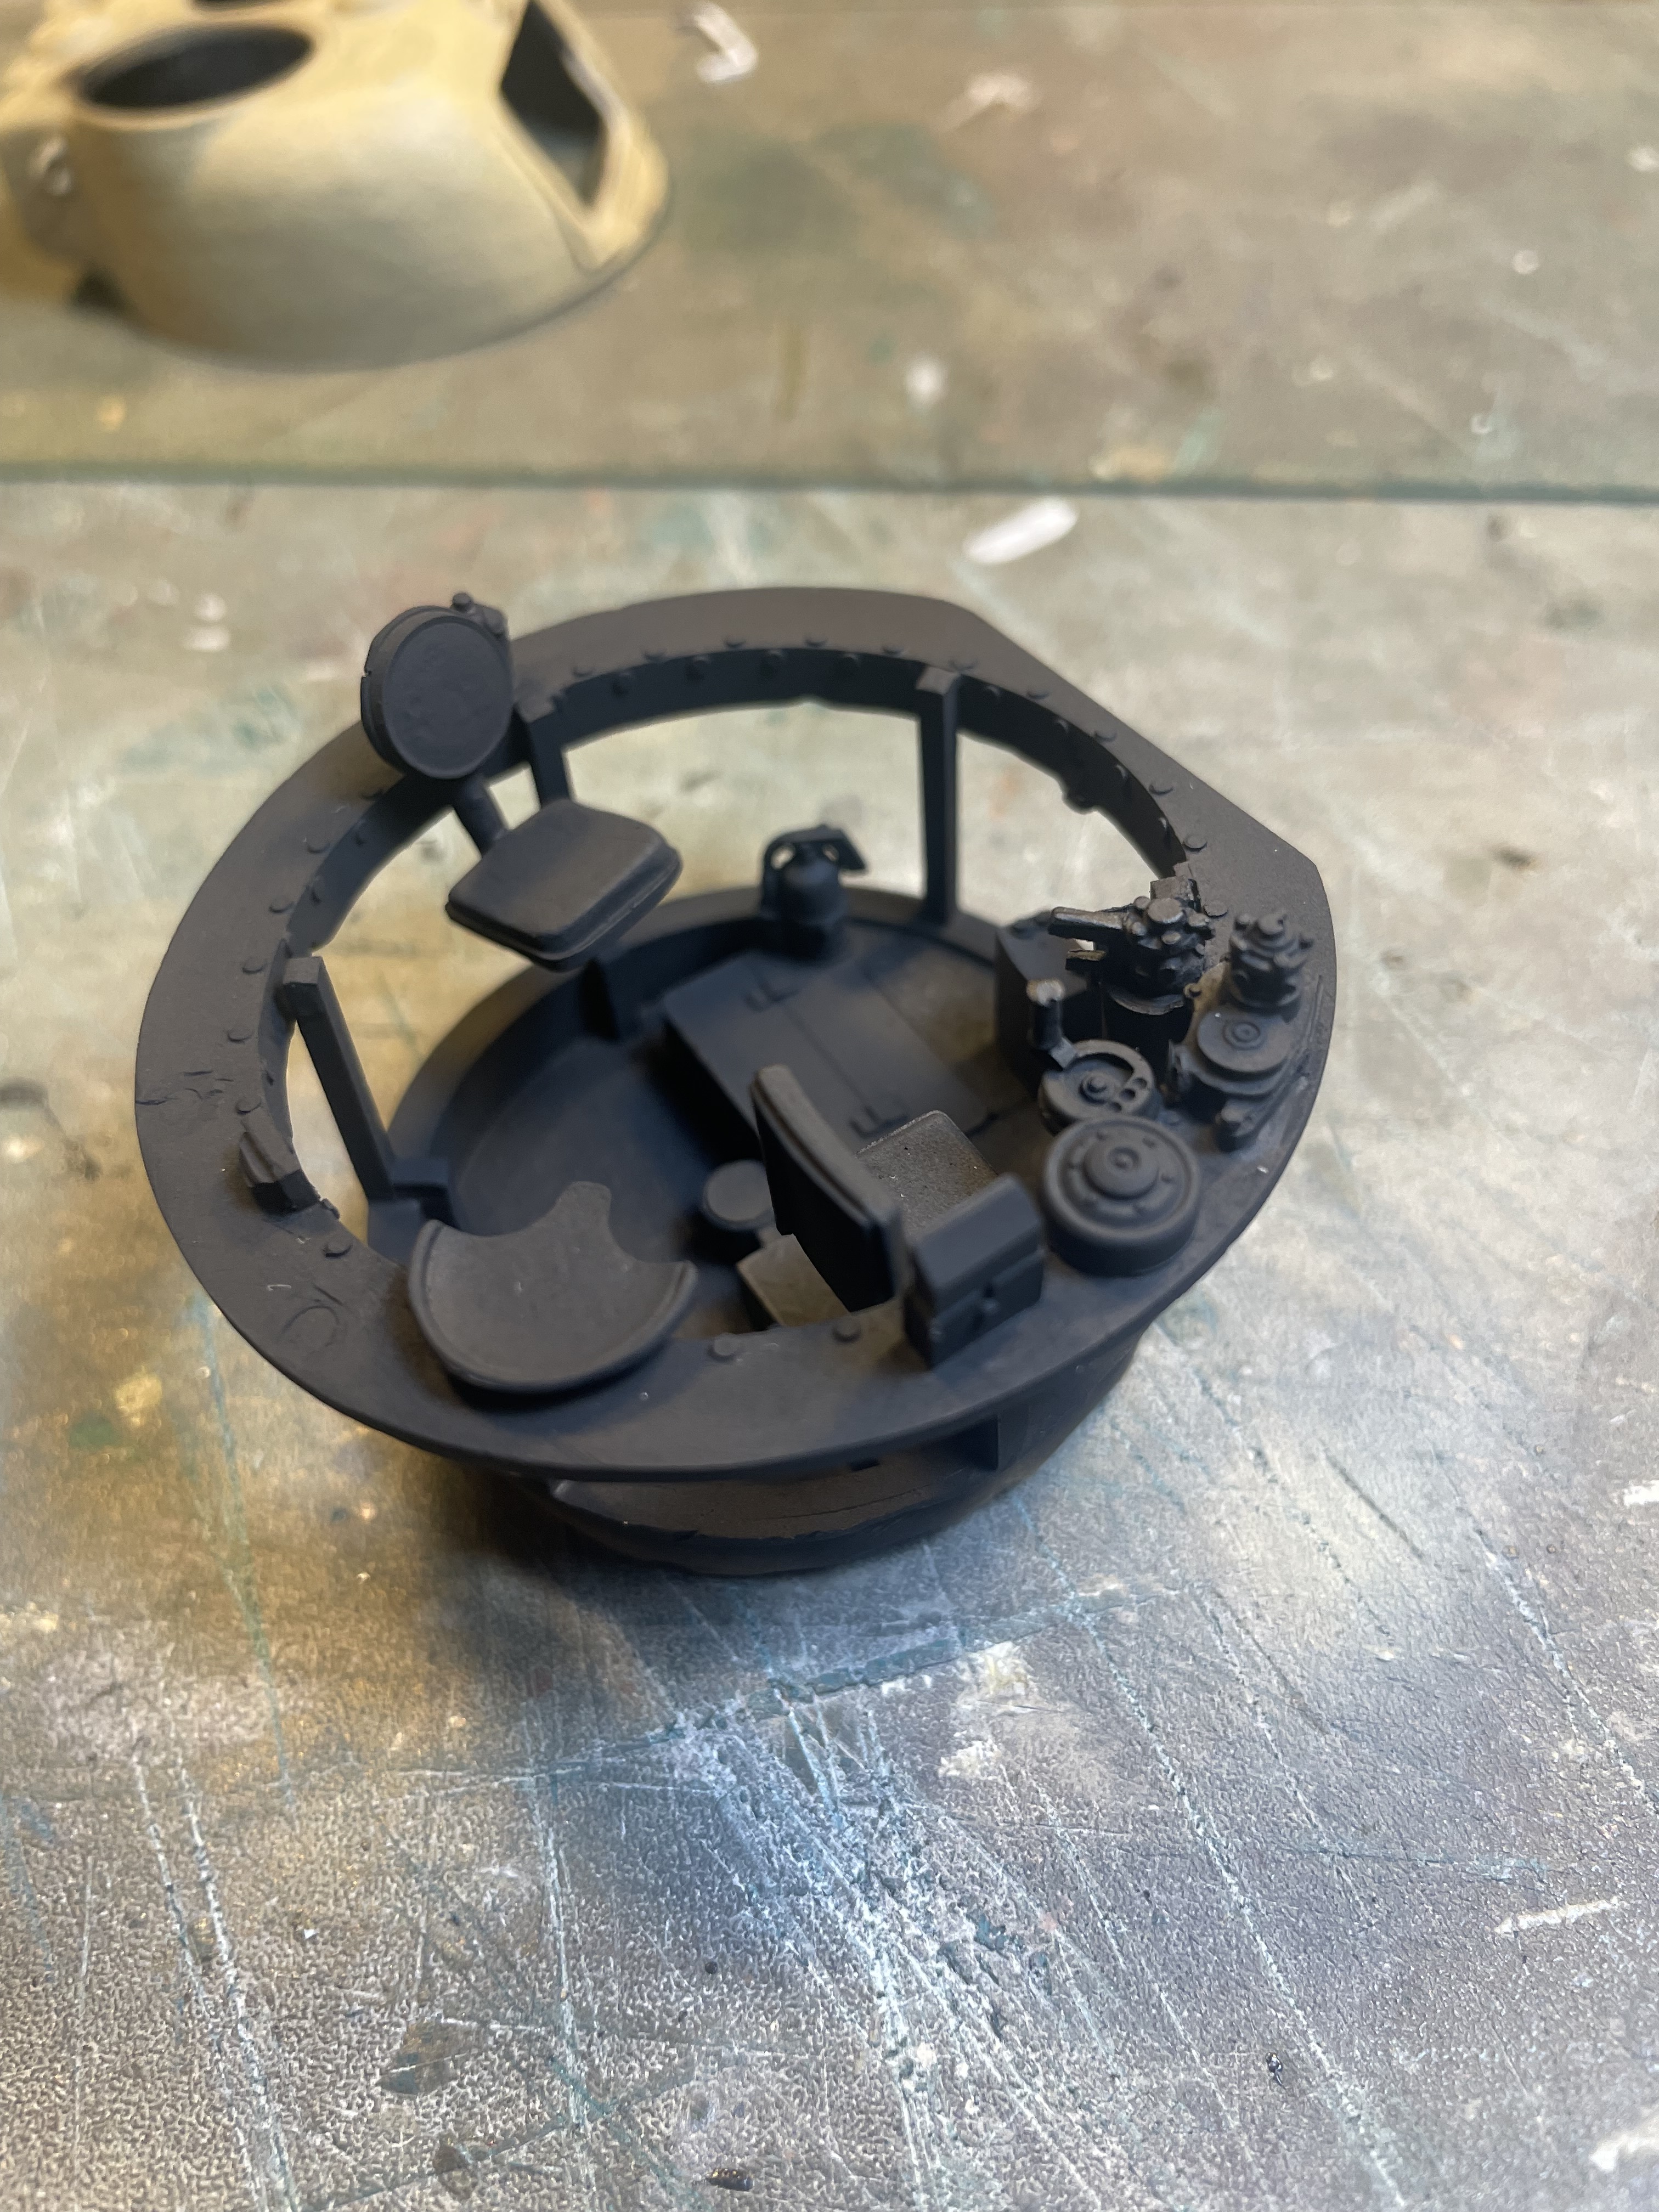
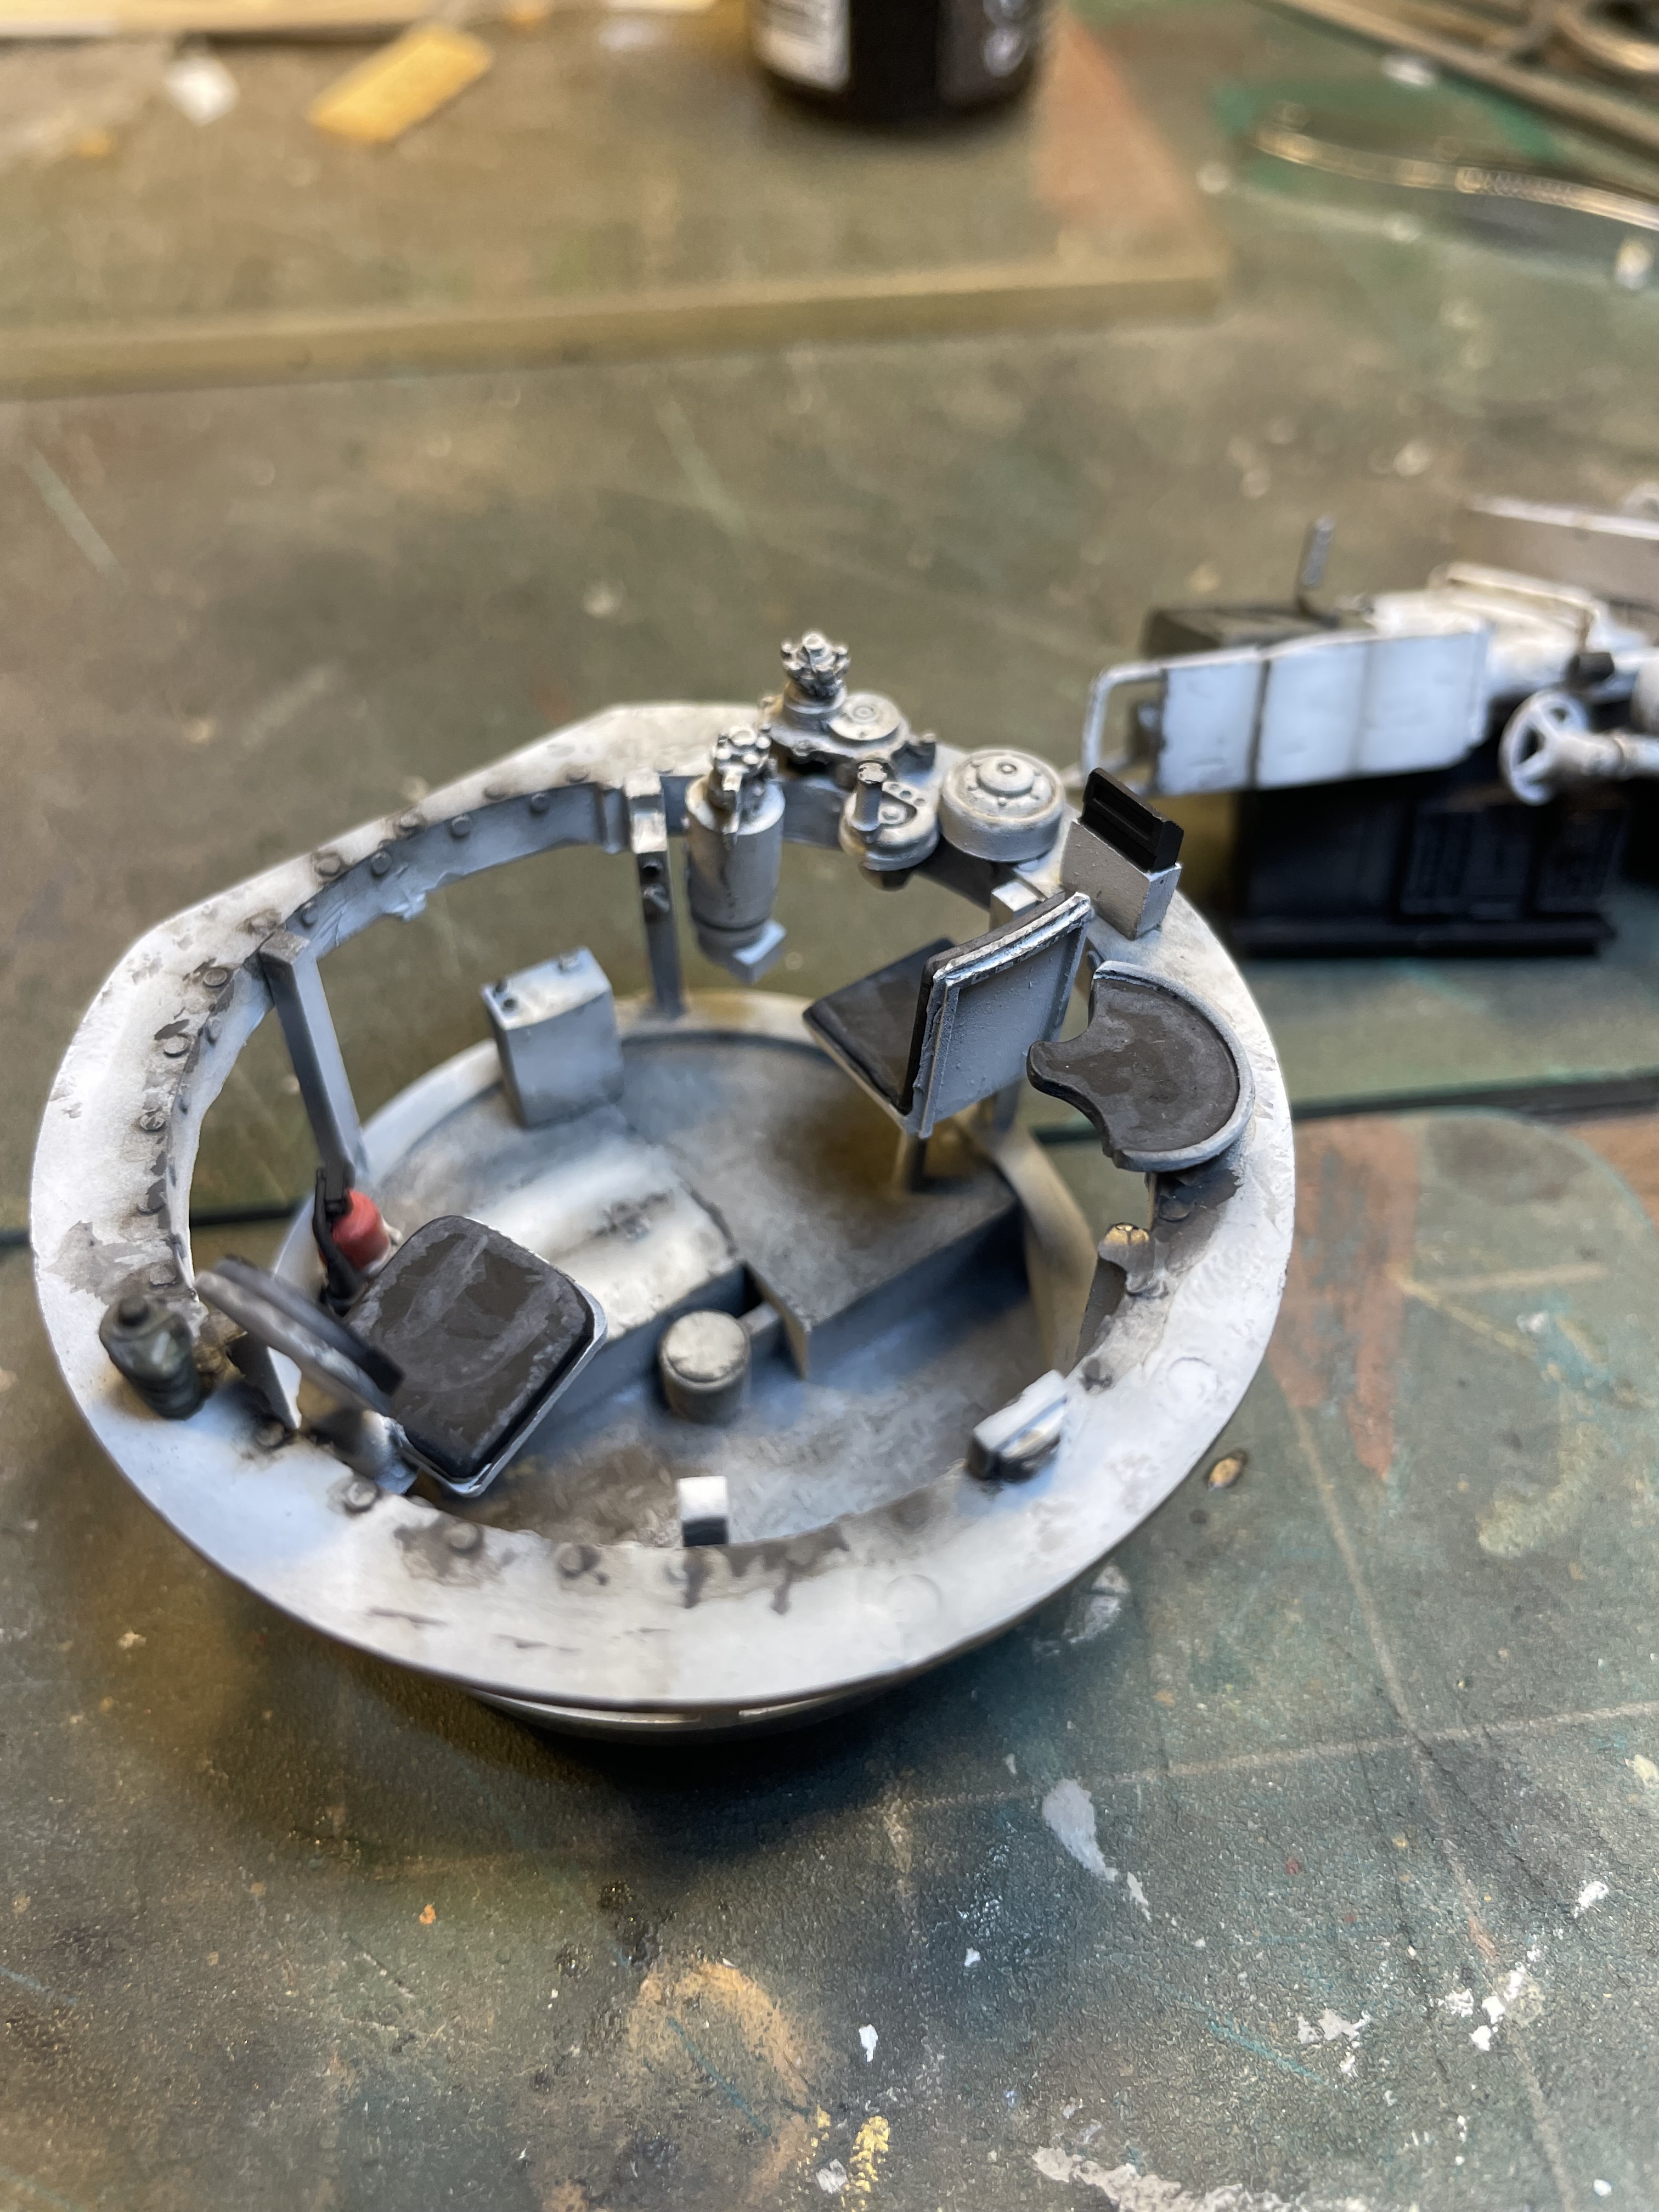
As usual, most of it won’t be seen except the driver and bow gunners positions (unless I put figures in the hatches but I’m not sure at this point) which is fine because it is only a rudimentary interior. There’s a lot missing. The turret will be a little more detailed.
3 Likes
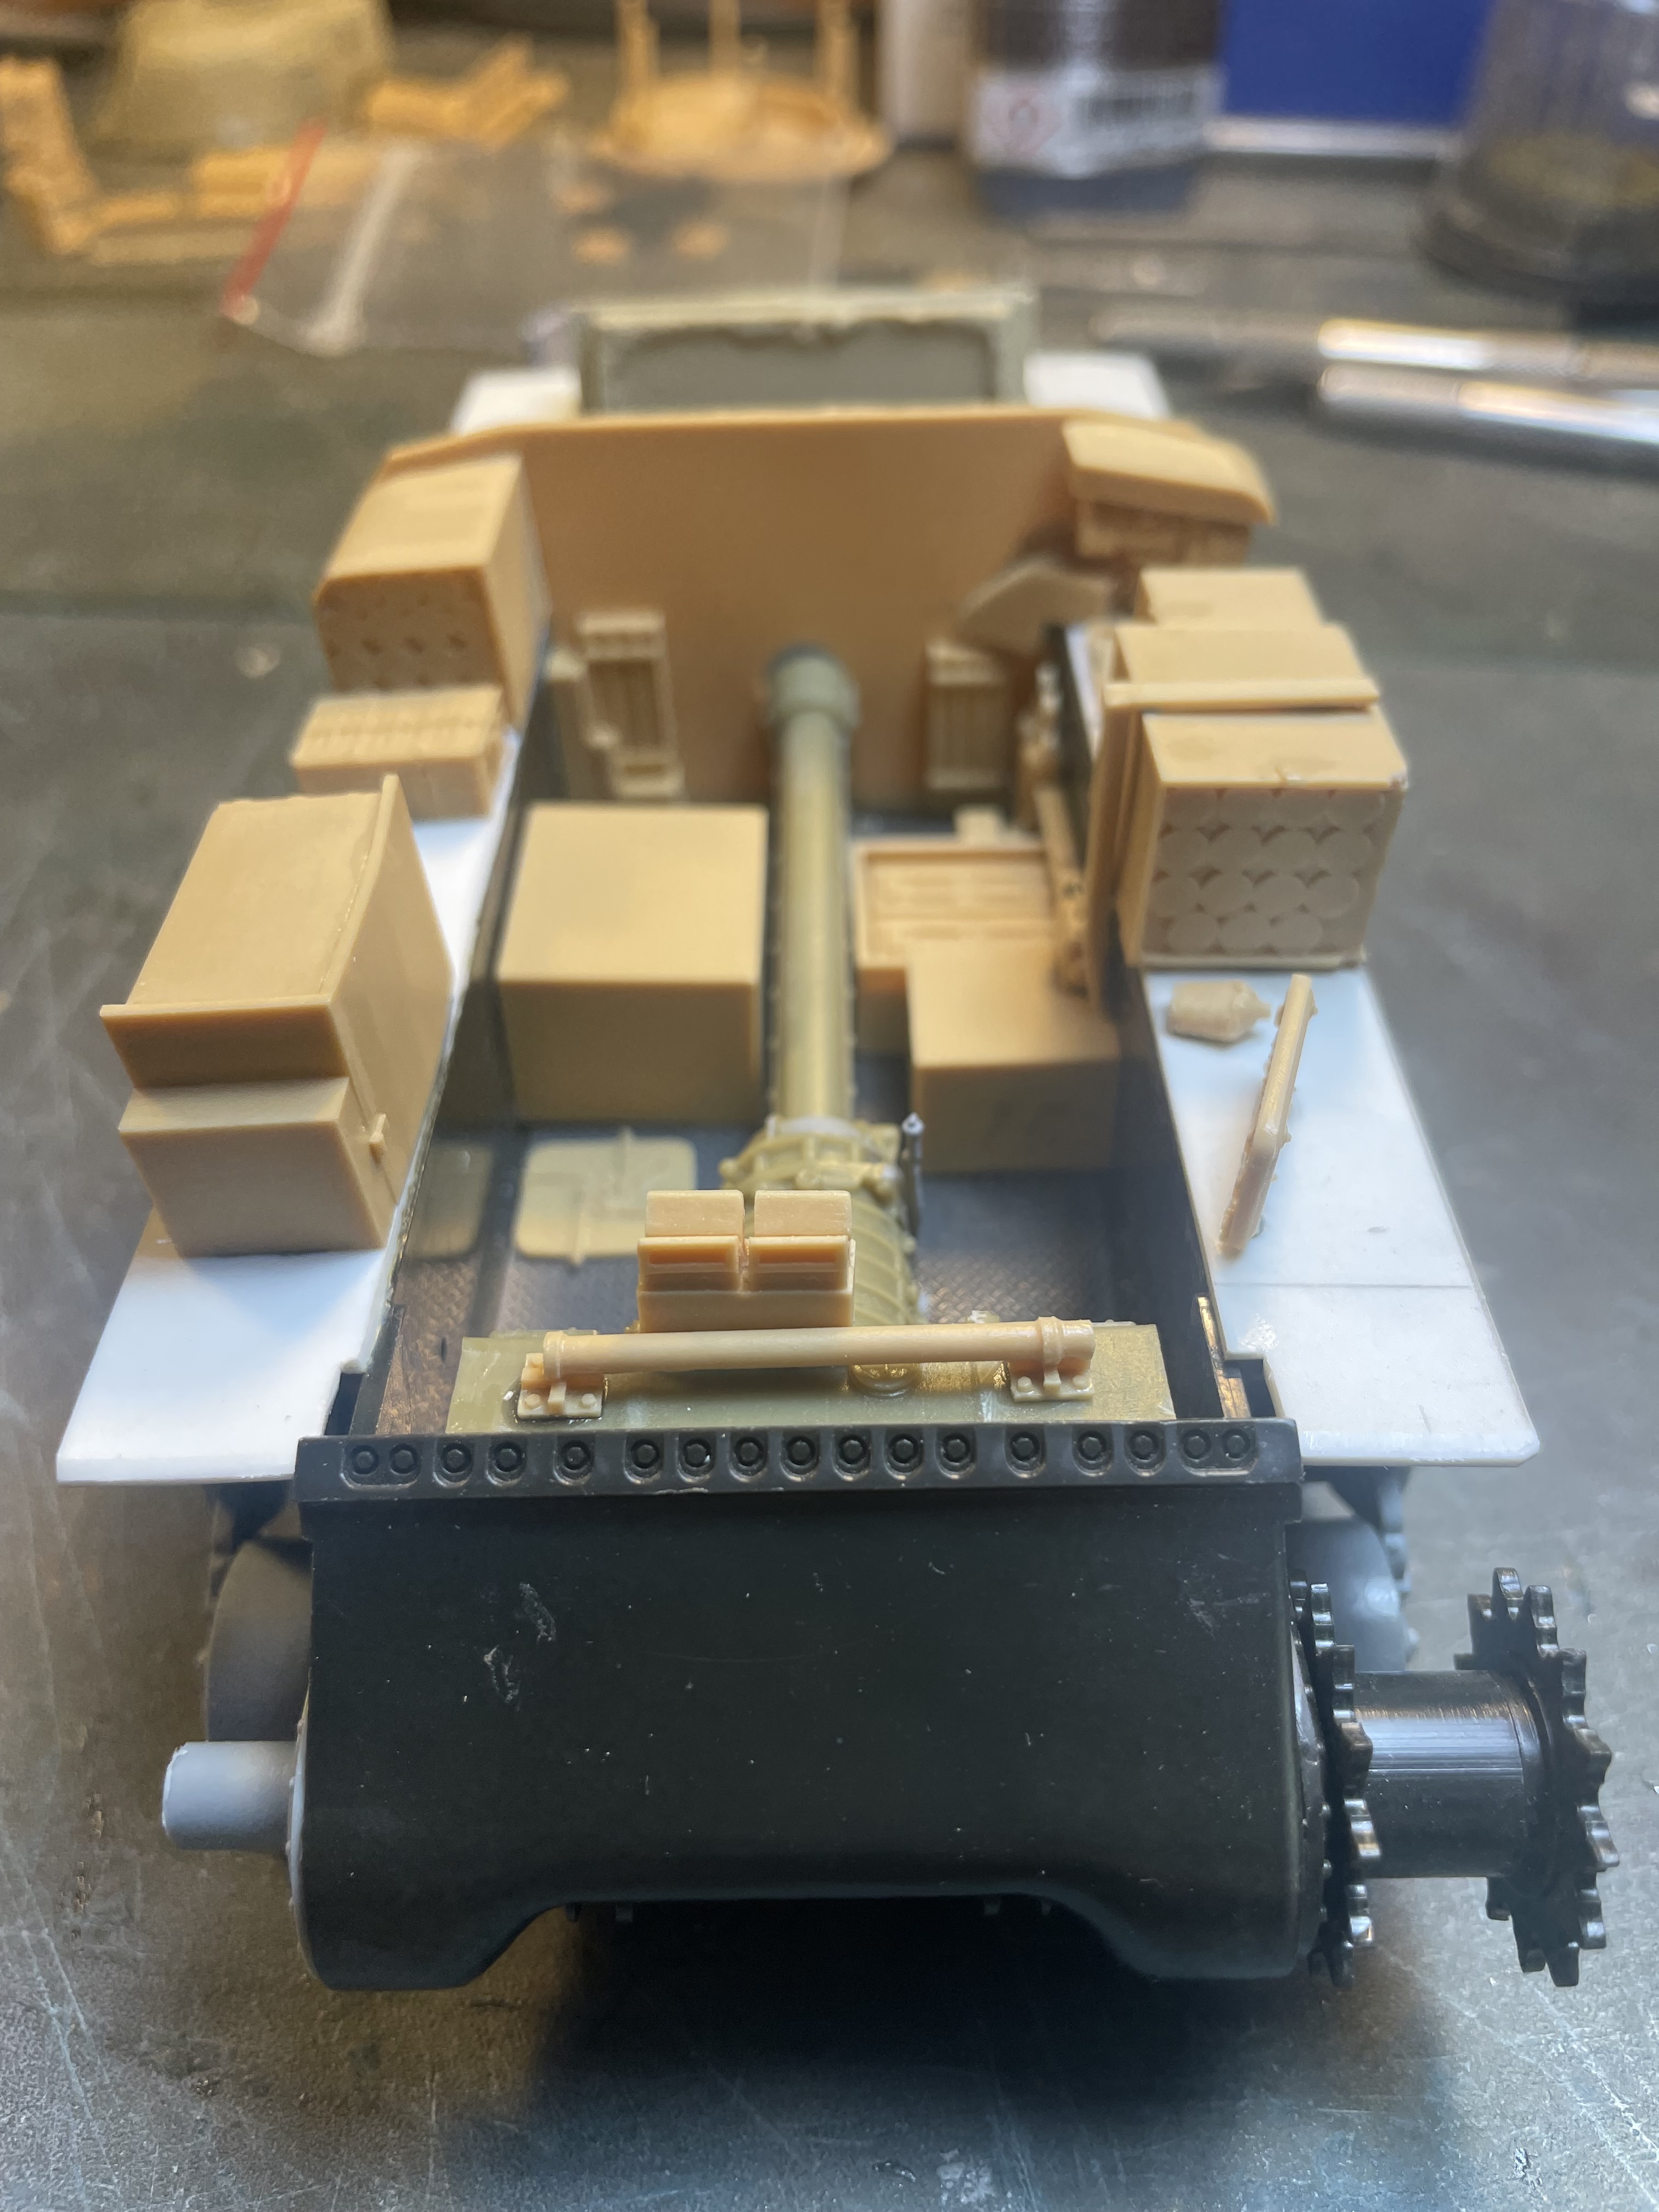
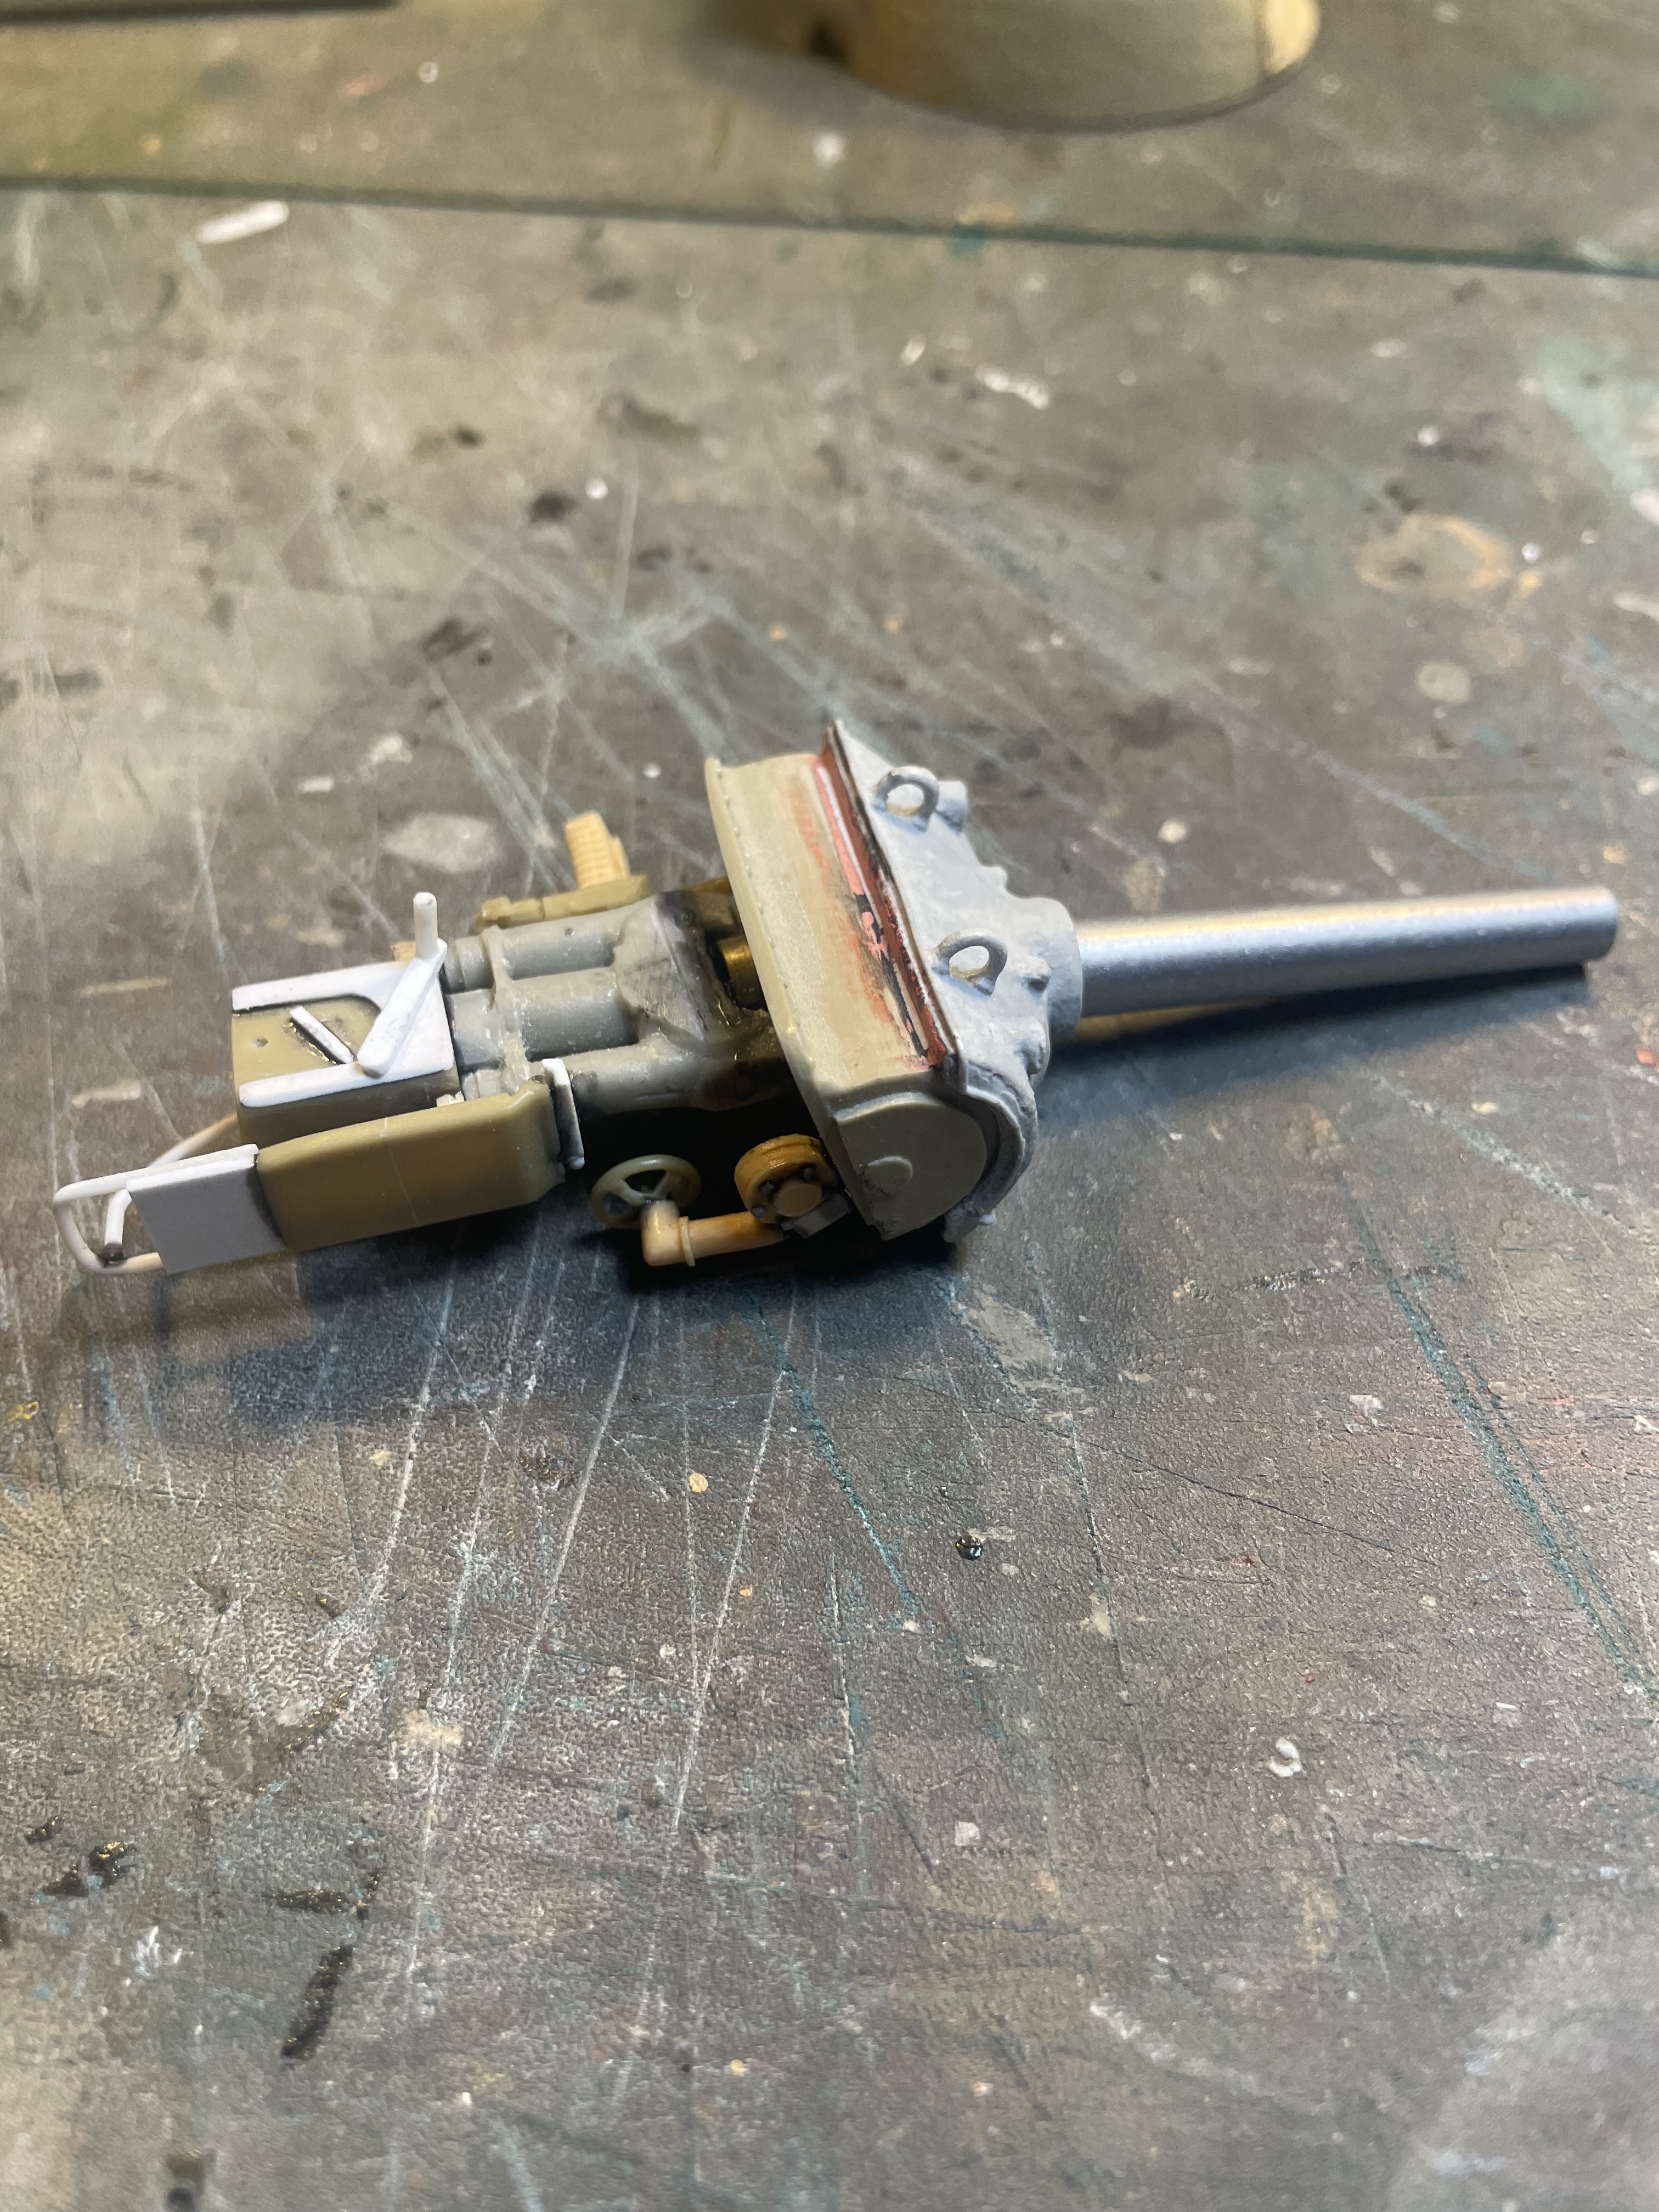
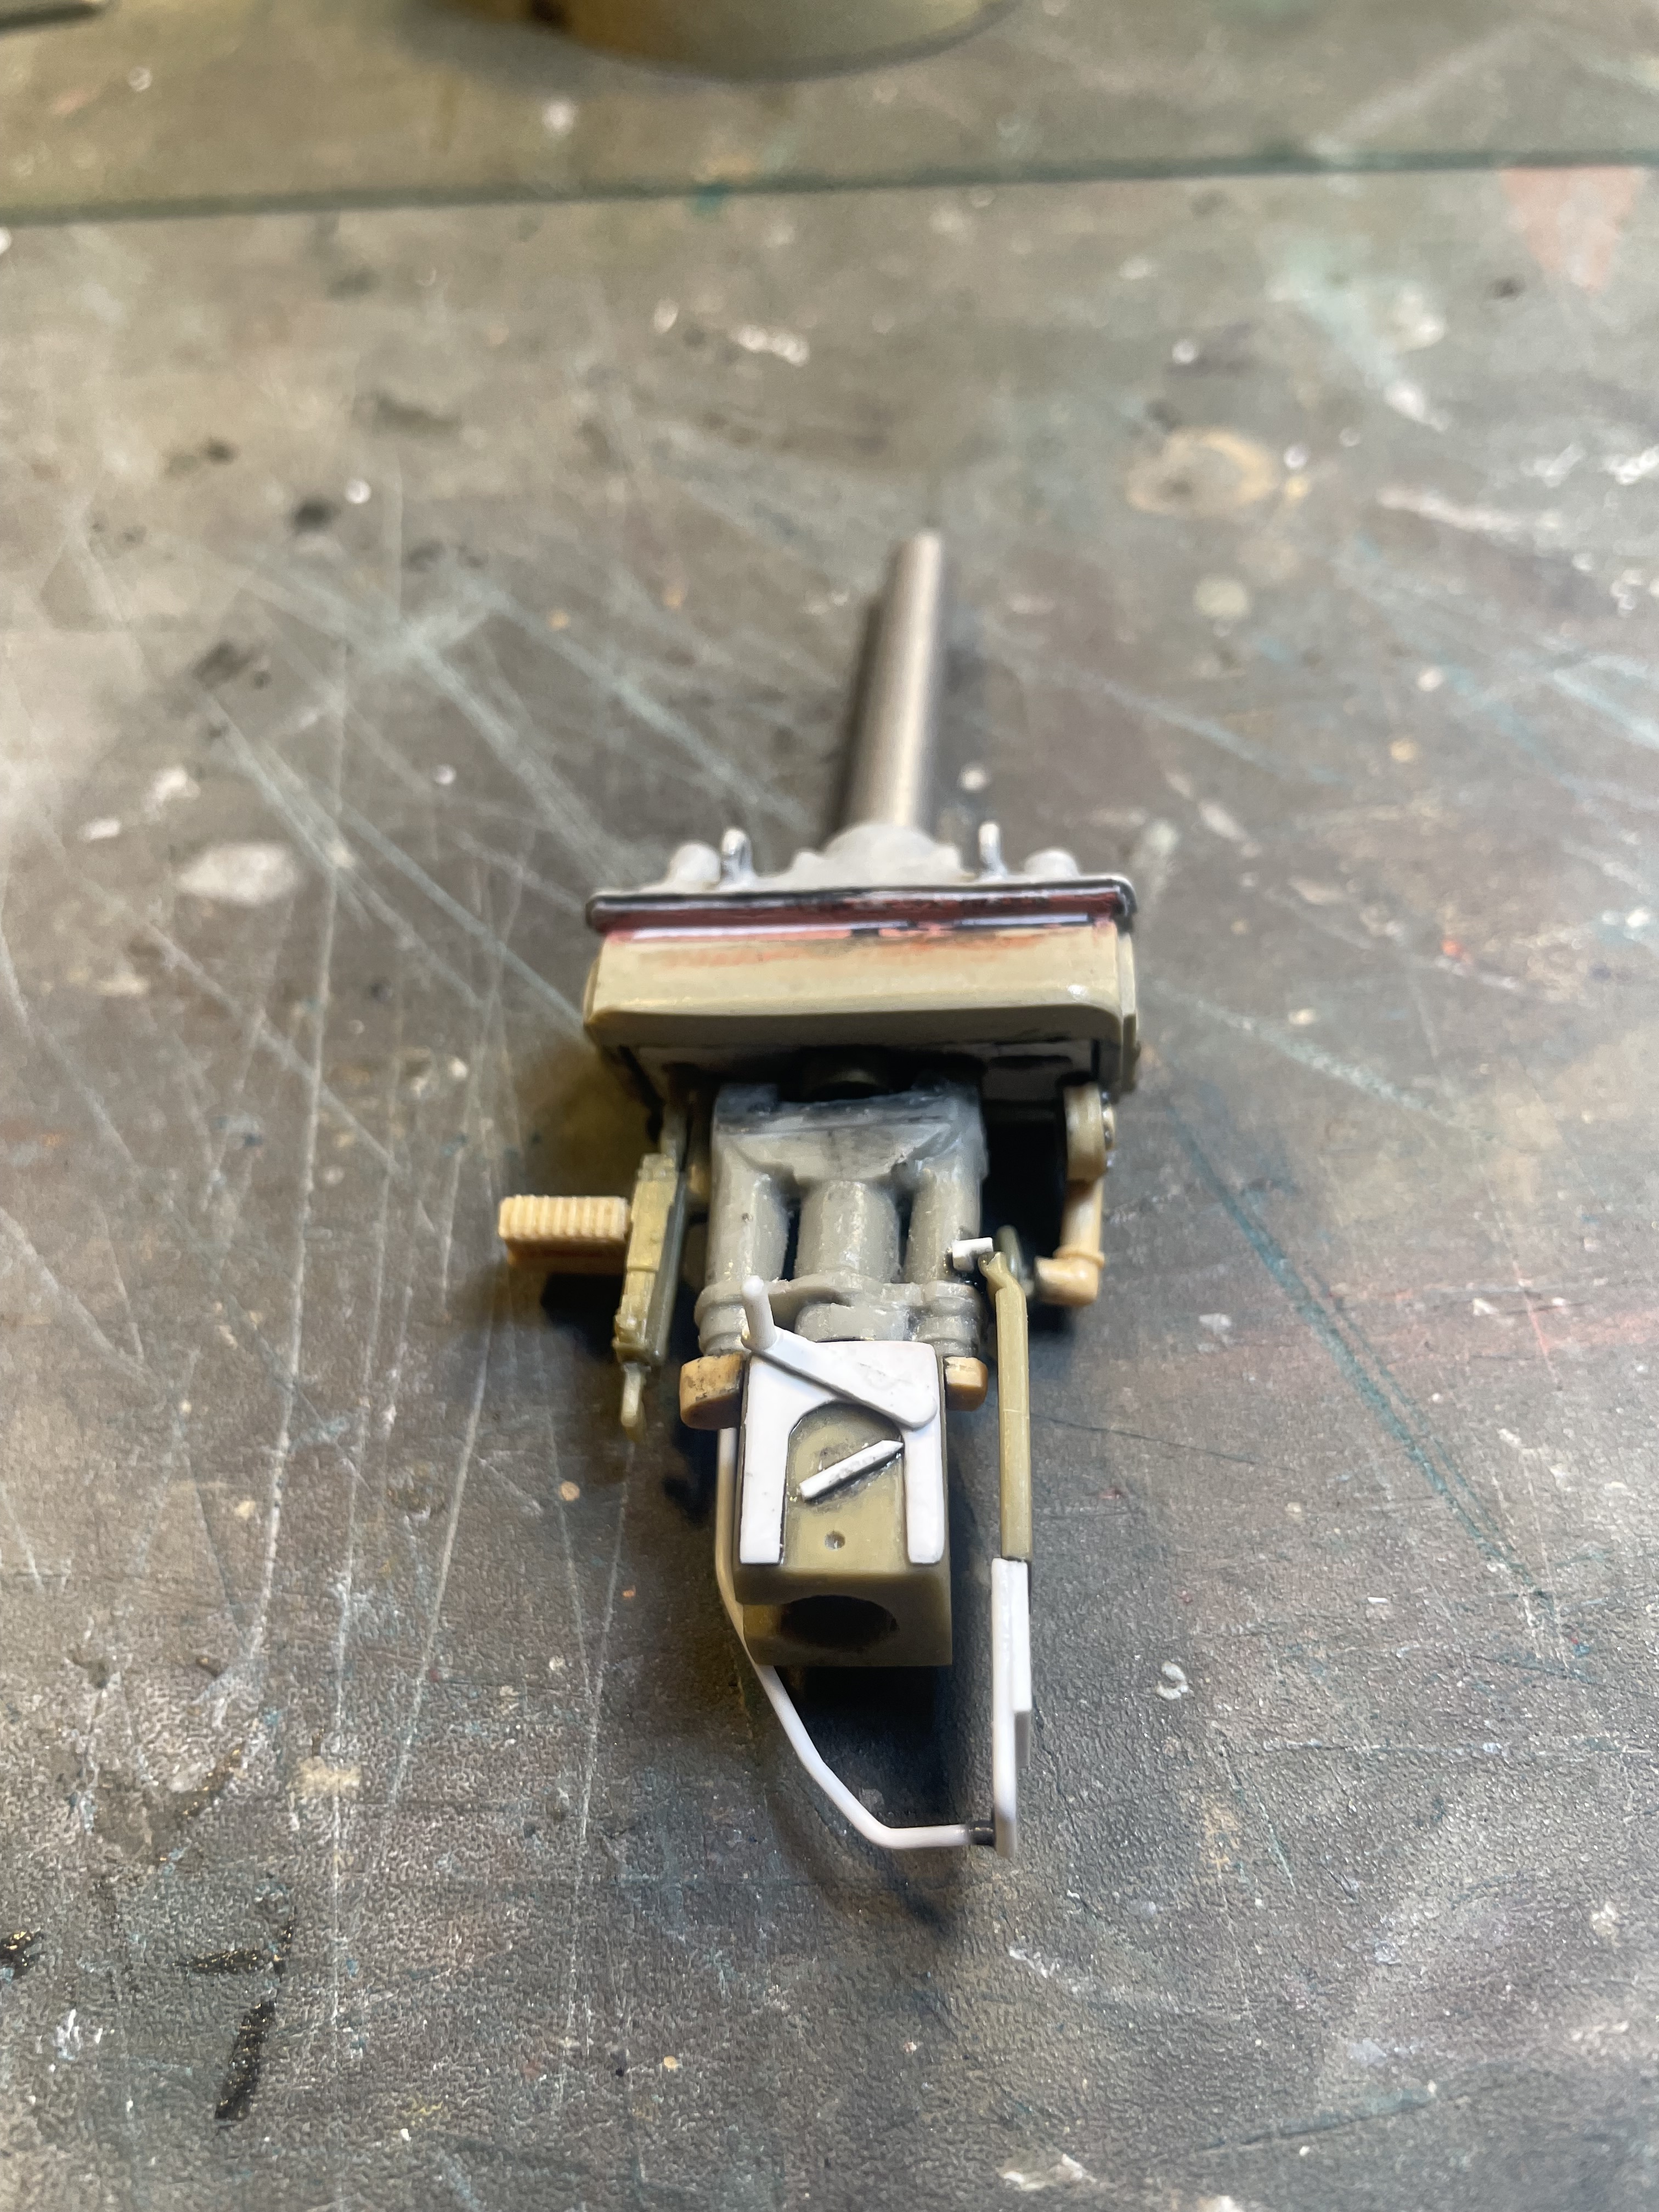
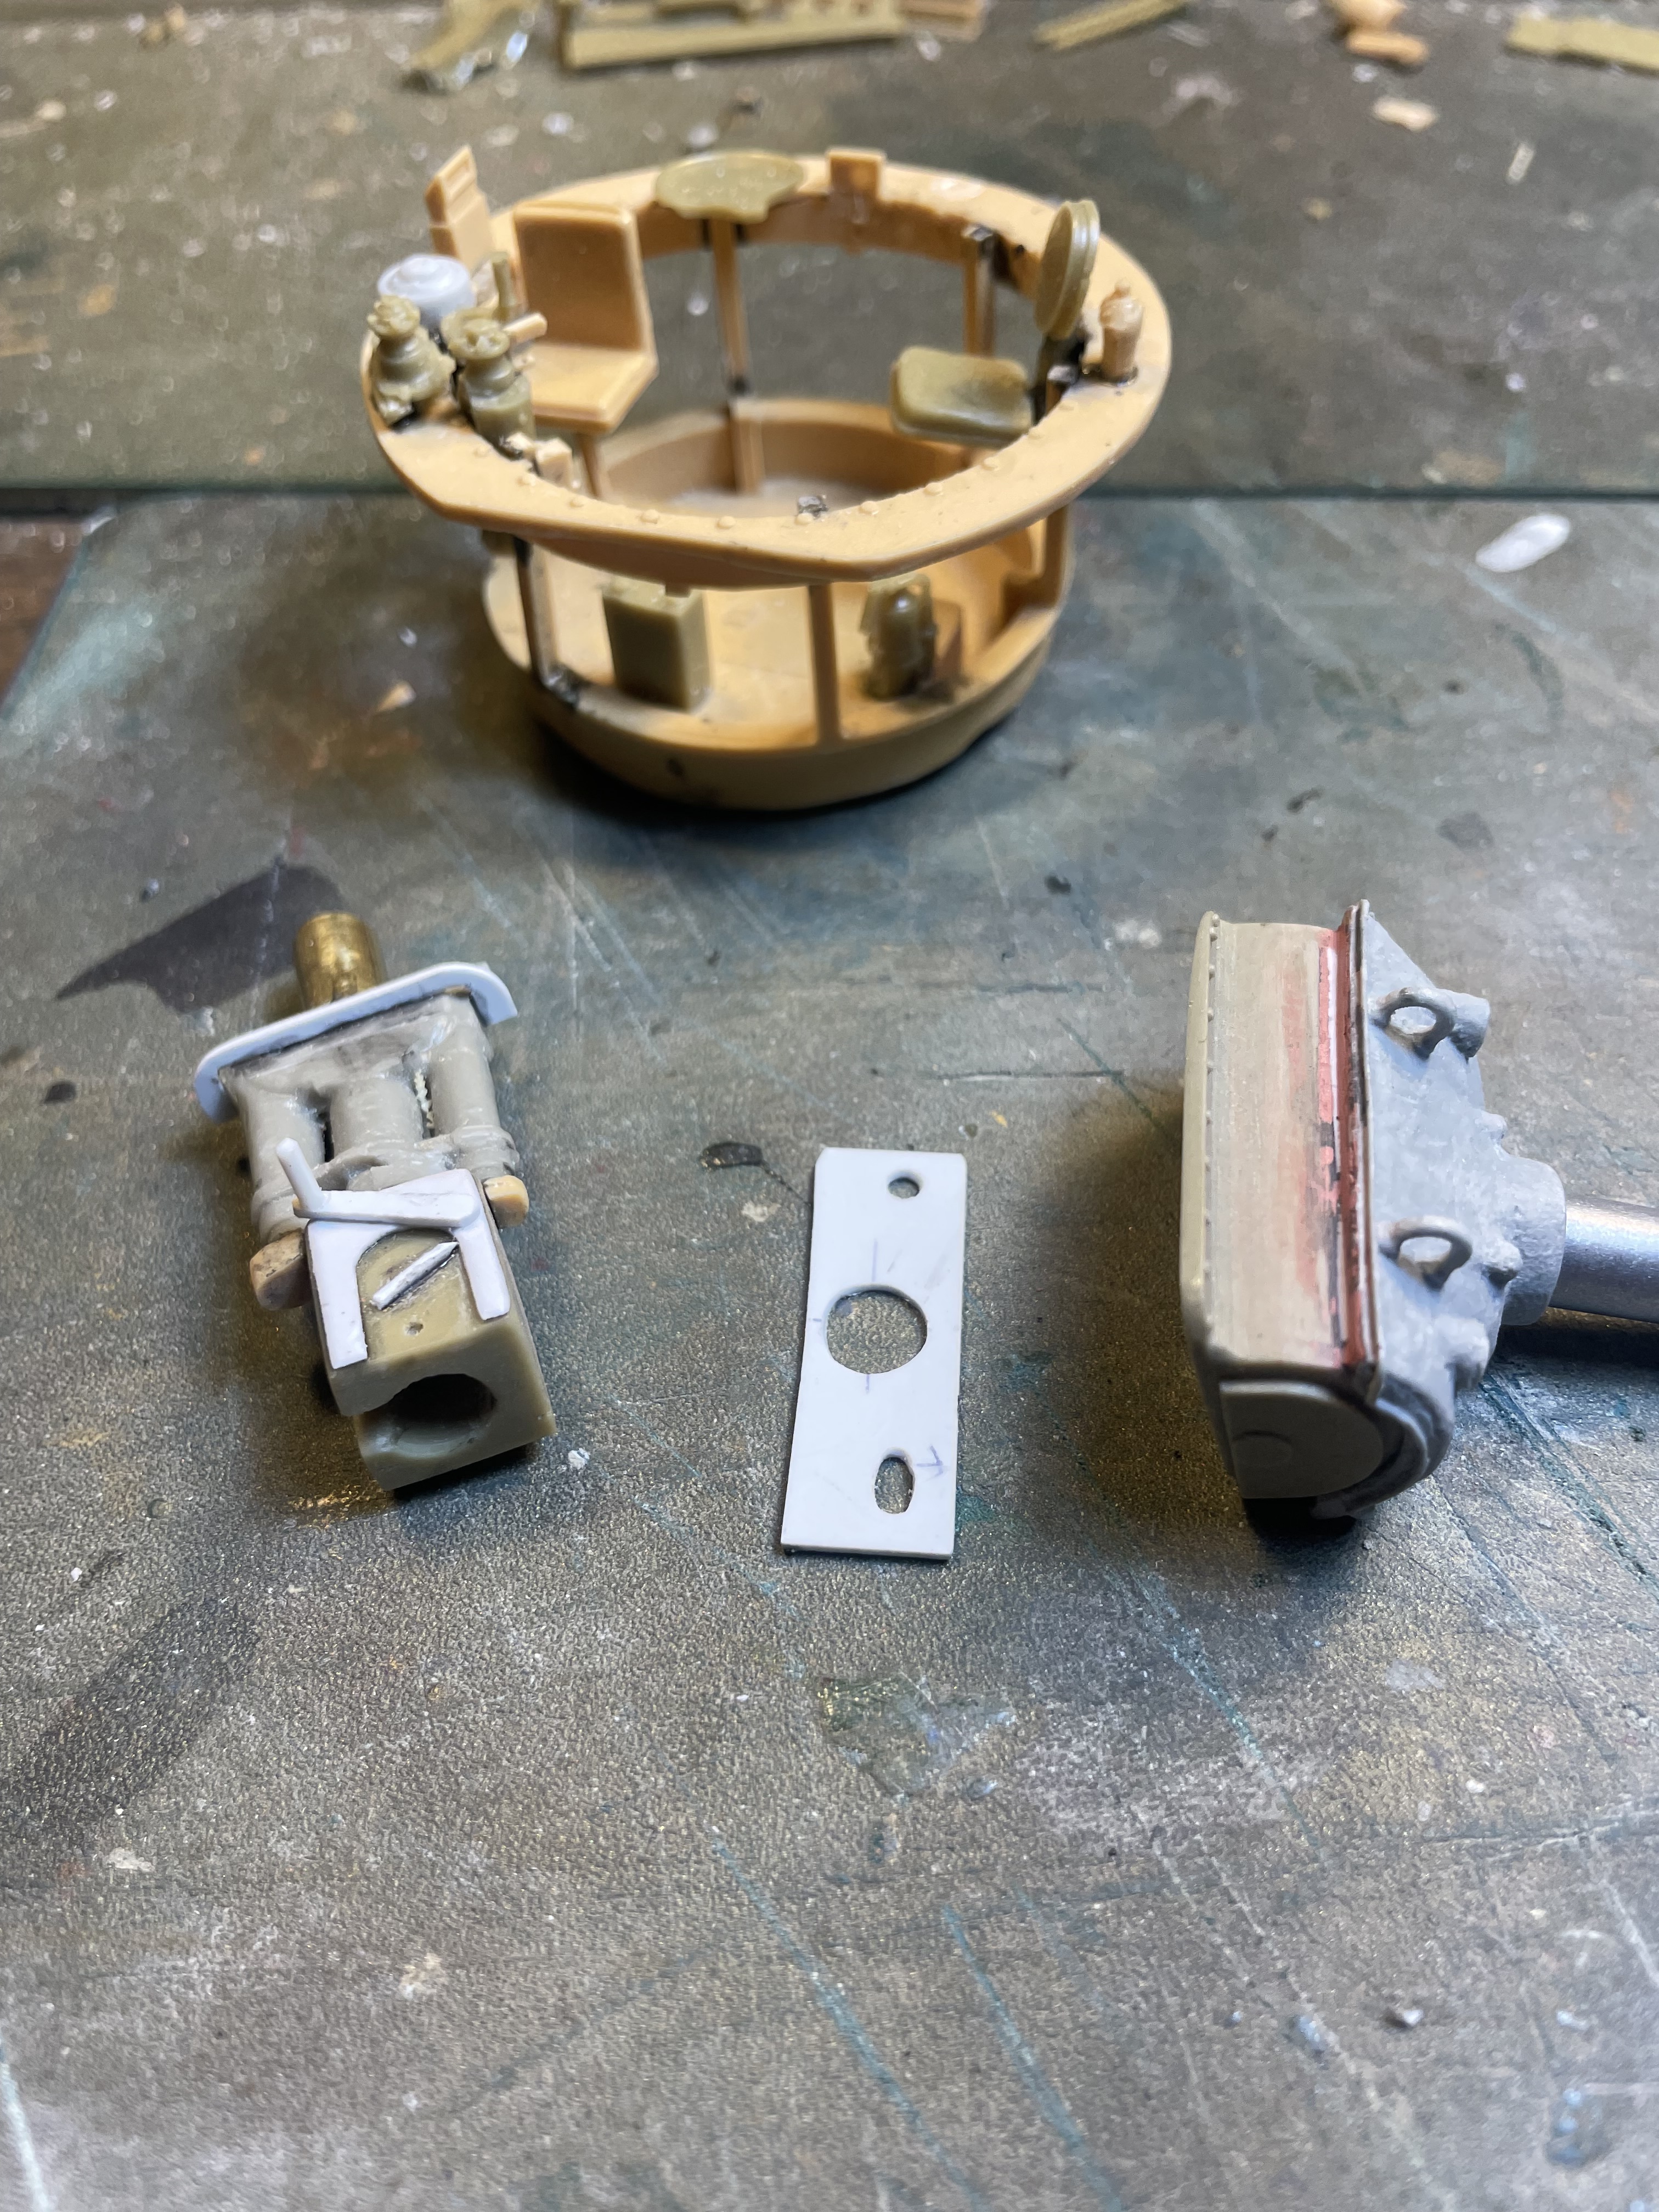
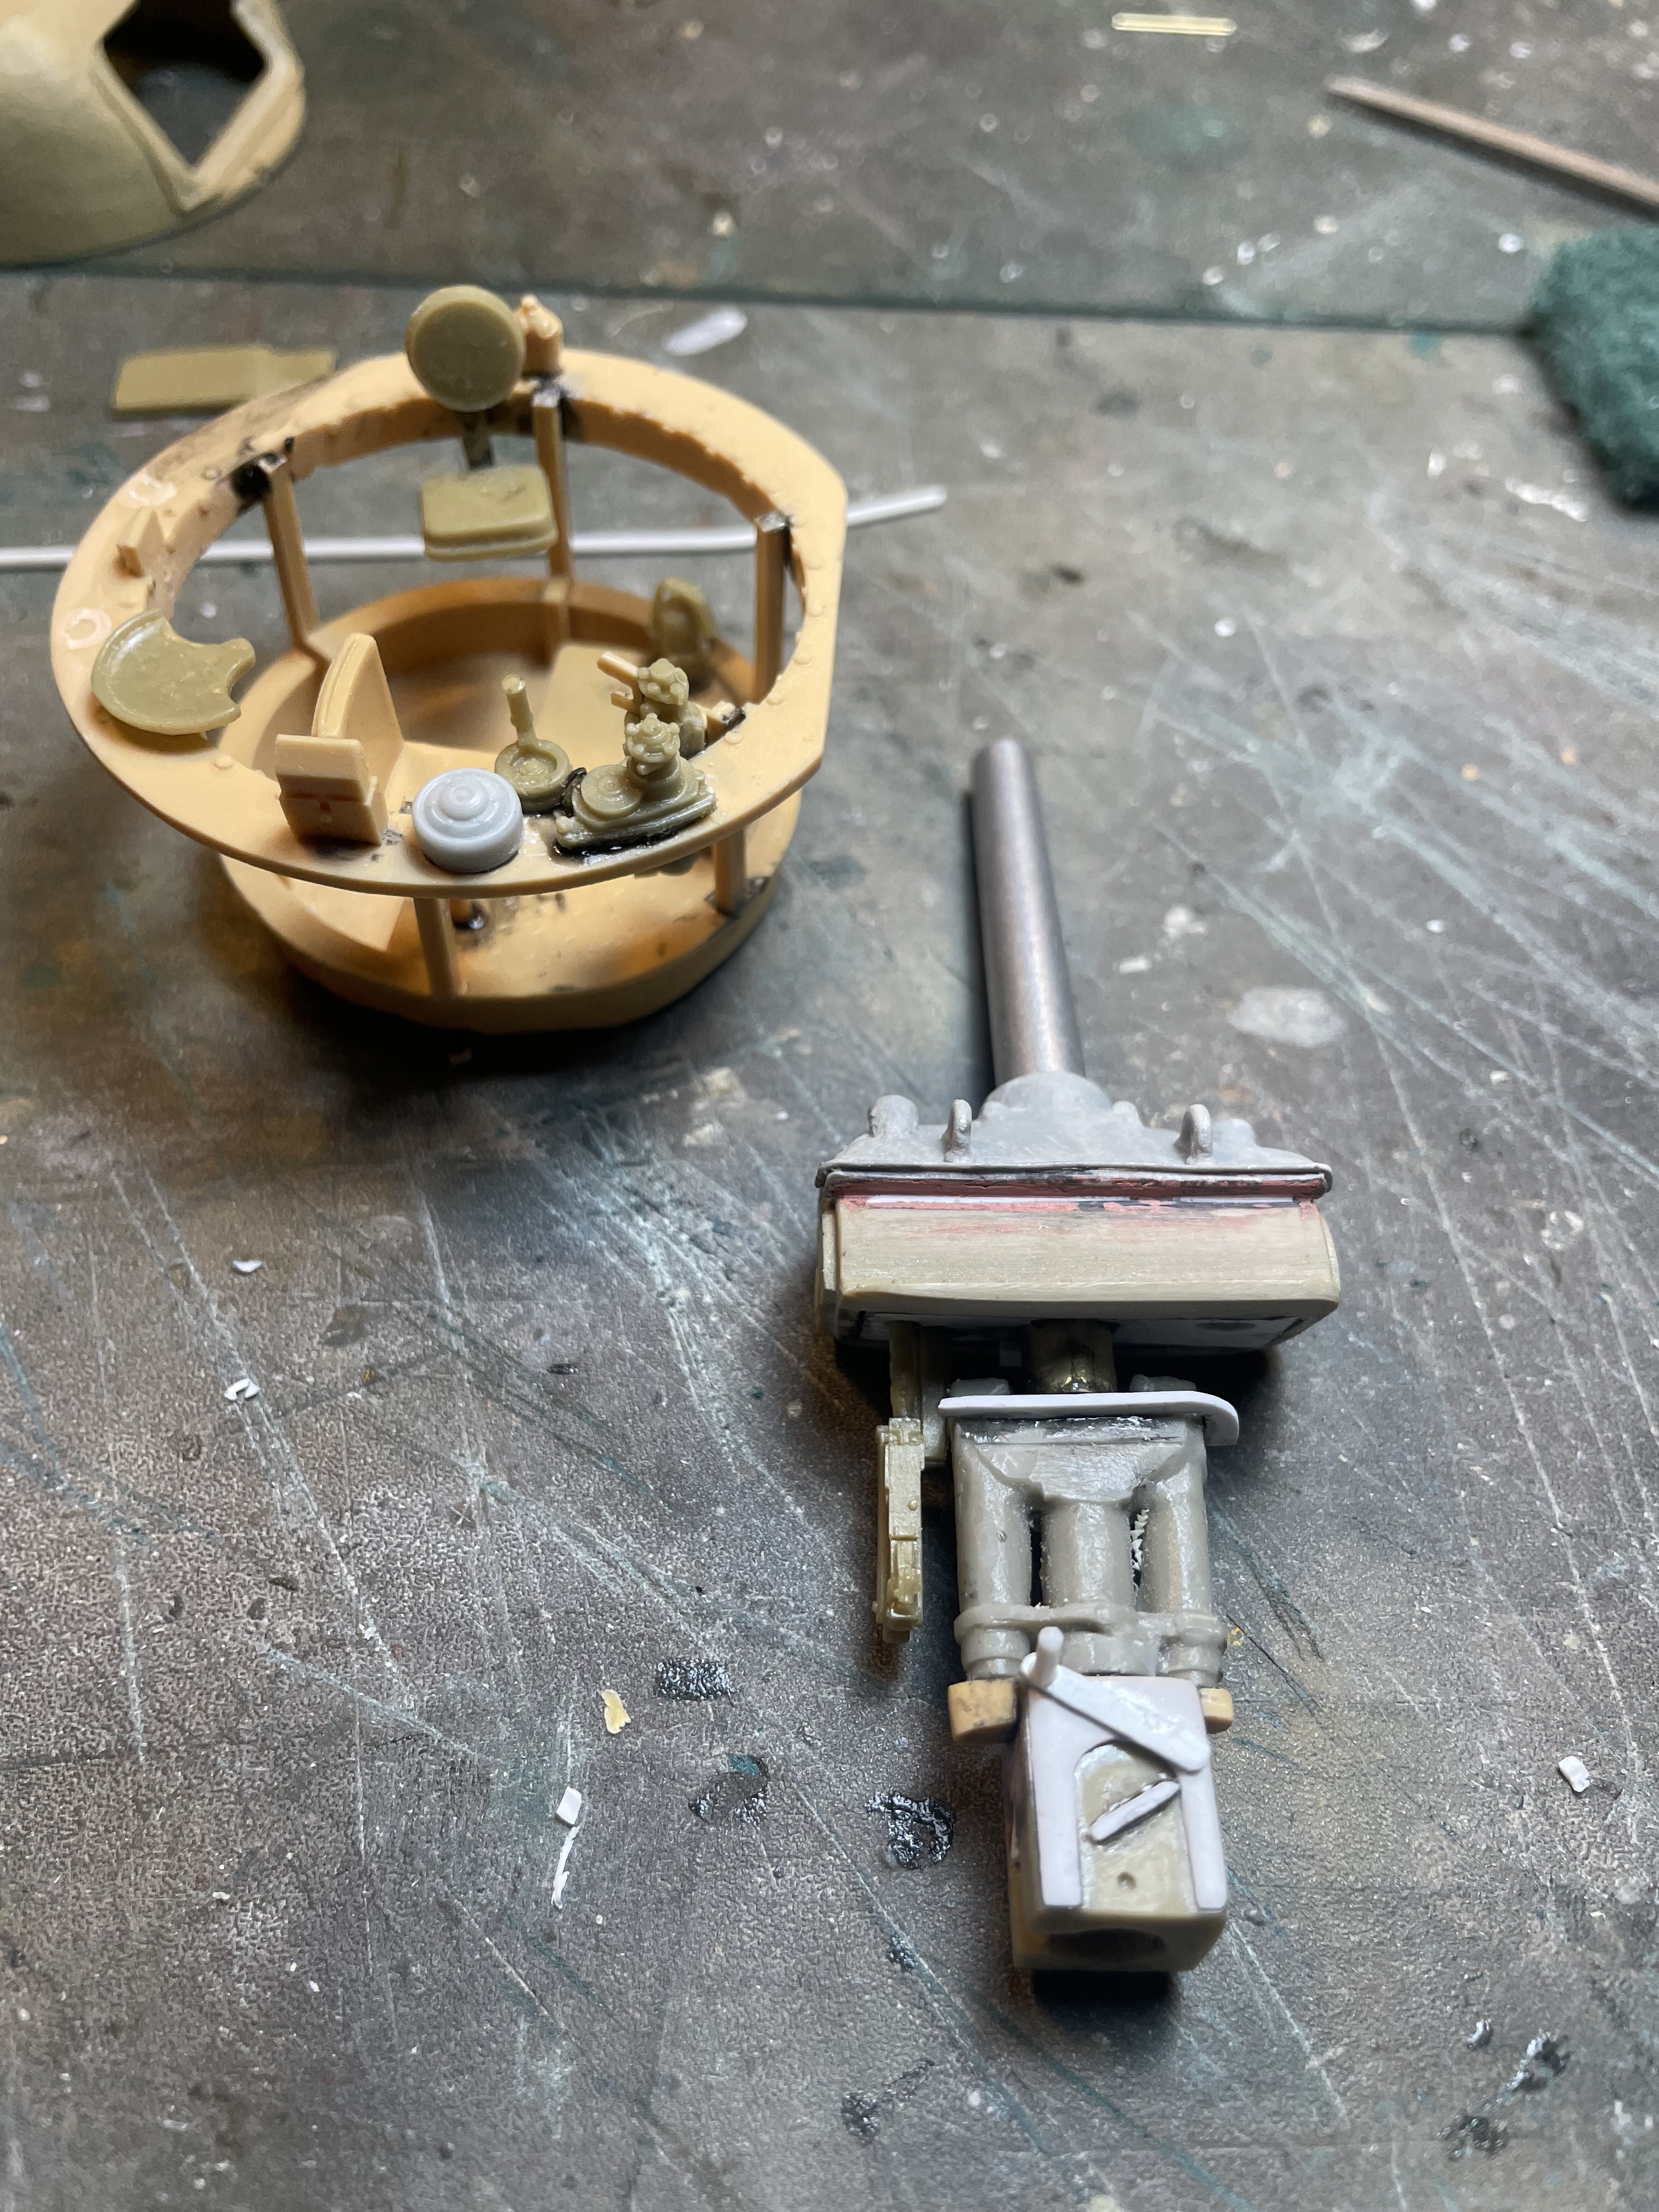
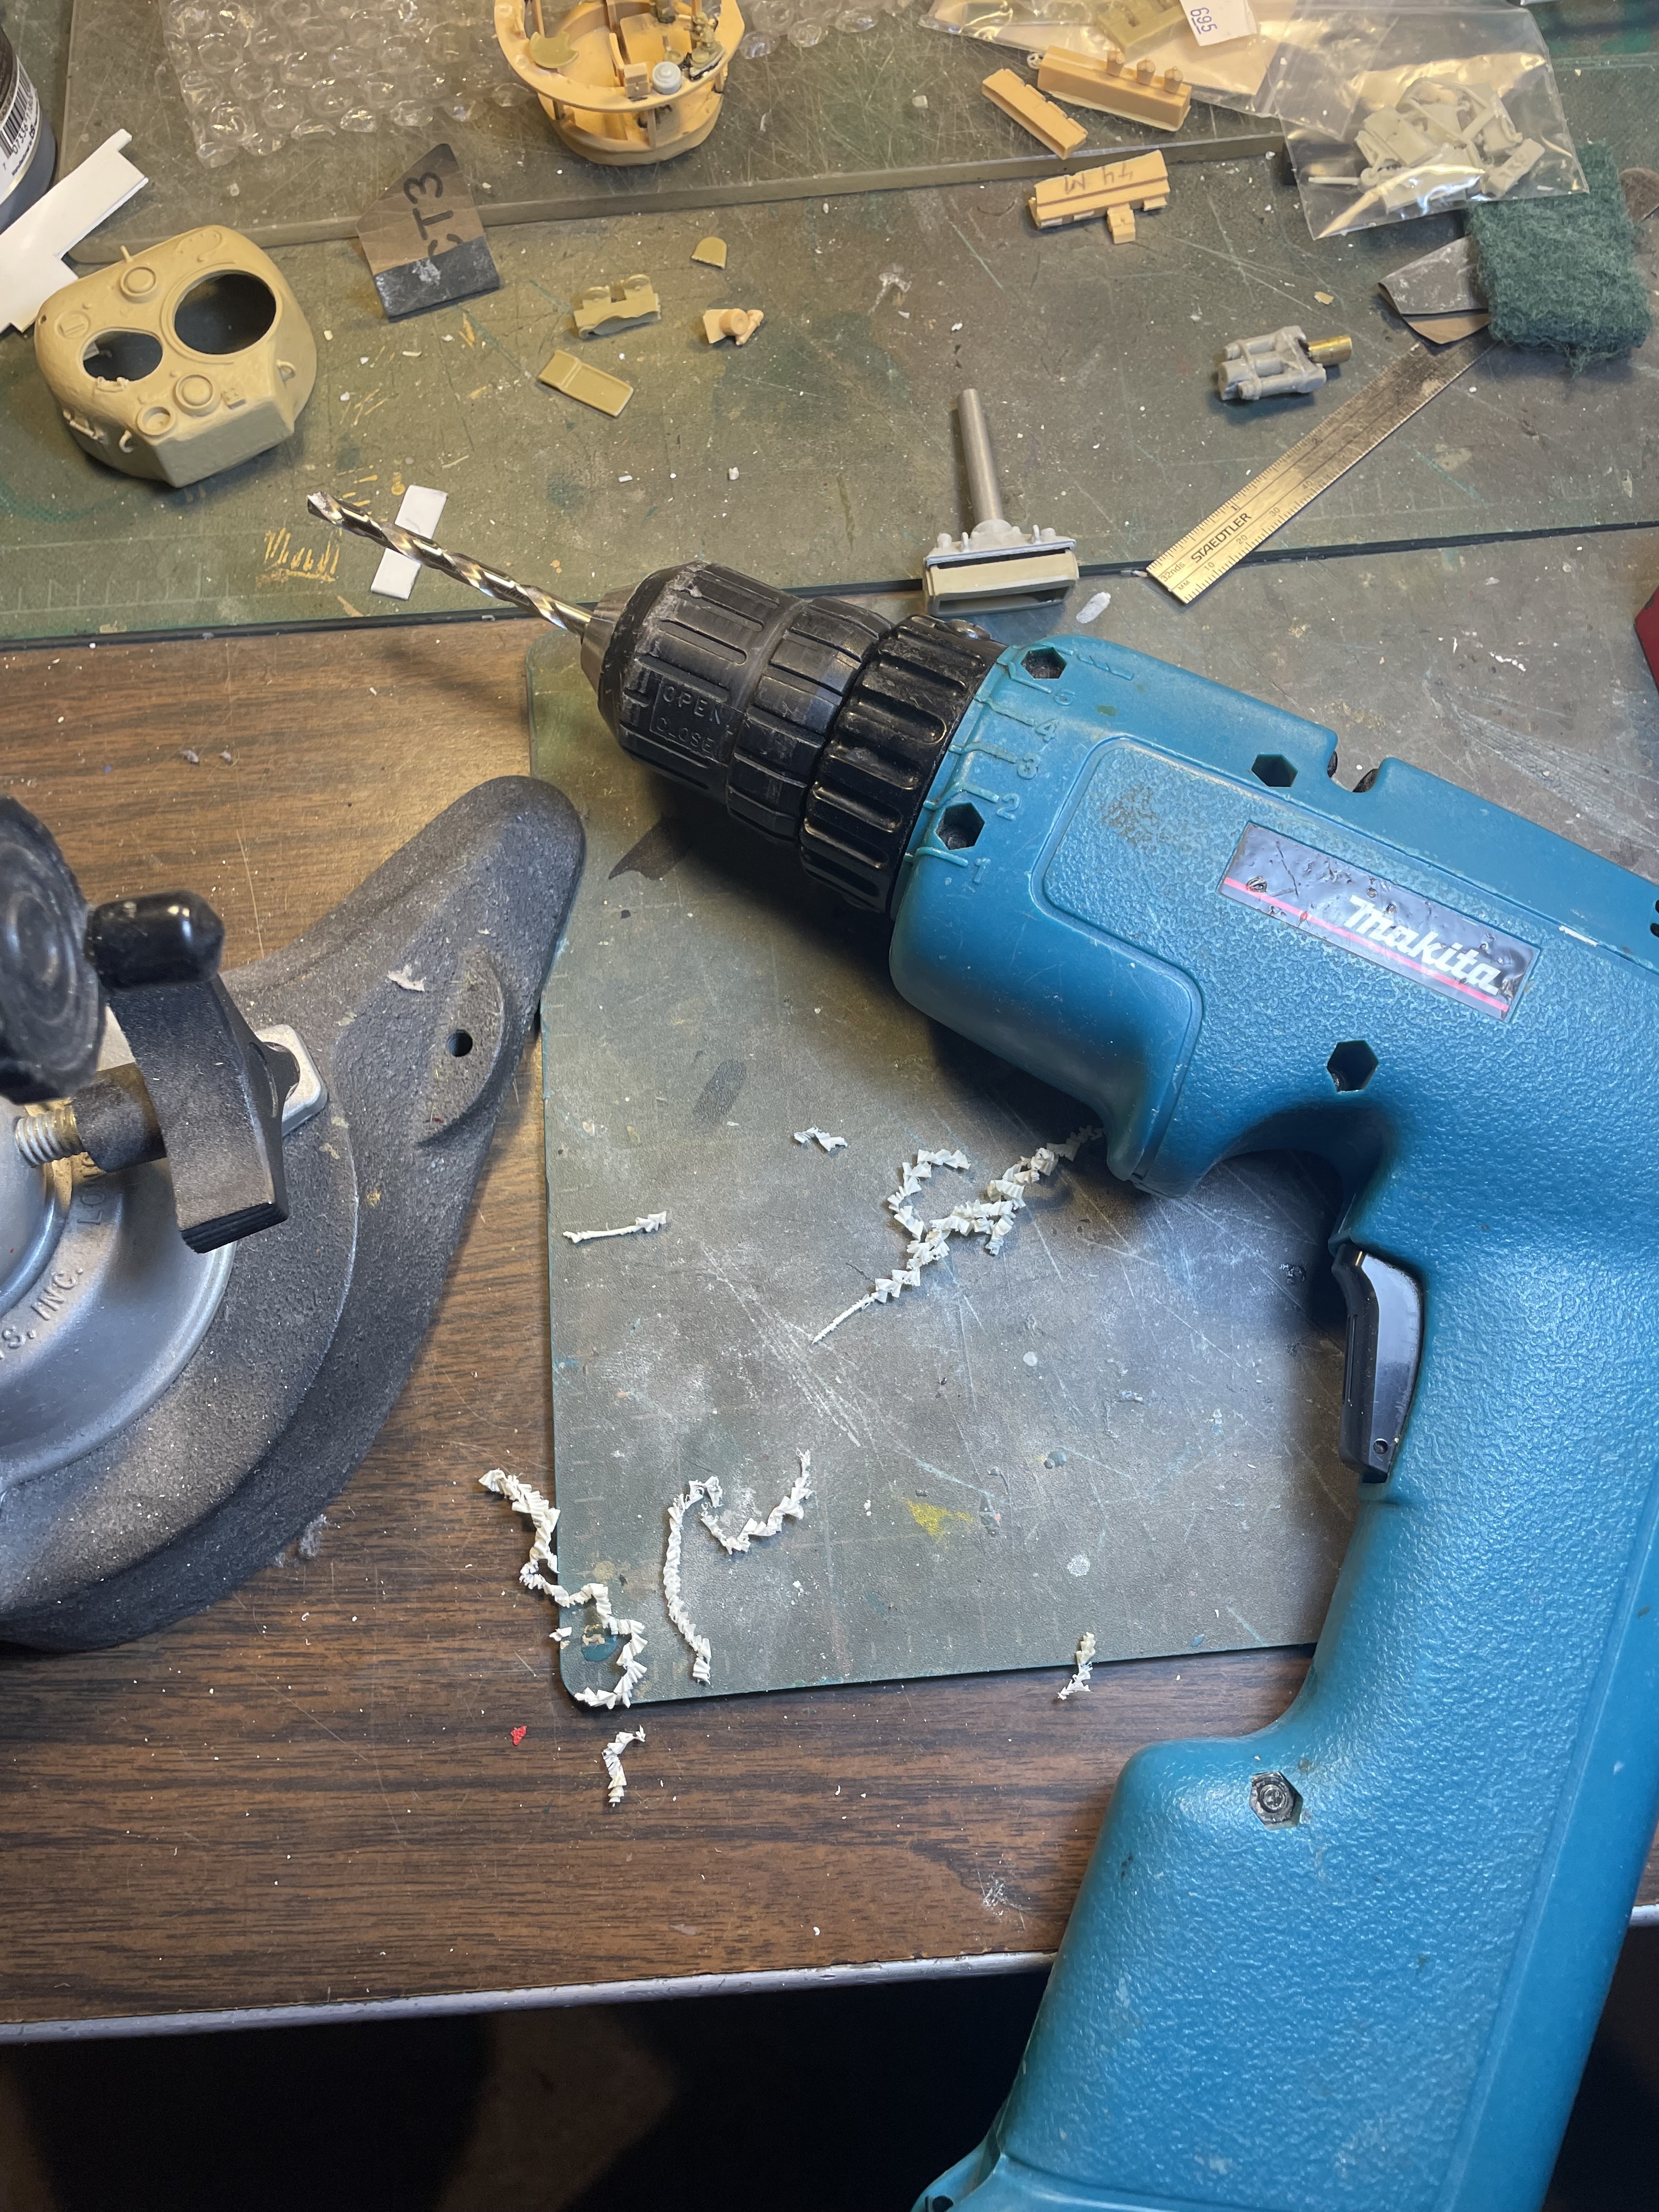
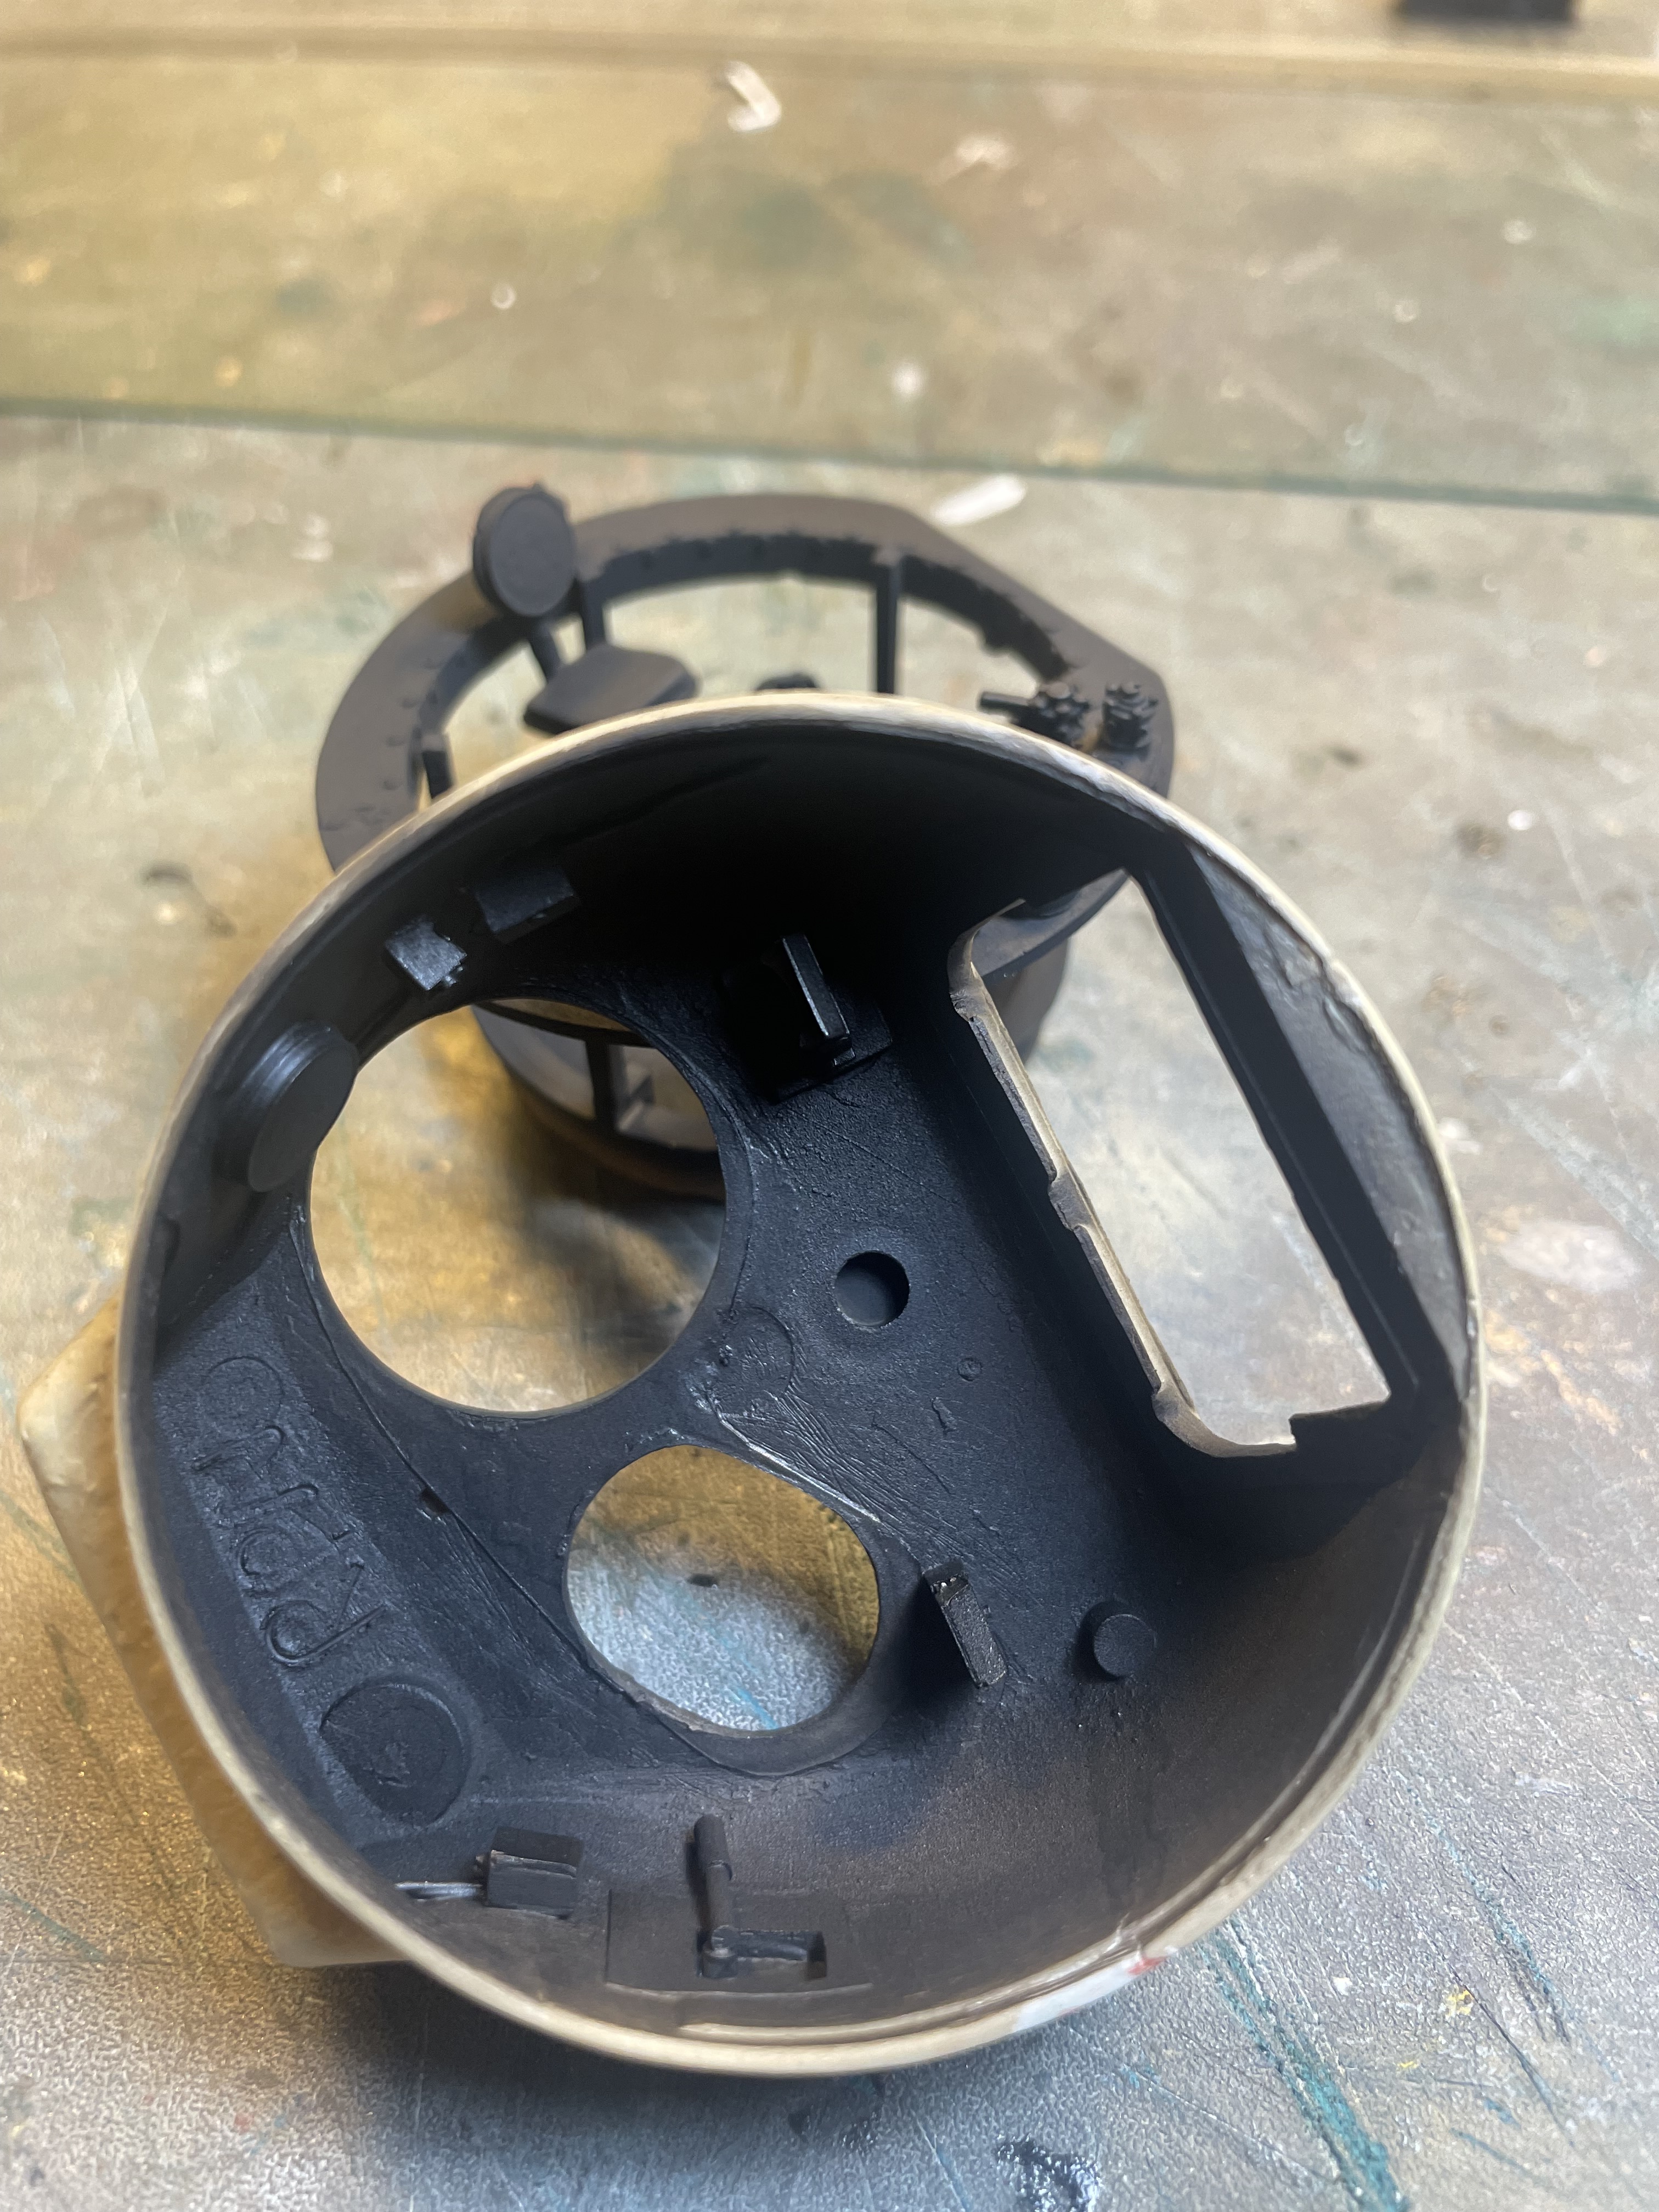
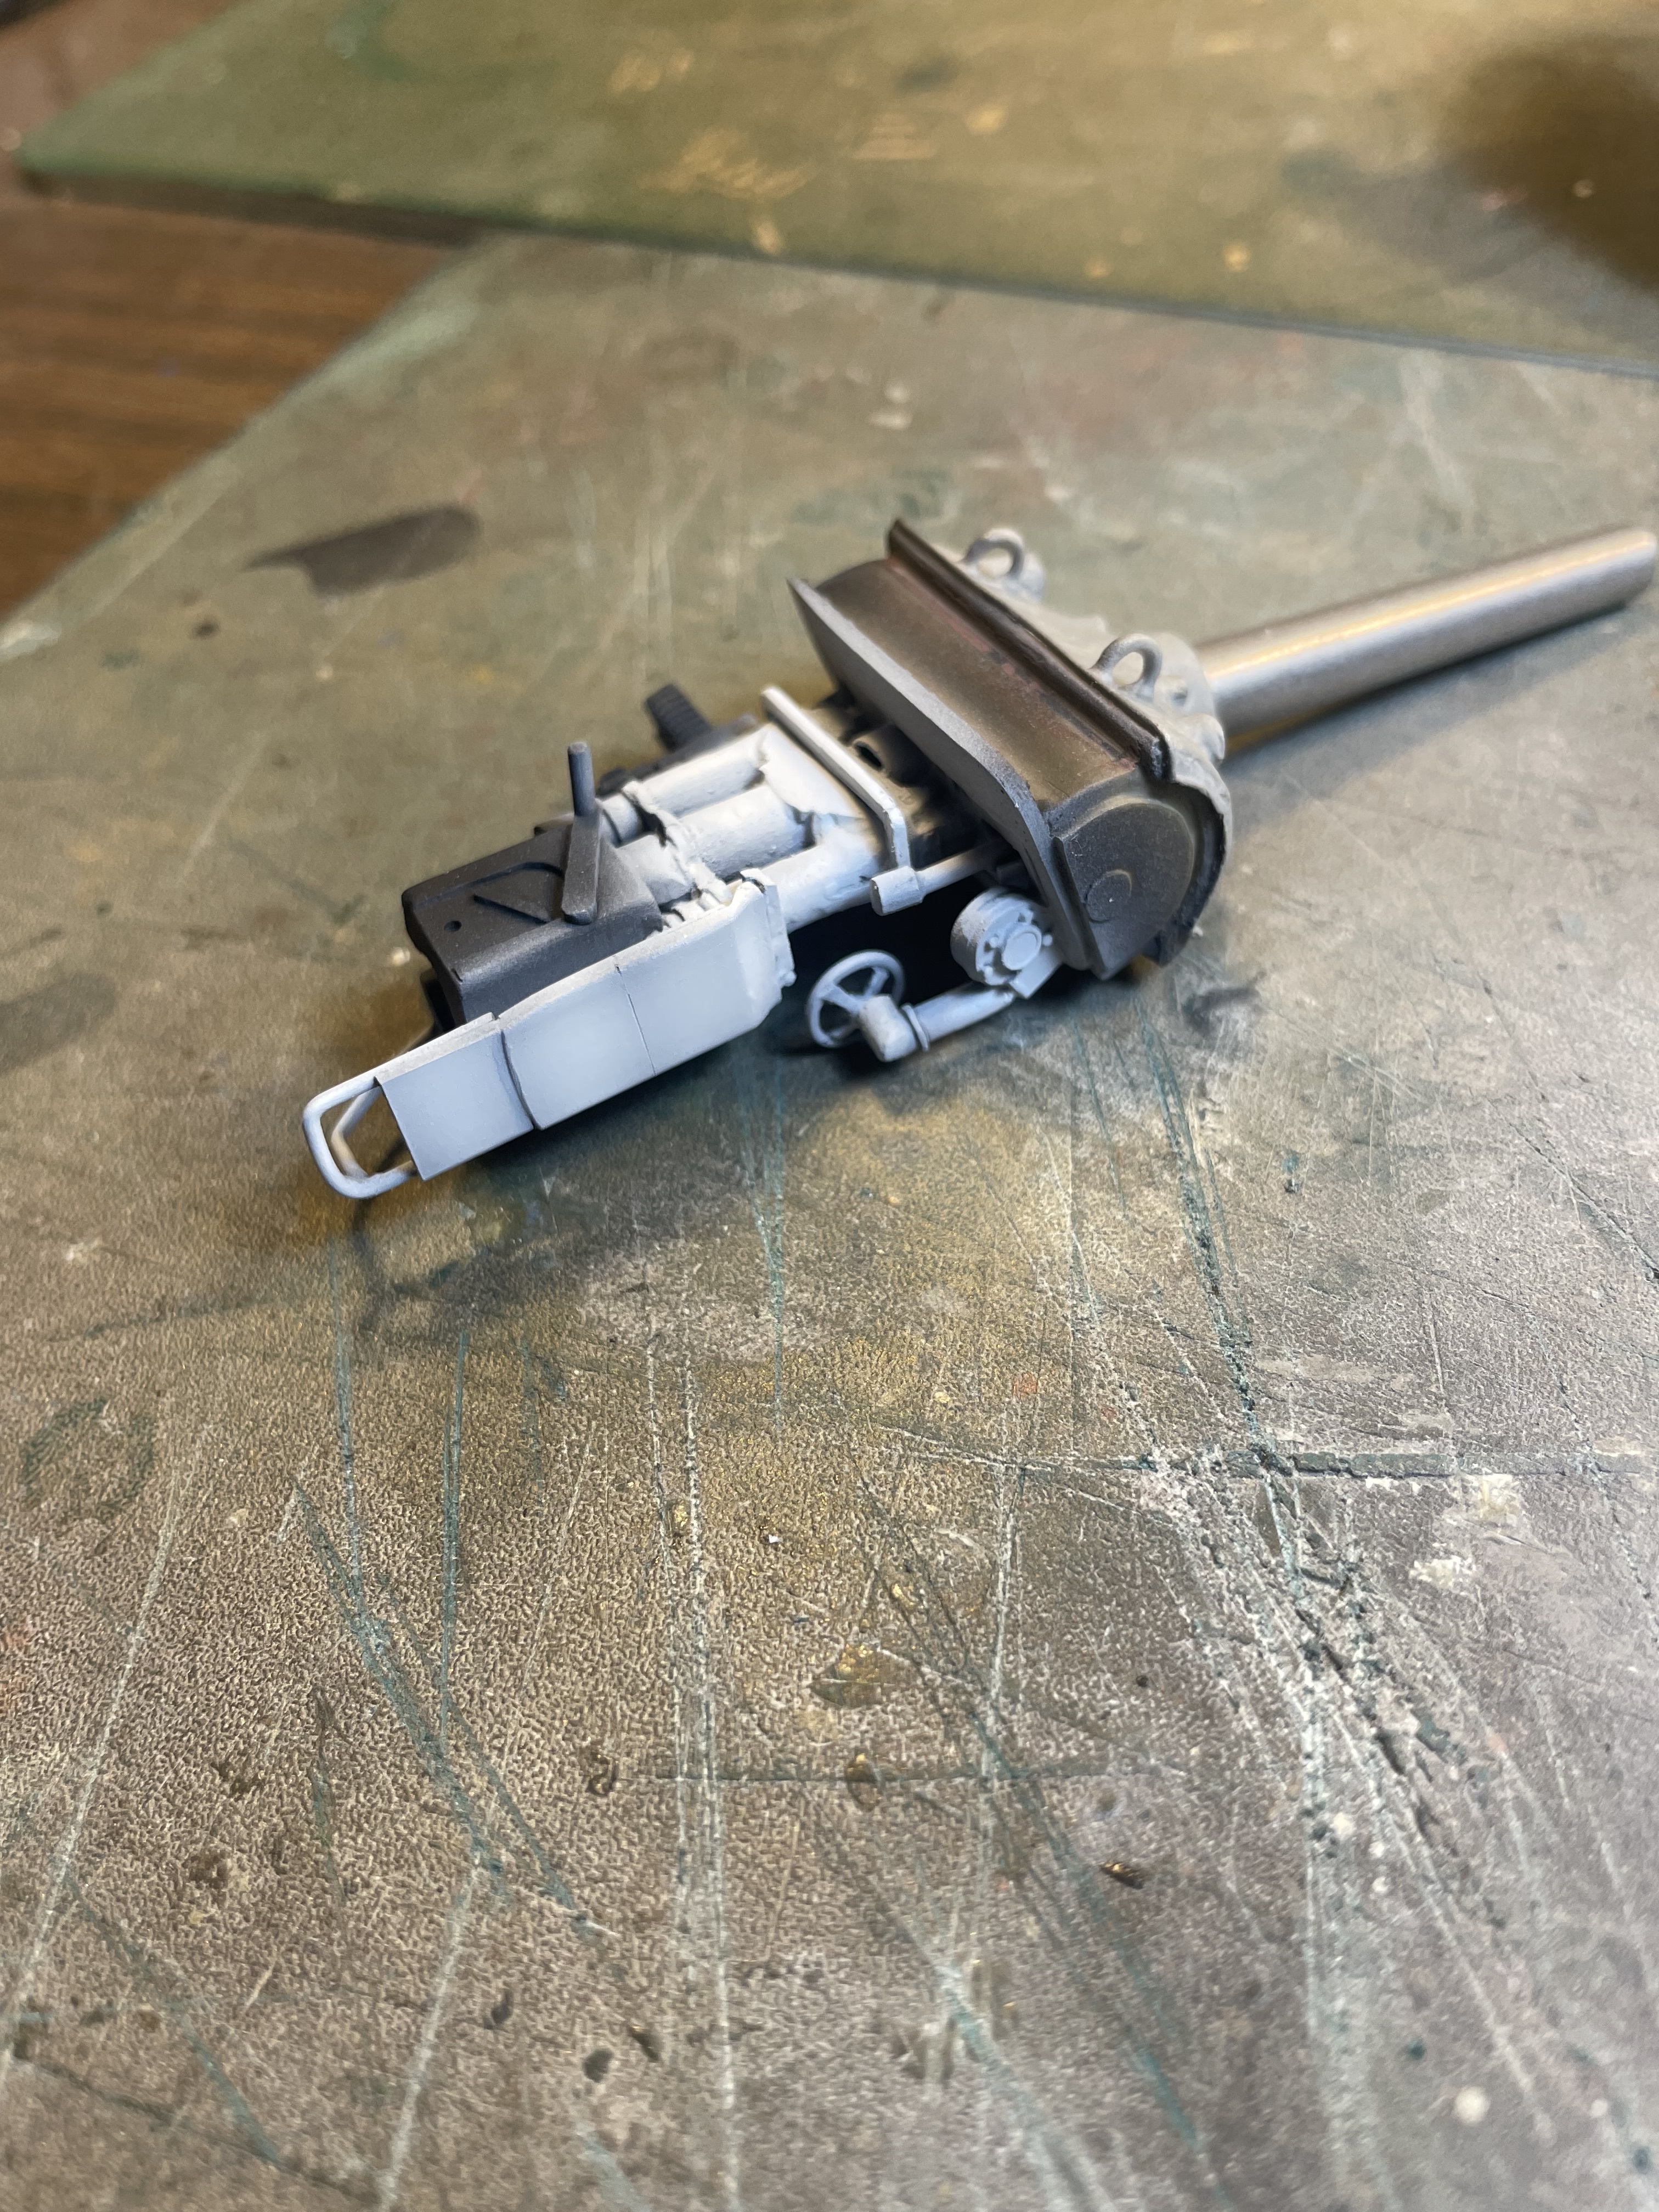
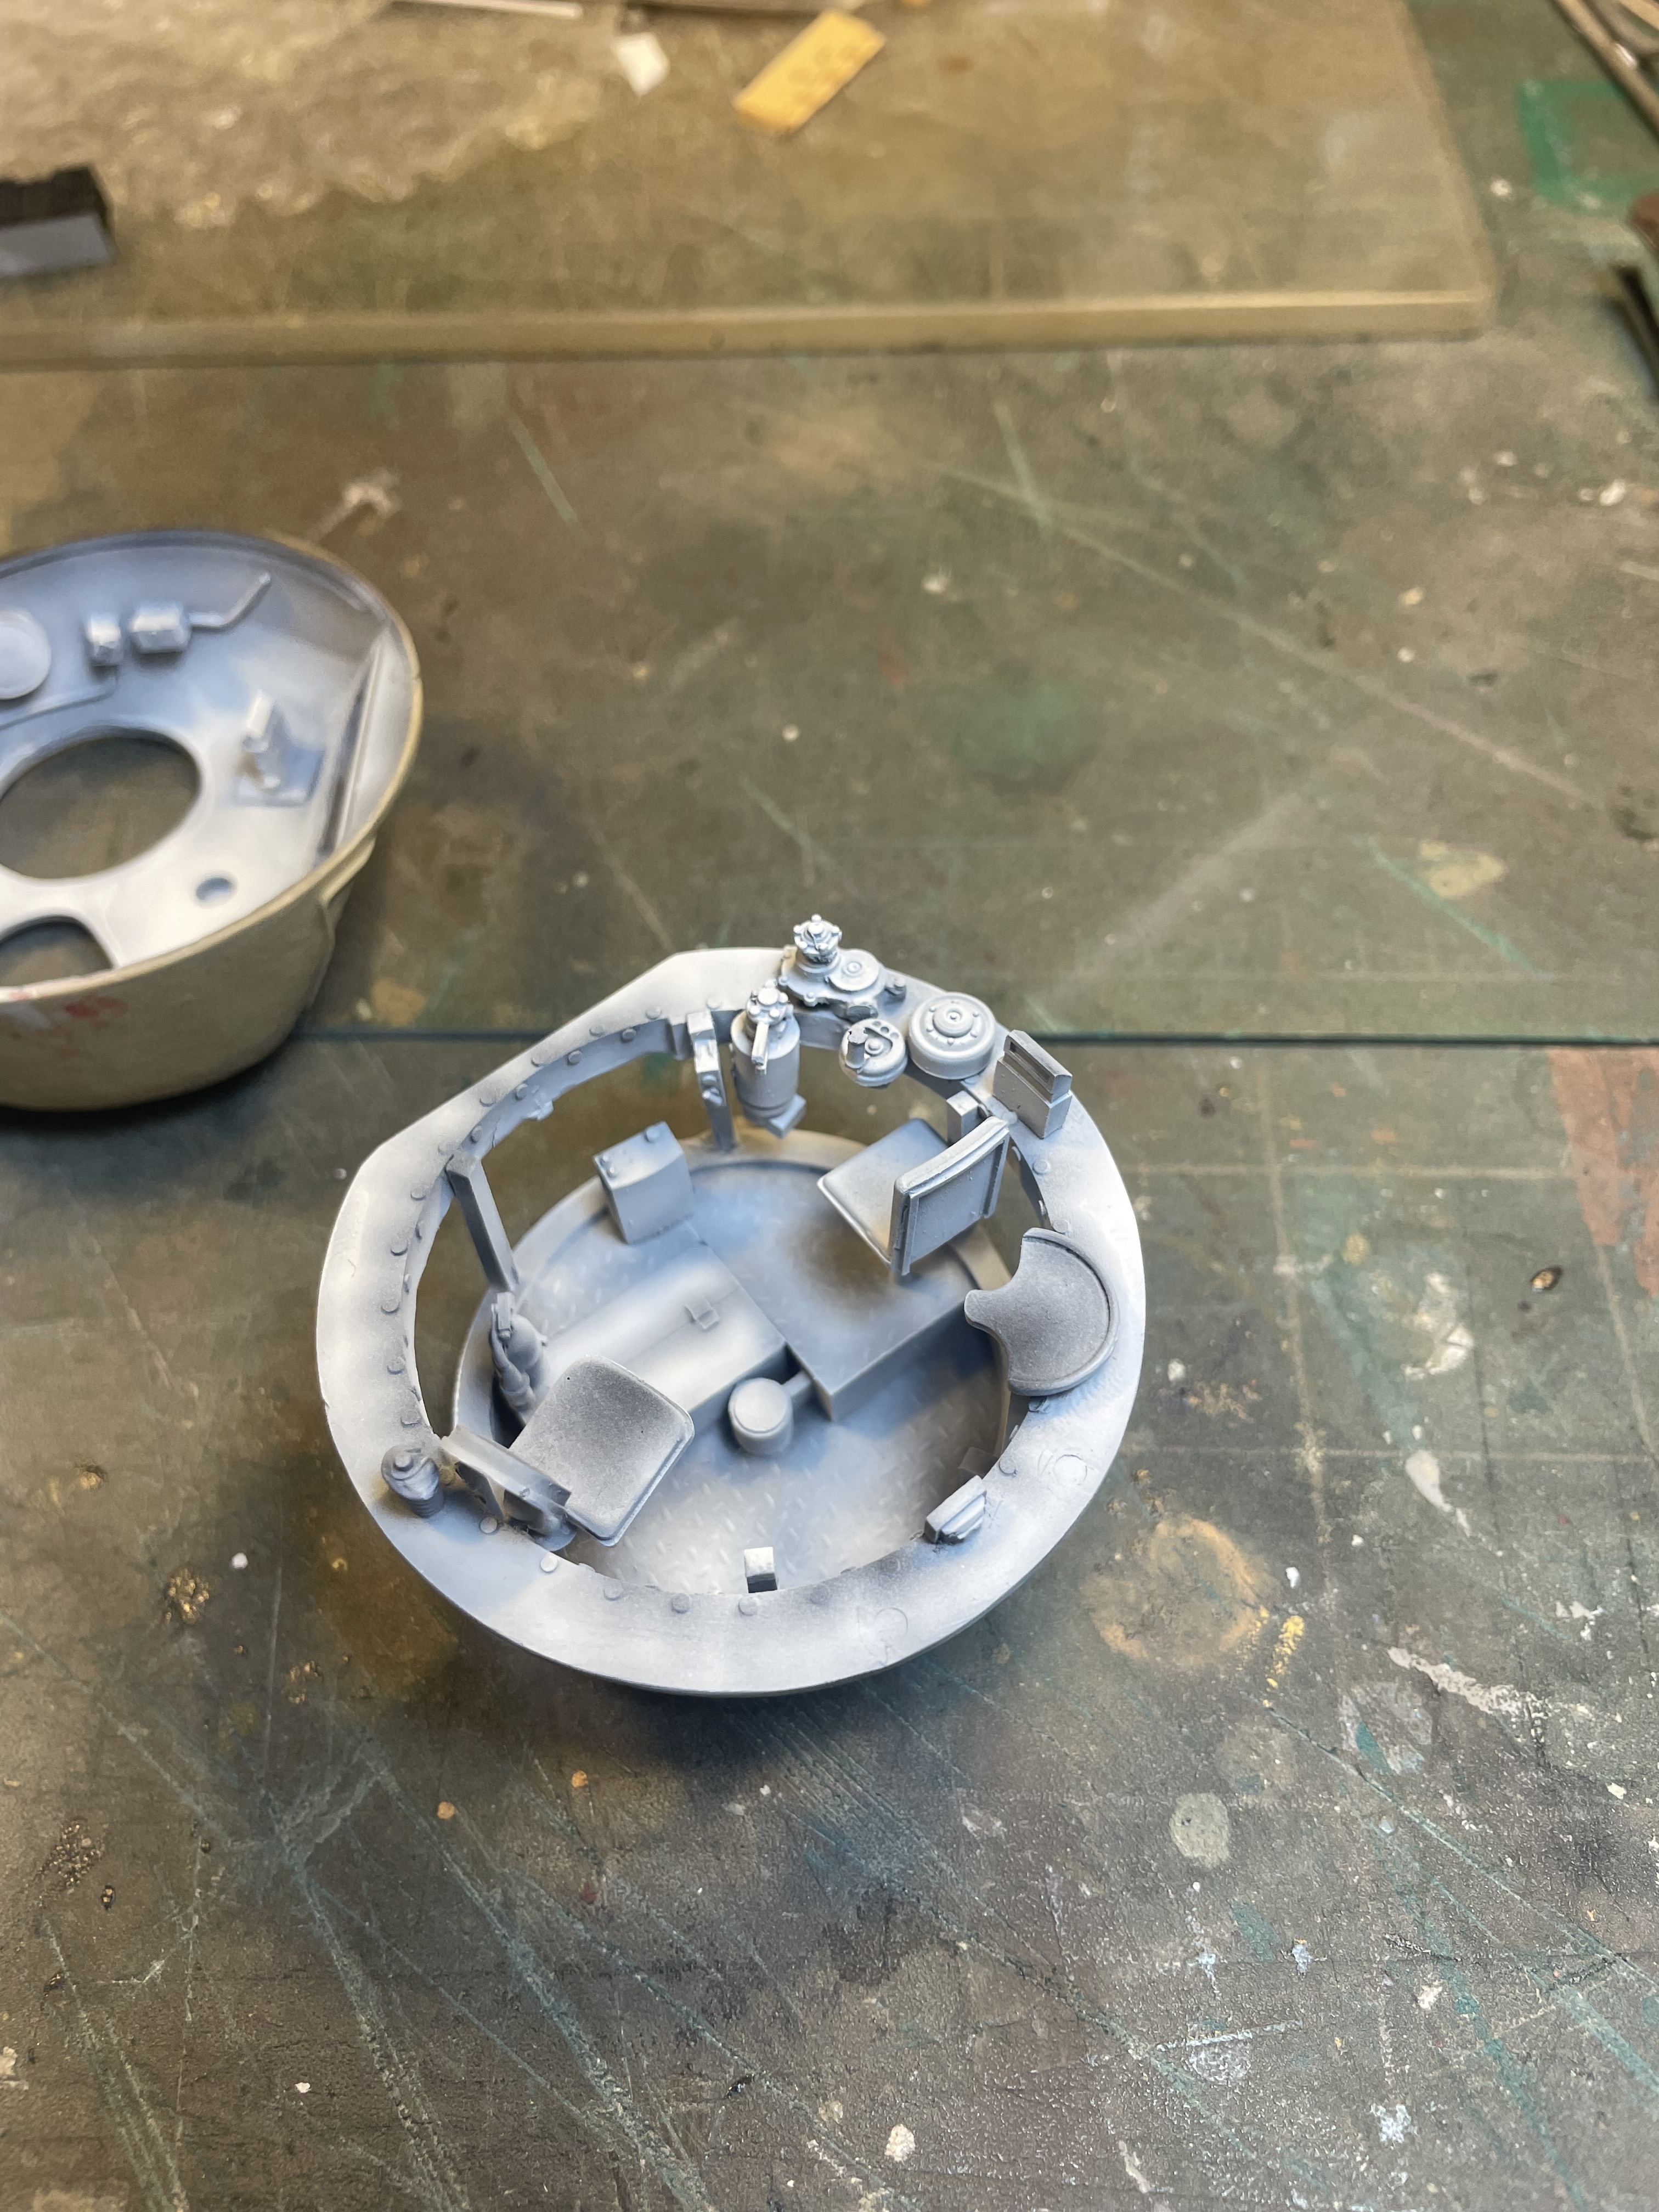
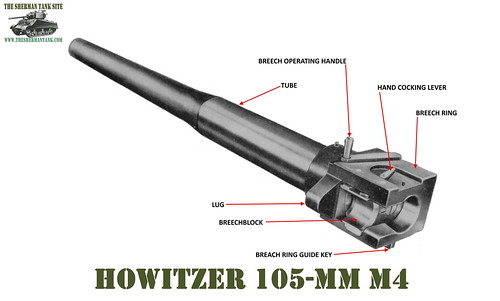
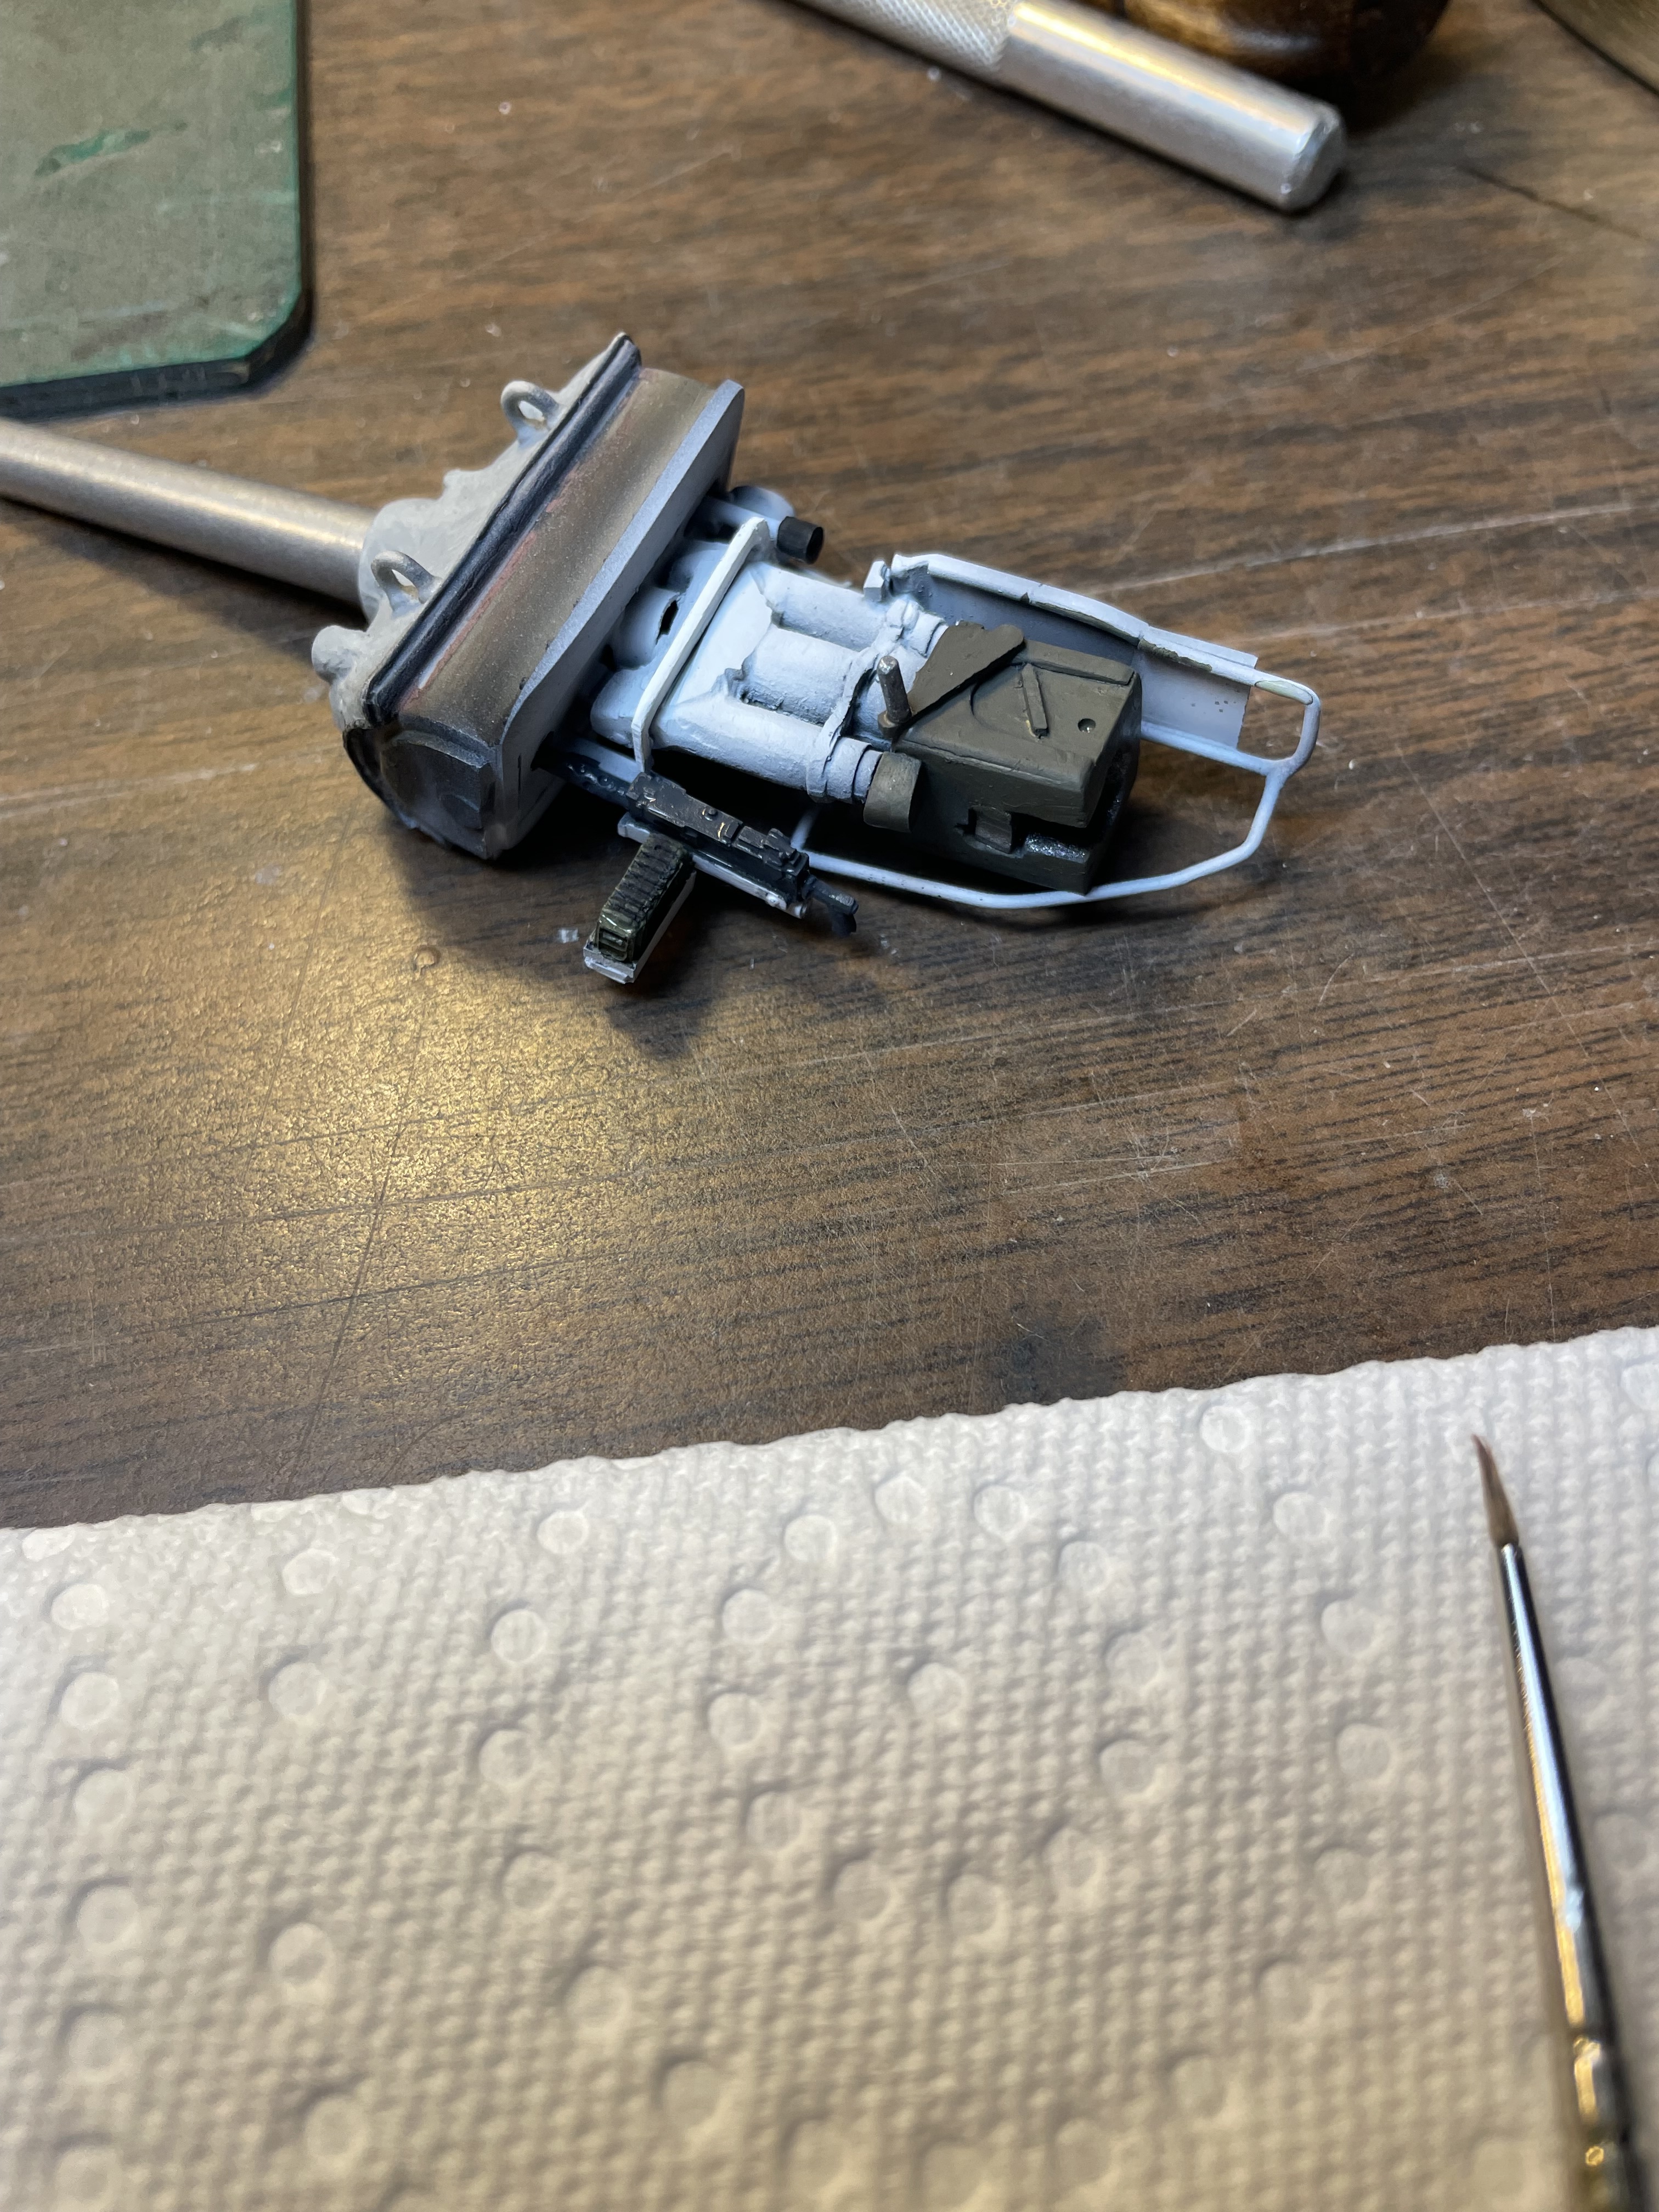
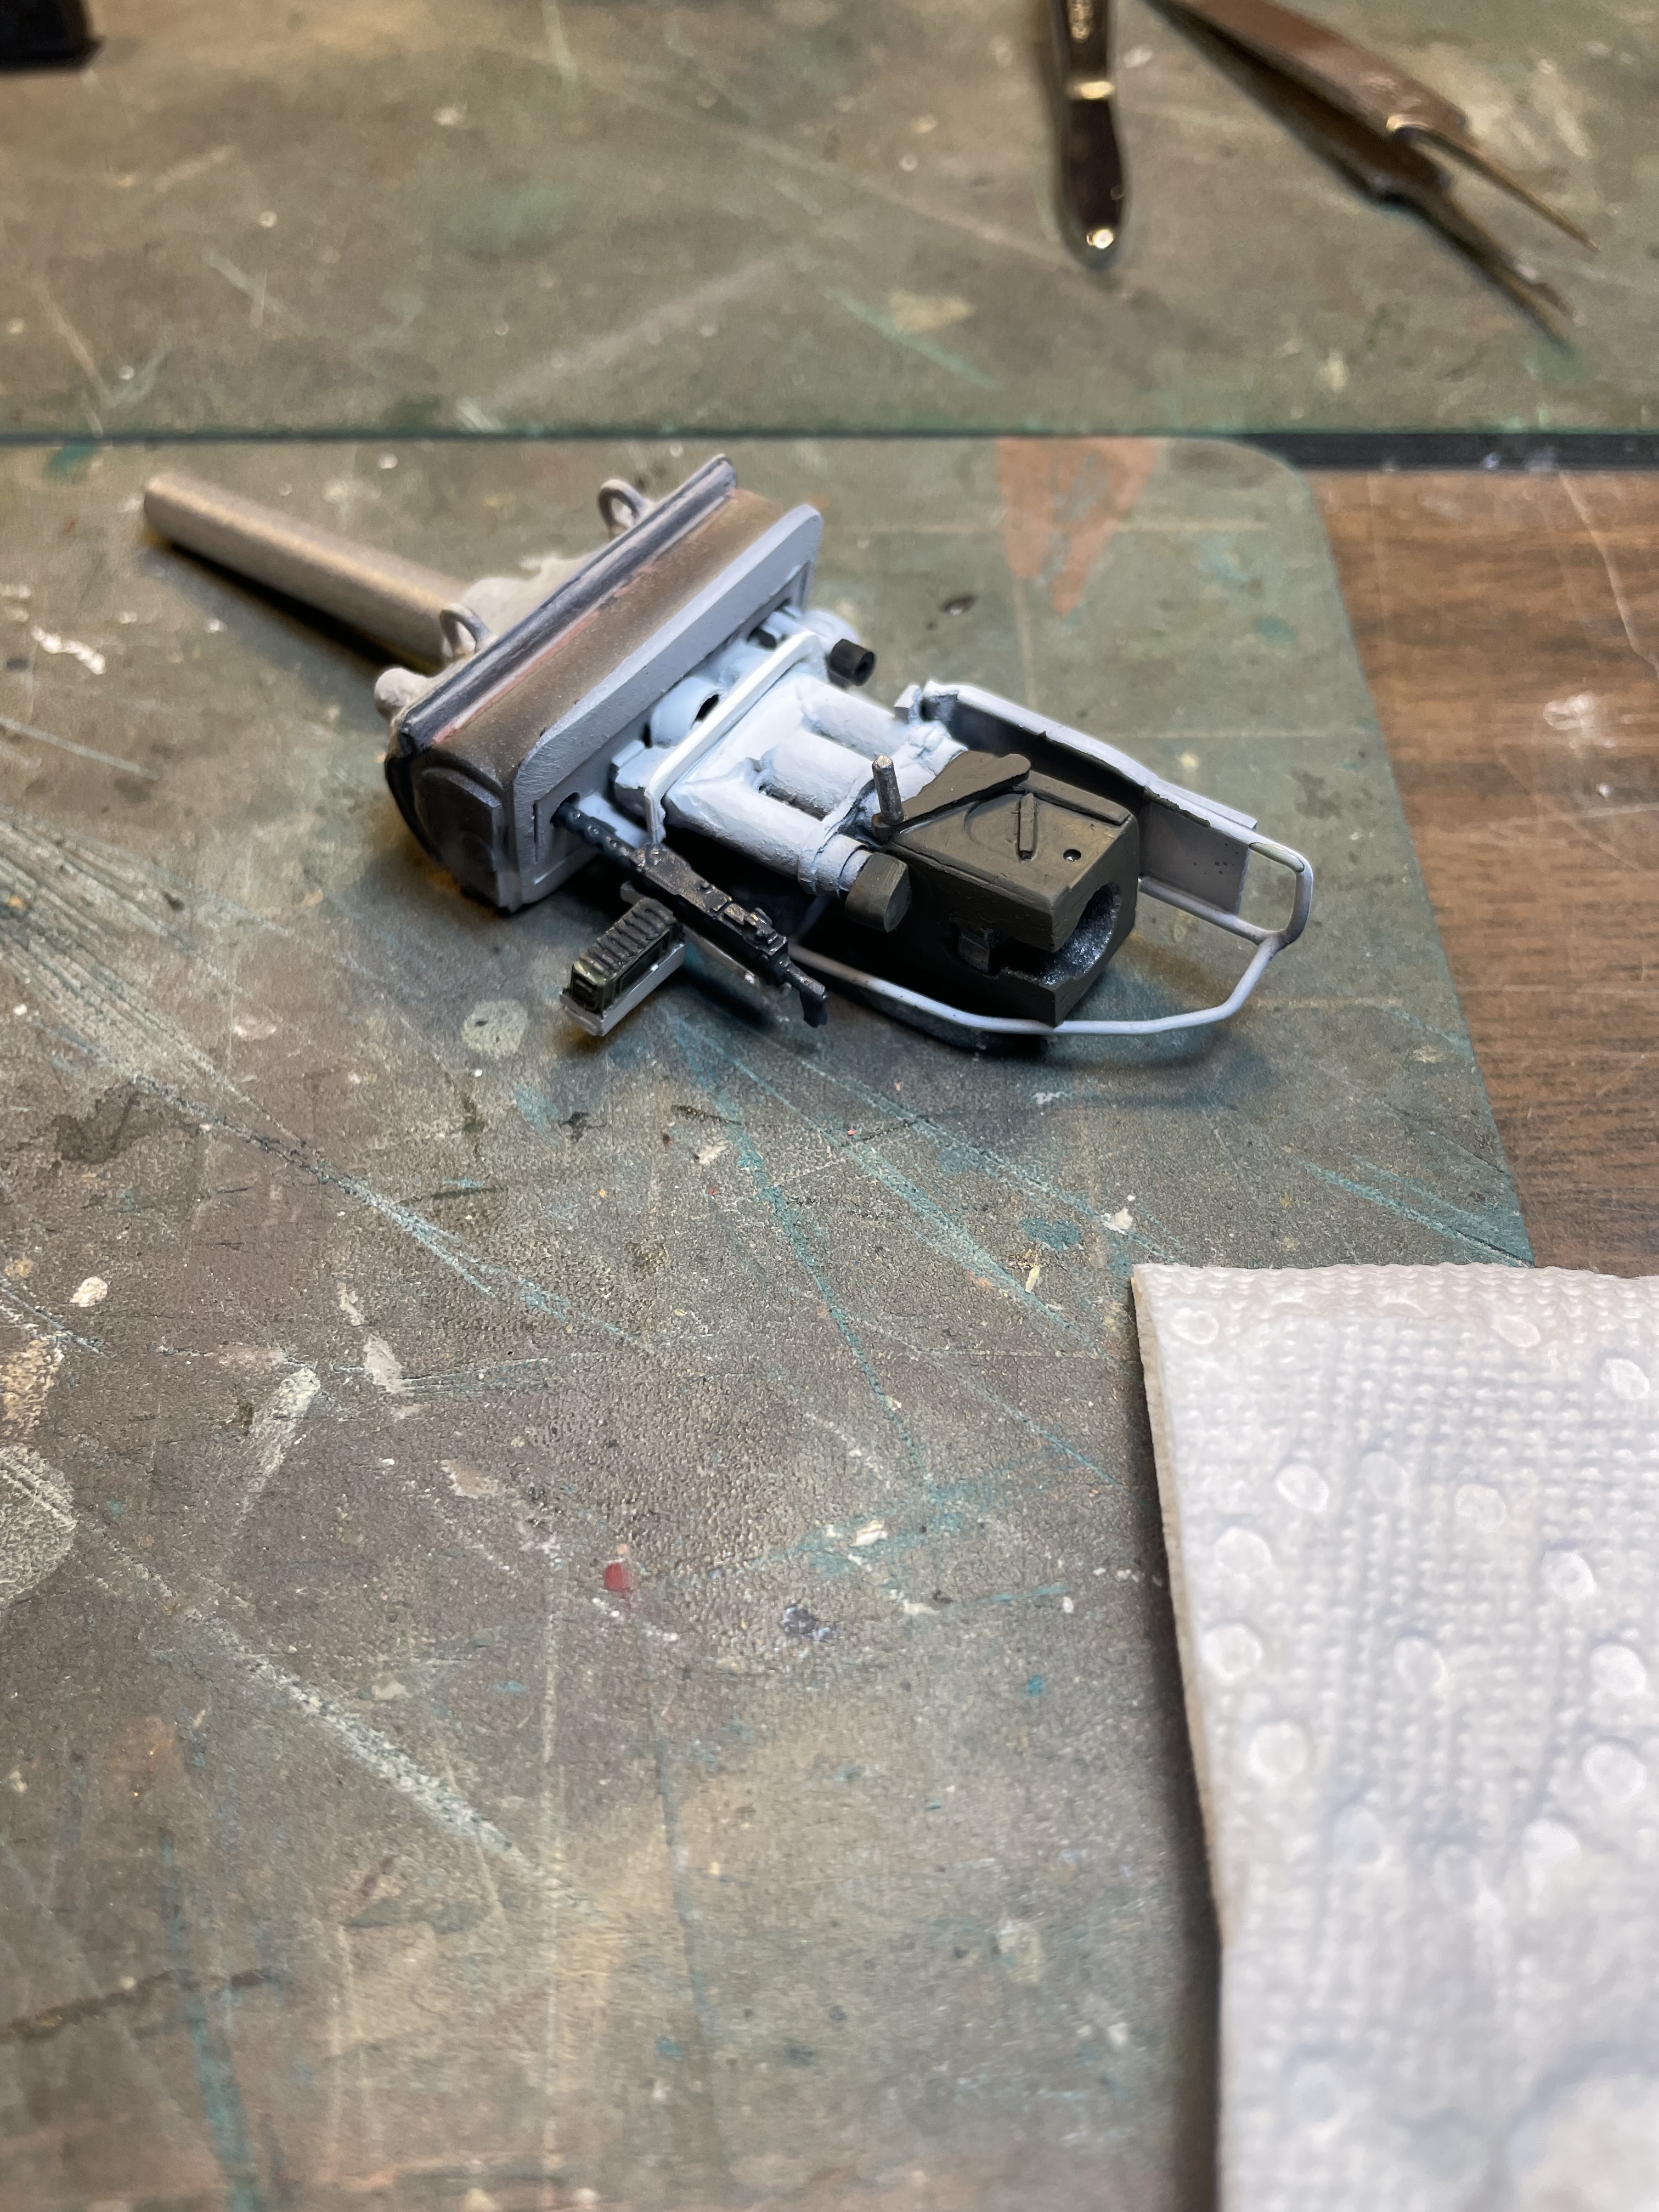
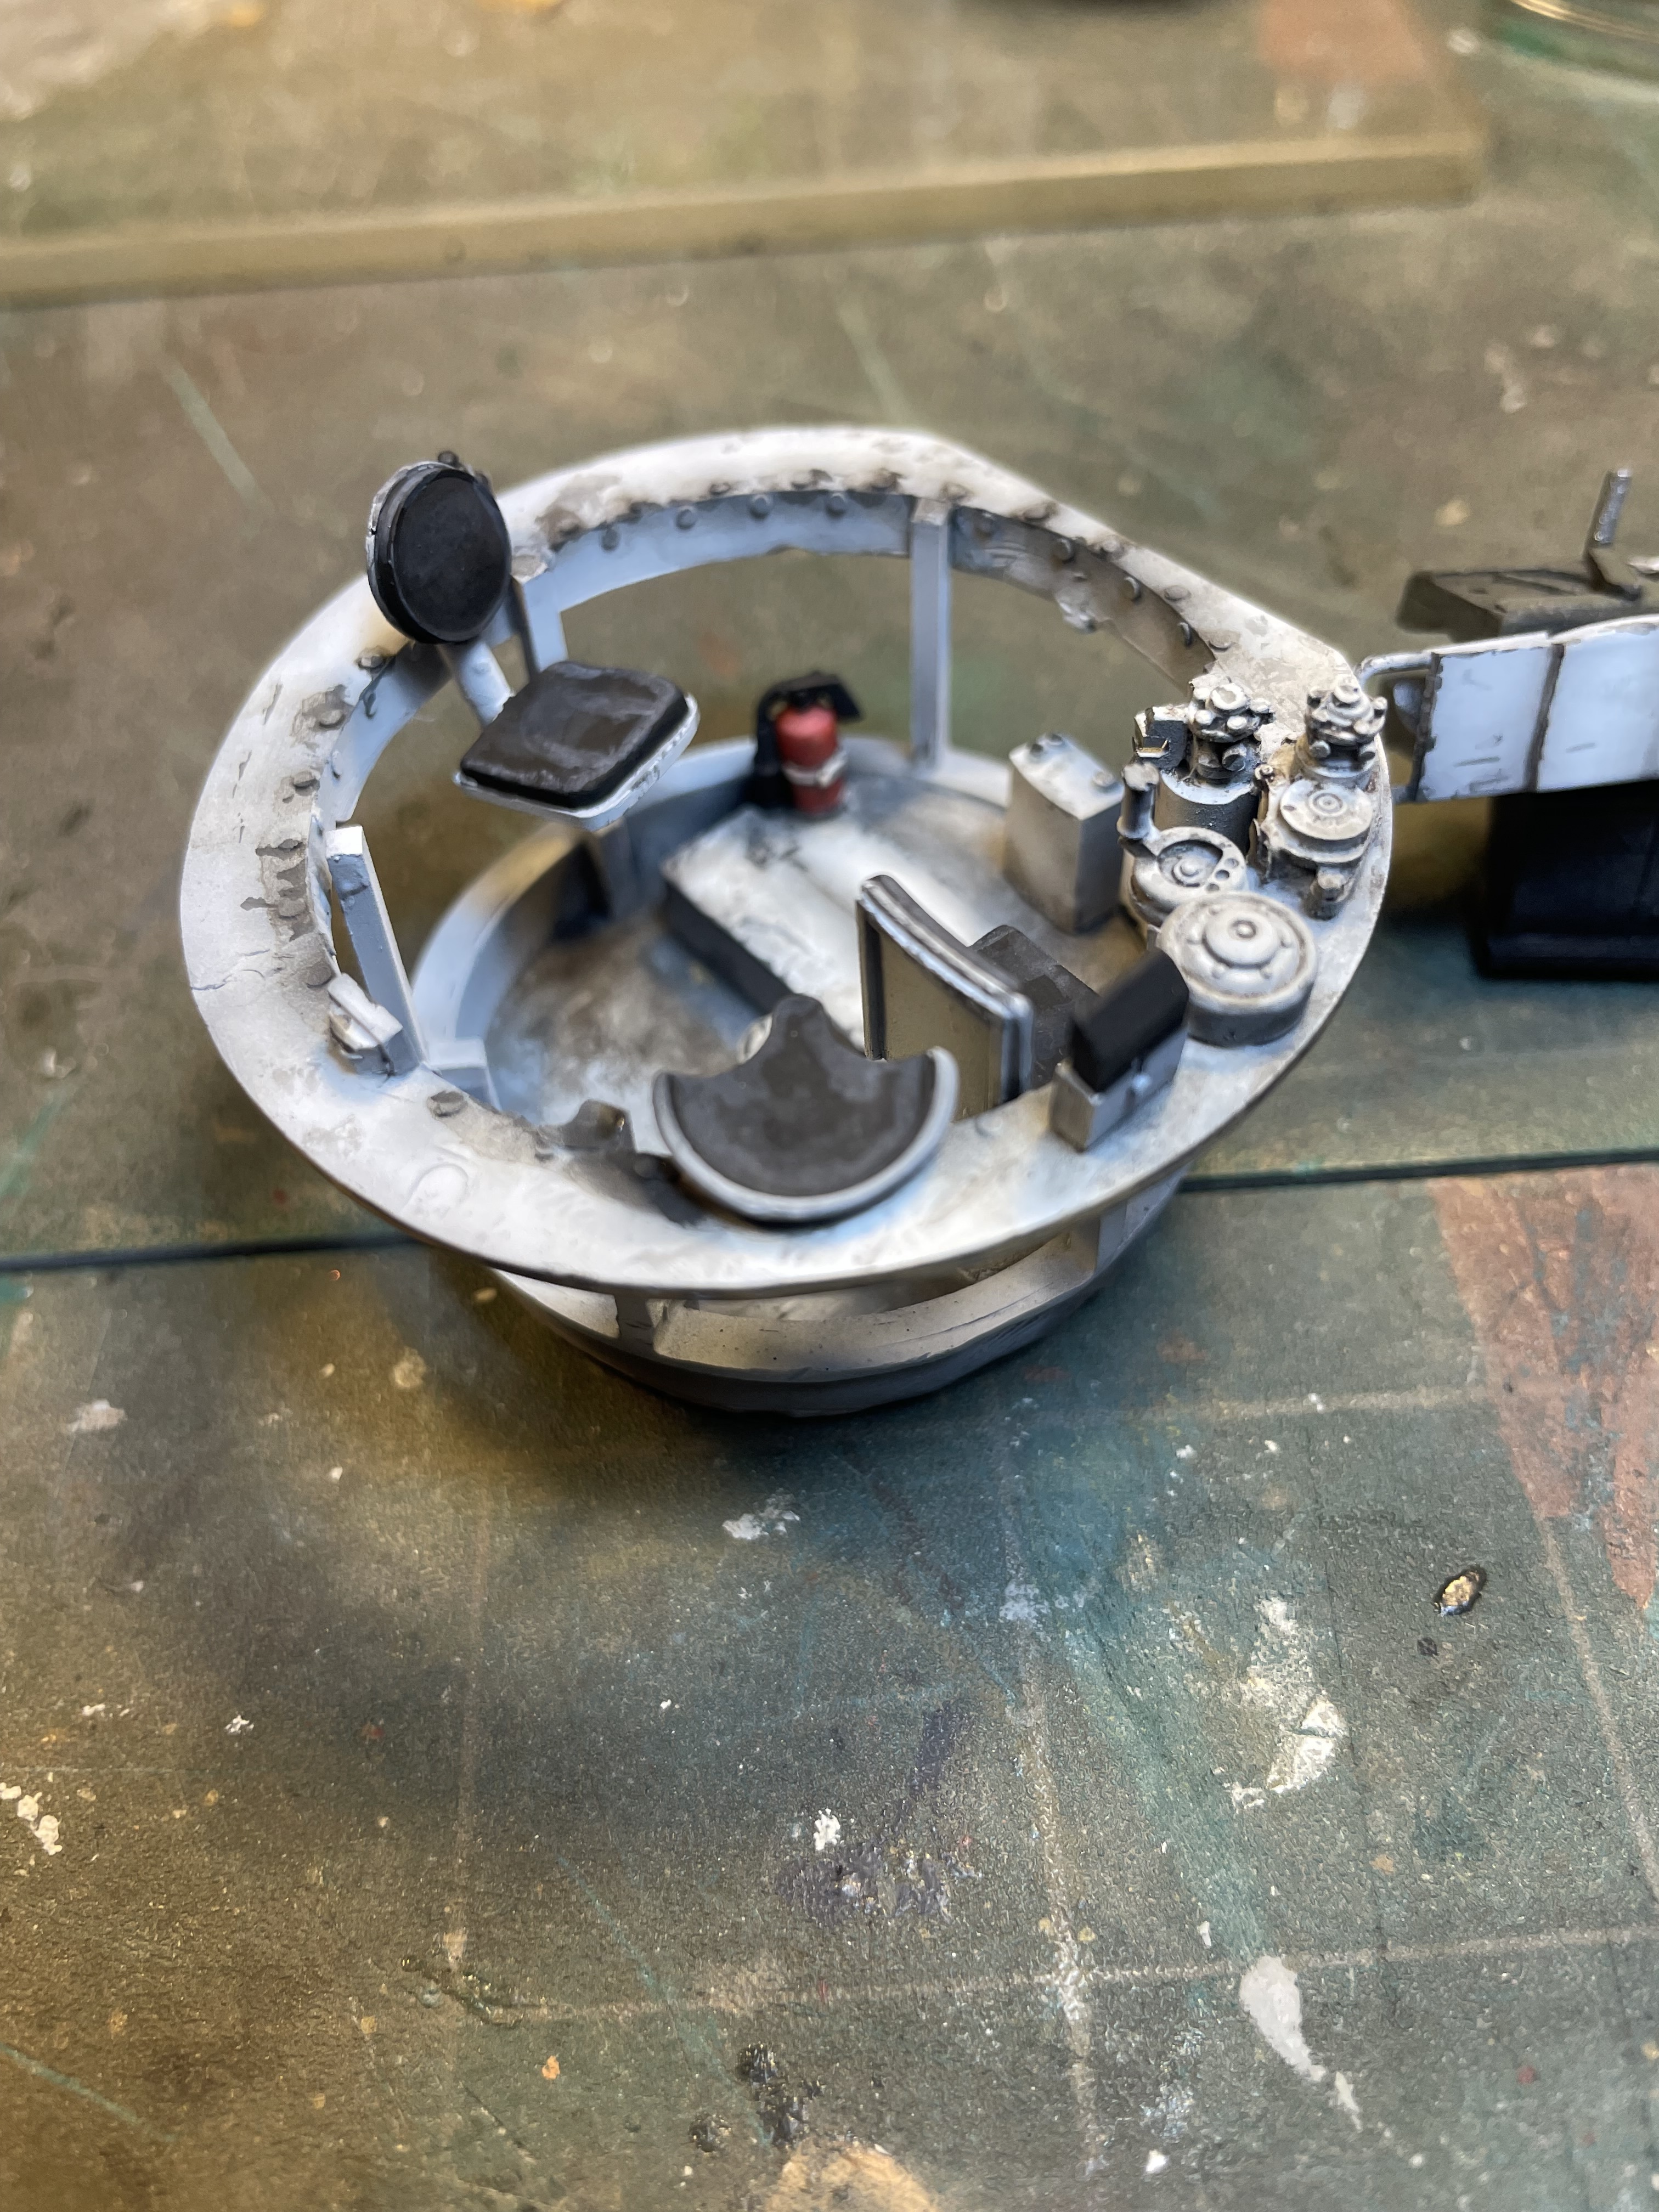
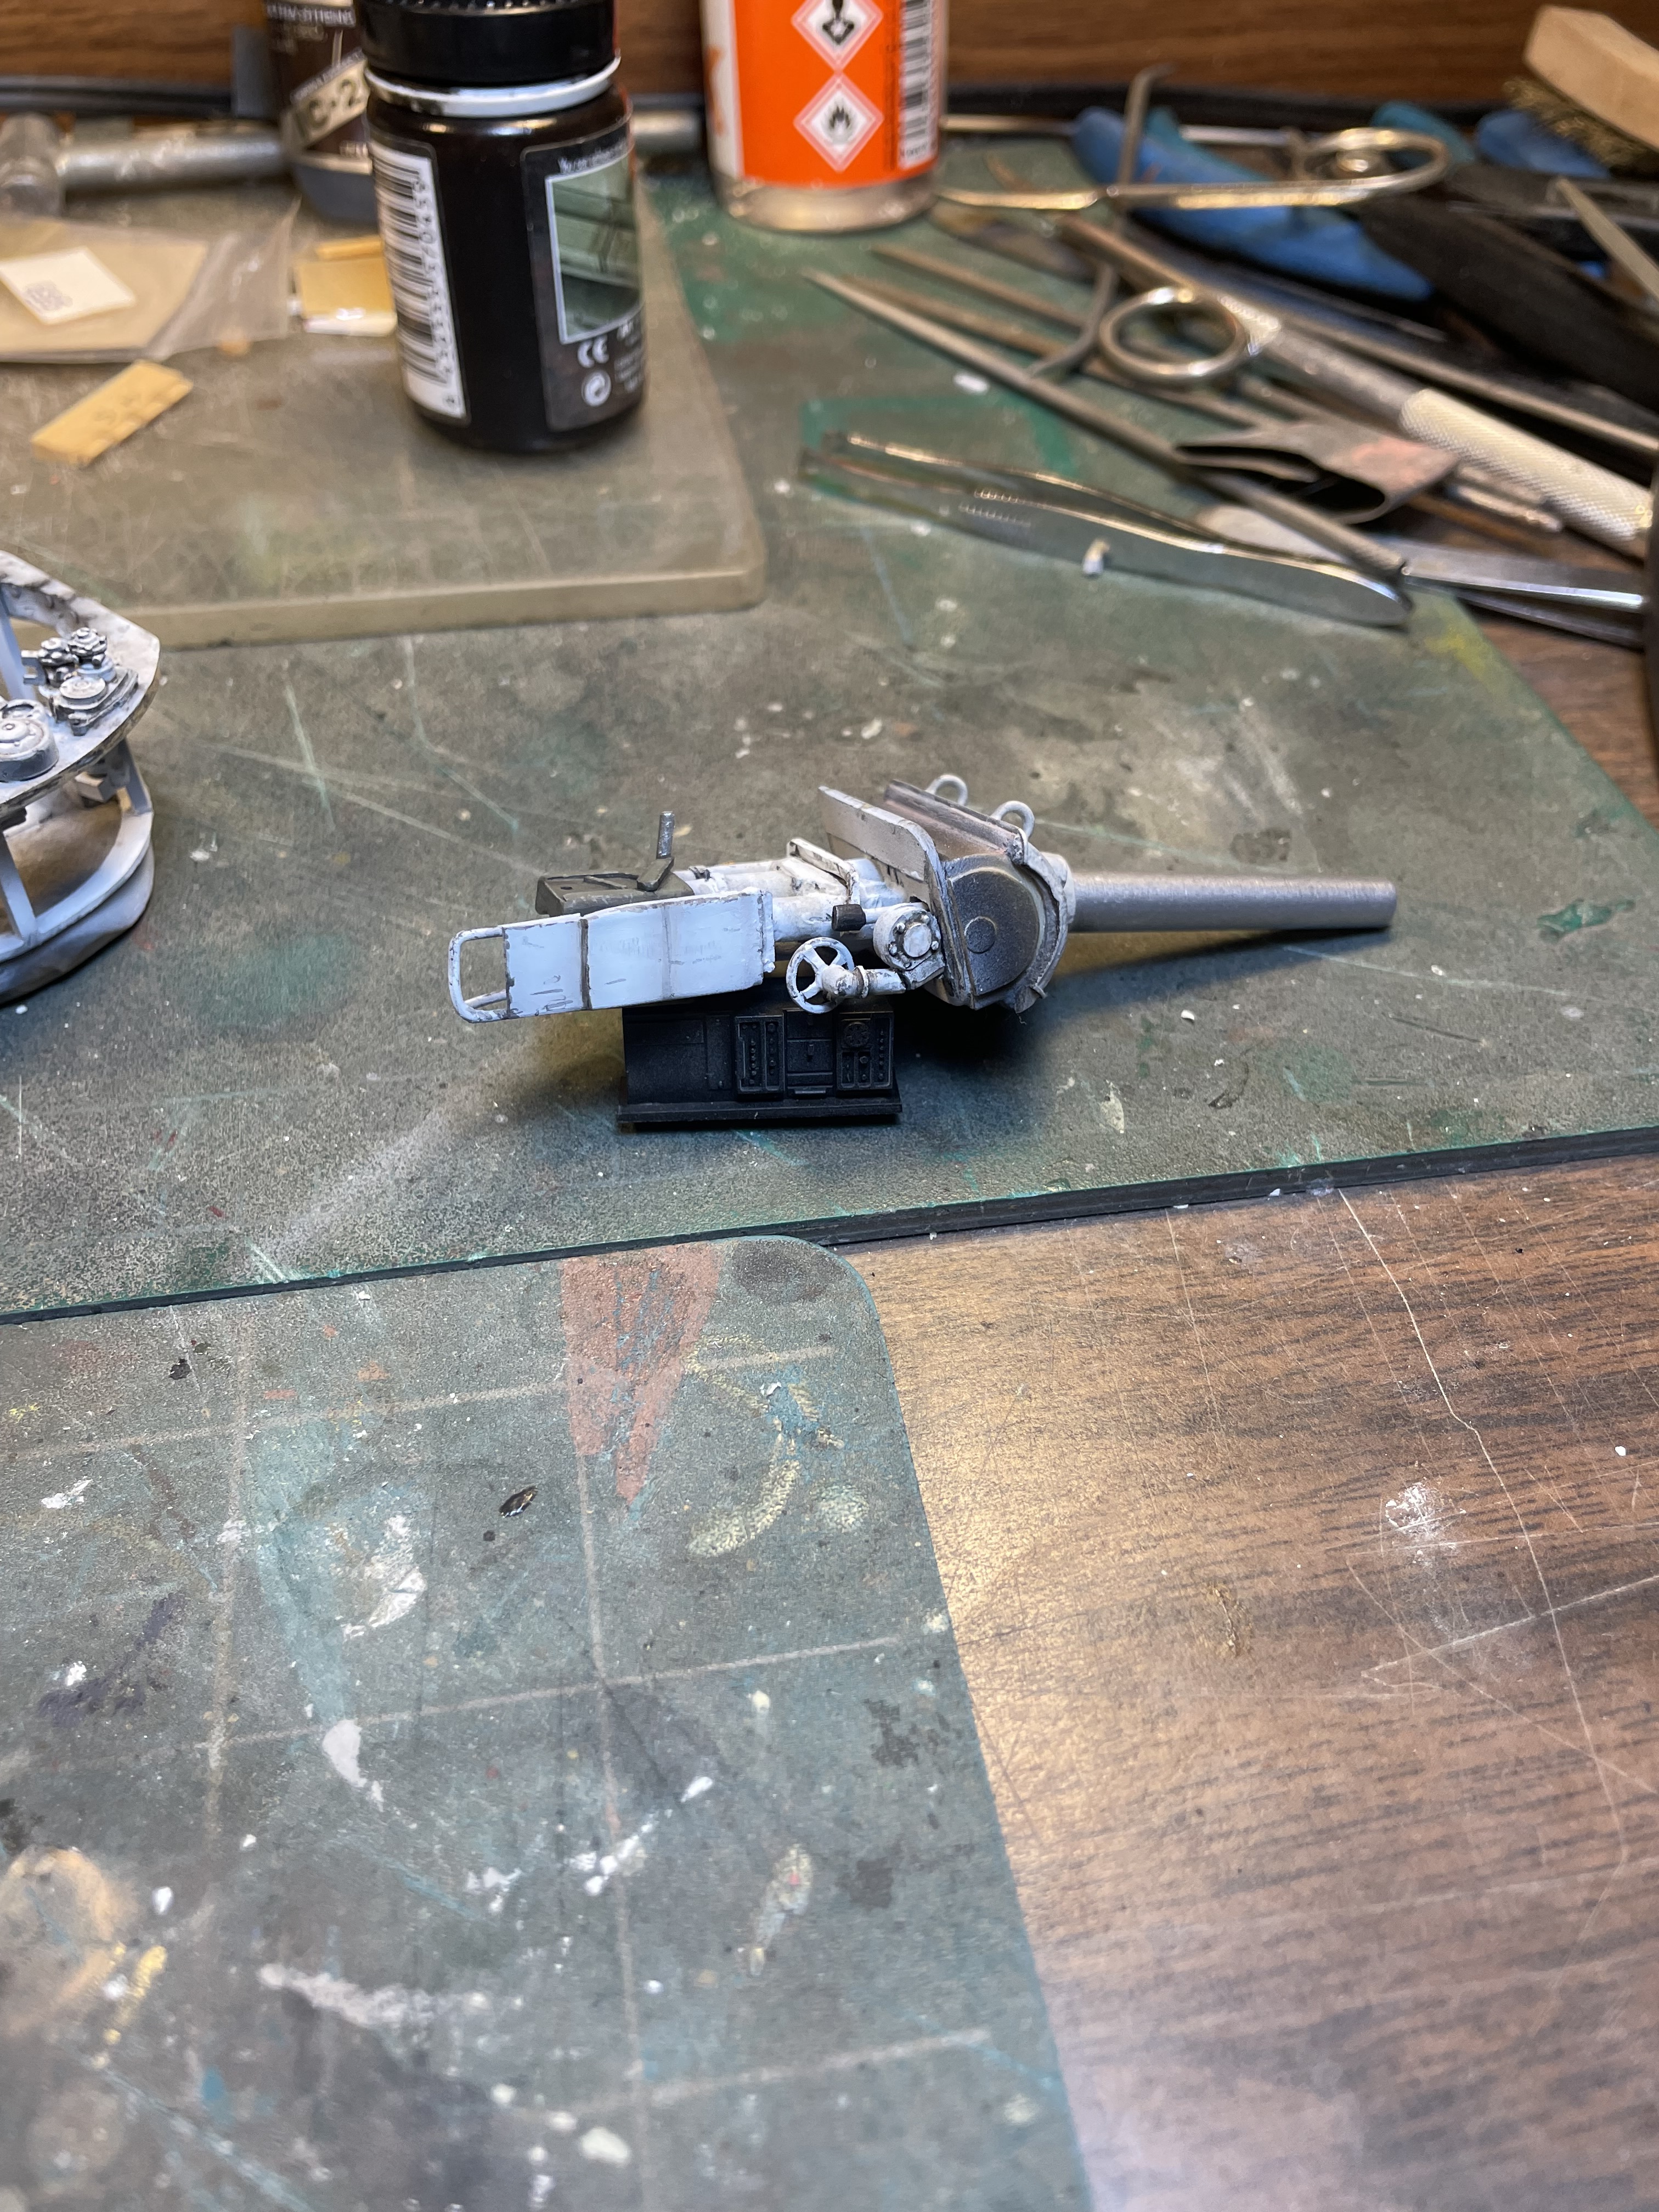
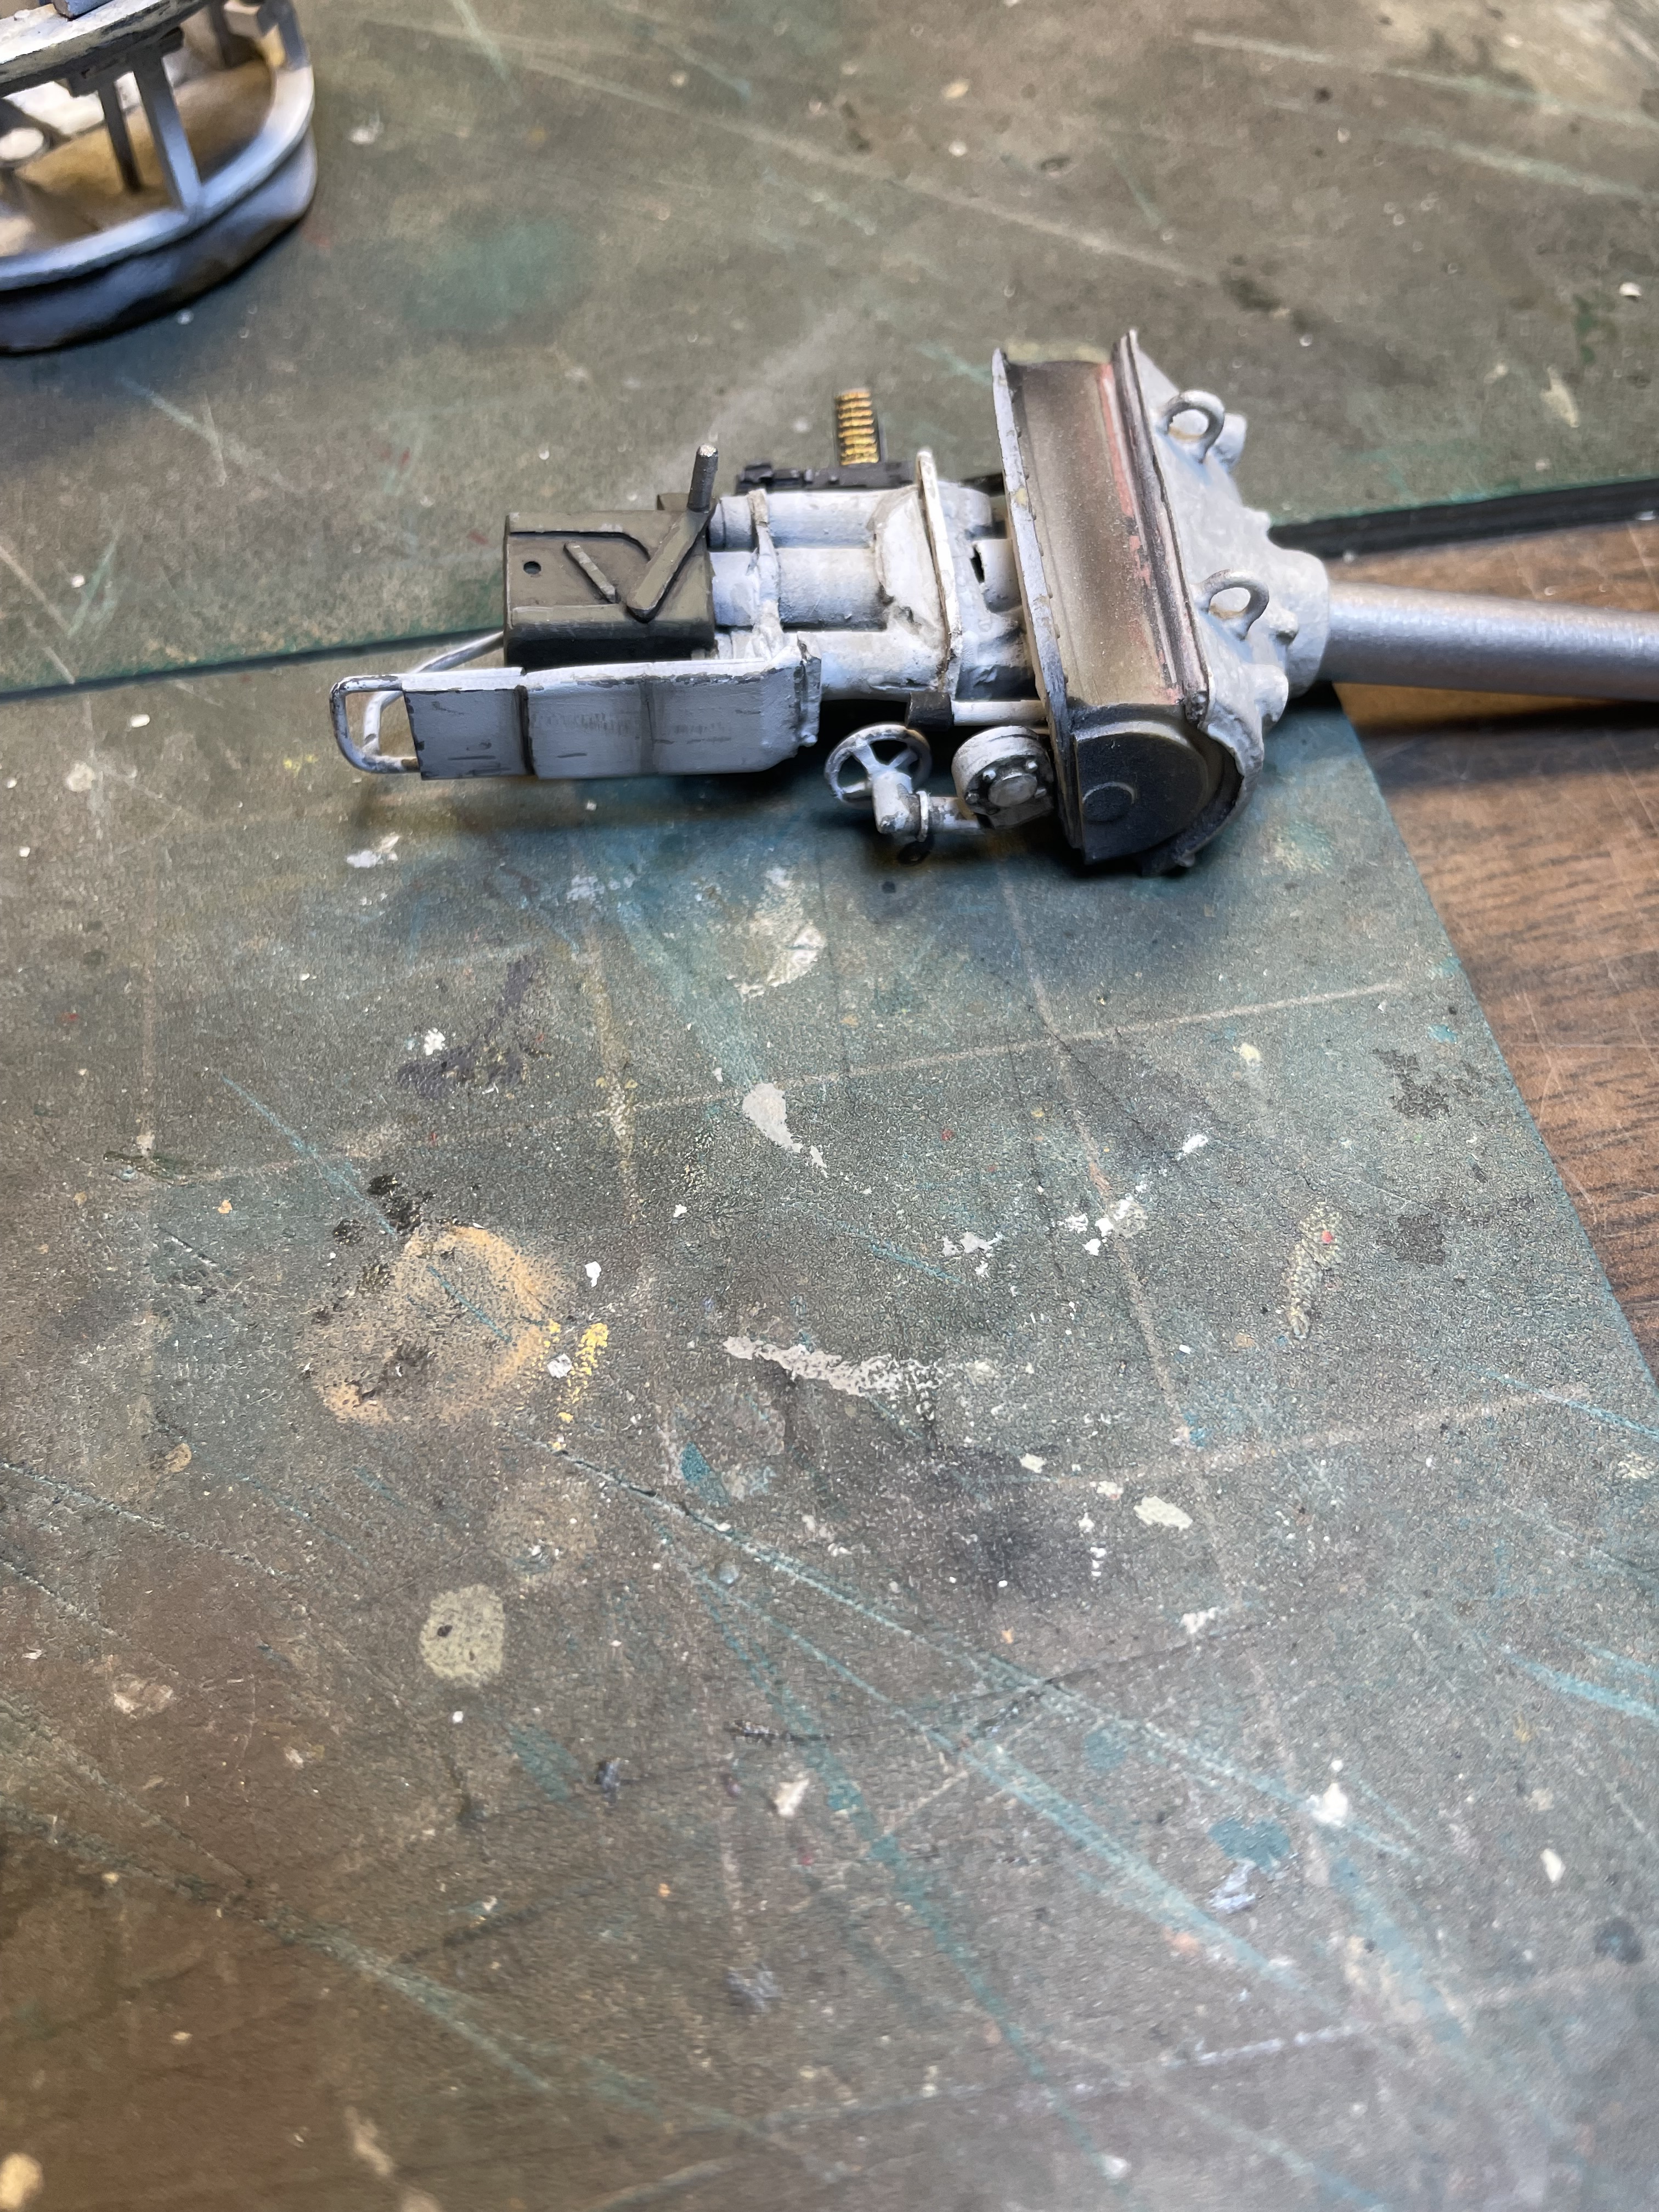
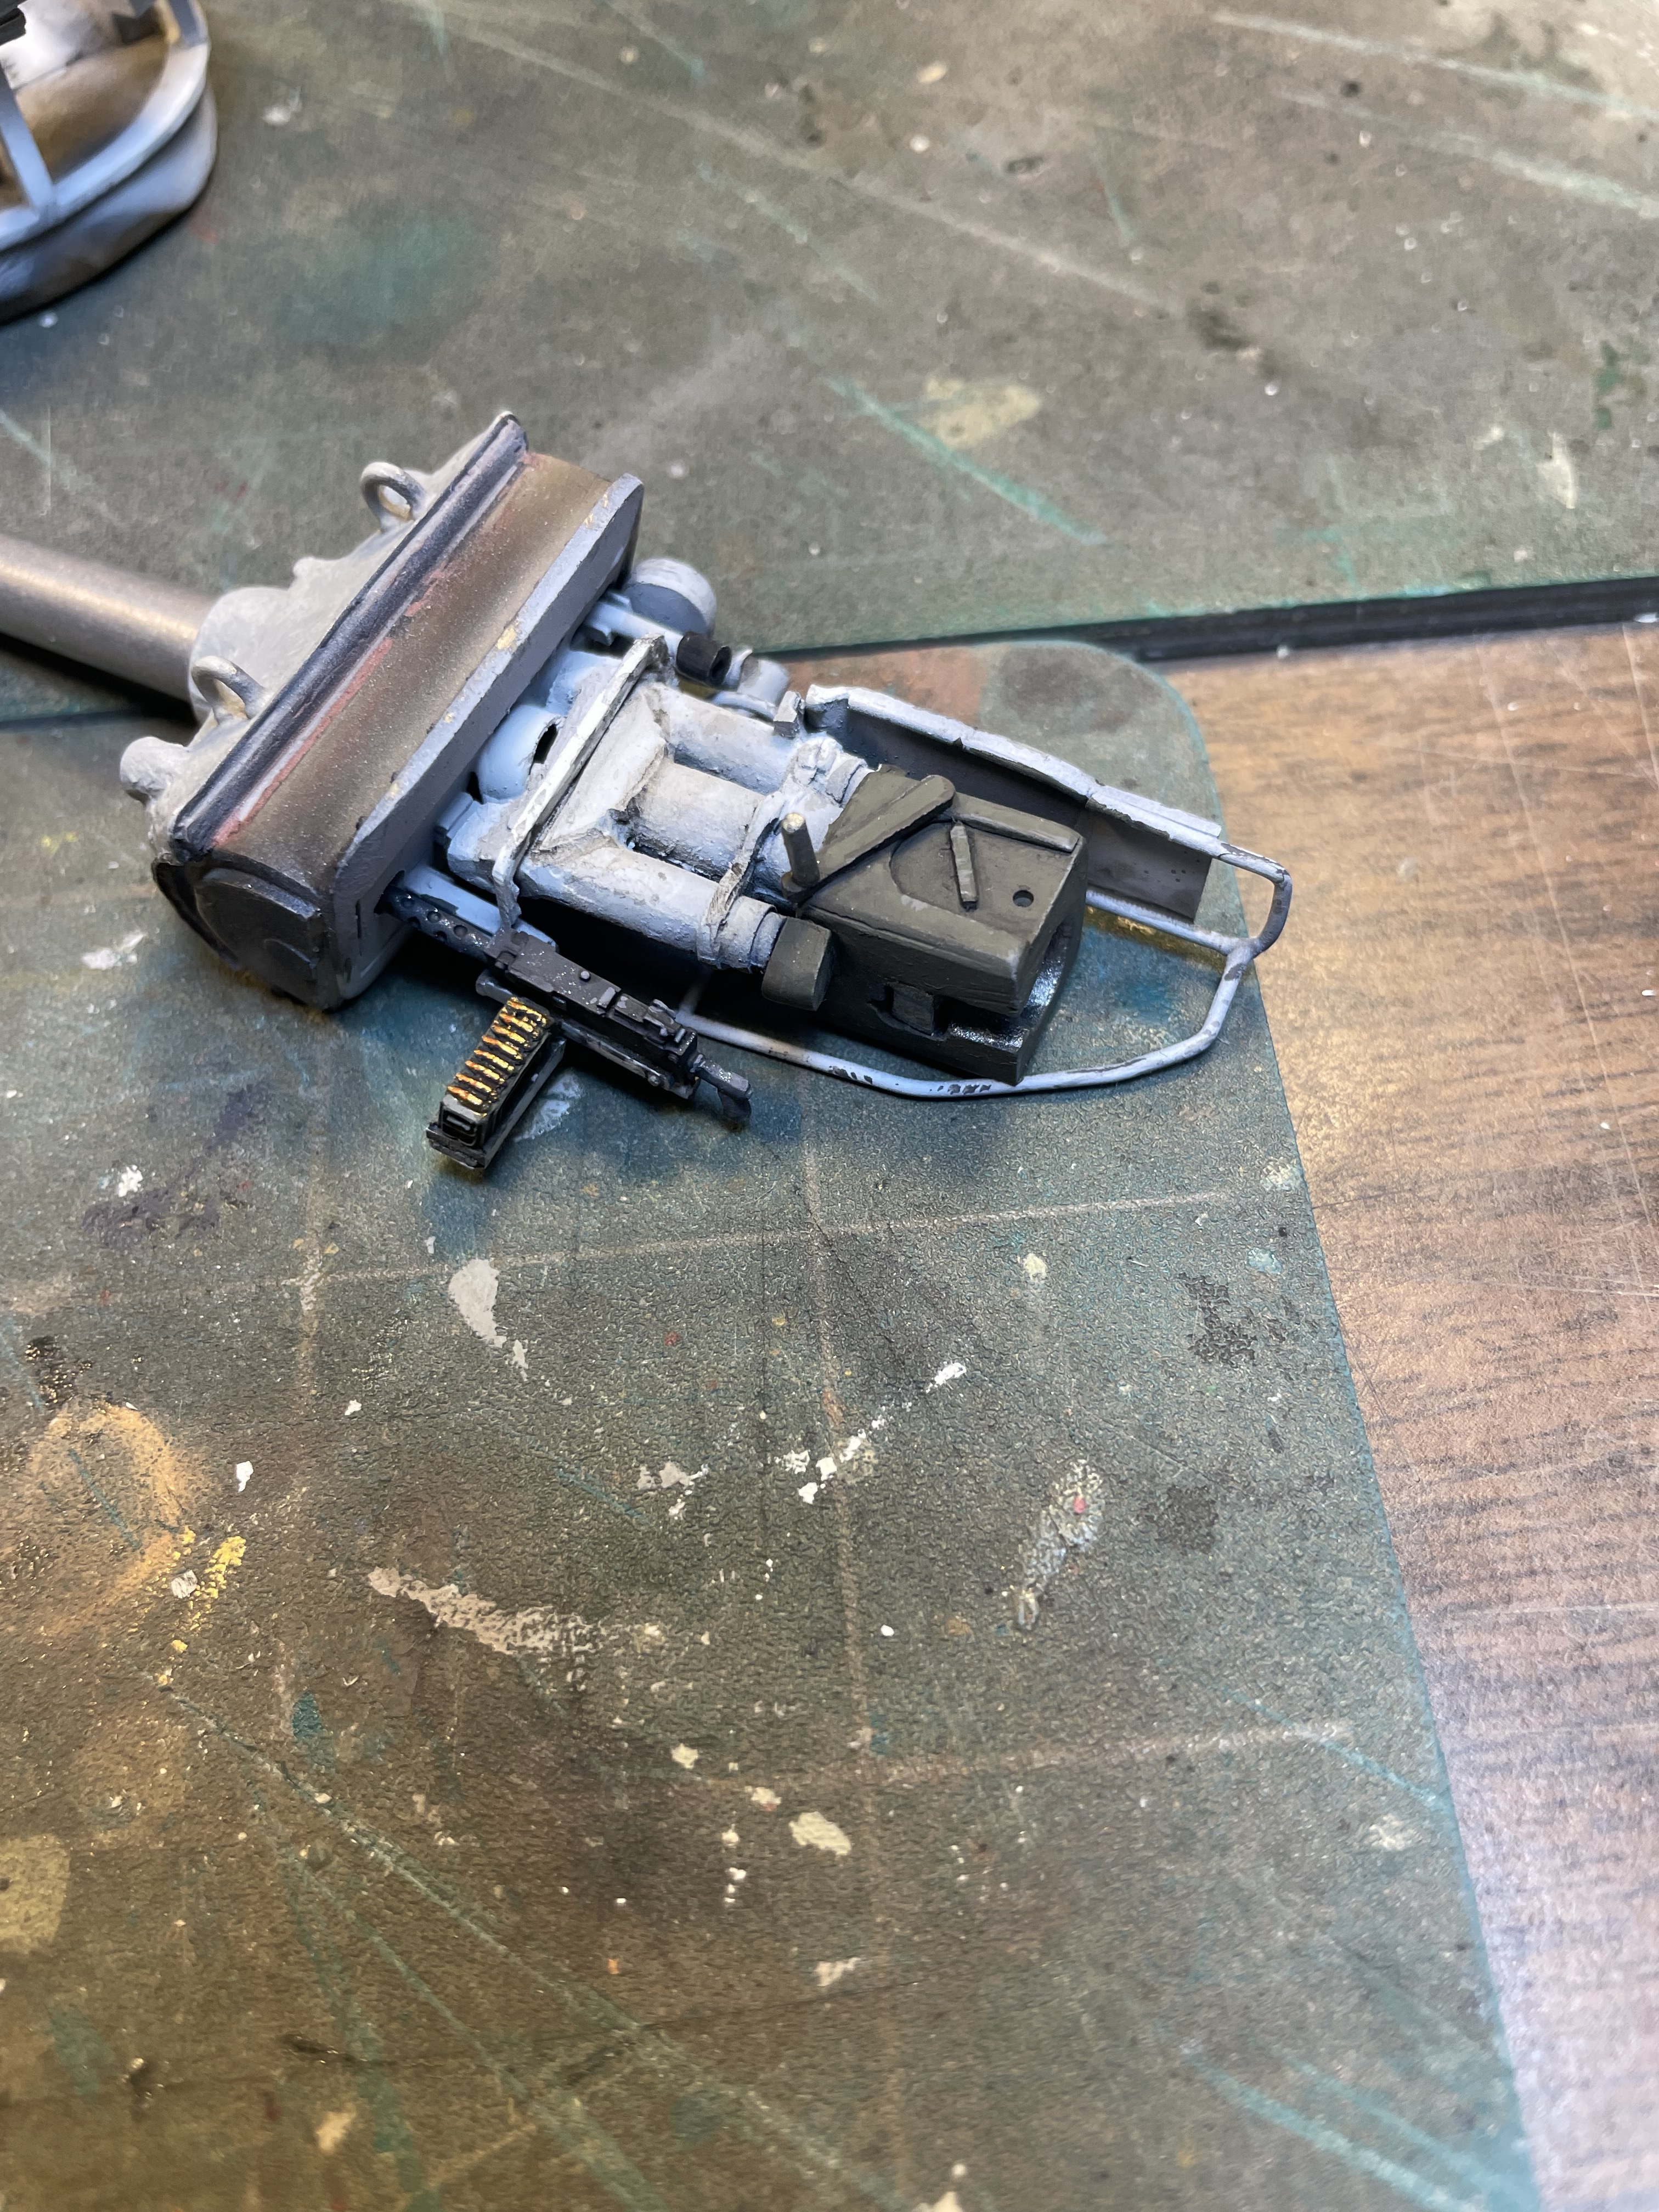
A long overdue update to this project. I decided to scratch build the M52 breech for the 105mm gun on my M4 since none are available to my knowledge. I used the recoil tubes from a Resicast M4 75mm gun. In hindsight I would have been better off scratch building that as well. I found a block of resin from a Verlinden M3 update set and drilled an appropriate size hole then cut a slot in it . This was all just eyeballed by the way. I did the same with the turret basket just using pieces from the parts box. I didn’t add any hydraulic lines but did add some electrical lines to the intercom boxes in the turret. I used various shaped parts for the different crew seats. Not accurate really but much of it will be hidden. The breach guard was made with some resin panels and plastic rod. Primed black then sprayed white. Comments welcome
9 Likes
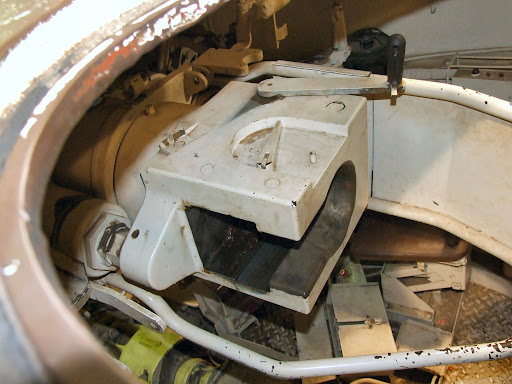
Does anyone know what color the breech block was painted? Black or OD?
1 Like
I think the breech block is painted white, with the contact/moving portions were bare metal.
2 Likes
Thanks for your reply Reynier. I’m confused because so many pics show a very dark color, as do many restored museum vehicles; but I know to not use them as reference necessarily because often times they’re just wrong. Pics are for discussion purposes only.
Uploading: IMG_1349.jpeg…
Uploading: IMG_1306.jpeg…
Uploading: IMG_1309.jpeg…
Uploading: IMG_1310.jpeg…
Uploading: IMG_1313.jpeg…
I went ahead and painted the breech olive drab, with the moving parts oily steel.
5 Likes
Wash and dry brush applied to the turret basket, gun assembly and a little bit inside the turret.
1 Like
Doh…. Forgot the pics!
Here they are:
8 Likes