Wow - and then some! There’s some good work there.
May I ask as to how likely this will be available - if only to us good folks on Armorama? It looks really good and will make a world of difference to any M48A1s and M103s.
Wow - and then some! There’s some good work there.
May I ask as to how likely this will be available - if only to us good folks on Armorama? It looks really good and will make a world of difference to any M48A1s and M103s.
I wouldn’t want to deprive my fellow modelers of these fuel racks. Especially if they turn out as nice as I think they will. Let’s just see how they print first.
Roger that! Thanks very much.
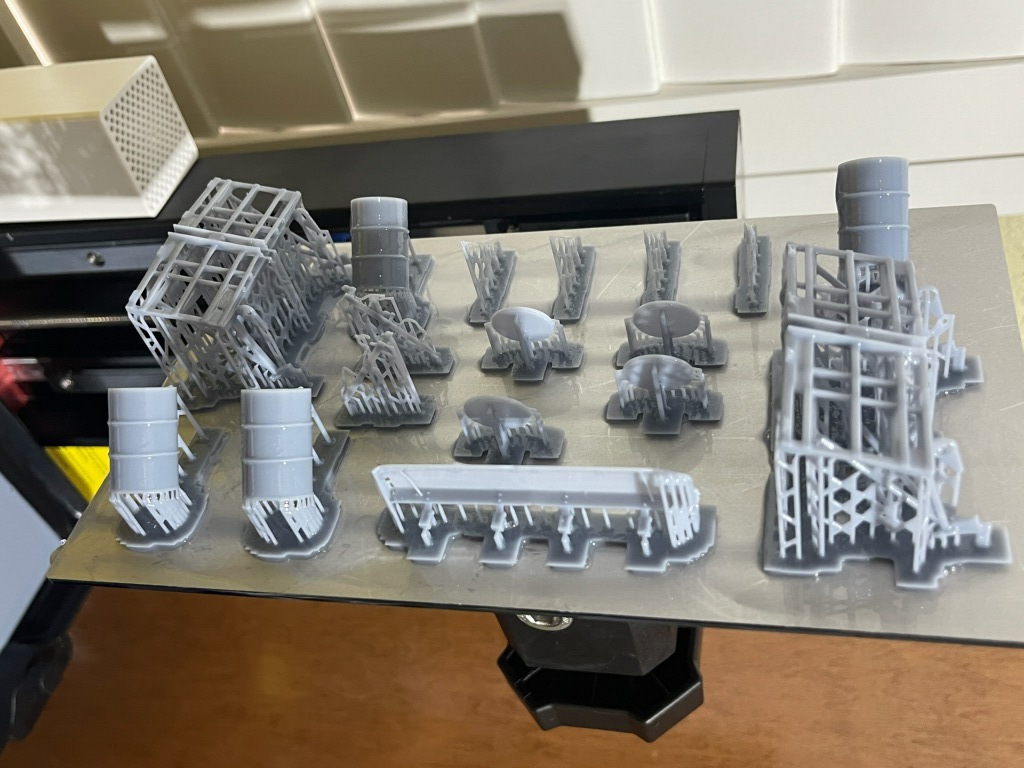
Here is the first print. Just a prototype mind you. I’m going to see it in person at my club meeting this weekend. Looks like a tedious cleanup to snip it free of the sprues. Worth the effort though.
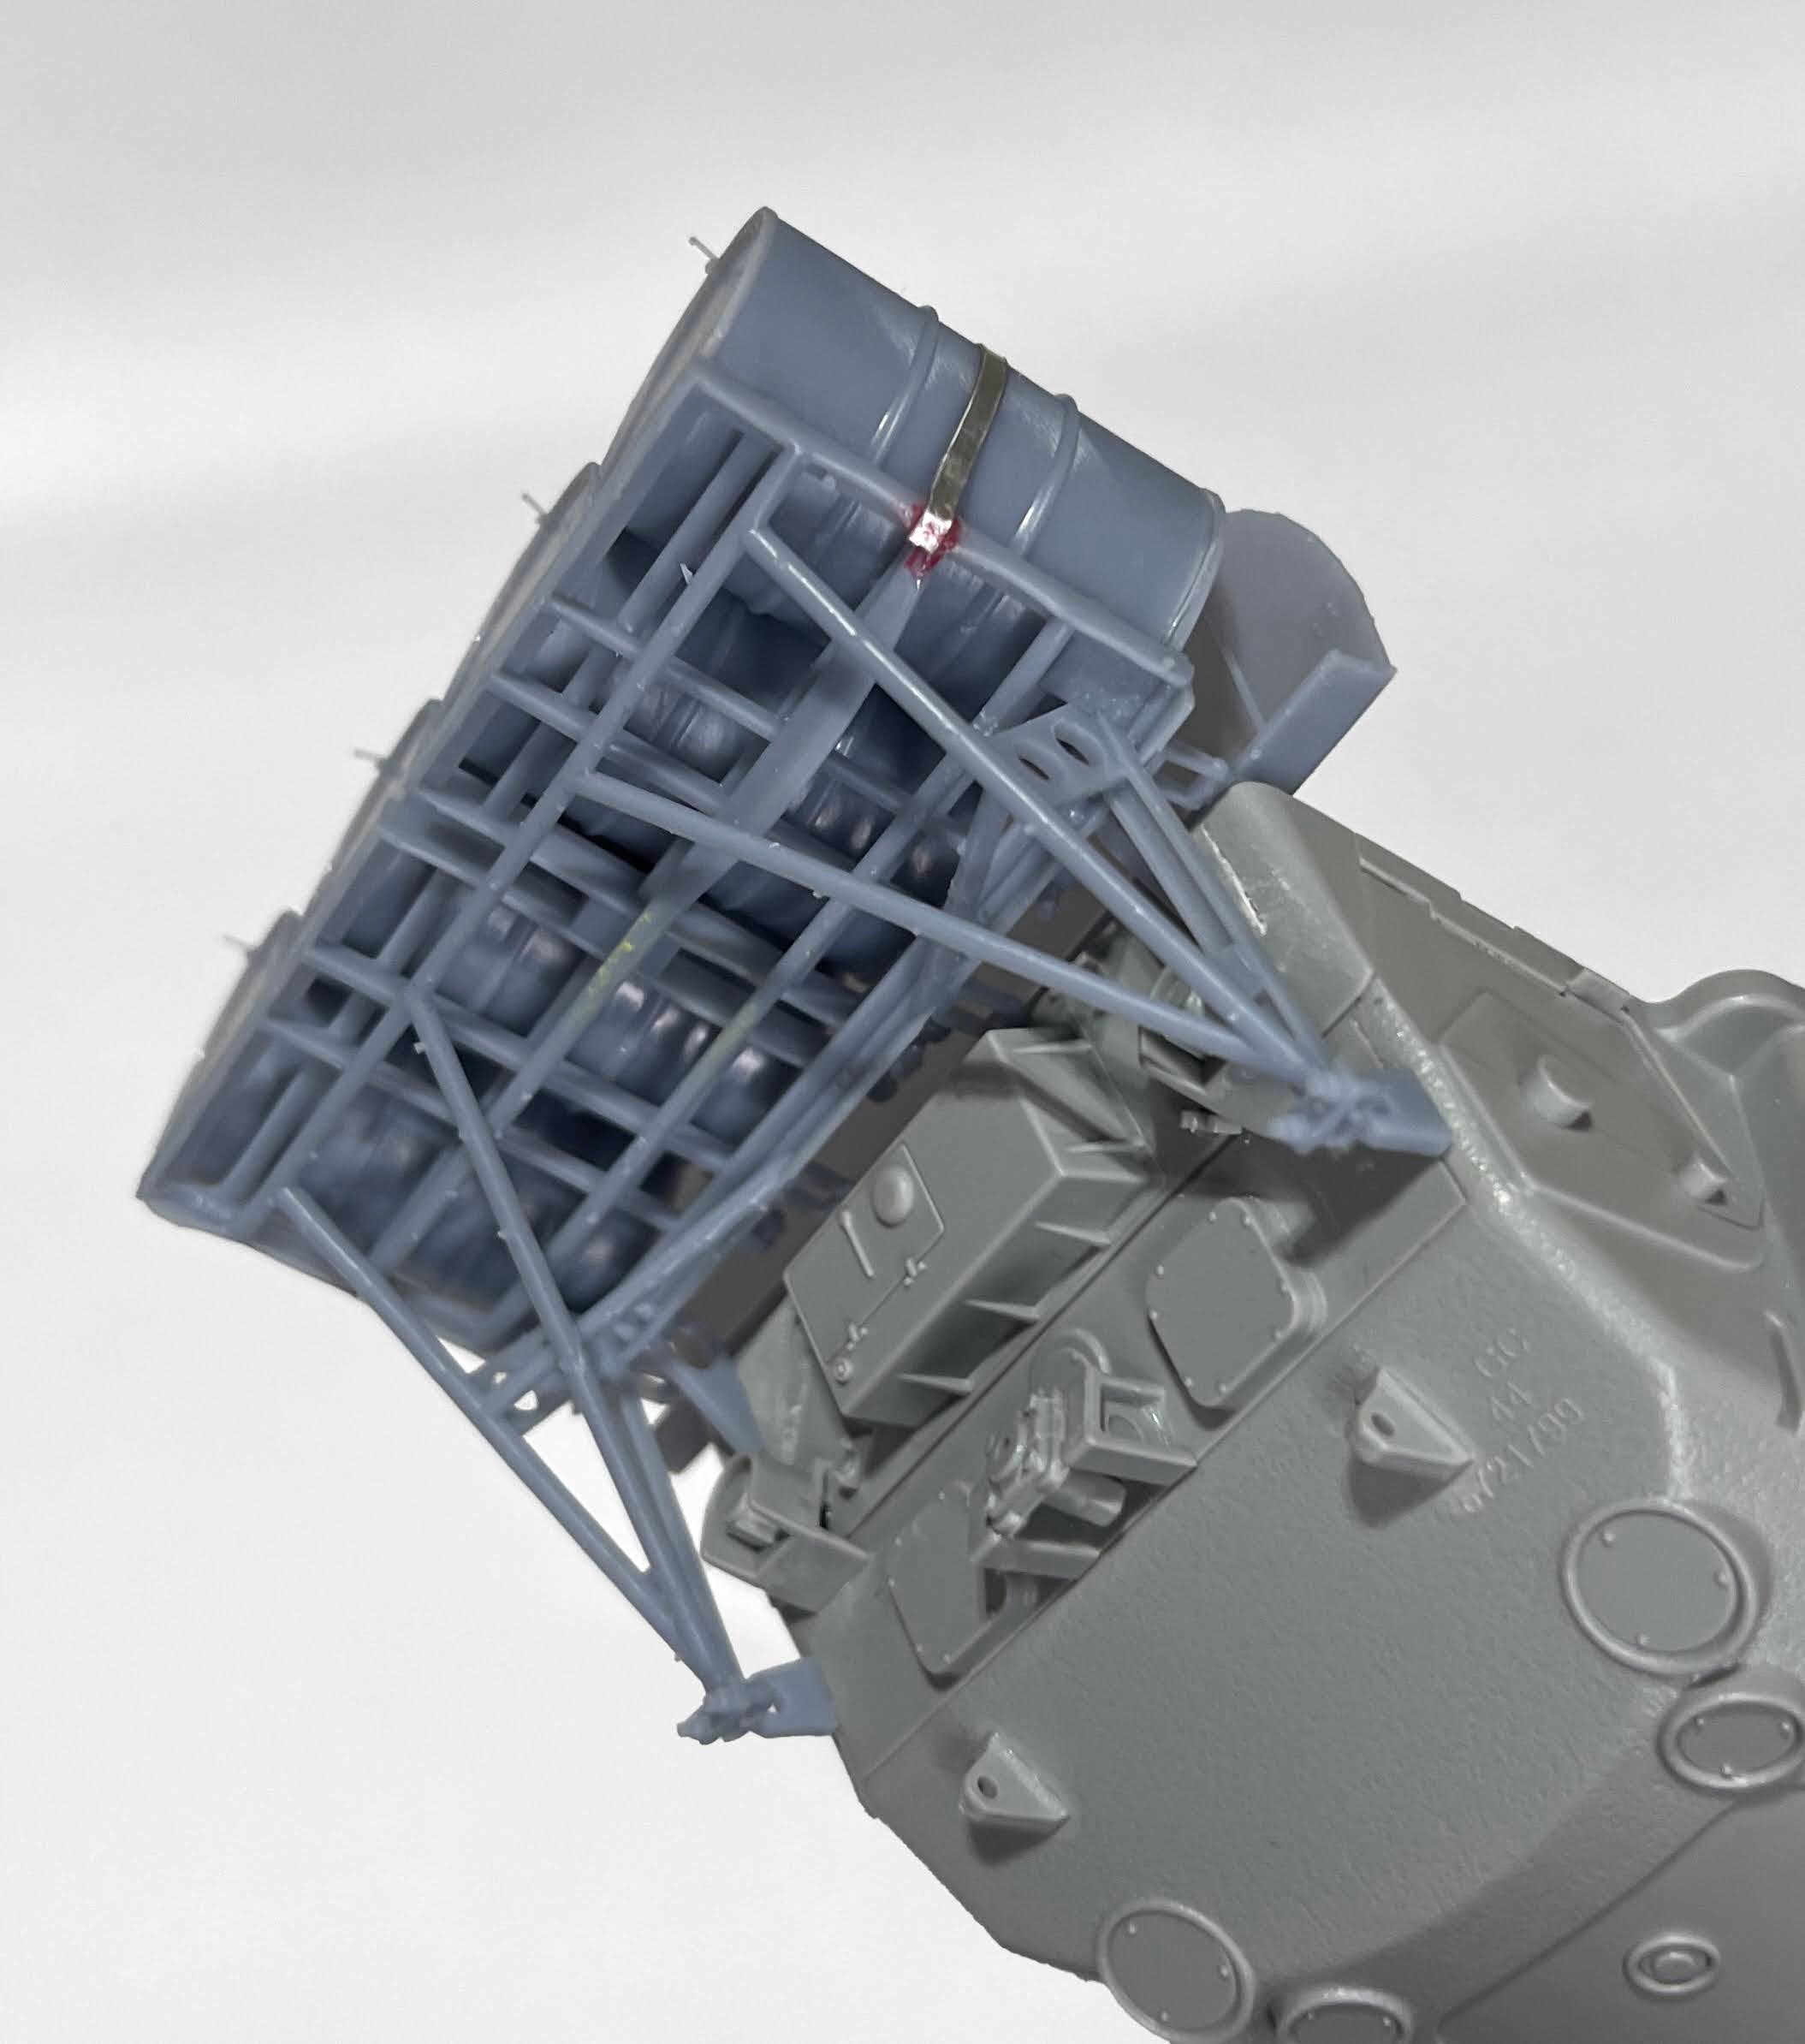
Here it is built.
Holy Crap!! That looks fantastic!
Wow! And what a difference it makes!
I’ll take one ![]()
Looks REALLY NICE!!
I will take 2,Please.
This looks absolutely fantastic! Would love to get hold of a couple of those one day!
That looks amazing!
I’ll take two of those if he makes them available.
Good afternoon.
I built the first prototype of the M-48 fuel rack. Wow! It is really nice. The fit is great as is the detail. The mounting points to the hull need to be tweaked just a bit, and the bottom hoses need to be finished. Other than that it is good to go.
The Dragon kit is the base model for this, so once the mounting points are adjusted, it should line up with where the back “eye hook” slots are. That will center it nicely.
Does anyone have one of the M-48A1’s from “I Love Kit”? I don’t have one because, frankly, I think they are too expensive and the Dragon kit is pretty good in my opinion. But, I am curious to see how the back differs from the Dragon kit. I couldn’t find any reviews or pictures of the parts anywhere.
Also, would anyone have a detailed photo of the “coupler” or whatever it is called, where the four hoses from the fuel drums meet up and go into one line that enters the hull? This is the best picture of it that I have seen.
That’s awesome ![]()
Hello y’all
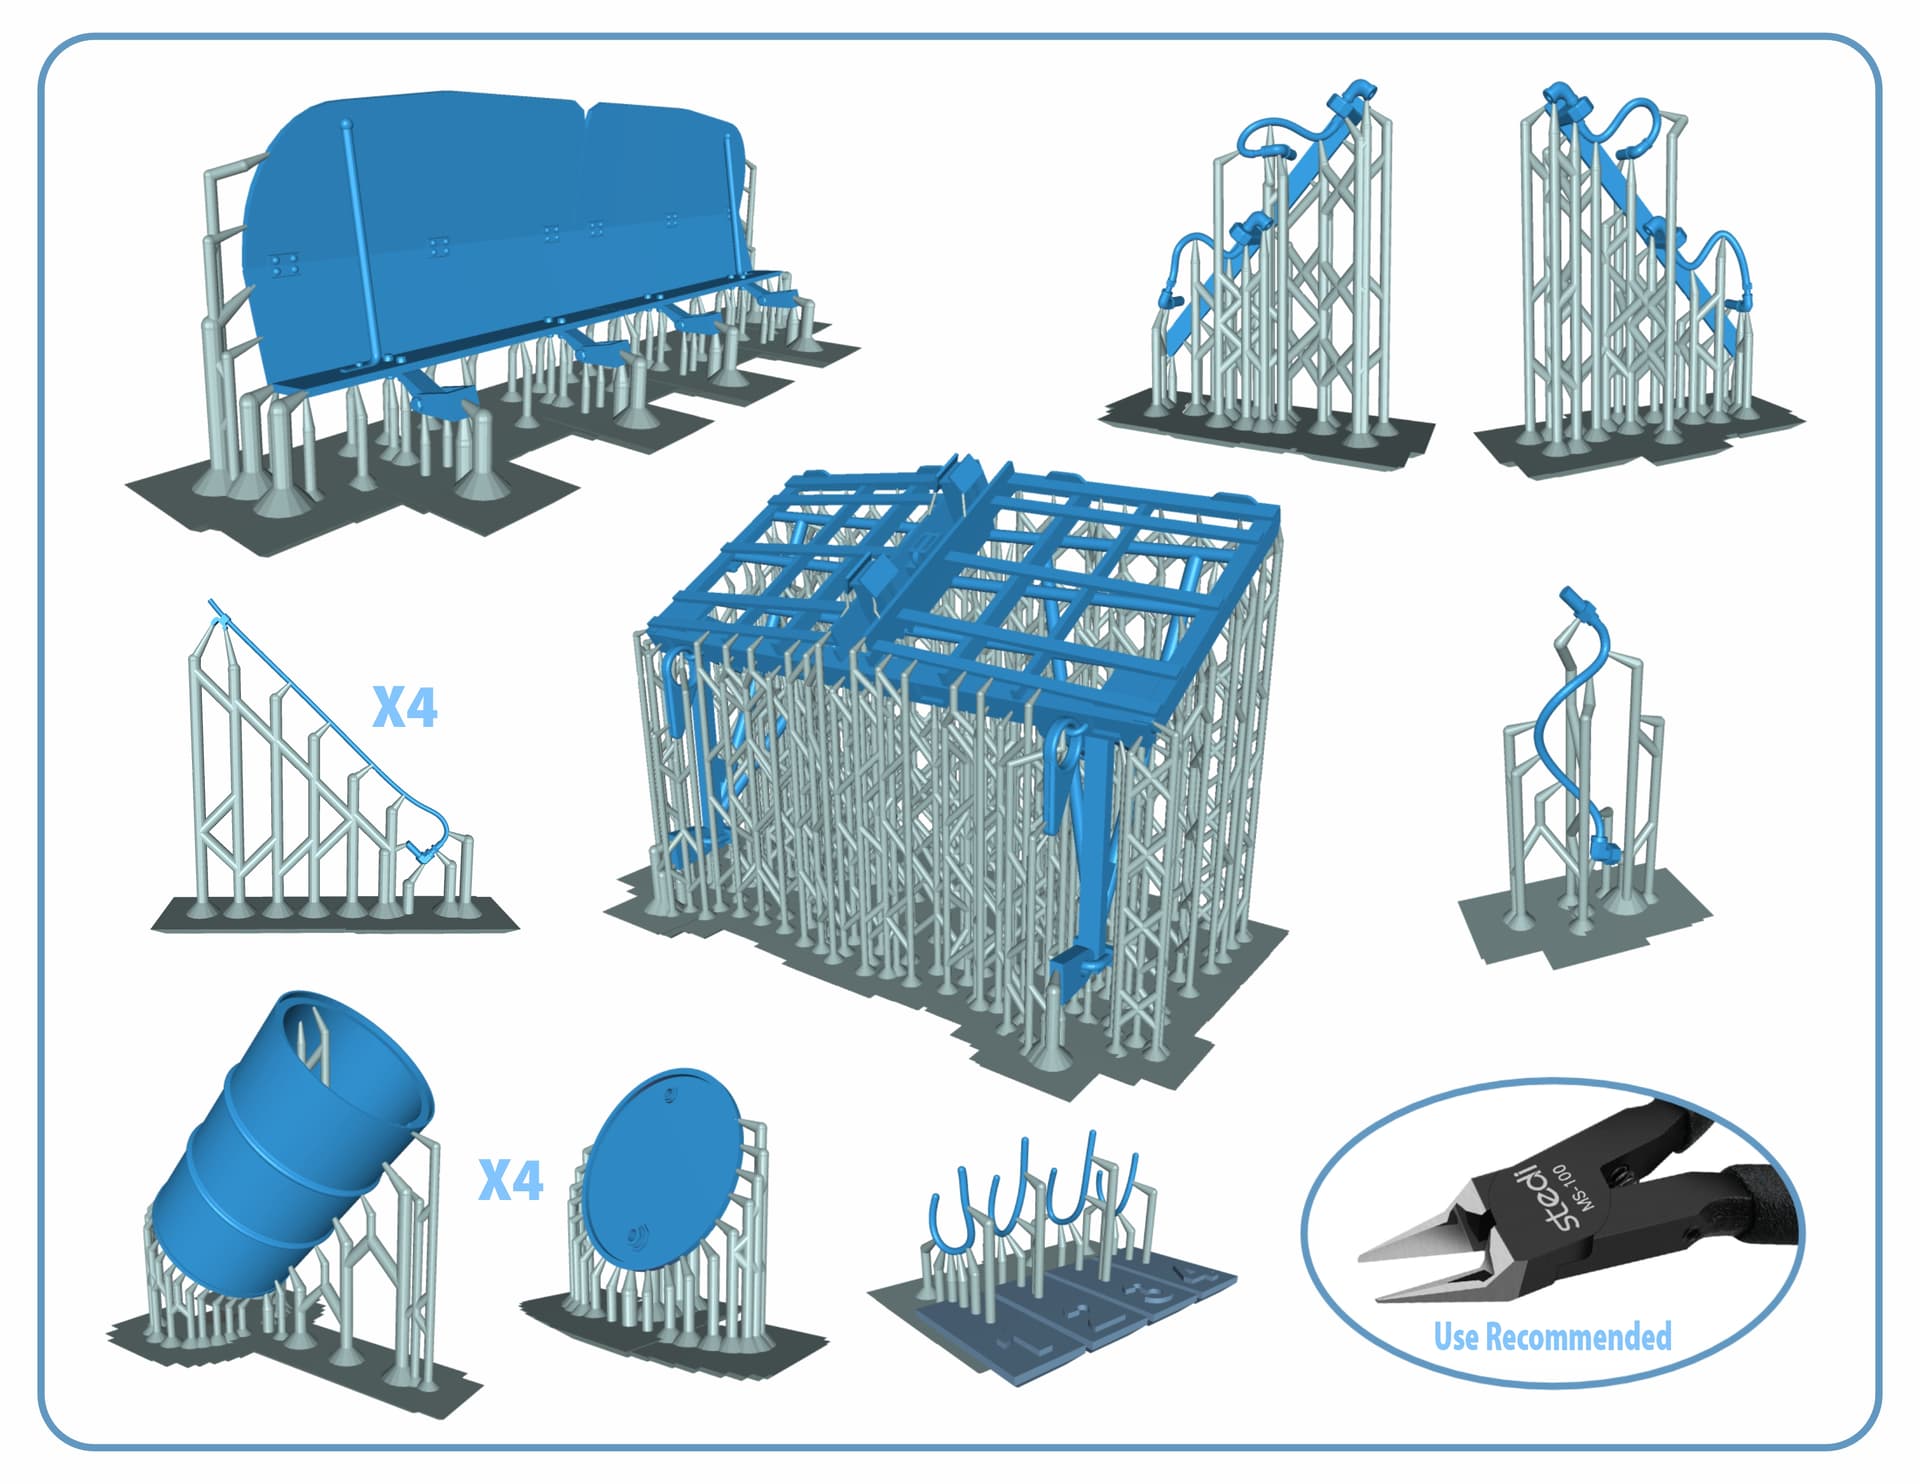
My friend ImJimScout87 encouraged me to join the forum and this thread and share with you the progress made on the M48 fuel rack. At this point I am still working on fine tunning certain details but I am getting closer to the final revision, hopefully! Meanwhile I’ve been creating a sort of an assembly sequence guide based on my own experimenting with the prototype versions.
Here a link to Dropbox where you can review and/or download the PDF document if you’d like to check it out:
We were talking about how to identify supports before separating the printed parts and so we thought it would be nice to have the graphics I added on page 2 showing parts vs supports in different colors.
Welcome aboard!
I am very tempted to get one of these.
I suppose this isn’t detailed/clear enough?
Sprue images and instructions for the ILK M48A1
https://www.super-hobby.se/products/M48A1-MBT.html
Part A5 which seems to be the rear plate:
In the instructions:
Welcome aboard. Looks great. ![]()
Thank you!
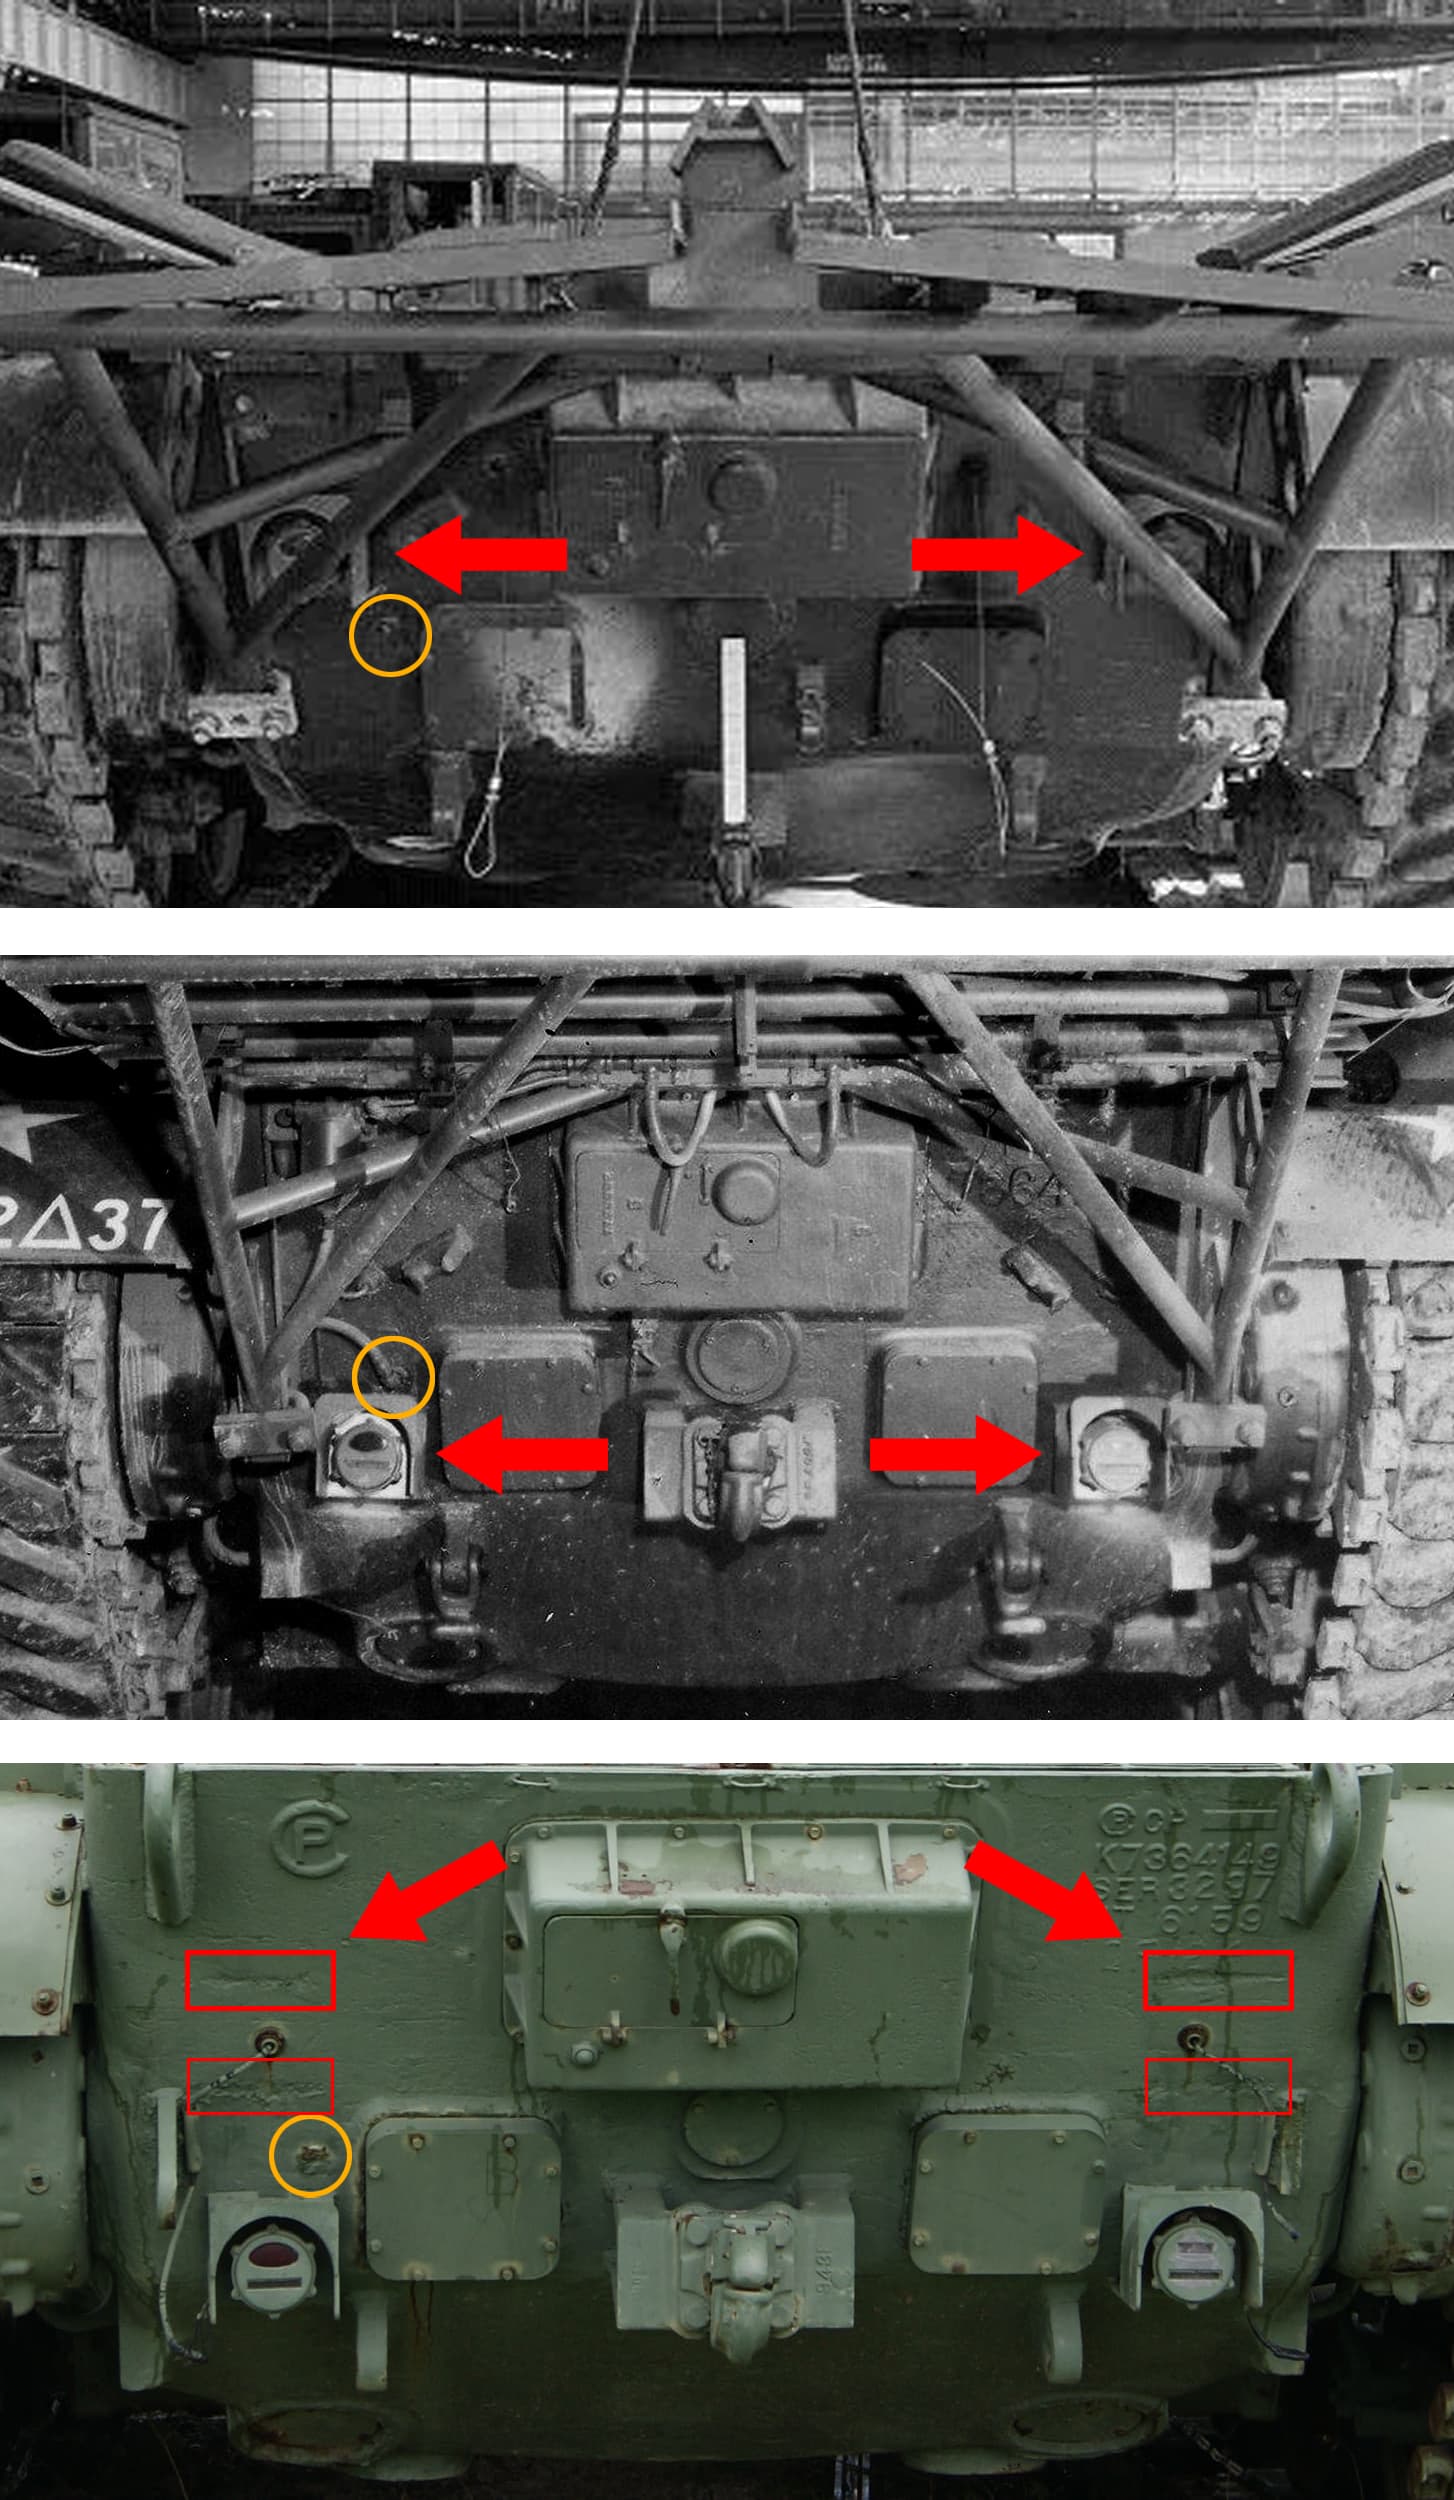
This rack is being created to fit the Dragon M48A1 / Magach 1&2 but I would think it can be also accommodated to the I Love Kit model with barely any tweaks. A detail to take into consideration is the position of the rear lights. In some of the references you guys kindly posted in this thread you can clearly see them in the upper back of the rear plate, while in others, the lights were obviously relocated further down (red arrows) so the rack does not block their visibility, I’d assume. Also note the fuel connector port position, circled in yellow.
By the way, when using the Dragon kit, parts L8 (A2 for I Love Kit) are not to be used since these lifting/pulling eyes are already integral with the rack’s backplate, and will fall right into the recessed slots of Part L1.
That light position change is a great catch. ![]()
![]()
![]()
Doing some experimenting this week. I prepared a mix of standard and flexible resin and tested those very fragile siphon tubes, as well as the connecting hoses, that are prone the break. The resulting test was a resounding success as you can see in this video clip. The parts flex and then come back to the original shape with no deformation whatsoever! ![]()