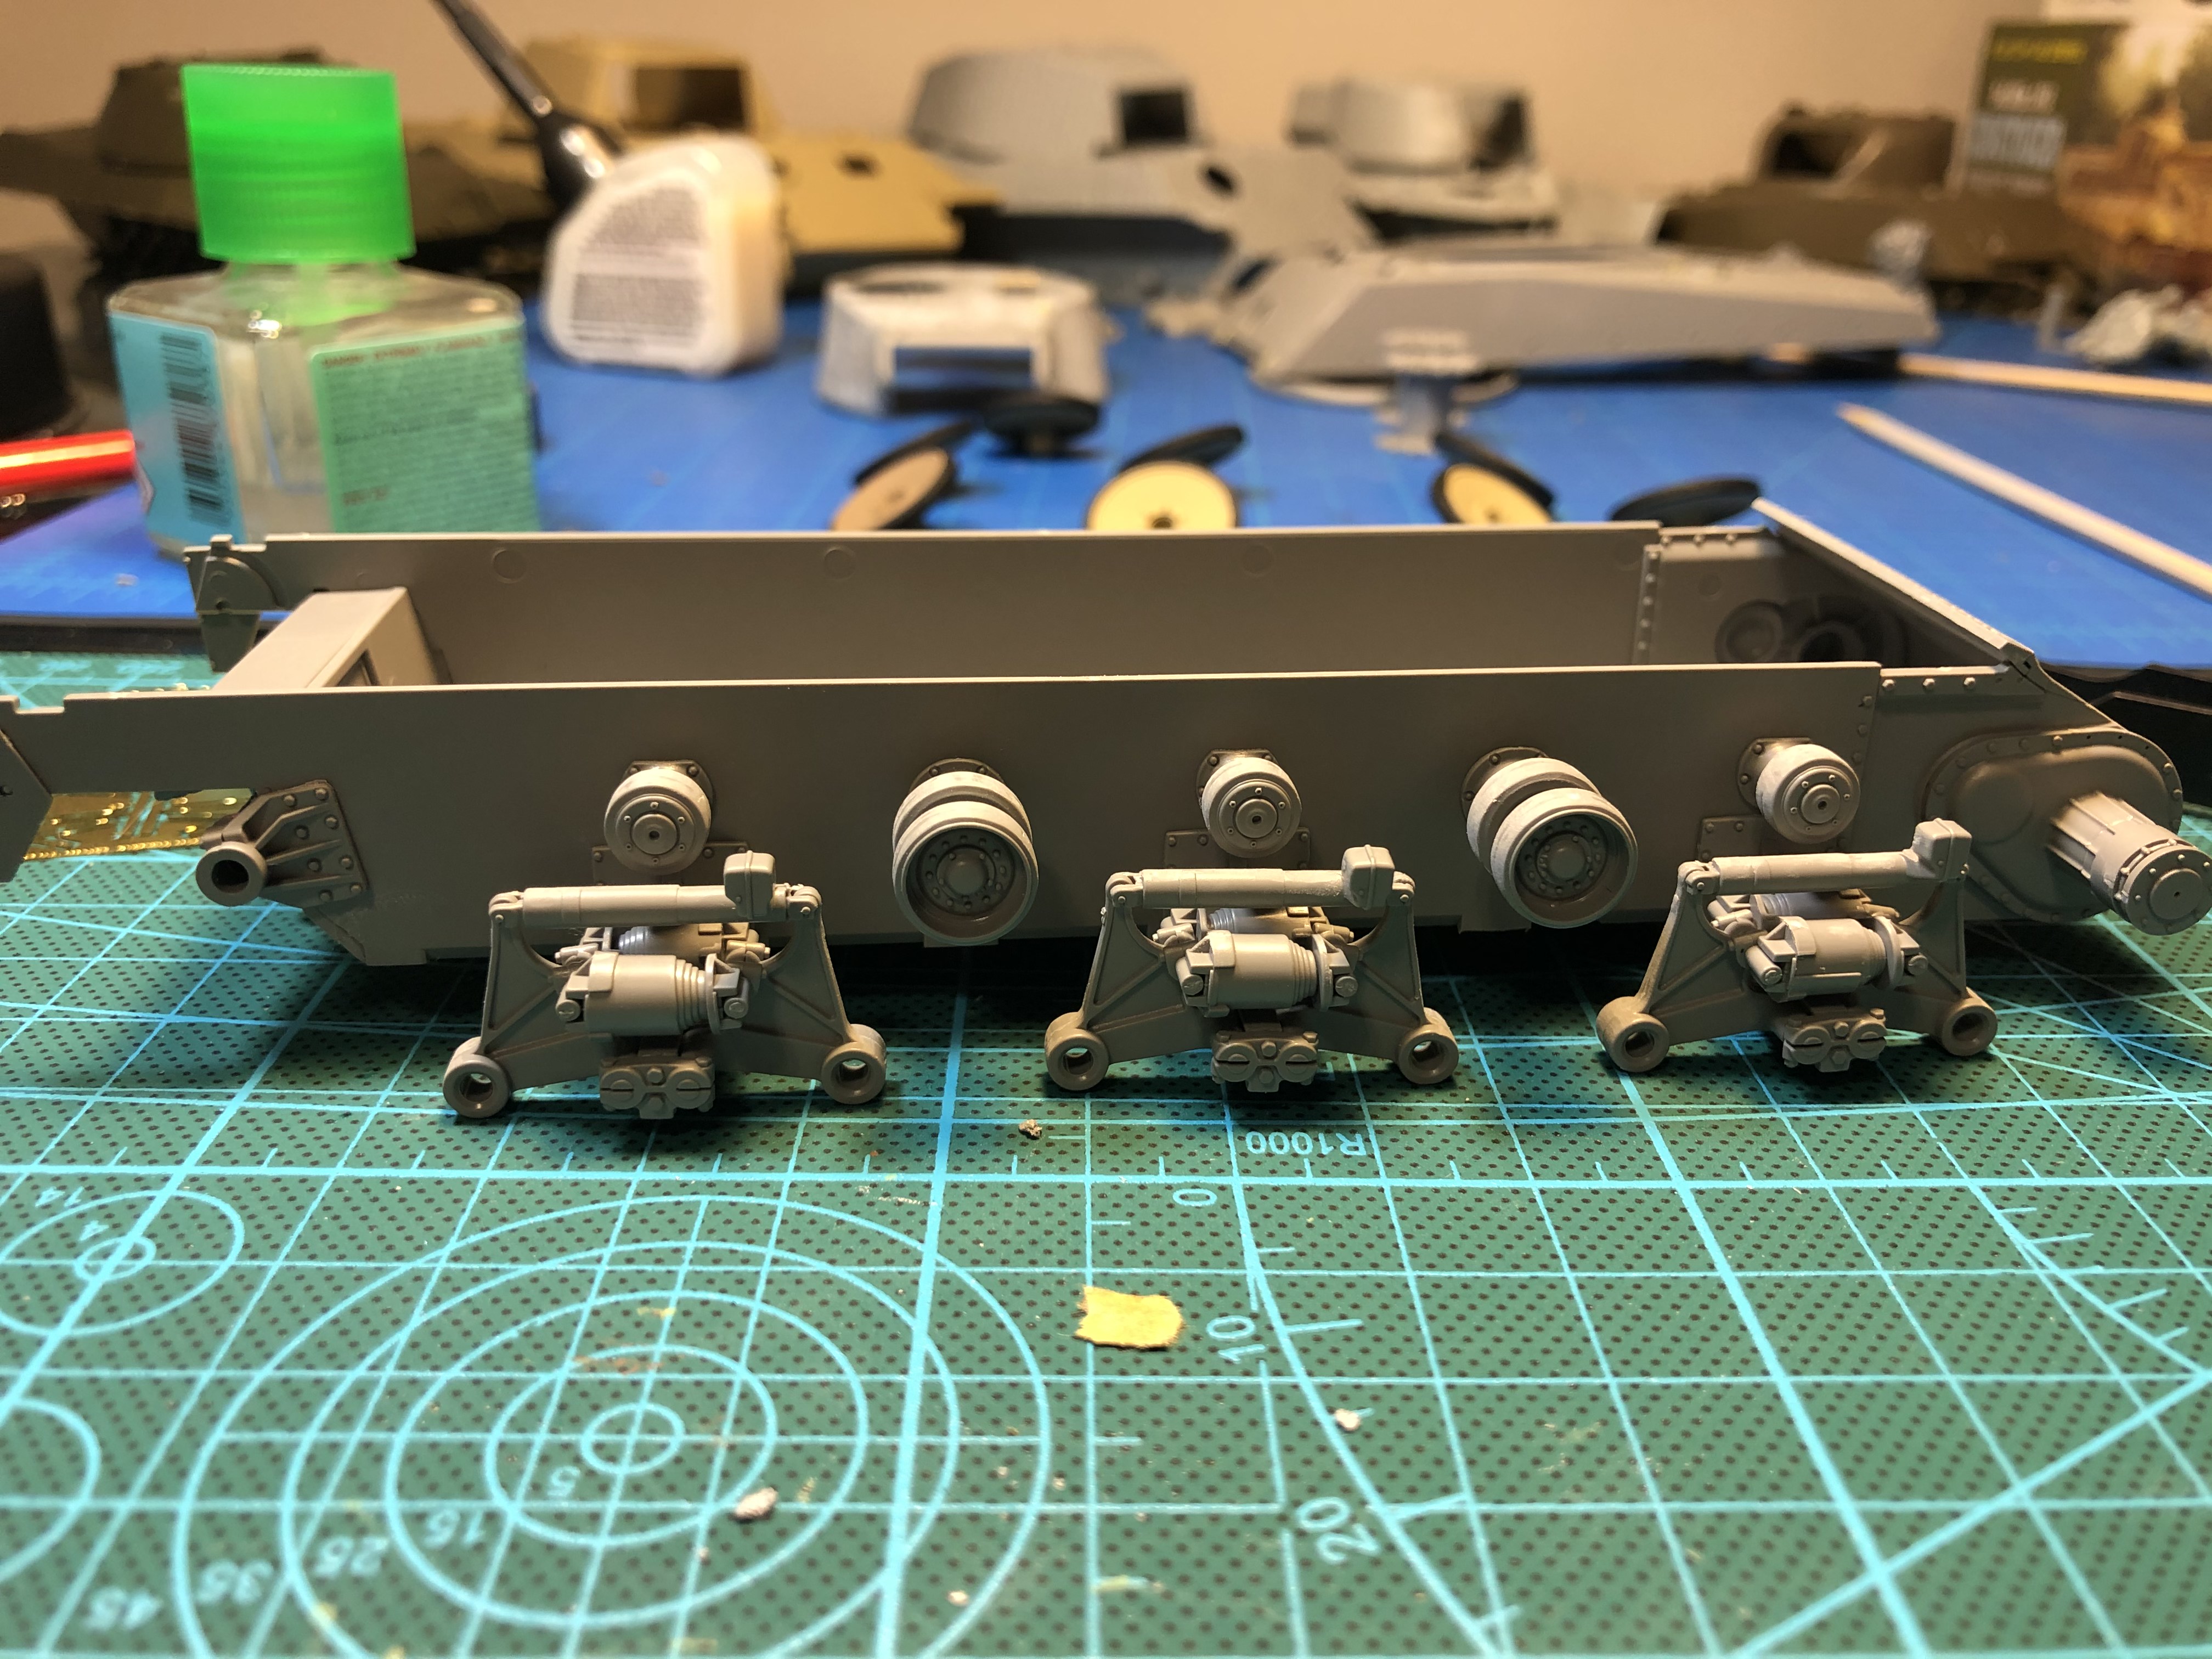
I couldn’t sit with the bogie being updated wrong so here’s an update after some very careful tank maintenance and the proper orientation of the bogie.
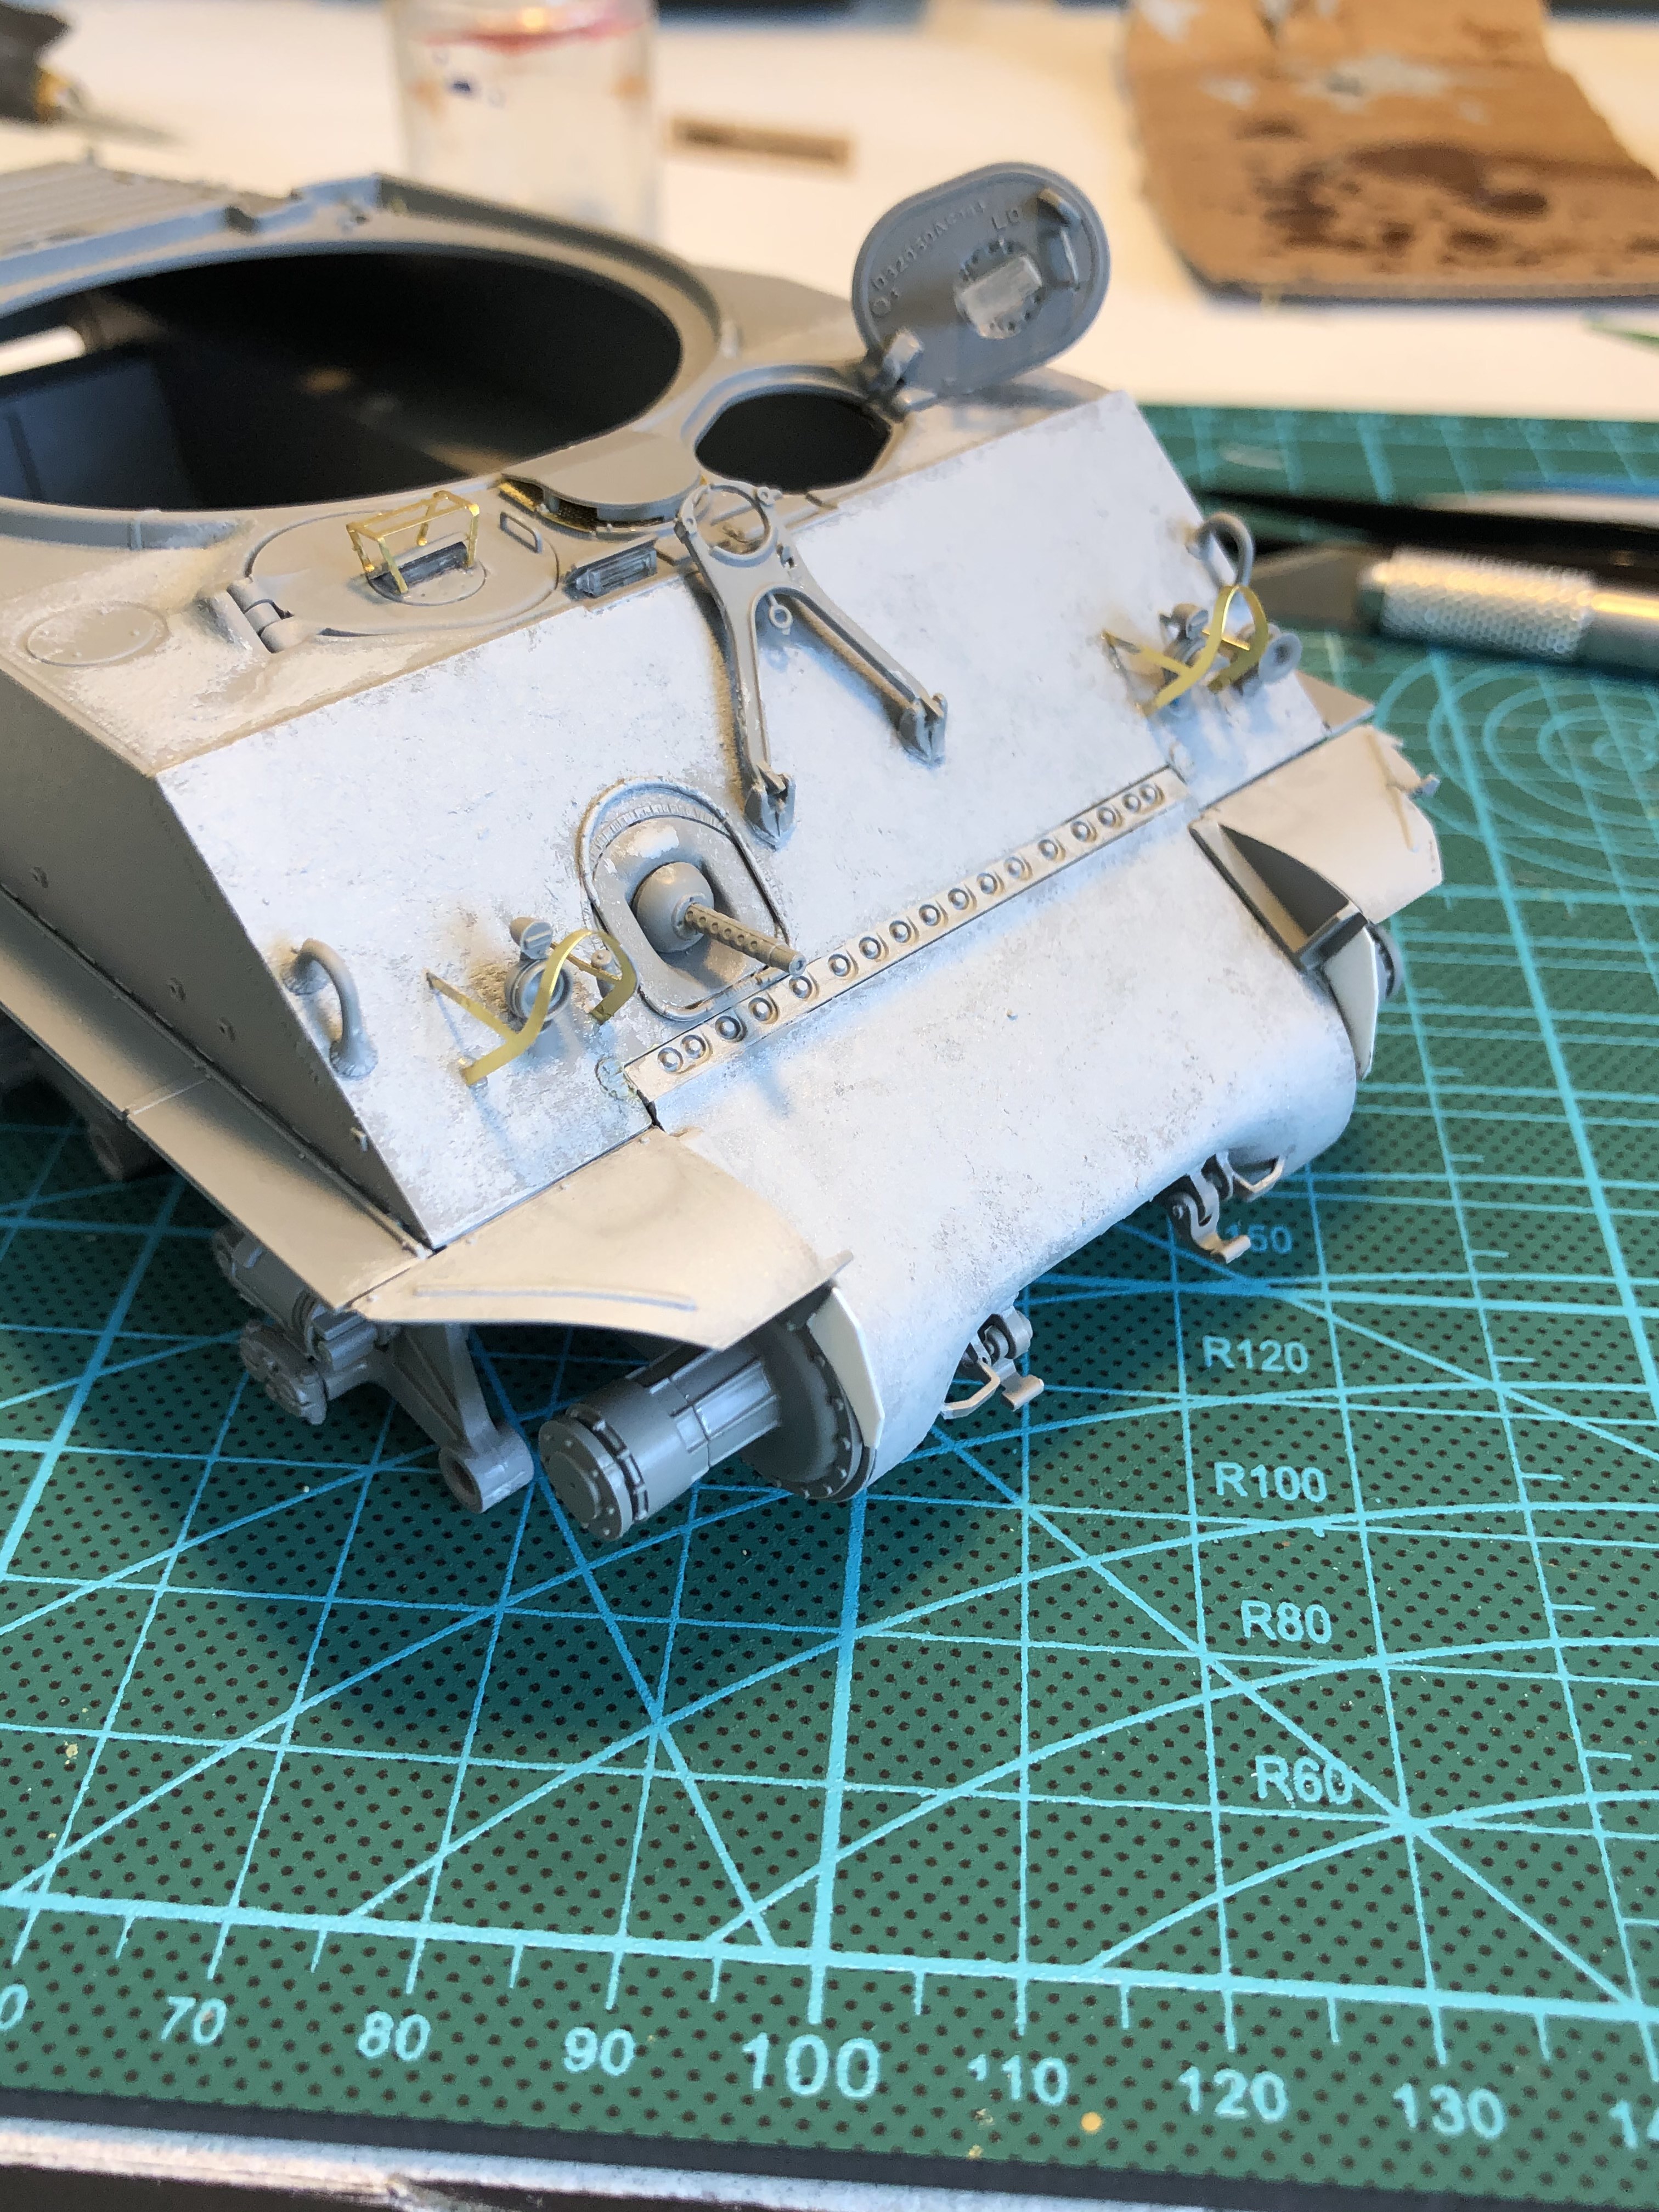
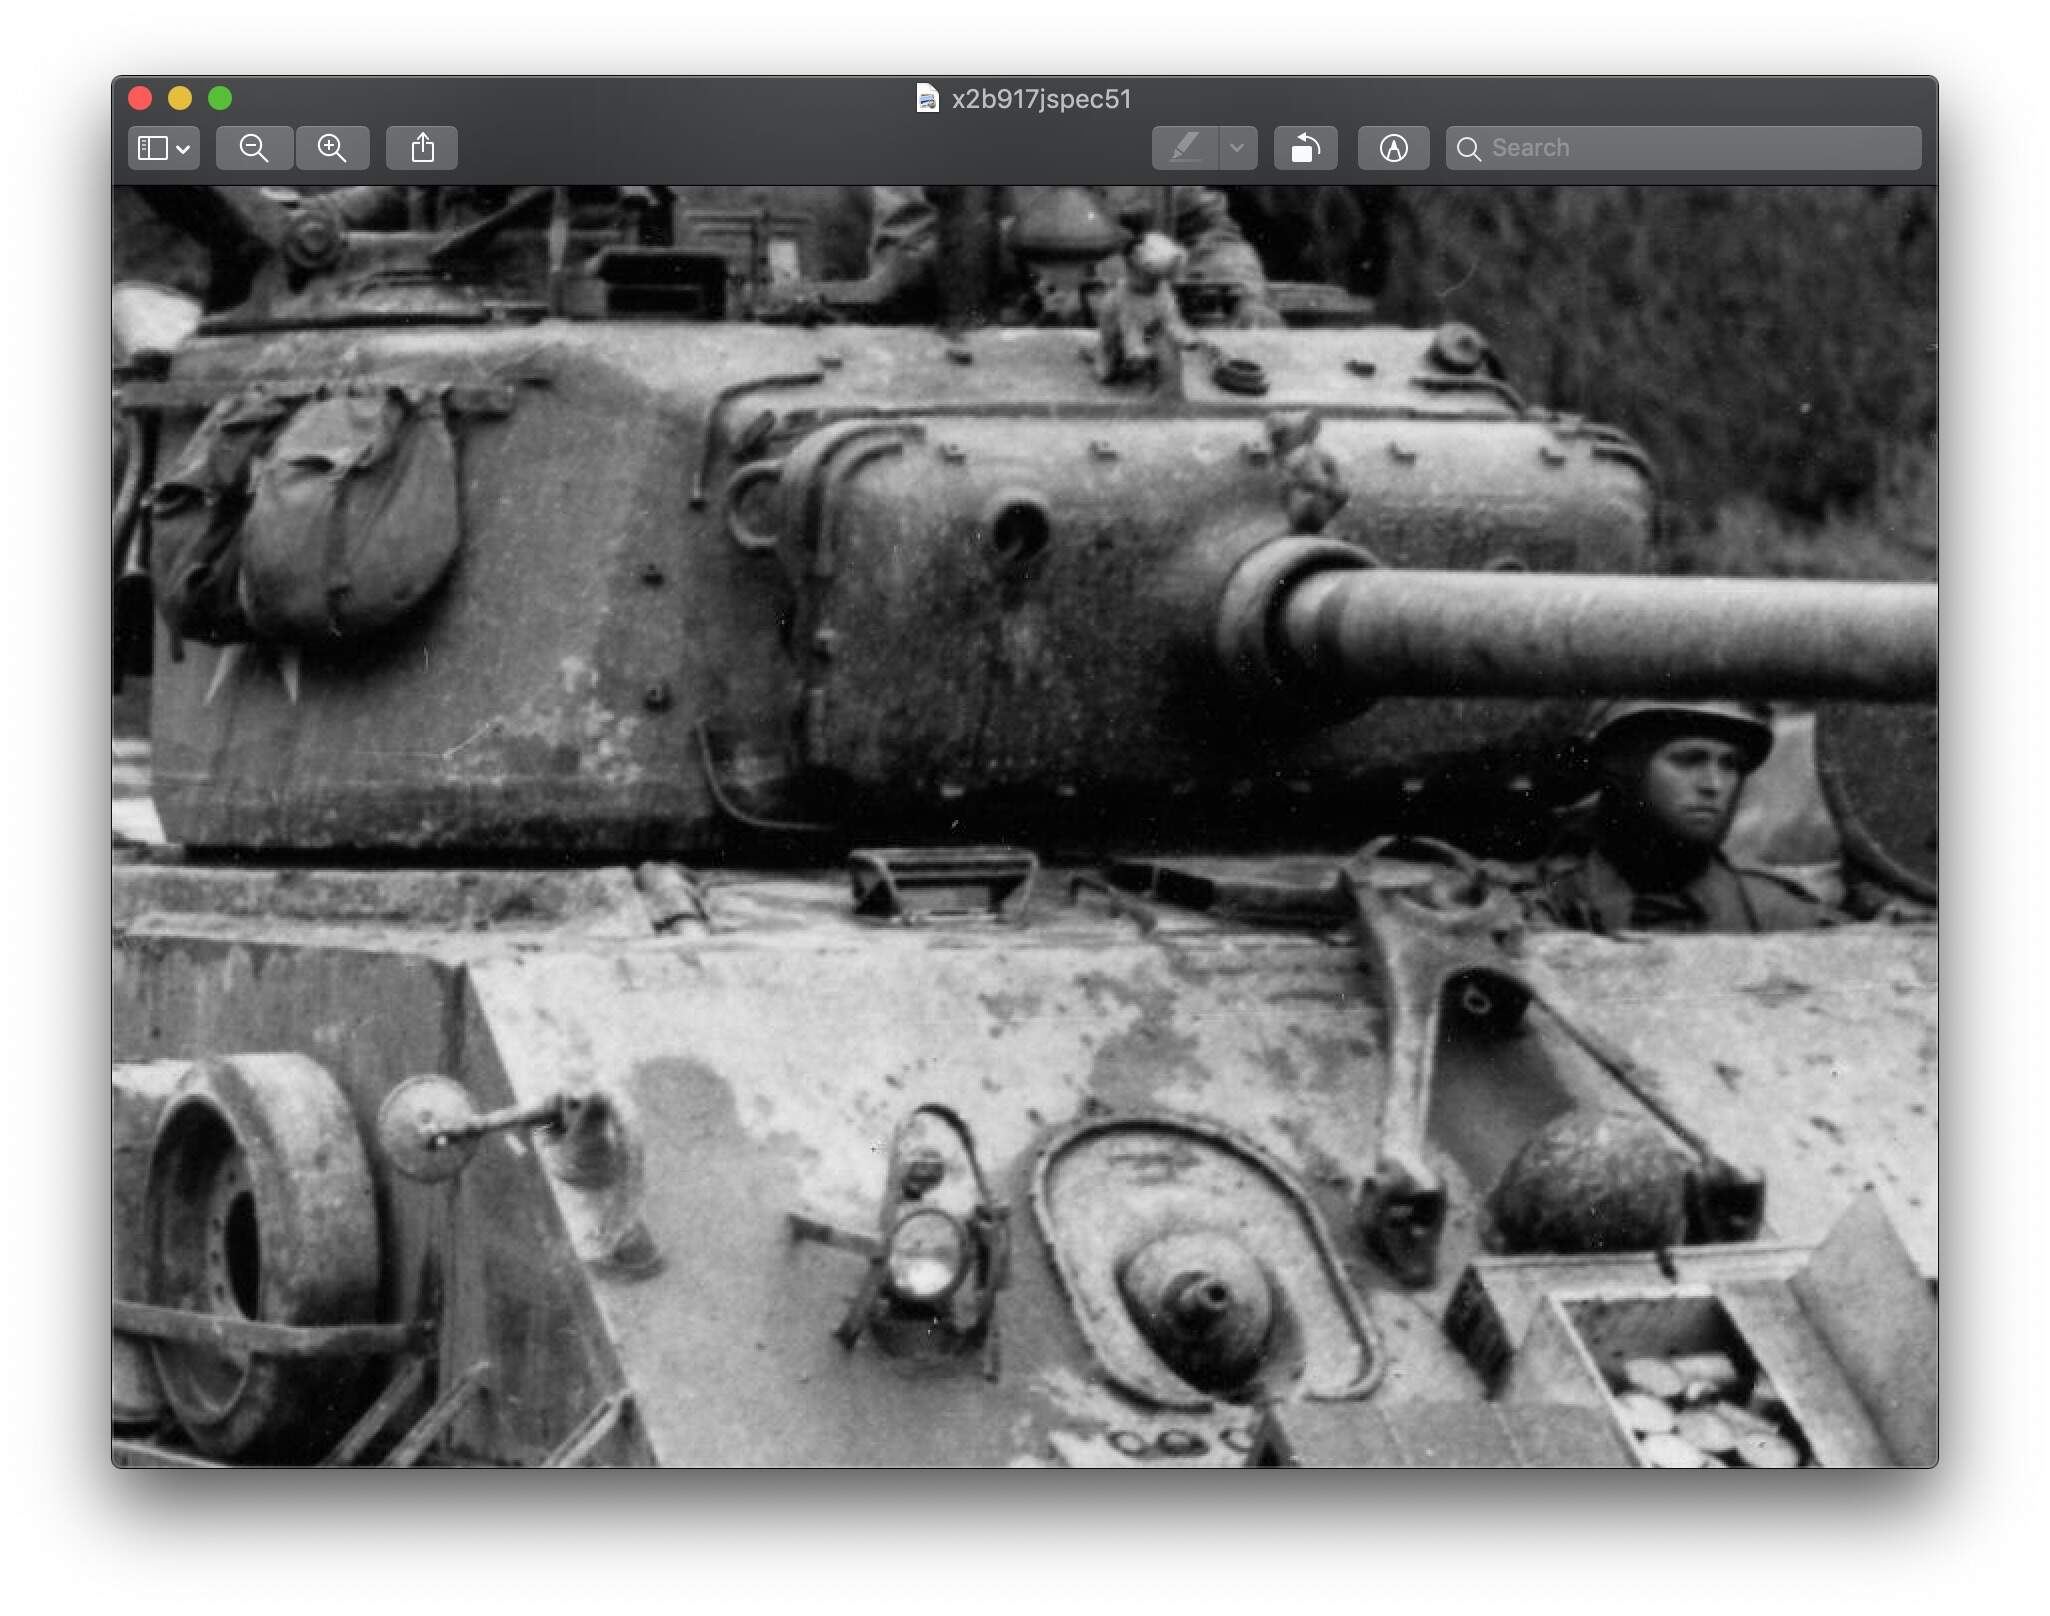
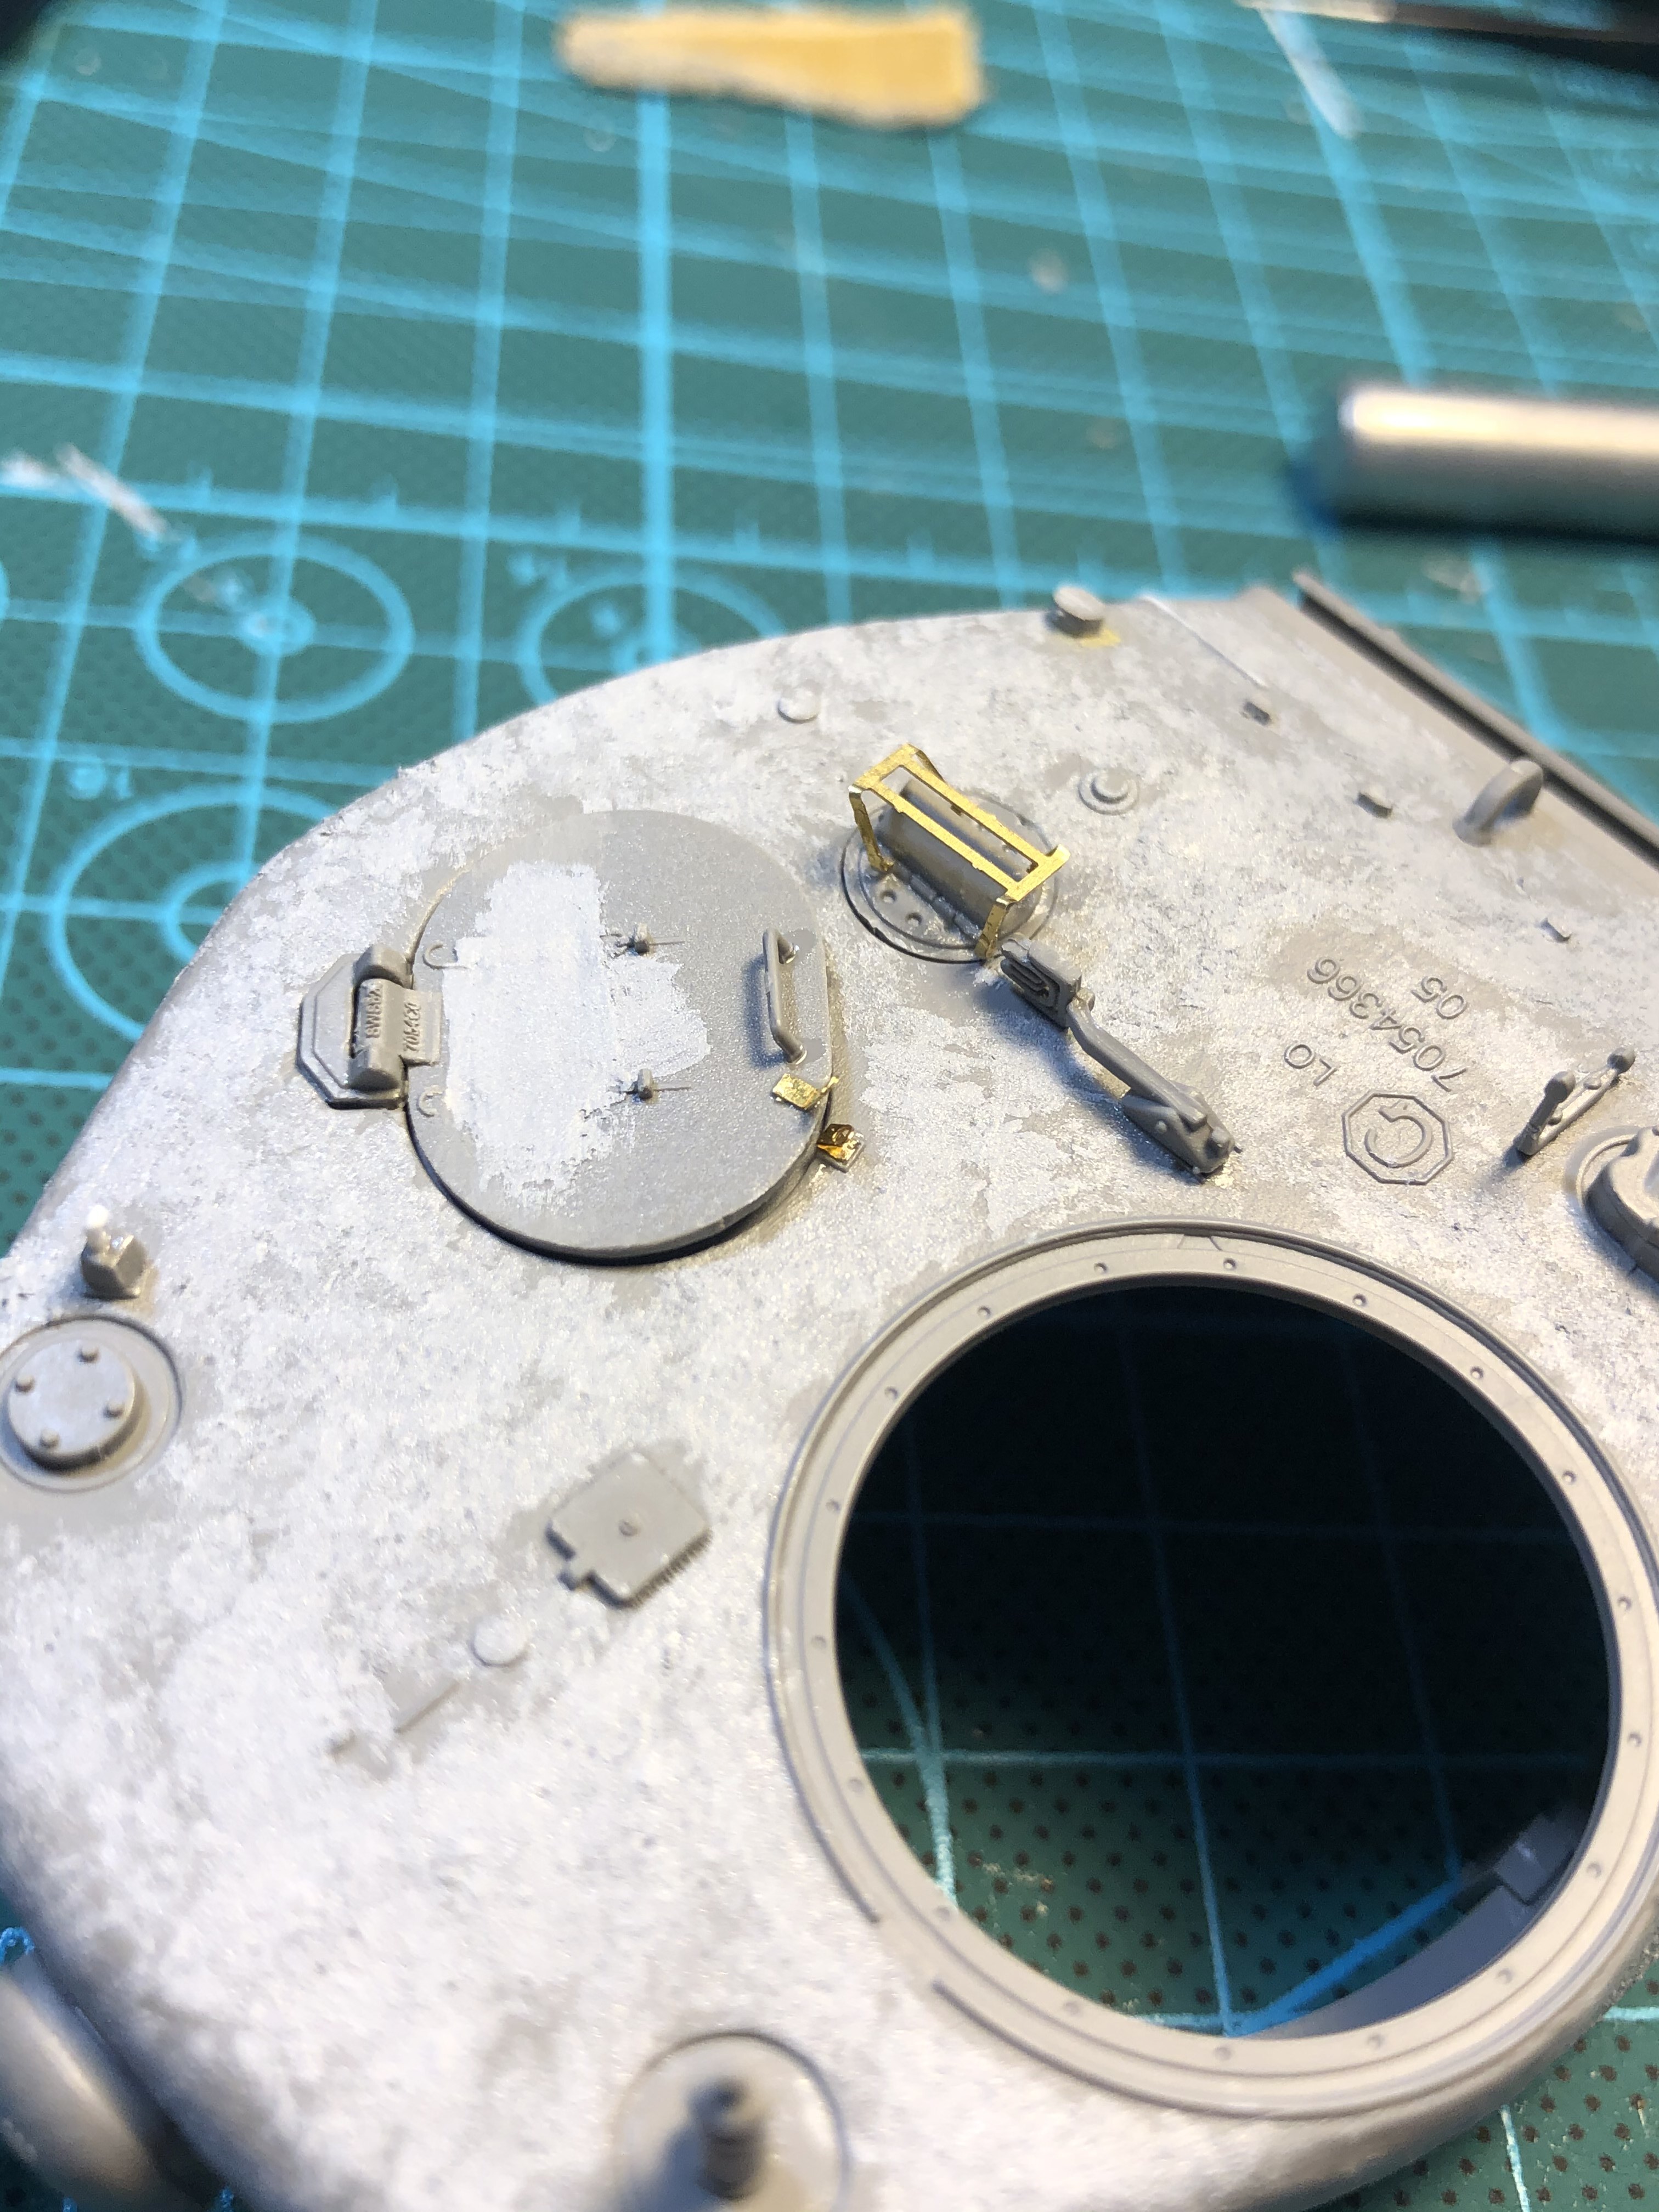
You’ll see various updates that I’ve made according to this source image; First, I re-did the smoke mortar. Rather than modeling an open tube, I utilized a piece of the cast off plastic nibs that are on almost every part of this kit.
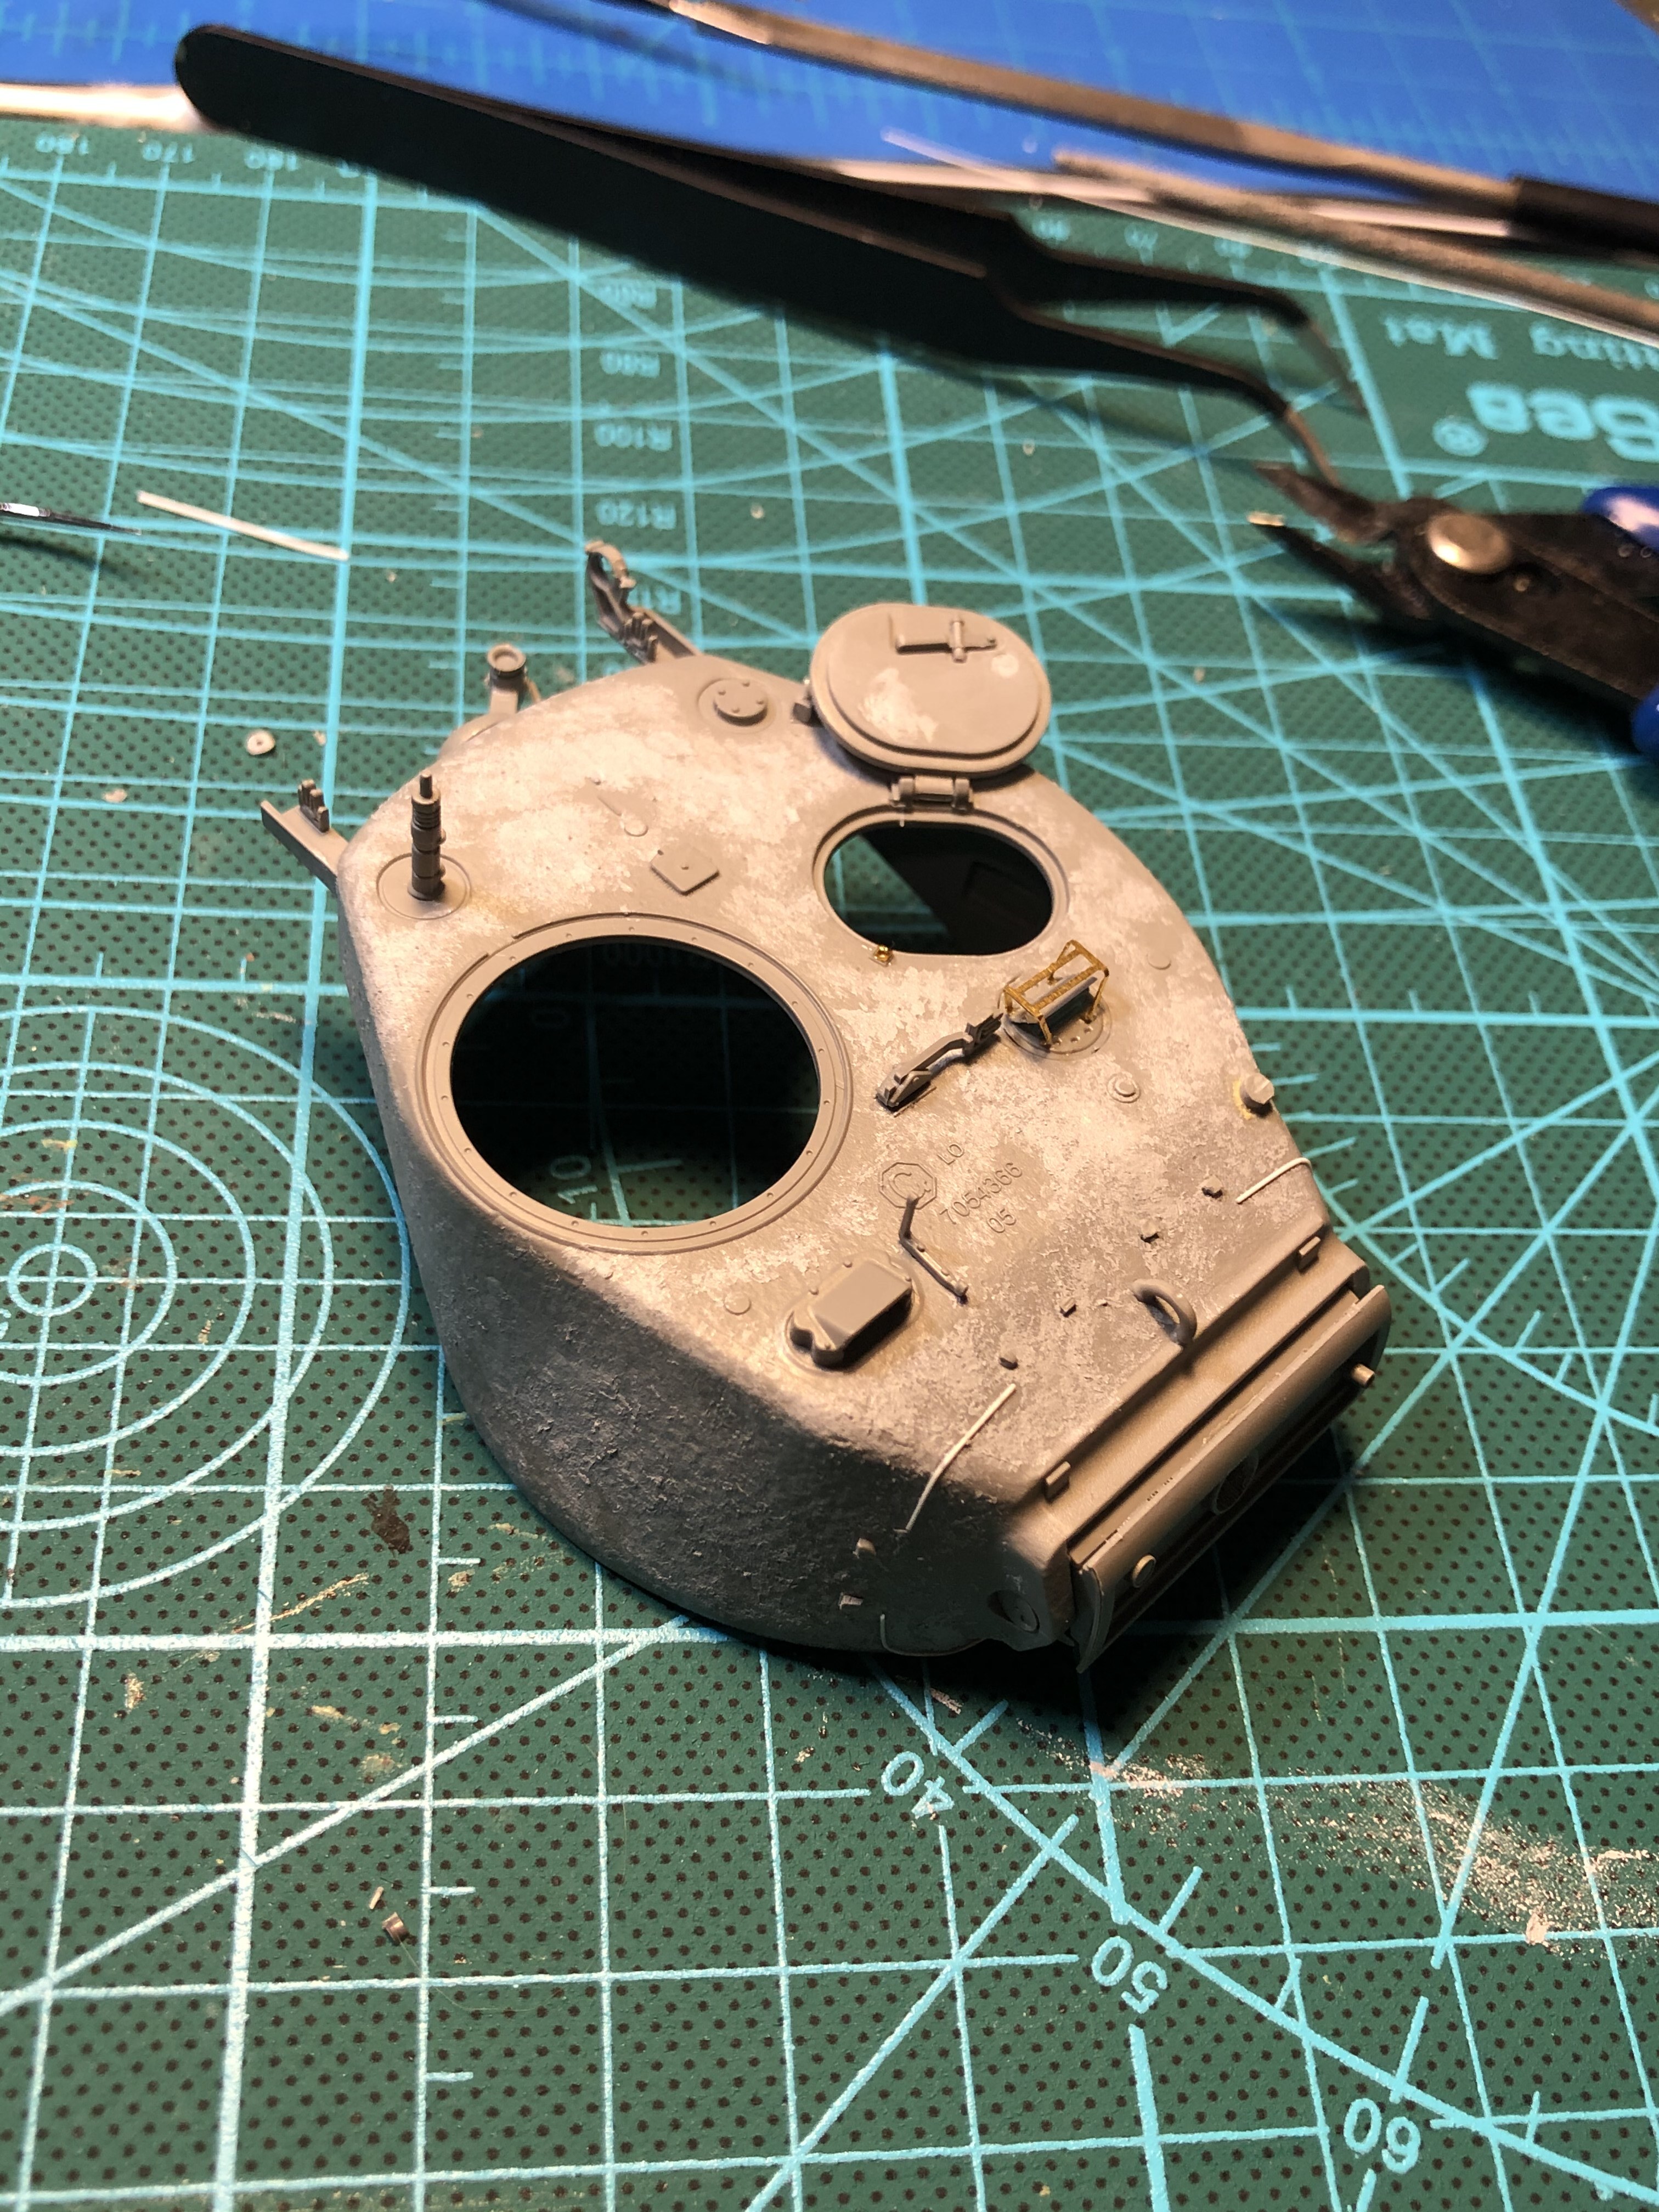
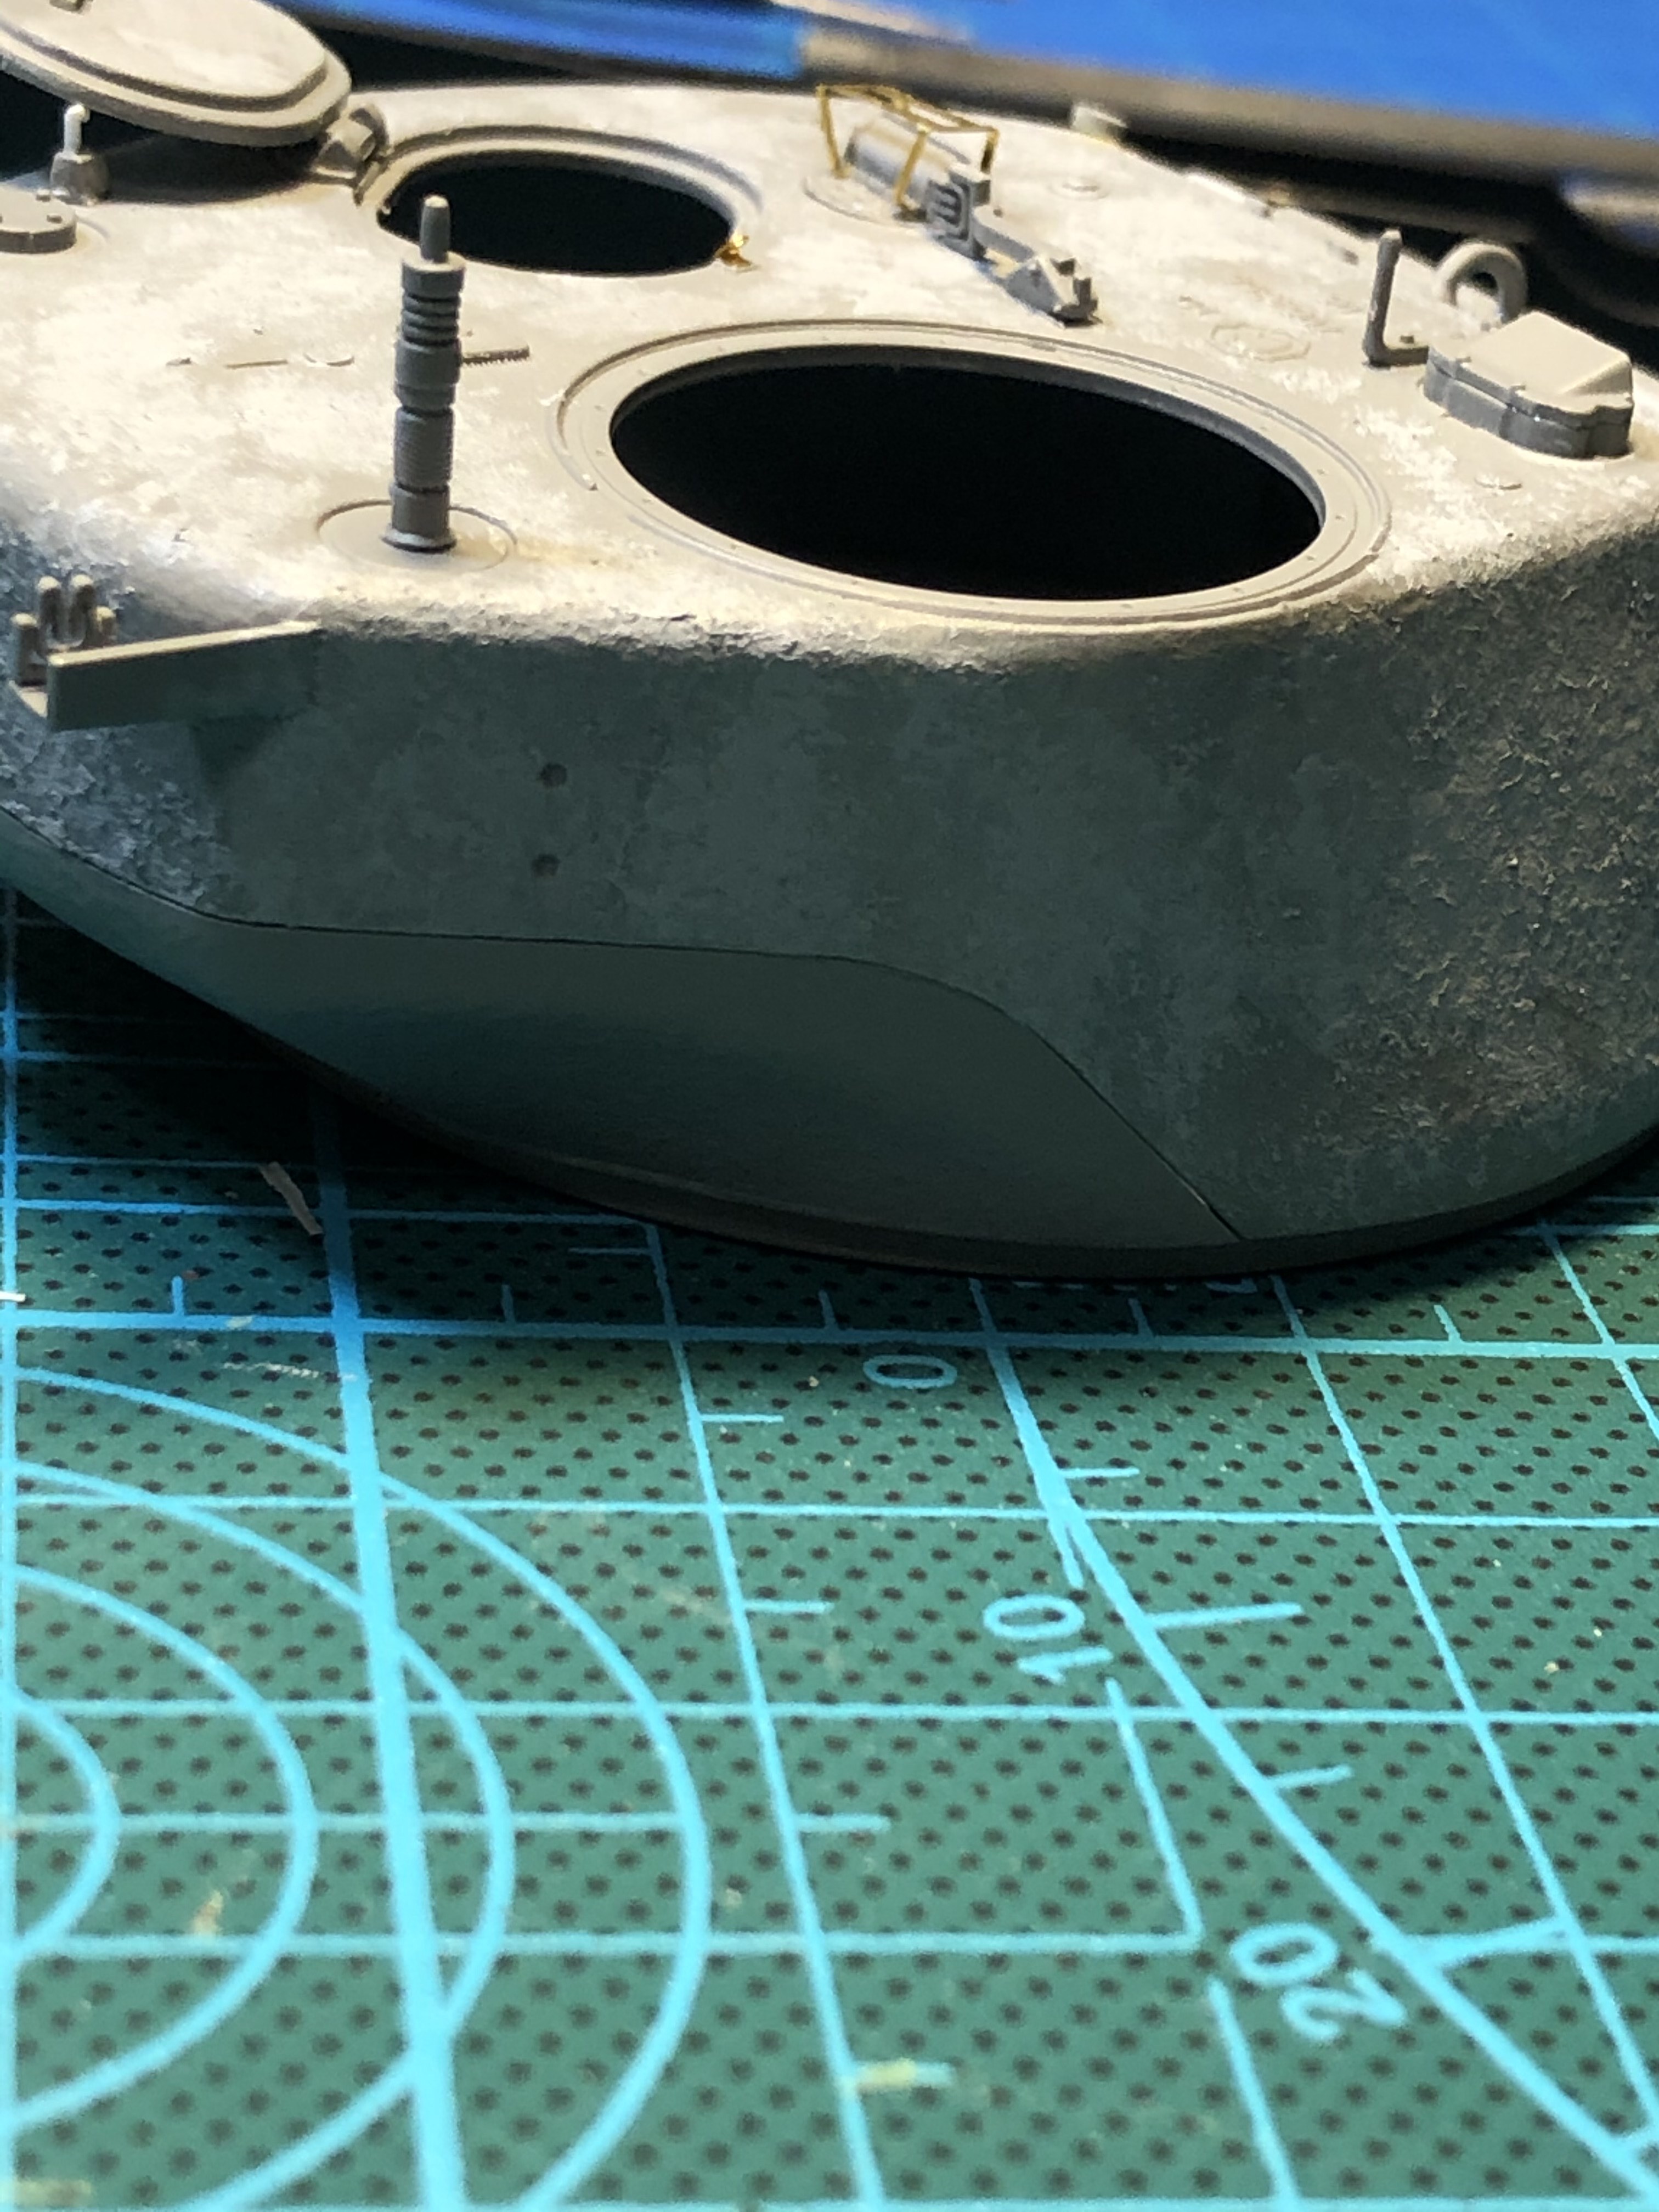
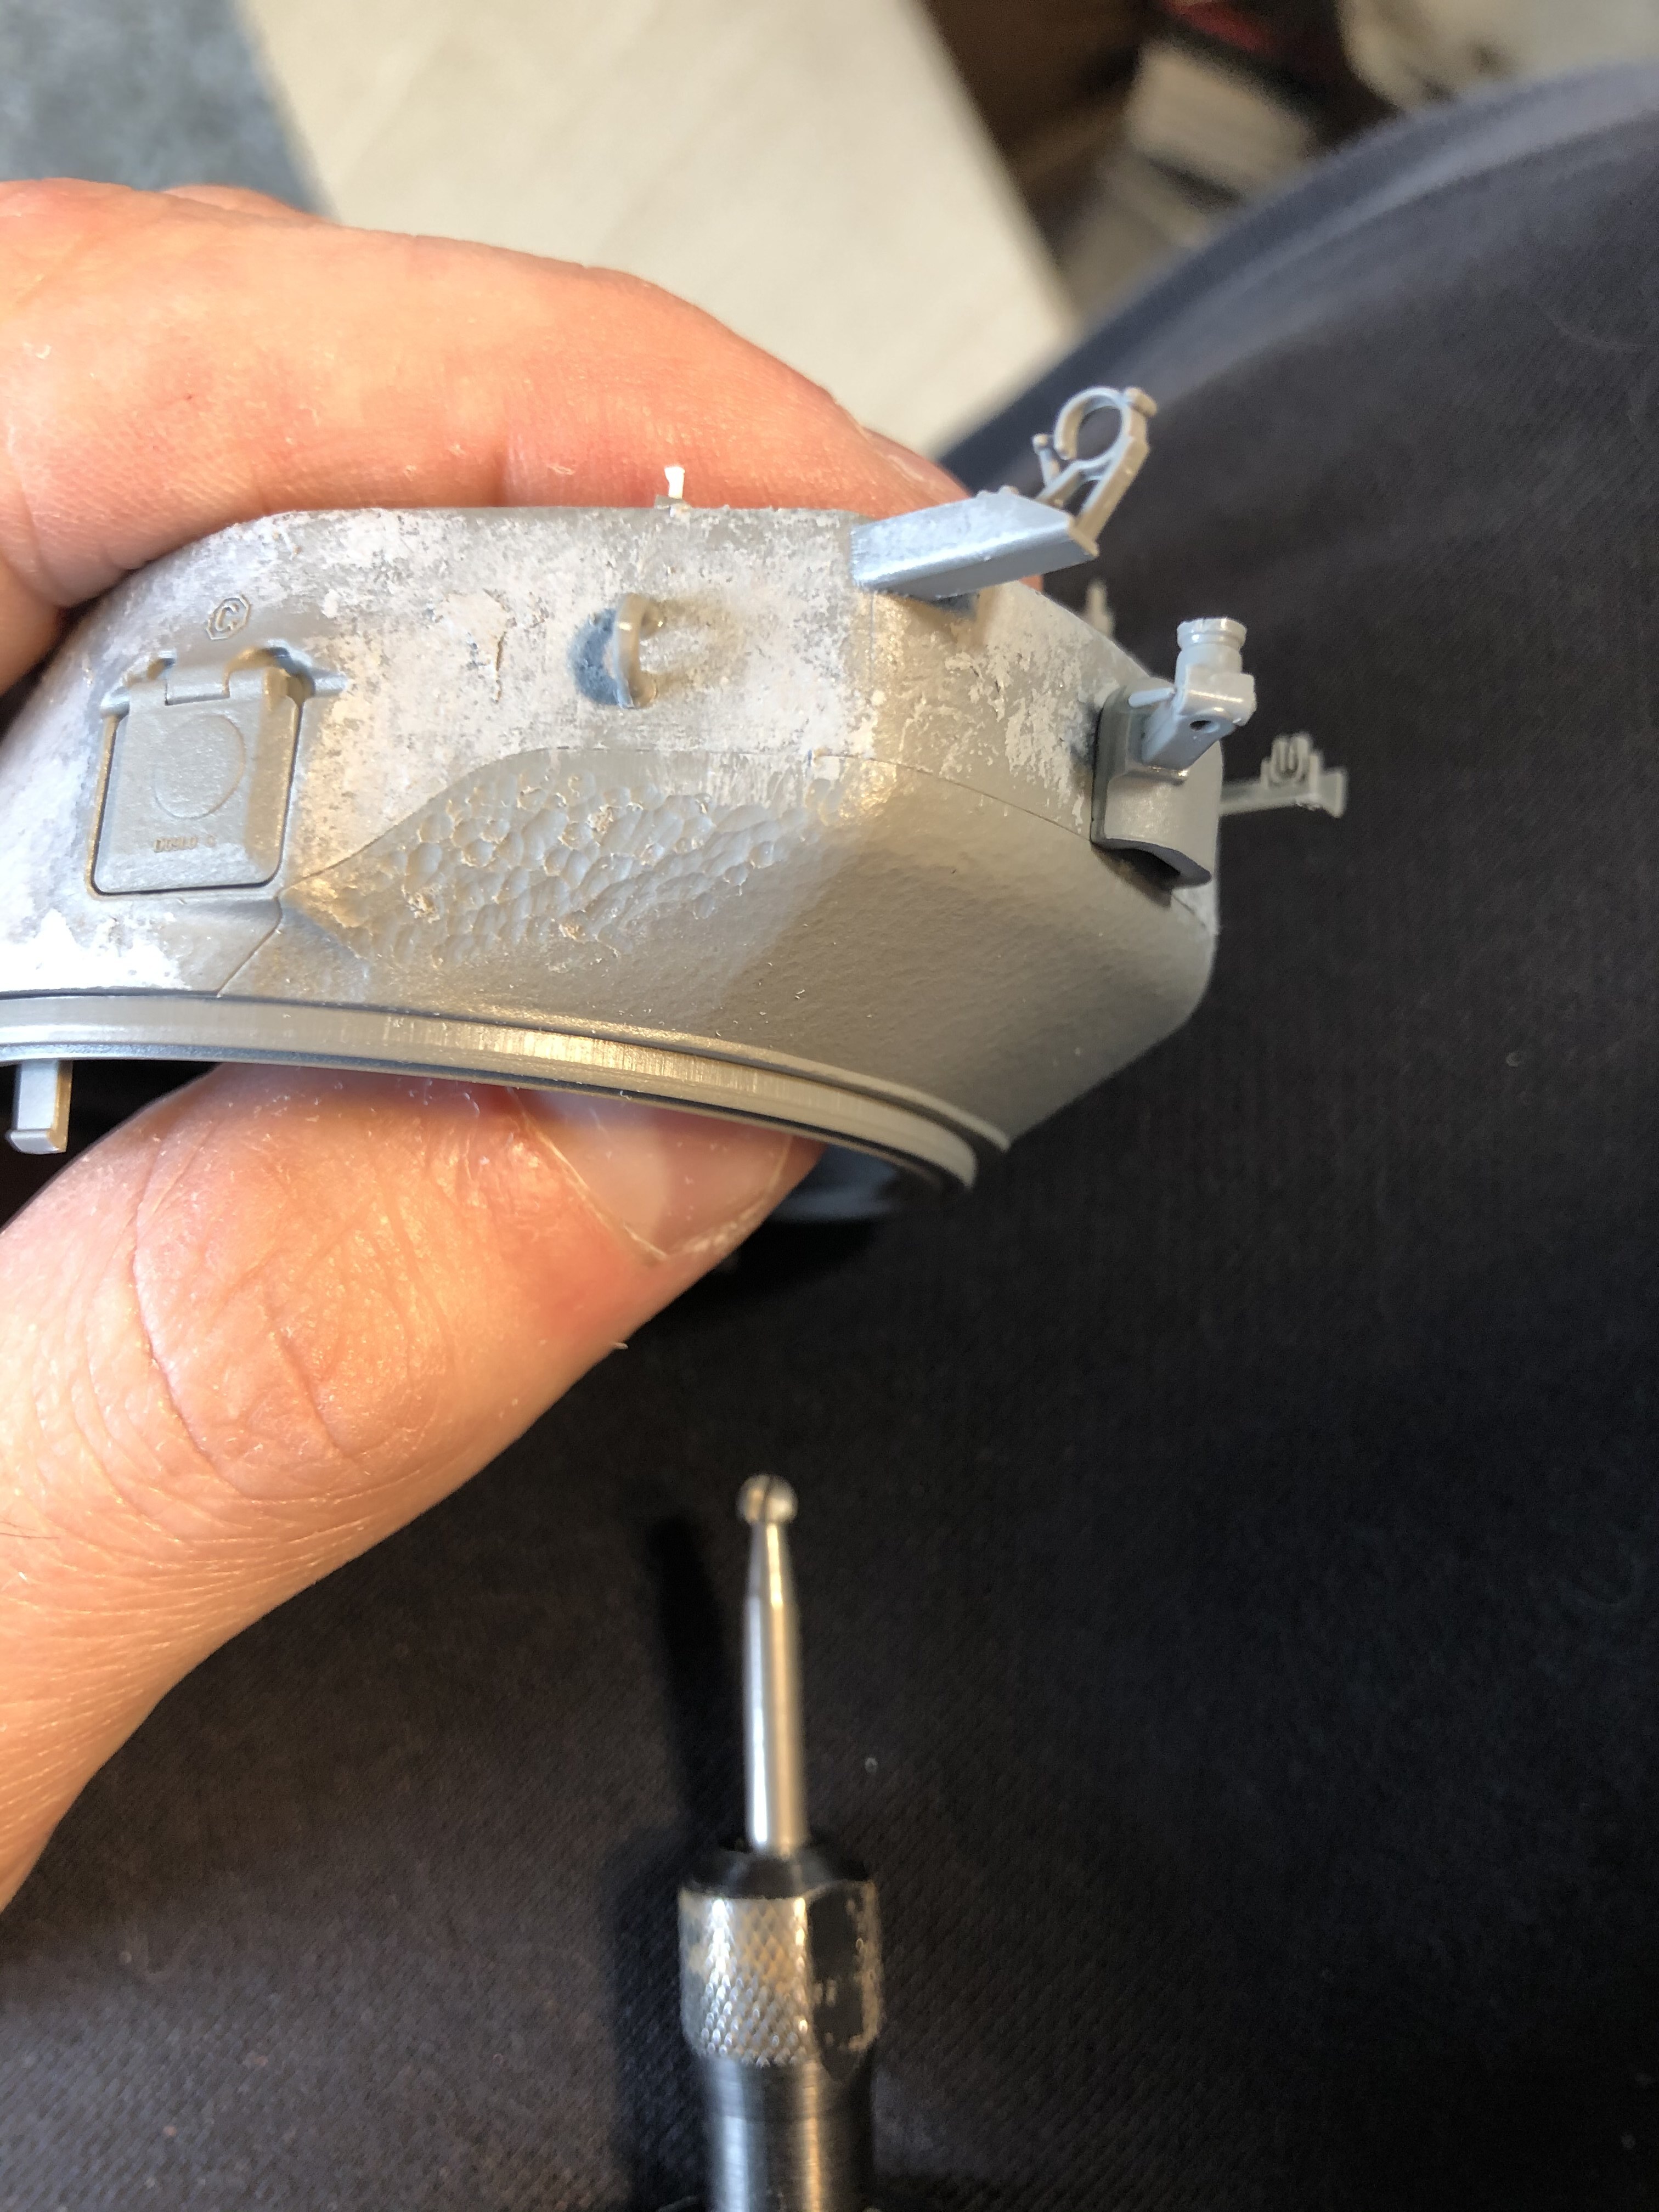
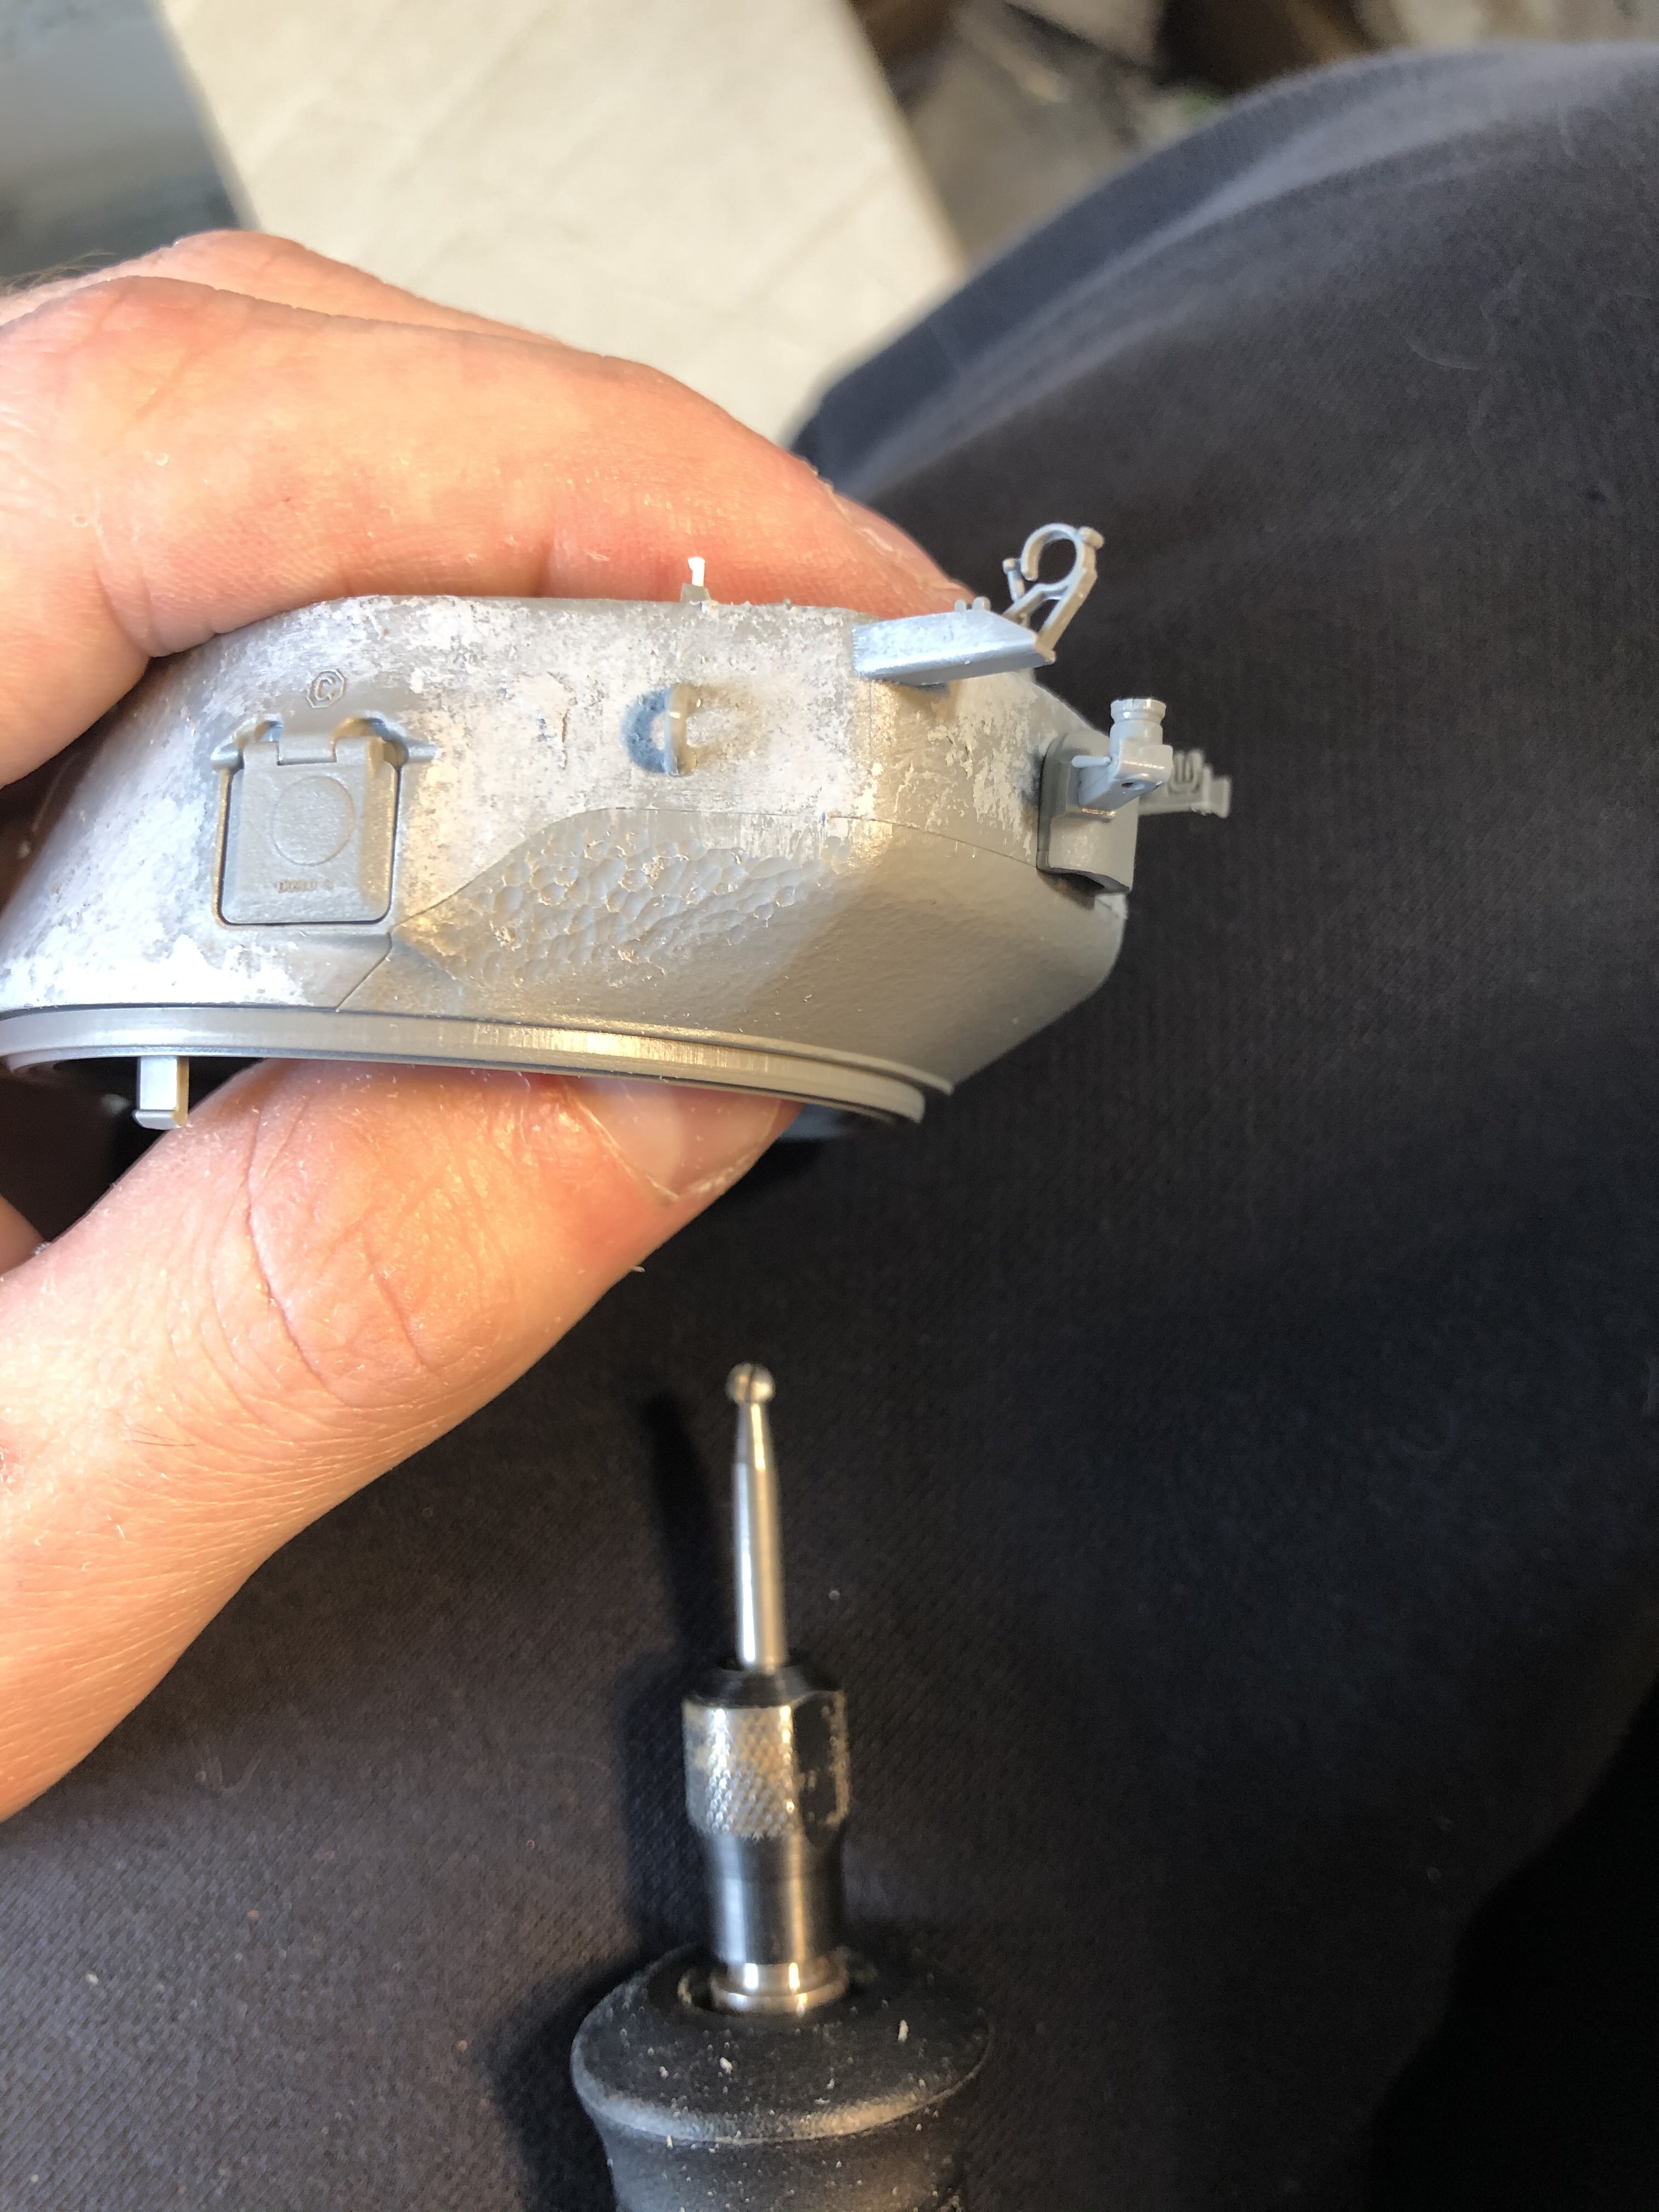
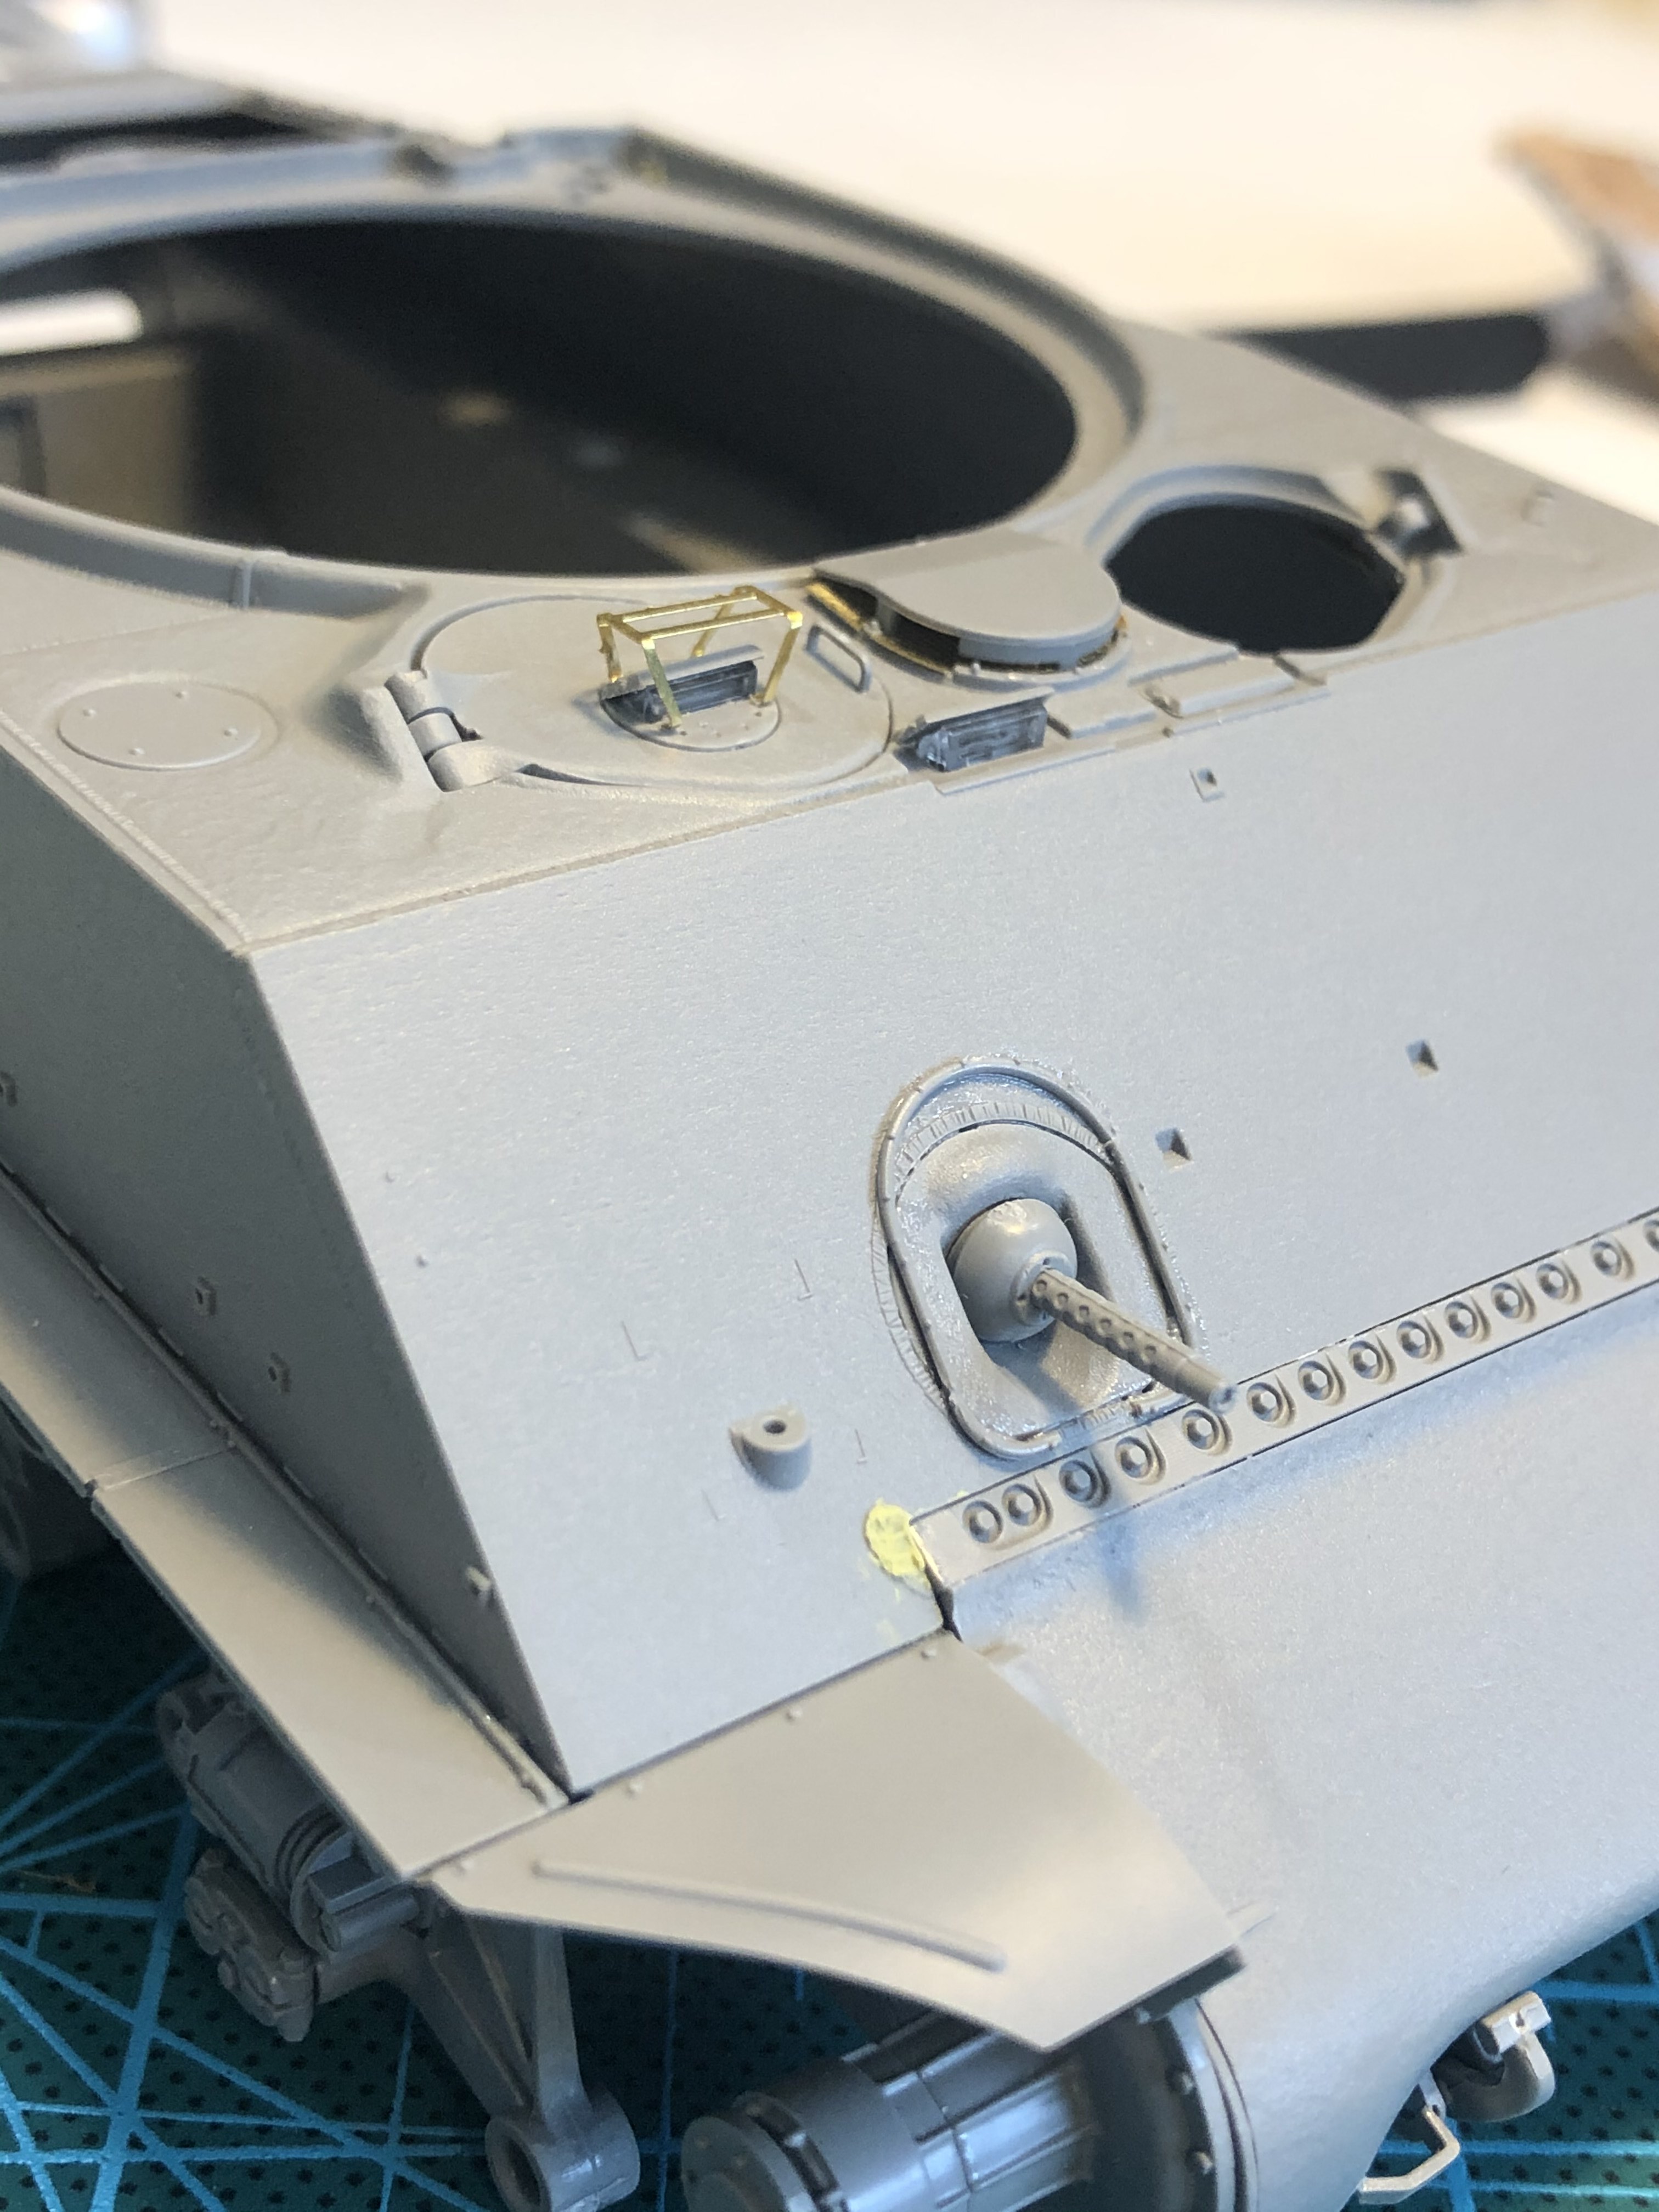
Here you’ll see the larger hole in the gun mantlet that I needed to drill to fit the Aber barrel.
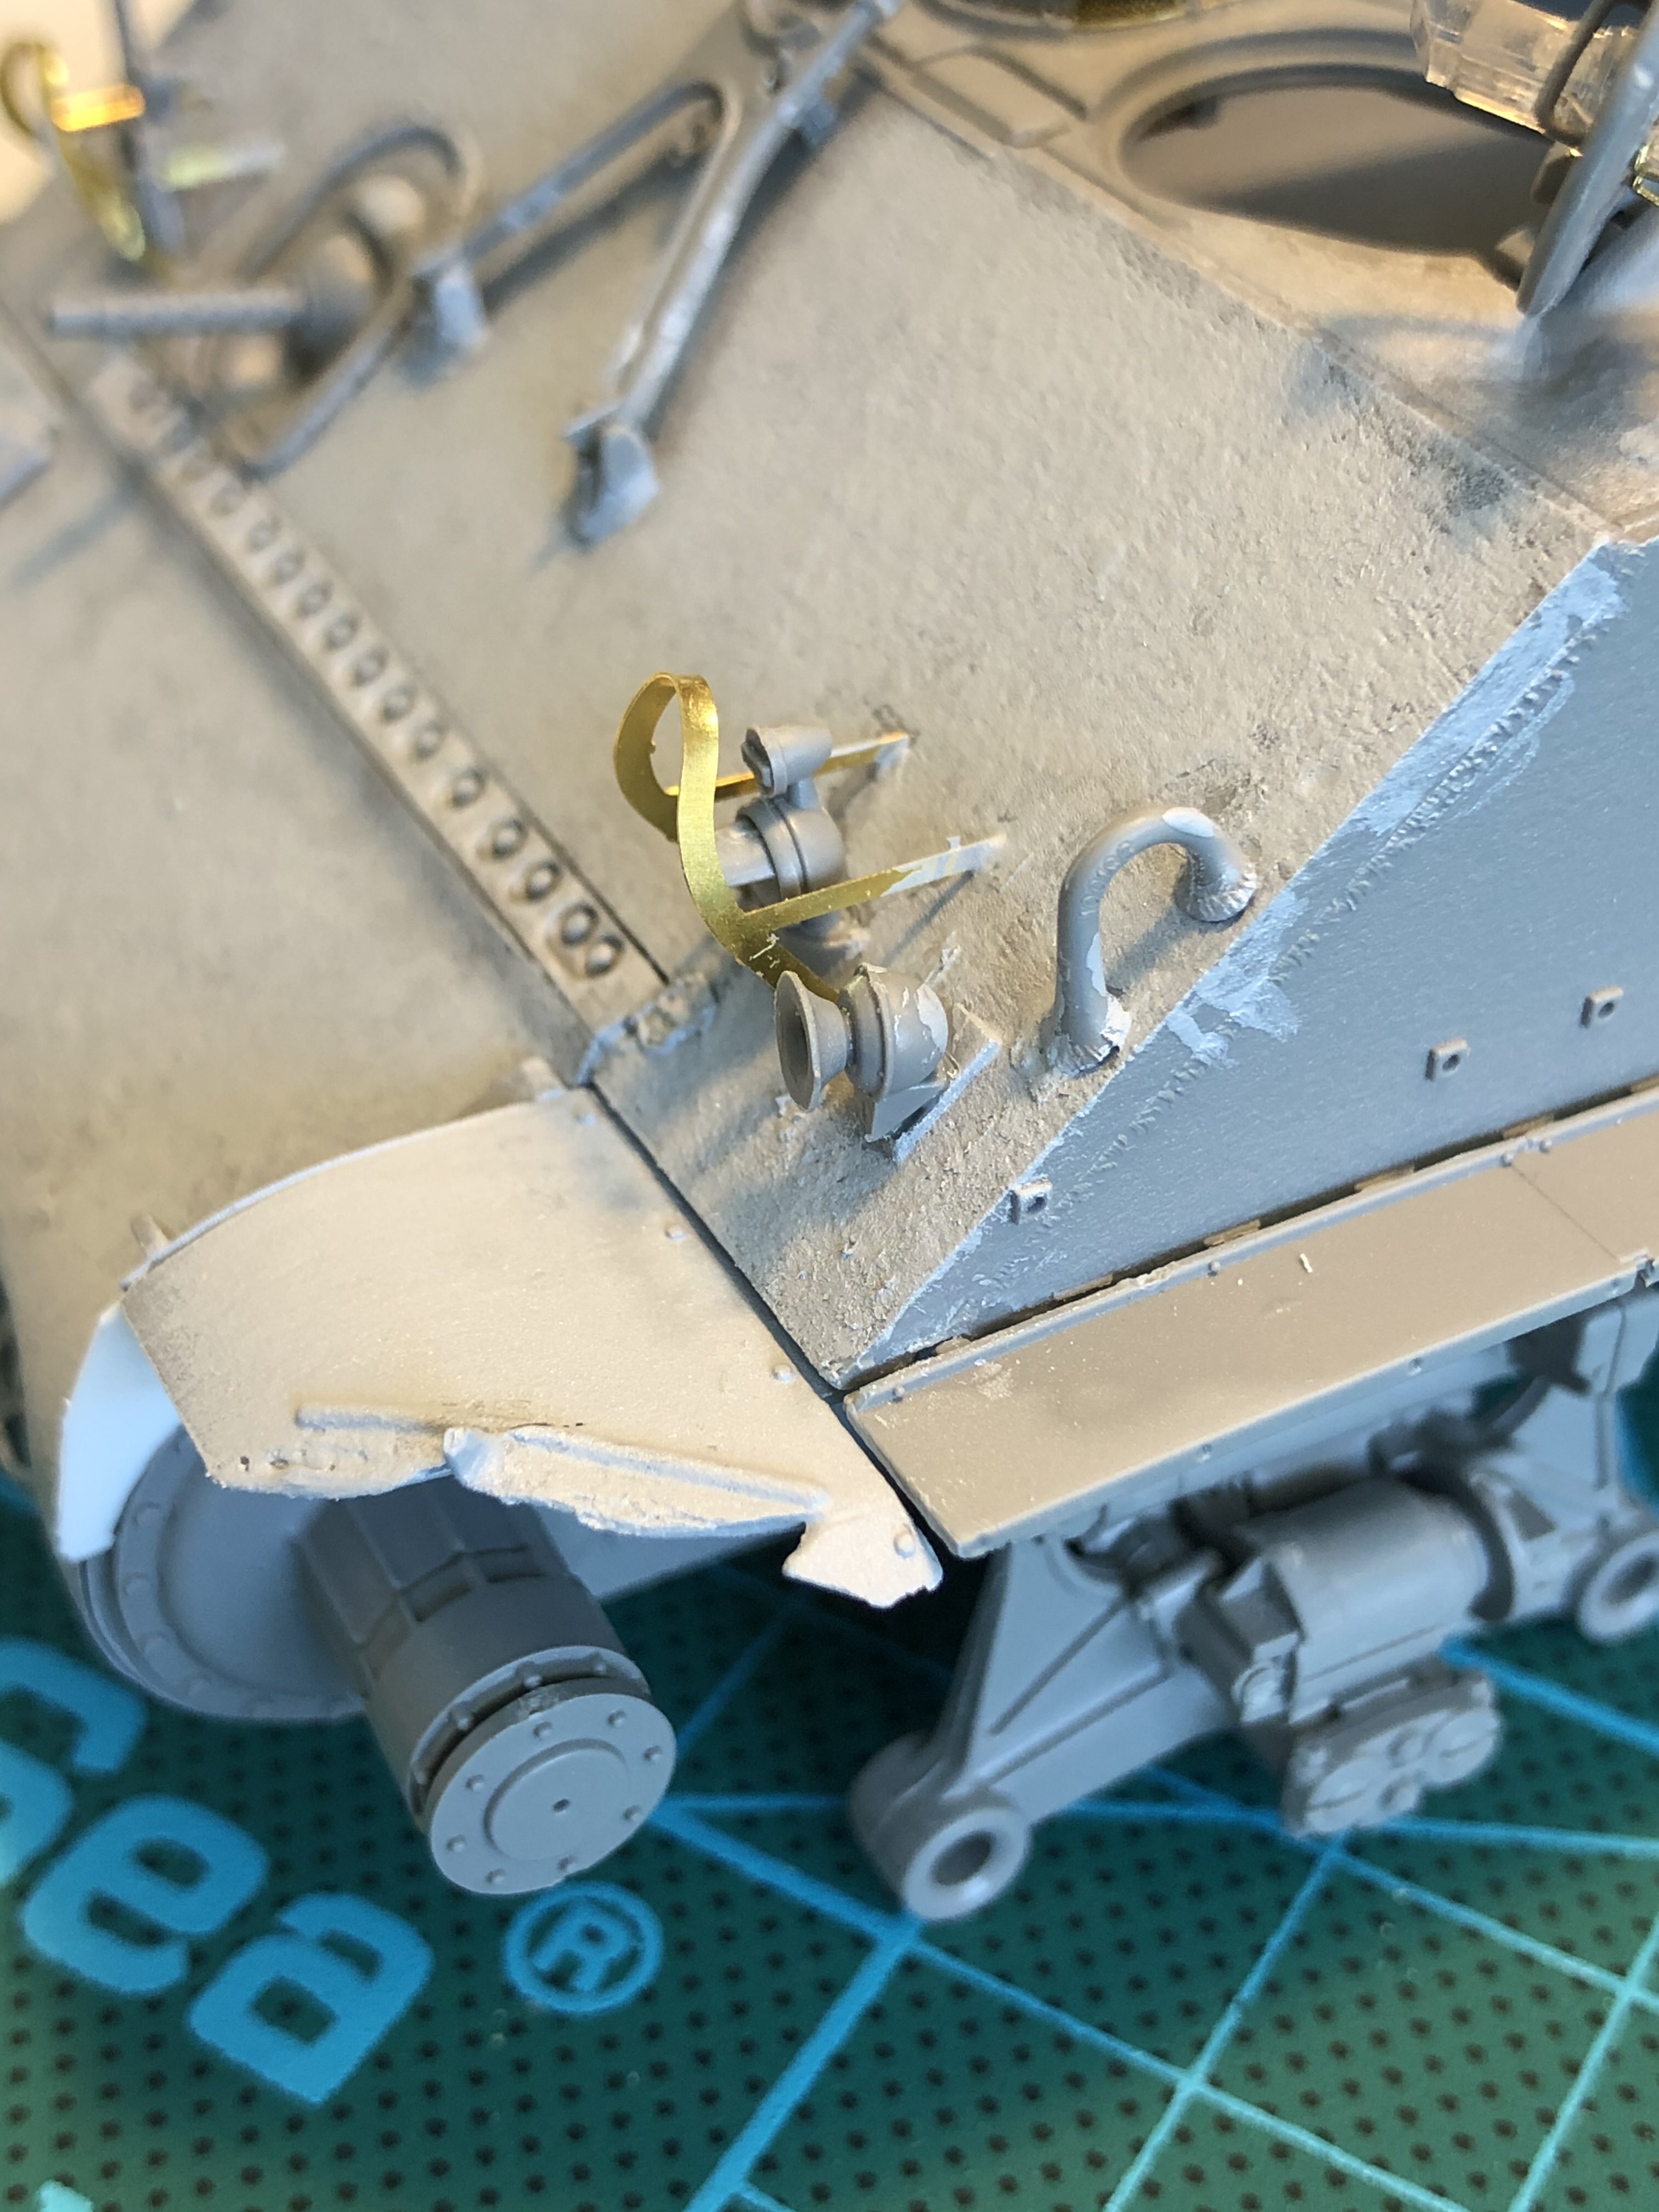
Below you’ll notice the new piece I had to scratch build because the kit part, literally, flew away. I think this is a hatch catch? I’m not exactly sure but it’s the best thing I could do.
I also need to add the canvas mounting locations on the gun shield as they aren’t there on the stock one as it’s molded with the intent of adding the canvas.
I don’t plan on making a toy dog or other stuffed animal. I’m not planning on modeling this specific vehicle but using it as a general guide for a late war E8. I am however keeping in mind of other “war trophies” that may be displayed on the tank. I need to do some research for that.
Armor, thanks for following along! I’m looking forward to making some really good progress on the turret tomorrow! I have some plans for surface texture, the joint bead between the upper and lower portions of the hull, as well as some stowage!
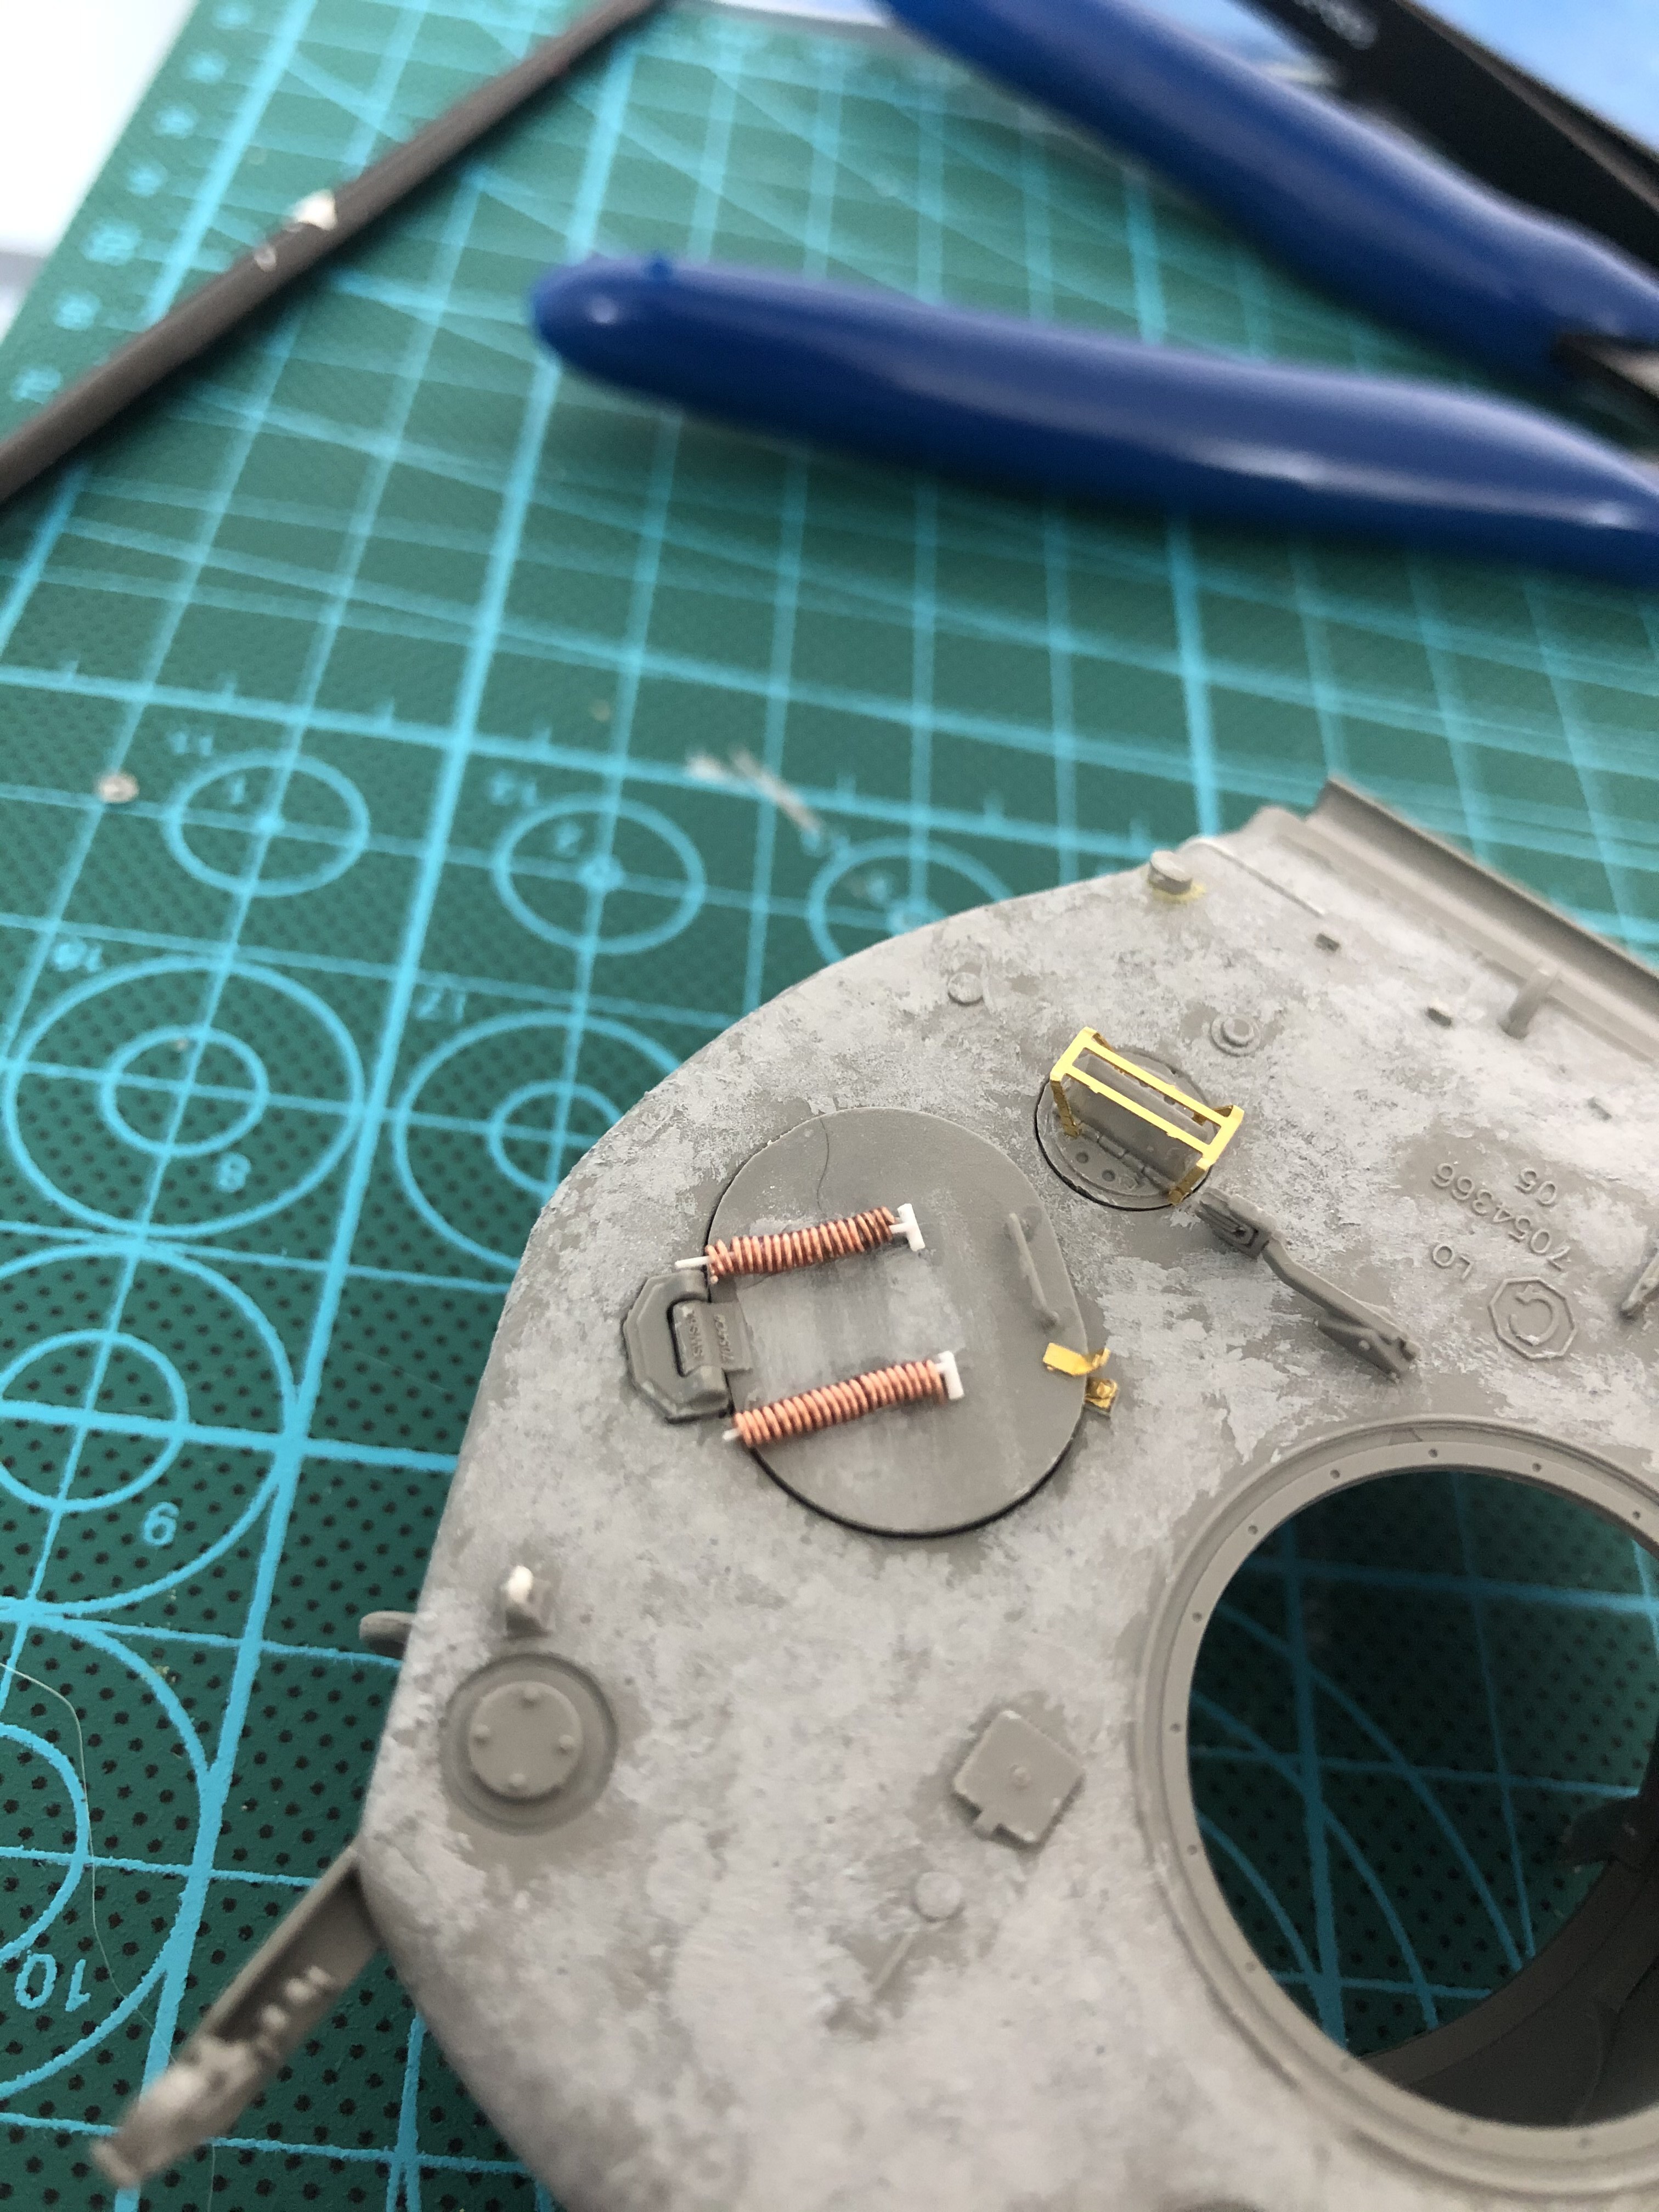
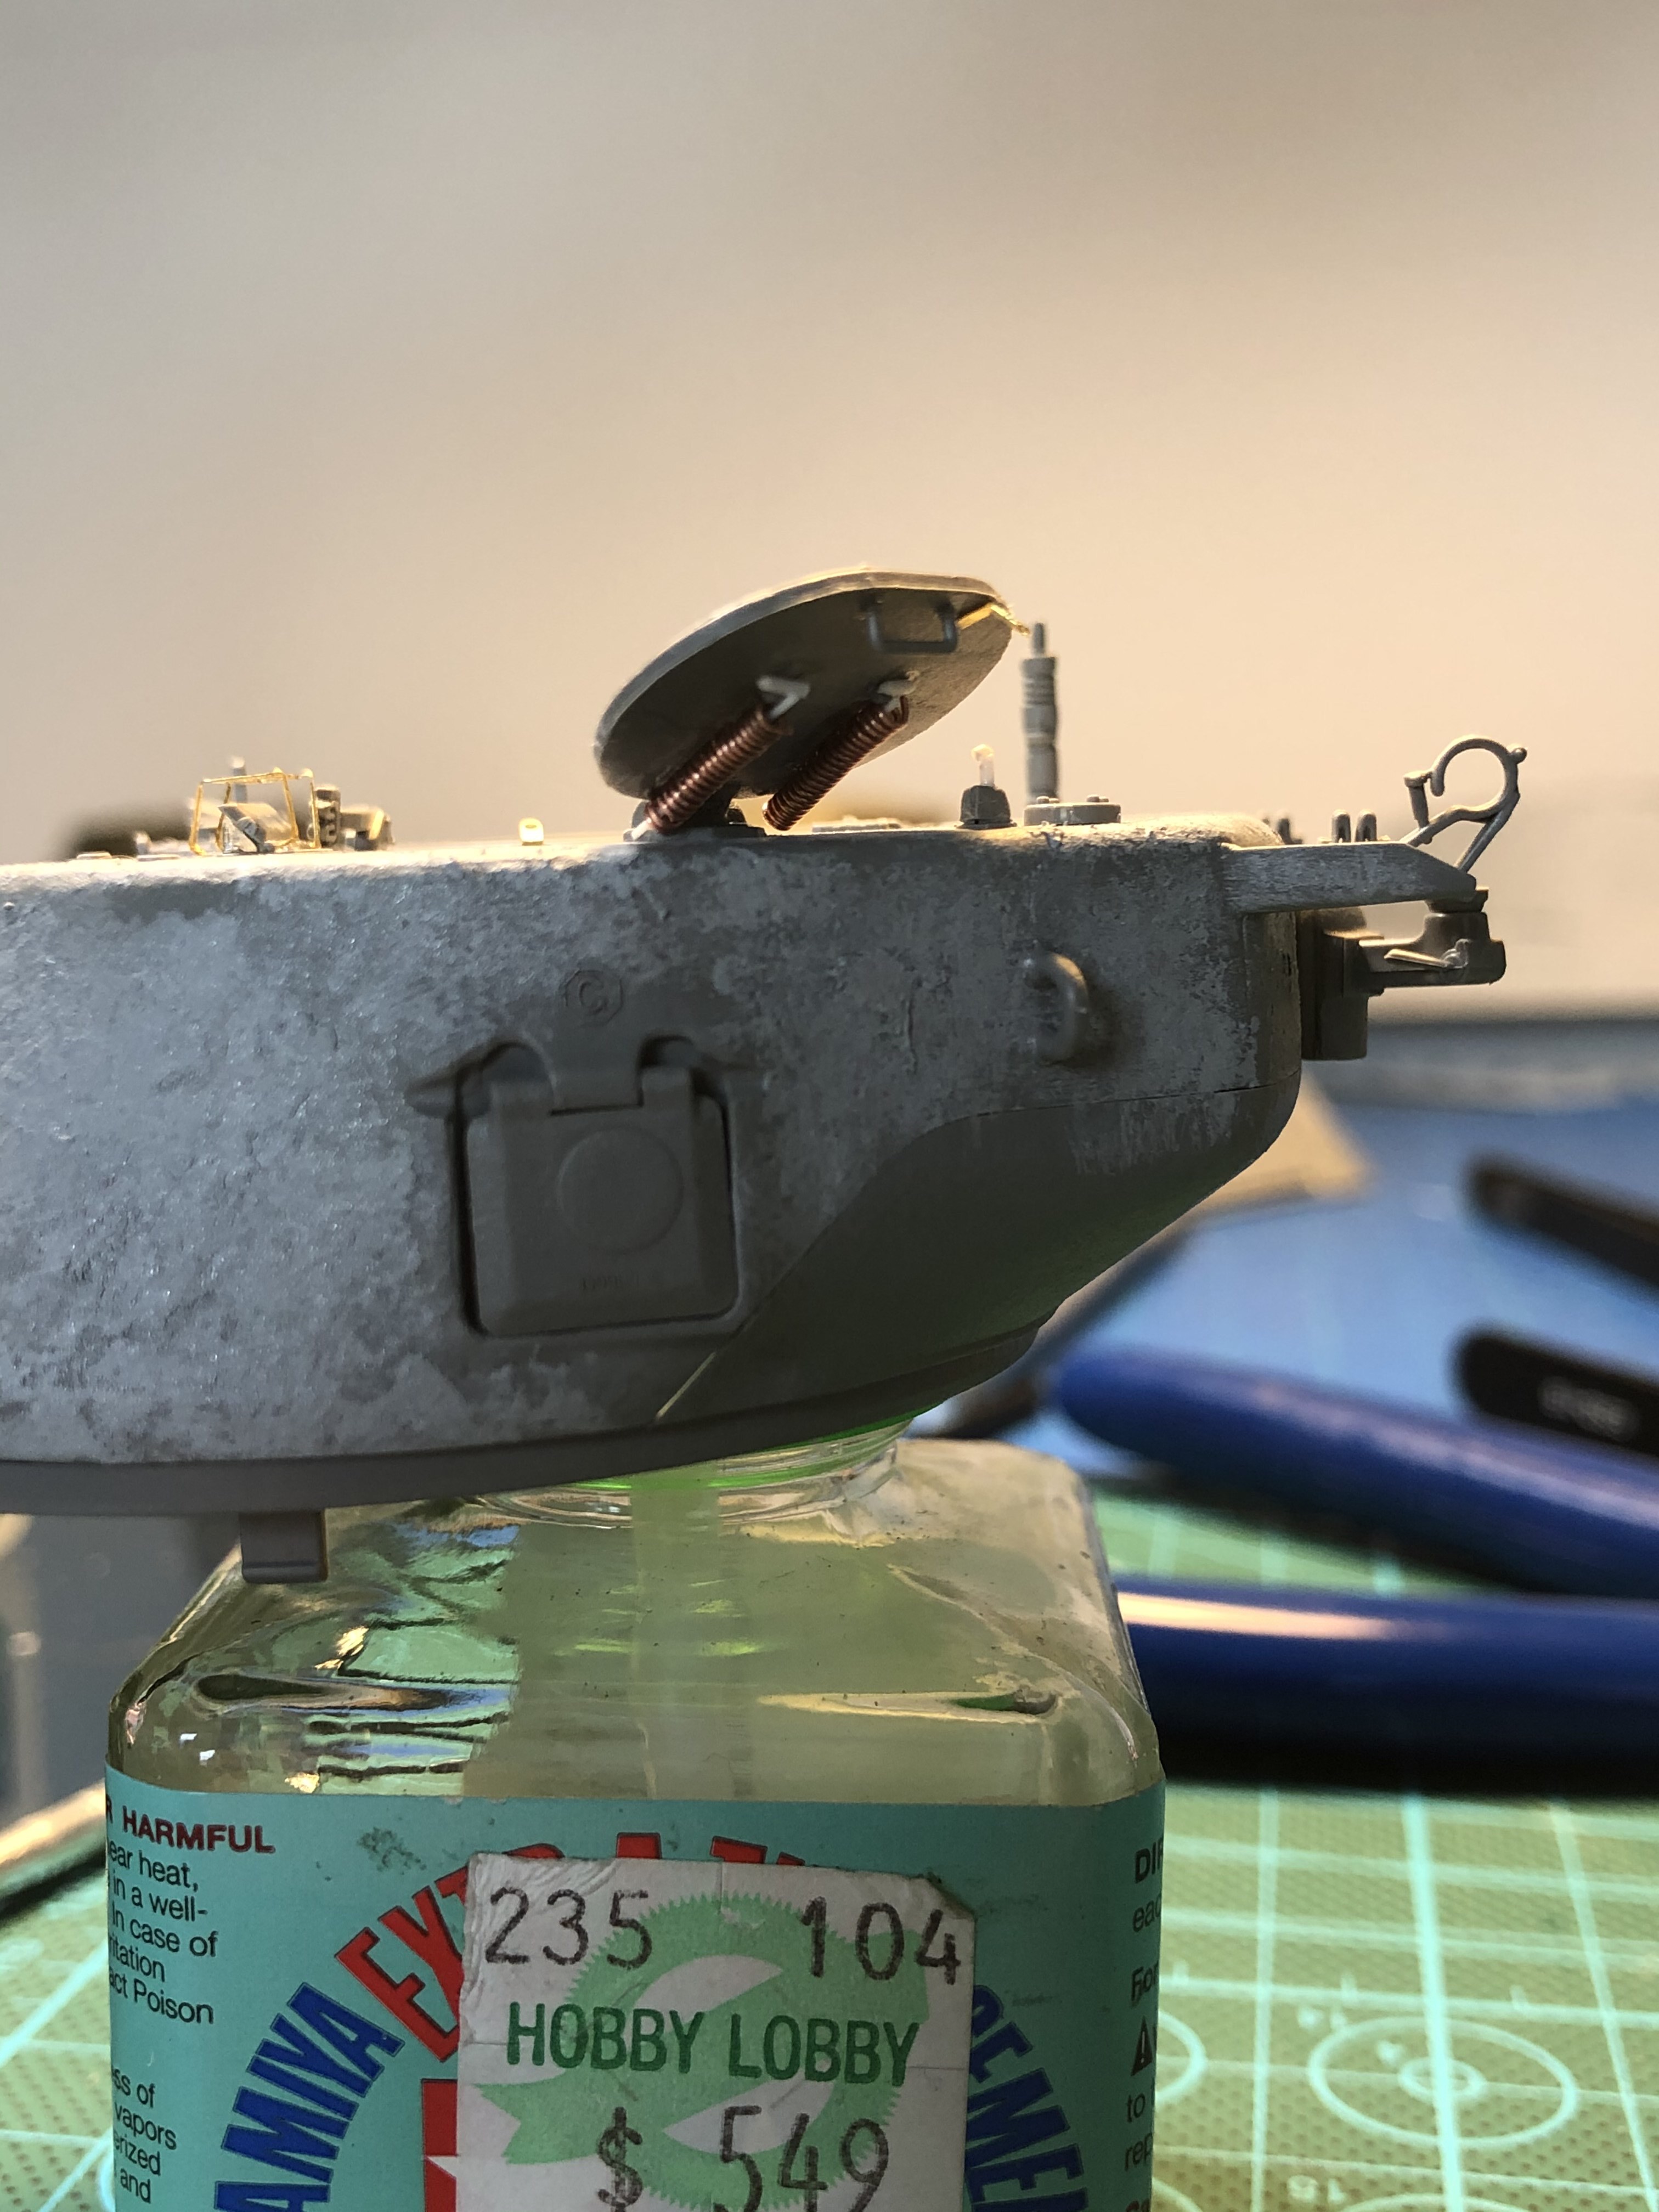
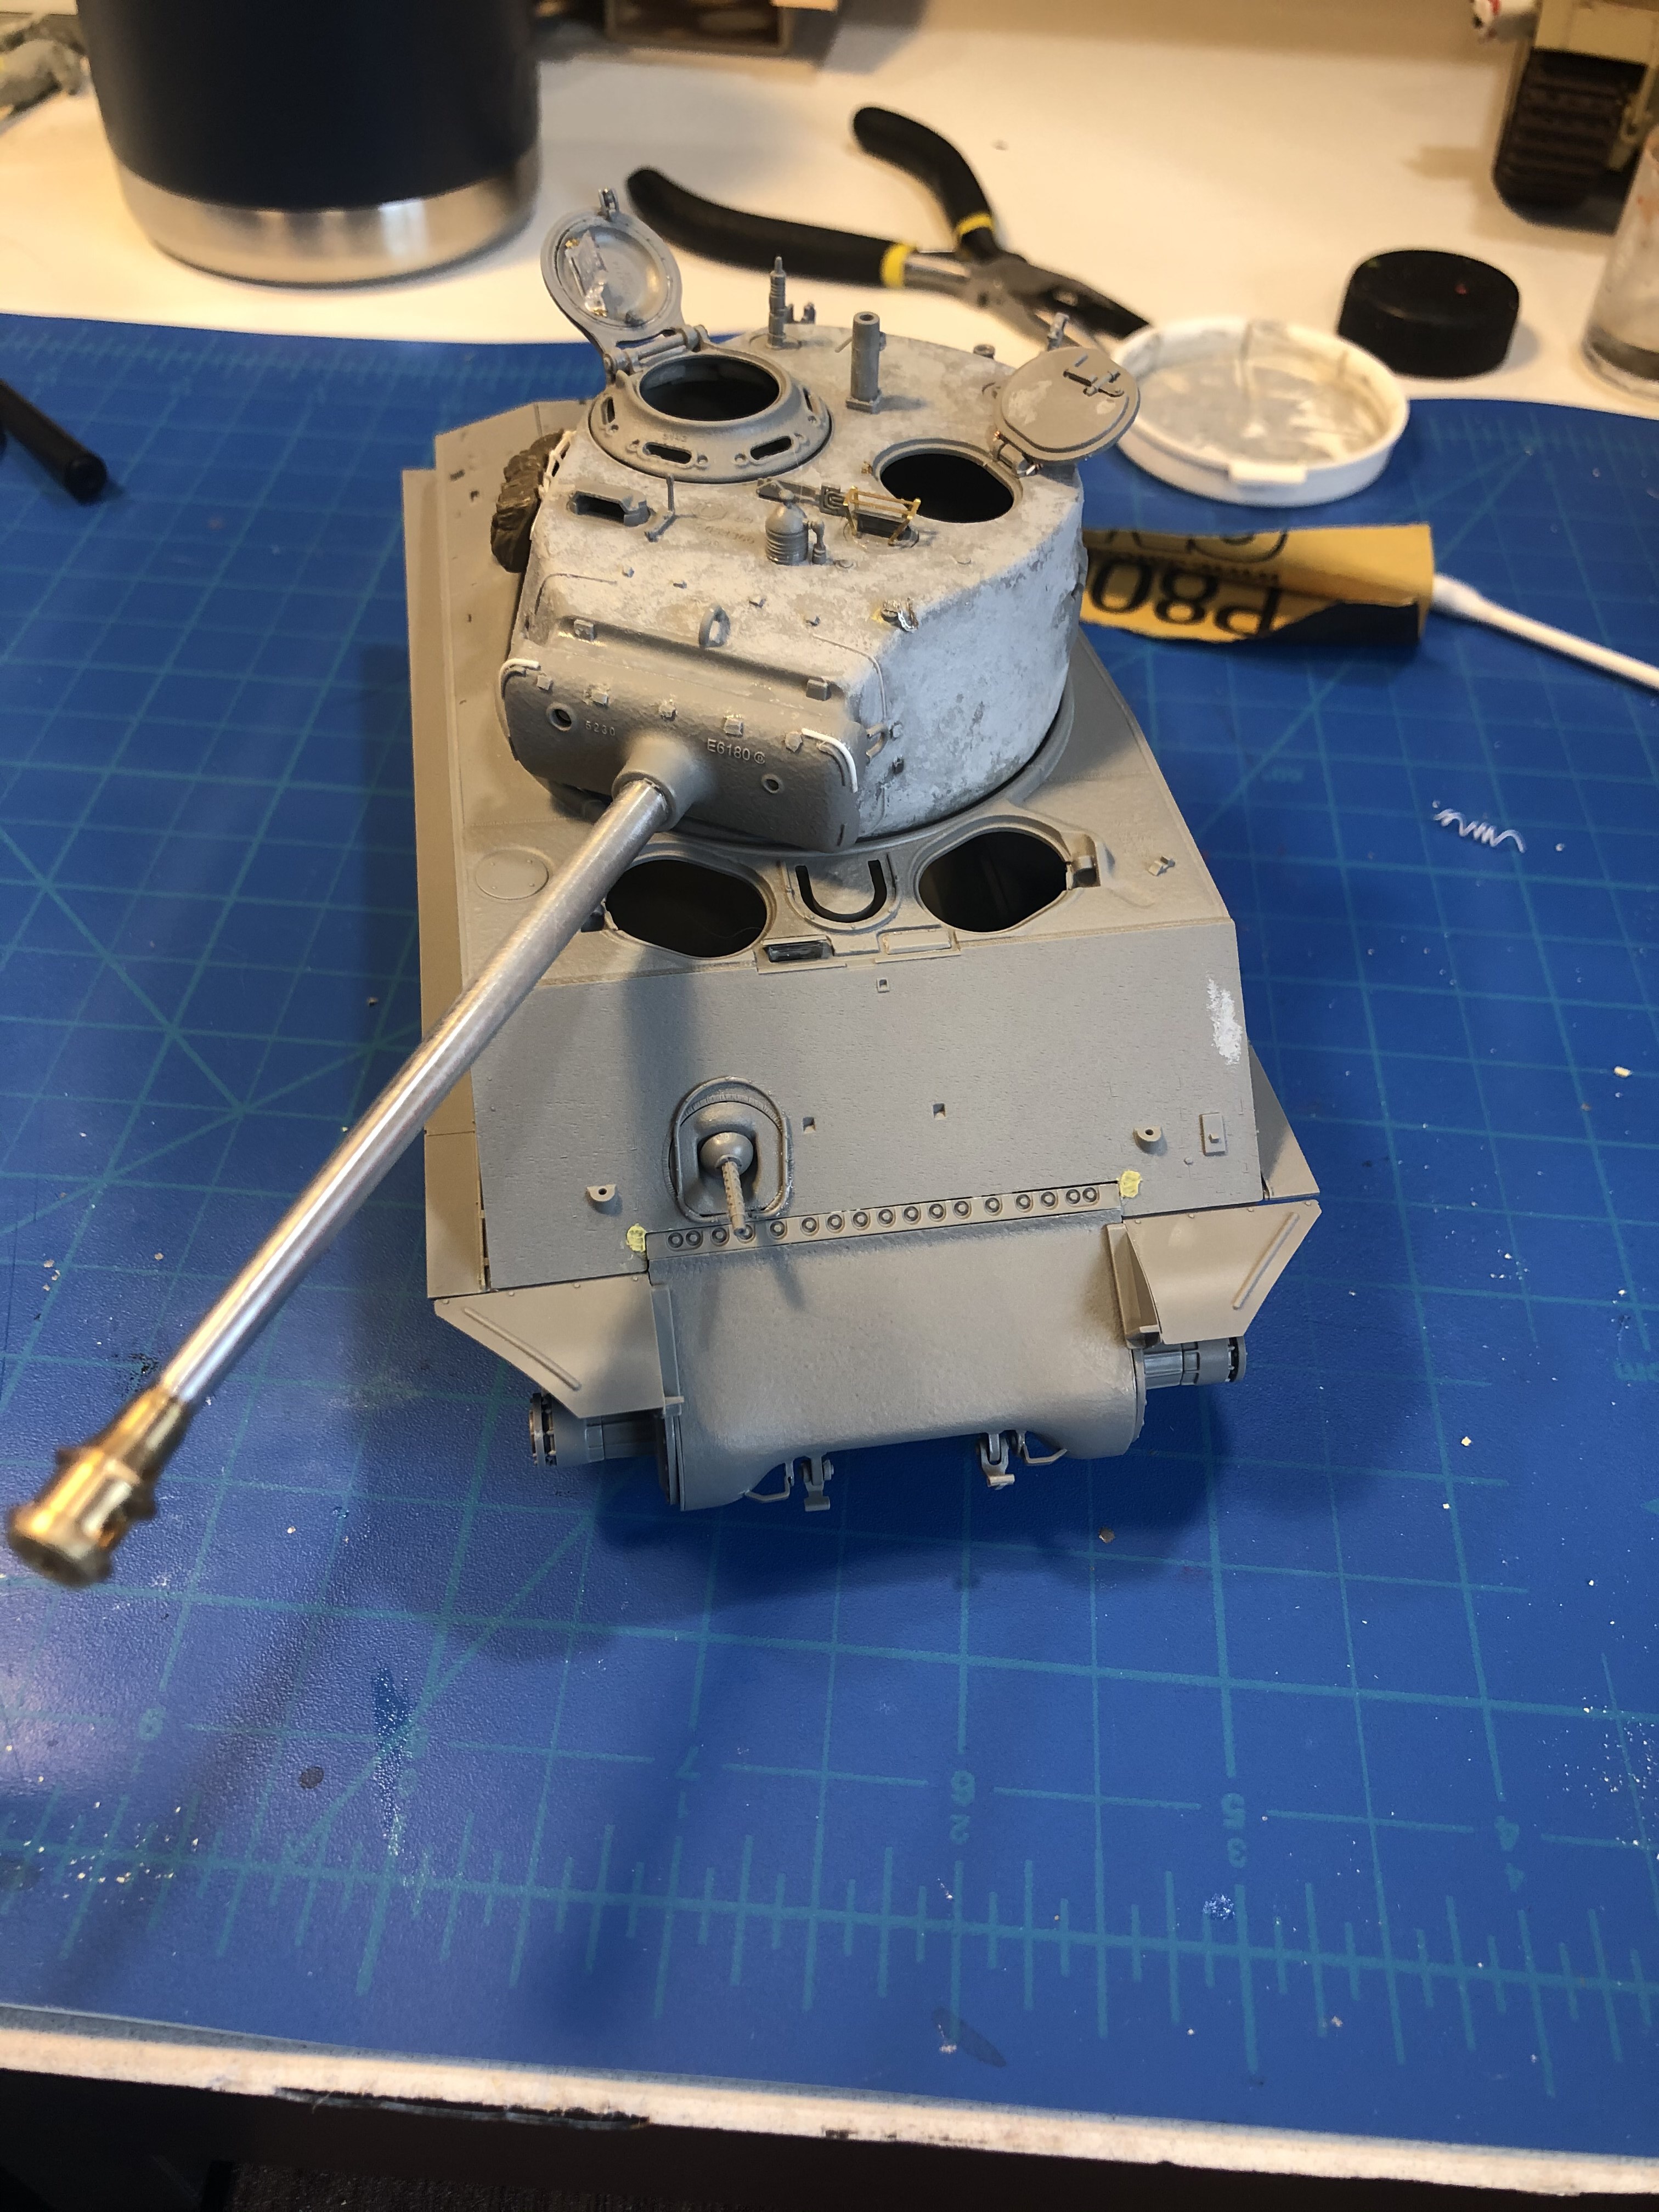
More progress on the turret. After joining the lower and upper portion, I decided that I REALLY didn’t like the moulded on loaders hatch springs. They looked atrocious. So I fired up the dremel and used the ball bit to remove the offensive bits.
Then I applied some basic putty, sanded and used .3mm copper jewelers wire to make the spring. I then used a .3mm styrene rod and a larger .5mm rod to create the rest of the spring.
That turret is looking fantastic. The Dremel tool texturing looks just right. I was amazed at how rough the castings were when I saw them up close in real life. Excellent work - usually a Dremel is implemented to destroy a model kit, no matter how well intentioned.
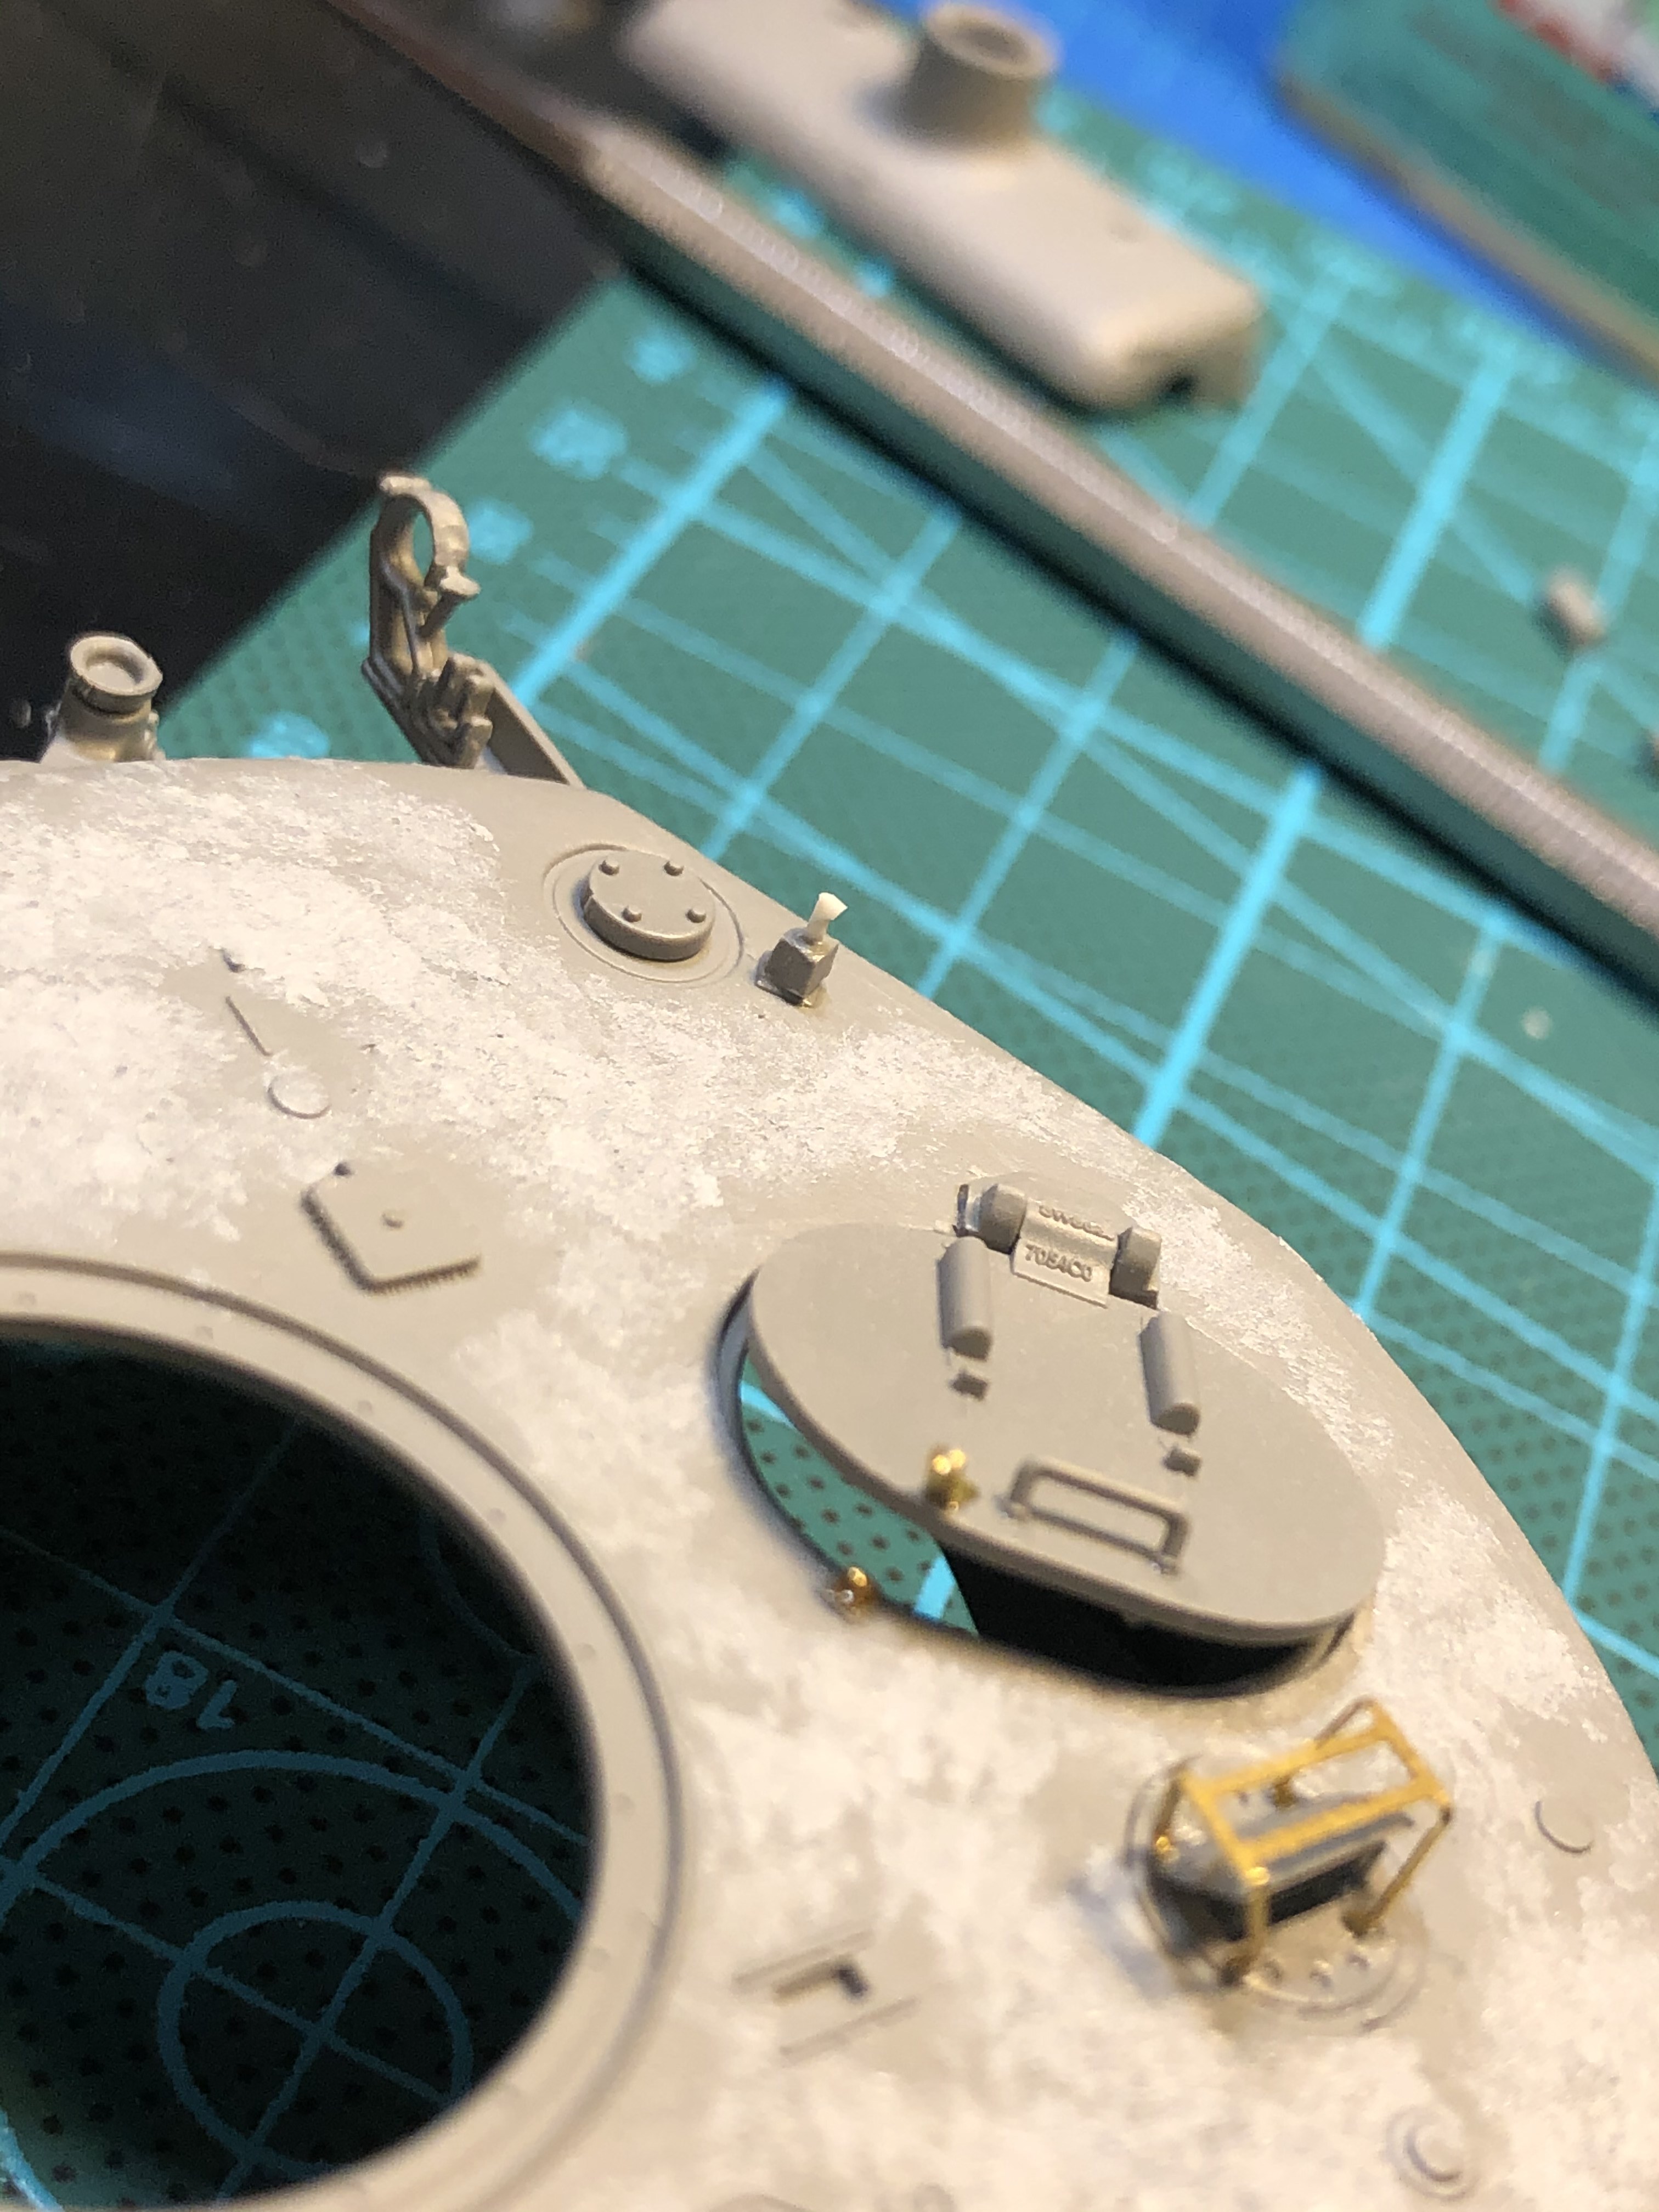
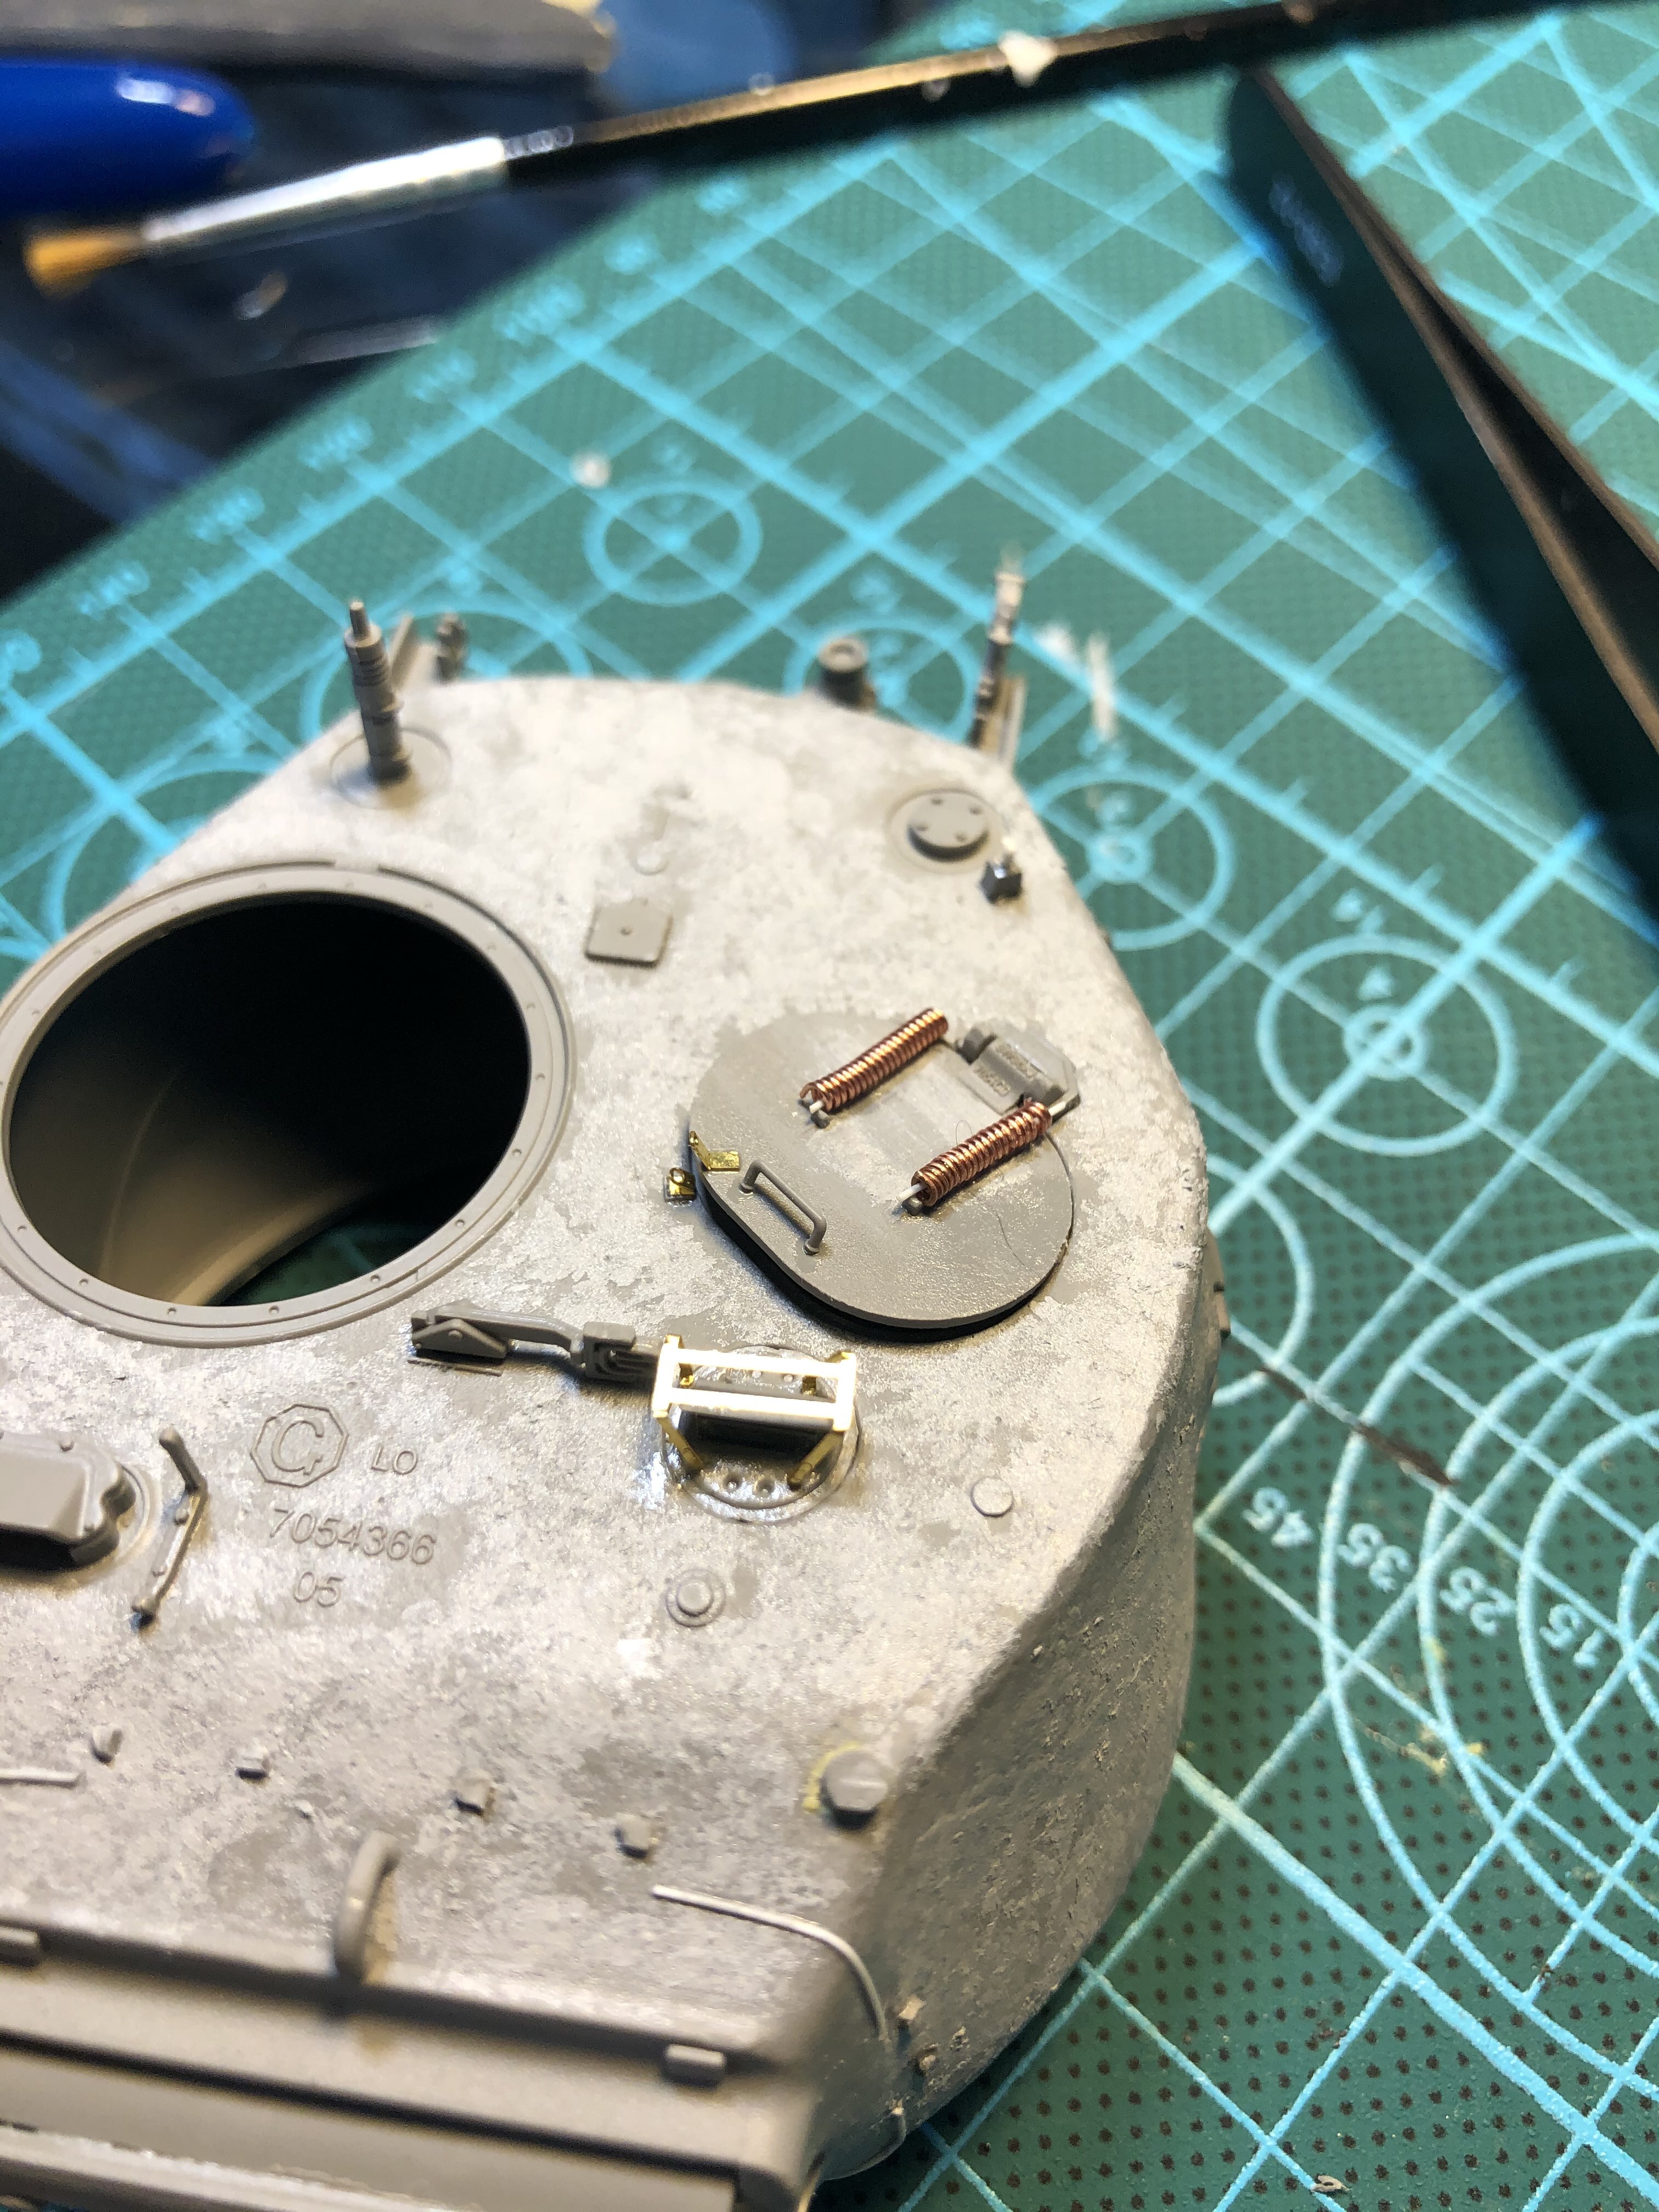
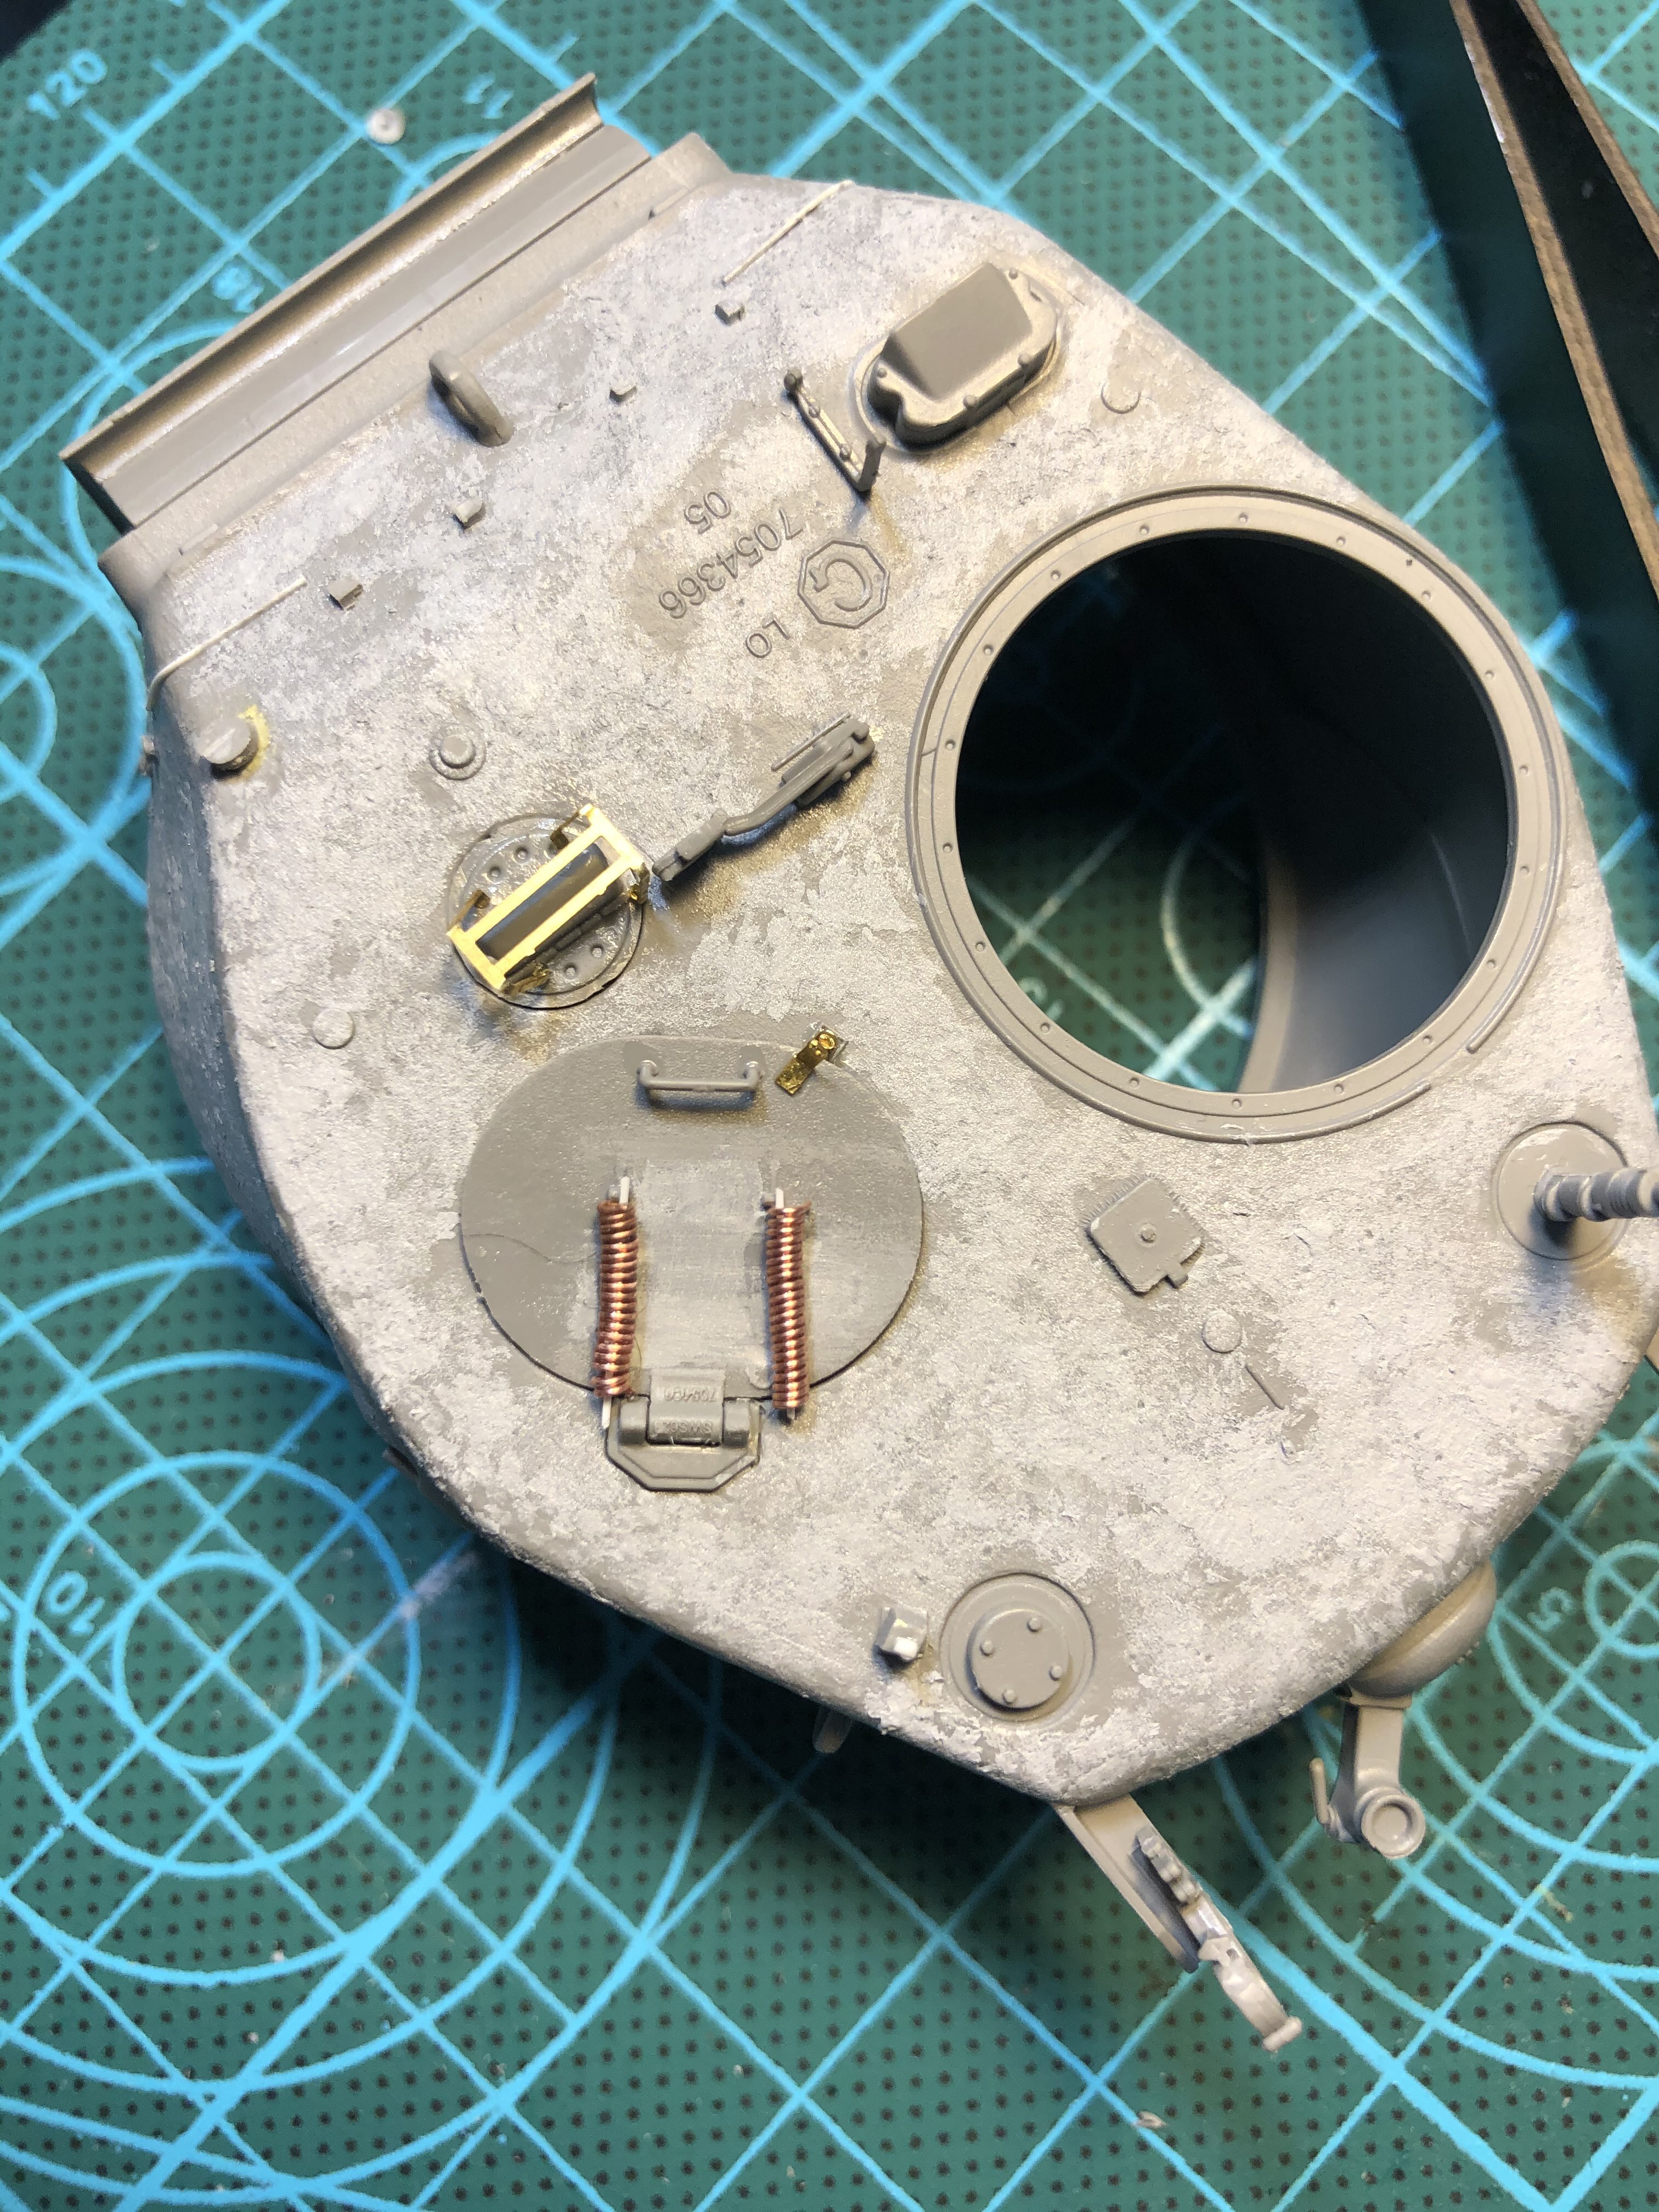
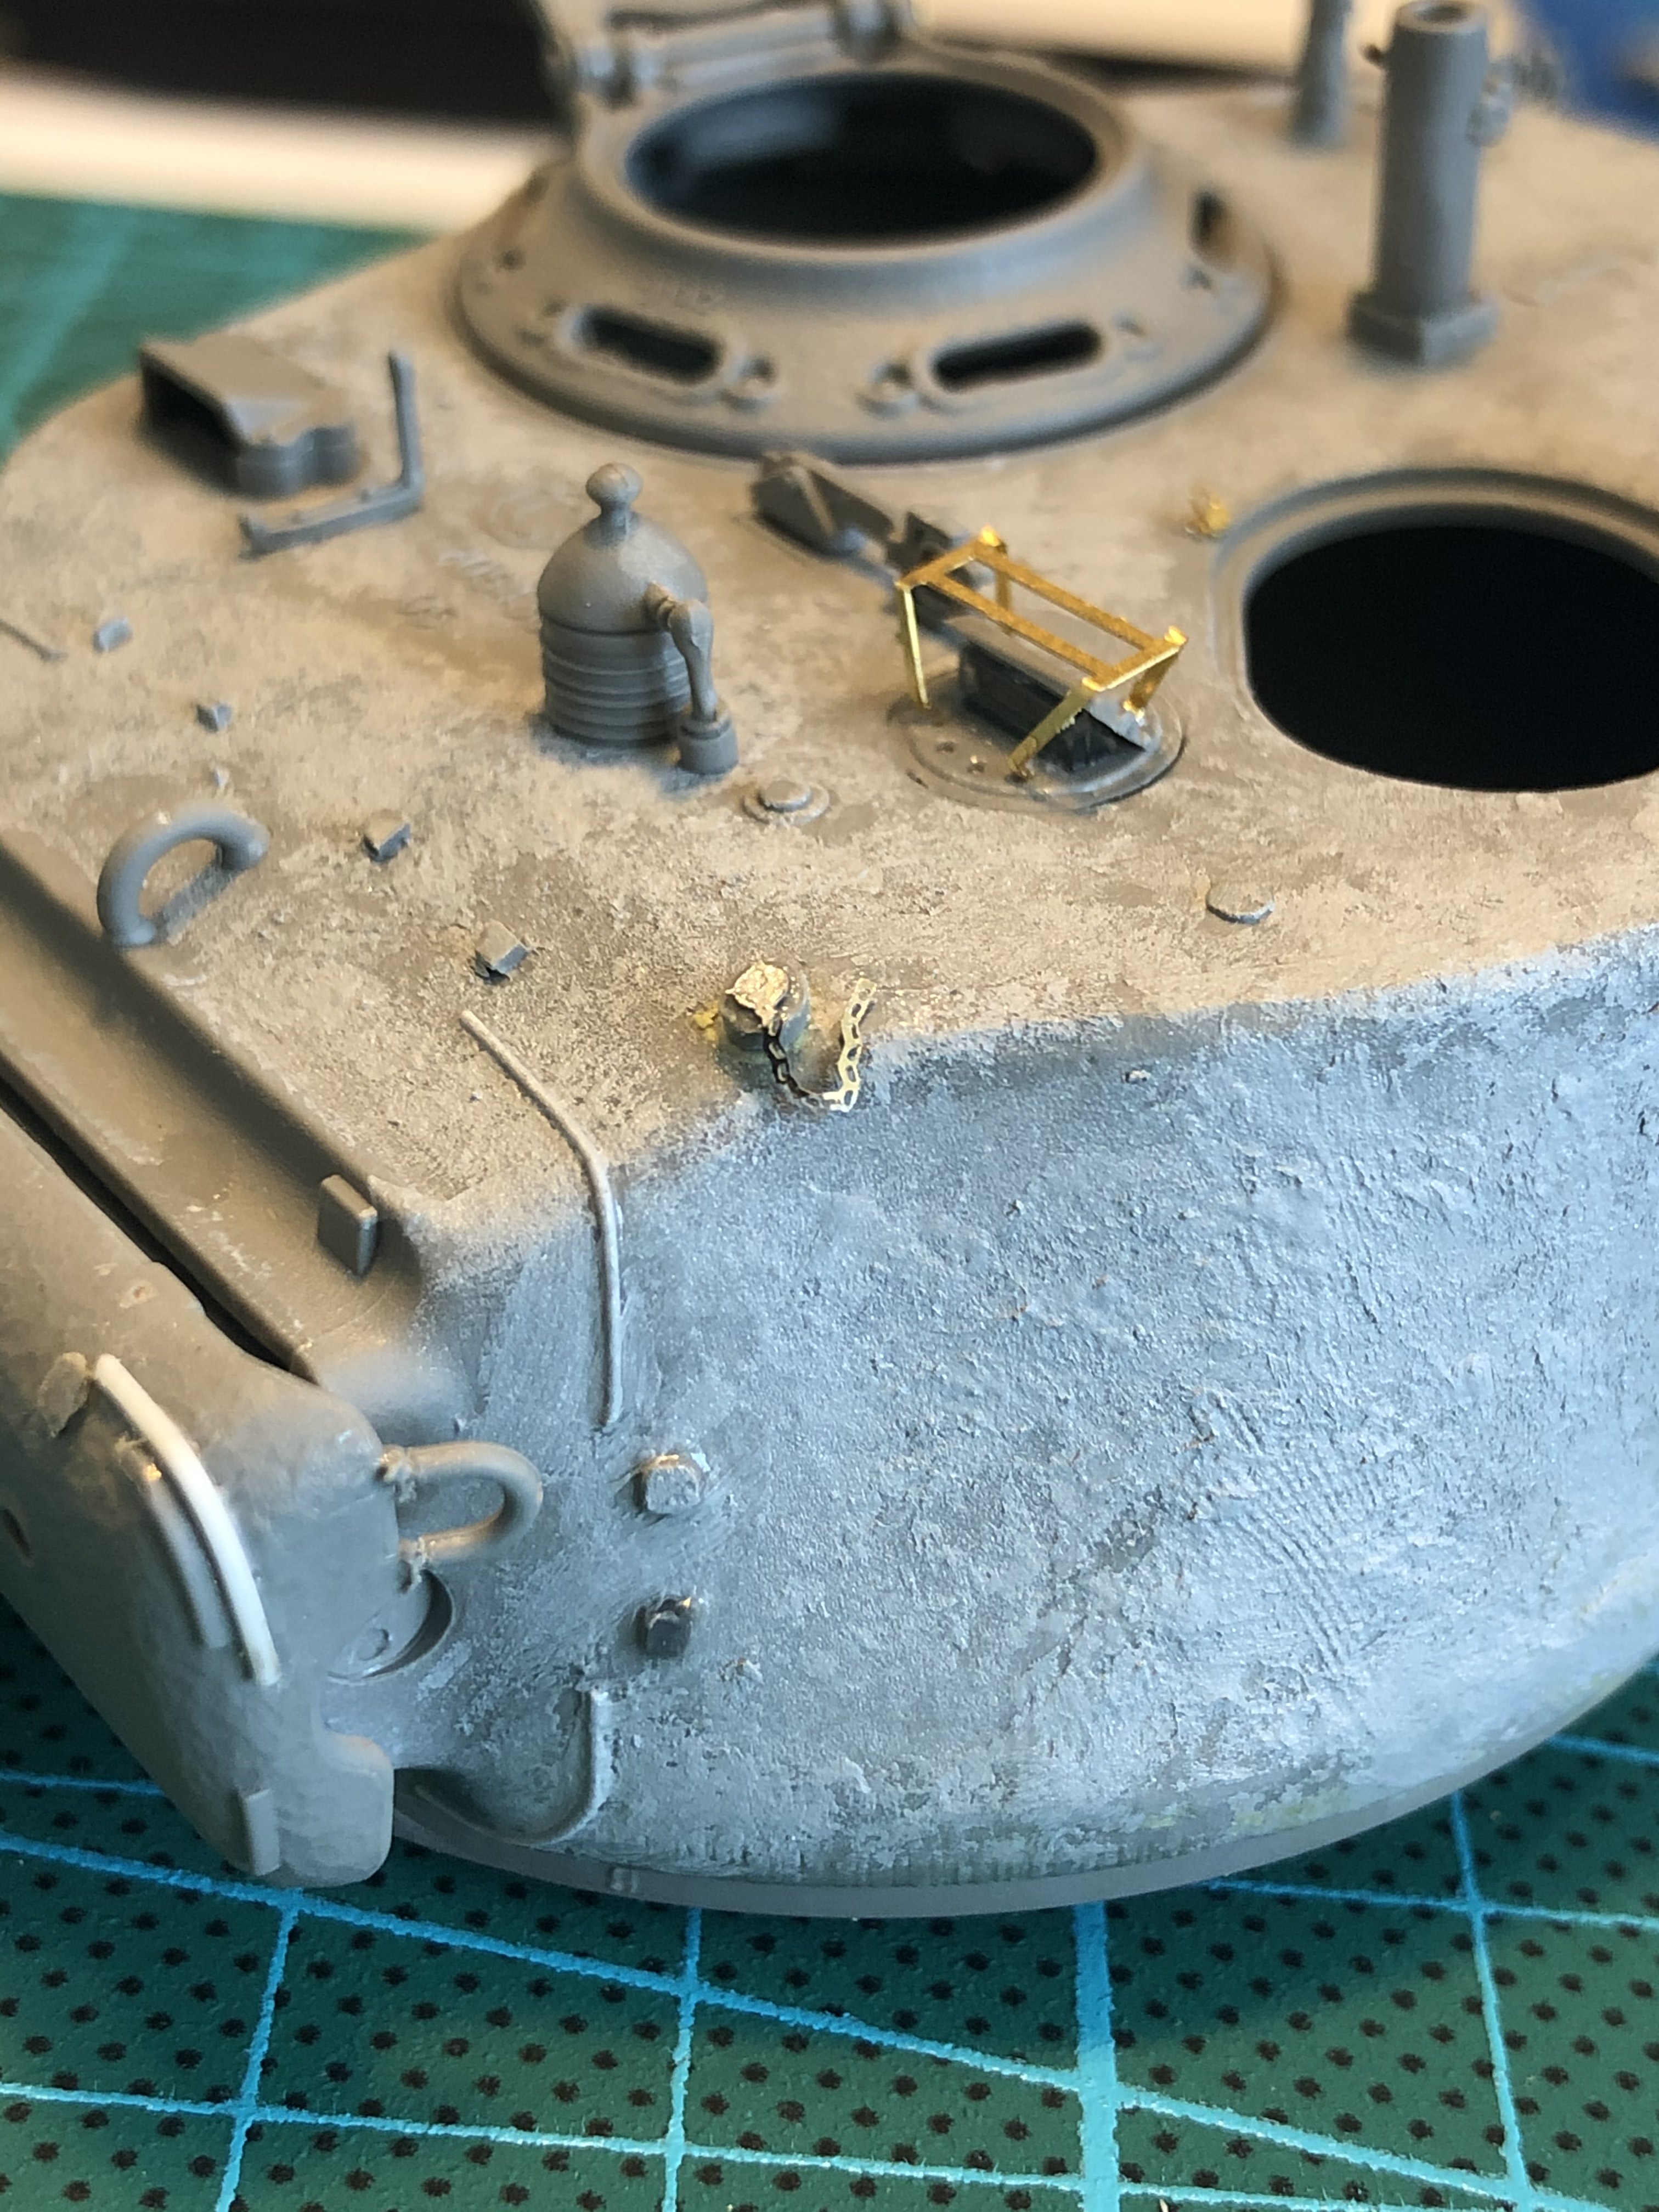
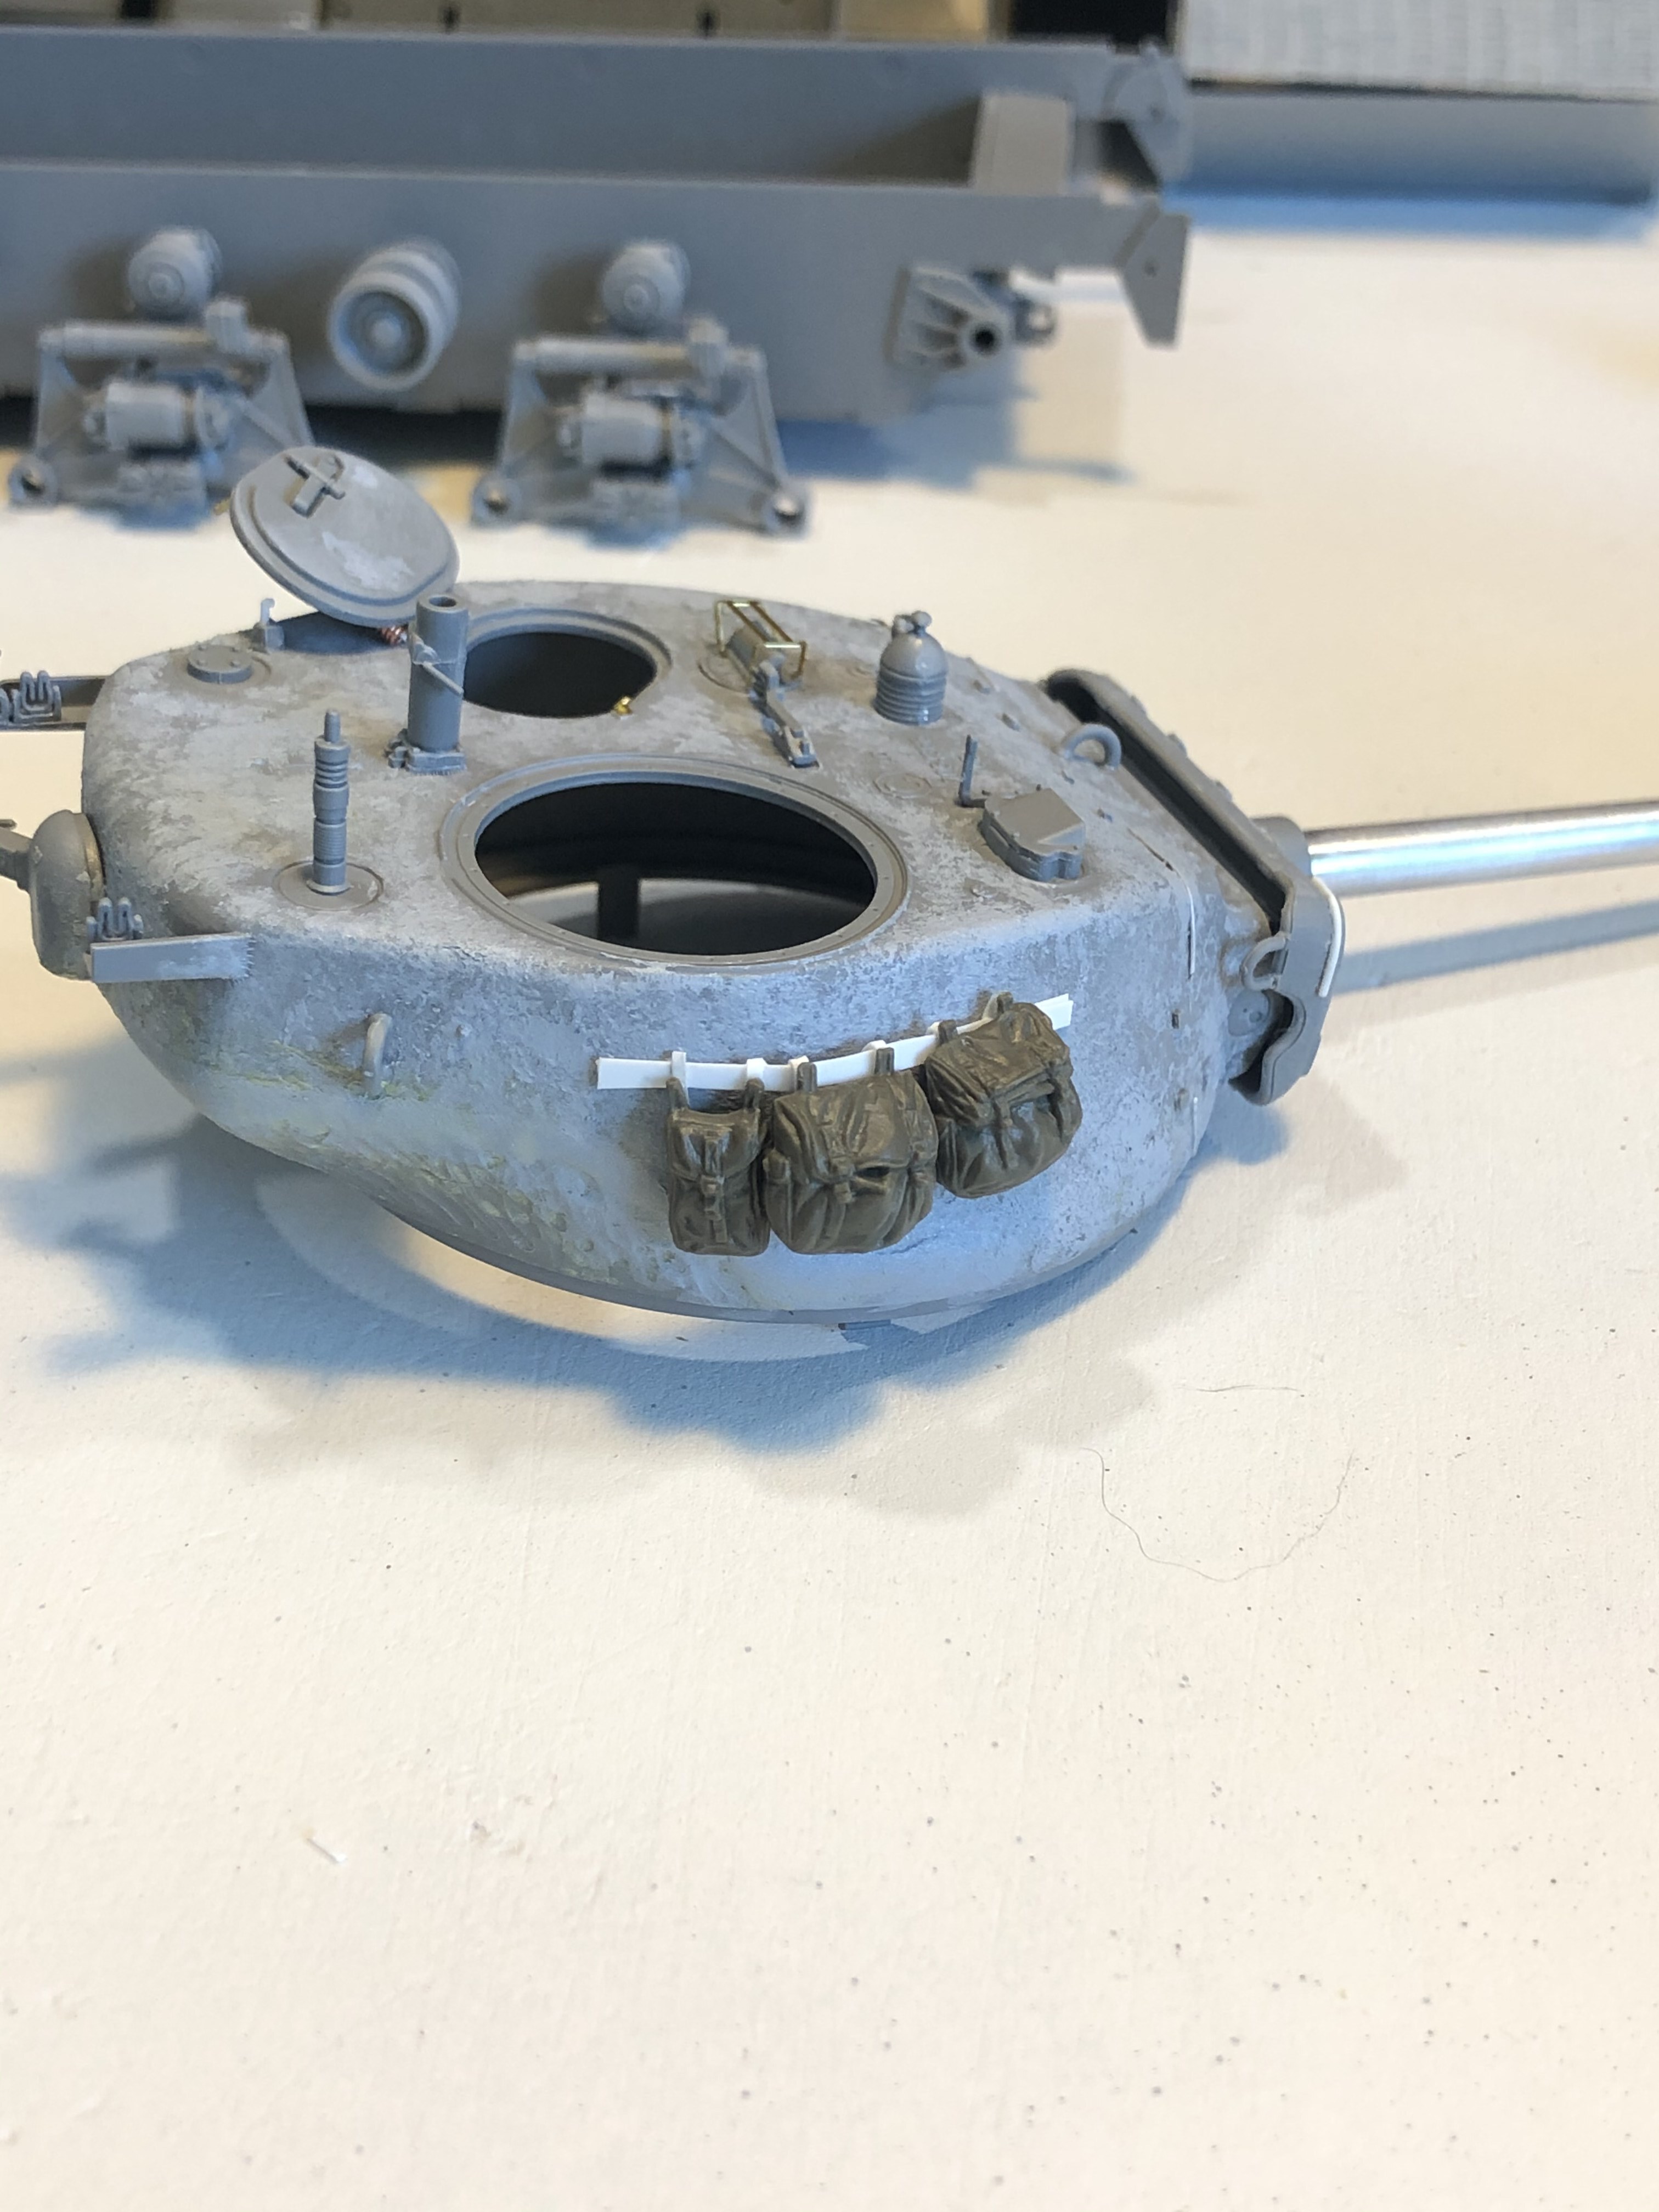
Another weekend at the bench! I’ve more or less wrapped the turret up. I finished the cupola and added some stowage. I also found out what the part was, it’s a spot light. If you look closely on my source image of the river crossing, you’ll see it. So i decided to add it back on as it was likely not missing from late war tanks. You’ll also notice that I used some PE for the Royal Models “chain” set. In actuality, it is a PE pocket watch! I just flipped it over as it was about the perfect size for my smoke mortar cap. Lastly on the turret, I gave it a bit more thinned tamiya putty.
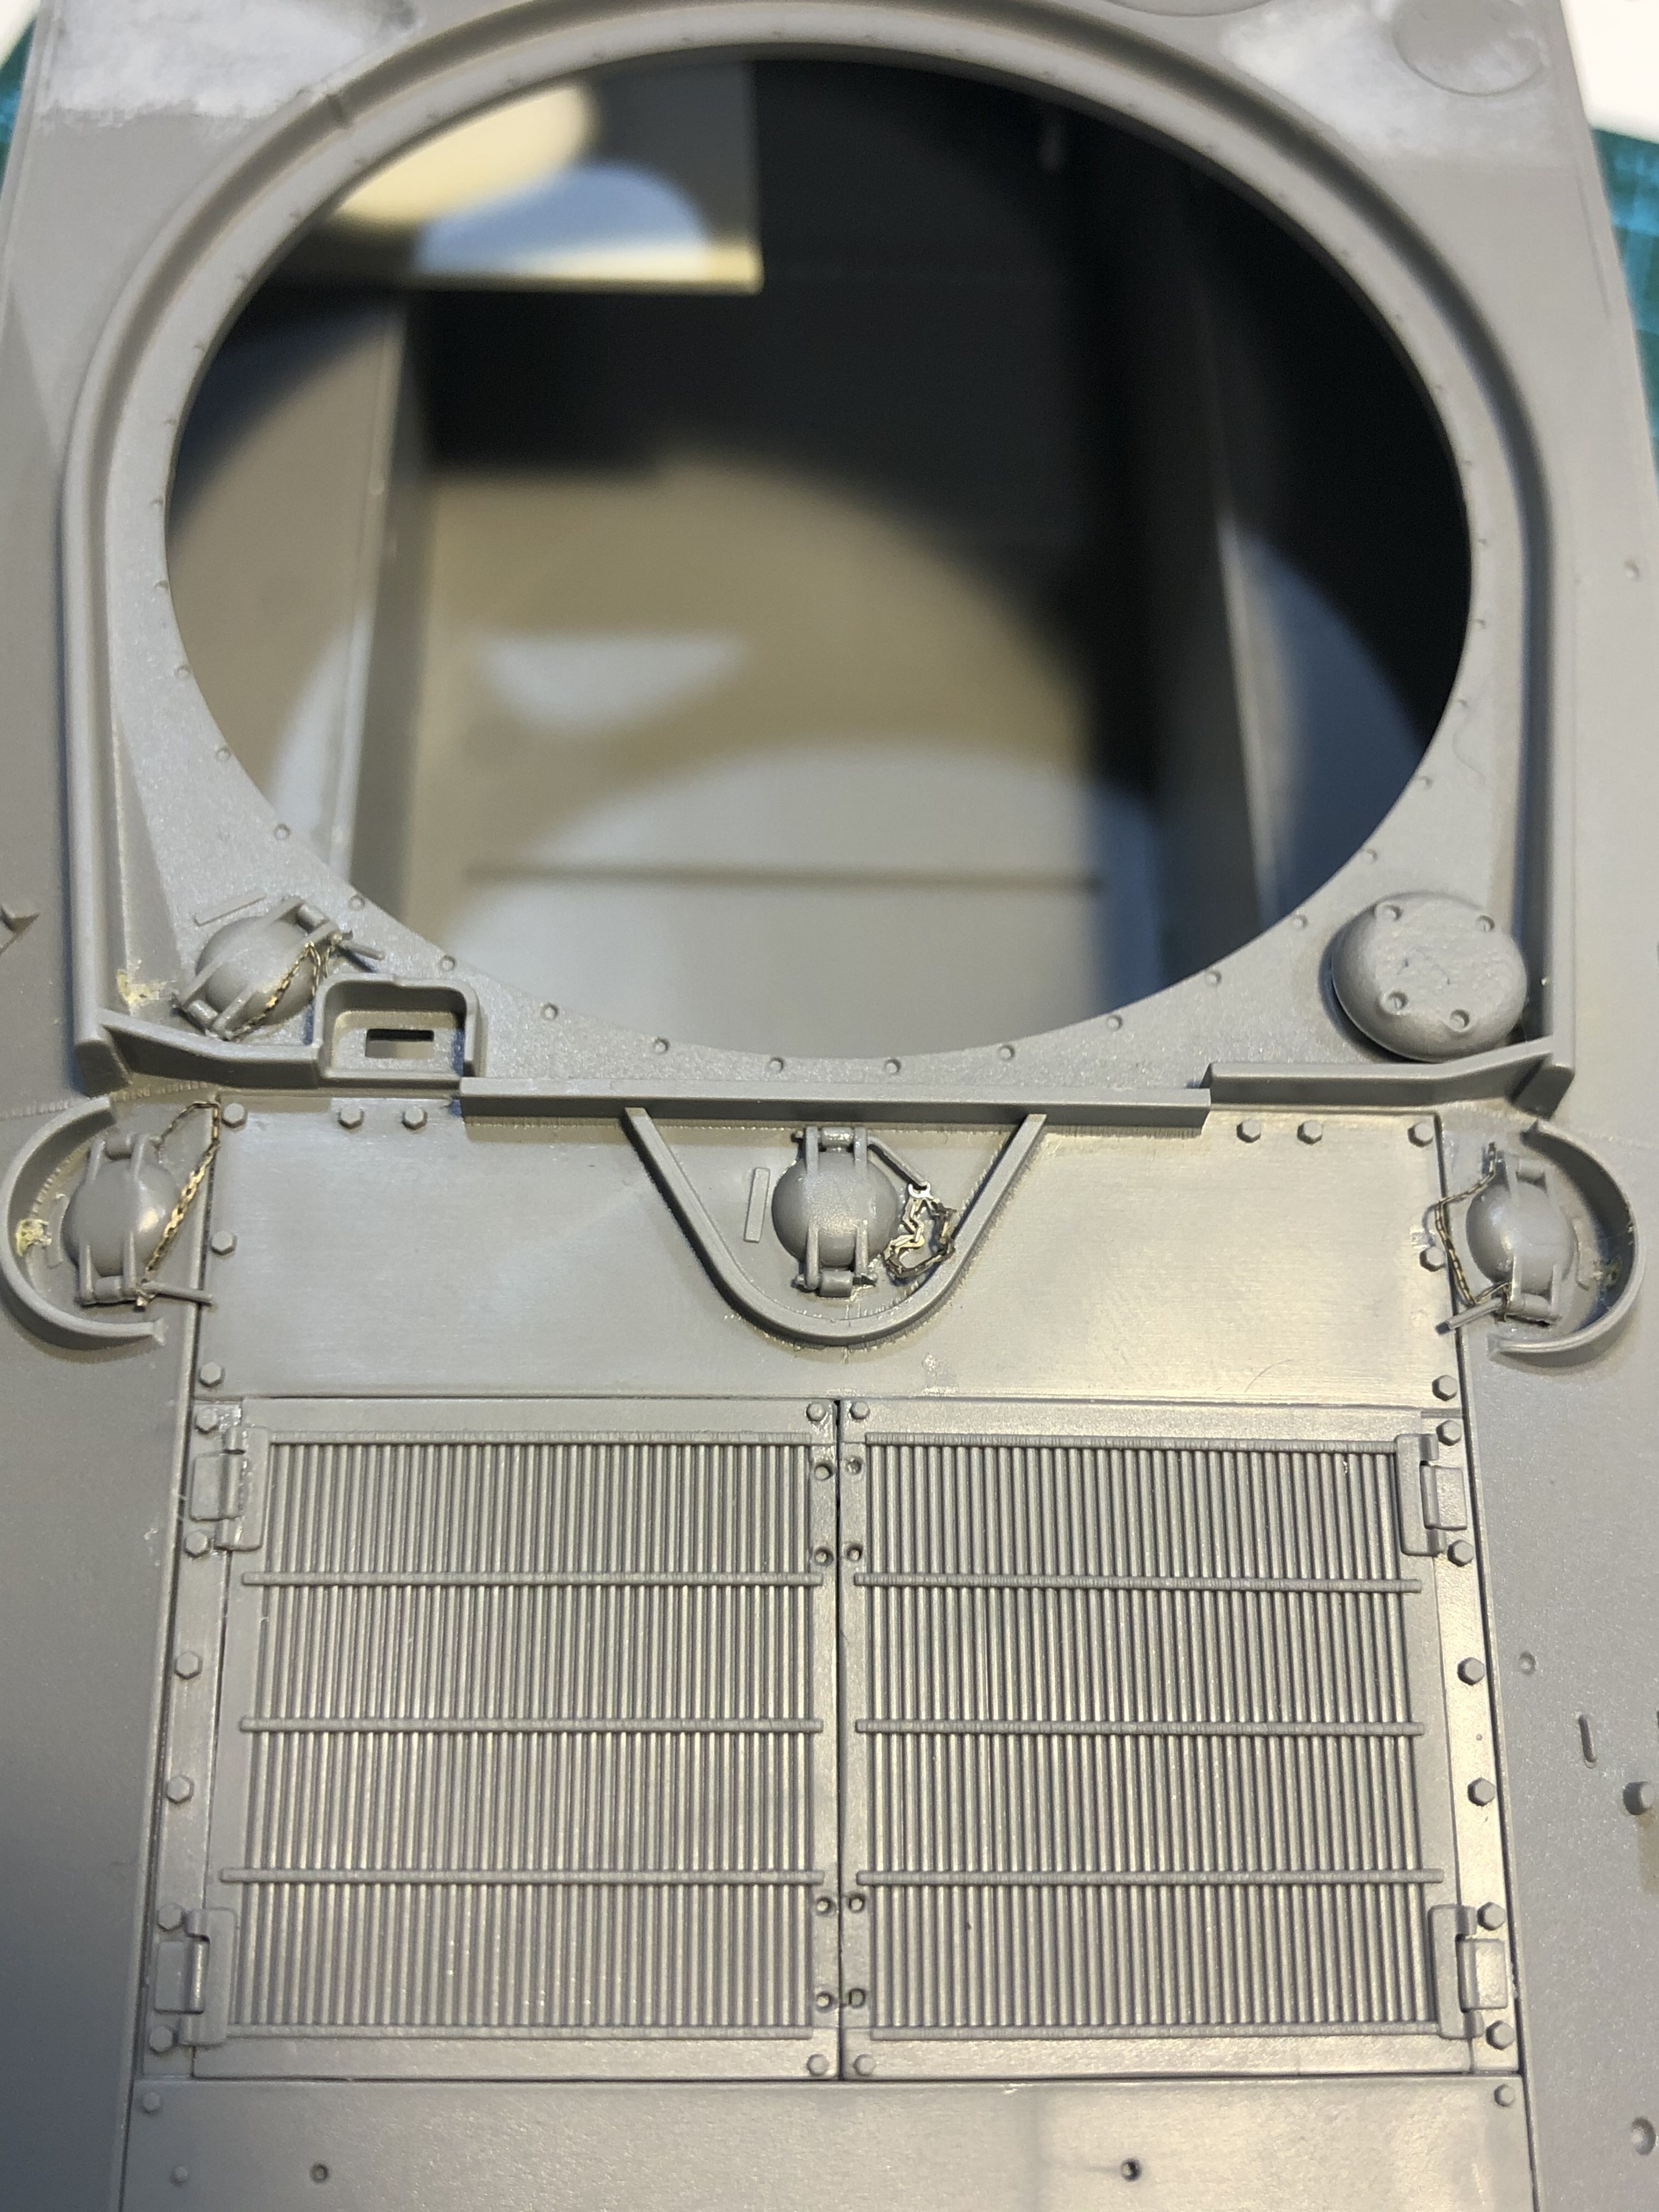
Through the building process I decided to keep the bow gunner closed up and his periscope installed. The driver on the other hand, has his periscope uninstalled.
Side note: I gave this old desk a sanding and repainted it. I now have a kickass work desk!! (but not a kick ass chair )
@BoomBazookaJD Justin, I need to bring this to your attention before you notice it in the paint - if you look closely at that first photo, there are several thumbprints in the putty on the side of the turret. Catch it now. You’re doing an excellent build here!
Nice work station! But that’s not even a chair! You must have a great back.
yes! thank you for mentioning that Toms! I went back after taking those photos and sanded the finger prints down and covered them back up with putty. What happened was I used thin CA to glue the gun in place as the Aber barrel was too heavy and it keep drooping. In the process the thin glue ran EVERYWHERE and for a moment i was glued to the turret.
It’s amazing how thin that stuff really is! I noticed those fingerprints after taking the photos but didn’t go back and take new ones after the corrections were made!
Thanks Toms!! P.S. I do not have a great back lol too many ruck marches and too many “tailgate jumps”. Indeed as Dan mentioned, a new chair is on order!
You might give a third dimension to the PE periscope guards by “painting” them with slightly diluted white glue that you’ve dyed with water color.
Peter
Small update for y’all. I’m going to be tied up with training for the next two weeks so progress will be decidedly slower.
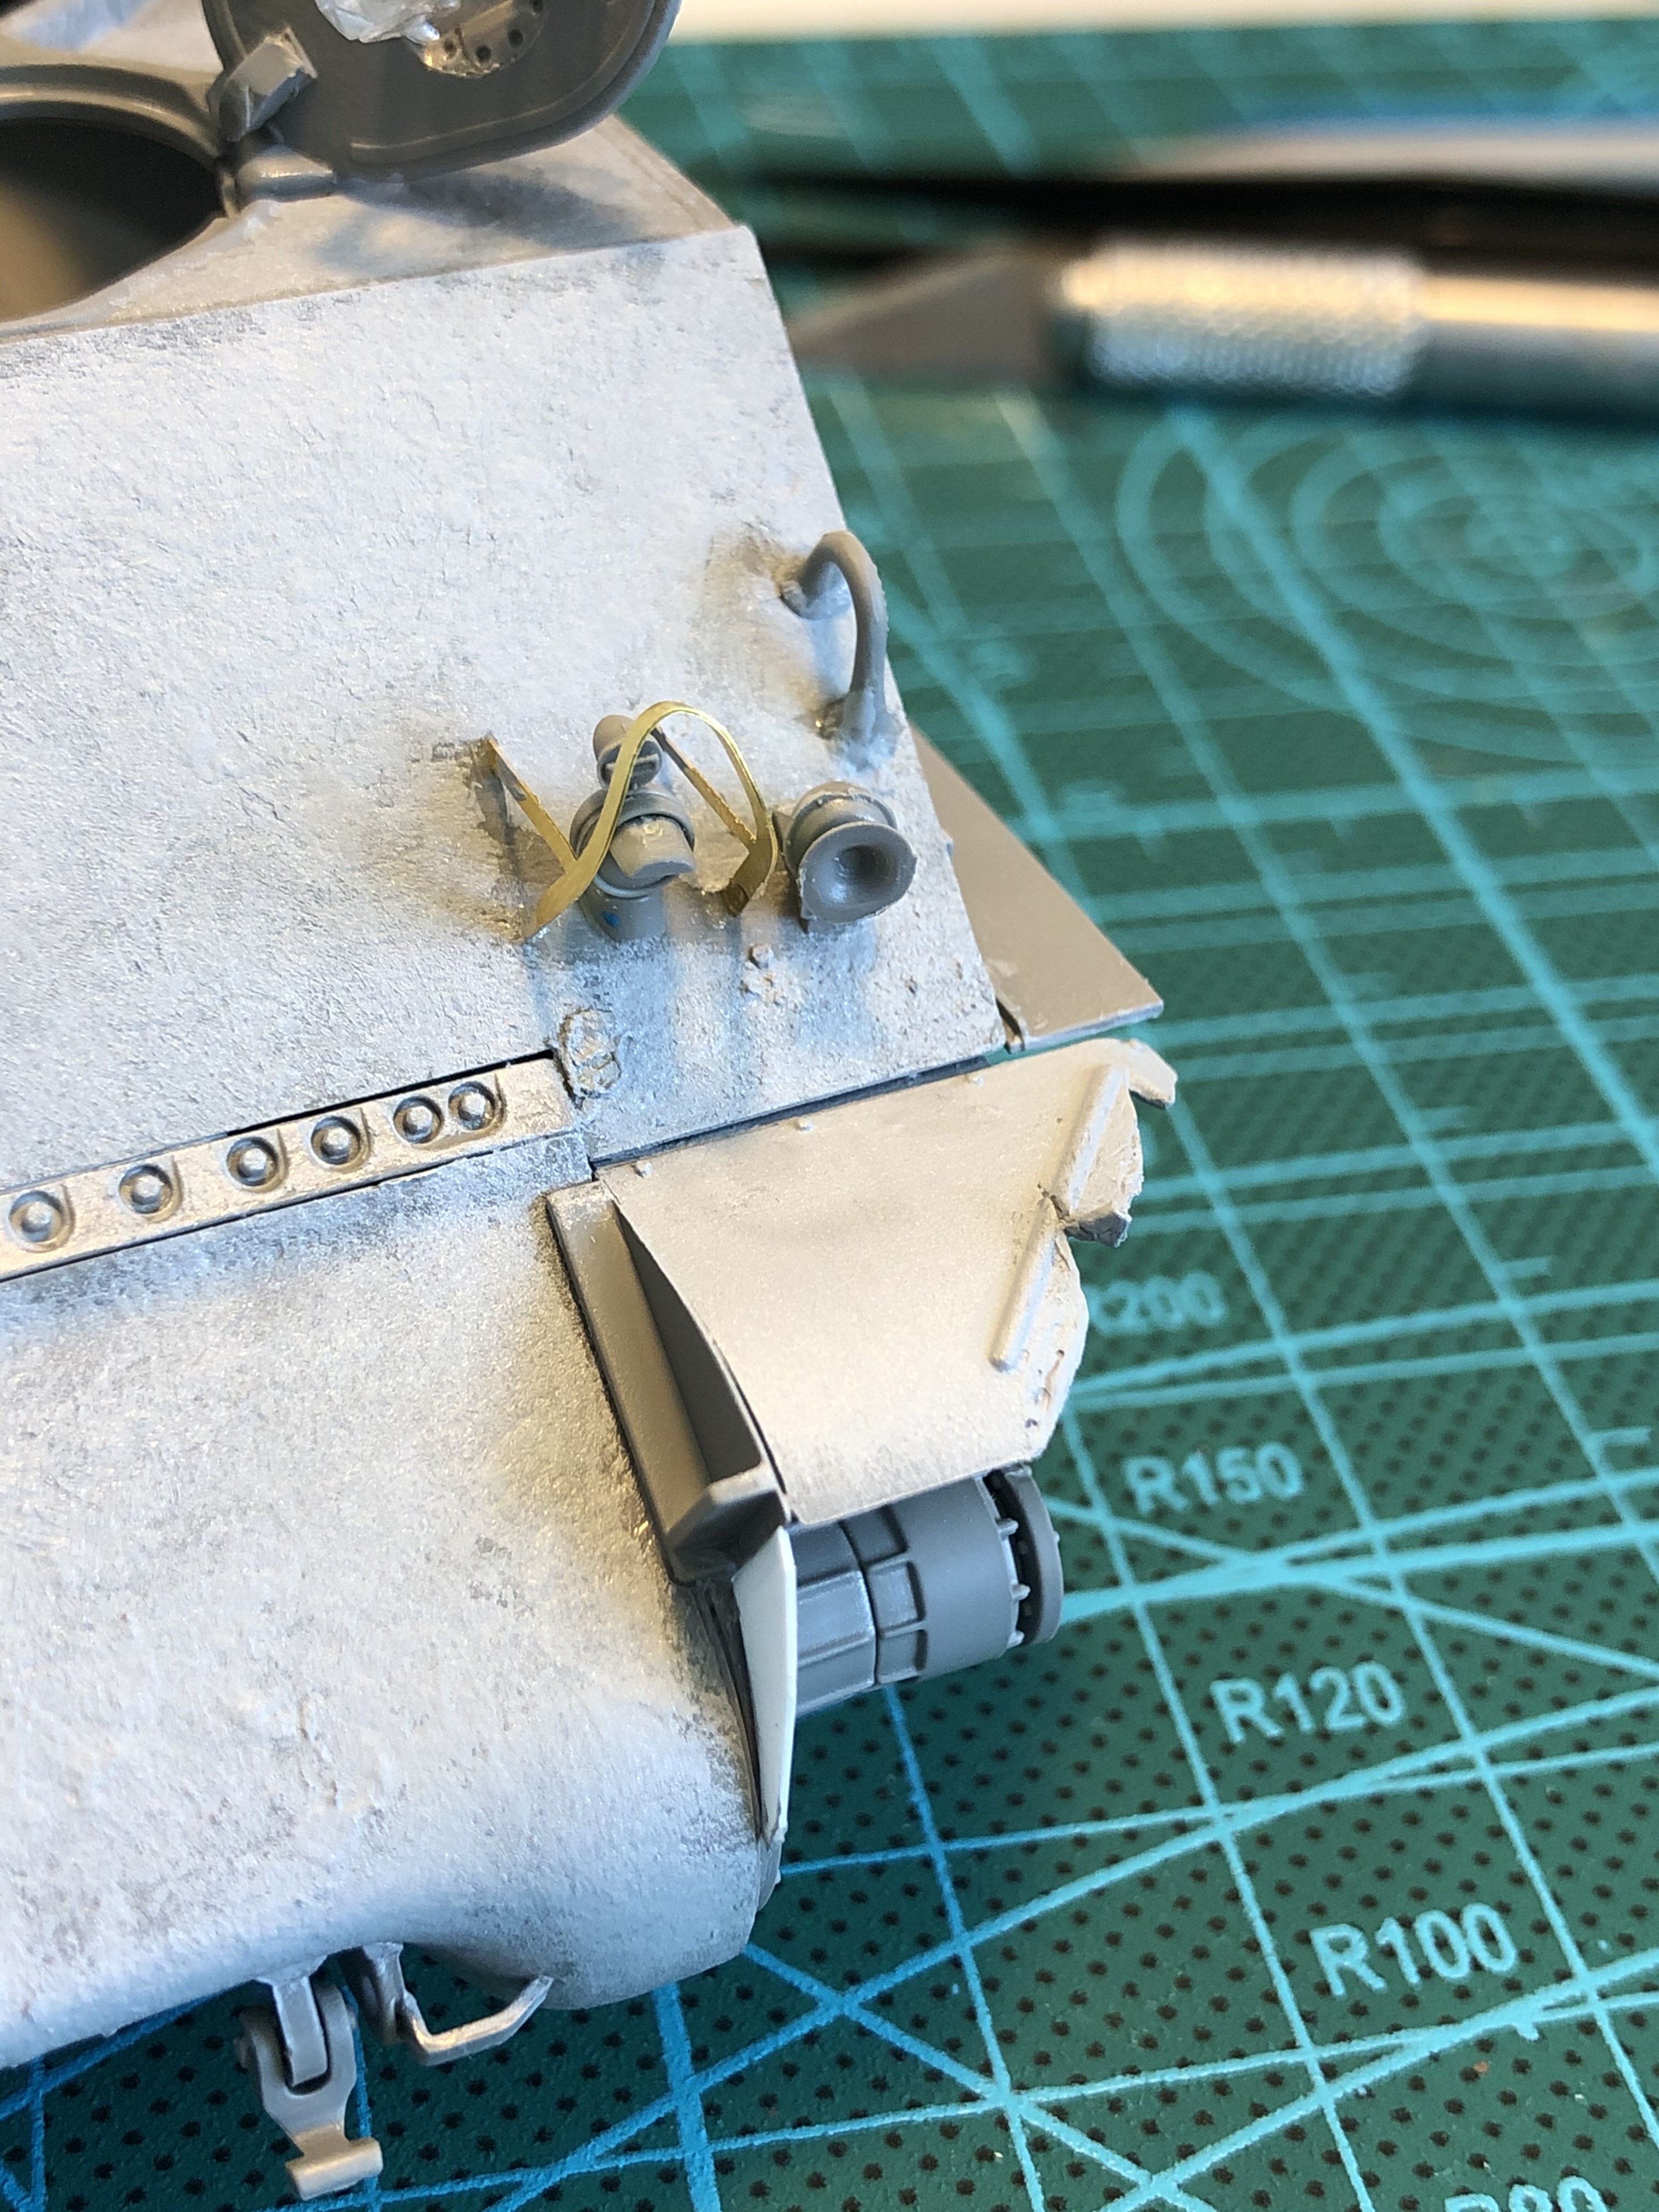
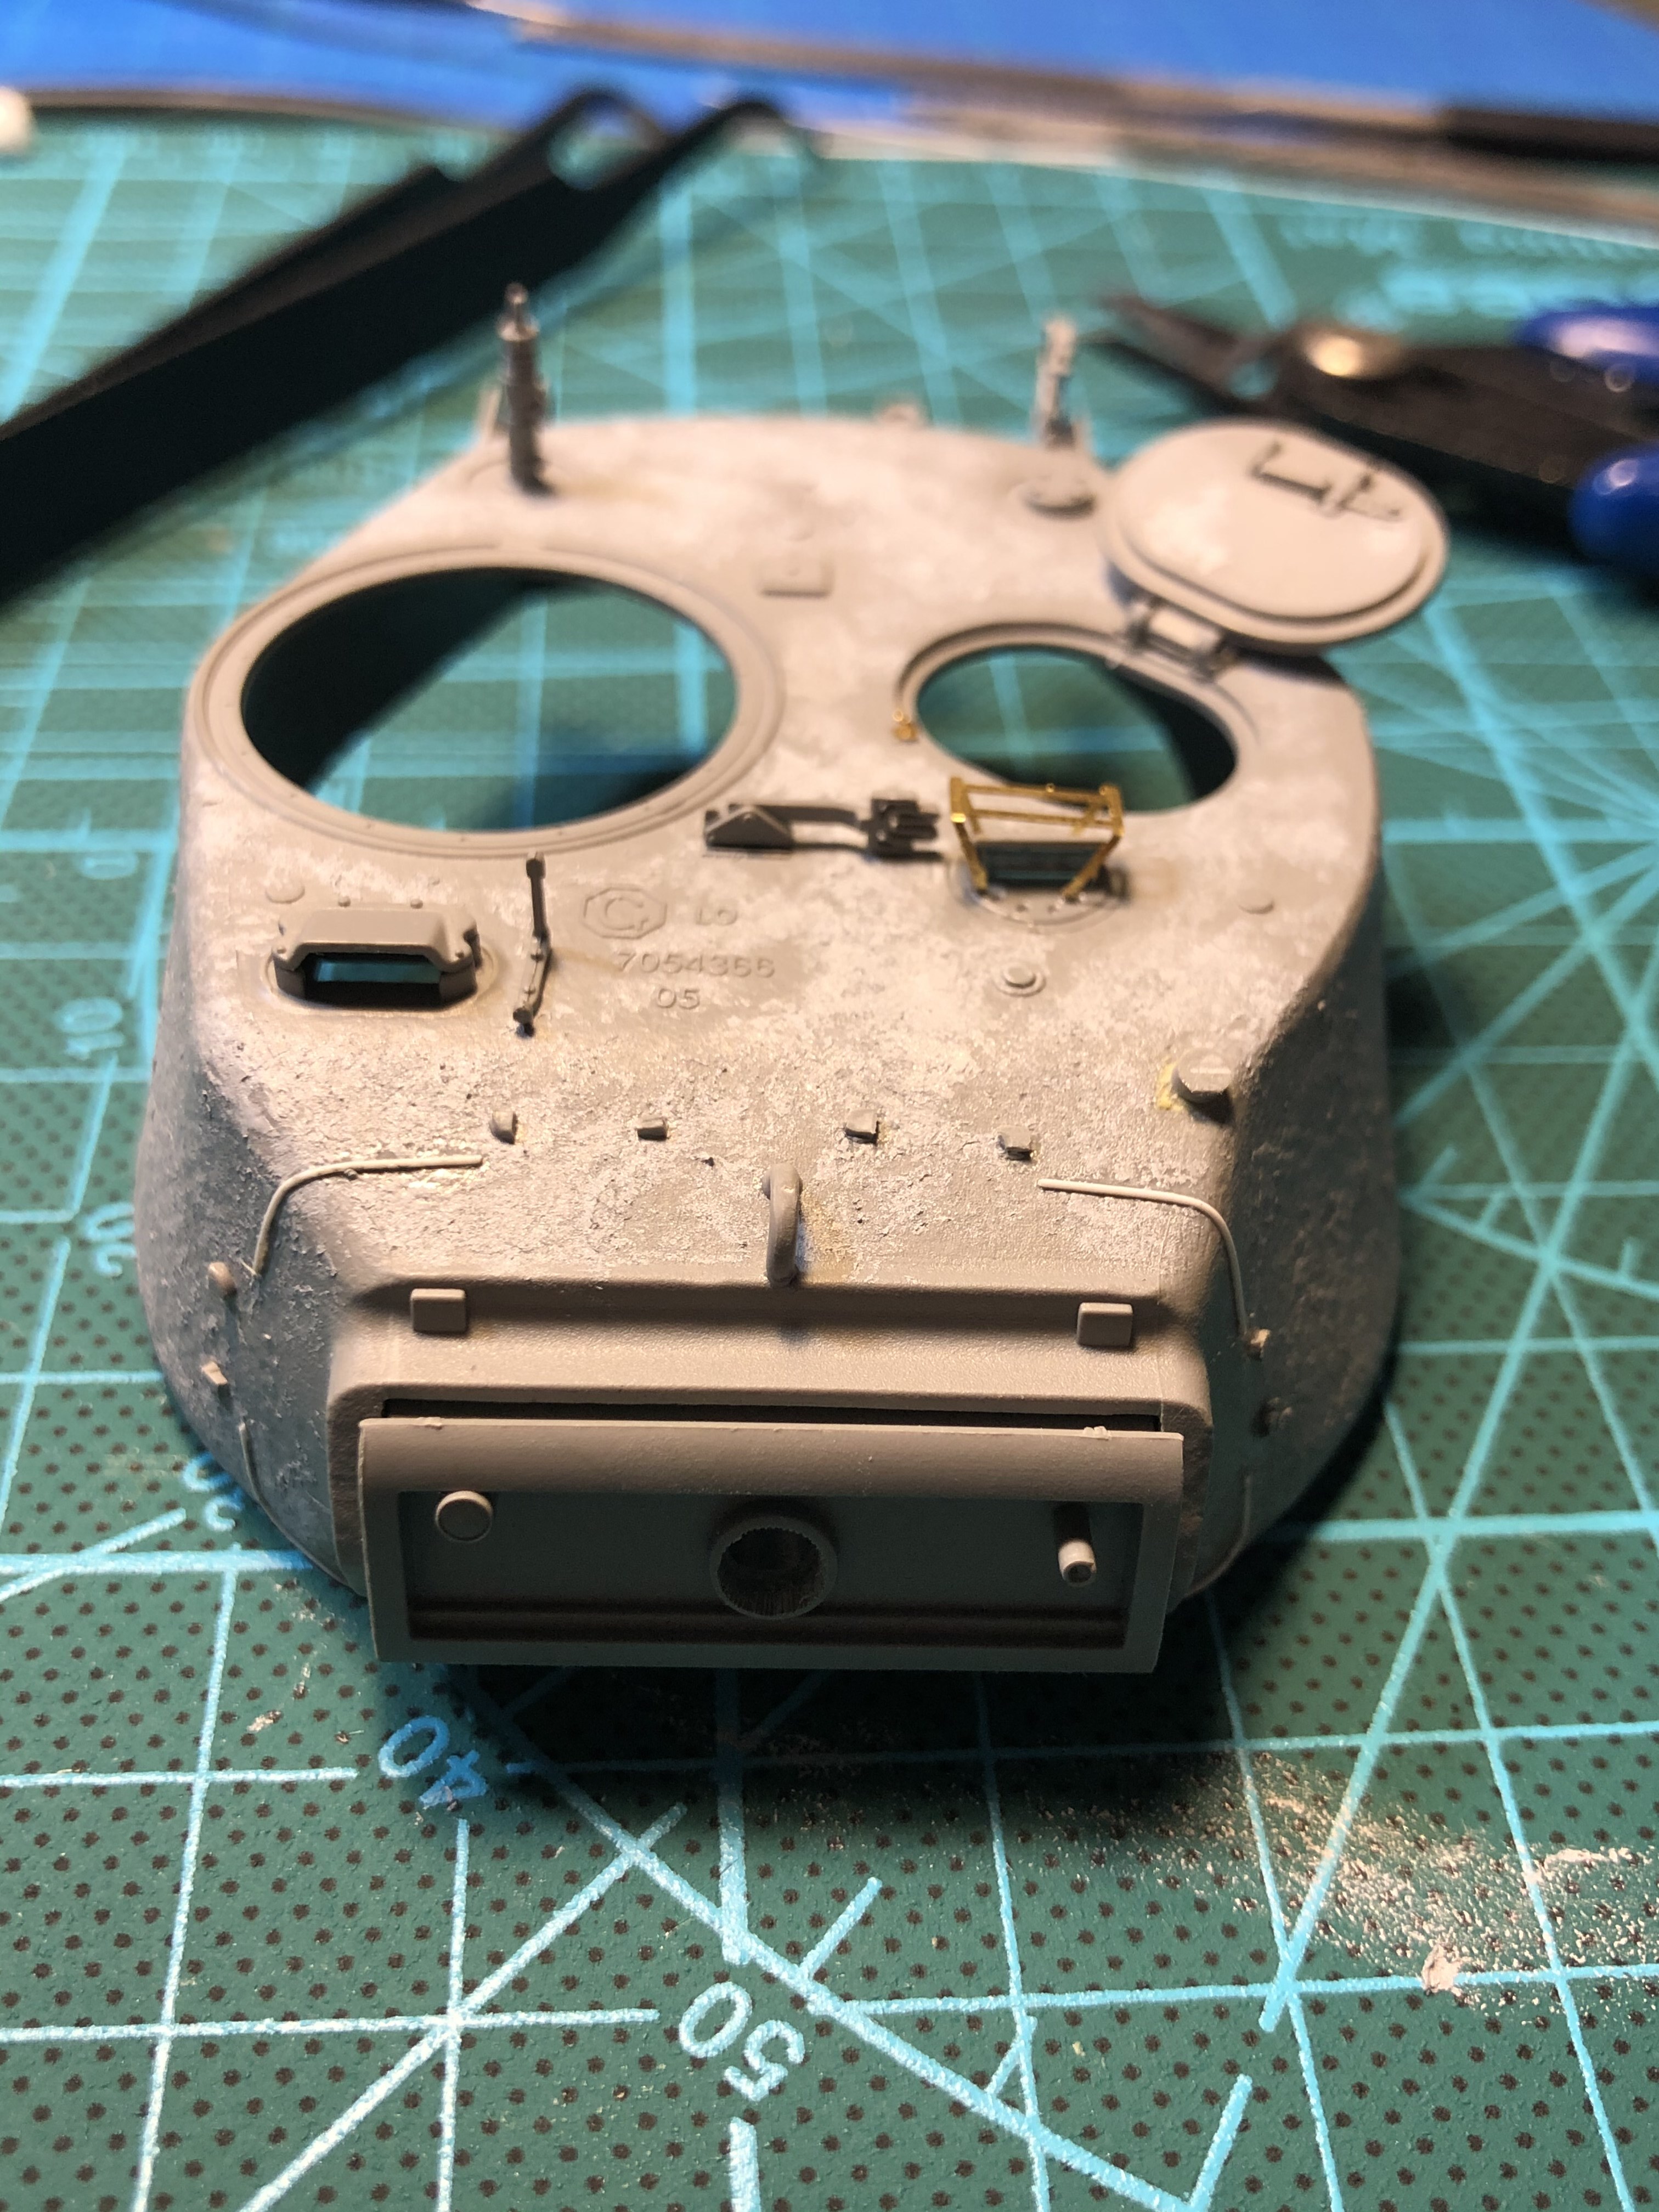
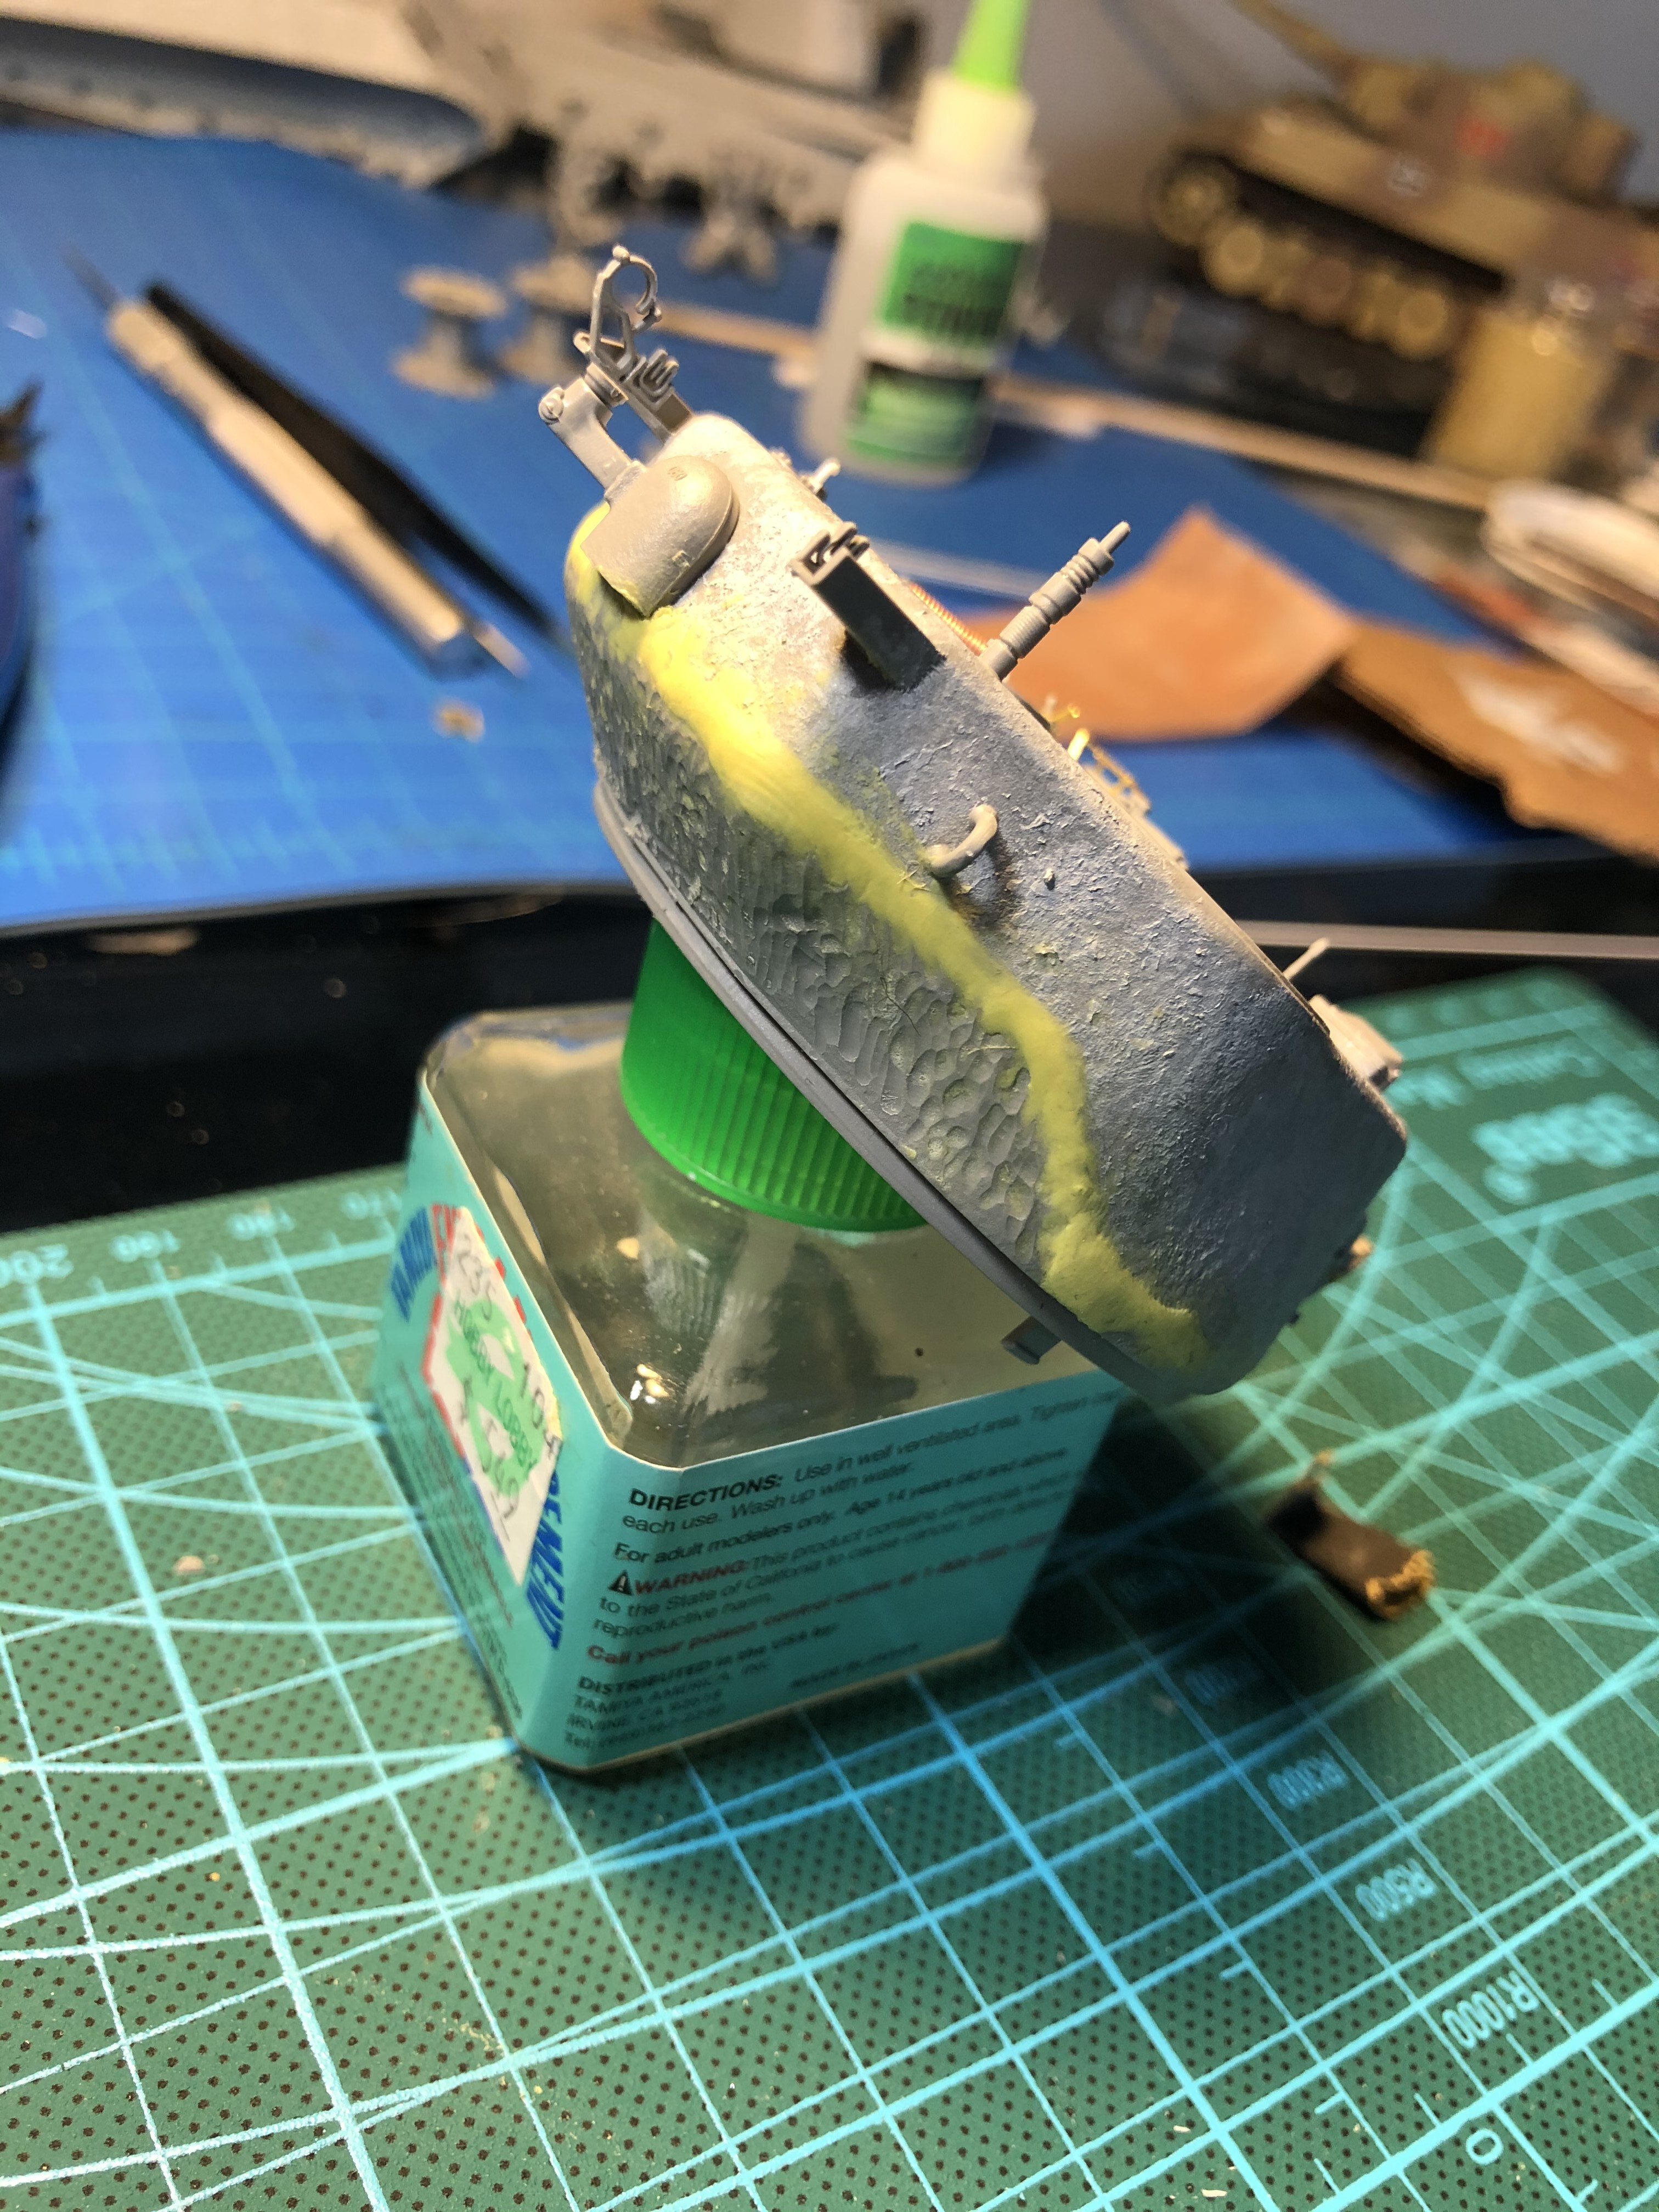
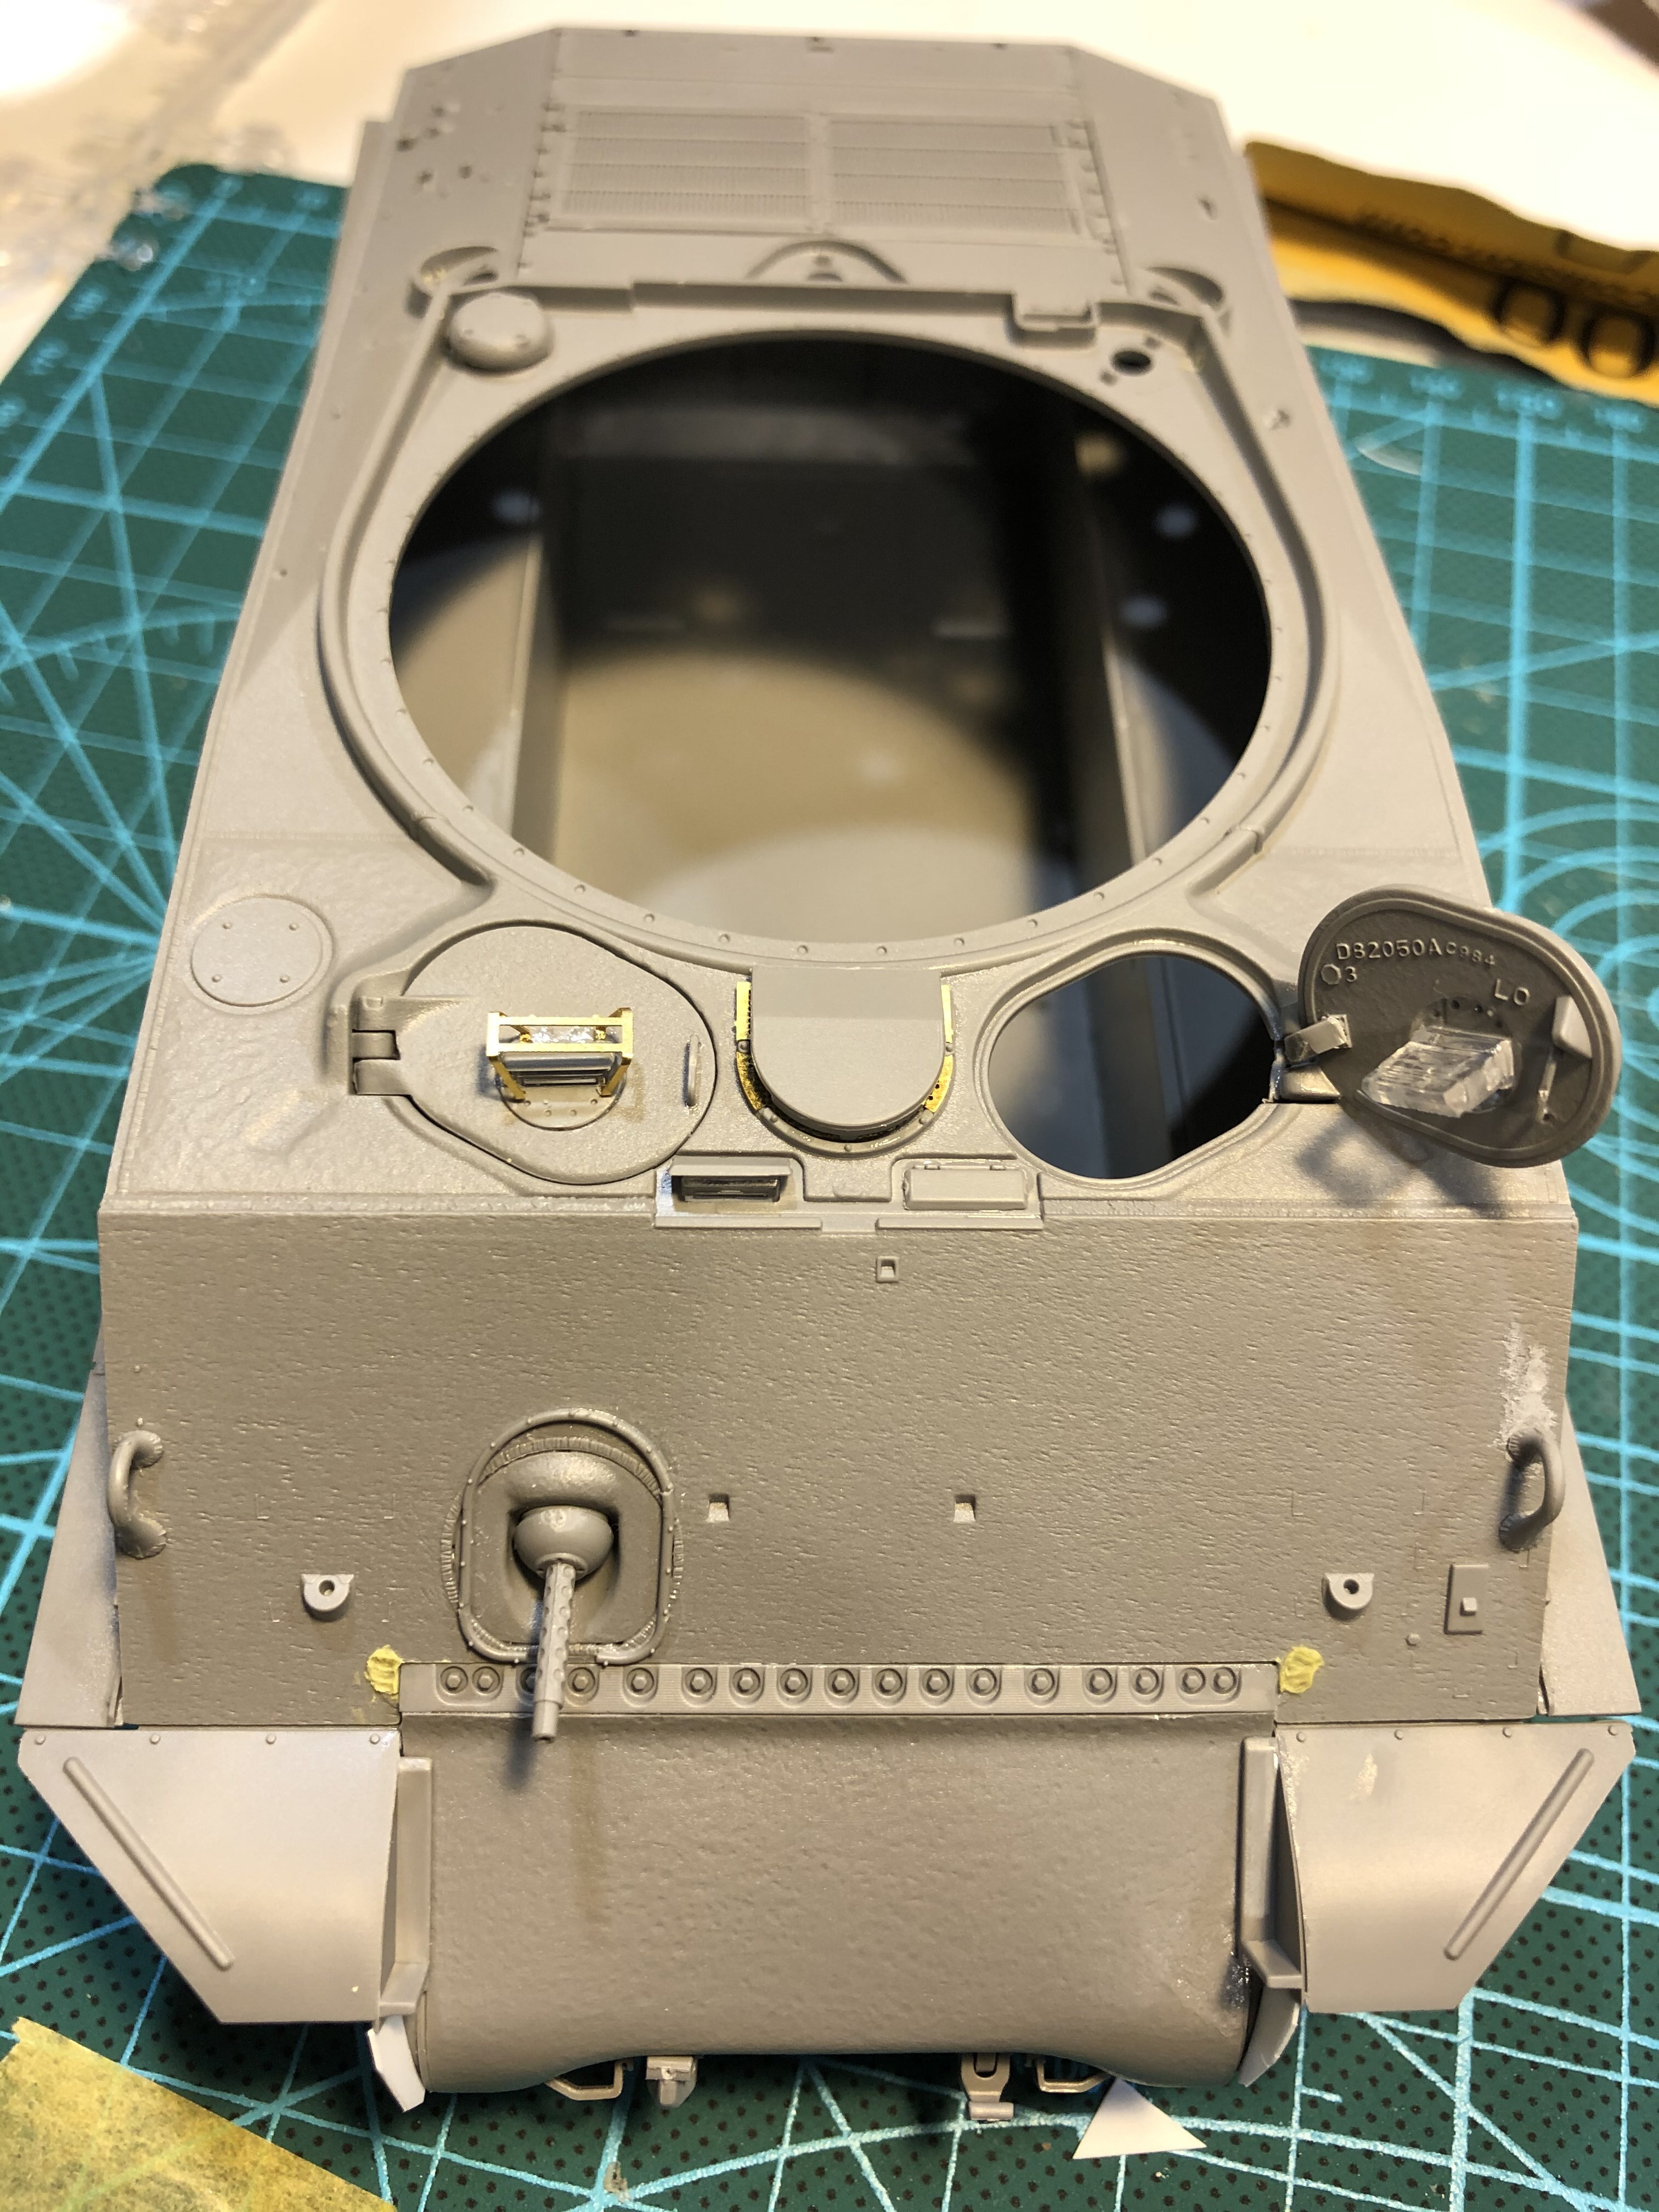
I’ve assembled the various items on the glacis. I still need to decide if I am indeed going to install the mirrors. I believe I am only going to install the bow gunners side mirror as I’ve decided to add some damage to the front left. The source image has a very well smashed horn and drivers side light with some fender damage. I’ve replicated a bit of that in the fender and the guard around the horn itself. I am not sure if I am going to leave the horn in place however and may remove it. I also gave a bit of texture to the glacis as I felt the model was lacking texture that would stand up to a coat of primer and paint.
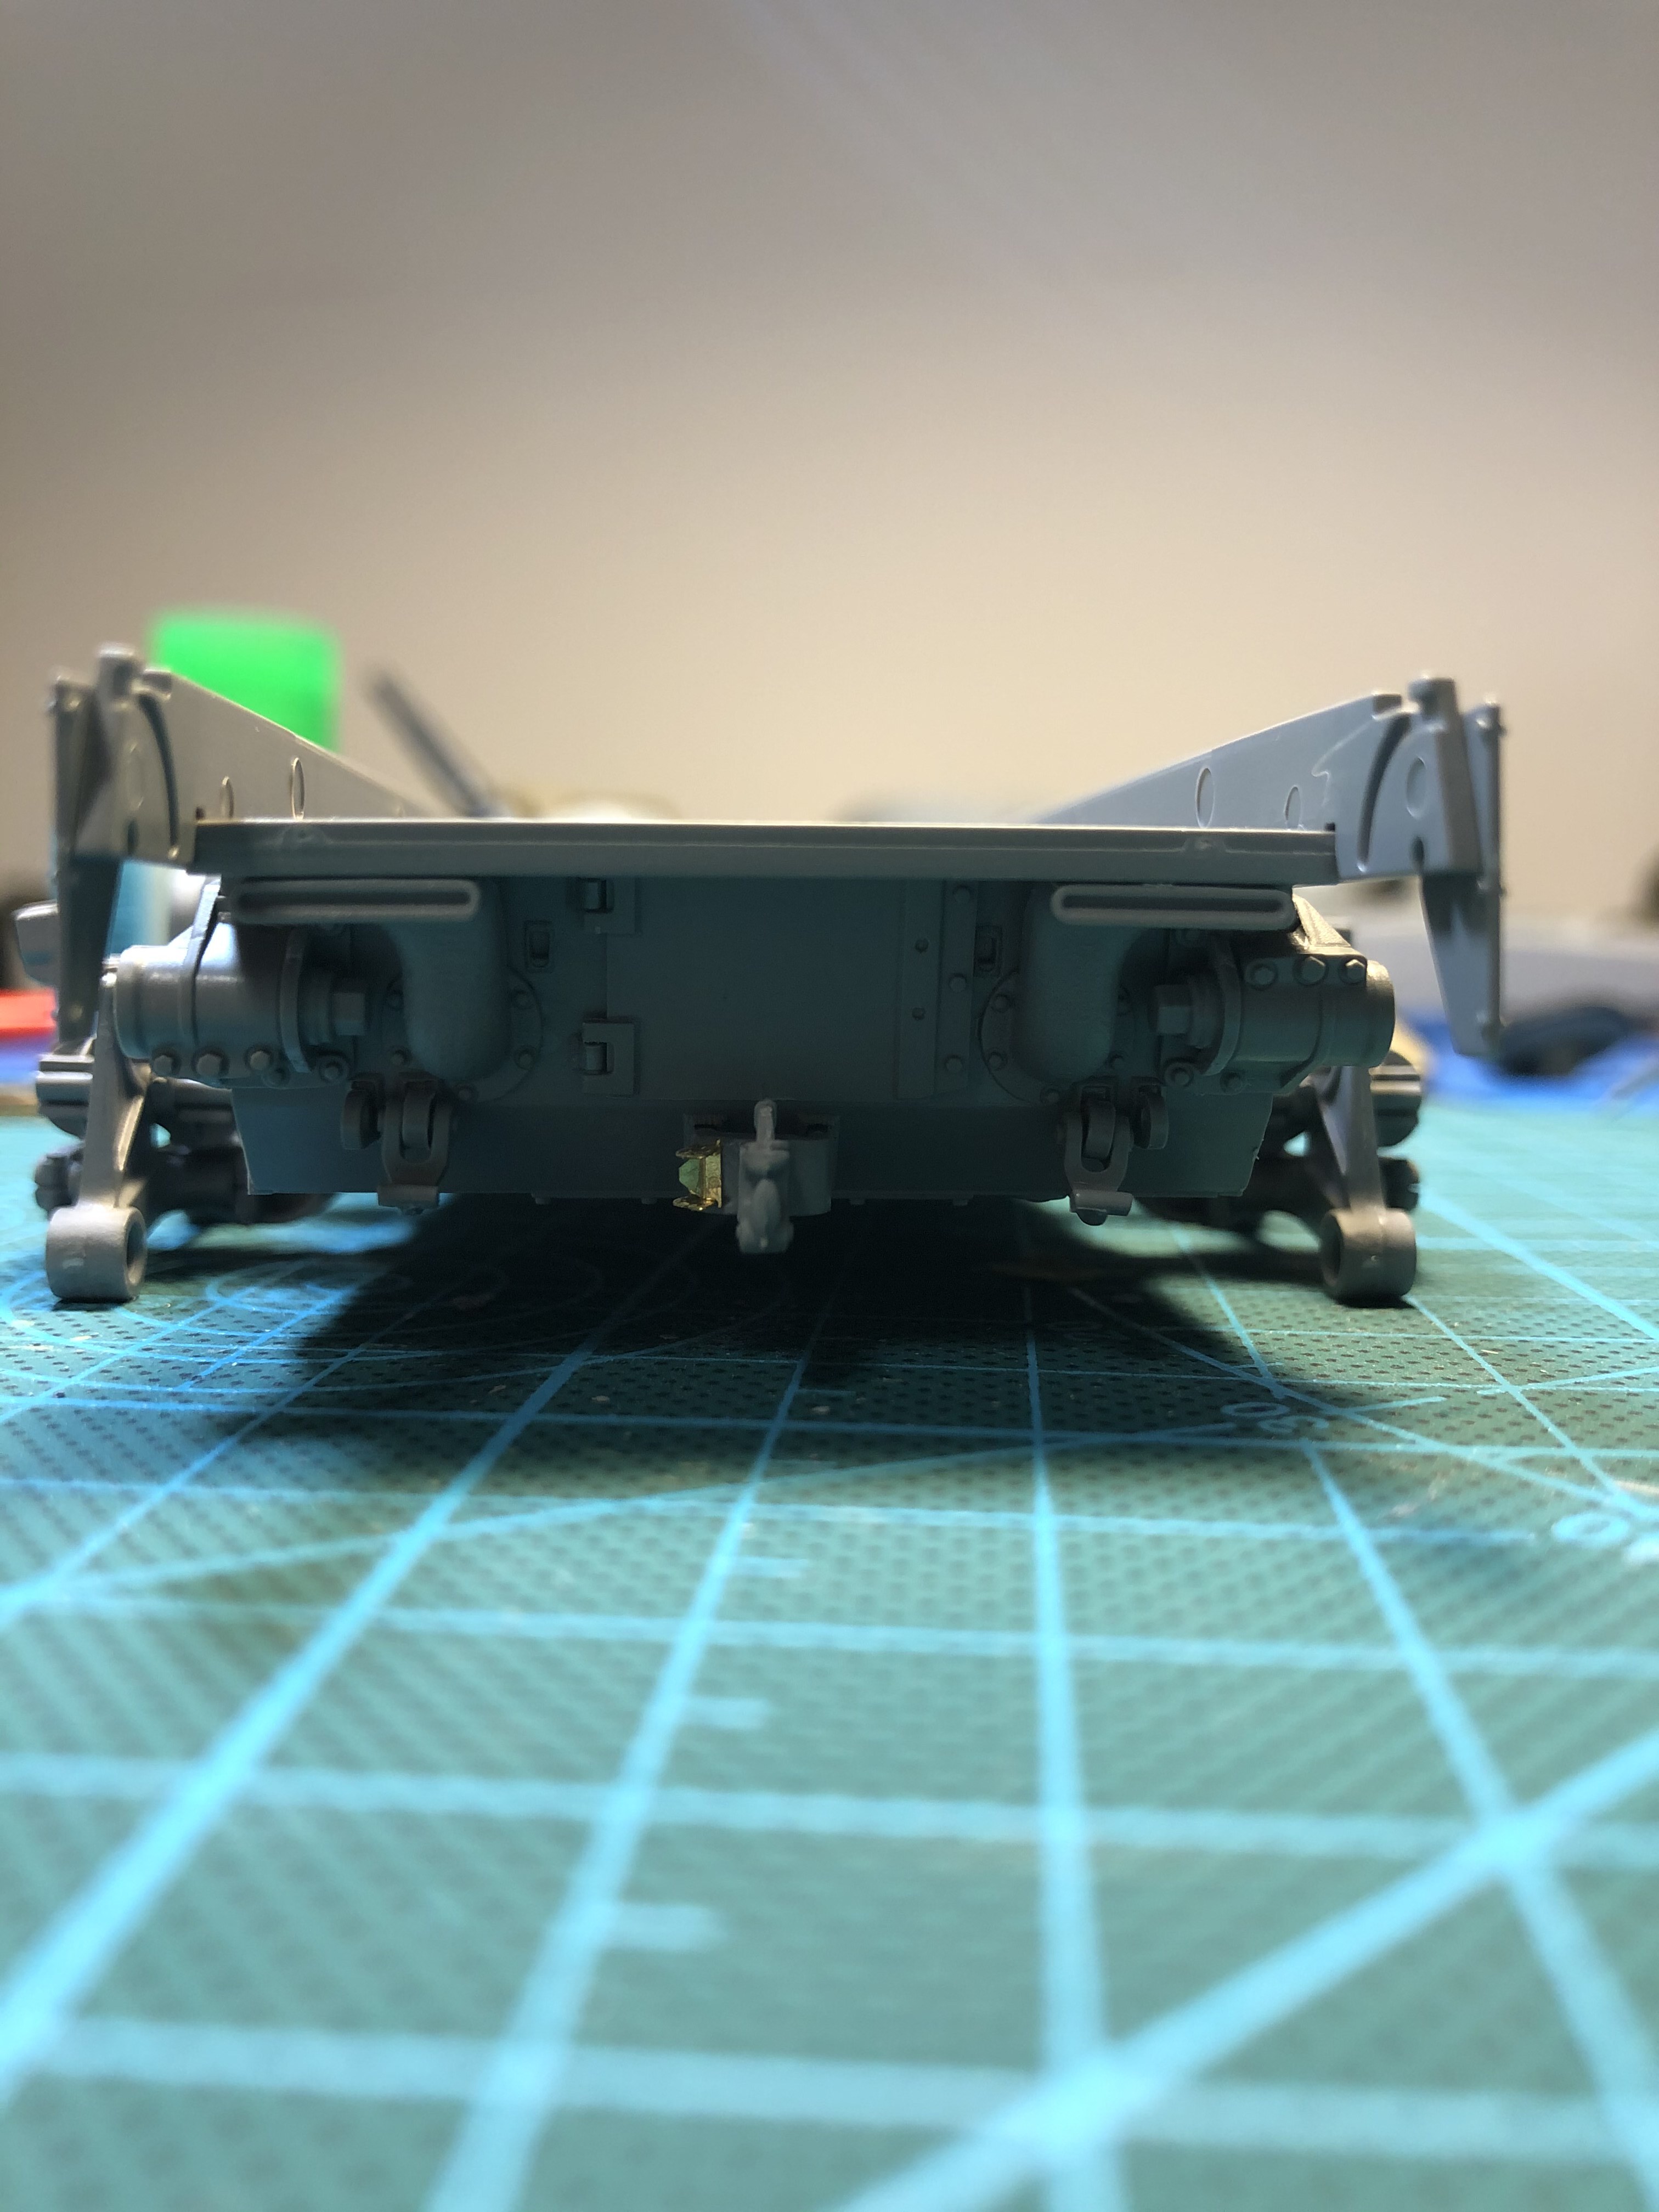
On the rear of the model the various caps were installed with retaining chains from Royal Model.


 )
)