M548 gun truck

Hello!

Three years ago I started a project that got “frozen“ in the end of 2024 - at these times I wasn’t a member here…

But now I’m trying to finish it, so I’ll try to gradually write about it’s beginning, and hopefully have it up to date soon.

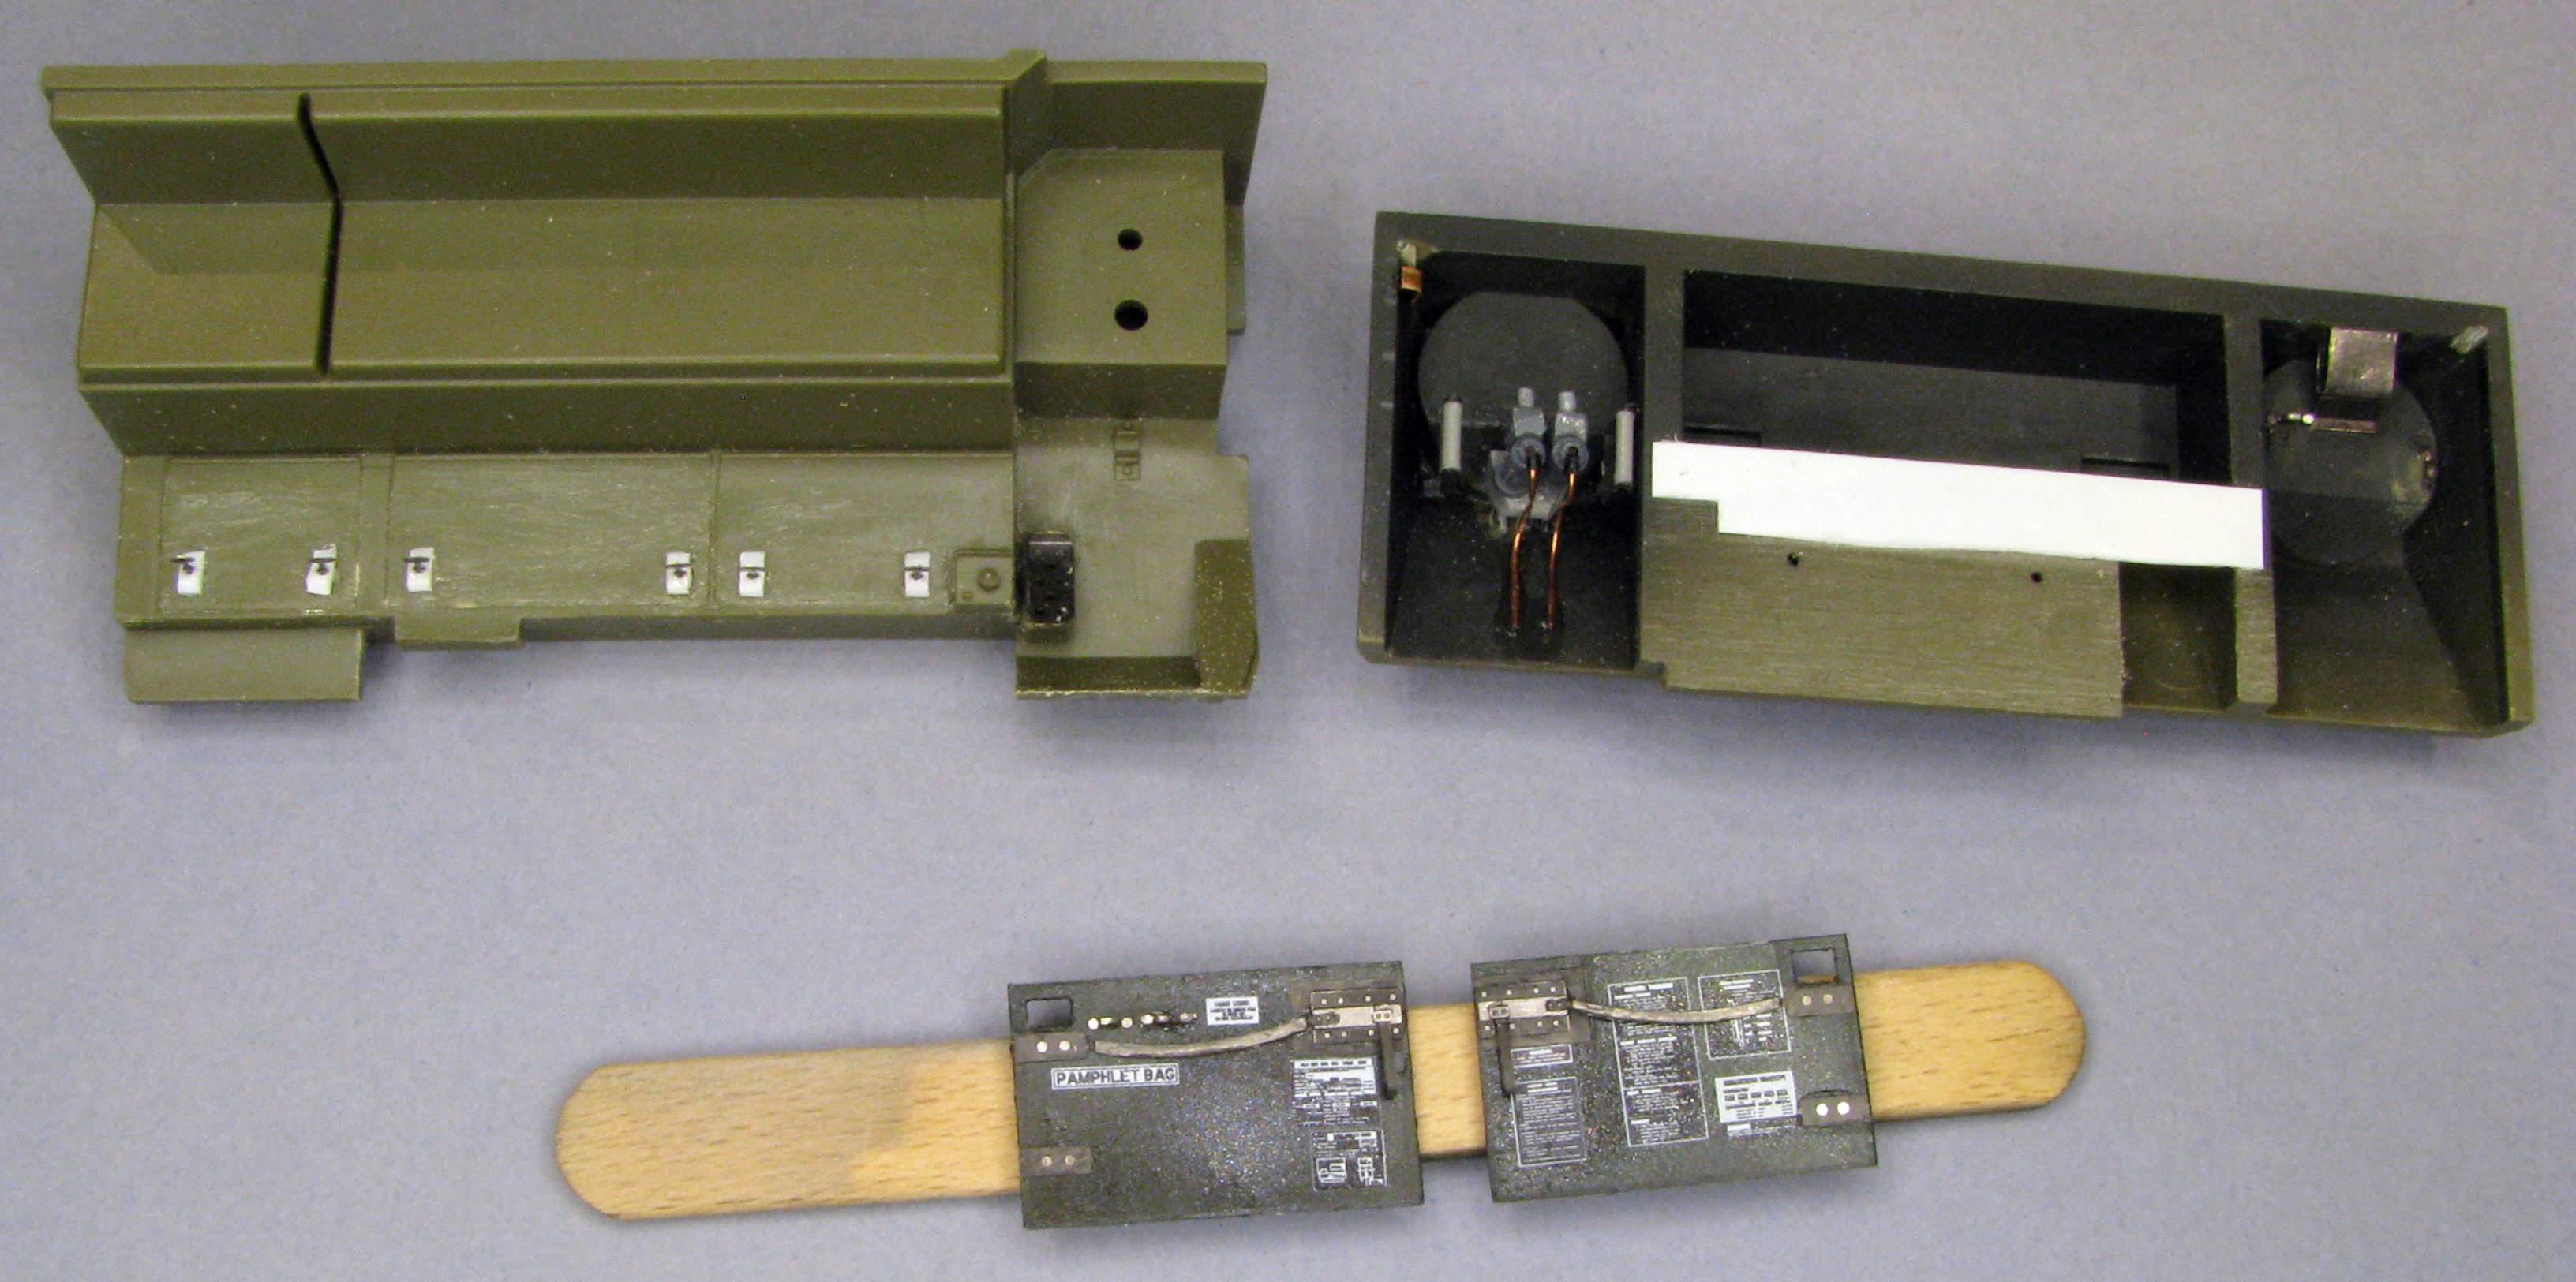
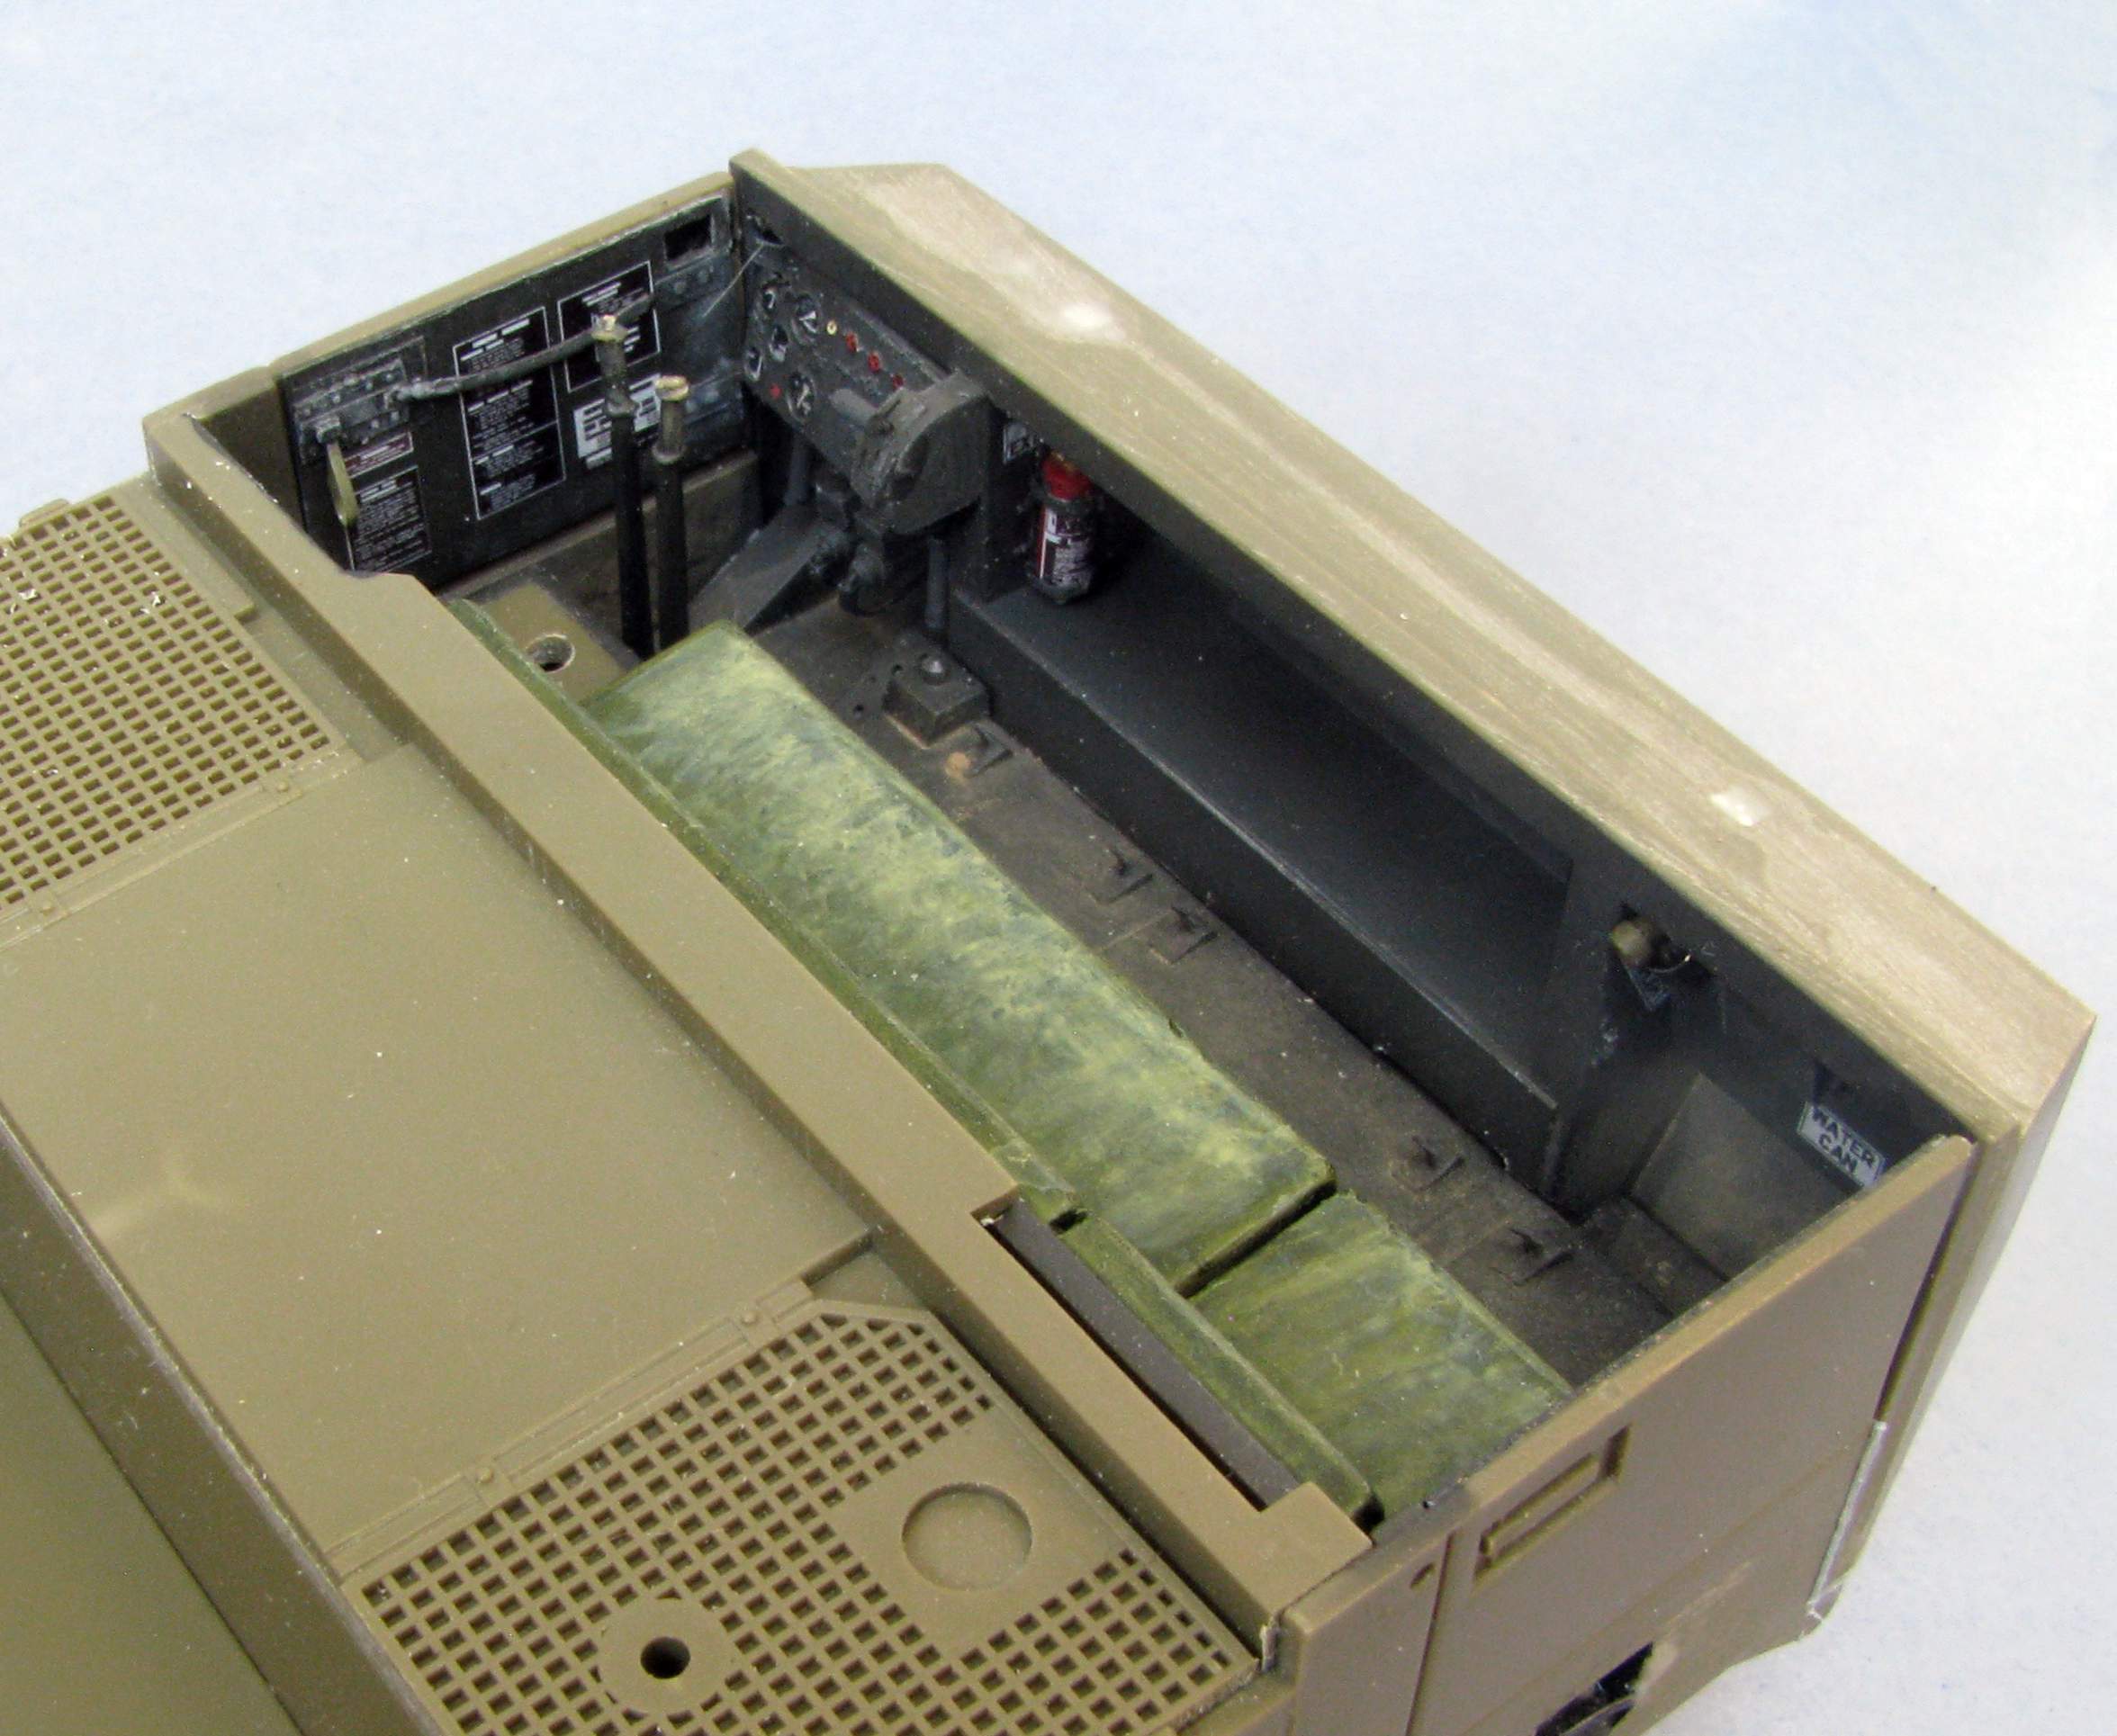
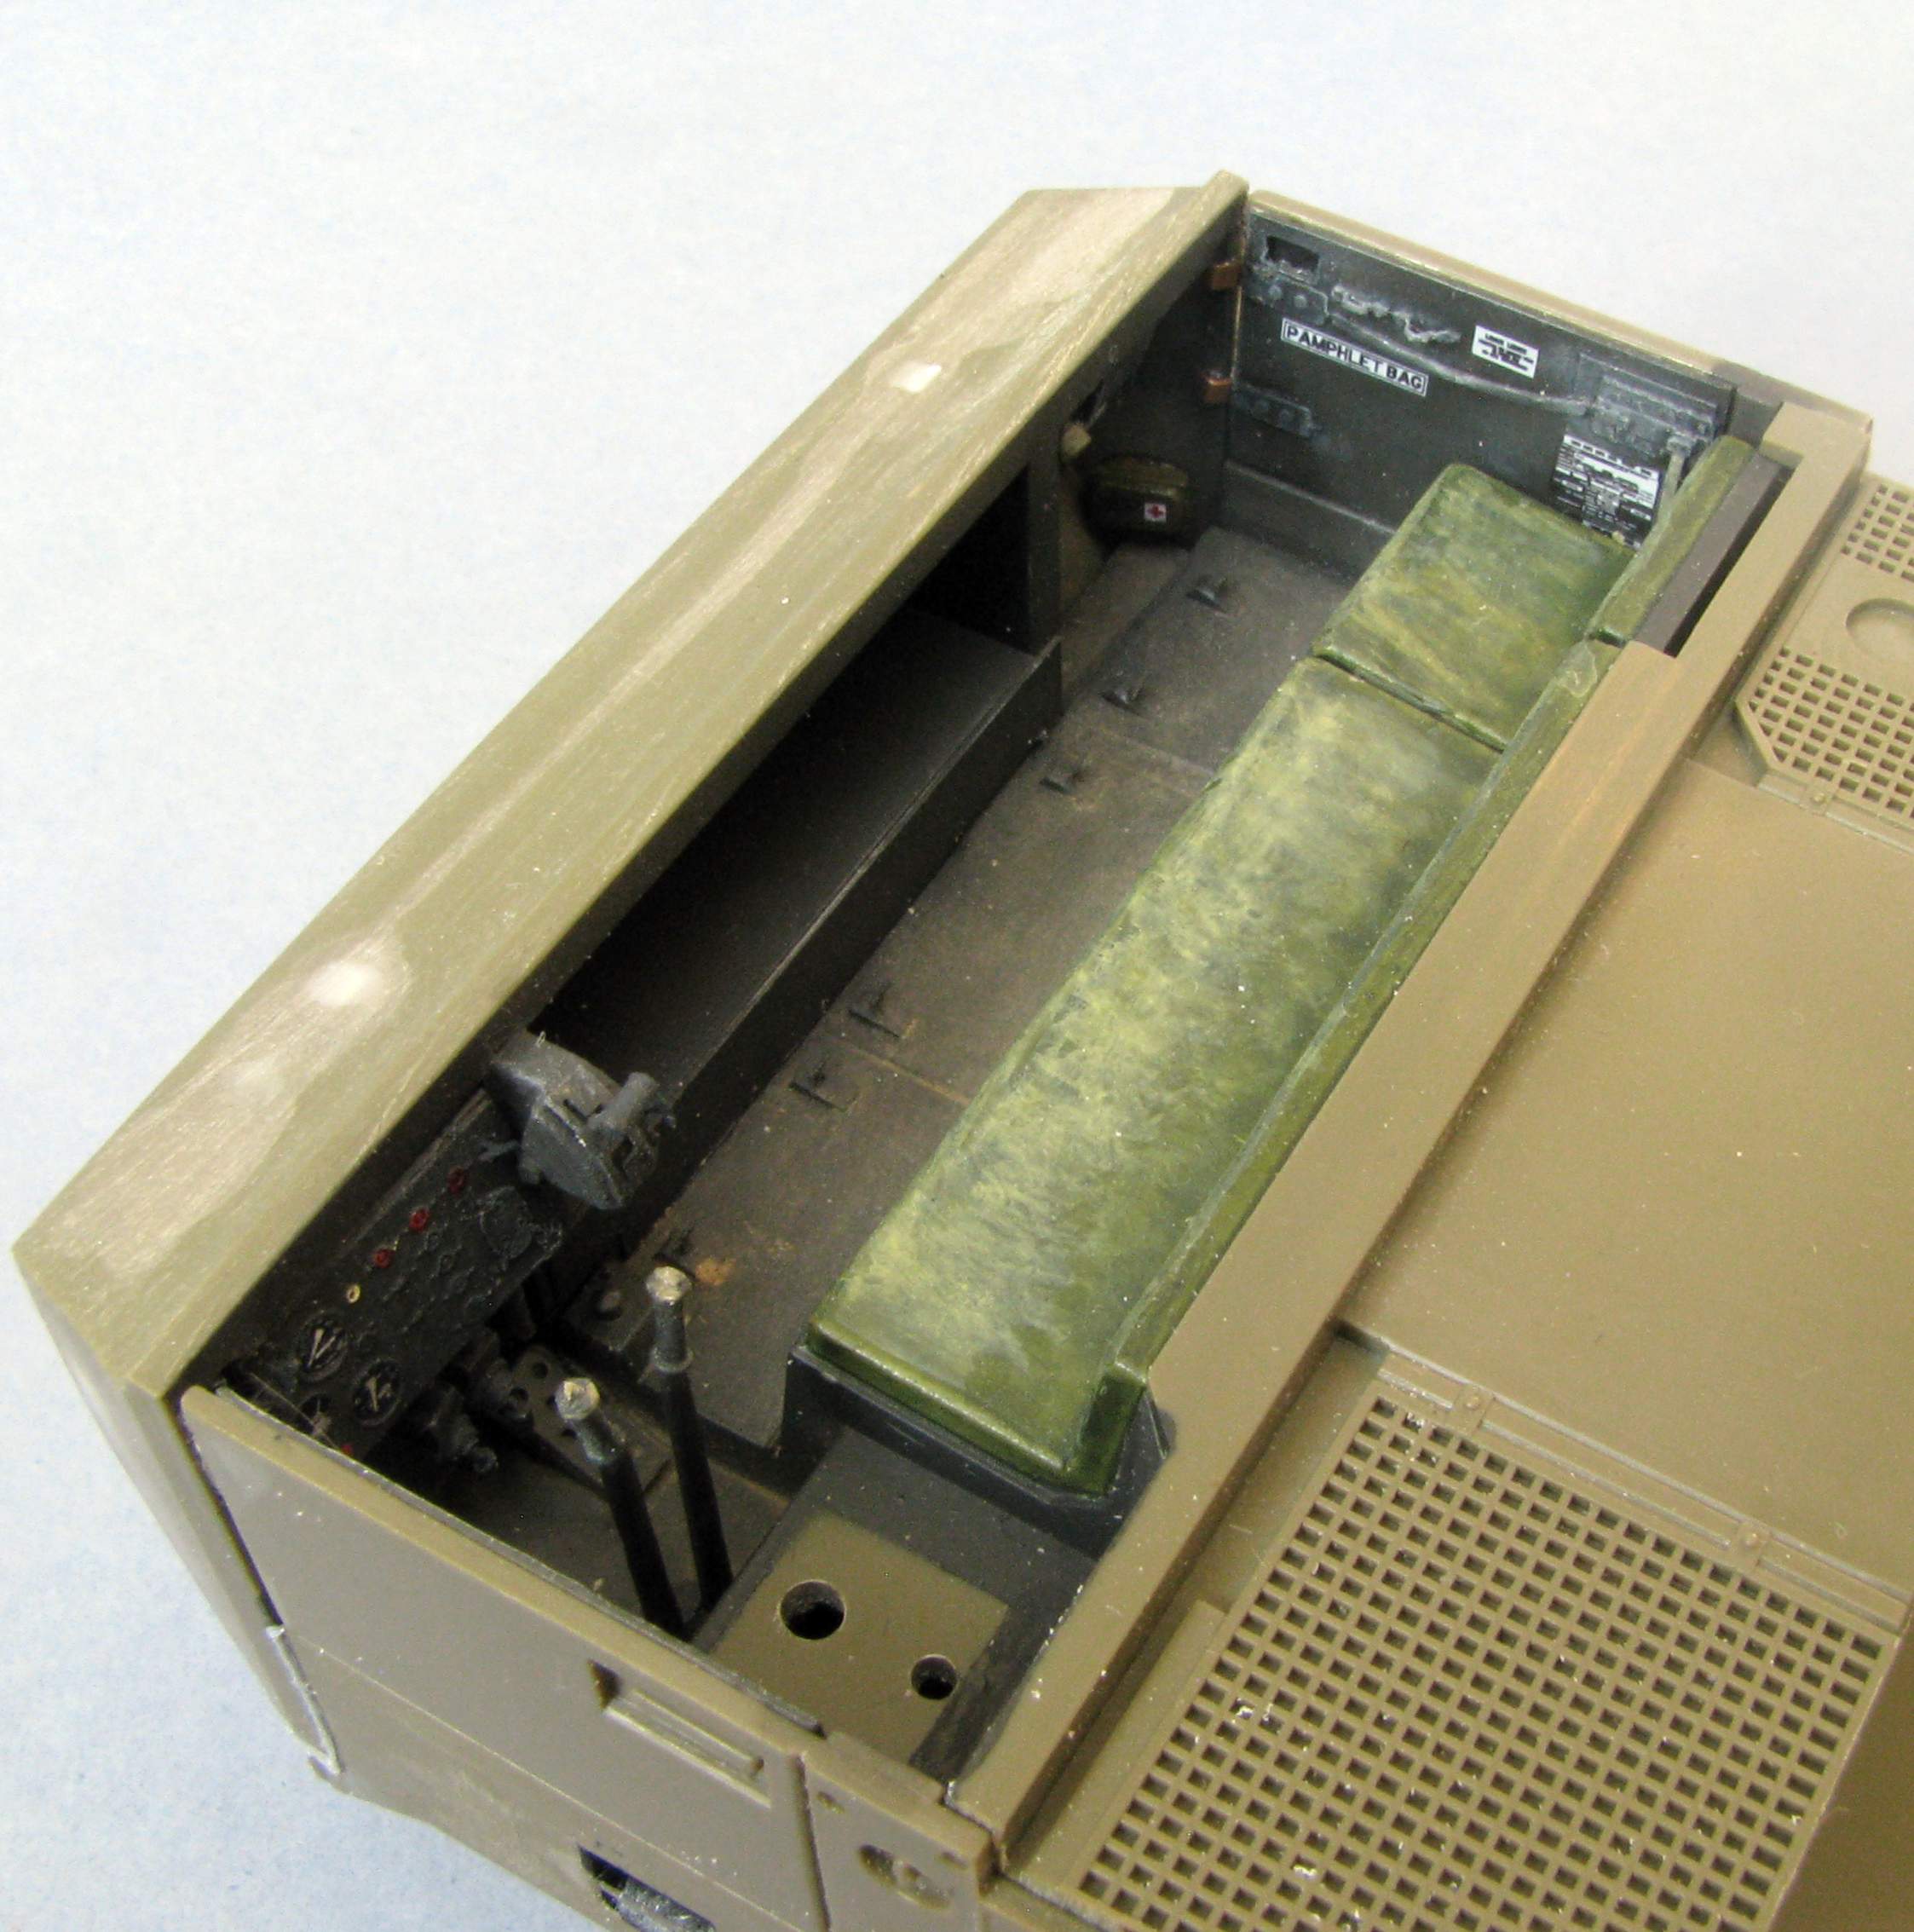
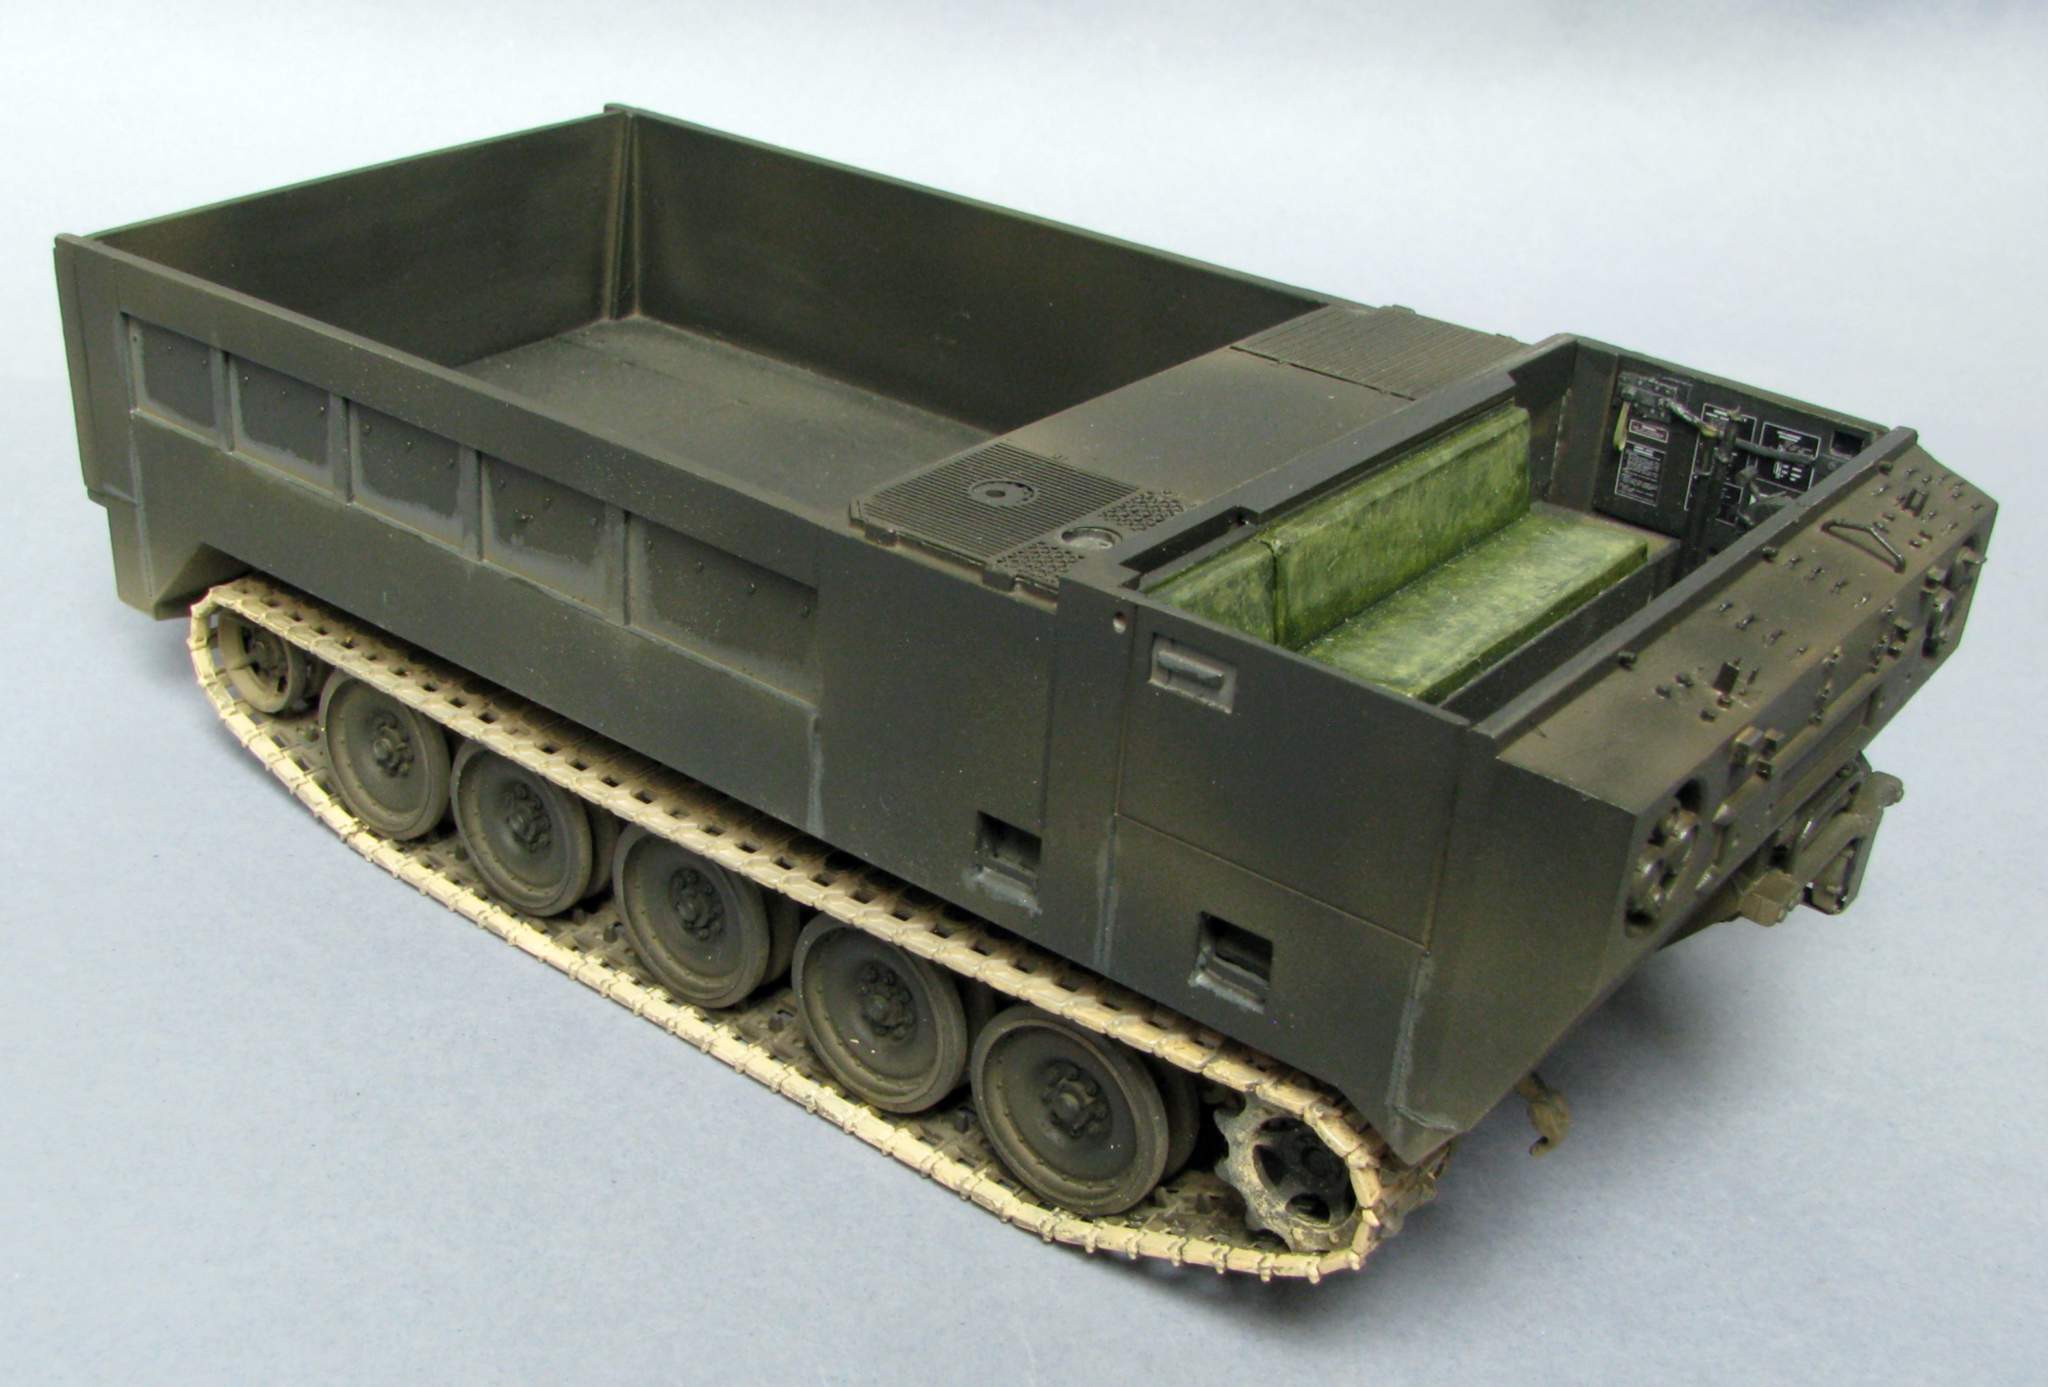
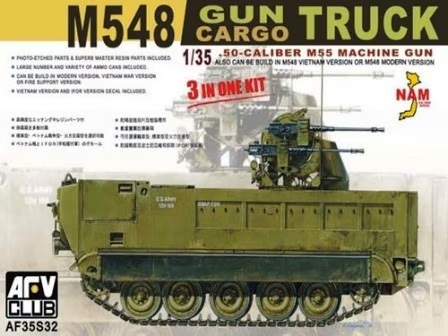
This is the AFV Club I started to work with back then:

1:35 AFV Club M548 with Quad .50 by Pawel

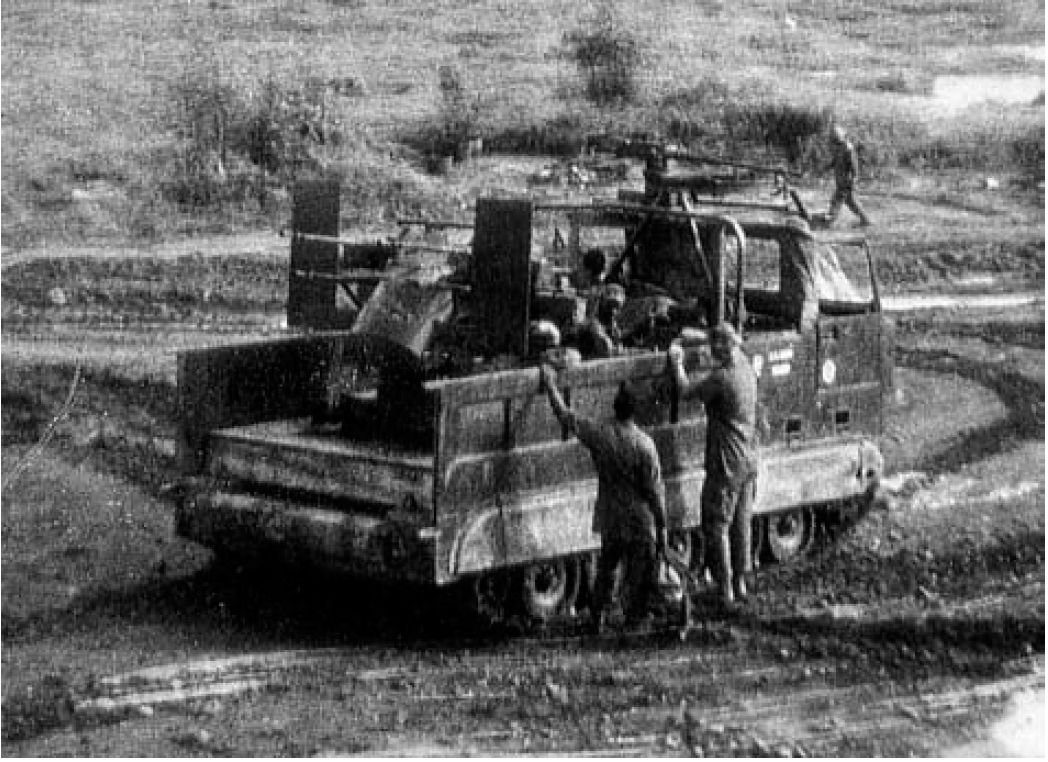
When I bought it there was just one photo of it availalble:

1:35 AFV Club M548 with Quad .50 by Pawel

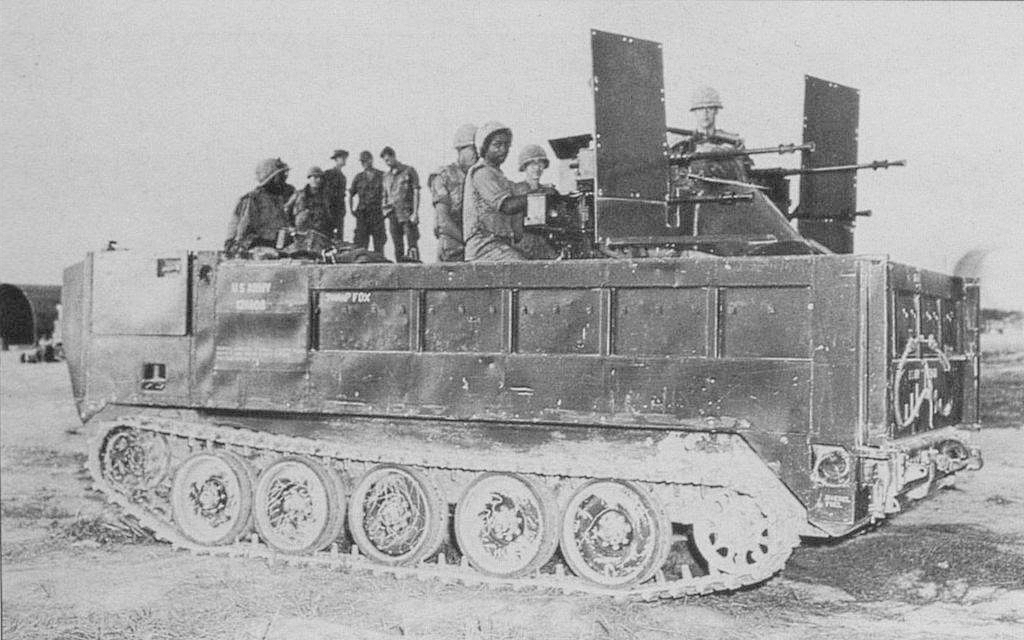
It’s from the Concord’s “Armor of the Vietnam War (1) Allied Forces” book.

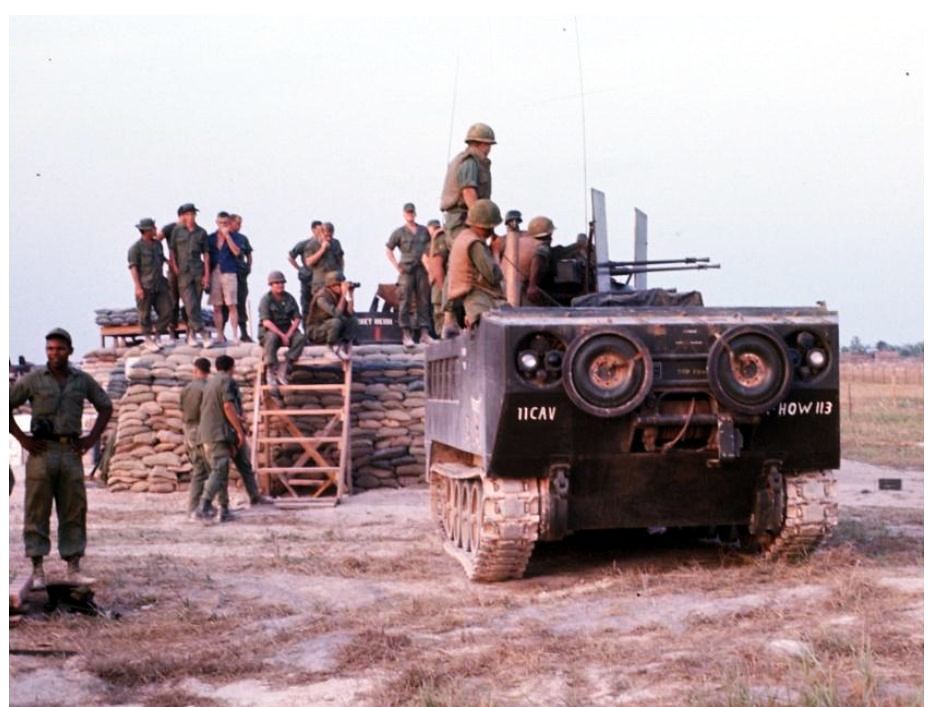
Later veterans from the National Duster, Quad and Searchlight Association (NDQSA) came up with a photo of a similar but different vehicle:

1:35 AFV Club M548 with Quad .50 by Pawel

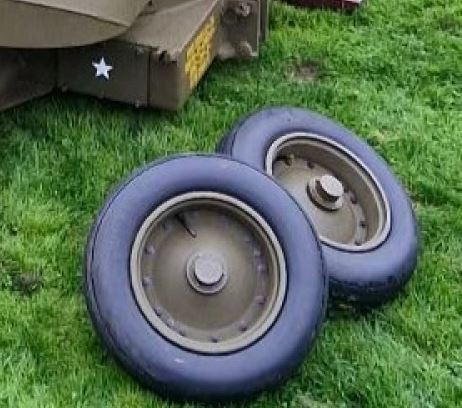
Finally I have found (and @Frenchy helped me with it - thanks!) two more photos:

1:35 AFV Club M548 with Quad .50 by Pawel1:35 AFV Club M548 with Quad .50 by Pawel

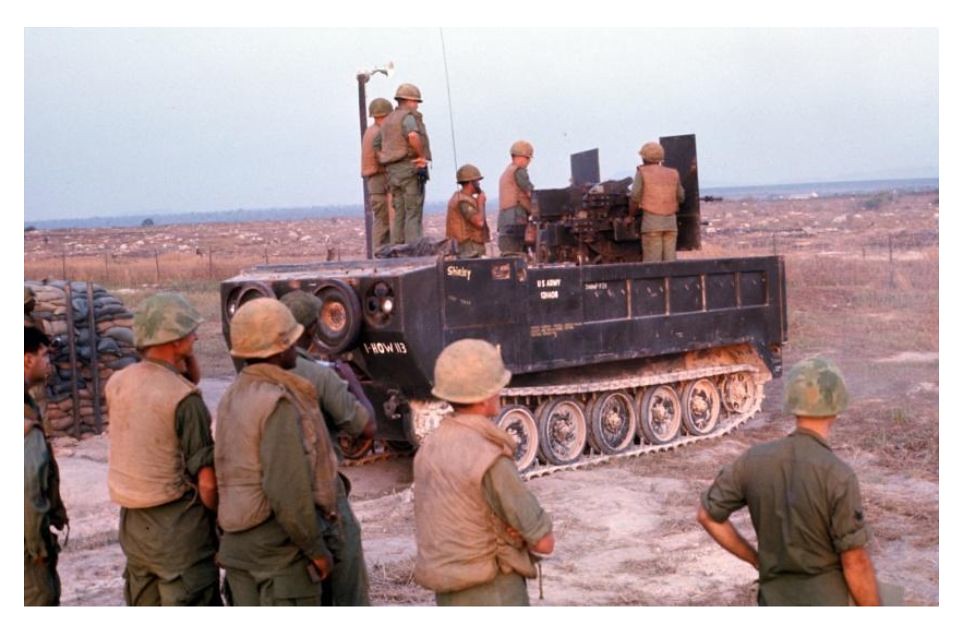
And that did it - I thought: It’s not going to get any better than that and I started working. Of course if you have any more cool photos, please post them in this thread. Also, if you have an idea what the “fine print” above the second road wheel in the photo above says - I would love to know it, too.

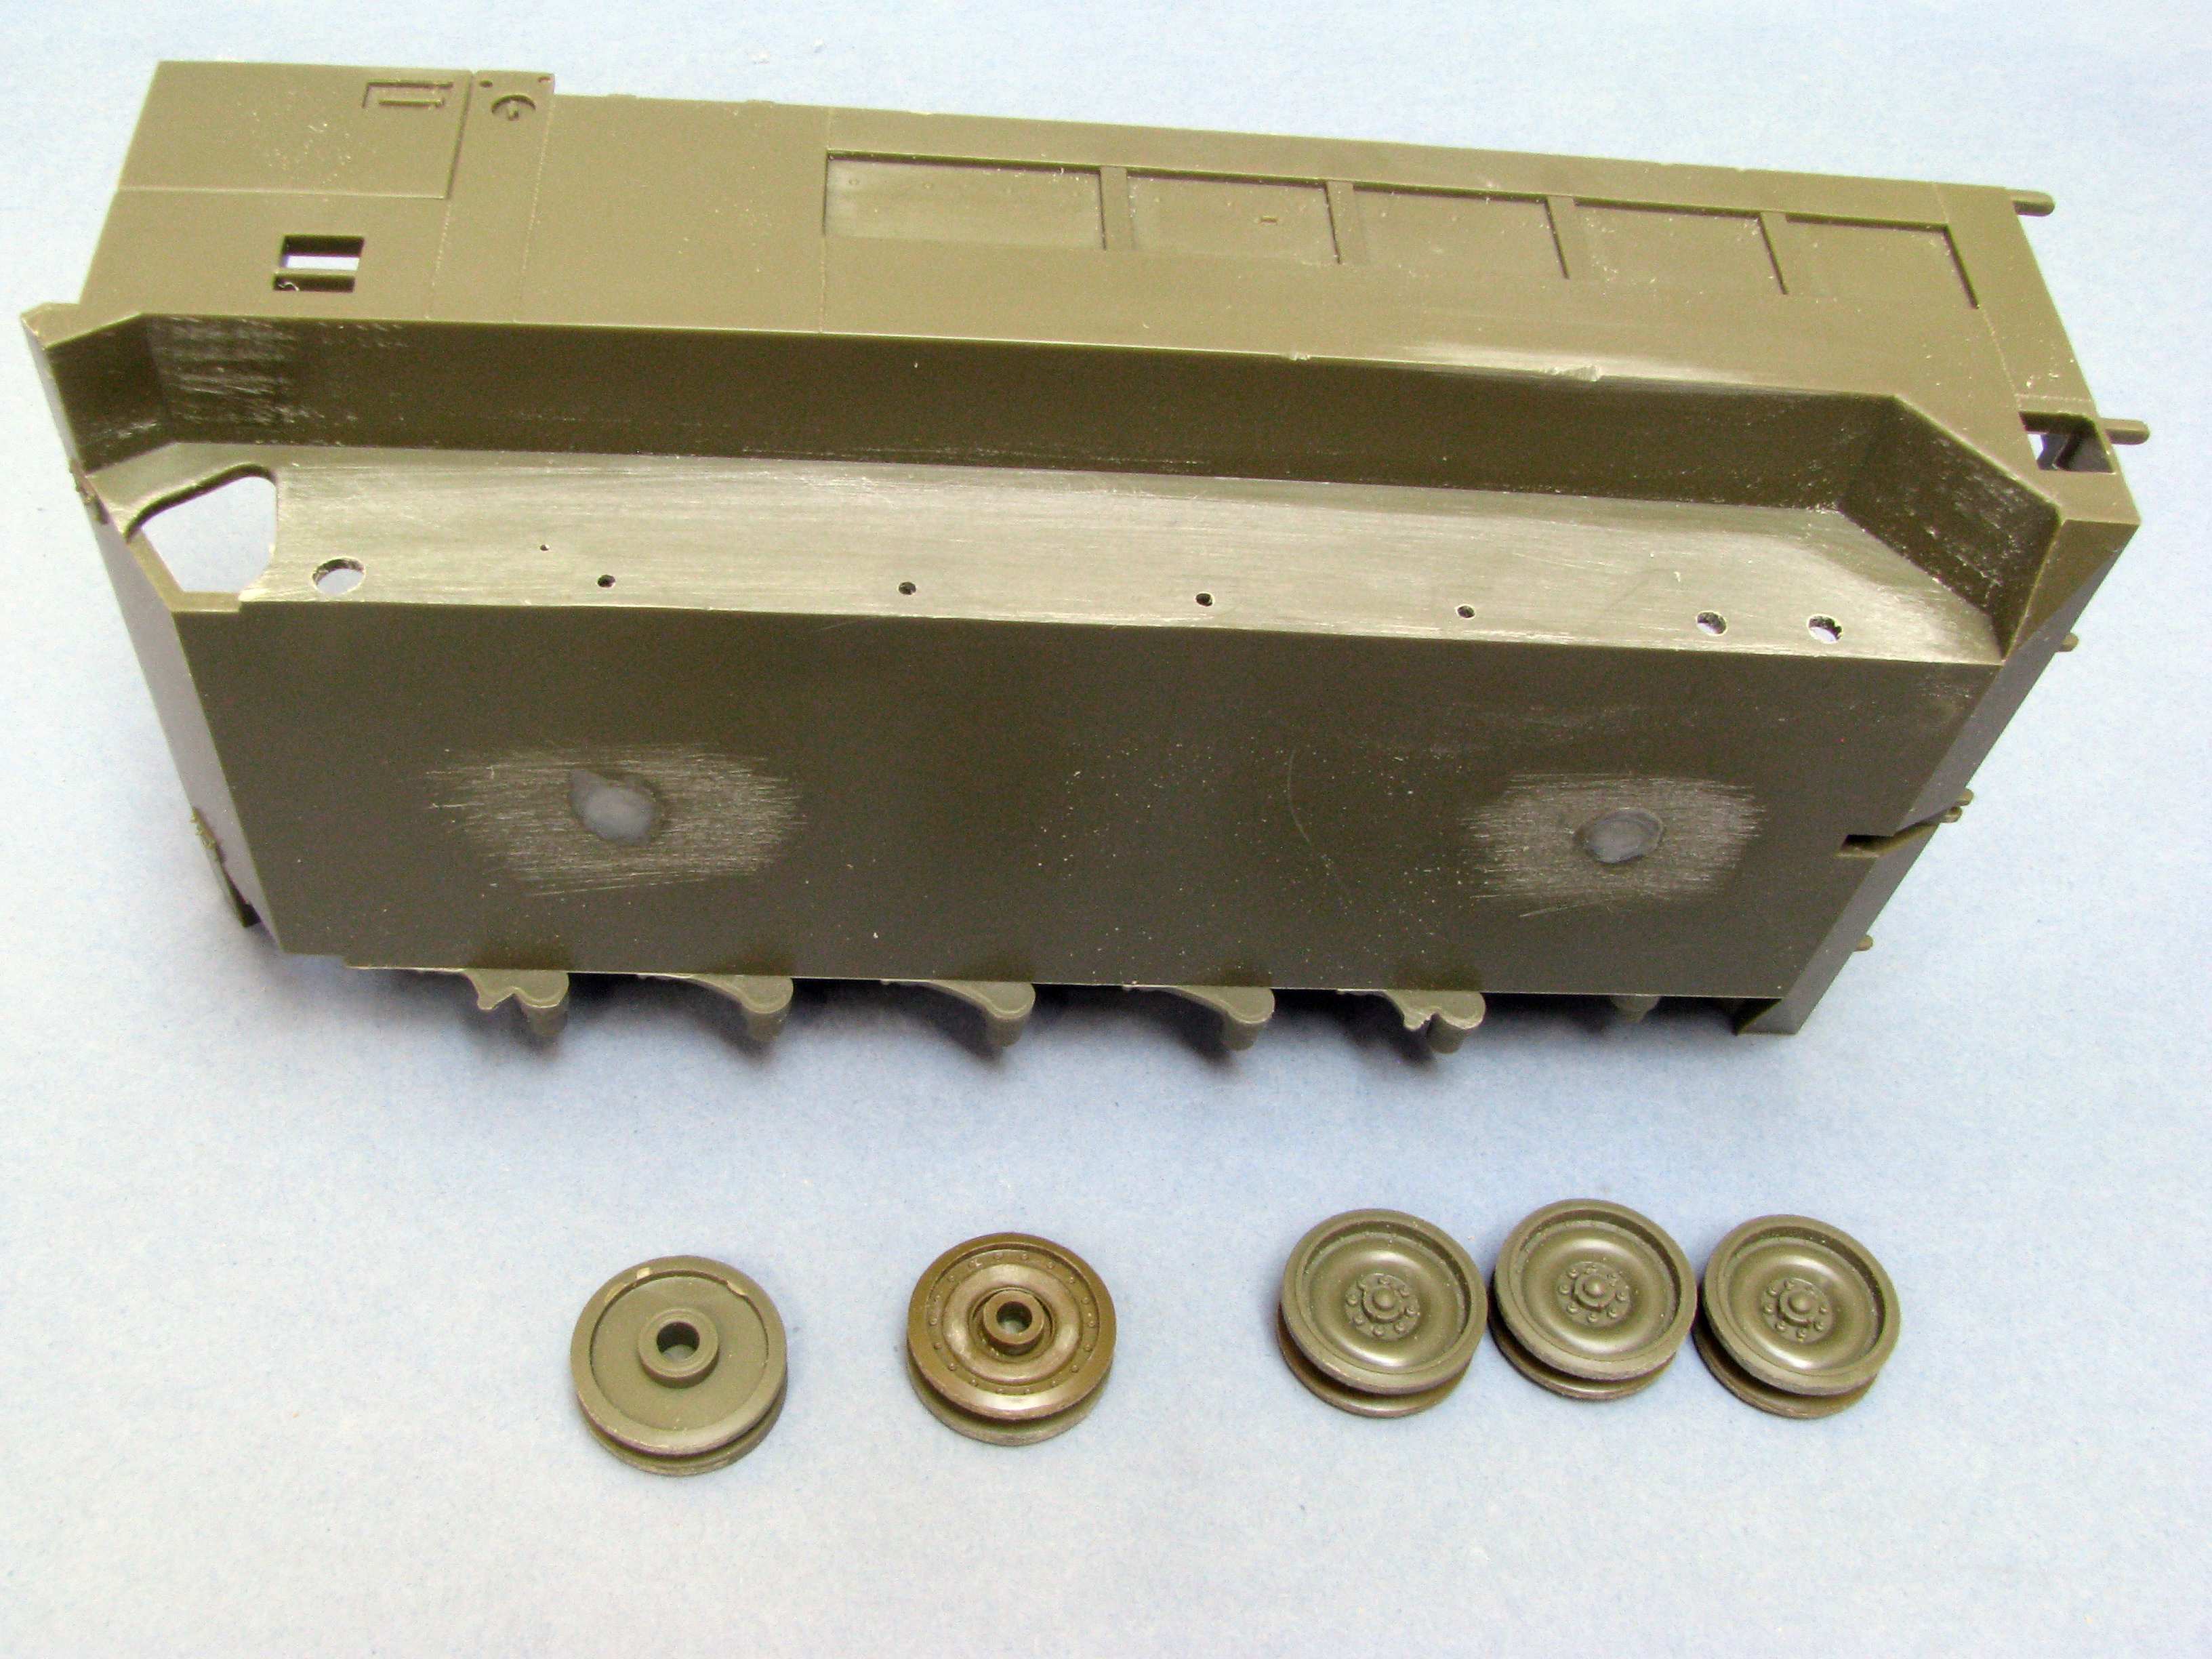
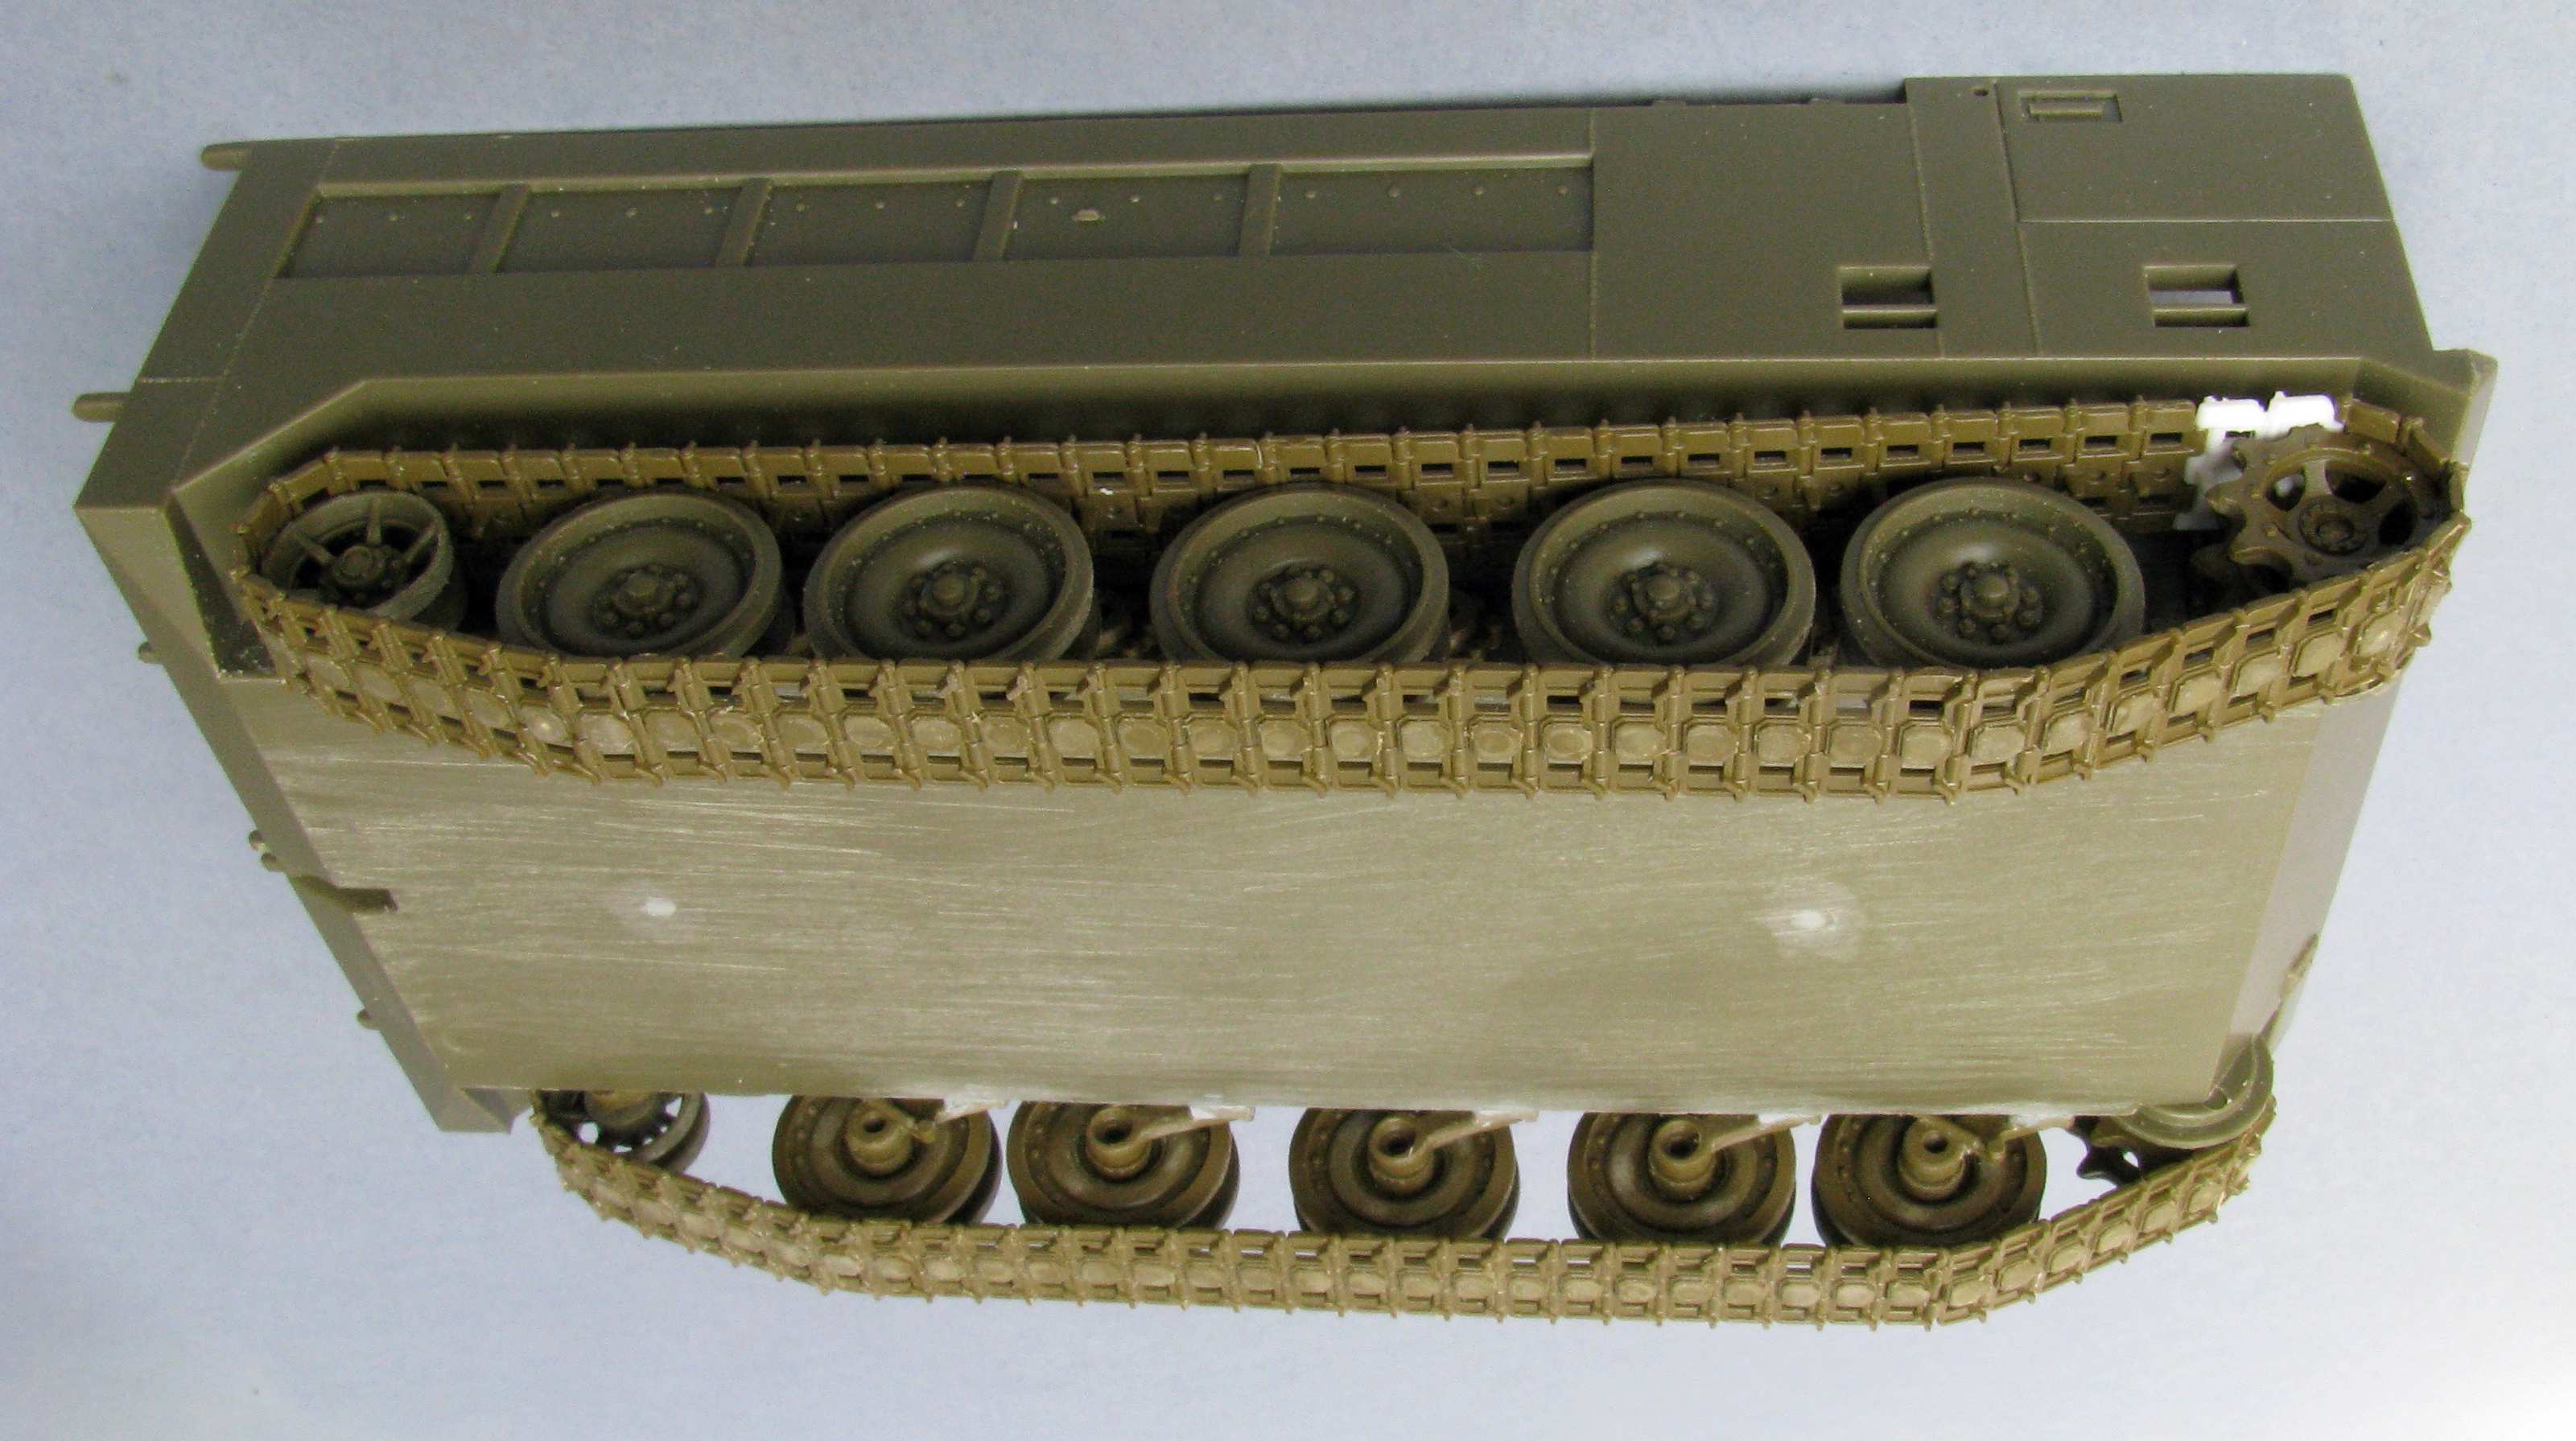
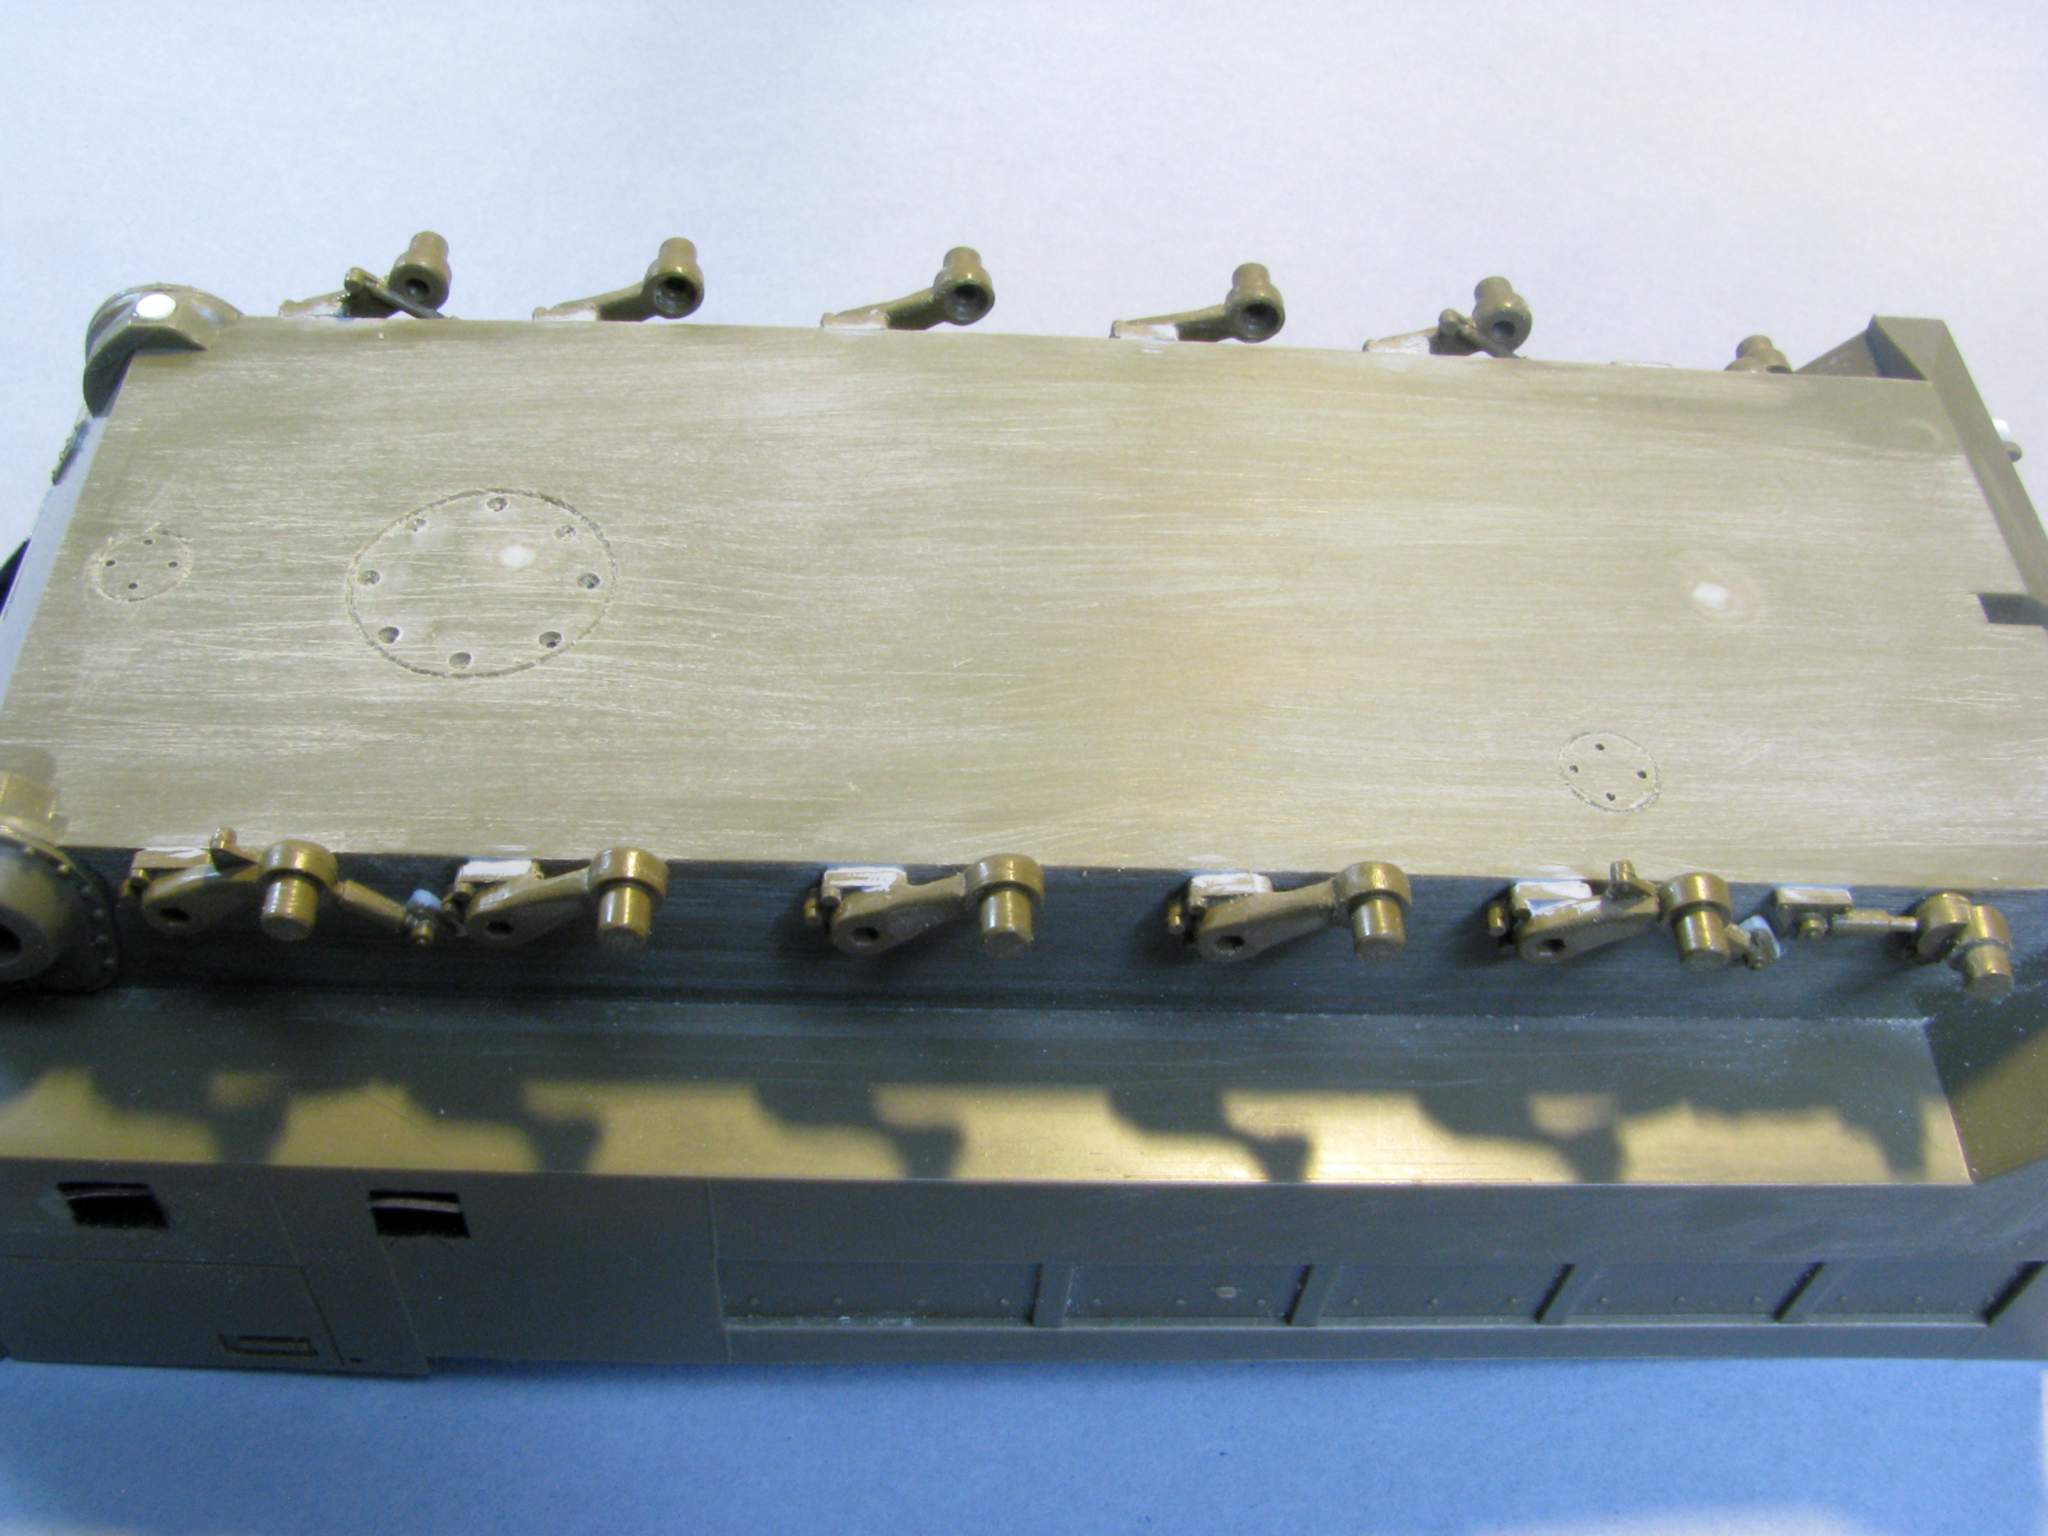
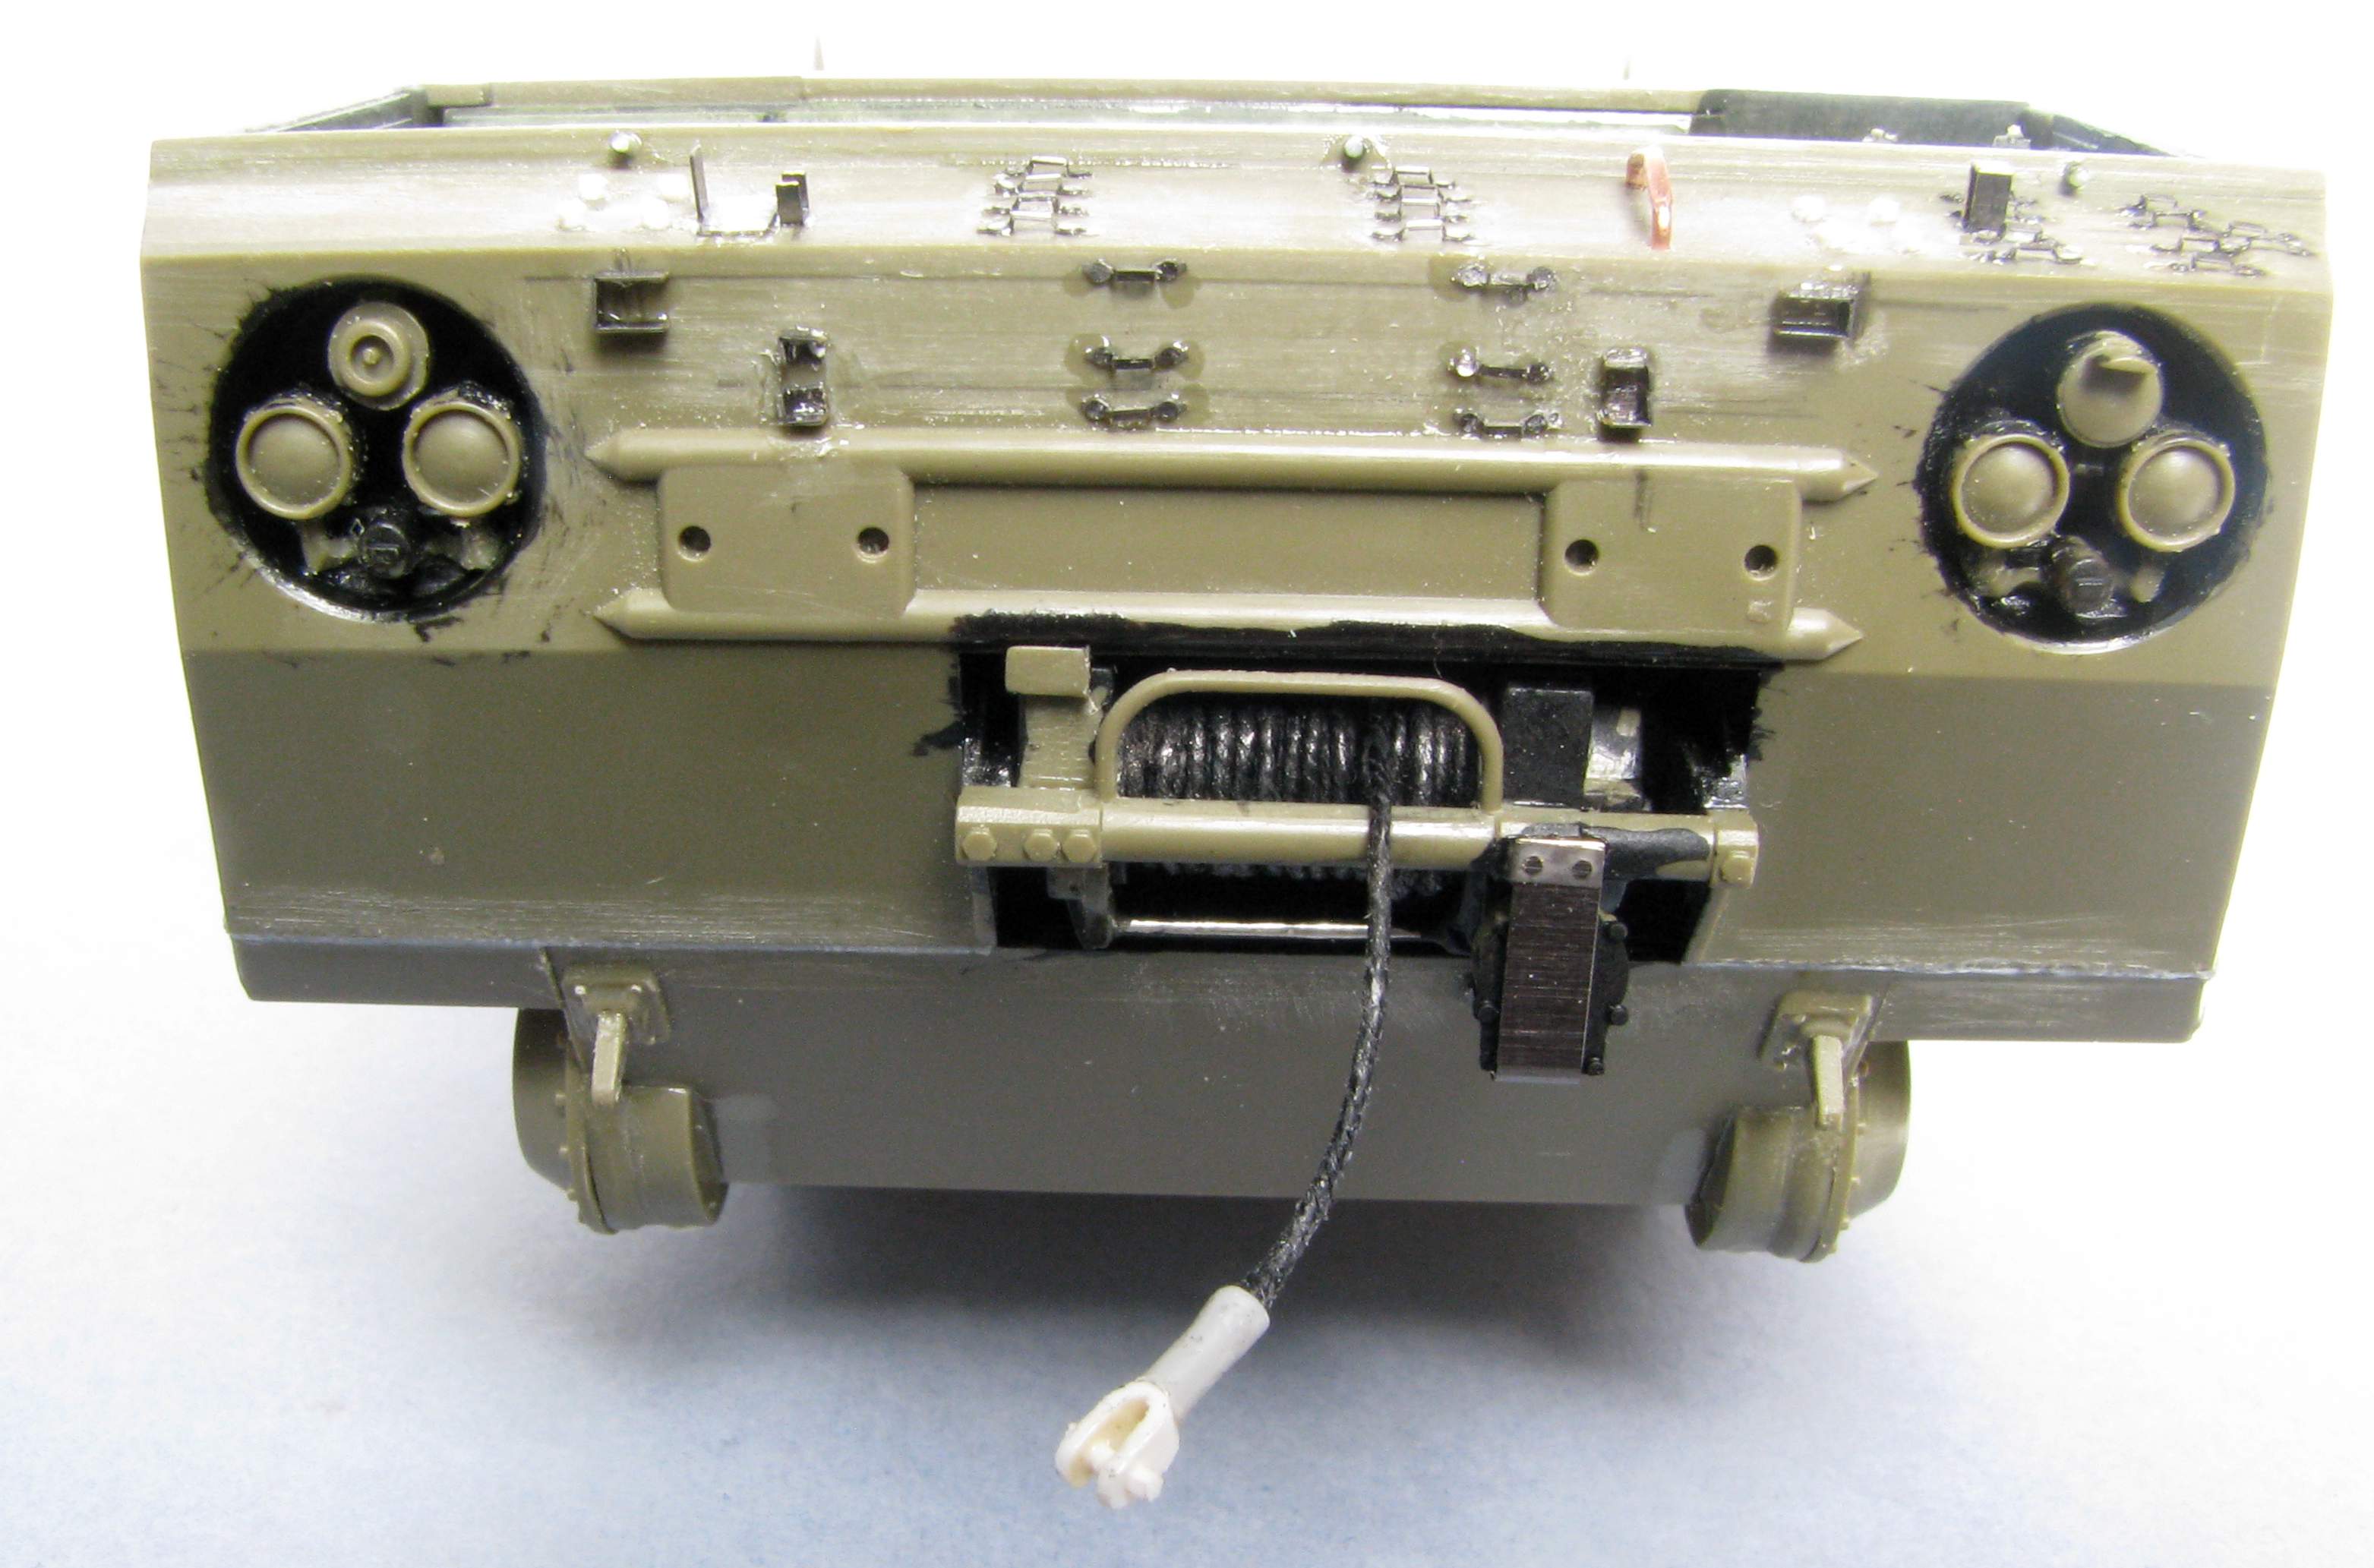
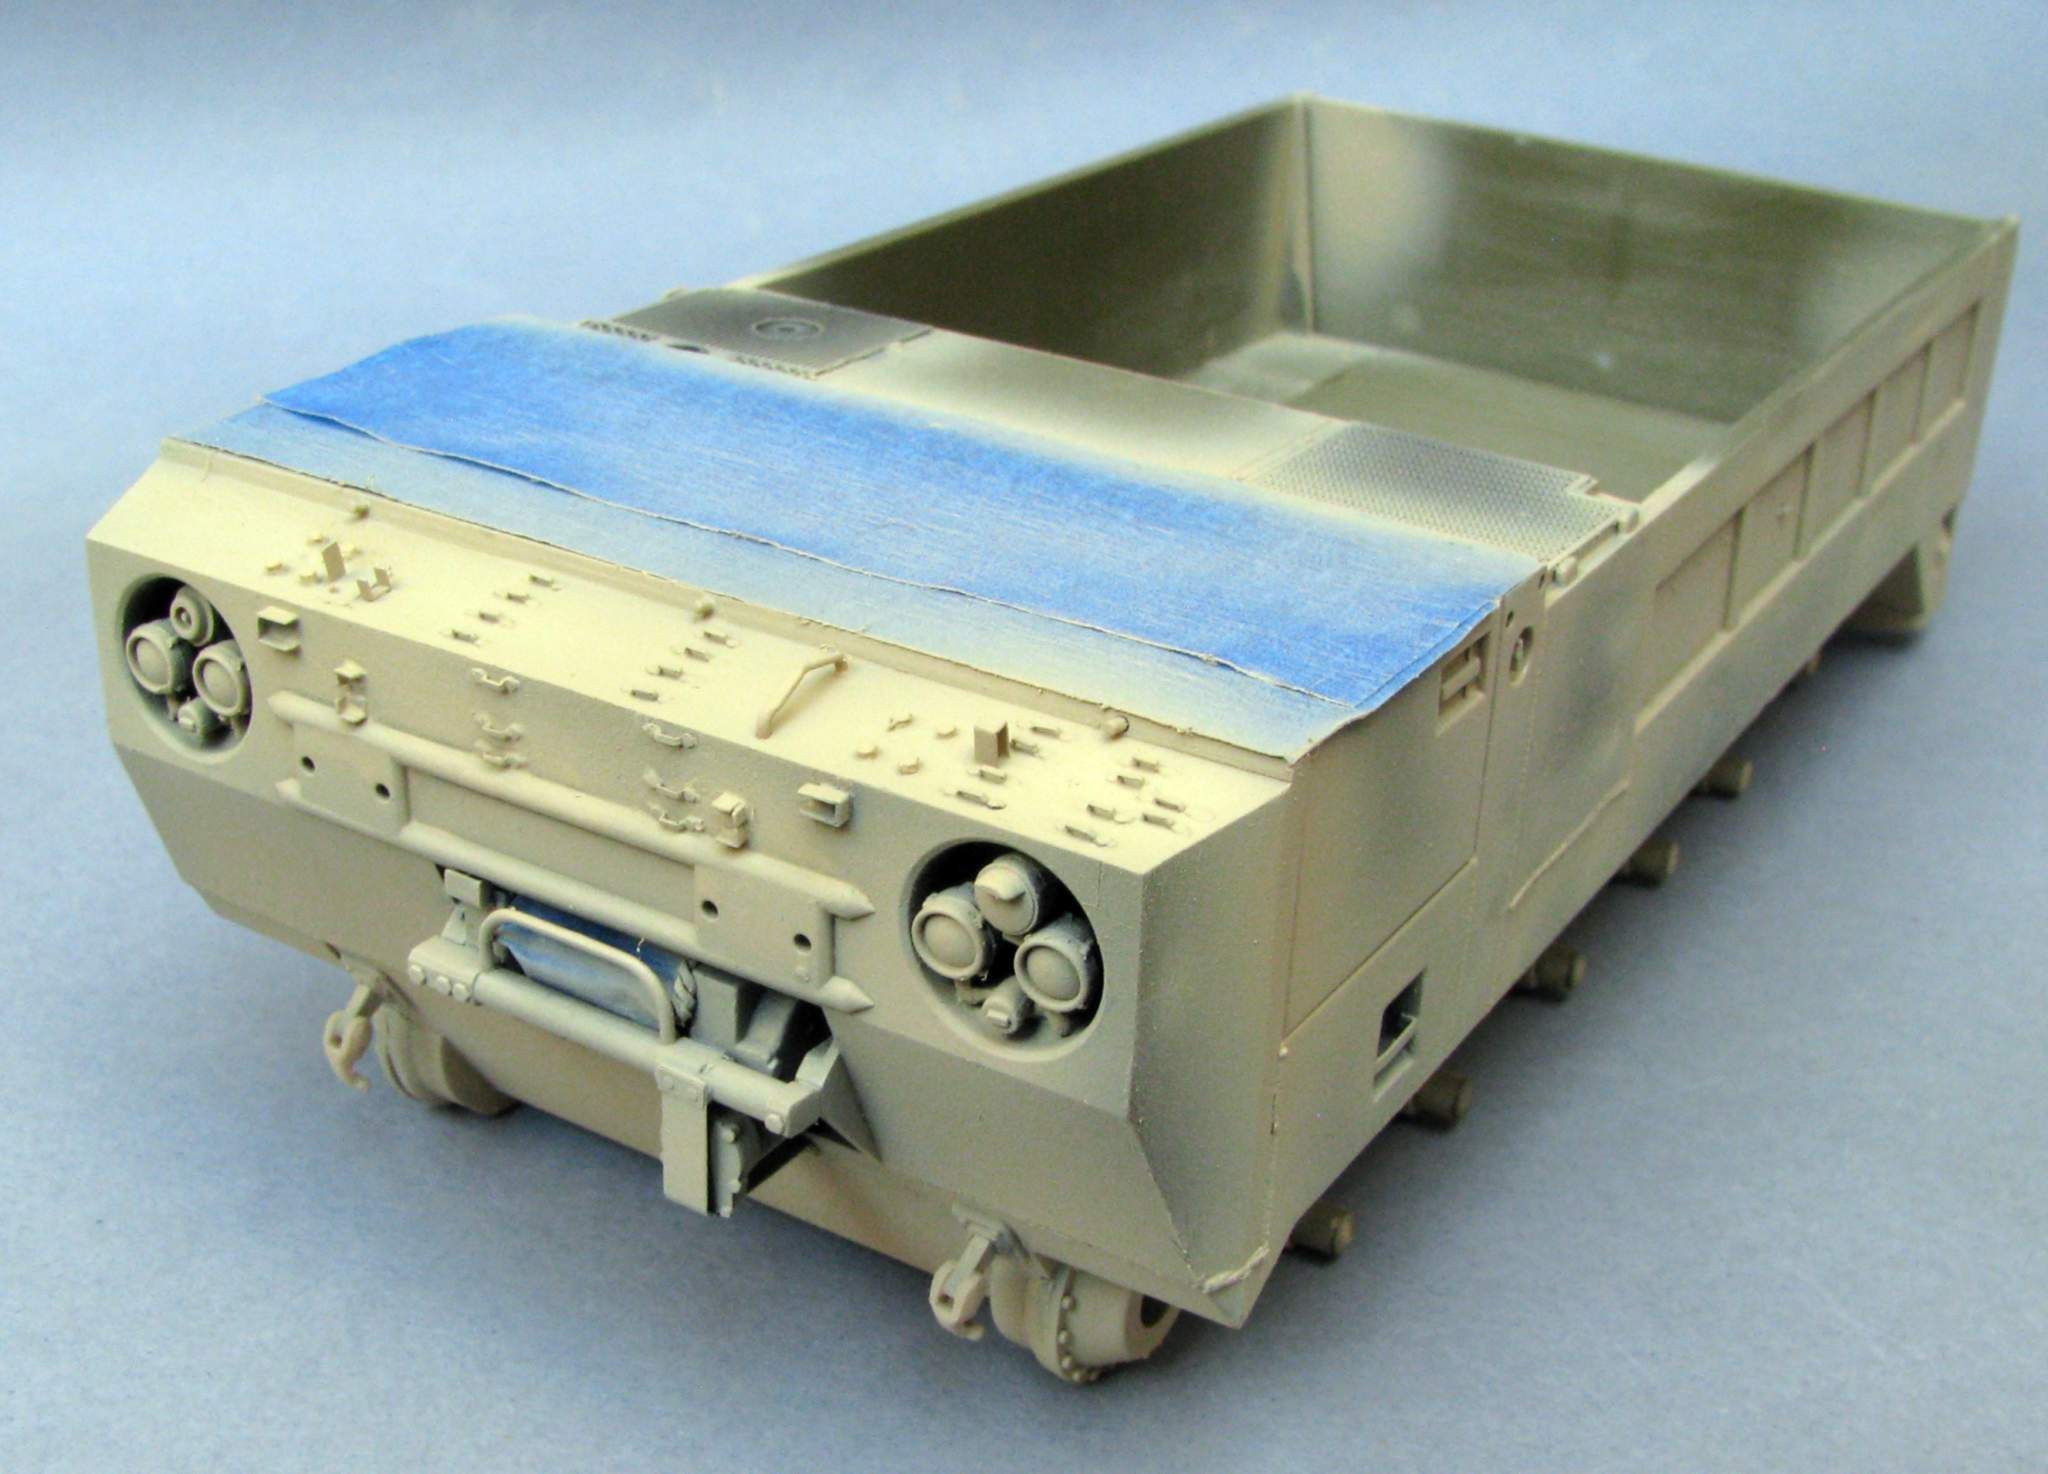
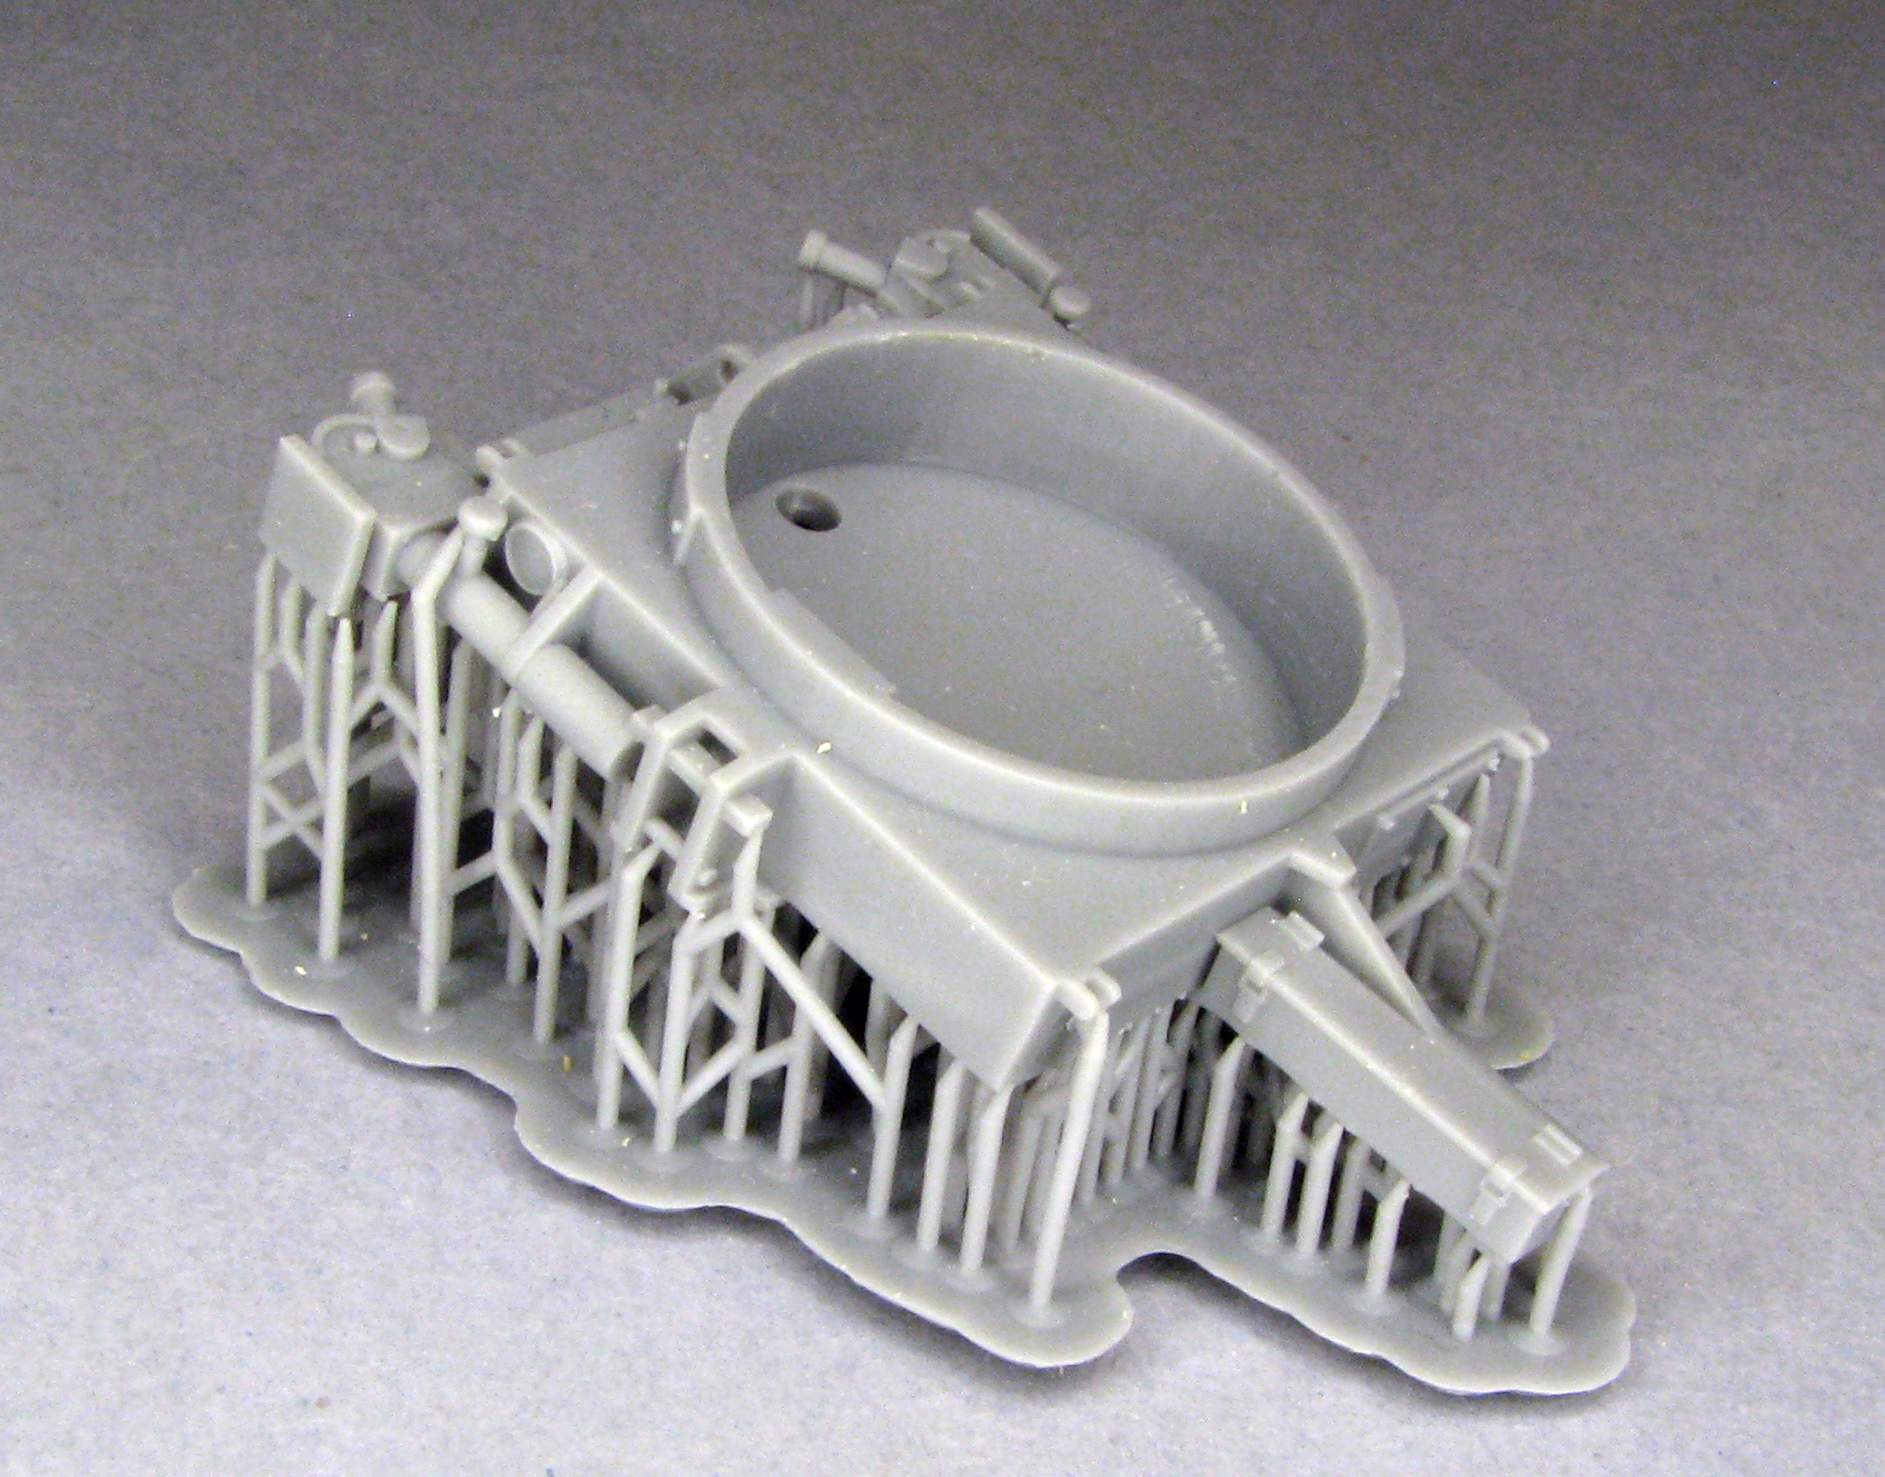
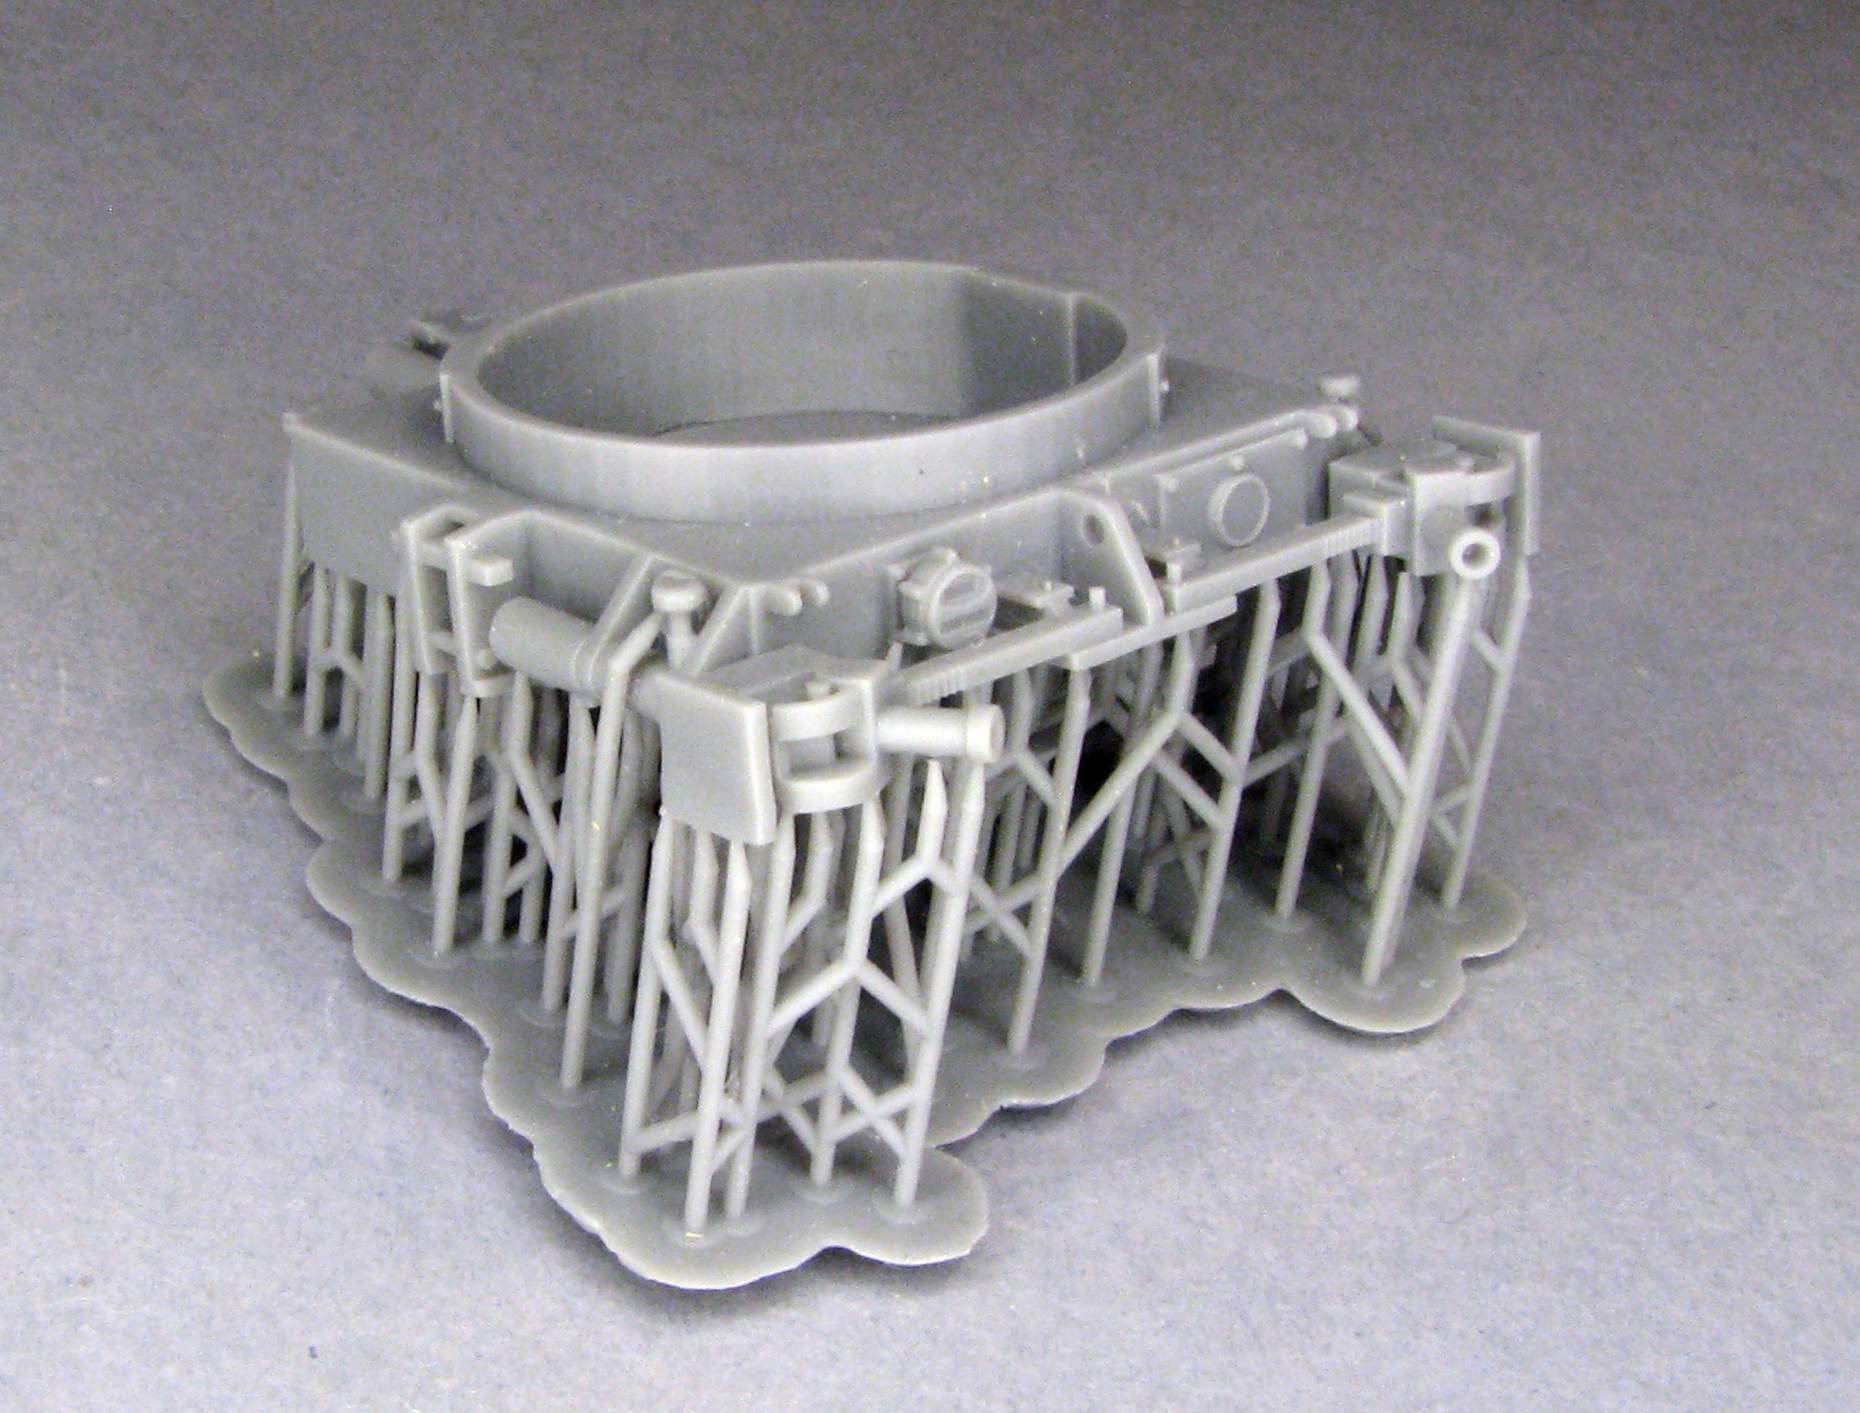
And I took the hull bottom out of the box:

1:35 AFV Club M548 with Quad .50 by Pawel

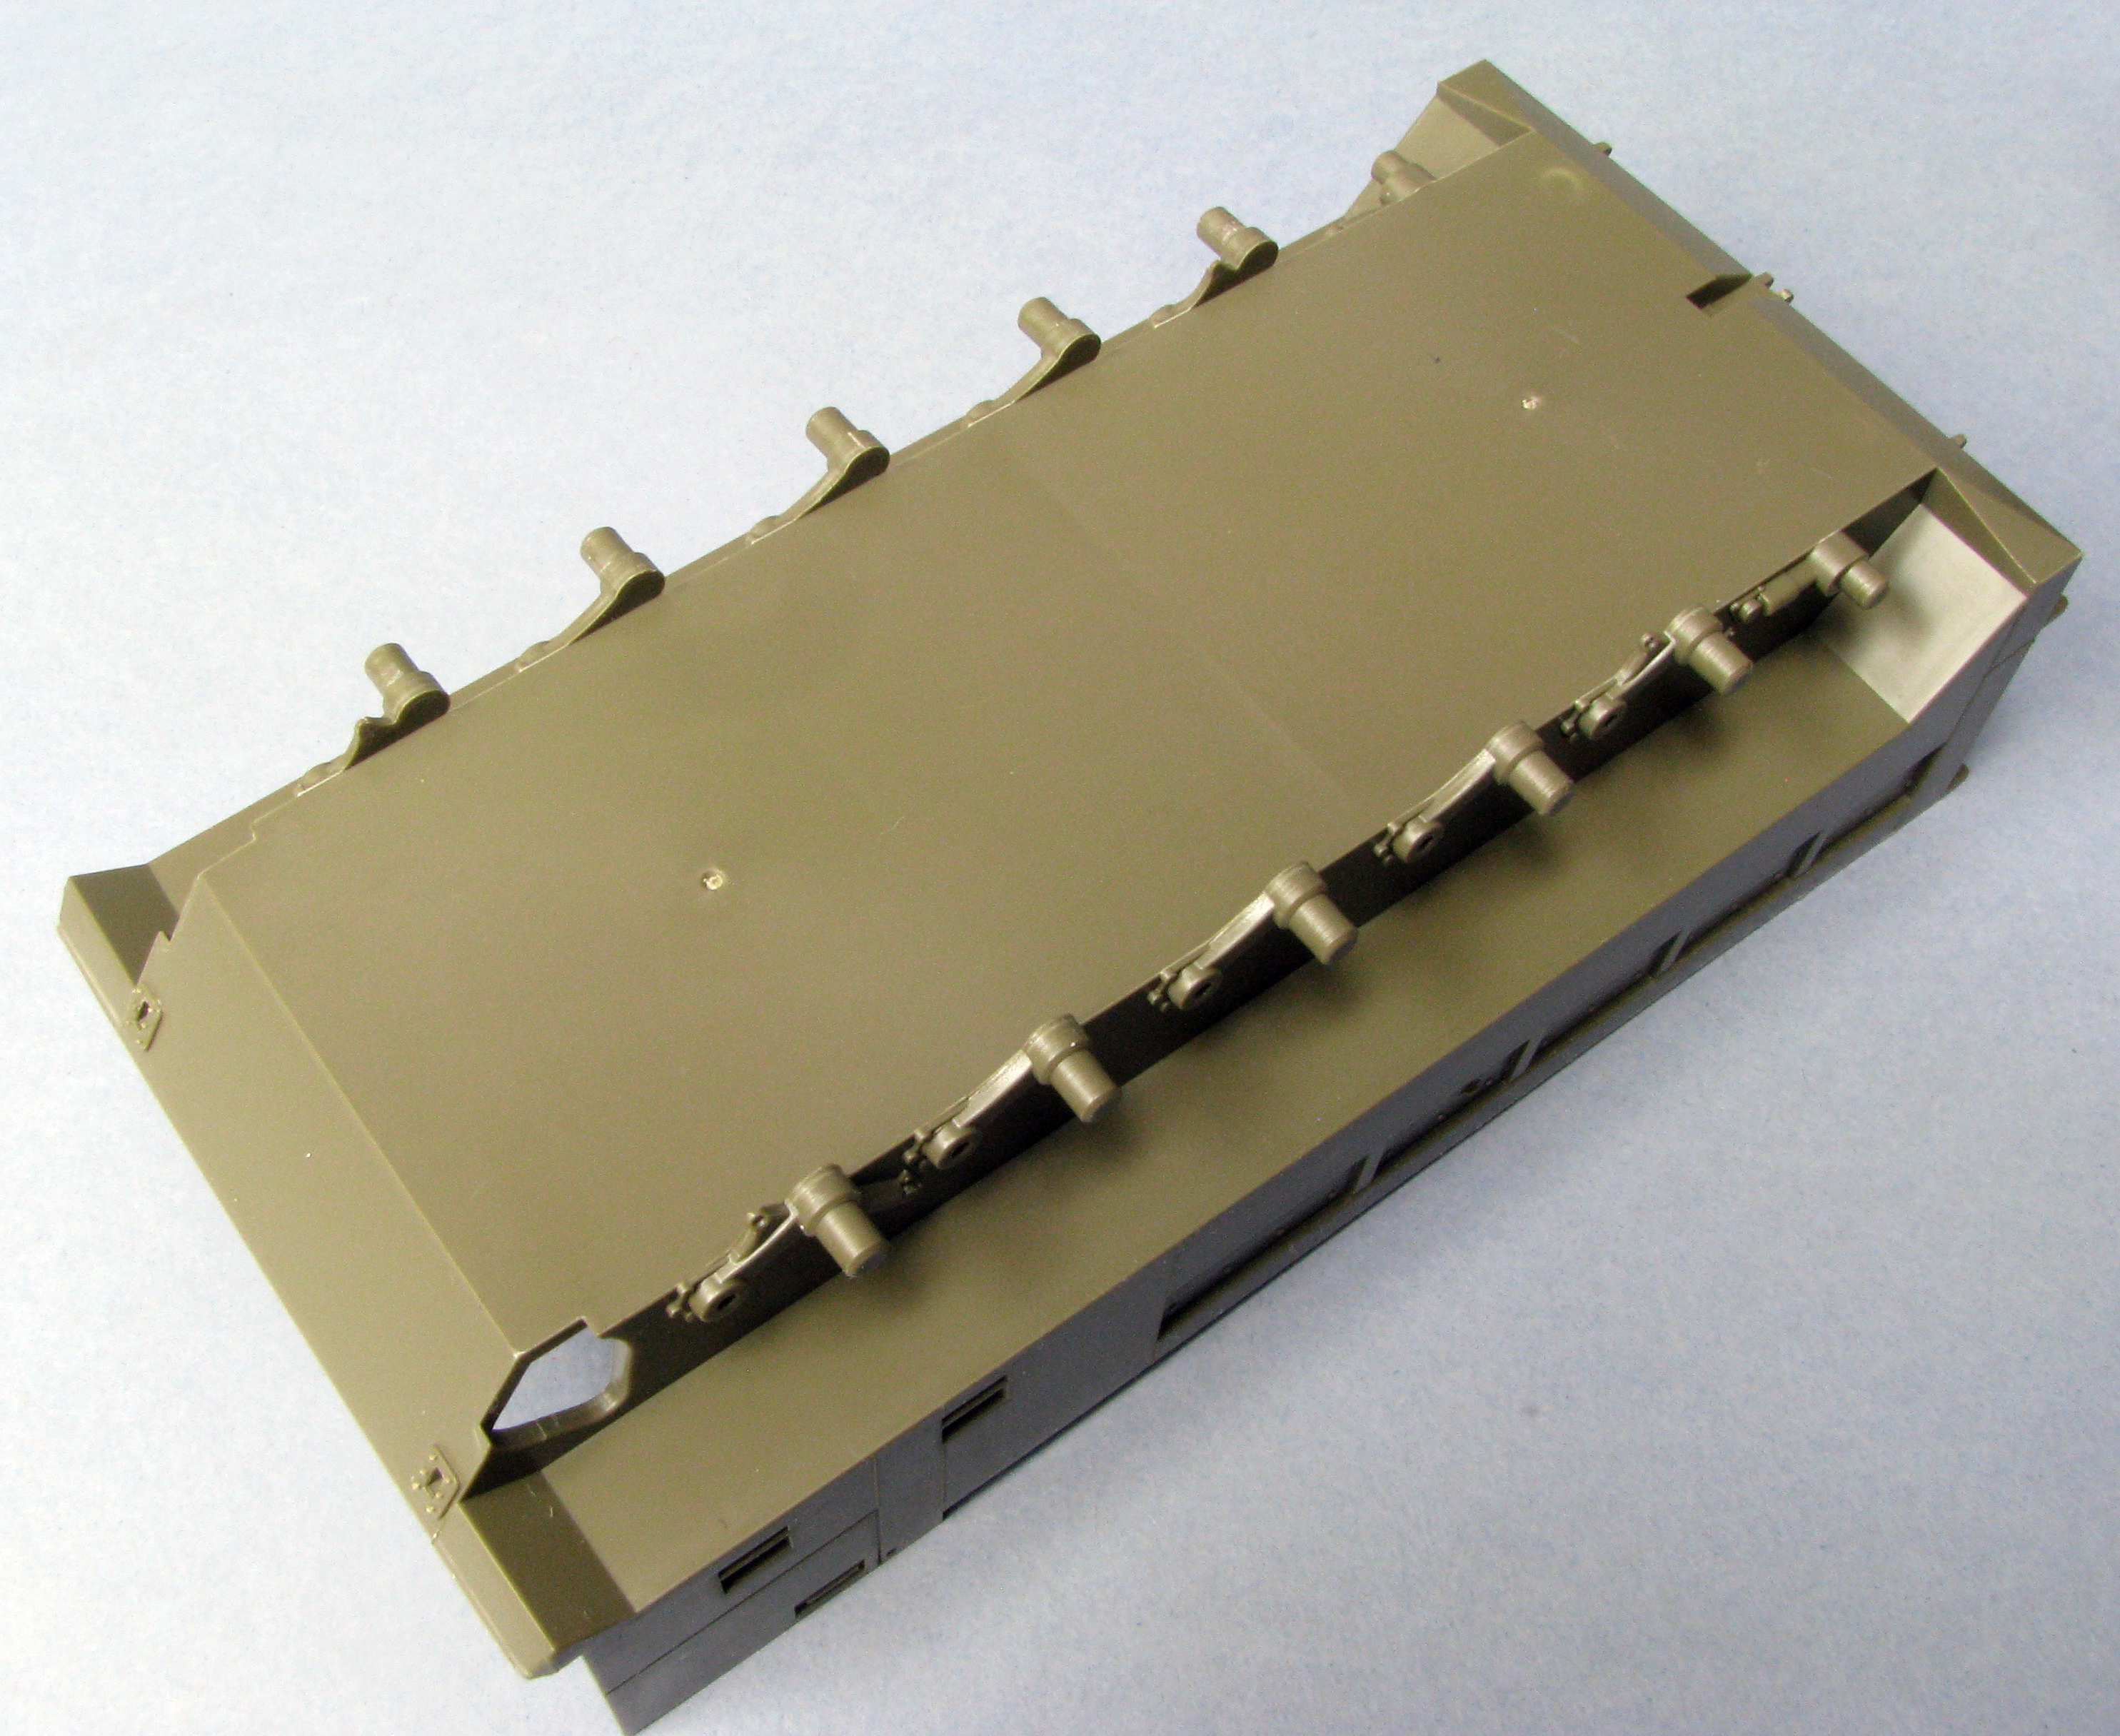
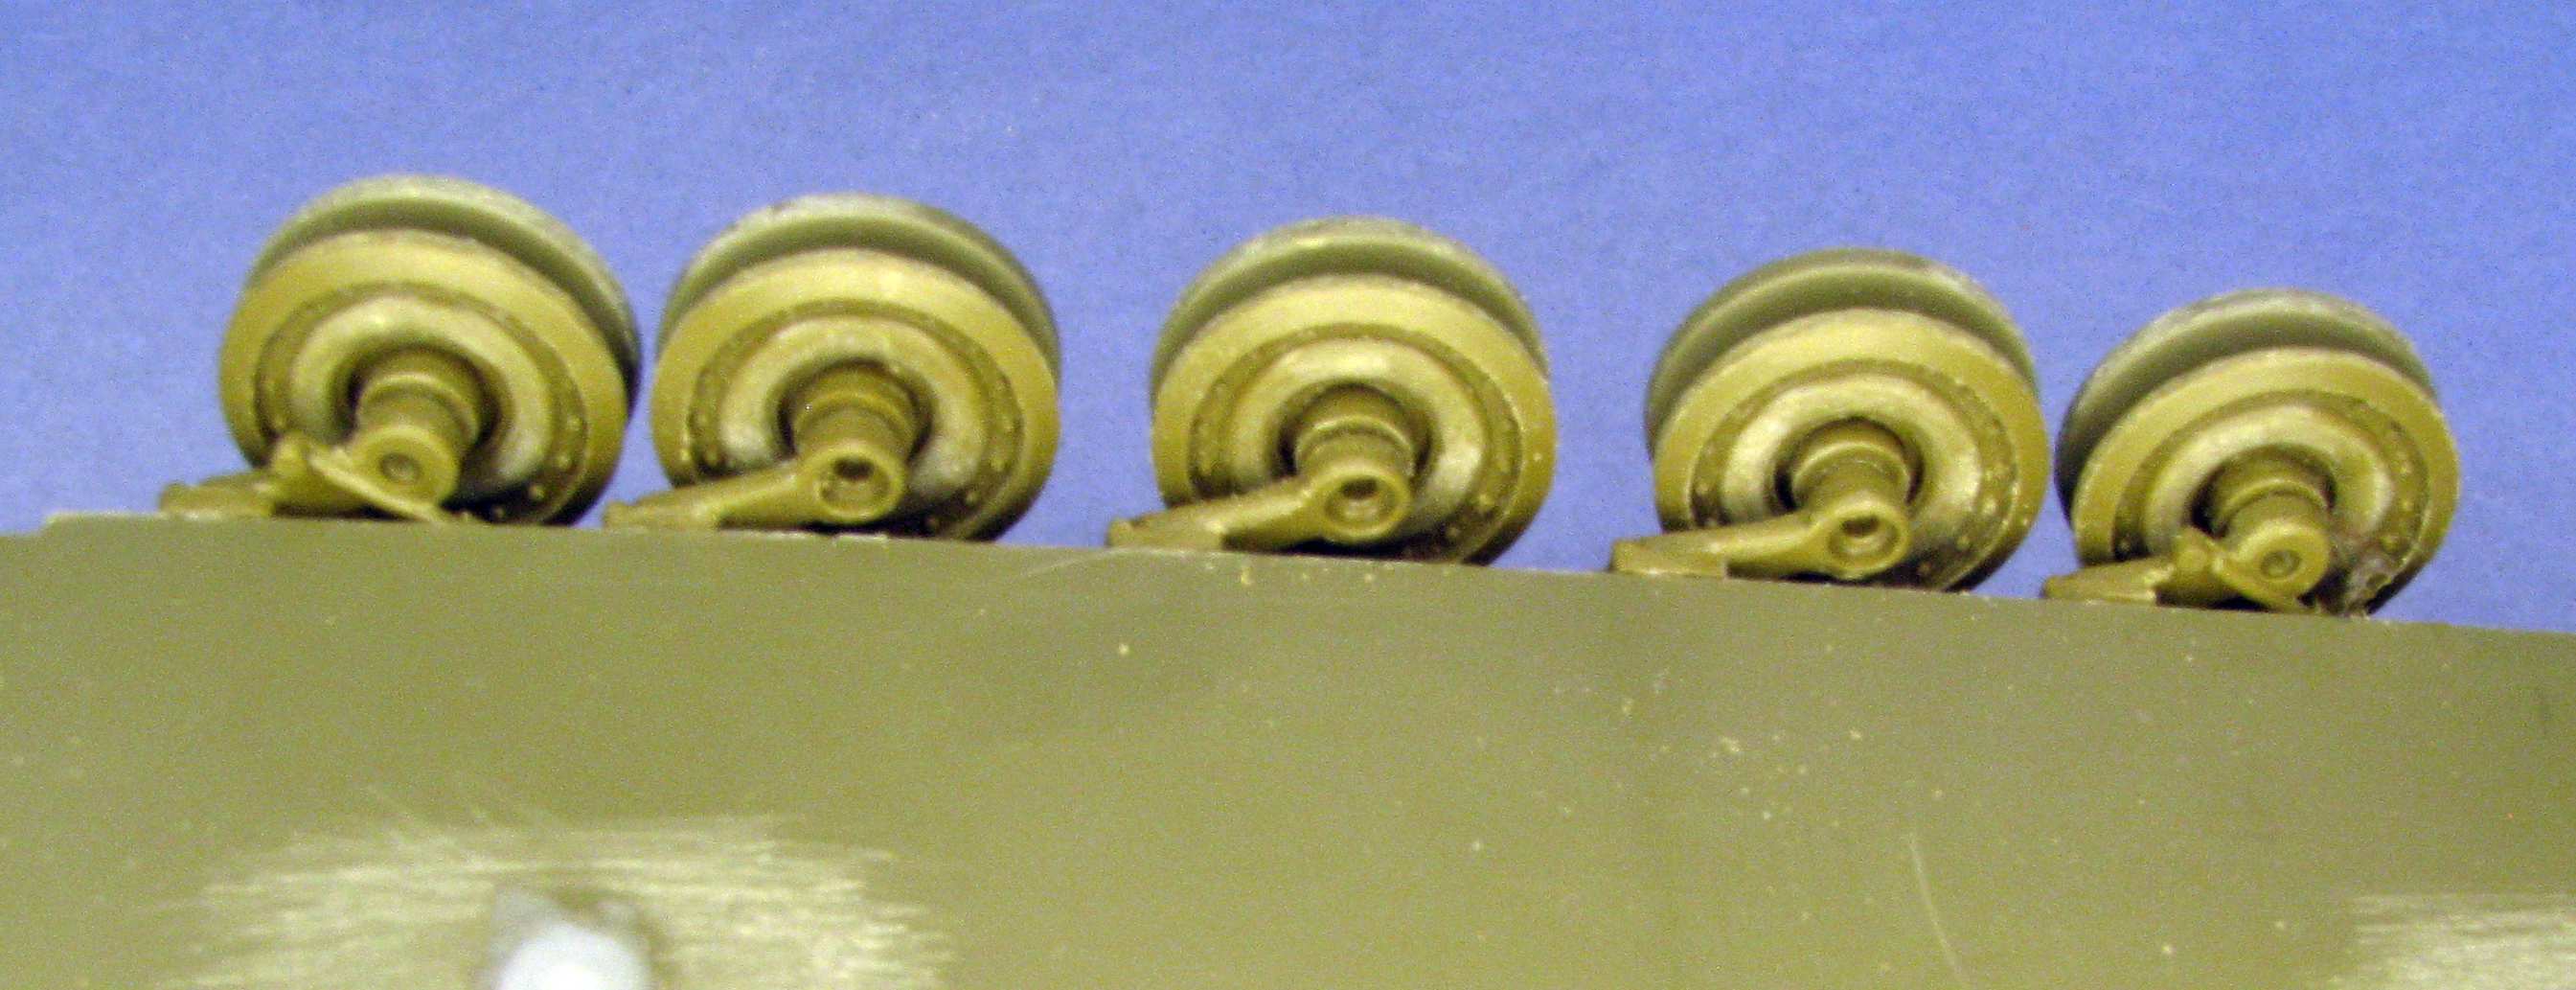
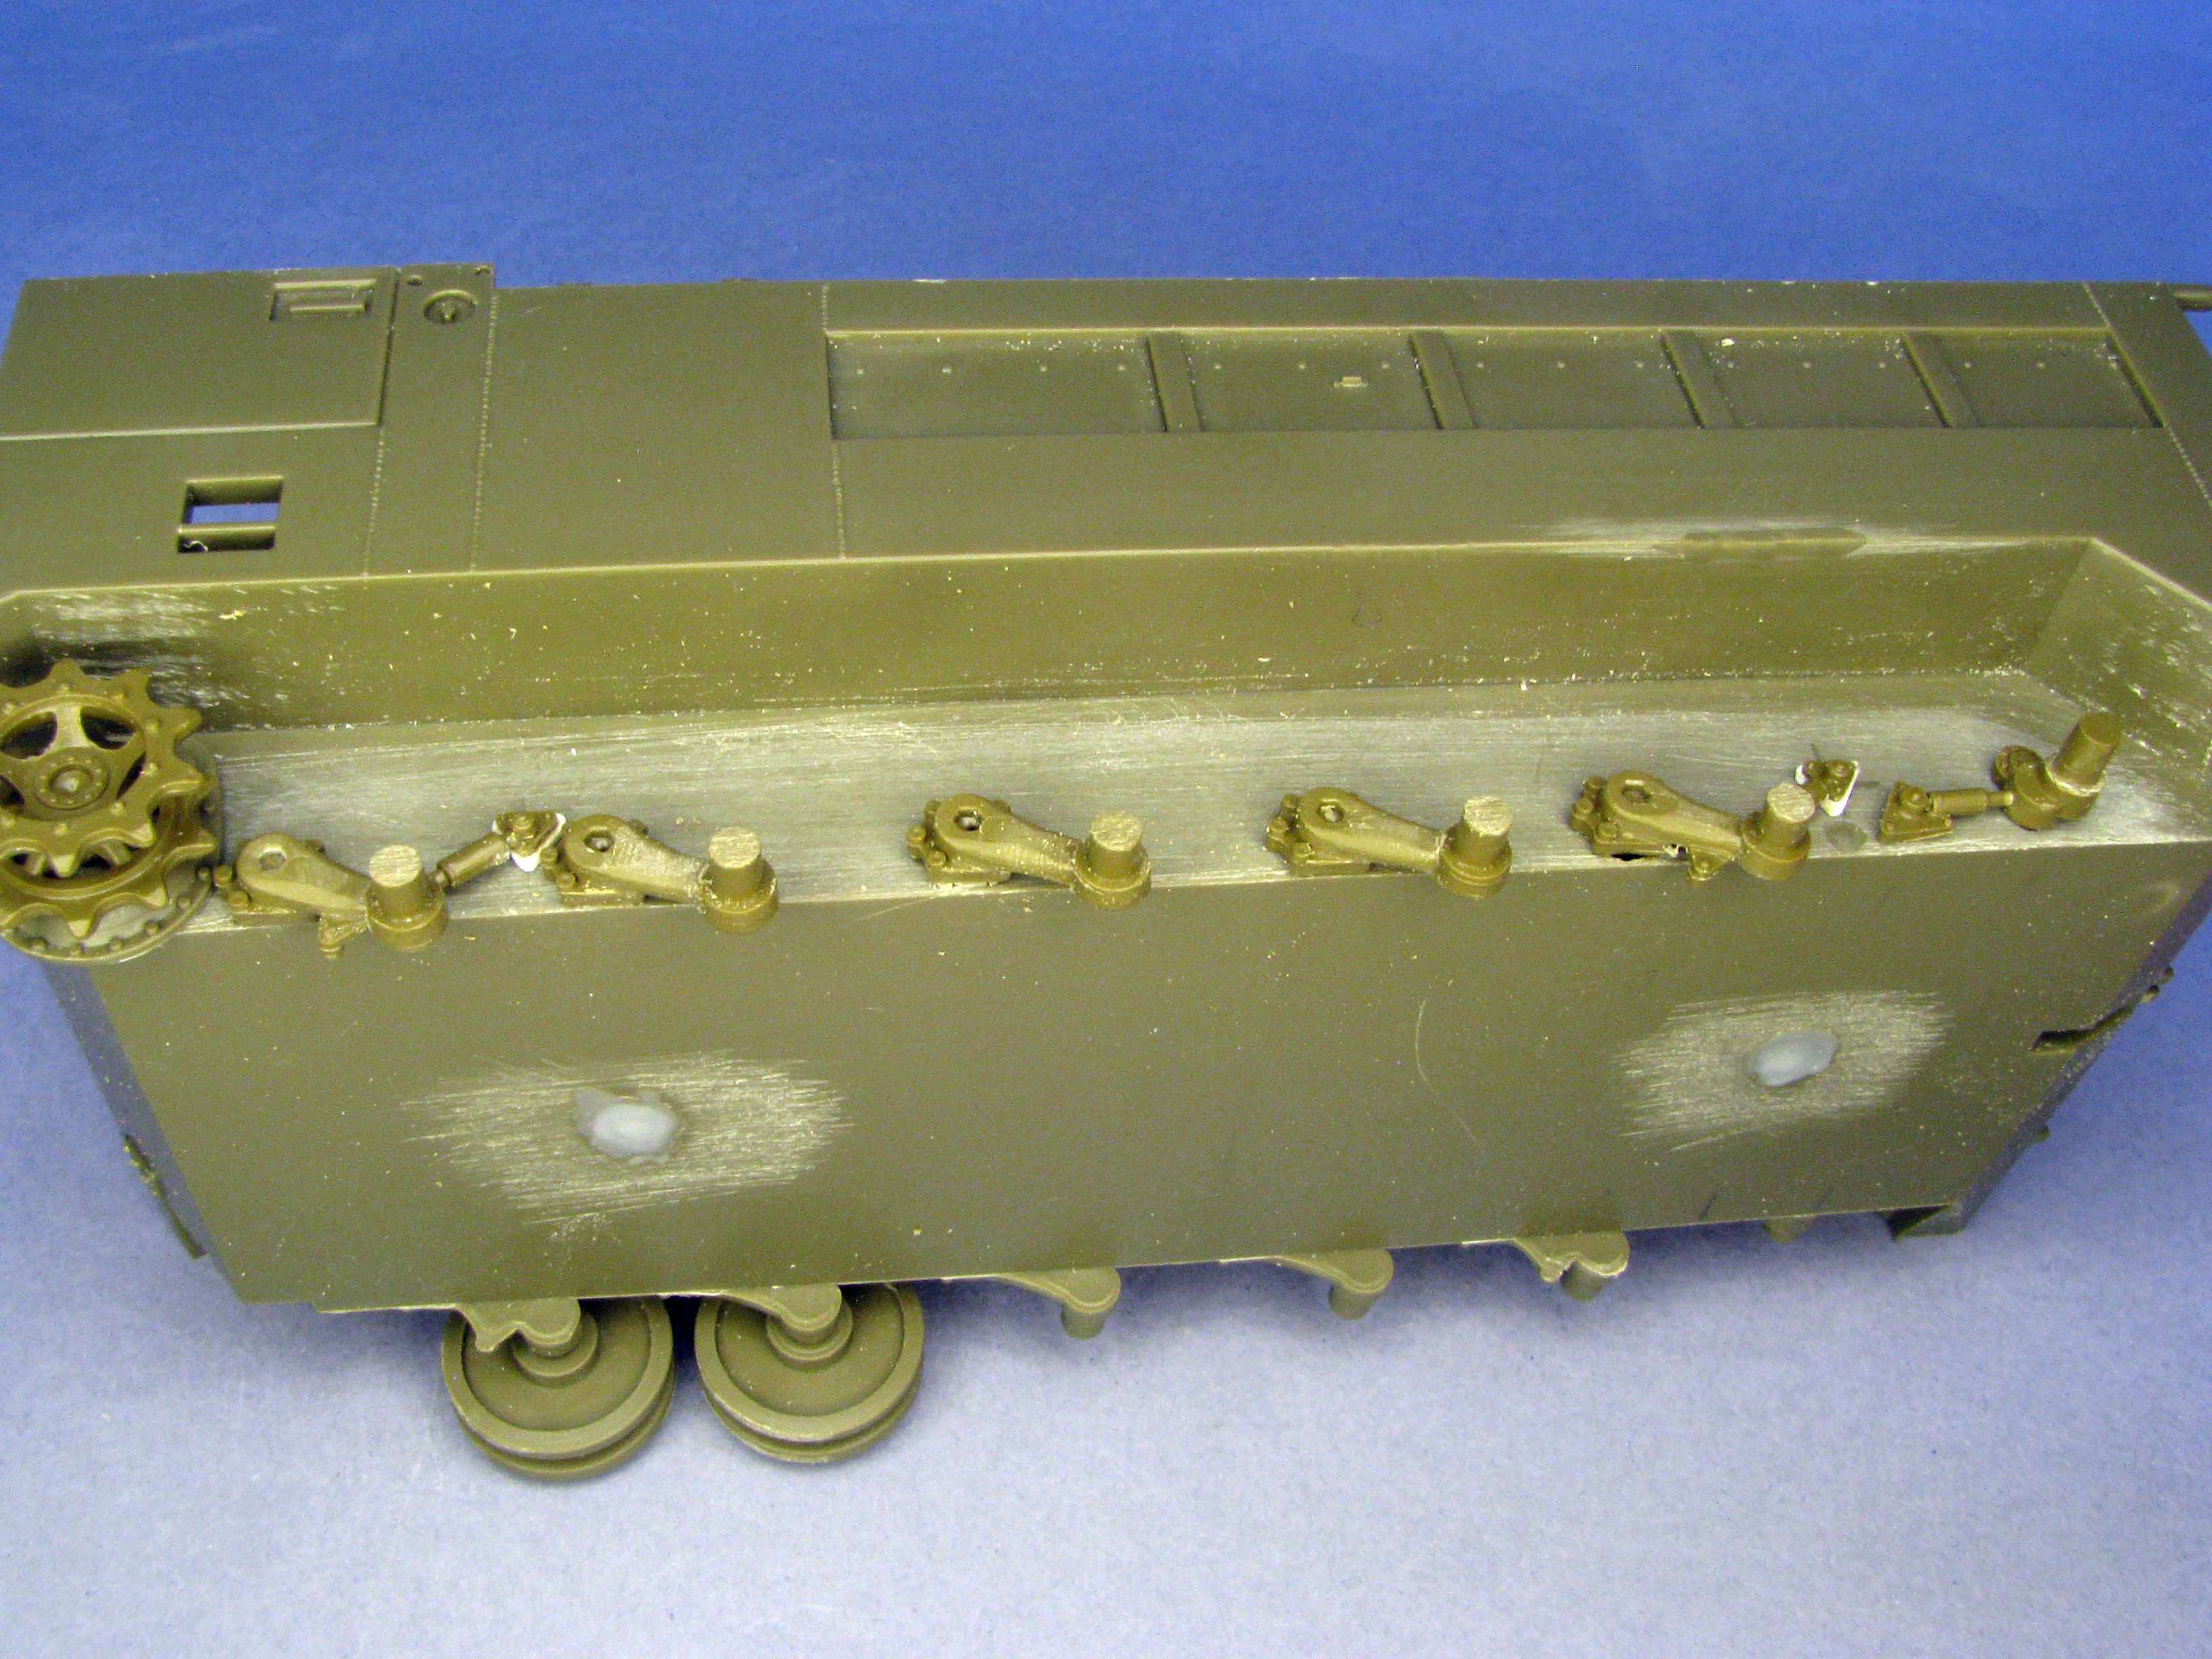
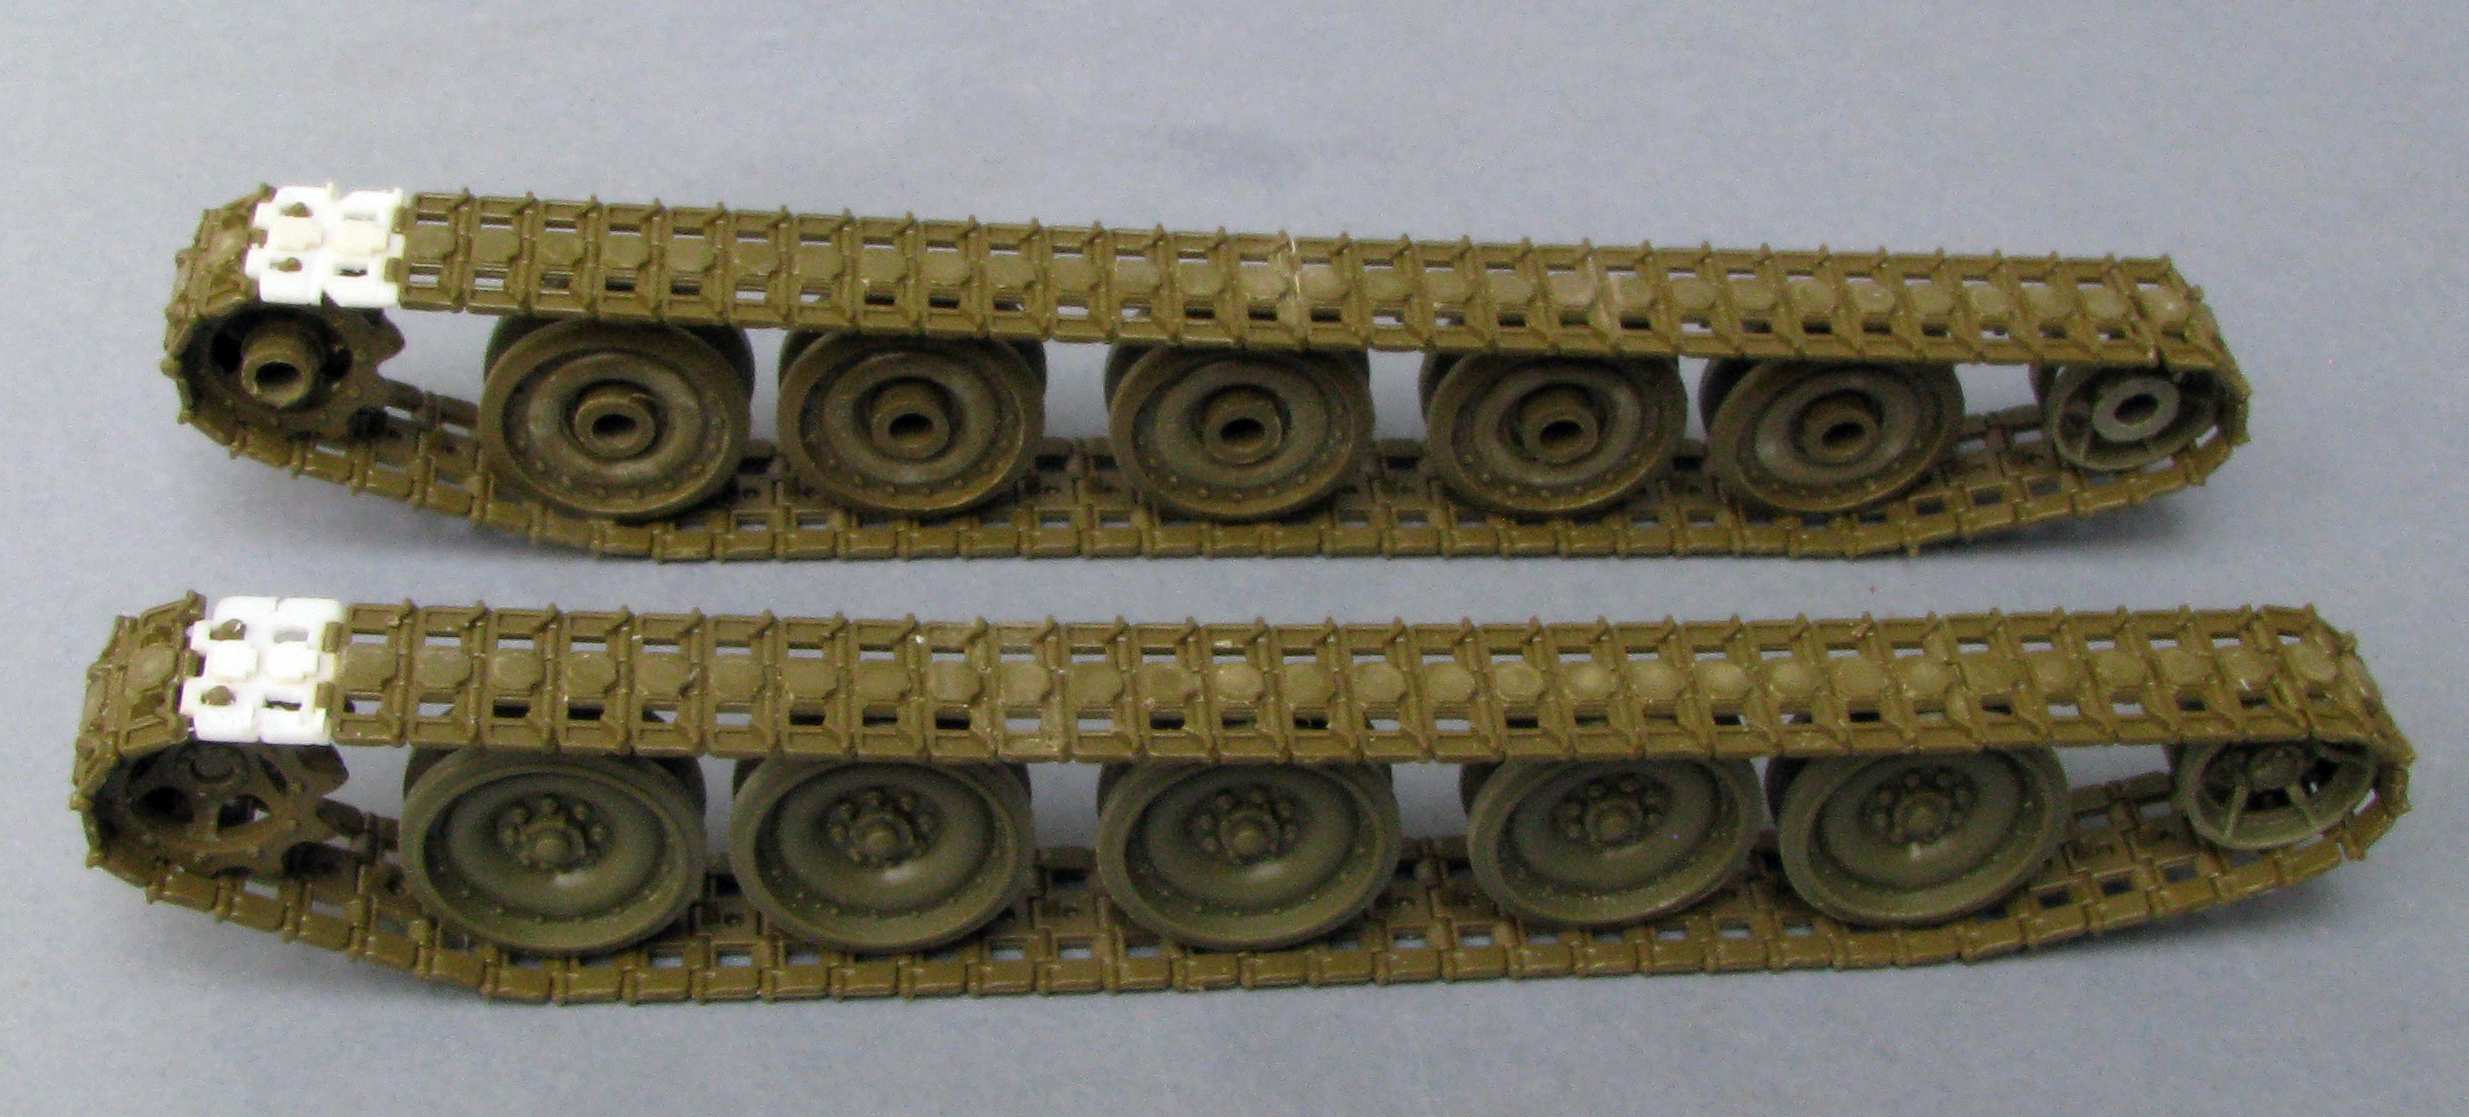
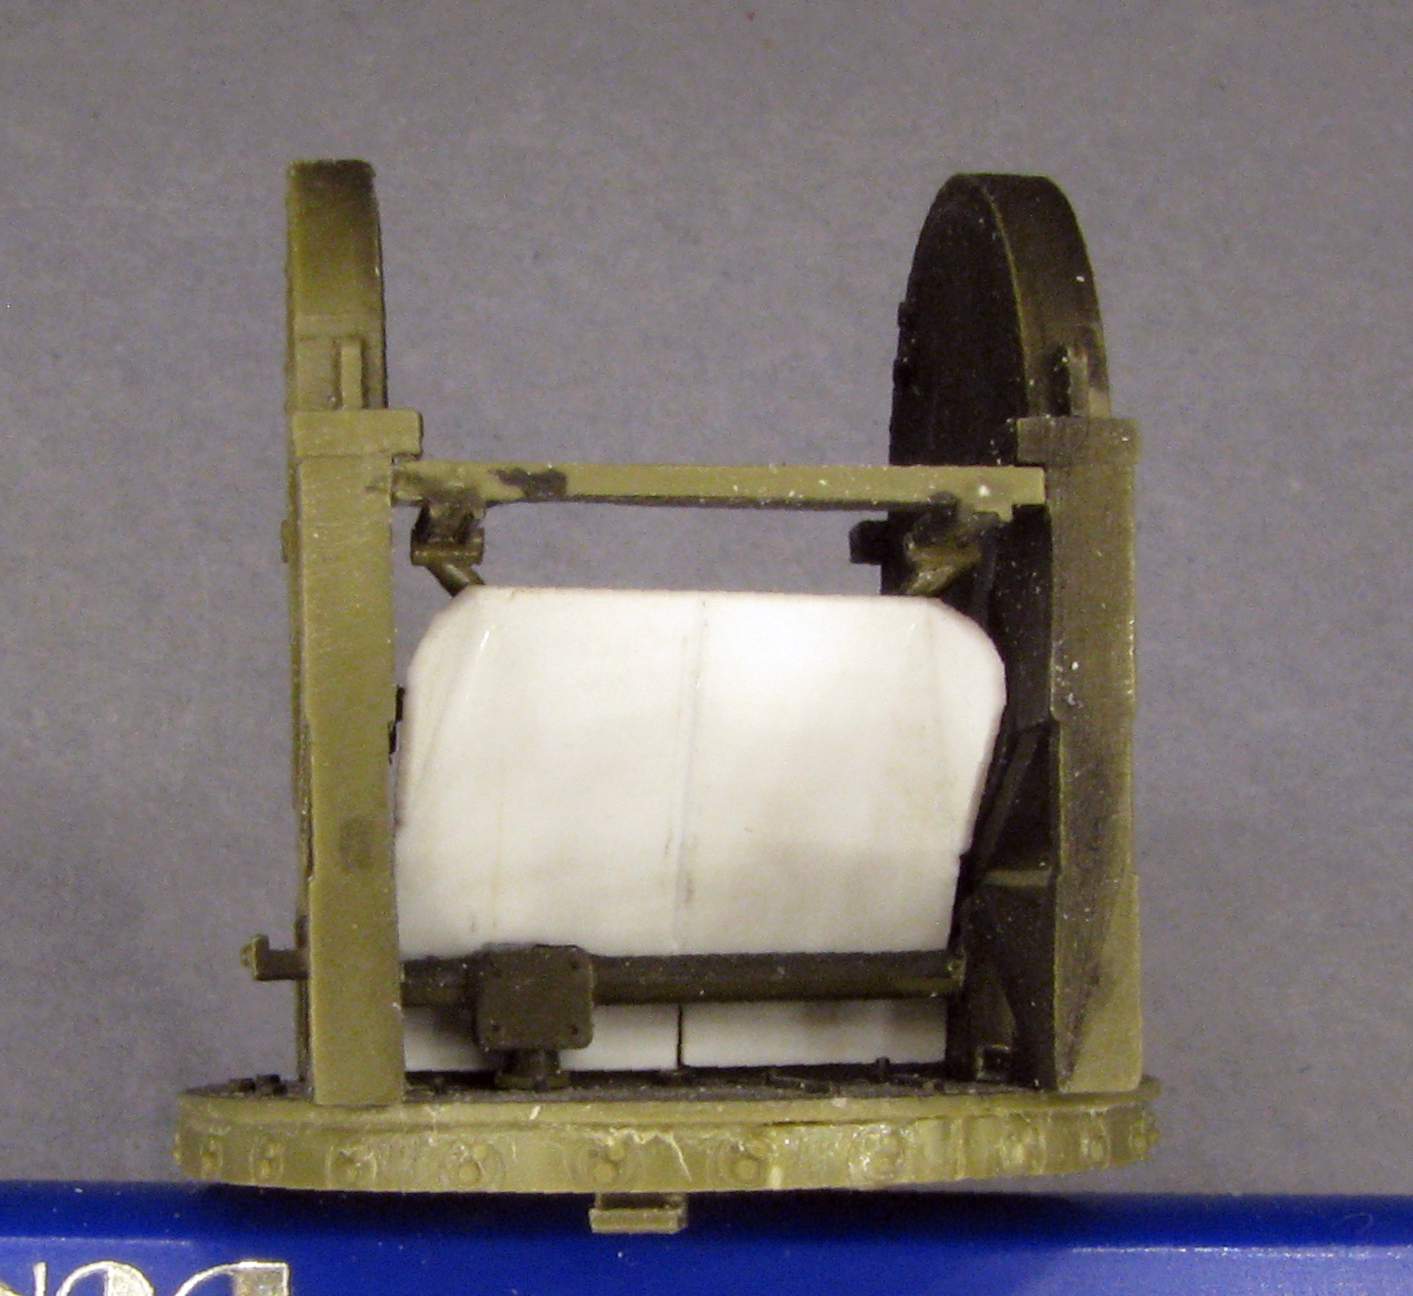
And I decided to improve the wheel suspension - so that’s what I’m working on now. Thanks for looking and have a nice day

Paweł

18 Likes

This is very interesting,will be watching.

3 Likes

Hello!

@Reaper2020 - thanks a lot for your comment! And thanks everybody for the likes.

Here’s my next update post:

I got an Italeri M113 variant to use it as a donor for a chassis parts transplantation. I started with lots of dry fitting and measuring. Then I drilled a hole in each road wheel pivot point to mark their positions. At last I took a saw and levelled the playing field, so to say:

1:35 AFV Club M548 with Quad .50 by Pawel

As you can see I have already made some road wheels. The leftmost wheel shows the AFV Club part - as you can see no detail on the inside, whatsoever. That’s why I decided to take the italeri part for the inside of the road wheel (second from the left), but also use the AFV Club part for the outside (it’s quite nice).

When I wrote it back then I have already glued the road wheel arms in place and I wanted everything to dry throughly to get a nice stable alignment. I started working on the other side only after my mods on this side had a chance to dry really well.

Thanks for looking and have a nice day

Paweł

9 Likes

going to follow this with interest.

1 Like

Great job so far Pawel. Very interesting vehicle I did not know existed. Is it painted black in those pics or very dark OD?

I tried finding one of these online and no luck.

1 Like

Hi Pawel,

close to ten years ago, I did an extensive build report of the standard M548 in AMPS Boresight, july 1996. Unfortunately, I was told a while ago that issues that old hadn’t been digitalized as their value nowadays was questionable; on the other hand, the Boresight index gives said issue as #36 - but you have to be logged in to view it, which I can’t be anymore.

Anyway, as you’re obviously decided to go all in, here’s a quotation from the text: “The road wheels lack the outer row of nuts (which is rather inconspicuous anyway). They received a separation line for their rubber bandages scraped in with a compass, and the holes in the hub centers were slightly enlarged and filled with Kristal Kleer to depict the oil check glasses.” Maybe the wheels of your later issue are already better in this respect?

A few pictures of my model can be seen here: M548A1 Munitionstransporter, AFV Club 1:35 von Peter Schweisthal . For more detailed informations, you can contact me offline if you wish. – What I would like to know, however: Does your kit contain the special front panel with the depressions for what I think are the wheels of the Quad trailer, as seen in the last two pictures?

Have fun, Peter

2 Likes

Very nice. I suspected that’s what you were going to do with the suspension. As for the wheels, FYI, Def Models do very nice early and late ones. I have both kinds, and they’re an improvement.

2 Likes

Will be watching this as I finally found one of these a while back and hope to build it. Wayne

1 Like

:thinking: The two wheels hung on the front of the pictured M548 are spare M113/M548 roadwheels…

Here are the wheels of the M55 carriage (M20 trailer) to compare

H.P.

1 Like

Hello!

Thanks a lot for your comments!

@Klaus-Adler - thanks a lot!

@metalhead85 - the way I see it it’s just the shade of OD that was used in vietnam. Converting this one from a “plain” M548 (just as it was done real life) wouldn’t be too hard. Still, as far as I know AFV Club is the only company makin an M548 in ths scale.

@PzAufkl - I looked at your work, congratulations! as you will see I made a lot of the same conversions you did. I just checked, my road wheels do have the outer set of nuts. I did’n do the oil glasses though.

Just like @Frenchy pointed out the wheels hung on the front are just spare wheels for the M548. And the front panel is just stock M548 front. The wheels use the bolts that are normally used for spare track shoes.

As for the quad 50 it usually has not only it’s wheels, but also its tow bar removed and left at the base, as towing it isn’t really practical and the useless wheel and tow bar would just be in the way of ammo loaders. Quad 50 was usually lifted on top of it’s transportation by helicoptrer or some crane - like a wrecker or ARV.

@18bravo - thanks a lot! I went with the kit wheels and the Italeri wheels.

@namengr - thanks, I’m looking forward to see more of your builds!

And let me post more of my build progress from two years ago:

Fit of the new suspension:

1:35 AFV Club M548 with Quad .50 by Pawel

And here’s a photo showing the wheels off, a the same time comparison to stock suspension on the other side:

1:35 AFV Club M548 with Quad .50 by Pawel

Now I could use some “The Doors”… “…break on through to the other side, break on through to the other side, yeah…”

After the transplant was done I went on to build the Italeri tracks. As it turns out, Italeri gives you 69 track links per side, which looks like a lot, but the tracks are still two links too short - so I decided to scratchbuild those missing two links per side and put thm where they will not be too visible. And so the tracks are finished:

1:35 AFV Club M548 with Quad .50 by Pawel

As I still want to paint them, I just made the track sets removable for now - that should help with said painting:

1:35 AFV Club M548 with Quad .50 by Pawel

Thanks for looking and have a nice day

Paweł

9 Likes

Hello everybody!

I’m movin’ on with the progress from long time ago:

The interior of the AFV Club kit is pretty barren, and without the windshield and roof it will be very visible… Eduard set 35906 helps a little, but I also had to design my own decals, then get them printed.

So here are some details and first decals on:

1:35 AFV Club M548 with Quad .50 by Pawel

And here are the interior parts painted up and more decals… I have also made the fire extinguisher. There will also be a 3D printed flashlight, and I think I have to 3D print the fire extinguishers, too, for future projects.

1:35 AFV Club M548 with Quad .50 by Pawel

I had the parts on Shapeways, but now Shapeways are no more and it successor - Thangs - well, doesn’t really do the job.

So, how do you like my data plates?

I have built a first aid kit and a flashlight (it’s 3D printed), here’s what they look like in big magnification:

1:35 AFV Club M548 with Quad .50 by Pawel

And the cockpit looks like this so far:

1:35 AFV Club M548 with Quad .50 by Pawel

1:35 AFV Club M548 with Quad .50 by Pawel

Thanks for looking and have a nice day!

Paweł

16 Likes

Flashlights and first aid kits, things that she be included in every US vehicle model.
Nice job, by the way!

3 Likes

That already looks great, Pawel!

I enclose a few pics I took from a borrowed TM years ago; some of them might be of use.

Linkage from the brake levers goes into the seat on their right.

Note trailer light socket cable at left of bottom tailgate.

Certainly not on every vehicle, but distinctive.

And there are holes for the tarpaulin bows in the side wall tops - for service and stowage positions, see pics of my model.

This kit can sure keep you busy - enjoy!

Peter

3 Likes

Pawel, those data plates look spot on. Fantastic work. The interior looks excellent. The first aid kit and flashlight look great and are wonderful additions to the model. Nice attention to detail.

1 Like

Hello!

Thanks a lot for your comments!

@JJohnson59 - thanks a lot! Yeah, some stuff is mysteriously missing almost everywhere!

@PzAufkl - Thank you very much! Thanks for the pictures, I also worked with the TM for this one. They have so many nice infos in them. That’s one thing that draws me to models of US equipment - it’s relatively easy to get info on them from TMs that are easy to get online.

@SSGToms - thank you! Good thing we got 3D printers now, and custom printed decals, too! This makes modelling so much more fun!

Let me post some more pictures from the already done work. Here’s how the cargo bed gate looked like OOB:

1:35 AFV Club M548 with Quad .50 by Pawel

The blue arrows point to the hinges I made to replace the kit hinges that would allow to make the tailgate “operational” (what for?), but they were decidedly oversize… The yellow areas mark the tailgate latches missing altogether, and the red areas mark the cargo door latches that would have to be removed and re-done…

And here’s how I handled it:

1:35 AFV Club M548 with Quad .50 by Pawel

And also some photos of the underside with modified suspension and some access hatches scribed in:

1:35 AFV Club M548 with Quad .50 by Pawel

I tried to recreate the dented sheet metal seen on the 1:1 photo:

1:35 AFV Club M548 with Quad .50 by Pawel

I’ve also made some welds - I basically stretched some sprue, melted it a little with some lacquer thinner and then shaped them with a tip of my surgical blade:

1:35 AFV Club M548 with Quad .50 by Pawel

I’ve also populated the light clusters. The hull cavities are painted with black Gunze paint to help with painting later:

1:35 AFV Club M548 with Quad .50 by Pawel

The large opening is for the winch. I worked on the winch itself, too. The winch drum comes in two halves with fake line - instead of cleaning that up I decided to scratchbuild a new drum and wrap some fitting line around it - I think I got something good looking in a comparable time this way:

1:35 AFV Club M548 with Quad .50 by Pawel

Thanks for looking and have a nice day!

Paweł

10 Likes

And another update from back then…

I have installed the winch and detailed the front to show empty tool racks. Lots of tiny PE involved, and macro ruthlessly shows all minor problems. I got so close the lens distortion is even visible (the top edges got bent on the photo). The ending of the winch line is scratchbuilt:

1:35 AFV Club M548 with Quad .50 by Pawel

And then I started painting:

First I put on some sand coloured preshading. It’s Humbrol 121. You can see the plywood cargo bed liner on the front bulkhead:

1:35 AFV Club M548 with Quad .50 by Pawel

1:35 AFV Club M548 with Quad .50 by Pawel

On top of that I put on some OD - Humbrol 66 mixed with some gloss clear:

1:35 AFV Club M548 with Quad .50 by Pawel

1:35 AFV Club M548 with Quad .50 by Pawel

I put some pigment on the tracks and on the hull sides.

I started applying the decals, but noticed some of the registration numbers and bumper codes are too big, so I had to redesign them and order them printed again…

Thanks for looking and have a nice day!

Paweł

11 Likes

I really like the interior decals. Looking at real vehicle they really are needed to make it look right. Wayne

2 Likes

Hello everybody!

@namengr - thanks a lot Wayne!I think I got a good method now to make them as custom decals. On a side note - I have one extra set for the M548 (I always print a set of spares) - should somebody need something like this, please contact me!

Here’s one more shot of the chassis, with decals on:

paint05.jpg

And some time ago I started building the Quad 50. First thing I needed to do is to “frankenstein” a gunner for it. Lot’s of hacking, filling, fitting and filing - and still more to come - here’s what the process looked like:

1:35 AFV Club M548 with Quad .50 by Pawel

1:35 AFV Club M548 with Quad .50 by Pawel

That white thing is “Patafix” - sticky stuff that I used to hold the parts together for fitting.

So this guy still isn’t out of surgery, but now a few operations less to go:

1:35 AFV Club M548 with Quad .50 by Pawel

1:35 AFV Club M548 with Quad .50 by Pawel

The photos show him still with a “dry fit”.

I have painted him with acrylic paints and here’s what I got:

1:35 AFV Club M548 with Quad .50 by Pawel

1:35 AFV Club M548 with Quad .50 by Pawel

One of the vets I’m in contact with told me all the Quads he had seen in Vietnam had the “plate” behind the gunner’s seat, and not the “cross” as depicted in the AFV Club model. So I added the appropriate part - in white in the photo below:

1:35 AFV Club M548 with Quad .50 by Pawel

I have also been looking at the resin trailer AFV Club supplied in the kit. While it’s not bad, I would have to remove the tow bar (this was done a lot to save space and keep it from getting in the way) and work hard on the two rear jacks (shown in the wrong position by AFV Club). So I decided to go for something completely different - I drew up a 3D model and a friend printed it out for me. This way I won’t have to do much more here, and everybody needing a part for a gun truck (it’s missing in the “Nancy” kit for example) can also easuly get one. Here’s what I’ve got:

1:35 AFV Club M548 with Quad .50 by Pawel

1:35 AFV Club M548 with Quad .50 by Pawel

Thanks fr looking and have a nice day!

Paweł

12 Likes

Hello everybody!

Another update:

In the photos below you can see the loader’s shields and the power charger of newer type (that was the type used in Vietnam) and its control box installed rotated 90 degrees - like in the photos:

Here are the Ma Deuces, practically done - the barrels and the ammo boxes are 3D prints from Dynamo:

quad_chassis06.jpg

And the mount after painting looks like this:

quad_chassis07.jpg

quad_chassis08.jpg

Here is the chassis with the decals on:

paint05.jpg

I have also - from parts from different sets - assembled a team of 4 figures that will be posed in the cargo bed, like in the photos of the 1:1:

More work on the figs:

crew02.jpg

Thanks for looking and have a nice day!

Paweł

12 Likes

You’ve turned this kit into a real stunner Pawel. Your build is tight, your scratchwork is outstanding and those figures look excellent so far.

2 Likes