That’s a lot of great work building all that extra detail; but none of us would even know any of that even existed if YOU hadn’t told us. But since you did now we know what to look for!
Ken
1 Like
The “like meter” is pinned on this build! 
1 Like
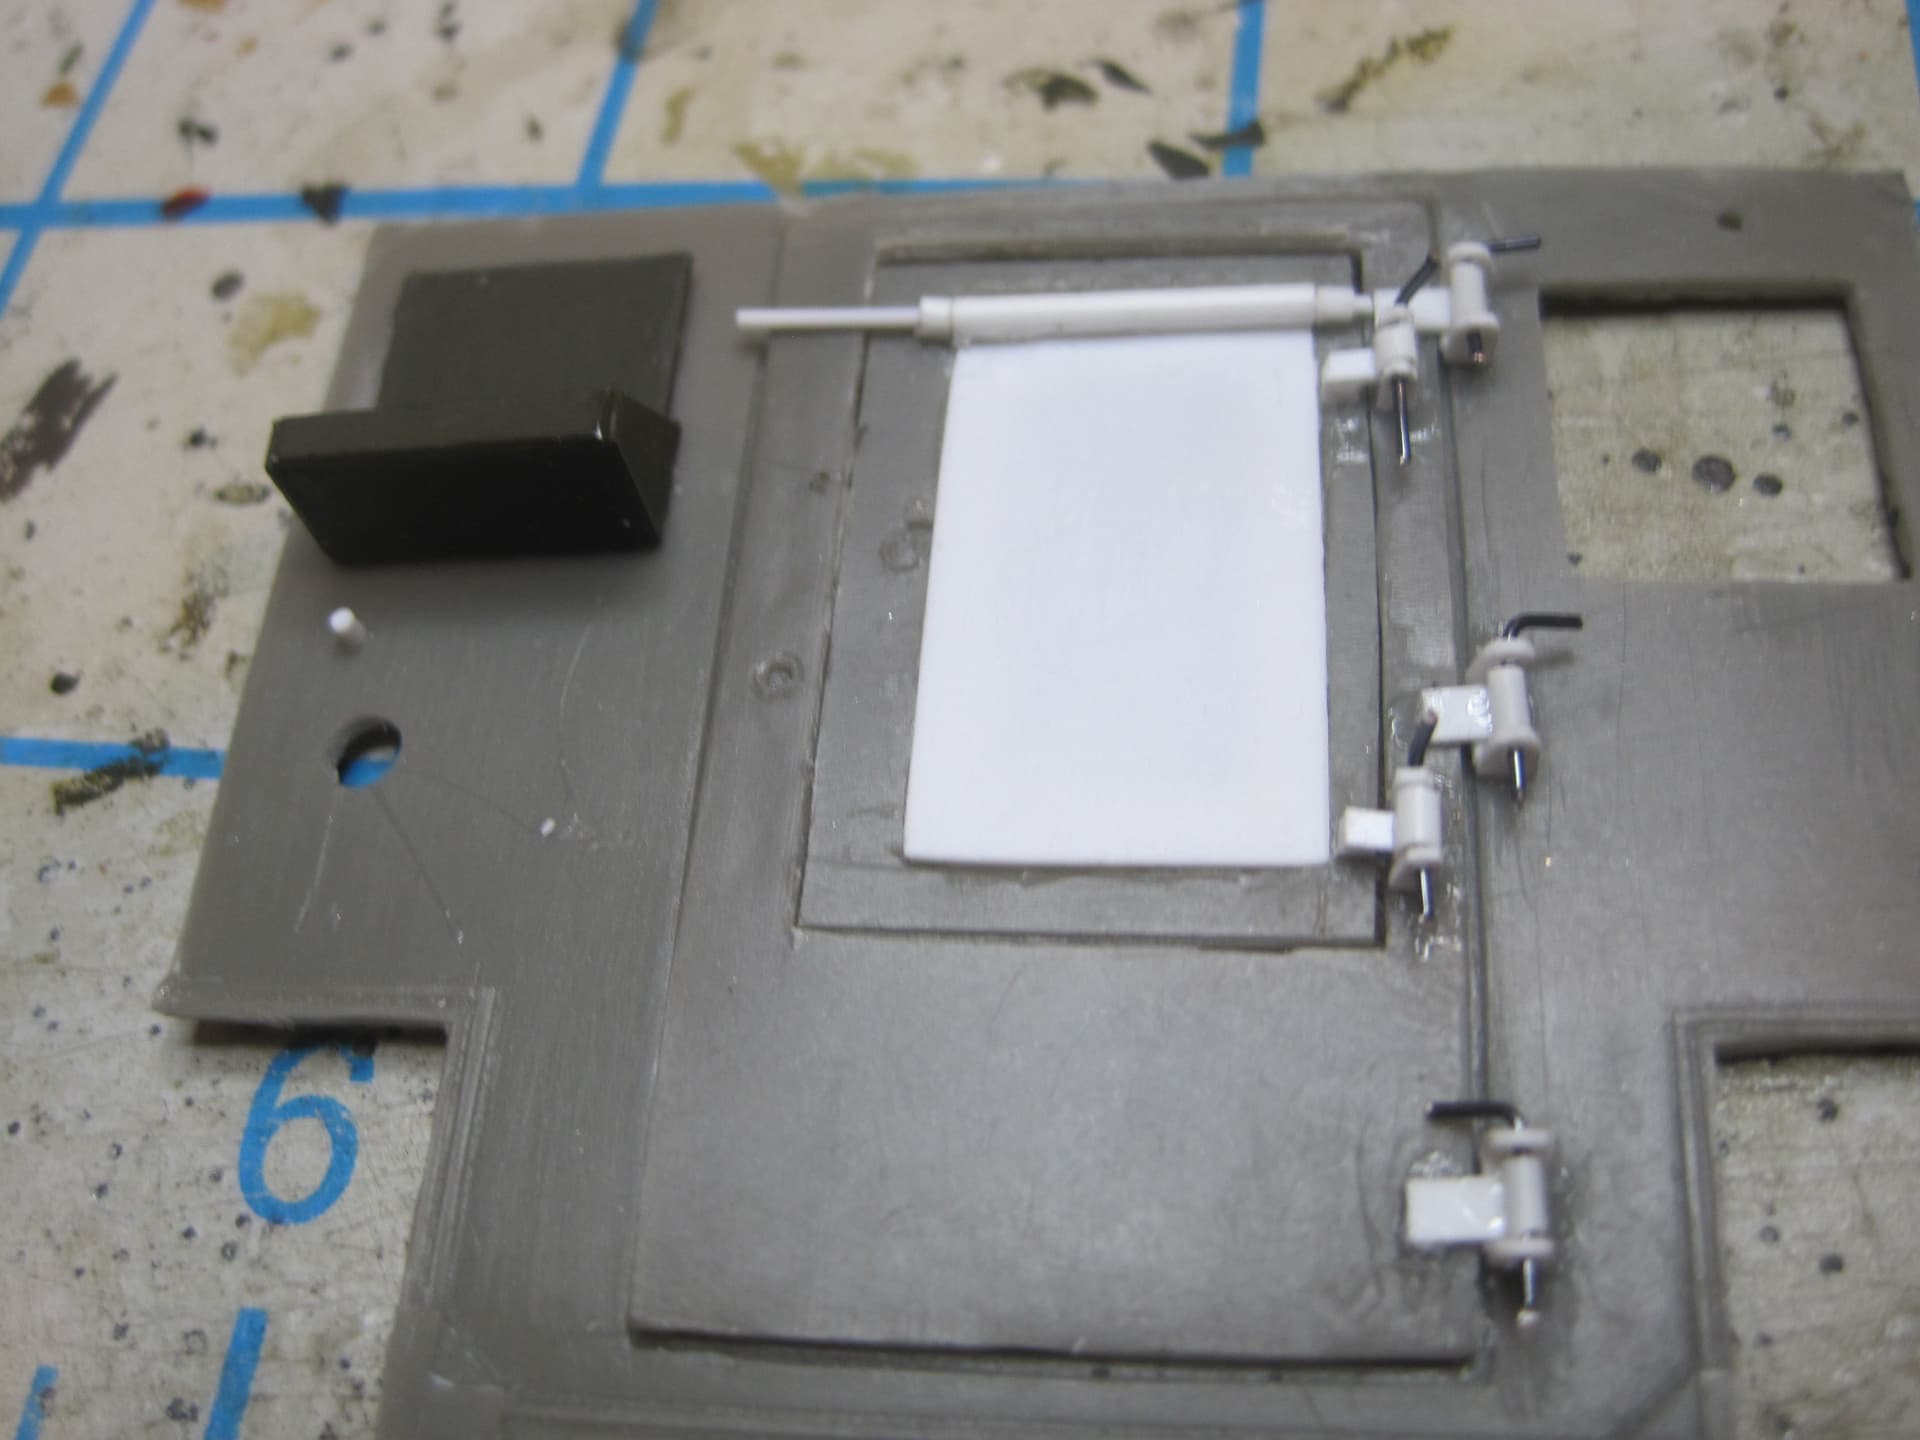
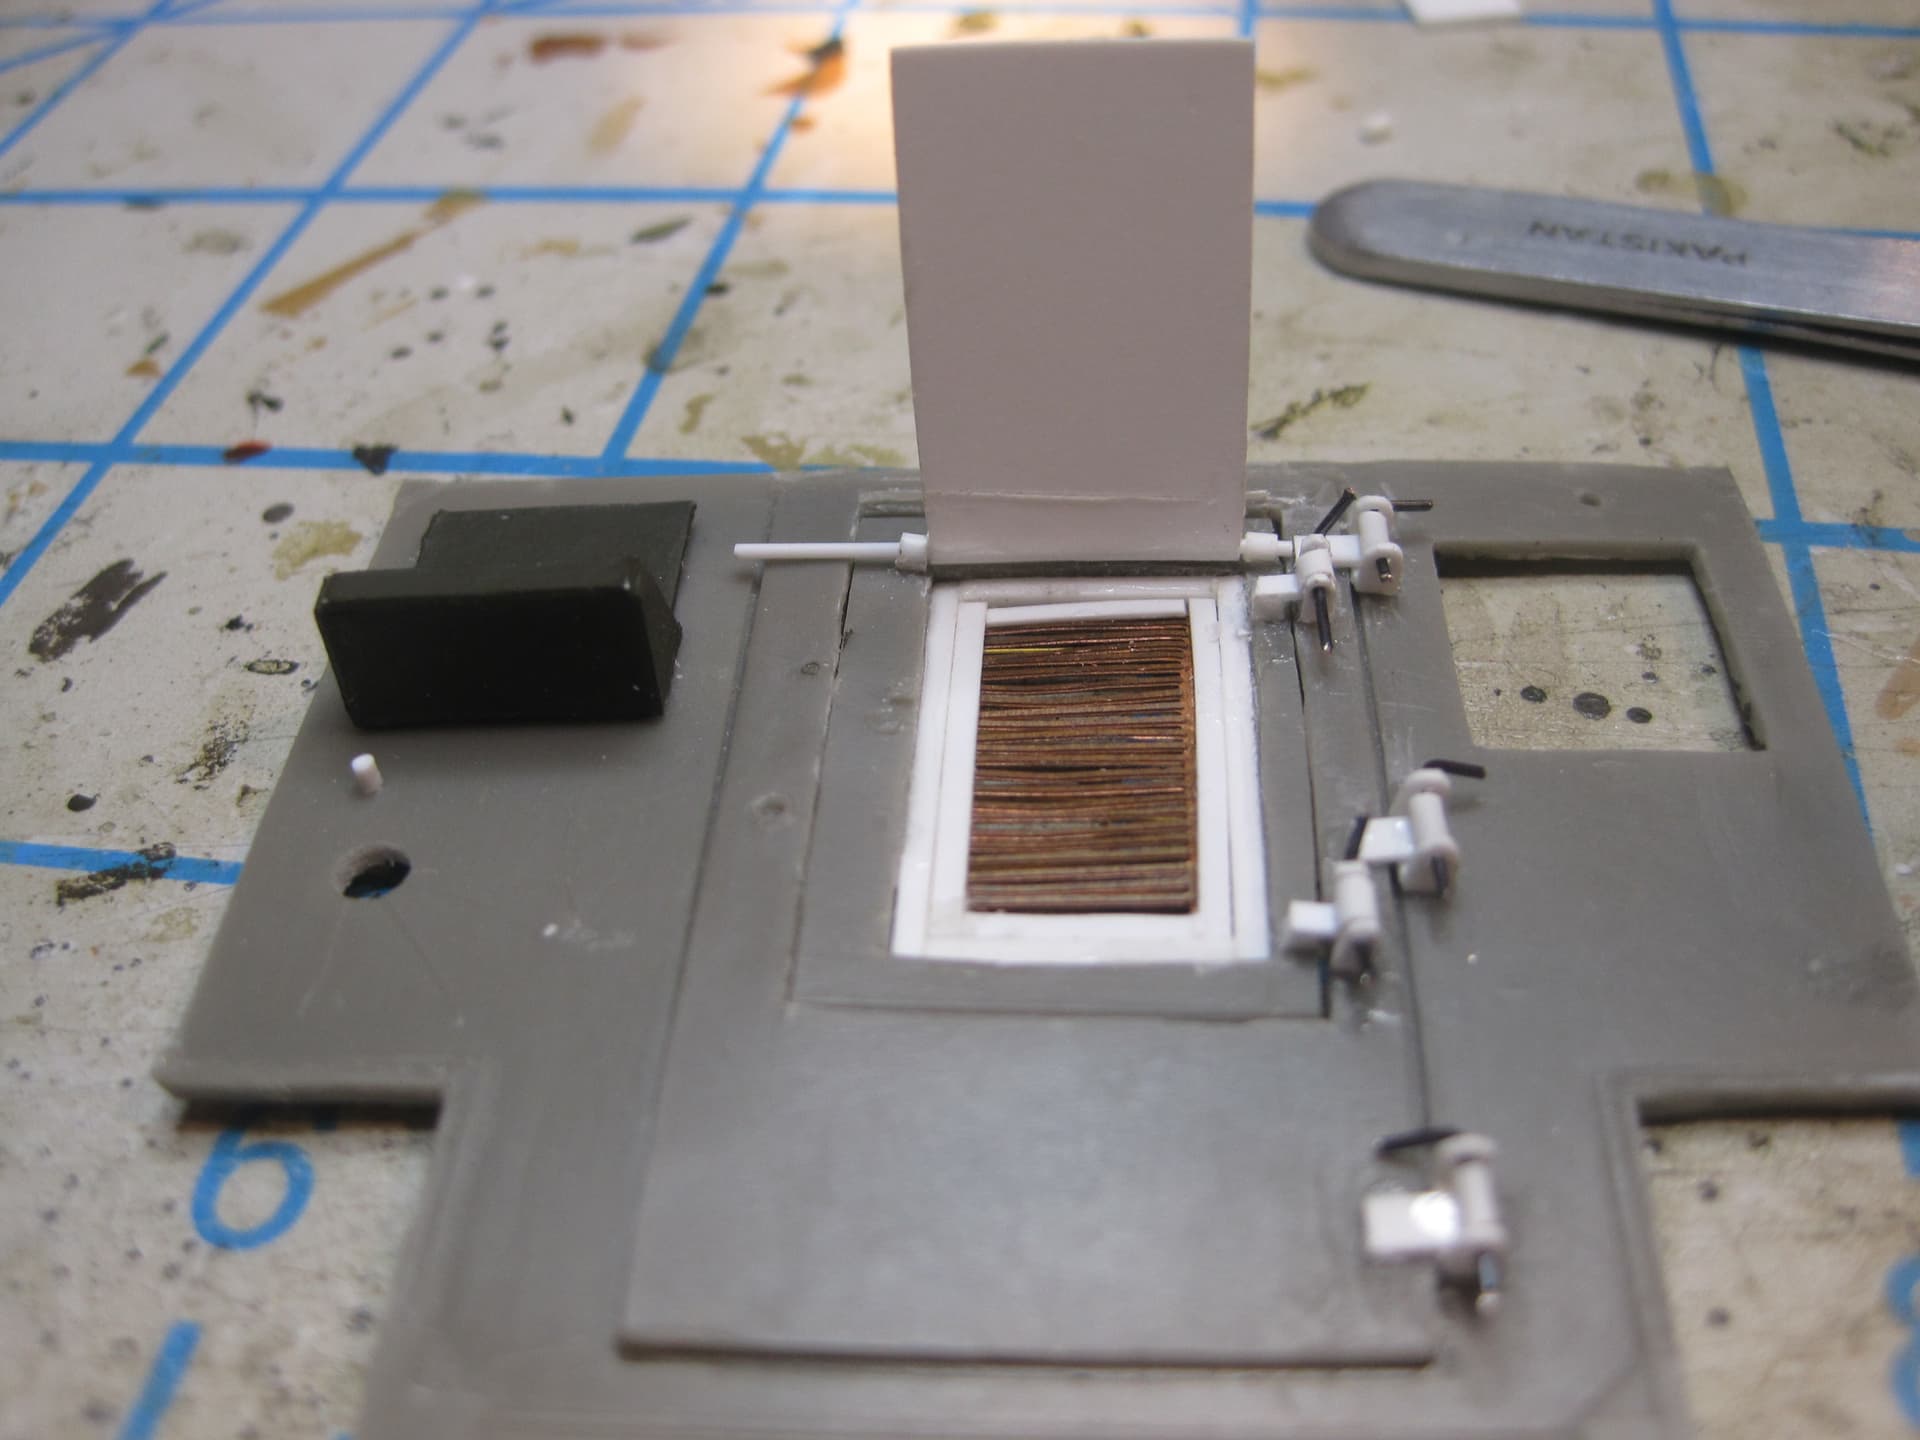
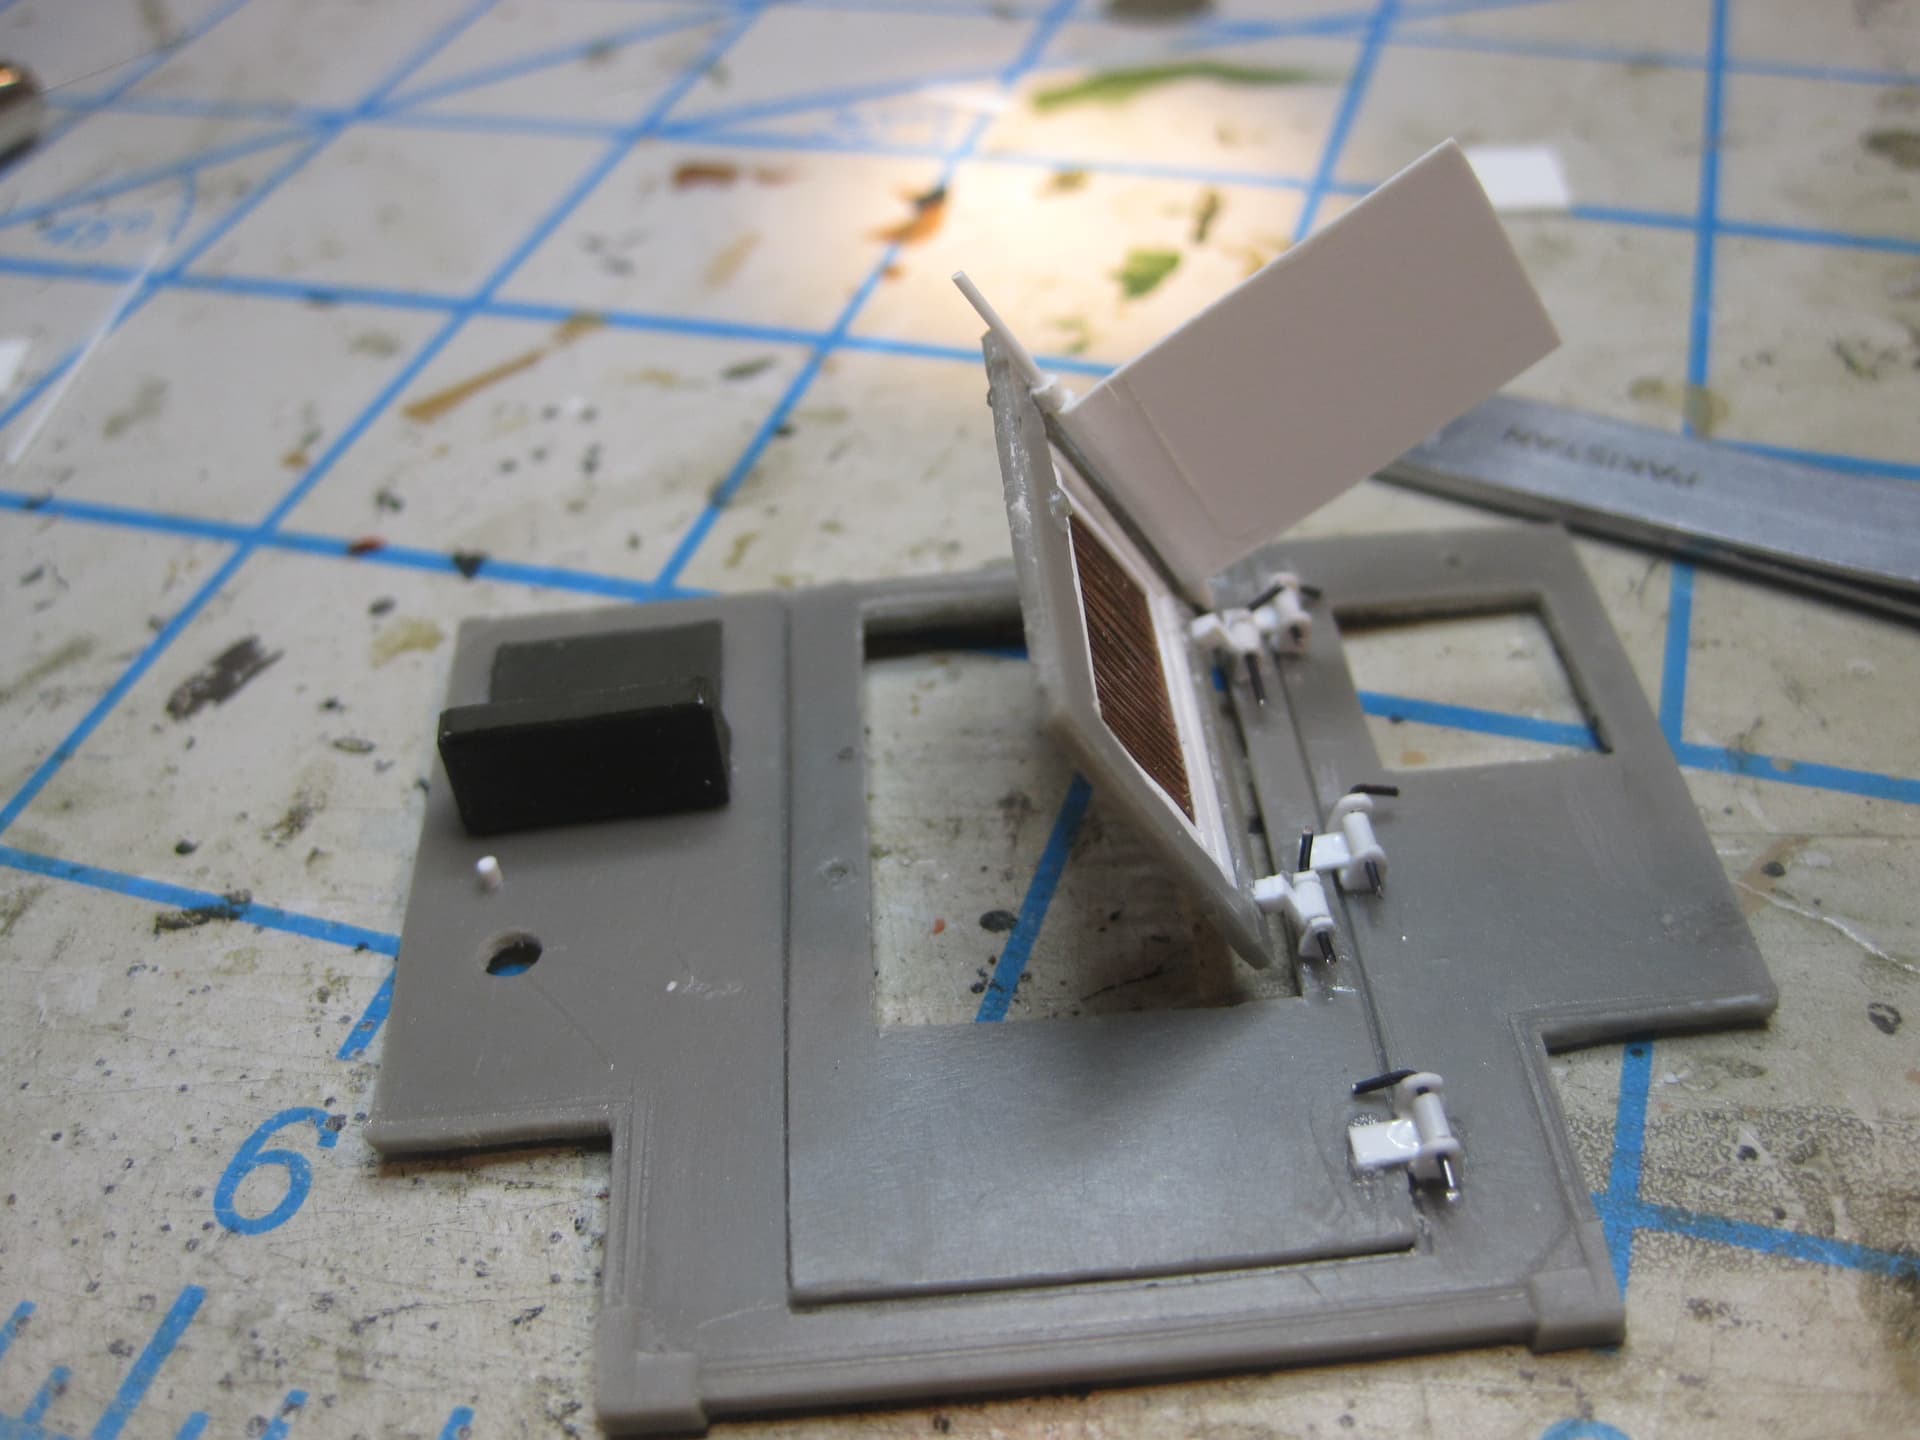
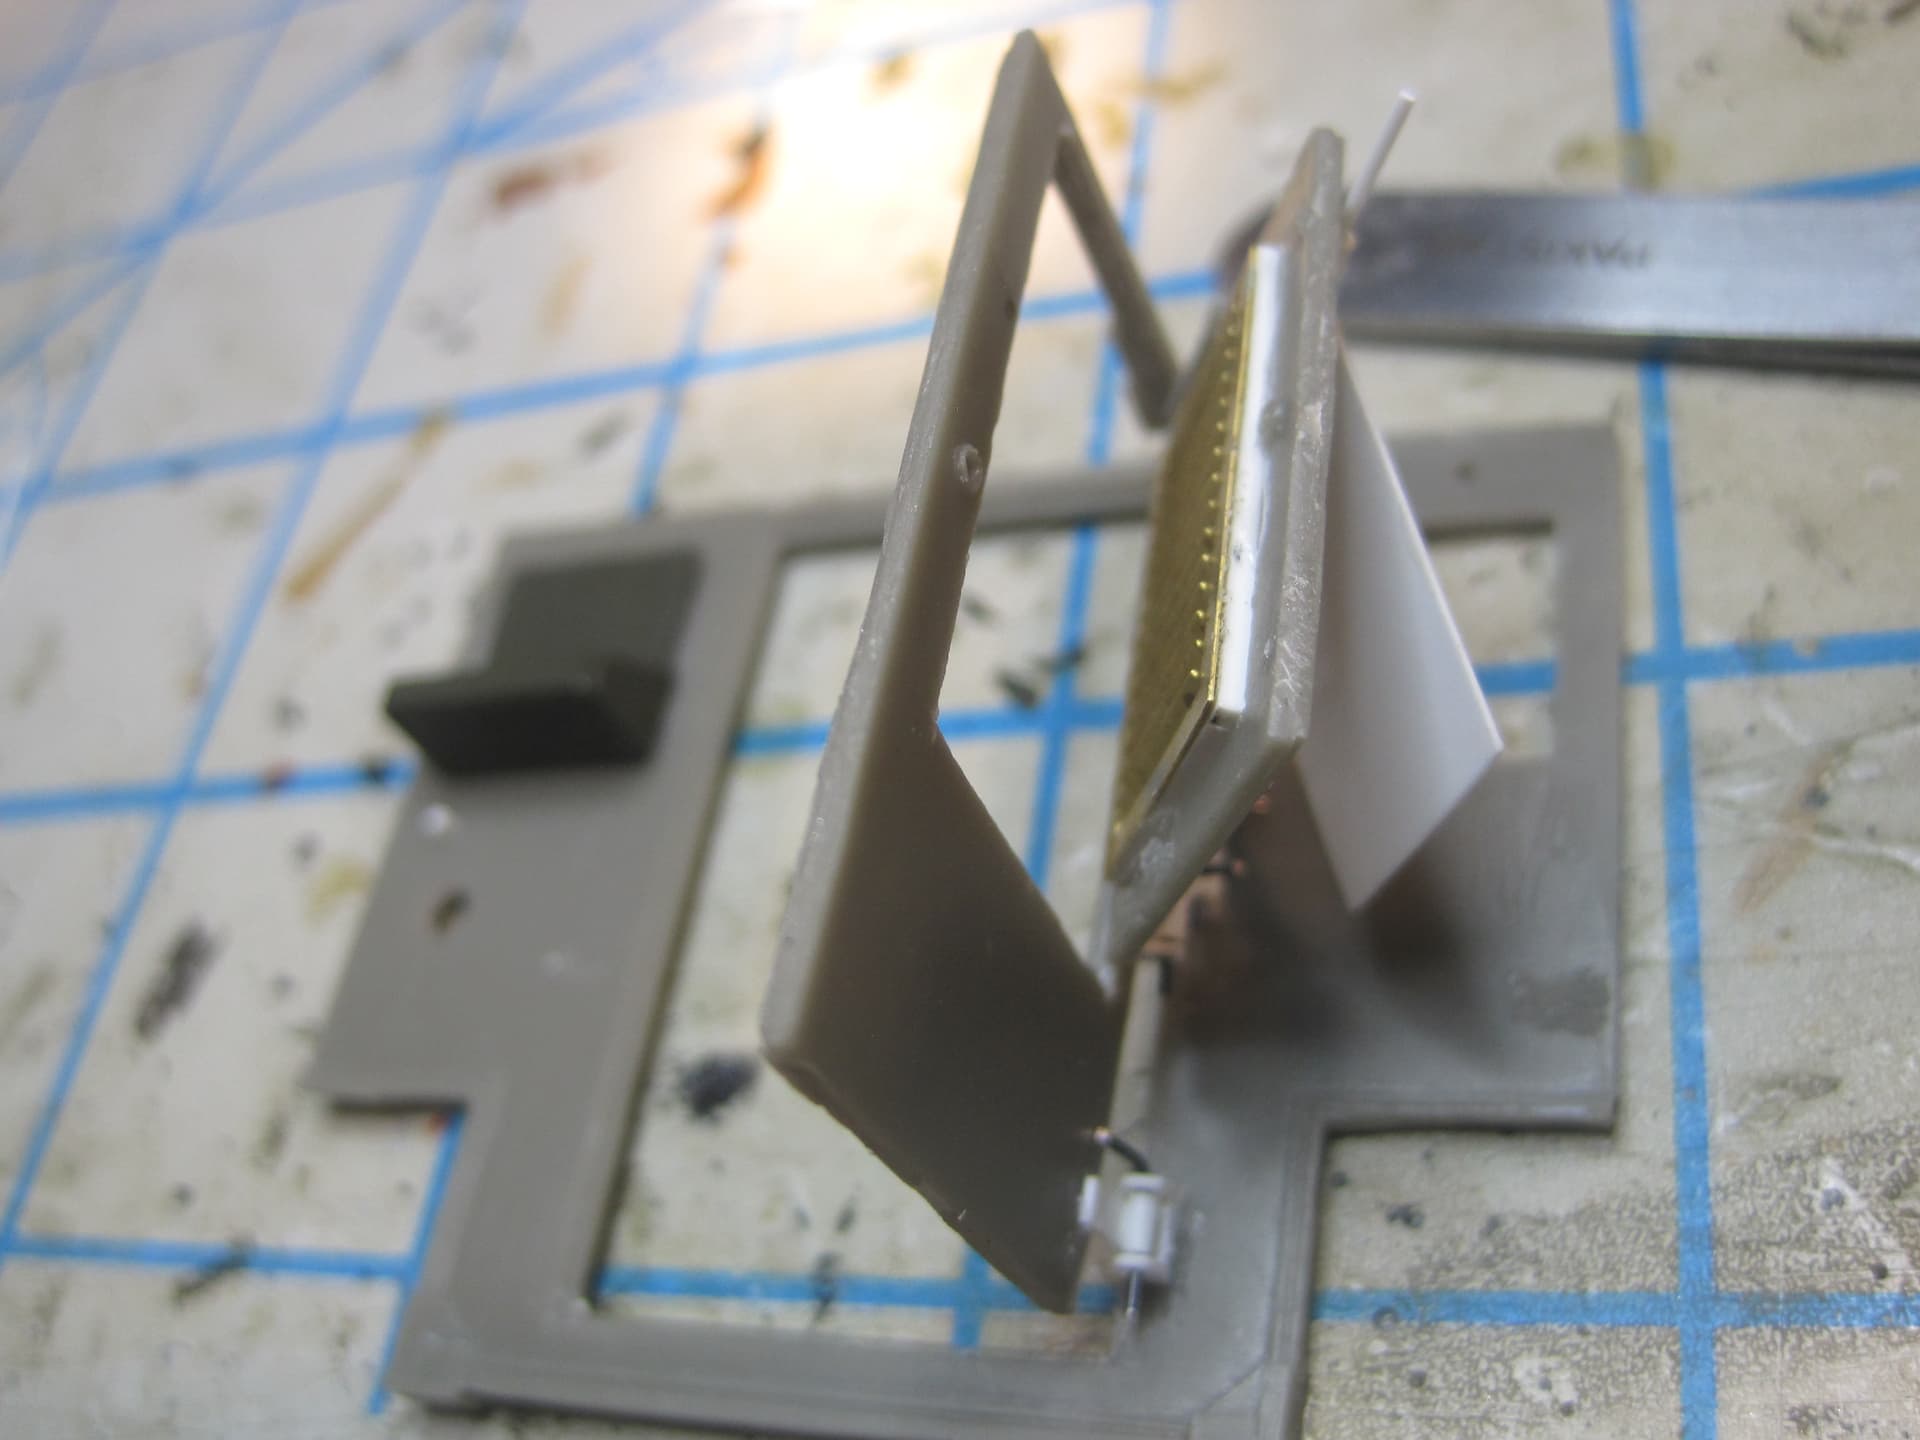
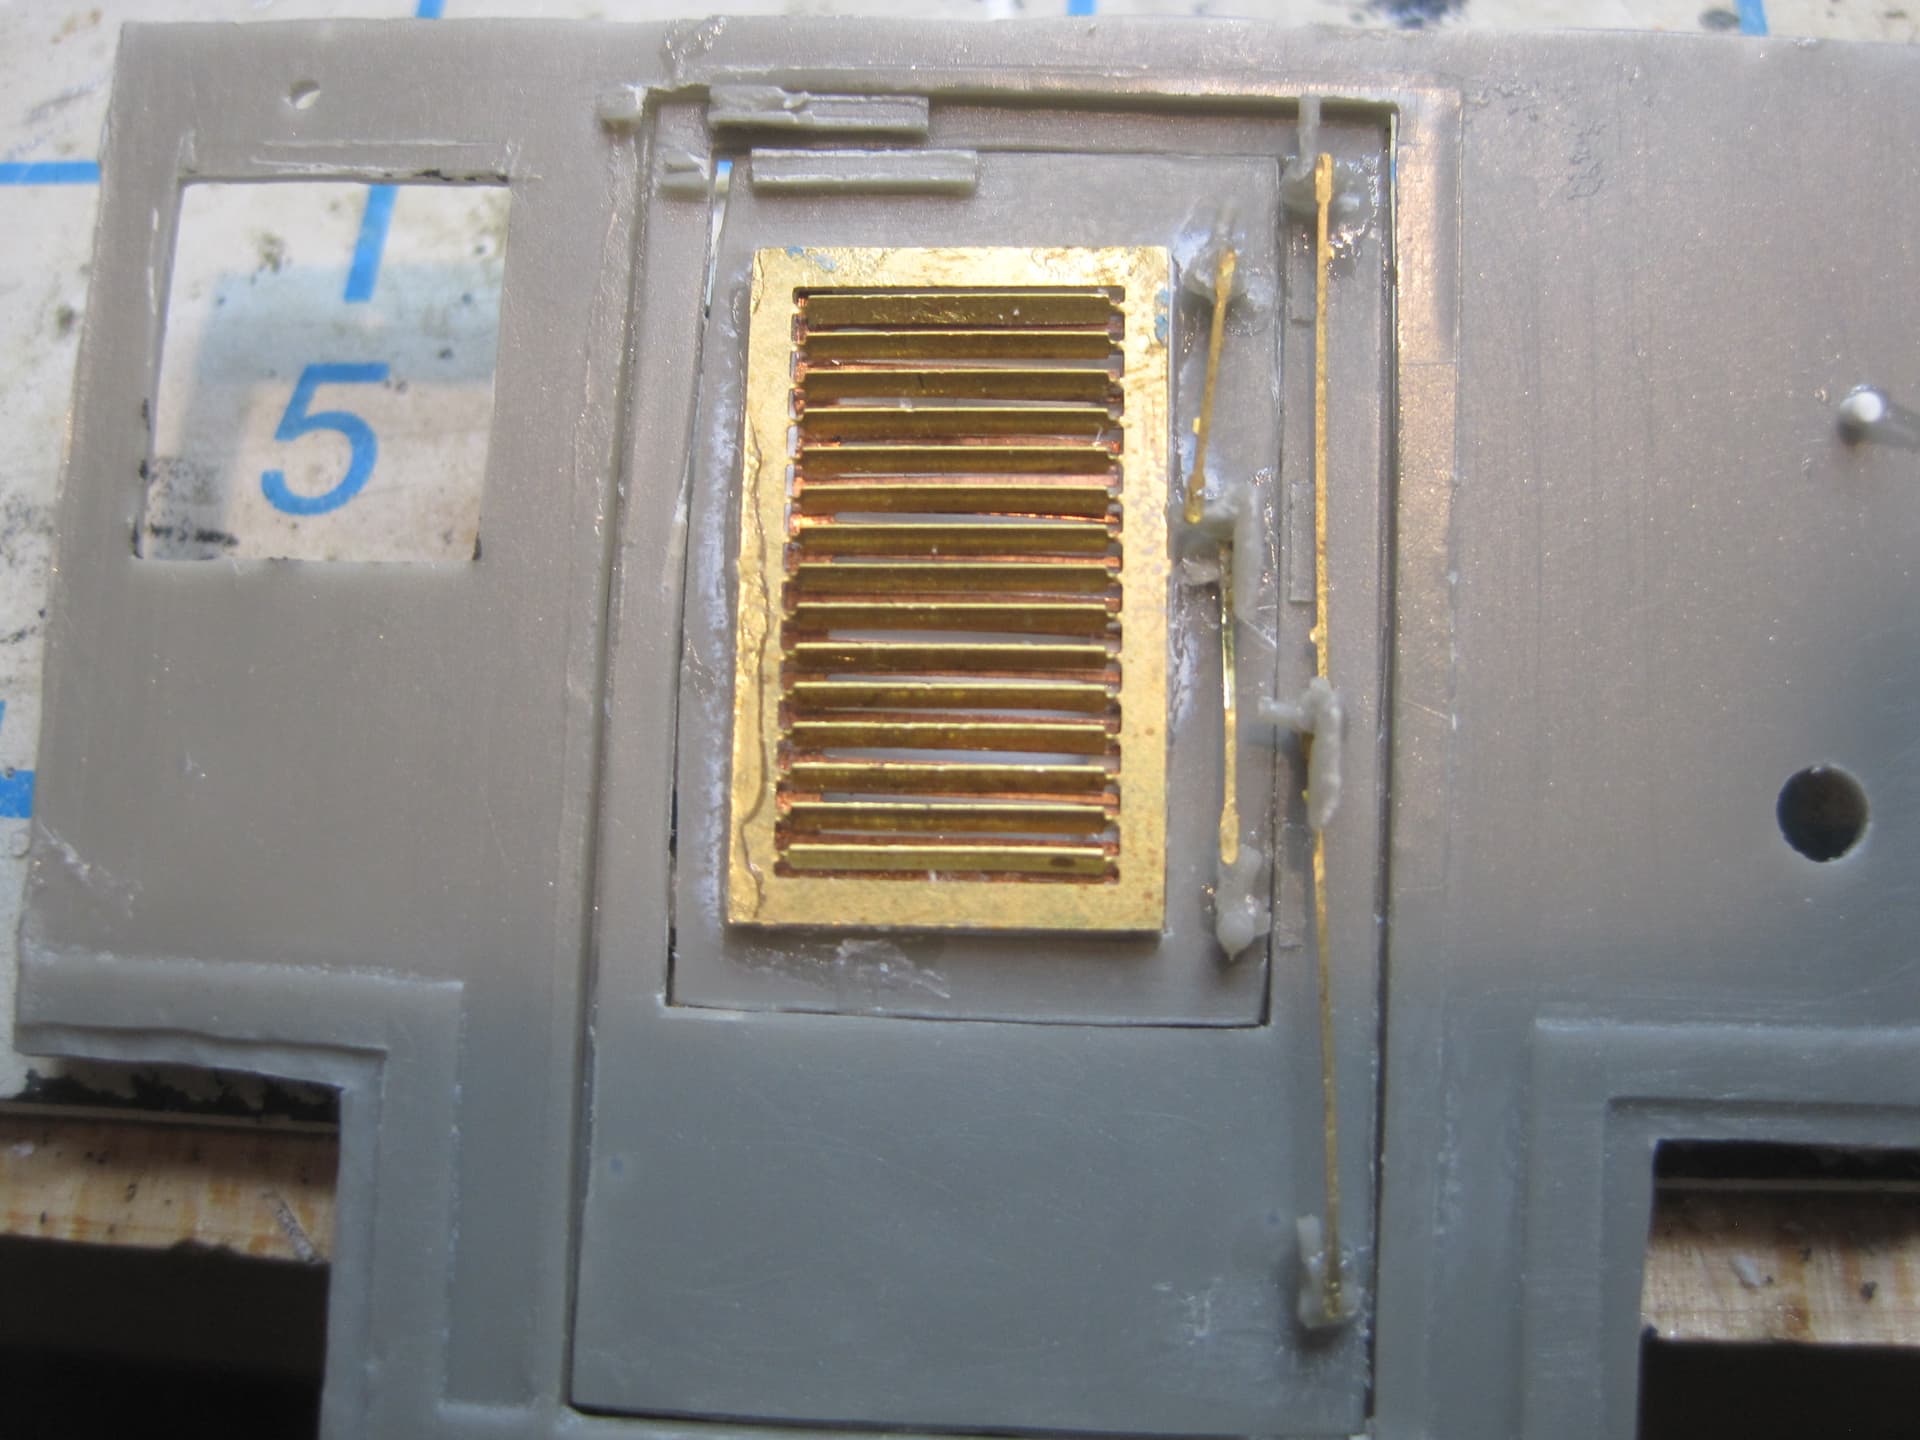
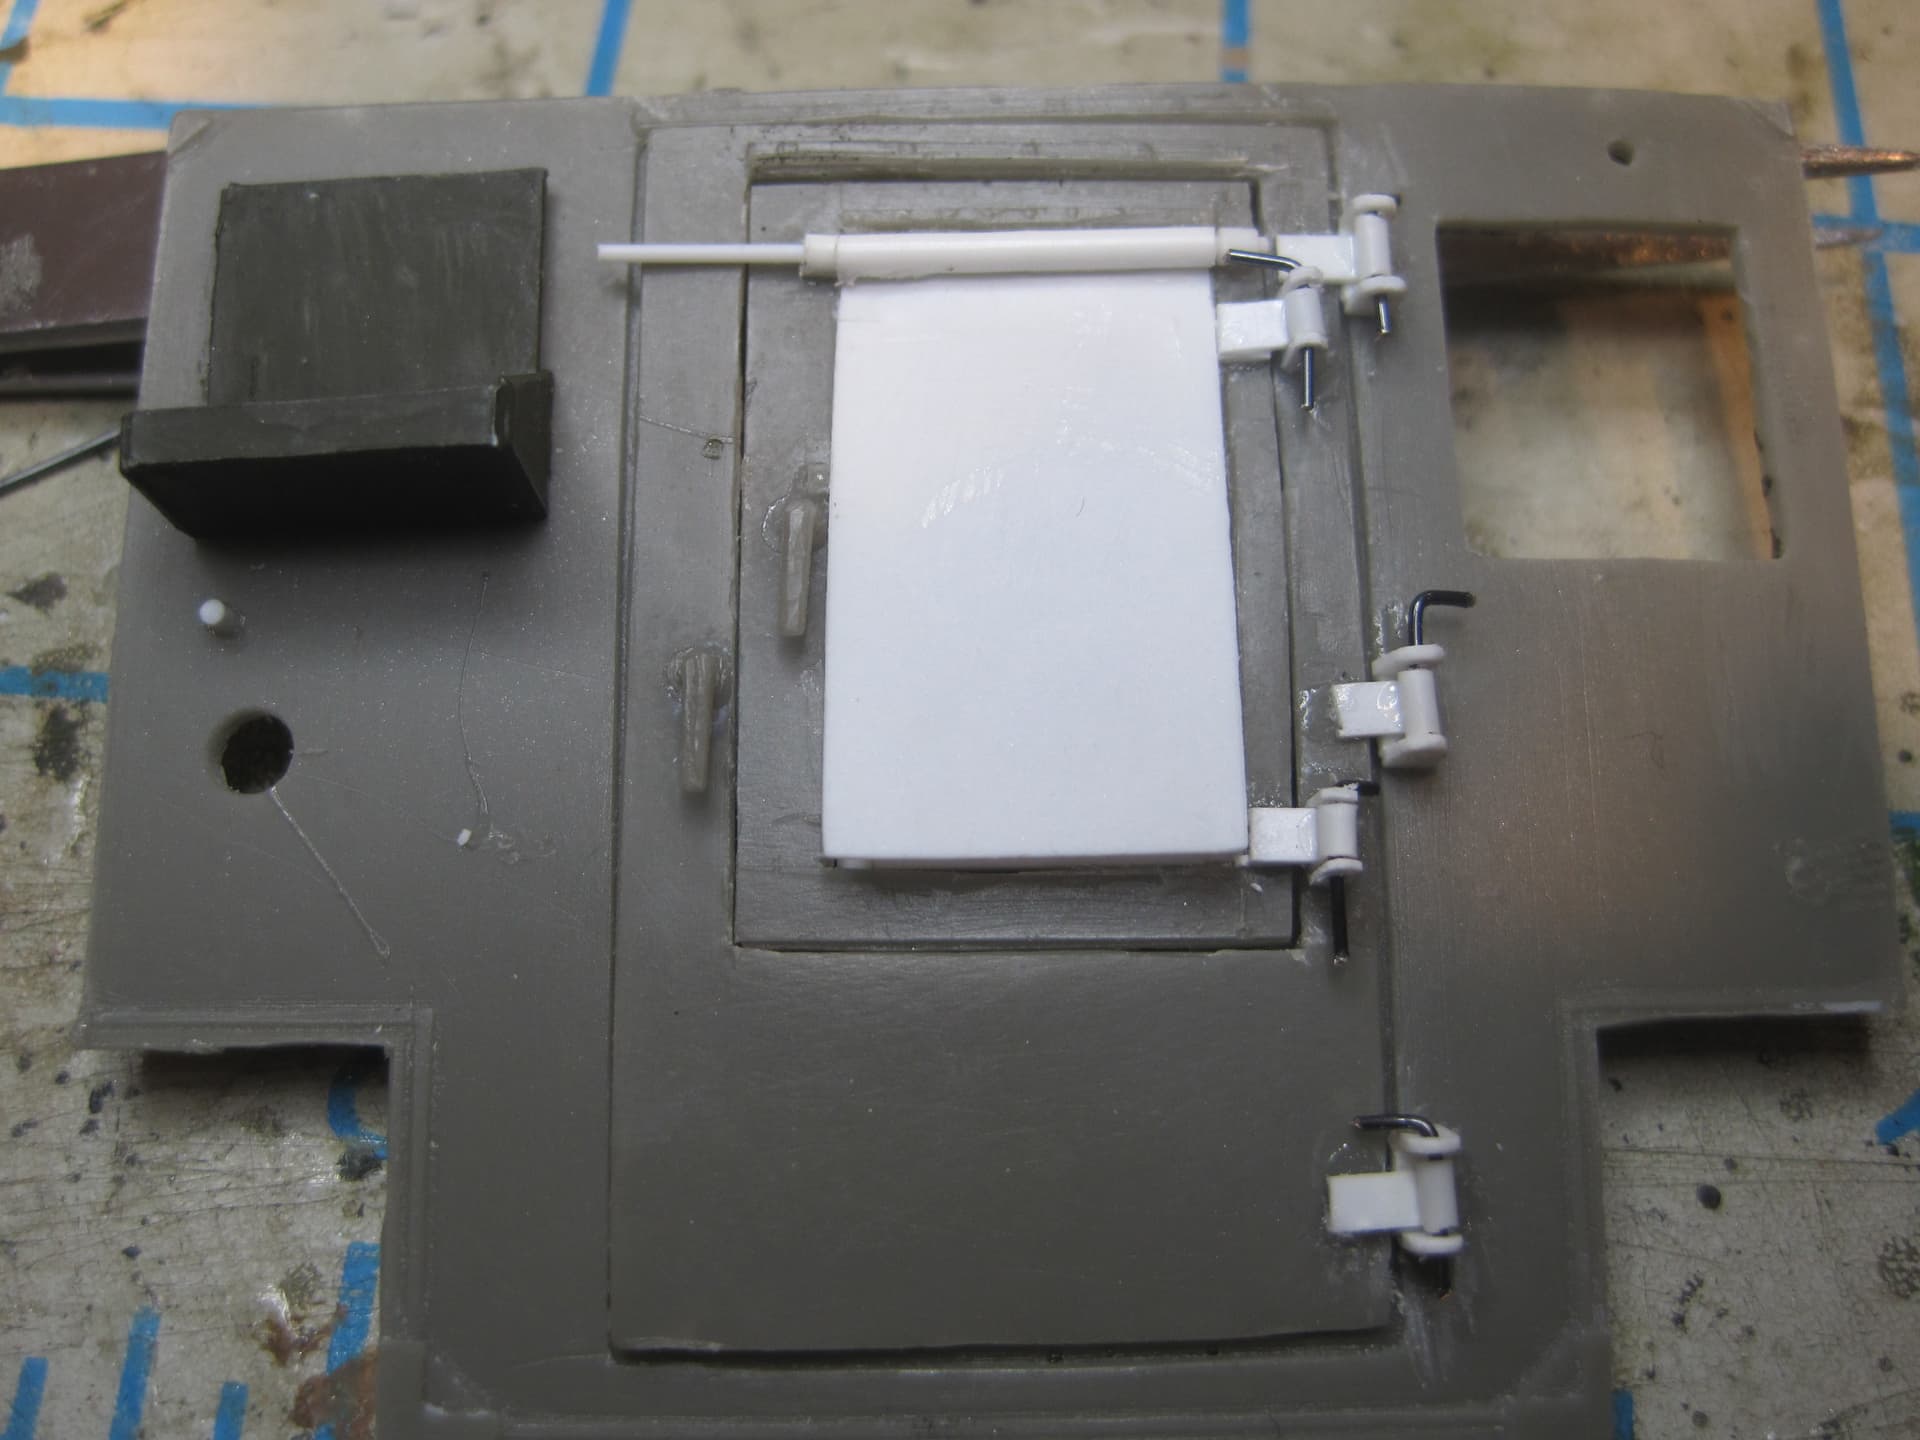
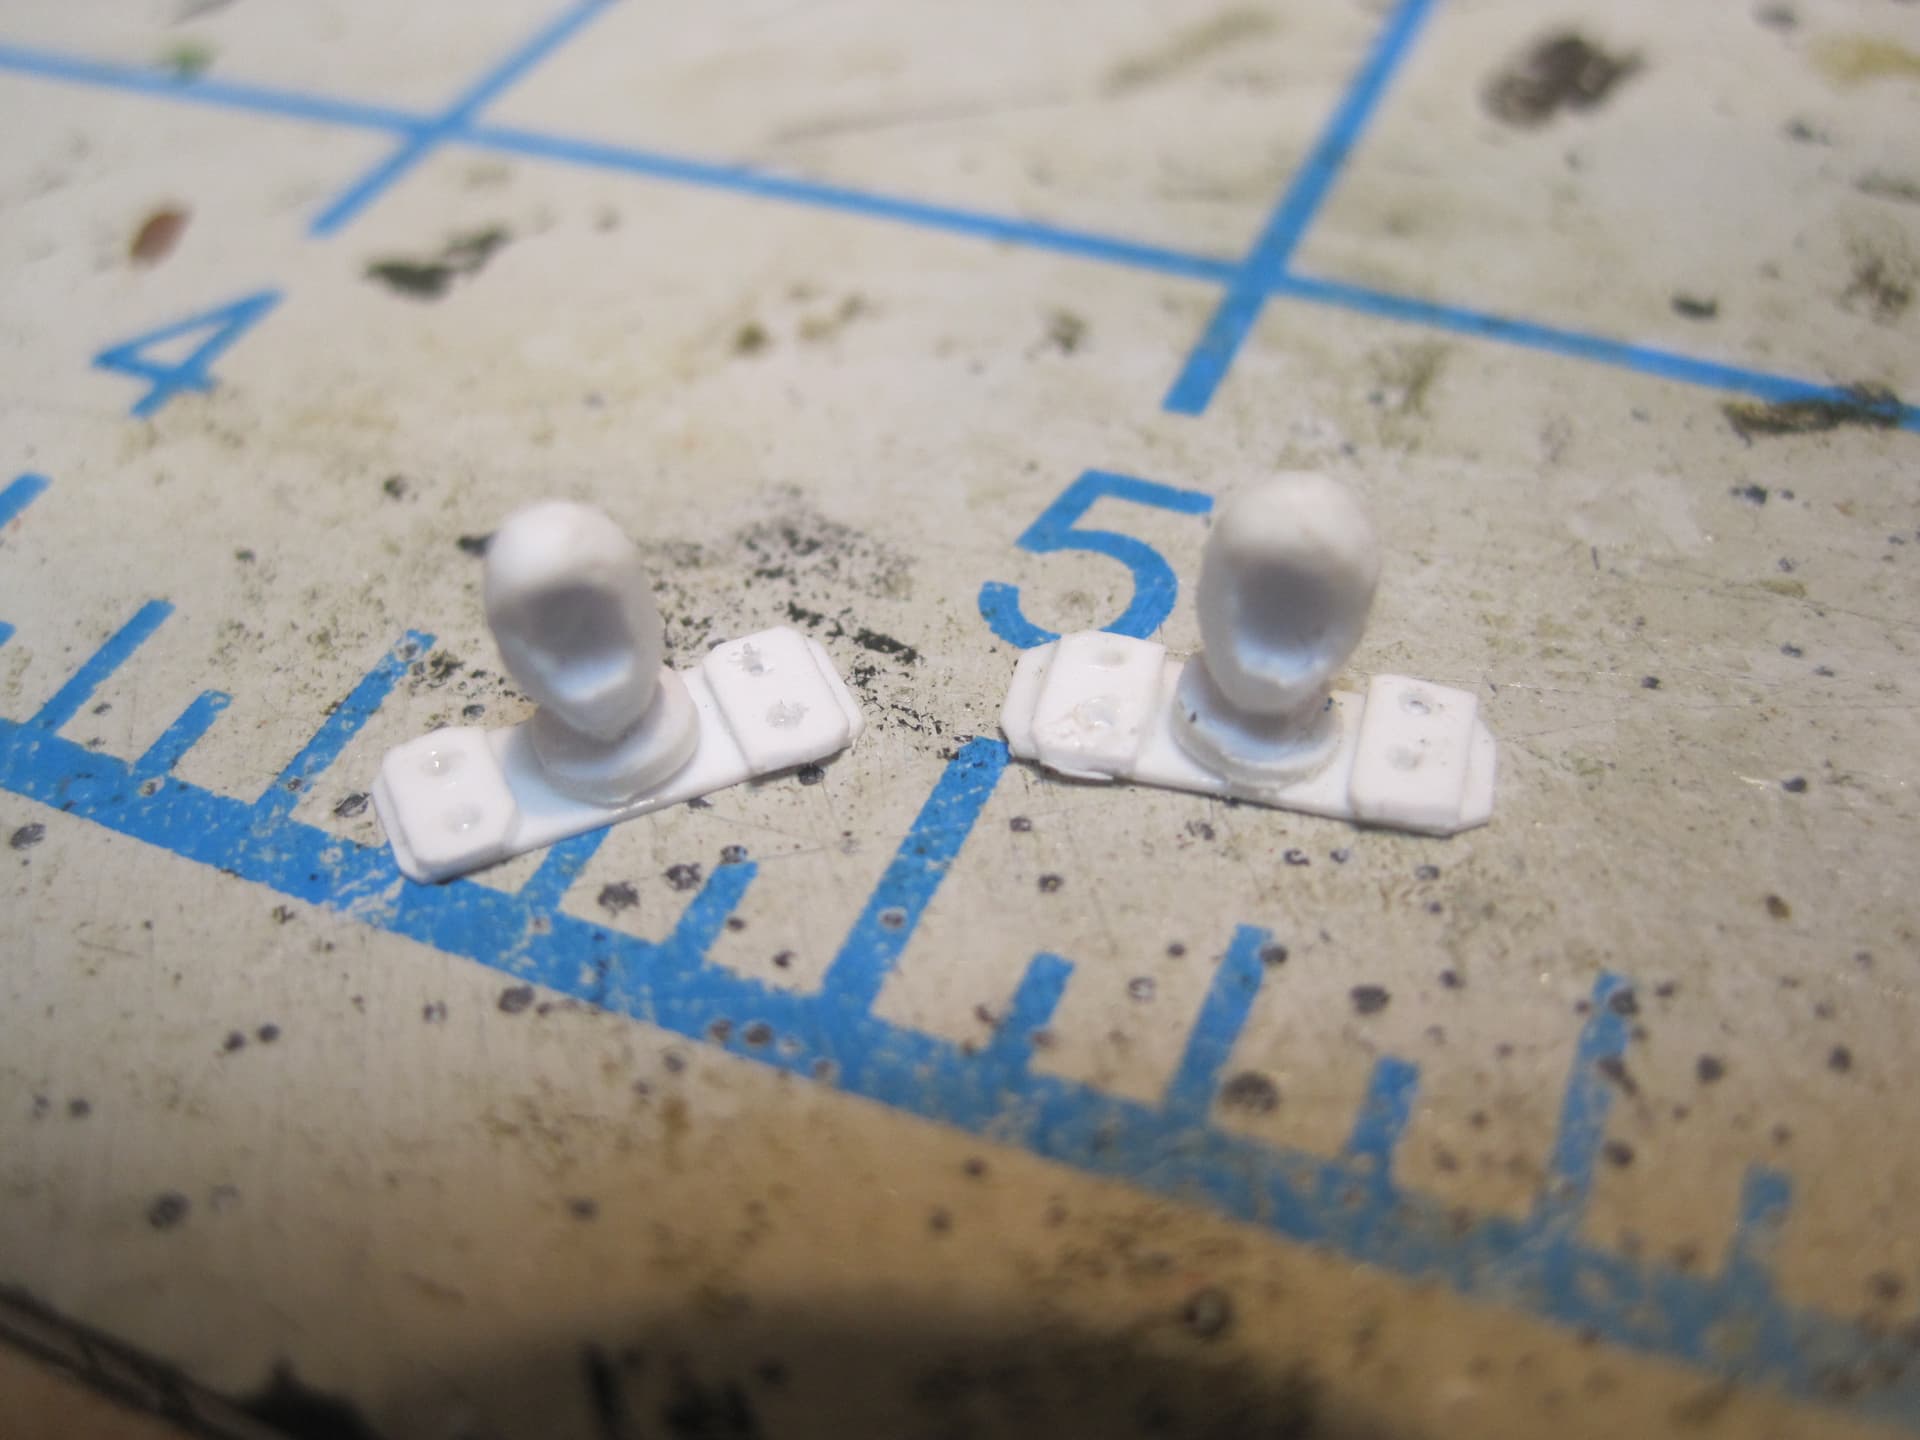
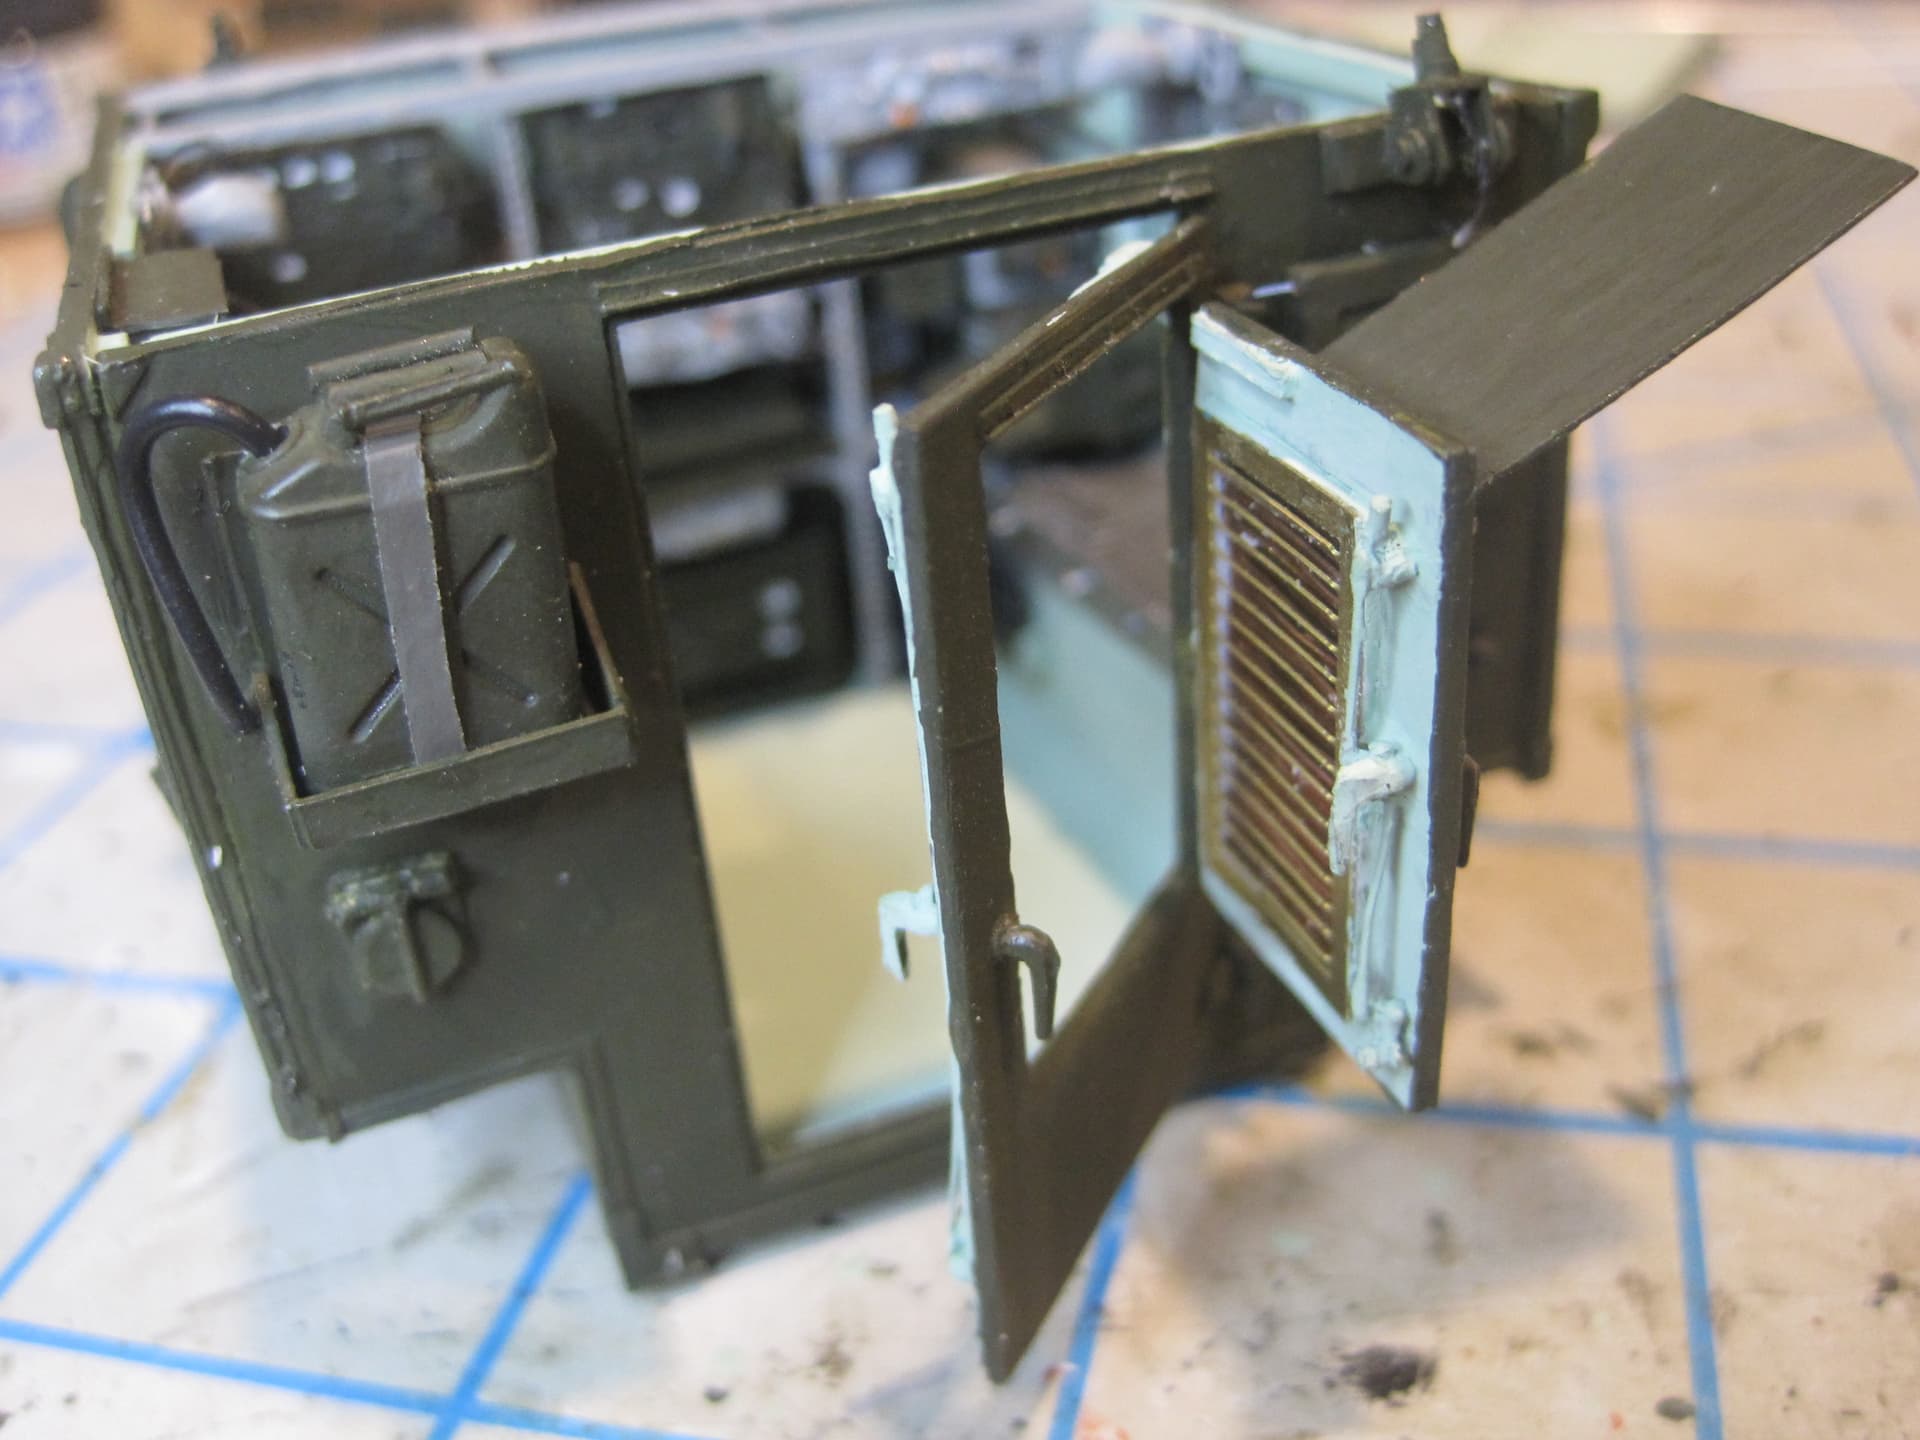
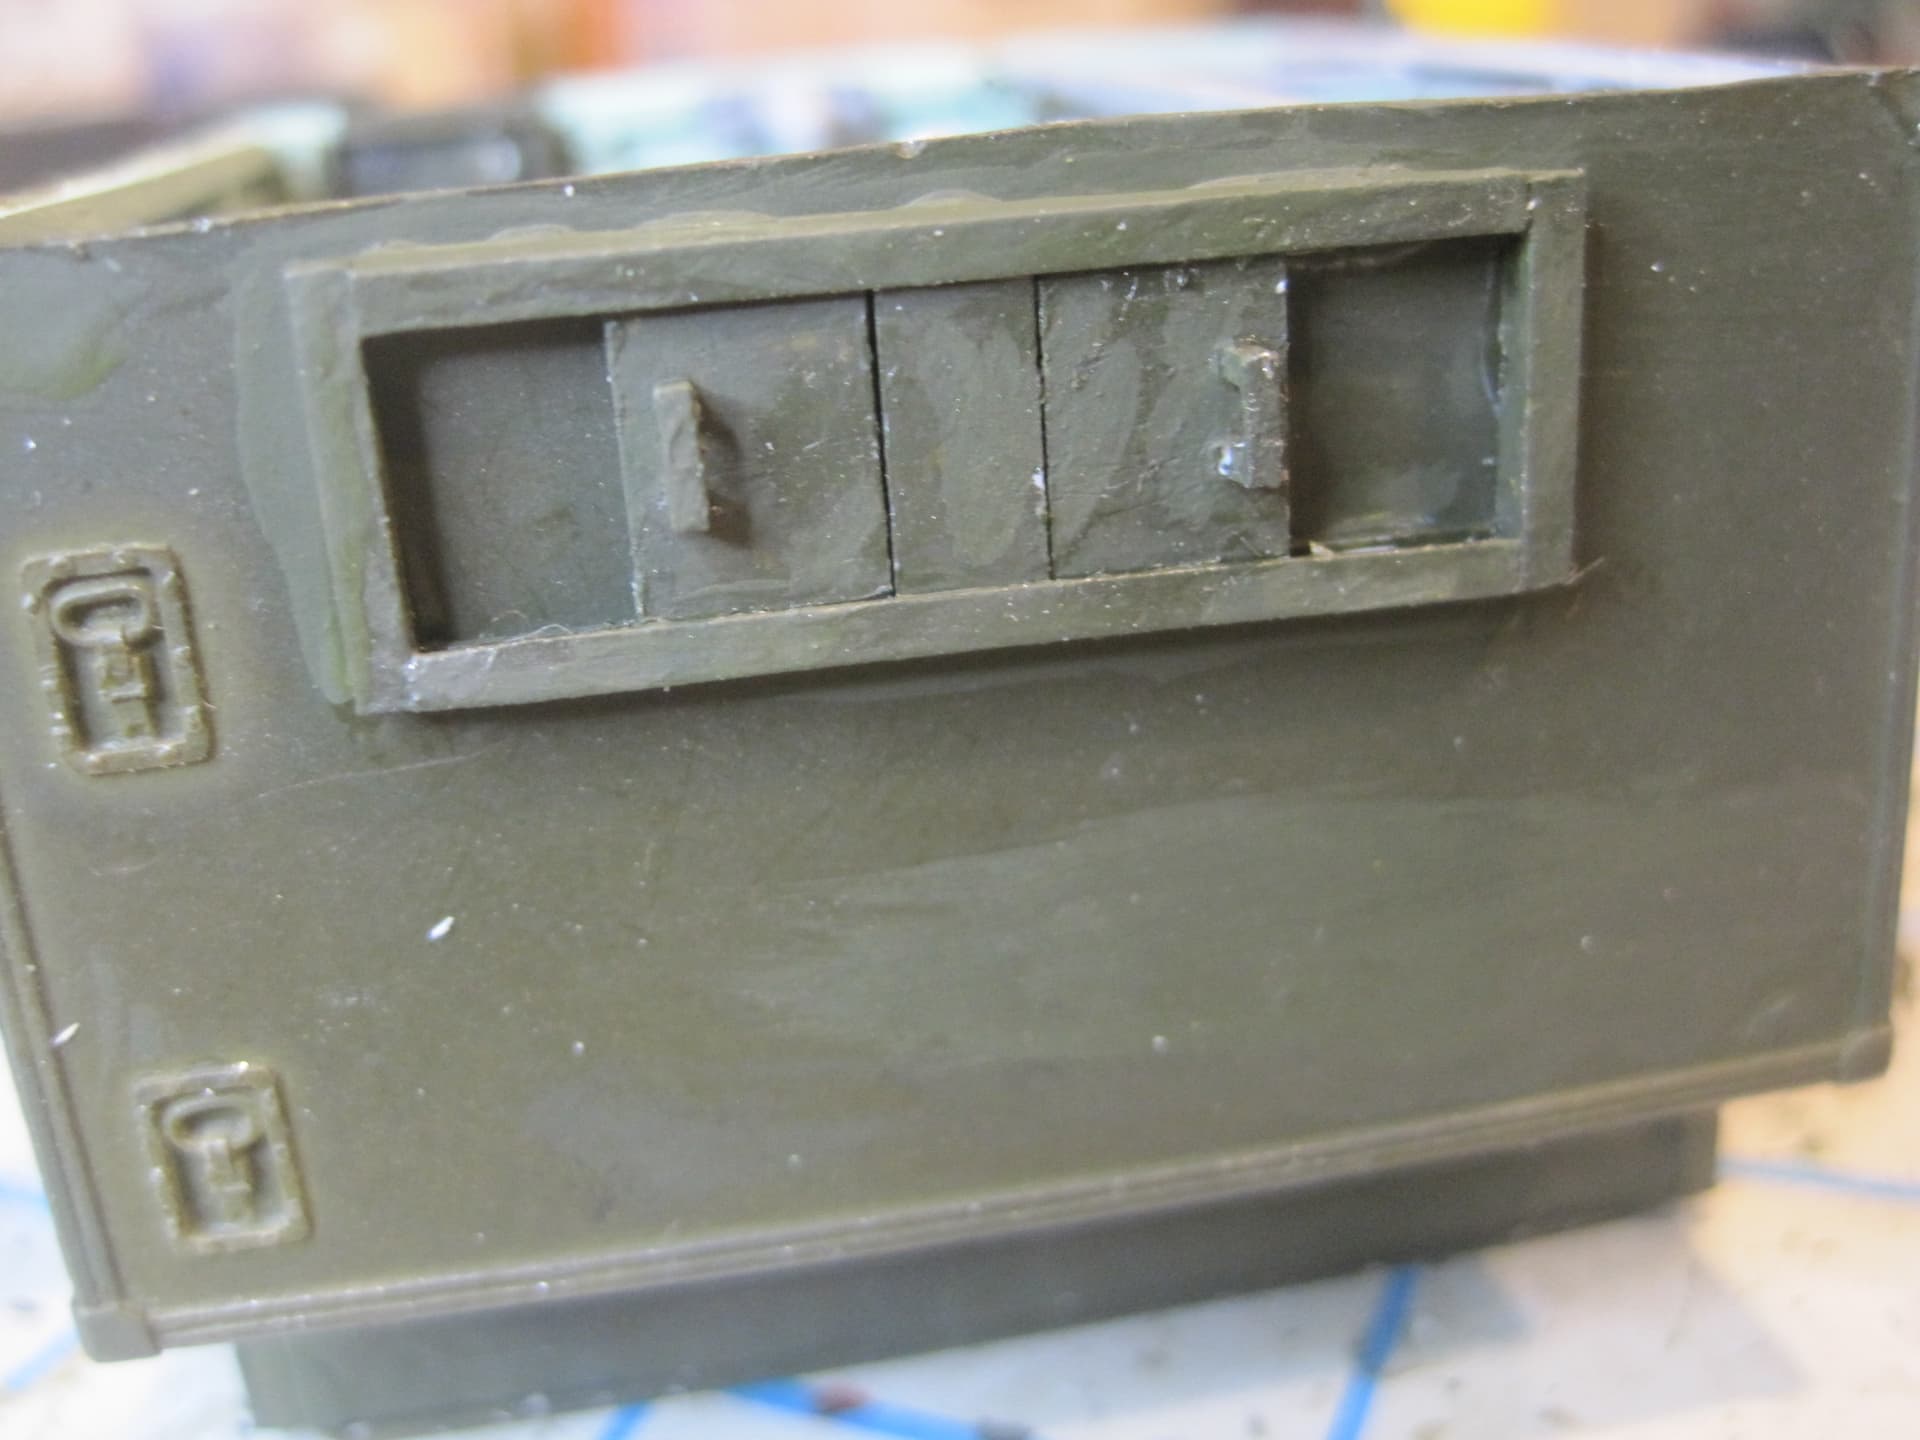
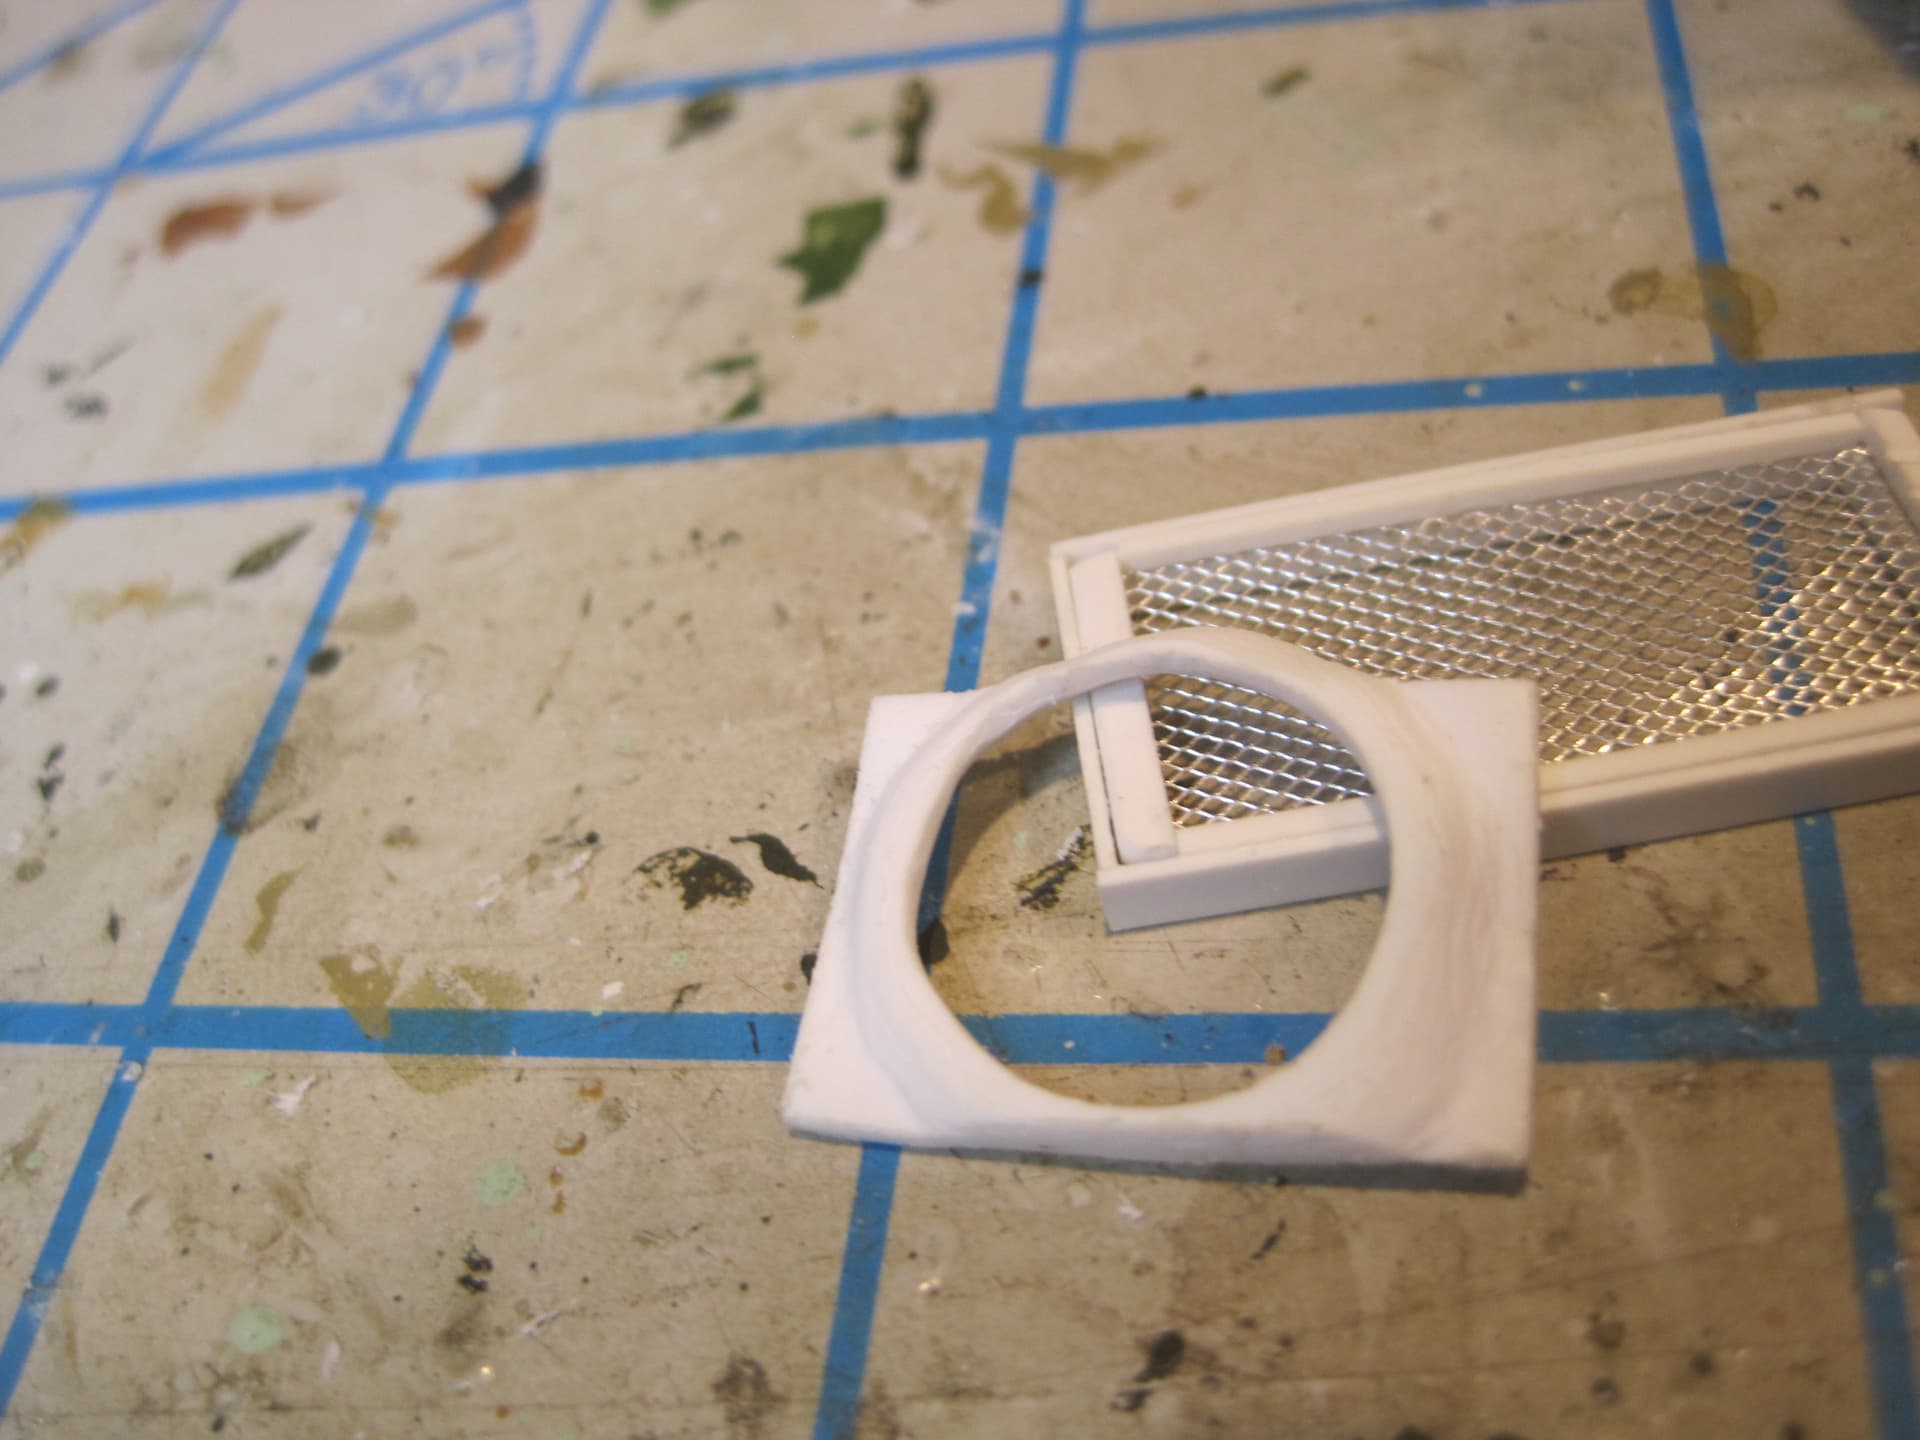
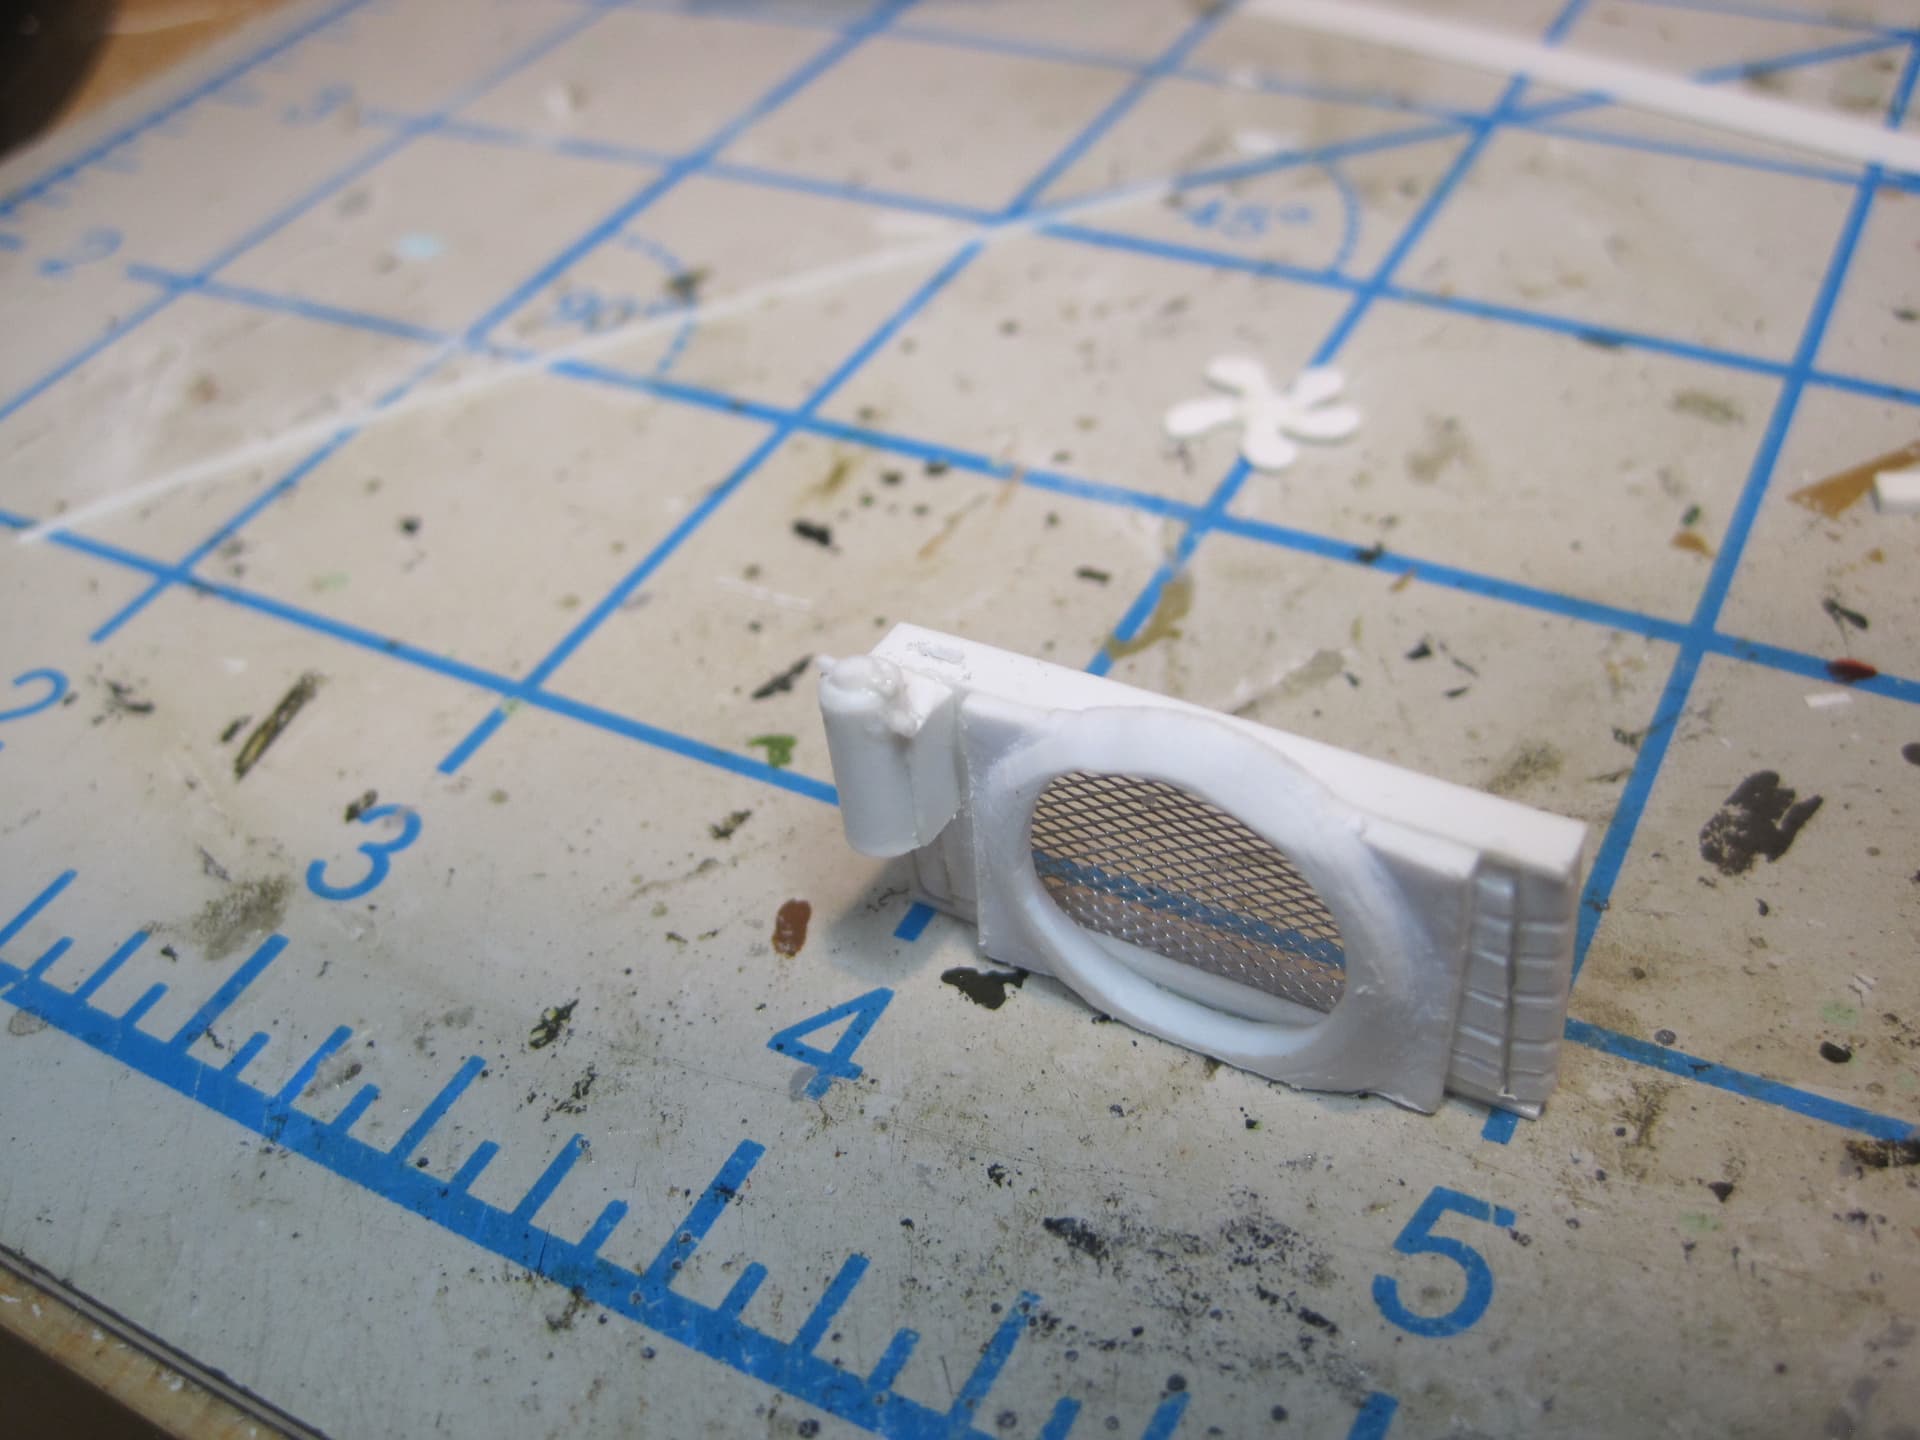
Finished up working on the doors today. The two interior doors on the real shelter each have a bell crank and linkage mechanism for latching and securing the doors and the Plus Model provides a very nice PE and Resin set of parts to replicate this. But the size is so small and the material properties such, that there is absolutely no way to make them function. (Trust me, I THOUGHT about it!!)
So since the doors themselves can be positioned in either the open or closed positions, I decided that I’d place the handles and linkage on the inside of the doors in the “open” position, and the handles on the outside of the shelter in the “closed” position.
4 Likes
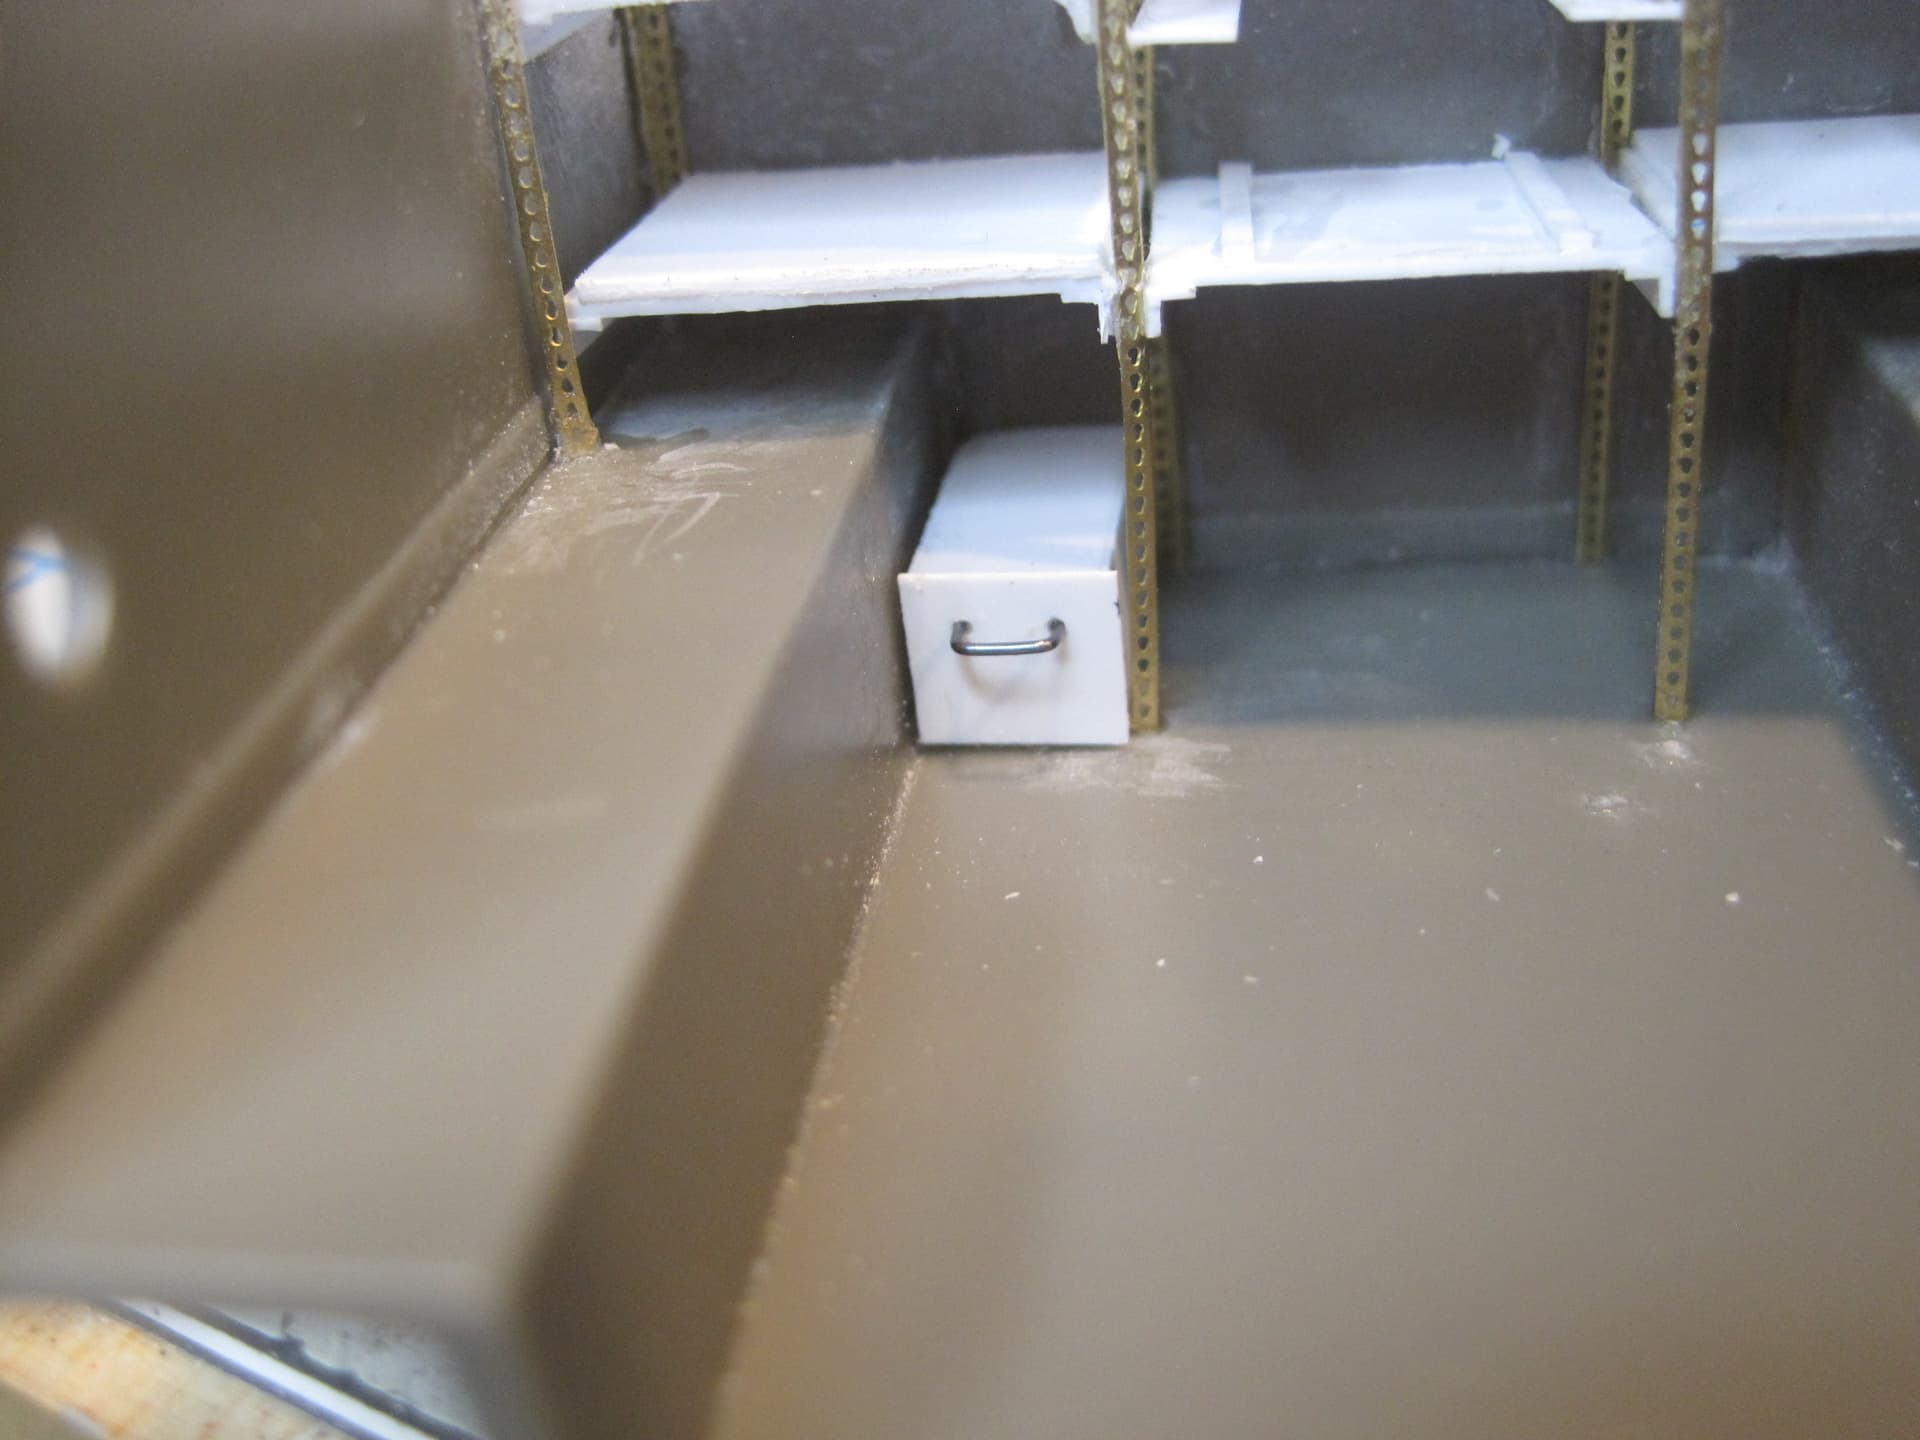
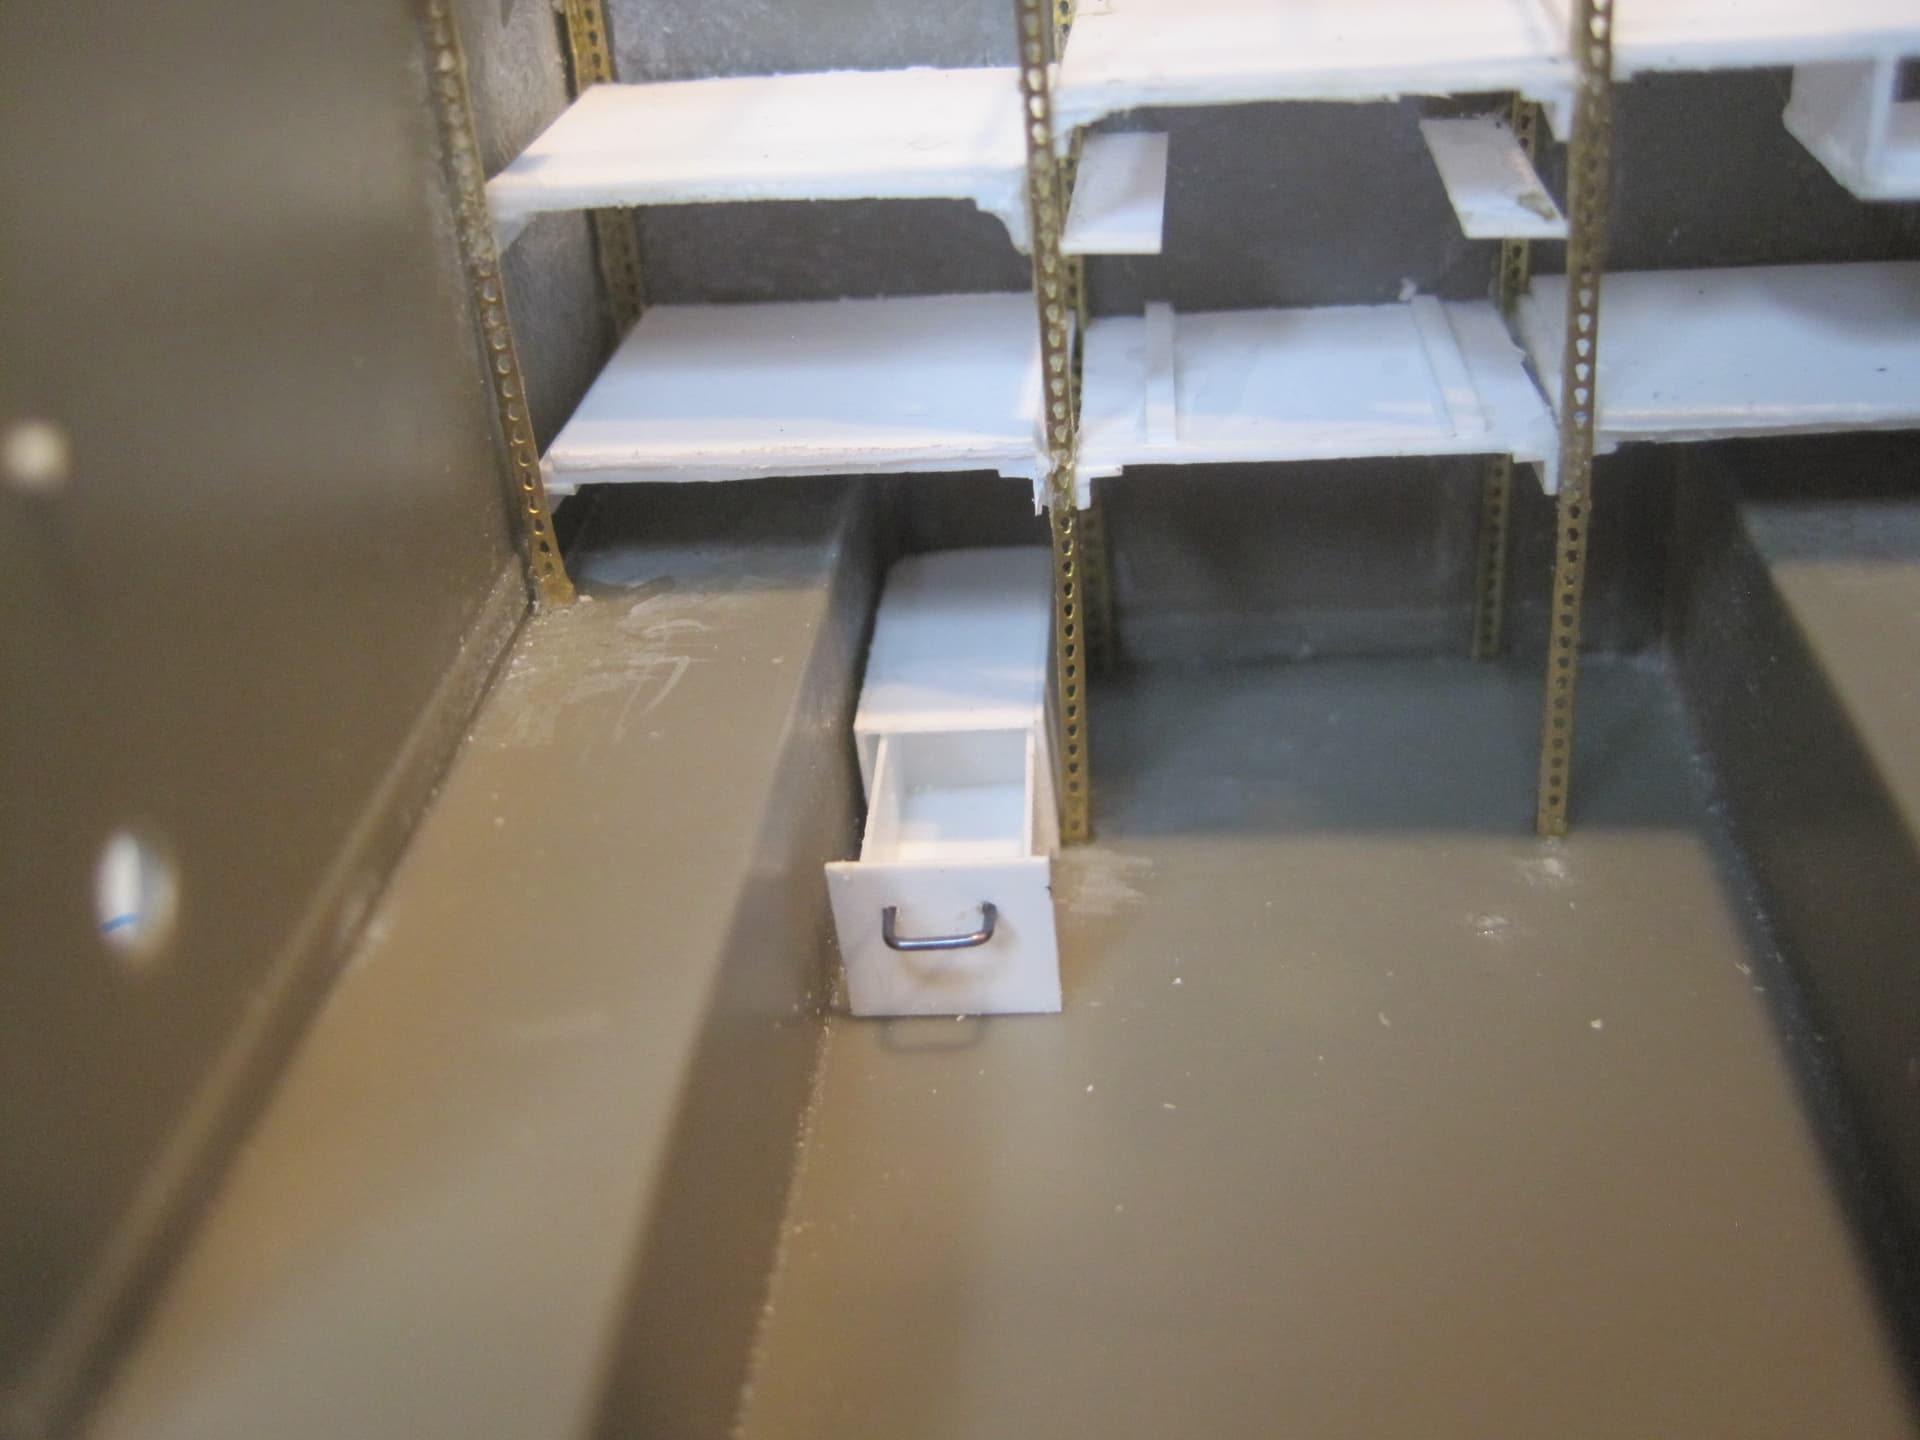
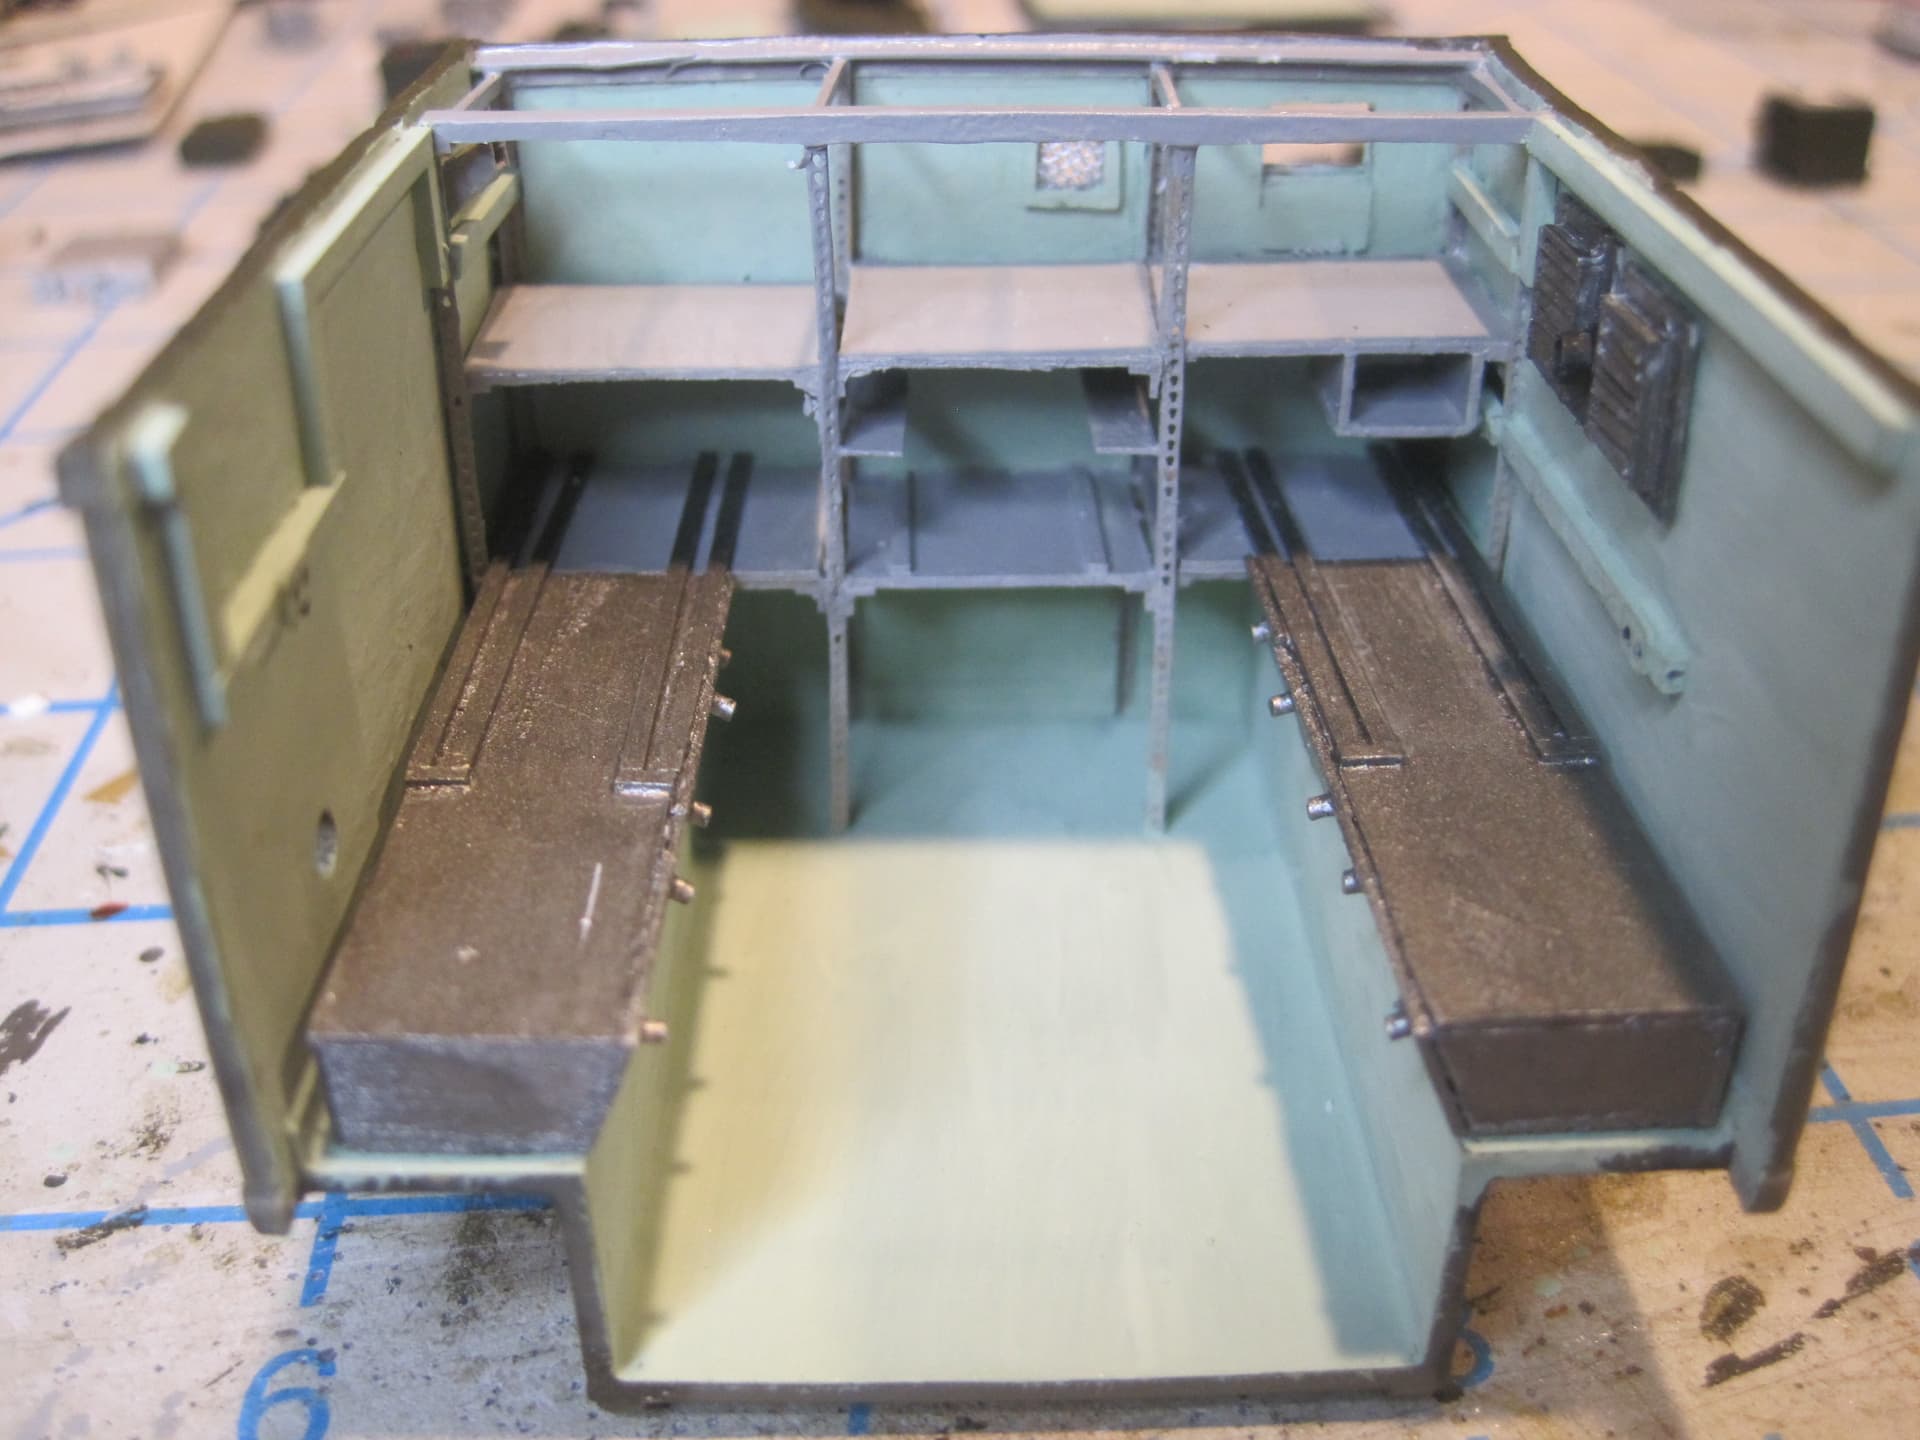
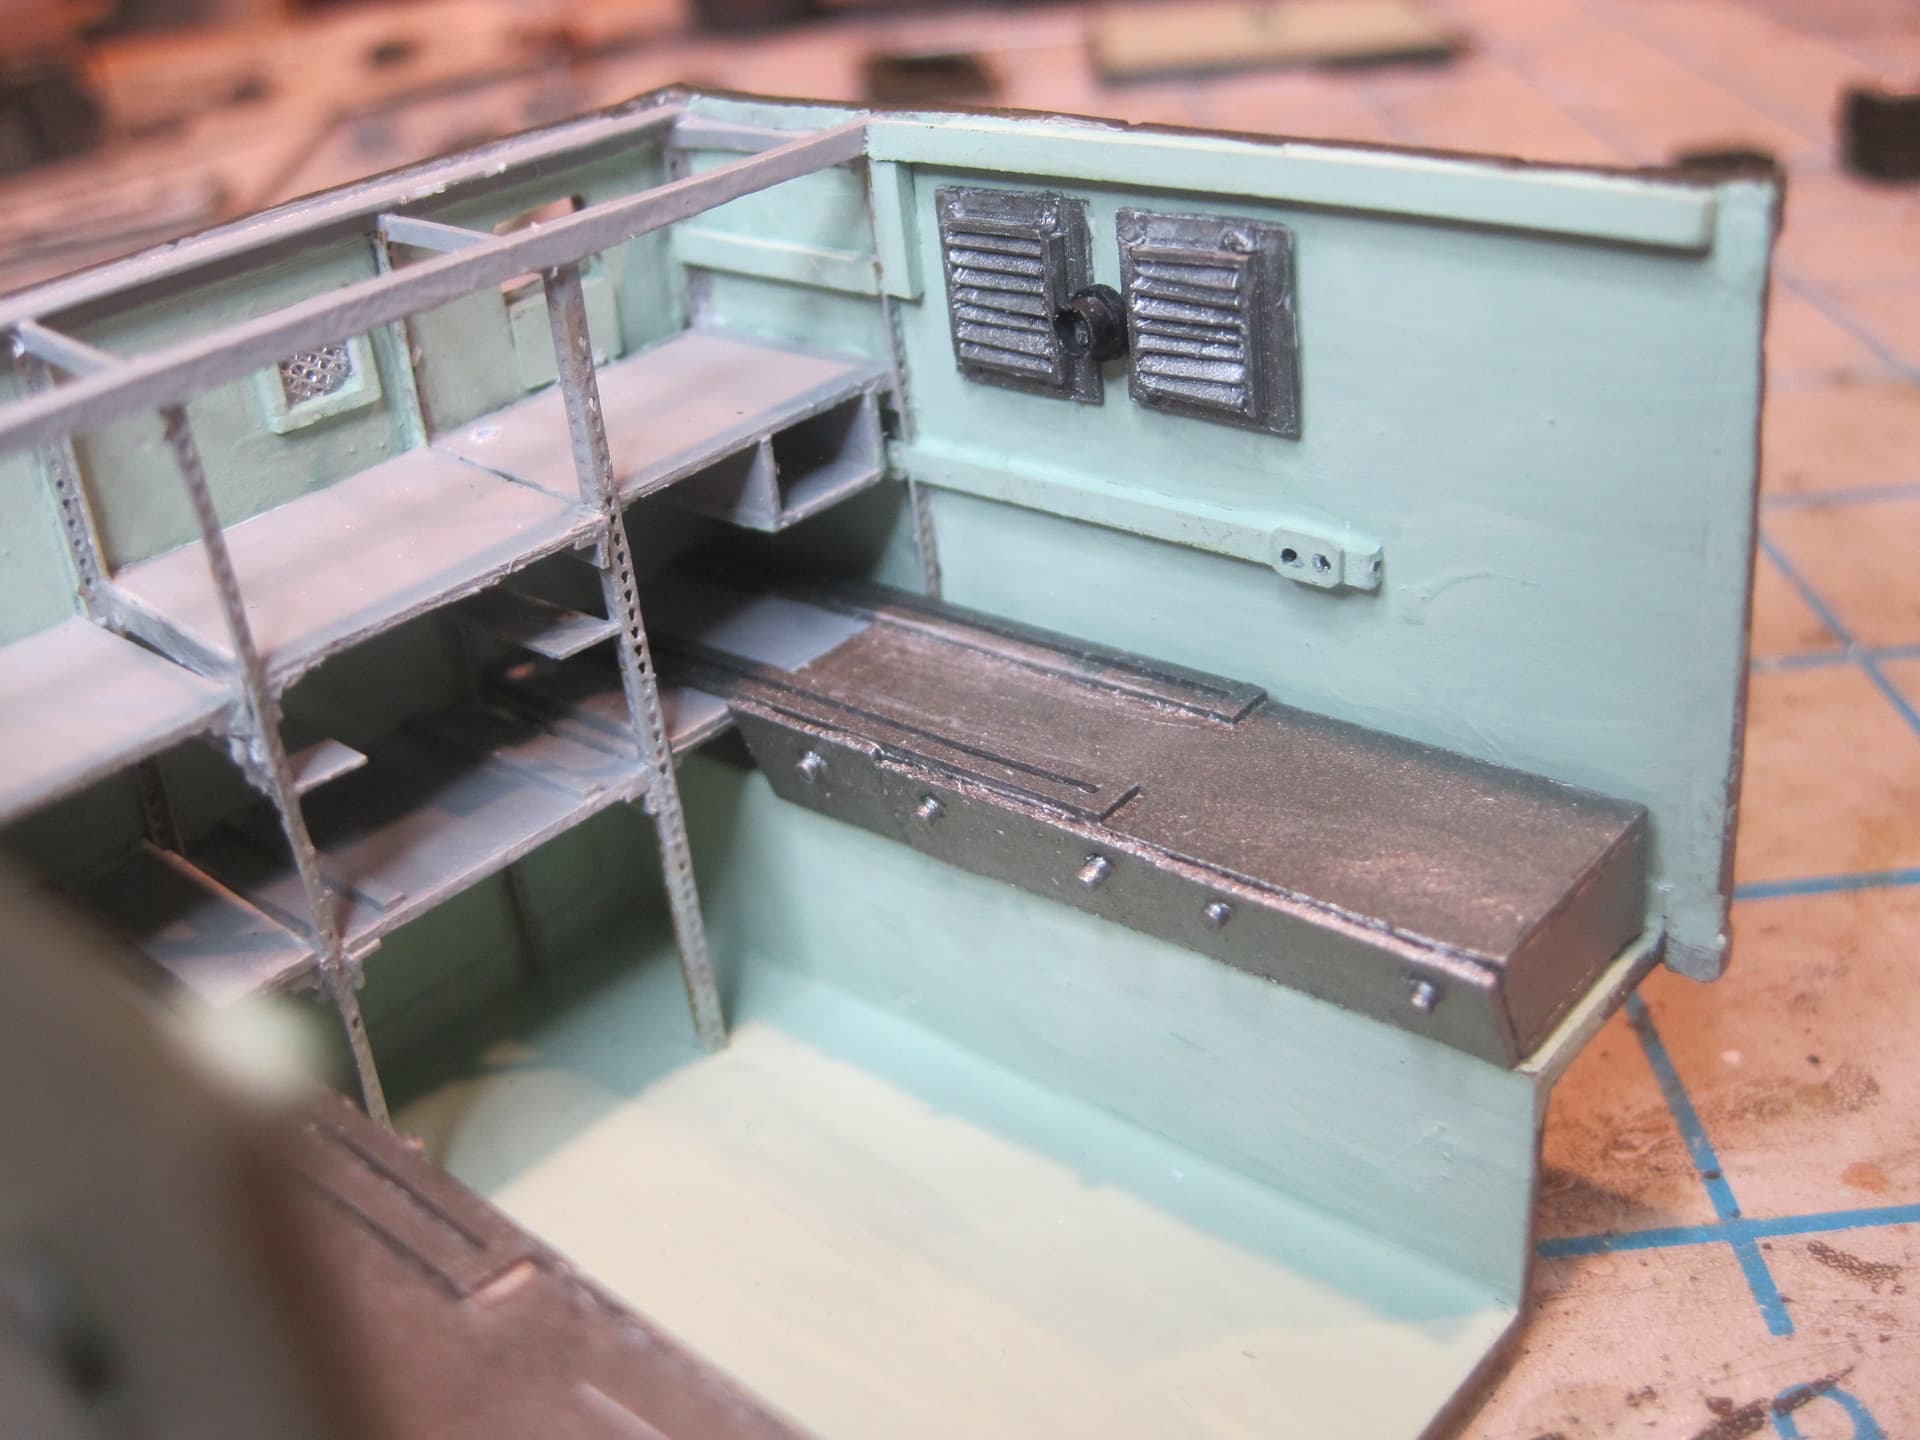
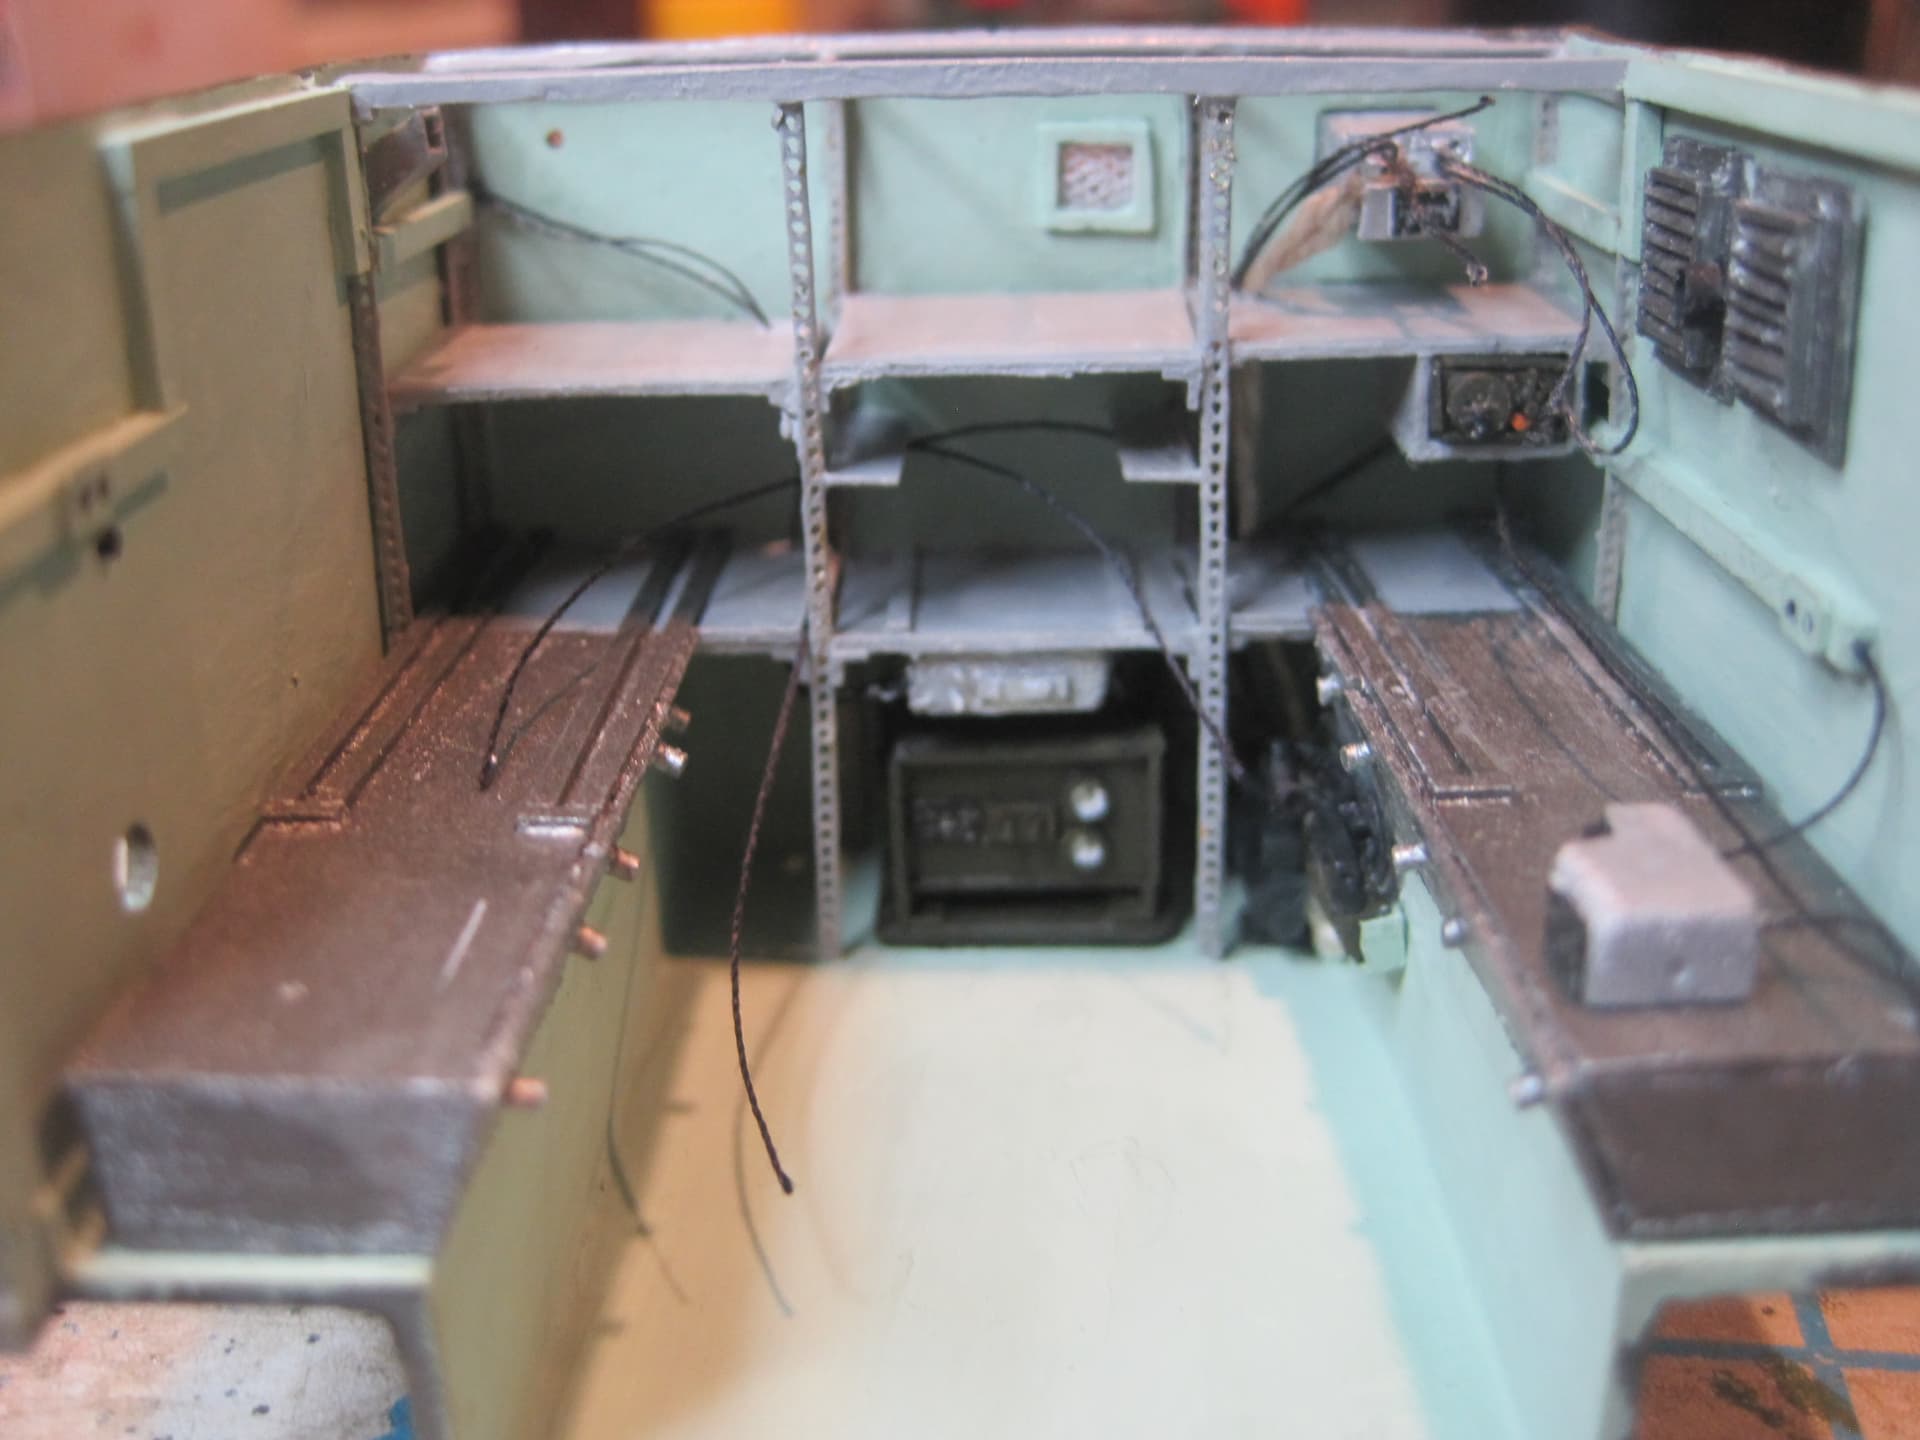
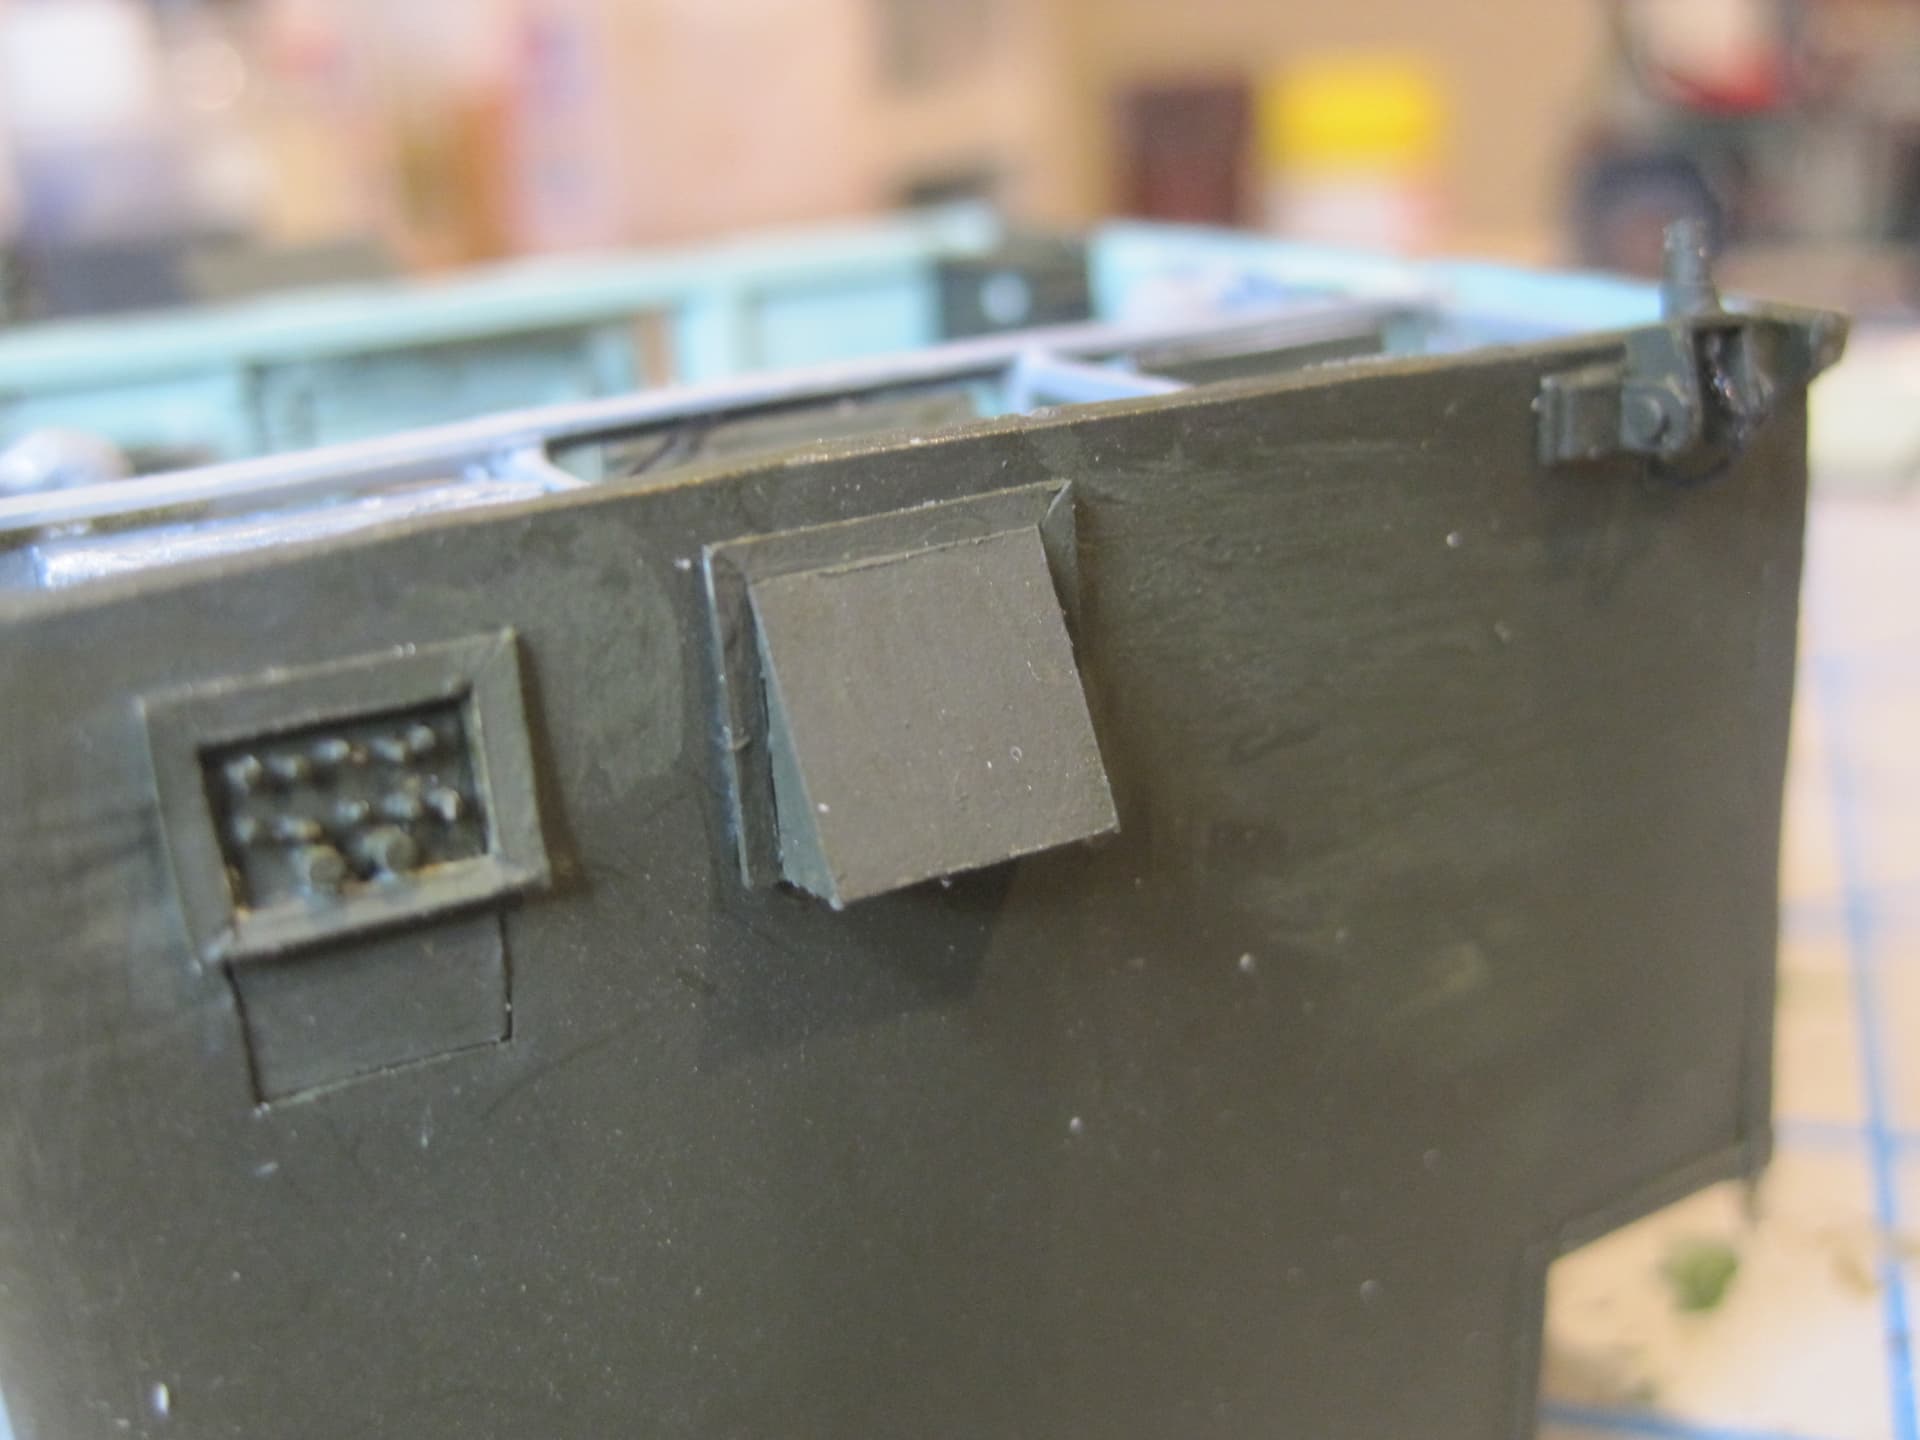
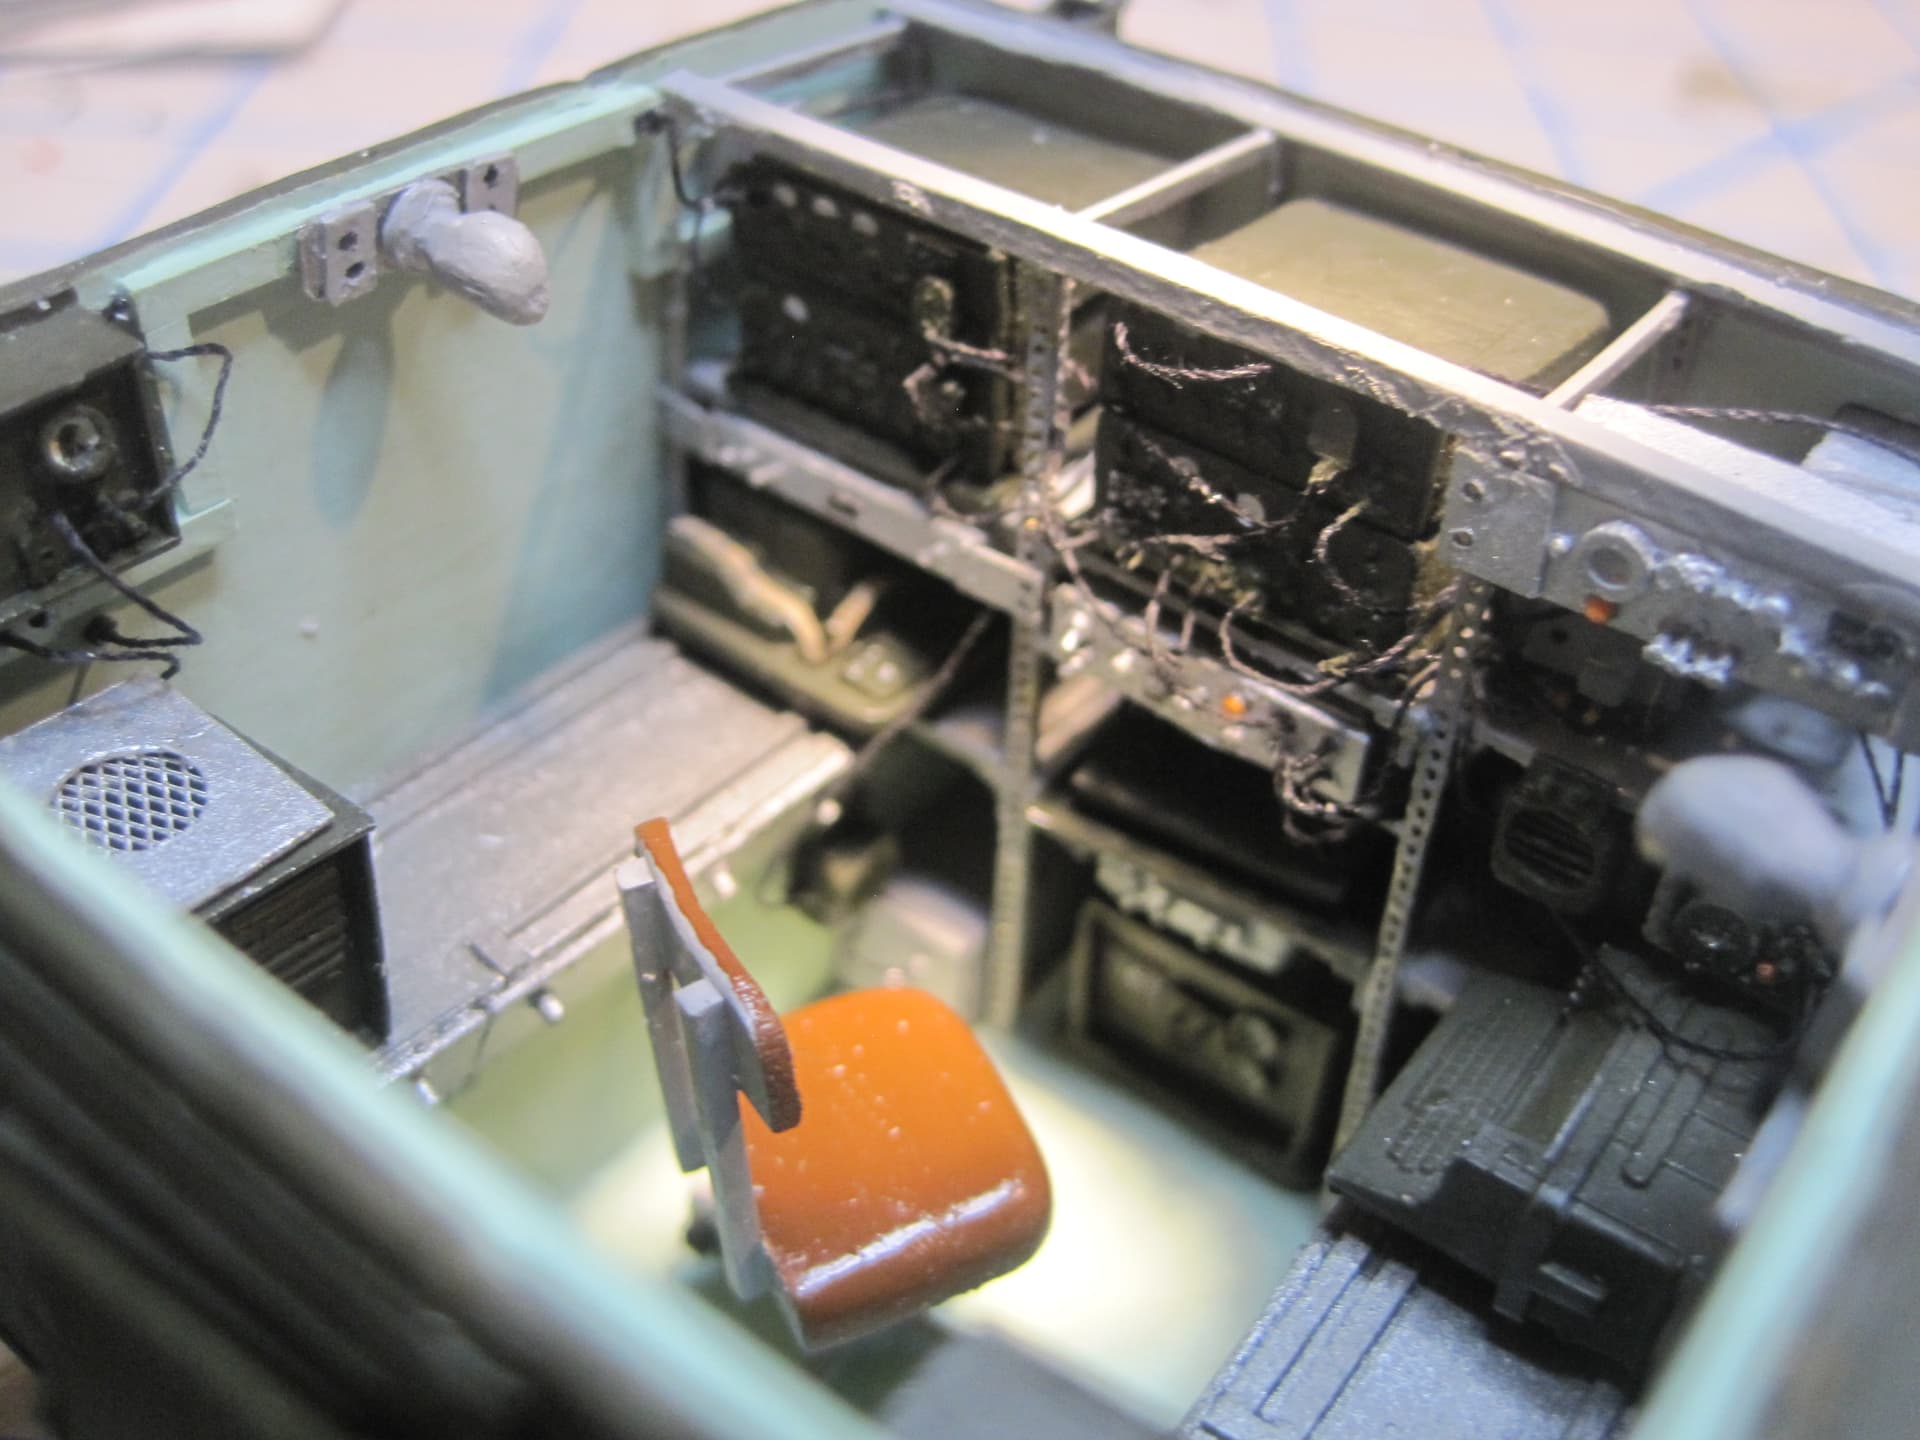
At this point I think I’m finished fabricating all the remaining items for the interior.
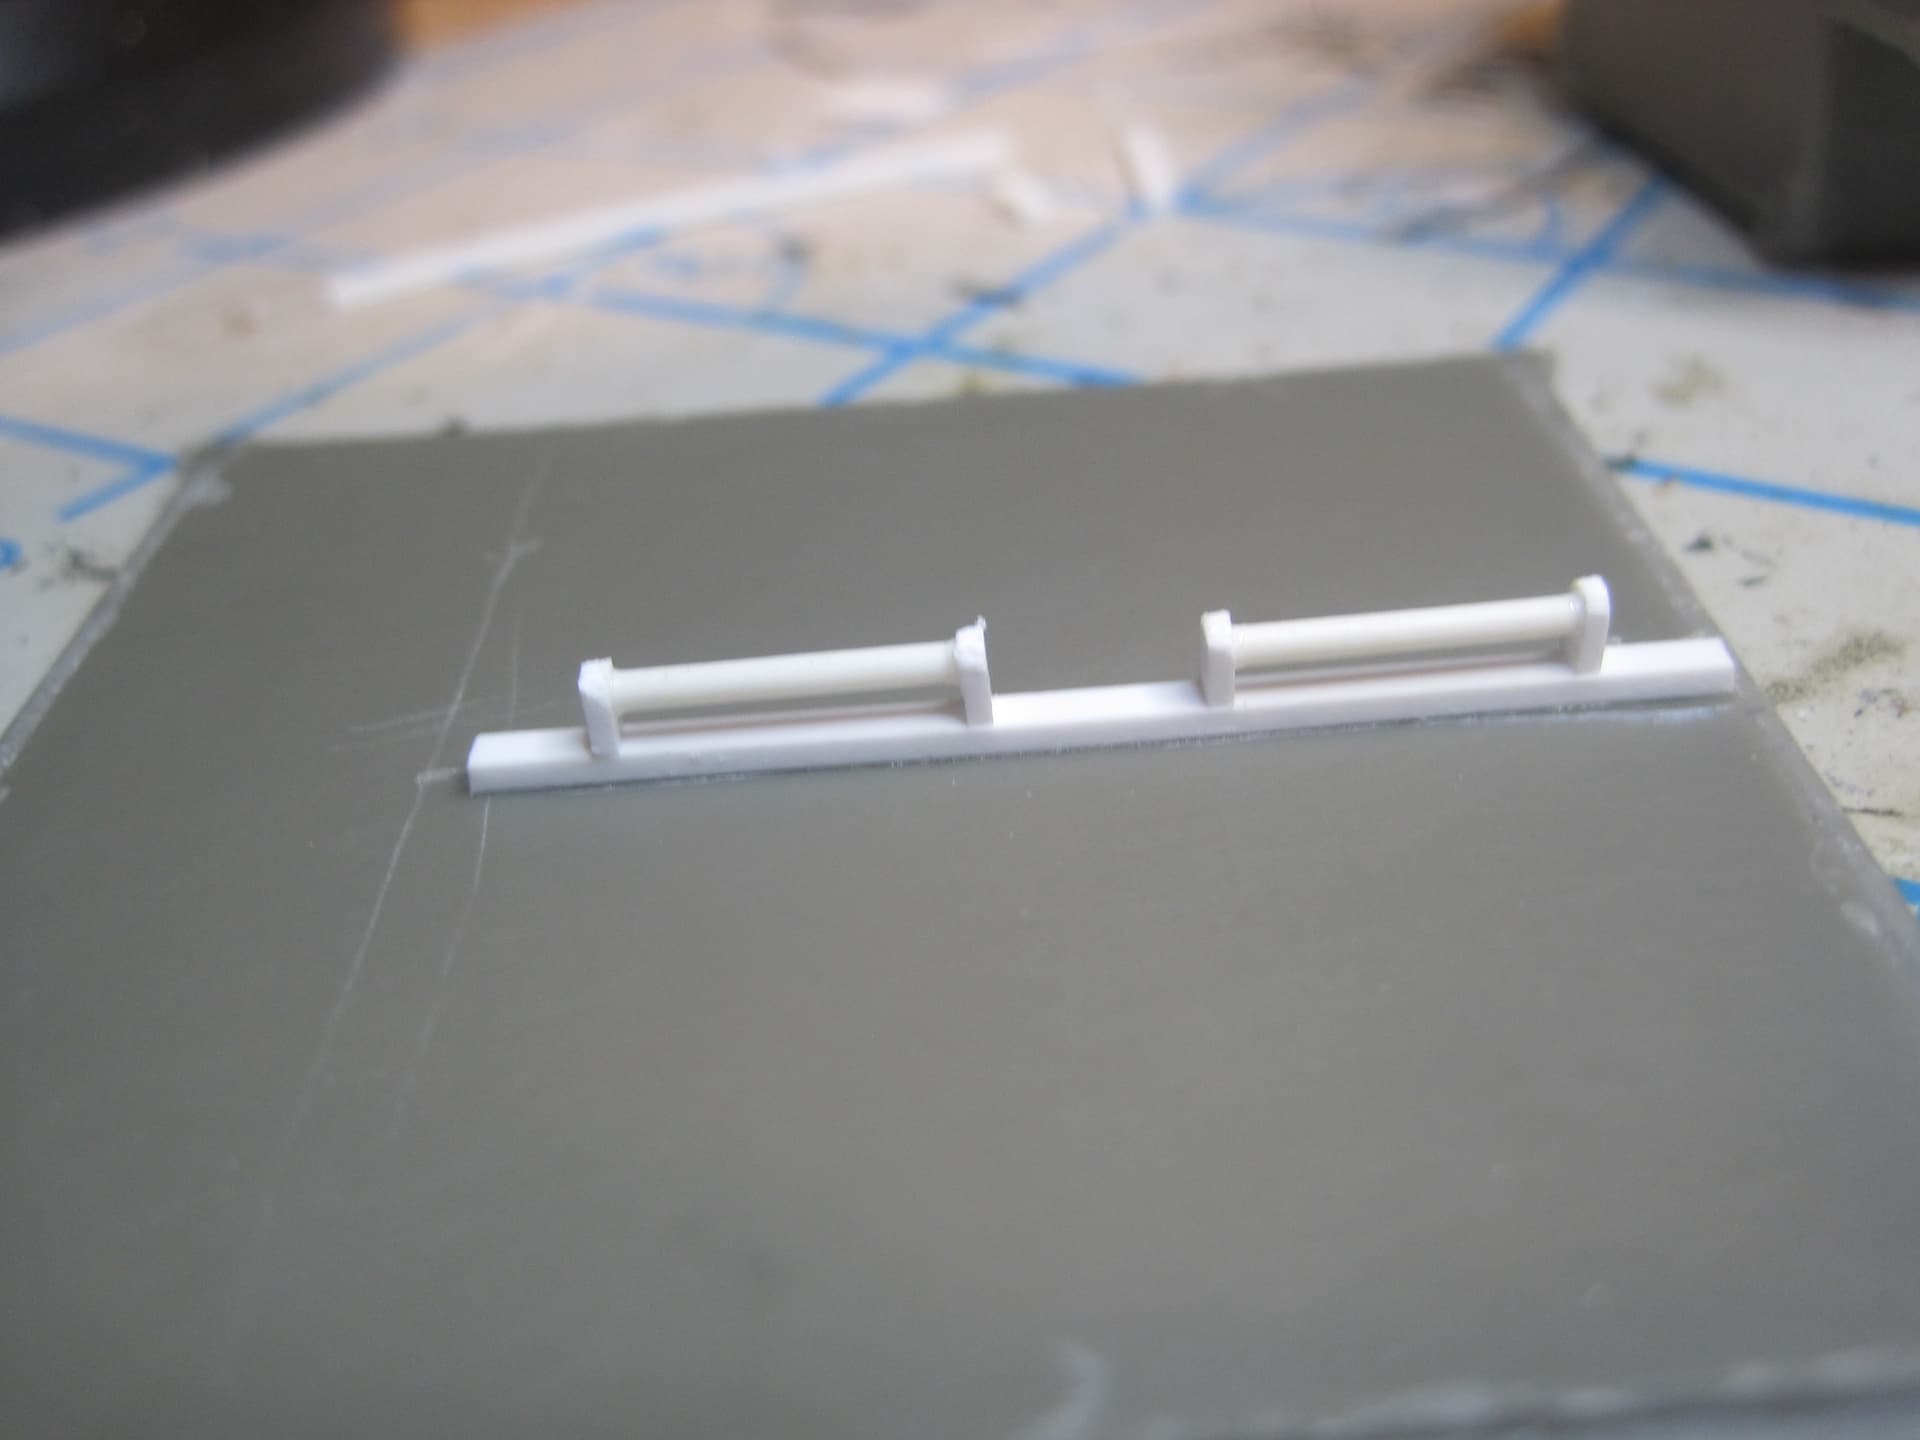
First I built the storage drawer which goes into the lower front bin.
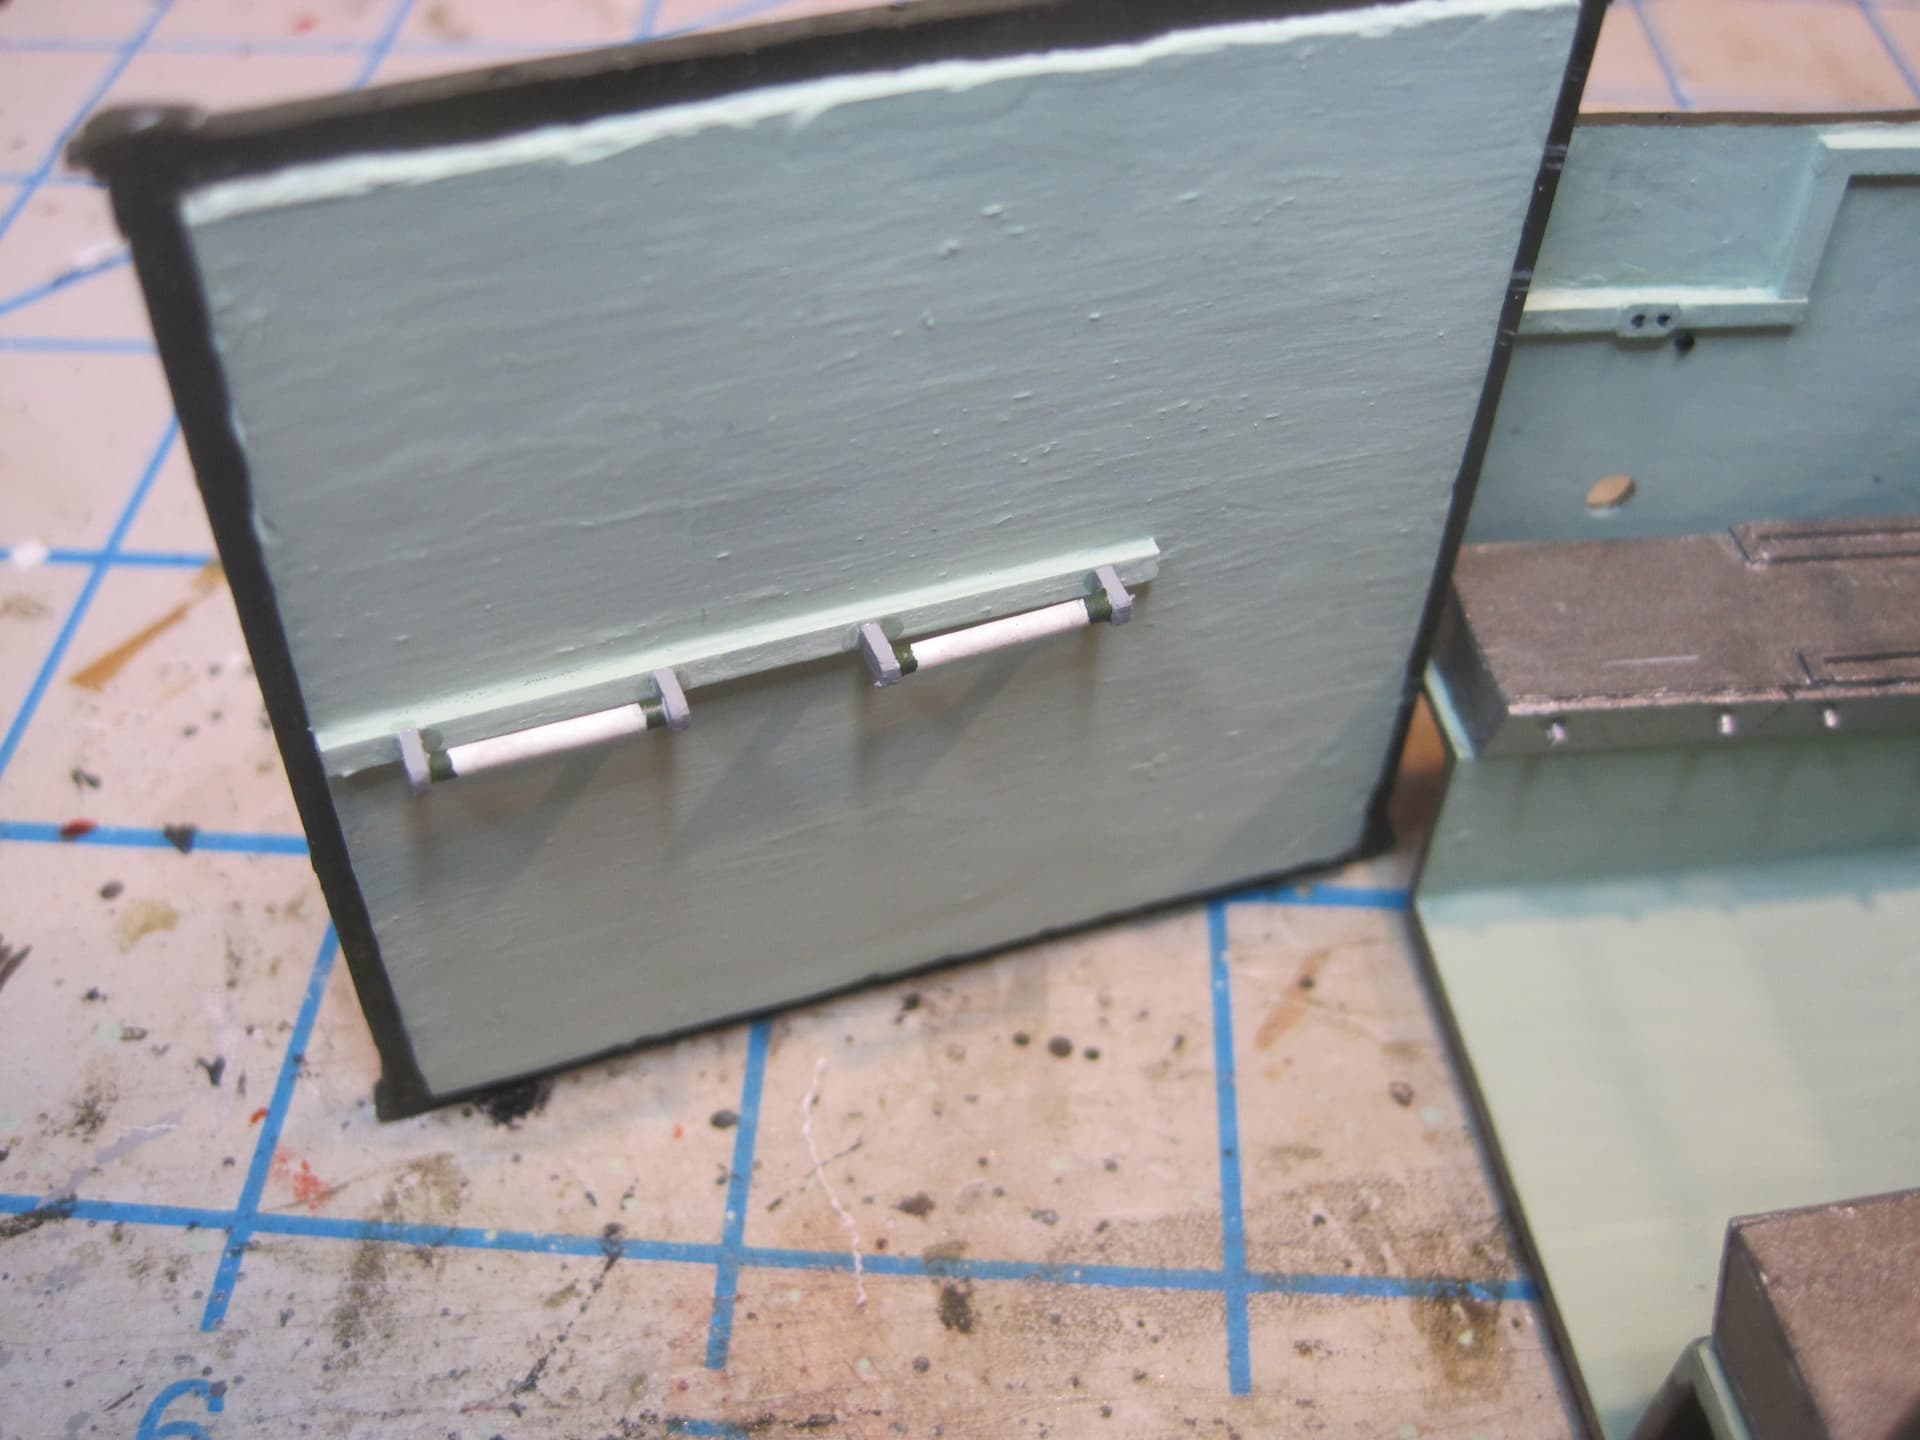
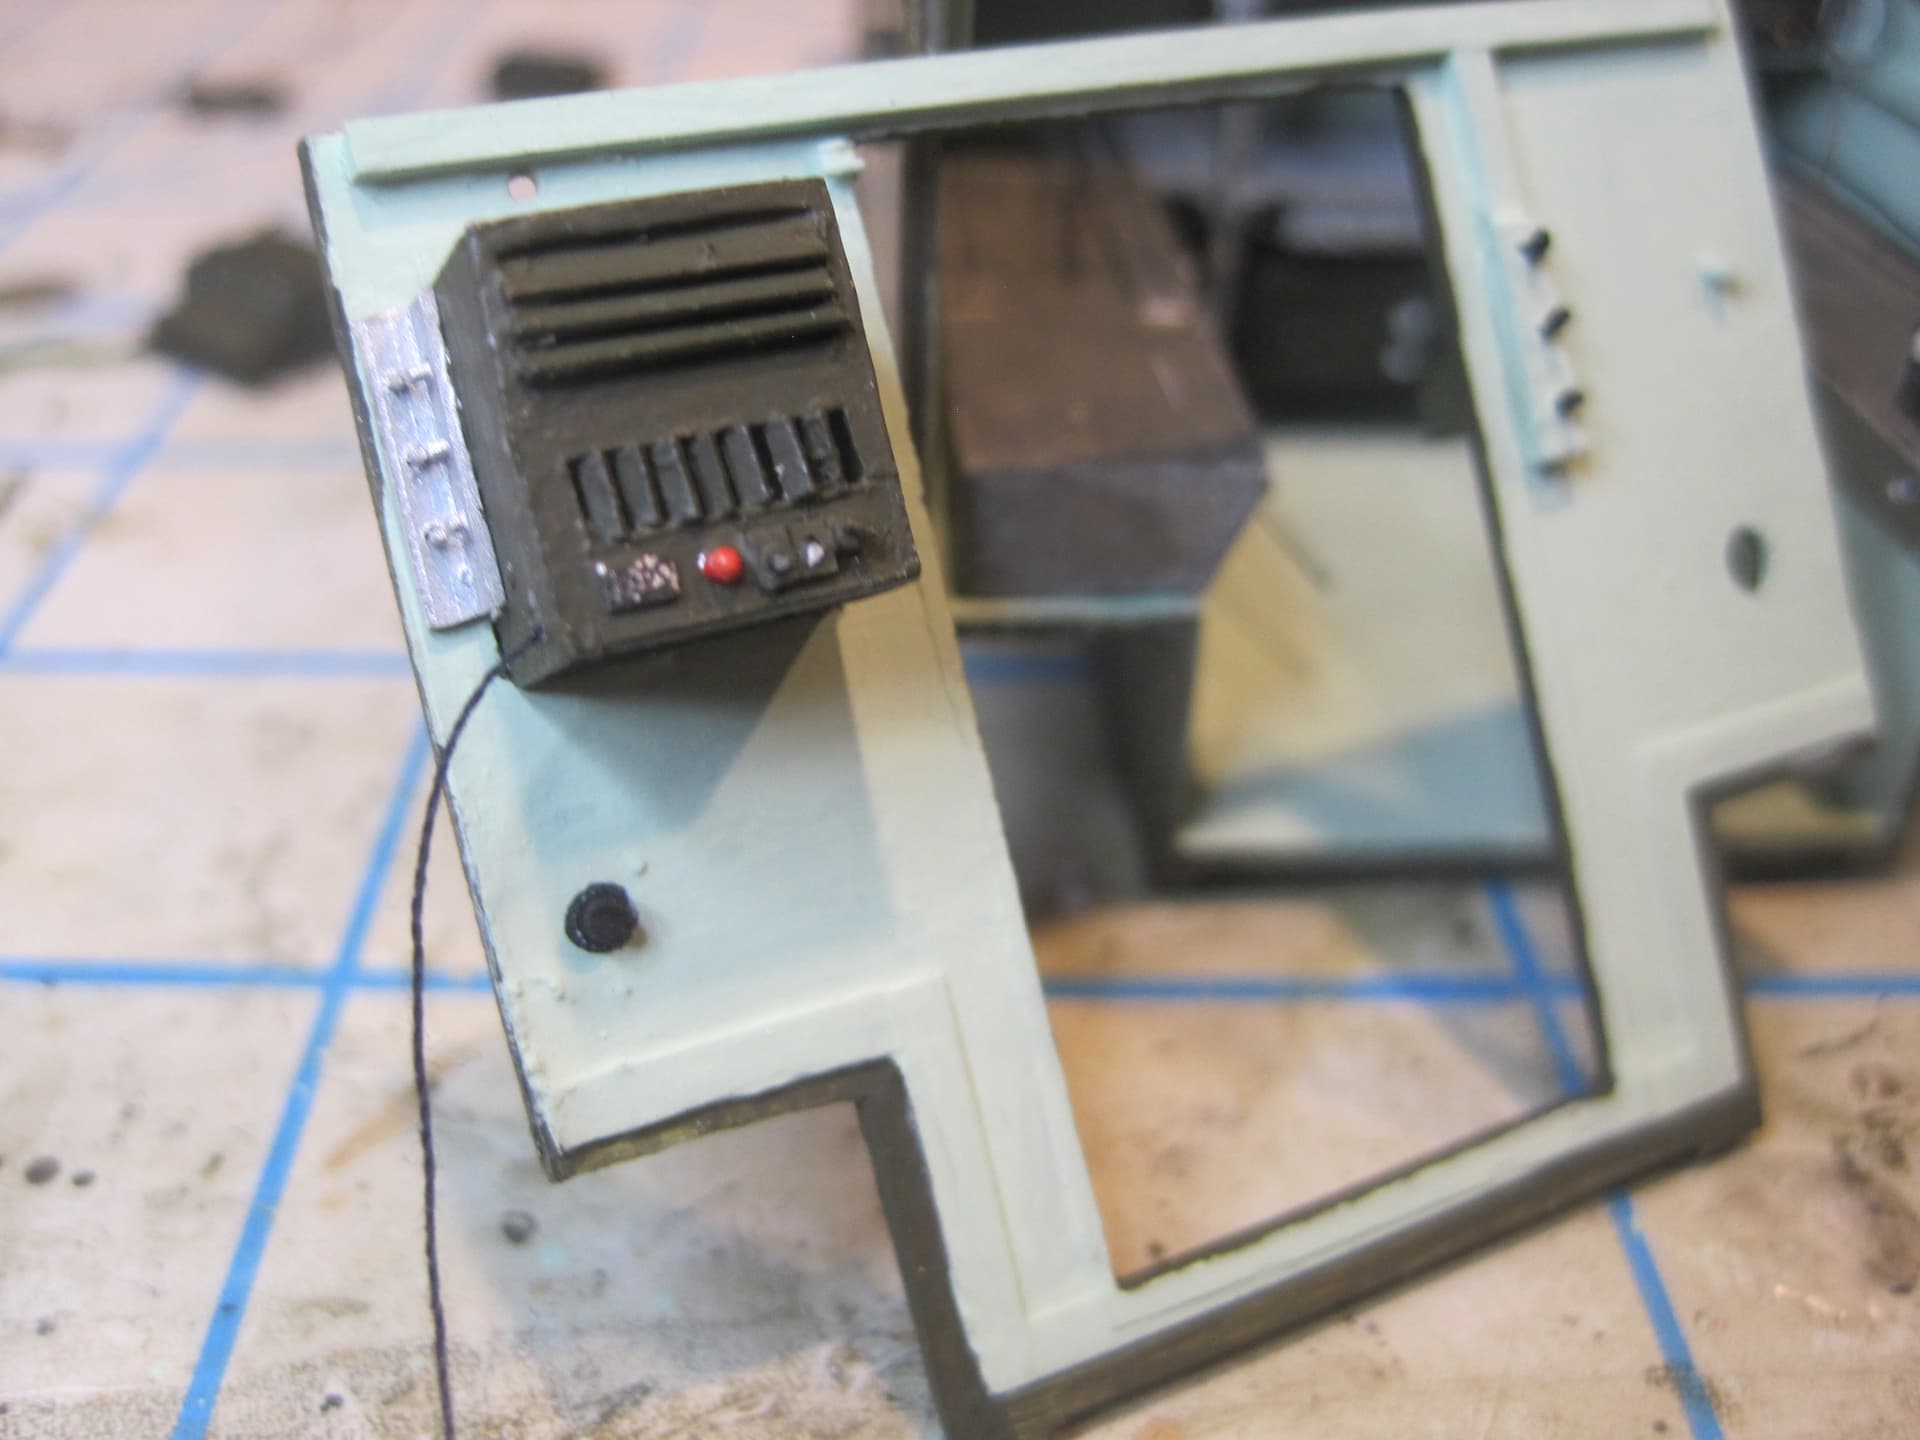
Then I added the coverings for all the electrical wiring runs along the walls as well as the power outlets, the two incandescent lighting fixtures for the two sides and the florescent lights for the ceiling. I also added the switches for the lights and made the wall clock as well.


I think the next step now is to paint the outside a base coat of OD (which will eventually be covered with the MASSTER scheme) and then paint the interior.
I’m somewhat dreading trying to paint the racks which I pretty much had no choice but to glue into place as a method for being able to build everything so that it would fit. I’m a little reluctant to try and remove them now, but if painting them is too hard I may have no choice. We’ll see!
2 Likes
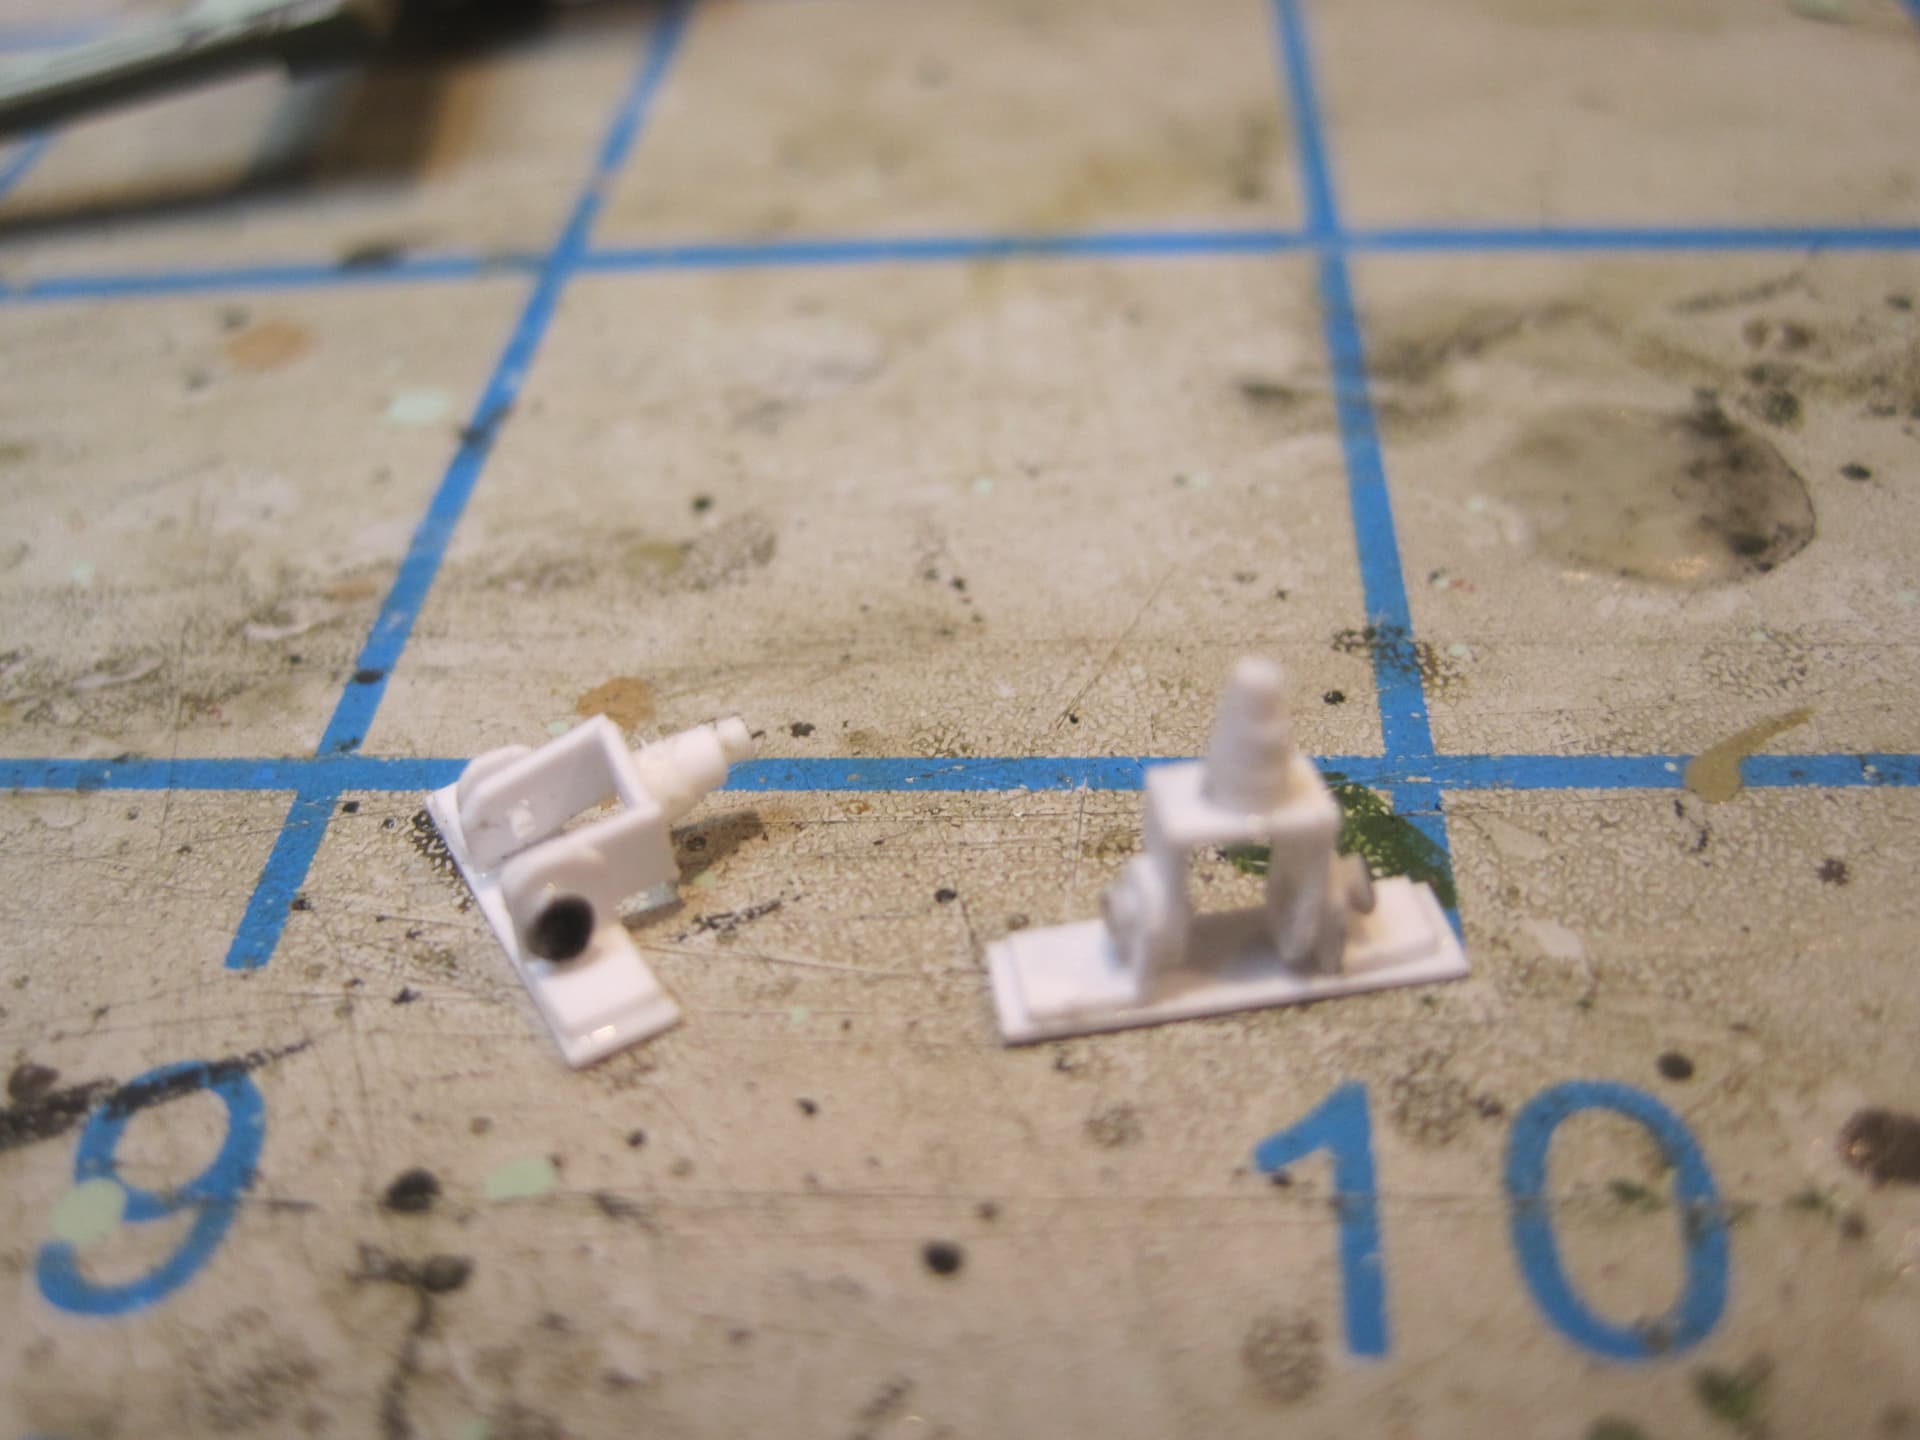
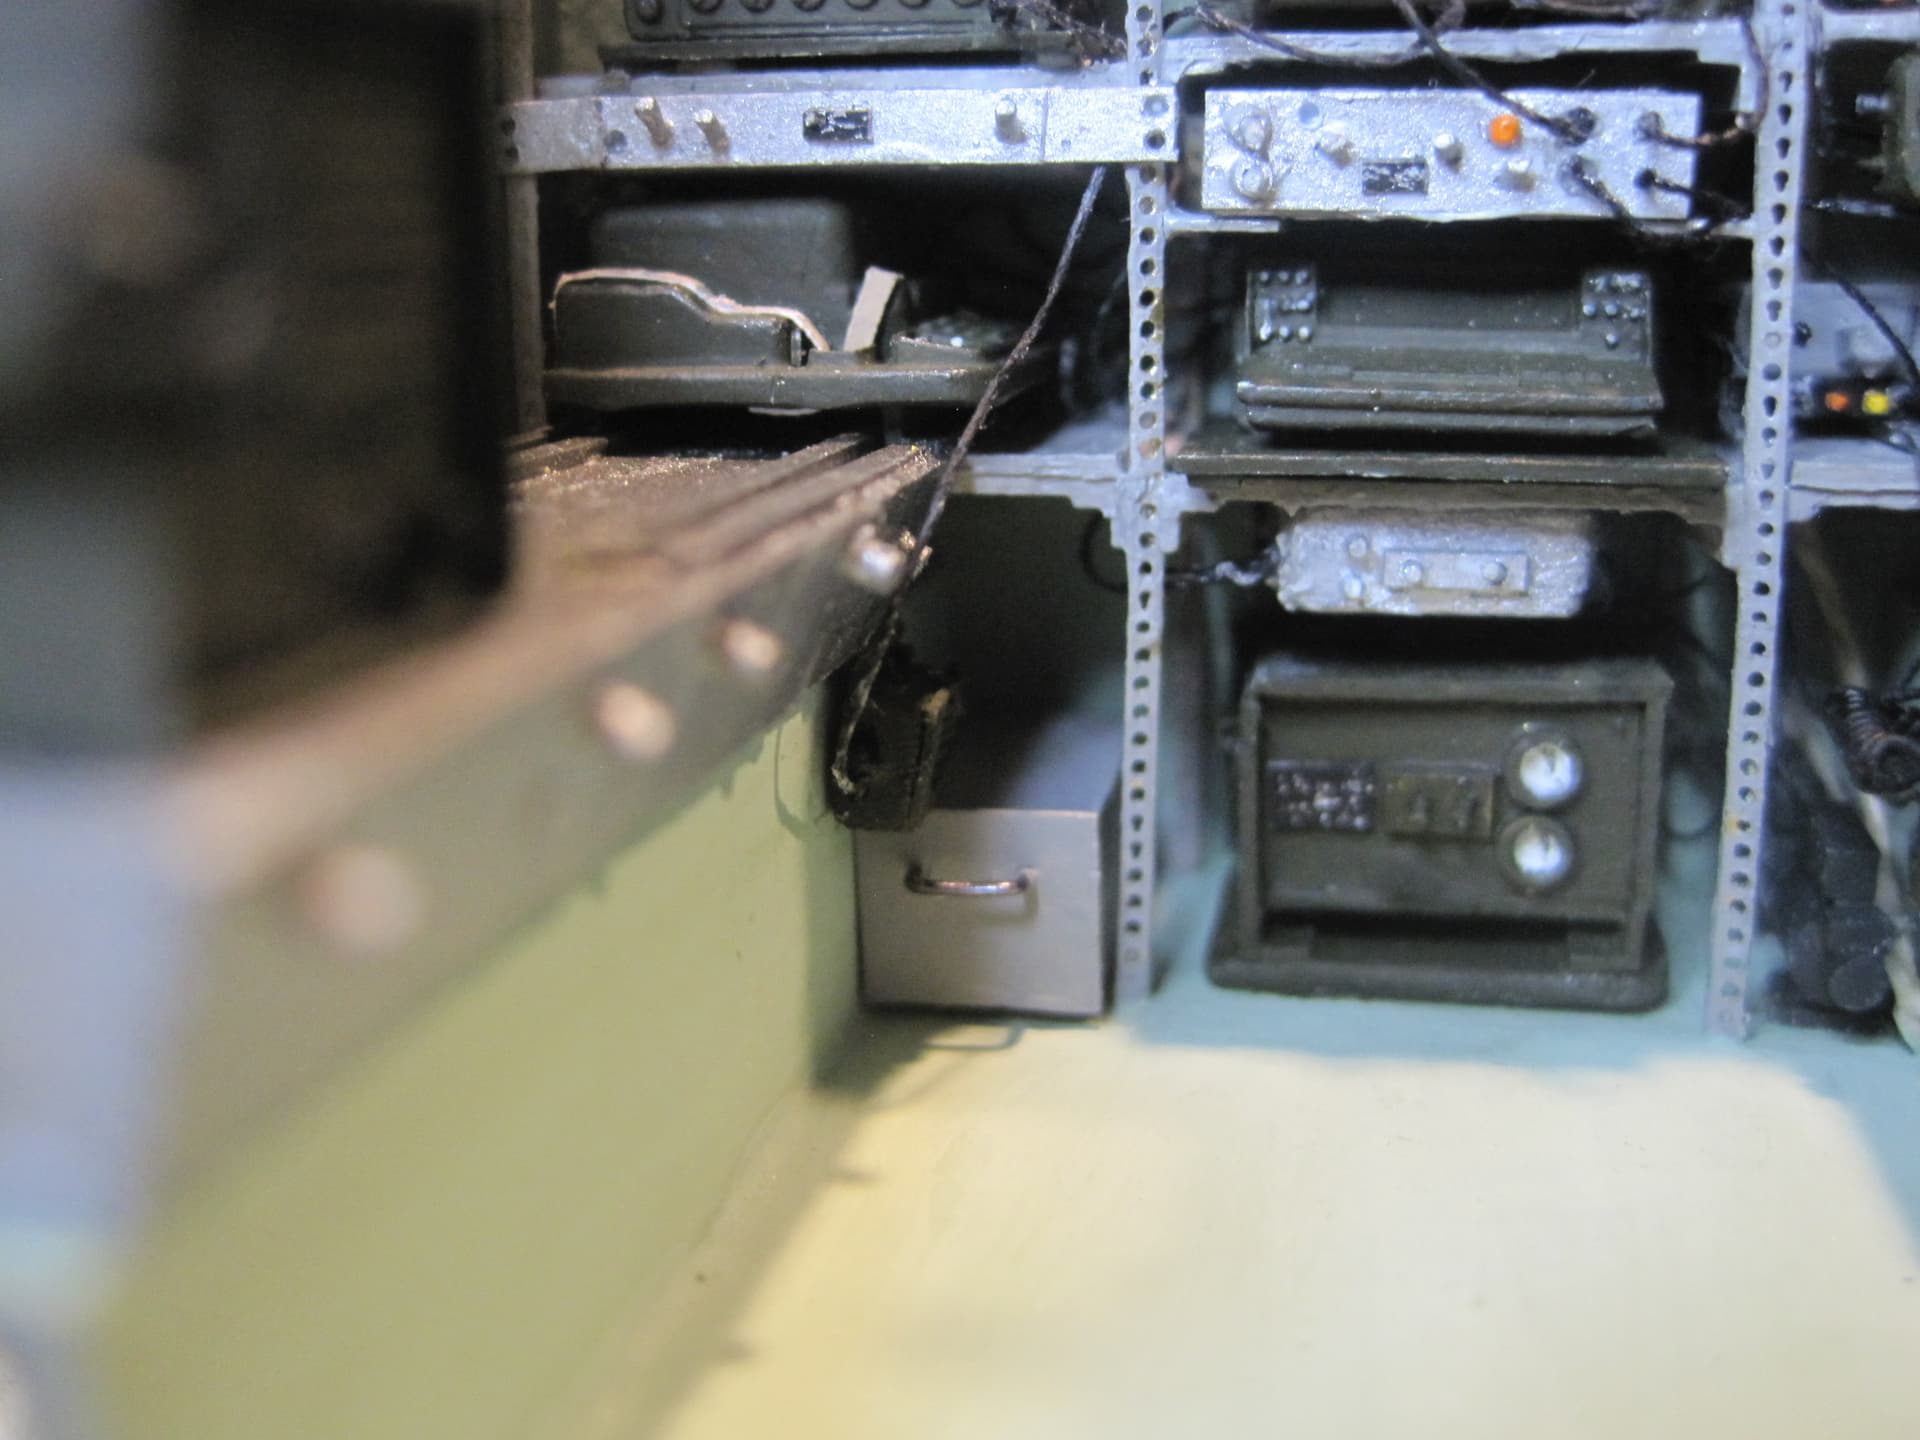
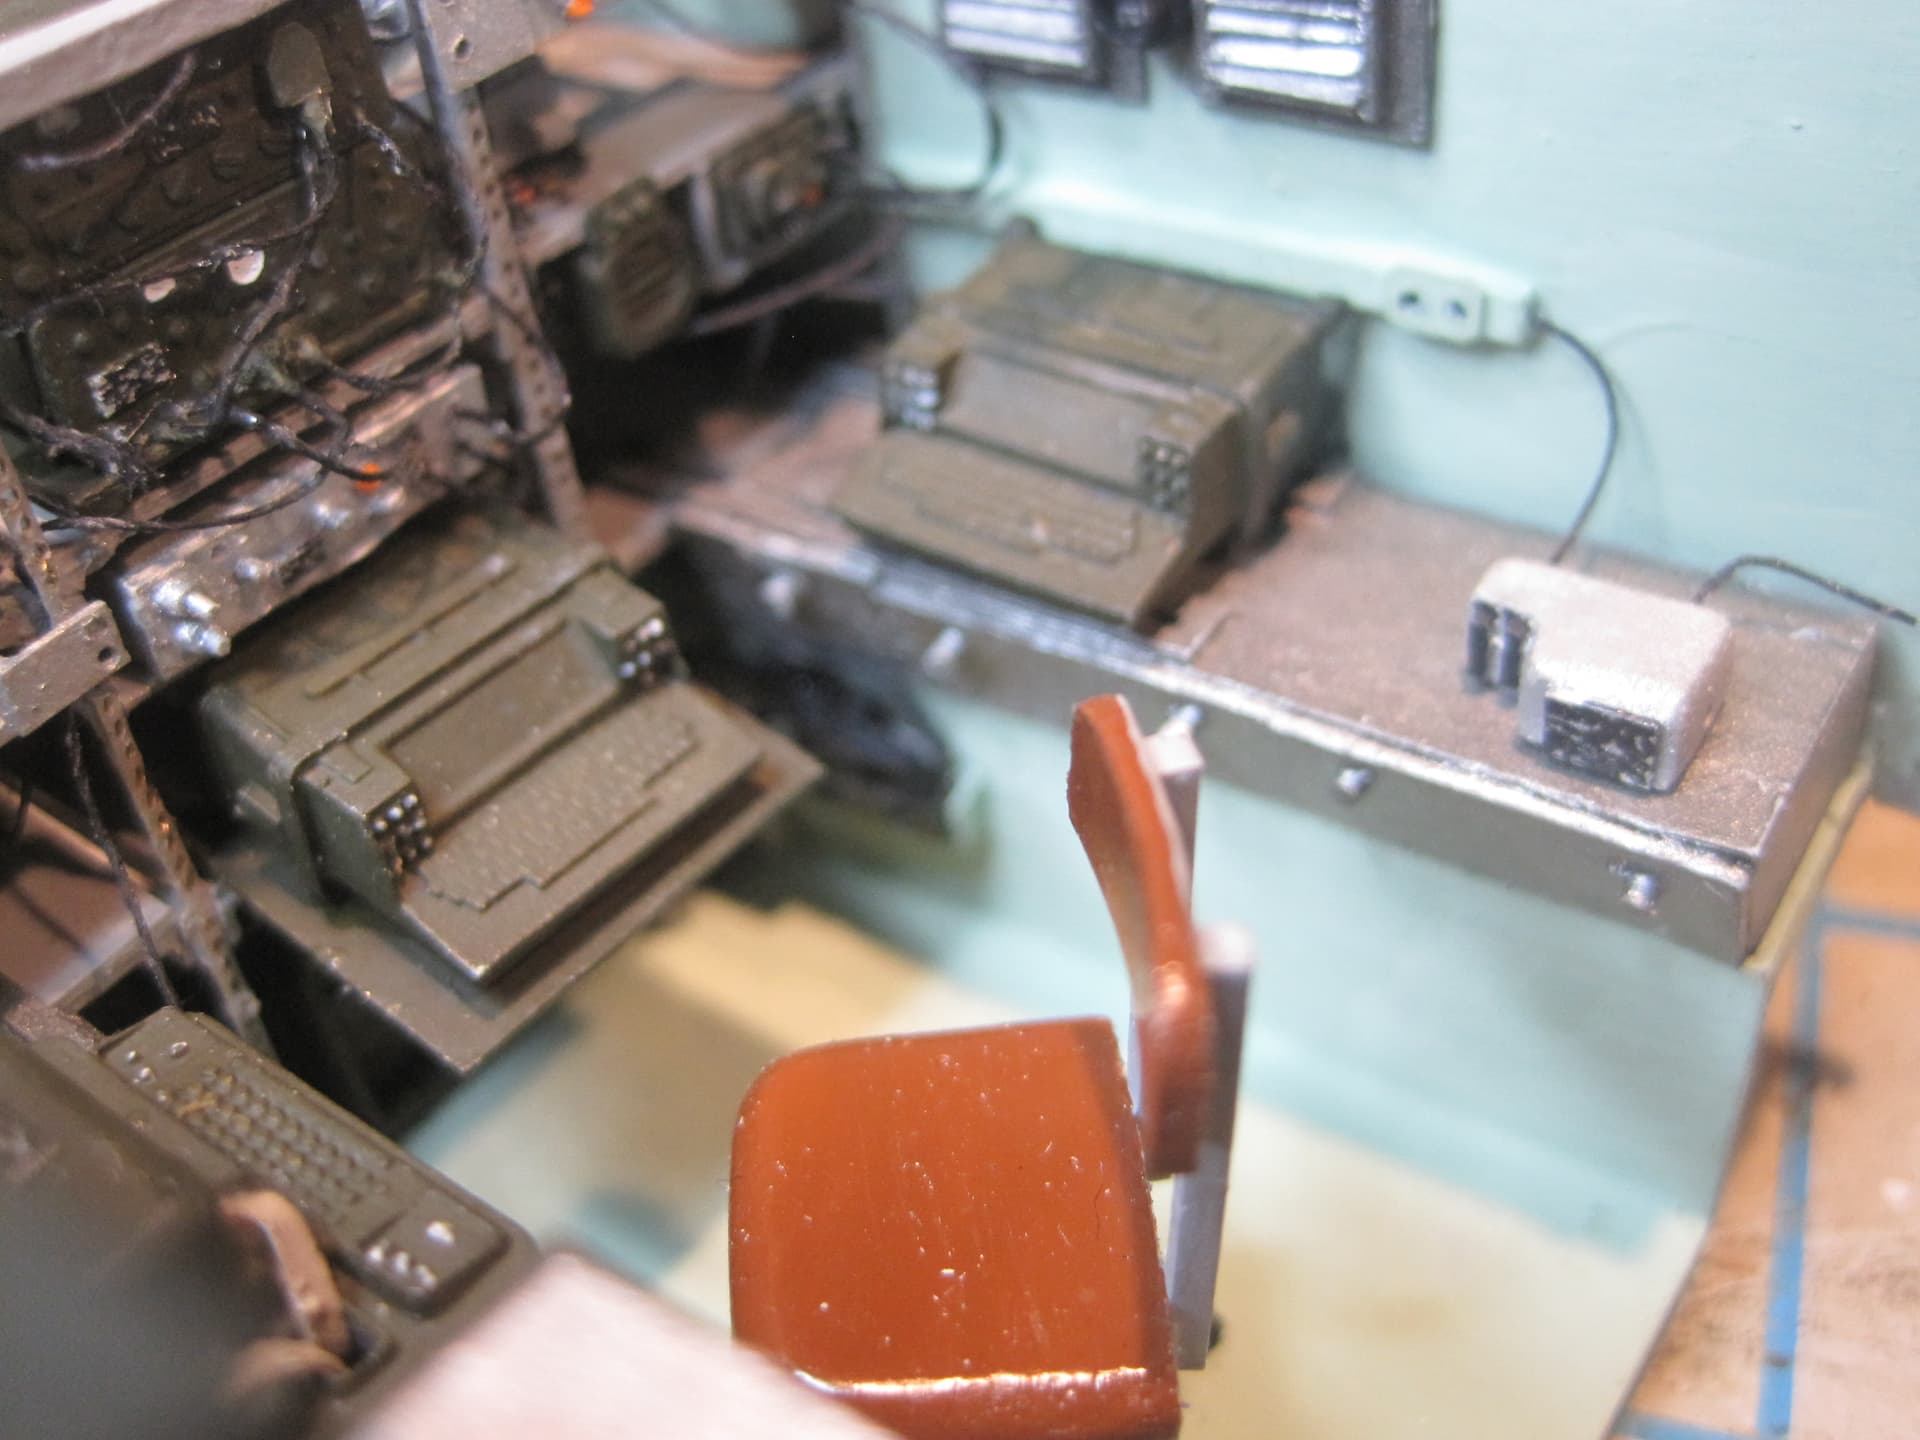
The next step involves putting all of the items into the shelter.

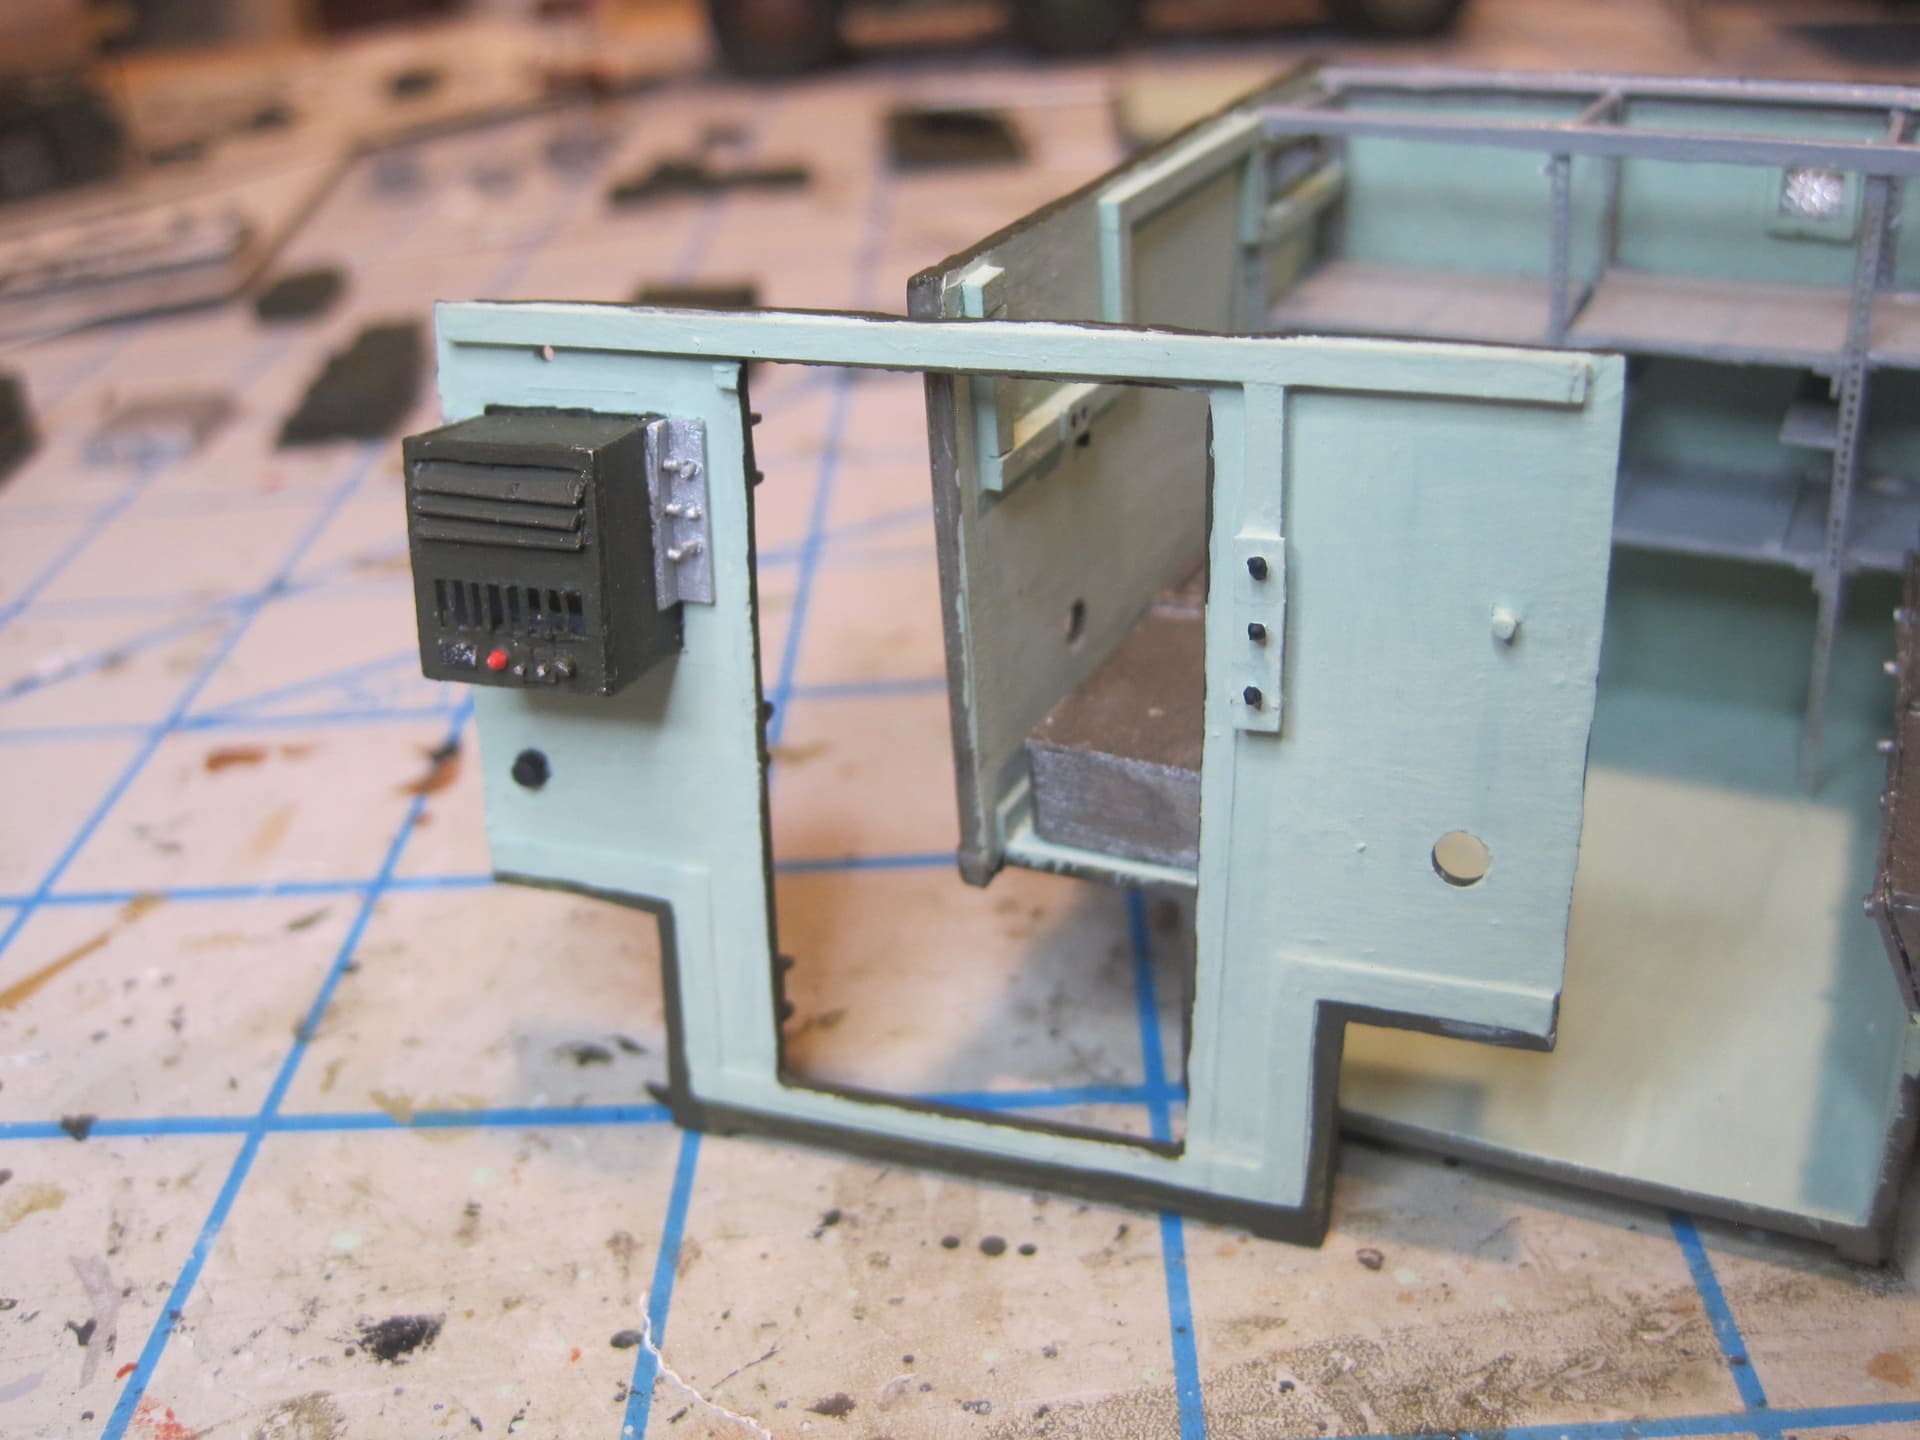
First up are all the items associated with supplying power, both the 28V DC as well as 110 AC.

1 Like
And today, I finally finished up the shelter. There are still a few minor things left, but those are going to wait until I complete the Gama Goat. You’ll notice that there’s quite a bit of mismatch with the base OD coat. But in effect that’s basically just a primer coat, and the whole shelter will be painted with MASSTER, I’m just going to ignore that. I debated painting the MASSTER on the shelter now, but I’ve decided to wait and do the shelter when I do the Gama Goat so the patterns will match as you go from truck to shelter.
The other thing I’m delaying is installing the tie down rings on the shelter. Once I get the Goat finished and the shelter mounted, I’ll finish up by putting in the tie down rings and fab up some turnbuckles. The shelter kit provides some very nice PE parts for the rings, but they’re pretty delicate so I decided to wait until the end so they don’t get lost or messed up during all the handling that comes with painting. From the kit instructions it appears that these should be mounted at the roof level, but since I’m not going to attach the roof when I’m done, I’ve moved them down slightly so they’re on the shelter body instead of the roof.
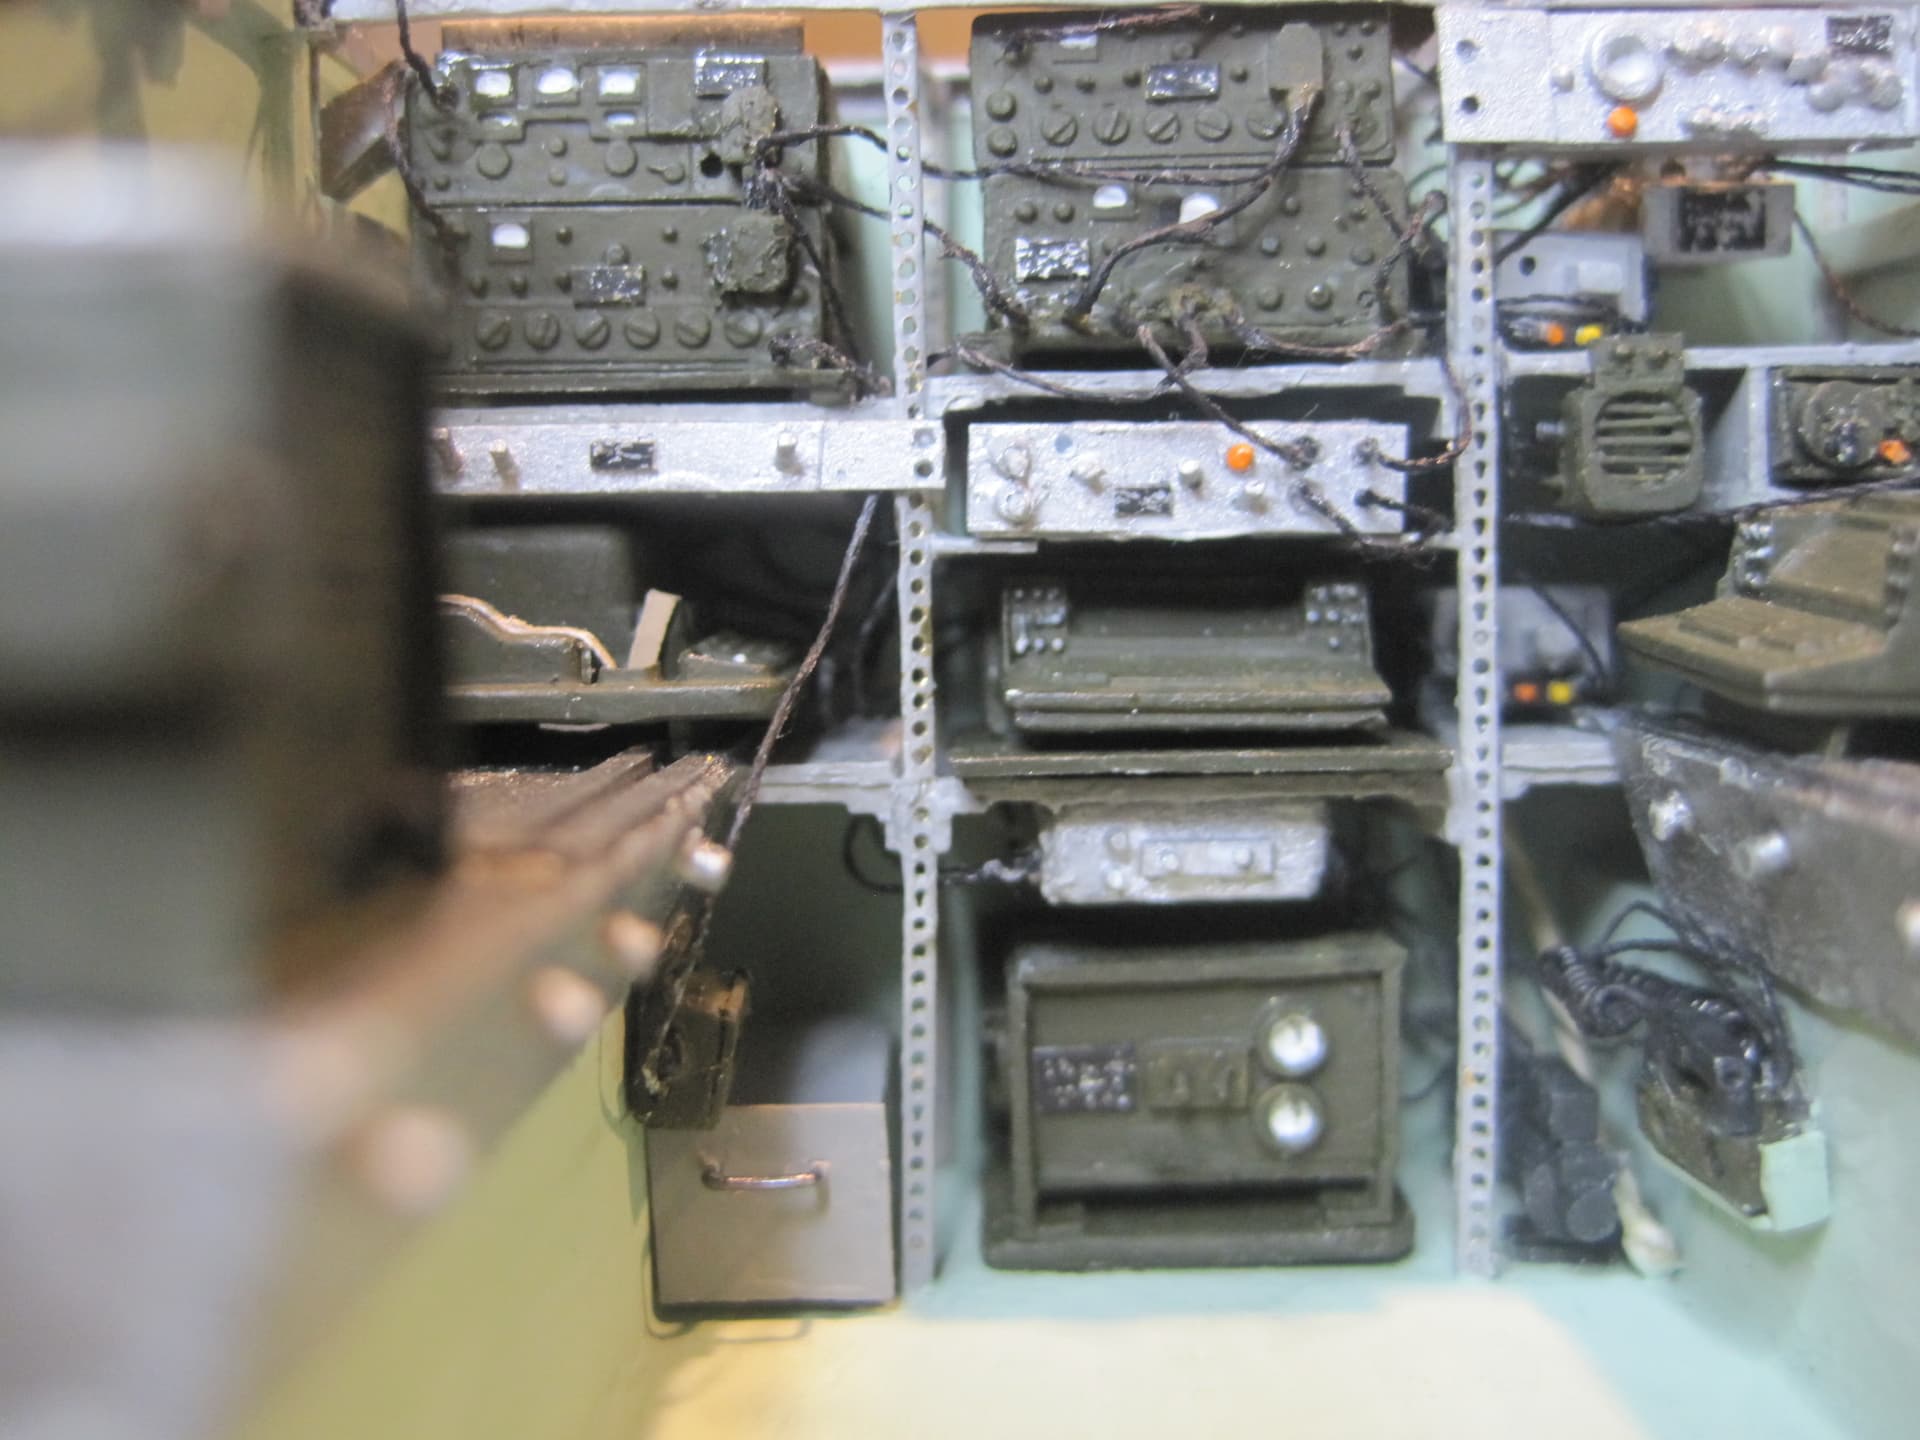
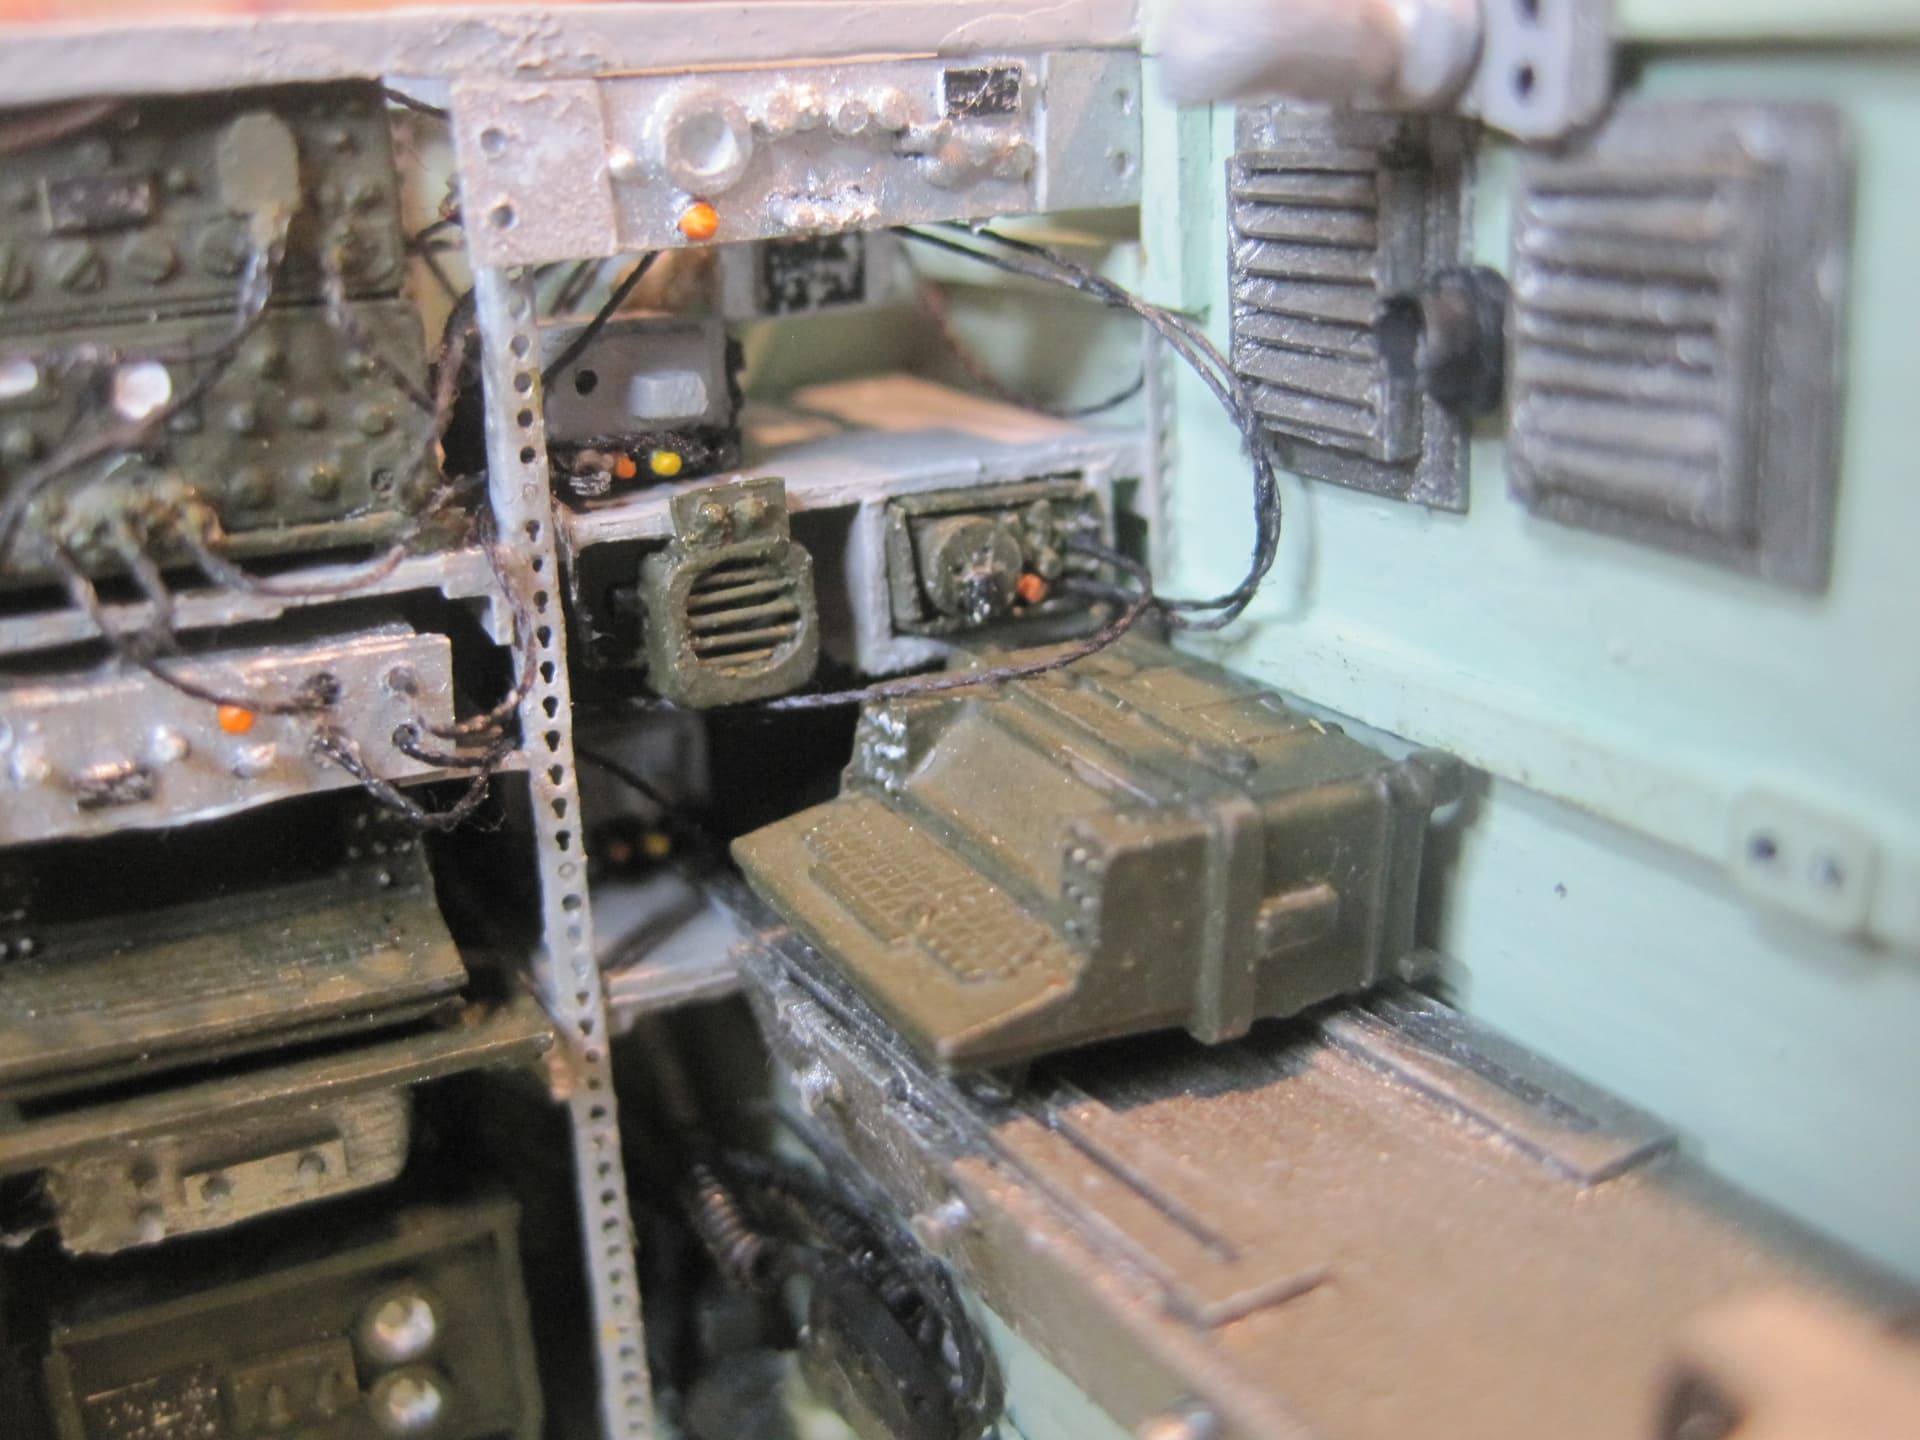
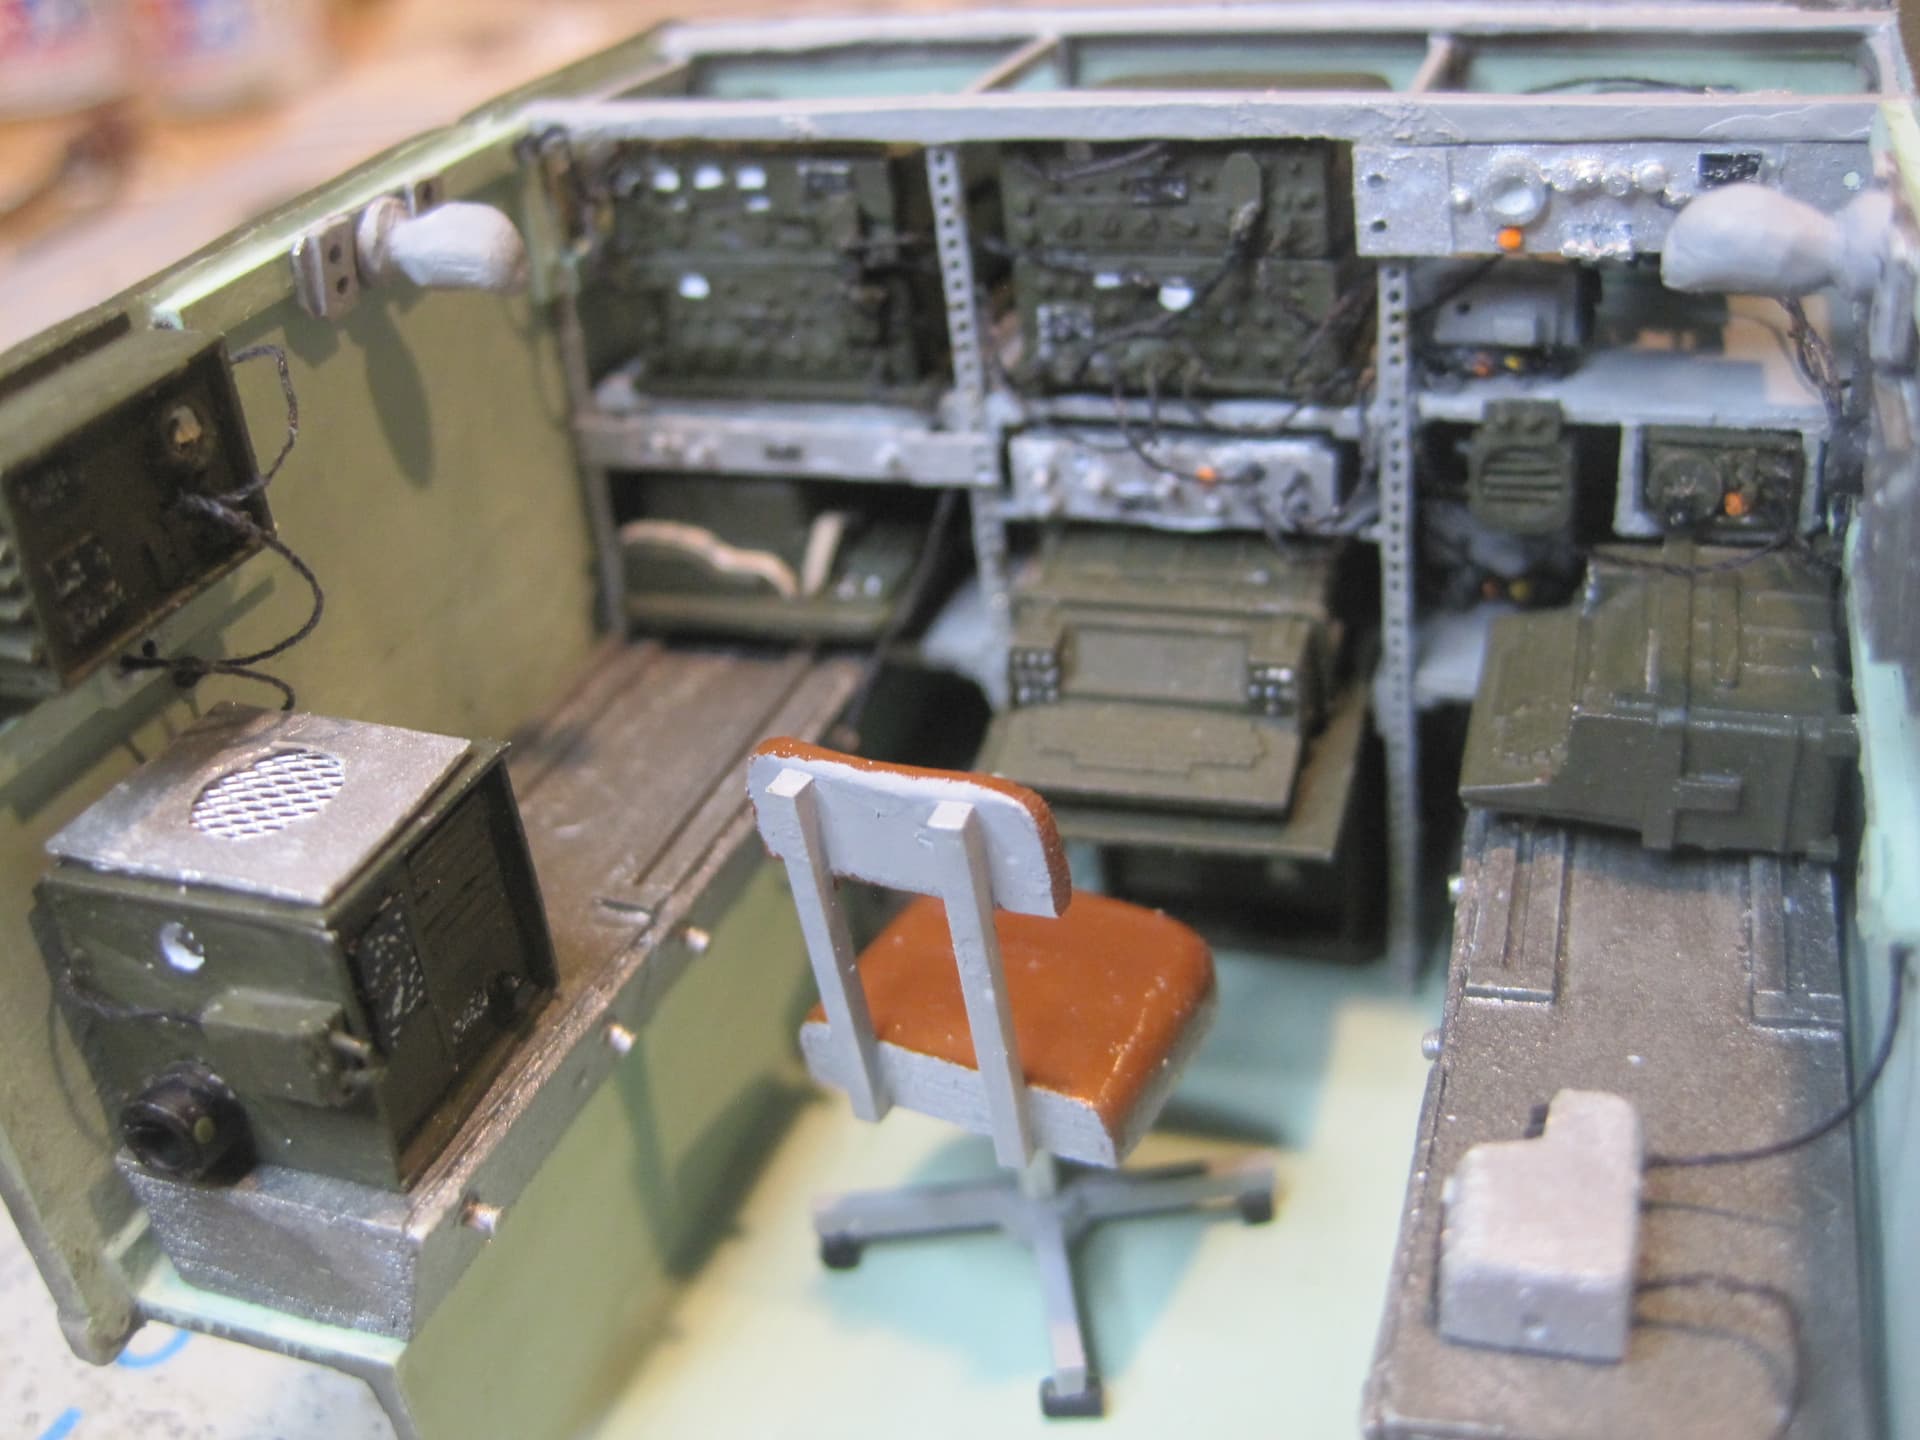
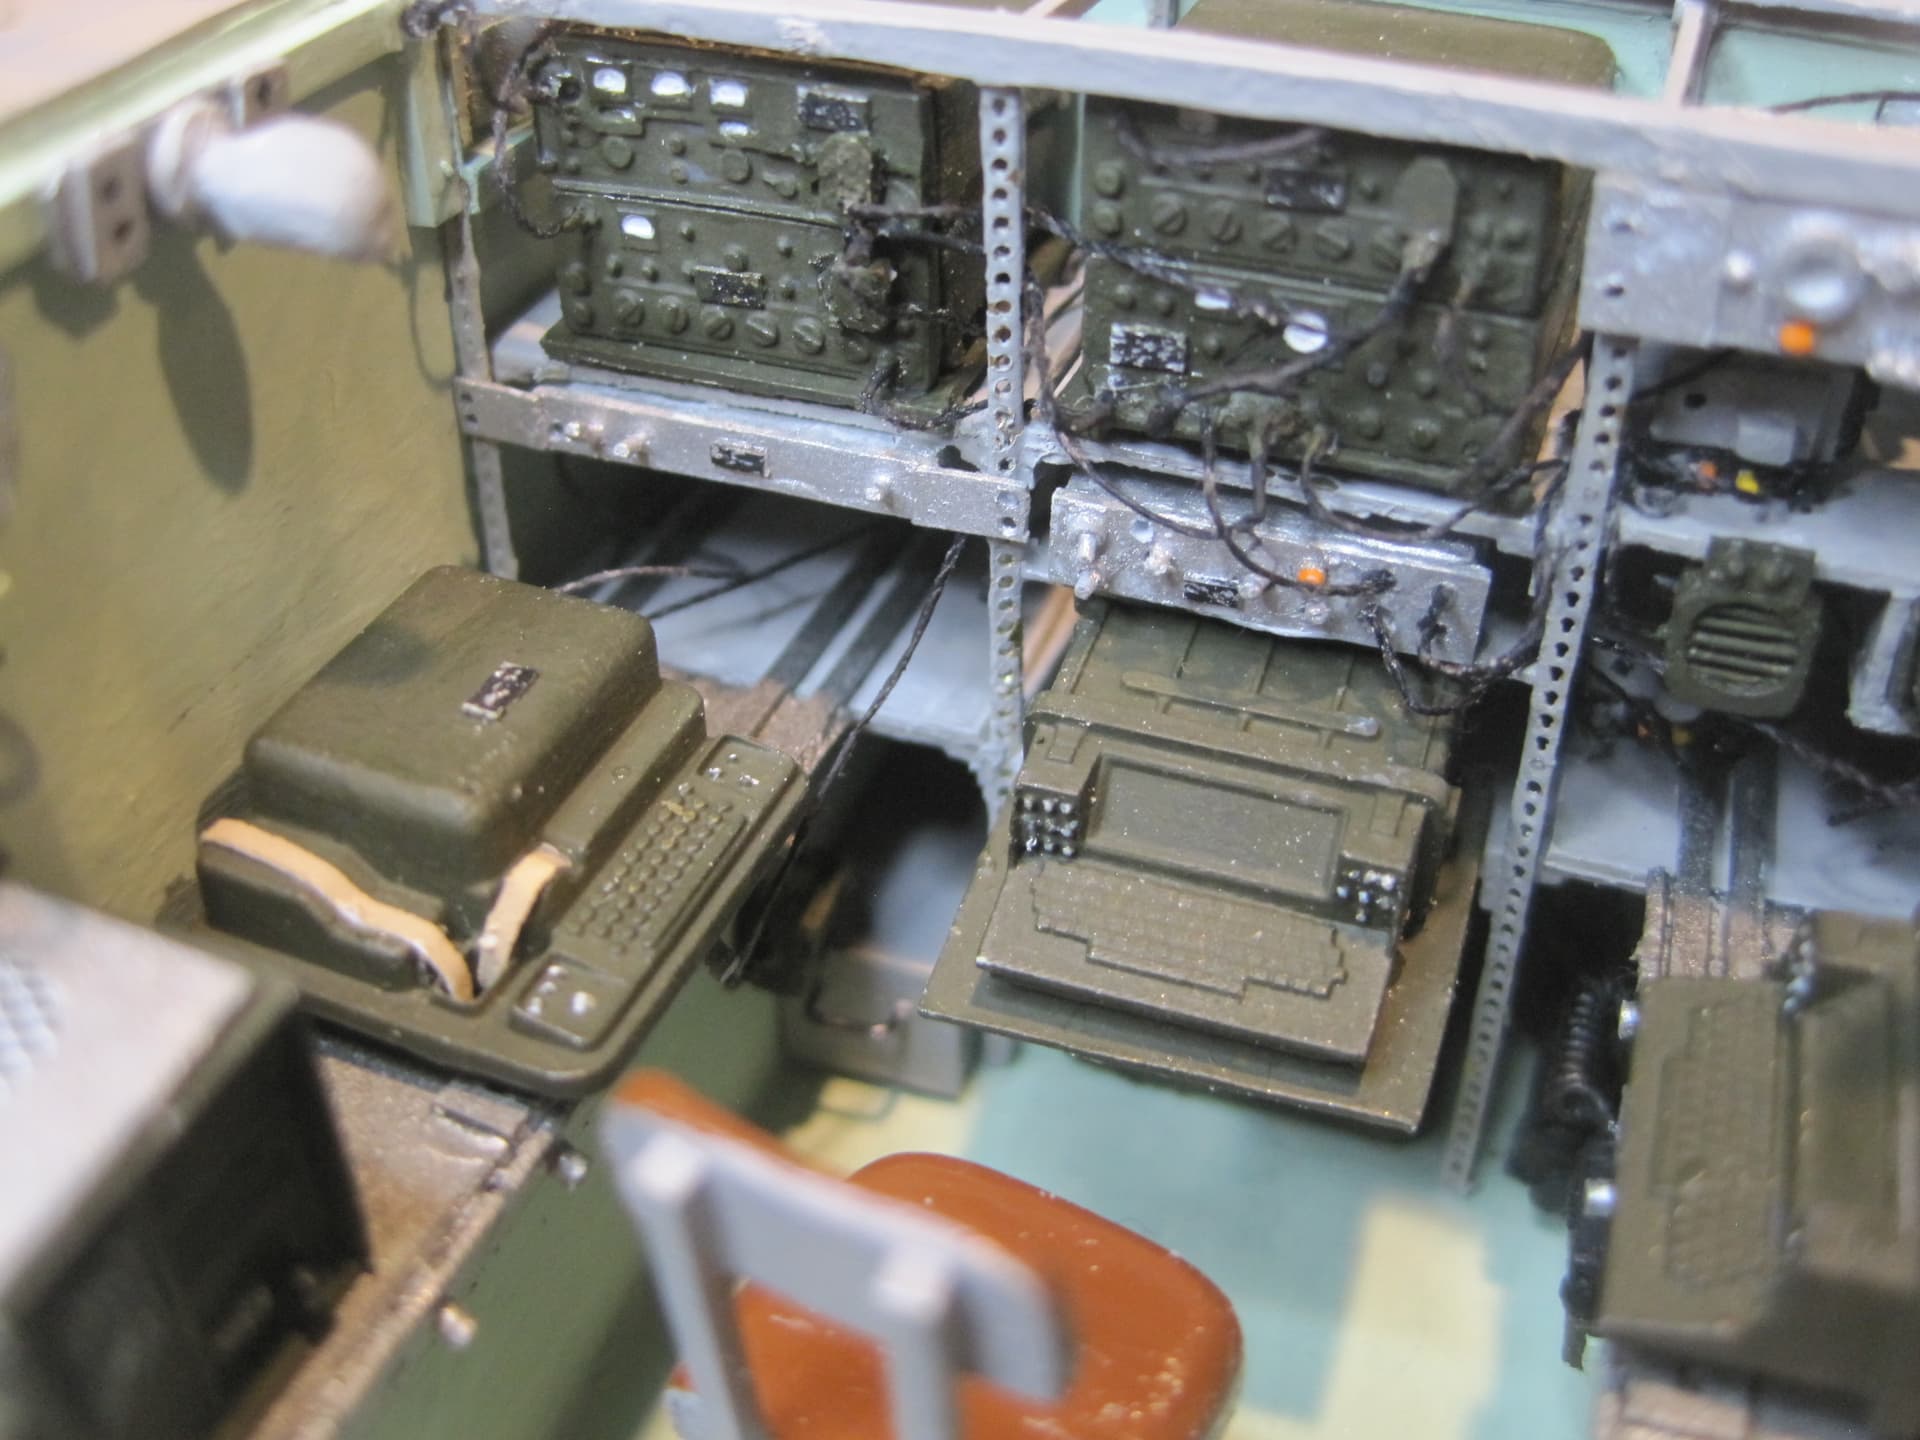
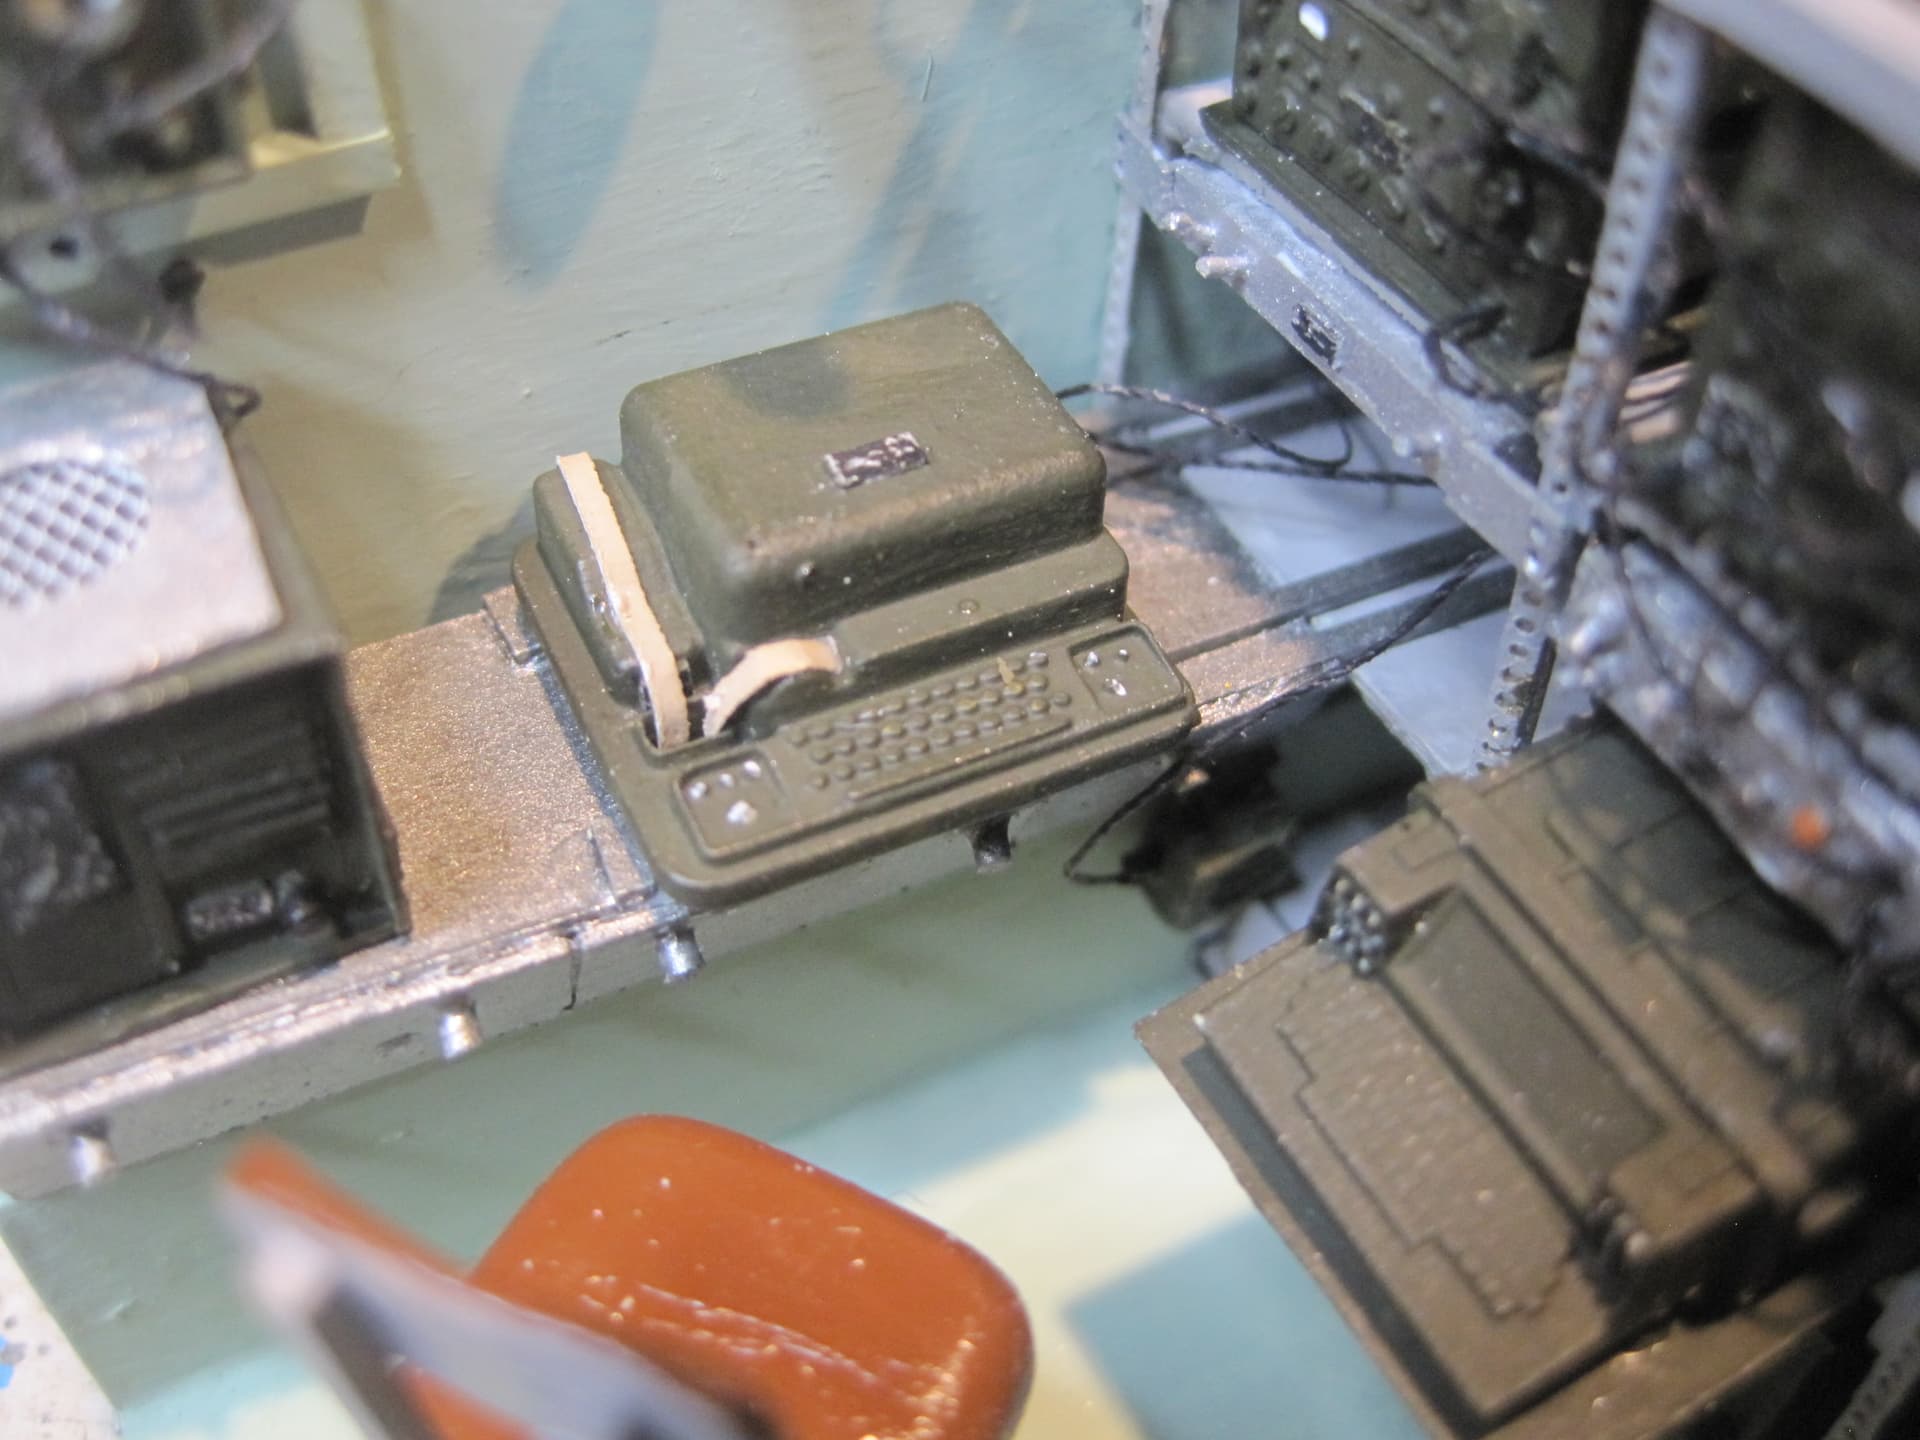
This first group of shots shows the progress to the point of adding the actual Teletypewriters, but not the actual radio/amplifier/and modem
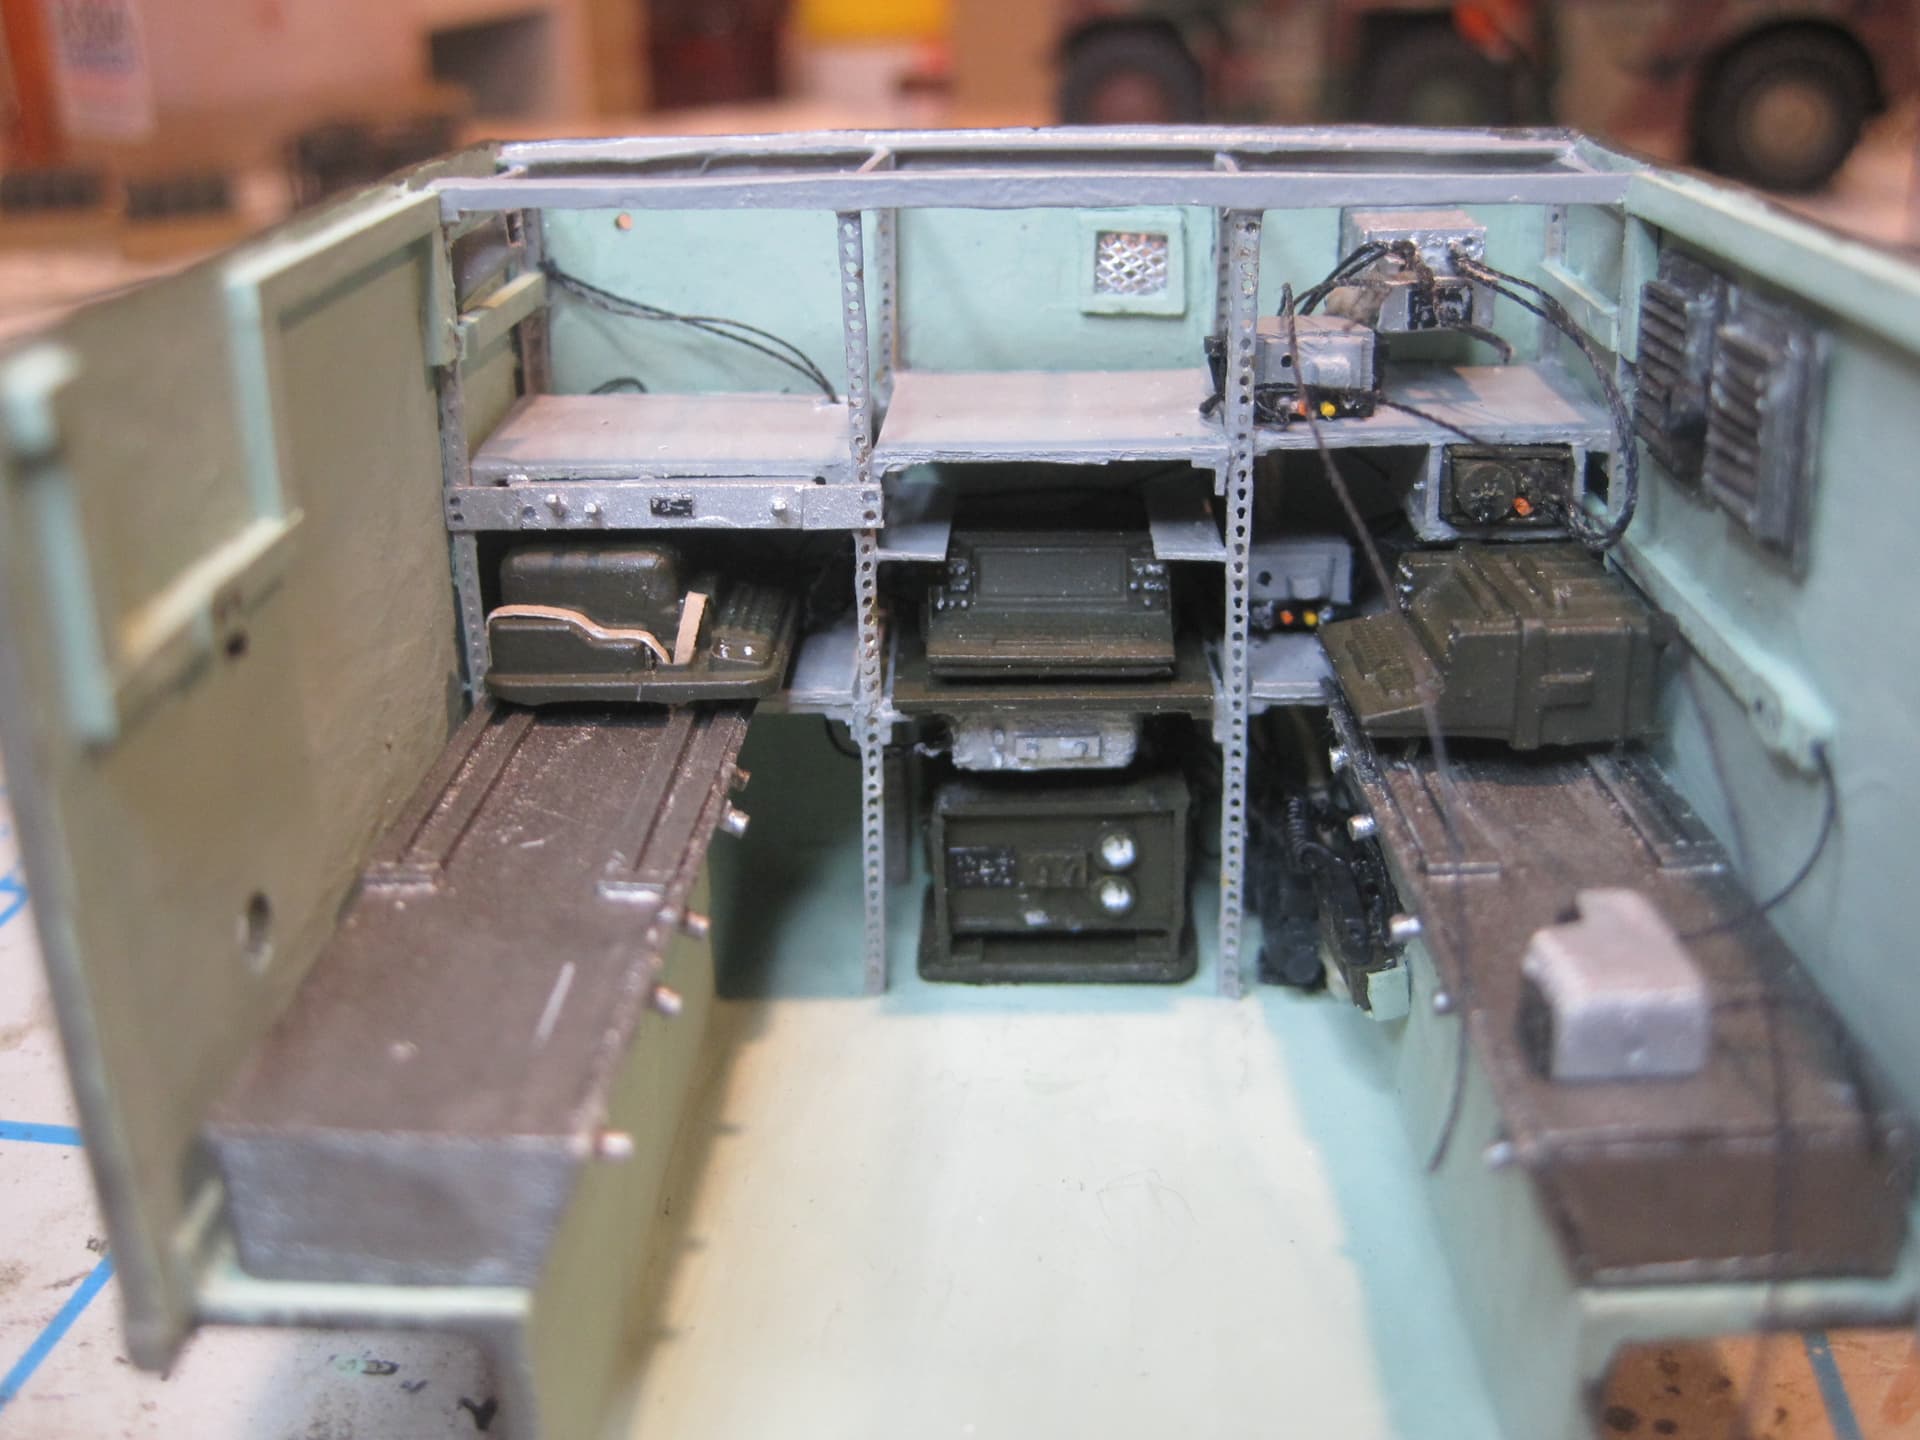
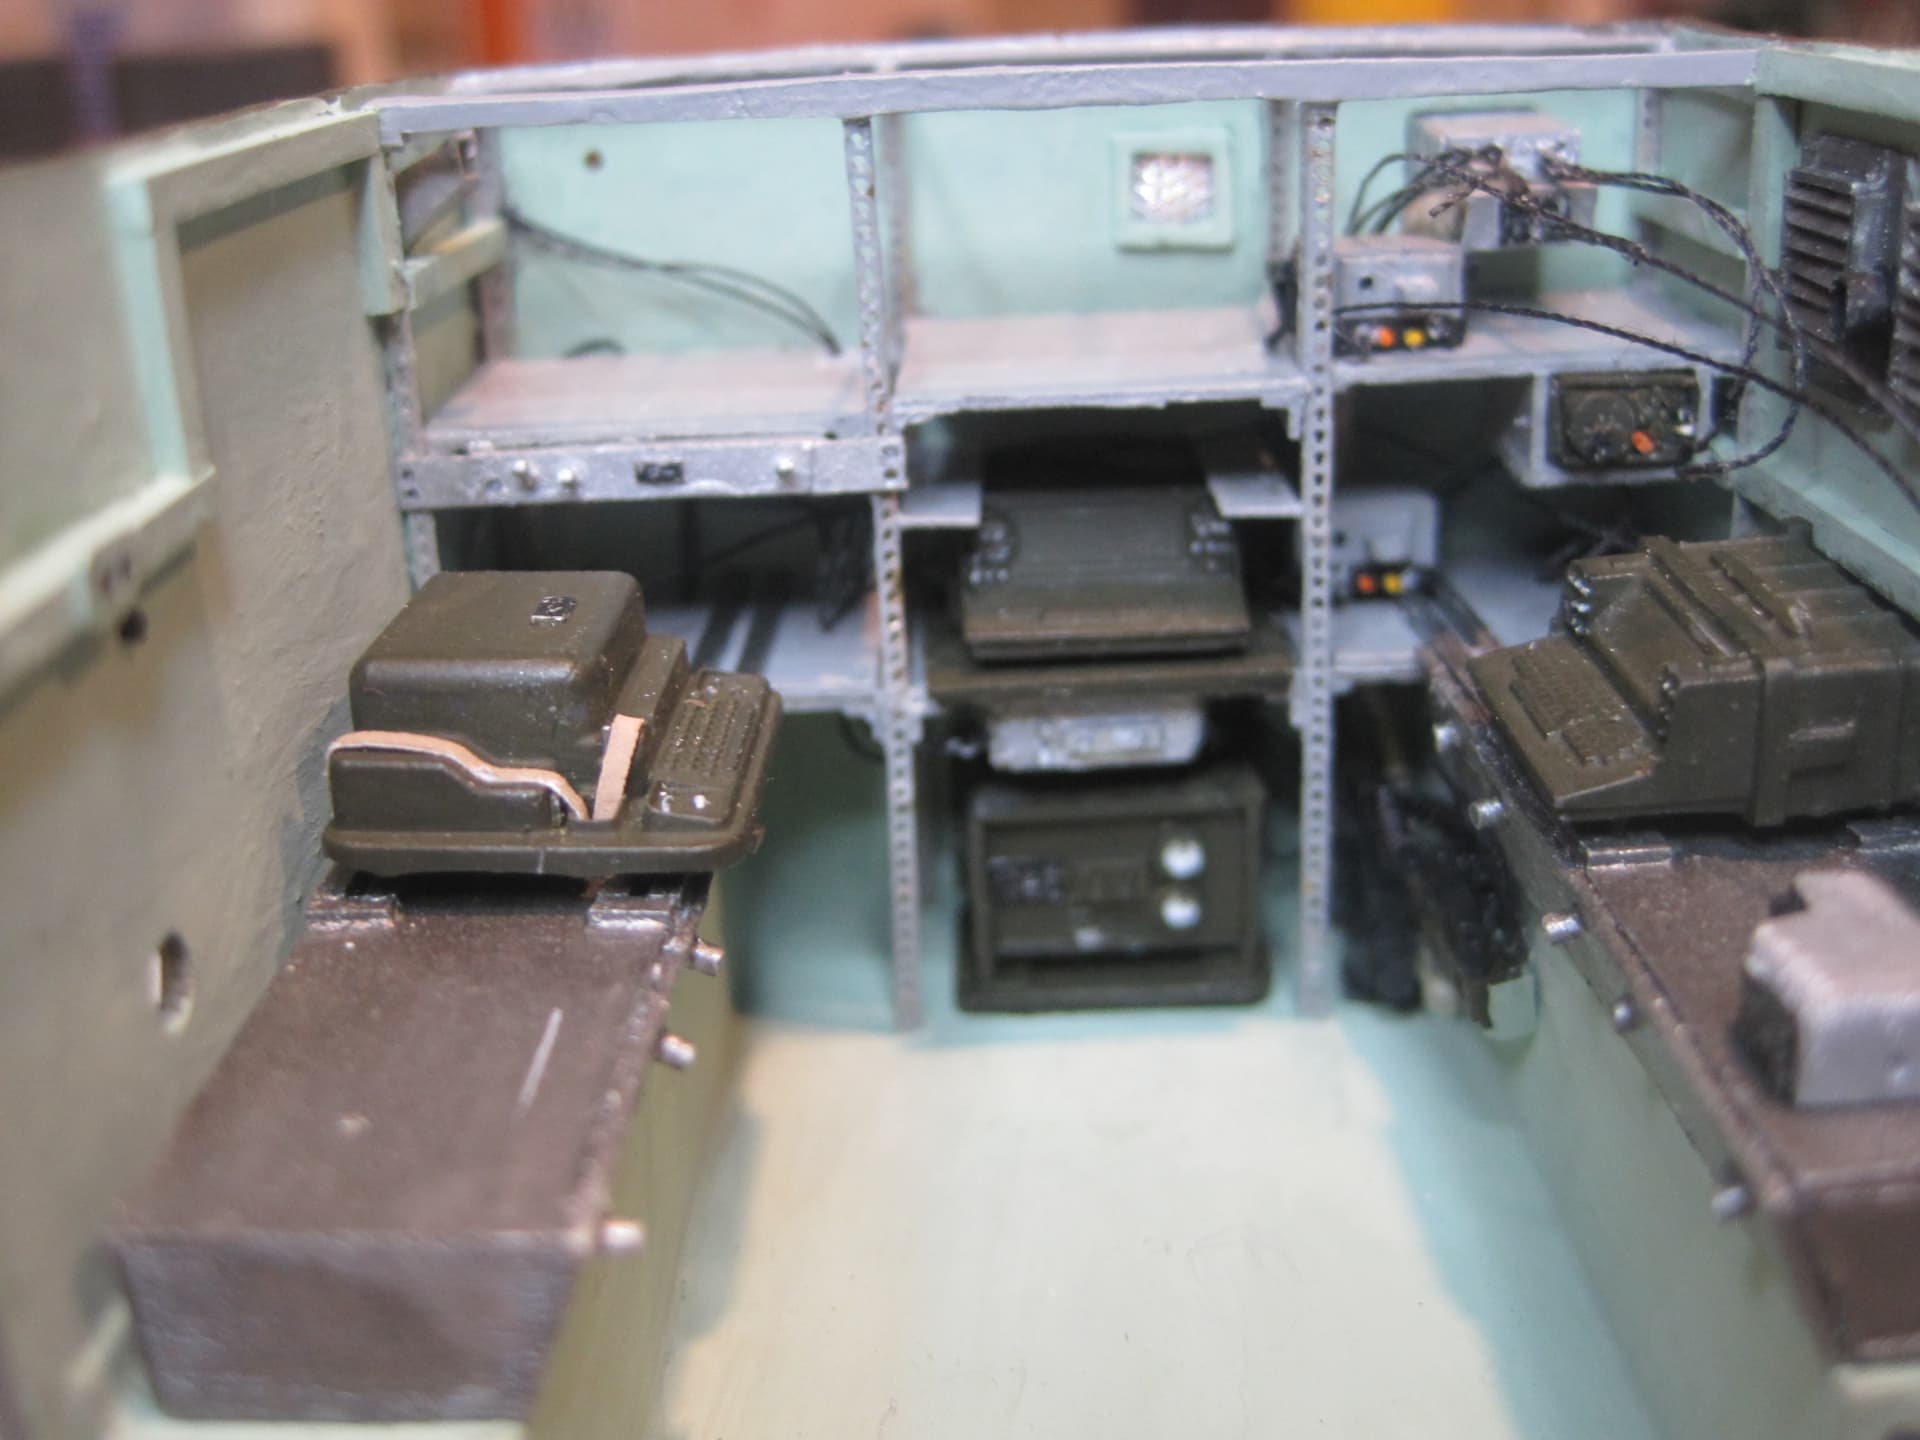

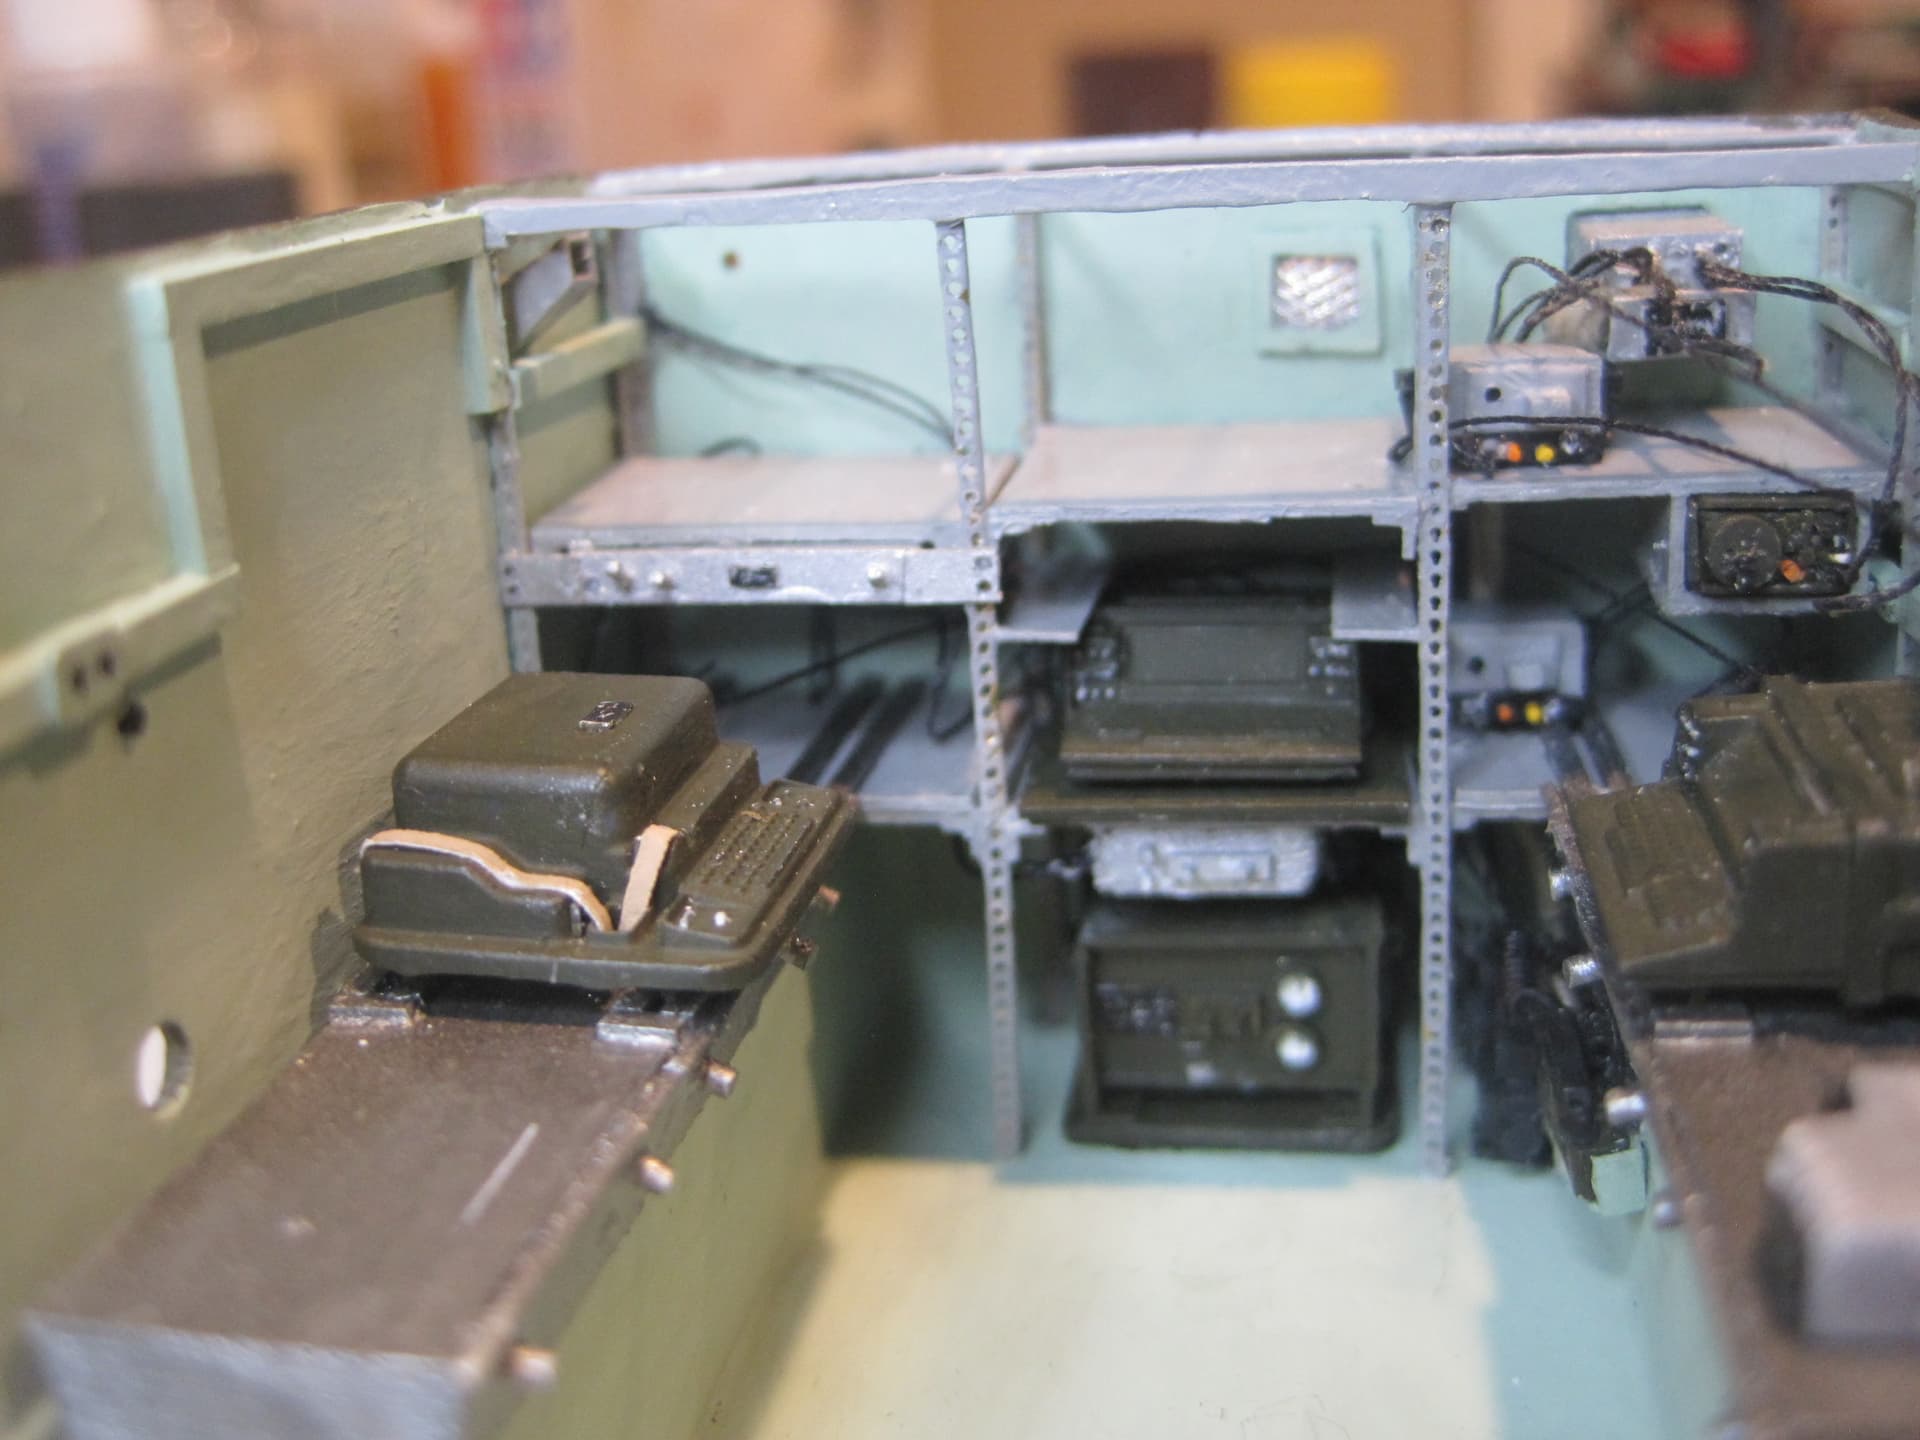
And now here’s everything all crammed into the shelter.
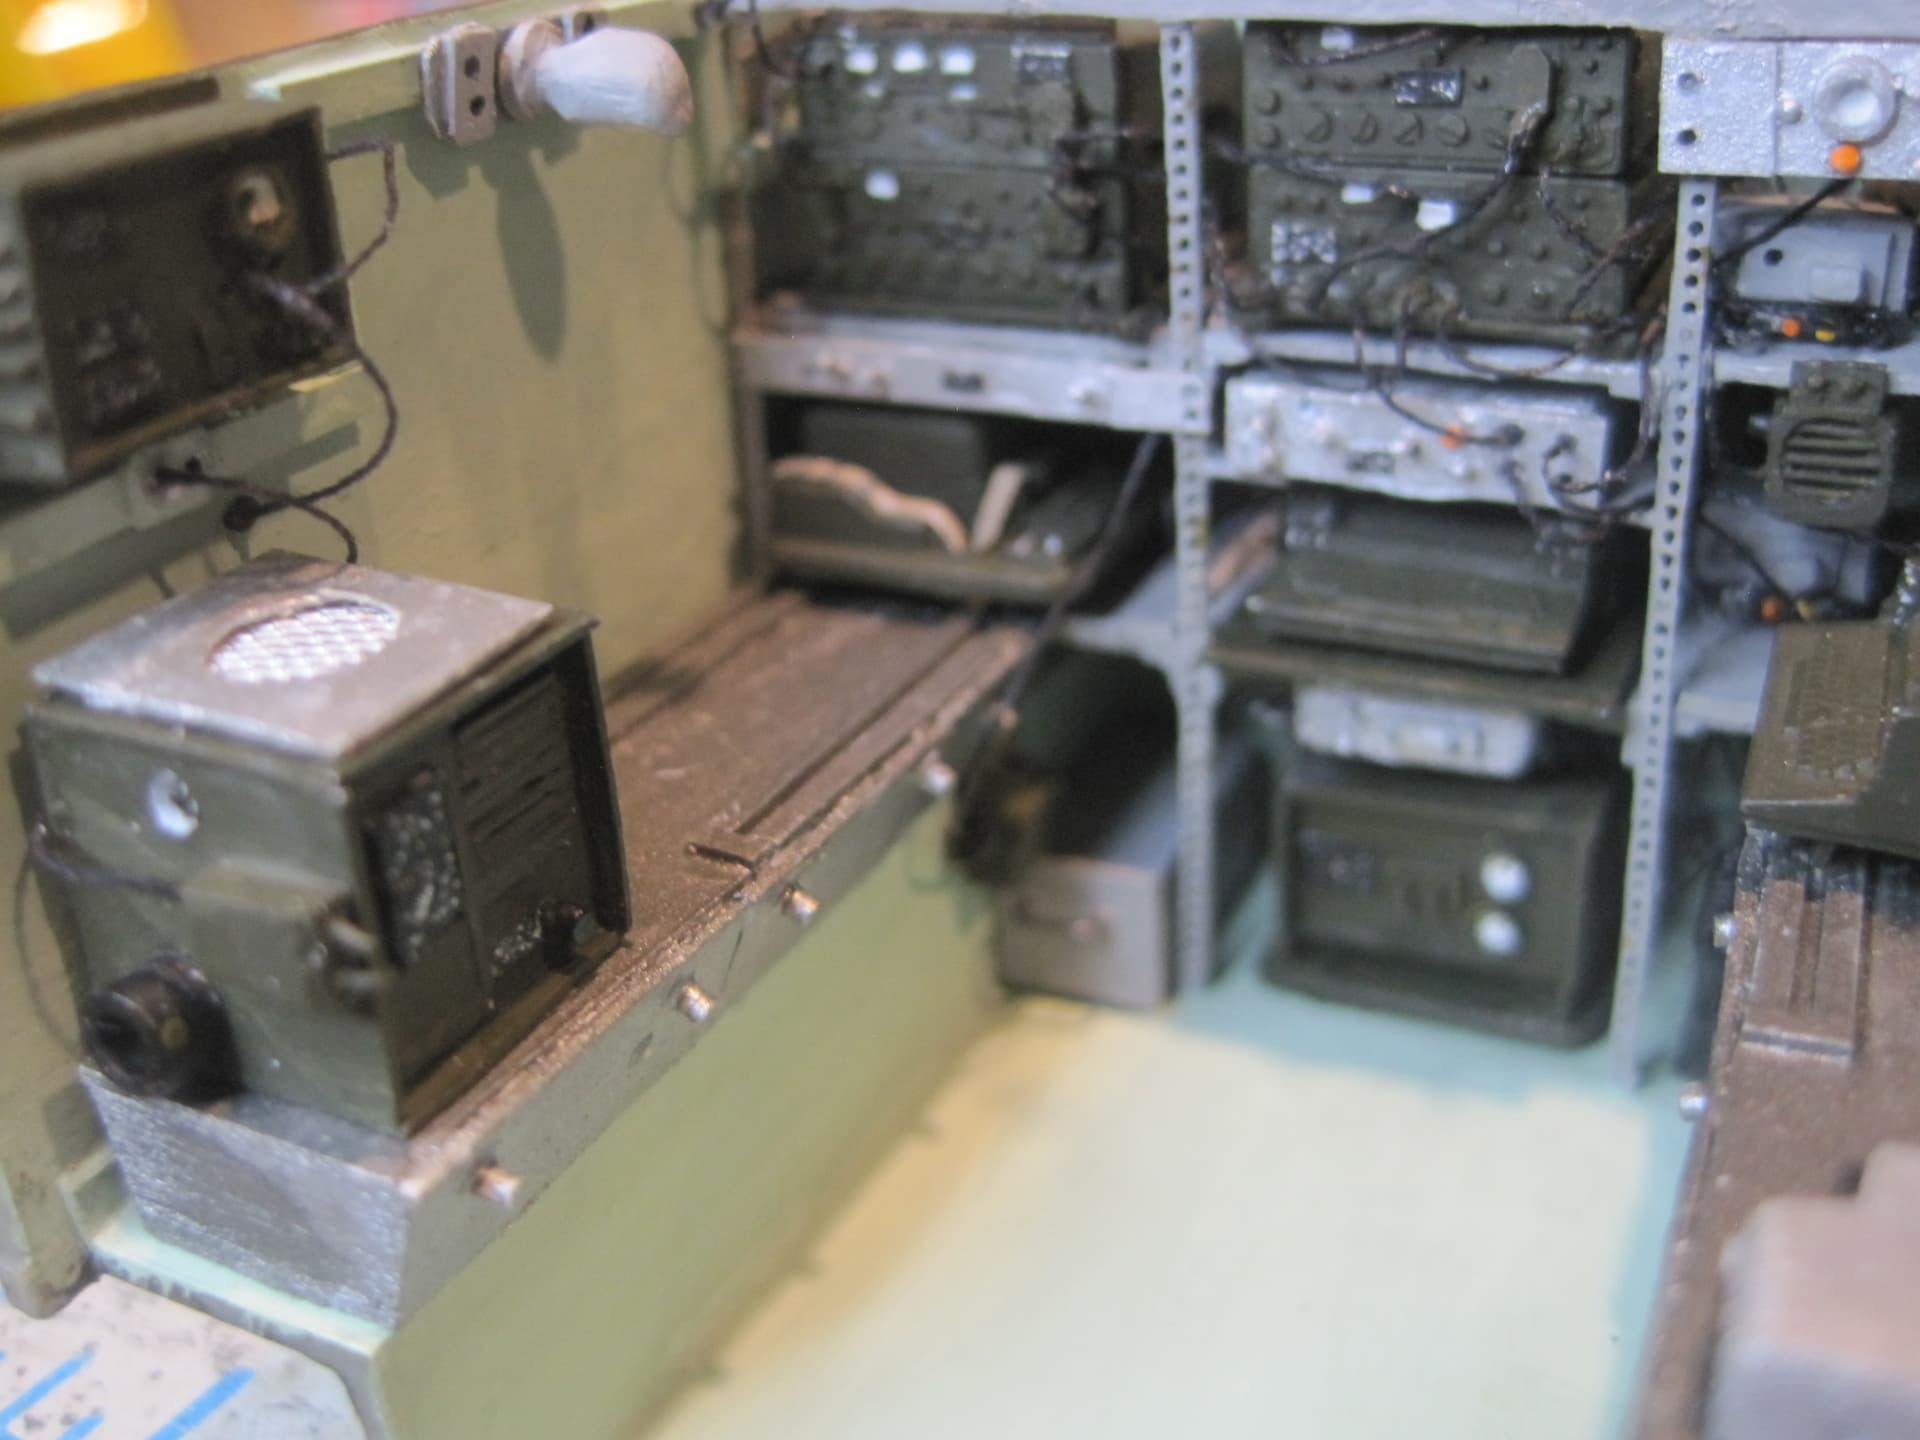


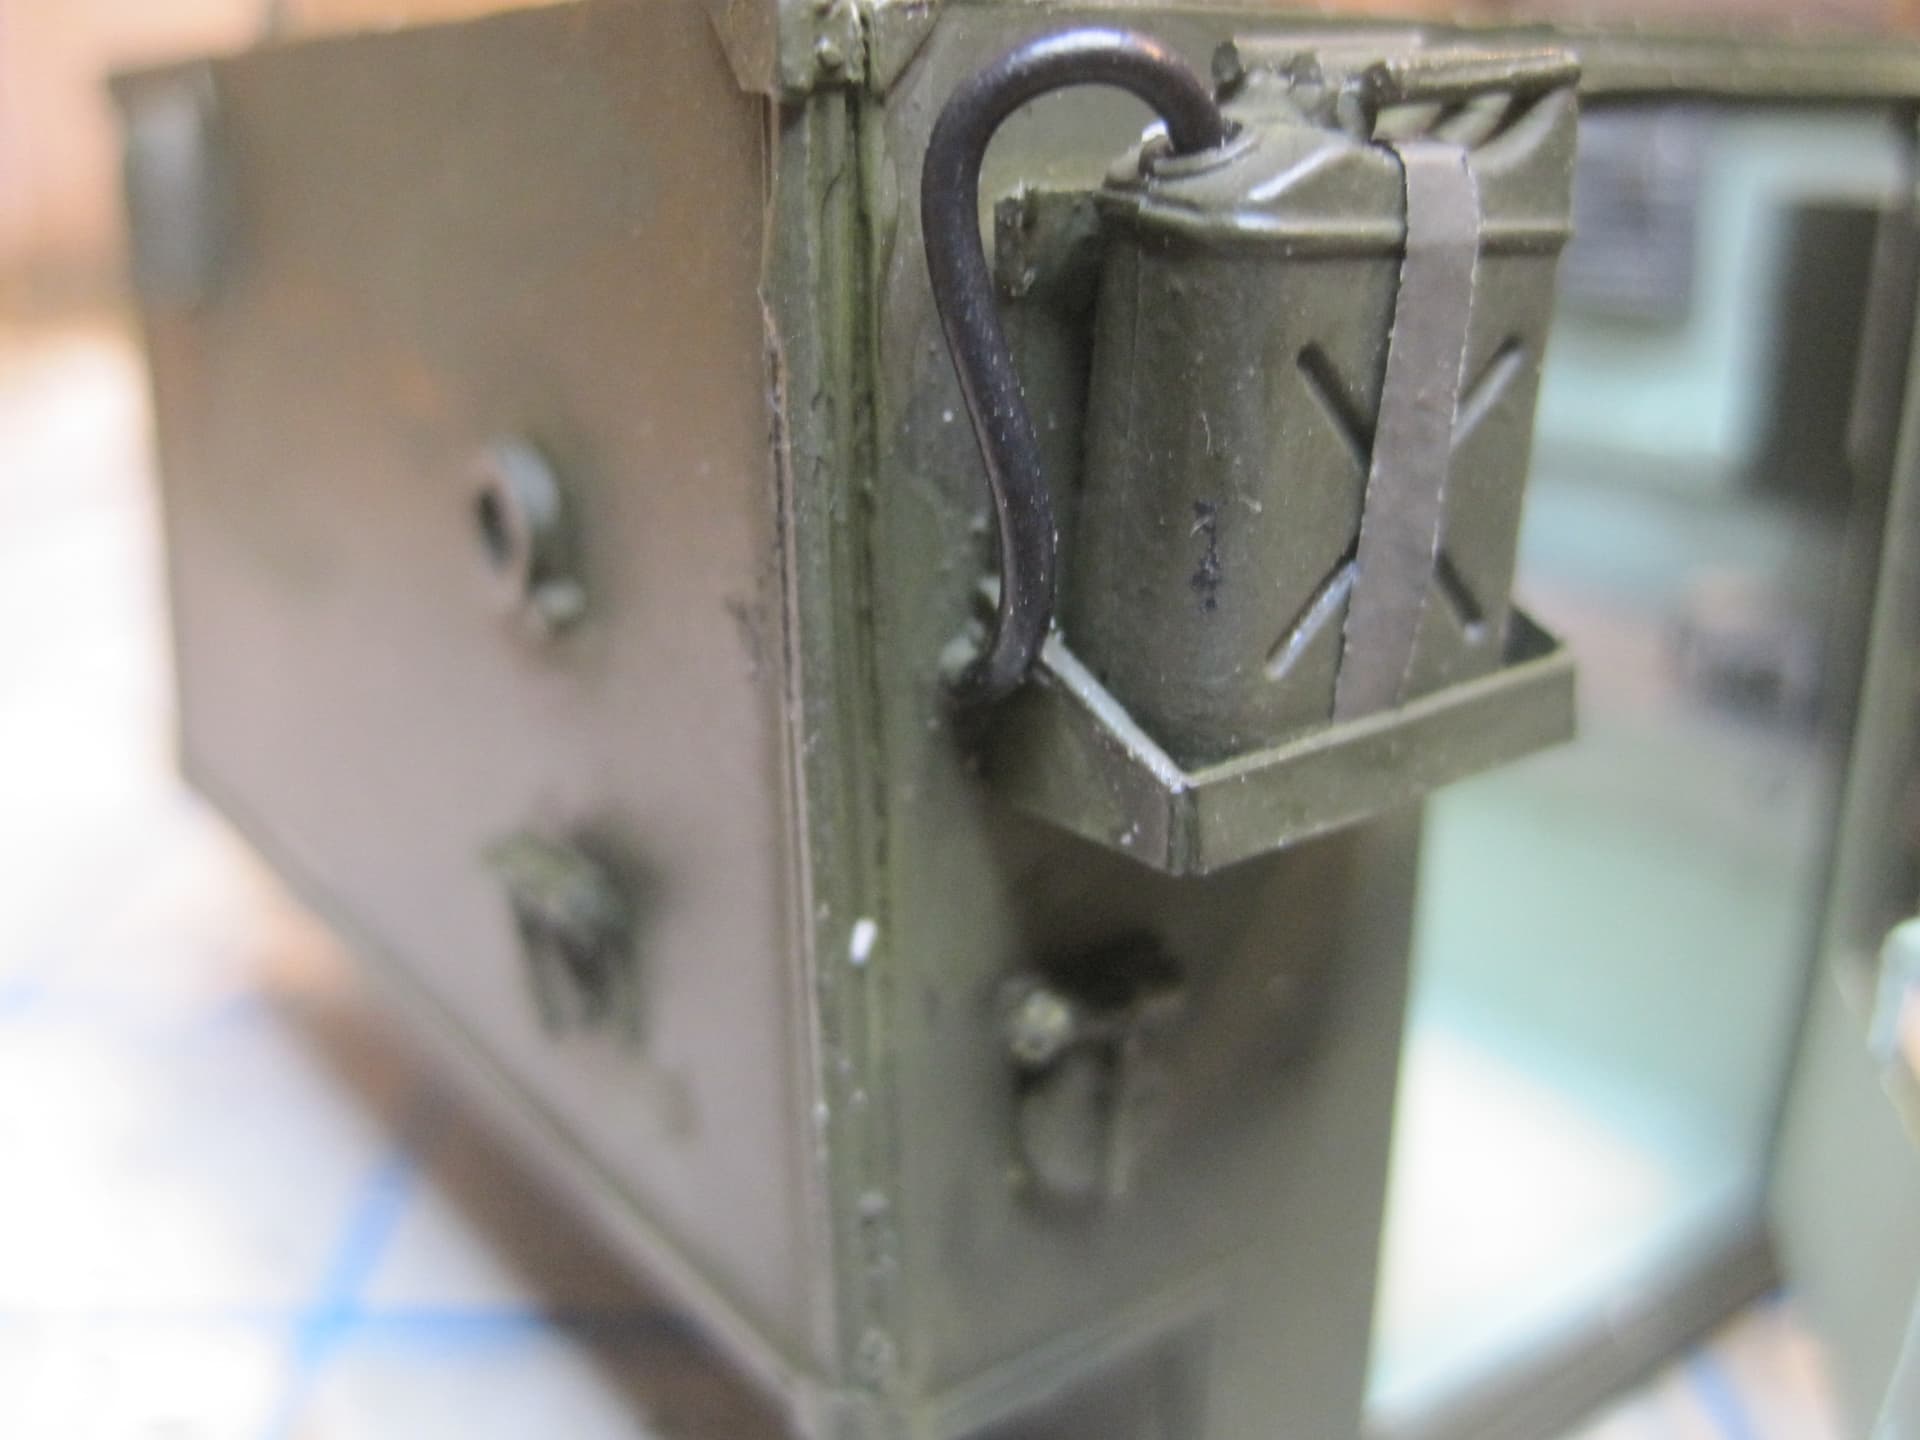
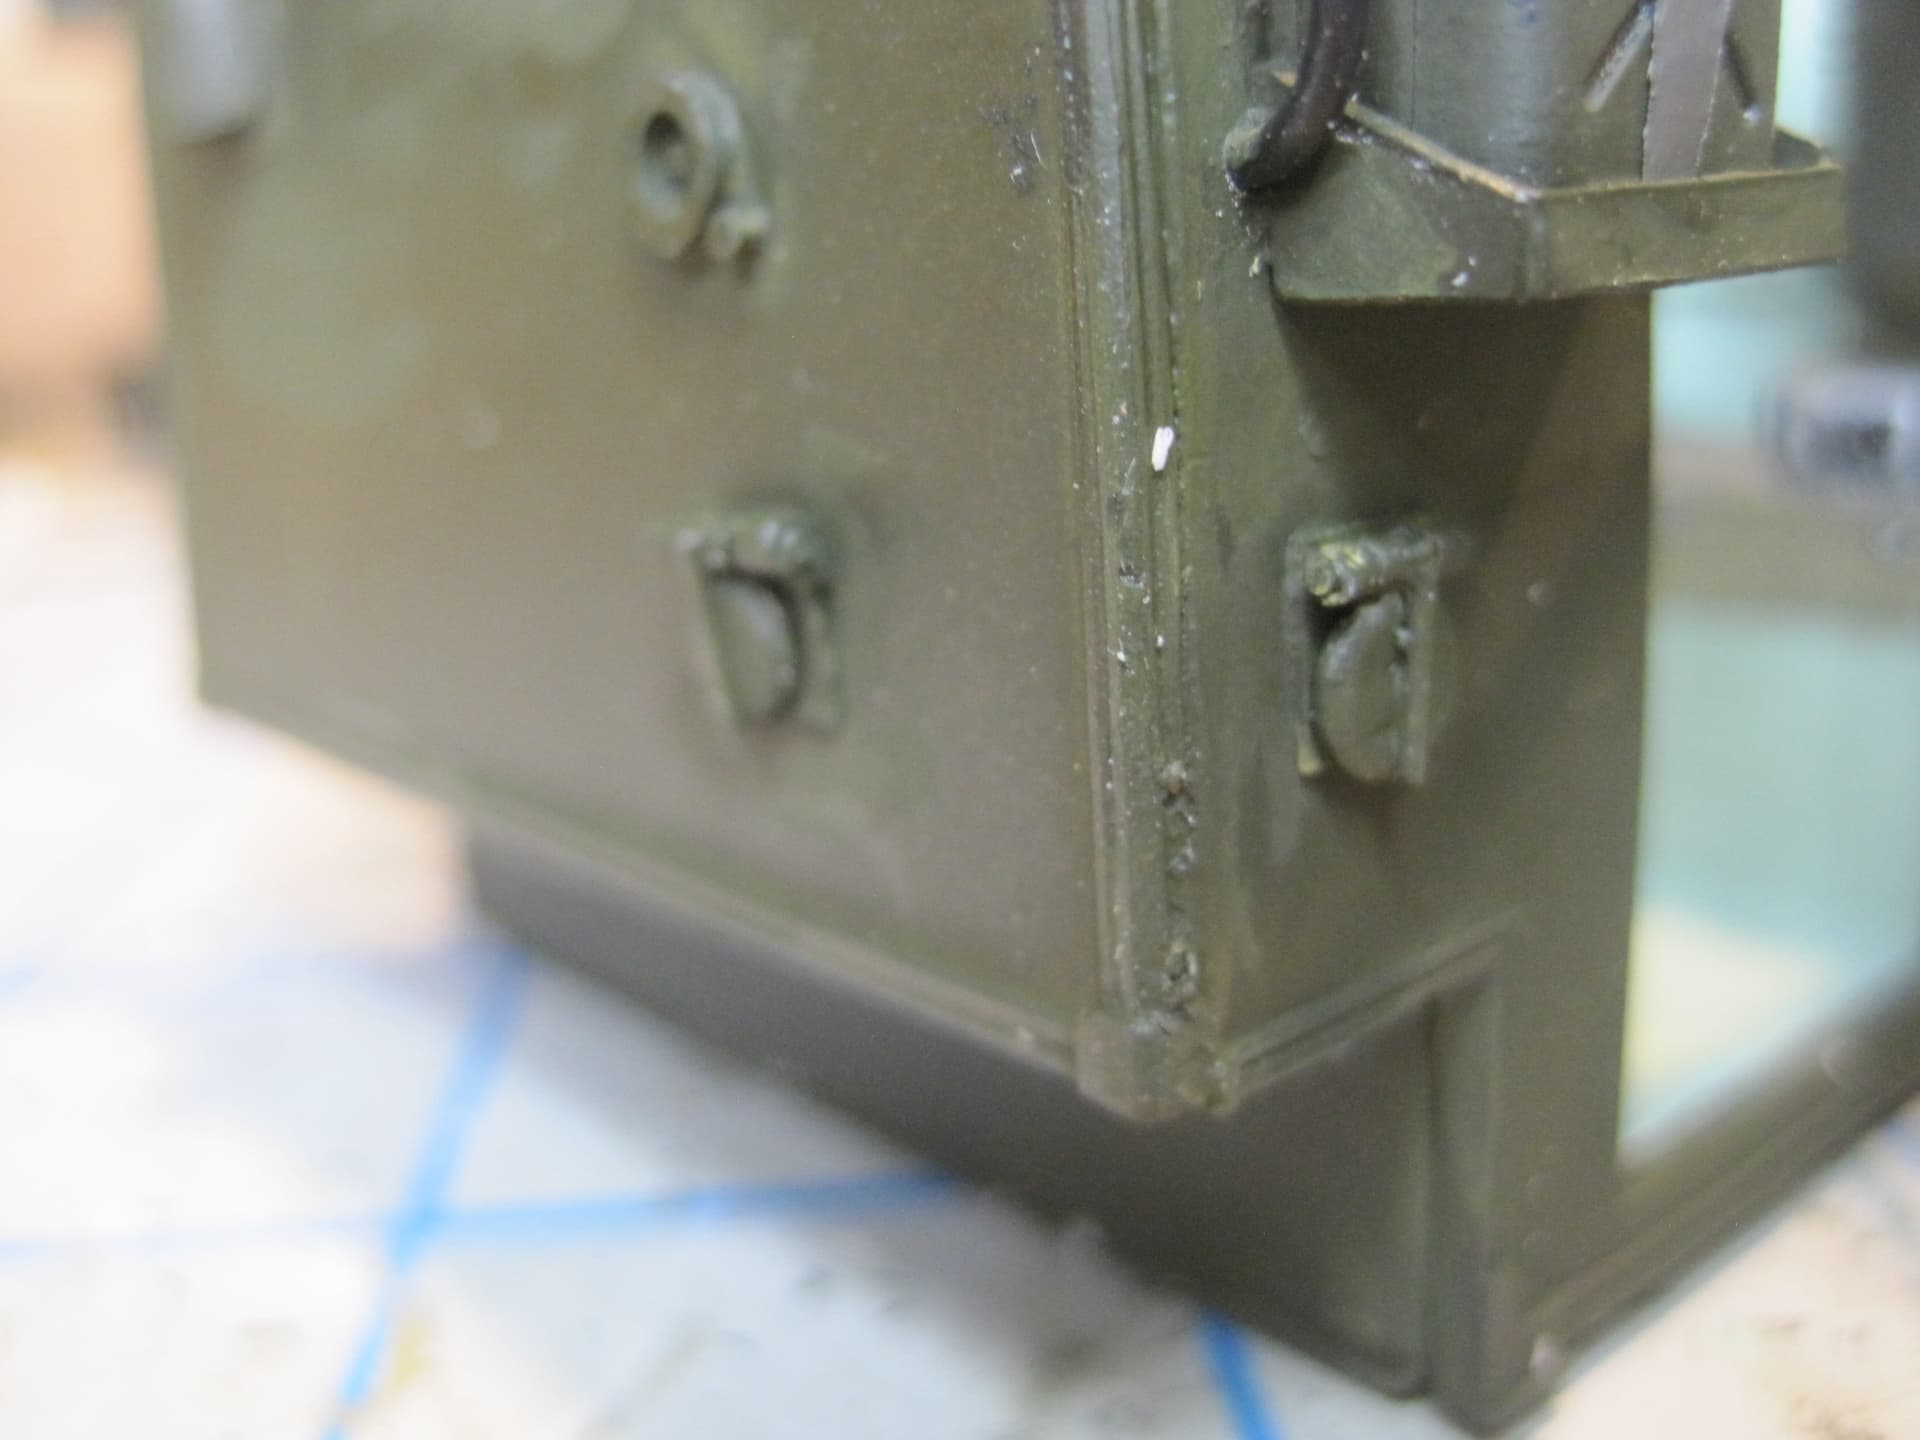
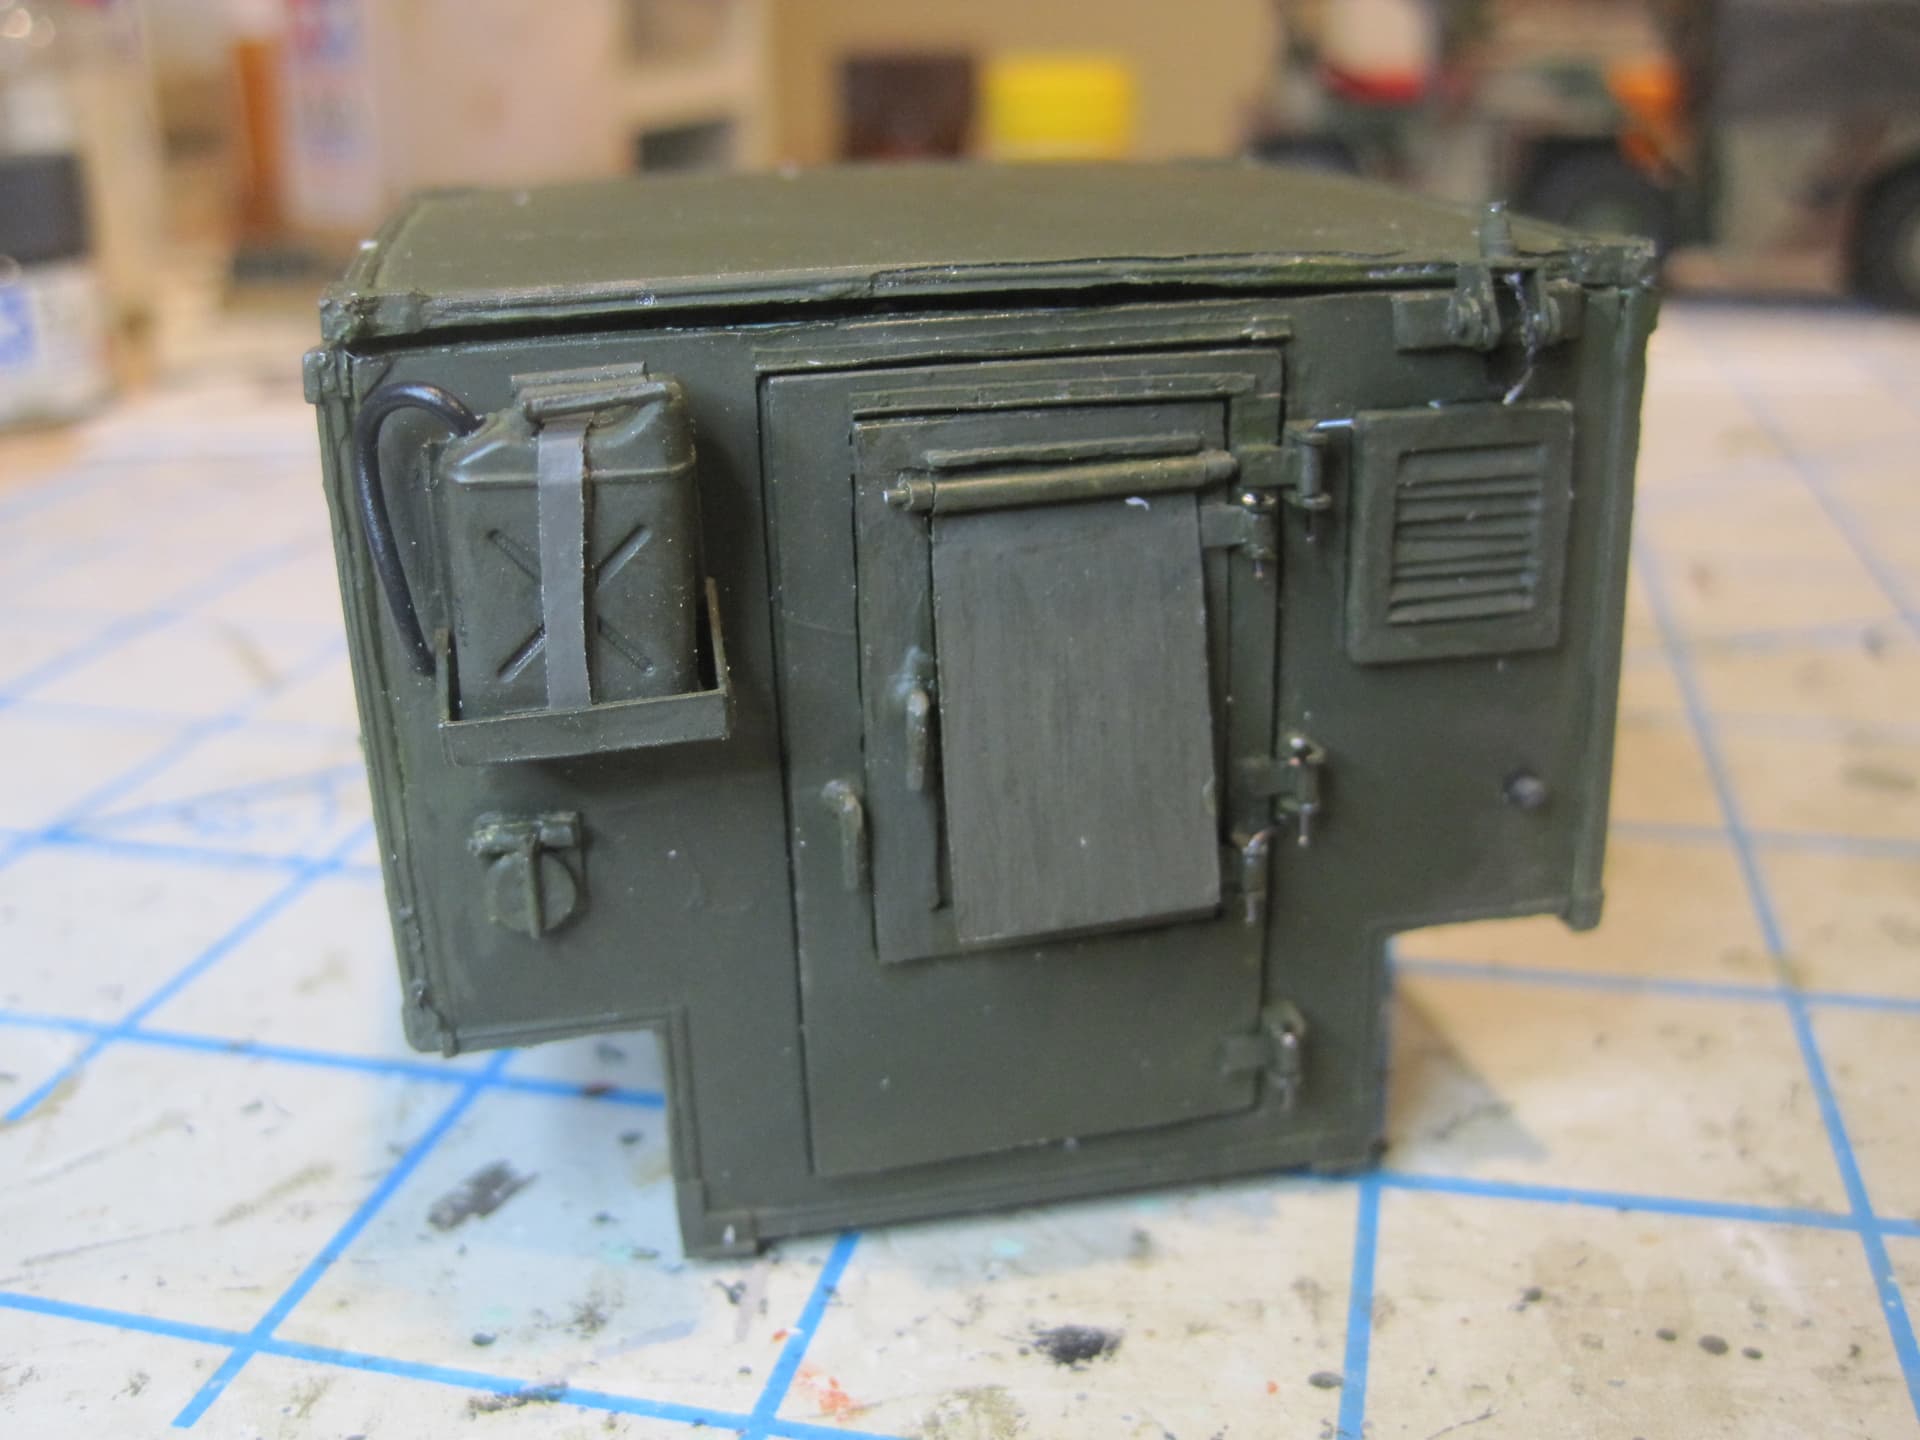
With the inside done, it’s finally time to secure the back wall of the shelter and finish up the detail items on the outside. I still can’t believe that they mounted a 5 Gal can of Mogas on the outside and ran a line into the shelter for a heater, but again, what could go wrong???

And one last shot as it will appear with the top off.
Next up is the actual Gama Goat! (Finally))
4 Likes
Very good. That is a lot of scratch building! Showed this to my former RTT operator wife. She immediately stated that her chair didn’t have wheels…
Yeah, I can totally see how a chair on wheels could be problematic! The TM shows an illustration with this particular style chair, and then in another place shows a completely different style chair also with wheels.
One thing that they do appear to have is some sort of depression/fitting in the floor of the shelter and a small lever on the bottom of the chair to lock it into place. I may go back and add something like that.
Looking good! A couple comments to things you brought up. Having the Mogas can outside is a lot safer than having it inside, fumes could accumulate and asphyxiate the crew or cause an explosion. Having a line to the inside was pretty common on a number of gas powered items, including the gas stove used to heat the old GP Medium tents.
You could, if you want, paint the shelter in a mismatched camo scheme to show that it was moved from one vehicle to another.
Ken
You’re right about the heaters. I can recall in Germany sleeping in a GP small with one of those old Yukon stoves and the fuel can was outside.
Having spent all those years as a Design Engineer at Ford worrying about crash standards and Federal Motor Vehicle Safety Standards, I recall the old “in-cab” behind the driver fuel tanks on pickups, which filled at the “B-pillar” and how NHTSA bitched about those exploding in a crash.
Guess NHTSA never saw a Gama Goat!!!
I don’t believe that they have authority over military vehicles, which are technically not legal for highway use.
Ken
That is one amazing sratch built interior…
Thanks!! I’m really happy with the way it turned out. Major props to my son for doing the CAD modeling for the 3D printed parts!!!
Well, more insanity. The first Gama Goat I built years ago was a resin kit well before the Tamiya kit came out, and somewhere along the line, I got a resin engine for it which I installed along with a working cover. That is such a large and easy space to show and so I felt that I had to add that. Looking over this kit, I came to the conclusion that I should probably add an engine to it as well, since I had gone to so much detail inside the shelter.
So, after some long deliberation, I’ve decided that I should probably not do THIS build without an engine and working cover, so I’m taking on the task of building everything from scratch.
I do have some fairly decent photos of the work I did on the previous build, so we’ll see how it goes.
Hey, it’s nothing but a bunch of different shapes, right?
This will be a bit more difficult as the rear portion of the engine bay is not as deep on the Tamiya kit for some reason, so I’'ll have to cheat a bit on the radiator depth, but it won’t show, so we’ll see how it goes.
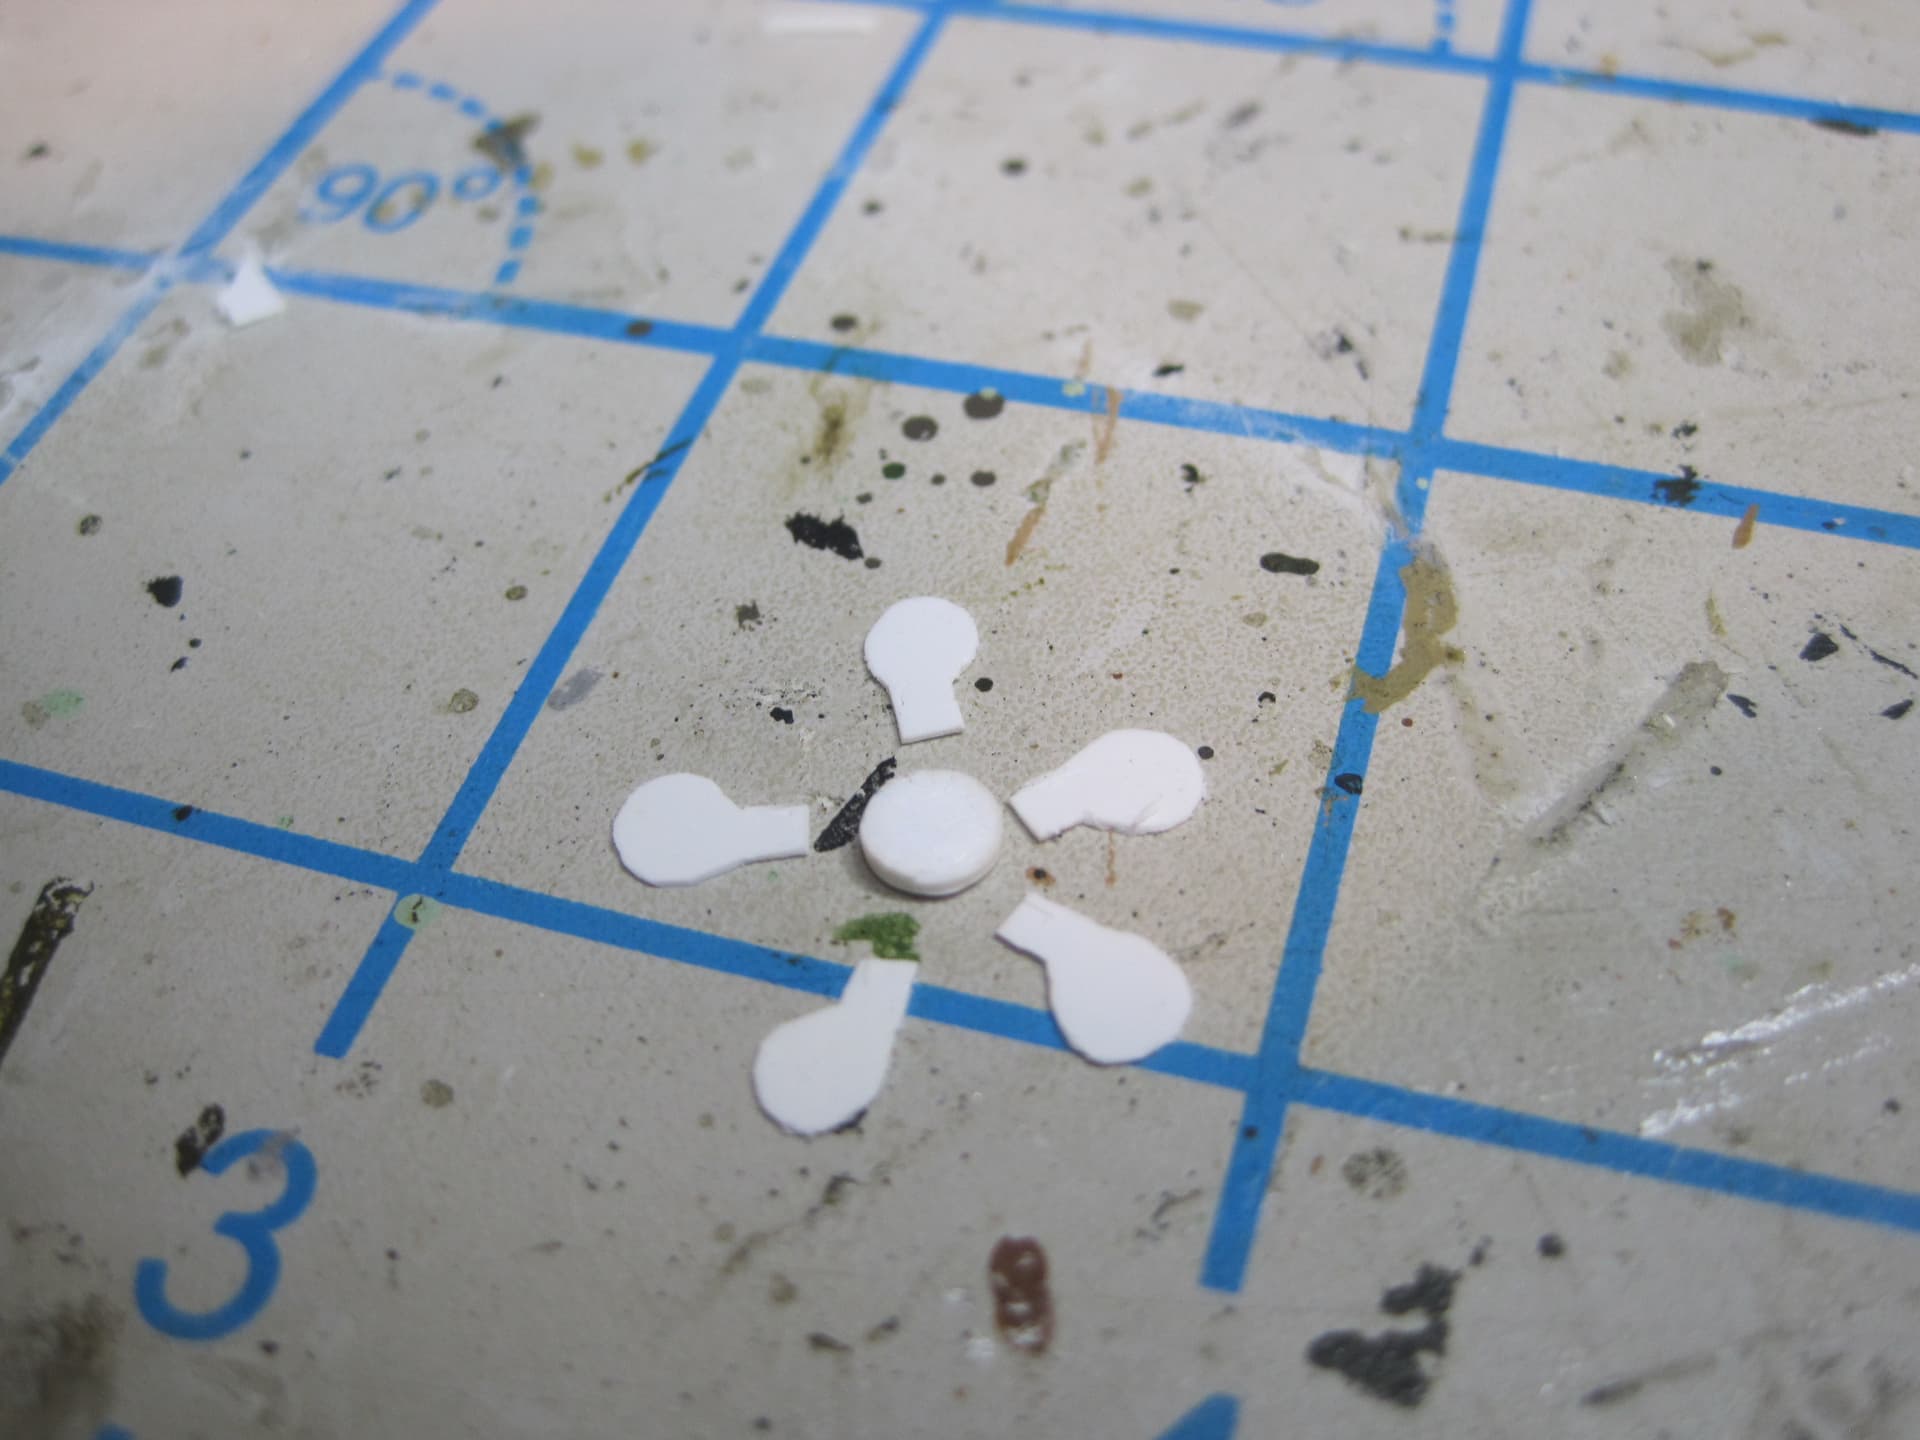
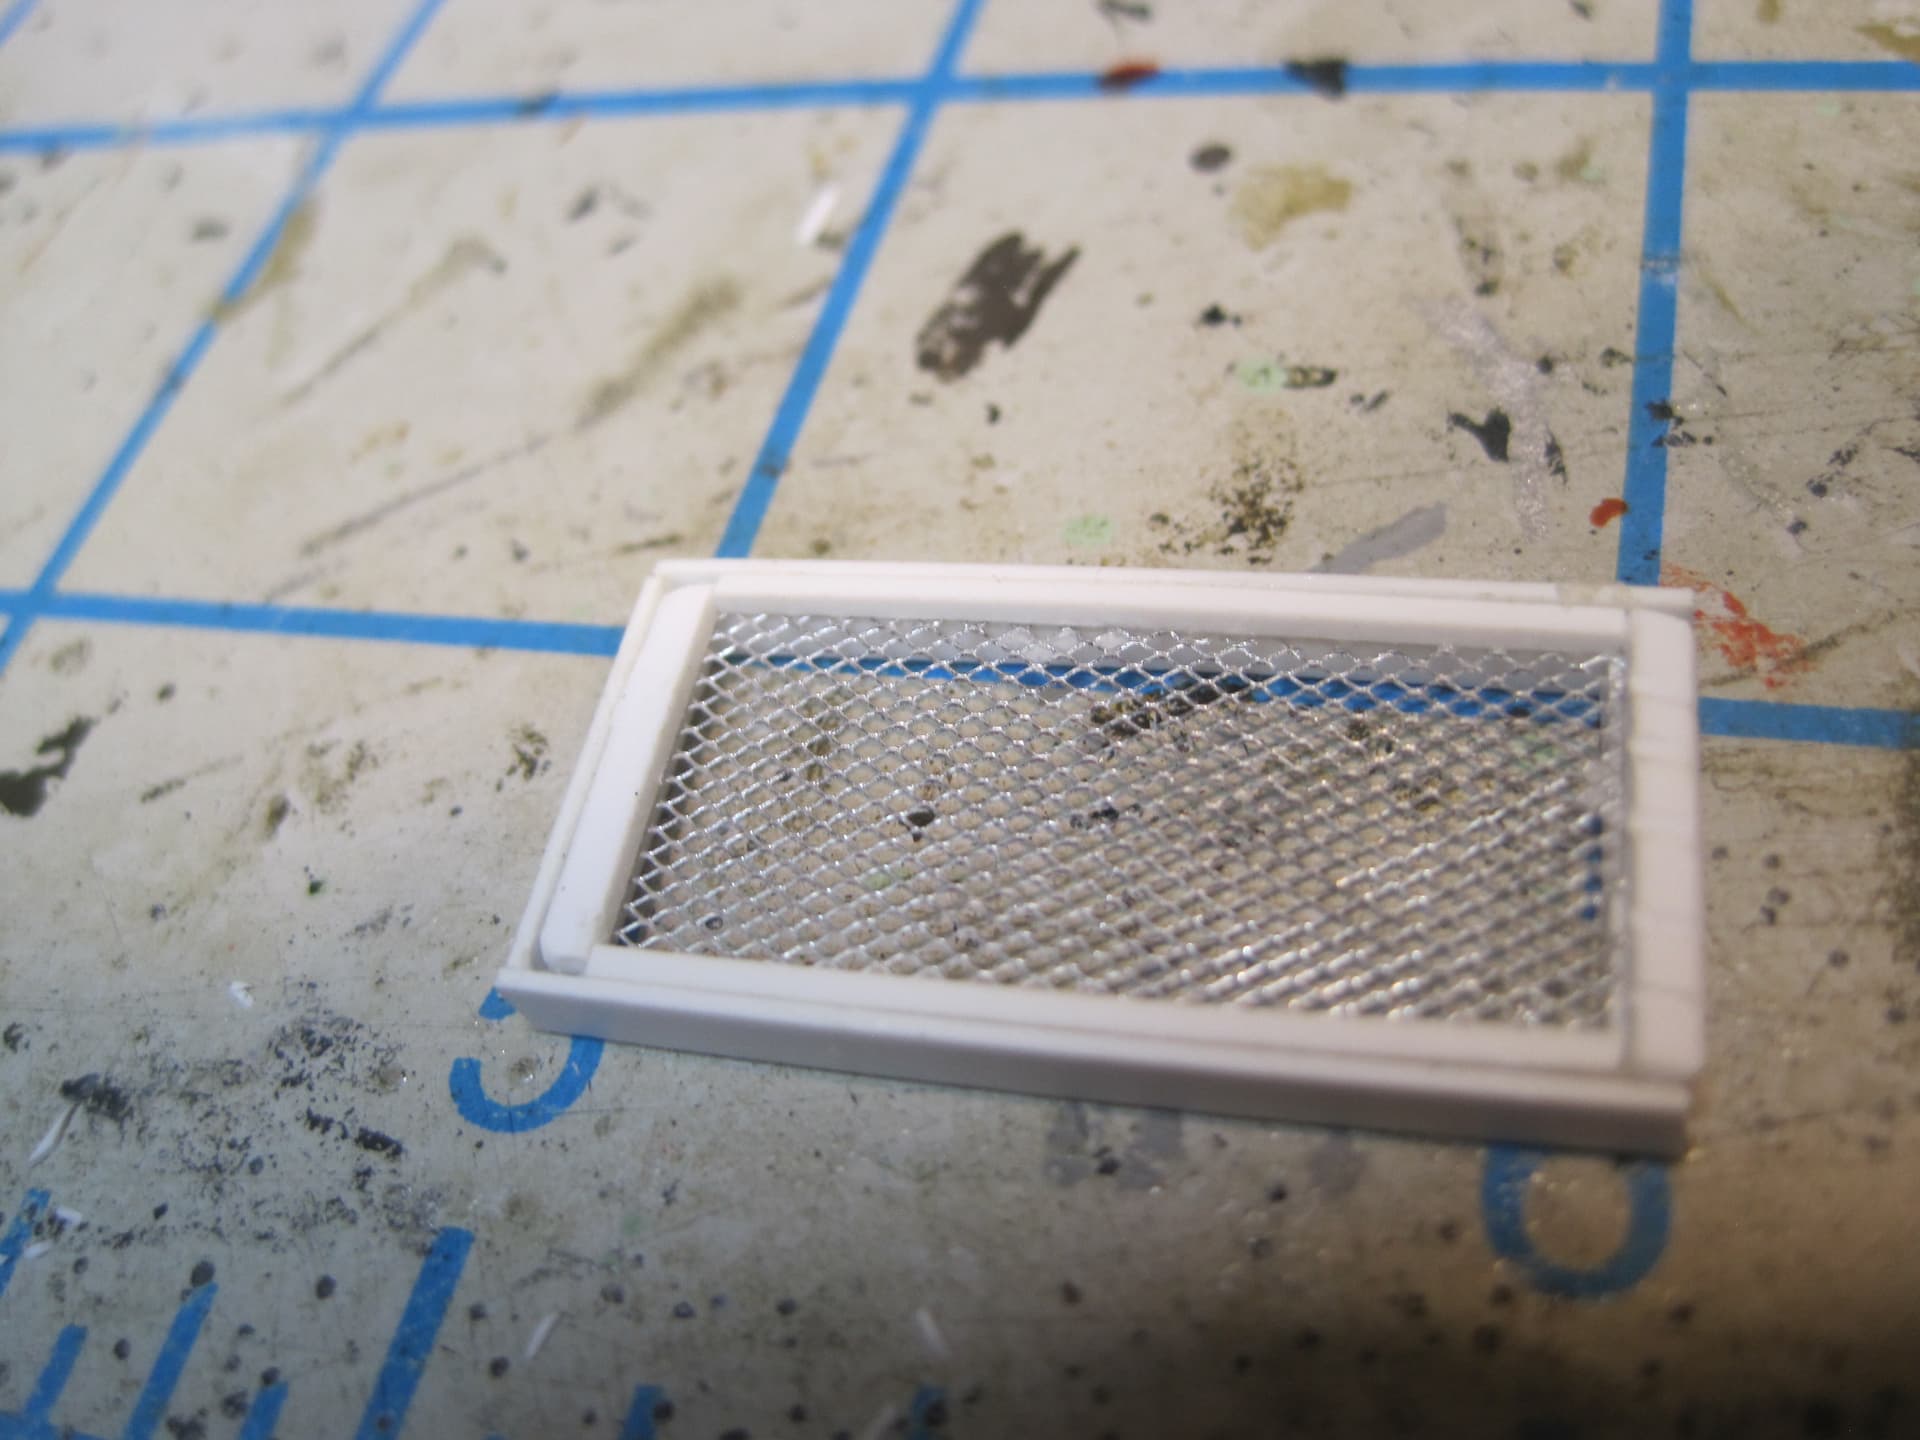
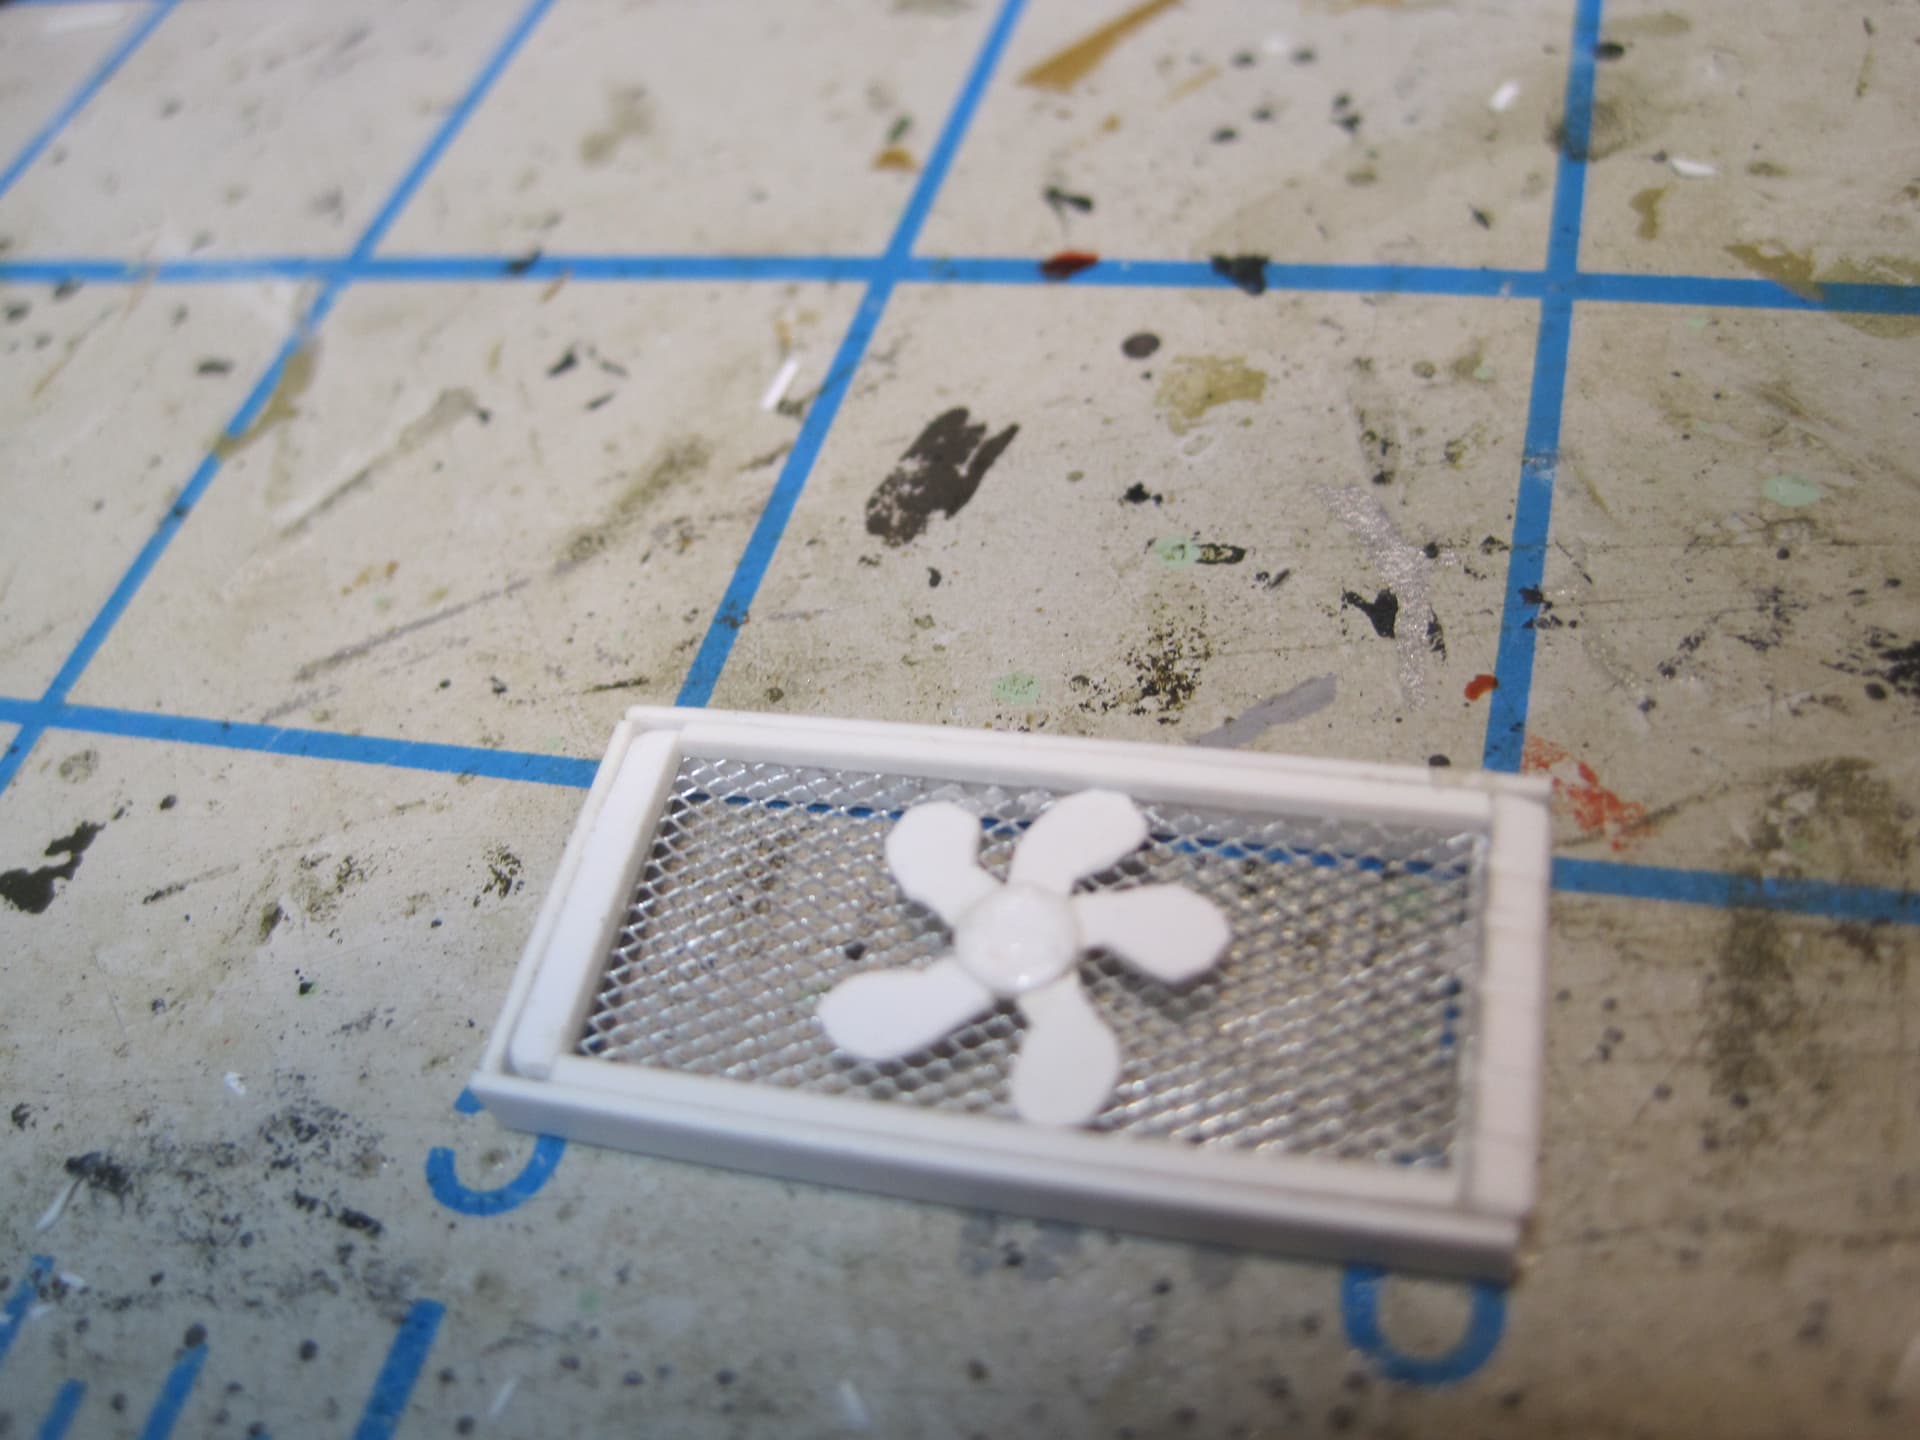
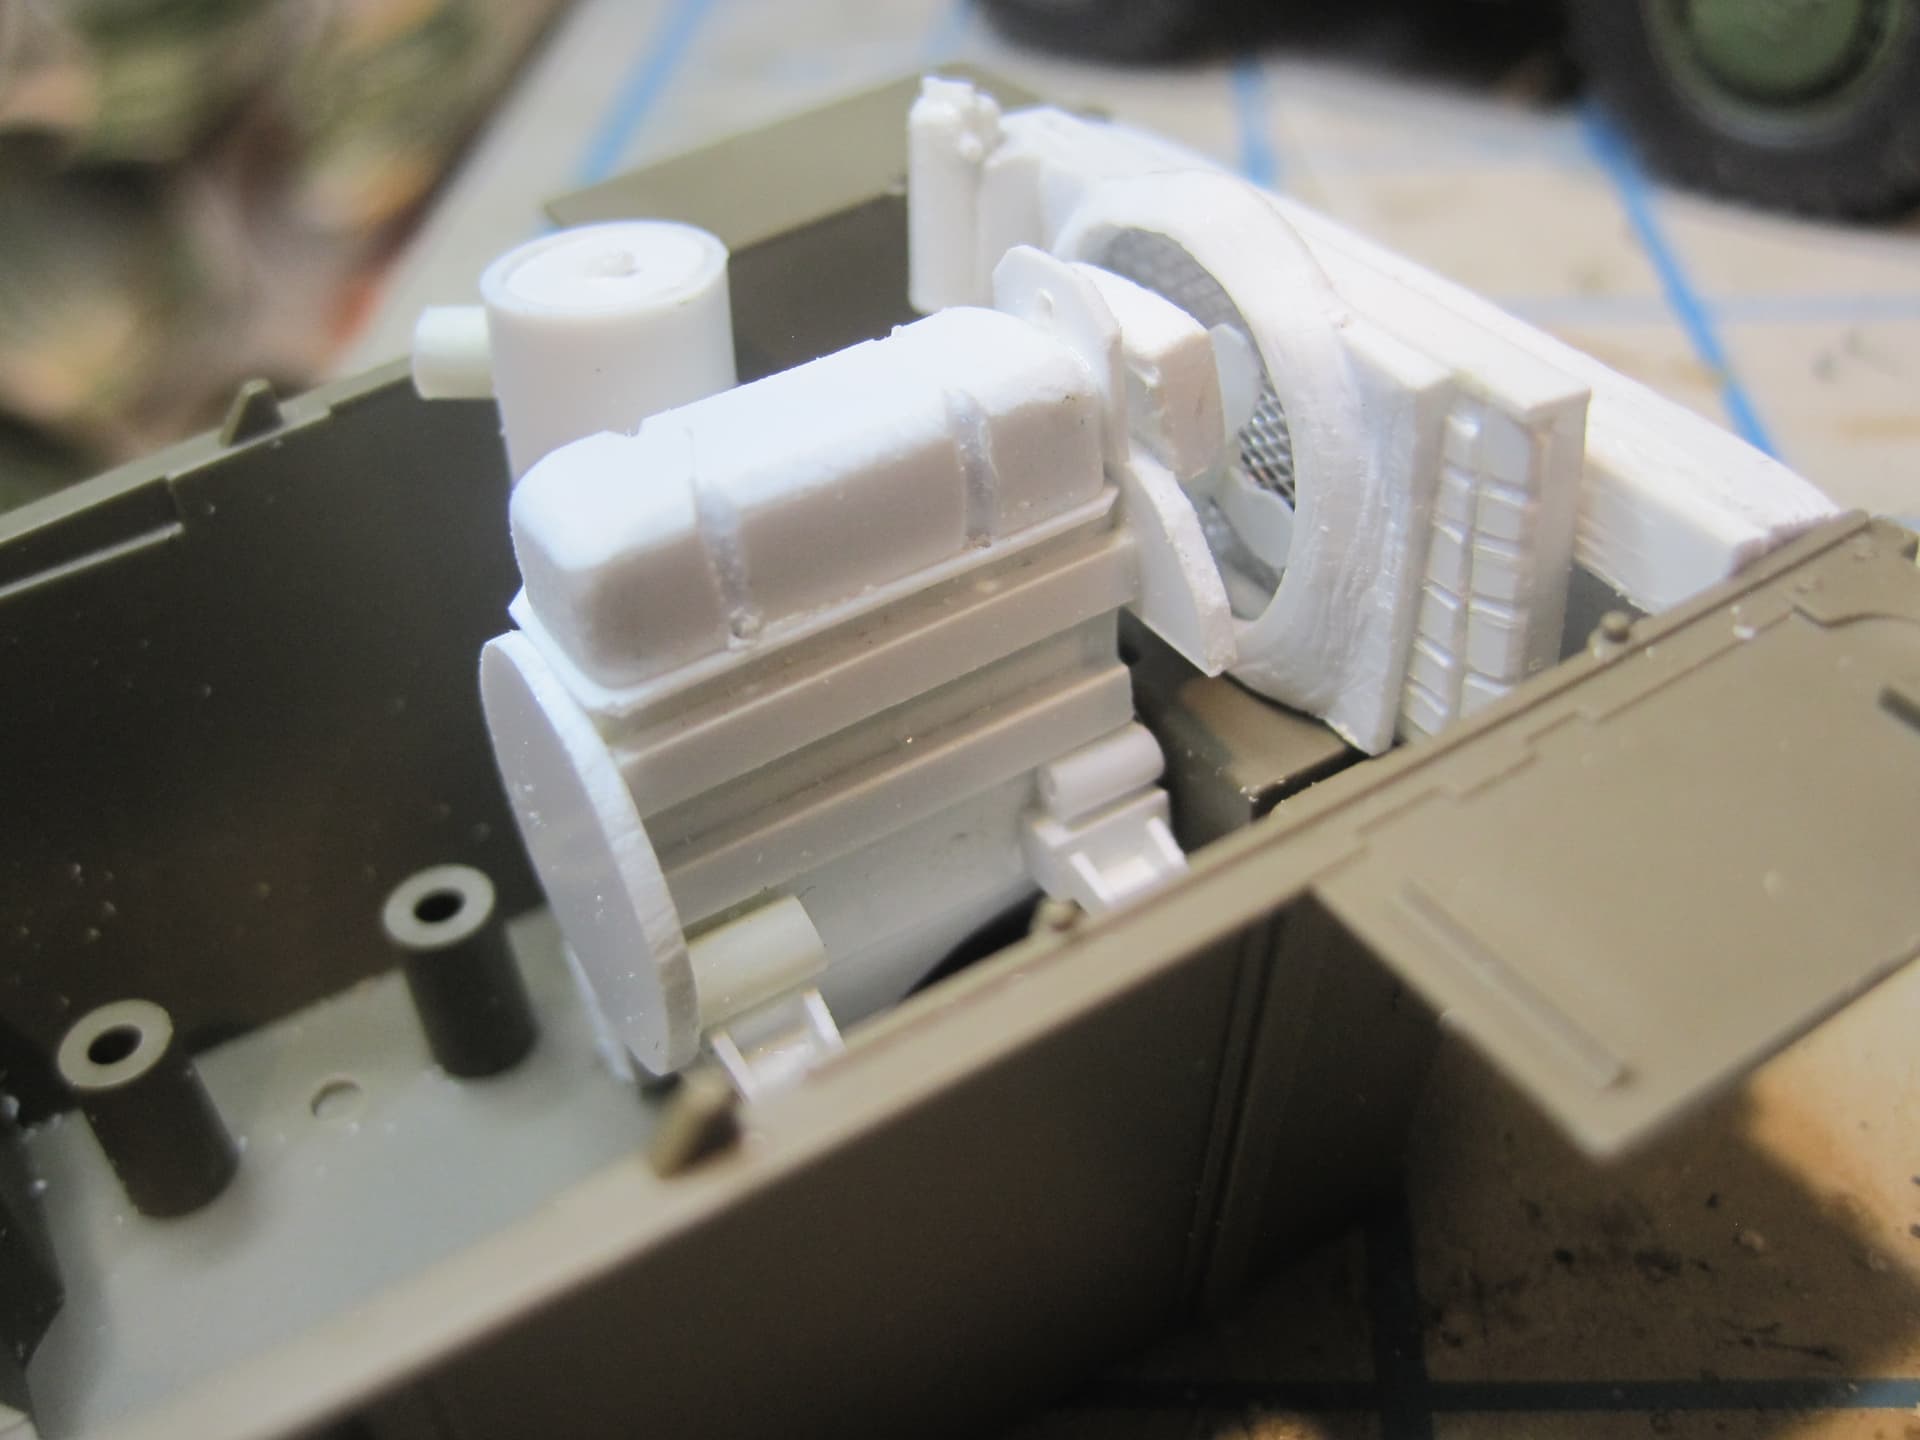
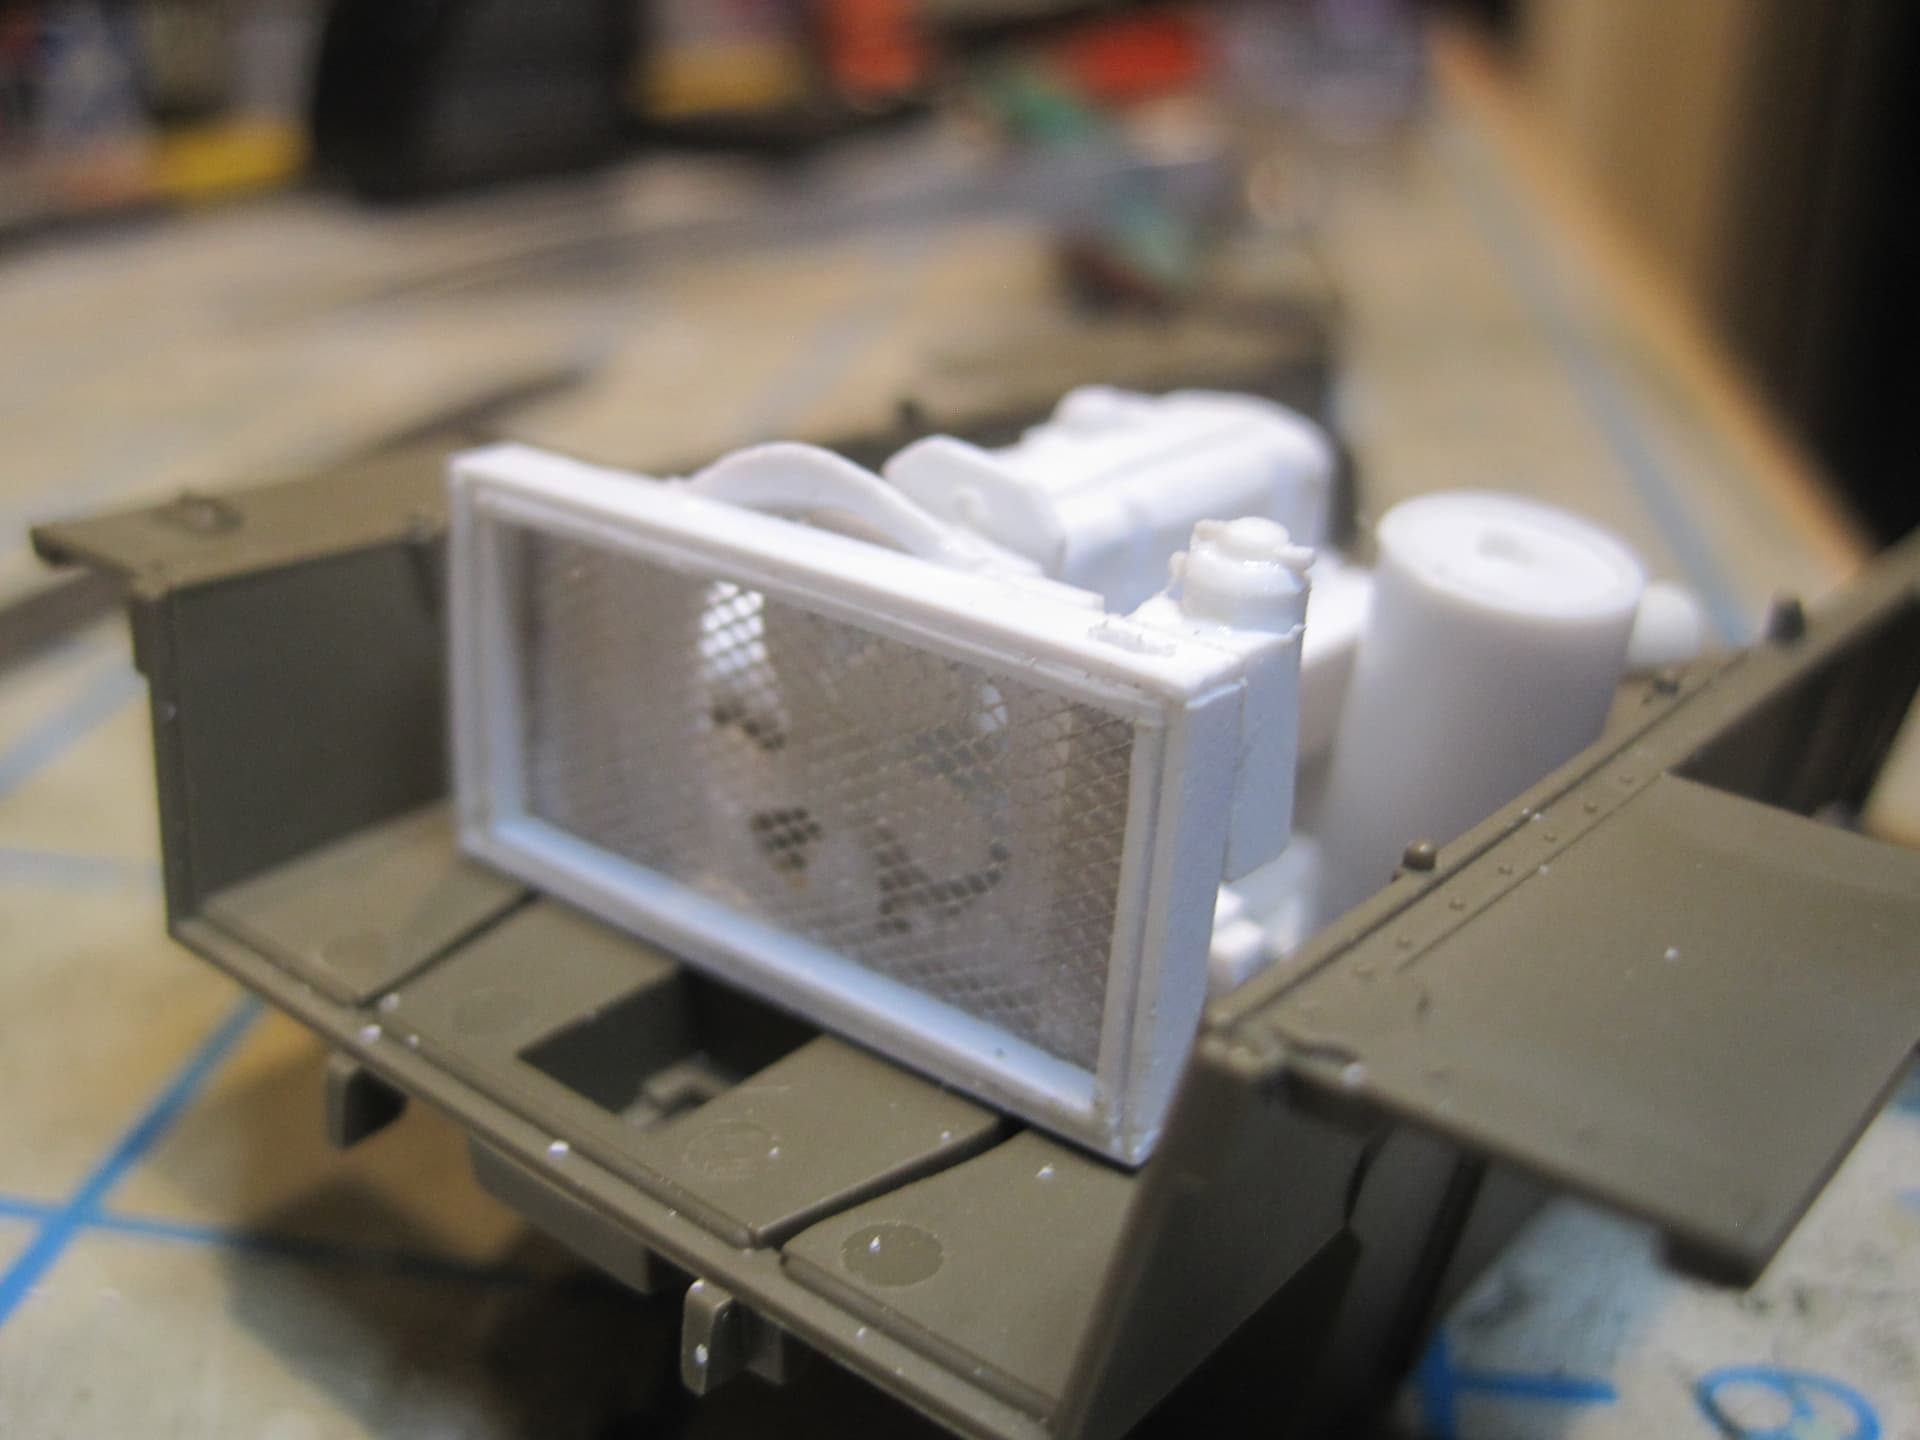
First up is to make the fan, radiator and radiator shroud.

2 Likes
In case I haven’t already said it… I love the level of detail you put into your builds.  Truly outstanding work!
—mike
Thanks Mike! Once an engineer, always an engineer I guess!!
1 Like
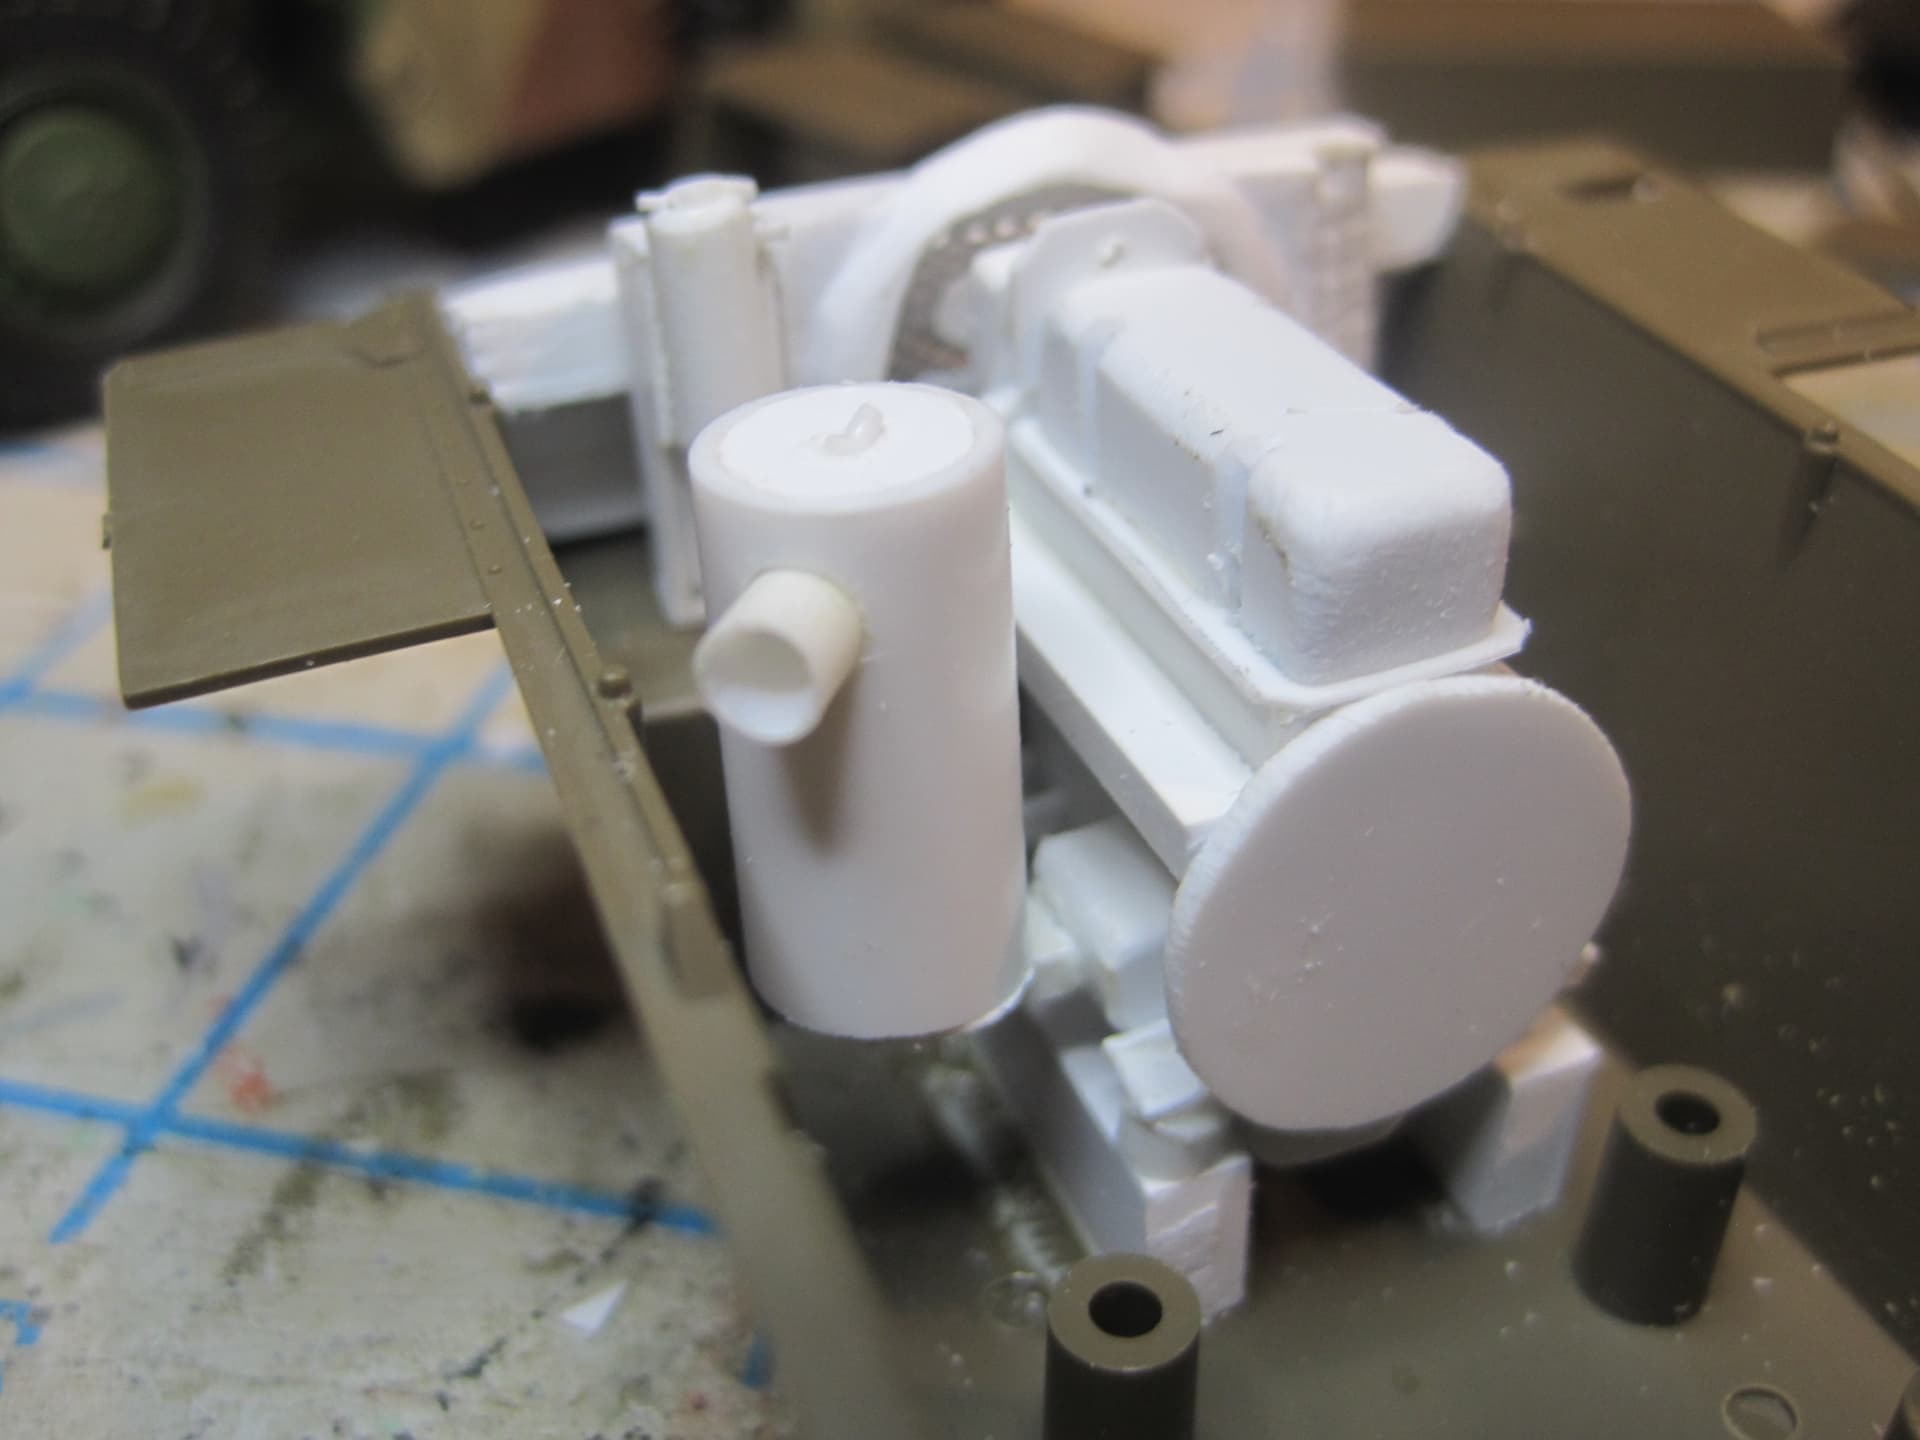
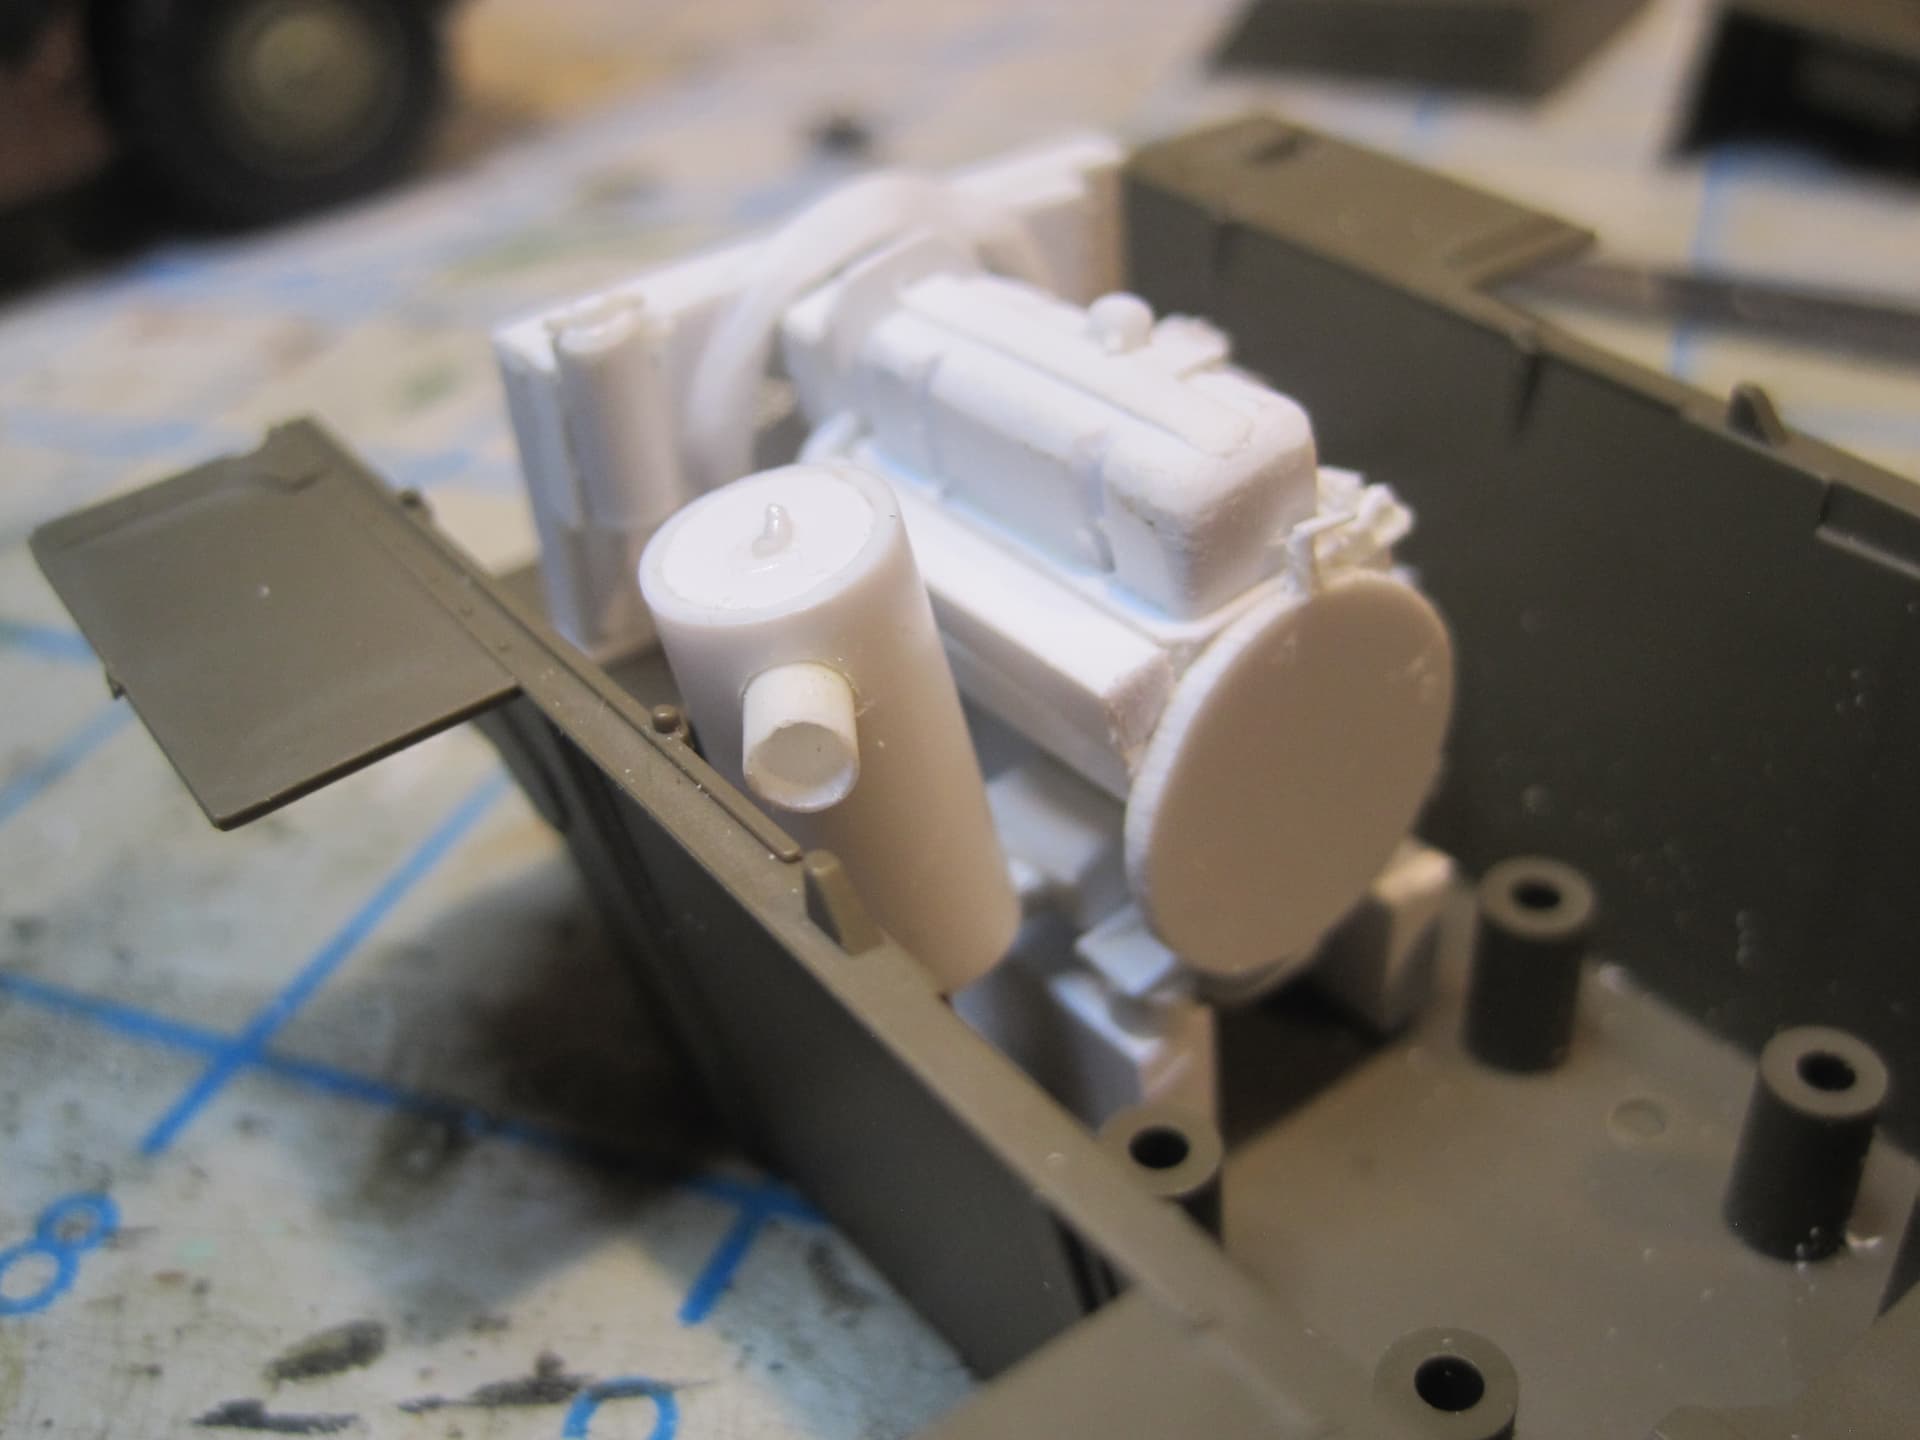
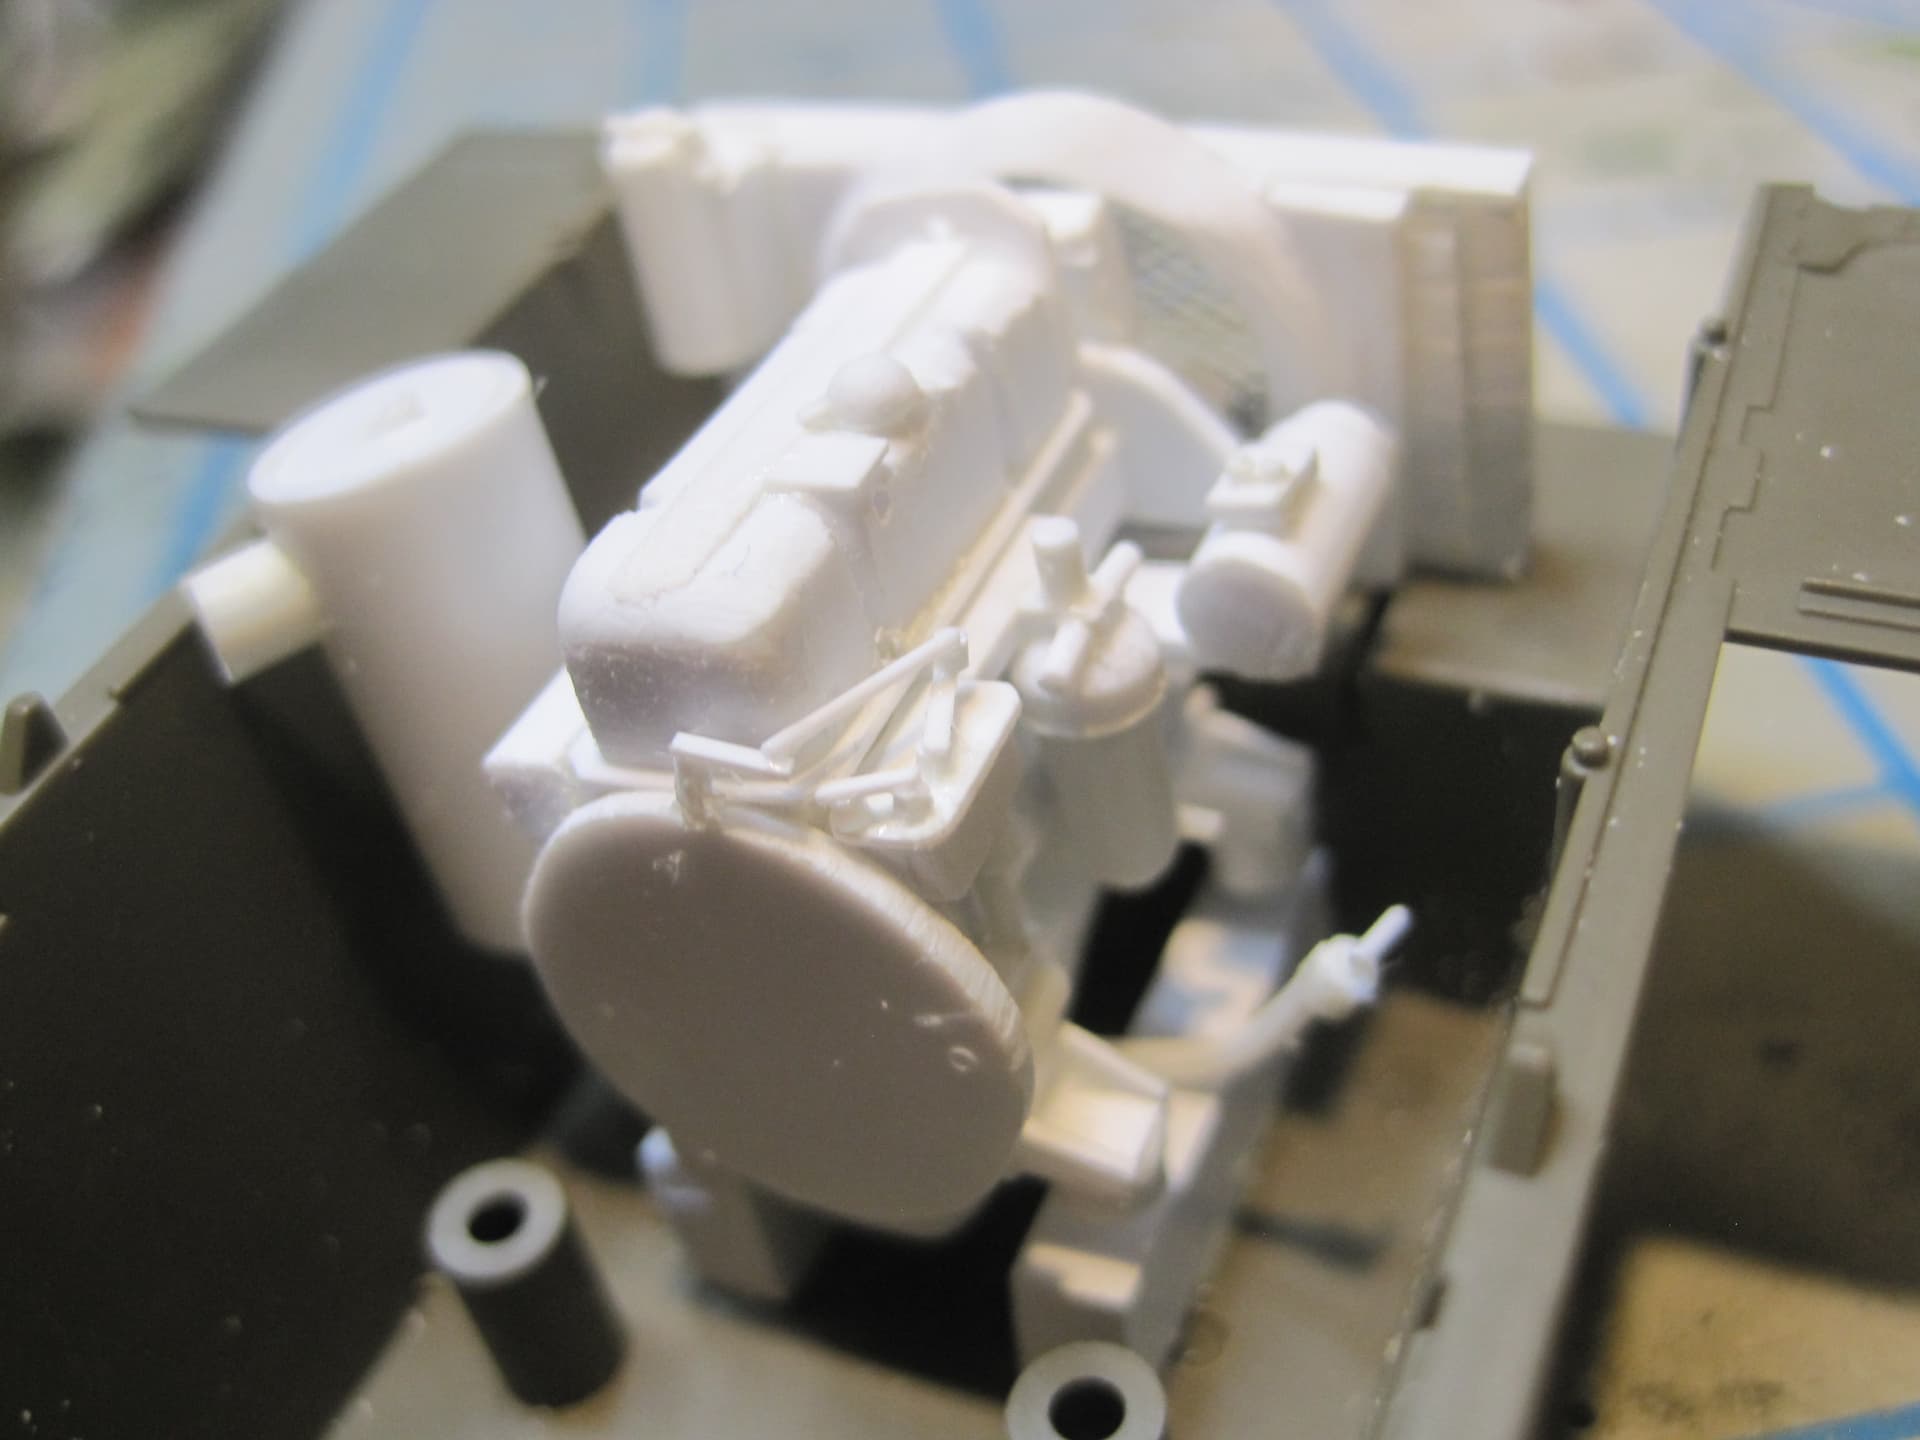
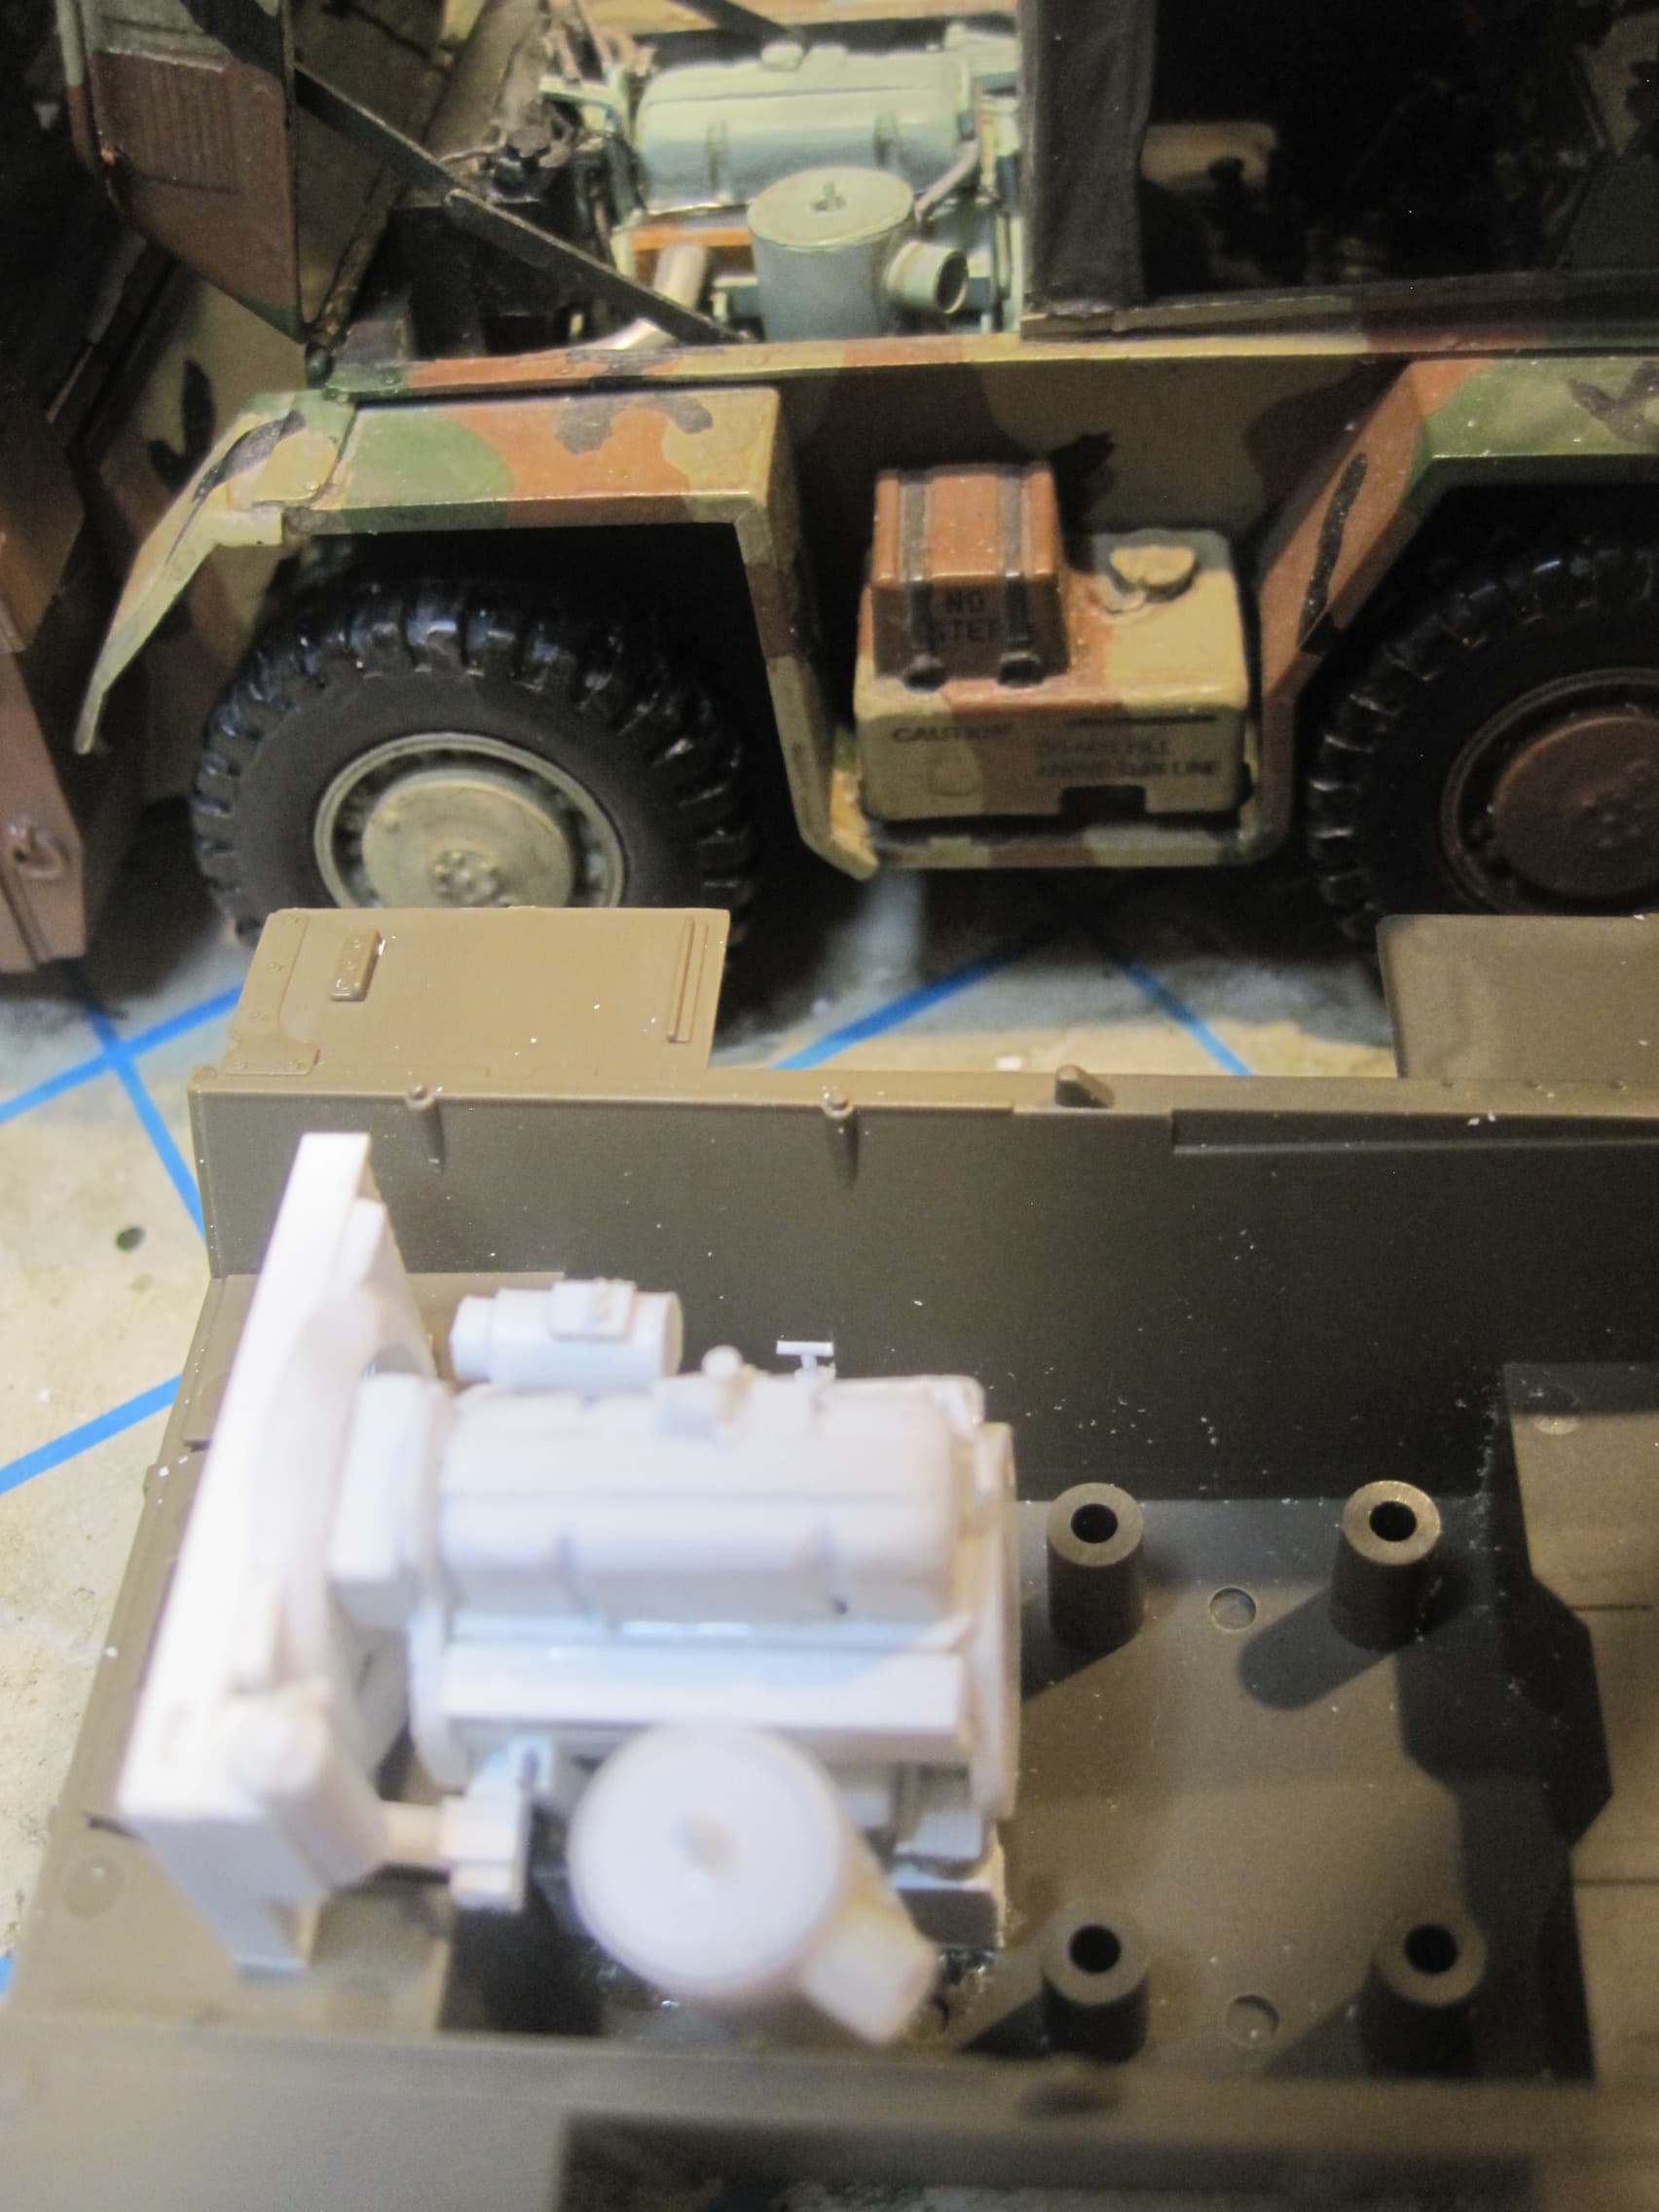
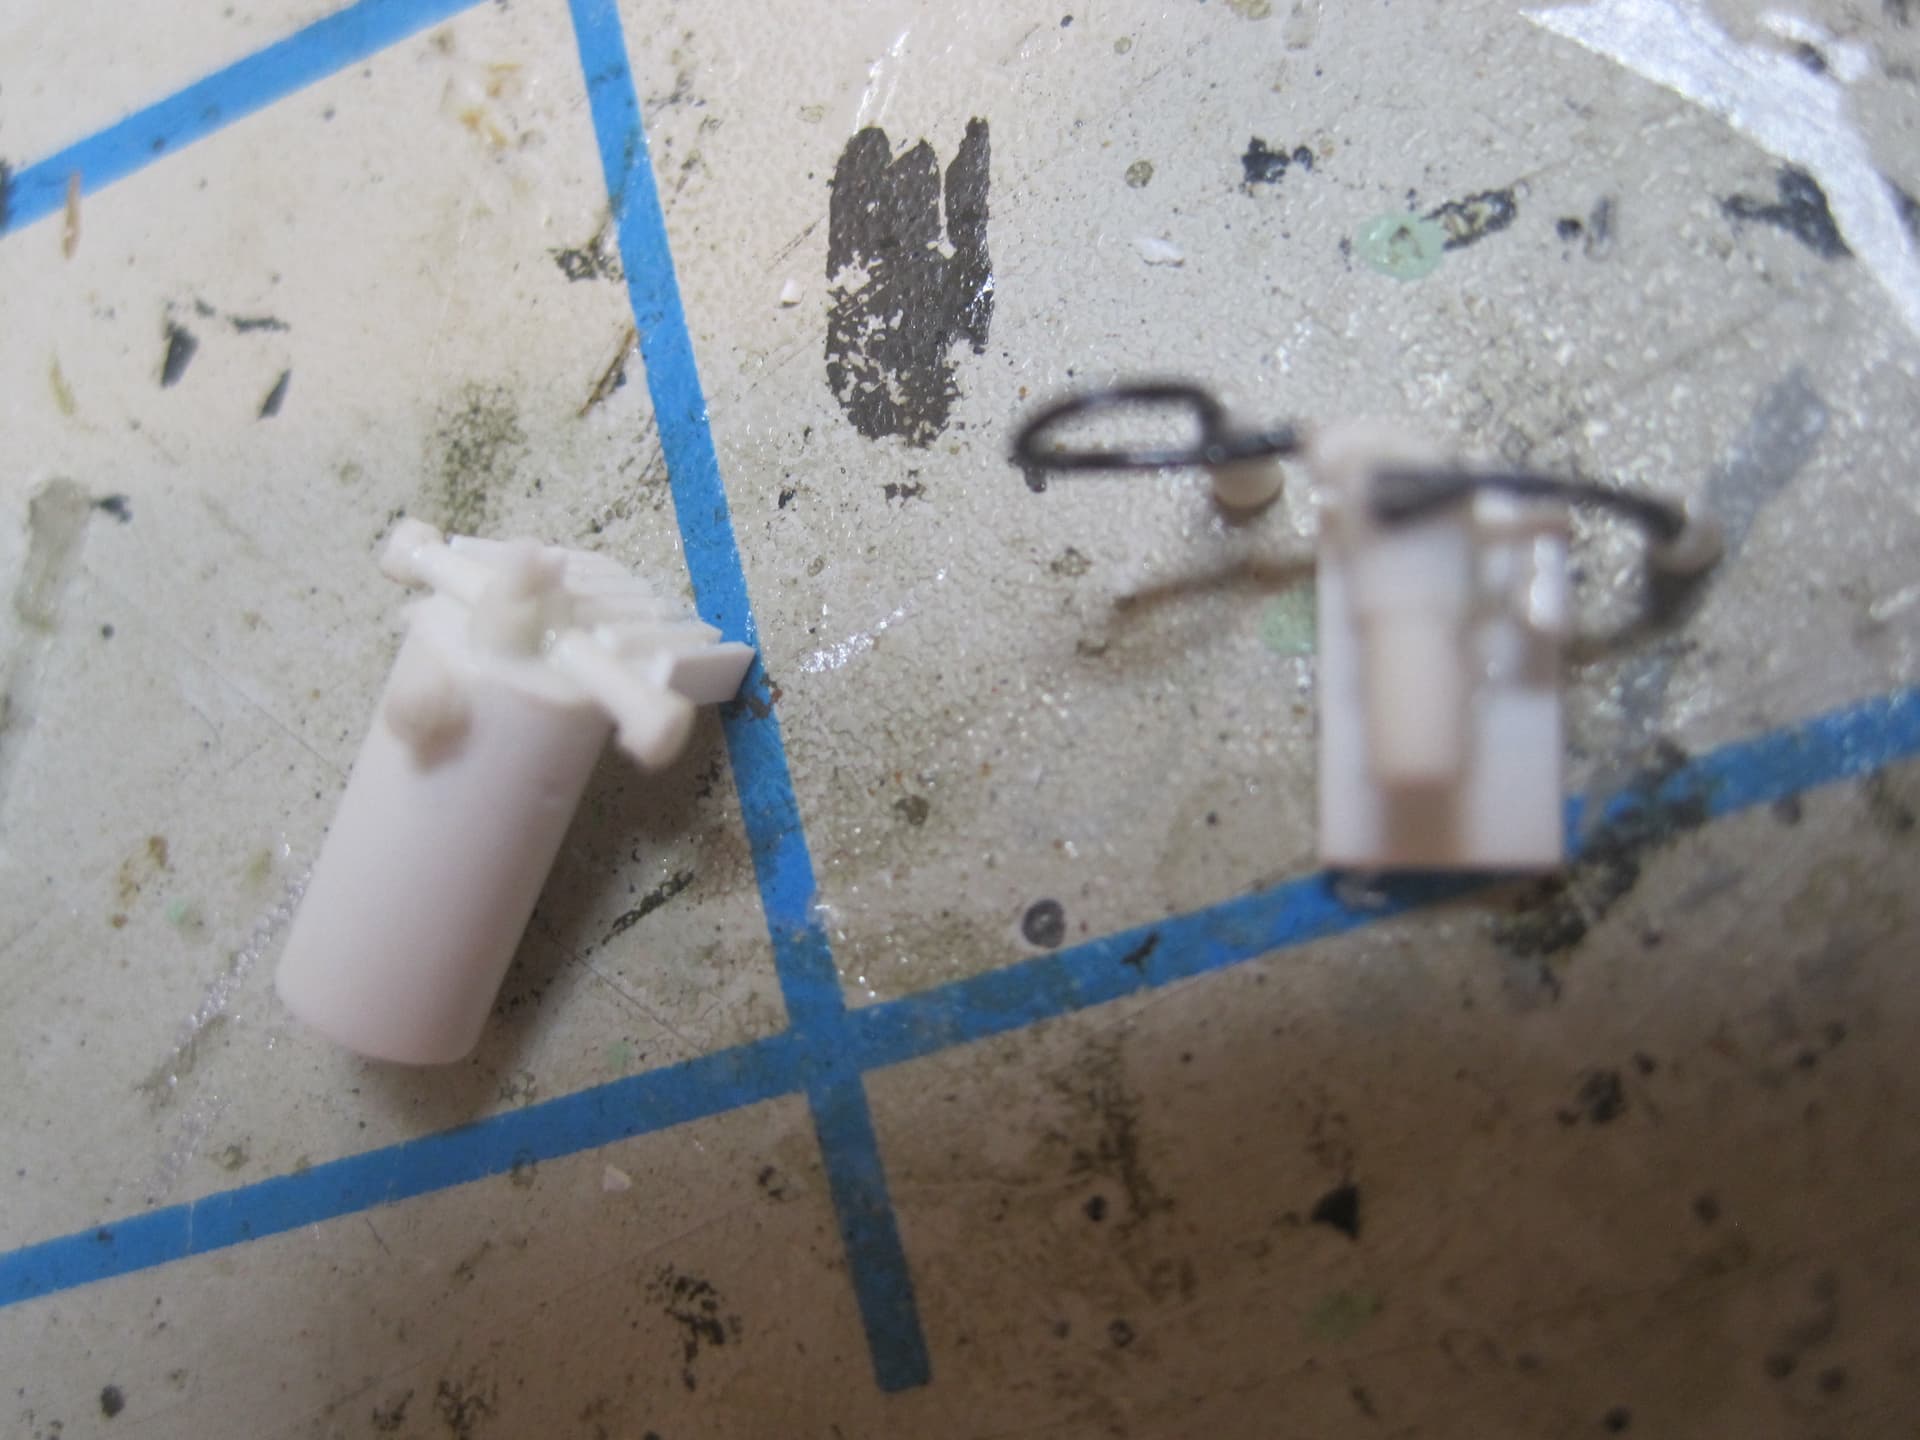
I think I’ve finally finished what I need to scratch build all the components to go inside the engine compartment. There are still quite a few lines and hoses etc. needed to finish dressing out the compartment, but I think everything that needs to be fabricated is done.
This was WAY harder than I thought. With one vehicle already built with an engine, this one had to very closely match the one that’s already in the other vehicle. That caused two big problems.
For starters, the two kits are not dimensionally exactly the same and that meant that the two engine compartments are not the same size. In the Tamiya kit, the rear half of the compartment (where the radiator is), isn’t any where near as deep as the other kit, and that section is also quite a bit longer before opening up to the deeper section. I’m not sure which one is more accurate, and it obviously makes no difference if you’re not putting anything inside, but since I am, that meant that I had to do a bit of cheating to make things work…
But the biggest problem is that the existing engine is installed in a very small compartment and that meant that it was pretty much impossible to measure anything that’s already in there. That meant I had to eyeball each part, make a “prototype” part and then using tweezers hold it up against the installed item and then if it was off, make adjustments. Lots of scrap, bit I have PLENTY of stock!
With all the parts built, I think I should finally be able to start in on the actual vehicle build!!!
Sure hope I don’t run into any assembly issues!!

3 Likes
The engine looks very nice. Great job on it. Can’t wait to see it all painted up.
Thanks, Gino! I know when I’m finished with the entire project that I won’t regret having taken the extra trouble to add it.