I believe it was just that. There are lots of tie-downs (footman loops) on the top of the vehicle. Then straps to pallets.
Ken
2 Likes
Gadzooks! Another small but important detail.
1 Like
We never had them, can only imagine the rattles and bangs when going down the tank trail.
1 Like
I never had them either. Seem like they are not worth the trouble, but maybe the people who used them liked them?
Ken
2 Likes
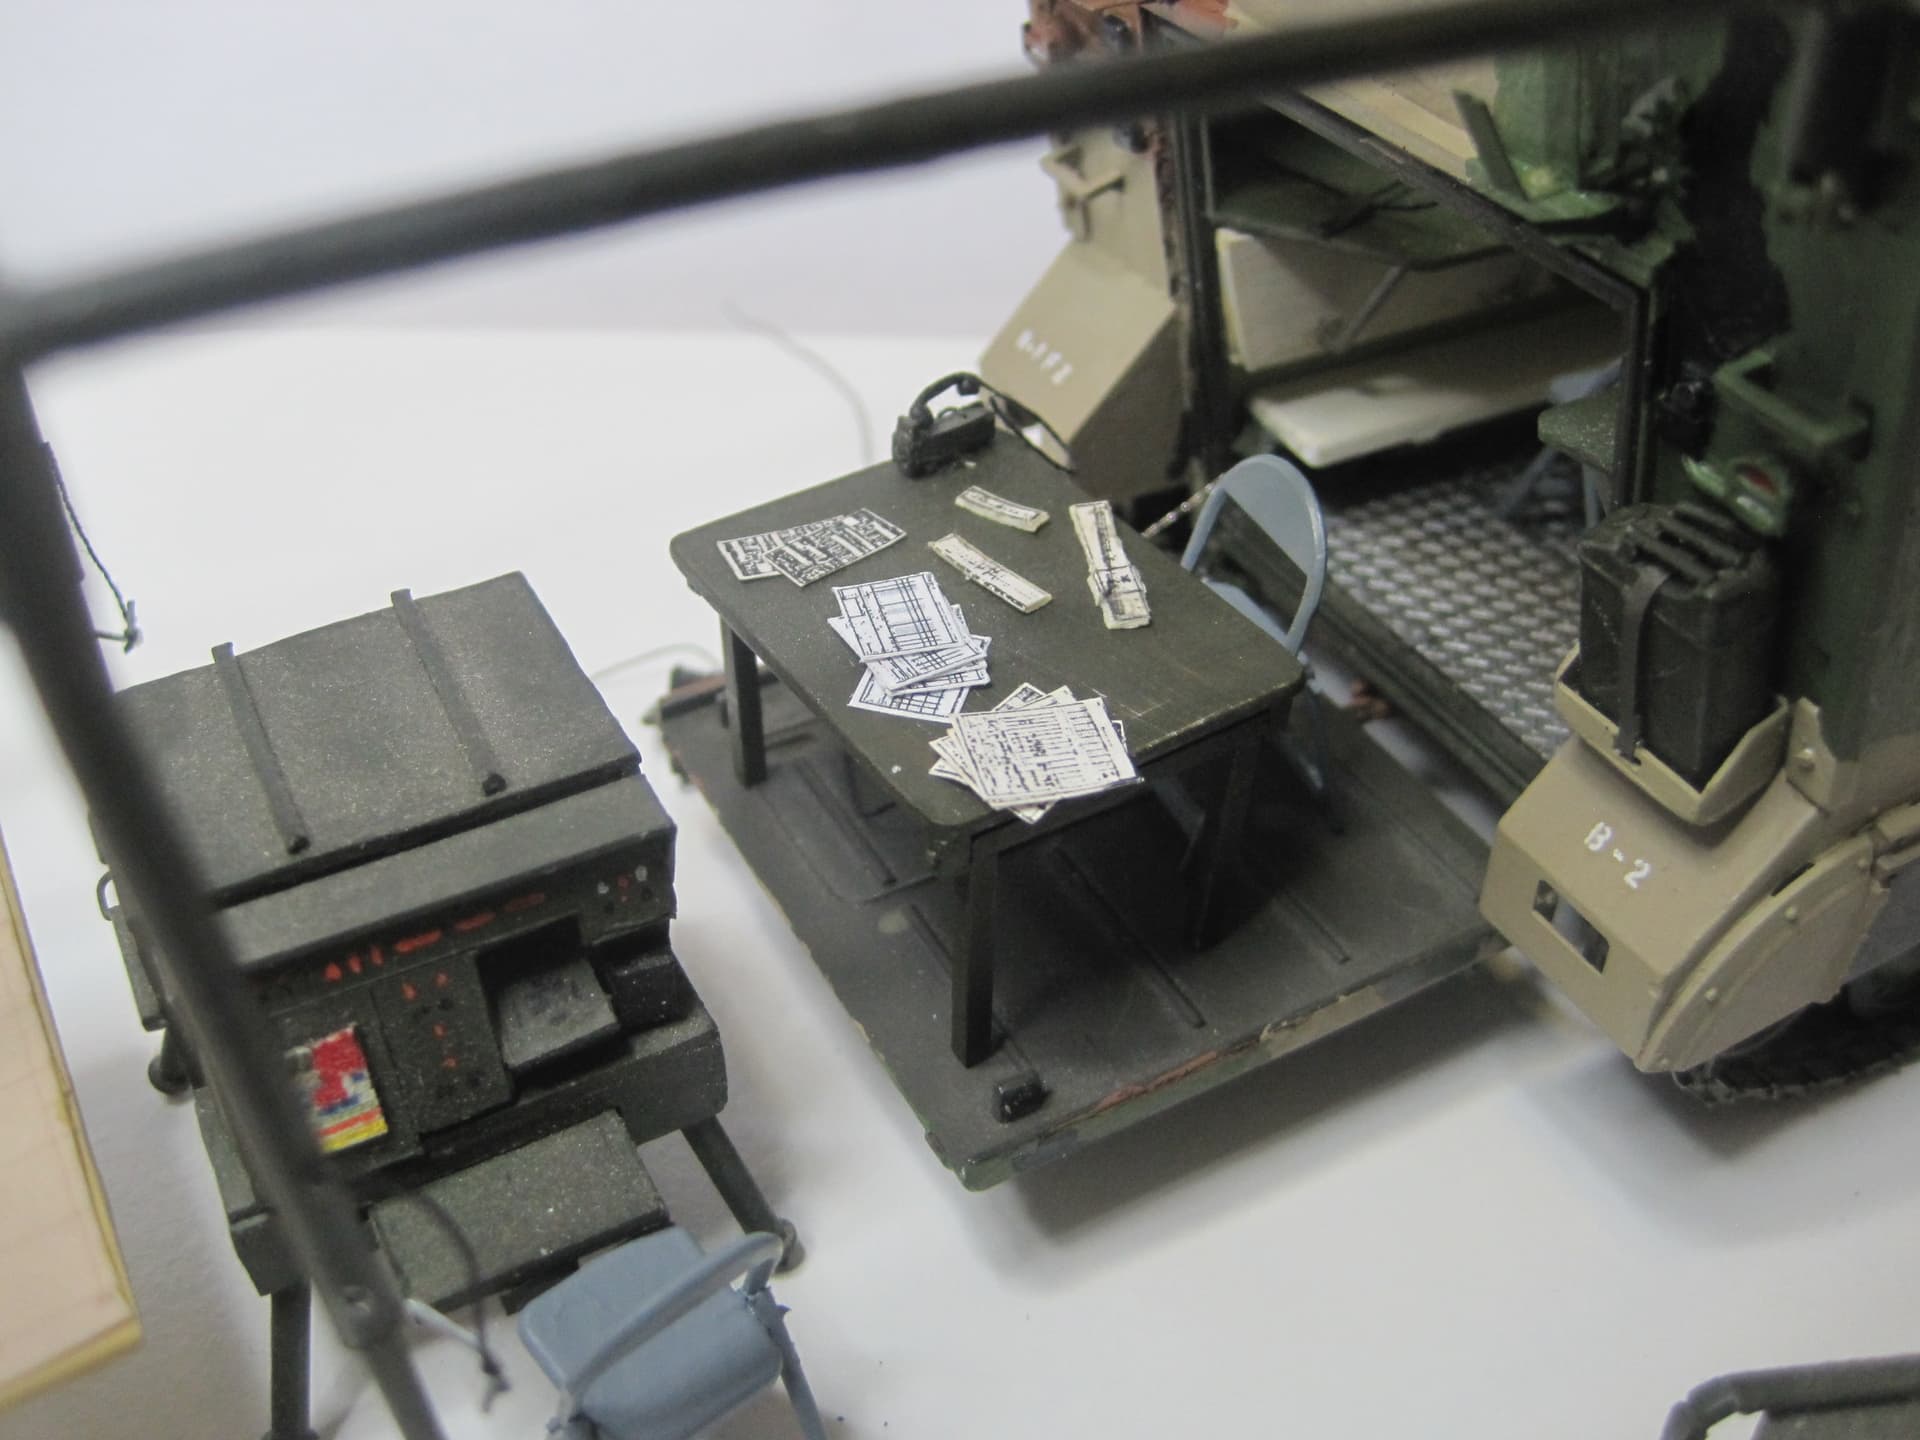
The one year I was the Fire Direction Officer and we used the M577 as the FDC, we did not carry any pallets or floor boards to put down when we set up the FDC. One less thing to worry about.
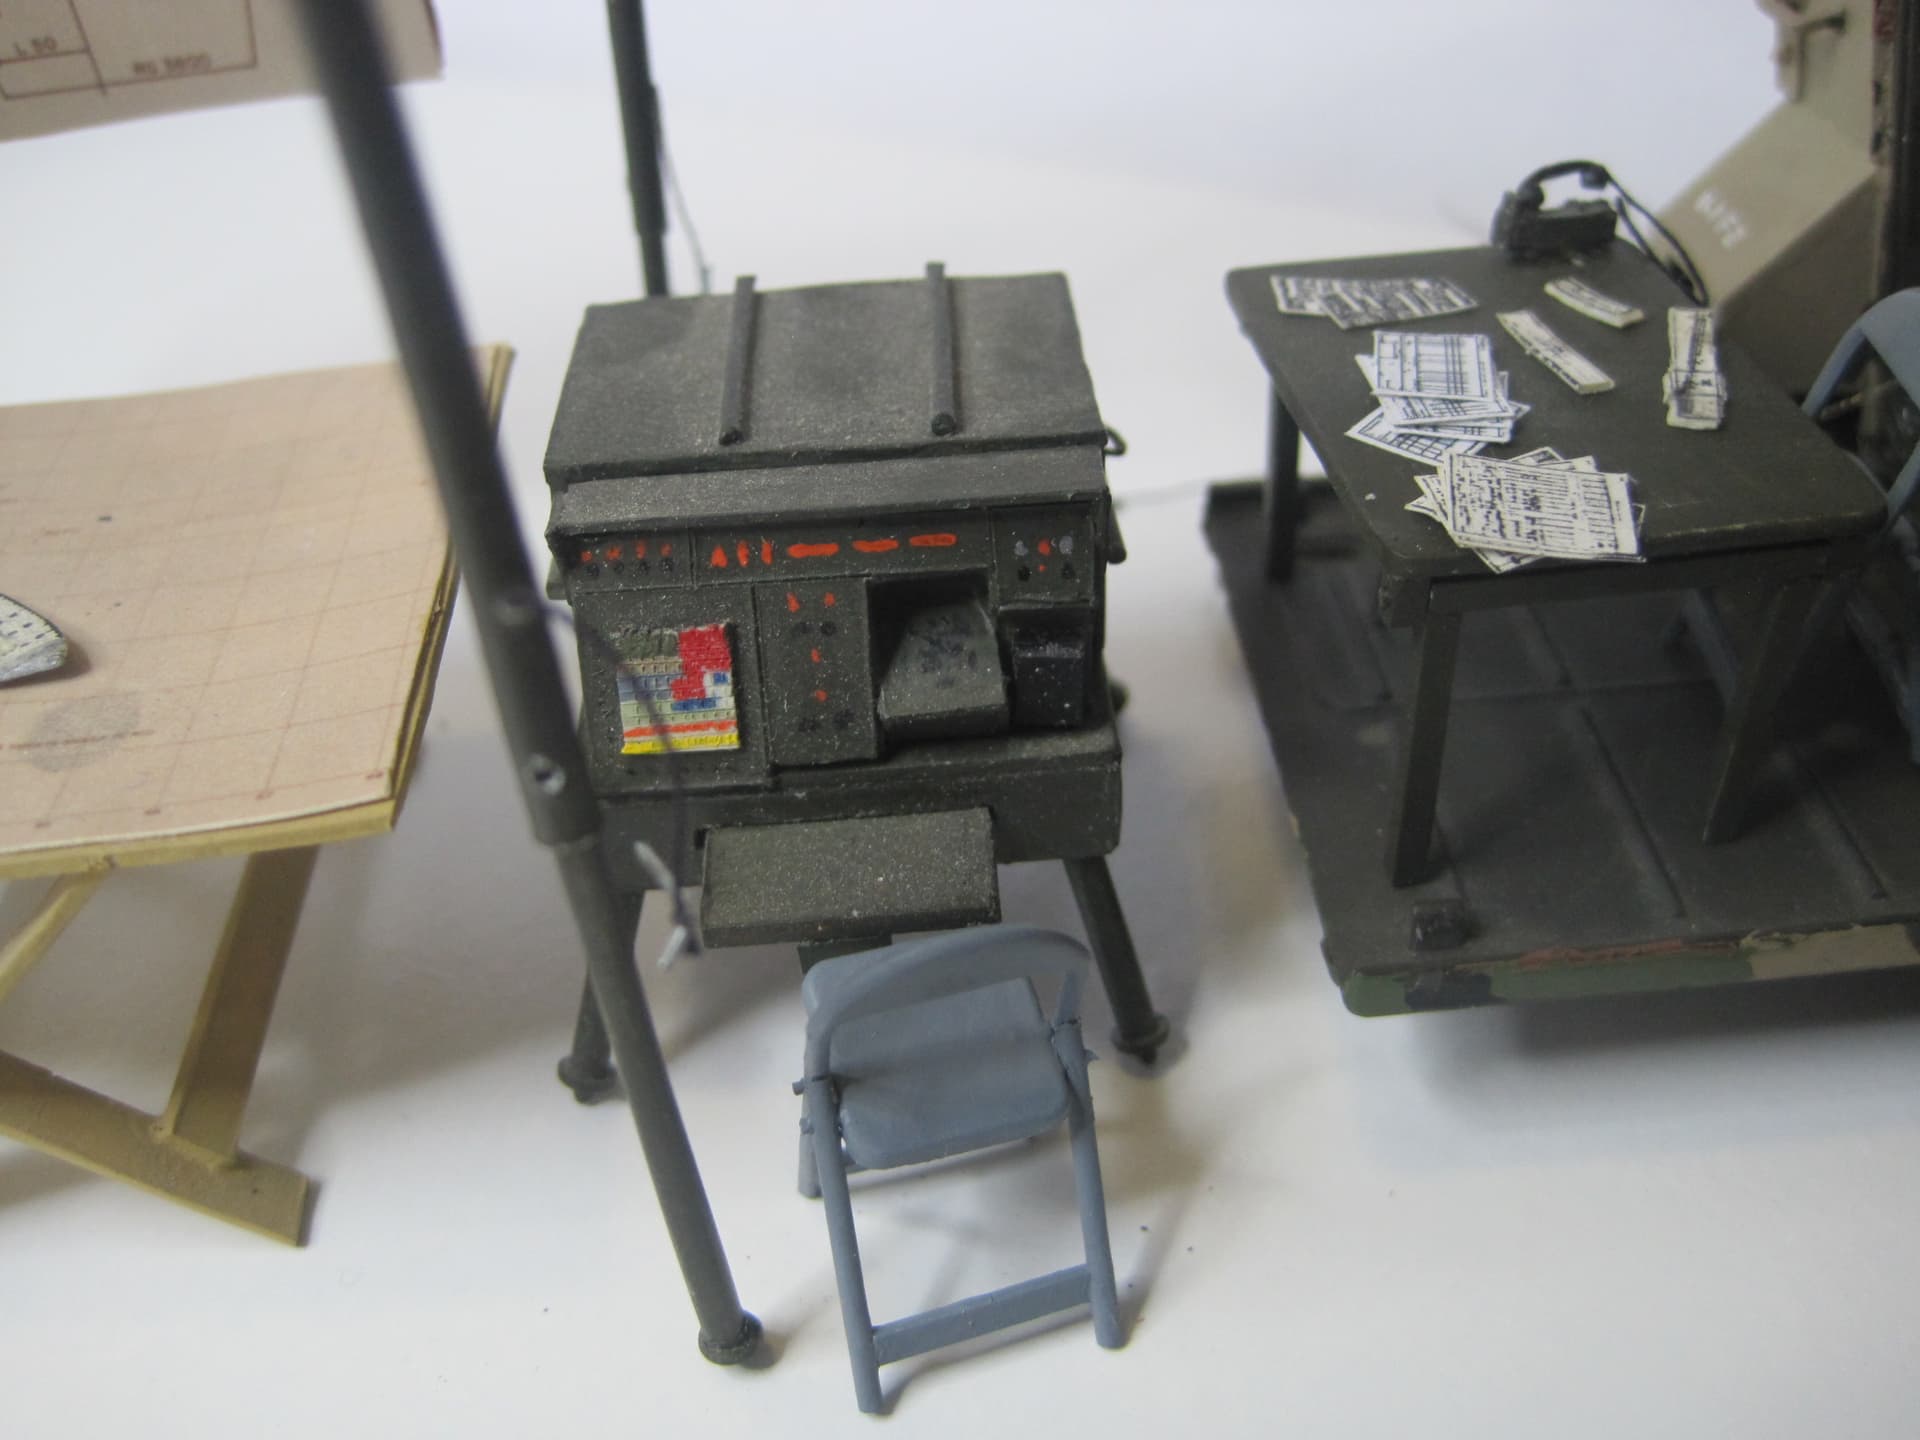
And while it may not have been the right thing to do, the Chief Computer (E-5 NCOIC of the section) always set up his station on a field table on the ramp, which we usually supported underneath with the wooden chocks placed in front of the tracks in the motor pool.
As you can see, with one chart set up and the other “chart operator” running the FADAC (when it was actually working!), there’s not a lot of room. Besides myself and these three, the section had an RTO who sat inside and monitored the radios and called out the information from the Forward Observer when a Call for Fire came in, plus a “Recorder” who kept track of the ammunition count and a Carrier driver who was either performing maintenance on the track, or handling the 4.2KW generator for the track or the 3KW for the FADAC.

12 Likes
Nice, gotta love an old-school M577 FDC. Love the Klingon Battle Axe.
2 Likes
Really nice work Tom.
1 Like
I actually had to think a second before I got that!!!
At that point we either had to use two charts (a primary and check chart) OR one chart and the FADAC.
Doctrine called for the FADAC to be “primary” and the manual chart was to check.
Because of the way the FADAC calculated to path of the projectile and the limited computational power, in arriving at the INITIAL Range and Deflection to the target, my chart operator could beat the FADAC almost every time. But once he put down the tracing paper circle used to shift the pin for Left/Right and Add/Drop corrections, the FADAC was usually faster getting the revised Range (For QE) and Deflection.
1 Like
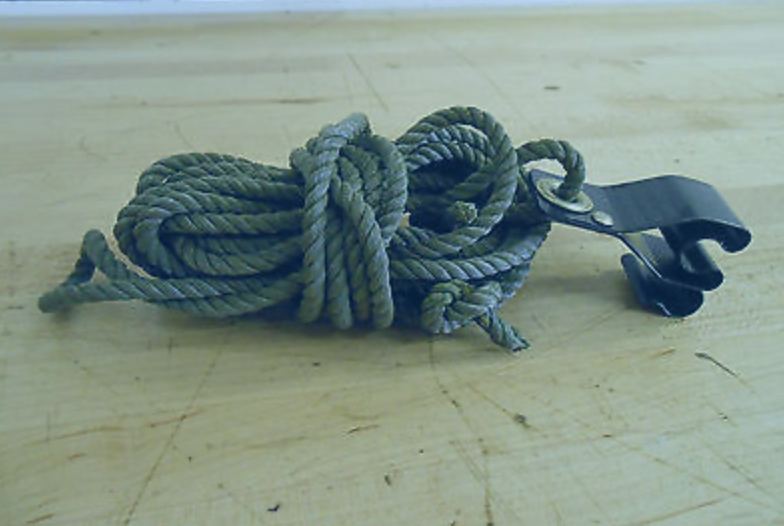
With antennae in place, I need to scratch some tie-downs. Ive read through a TM on mounting antennae but need info/pics on tie-downs not in use. I guess the attched pic is how they look but was eg.the clamp just left on the base of the antennae, with rope coiled up? And was the rope just tied to a regular tiedown?
Thanks Folks
1 Like
@thathaway3 That is a beautifully done set up, just love it!
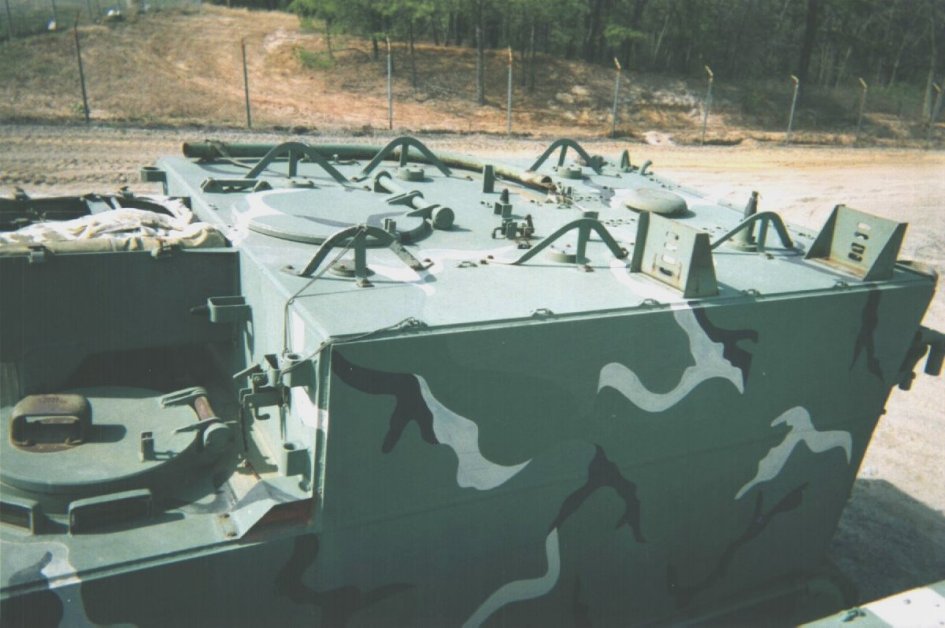
@Denimo The tiedown in your photo is much fancier than what we had, basically a single piece if metal with an “S” curve in it. The rope was tied to whatever was handy. in the case of the M113/577 that was usually the guard around an antenna base. To be effective, the tiedown rope was normally secured at the opposite side/end of the vehicle. So if the antenna was at the rear, the tiedown was at the front.
When not in use, the tiedown was wadded up and placed next to whatever it was tied to. Note the two antenna on this track:

Ken
2 Likes
Thanks Ken. Thats a real help.
From memory, how long was the rope?
1 Like
I have no idea, never measured it. However, I know that some crews would tie the two ends to different parts of the vehicle, forming a triangle that reduced wobble of the antenna. Also, sometimes the rope would break, resulting in a shorter rope.
I am sure there is a TM out there that states how long the rope is.
Ken
1 Like
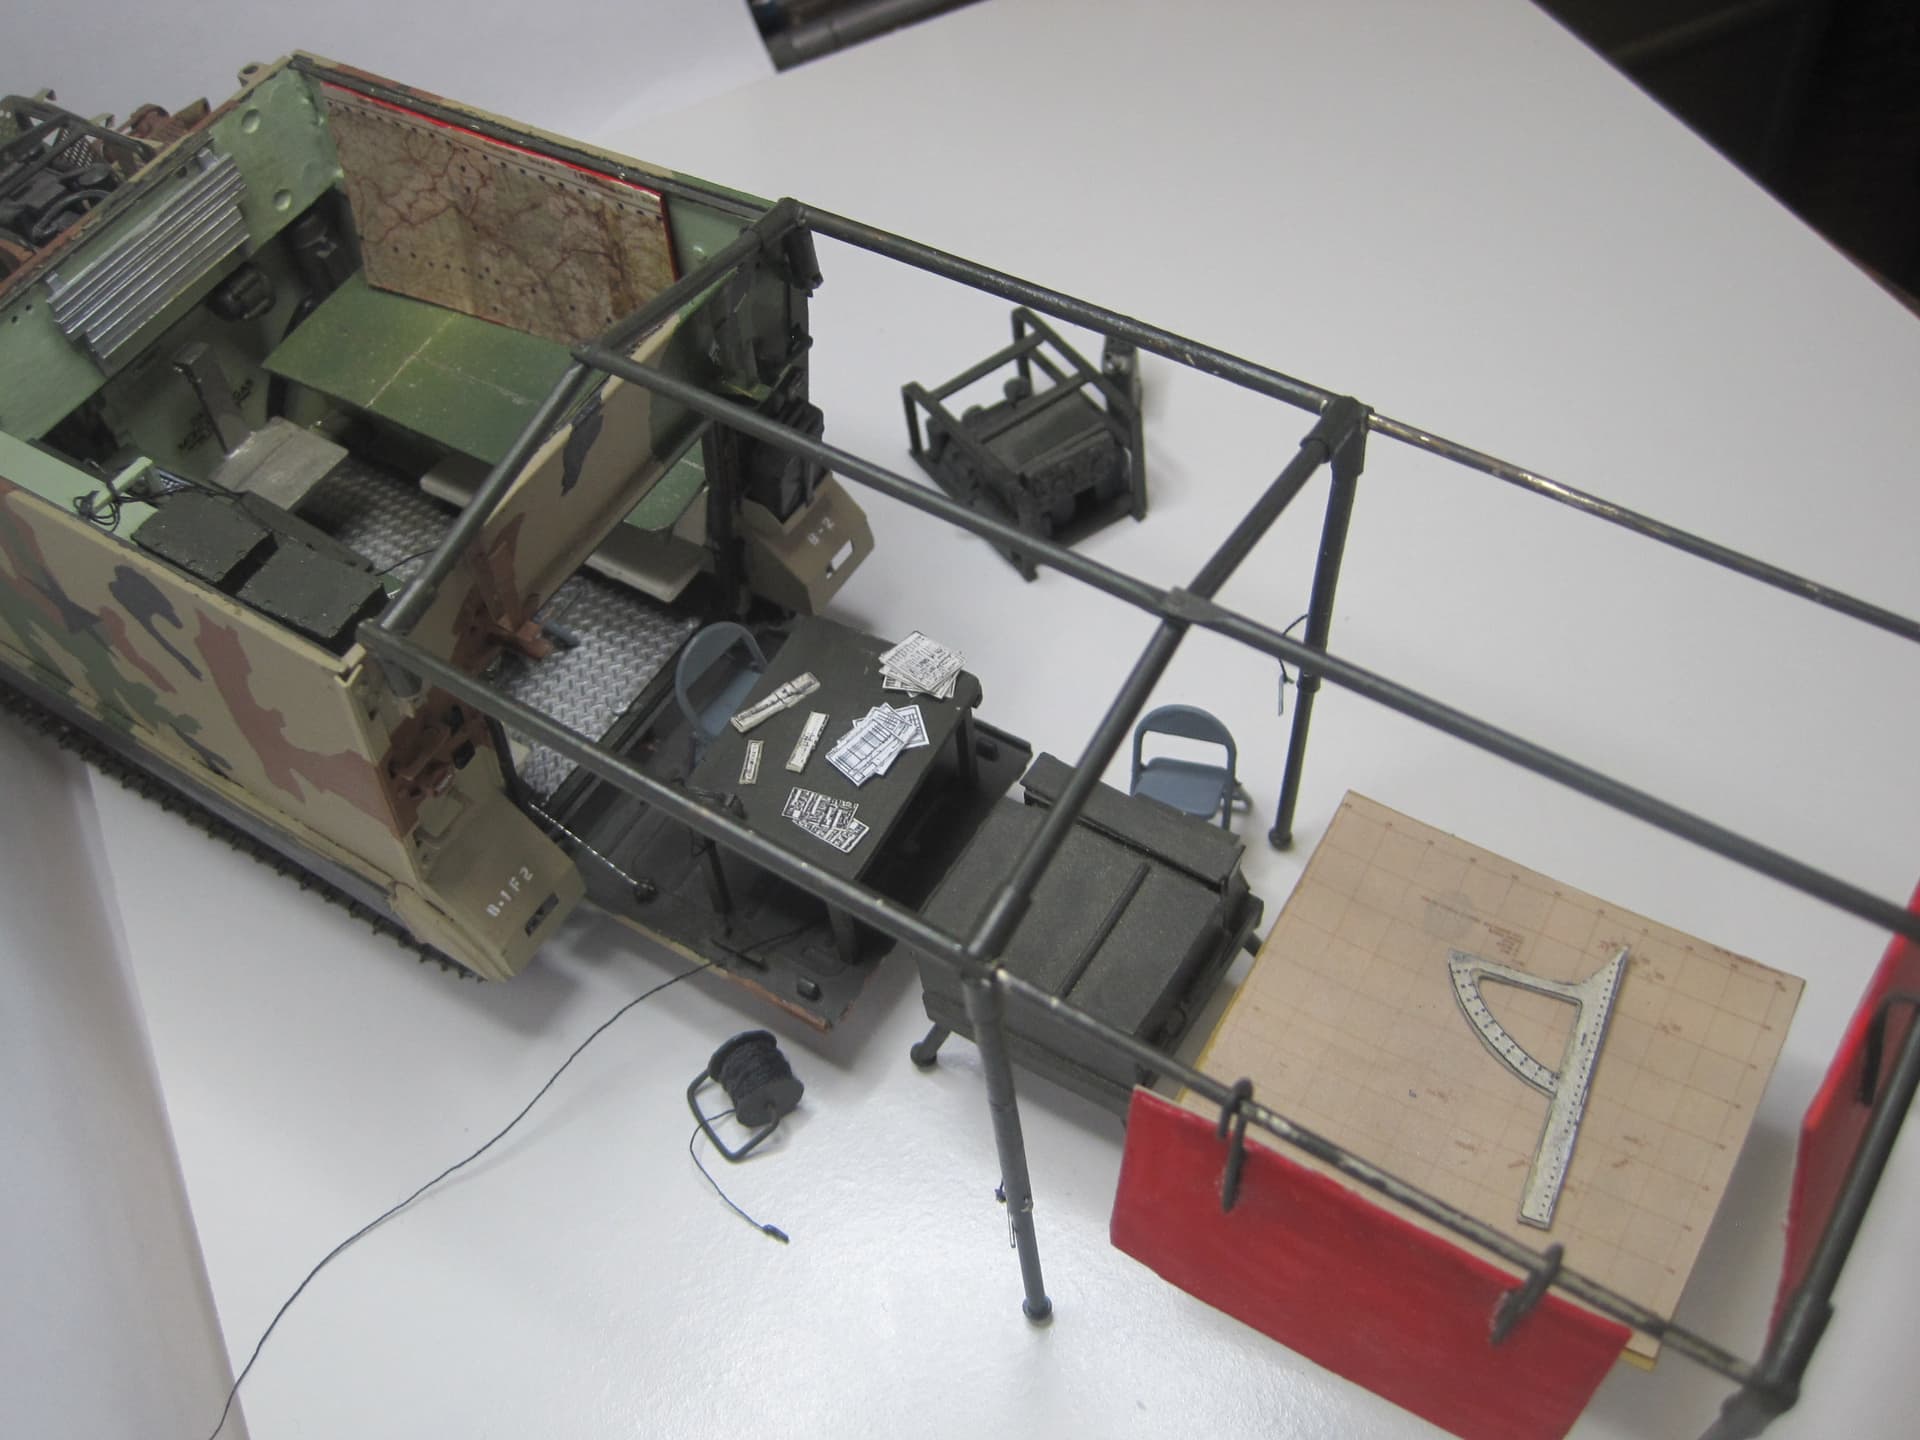
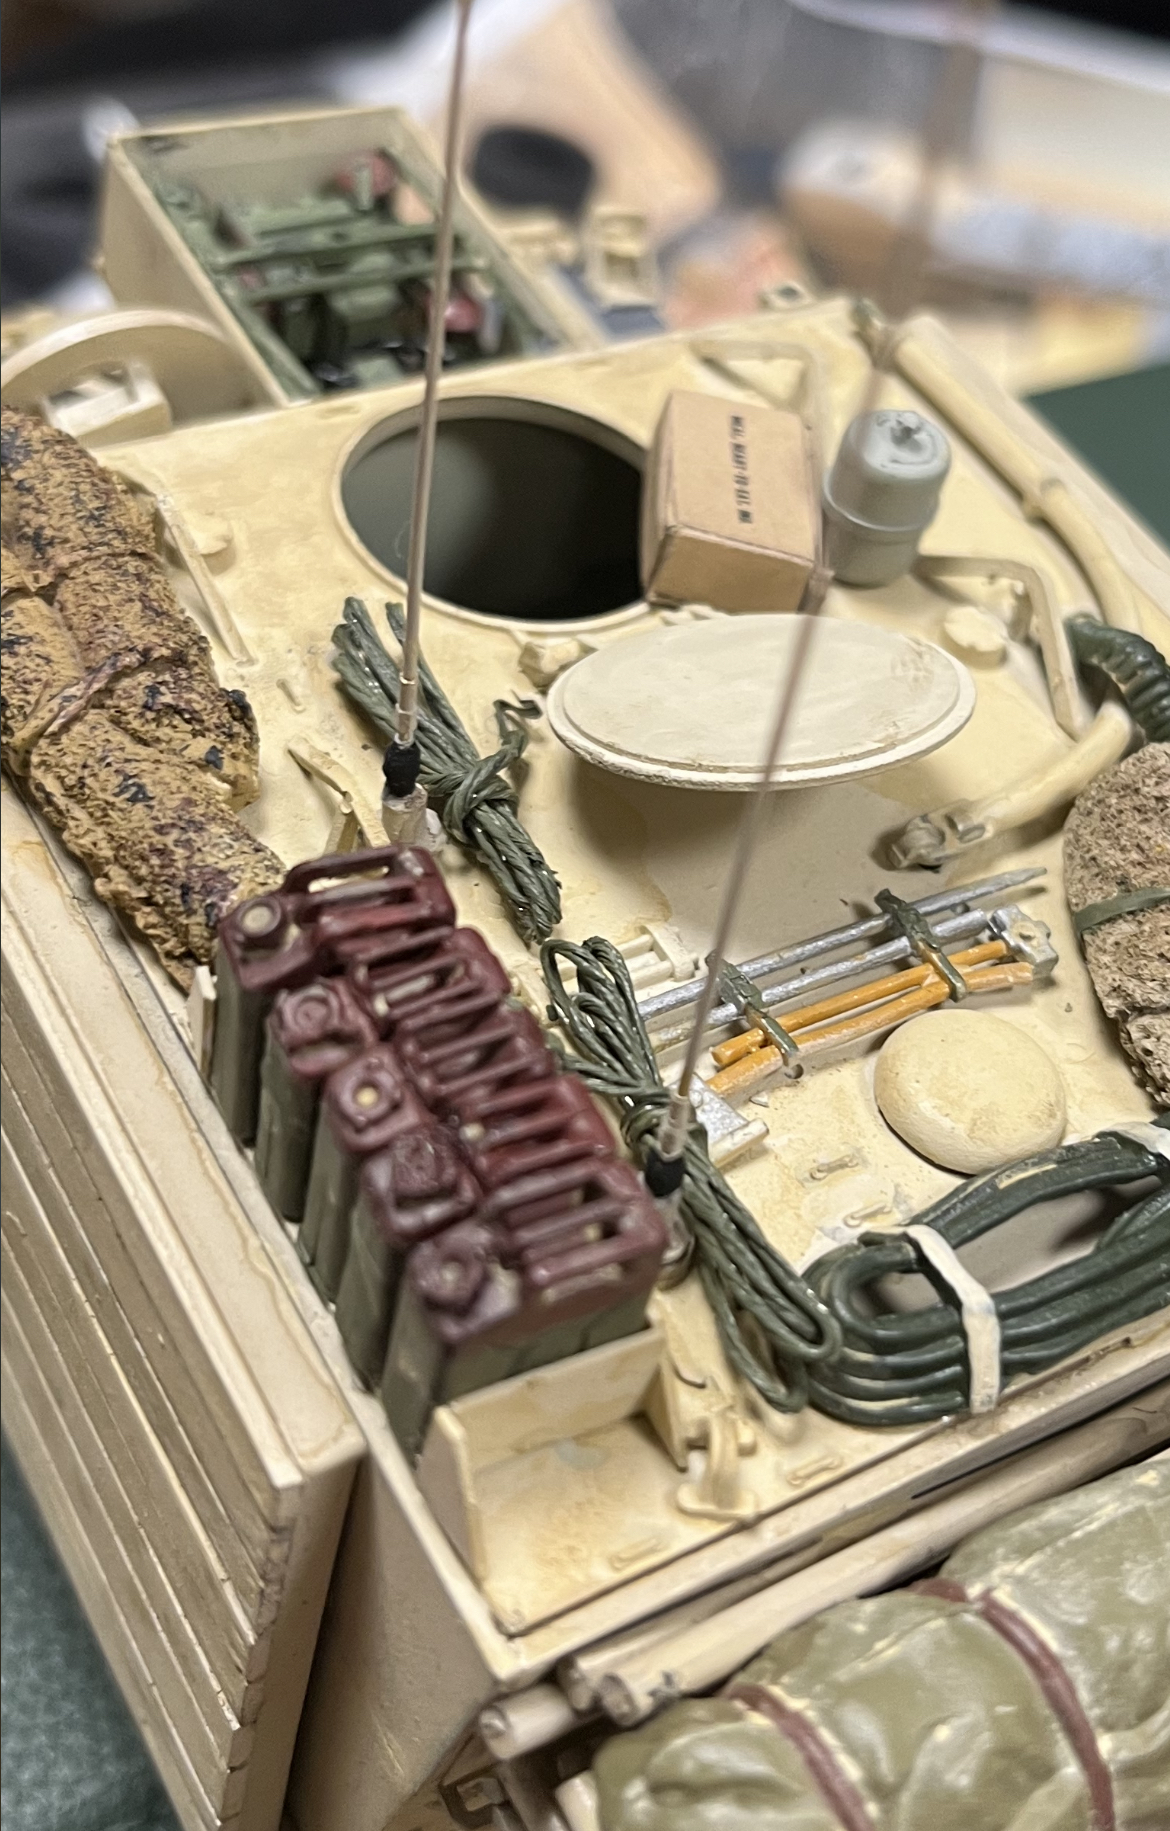
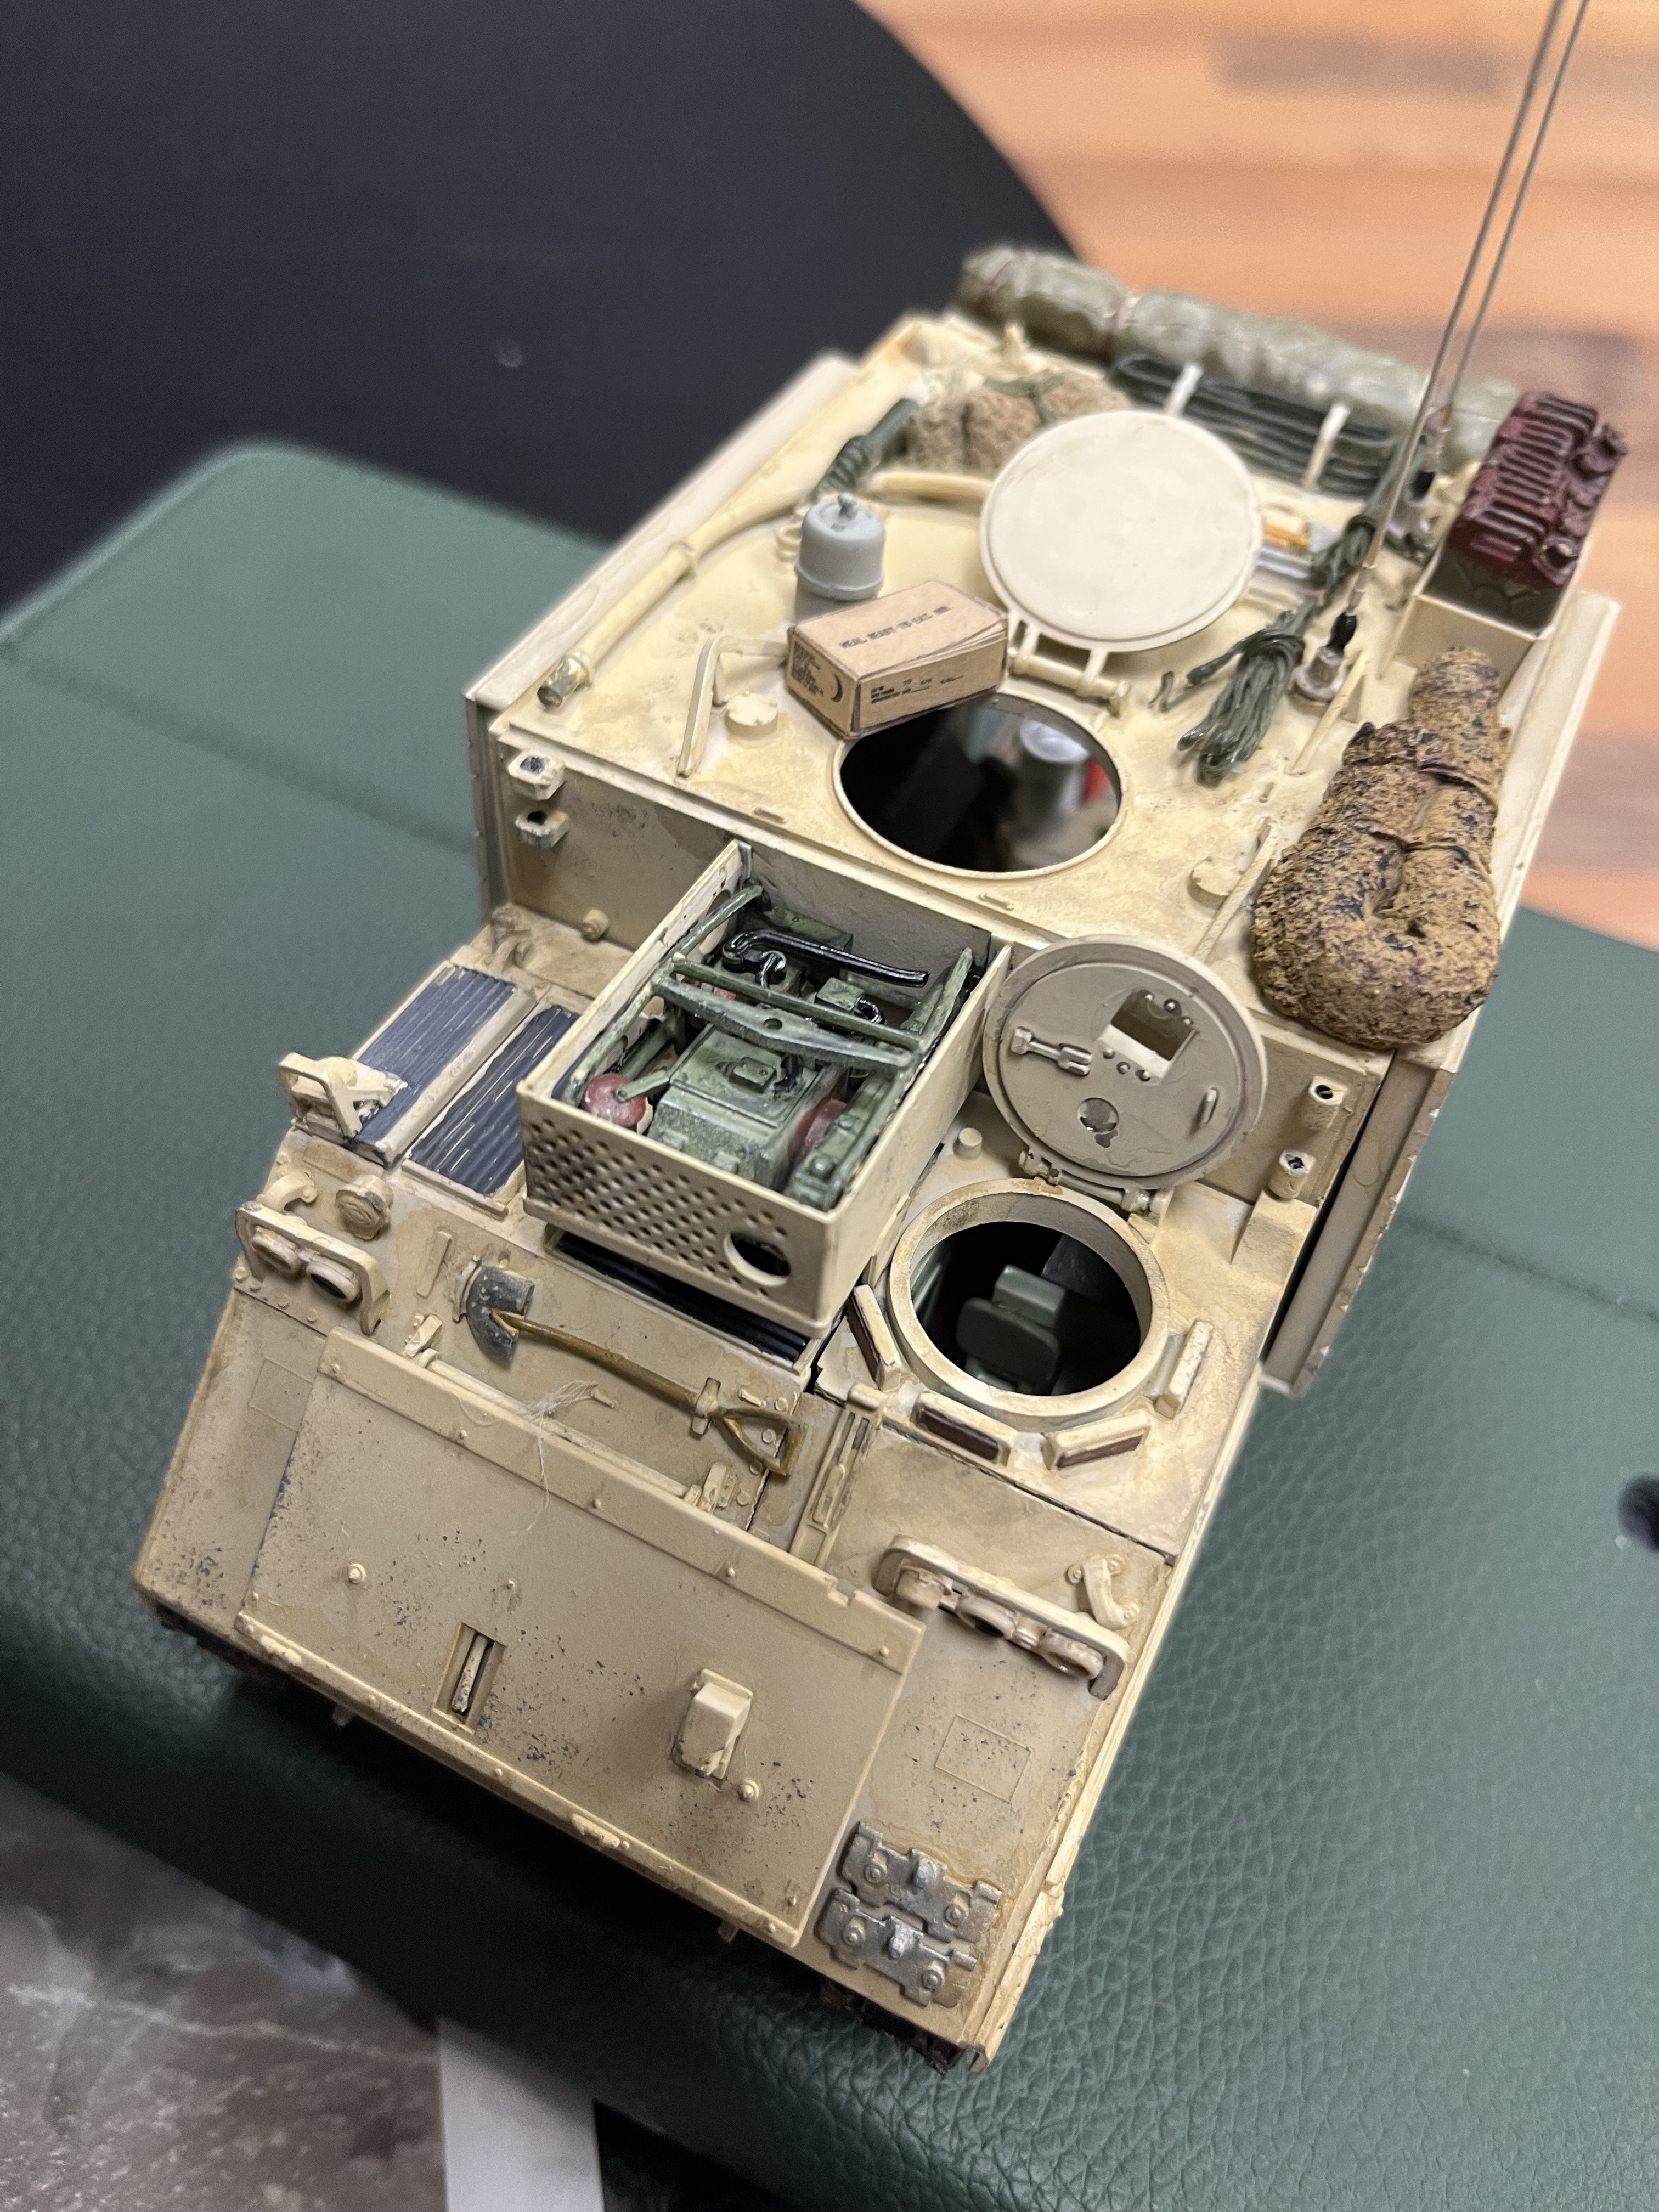
Nice setup. About how we did things- but we had the BCS so it was inside, 4 radios instead of 2. Still did charts and darts out in the extension. We also used chock blocks for the rear deck to keep it level. How did you scratch the interior? What ever happened to the set that Iron Division/ Bob Batdprf was working on- any one know?
1 Like
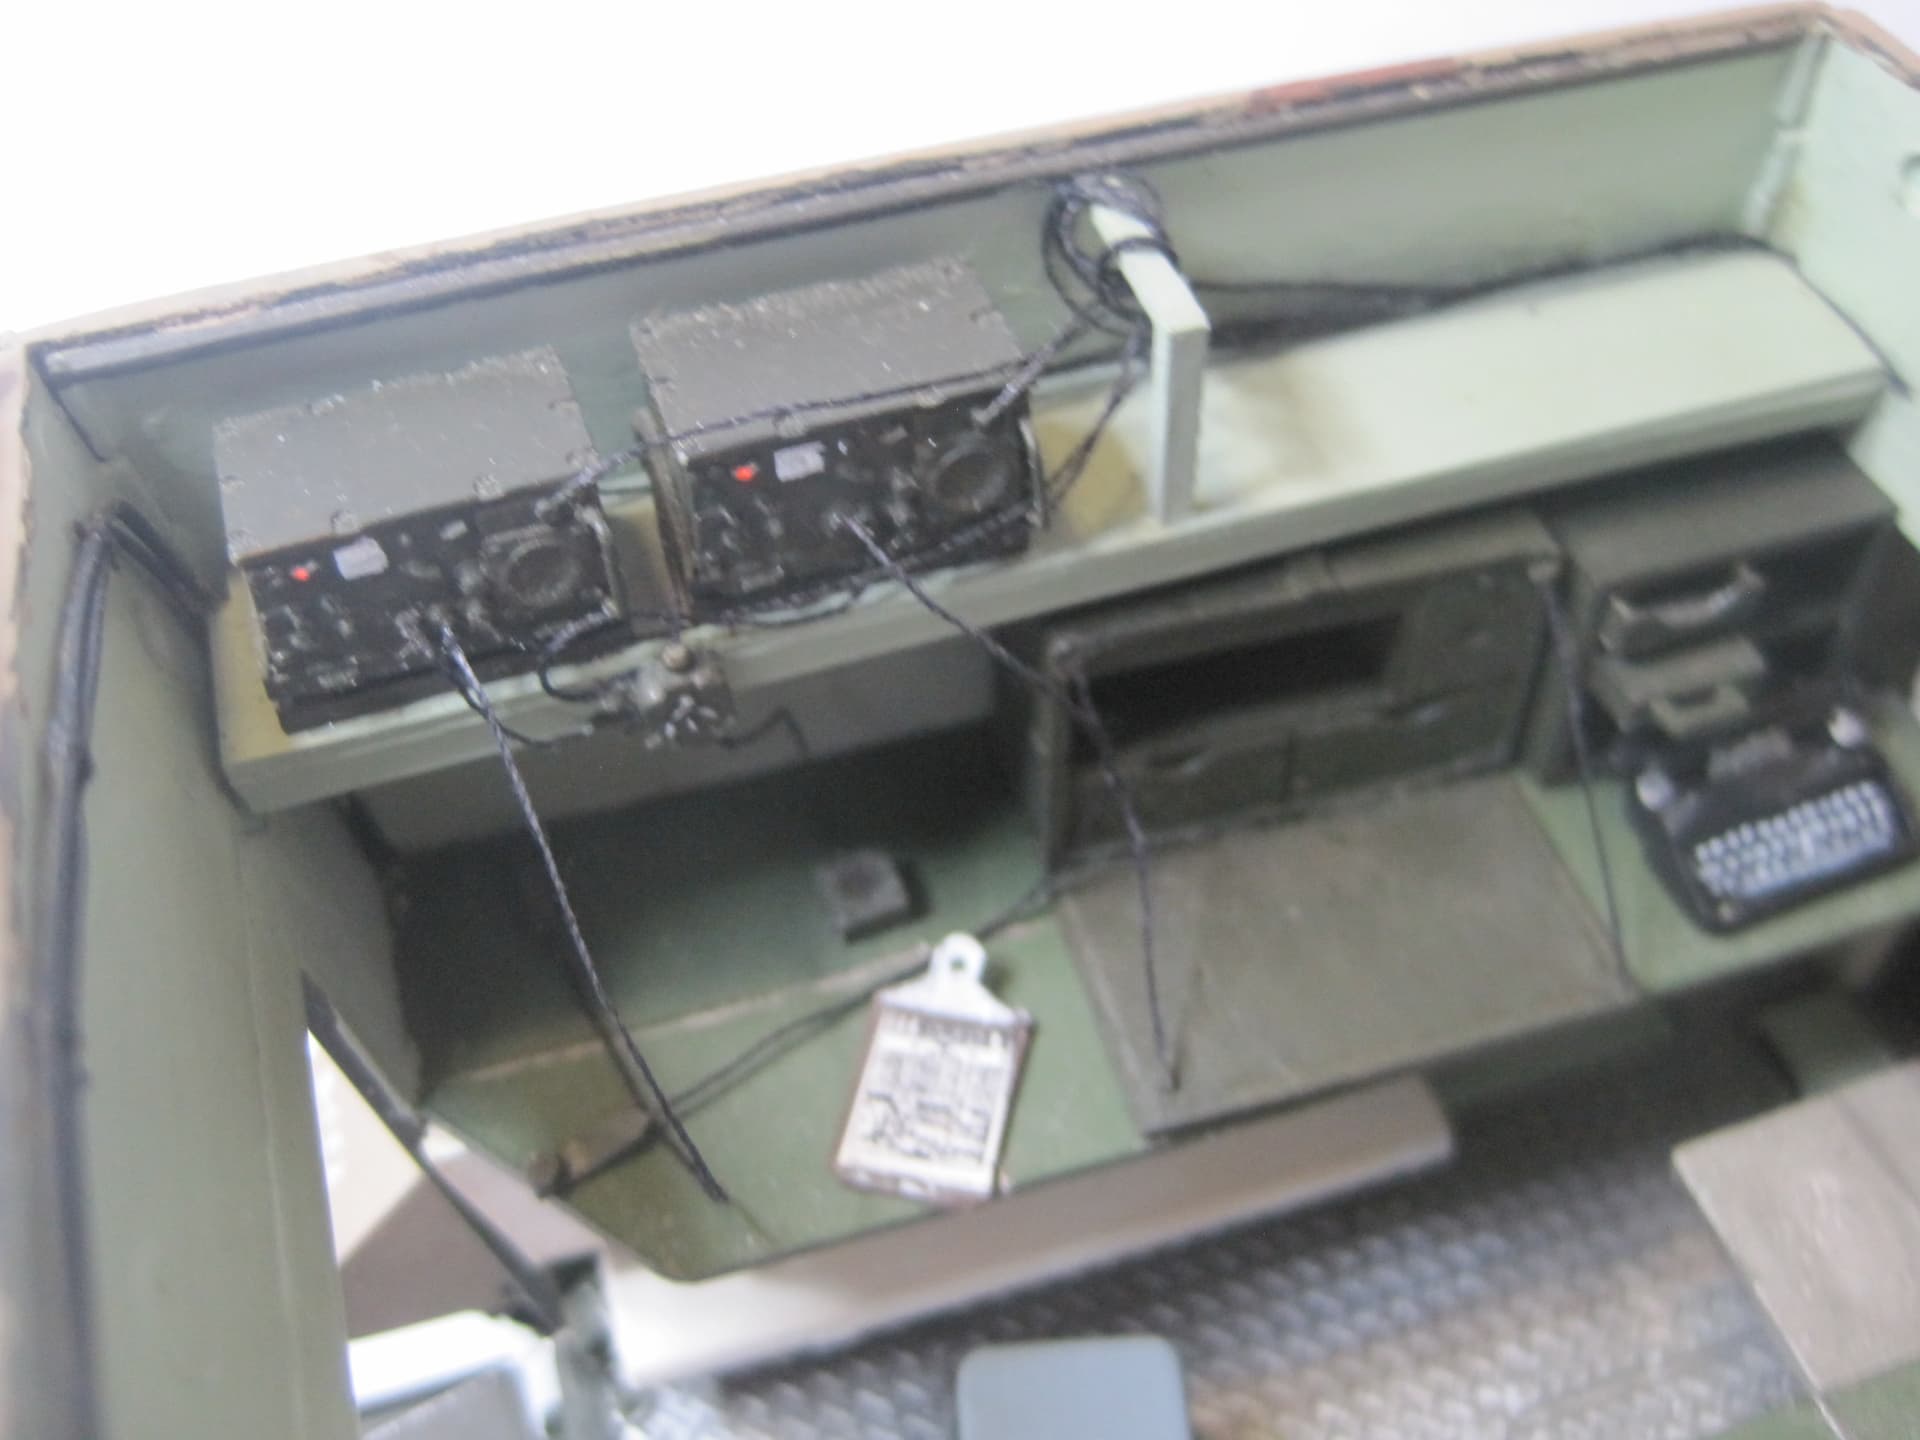
If you’re talking about the interior of the track, the radios were Verlinden and the field desk and typewriter were from some other AM set. The big map was made by actually taking a 35 mm photograph of my old field map which I had of the Training Area. Knowing about what size the print would be I estimated the distance from which to take the picture (and took several at various distances) and then when I got the prints, I just used the photo which seemed the best size.
As far as the items in the FDC, I scanned several pages from the FM 6-40 and some other material I had from teaching gunnery at Ft Sill, and just reduced the pages on the copier to get the RDP, the sticks, and the forms to the right size. The table and chairs are from the Tamiya 577 kit. The charts both the firing chart, safety chart and ammo board were done in the same way. And the chart table and the FADAC were scratched from Evergreen plastic. I just “divided” the FADAC into various blocks and put each section together using a TM as a guide. Having been a design engineer for an auto company it’s something I was used to doing.
1 Like
I would just do what looks good to you. I can guarantee that whatever length and tie down method you select, SOMEBODY used it. There is no “one and only way that everybody had to use” when it comes to how things were done with equipment in the field!!!
1 Like
I’m not looking to tie them down. I just want to model a length of rope with an S hook on the end. Easy enough I guess, just want it to look right.
1 Like
I’d say that if whatever length you choose is scale length to actually work as a tie down, there probably is no “wrong”. While there is an “official” tie down rope (I’m sure) with a part number, you can be absolutely sure that at some point a LOT of people were using a field expedient. Besides, if it’s a length of rope lying on the roof of the track, how many people are going to be able to visually “uncoil” that rope, visualize how long it is and then imagine exactly how it would look in use?
I say go for it.
2 Likes
Thanks for that Tom. I’m done with the build except for the ramp winch and carton of Mtn Dew. Both are on the way so I’ll park the track until then.
I’d like to name her “Queenie” and plan to start making simple decals now I’ve upgraded my printer.
PS I painted the little bit of silver on the “ropes” after I took these pics.
4 Likes
After posting about the tiedown earlier, I remembered that I have one. Remembering where I put it, on the other hand, took me a while. But I did locate it. So for anyone who is interested:
The rope is 1/4 inch in diameter. The piece that I have is cut/broken; what remains is just under 7 feet, or about two meters.
Ken
1 Like
Thanks Ken, then mine are too thick but I’ll try and find a narrower wire that is bendable. Nylon etc. doesnt work for me.
1 Like