OK, now i see the reasoning behind the read box of the M47. they added the box to the M60 as a mean of storage for the searchlight, that wouldn’t be exposed to the elements. Clever.
1 Like
They might have found it was easier to store the searchlight in the box than remove a piece from the bustle rack and hang the searchlight on the intended mount.
1 Like
And a bunch more pictures I had not seen before. Thanks!
Looking at box and searchlight I do not think it would fit.
Besides you see some of them have the storagemount to the right of the bustlerack with the rack in one piece.
Furthermore looking at the trainloading sequence you see that only a few have these extra boxes, so I think it is a case of crew scrounging and adding.
1 Like
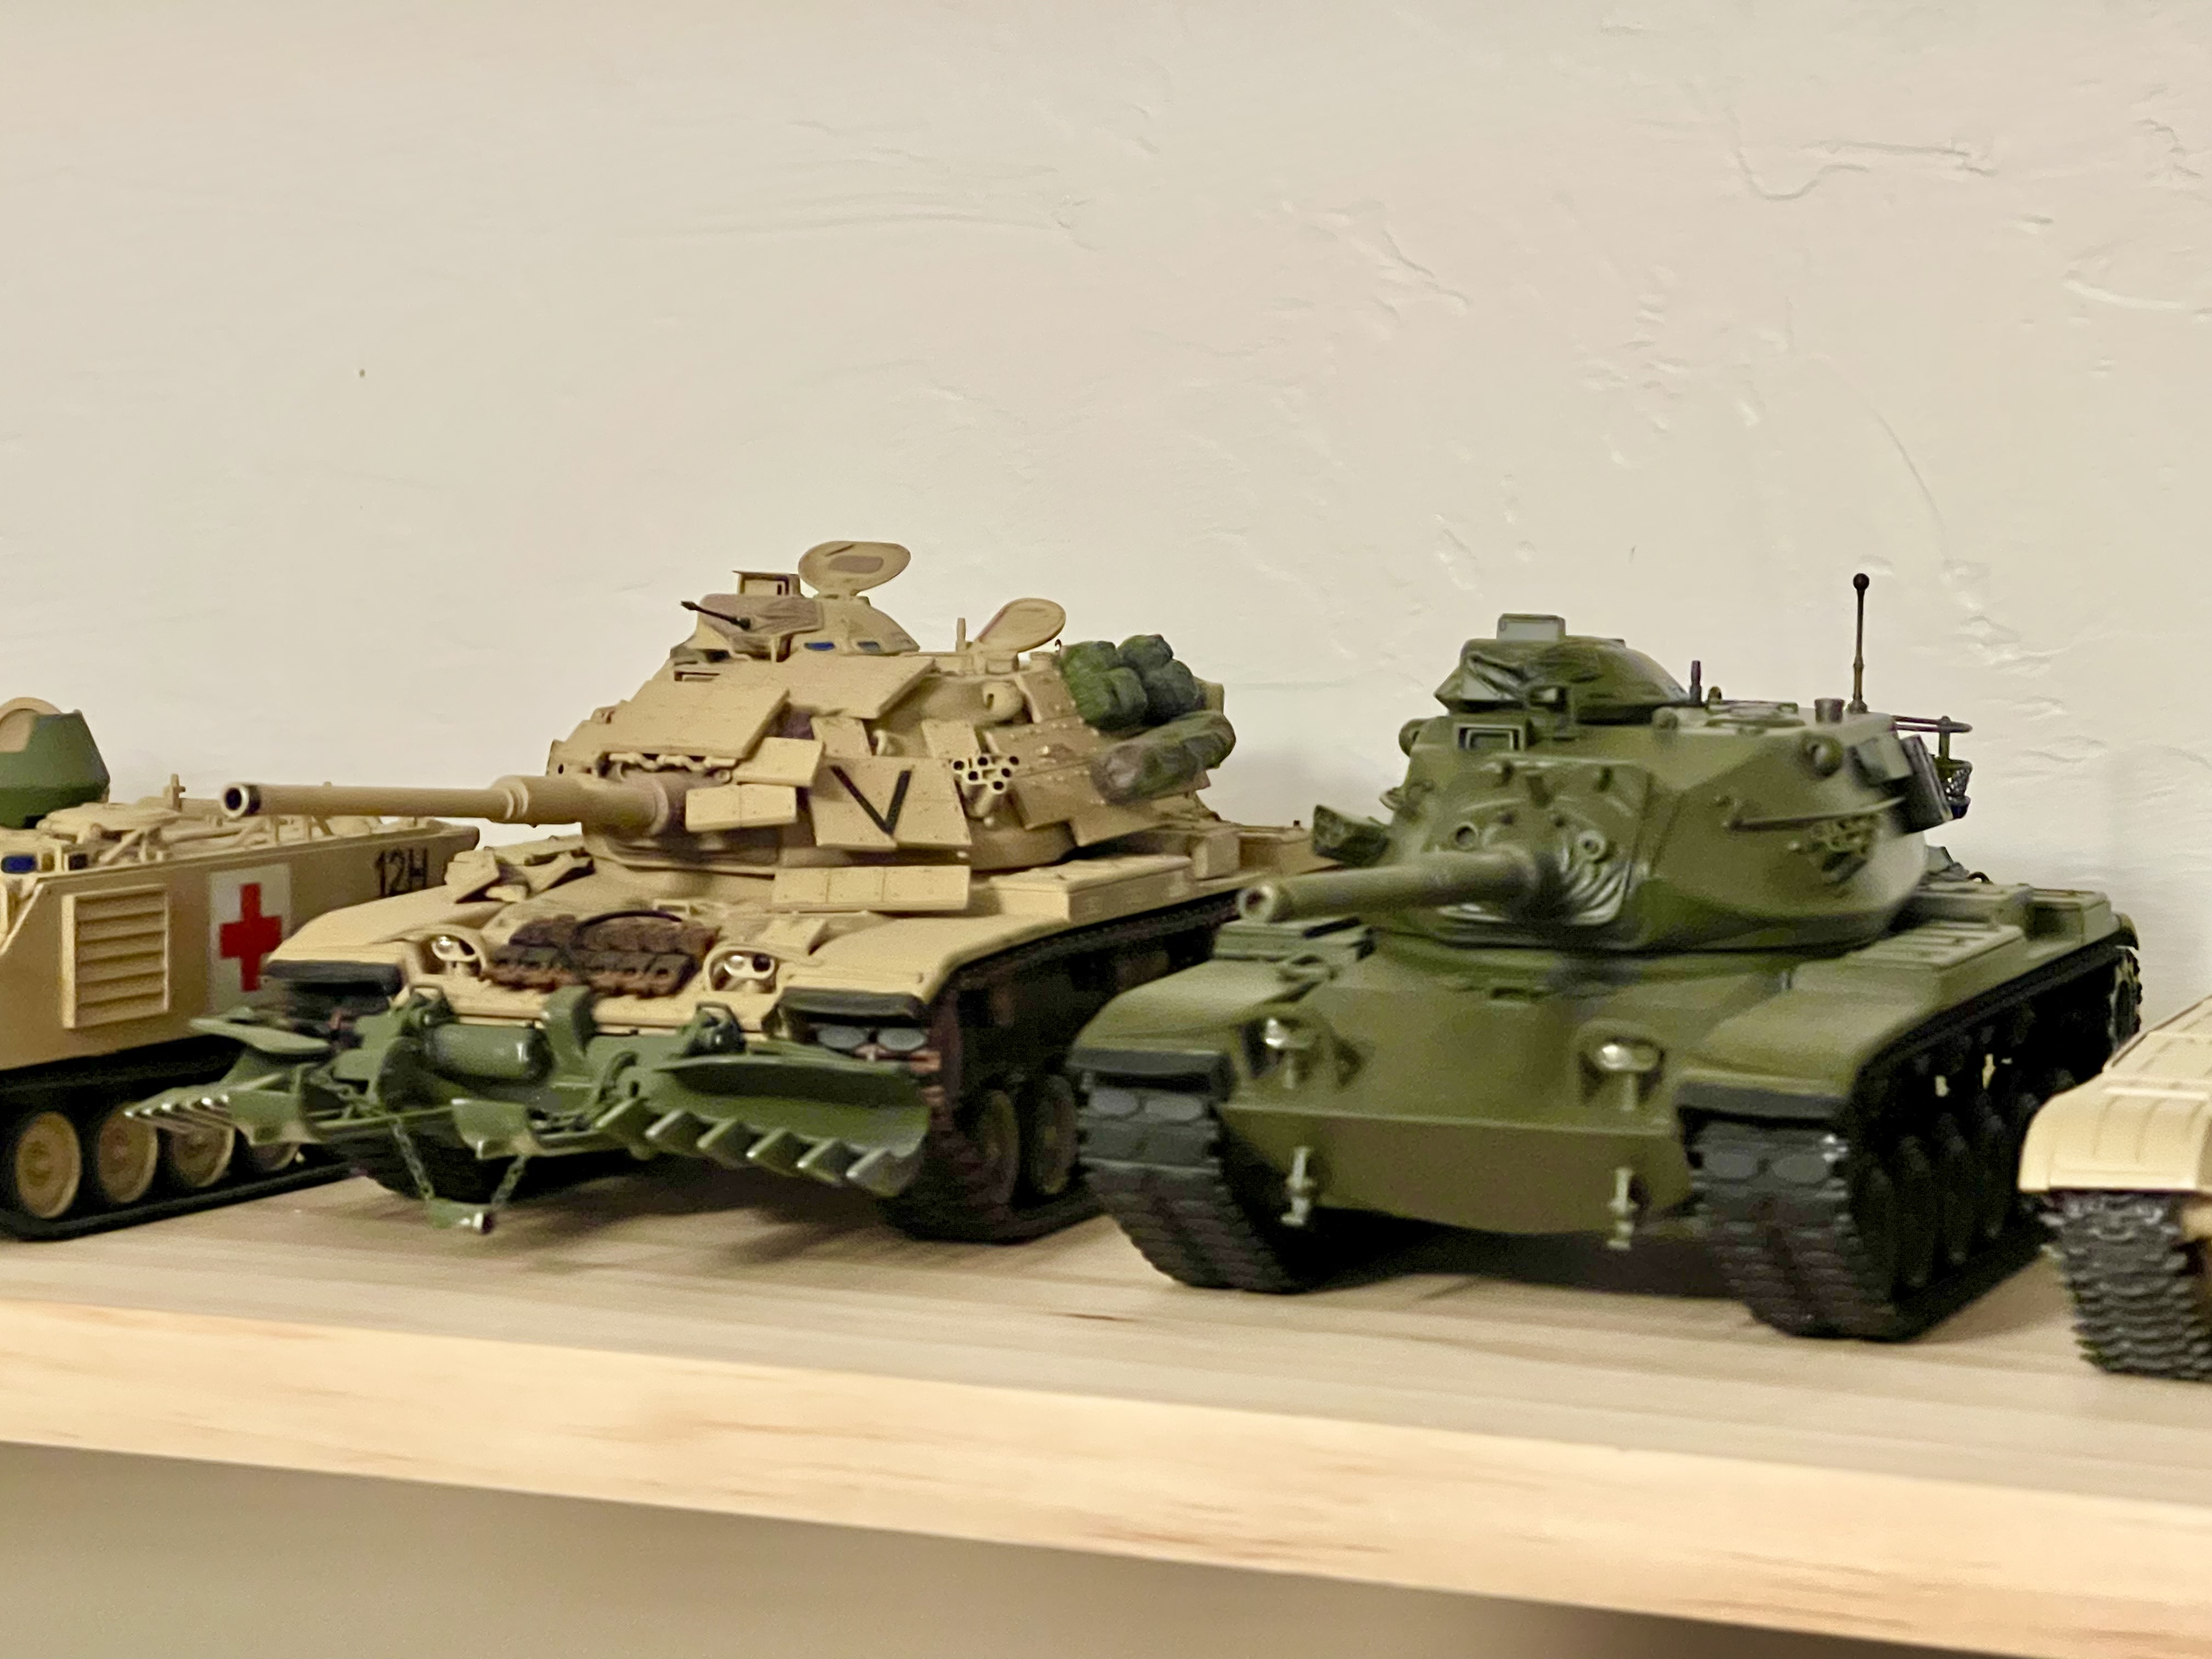
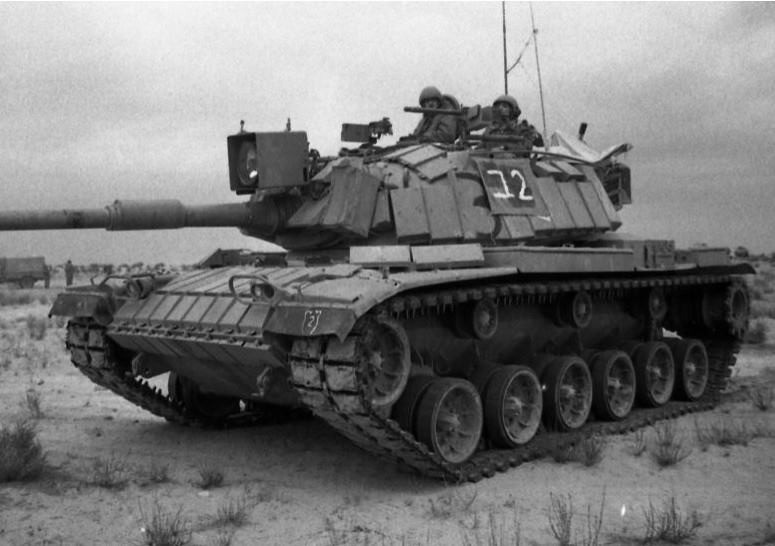
Lovely shots of MASSTER - always a favourite; below are a couple of pics I filched off the www some time ago which appear to show the scheme in more vivid colours. I believe this is also the scheme shown on the front cover of the old Signal book, whereby, as I say, the colours - especially the green -are quite bright.

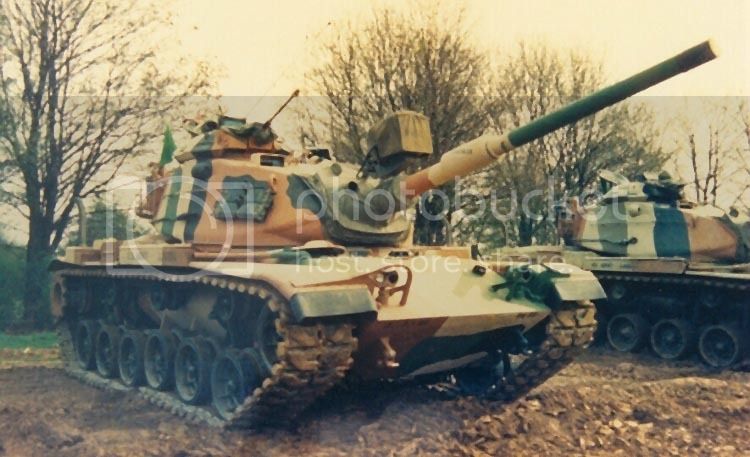
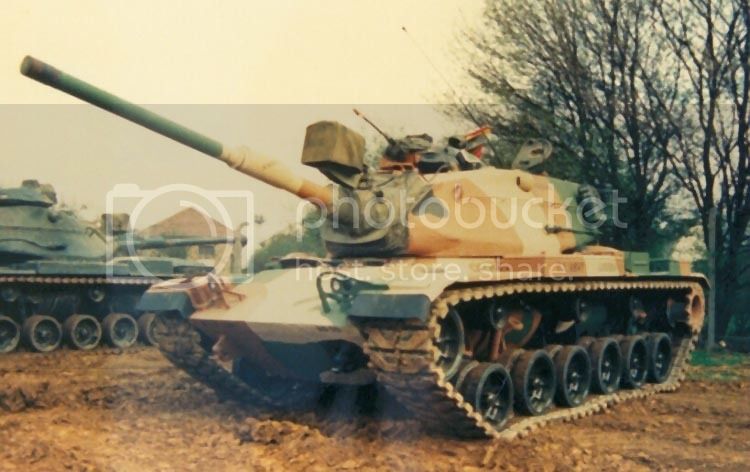
I attempted to replciate this some time agon on the venerable Esci kit:

Anyway, not to hijack the thread or an attempt to garner plaudits, but a not uninteresting interpretation of MASSTER perhaps - which would seem to be authenticated by the pics.
'Looking very forward to following this project.
7 Likes
Some amazing MASSTER camo ref pictures there, and I see @BootsDMS has also posted a few.
Thanks both for sharing. Always interested in seeing MASSTER pics!
3 Likes
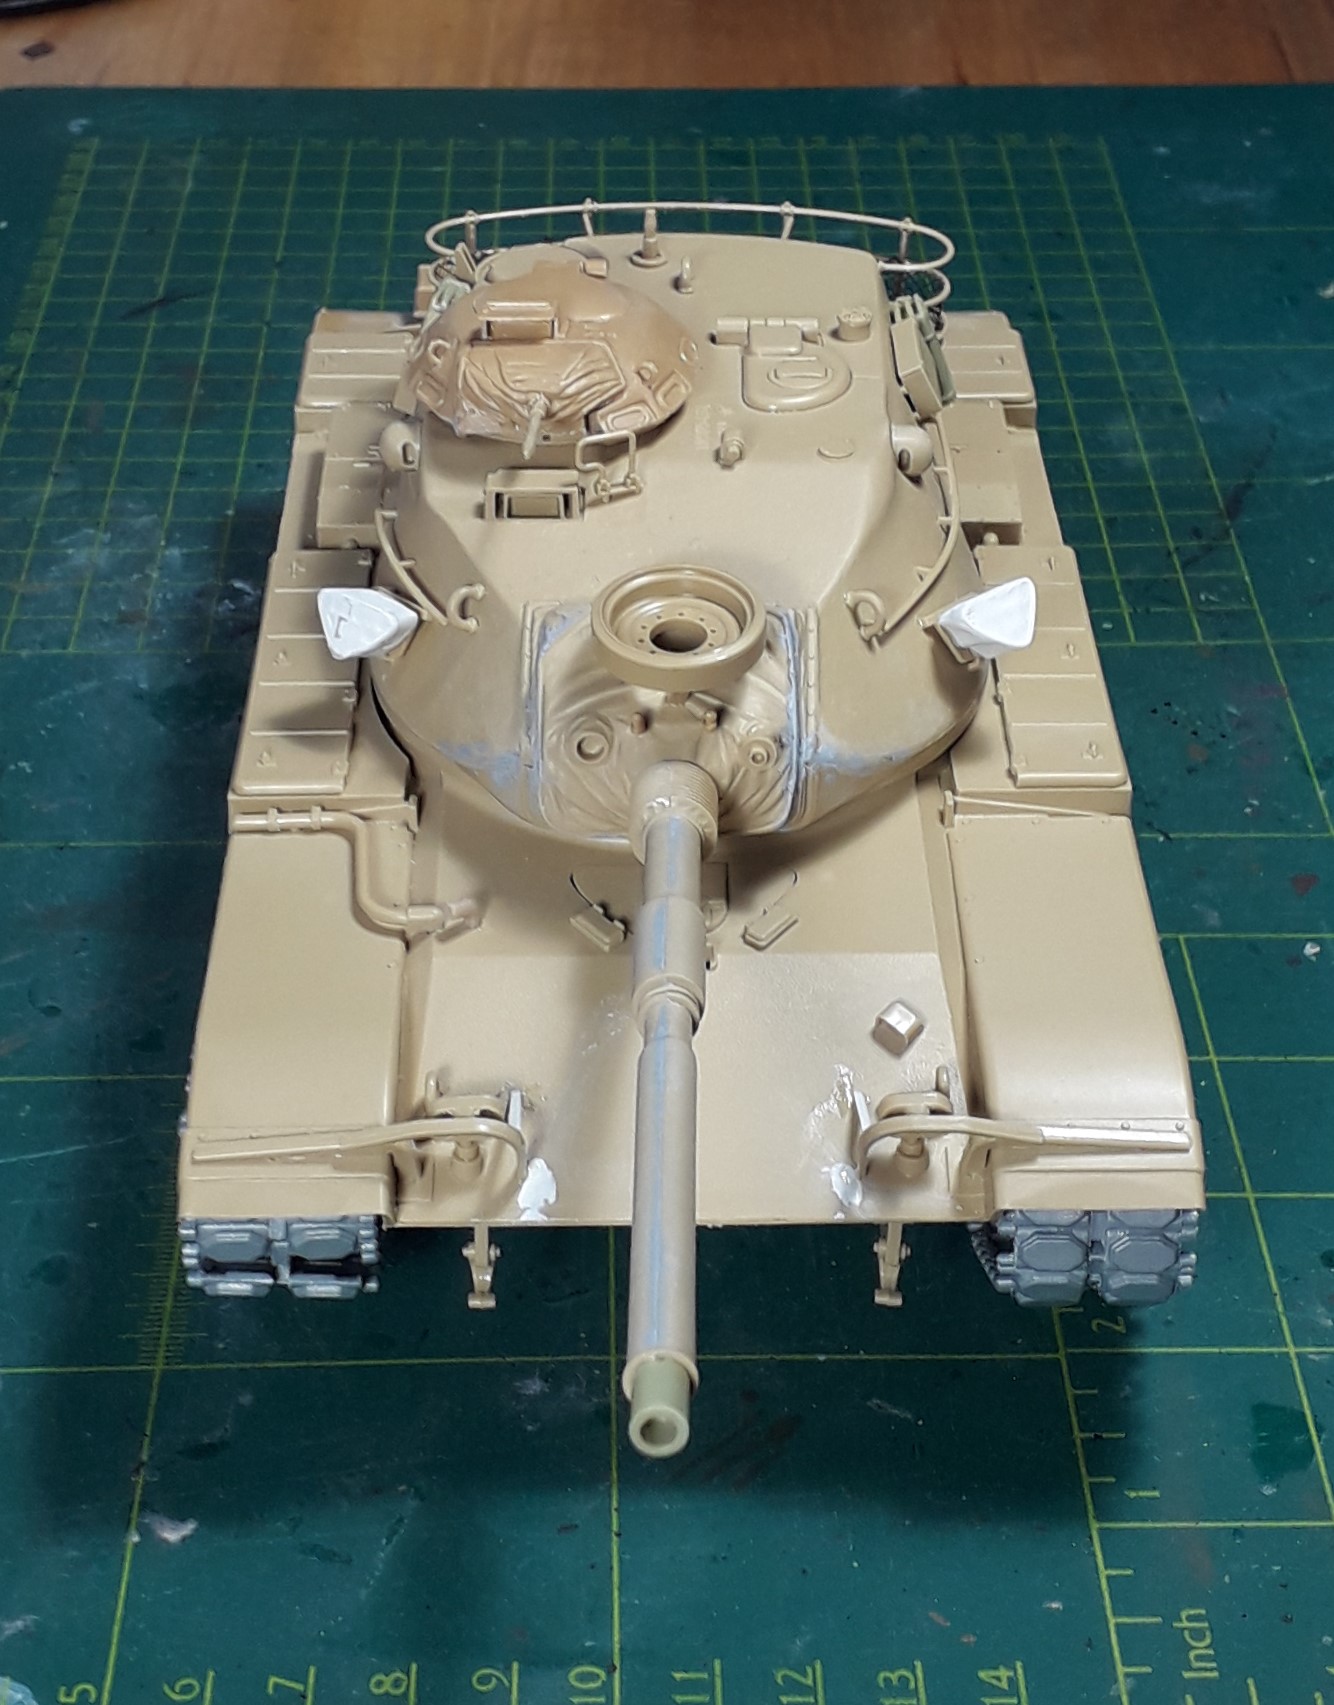
The first 2 of the batch are basically done, construction-wise.
The Tamiya kit lacks some noticeable parts, like the braces for the headlight guards and the rounded covers between mudguards and rearlight! That meant scratching them.
I used the tracks from the Italeri-kit for this one, which are link & length, but they are a weird kind of material; almost like a half-vinyl? Revell’s glue would not really work, Tamiya’s xtra thin did. I put them on loosely for the photo’s, but the right one decided to fall apart anyway.
The tank is fairly basic; it is the camo-pattern that counts. I¨ll put gear on it after the paintjob.

The Italeri-kit had a bit more work involved.
The infrared light with cable and stowagehook on the rear, holes for jerrycans filled and the M48A3-tracks “borrowed” from the Tamiya-kit.
The chrome inside the lamp did not work out well. Paint might have been (way) too old. The glass had to be cut to size. The M48’s was too big.
3 Likes
Looking good. Quick question: why did you use a barrel with a thermal sleeve on what looks to be a m60a1 and a wind sensor on the other tank?
1 Like
Because that was what I had to make it look like the pictures that inspired me.
And the windsensor ended up on the wrong tank!! Doh…

2 Likes
Loving these builds and chat guys.Love the M60 tank.Ive got a few Tamiya,Esci,Italeri kits in 1.35th.Im a great advocate of updating older kits with good old fashioned modelling materials like brass wire and plastic strip.Ive been collecting a few decal sets for different countries like Egypt,Iran,U.s ones in Korea,Spanish.U.S OPFOR ones in Germany.
Watching with much interest.Ive tried using the Italeri tracks and they are a pain.Awful material and glue just about sticks them but they fall apart.Check out Rick Lawler kn Youtube who does a boneyard m60a3 in California.
Happy modelling from Richard
3 Likes

Wow Ron you’re a fast worker! These are nice tight builds - they look great!
Yeah well… I’m “in between jobs” at the moment and for the past 6 weeks, so… yeah…
3 Likes
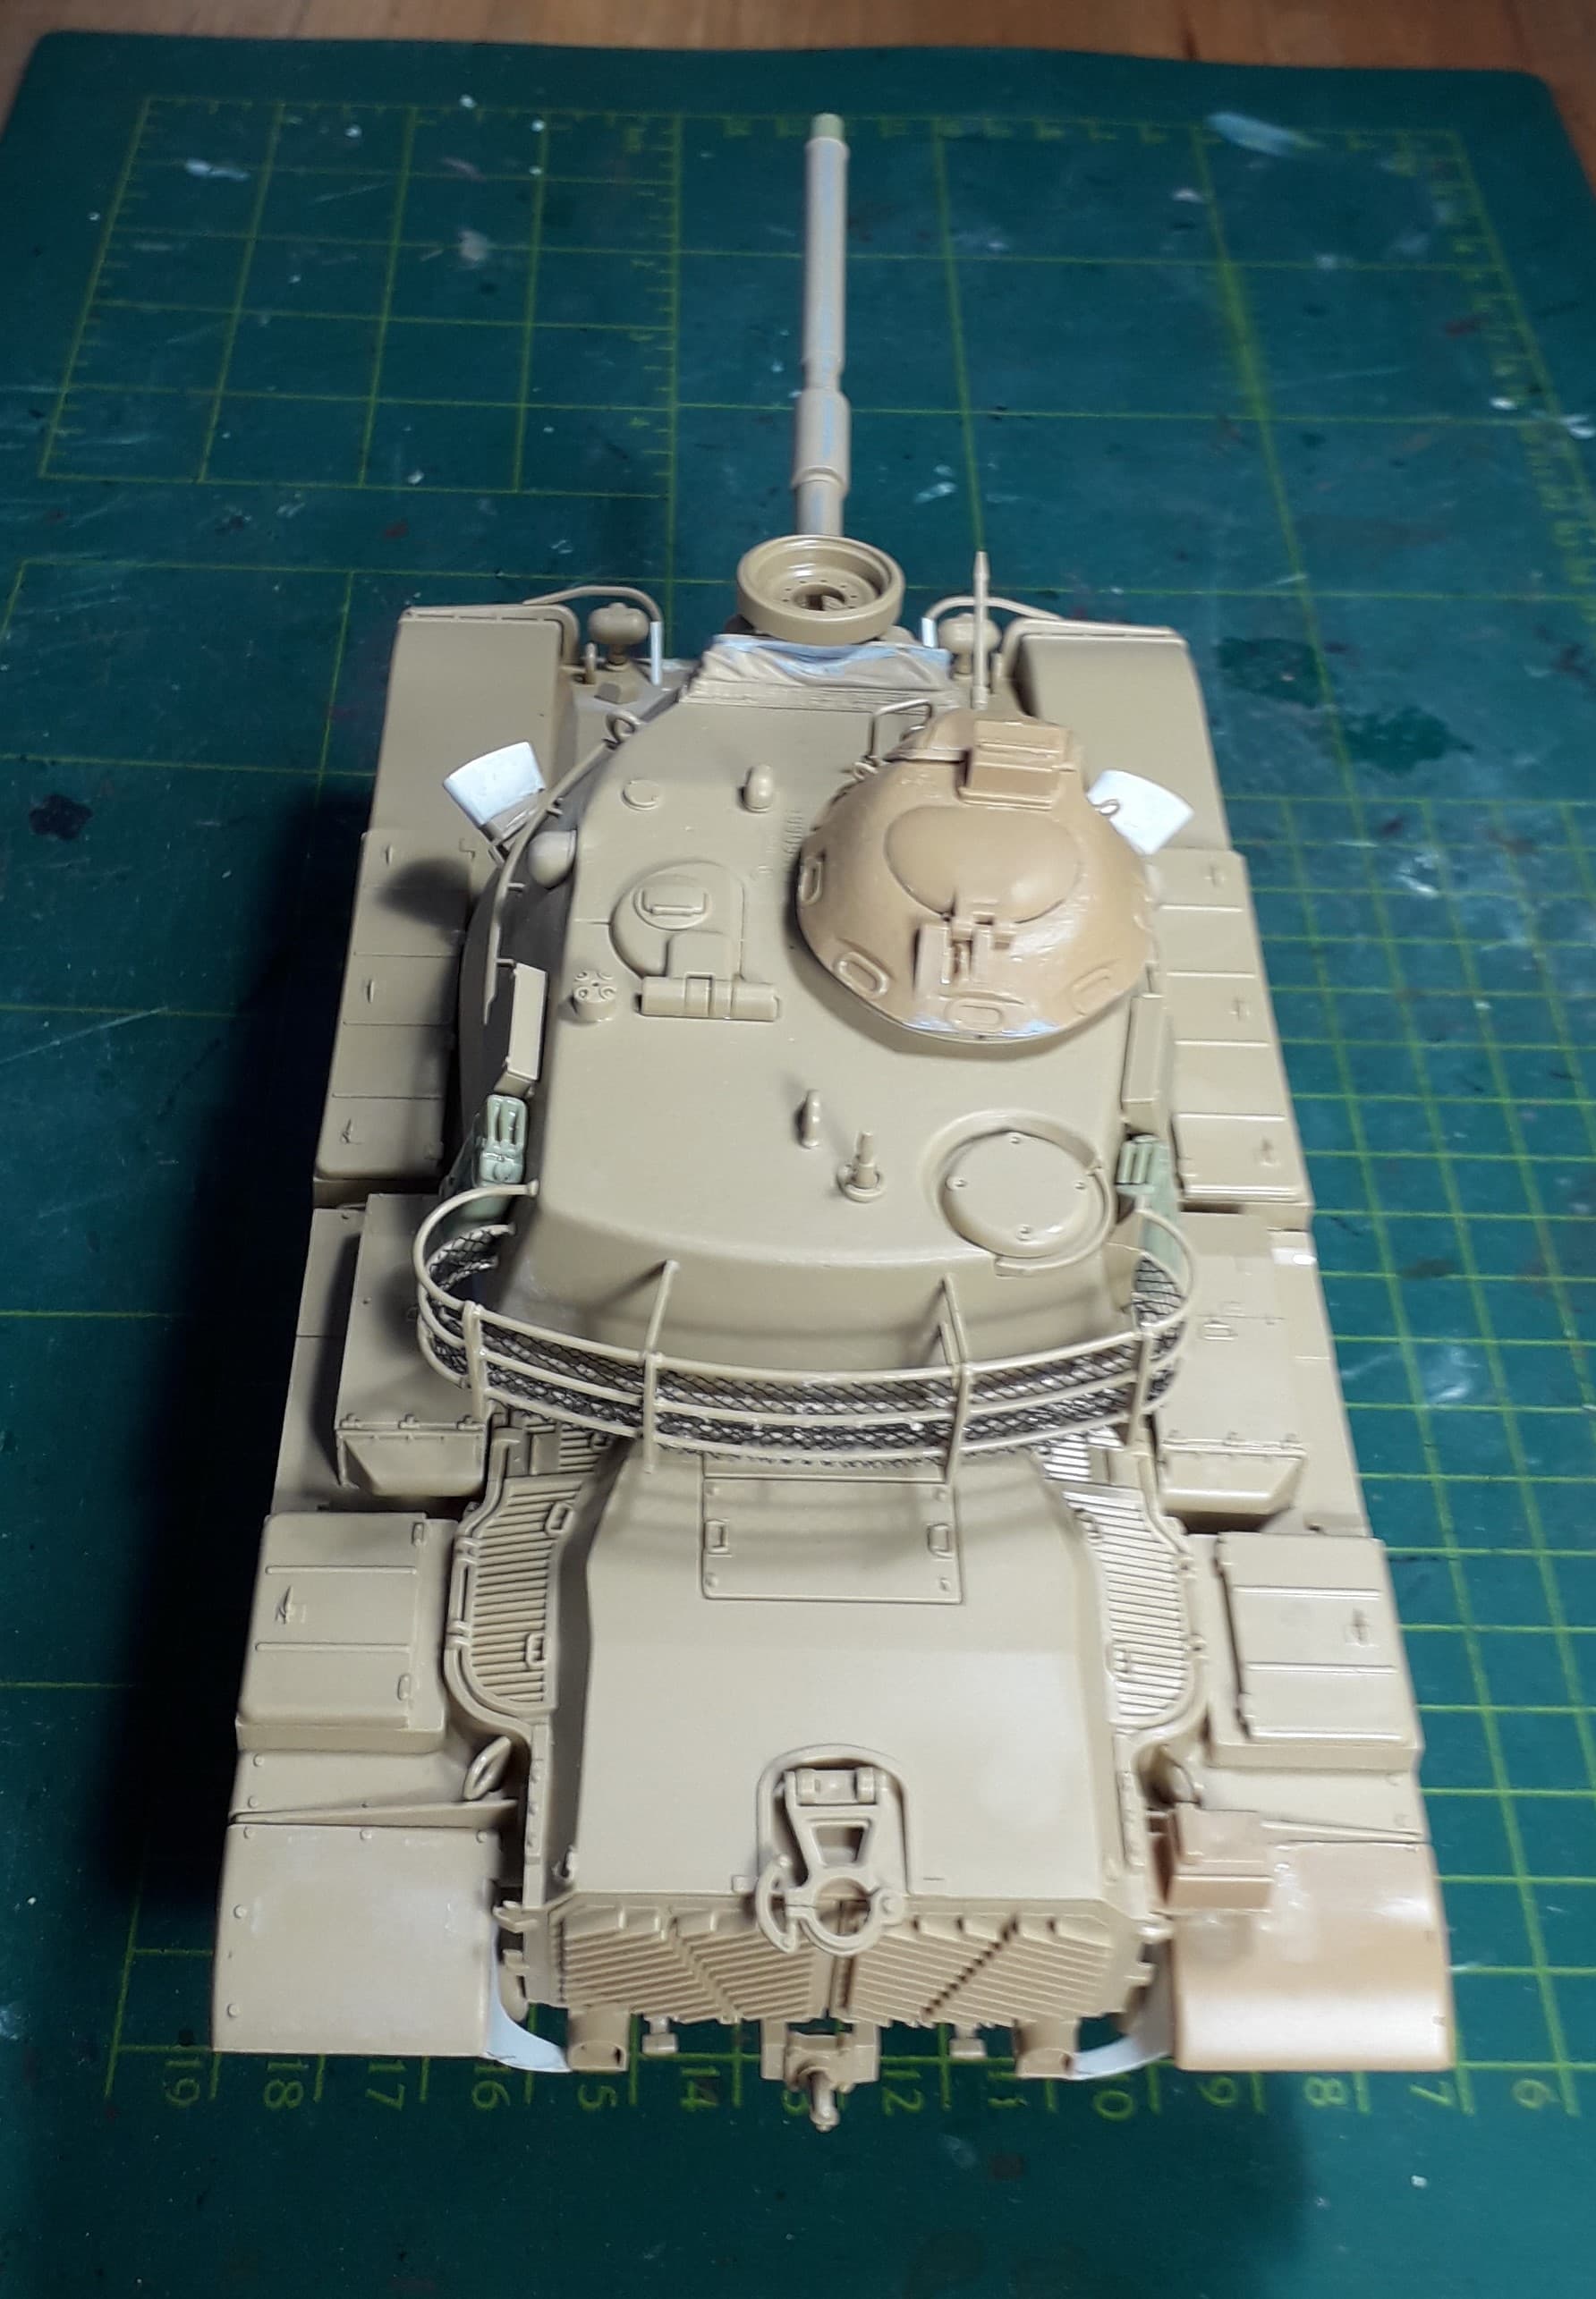
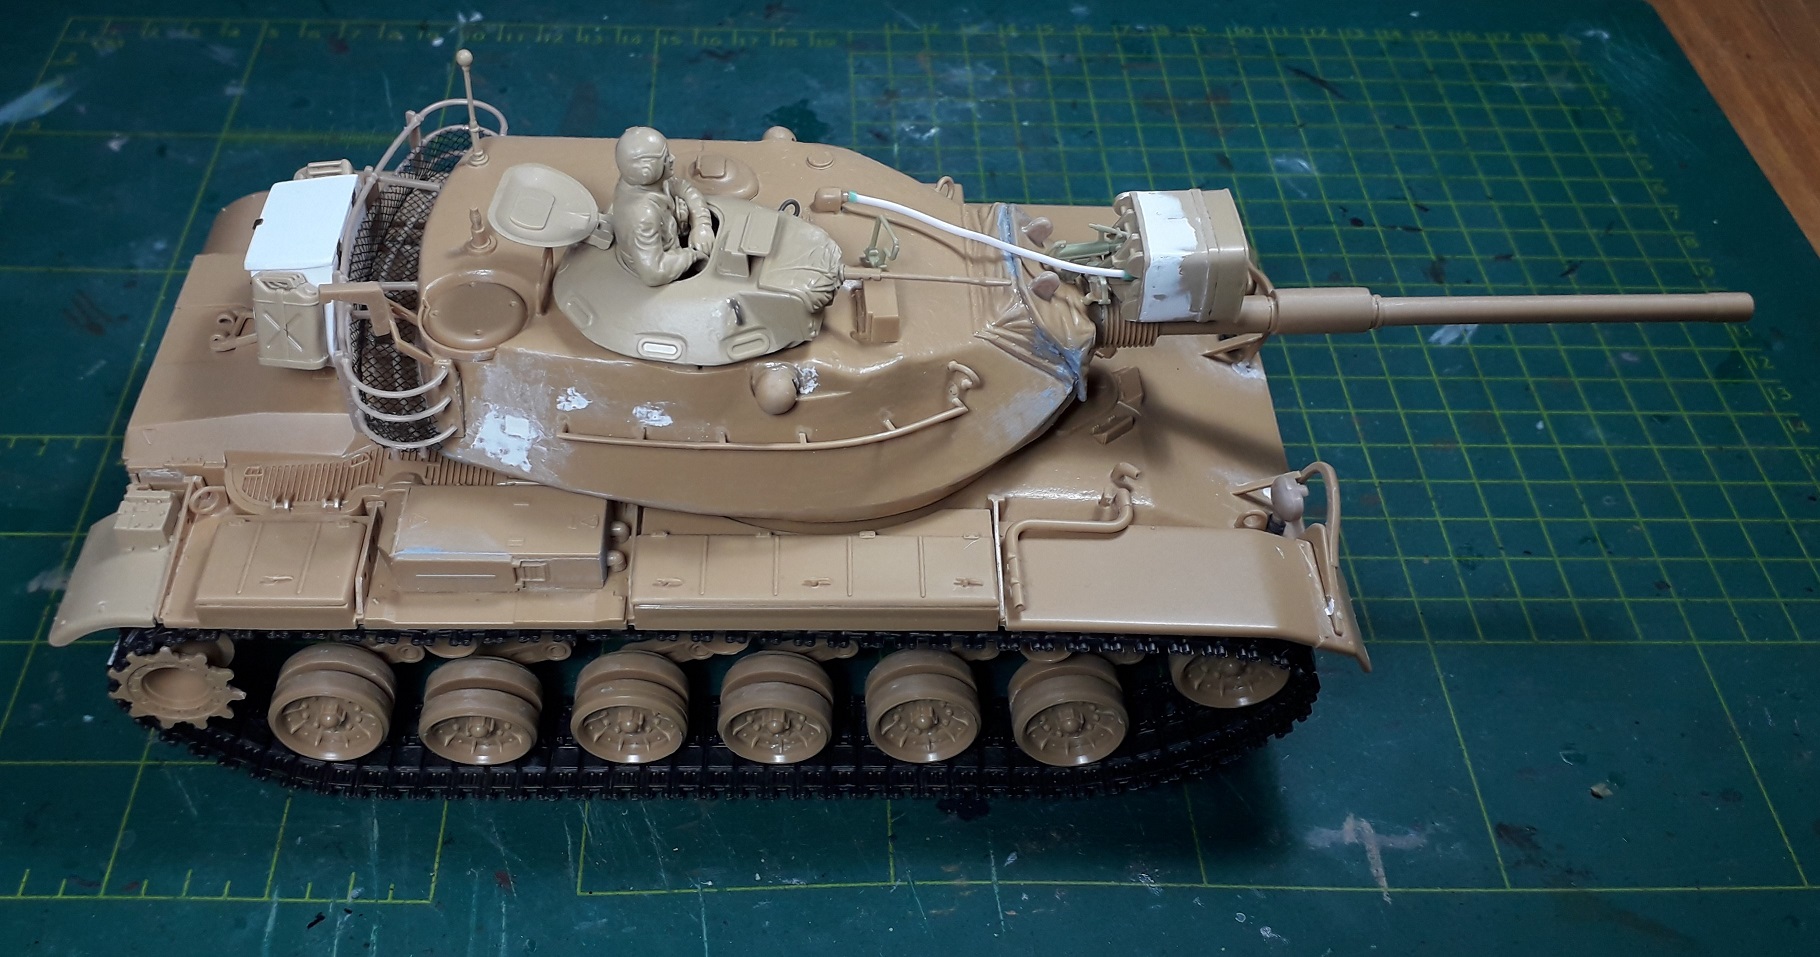
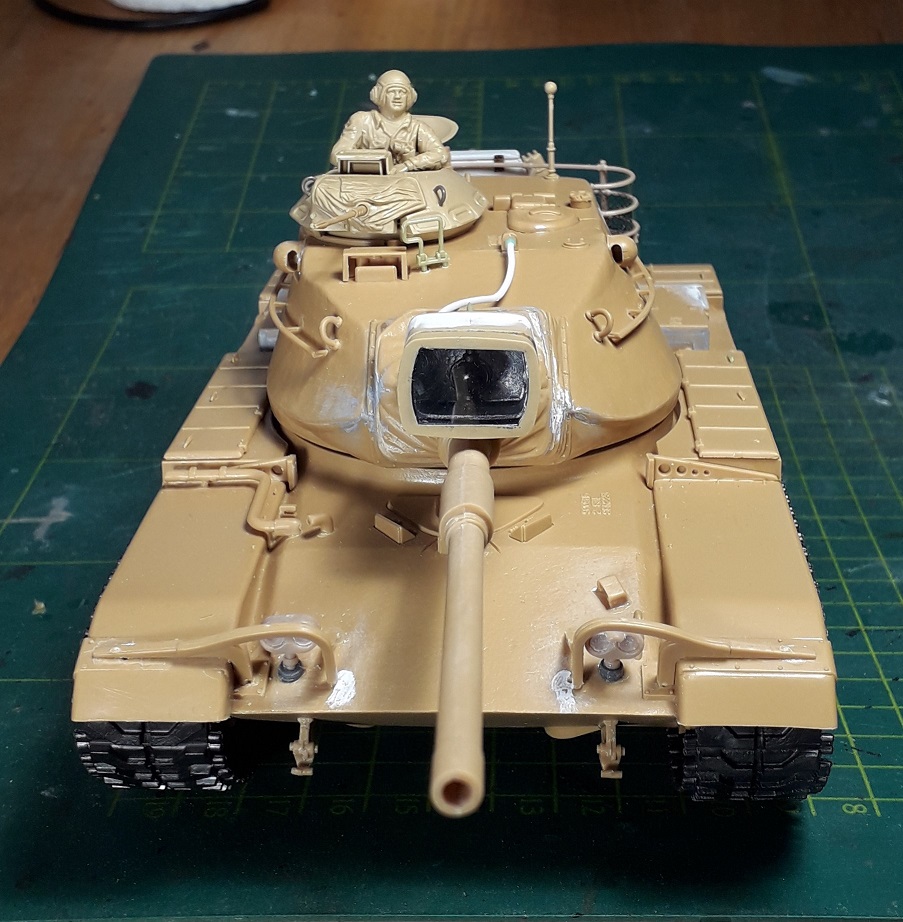
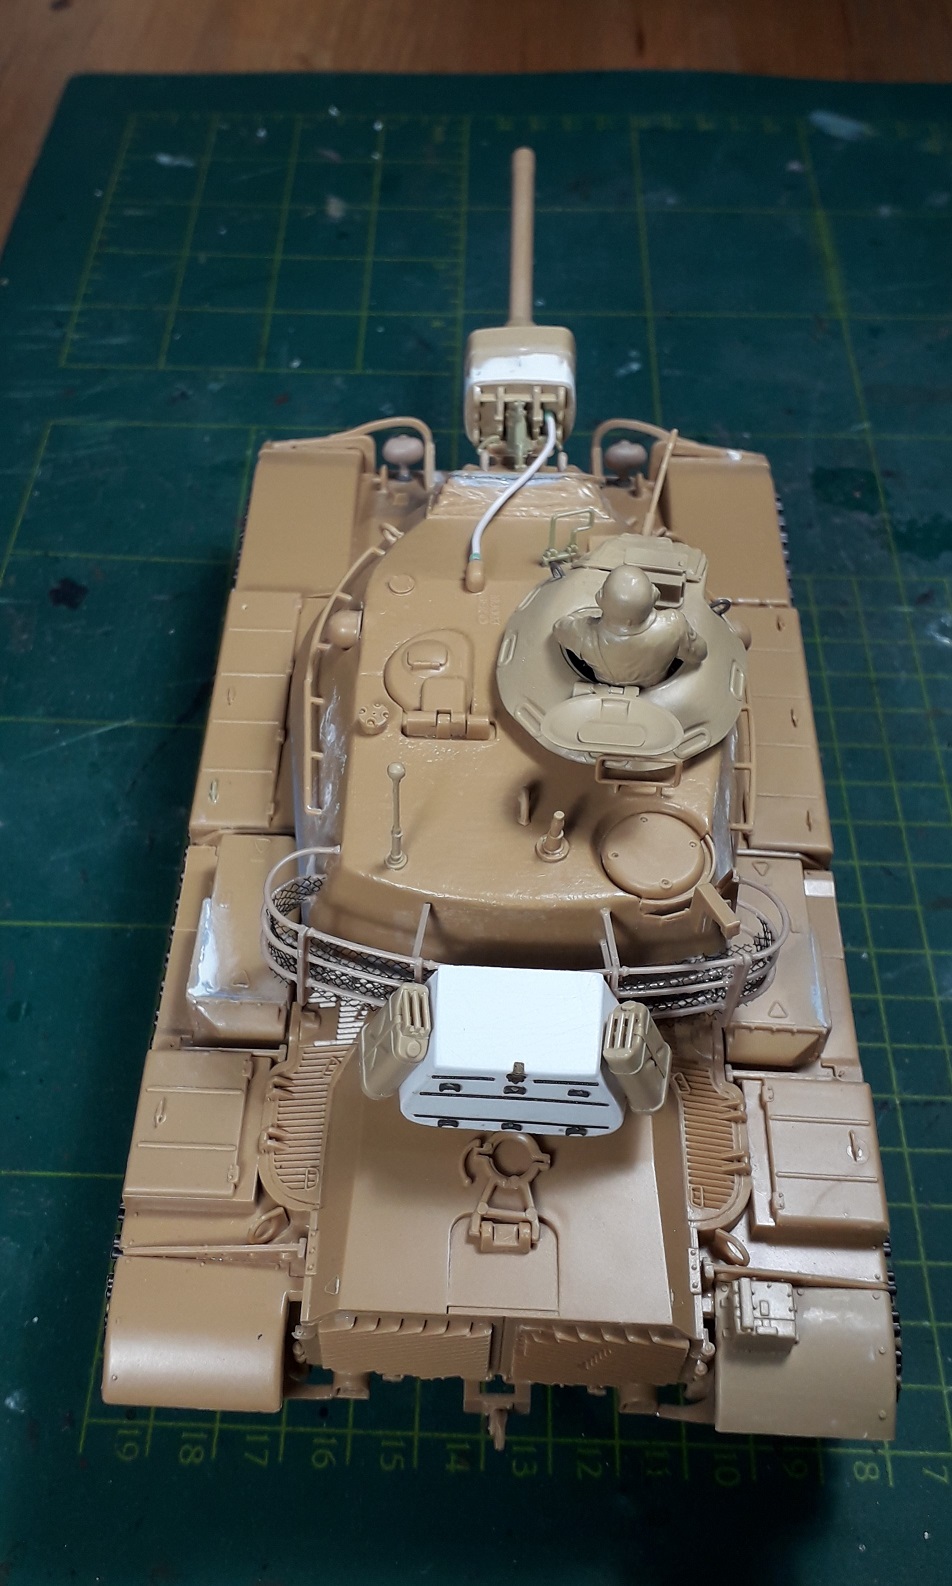
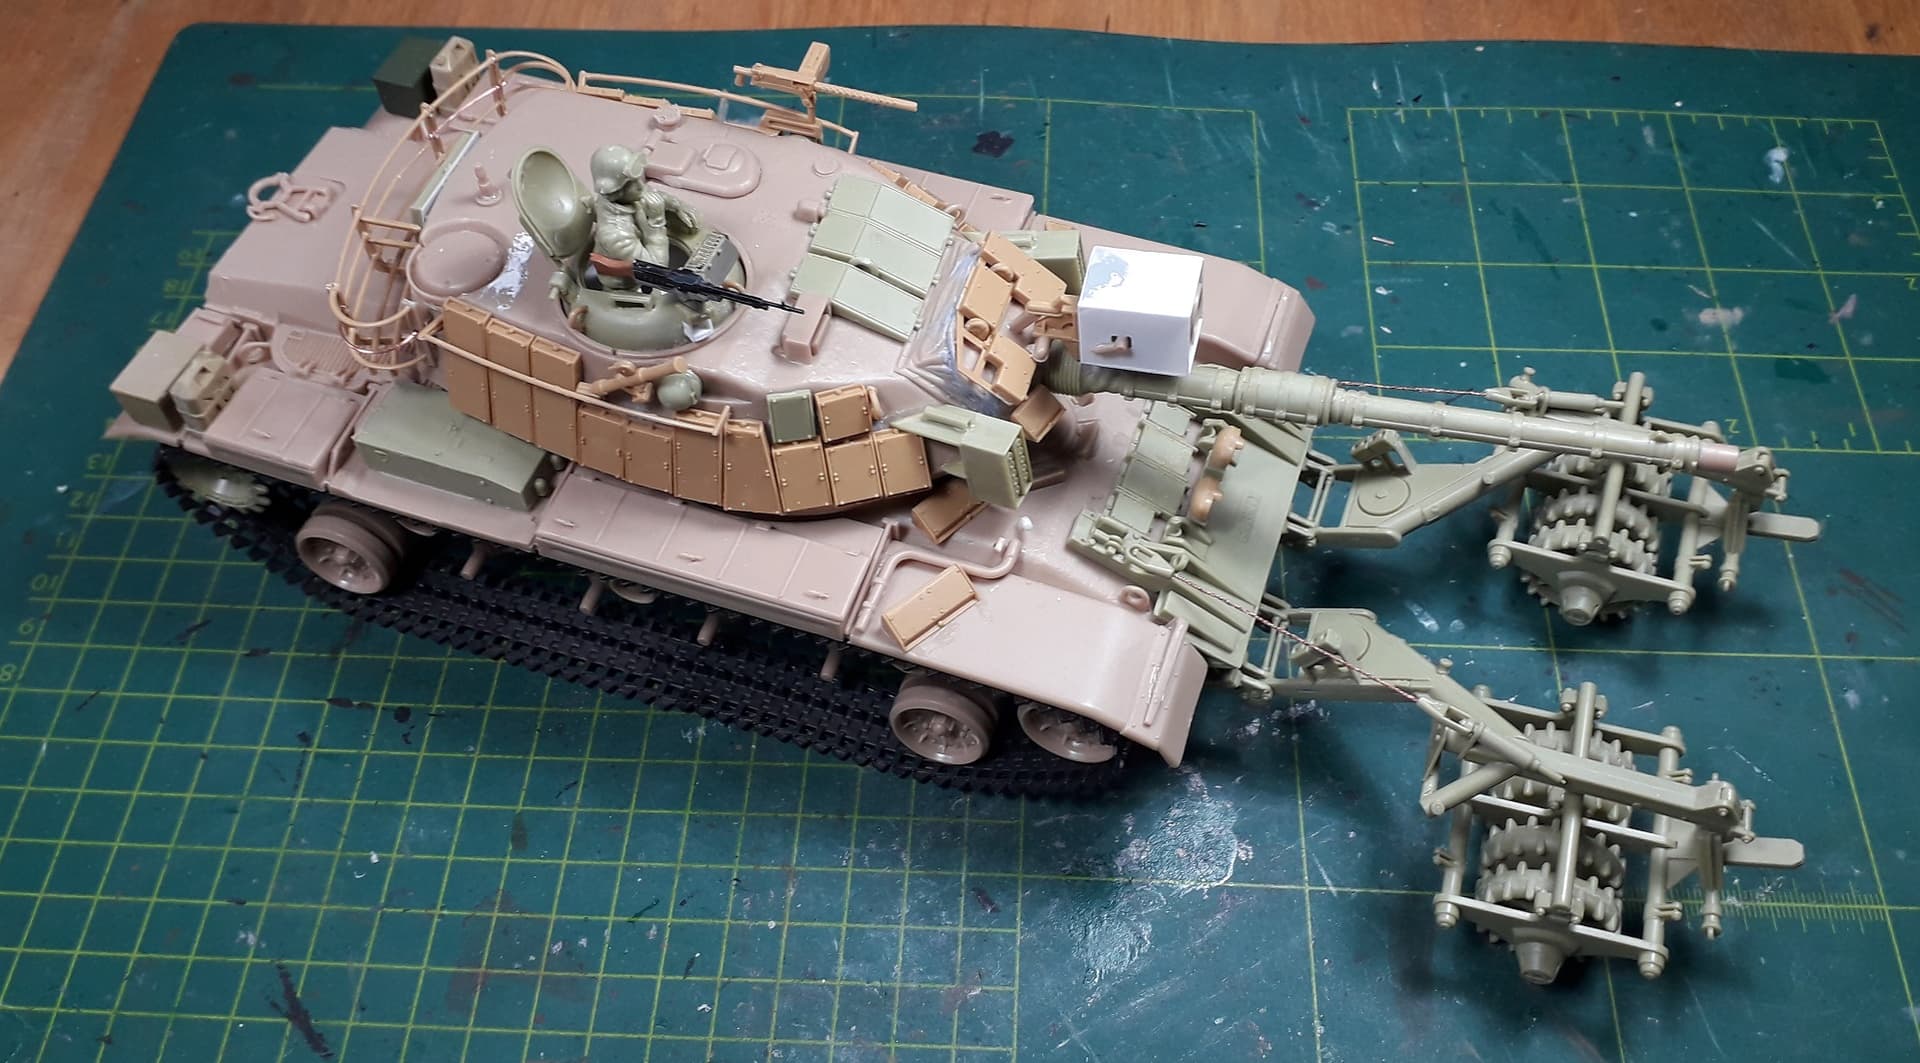
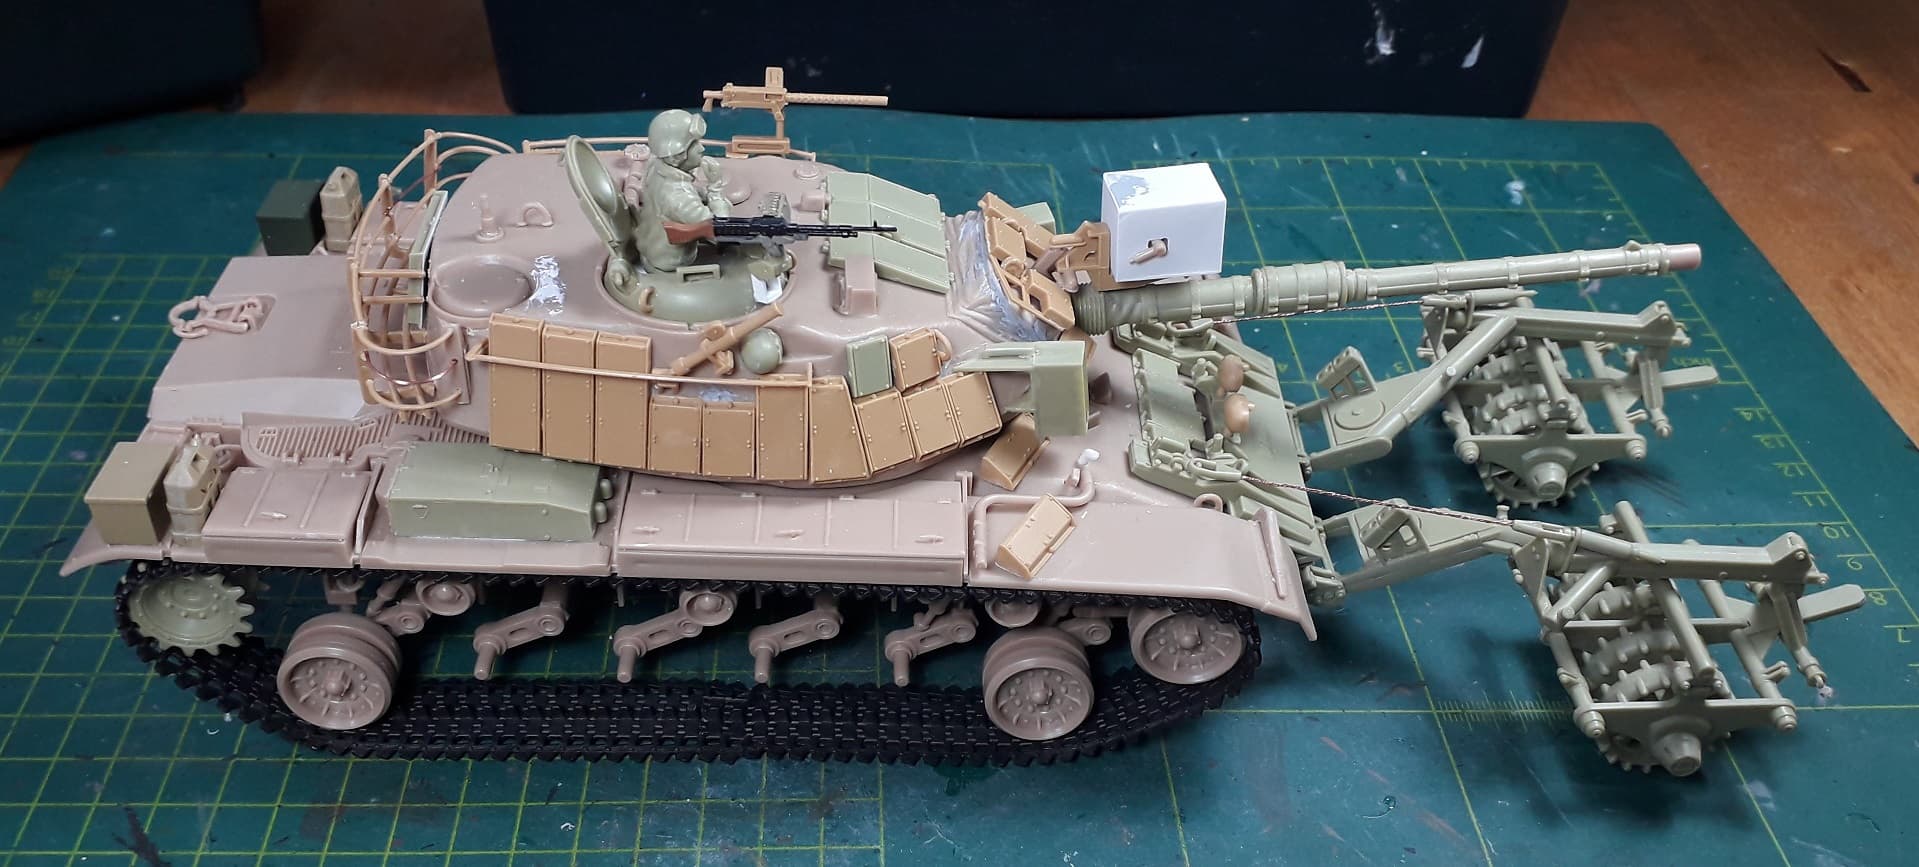
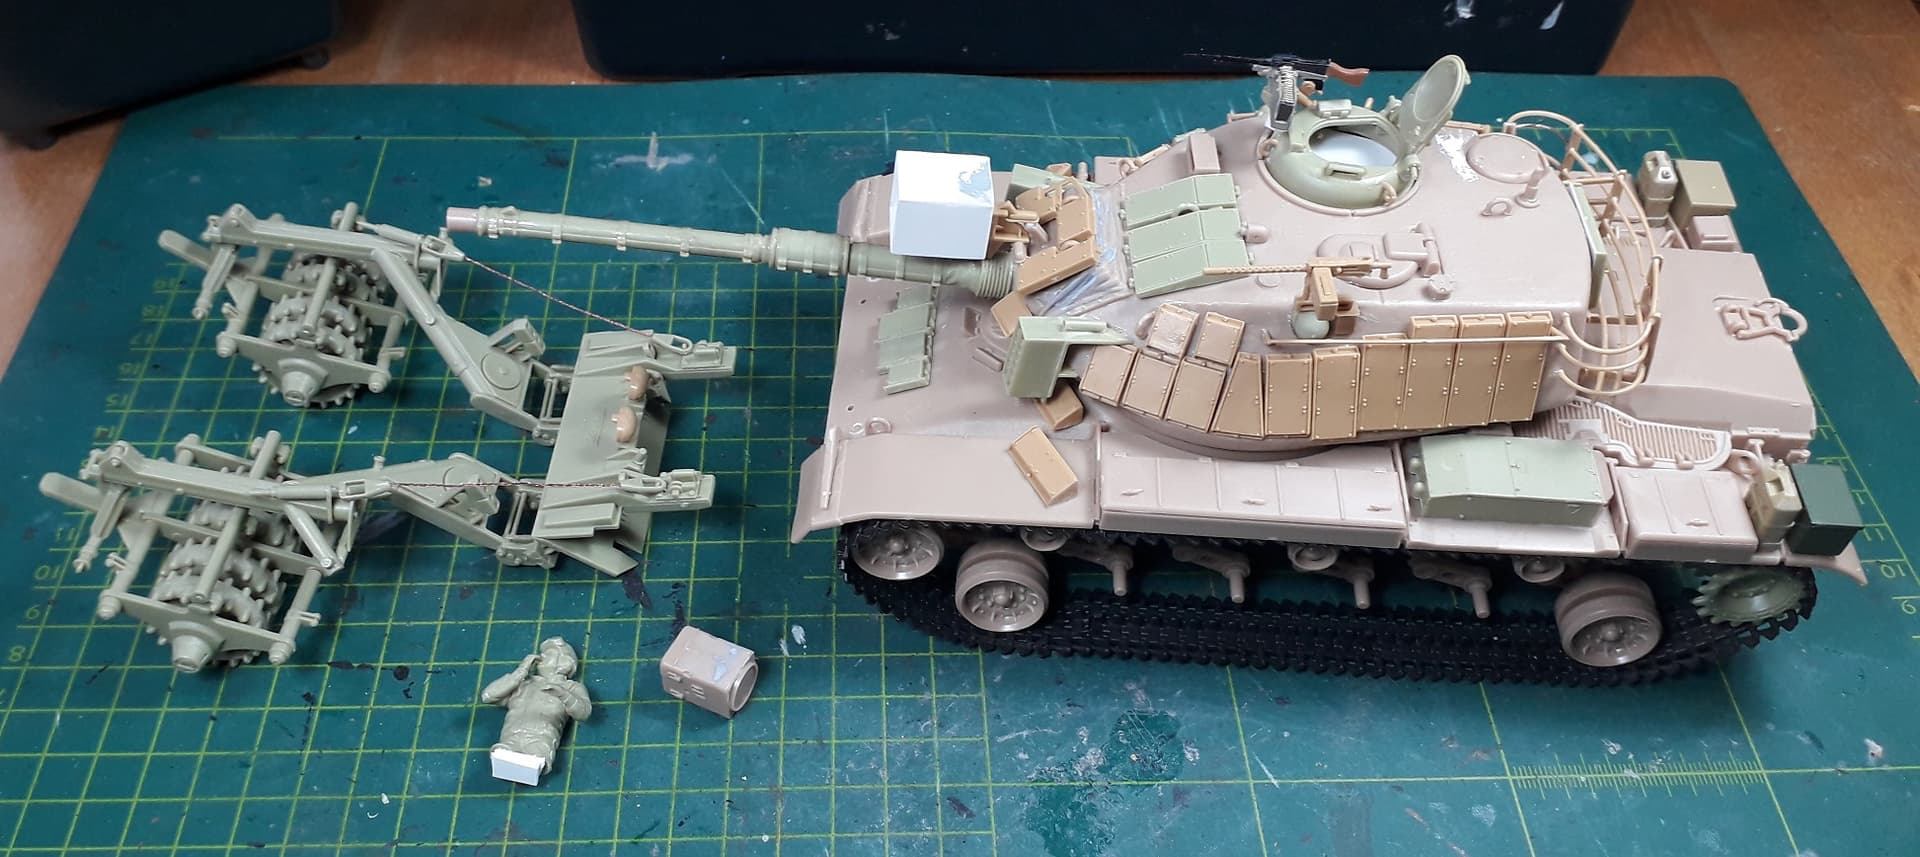
The Magach is practically done, construction-wise.
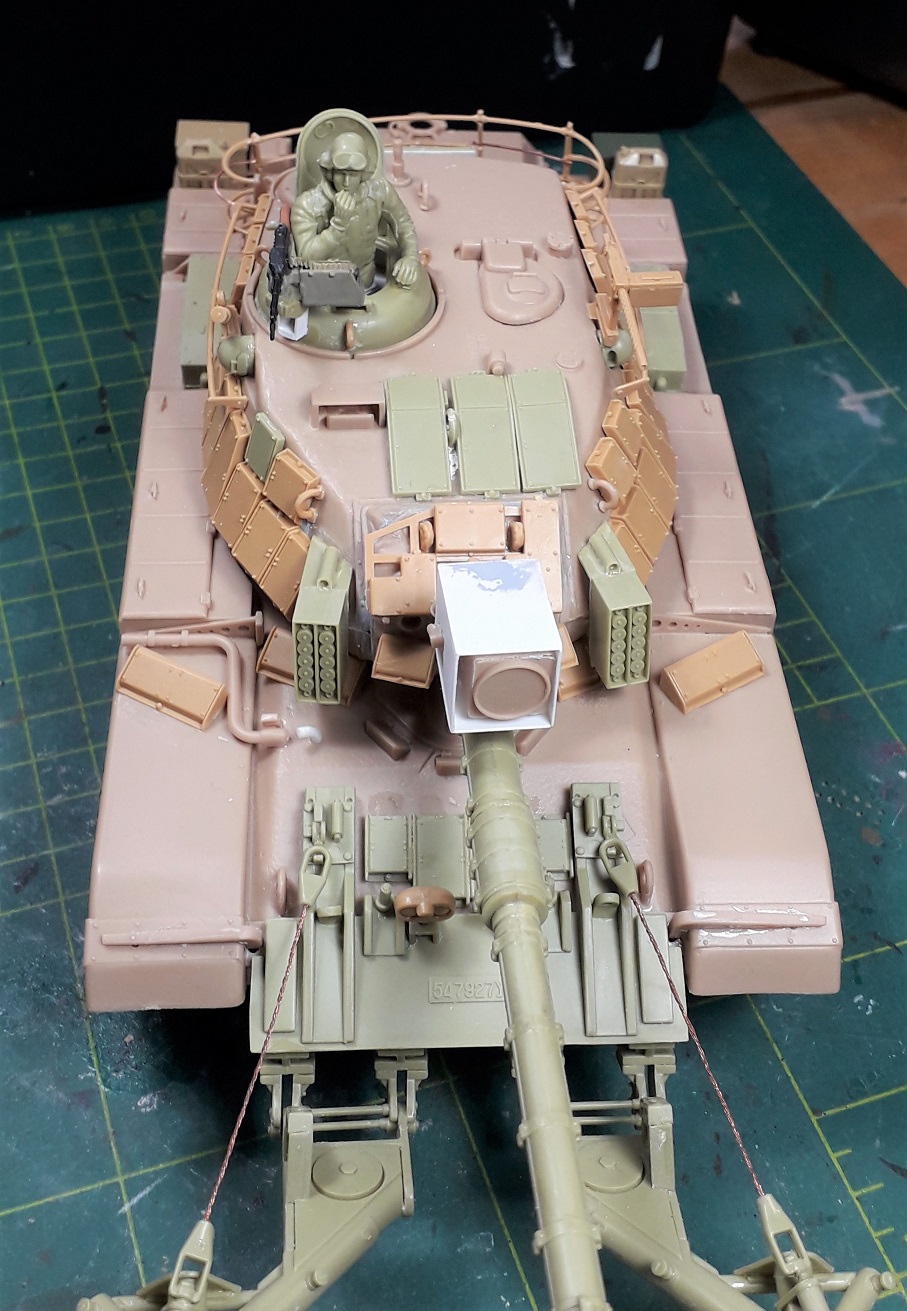
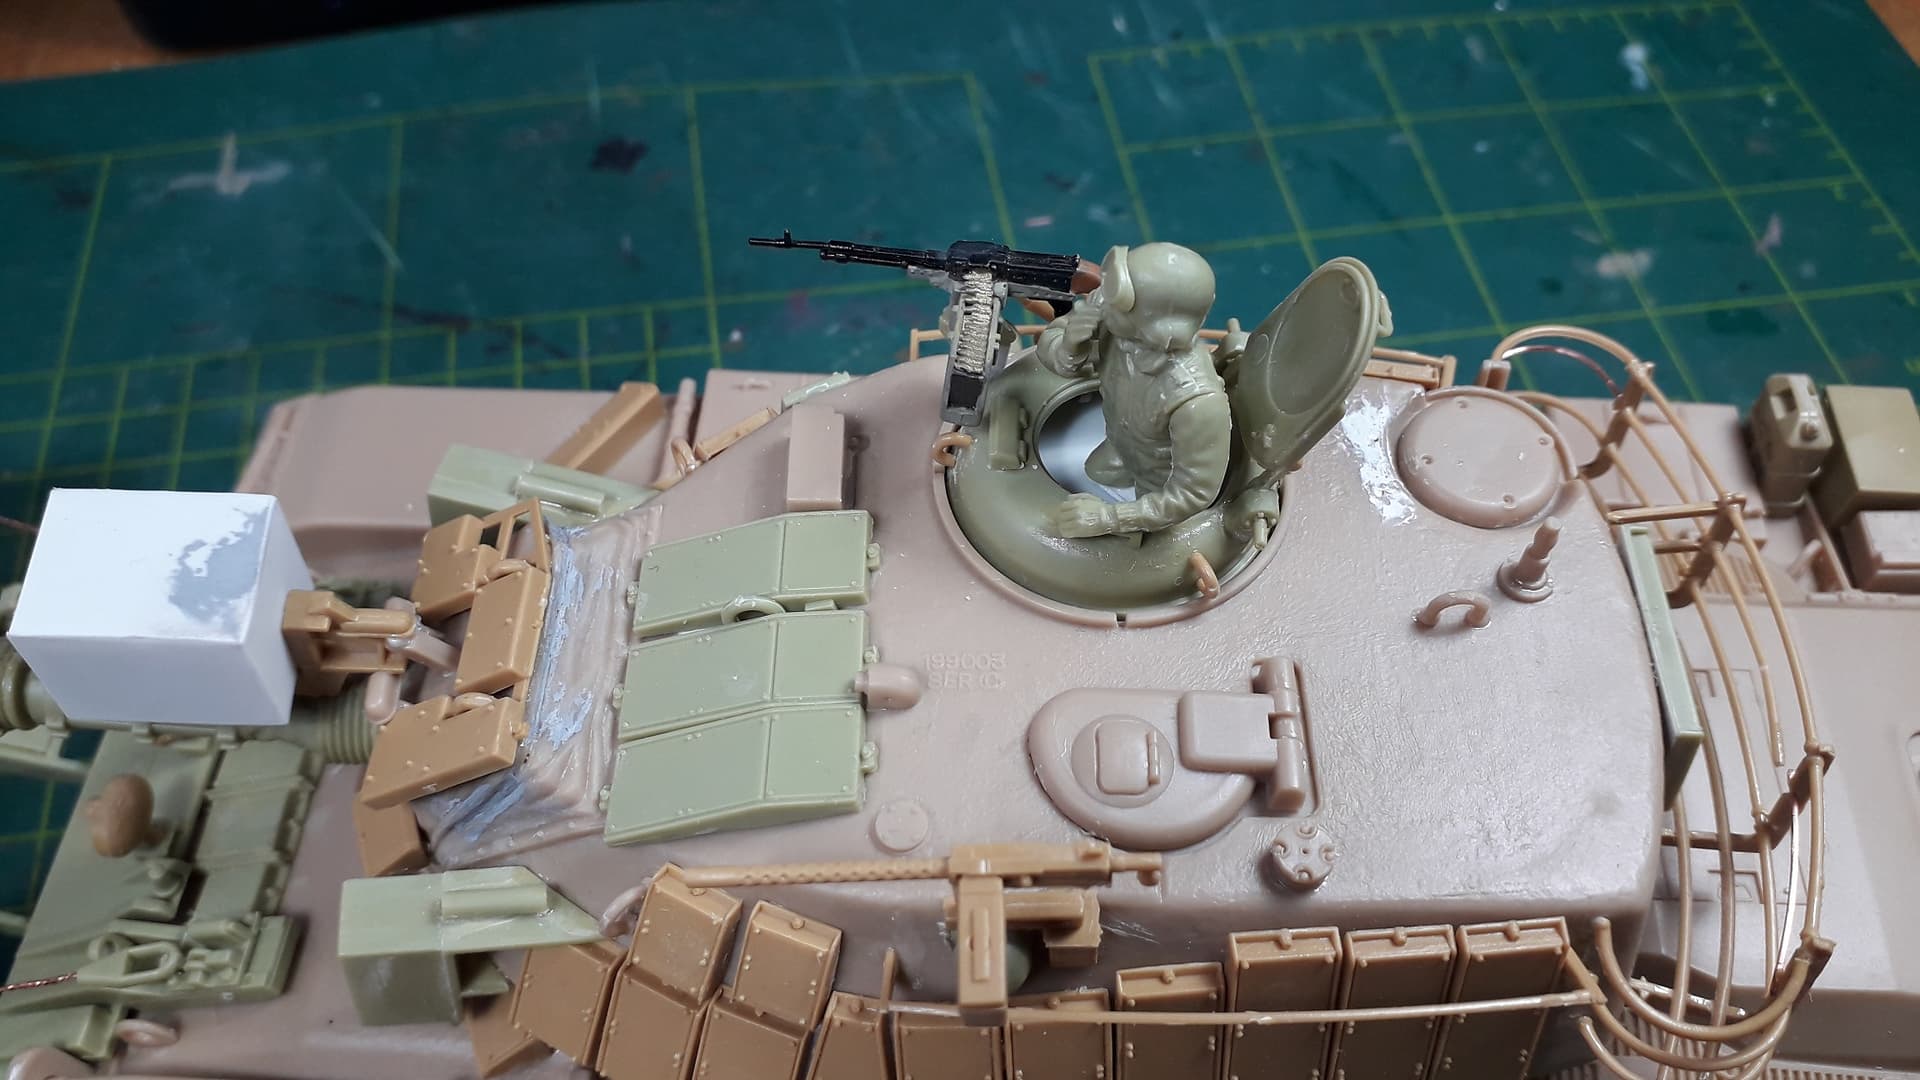
I was doing the front .50-assembly until my eye fell on something else; a searchlight, but different. I think it is a US xenon-light, but with protective case. So, me being me, I went with the oddball-option, since I figured everyone would do the .50. I used the light and built a box. It is hard scratching a square box.
I also mixed and matched the ERA blocks, since most M60’s appear to do so too.
The mineroller was a pain in the rear, especially the cables; these were too short. I can not get them to align either.
Threw in some extras on the rear and ditched the loaderfigure. He would not fit around the hatch. Command will be standing “in the dark” from the thighs down. I filled the hole and will paint it black.
8 Likes
All well and good, but now comes the hard part; painting!
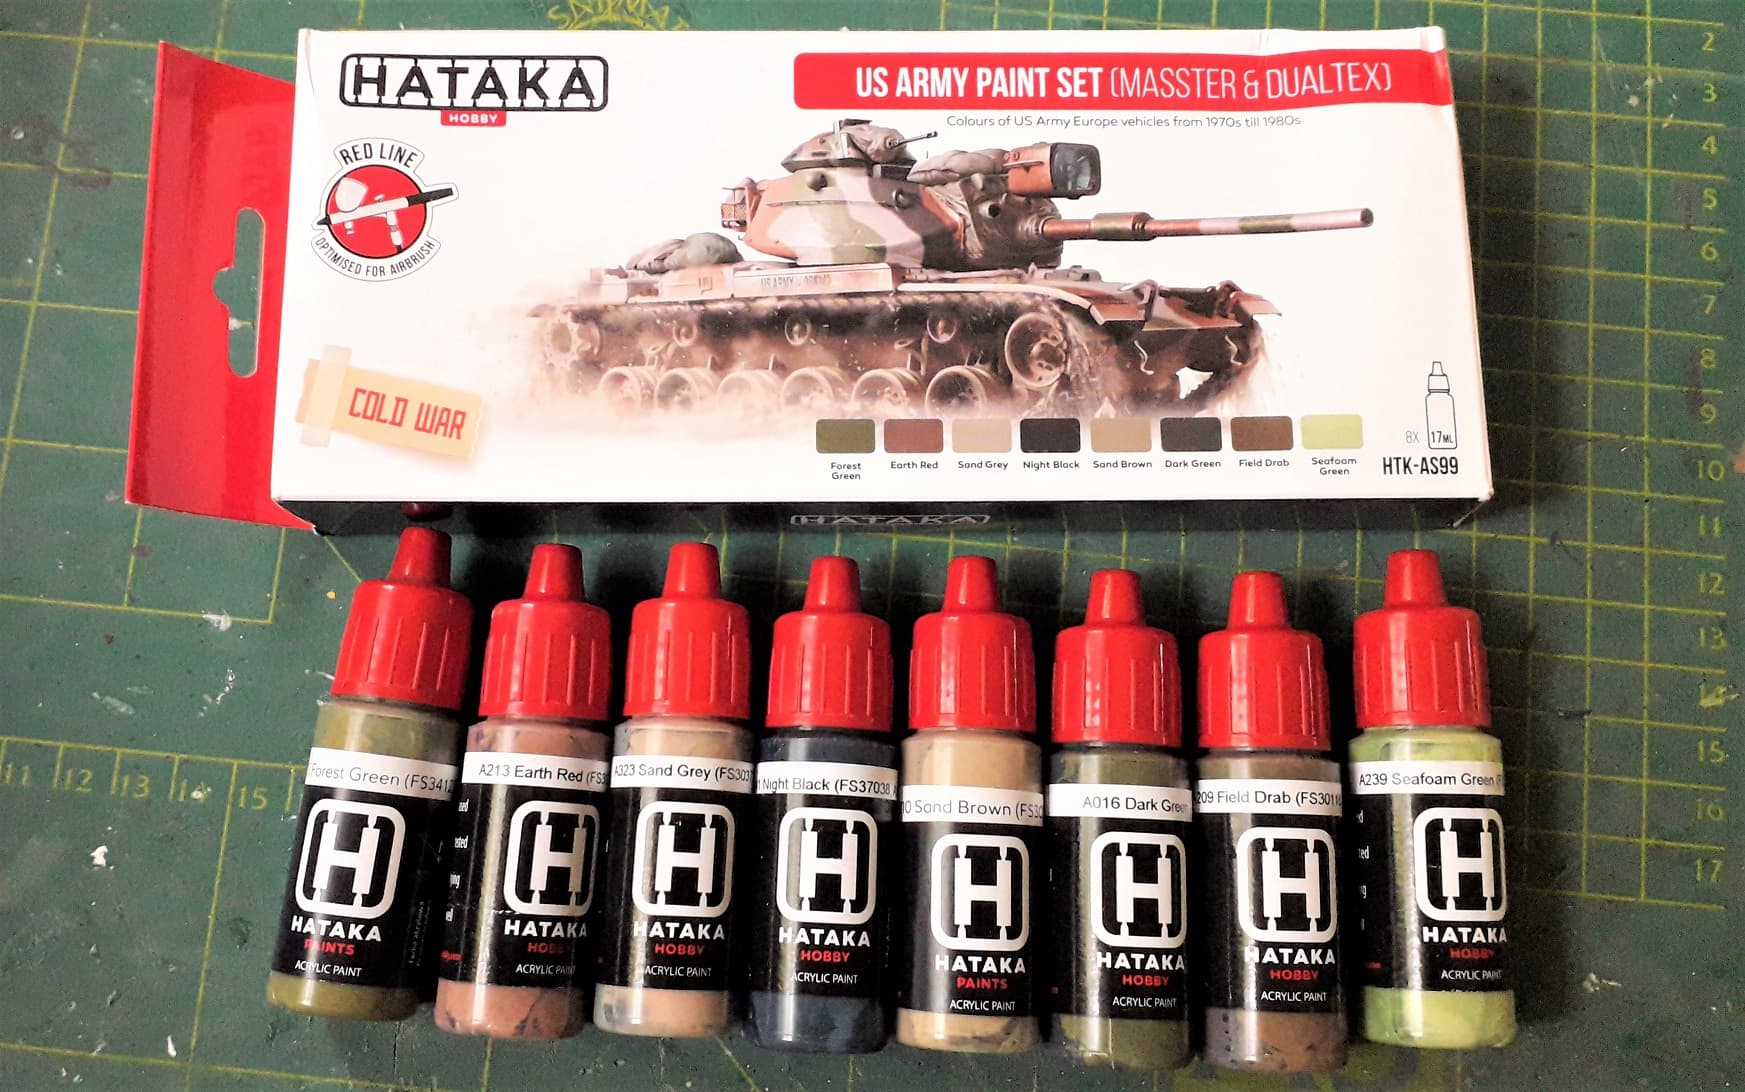
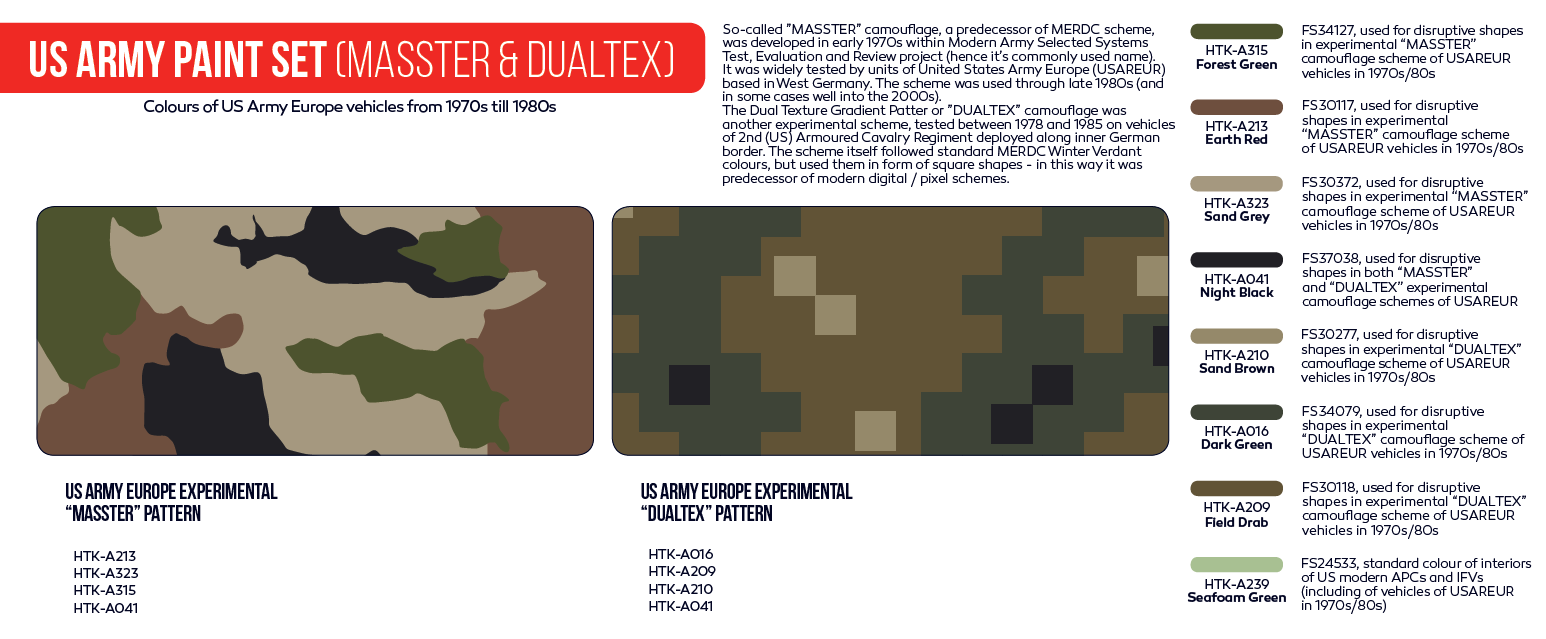
I got this set from Hataka, which gives the colours needed for Dualtex and MASSTER.
7 different colours plus seamfoam green for interiors, allthough I am not too sure on the sand grey, which seems too dark for MASSTER. In pictures the basecolour looks much more like a light sand, almost ivory at times.
The content apparently is airbrush-ready and the jars come with pellets in them to ease the shaking process! Great thinking!
Front and content:
Back:
2 Likes
The searchlight looks like and early AN/VSS-3 Searchlight, like the o es used on the M48, inside an armored box.
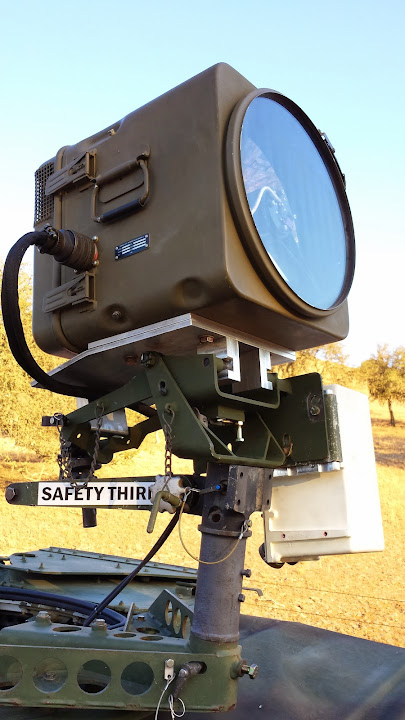
1 Like
Ron, you will love shooting Hataka paints. They are easy and beautiful to use and give a great finish straight out of the bottle. No thinning required. Cleanup is easy with lacquer thinner. You’re going to be very happy with your paint jobs!
I have the acrylic version, so cleaning should be easier still with water.
1 Like
Indeed it is. This light is included in the Academy/AMT-kits.
1 Like
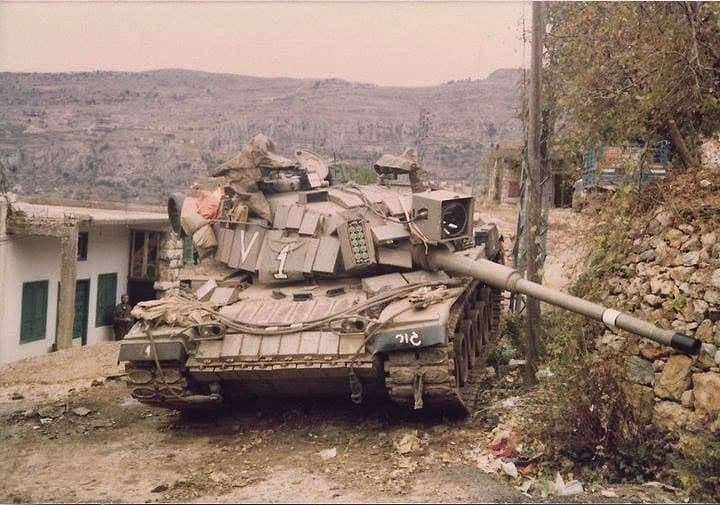
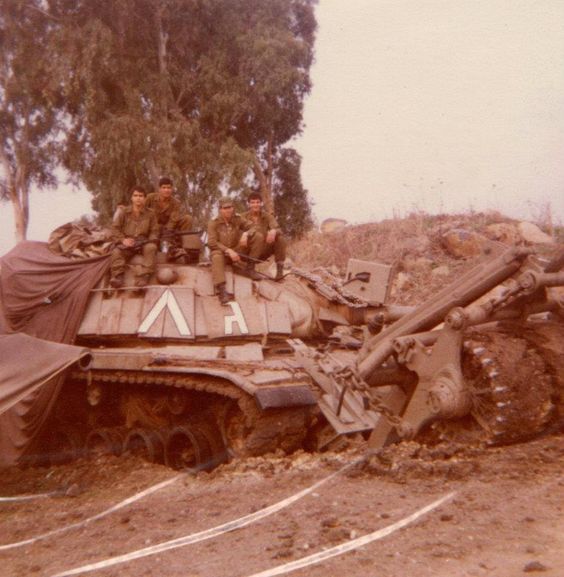
That’s 6 Bet Gal. The 5 was based on the M48.
The purple air recognition panels indicate the photo was take during the initial phases of the First Lebanon War in 1982. The 6 Bet Gal came out in the early '90s.
Before it was dismantled in 2003, the brigade was equipped with Magach 7s.
The 401st was equipped with Magach 6 Bet Gals before transitioning to Merkava Mk.4s in 2004.