Very helpful! I’m away from the workshop but will study these as soon as I get back. Cheers!
2 Likes
The build continues.
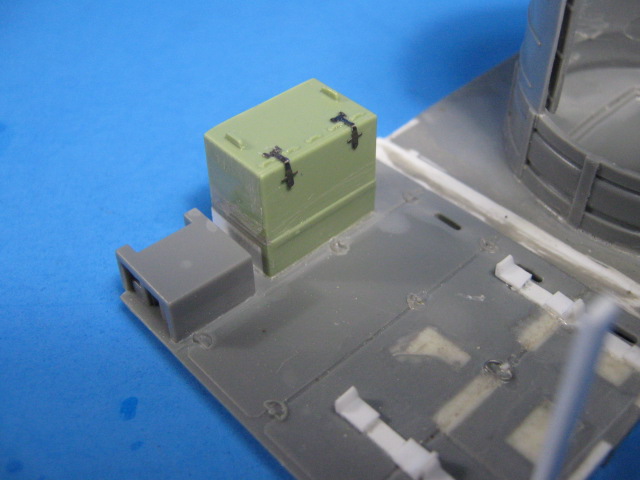
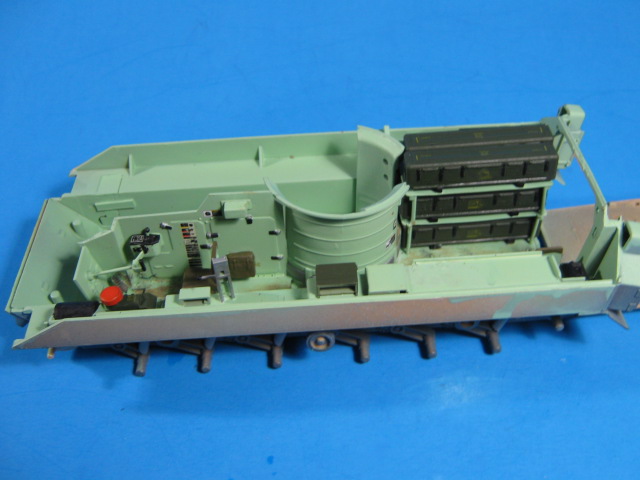
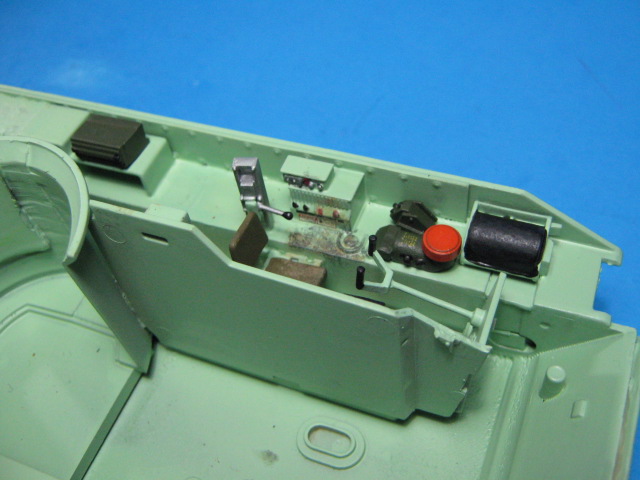
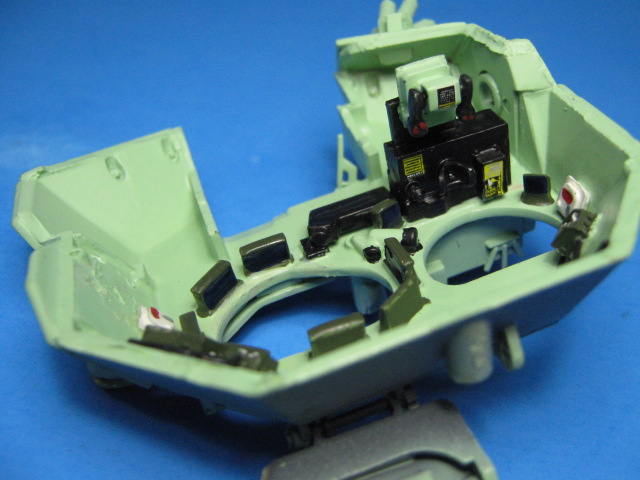
I added a bit more detail in the crew area with PE straps on the Battery Charger/Stowage box.
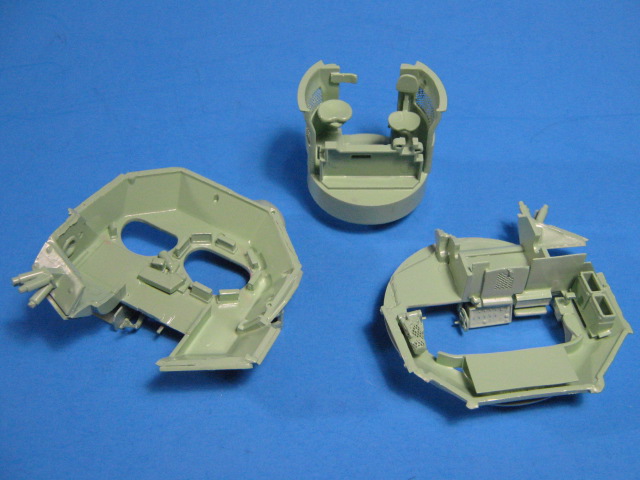
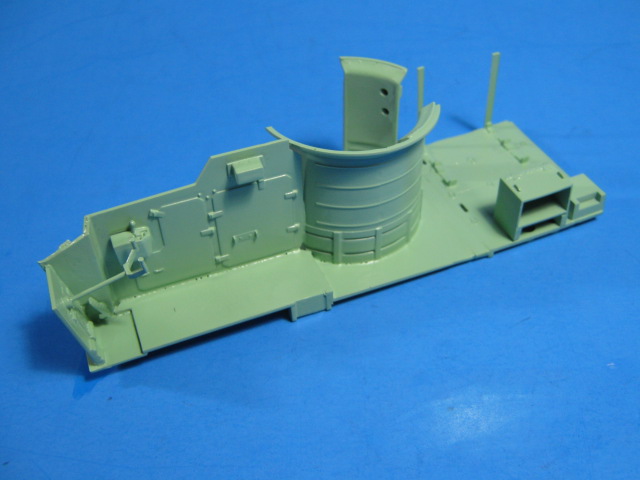
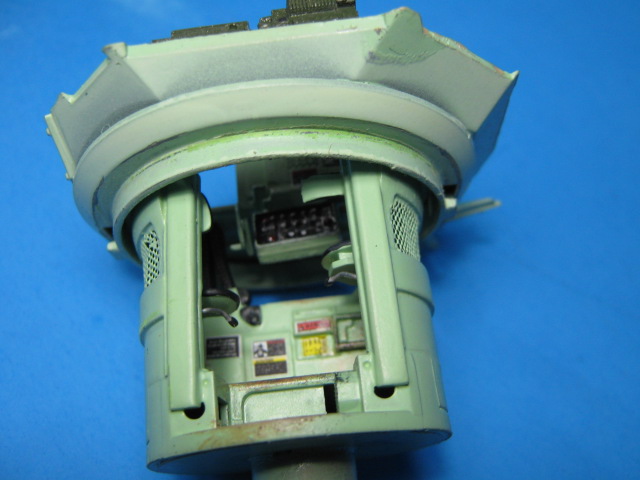
I also built up the Meng turret interior and added parts to complete the details on the kit turret interior. These included a front wall, vision blocks, kidney and arm pads, a seat (that Meng missed, only putting the platform under it) for the TC, and detail parts from Meng. I also built a radio shelf at the rear of the turret.
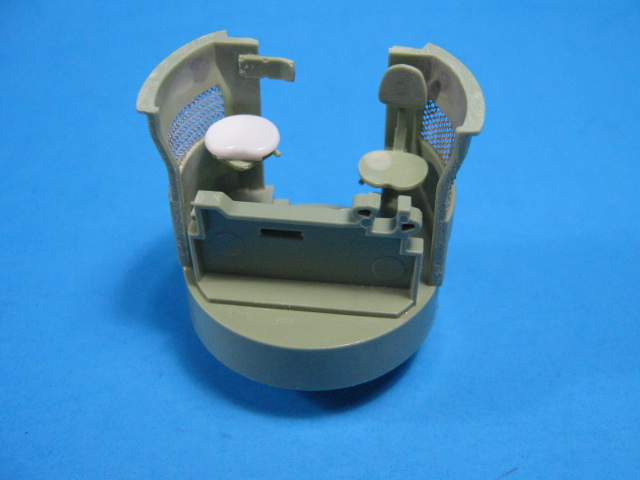

I added vision blocks/periscopes and a handle to release/lift the hatch with.
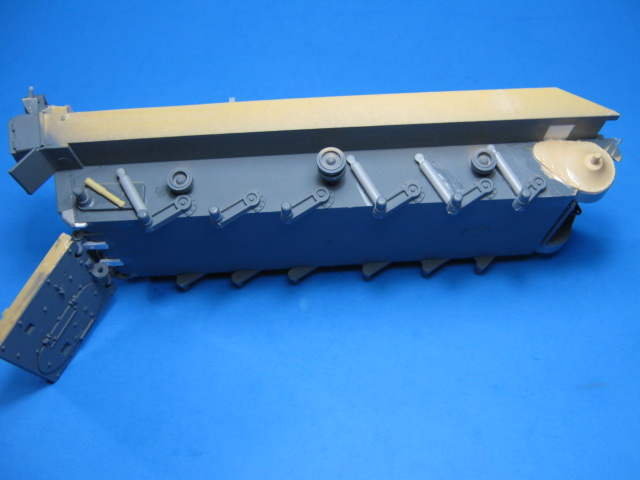
On the exterior, I added some PE and detail parts up top. I also added shocks and detail parts to the lower hull. I will be using the sprockets, idlers, and roadwheels from the Oroche/Kinetic kit as well as their indi-link tracks.
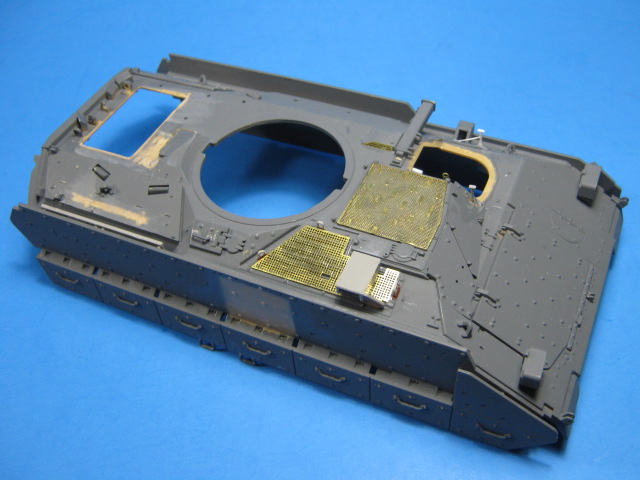
Next up is paint and adding a bunch of detail parts on the interior.
5 Likes
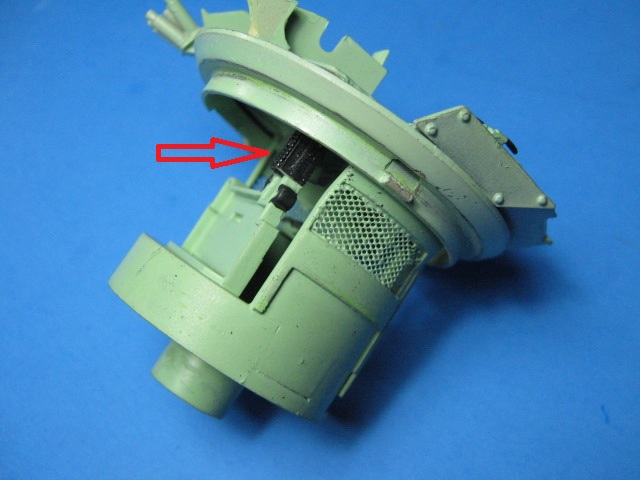
Looks great. Since you’re using Meng’s interior parts on the Academy kit. How much modding you had to do to make all the parts fit? I’m curious to know.
1 Like
I just got my hands on this kit. I saw the video he posted on YouTube and how he built the whole thing and I’m glad he got these done.

Tamiya 1/35 M2 Bradley Corrected Replacement Suspension | eBay

3 Likes
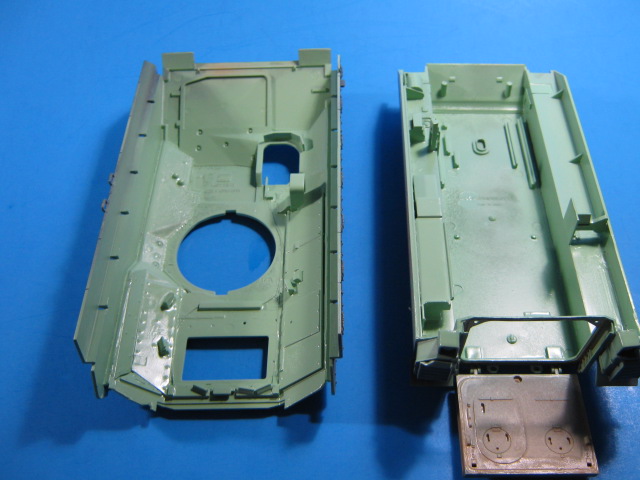
The interior parts fit pretty well, just a bit of sanding here and there to get it to fit right, but nothing much. The biggest mod was to the Tamiya floor to make the turret ring line up under the opening in the Academy M2A2 roof.
I did pretty much the same as in the video, just not w/3D printed parts. I used parts from the newer Orochi/Kinetic M3A3 kit. I ordered some extra running gear sprues off eBay.
1 Like
Very nice work so far. Following this thread.
Thanks James. I hope to get some paint laid down on it soon.
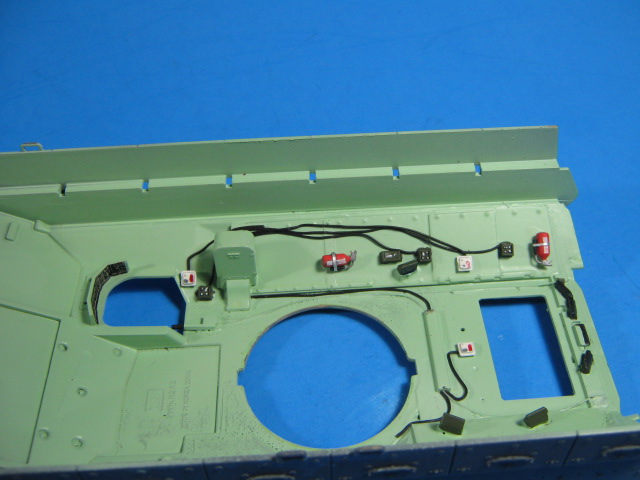
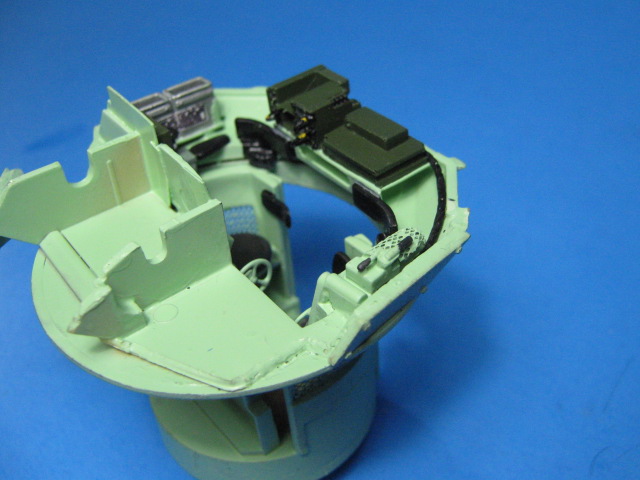
I was able to get some paint on the parts this last week.
I painted the interior parts w/Krylon Pistachio from a spray can. It is almost a dead match for US interior seafoam green. We used to use it for touchup paint on our tracks.
I also painted the seats and fire extinguishers.
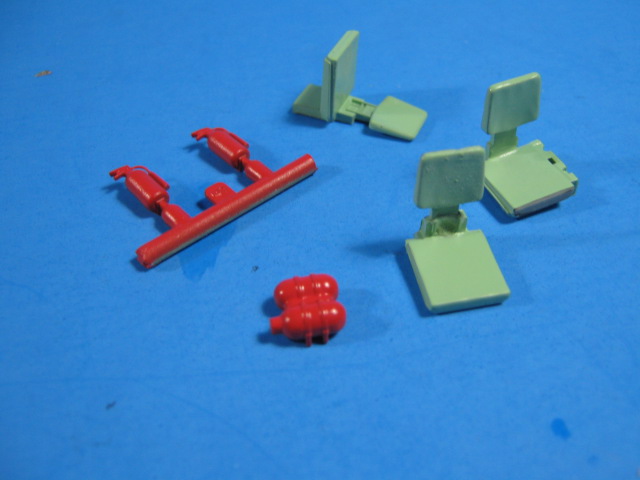
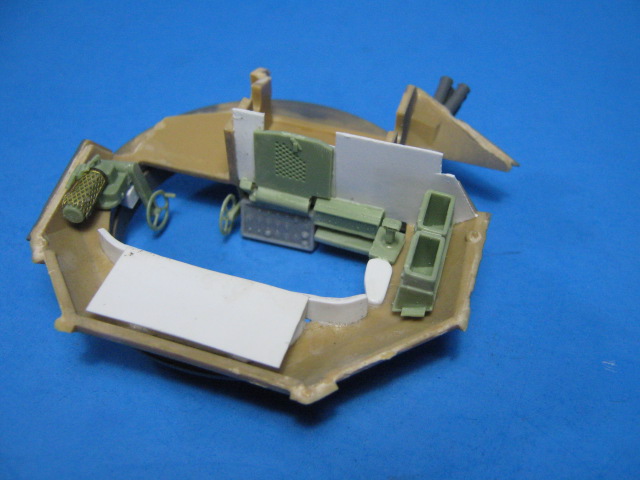
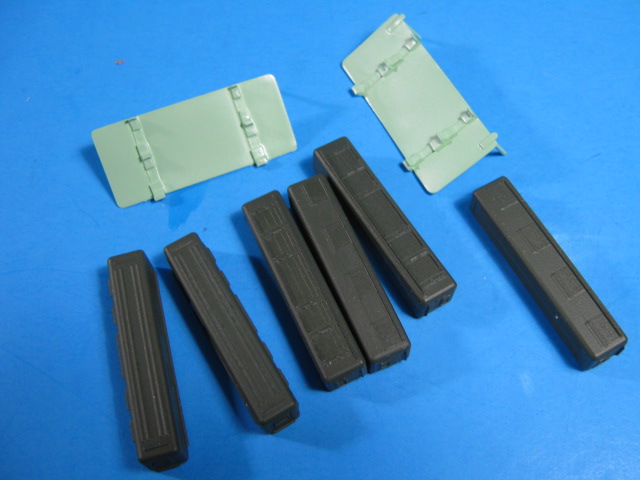
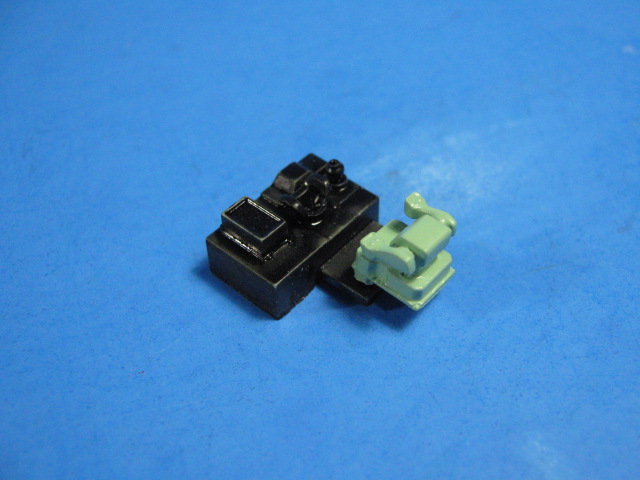
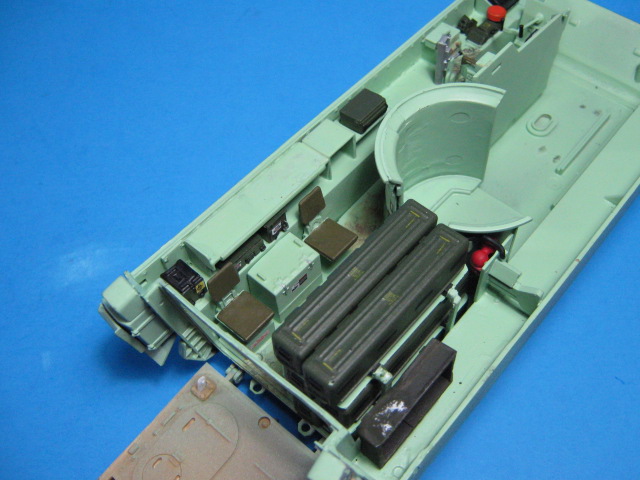
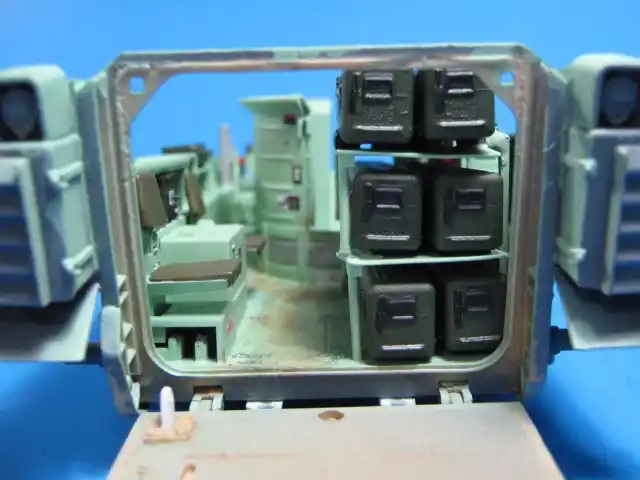
Stinger storage containers and their racks.
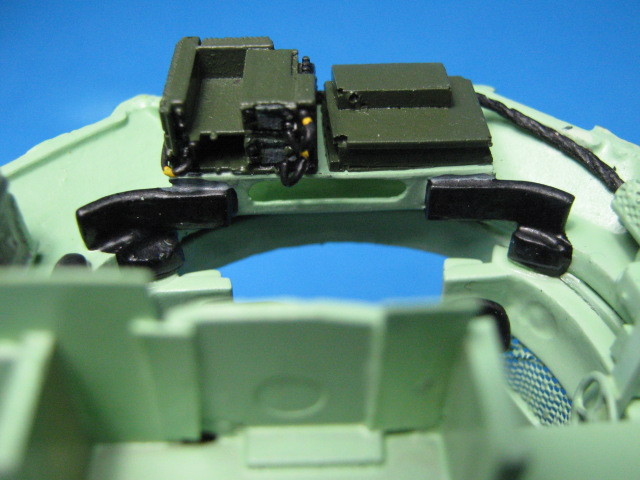
Various como gear and electronics boxes. The SINCGARS and Intercom system are 3D printed parts from our own Michael @MikeyBugs Goldberg. The rest are bits and pieces from other kits. The white lights are from the Meng M3A3 interior set.
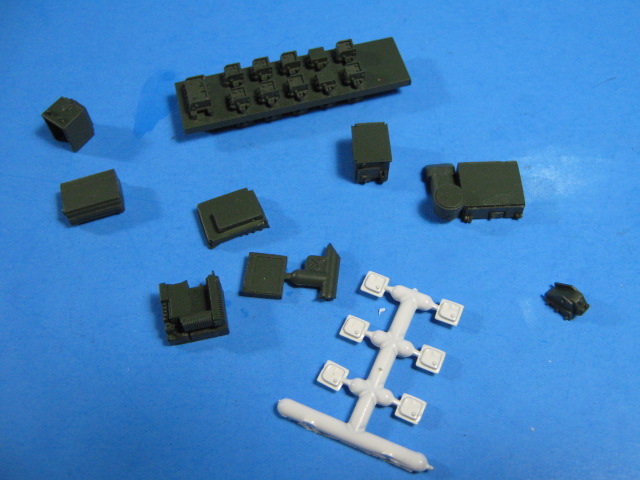
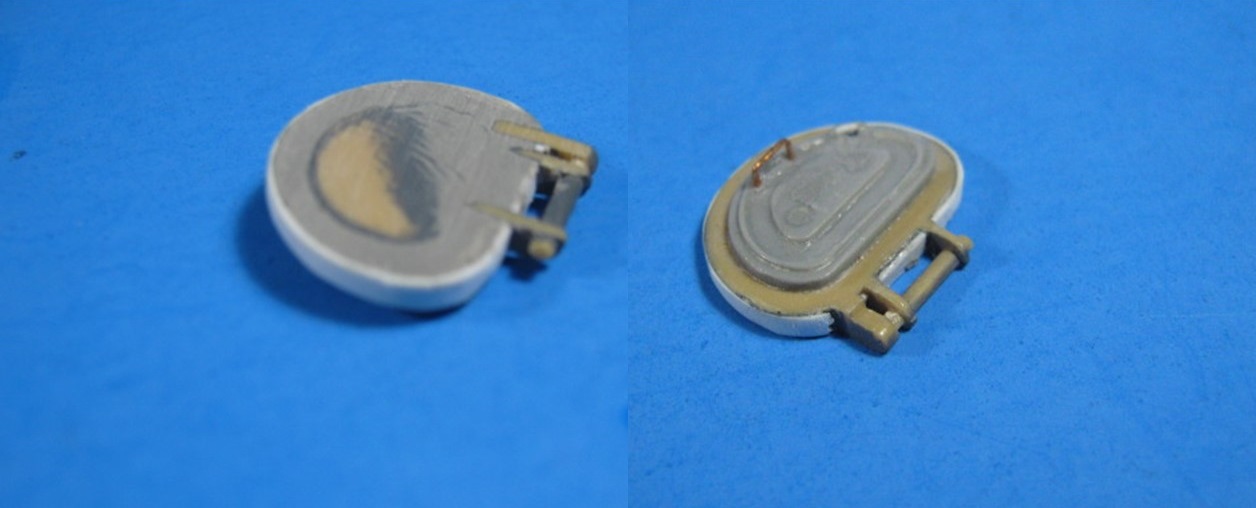
Here is the Gunner’s Primary Sight (GPS) with Cadillacs for it.
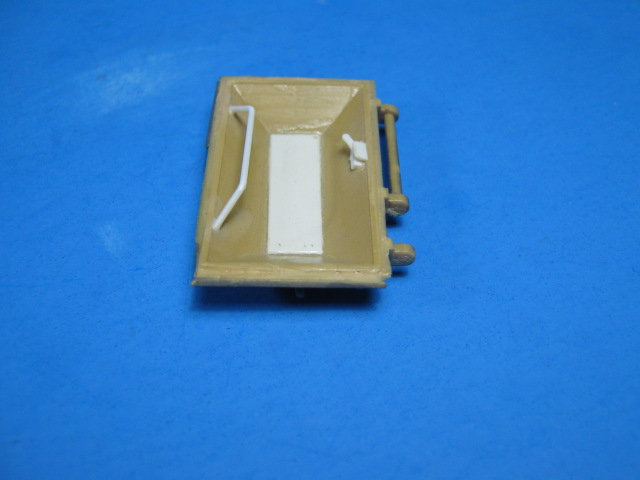
Lastly, I reworked the Gunner’s hatch to the more modern version which is beefier and has a flat top. I also used a part from the Kinetic sprues for the hatch interior, along with replacing the handle with wire.
Next up is starting detail painting, decaling, and assembling the interior parts. More to come as I continue.
I also just picked up the suspension/wheel upgrade set off eBay for a future build, probably a Ukrainian M2A2 ODS Brad. The set looks great and almost the same as buying the two sprues needed for the parts to do it that way.
5 Likes
Nice start, keep up the good work!
Very nice progress…good idea for the interior green…
1 Like
Thanks gents. It is coming along.
1 Like
I have made a lot of progress over the last week or so.
I pretty much have the interior details painted, decaled, and the basic gear, ammo, etc. in place.
First, a couple parts that I added details to. I detailed the interior of the rooftop hatch by adding the handle and the mechanism to open it.
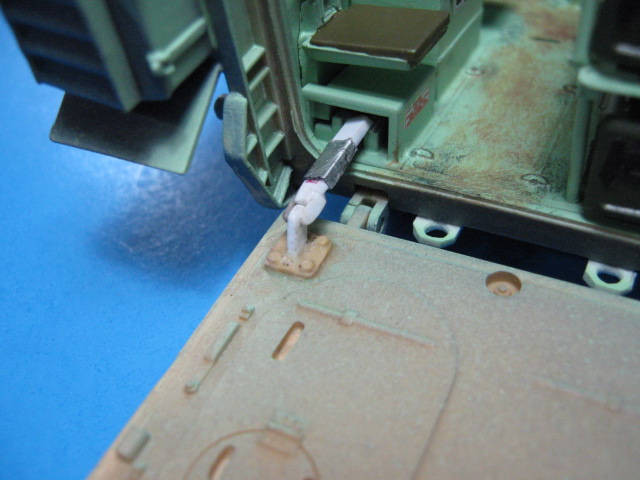
I also scratched up the lever that opens and closes the rear ramp.
Here it is overall.
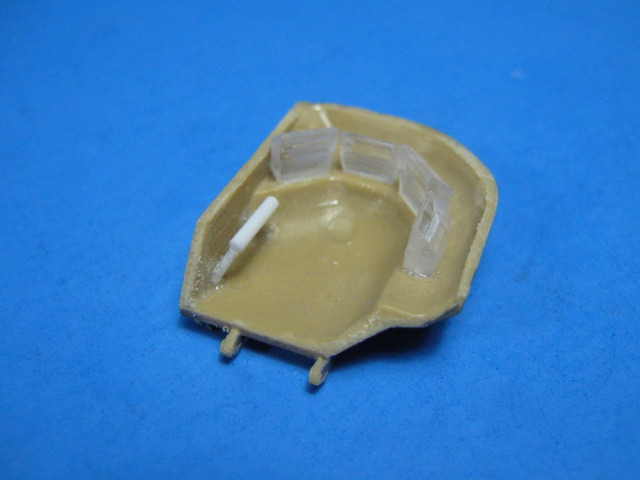
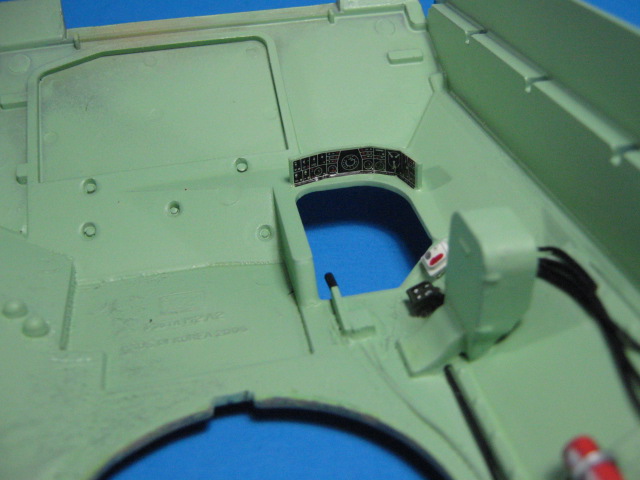
Driver’s area side wall. I added the periscope top to the IR Periscope (cylinder w/orange cap).

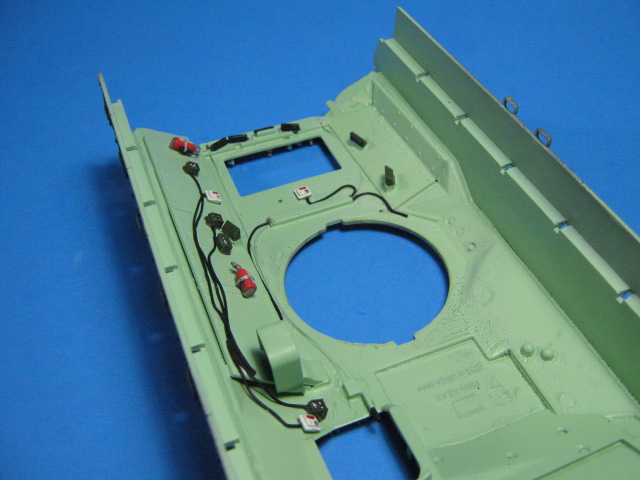
The upper hull. I added the intercom pieces and wiring to everything. Most won’t be seen, but I know its there.
The Tamiya IP decals. It still looks good and represents the IP pretty well. You can also see the ramp release handle which is over the driver’s right shoulder.
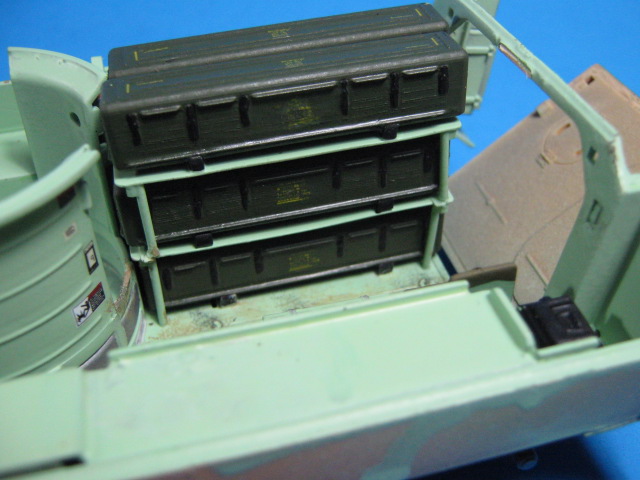
Here are the Stinger Storage Cases on their mounts. I added some stencil decals to them as well.

On to the turret. I added the intercom and SINCGARS here as well.
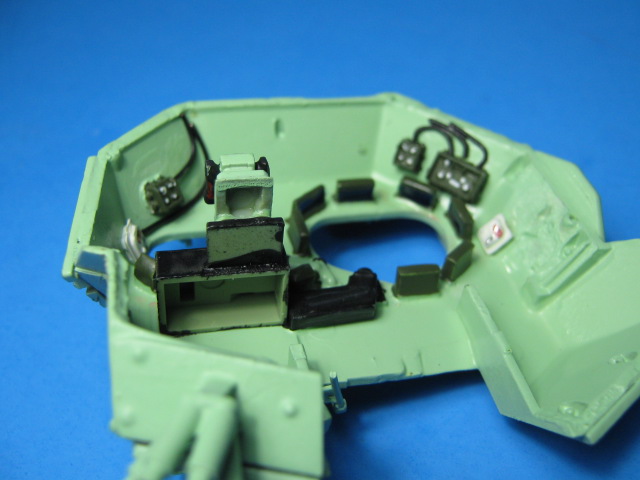
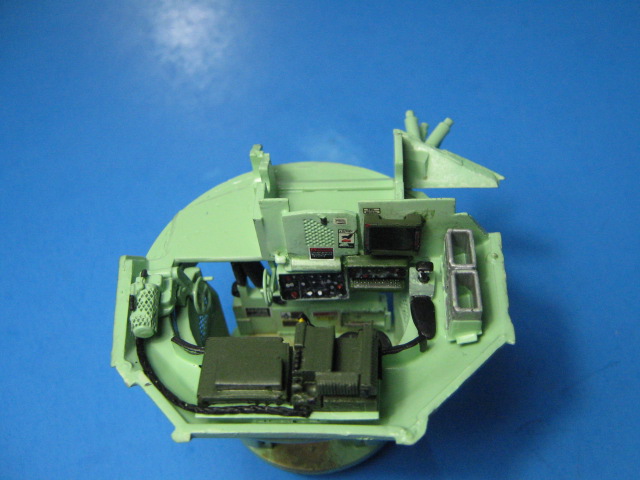
I also added the ammo chutes from the top of the ammo bin in the turret up to the lower shelf at the front of the turret. Meng missed these. I made them out of PE 20mm ammo chute from a Kitty Hawk H-60 kit.
Next I need to add some personal gear and stowage inside so it looks lived in. Then onto the exterior.
9 Likes
Fascinating detailling and conversion.
1 Like
Alright Gino! Superb scratchwork and outstanding detail!
Thanks gents. I like how it is coming along.
After some contemplation, I have come to a conclusion. Either the Stinger storage boxes are too big, which I don’t think is the case since they were scaled out properly from TM drawings which listed the dimensions, or they are the wrong type of box. I base this on the below pics. In the pic w/the kids in back, look at the height of the shelves for the Stinger boxes. The top shelf comes to about halfway up the ramp opening.
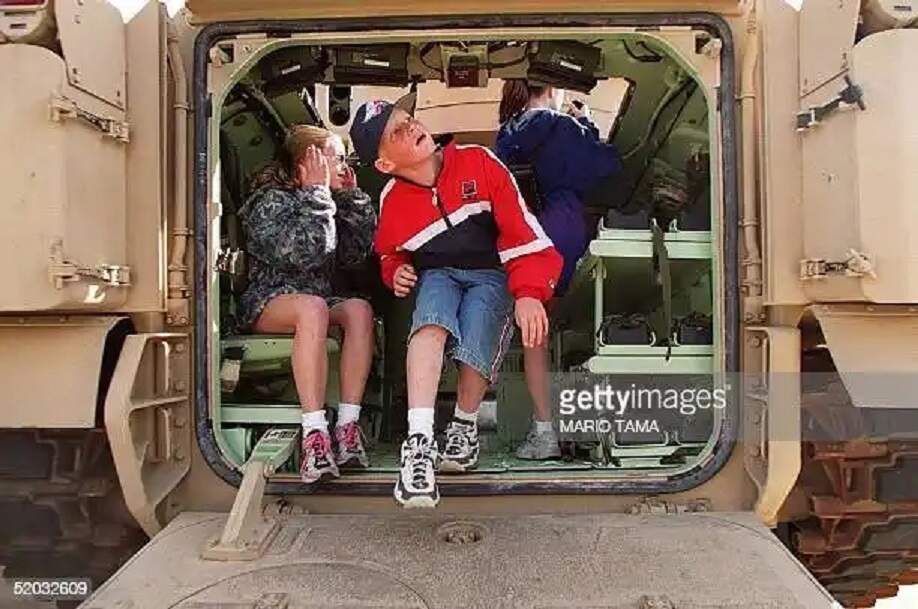
On mine, the top shelf is closer to the top of the opening and the boxes go almost to the ceiling.
However, I am going with this setup as I can’t find any other pics or info on the Stinger boxes. Oh well, it is a best guess and a representation.
7 Likes
Very nice update and some lovely detailing on the internals… A job well done ![]()
![]()
The racks in the pic with the kids looks completely different. Smaller in all dimensions. The padded inserts look like they are designed to hold the missile tubes without the storage boxes.
Ken
Yup, that is what I was thinking as well. Oh well, close enough.
EDIT:
Man this is really bugging me now. ![]()
![]()
I may have to redo these. I think I have enough separate Stingers to fill up most of, if not all of the racks. ![]()
![]()
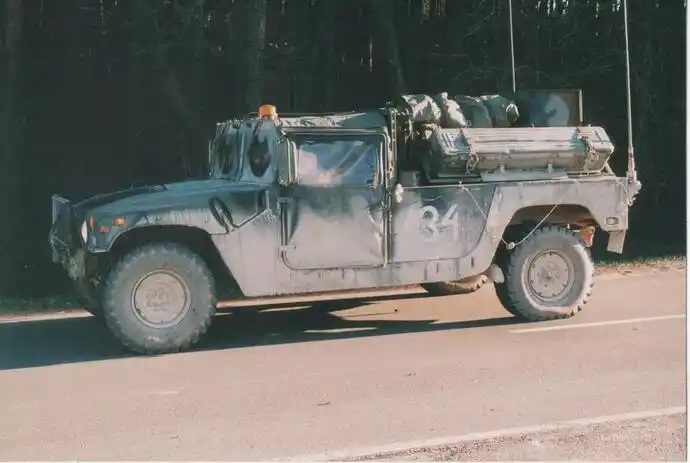
I can always save the Stinger storage cases for a future Dismounted Stinger HMMWV build.
3 Likes
Looking great Gino. Excellent work.
Cheers,
Ralph
Really looks the part, Gino, excellent work so far.