The interior looks really good. Are you using lead fly-tying wire for cables or copper wire or something else. What is your source for all of the placards?
Thanks gents. It is coming along. Now I need to redo the Stinger ammo racks.
The wire is 1/24 scale spark plug wire. You can get it in a wide variety of colors. I use it for lots of applications in 1/35; IP cabling, air lines on trucks, etc.
The placards are a combo of what comes on the Tamiya M2 decal sheet and the Meng M3A3 Interior set decals, along with a few I have copied off the web and printed myself.
Off to work on those ammo racks.
1 Like
Thanks @HeavyArty ! I’ve been using the lead fly tying wire. It works great; but I’ve heard that there are long term stability issues with it and CA.
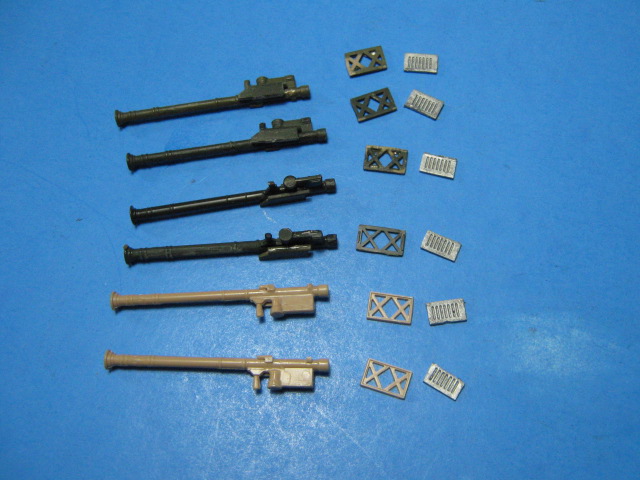
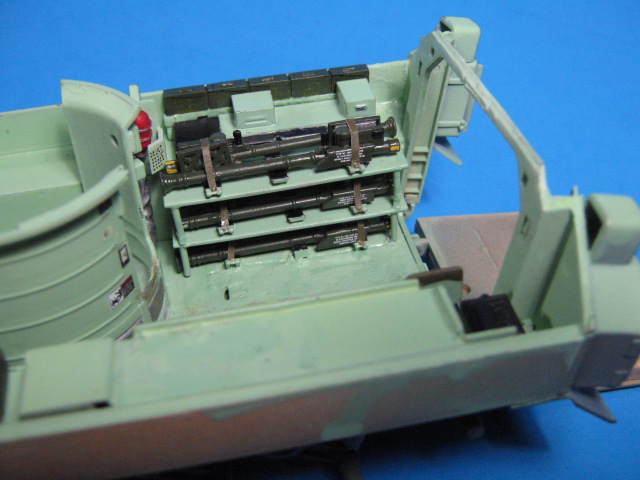
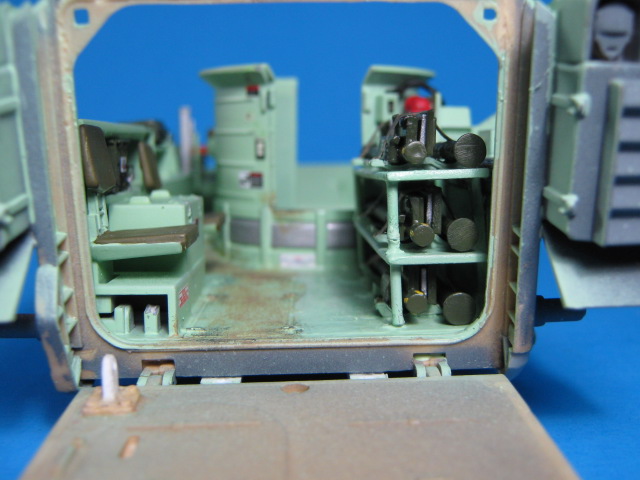
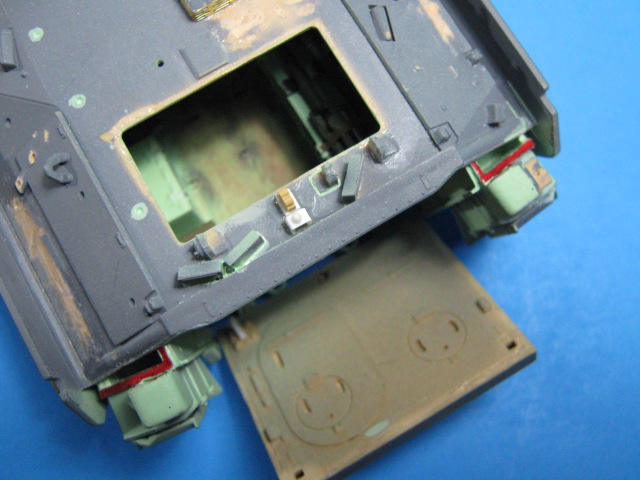
I have finished rebuilding the Stinger racks. I modified the TOW racks from the Meng M3A3 interior set. I cut them down to only hold two Stingers for each level of the rack. The table part of the racks are 0.040 sheet styrene with the front edge rounded over and styrene rods for legs. Here they are in the raw.
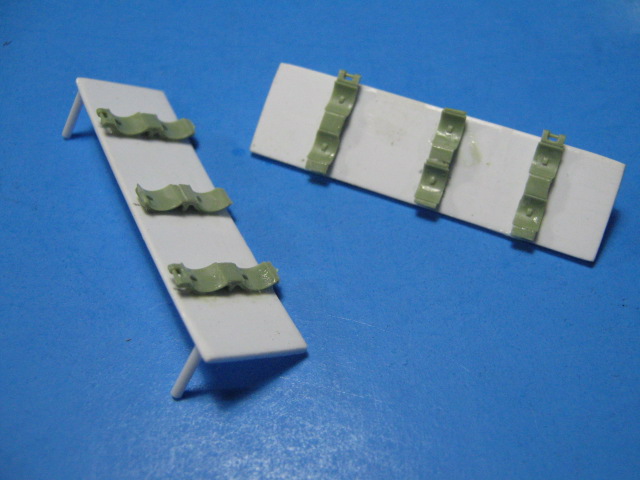
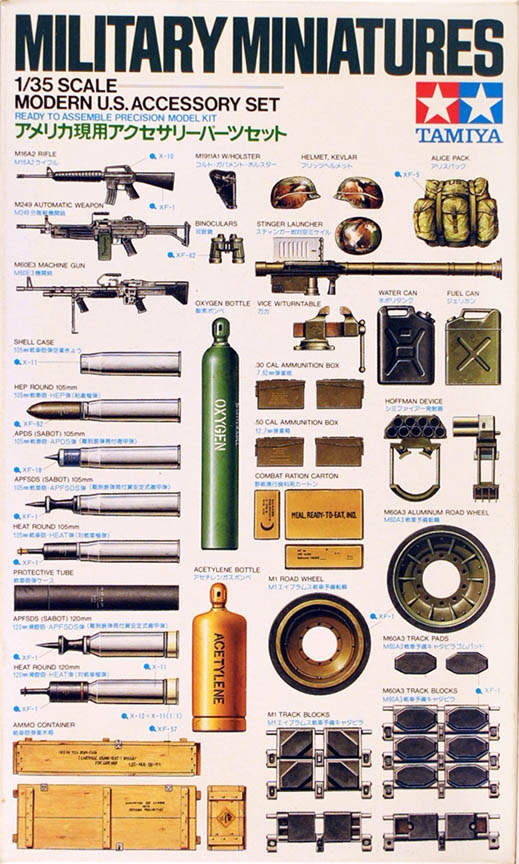
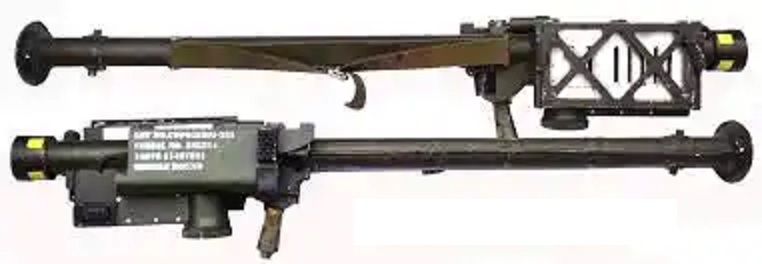
I used Stingers from the old Tamiya Modern U.S. Accessory Set (35141), each set has 2 Stingers in it.
Over the years I have used quite a few of the sets and kept the unused Stingers. I folded the sight and IFF box on them to show how they come before use.
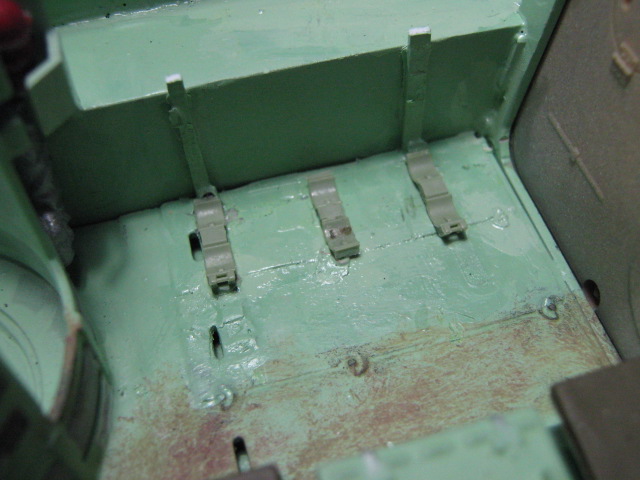
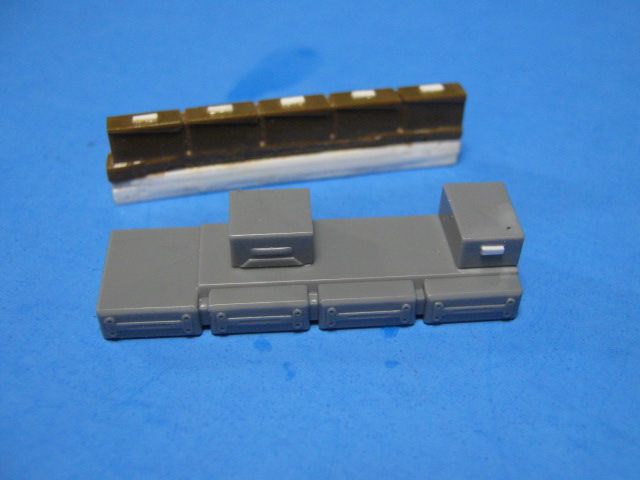
I also built up the ammo boxes from the Tamiya interior for the rear sponson now that it can be seen. I added handles to the 7.62mm ammo boxes and the far right storage drawer.
I painted all the parts, added decals to the Stingers and ammo boxes, and installed everything. I also added straps from painted, thin cut masking tape.
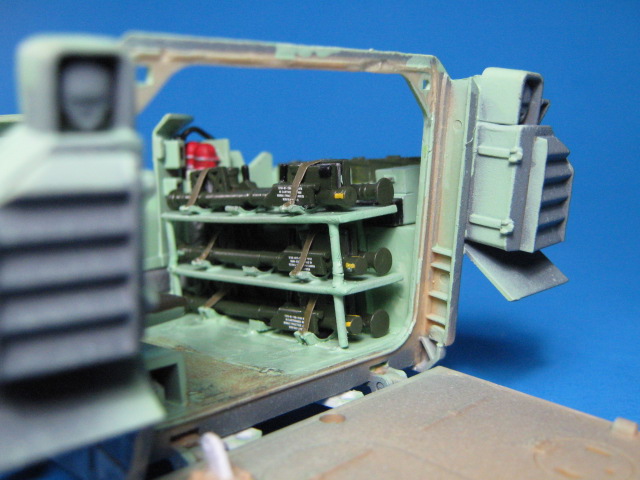
I think they look much better now and look more like what is in the original pic.

10 Likes
Excellent work Gino.
Thanks Matthew. I am very happy with how it is turning out.
1 Like
Wish I could have helped you Gino. Sorry.
But all my manuals on the vehicle and Stinger and other assorted materials are buried in storage.
It was 25 years ago. Damn!
Alan
No problem. I gather you were an M6 Linebacker crewman. Does it look right from what you remember?
1 Like
Great build Gino! Been following and loving this build. Can’t speak for sure as I was an Avenger, not Linebacker, but I believe the missiles were stored without the sight/IFF box attached. Those were usually kept separate, along with the BCU, as they were fragile plastic. I still have my TMs somewhere I’m sure, but if you need anything regarding the Stinger (or Avenger if you ever do one of those) let me know. Love seeing ADA represented in the modeling world!
HI Gino,
It’s great to see you building this. Several years ago, you encouraged me to build one of these, and gave me several pointers along the way, which I still appreciate! I’m sure yours will look great - this is what I came up with:
I’m sure yours will look better - I was relatively new to conversions etc at the time - nonetheless, I enjoyed the build, and your input led to a nice diorama:
Cheers
Nick
6 Likes
Thanks Nick. I do remember yours and it looks great.
Basqueechmo, thanks for the pointers. Too late on the stored Stingers, they are all glued in now. I will keep you in mind for an Avenger though, as I have one planned as well.
Just a small update today. Work has been nuts and I have another work trip this coming week, so no modeling.
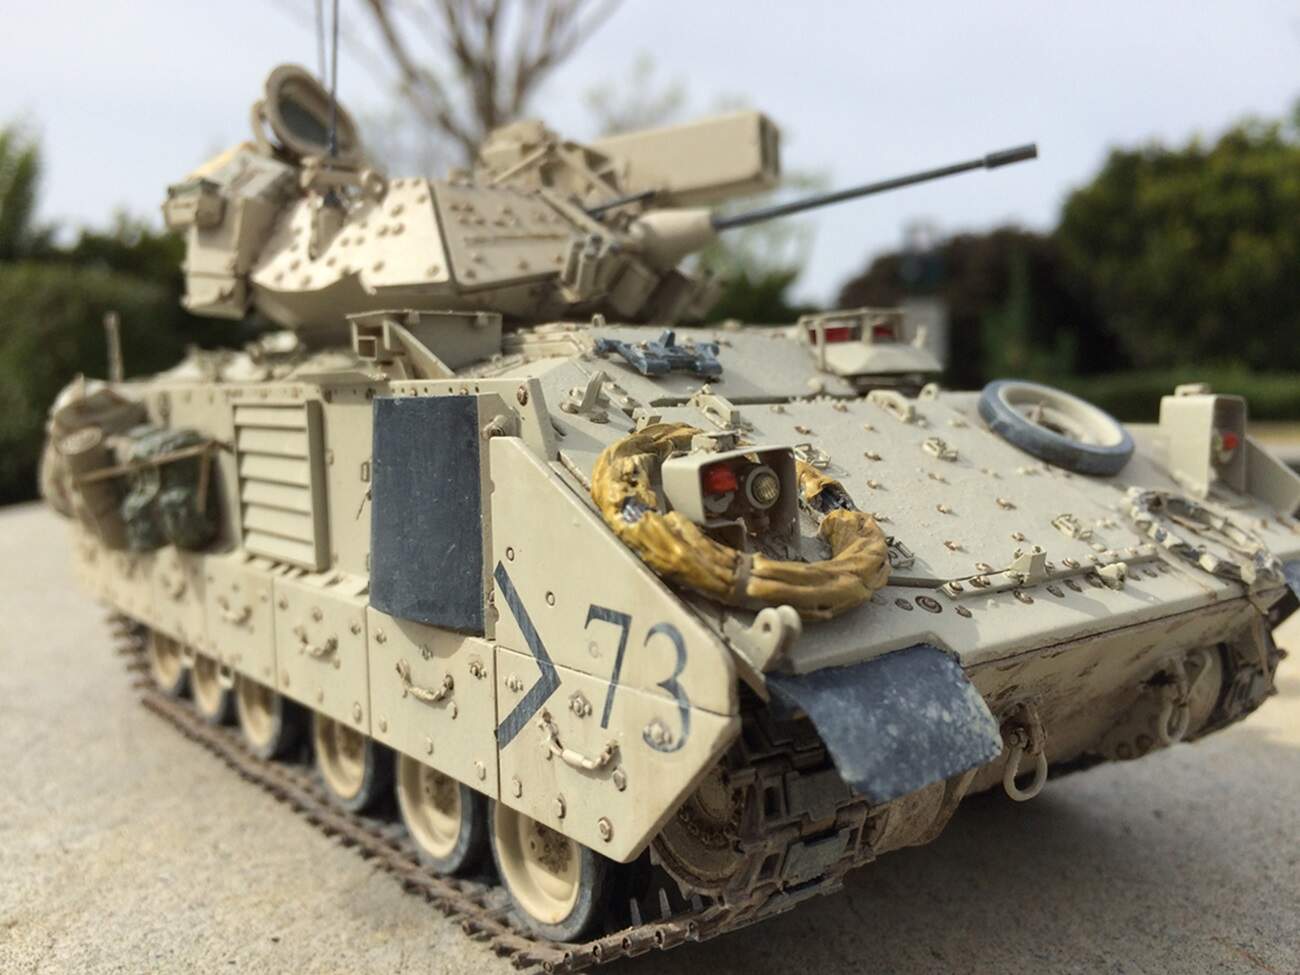
I did make a small correction on the Academy (Tamiya) hull rear. The original Tamiya hull has a stepped rear plate (red outline). It should be flat. It also has small wings (red below) on the top rear hull to cover up the stepped rear plate area, which shouldn’t be there either.
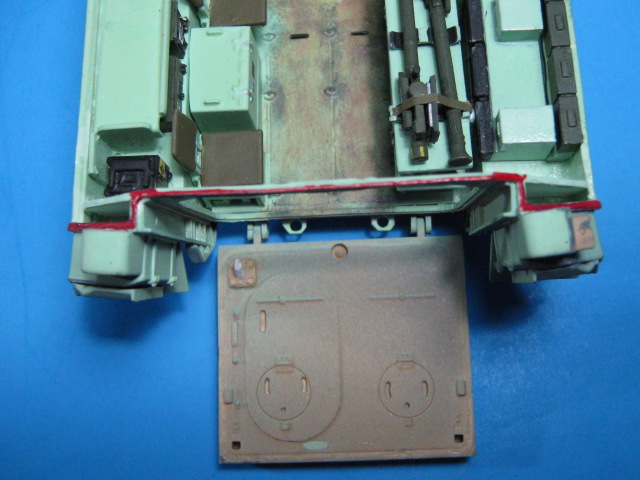
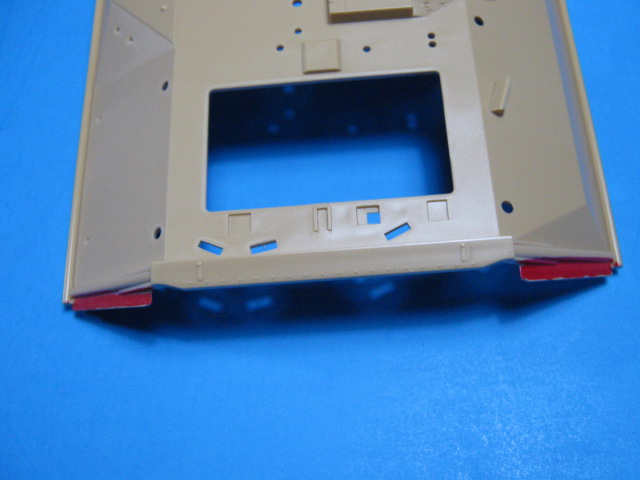
You can see on the Orochi/Kinetic kit below how it should be. The rear plate should be flat and there are angled plates that the rear stowage boxes mount to.
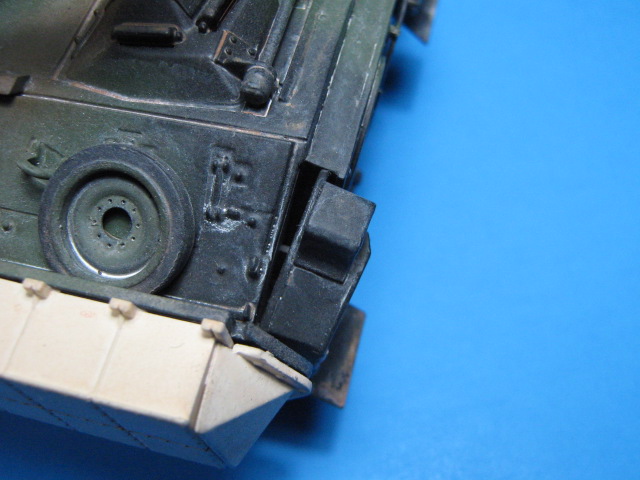
To fix it, I cut the wings off and added a piece of sheet styrene on each side to complete the flat rear wall (orange arrows below). This leaves the small opening between the rear of the hull and the plates that mount the boxes.
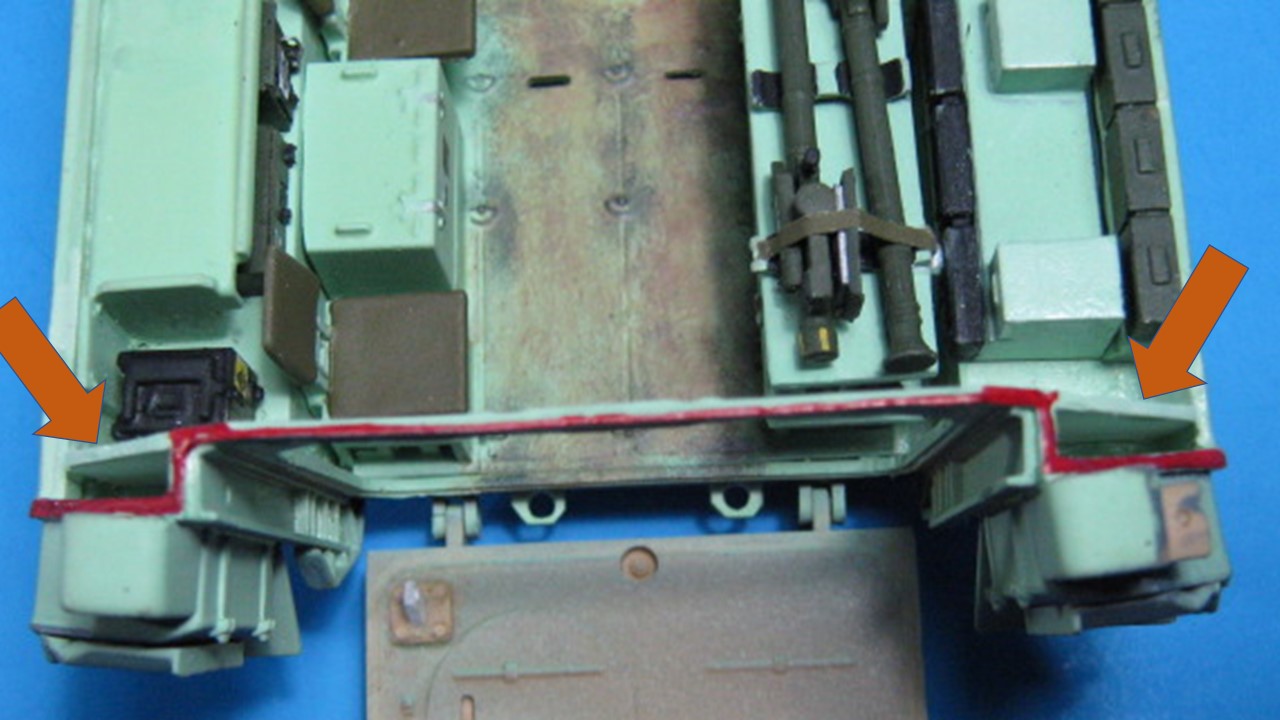
I think it is a pretty effective way to represent this area and fix what Tamiya got wrong and Academy copied onto their kits.
4 Likes
Looks excellent, Gino!
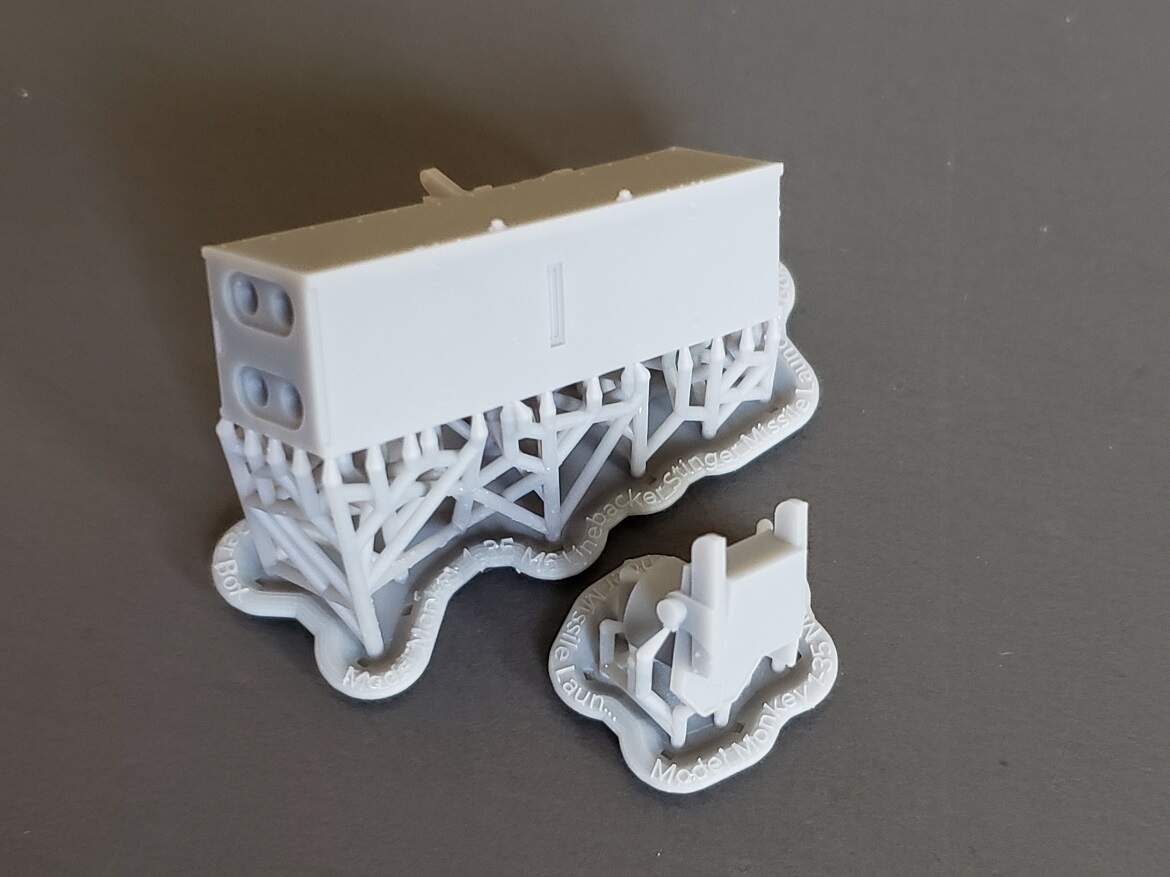
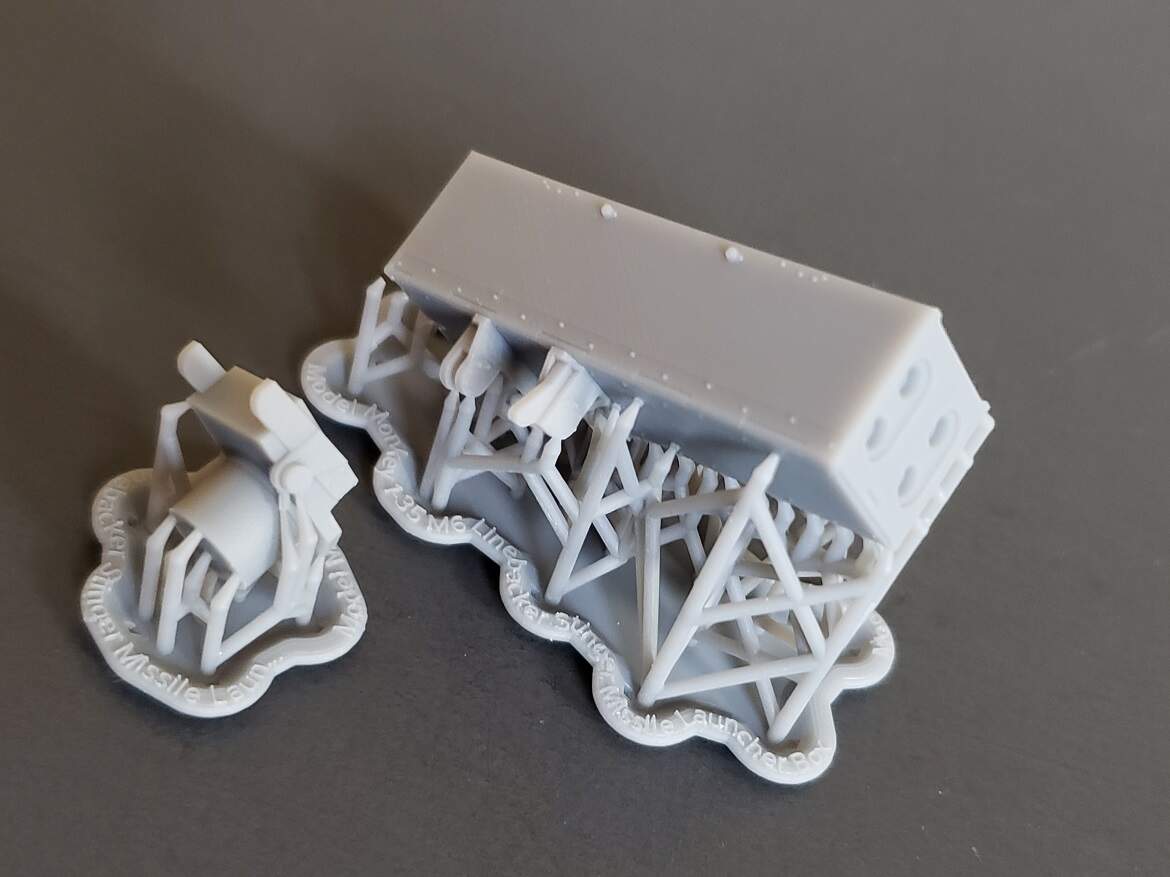
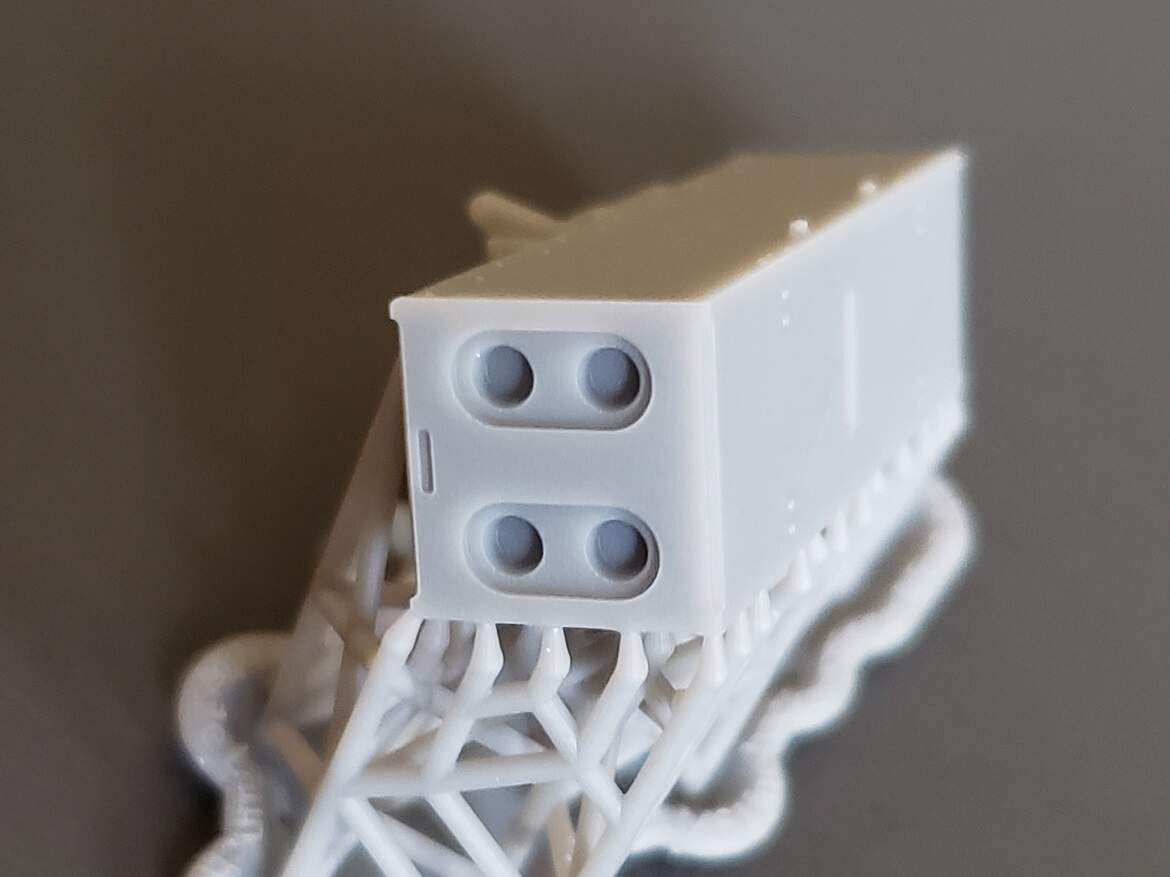
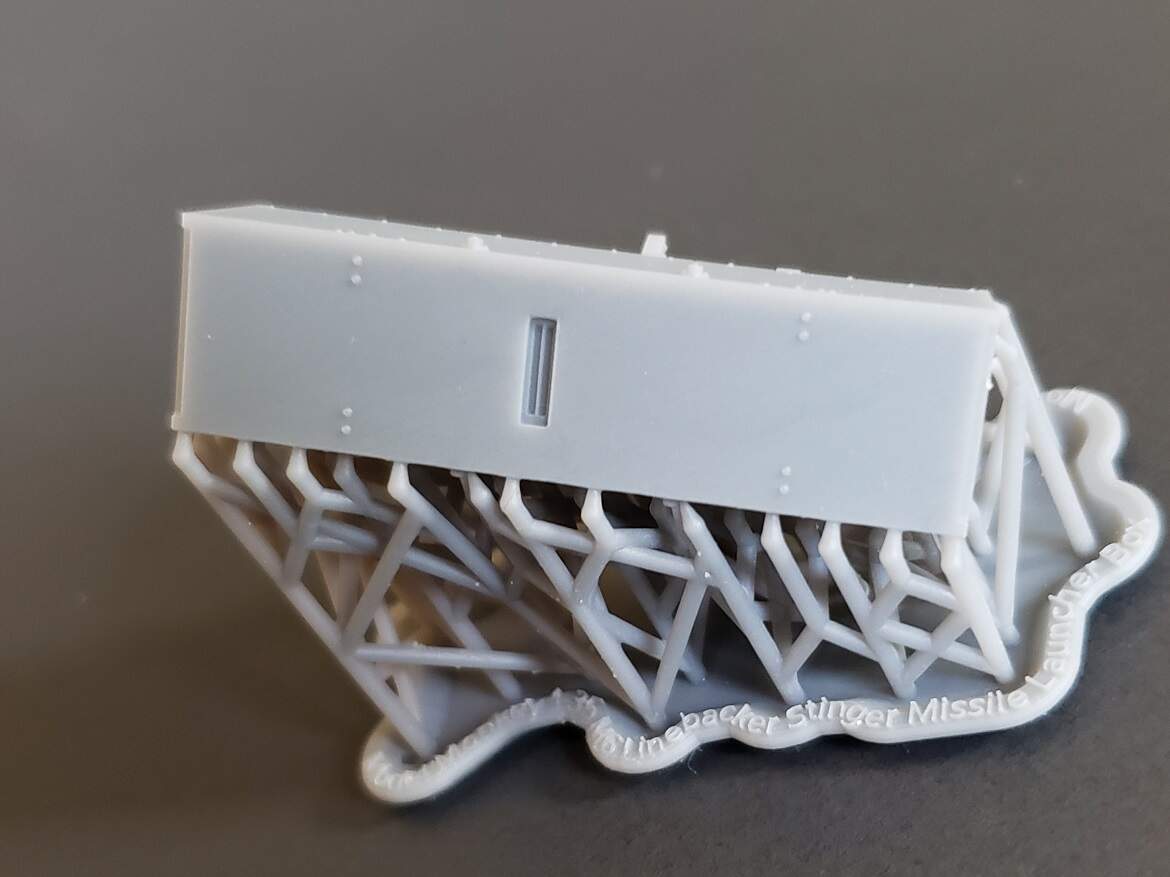
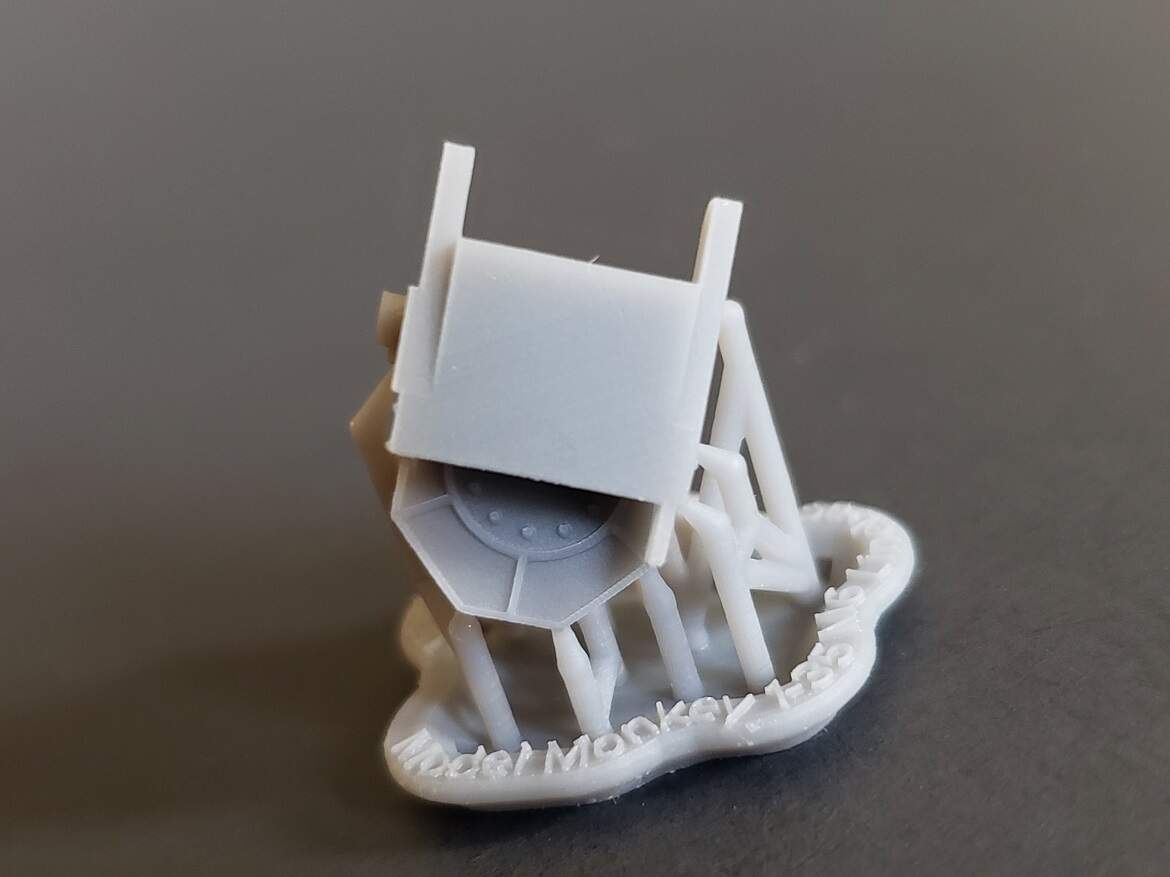
Here are preliminary renderings of the stinger box. The design is close to being done and some of what you see here will change as the design matures. Pending some minor tweaks, generally, this is about the best I can do without access to a real box. The box itself (not the actuator gear) measures 44 x 12 x 12 mm.
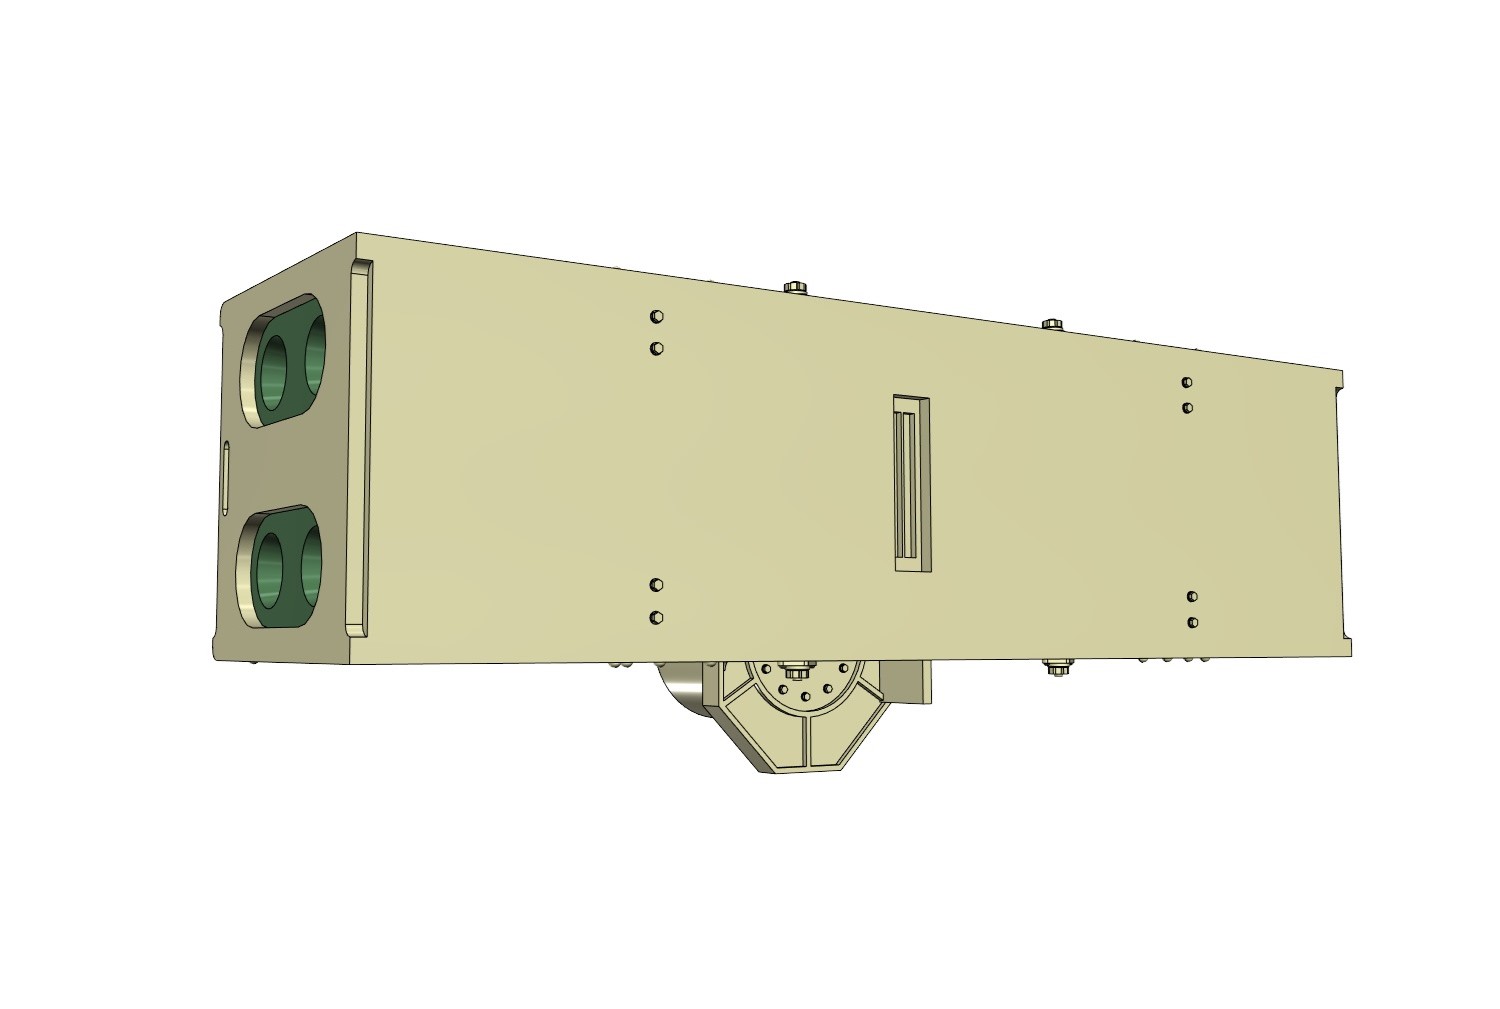
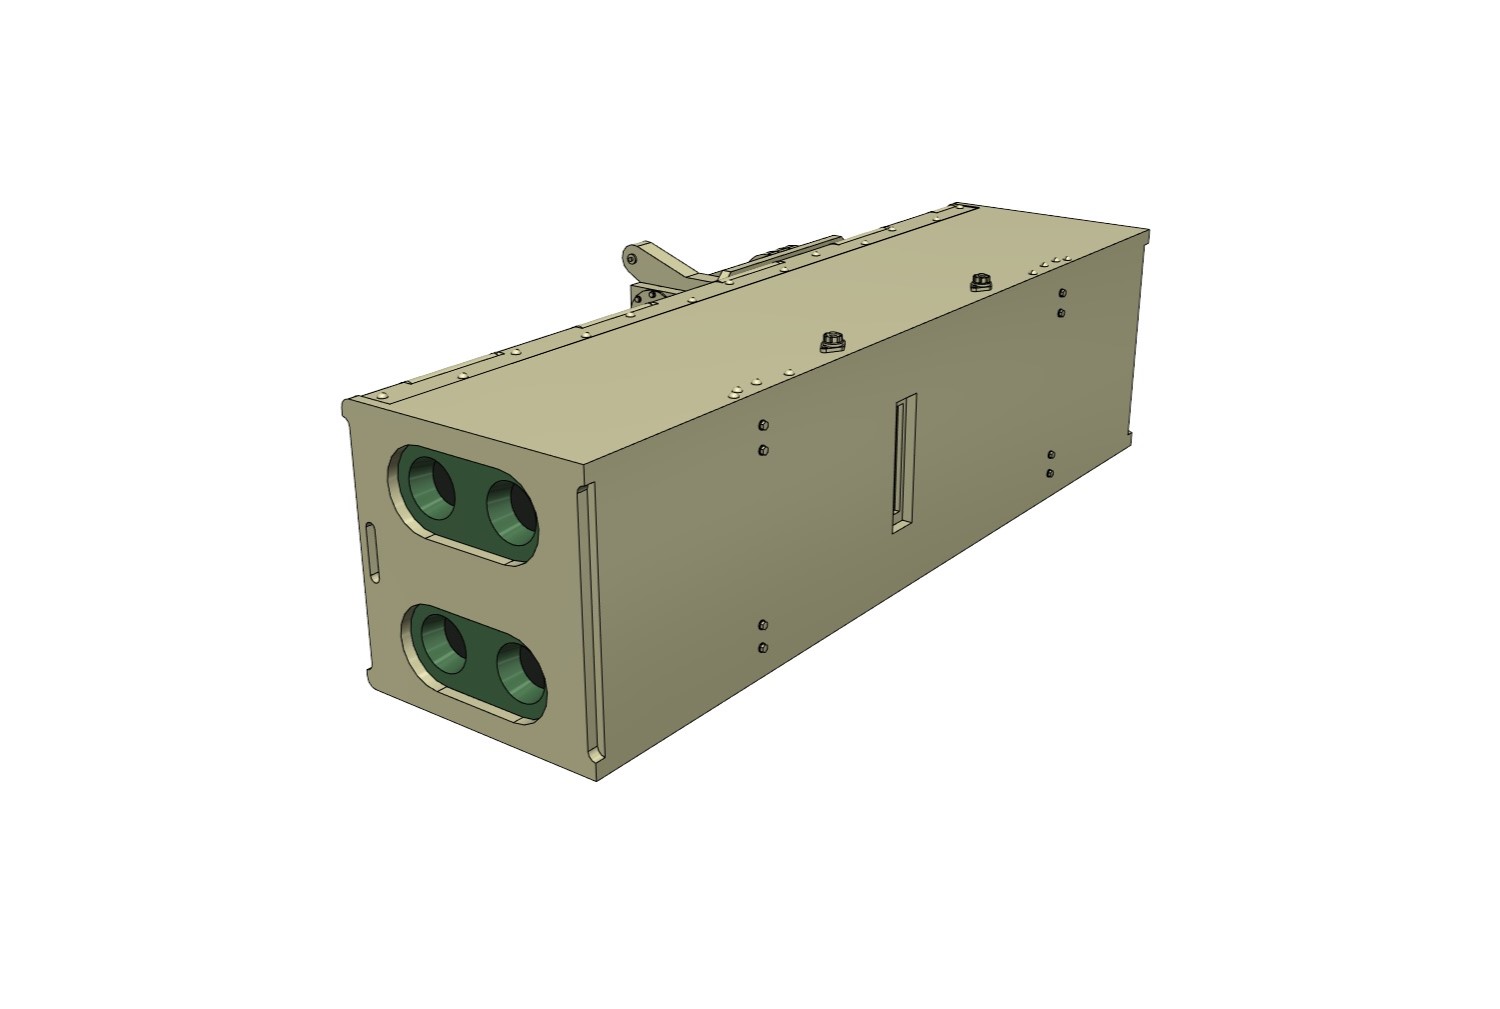
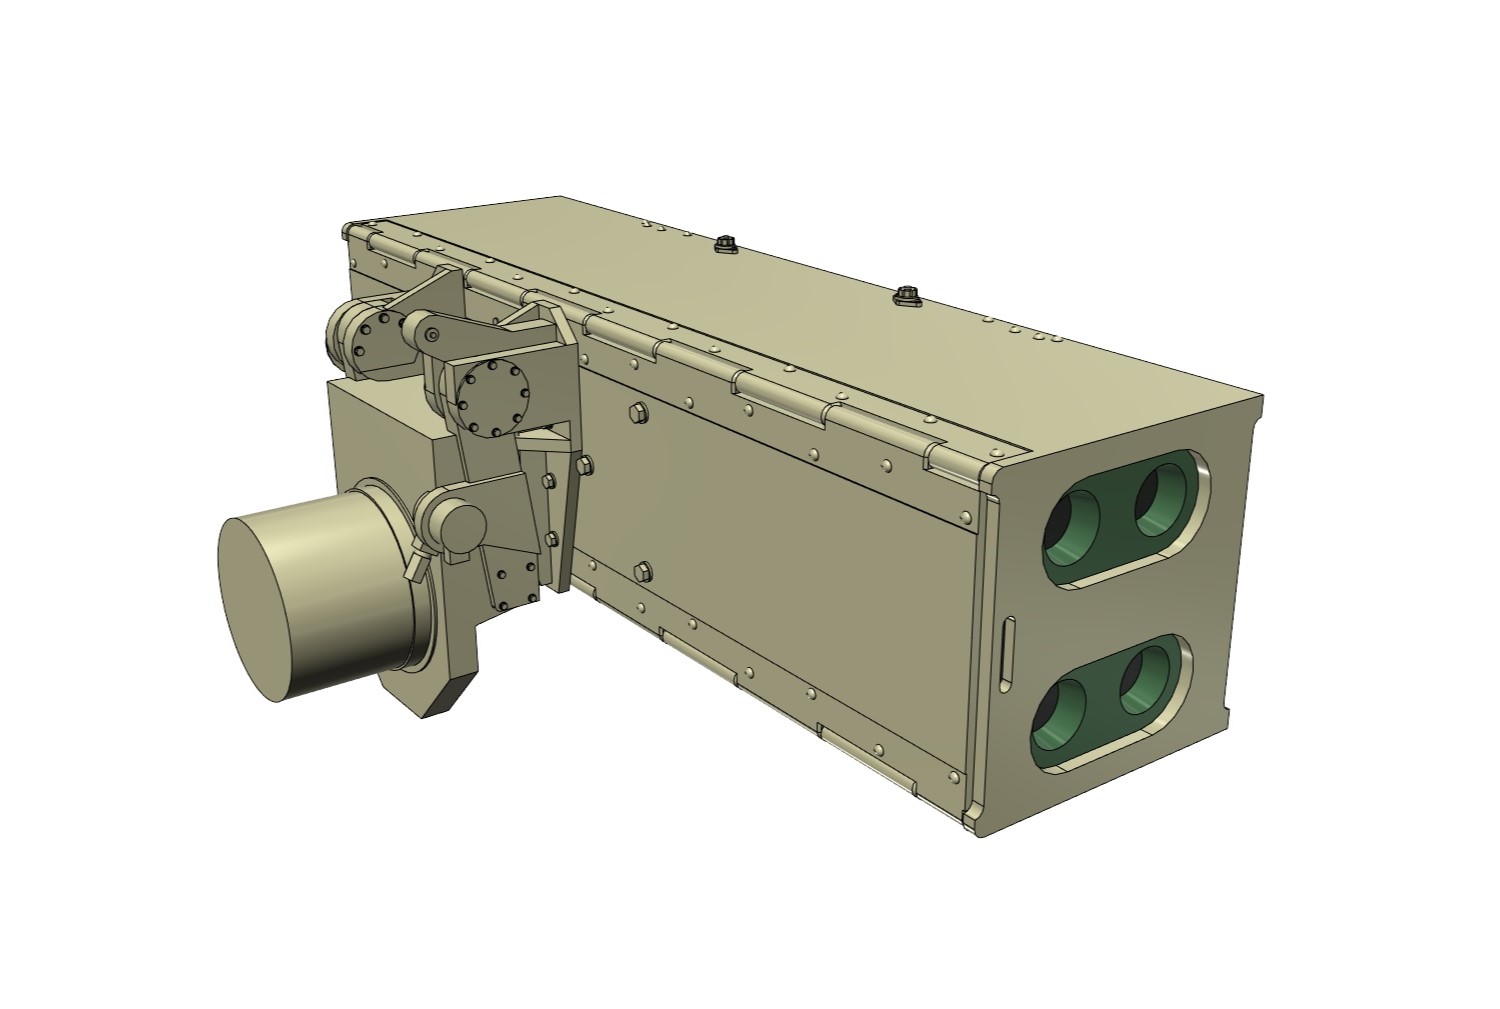
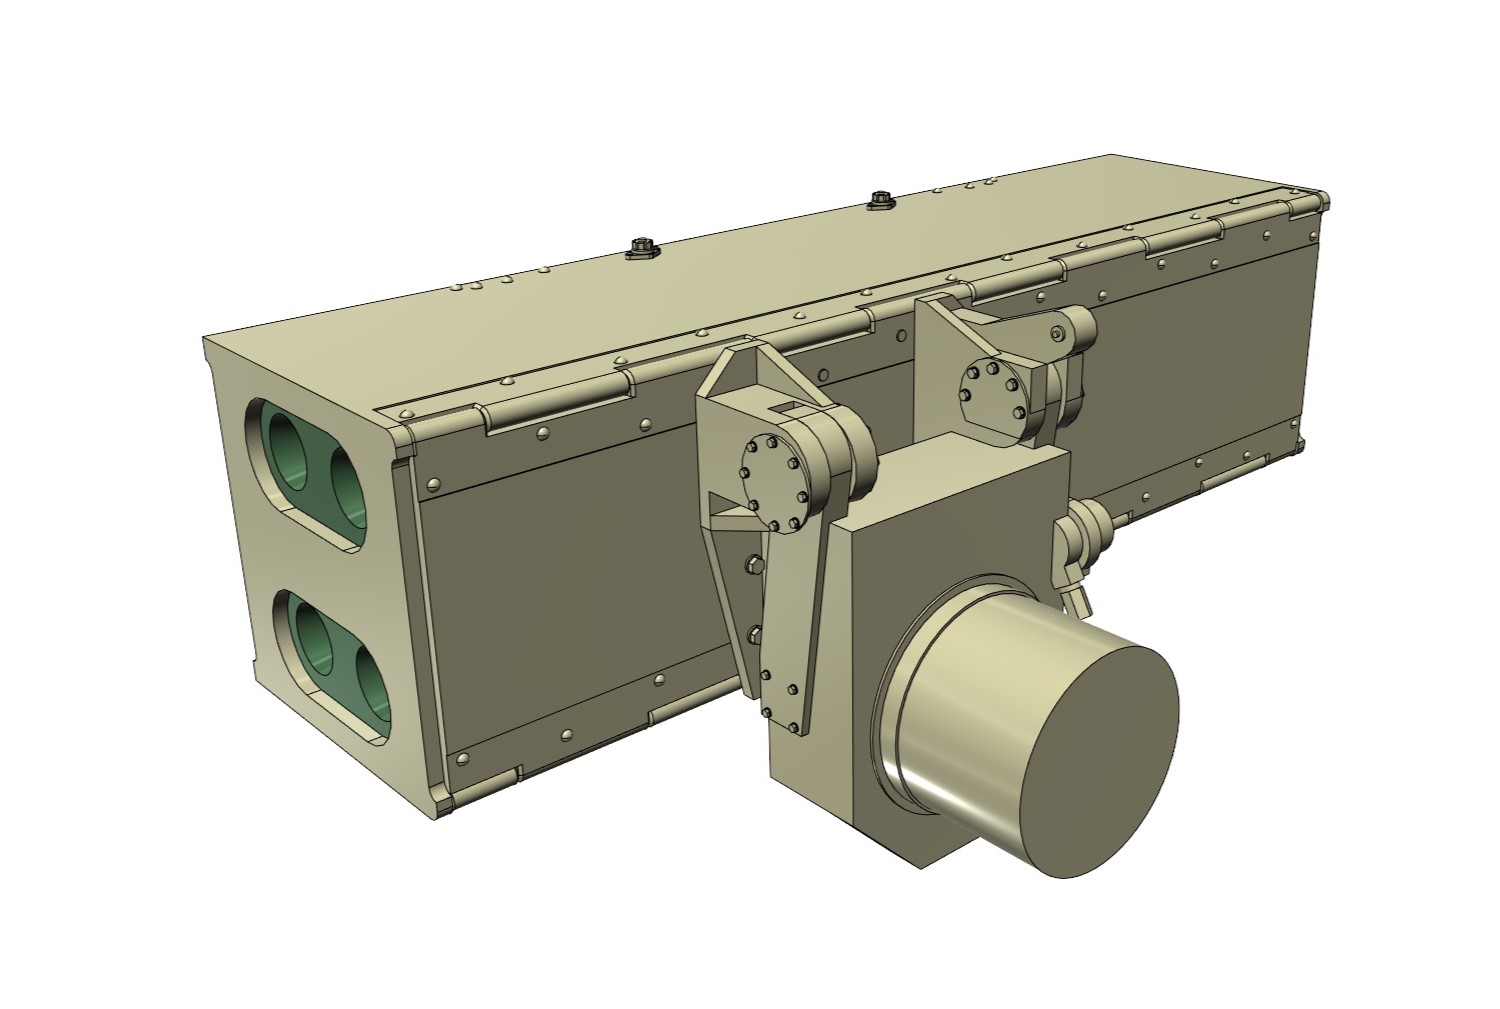
Hope you find the design pleasing.
7 Likes
Wow!! The Stinger box looks awesome. The mount looks great too. Tell me how to order it. Is it up (or will it be) on your website? Anything on the IFF antenna box too?
2 Likes
Not quite done so not ready to order yet. A few more tweaks and it should be good.
Regarding the IFF antenna, I haven’t yet done any work on it. I think I may need to have in hand a Bradley turret glacis to size and shape one correctly. Would you be willing to loan me your turret glacis?
1 Like
I have a spare I can send. PM me your address.
2 Likes
Coming together really well… Very nice work and some more impressive 3D additions as well… ![]()
1 Like
This is an awesome build!
Thanks gents. I am enjoying this build and the collaboration w/Steve at Model Monkey.
1 Like