Thanks Jeff, on both accounts.
Im glad i am not the only one who refers to 90 degree Evergreen plastic shapes as “angle iron”!
Great build so far and some very nice detailing which springs out … those details give it the genuine real look 
Looking great with the modification and detail.
Cheers,
Ralph
Thanks gents. I will be getting back to it next week. The visit with the kids and grand daughters has been great. Back to work and real life next week. Lots of bench time as the wife will be staying to help out our daughter with the kids for a while longer. It will just be me, the dog, and modeling.
4 Likes
@HeavyArty Gino just add GrubHub to that mix and you’ve got a man’s perfect situation!
1 Like
Gino, congrats on the new granddaughter!
Good start on your build. Enjoy your upcomming free time!
How did you connect the cargo bed to the frame? When you are back, can you post a photo of it, please? Because I’m interested in doing it too. I got a cheap trumpeter M1120 CHU and enough parts from an italeri kit. Was there an A2 variant of the M977 with the new dashboard design?
Andreas
Thanks Andreas.
The Italeri bed parts and supports fit the Trumpeter M1120 frame with no issues. The only change I made was to extend the very rear of the M1120 frame by 3/16 of an inch to accommodate the crane mount.
No idea, but mine will have whatever version comes in the Trumpeter M983 kit. It looks right to me.
Thanks Gino.
With the release of Trumpeter’s M1120, they added some new parts for cab interior. I’ve been thinking about using these for the M977.
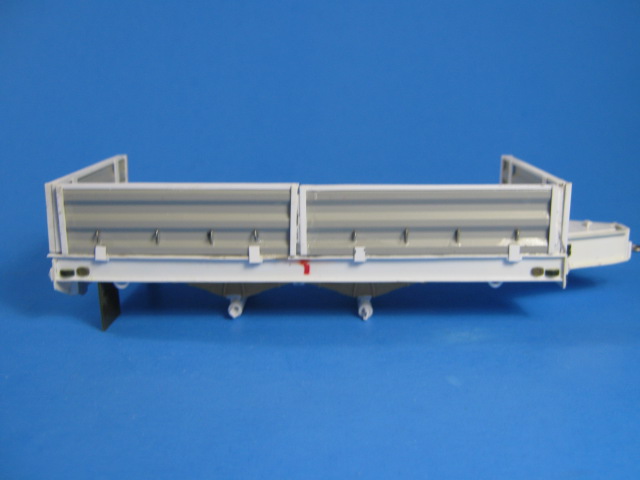
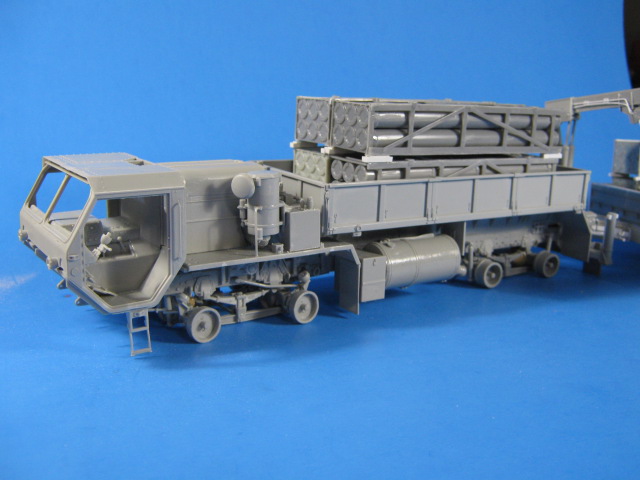
Work on the M989 HEMAT continues.
I added the NATO tail lights to the rear and a few more reflectors (2 clear ones to the rear and two more on the front).
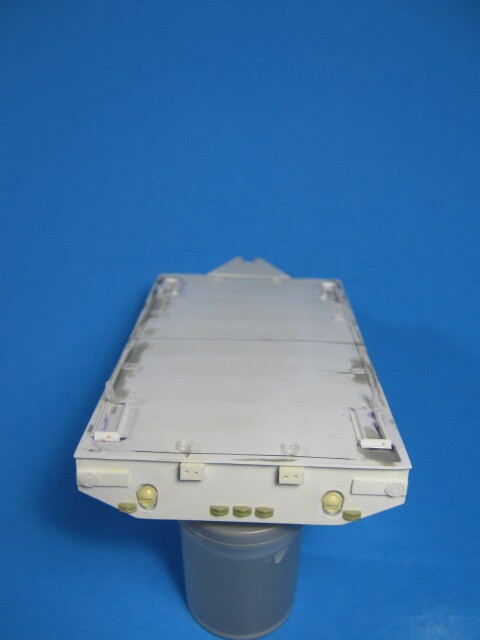
I also completed the suspension. My original plan to use HEMTT springs didn’t work out as they were too short and didn’t give the right spacing between the wheels. Meng came to the rescue again. On the two M911 sprues, there were springs for the front axle. I used both sets to make up the HEMAT suspension, along with some scratch-building of the mounts and styrene tubing for the axles.
On the topside, I added the footholds for the rocket pods and some tie-down rings from a 3D printed set from Shapeways.
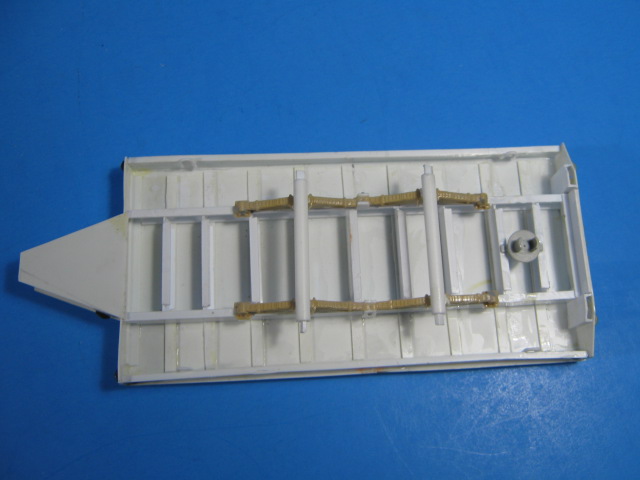
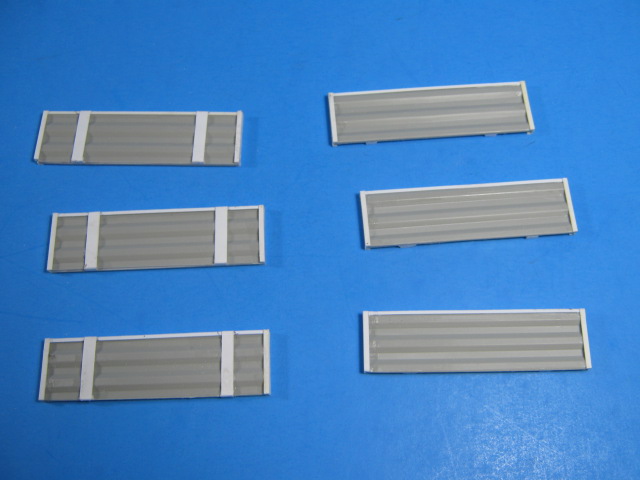
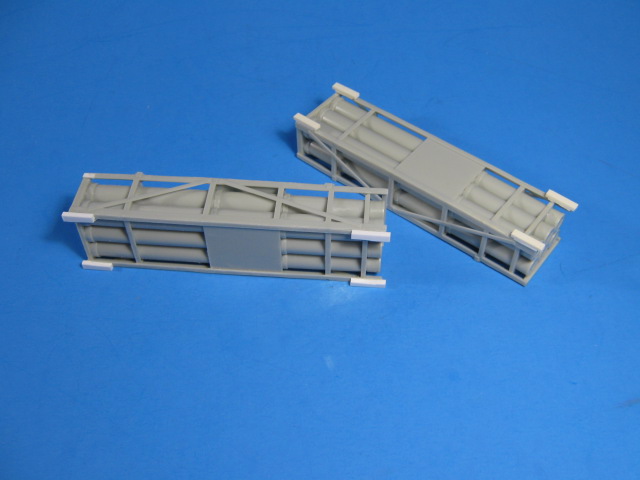
I also built the side panels out of the side pieces from the 40’ container in the Trumpeter M915 kit. The ones on the left show the inside details and the ones on the right show the outside details.
Next up is to assemble the side pieces (one side down for loading) and finish the hinge and latch details on them. Then it is onto the tongue, hitch, and landing leg.
This one is getting close to being built and moving on to painting.
9 Likes
Gino I was wondering how you would build those corrugated trailer sides.
Great idea to use the container wall panels ~ thanks for sharing that.
(Wish I had thought of it!)
Hi Mike. I was wracking my head on how to do them easily, then I saw the container…perfect. They are a little thick, but I can live with that.
2 Likes
They look pretty convincing to the uneducated on trailers… ie Moi ![]()
Thanks Johh. It is coming along.
Gino, this trailer is incredibly good. Excellent resourcing of various kit parts to flesh out what I consider superlative scratchbuilding. Your skill and creativity are outstanding.
Thanks Matt. I am liking how it is going together. I should have some more pics tonight. Got quite a bit done so far this weekend.
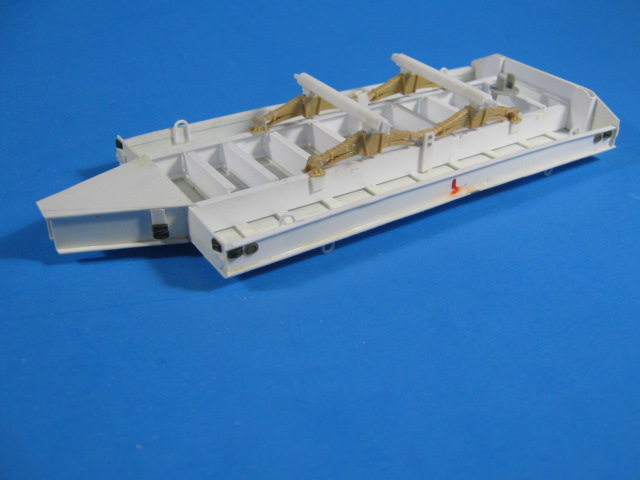
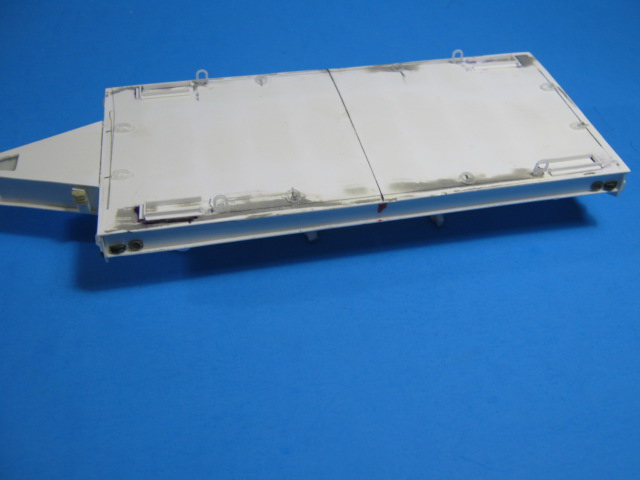
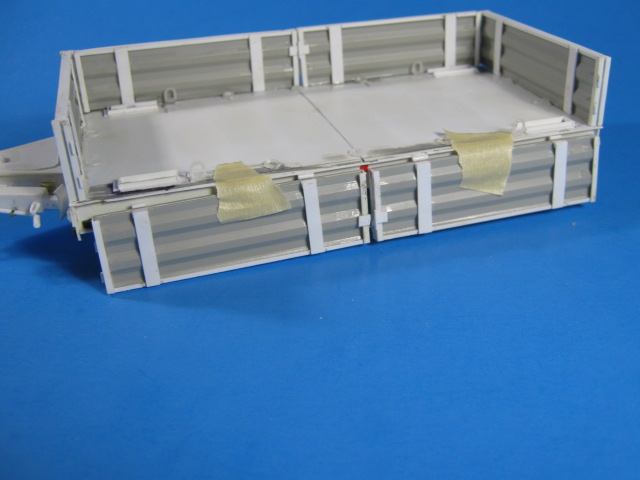
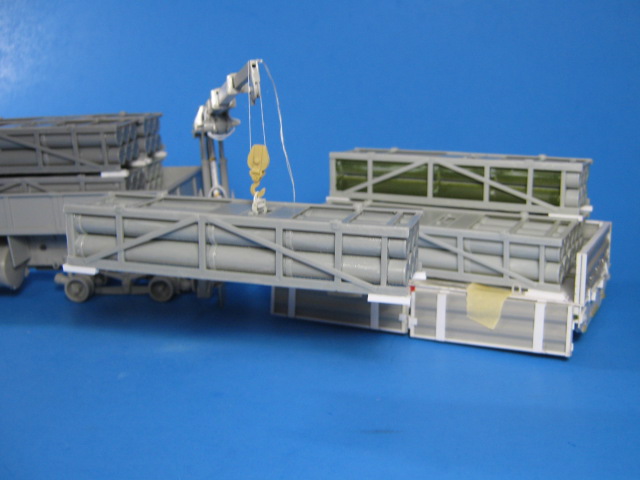
I have finished building the HEMAT.
I added the side panels and the hinges for them, along with pins holding them together and four tiedown loops for a canvas on each panel from thin wire, bent into an upside down J.

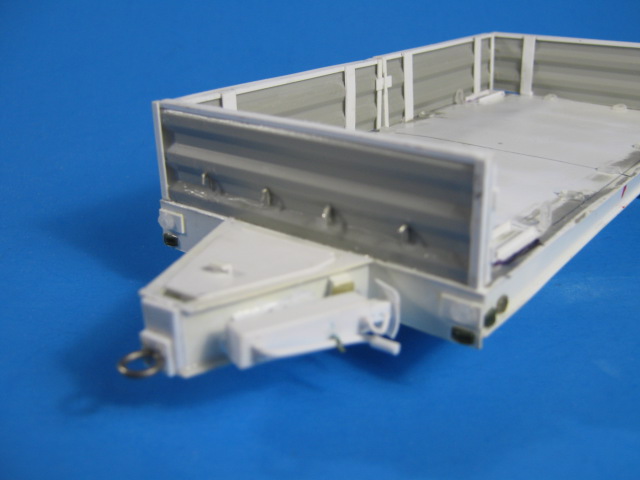
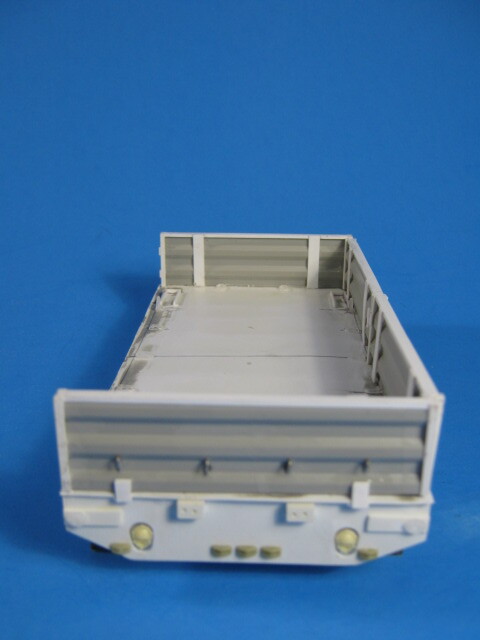
Here it is with the one side taped on to show the side panels down.
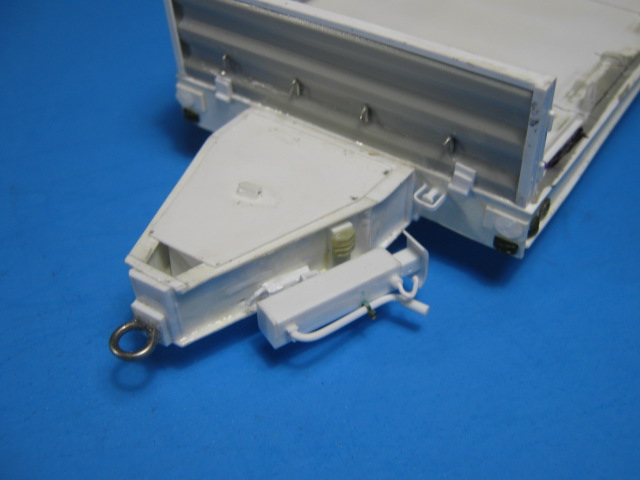
Then I moved on to the front with the BII box cover on top of the tongue and the landing leg. The leg is a couple different sizes of square tubing and sheet and rod styrene and a left over piece of PE runner for a holder for the handle arm. I also made the lunette ring out of thick solder, wrapped around a paint brush handle to get a good round shape.
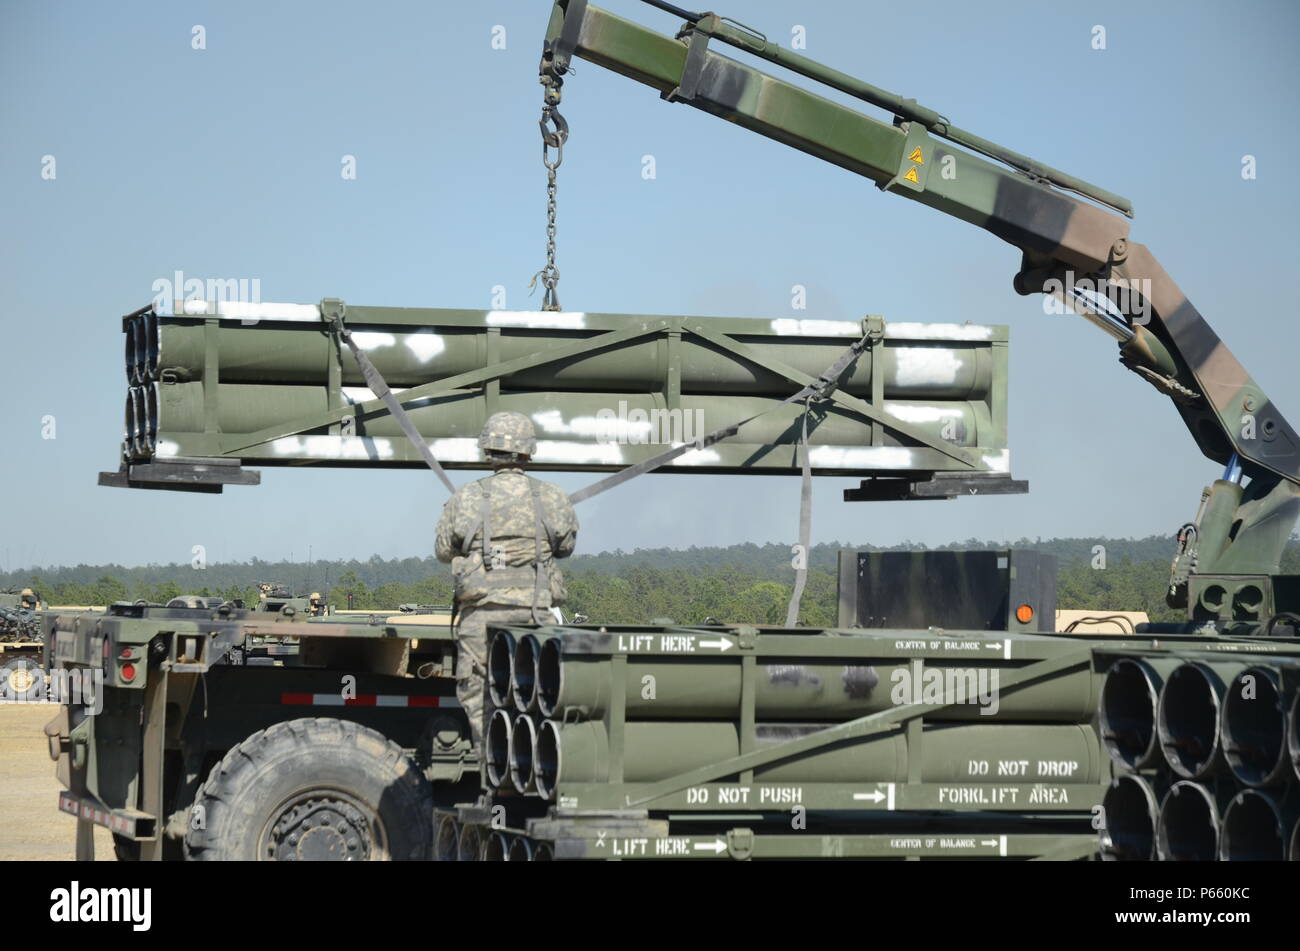
I also built the MLRS rocket pods, all eight of them. I added the transport feet from thick styrene bar. This is only four.
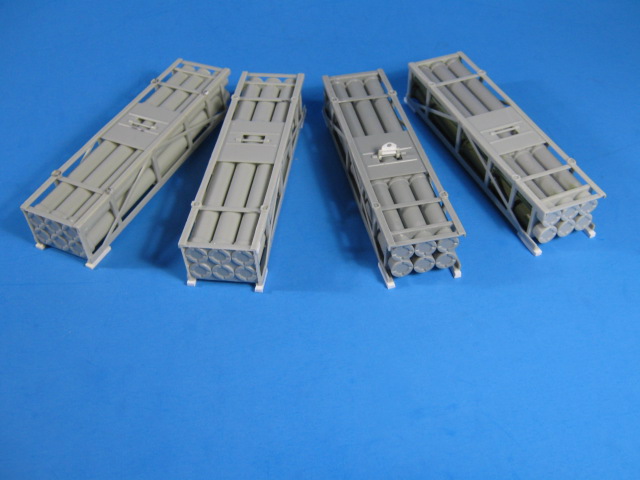
You may see that one of the above has a device used to connect the hoist hook to. I built this from a piece of sheet styrene, a piece of angle iron, and a couple hooks from the Dragon kit LLM hoist. The issue with this is that the plastic pods are not balanced and dip in the front when suspended.
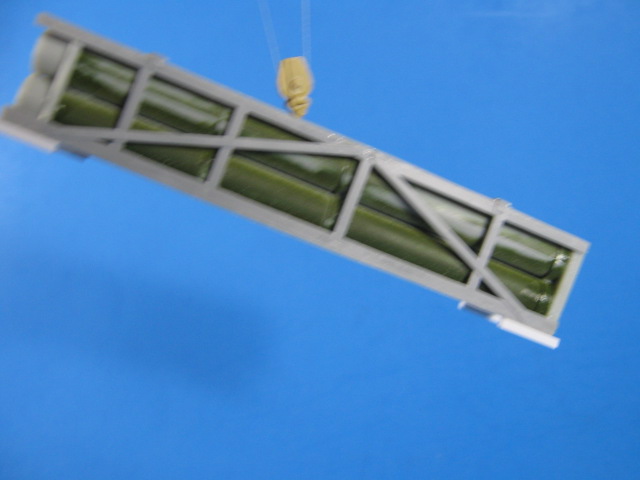
To fix this, I added 8 grams of lead fishing weight, flattened out, to the underside rear of the pod.
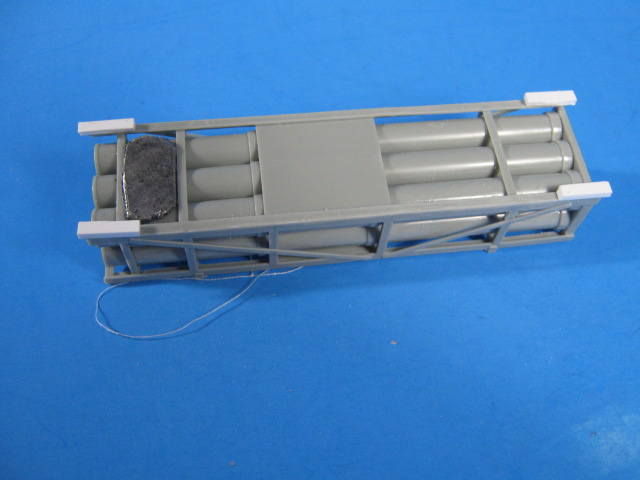
Pretty closely balanced; good enough for government work.
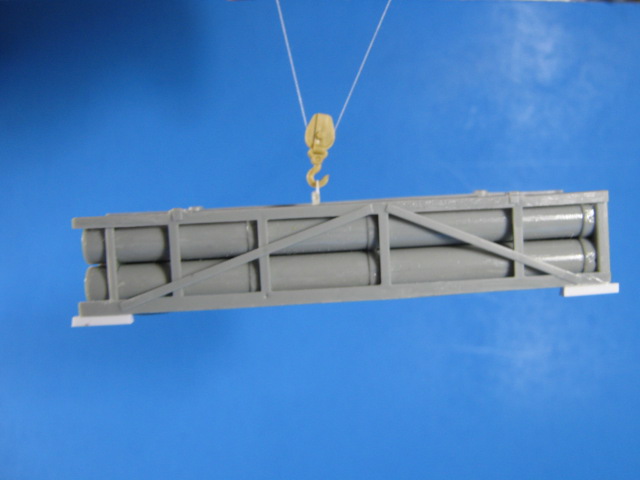
Here is a mockup of how it will look.
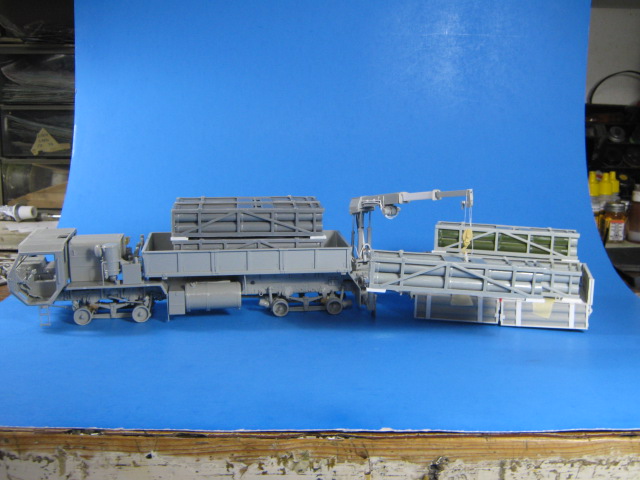
Next up is the paint booth.
5 Likes
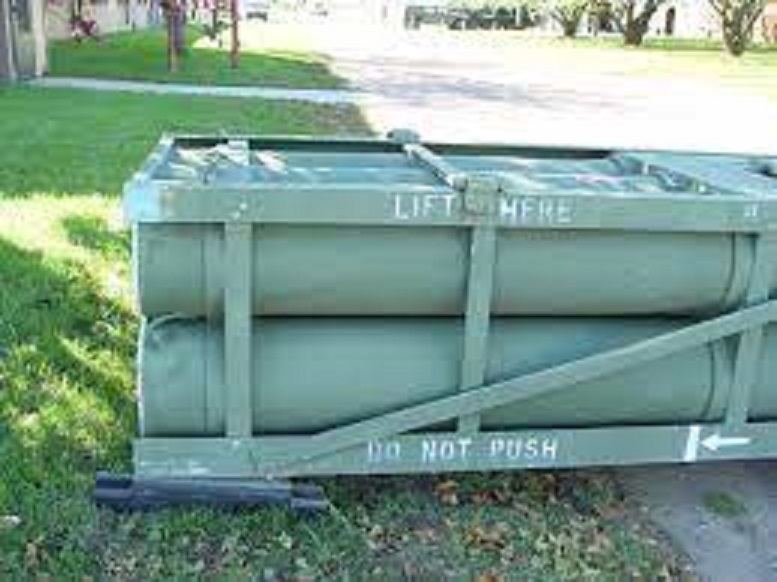
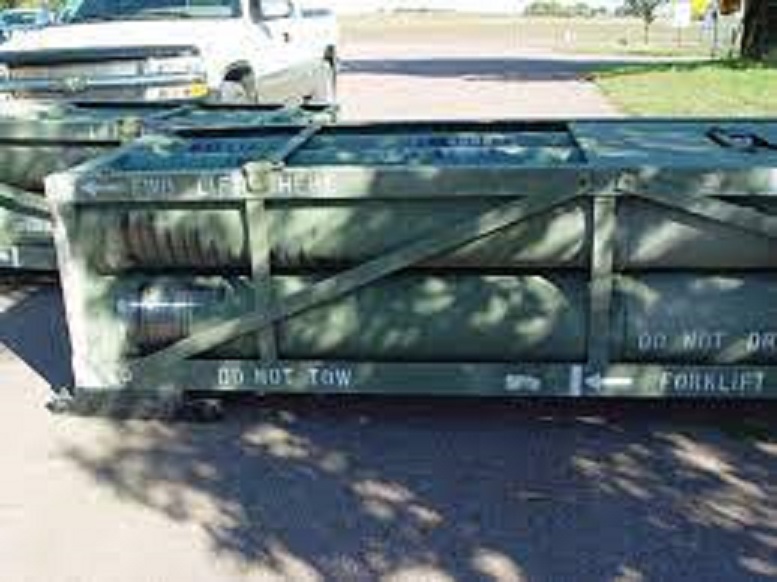
Any close up photos of the real transport feet?
Cannot help wondering about them.
I guess I need to add them to my four pods in the CROPS container.
The transport feet are blocks of rubber with two vertical pins that connect to the pod with cotter pins to hold it on.
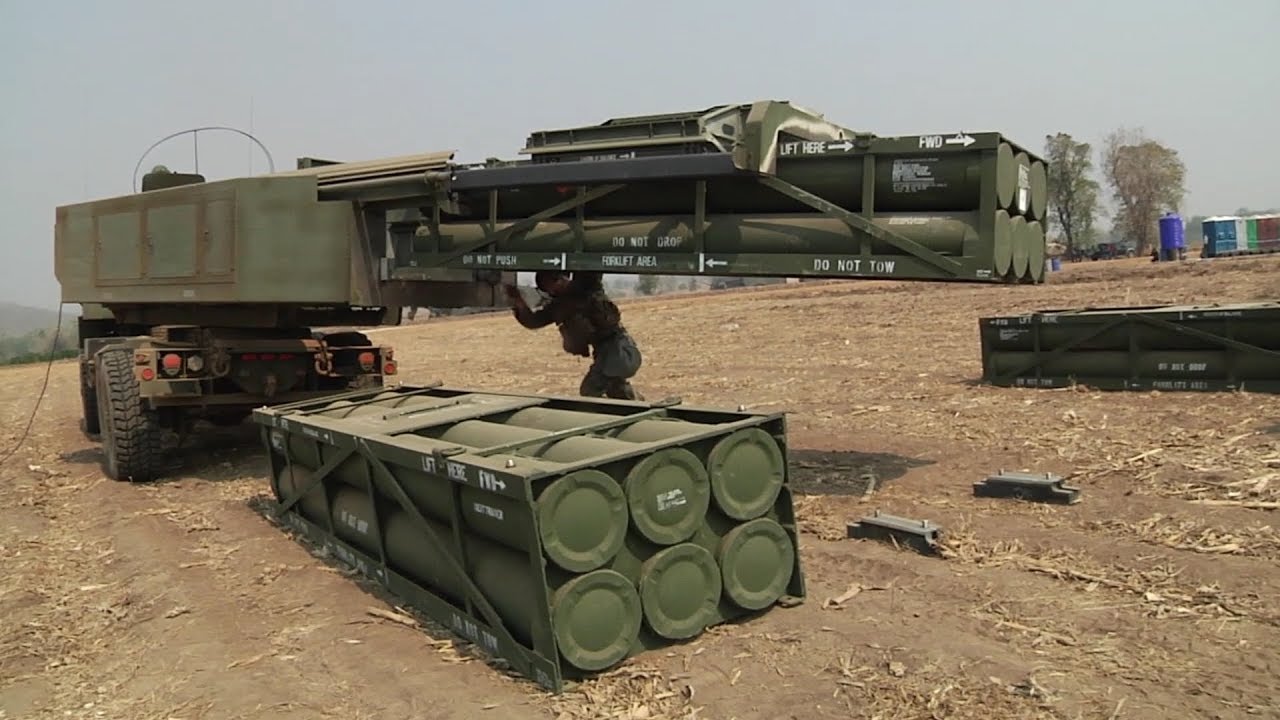
2 Likes
Thanks ~ Good to know!