Out-freaking-standing Gino! That’s certainly a lot of fantastic scratchbuilding and kitbashing. A phenomenal amount of work and it all looks exceptional down to the last detail. Can’t wait to see it in paint.
That is some exceptional work Gino. All the detailing looks spot on and the whole thing together is not only huge, but very very impressive and a testament to user knowledge and building skills… It will only get better and better with paint ![]()
Hi Gino,
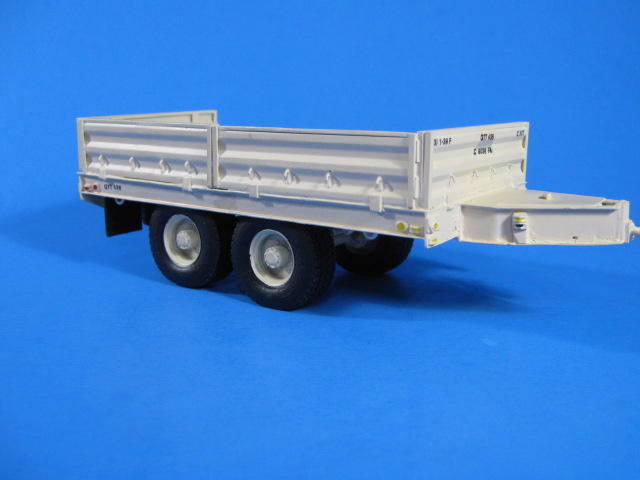
how big is the flatbed of the build? I saw these trailers carring 400 gal. fuel tanks, maybe a thing to build later.
Excellent work Gino!
Thanks guys. It has been rewarding so far. I really like how it came out.
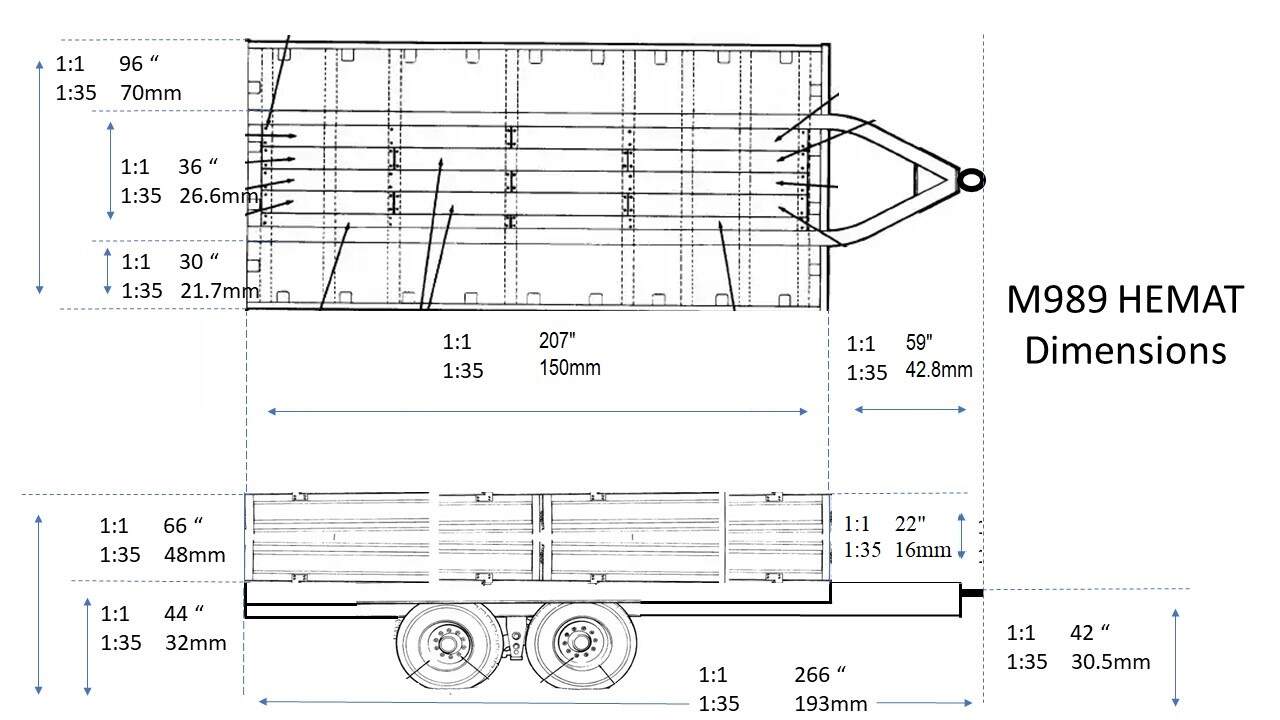
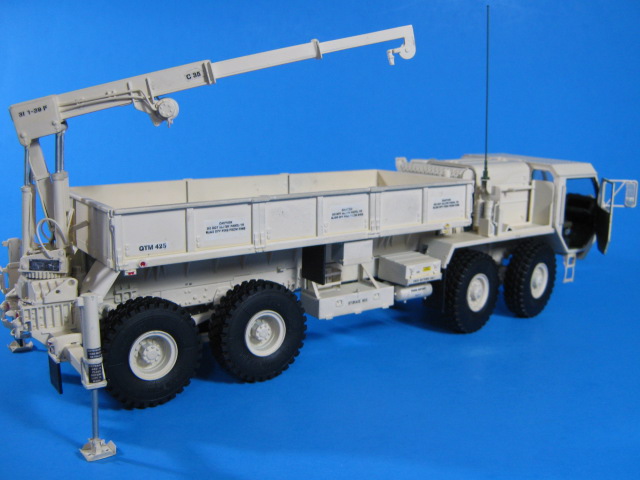
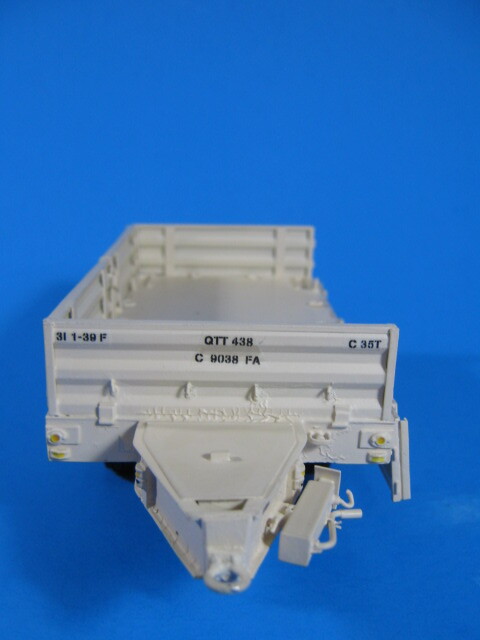
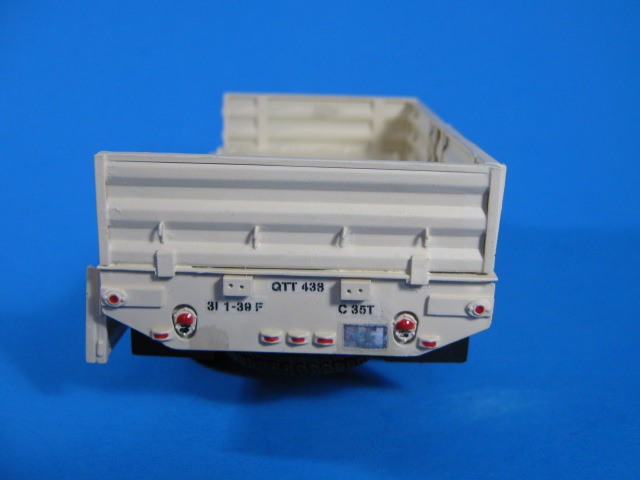
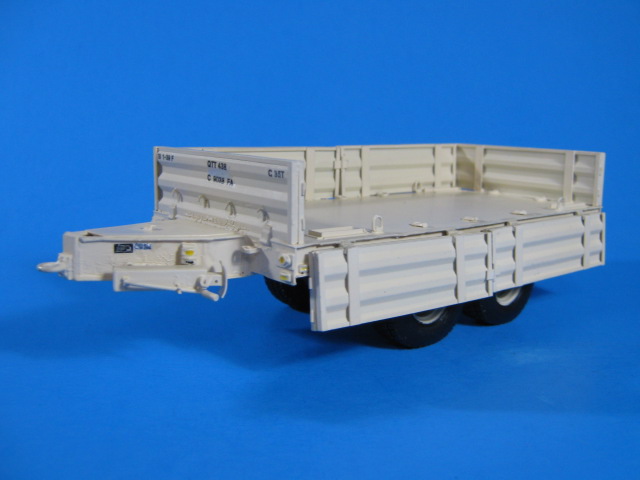
Here is a drawing with dims. The total length of the bed is 207".
1 Like
outstanding details wow !!
Really amazing work, Gino!
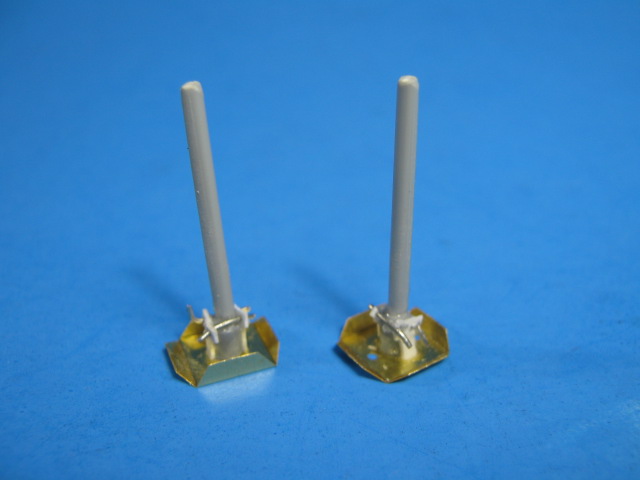
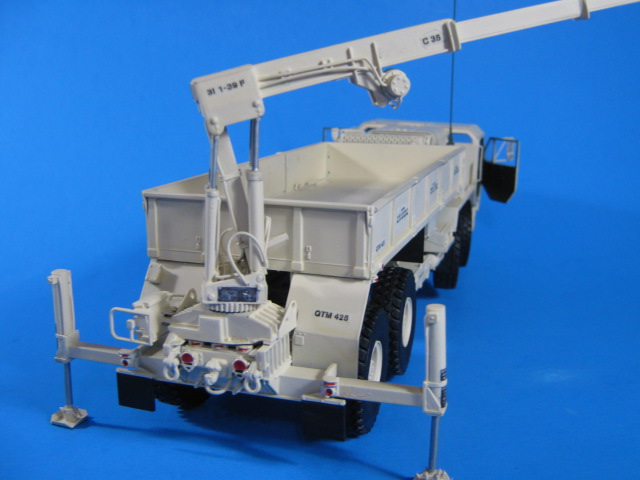
Thanks guys. I added a few more details to the stabilizing legs for the crane tonight. I had a couple of base plates left over from a PE set and added them, along with scratch-built pin supports to attach them to the legs.
3 Likes
Funny that you use feet for 1:1 size and metric for 1:35 sale ![]()
Is doubling the work, first from feet to metric, and then deviding by 35…
Beautiful build, would make a superb kit… ![]()
![]()
It really is the spitting image of your picture in your first post ![]()
Would this have been used to supply lets say, an M270?
Thanks for the compliments.
Actually, it was quite simple, especially as I used a scale conversion calculator online that allows inches input and metric output, so no issues. Also, inches is what I found the measurements in from the TM and metric (millimeter) is a lot more precise when building in 1/35 scale.
That is exactly what they were used for. I am modeling it as we used them in the initial invasion of Iraq in '03 in 1-39 FA (MLRS), 3ID. They have now been replaced by M1120 LHS as ammo carriers in MLRS Bns.
1 Like
Many thanks Gino!
1 Like
Thanks for the extra info on the role of this vehicles!
1 Like
Gino … all the details and the trailer are looking great.
Cheers,
Ralph
Thanks Ralph. I have an update as well.
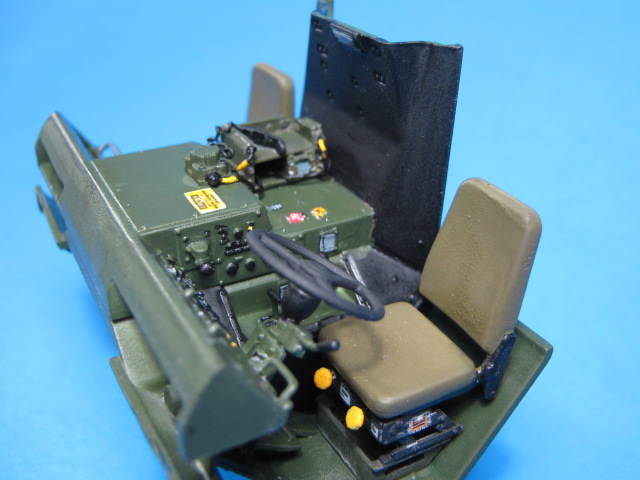
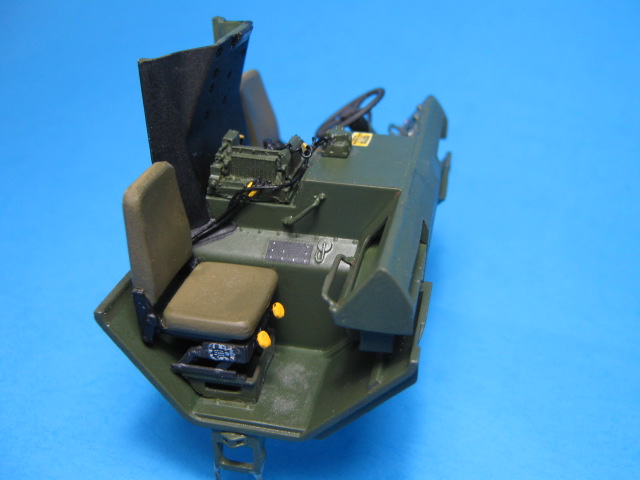
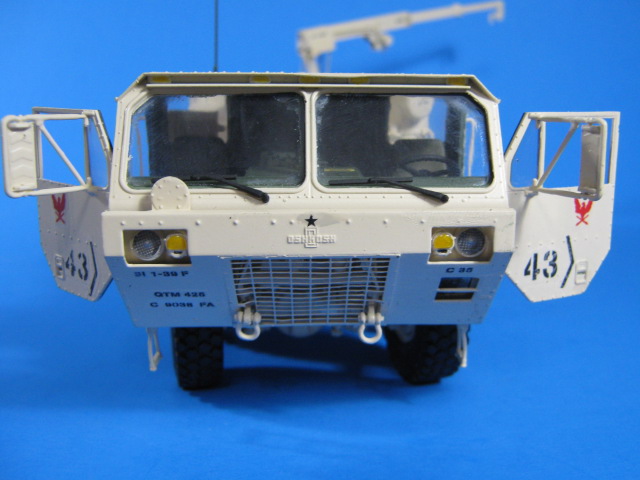
I have completed the cab interior painting and detailing. I mostly used the kit decals for the cab, which there are a lot of. I added a couple waring and general placards, but only a few. The kit is very detailed inside the cab.
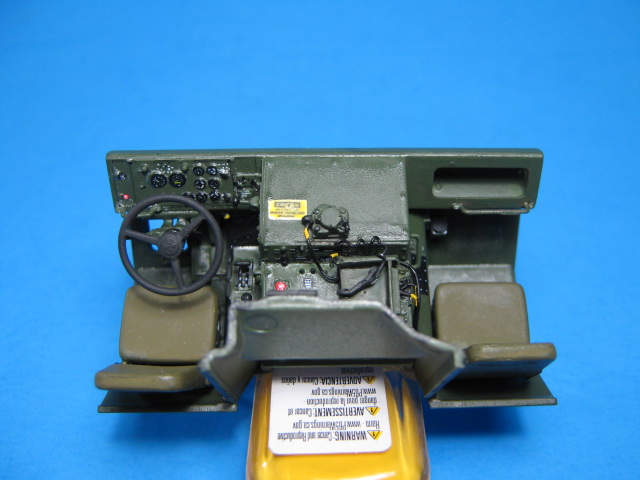
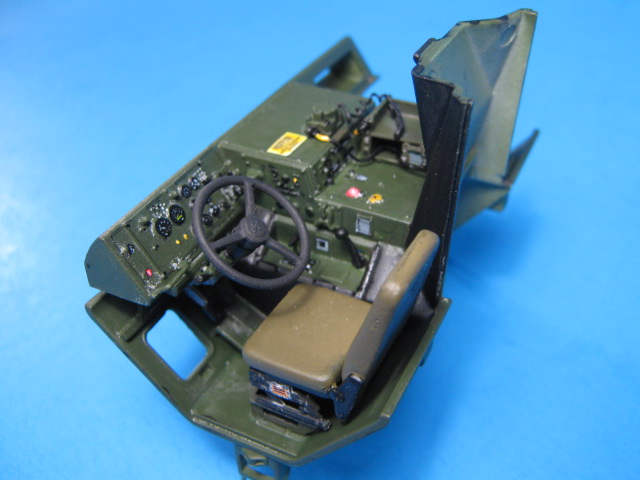
The only thing I added is a resin SINCGARS ASIP radio mount and handset. The kit comes with a radio mount, but I am not sure what radio it is supposed to be. It kind of looks like a SINCGARS mount, but not really. That is why I switched it. The speaker box comes in the kit. I fully wired the radio parts as well w/ 0.015 fuse wire.
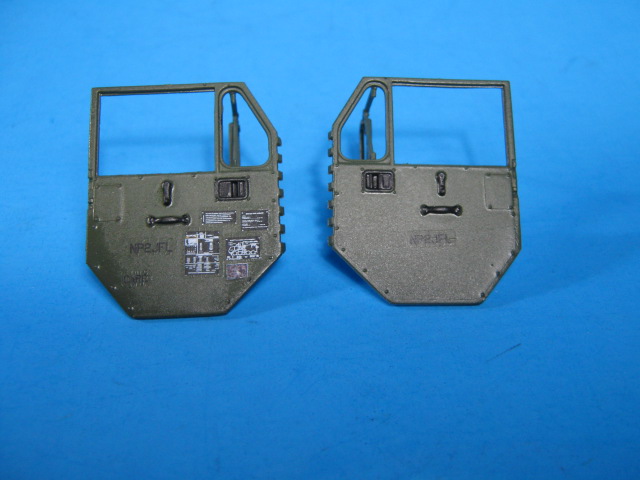
The kit also included placards for the driver’s door and a serial number that goes inside both doors. Here are the completed door interiors.
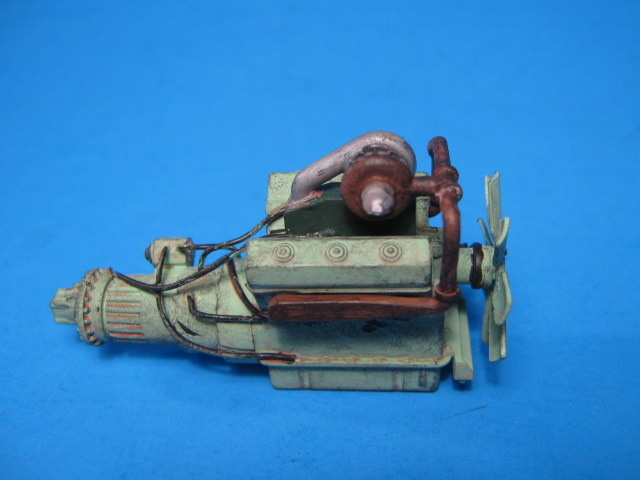
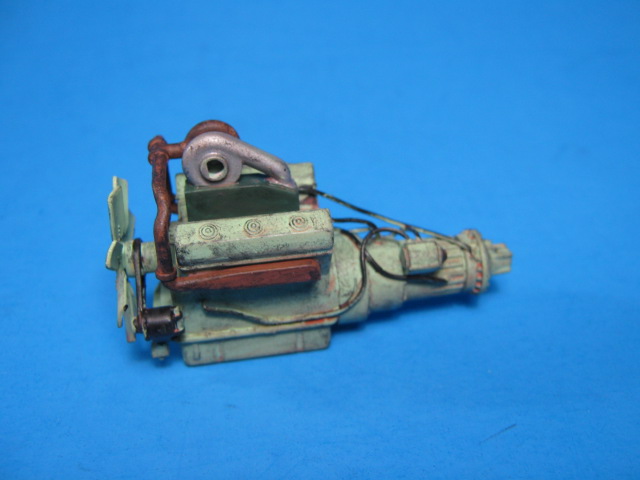
I also completed the engine. I added some wires/hoses to give it some extra details. Most of it will not be seen, but I know it is all there. You mainly only see the back side of the engine since I left the side access covers closed on this one.
Next up is overall paint color. Hopefully I will get them into the paint booth this week.
6 Likes
No chance to get into the paint booth this week. That will have to be Saturday’s task.
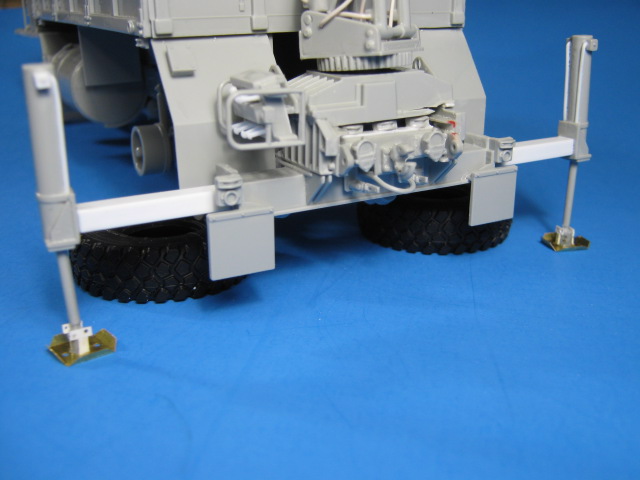
I did add the last details to the HEMAT though. I added air brakes underneath using brake cylinders from a Legend M923/5 Update set intended for the Italeri M923/5 kits. I scratched the mounts from U-shaped styrene and the actuators are from Legend.
Whoops, forgot to trim the smaller actuator rods.

8 Likes
I was able to get some paint on it over the weekend. I also applied the decals. All the decals were home-made by me on my home computer/printer. I have marked it as C35, from C BTRY, 1-39 FA (MLRS), 3ID during the invasion of Iraq in '03.
We were the “Phoenix” Bn since the unit had been stood up and stood down multiple times over the years, beginning life as A BTRY, 39th Field Artillery in 1918. The red phoenix over crossed cannons was our Bn symbol that we stenciled on all the vehicles.
We drew our vehicles from PrePo (PrePositioned) stocks in Kuwait, so it wears the codes for the PrePo set.
Here it is so far.
M985A2 HEMTT - C35
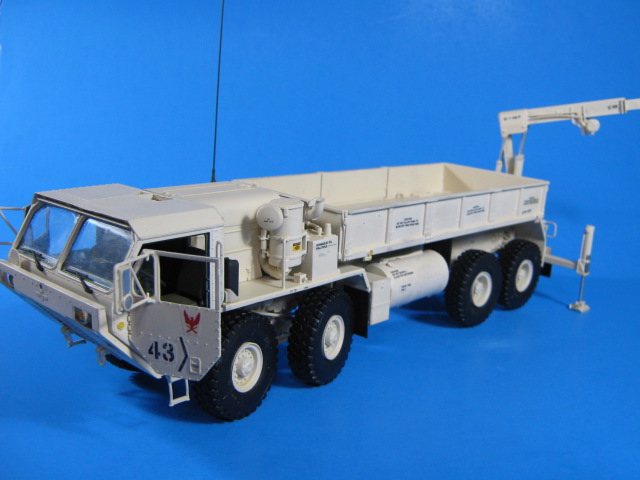
M989 HEMAT - C35T
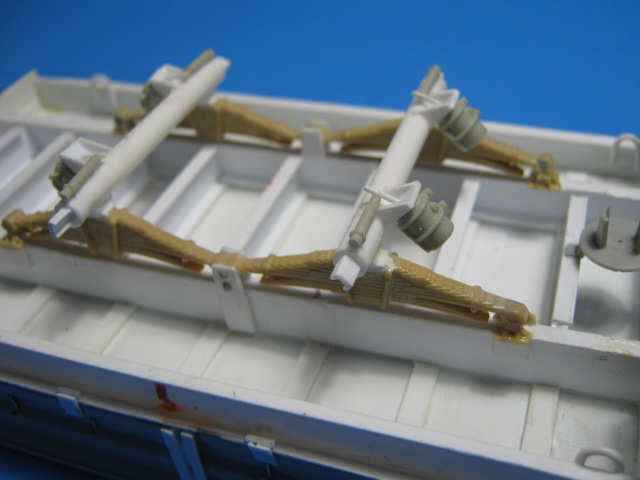
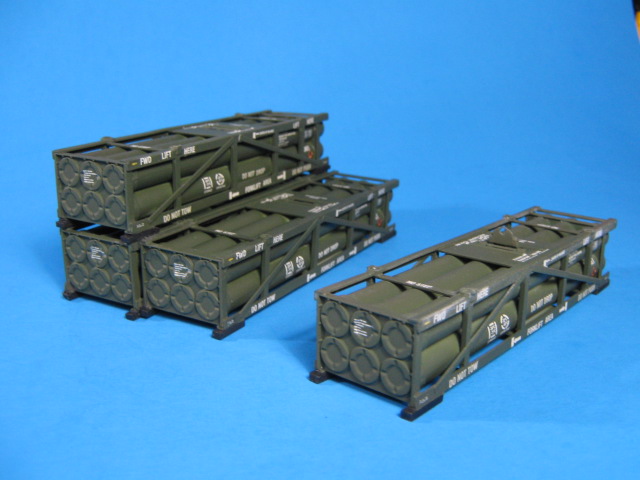
I also finished the M26 Rocket Pods. I had just enough of the Dragon kit decals to finish them, luckily.
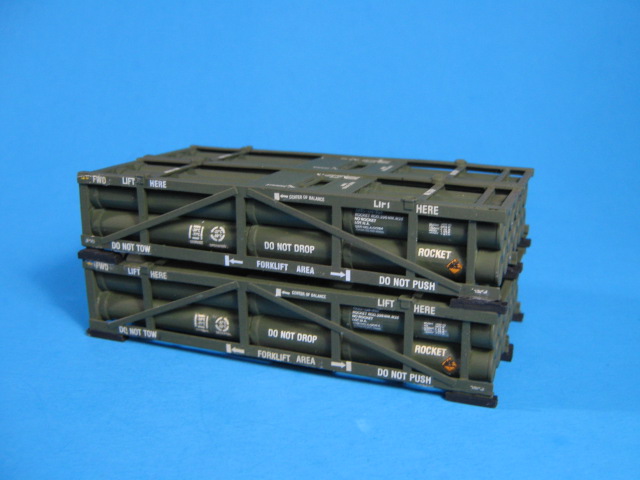
Next up is to finish final assembly, secure the loads, add a bit of personal gear, and weather them.
14 Likes
Decals are top-notch! ![]()
![]()
![]()
—mike
two small things:
The gear box is painted gloss black leaving the factory and usually stays black. The bolt heads are a gold cadium plated. The engine is usually painted O.D. color, but have seen a few in the standard Detroit Diesel blueish green. Never saw the transmission repainted on any we had at work.
gary
Absolutely beautiful Gino.
Thanks gents. Unfortunately, the engine, trans and gearbox are pretty much hidden once it is all assembled, so the colors are close enough.
1 Like