What follows will be a blatant re-hash of a model thread that is/was previously relegated to the Archives many moons ago.
This will be a General Forum on the WWII Mack NO6 plus detail photos for possibly building a scratch/semi scratch model in 1/35 scale. My primary goal in showing this is to encourage all modelers to consider venturing into some degree of scratch building. An art which seems to be dying within our hobby as more and more models on our “wish List” become available.
There is still hope that some hobby manufacture will finally provide us with an alternative to the M4 High Speed Tractor also used to pull the many 155mm and 8 inch guns that are being now provided by manufactures such as AFV Club, et al.
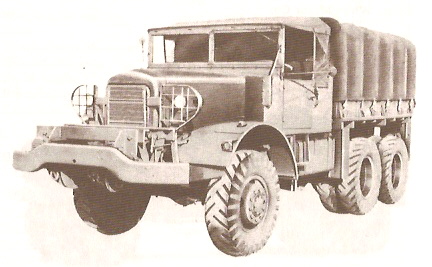
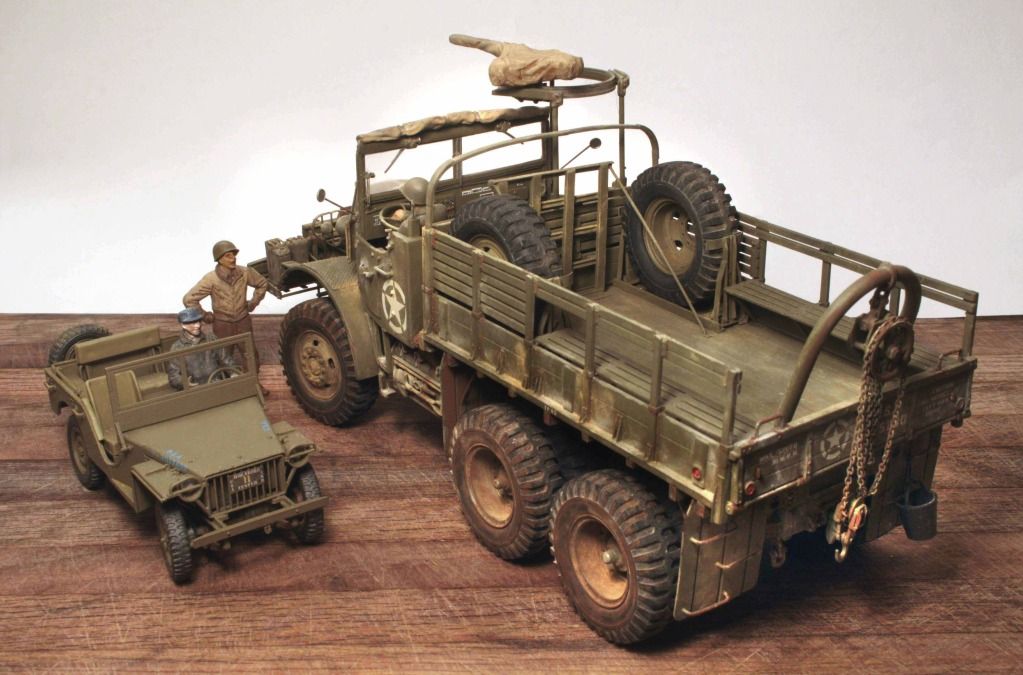
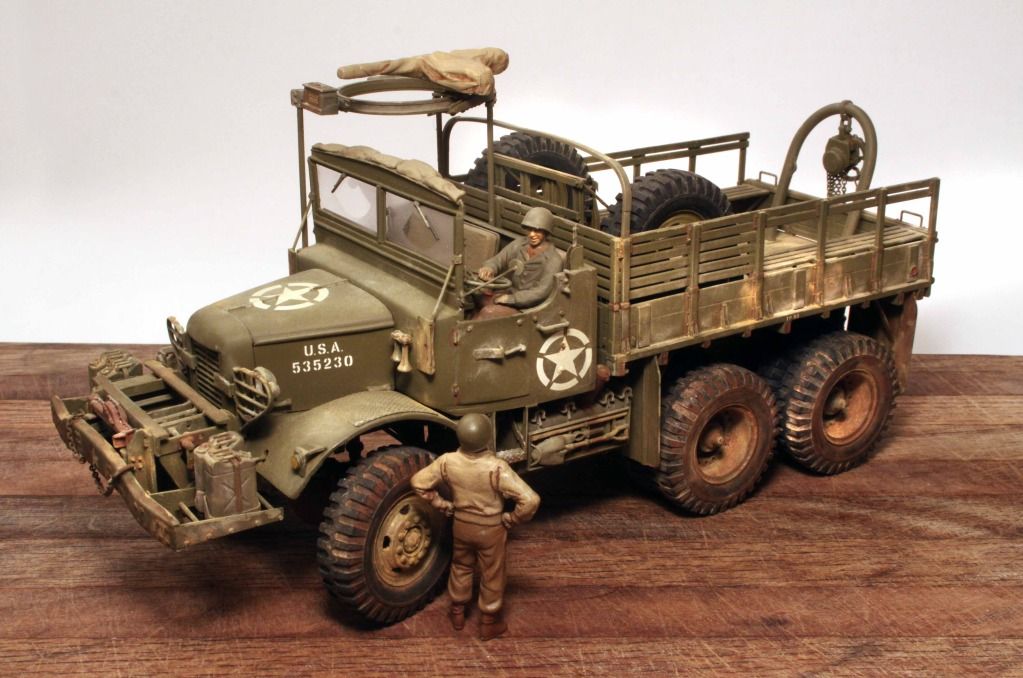
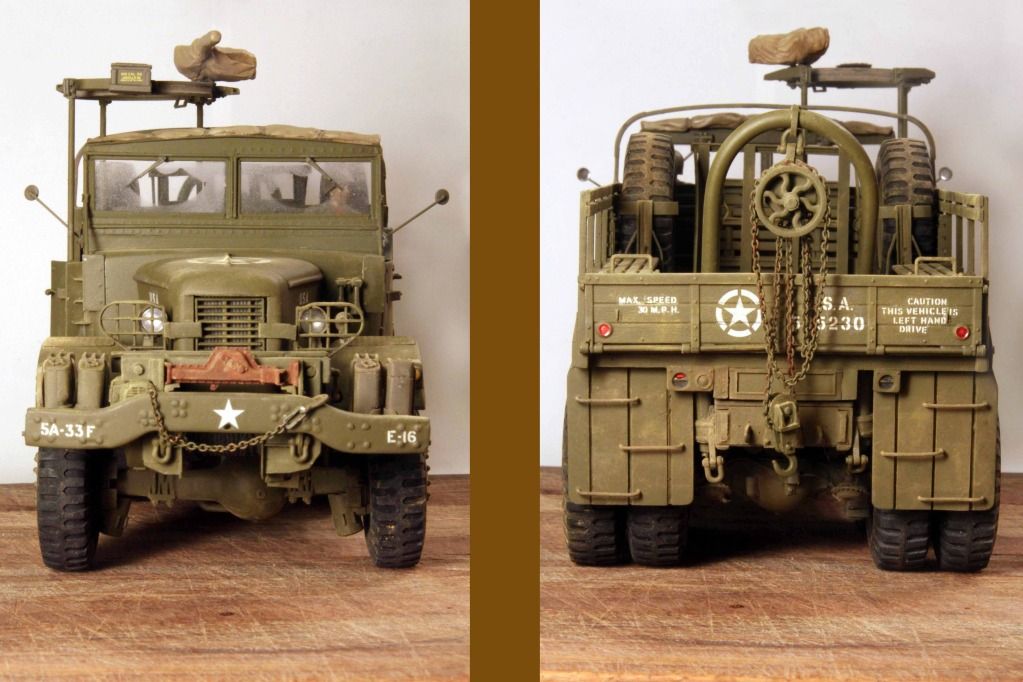
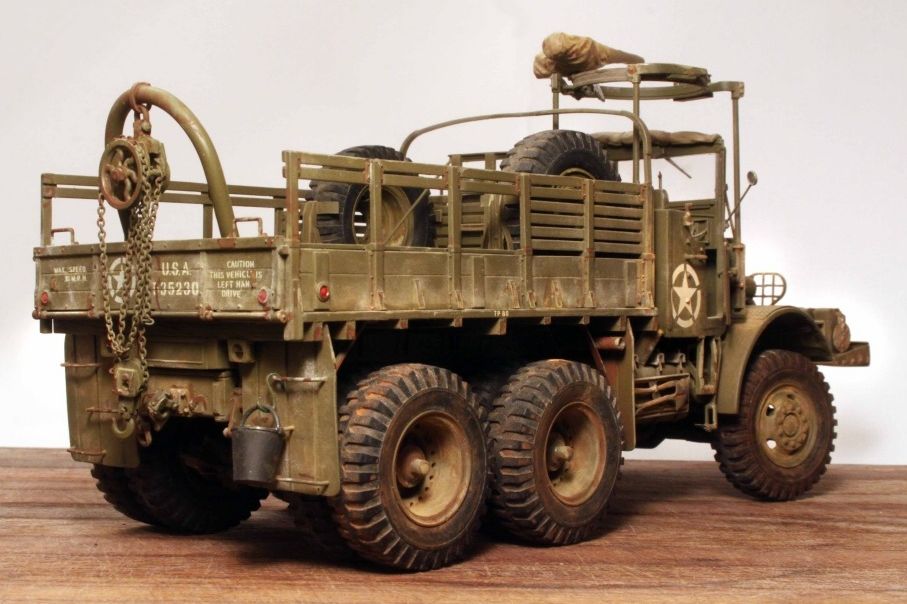
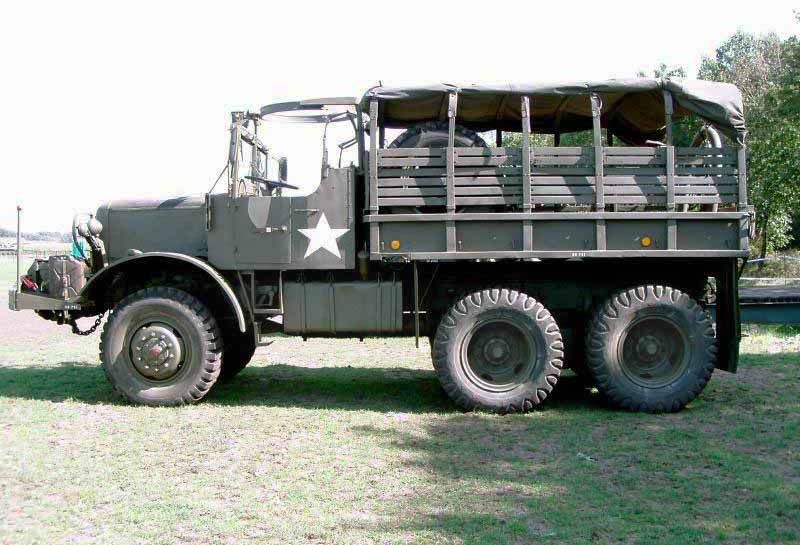
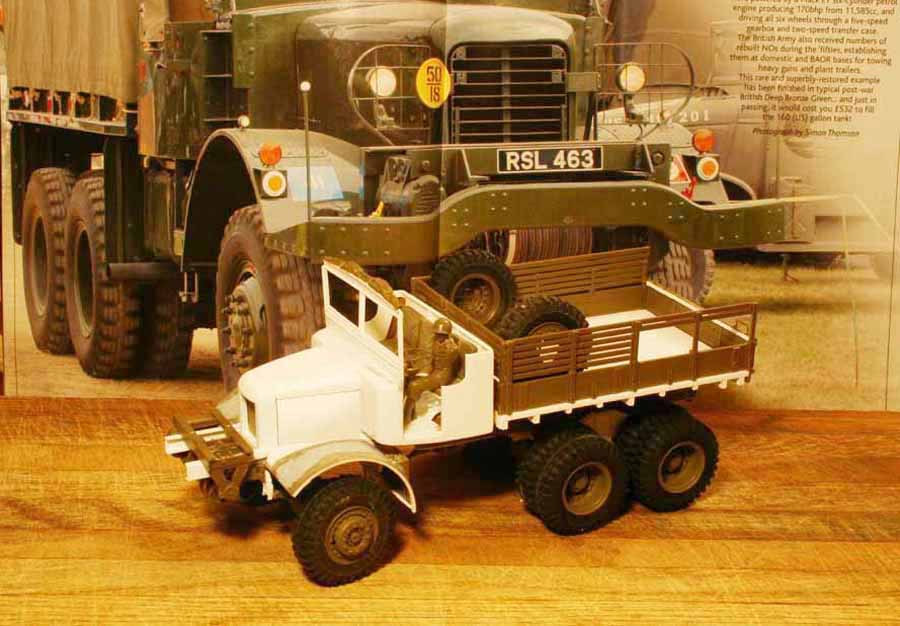
My favorite photo of my Mack in profile
The two things that really got me going on this project ~ where #1 learning that the Mack NO used the same tires as the Dragon Wagon. (But on slightly narrower rims so the tires stood somewhat taller.) and #2 that the Mack used just a slightly earlier model of the same 20 ton Gar-Wood Winch as the Dragon Wagon!
7 Likes
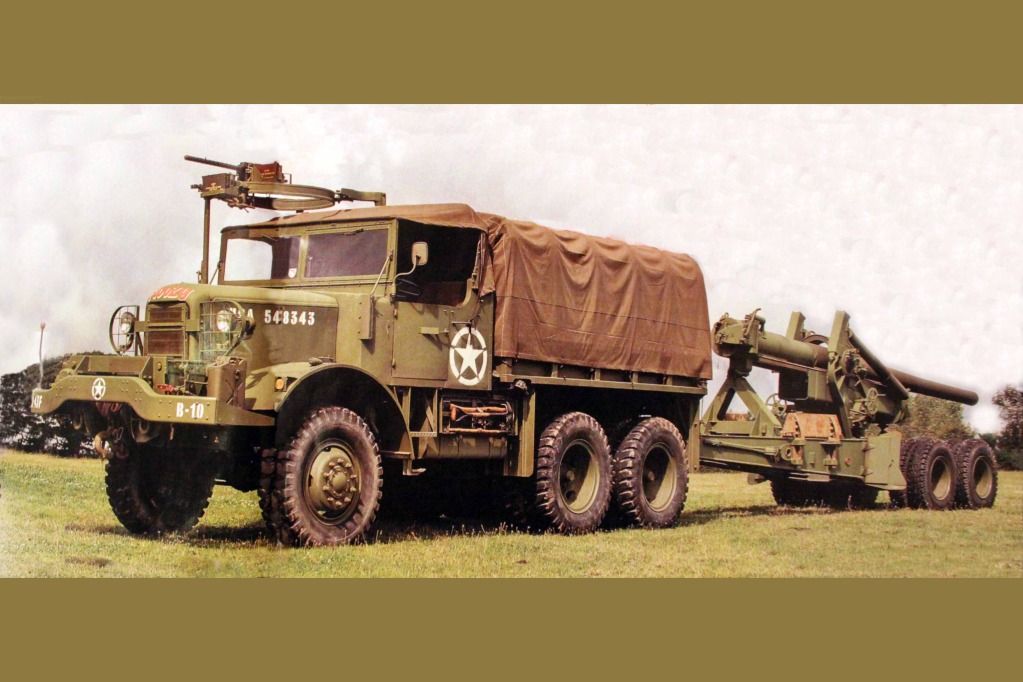
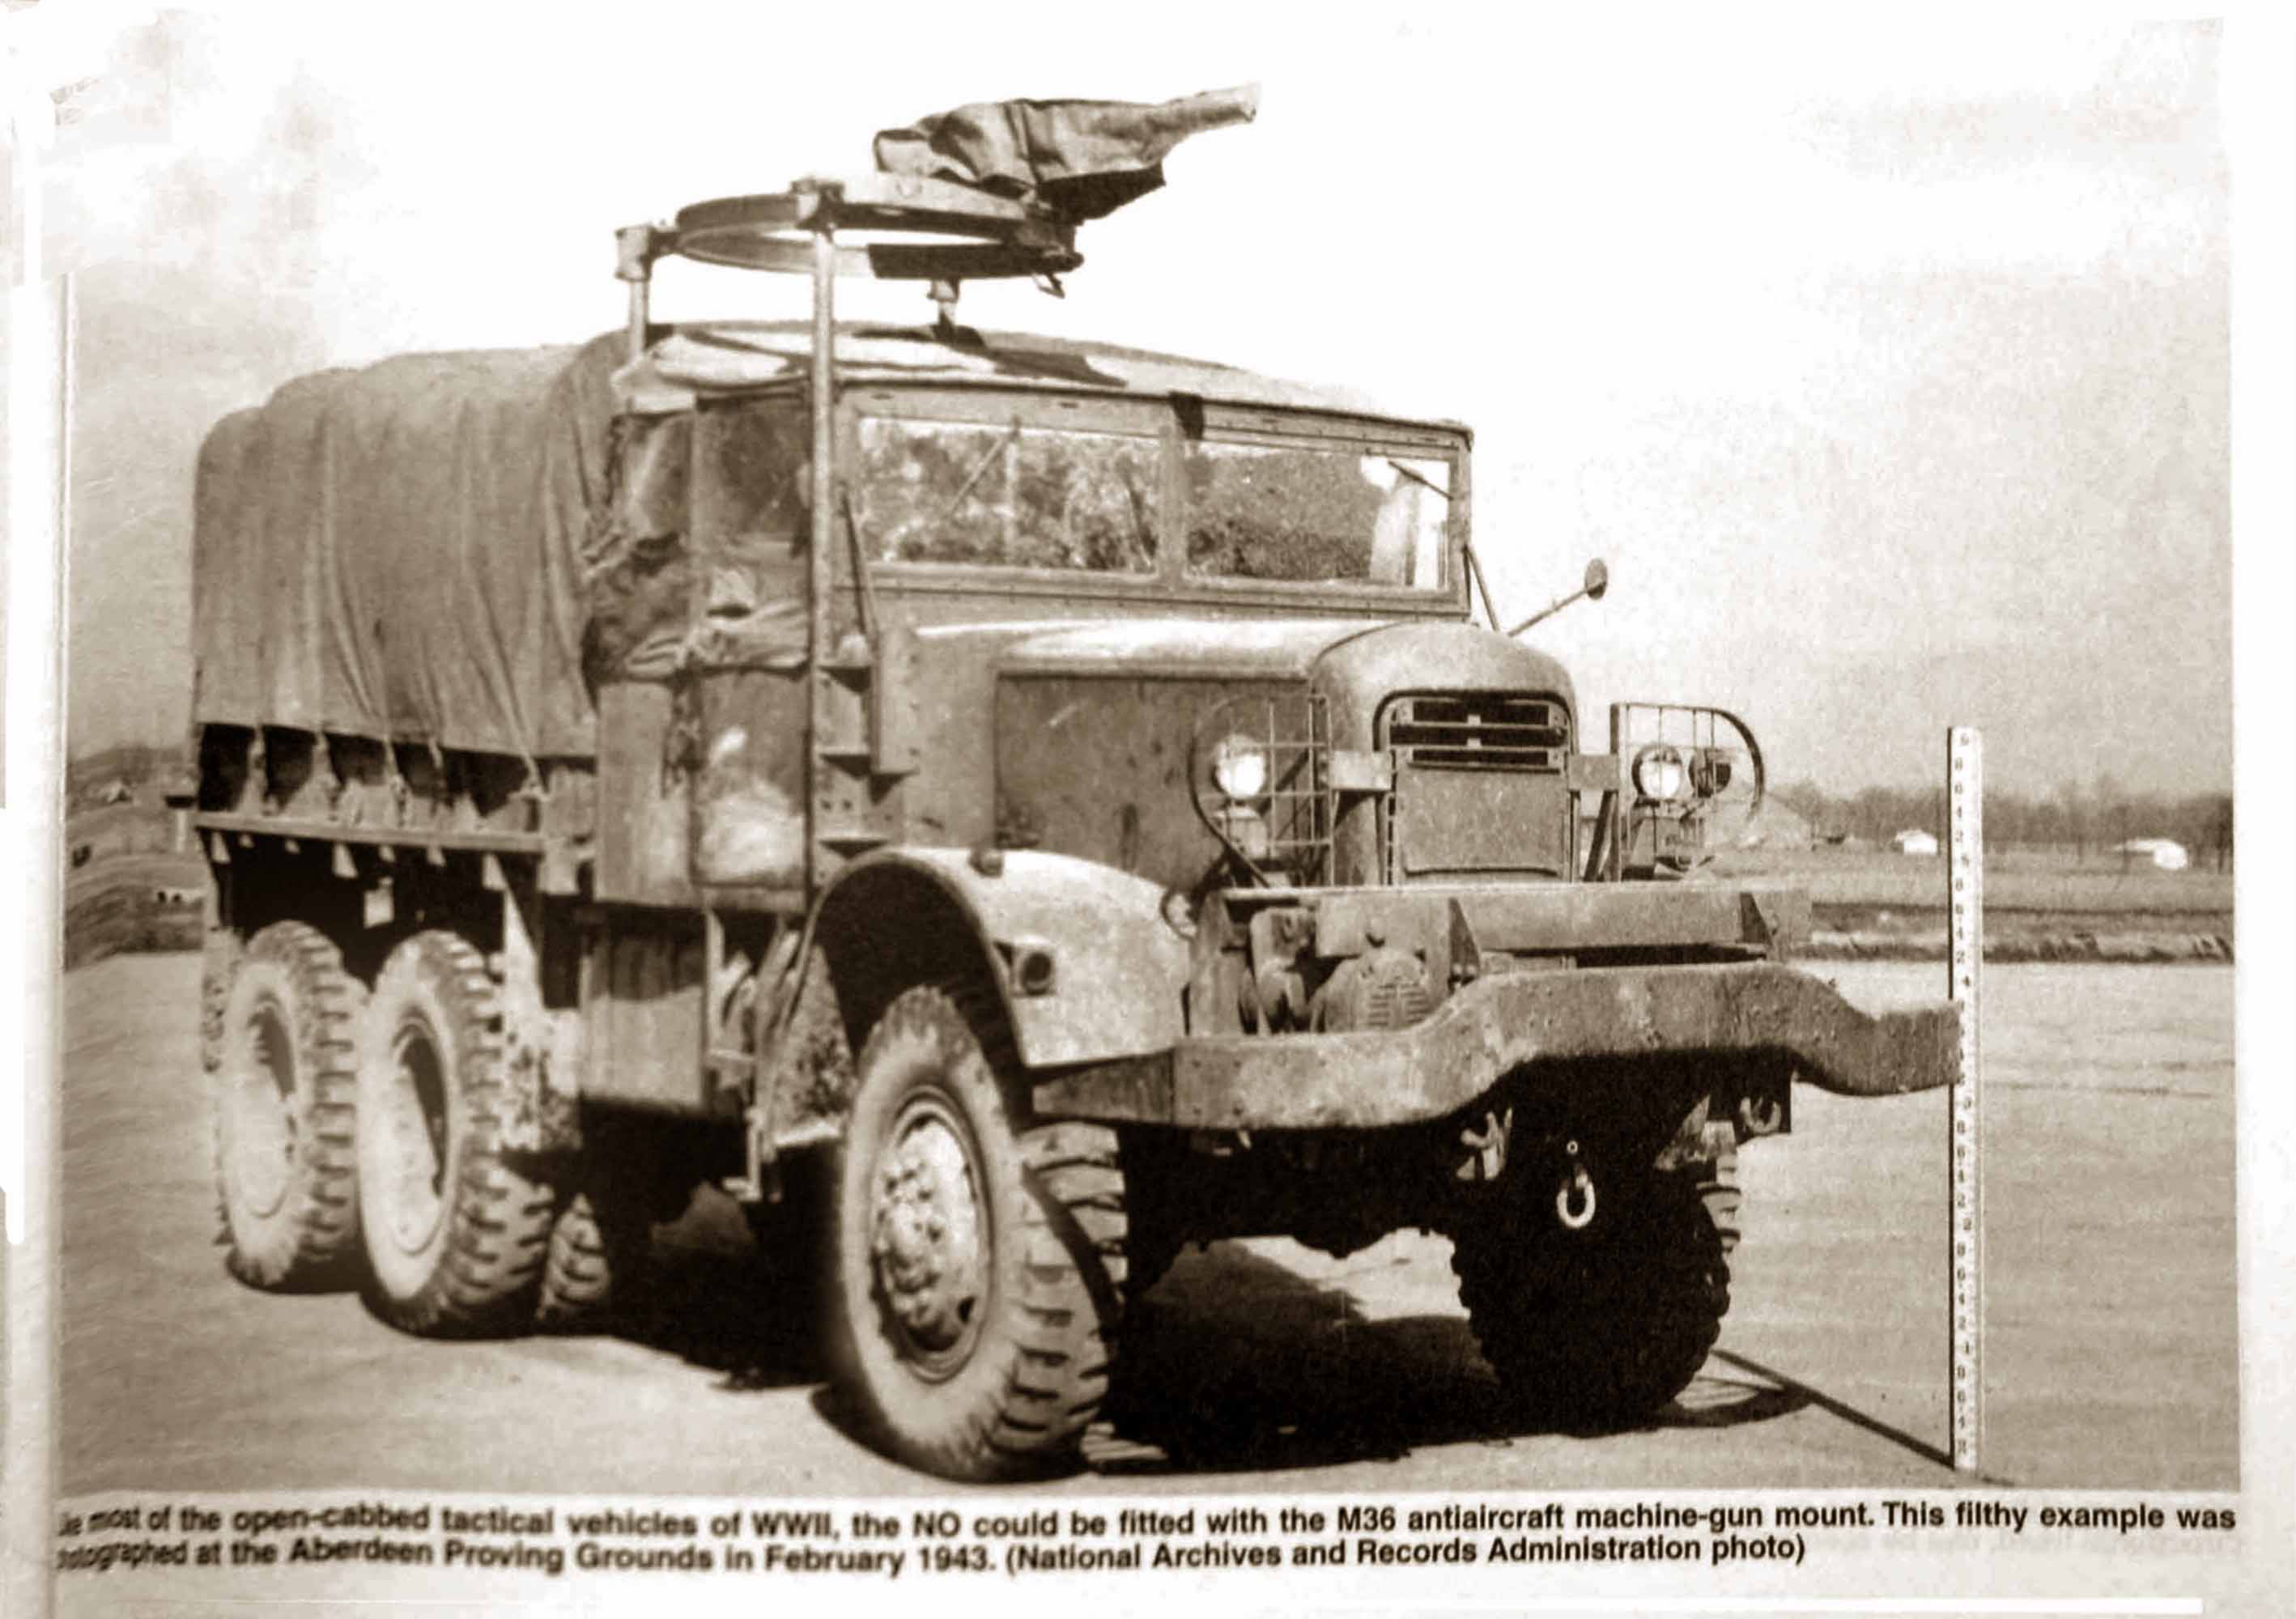
Some prototype reference:
Photo Copyright Pat Stannsil & David Doyle
(Great book on all things Mack!)
Photo Copyright LIFE Magazine
Last two photos above come from the pages of “Classic Military Vehicle” Magazine; published in the UK, a publication I highly recommend! AND it is now available online in an electronic form at:
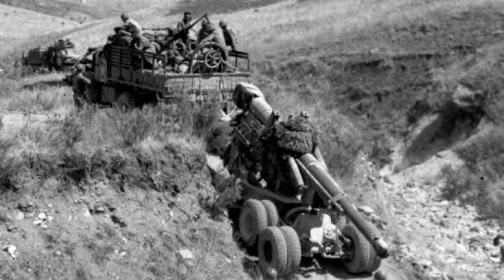
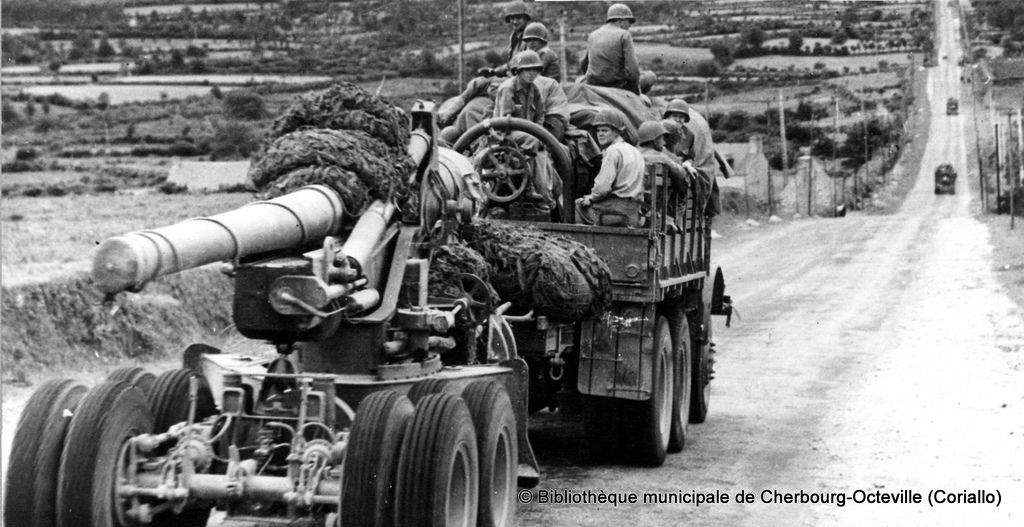
Mack NO towing a 155mm gun: Another found image.
Note: Canvas travel cap with electrical taillight attached just below, protecting the muzzle. Also note the taillight electrical cable spiraling back along the barrel. And finally, the gun is fitted with civilian pattern tires and the left side optics have been removed for transport.
(Photobucket | Make your memories fun!)
Photo Copyright; Property of the Cherbourge-Octeville Municipal Library
3 Likes
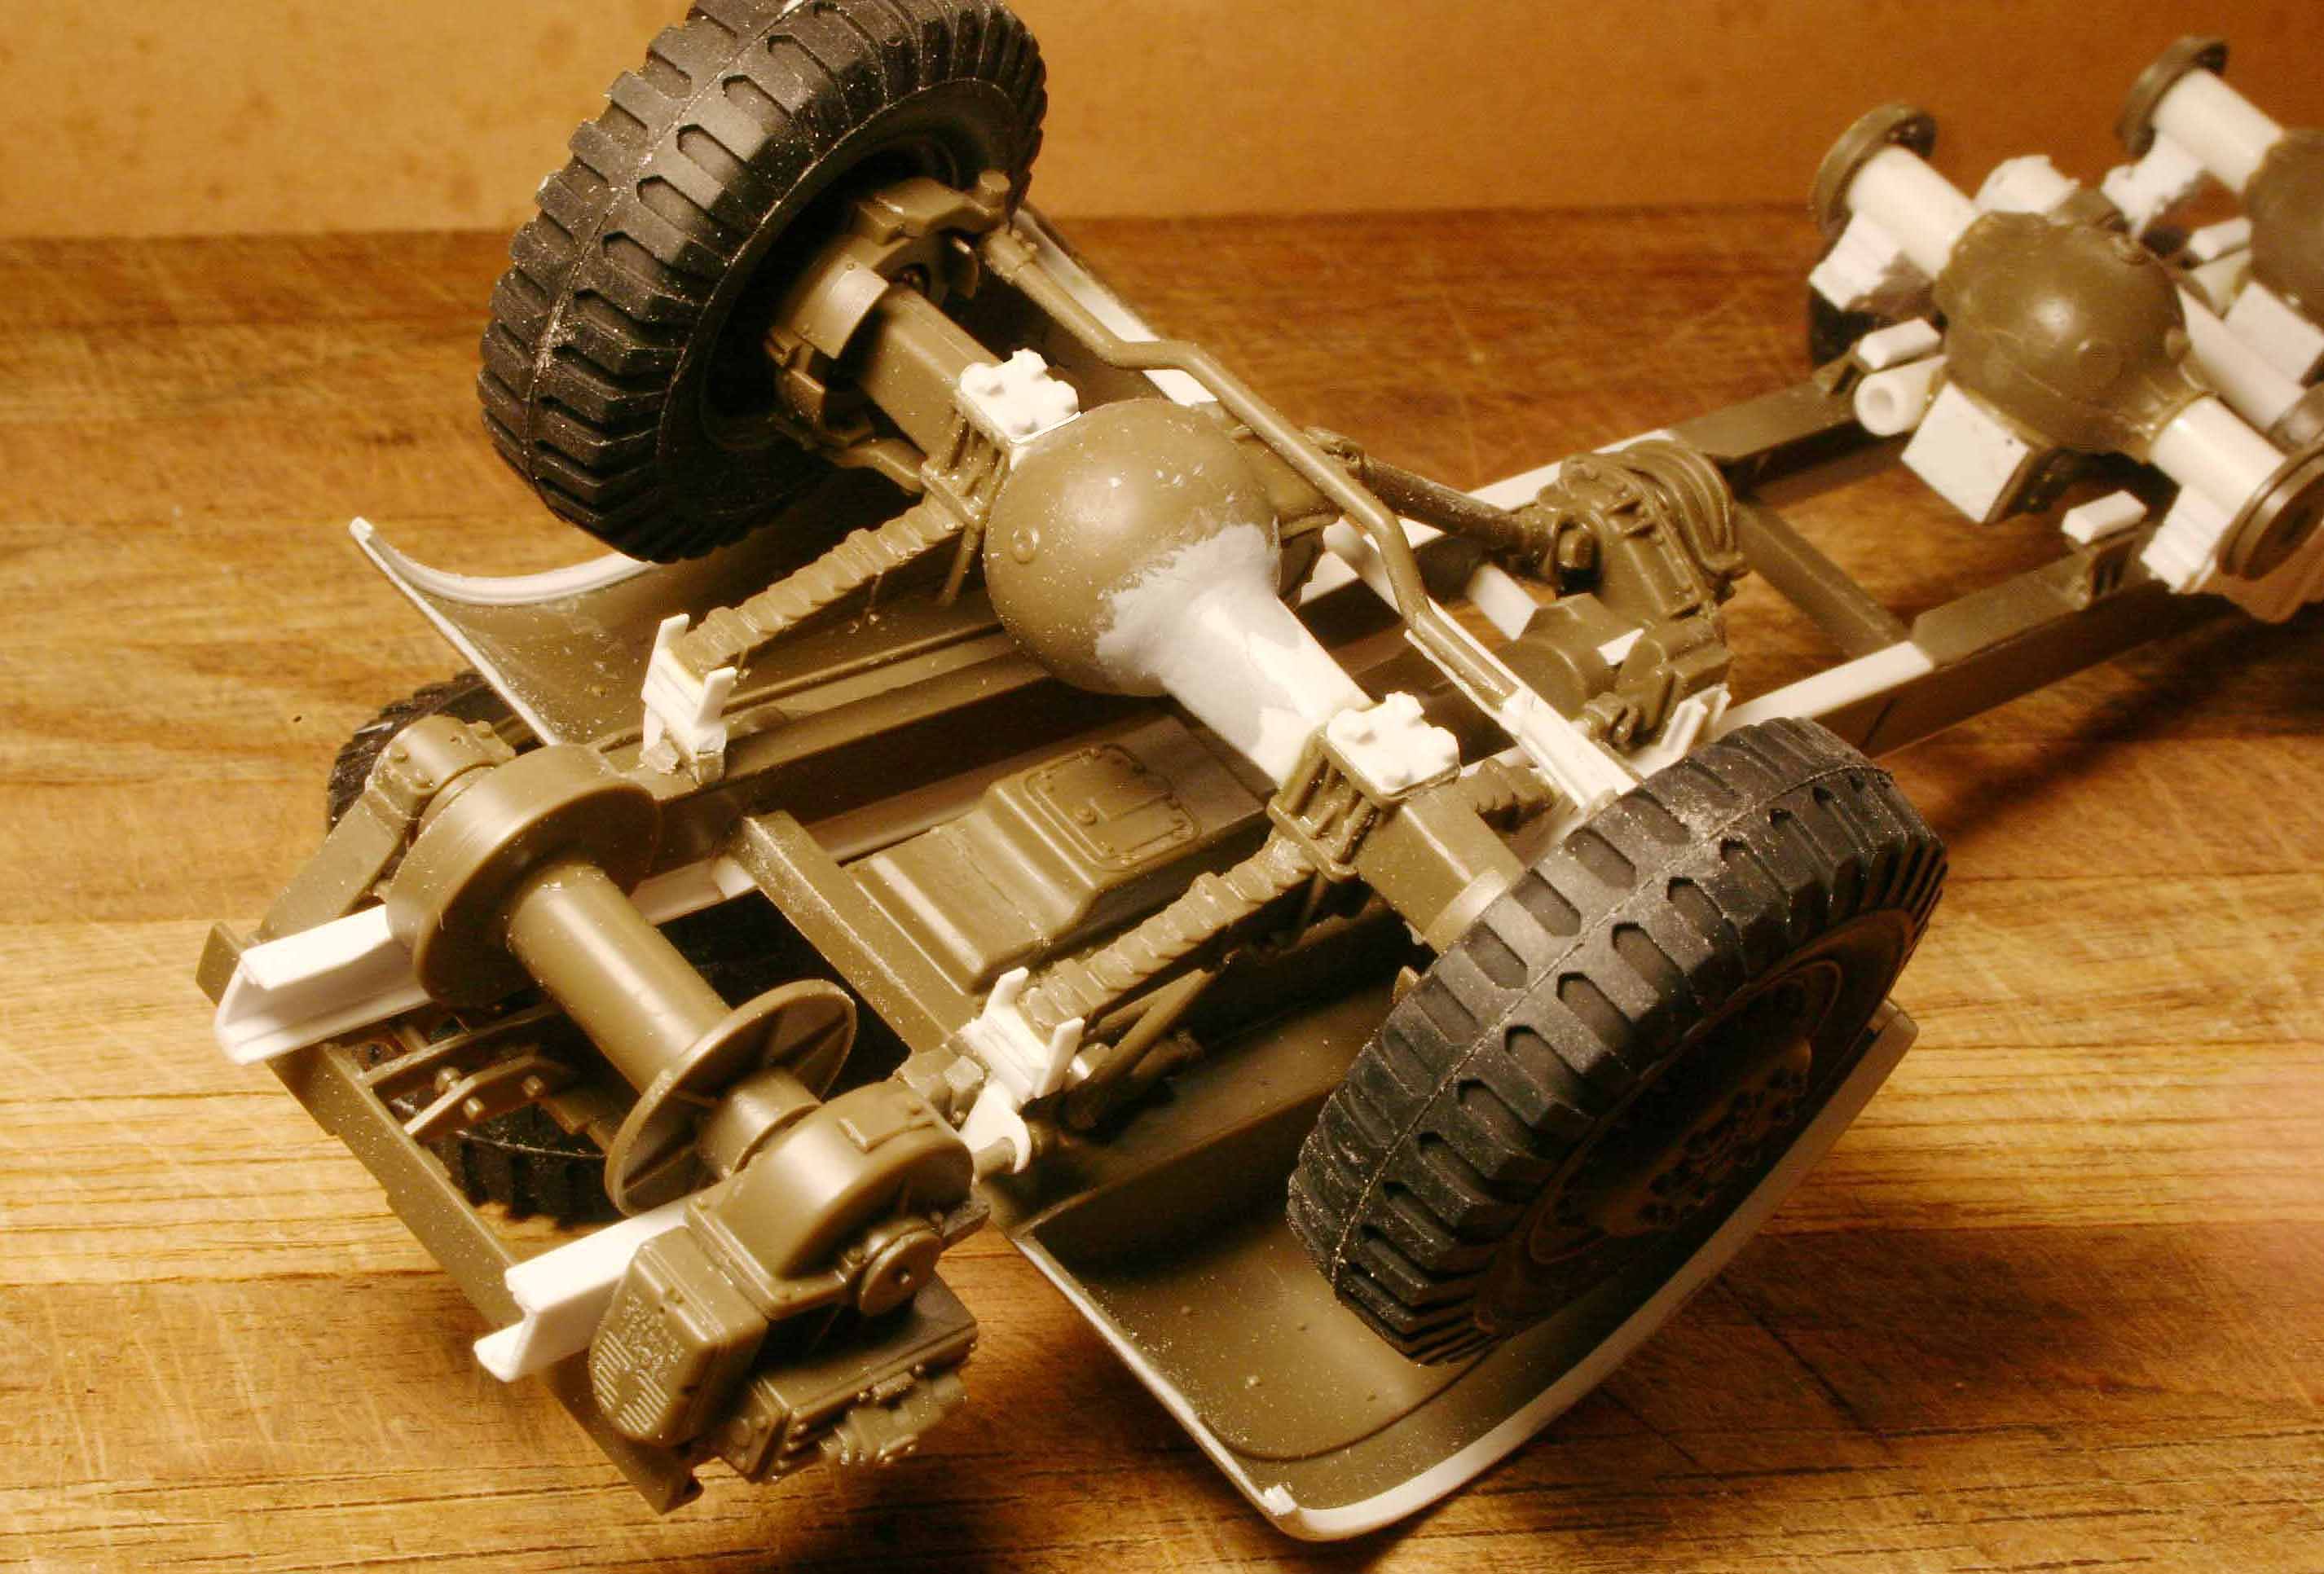
Usable parts provided by other 1/35th scale models:
Parts taken from the Tamiya Dragon Wagon:
Tires, Wheel rims (Narrowed & with new wheel centers), 20 ton winch (modified), frame (cut & modified,) front fenders, front differential (highly modified), rear differentials (highly modified), engine oil pan (modified), steering wheel, headlights, headlight guards (modified), pintle hitch, dashboard, shift levers, drive shafts, air tanks, drive shafts & U-joints, pulleys, front fenders (cut and extended), front leaf springs and some frame parts.
Parts taken from the Tamiya Deuce and a Half:
Hardware for the loadbox side walls and tail gate (heavily modified), troop benches, cab seats (highly modified - one seat shortened & one made longer/wider), taillights, convoy lights, trailer electrical connection, rear toolbox door and gun ring.
I actually started this project after already building the Dragon Wagon Recovery Tractor.
I knew I would need TWO complete kits to build my model because unlike the DW the Mack has two separate rear differentials.
I really lucked out because I found someone on eBay selling both a brand new fresh DW kit with trailer and a botched already started kit for one price!
(I ended up building that massive trailer to go with the recovery DW I had already built.)
Also little goes to waste around my shop in that I used the left over rear bogie parts to build a semblance of the post-war M199 2-axle trailer dolly.
3 Likes
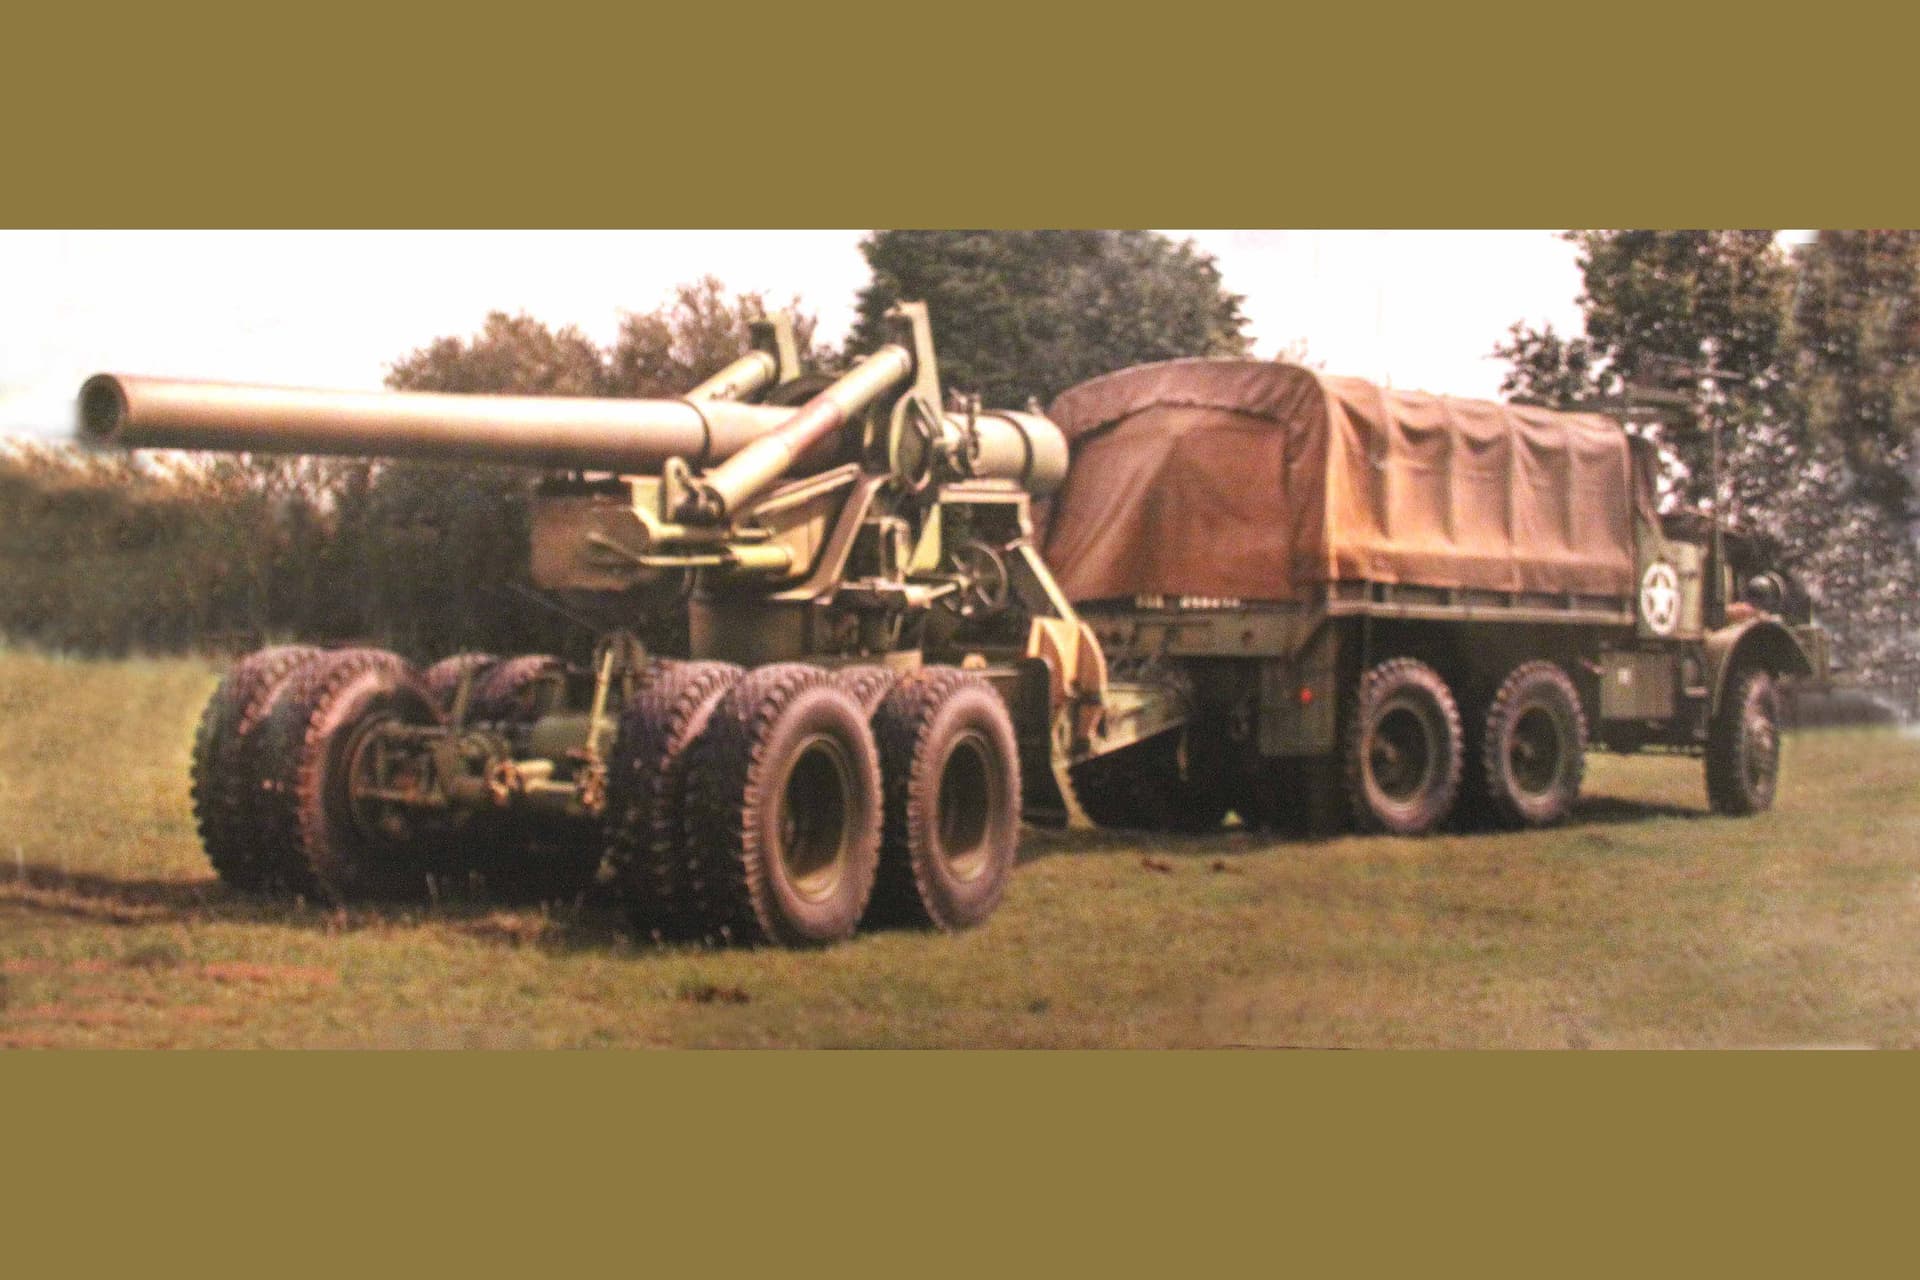
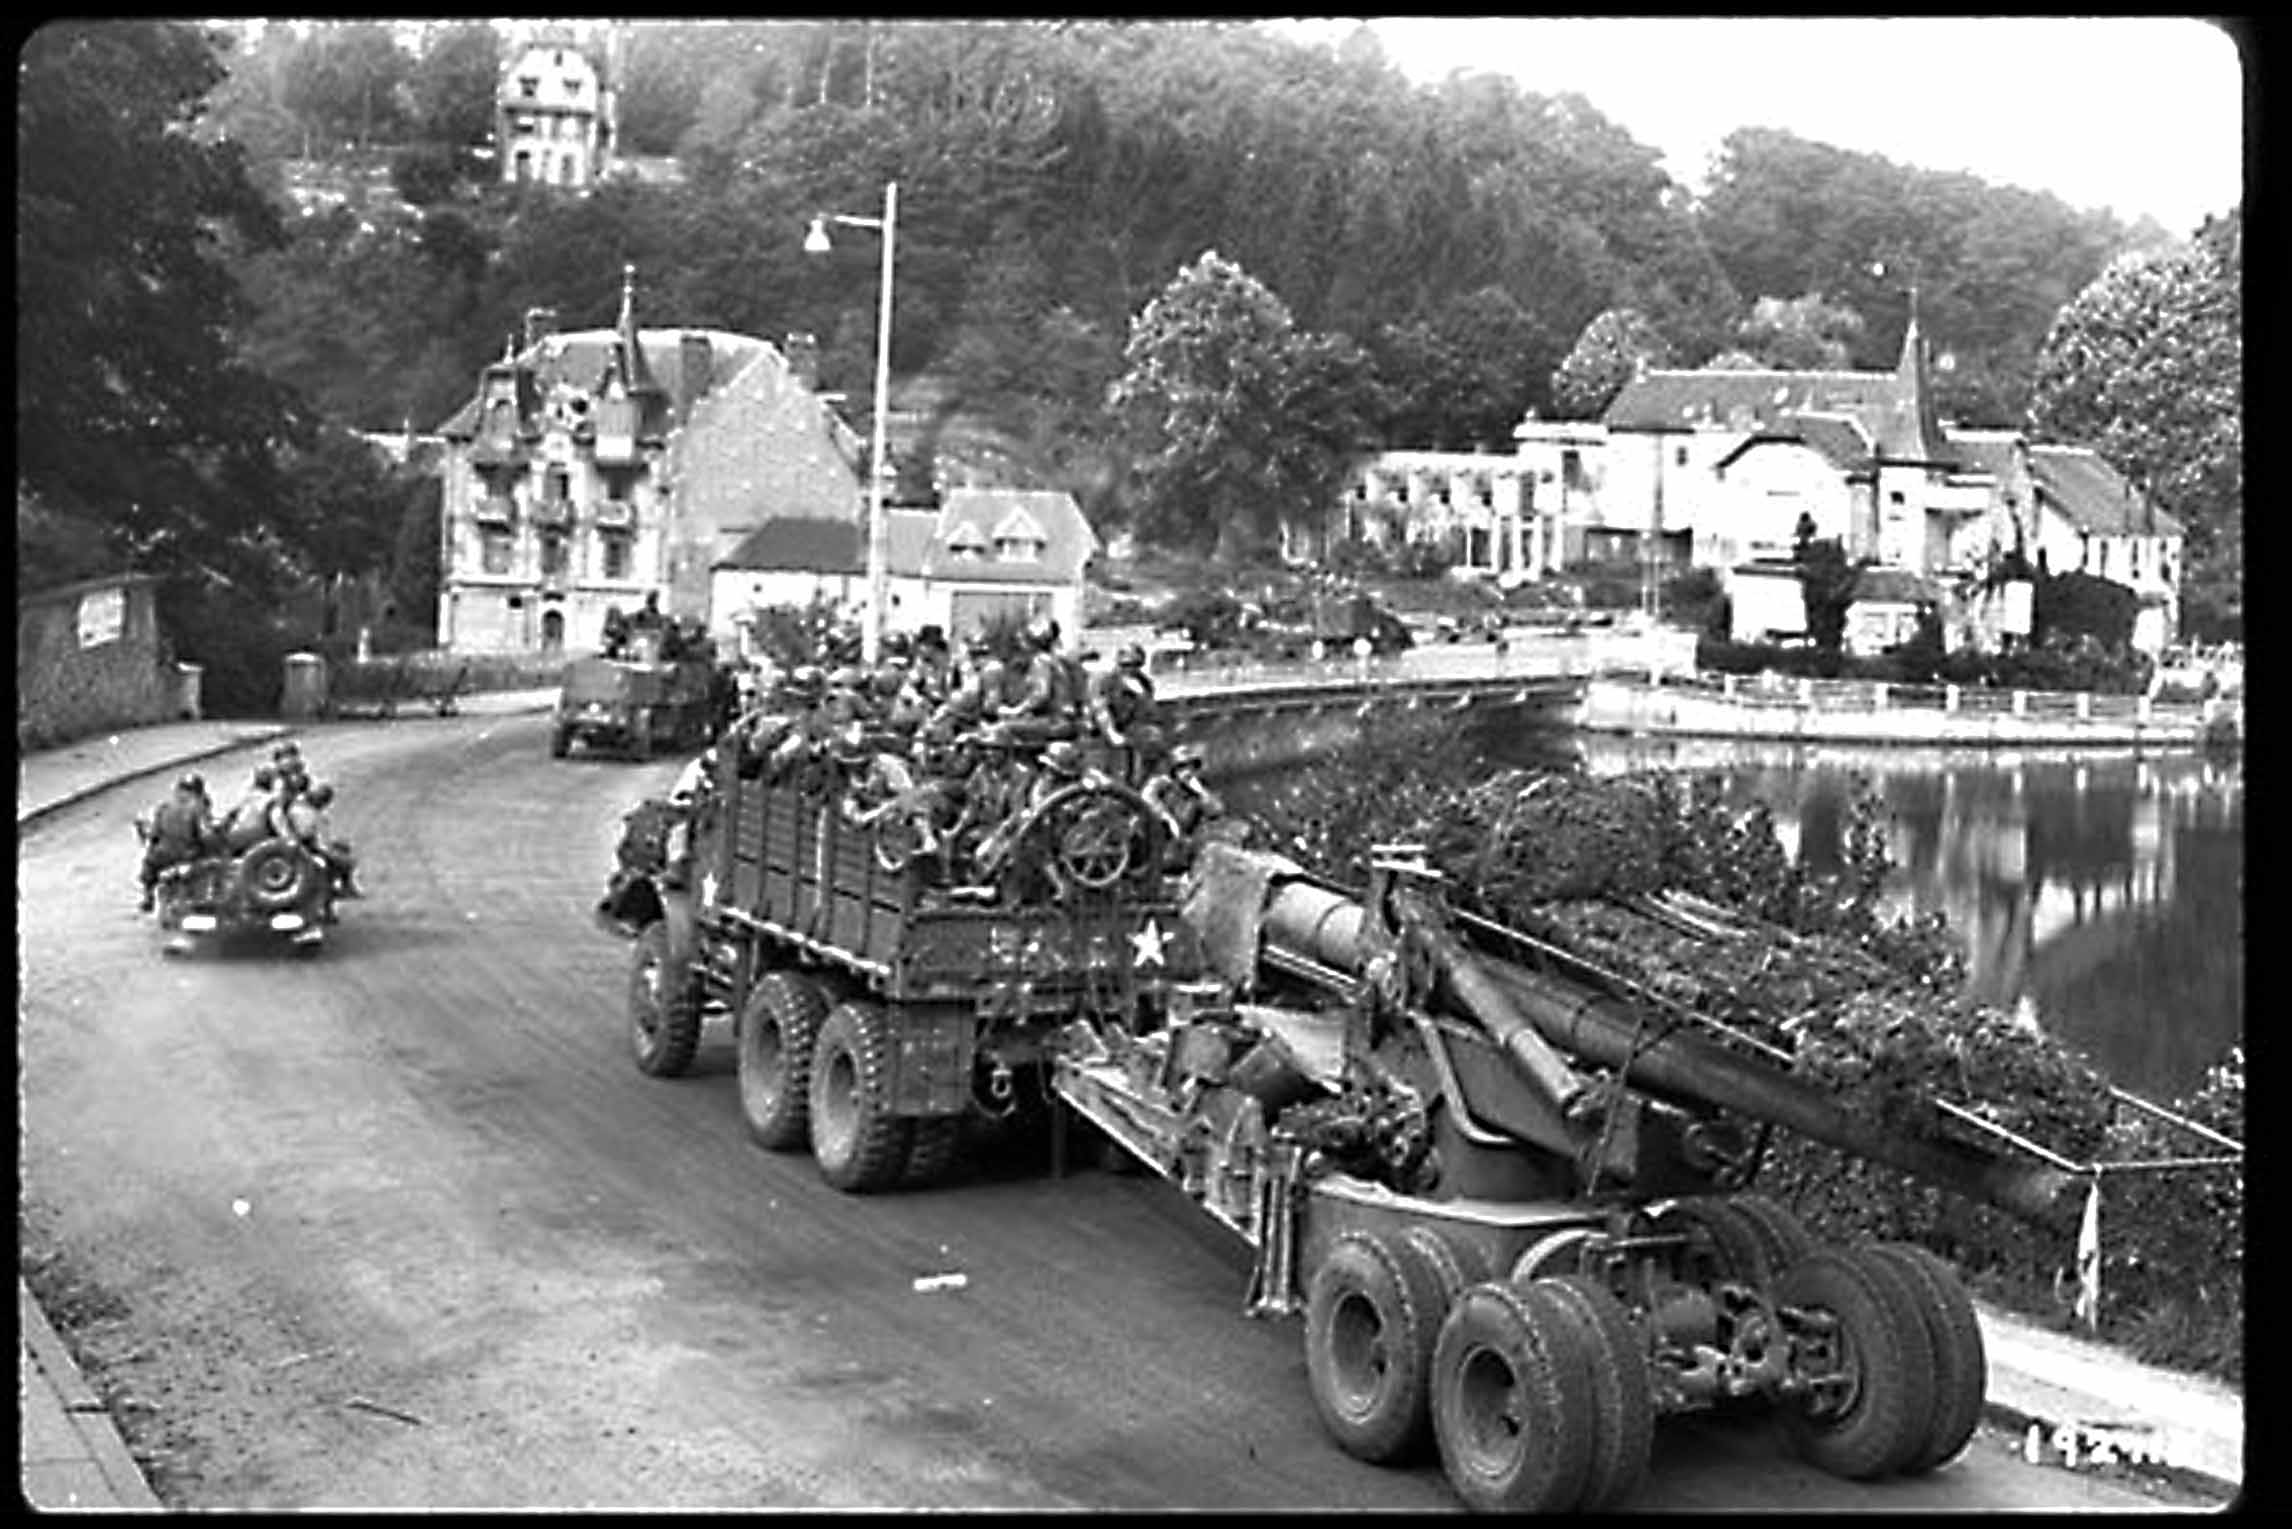
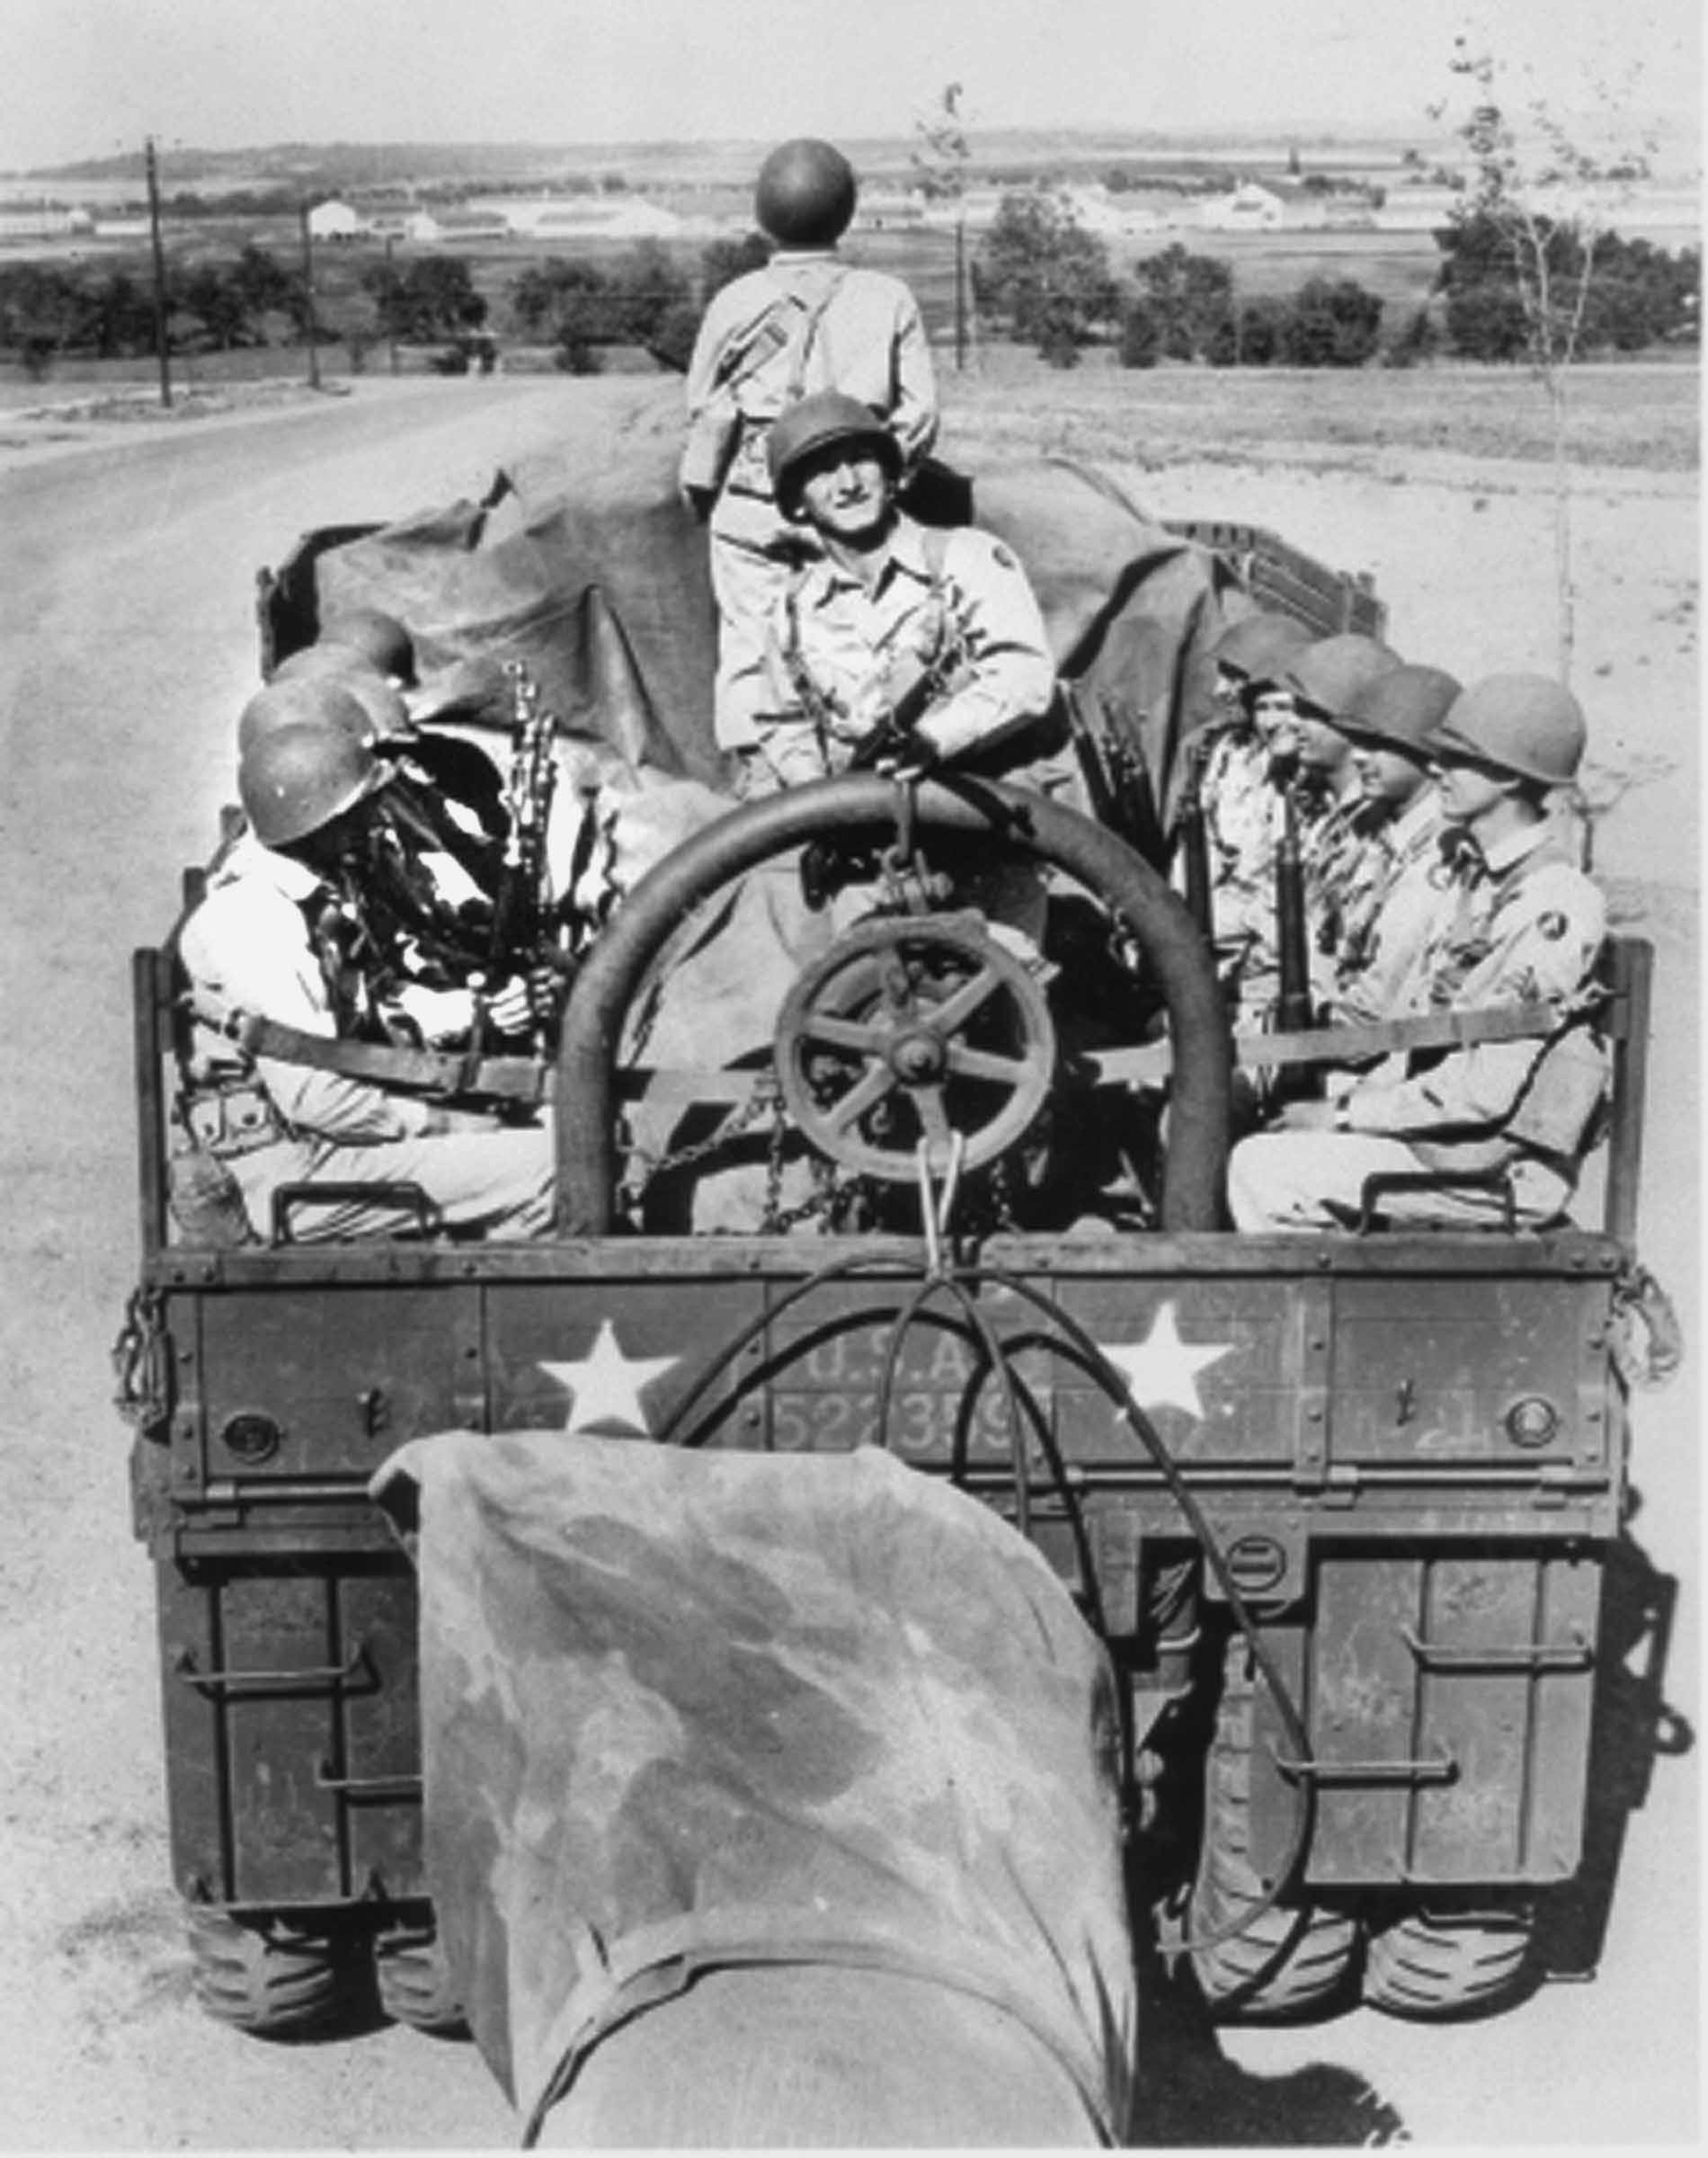
More assorted reference for the artillery tractor:
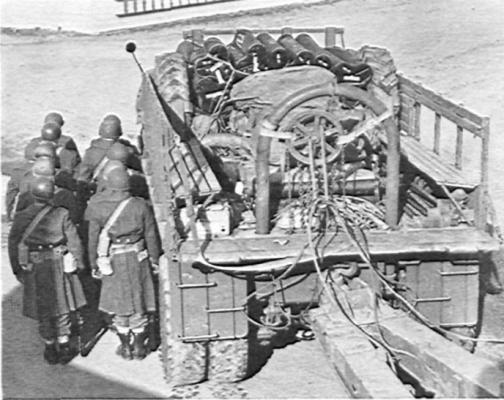
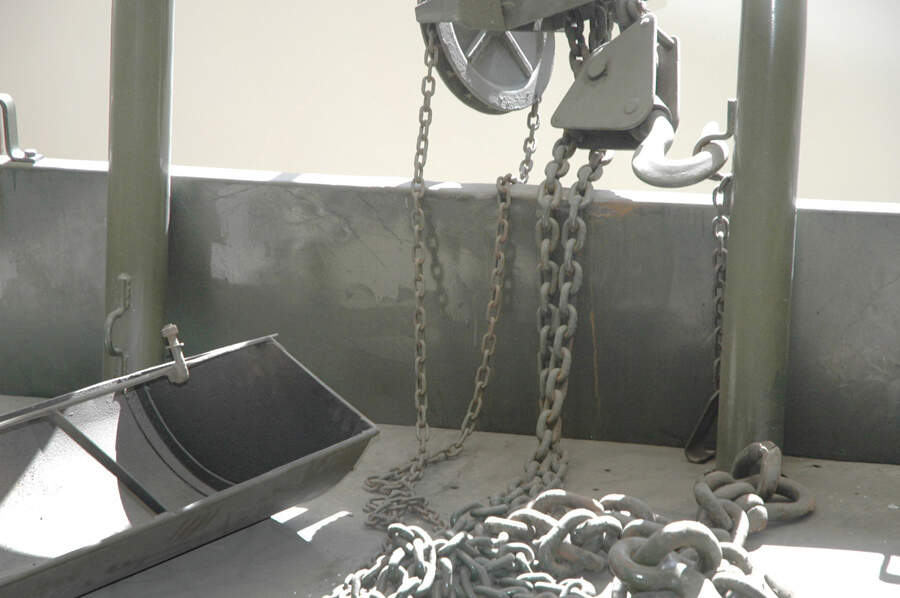
The purpose of the fixed chain hoist at the rear of the load bed was to lift the heavy gun trails onto the rear Mack designed hitch.
*
Note travel cover over gun breech.
Looks like this Mack has made for itself a tough row to hoe!
2 Likes
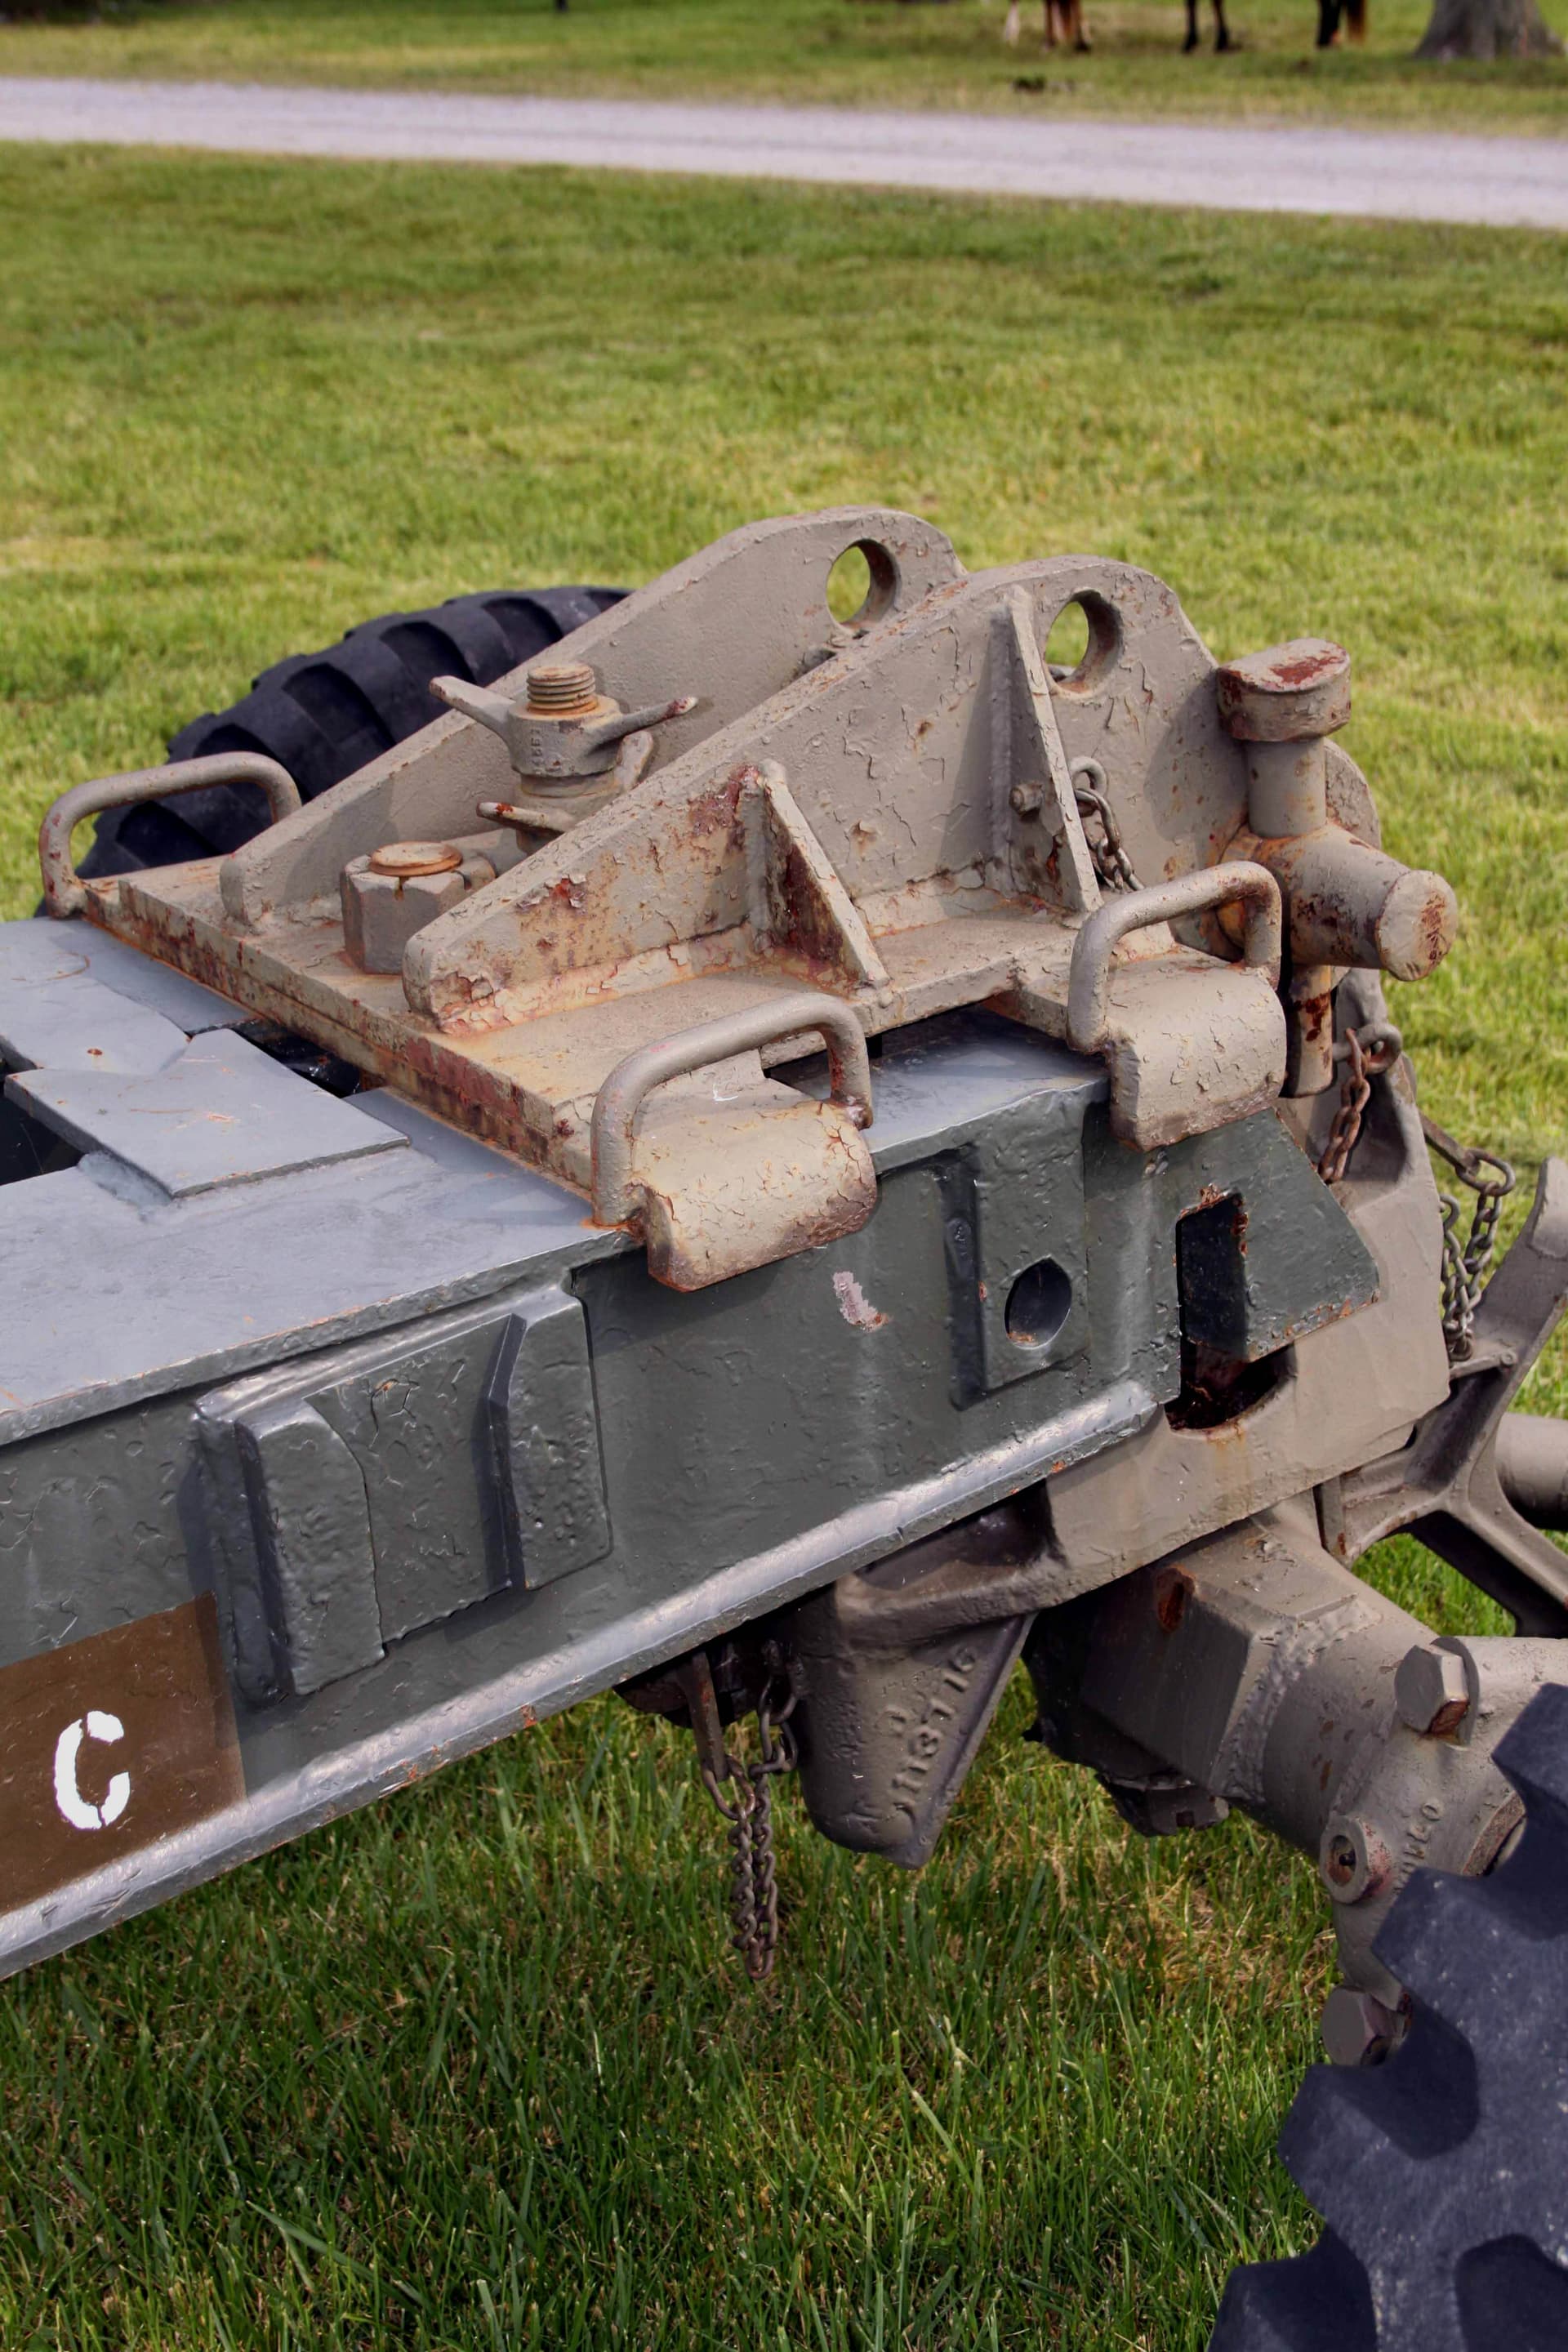
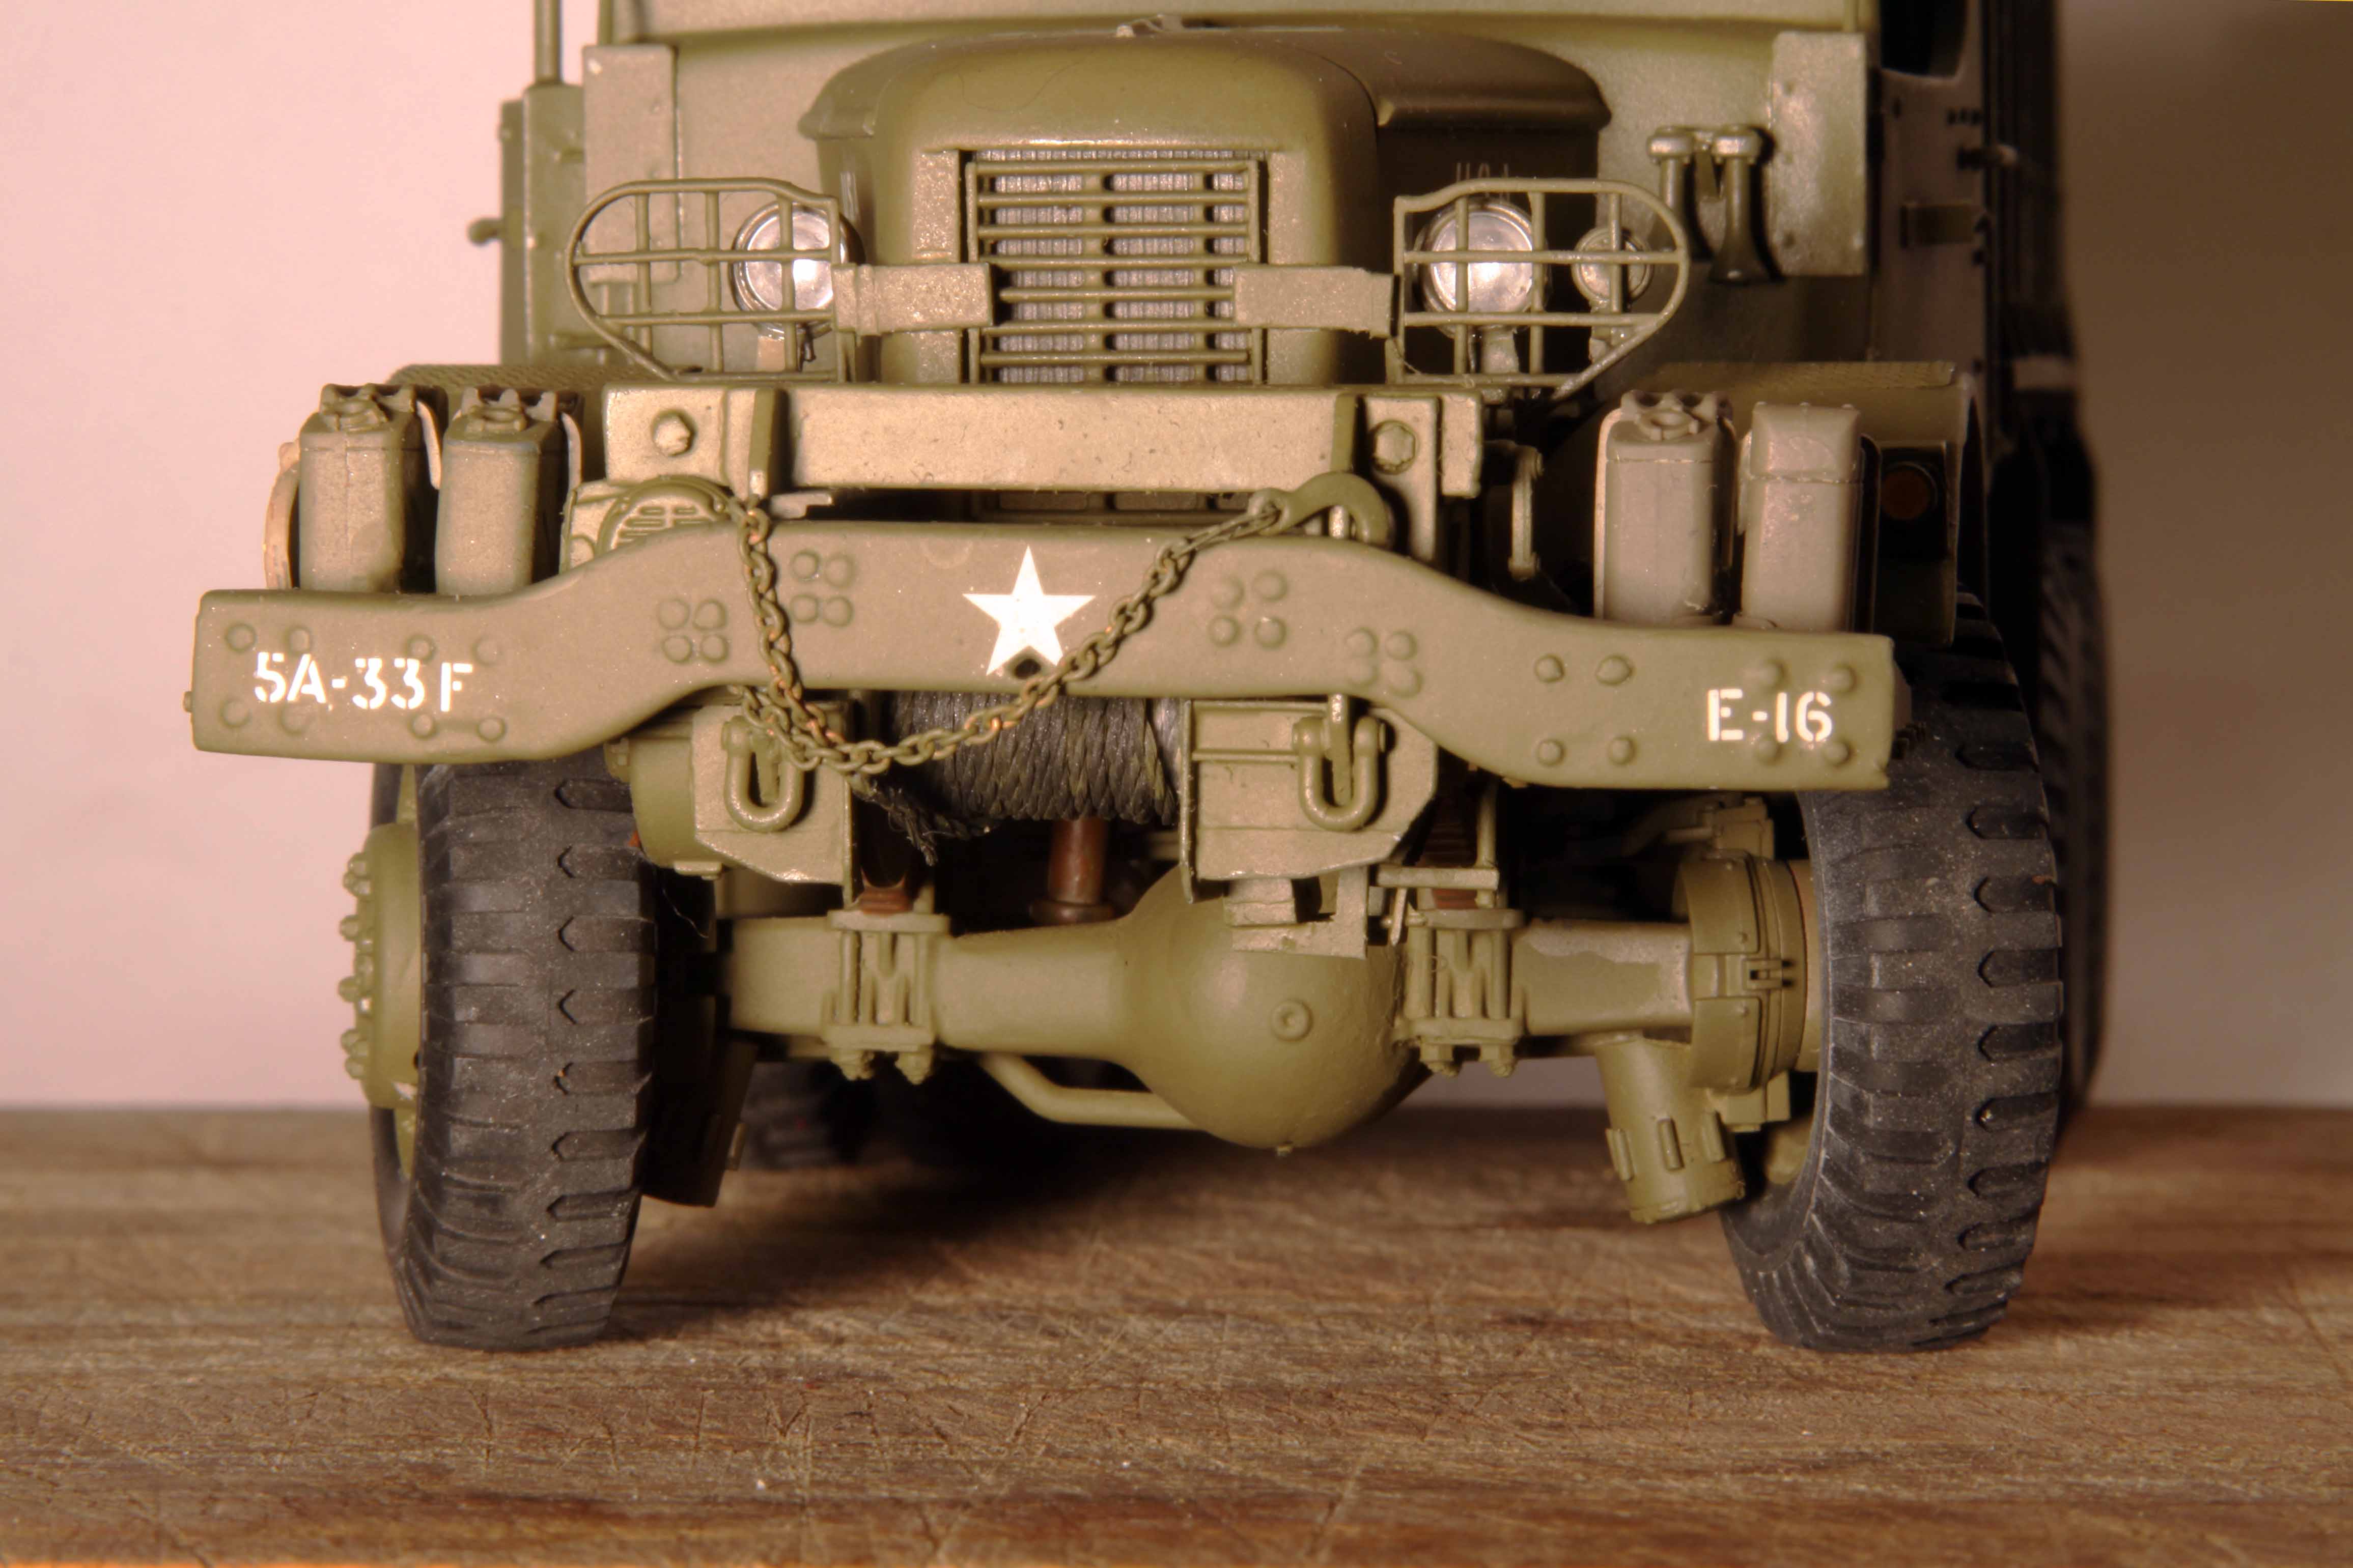
The unique Mack designed hitch that allowed the gun trails to be attached directly to the vehicle frame WITHOUT the necessity of an intermediate limber.
This provided greater control, greater maneuverability and transfered some of the gun’s weight to the vehicle so there was no need for the “dead weight” often added to heavy tractors such as the big Diamond T, hence the name for such vehicles: as “ballast tractors.”
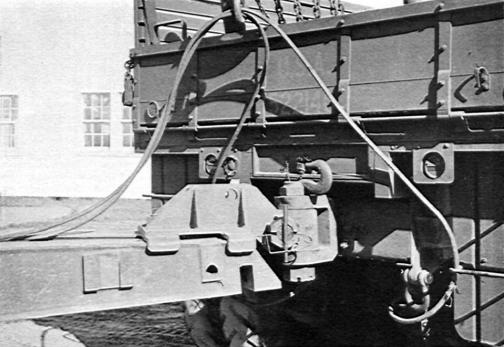
The item shaded in blue is sometimes referred to as the “trail clamp,” “bustle” or “girdle” for perhaps obvious reasons. This device clamped the gun trails together and could be used to attach the 155mm and 8 inch guns directly to the Mack hitch but also could be used to attach the gun to either the M1 or M5 towing Limbers.
Seen here is the 8 inch gun attached to the M5 Limber.
*As seen at a Patton Museum event many years ago.)
2 Likes
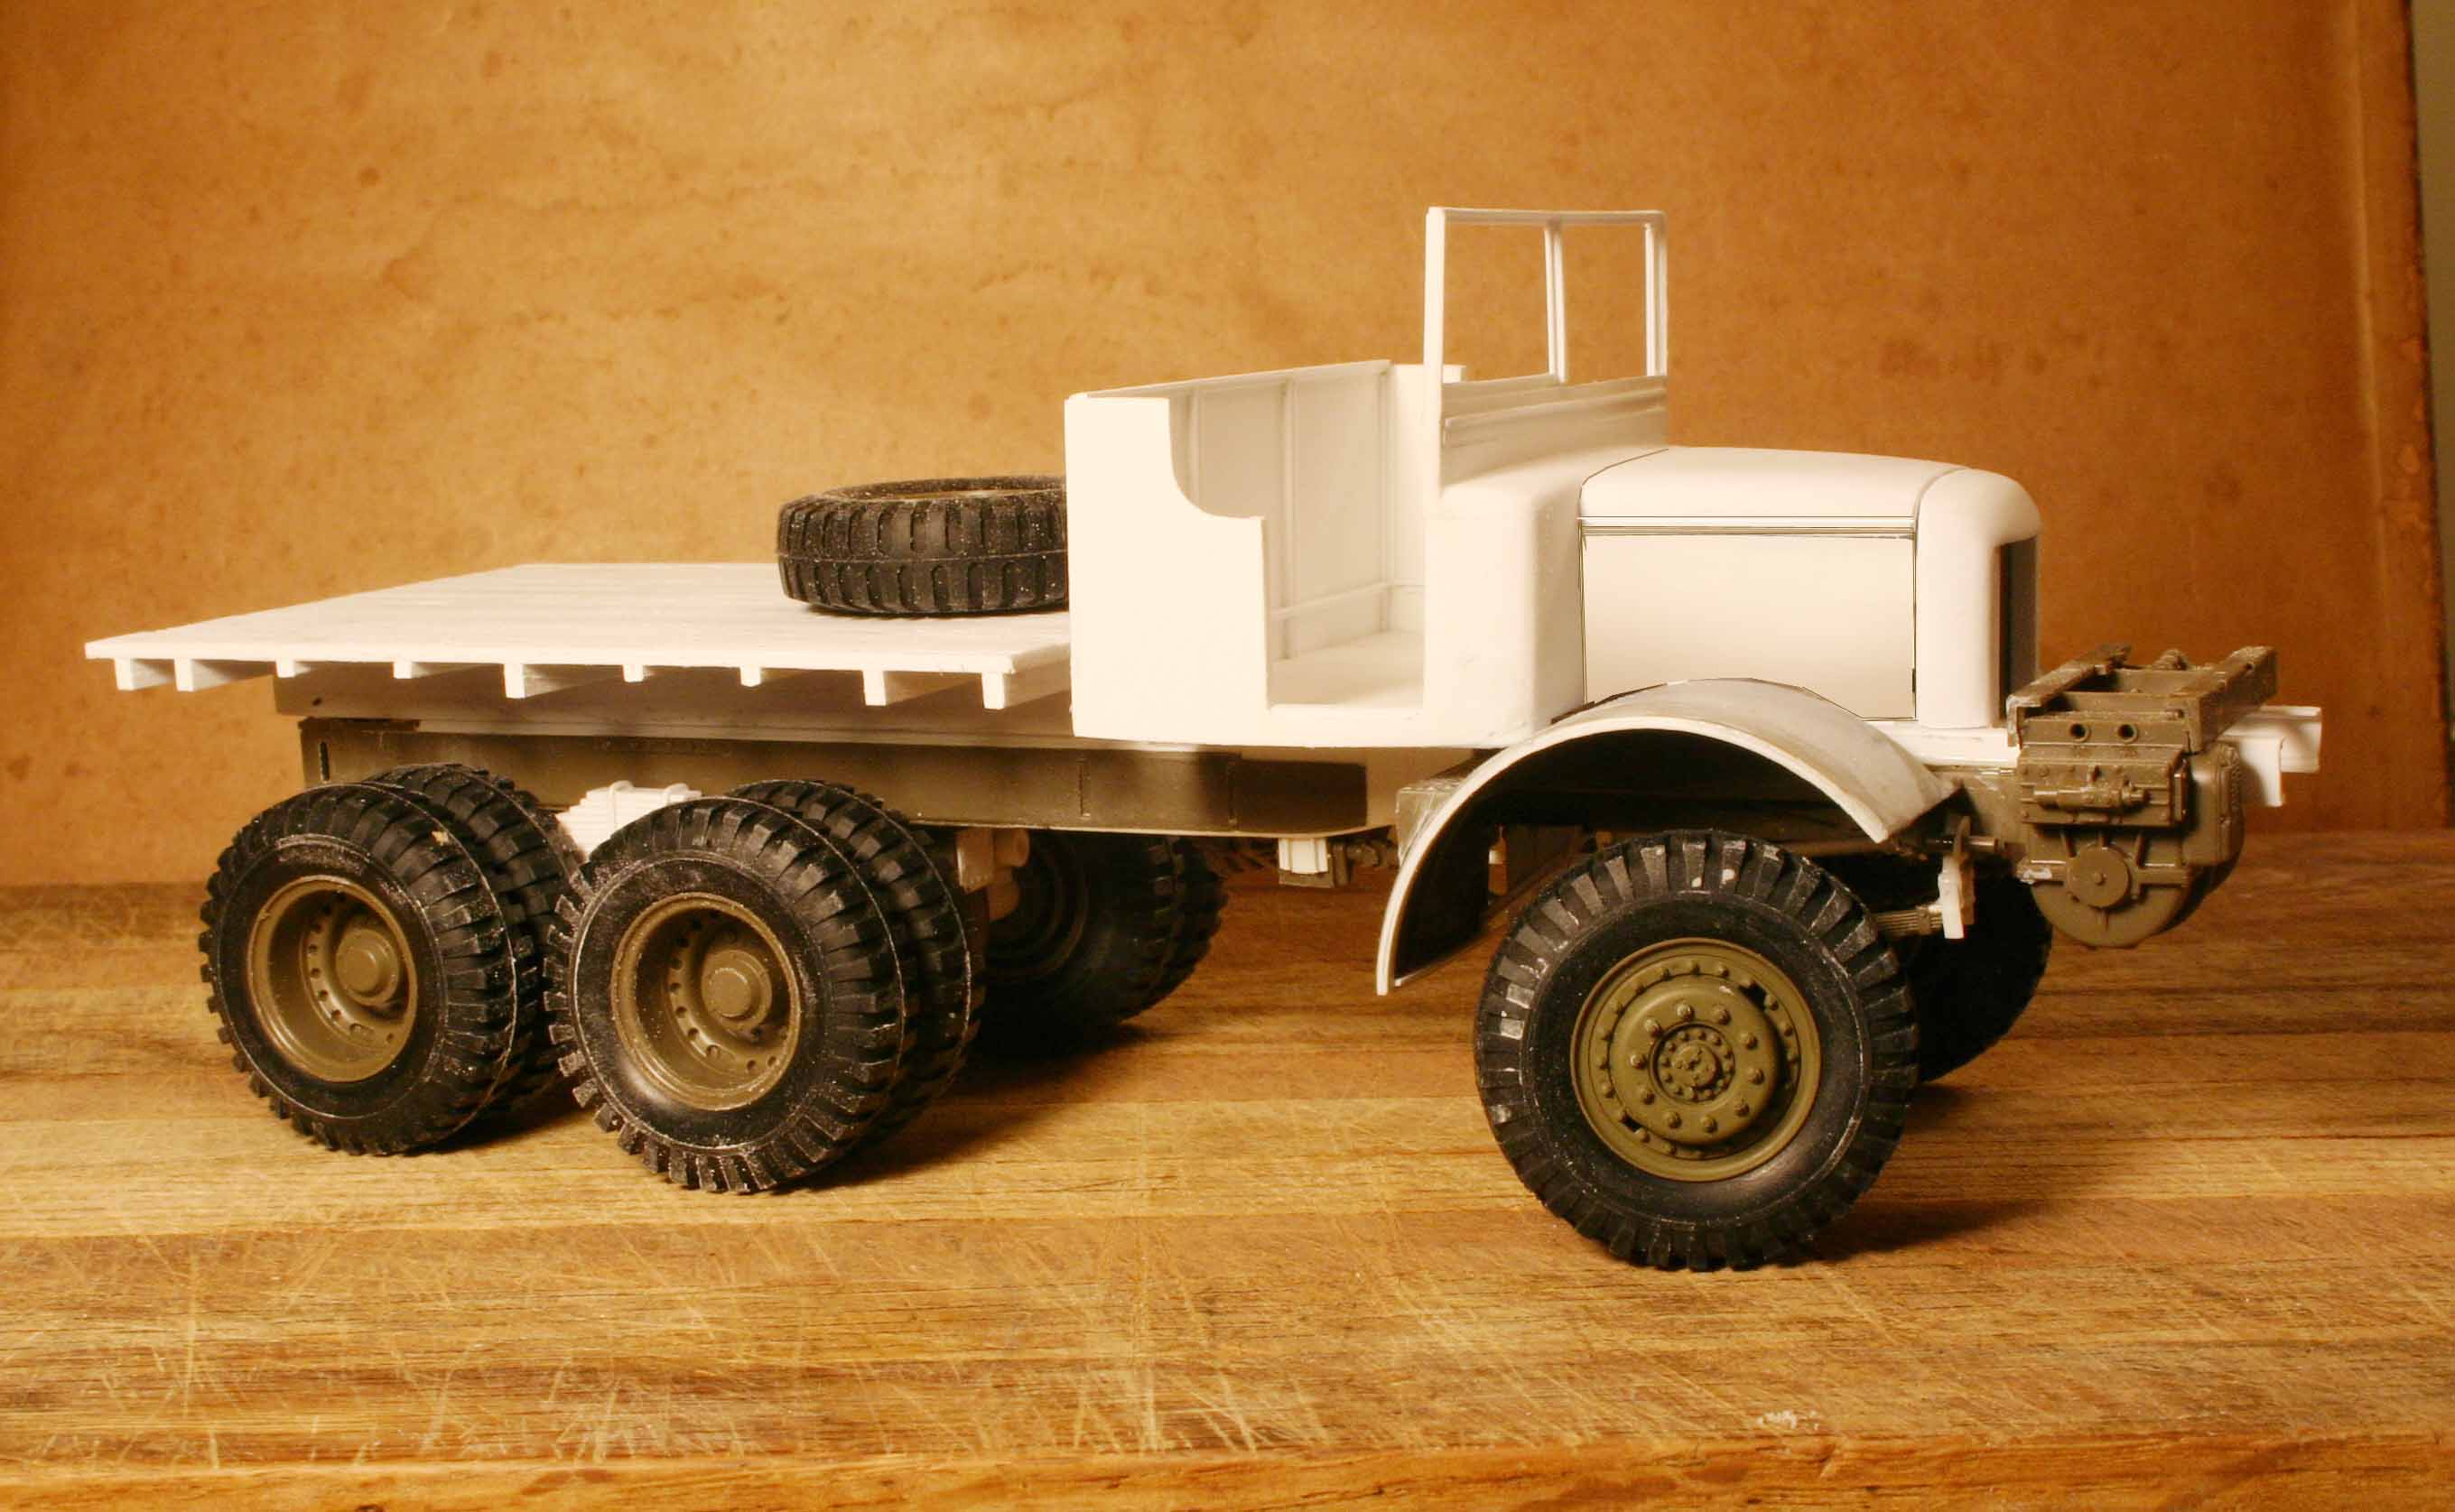
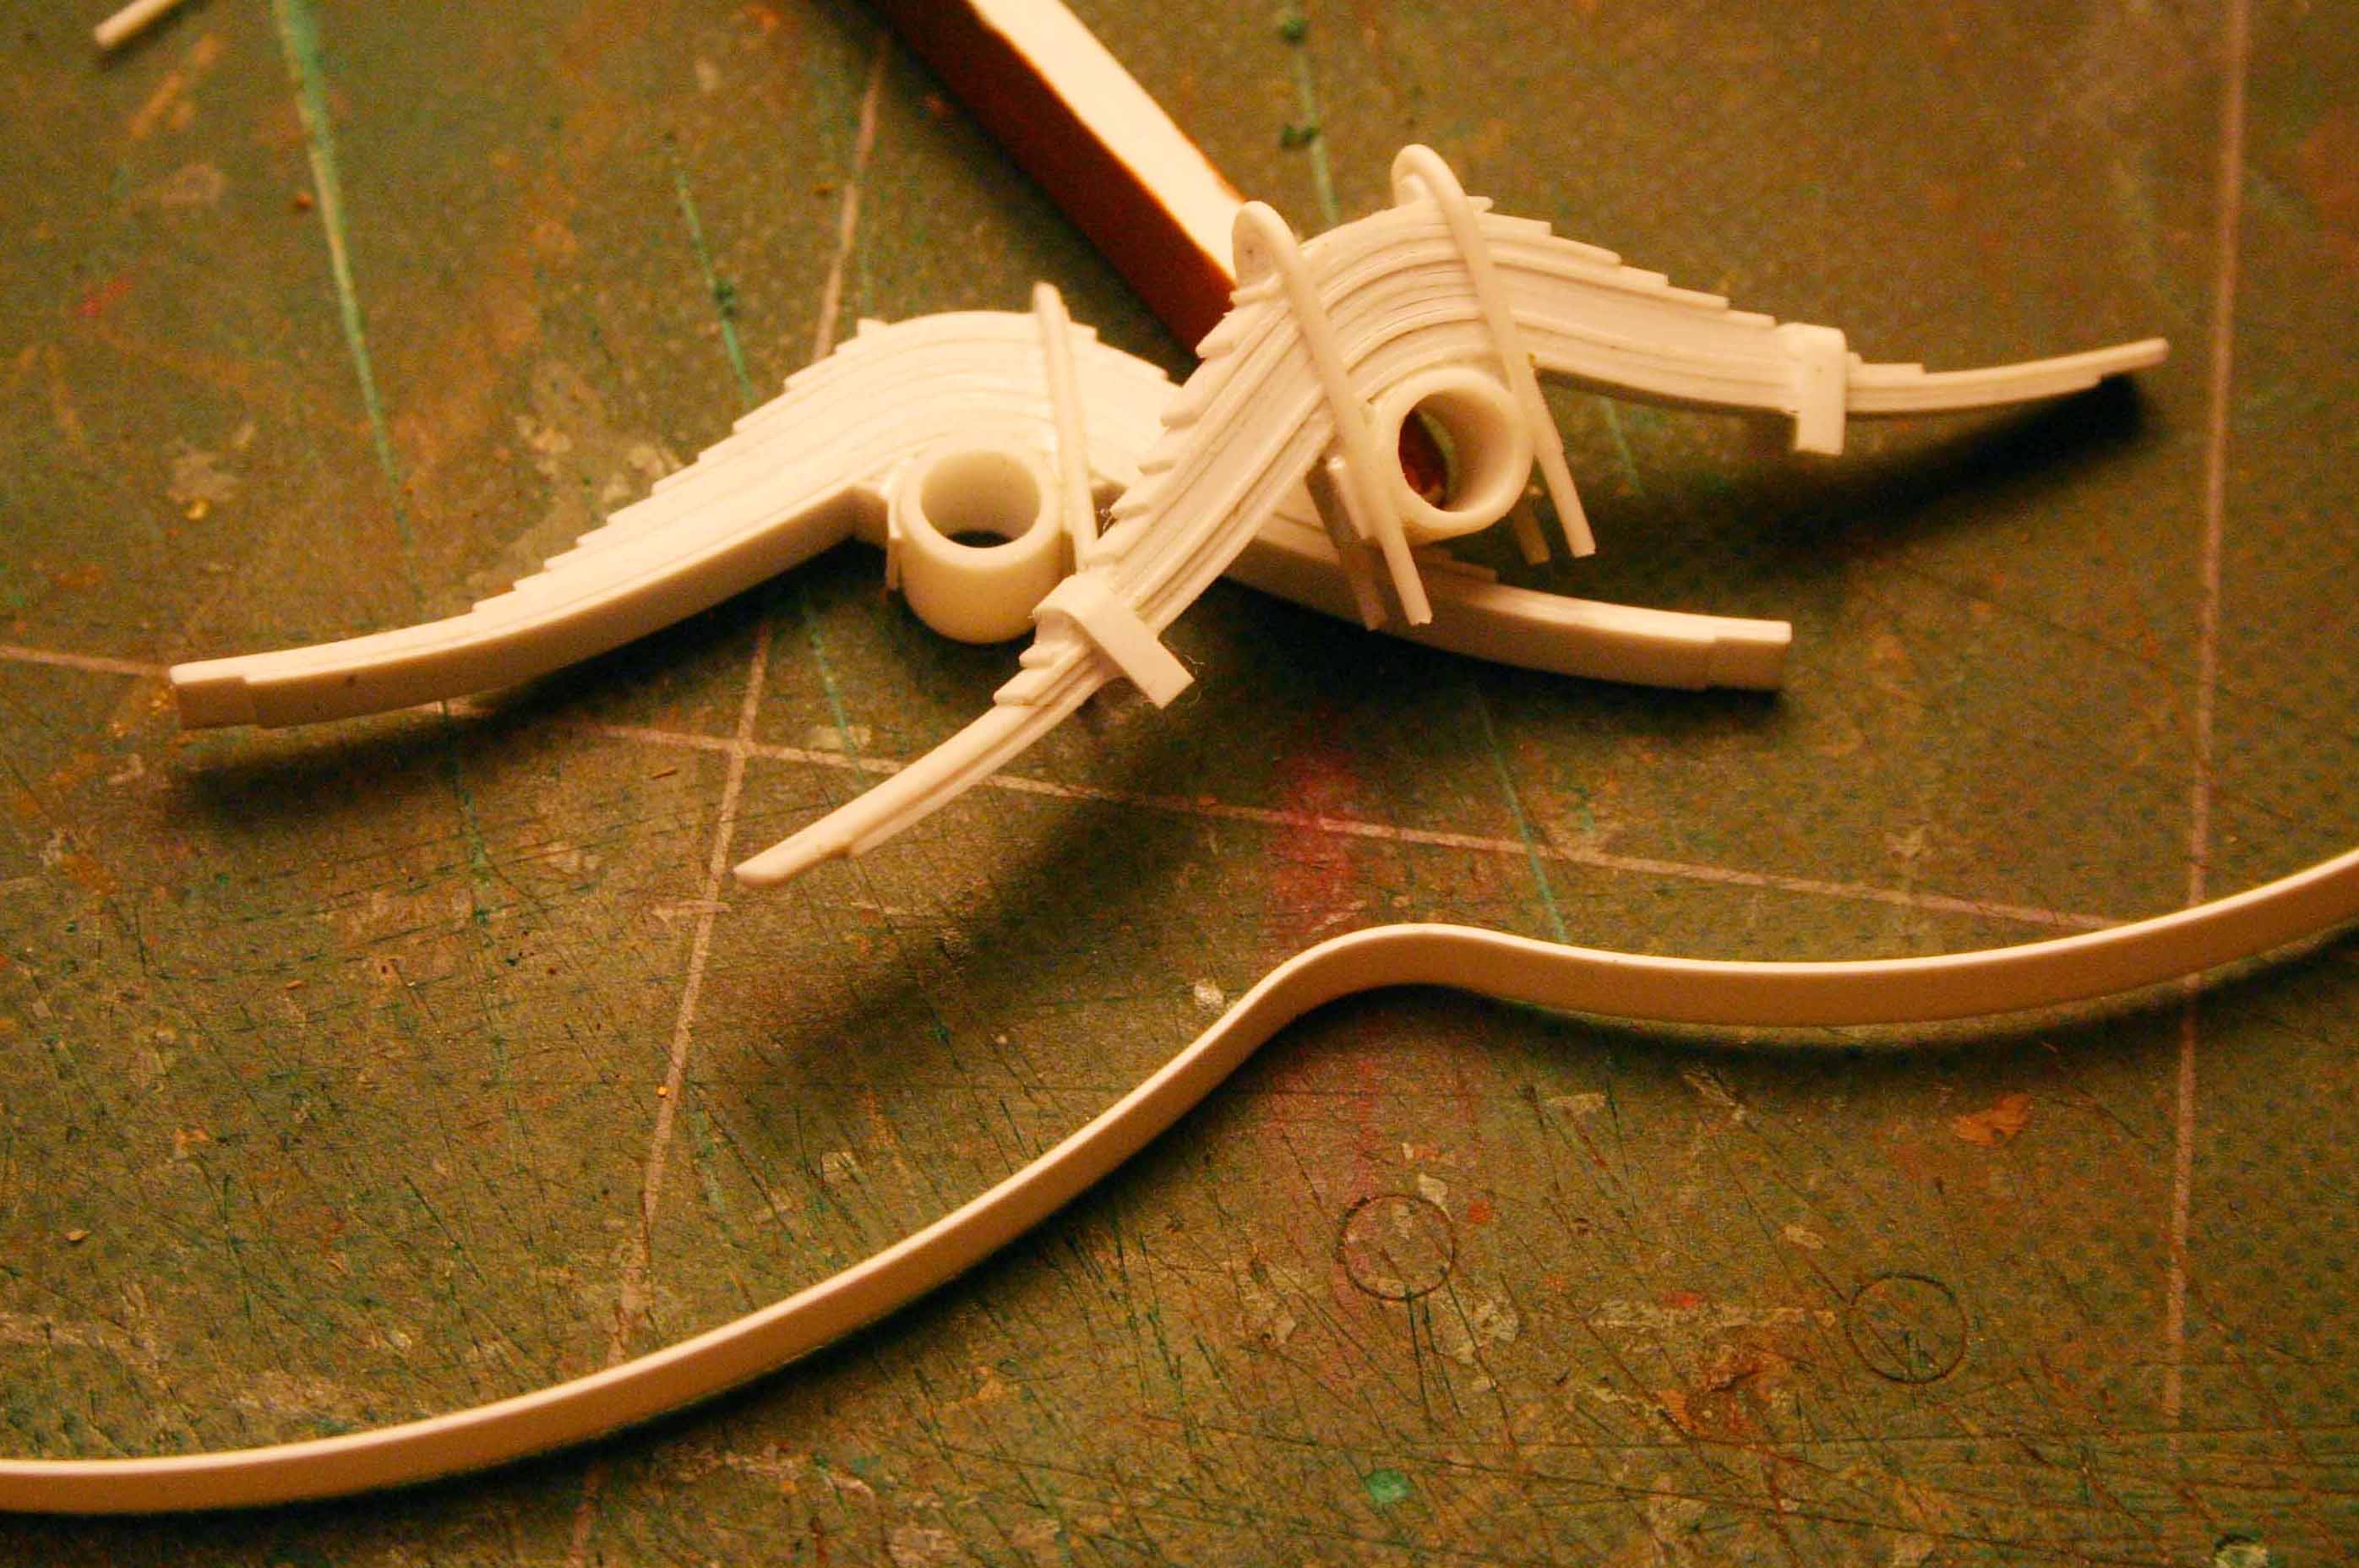
Some early construction work:
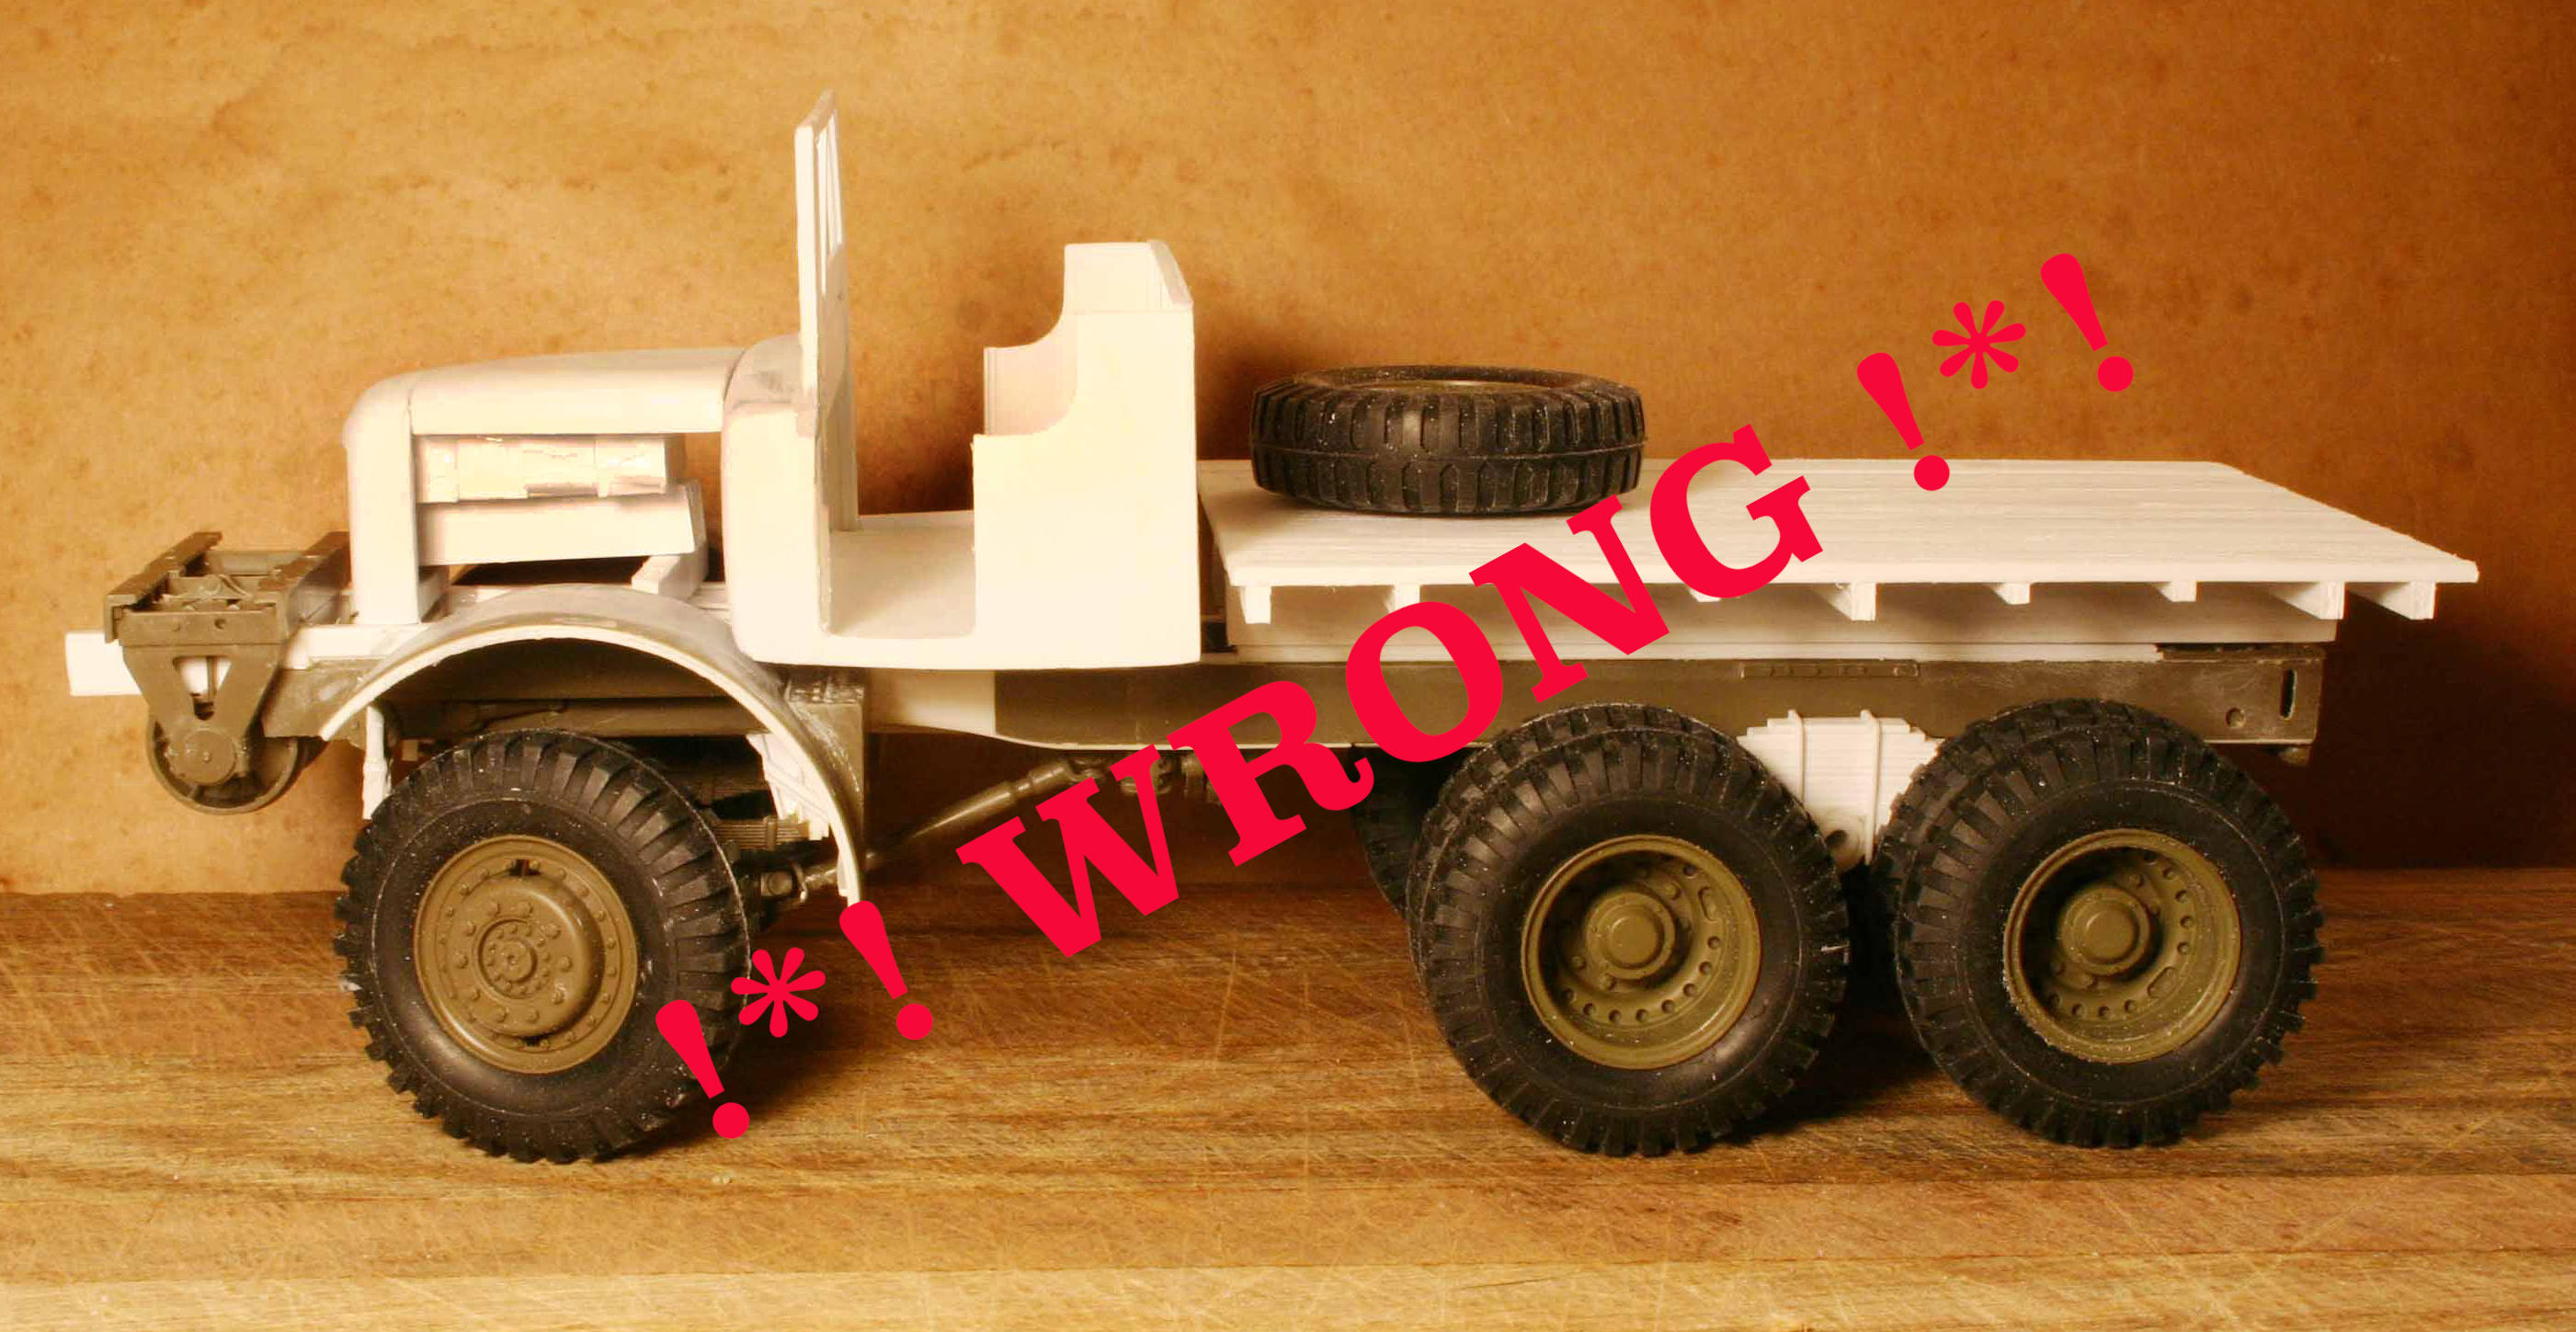
I don’t know if you can tell but in these early attempts the truck is sitting MUCH too high on its’ wheels and suspension. In one way or another I probably revised the frame and suspension some five-six times to finally get the vehicle down to its’ current finished height.
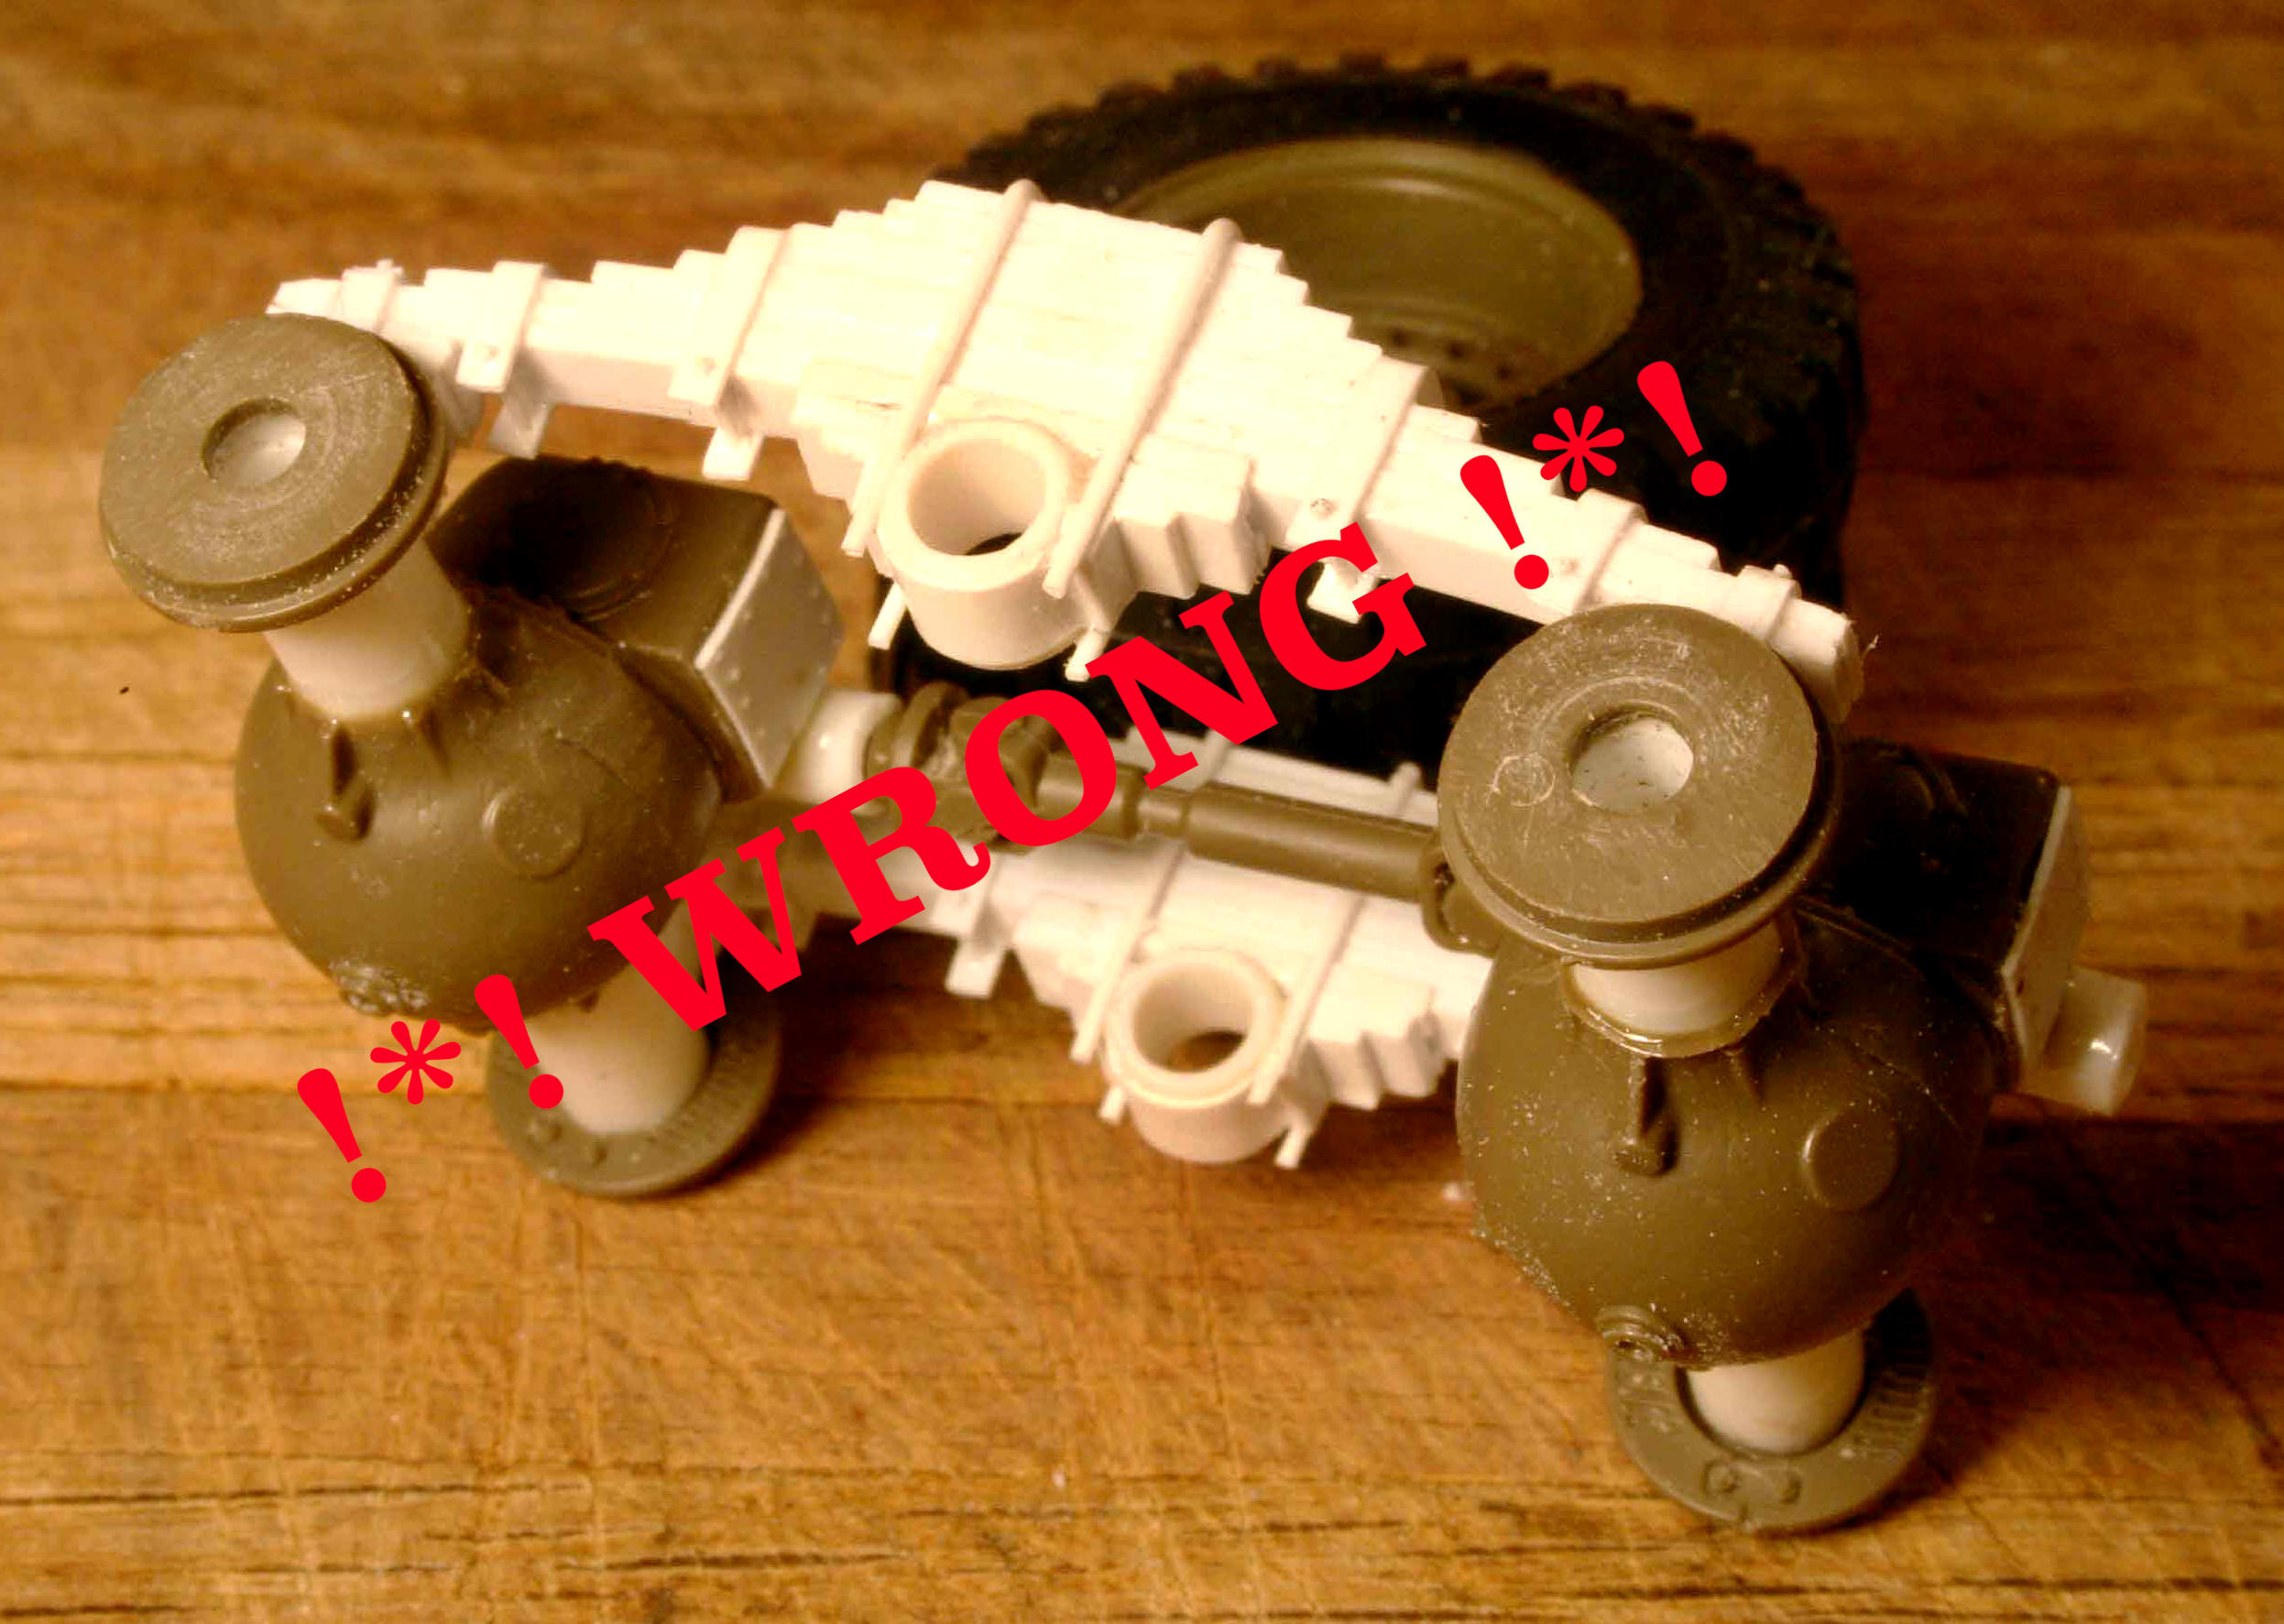
My first big mistake was assuming the Mack had a straight rail ladder frame like the Dragon Wagon. WRONG!
When starting on this project I had very limited reference and was doing everything mostly “by eye”. However as time progressed I gained much better references and had to make neumorious alterations due to having better information.
Unlike the Pacific Car & Foundry built Dragon Wagon tractor, the Mack had a more traditional and more complex off-set frame which lowered the front suspension considerably.
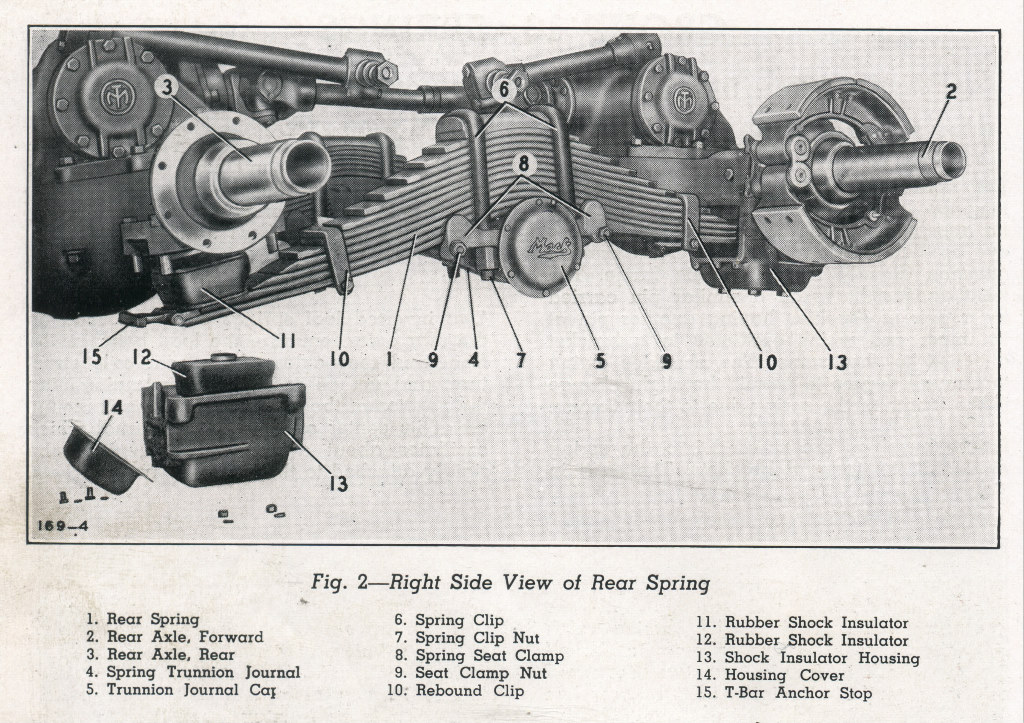
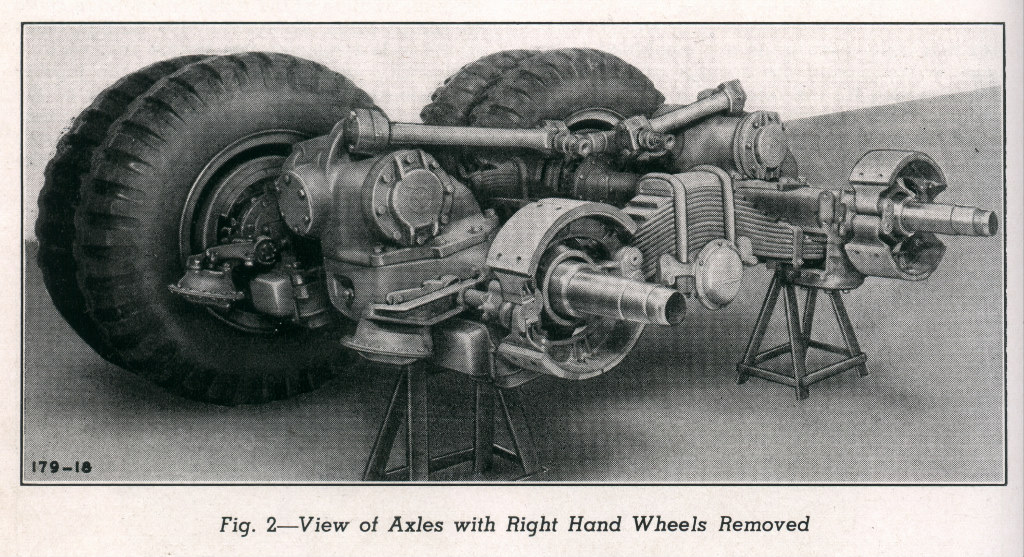
Images from the TM
4 Likes
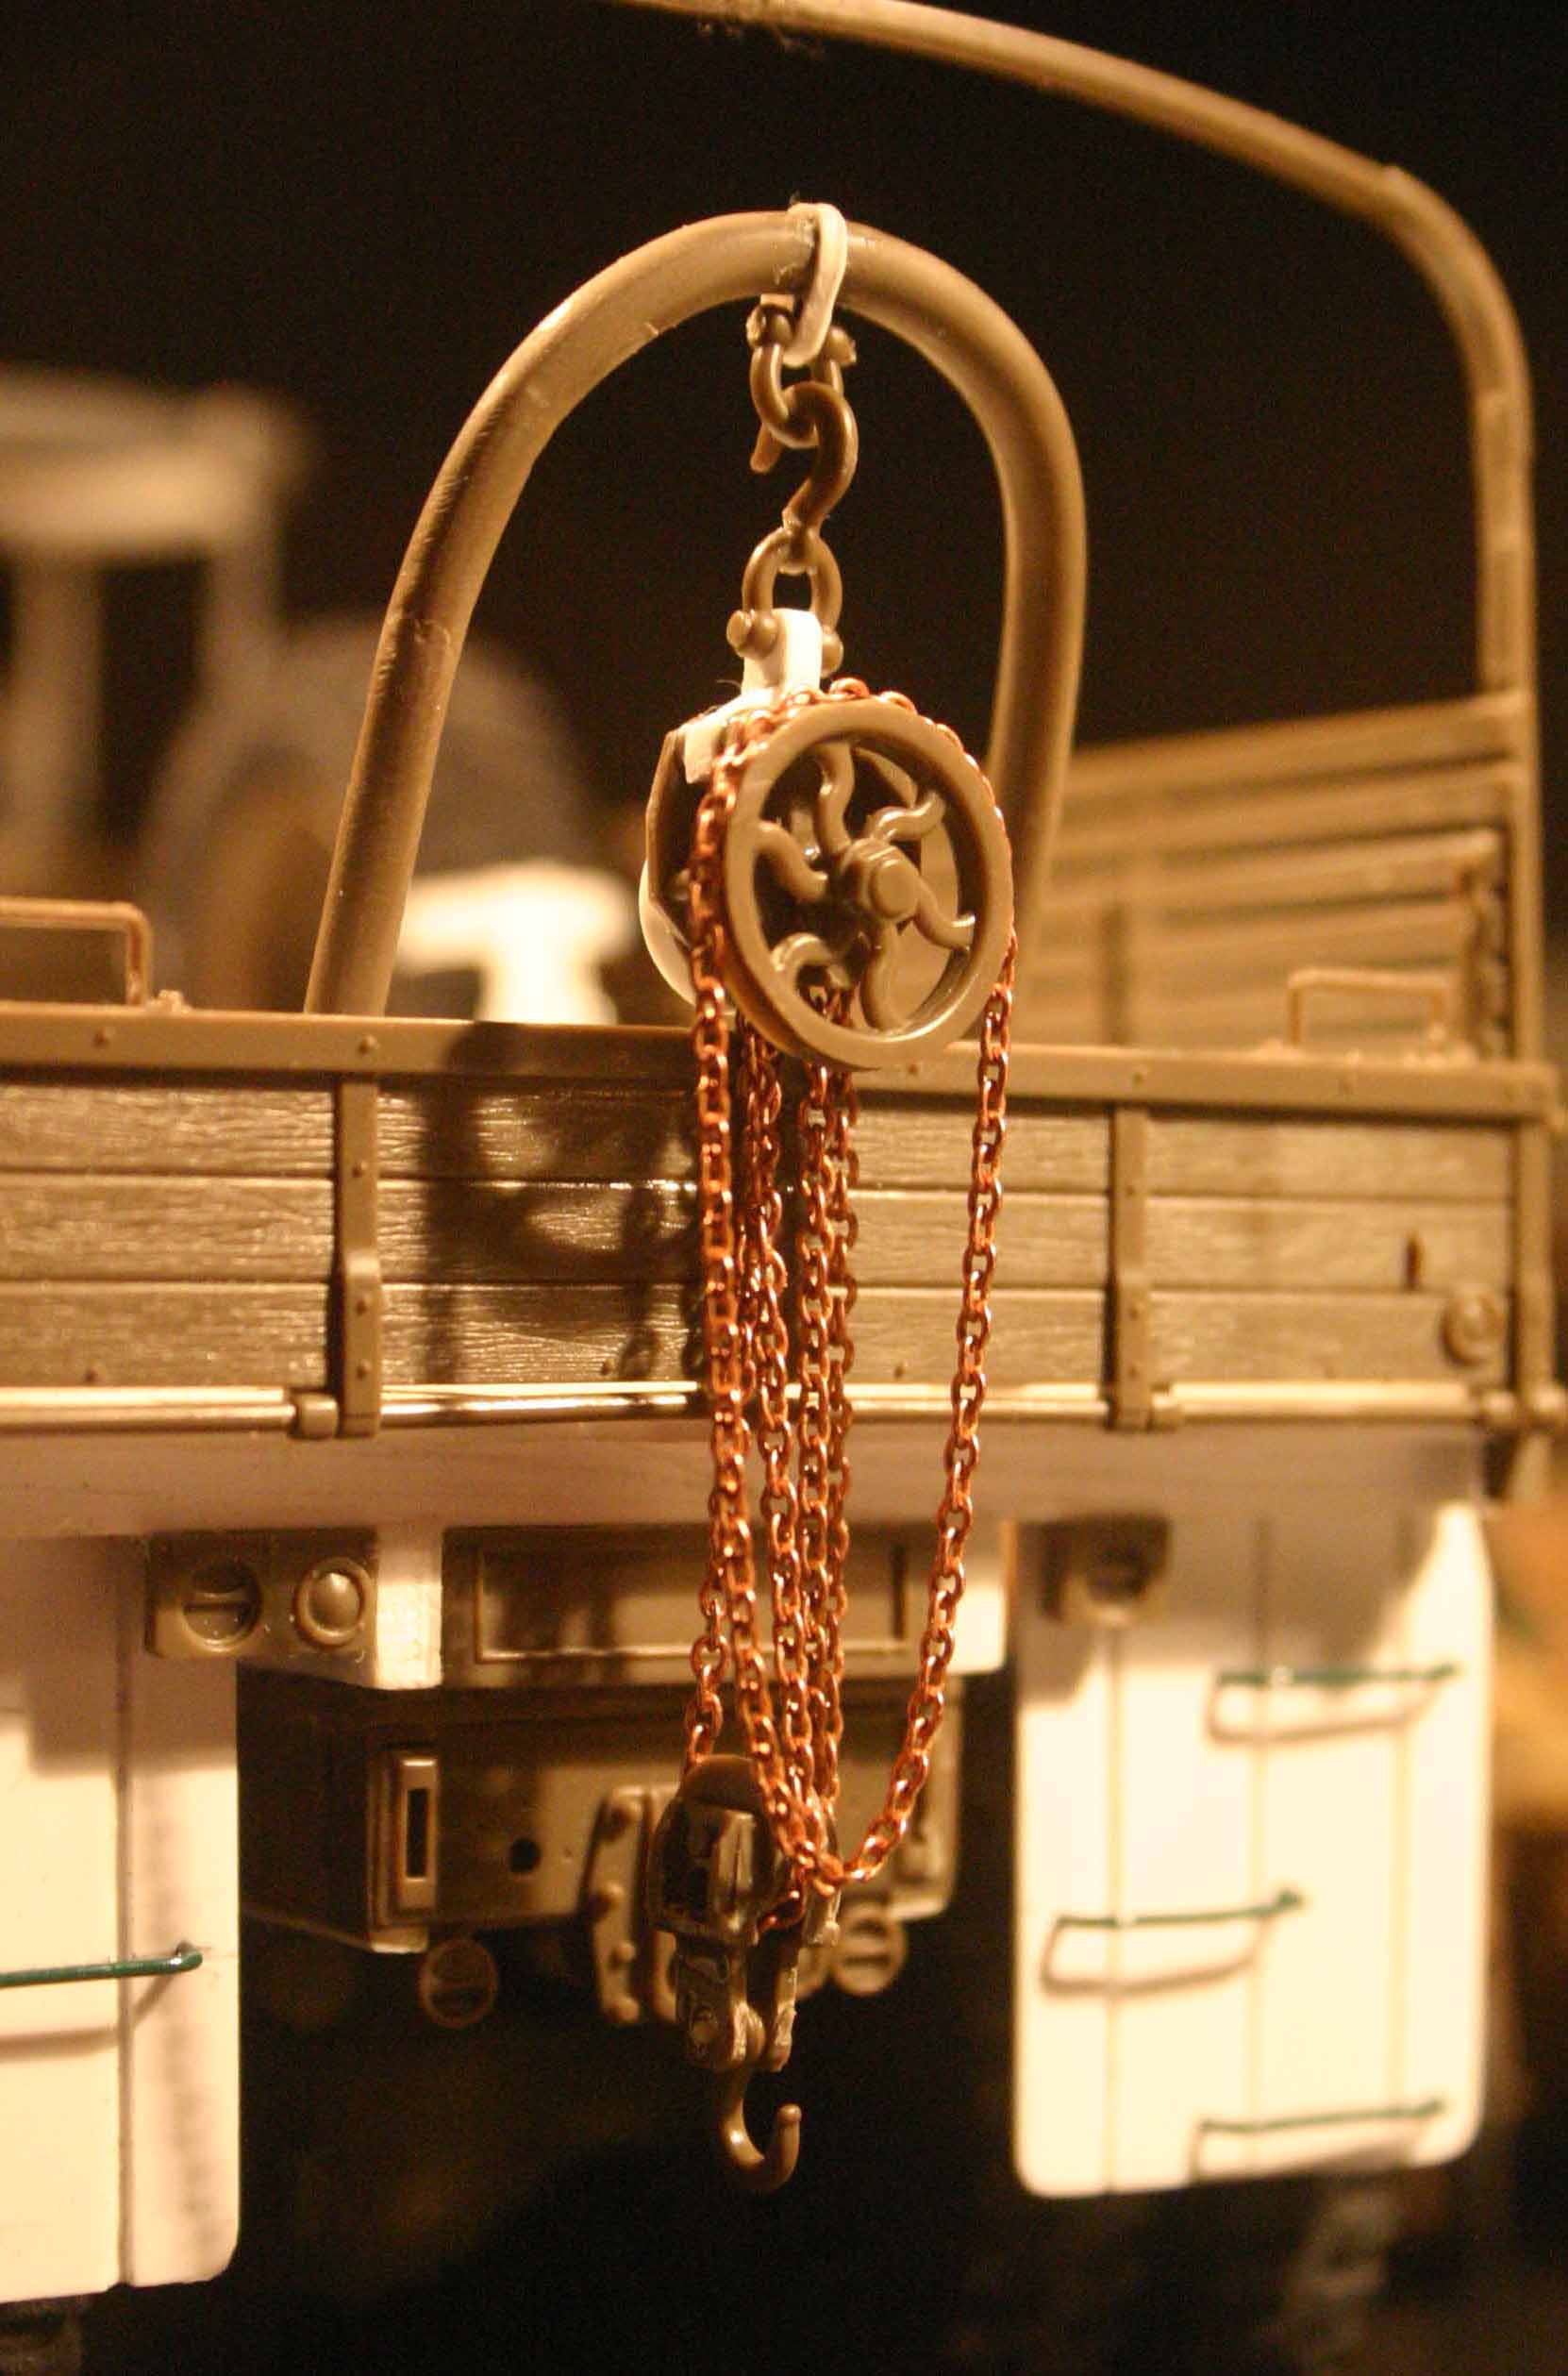
More reference on the rear chain hoist:
Images from the TM
My Photo
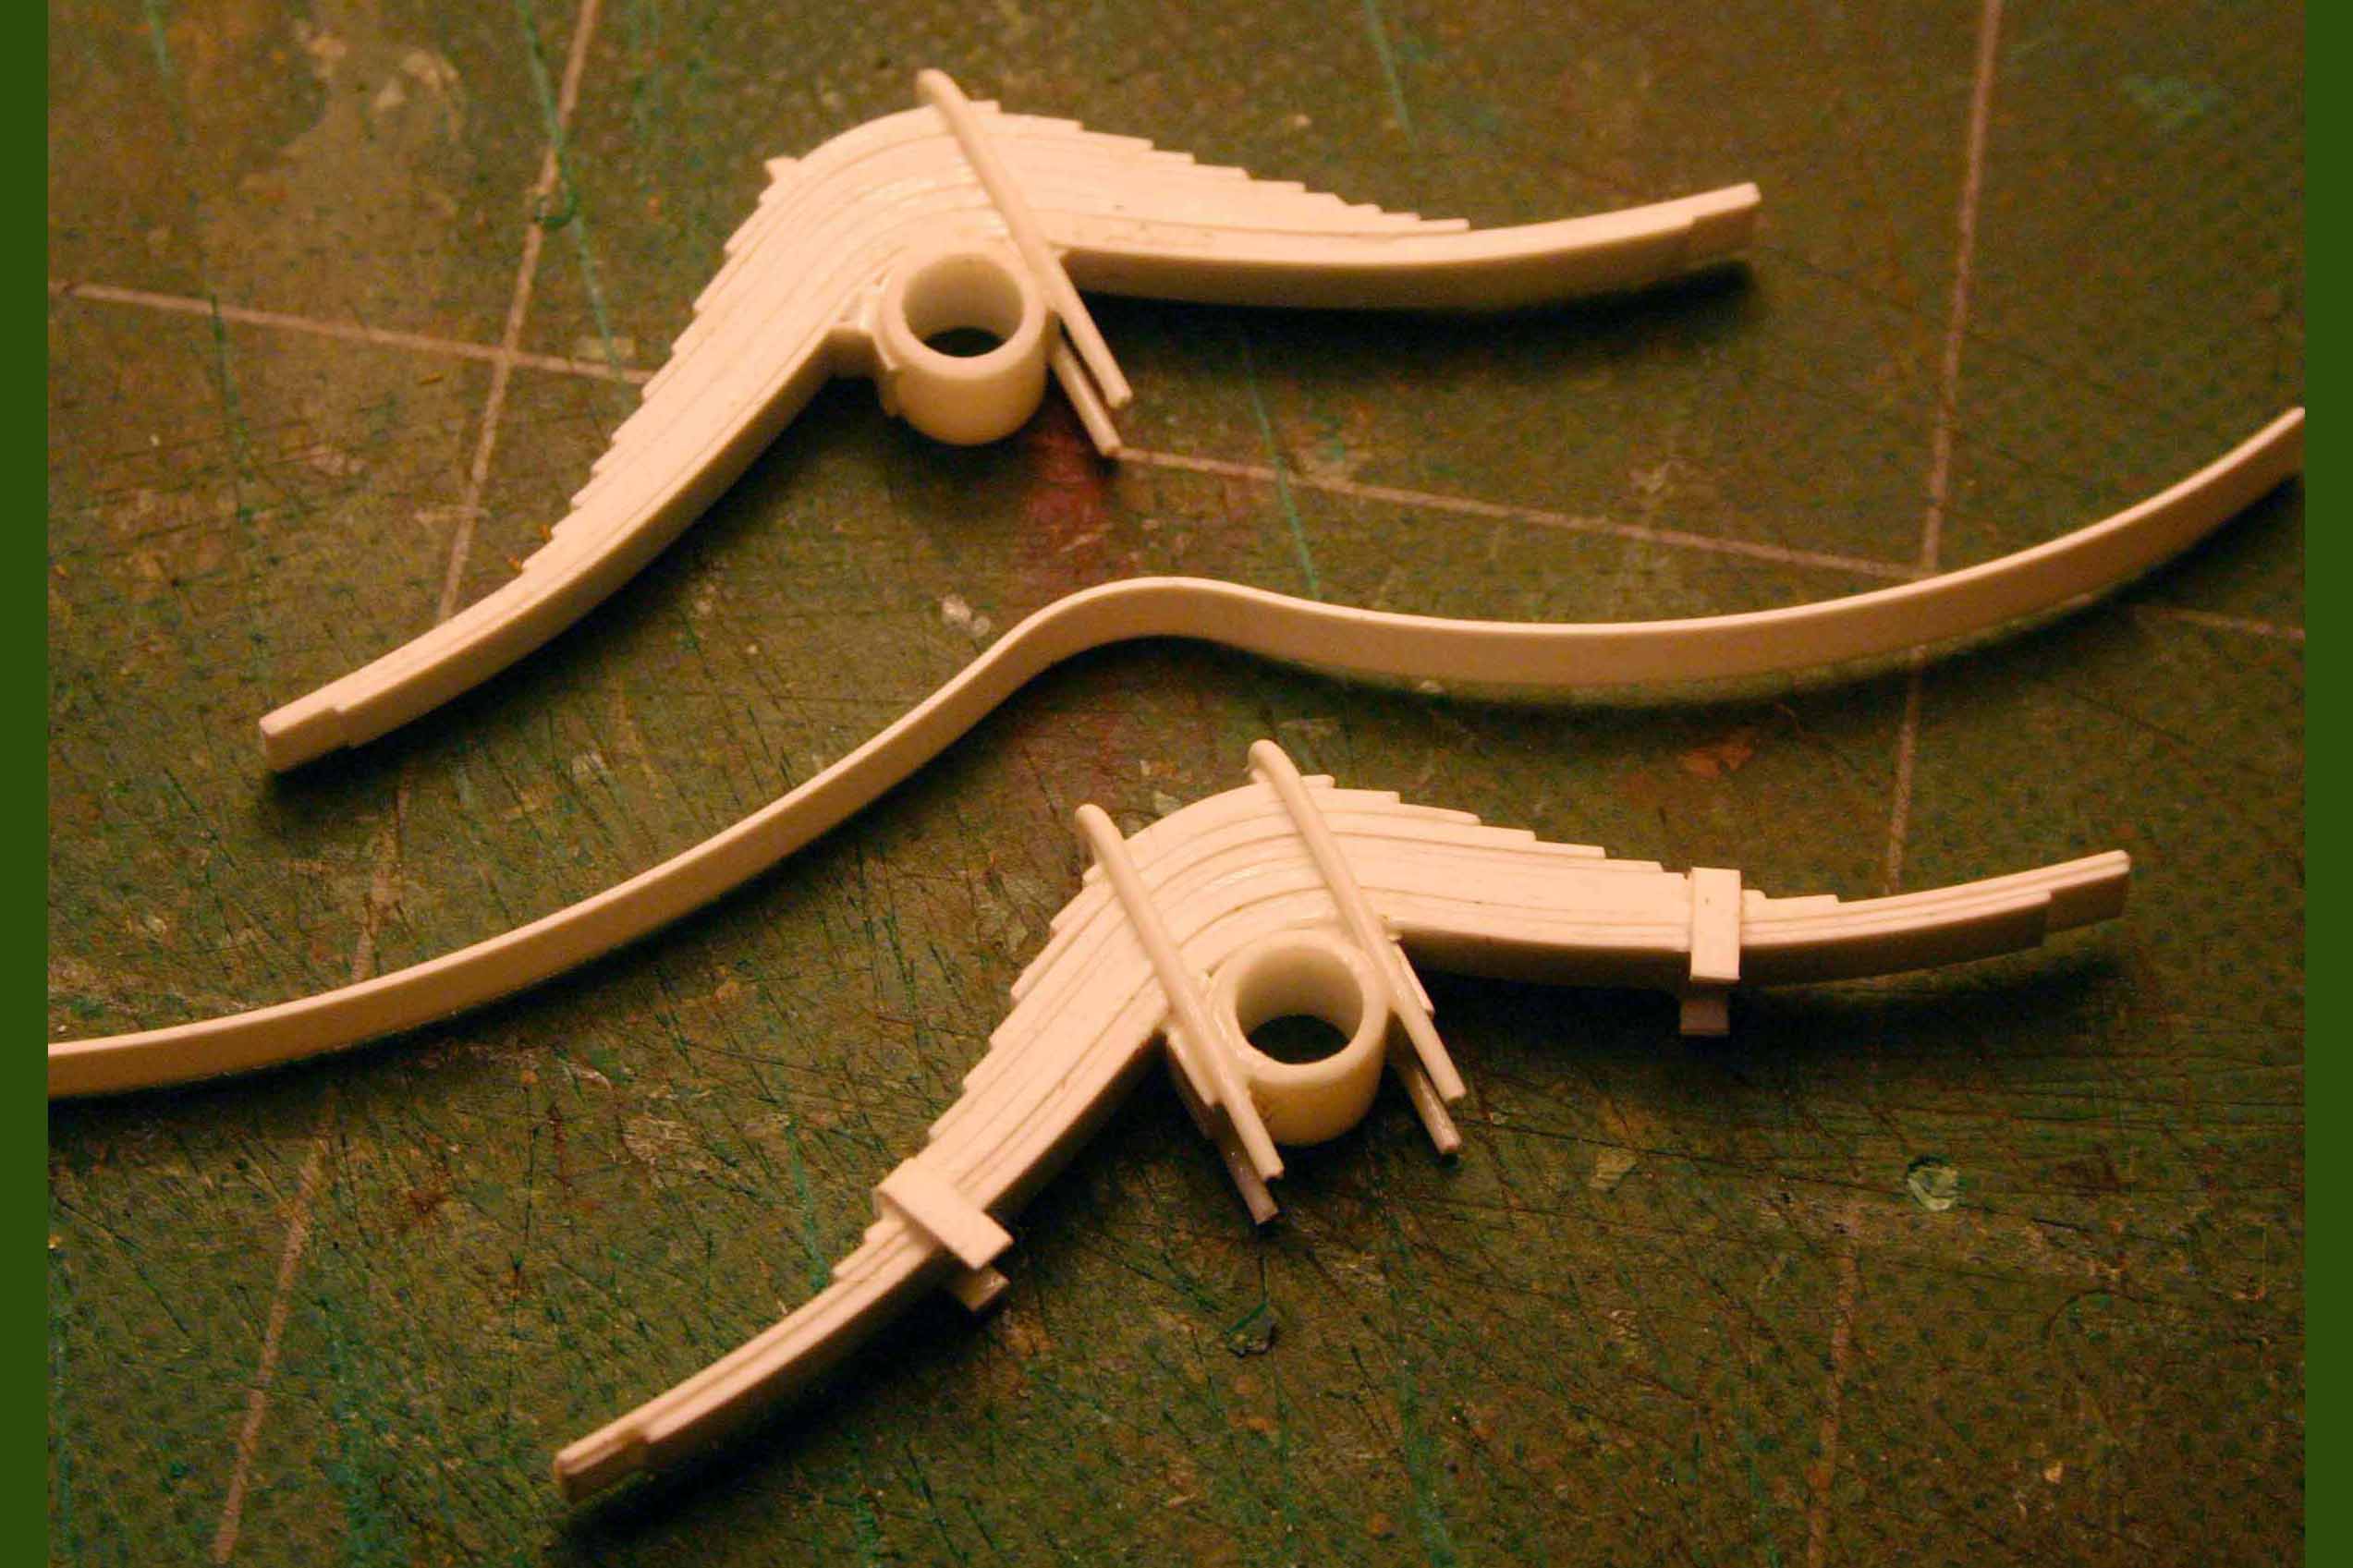
The arched boom on my model is a piece of 1/8" aluminum rod from an old sump pump float switch. (Evergreen rod kept cracking as I warmed it in hot water and tried to bend it slowly around a broom handle.)
The pulley is off the Dragon Wagon Trailer and the Chain Hoist body is scratch built.
Littlefield Collection
3 Likes
I was Wrong!
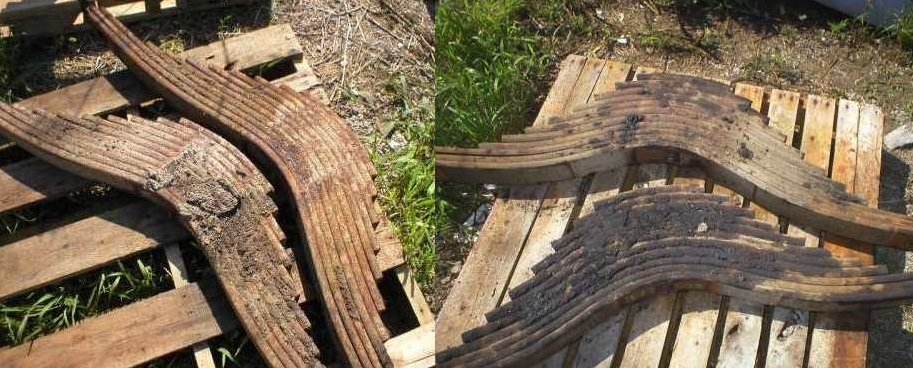
Another way I went wrong was in ASSUMING the Mack would have the more typical slightly curved arch leaf springs mounted to the top of the rear axles. WRONG
(This mistake would make the truck ride exceedingly high.)
I am here showing you what NOT to do so no one else makes the same mistakes as I did!
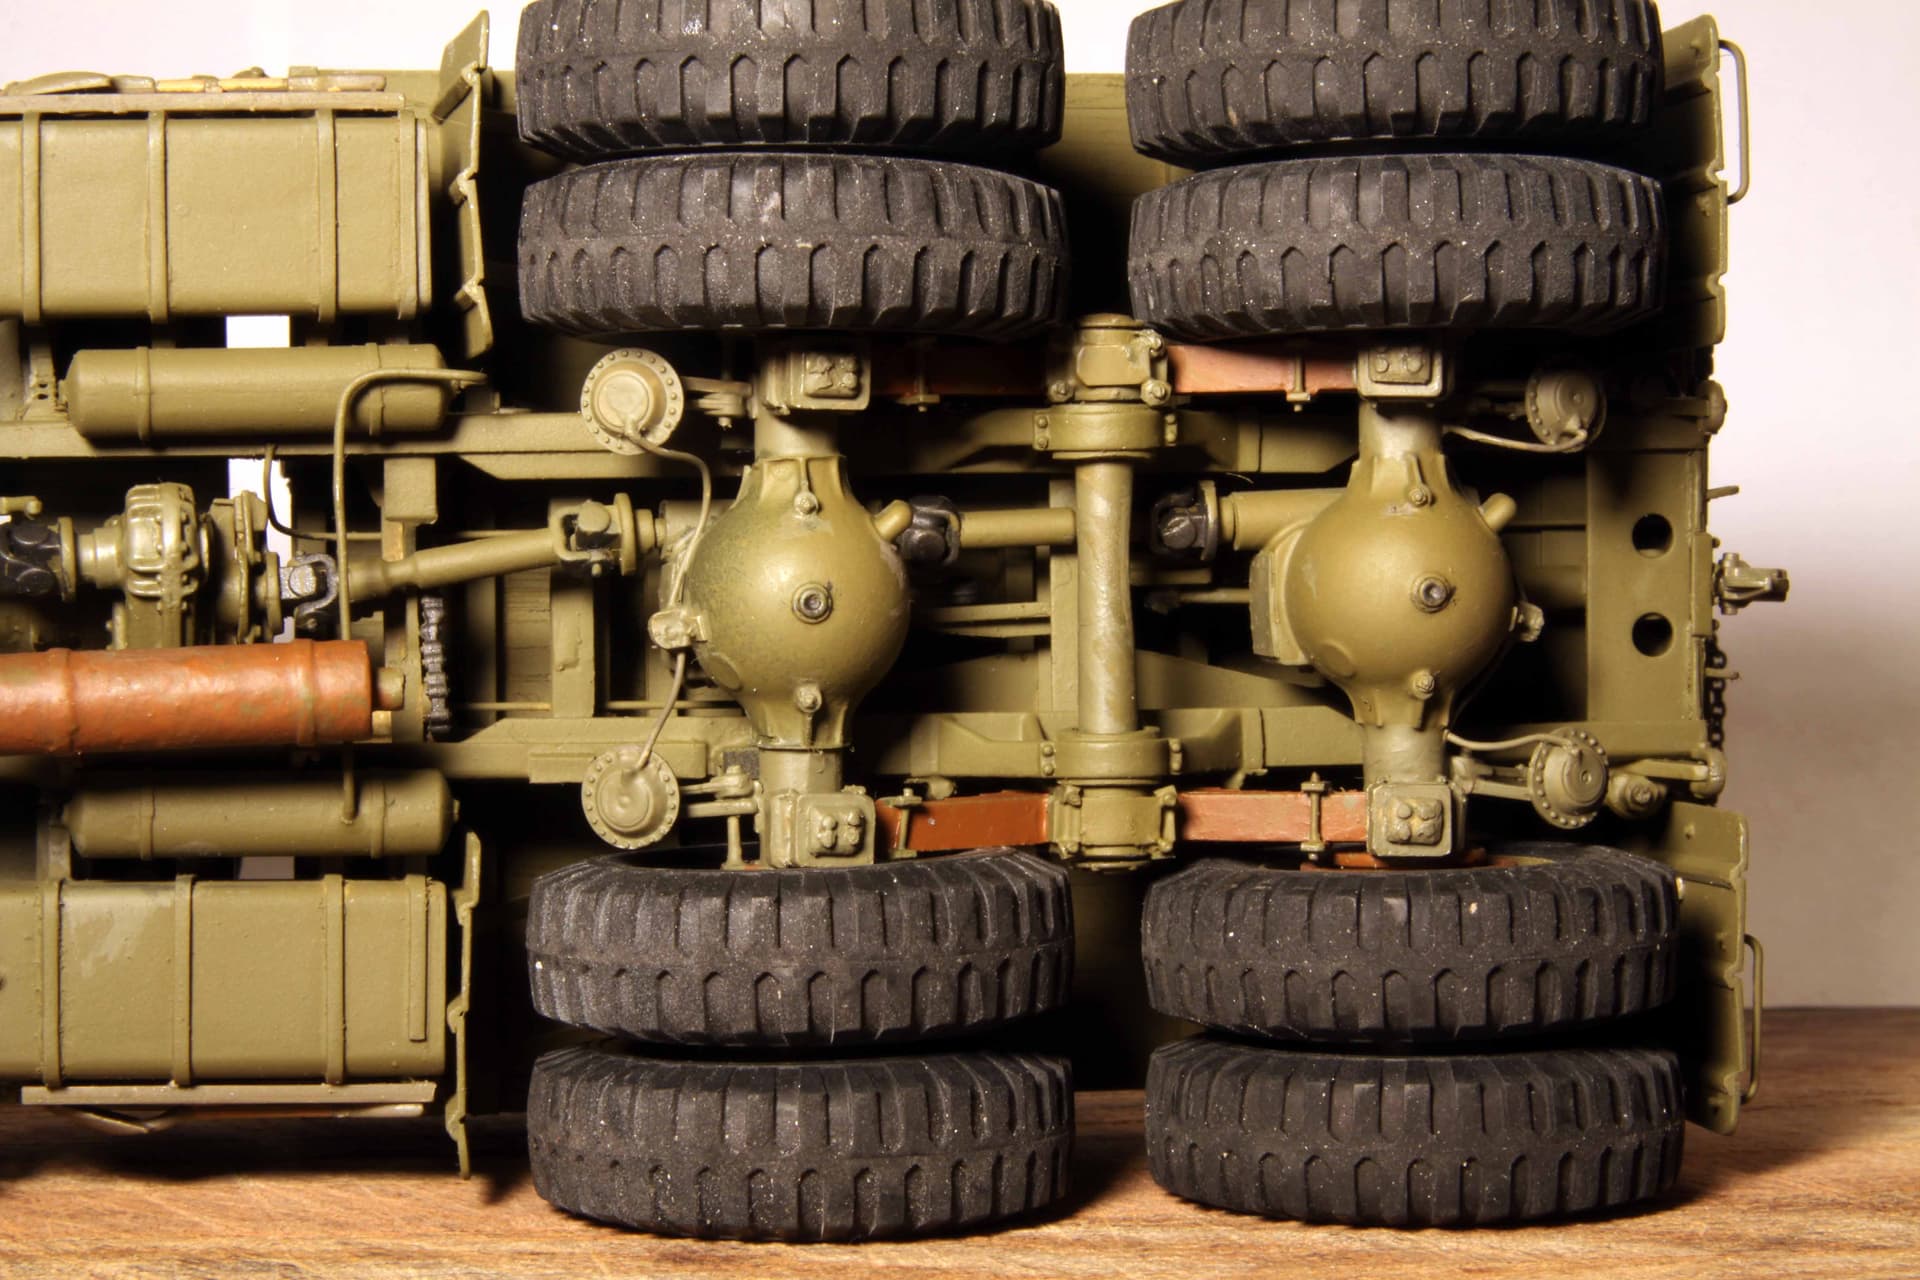
The MACK is Unique:
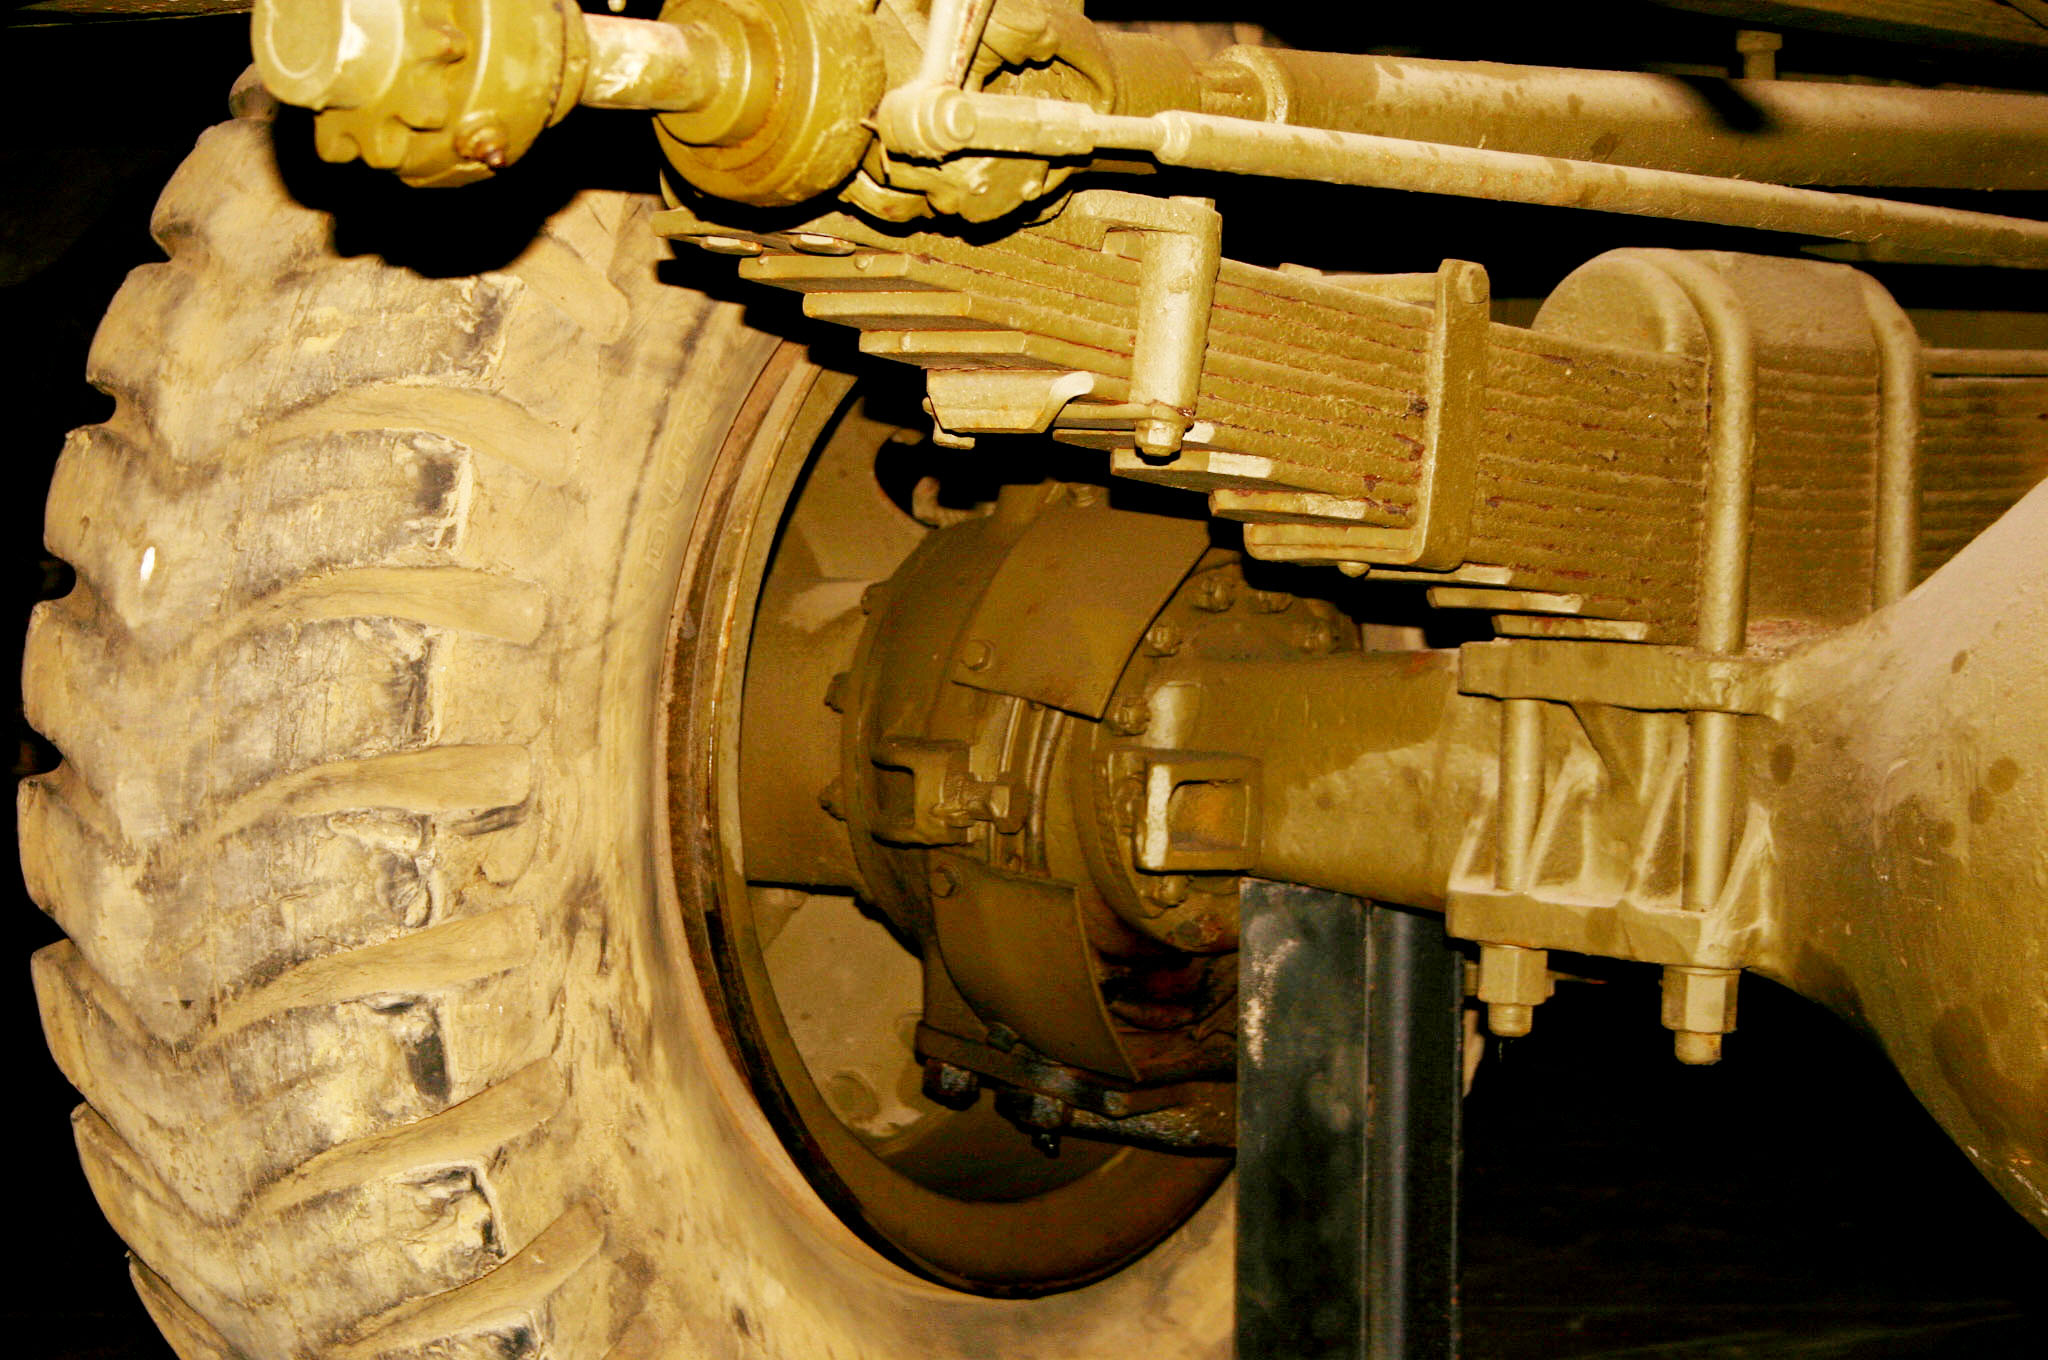
To this day Mack trucks (I believe) are the only ones to utilize this unique in the industry “Double Ellipsoidal” leaf spring design. Otherwise known as the Mack “Camelback” leaf spring.
Also these springs are underslung; attaching to the bottom of the axle housing rather than to the top. This design offers greater flexibility under heavy loads, a lower and smoother more responsive ride and actually helps the loaded vehicle to more easily steer around curves.
(As the loaded vehicle moves into a curve the weight of the load will press more heavily on the side of the truck facing the outside of the curve. This causes the Camelback spring on that side to depress and to spread slightly as to their overall length, thereby increasing the distance between the two rear axles housings on that side and allowing all three axles of the vehicle to ascribe a more gentle curve throughout the turn.)
4 Likes
_____________________
I must admit; I do love building leaf springs out of Evergreen plastic strip.
_____________________
You might notice a Panzer IV road wheel cap forming that center bearing cover plate in the photo just above. The actual cap had the Mack name stamped in script lettering. (I have never quite figured out just how I might make such a part.)
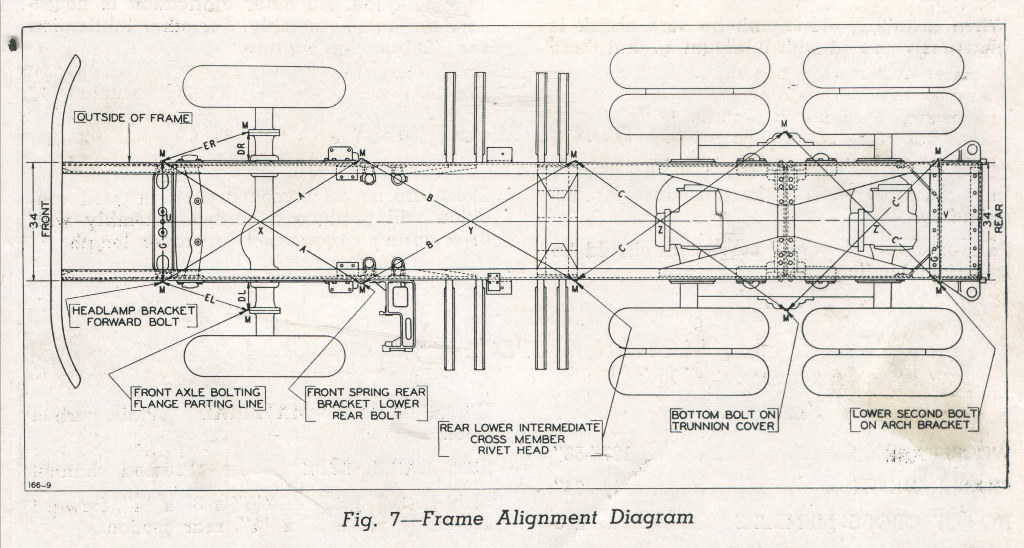
 Spring Schematic
A pair of used Mack Camelback springs up for sale on eBay.
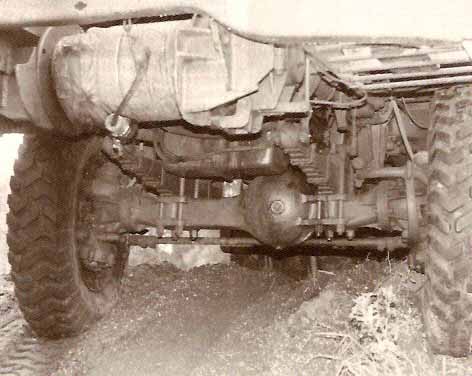
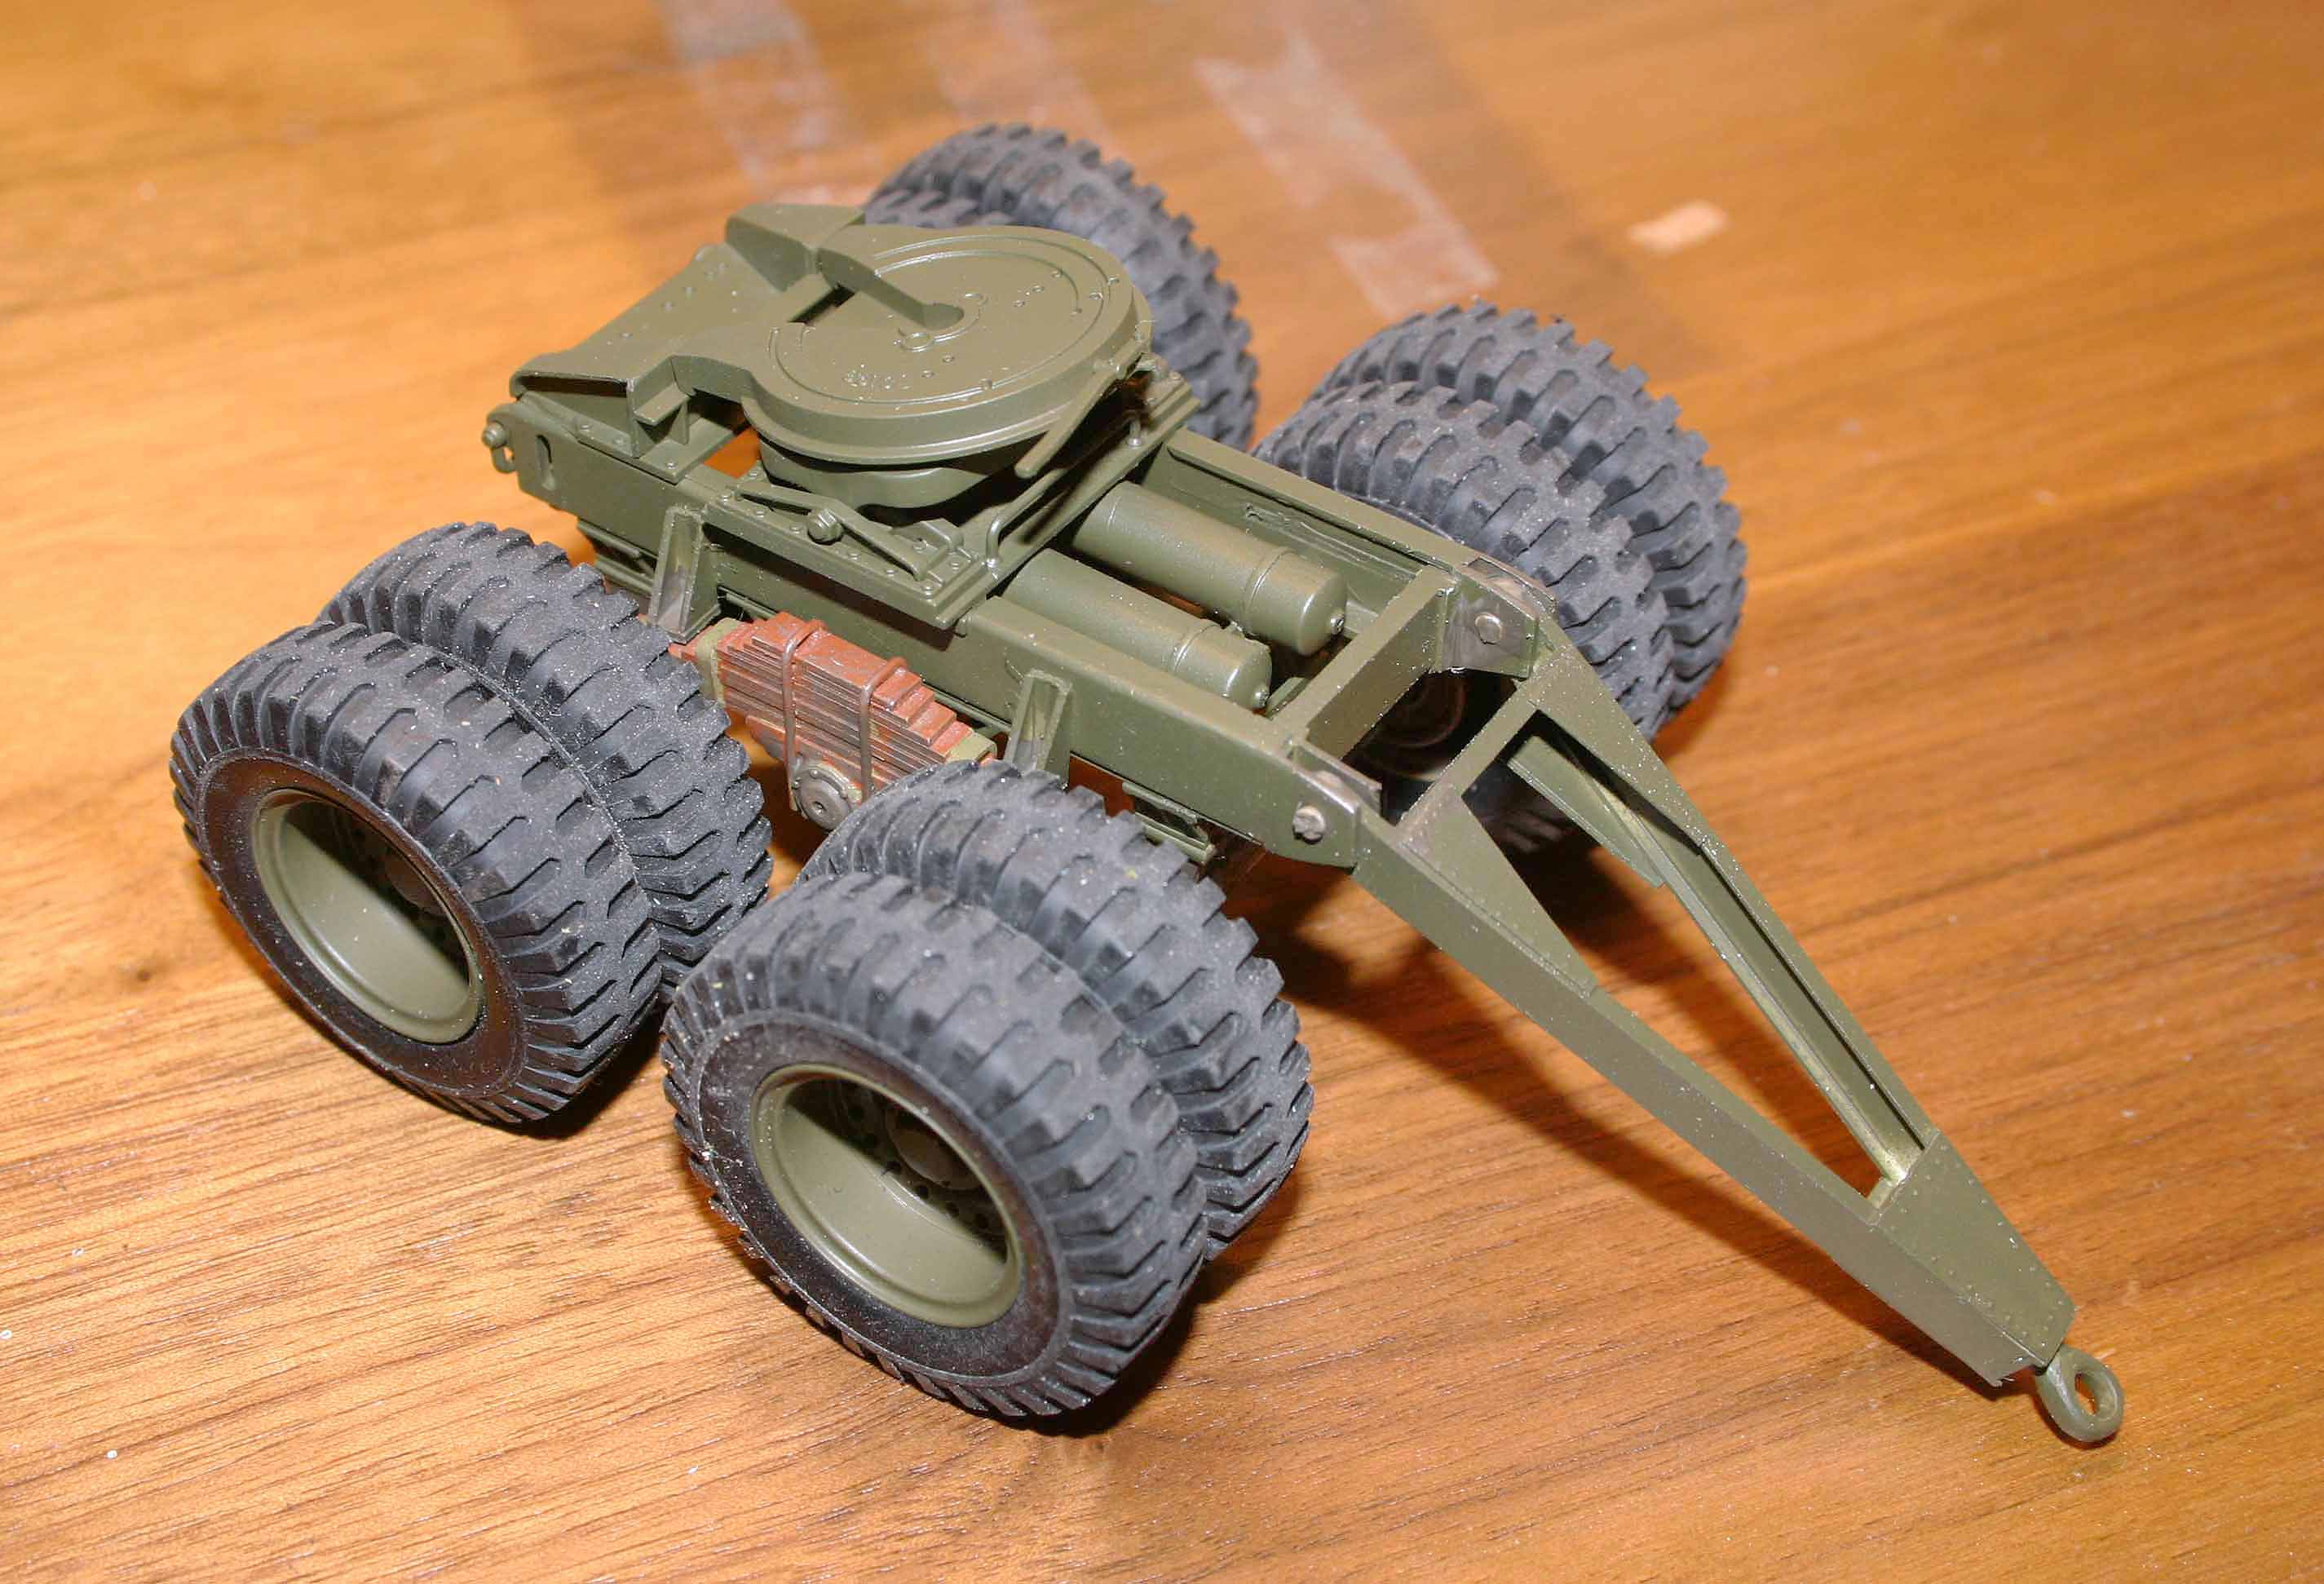
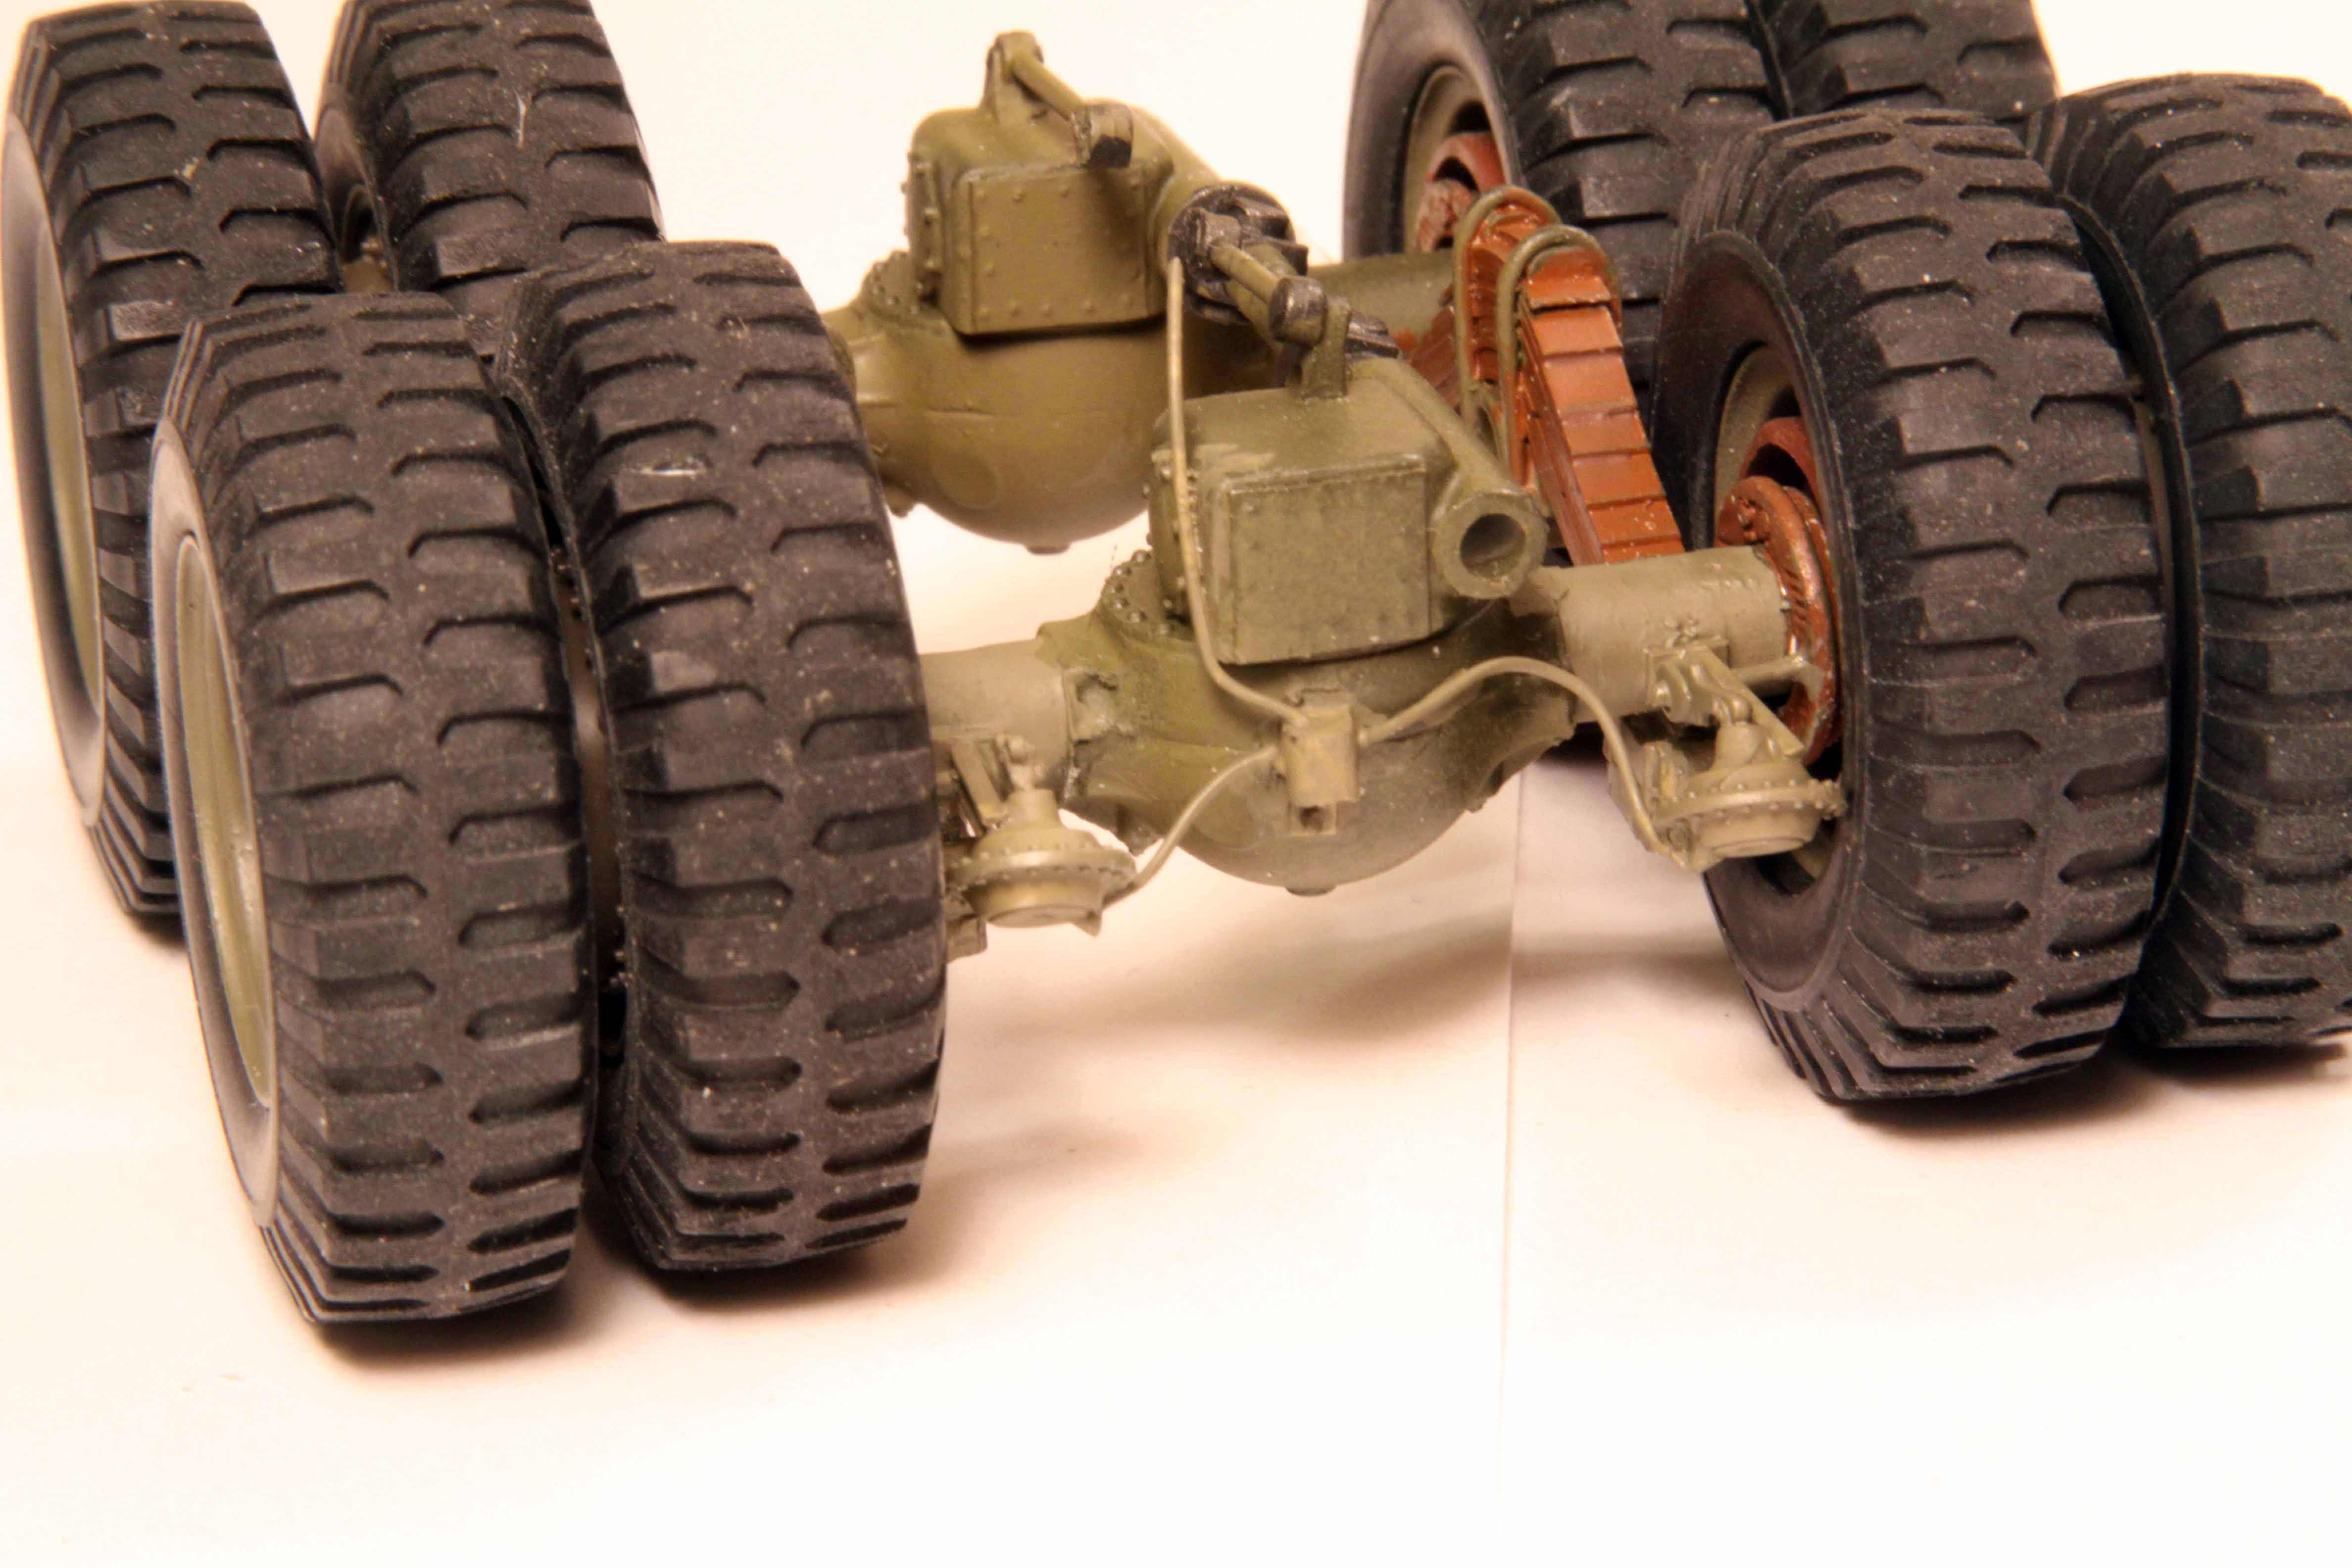
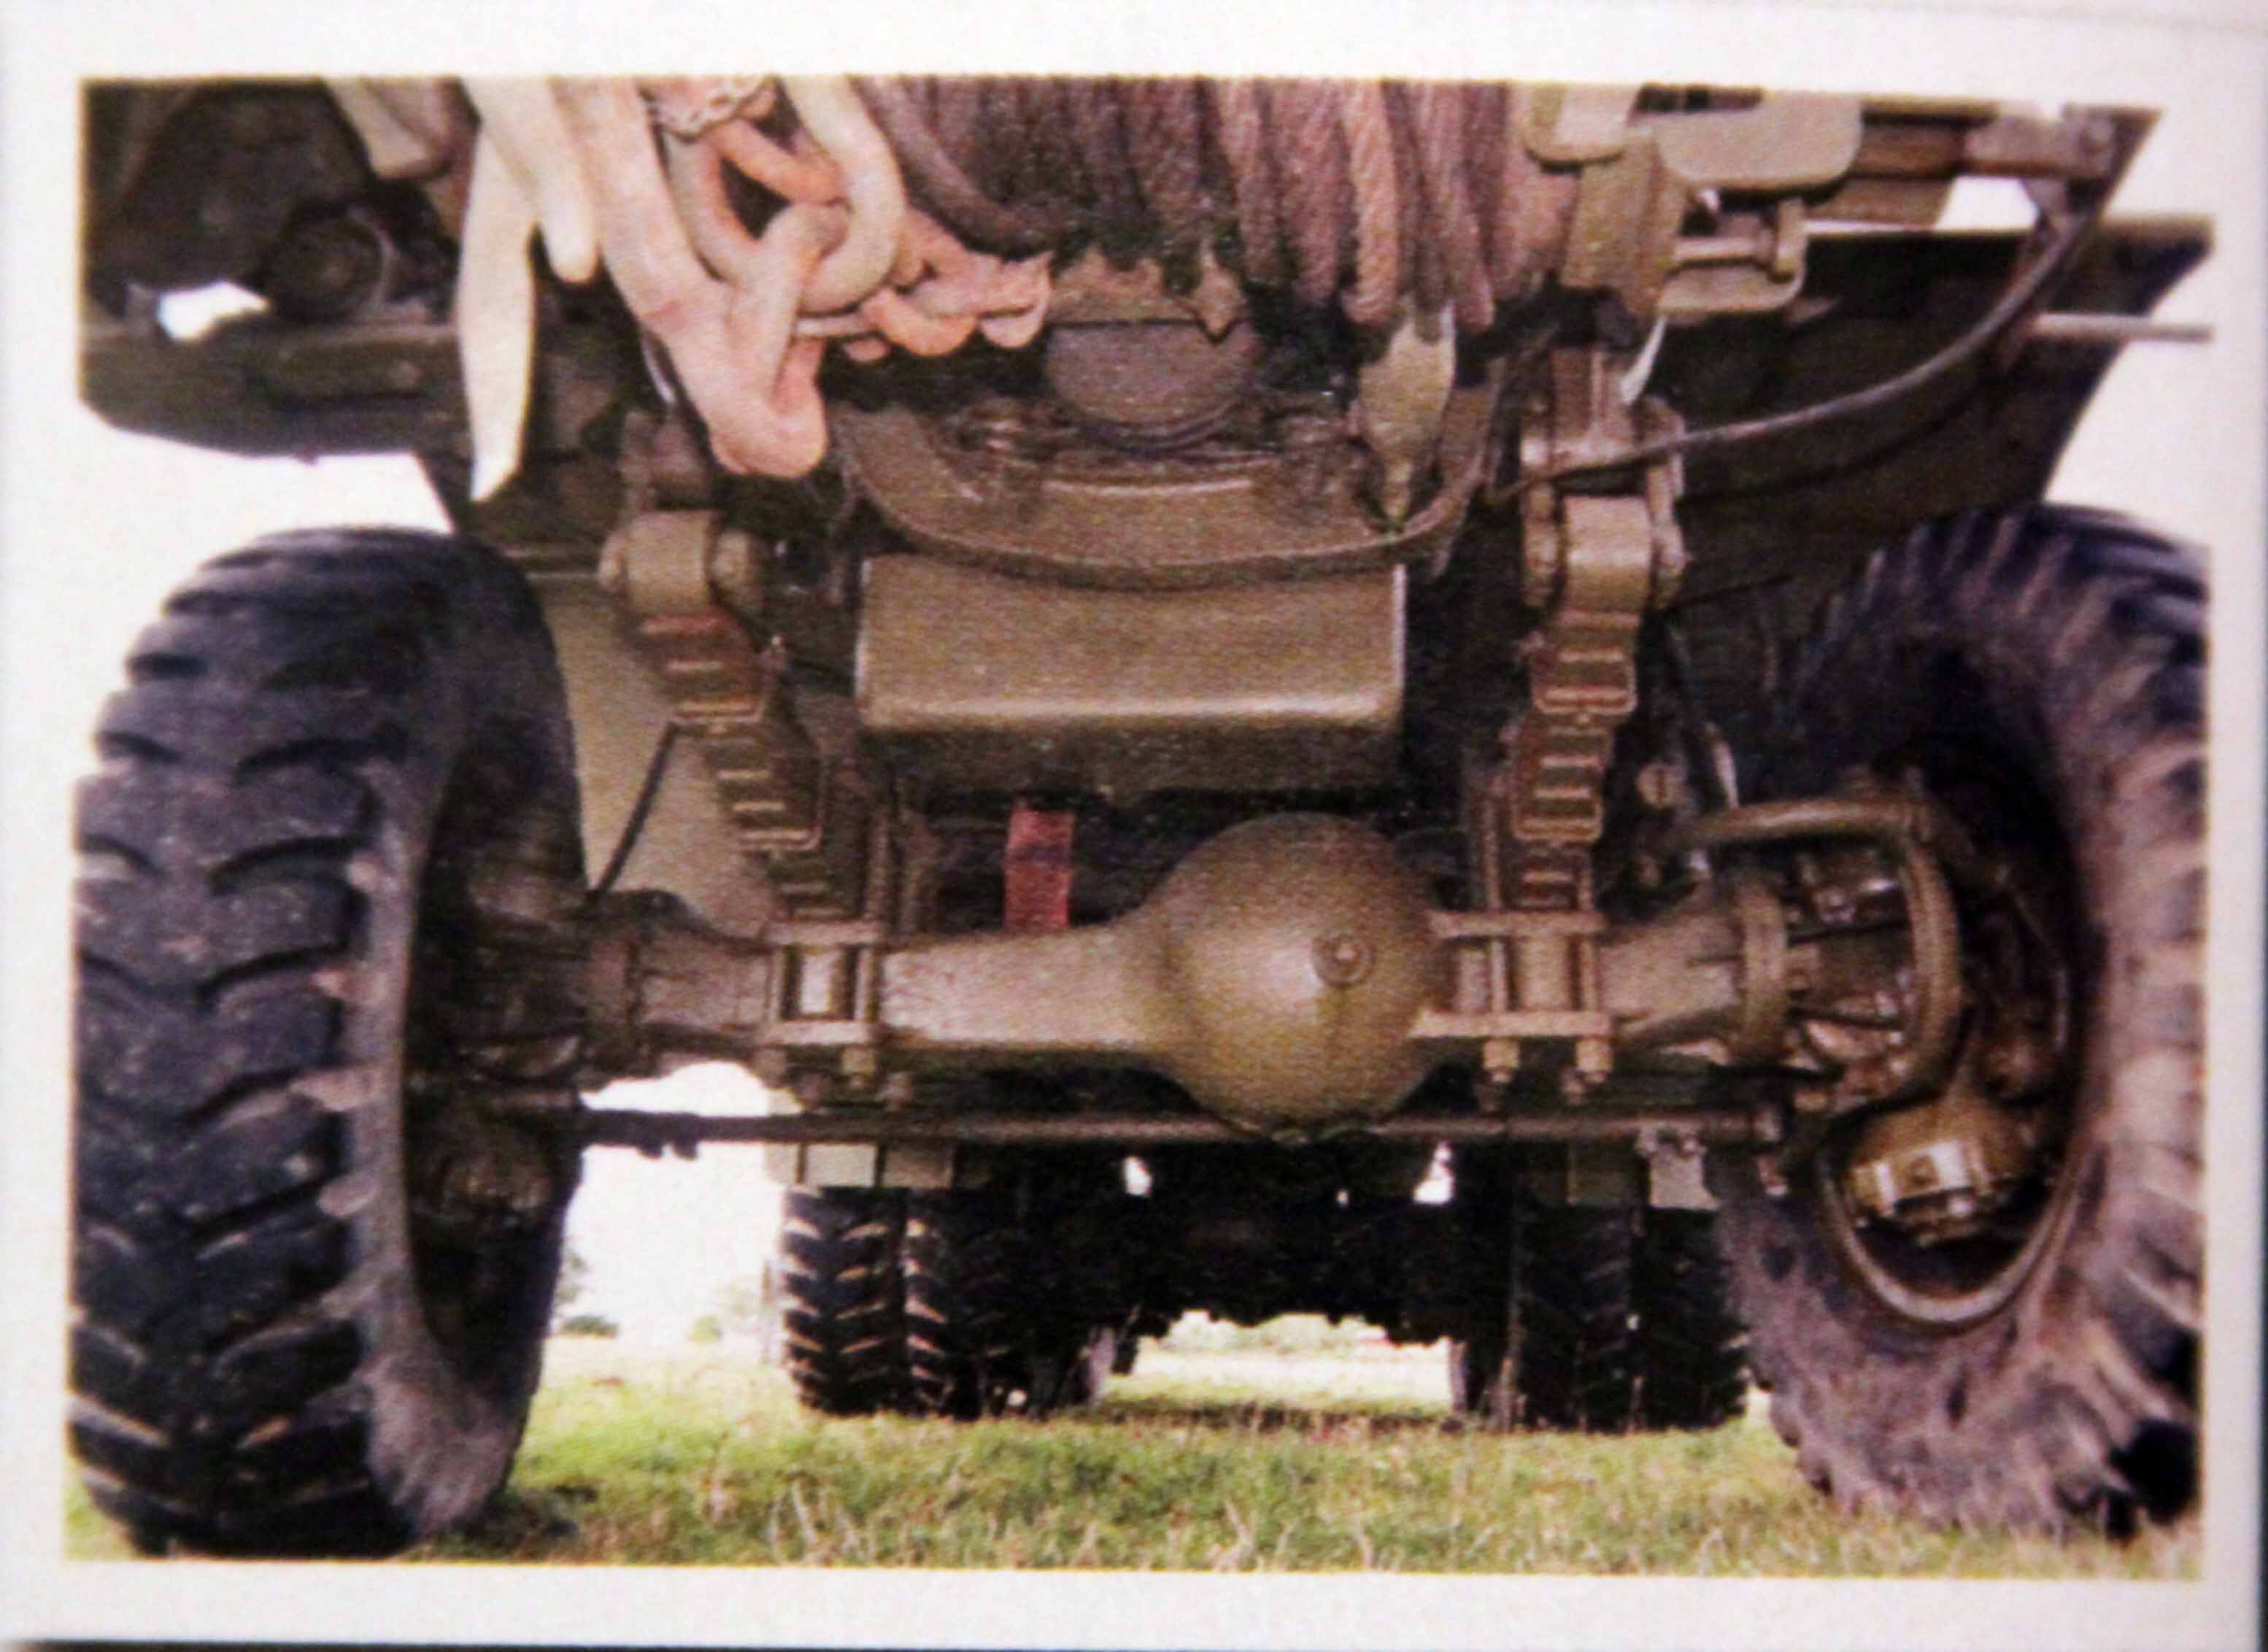
Final Rear Axle Assembly ~ but more on that later:
12 Likes
Thanks for reposting your Mack NO6 build!
1 Like
Those rear chambers look great. You’ve even included the slack adjusters and the “S” cam linkages for the foundation brakes. Excellent!
1 Like
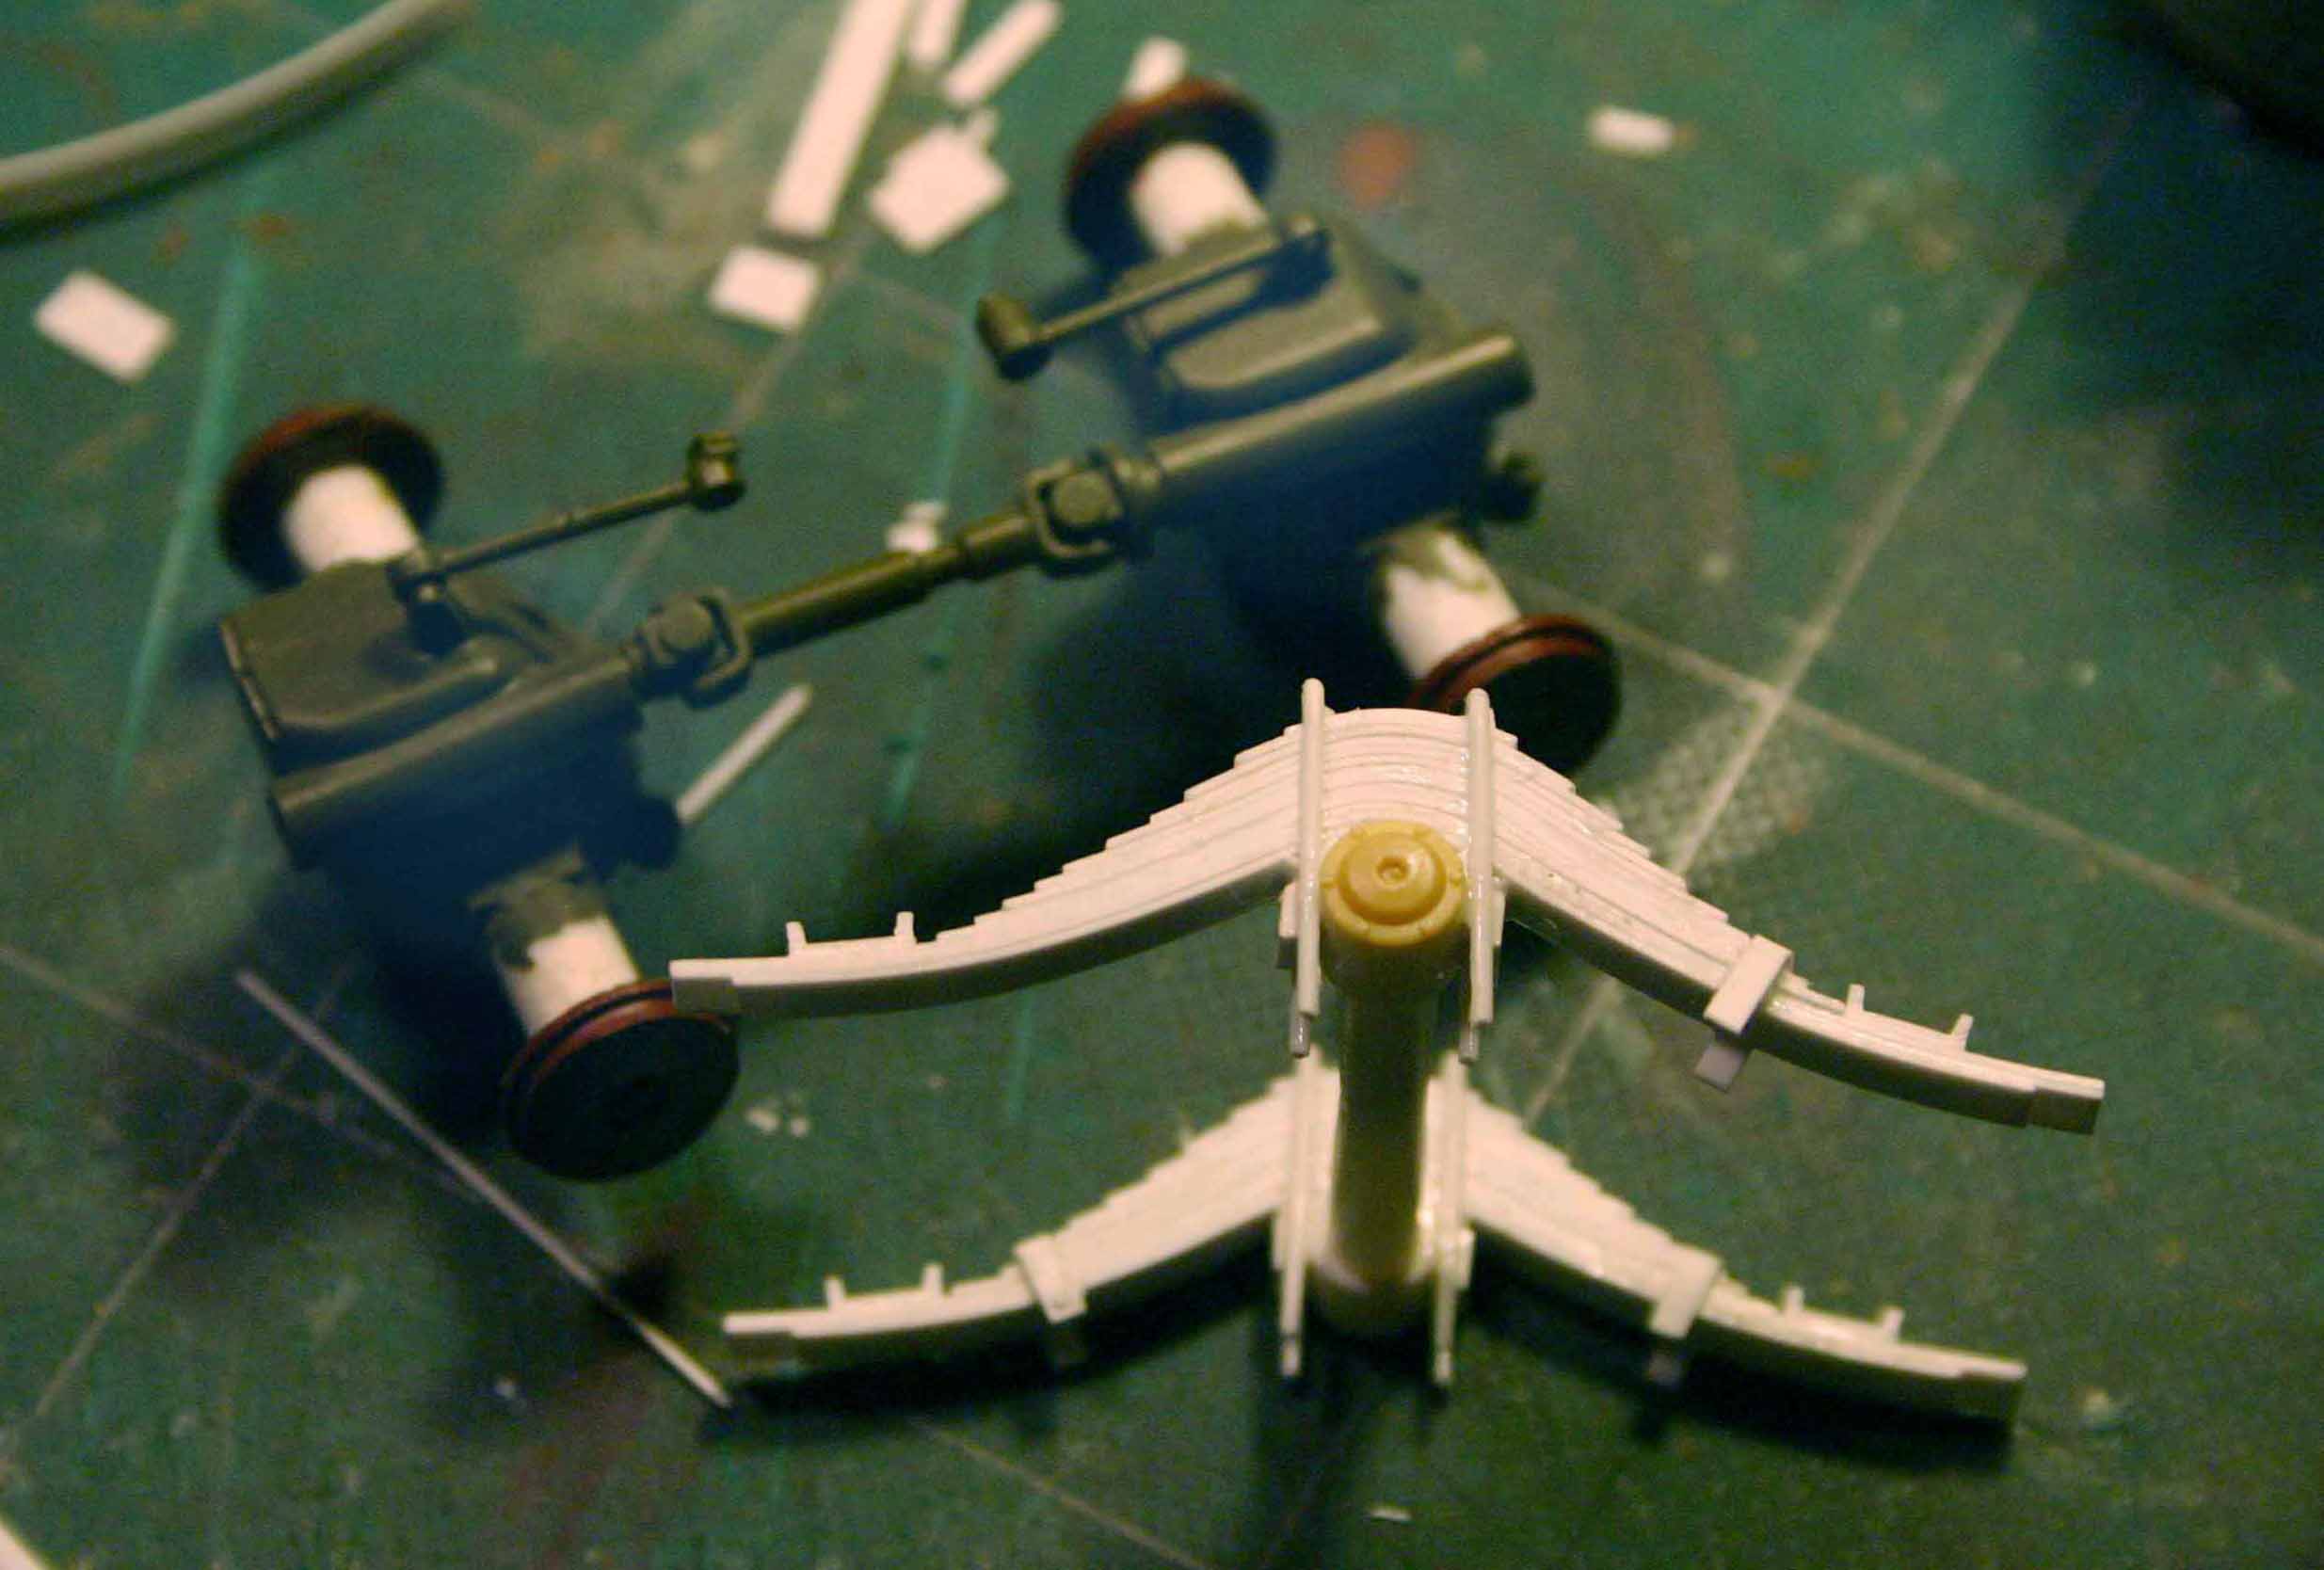
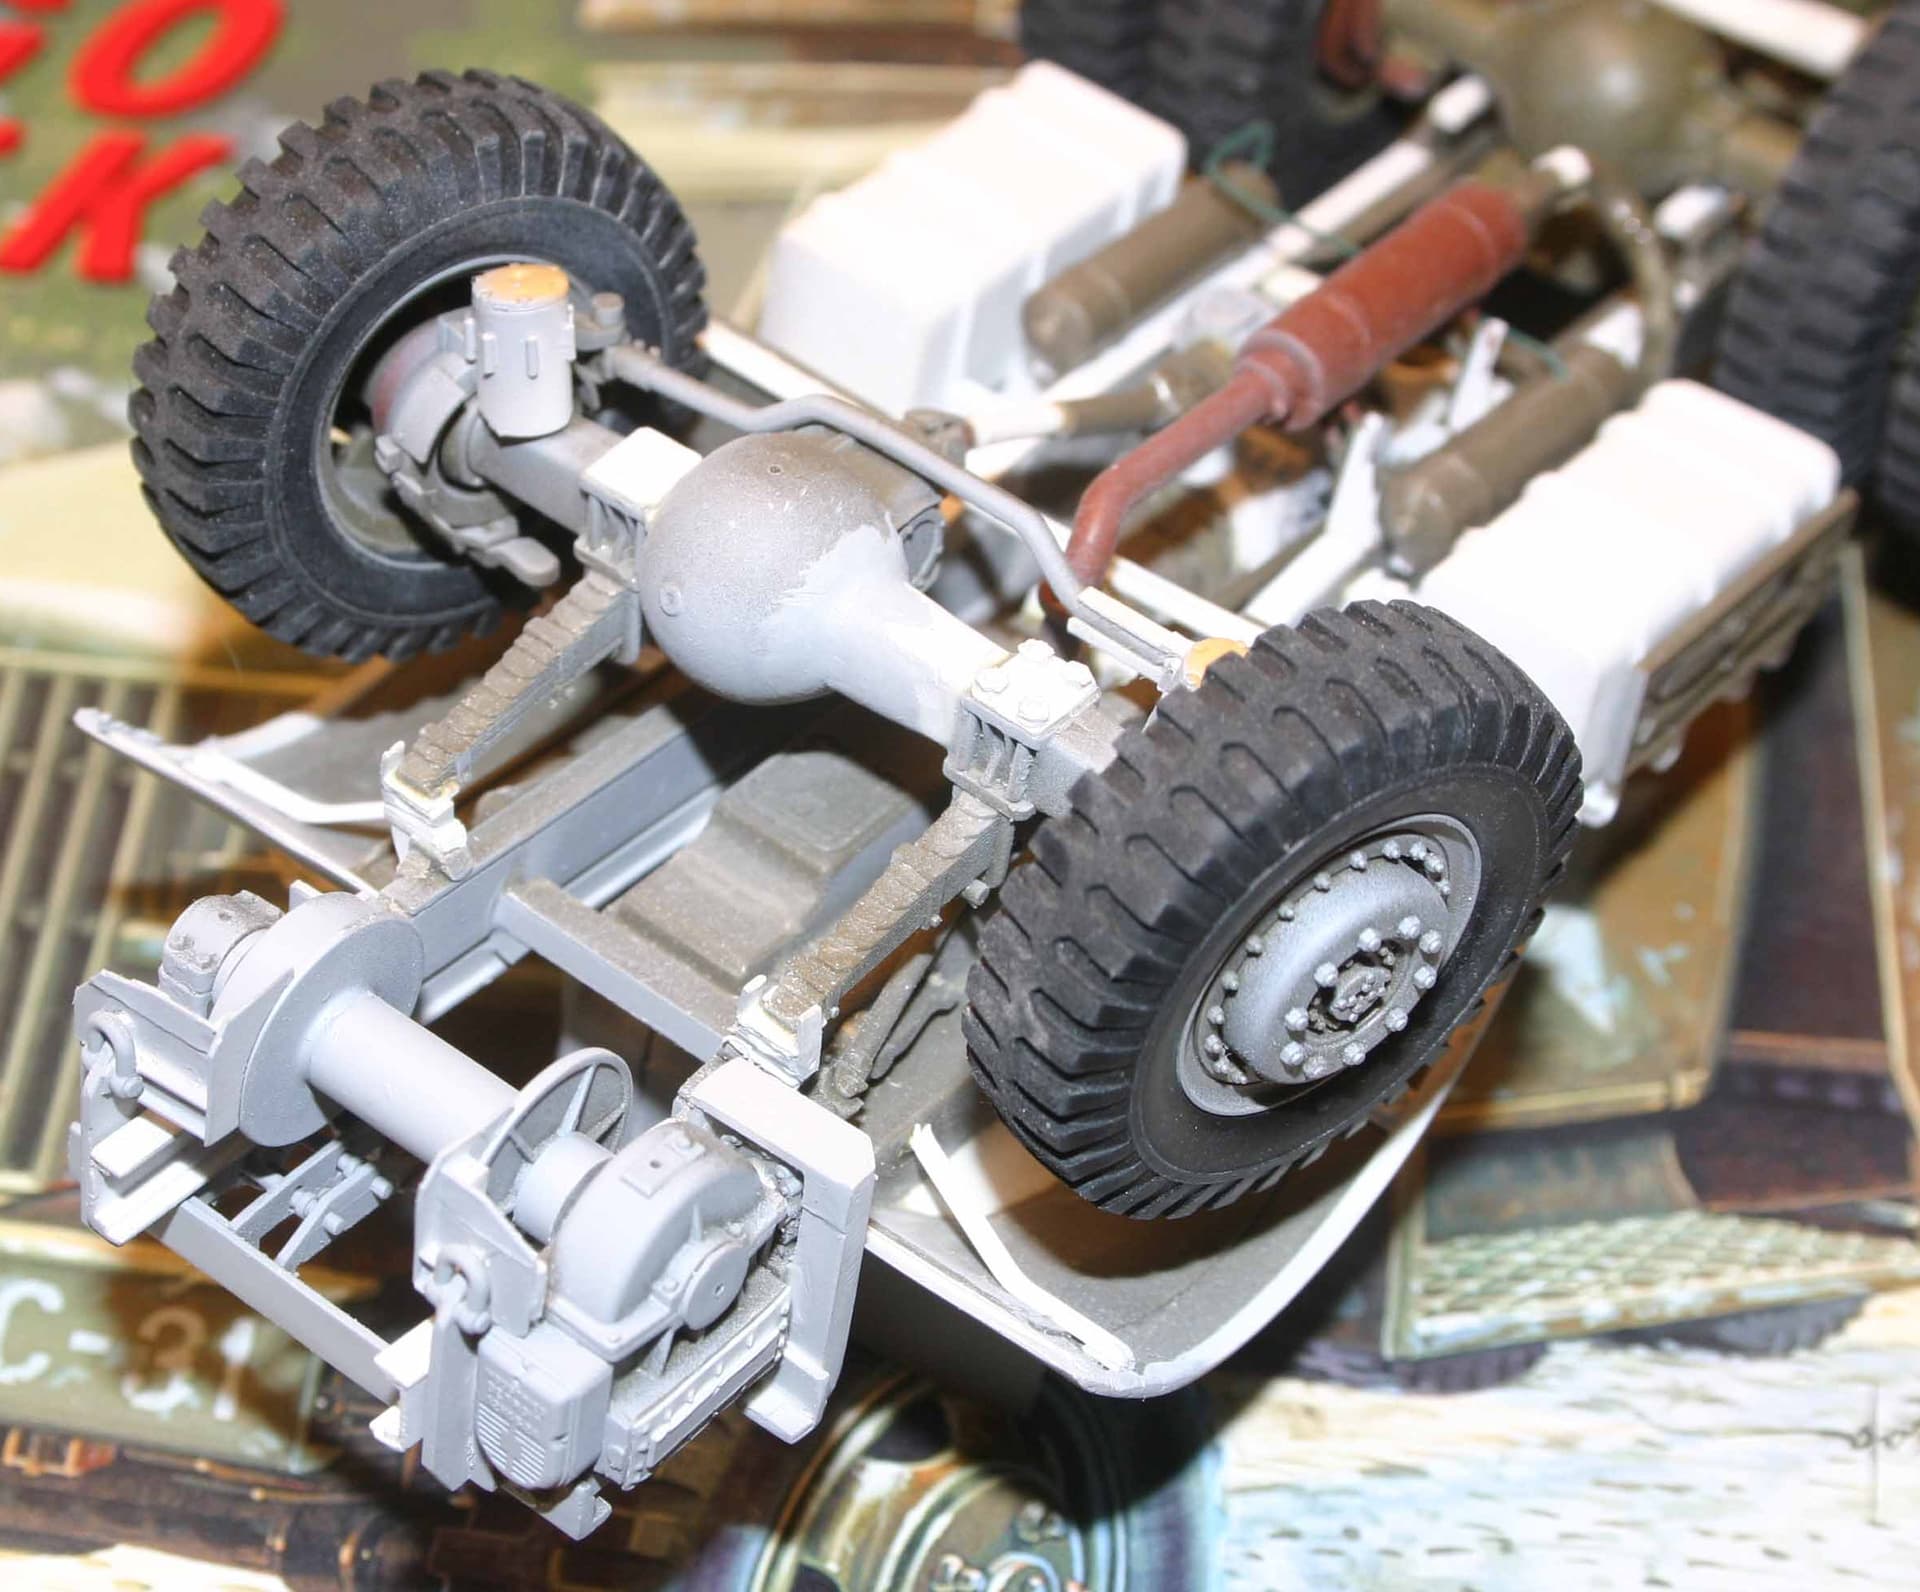
Switching to the front axle for awhile:
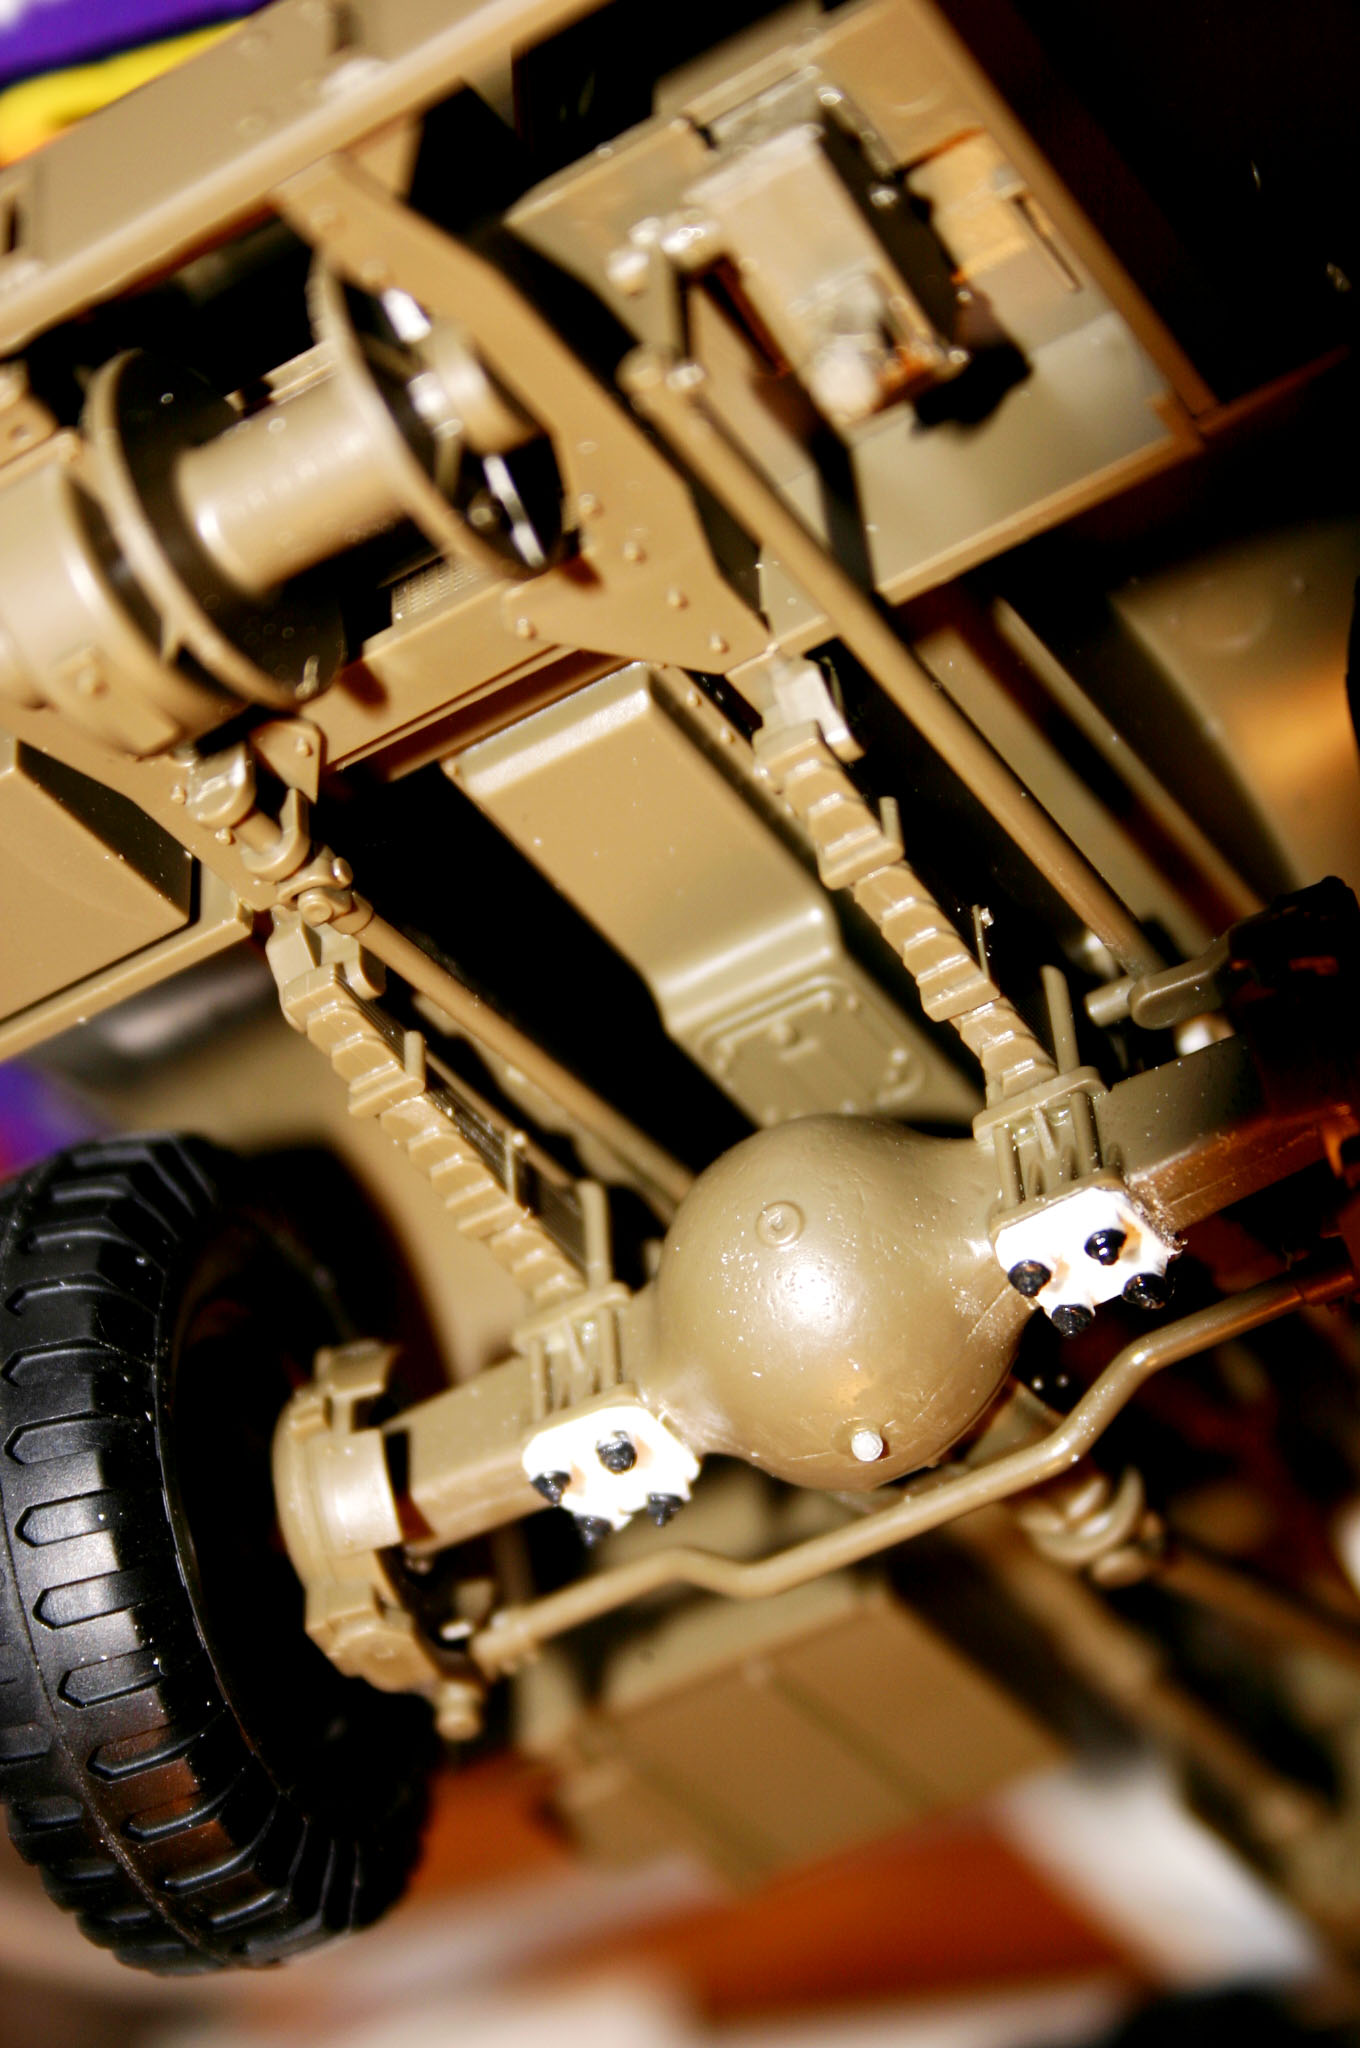
I basically used the front axle, leaf springs and steering gear from the Tamiya Dragon Wagon. However on the DW the differential is centered under the engine whereas the Mack had the forward differential off-set to one side.
Therefore some cutting and rebuilding was in order.
The two parts of the axle housing that are outside the front leaf springs remain unchanged. I then shortened the one side of the axle to bring the differential right up against the spring mounting fixture.
(I suggest installing a piece of Evergreen tubing thru this entire axle assembly for added strength.)
As to the long side of the axle housing I glued the remaining piece of axle housing onto the tube out by the spring mount and then carefully filled in the gap with more layers of built up plastic and body putty. Finally sanding everything to its’ finished shape.
Please Note: the eight heavy axle mounting nuts seen on the bottom of the axle housing where it mounts to the leaf springs. This detail is something that has been left off the Dragon Wagon by Tamiya.
Even though this is an underbody detail it is something that is readily visible when either the DW or the Mack are viewed from directly in front.
I have now added this bolt & nut detail to both my Mack NO and my DW Recovery vehicle.
Here below is a front axle view of the M26 Dragon Wagon that used to be on display in the Victory Museum in Auburn, Indiana. Also shown is my addition of these details to my M26 Dragon Wagon Recovery Vehicle.
Additionally I add bottom drain plugs to all my vehicle differentials, transmissions, transfer case and engine oil pans.
5 Likes
The Mack is a monster; but you have to be one to be capable of pulling a Long Tom around Europe.
4 Likes
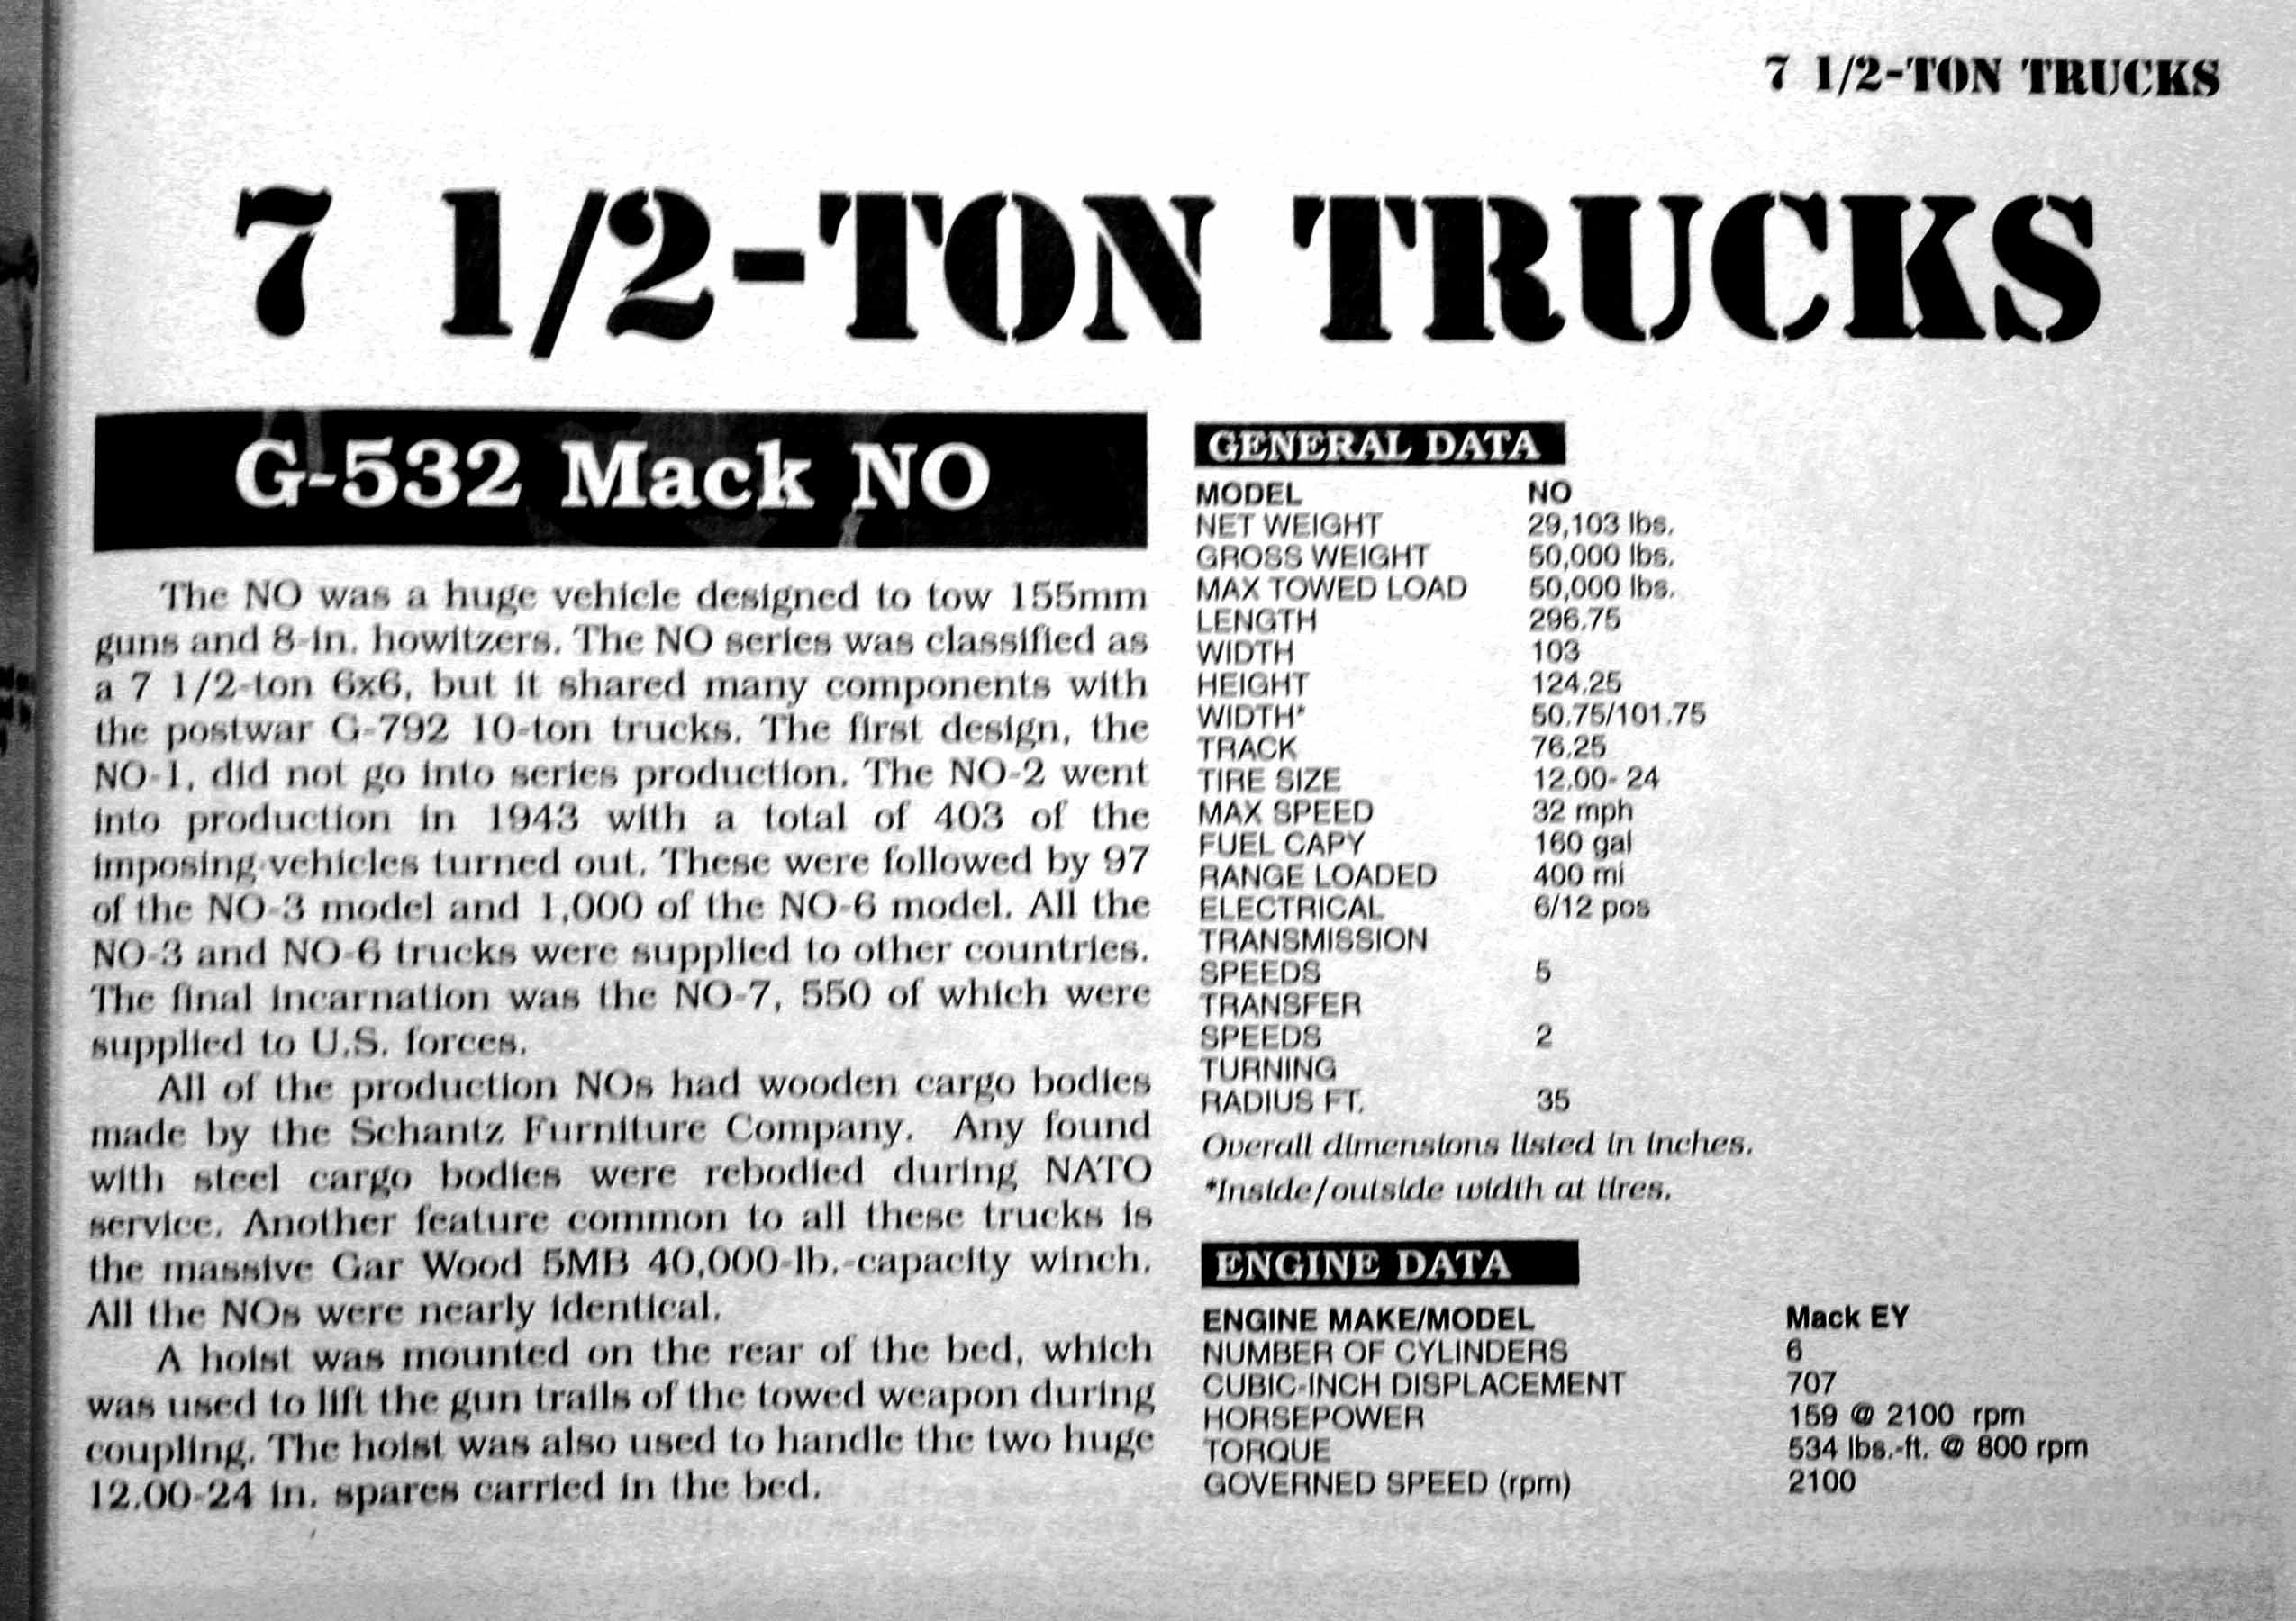
Stats on the G-532 Mack NO:
(I take issue with the explanation of the various Mack NO Model numbers as posted above.)
5 Likes
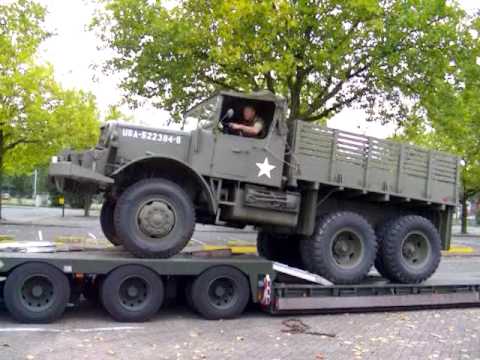
That is cool! What a beast of a rig.
Beautiful work there. That is one beefy big a$$ truck!
HAPPINESS IS FINDING A NEAR PERFECT PROFILE PHOTO OF YOUR PROTOTYPE:*
Here is the profile photo I used to scale and confirm the proportions of my Mack. I used the known diameter of the wheel rim (24") as a measure to determine all other lengths of the vehicle.
Please Note: You do not want to use the outer edge of the wheel rim (the flange) to determine your scale measure but the inner circle of the wheel drum which is where the 24" dia. bead of the tire actually rides.
____________________
This is where a nice pair of dividers comes in handy for determining and walking off measurements. (They are not just for transferring scale distances on a sailor’s navigation map or a chart.)
____________________
Even perspective photos such as seen below can still be of help to you in calculating proportions and measurements:
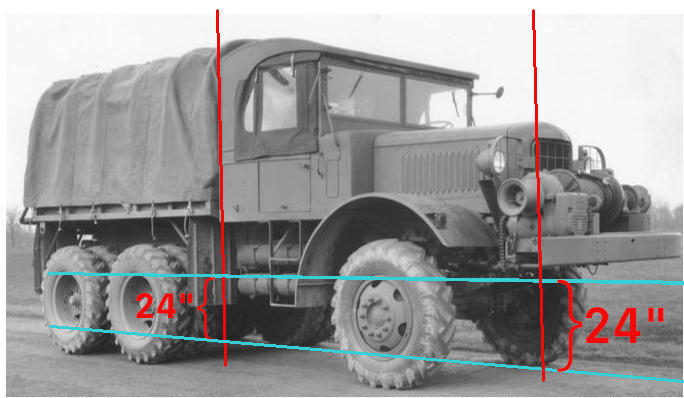
In this photo I have projected (in perspective) the 24 inch wheel rim measurement along the length of the vehicle - as shown by the blue lines.
Any VERTICAL measurement you wish to take along the length of the vehicle (represented by the red lines,) can use the bracketed length as being 24 inches, (along that one vertical red line ONLY.)
3 Likes
It’s too late for your excellent build, but the obvious way is to post pics and dimensions so some kind soul can CAD them for you to get 3d printed! (Assuming you know somebody local with one of those resin printers that are so much sharper than Shapeways Smooth Detail…)
Clearly 3D printing would be the only way to make this particular part. However this Mack build pre-dates the common availability of such machines as they were just in their infancy at the time.
I have since used a number of 3D printed parts on my builds. Some from Shapeways and some from private sources, as well was helping in the engineering research for a few.
(Tom I want to say some of these parts have been of your design! Such as that front mounted Darley Water Pump you did for my WWII Fire Truck!)
1 Like


