That will be perfect!
When you are composing a reply here, you will see an icon that is a box with an image on it (sort of). It is two icons to the right of the quotation mark icon. Click on that and follow the instructions!
That will be perfect!
When you are composing a reply here, you will see an icon that is a box with an image on it (sort of). It is two icons to the right of the quotation mark icon. Click on that and follow the instructions!
Yes, I see it, that is MUCH simpler that the old forum was. i’ll shoot some pictures over the weekend while getting the parts washed. Thanks for the help.
Paul
I will follow, I have the same in my stash.
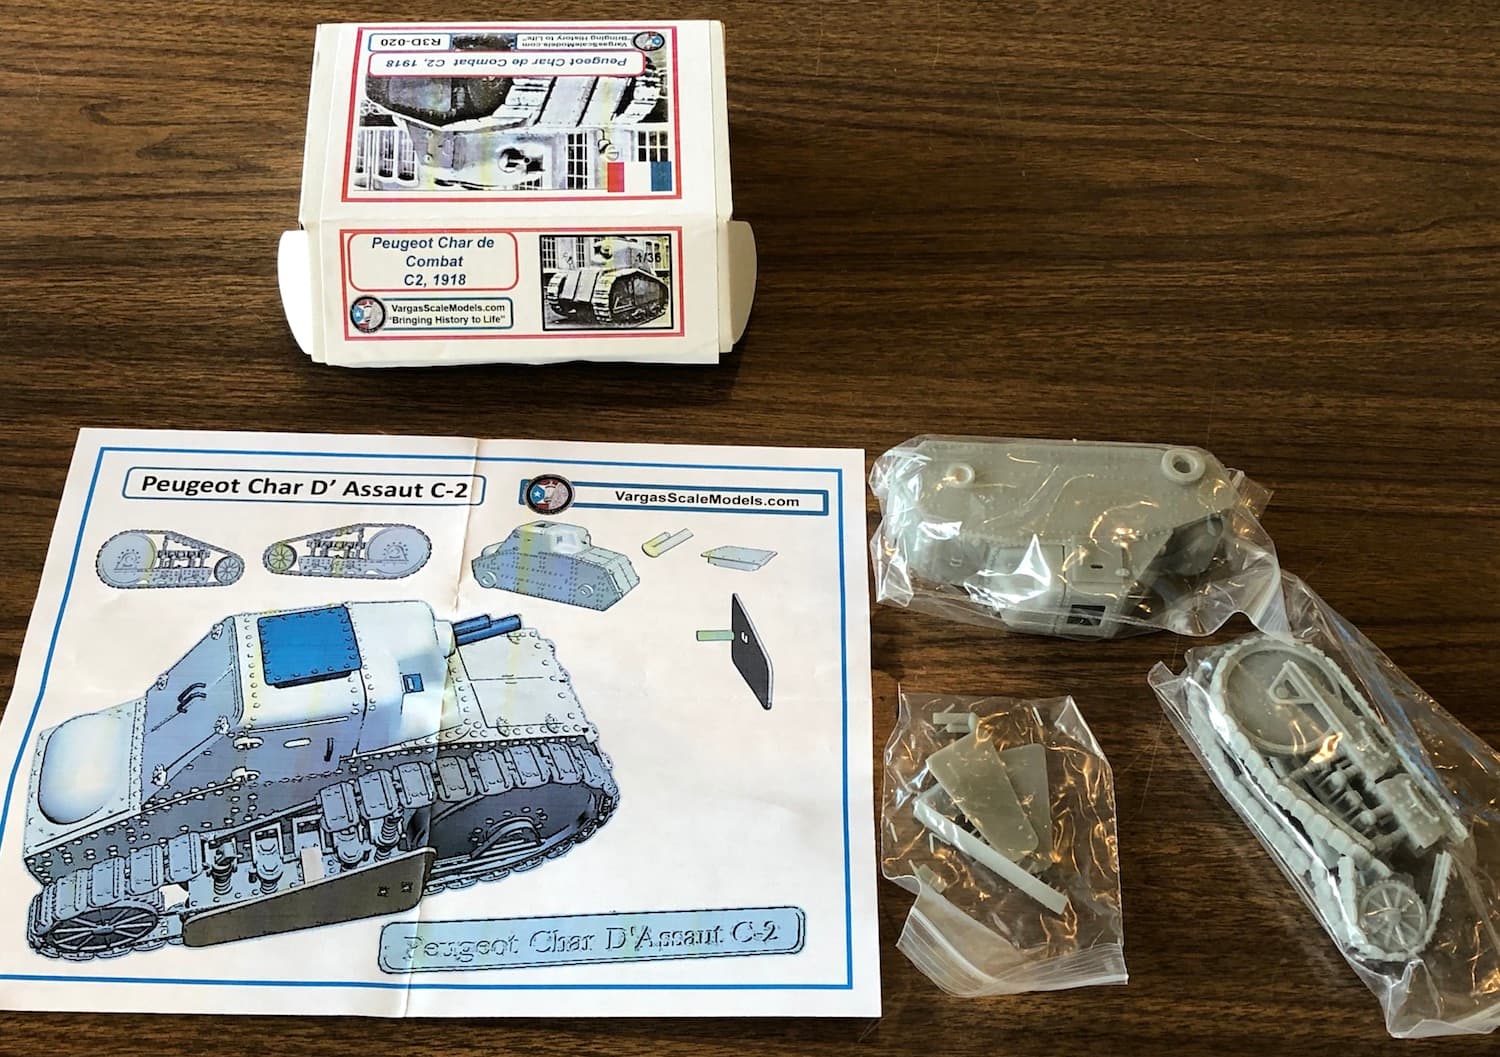
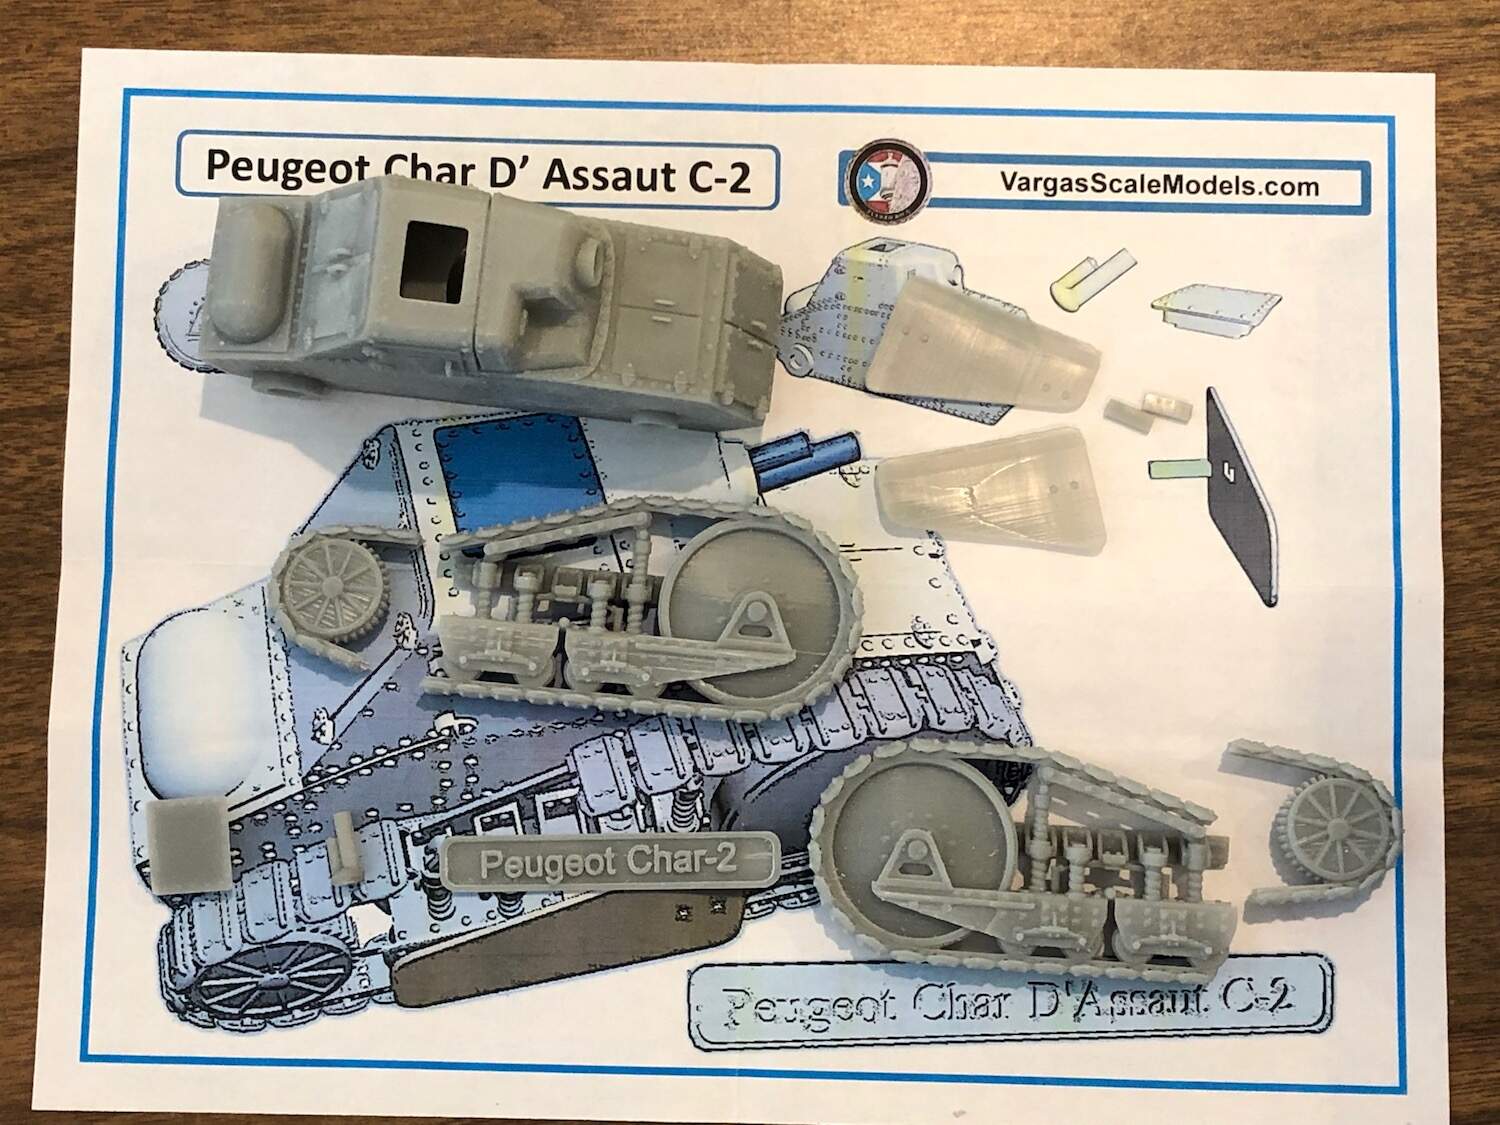
I got the Peugeot Char 2 75mm out and got the parts washed. Here is the box & contents:
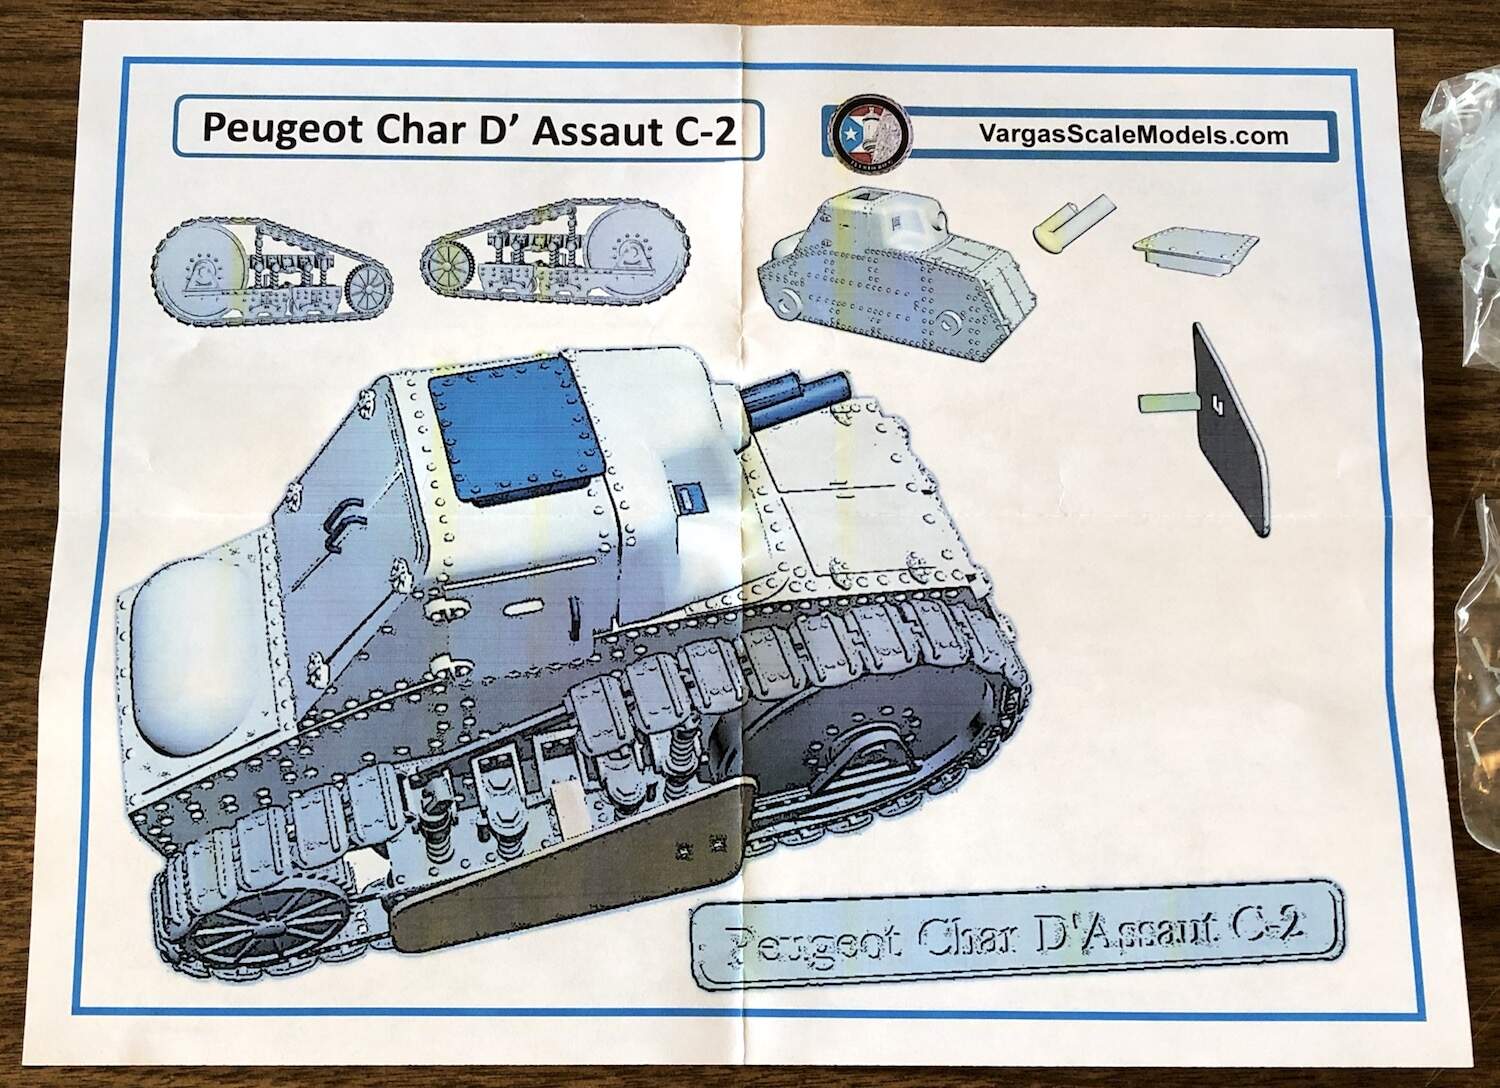
Here is the instructions:
As you can see, they are very brief. The other side mentions the parts need to be washed in warm soapy water & that the parts should be assembled with CA glue.
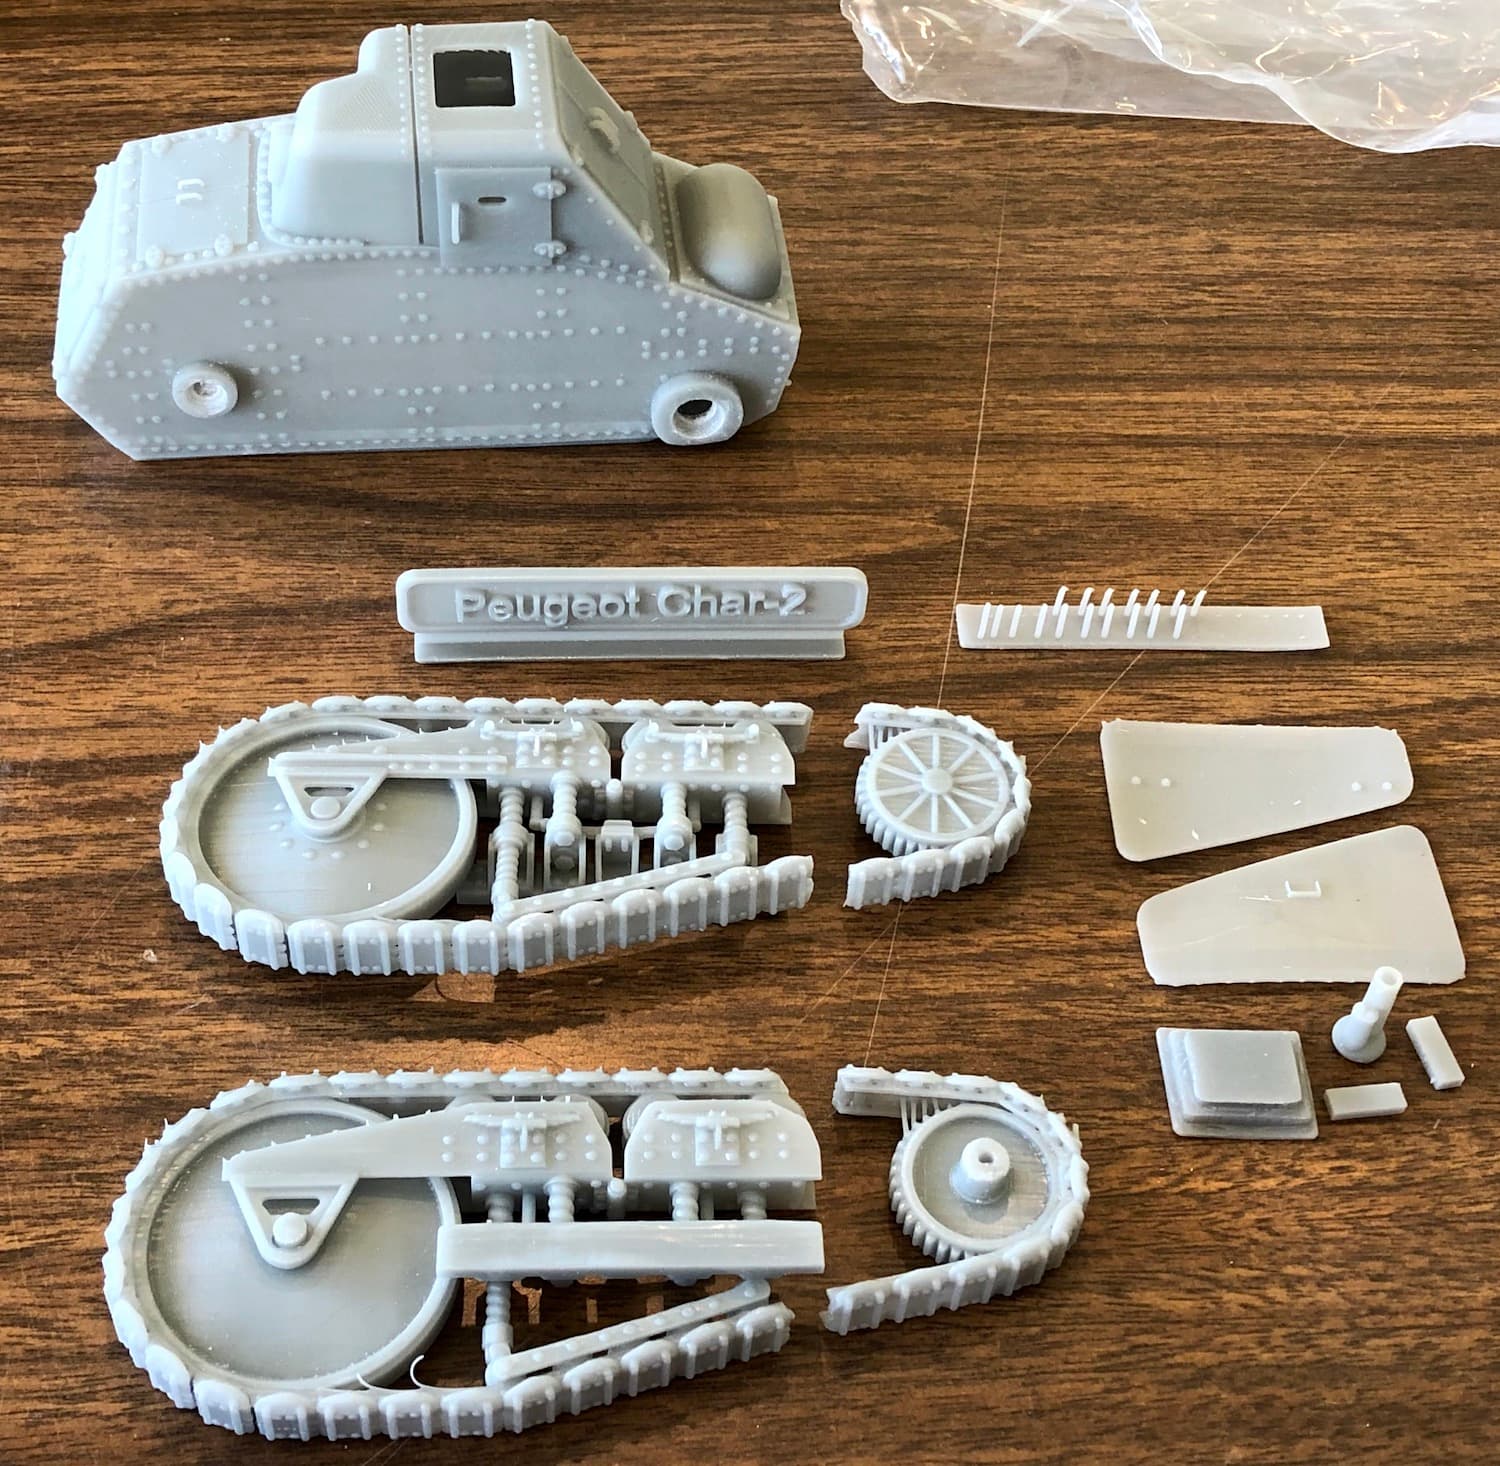
Here are the parts laid out. There are not many! The detail molded into them is amazing, even the hatch grab handles are already there. The big side pieces with the tracks & wheels & suspension were made on one piece. As you can see, they were broken in shipment but the parts fit and should be an easy fix.
Here are the parts:
There are some raster marks on the castings that I hope will go away under a coat of paint. Being made all together the side pieces are going to require a new building methods for me. After shooting the photos, they got a bath in warm soapy water and are now drying to be ready for the next step.
Please feel free to make comments & suggestions. These 3D printed kits are something completely new to me.
Paul
BTW, this new forum can be a chore to sort out but I find the process of processing posts with pictures to be easier than the old one was.
Paul
Paul, very interesting model. I have been disappointed in the past by 3D casts that leave too large laser lines in the resin, but your model looks great in the pictures.
Looking forward to see more soon 
The lines here look pretty fine and may go away with a light coat of primer and a bit of sanding. I like that this company, Vargas makes kits of things I never expected to see or, in this case, something I never heard of.
Paul
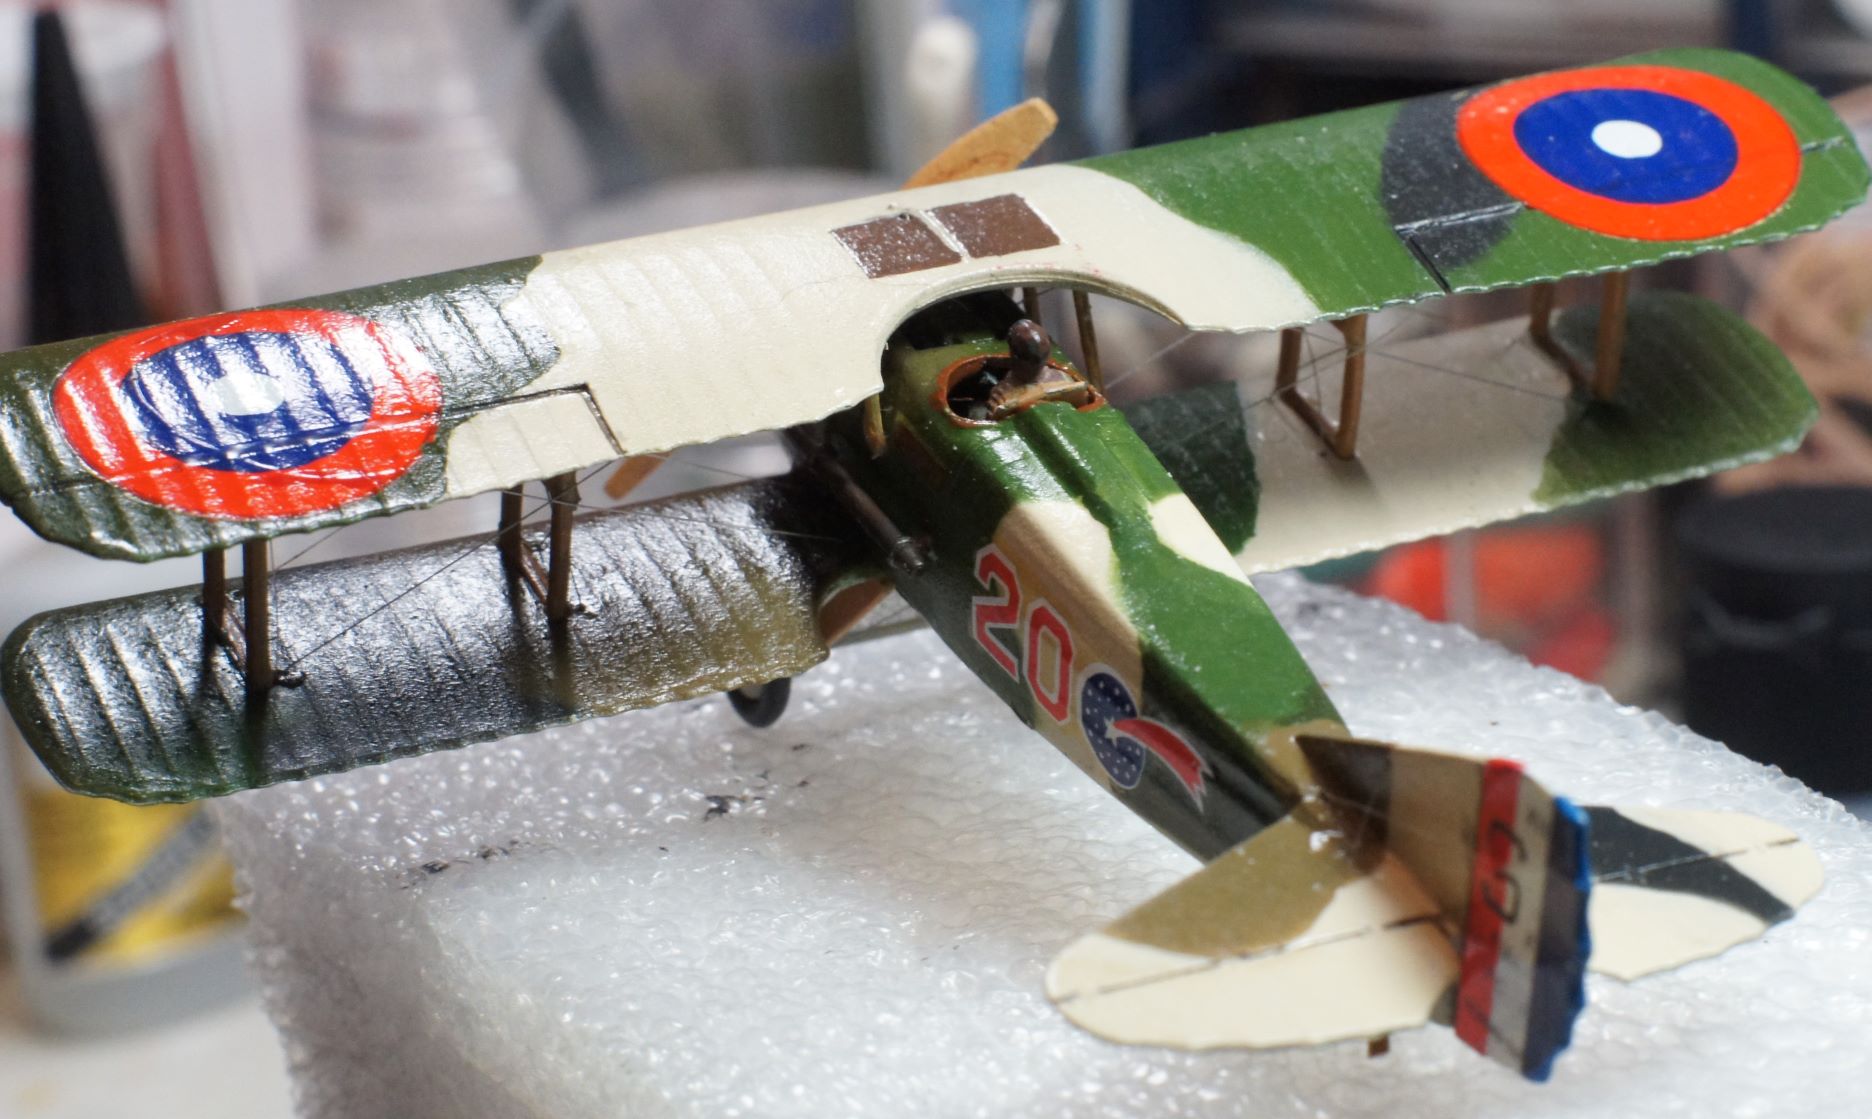
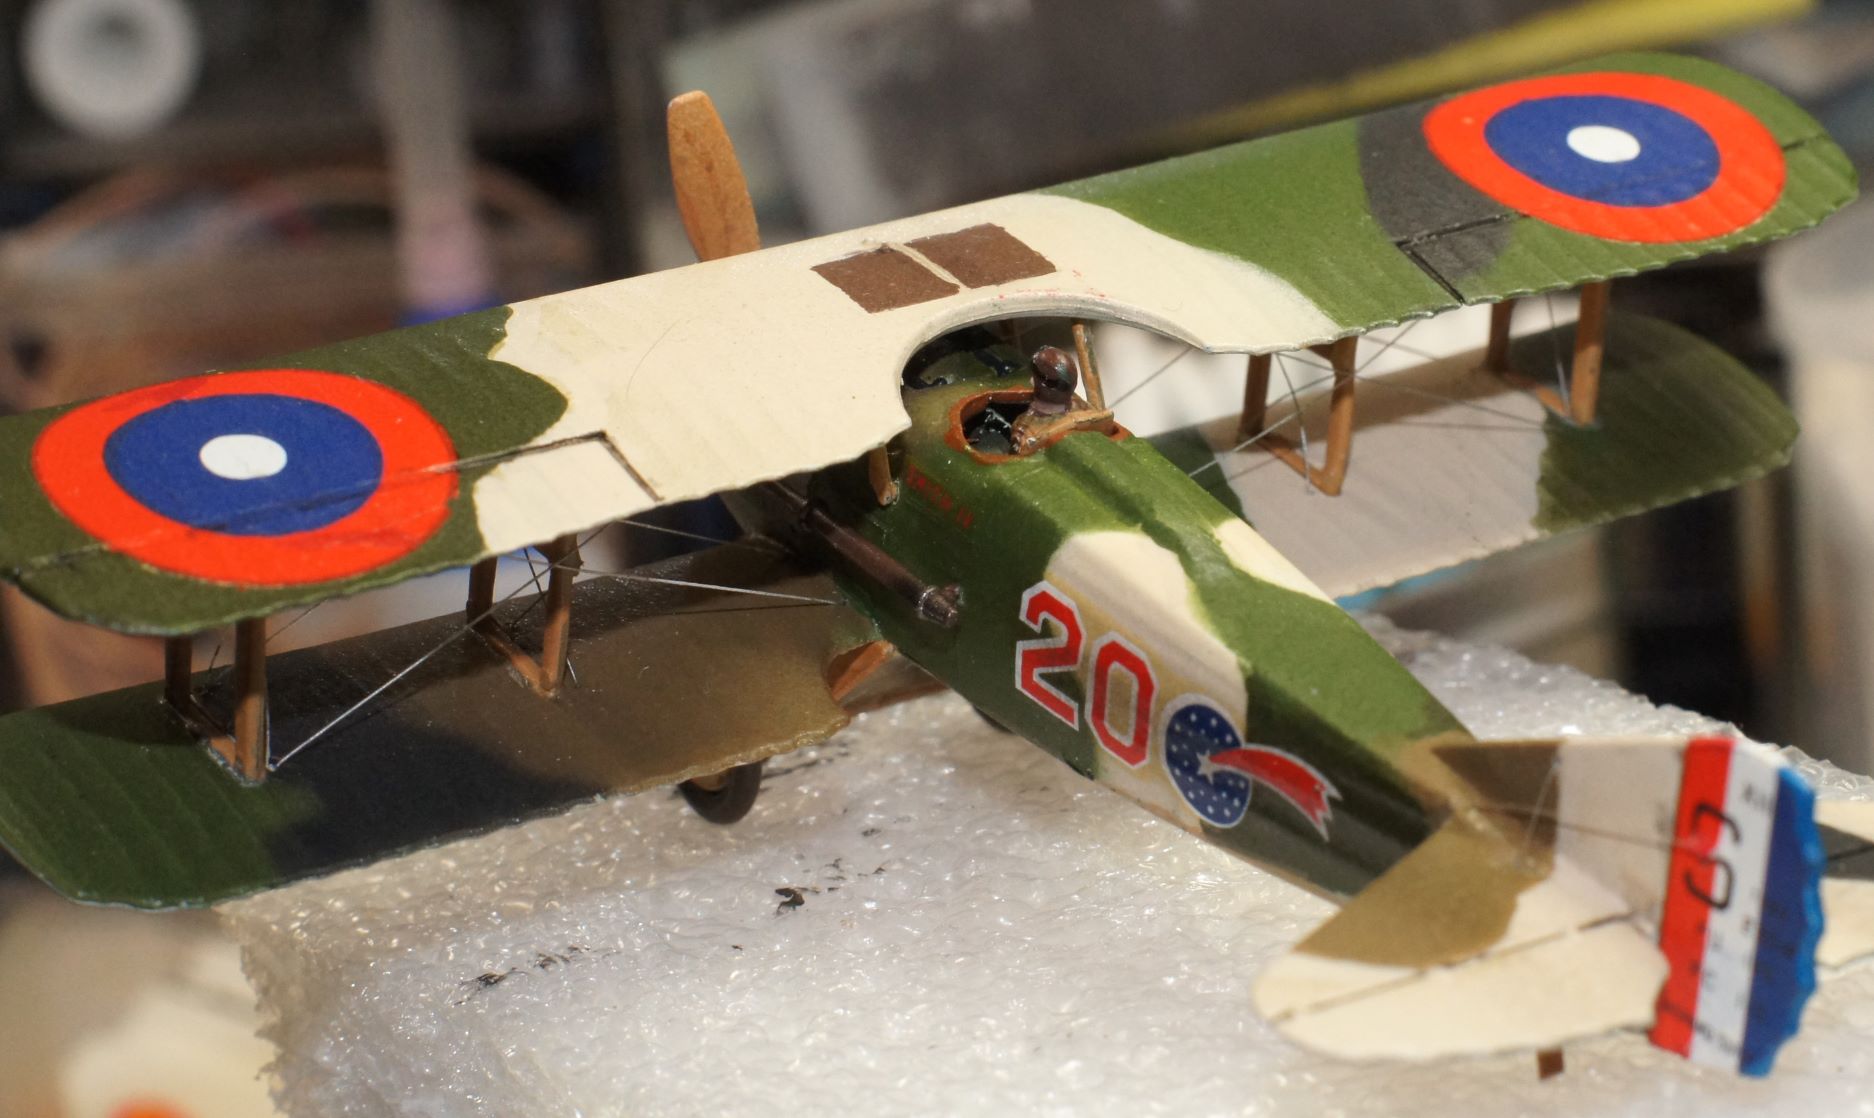
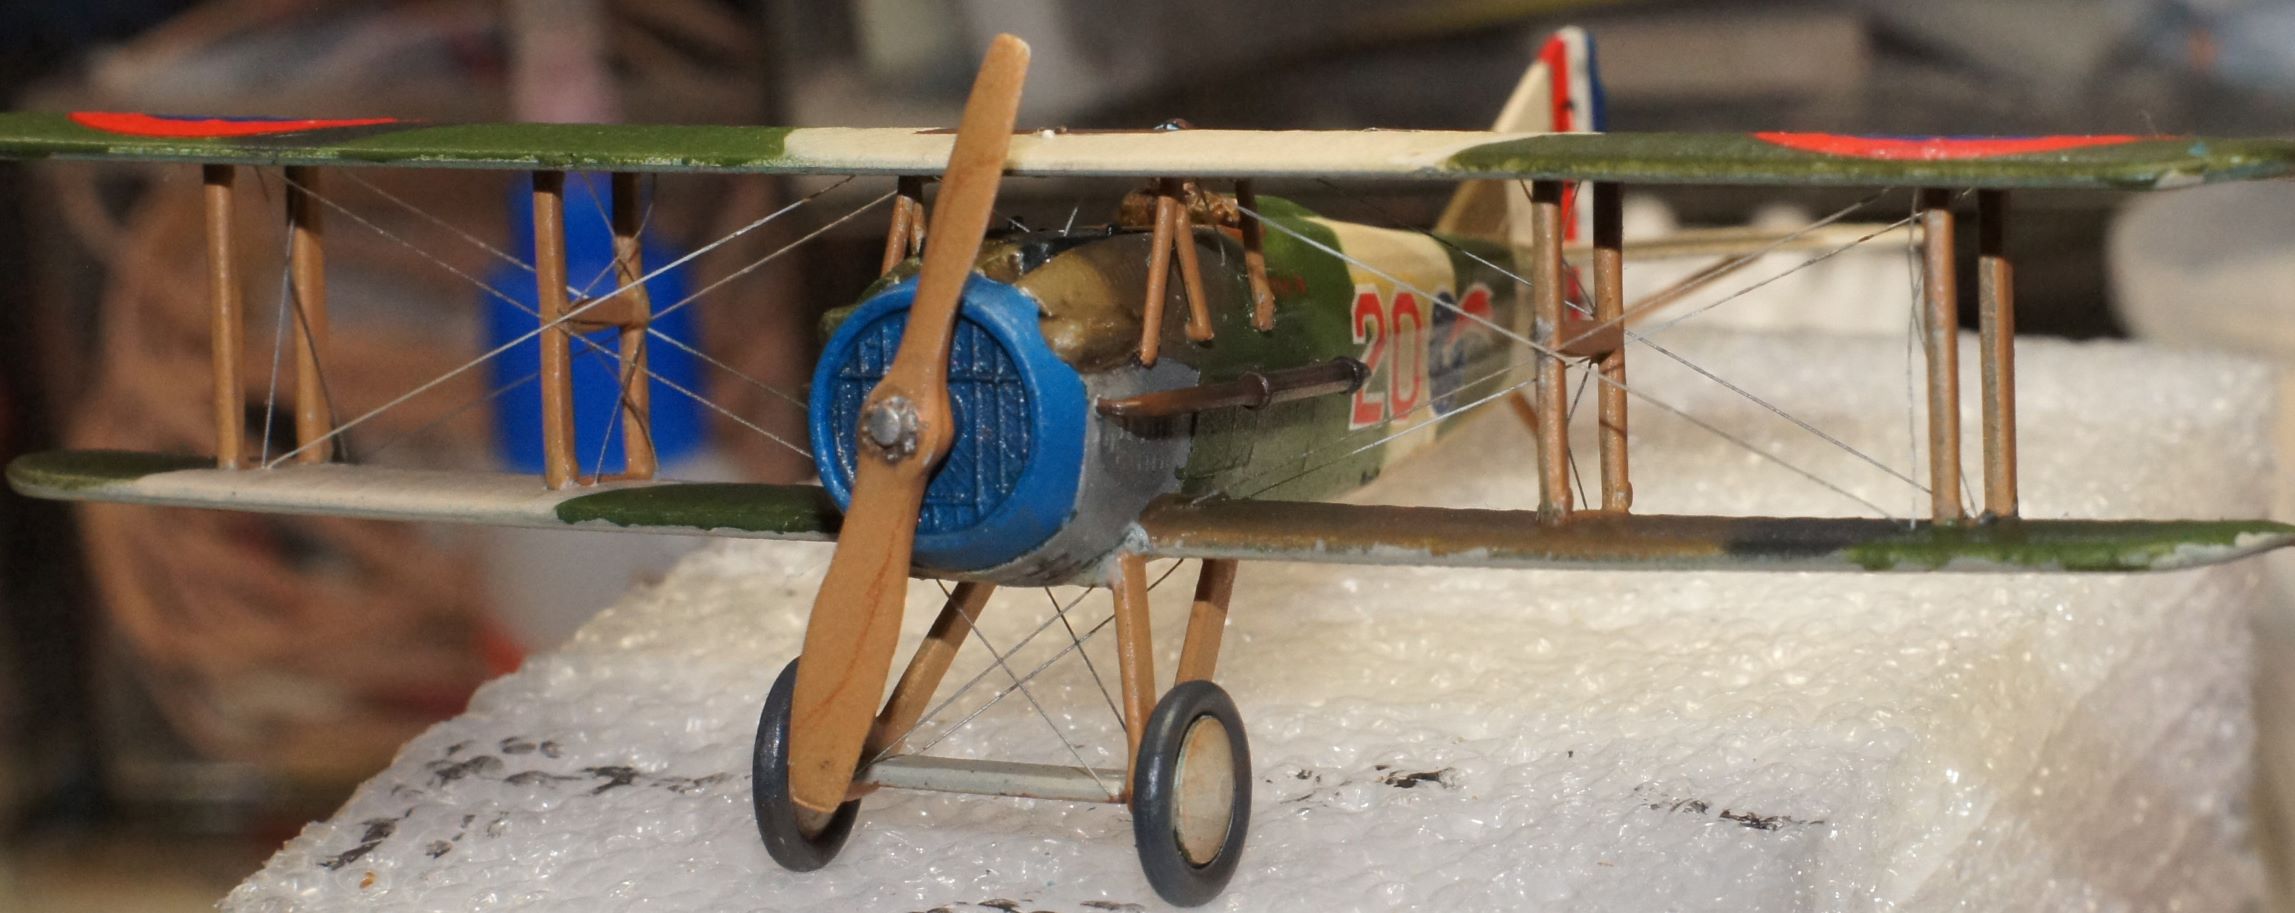
Congratulations on finishing Mark.
That Spad has fought you, but it’s been well worth the work. Looks brilliant.
What a wonderful job on the rigging. It looks in scale and really adds to the model.
Paul
I did some work on the Char 2 Sunday. Mostly, I cleaned up the castings and gave things a light sanding where it would not diminish the rivet detail. This all went very quickly.
I was defeated gluing together the tracks. All of my gel type CA glue had gone solid over the 4 years since I was last building. I found a bottle of Zap A Gap that was still liquid & smelled the way CA glue should. Sadly, it was not up to the job and after spending a considerable time holding the parts I through in the towel & ordered some new.
This picture shows the project as it is now. There are just a few parts to glue then it will be time for prime & paint.
Paul
Paul. Have you thought of drilling into the ends of the links and inserting wire or pins to add strength?
Insert one or two pins in the track join of the larger pieces. Put a dob of paint on the ends and then line up the smaller pieces and press onto the pins so you can mark where to drill those out.
If cyano still does not work (and some 3d filament rejects it) try epoxy glue.
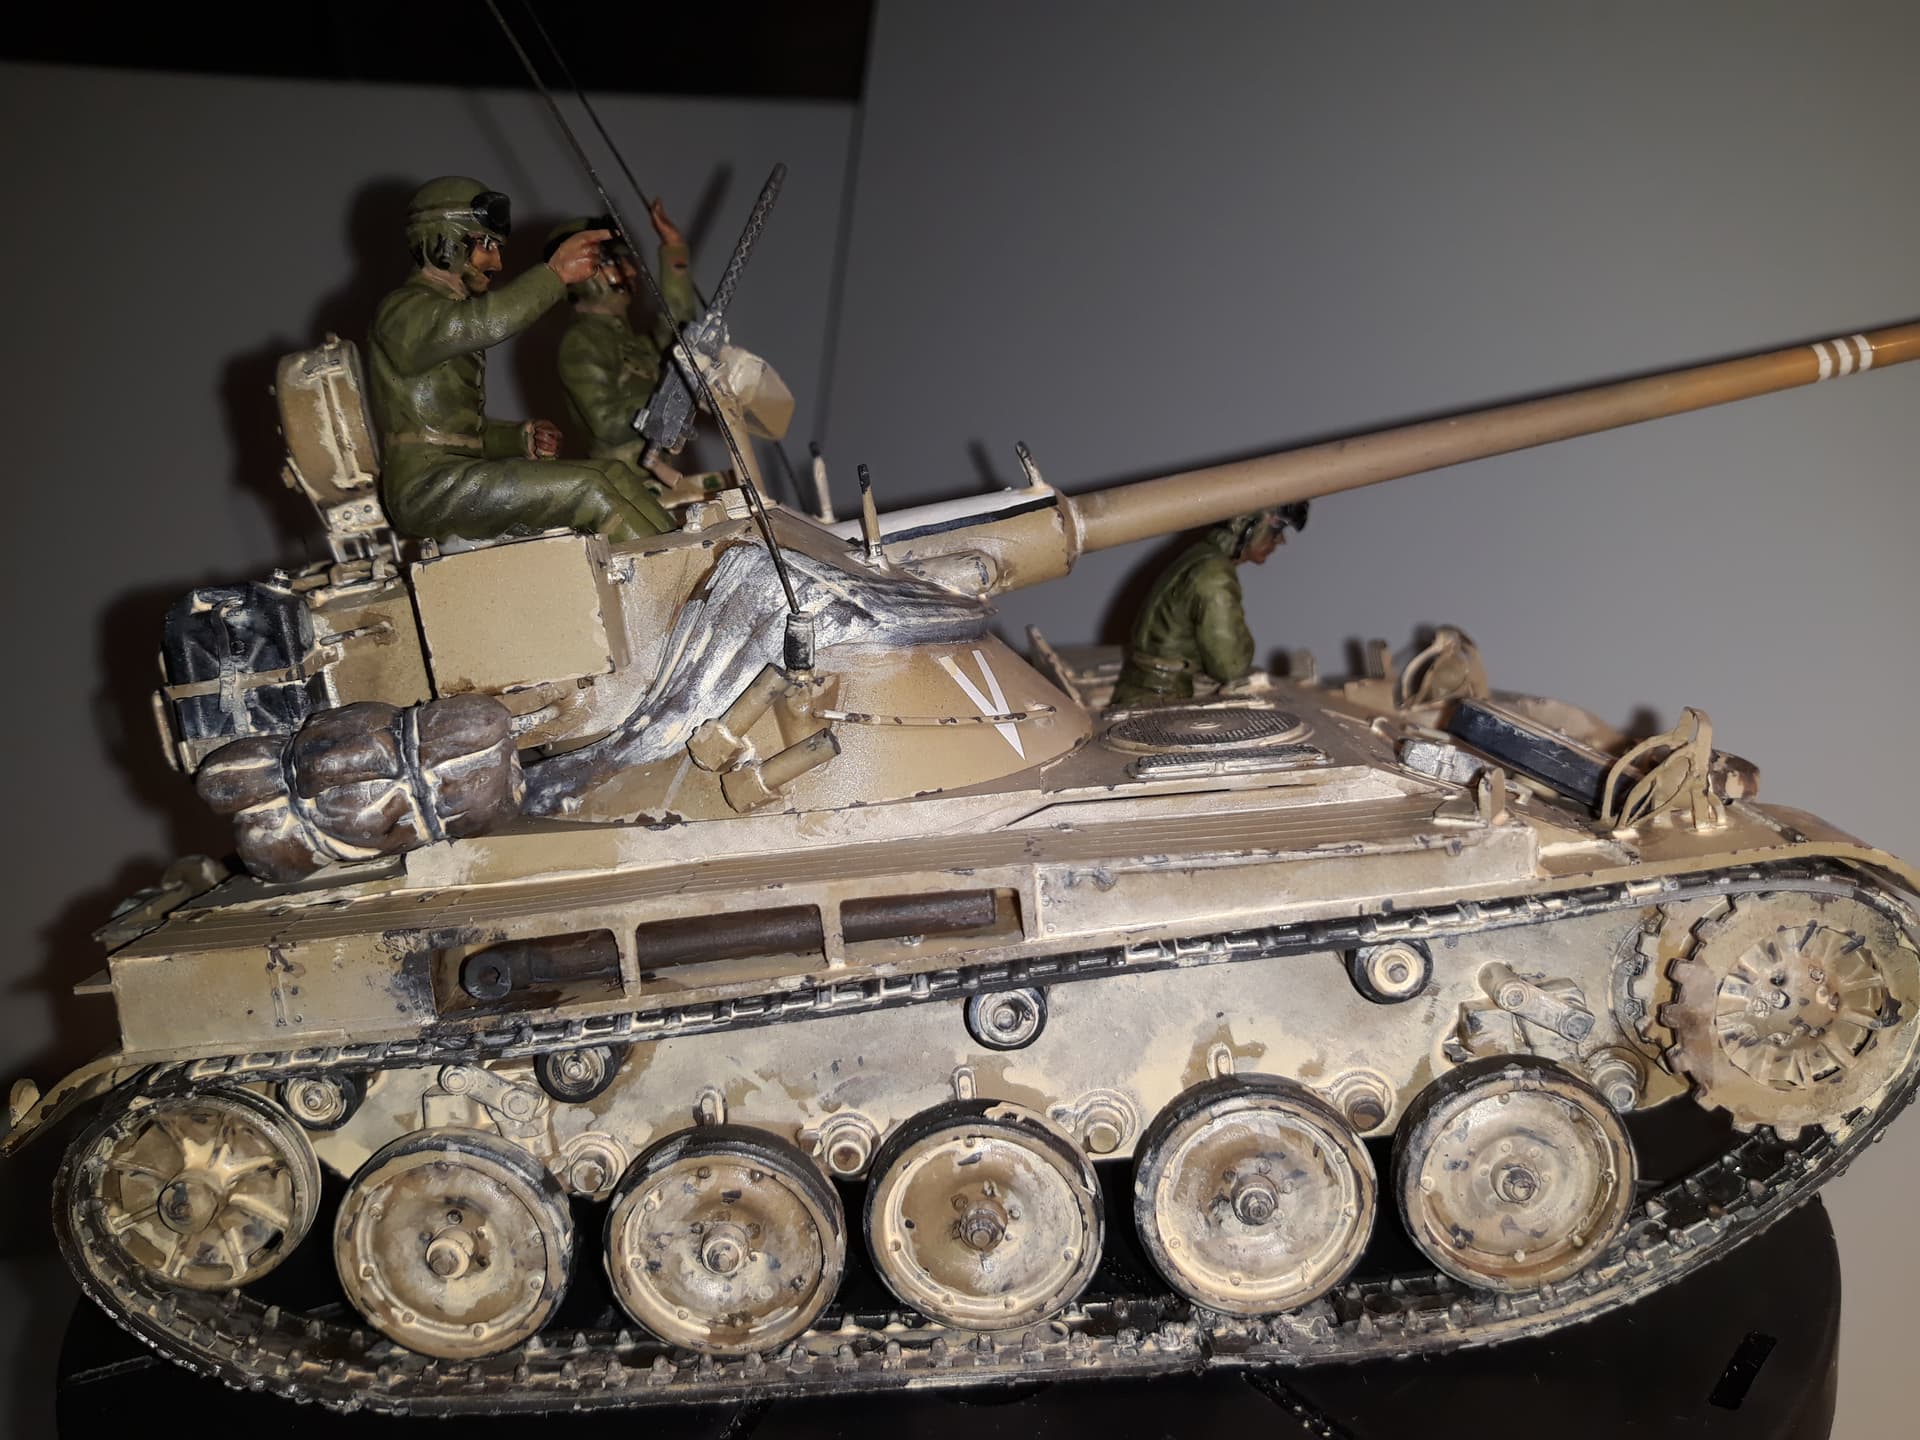
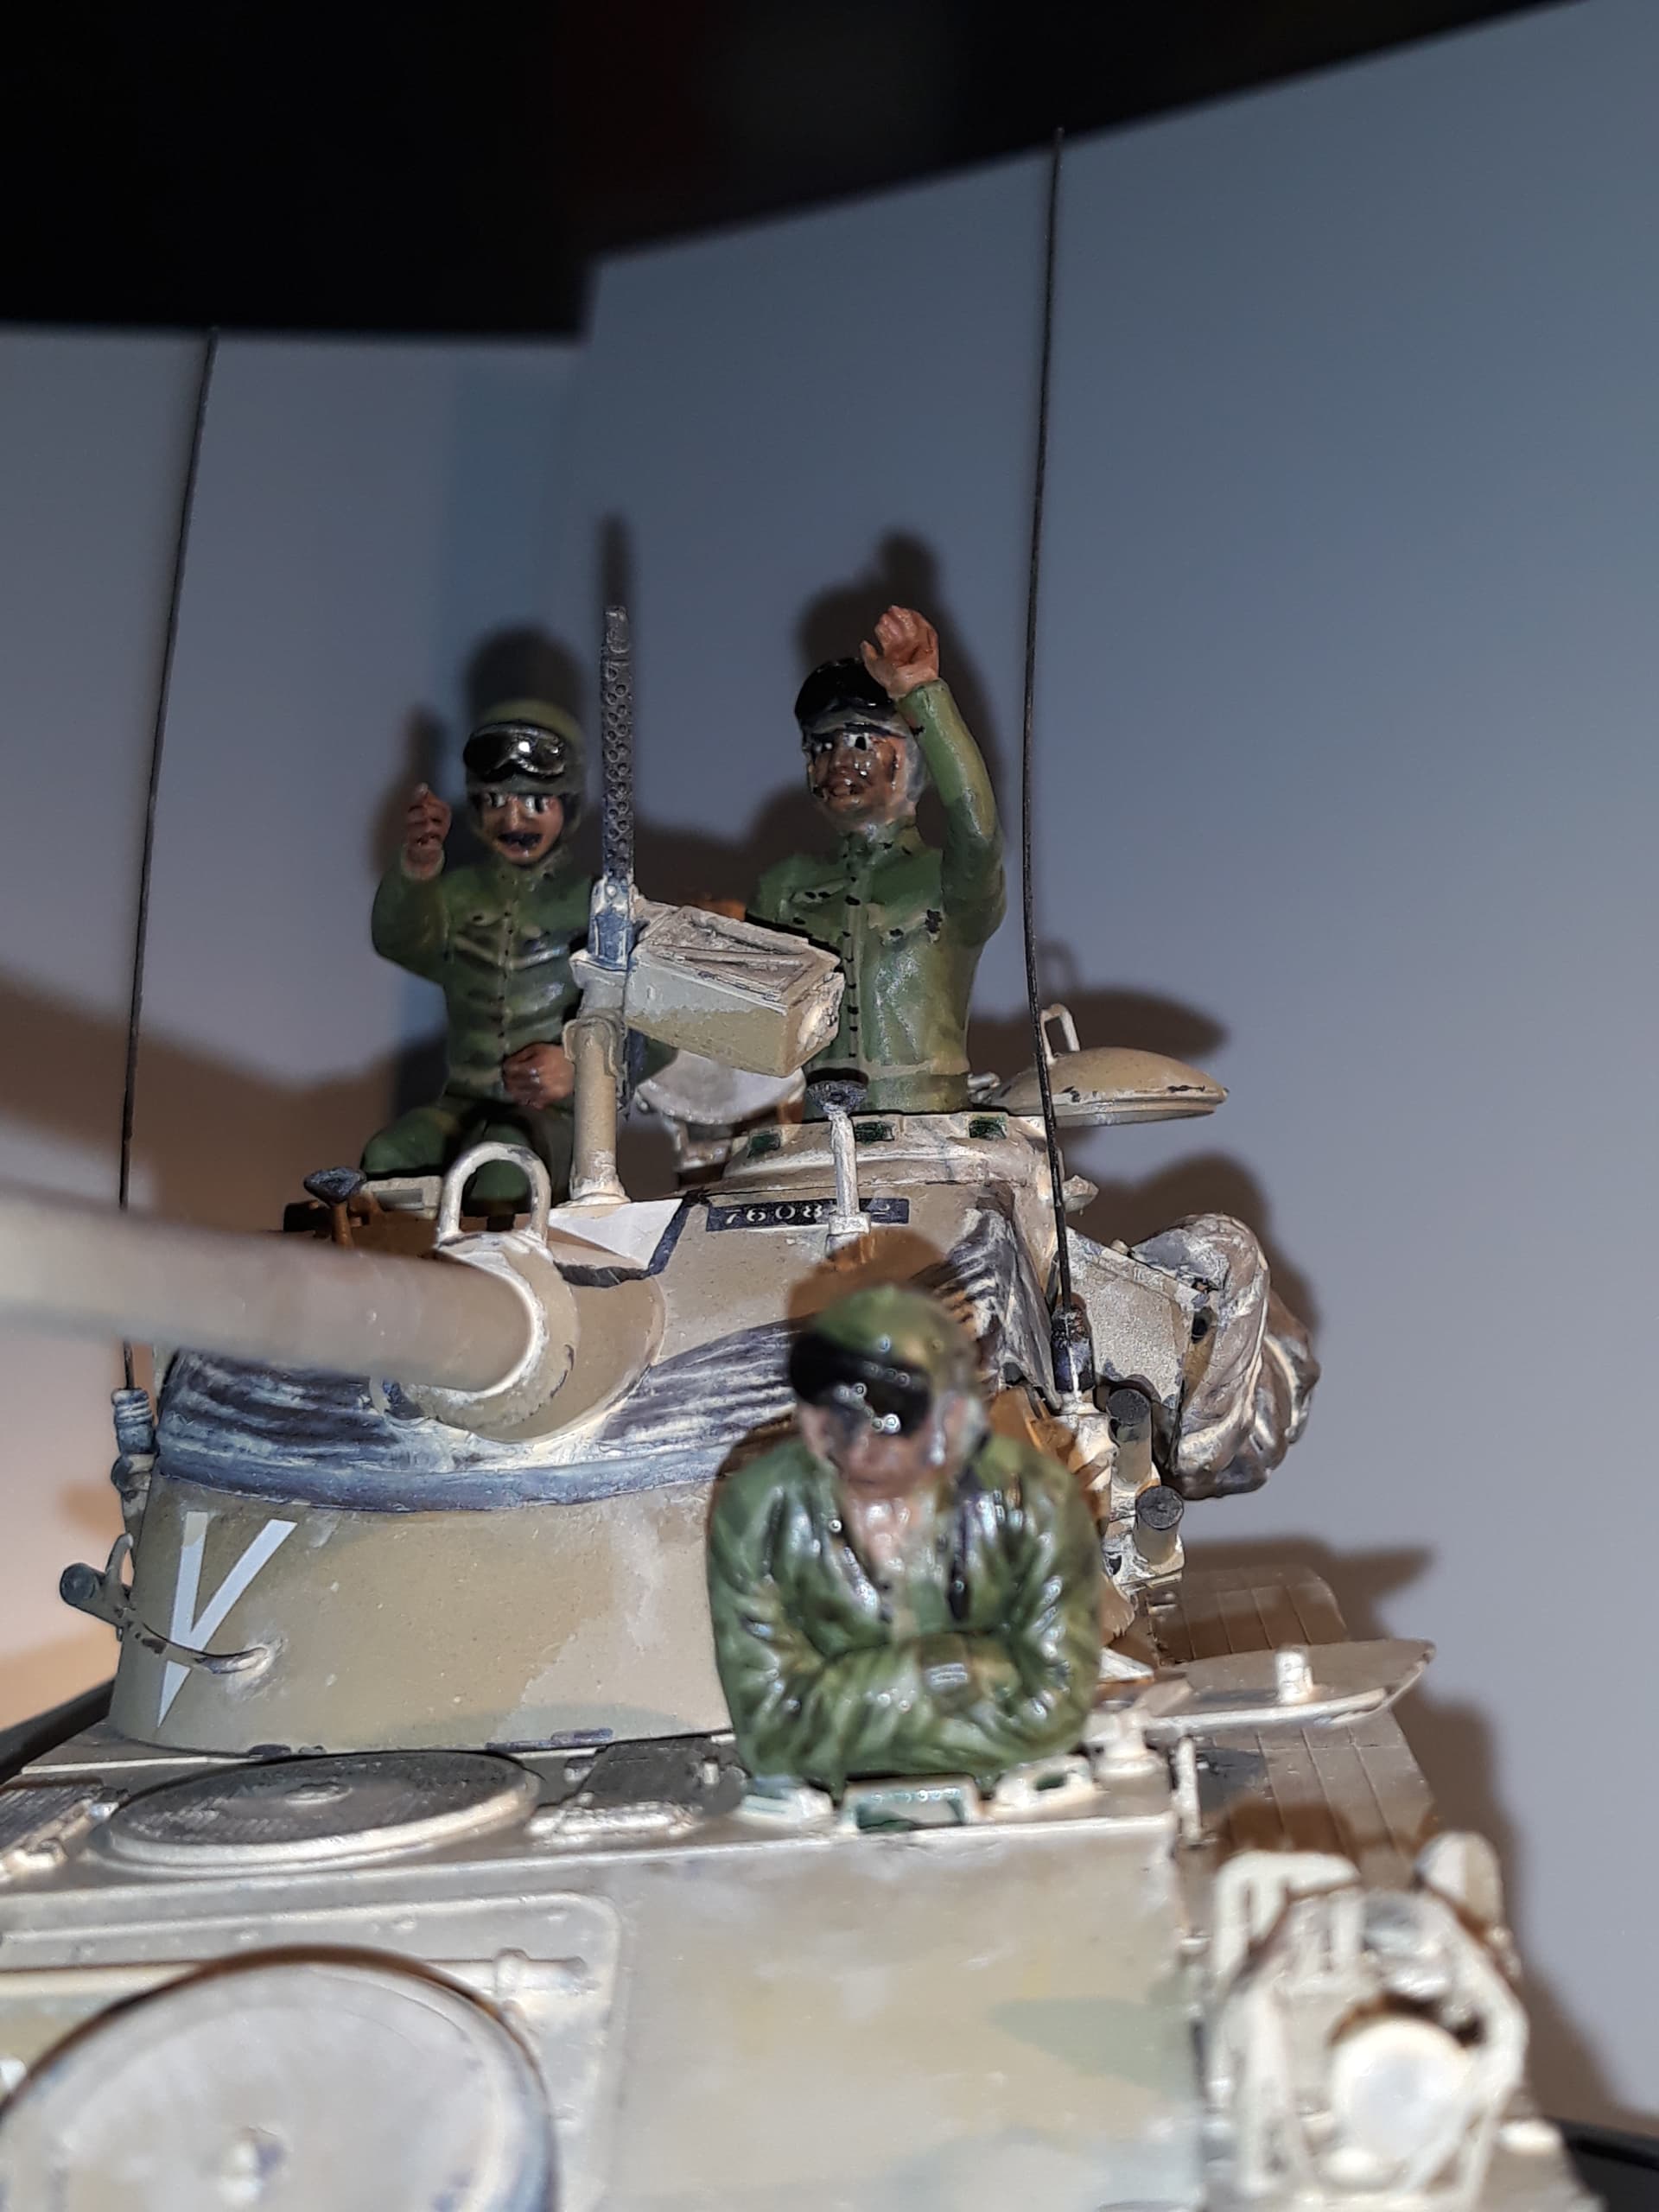
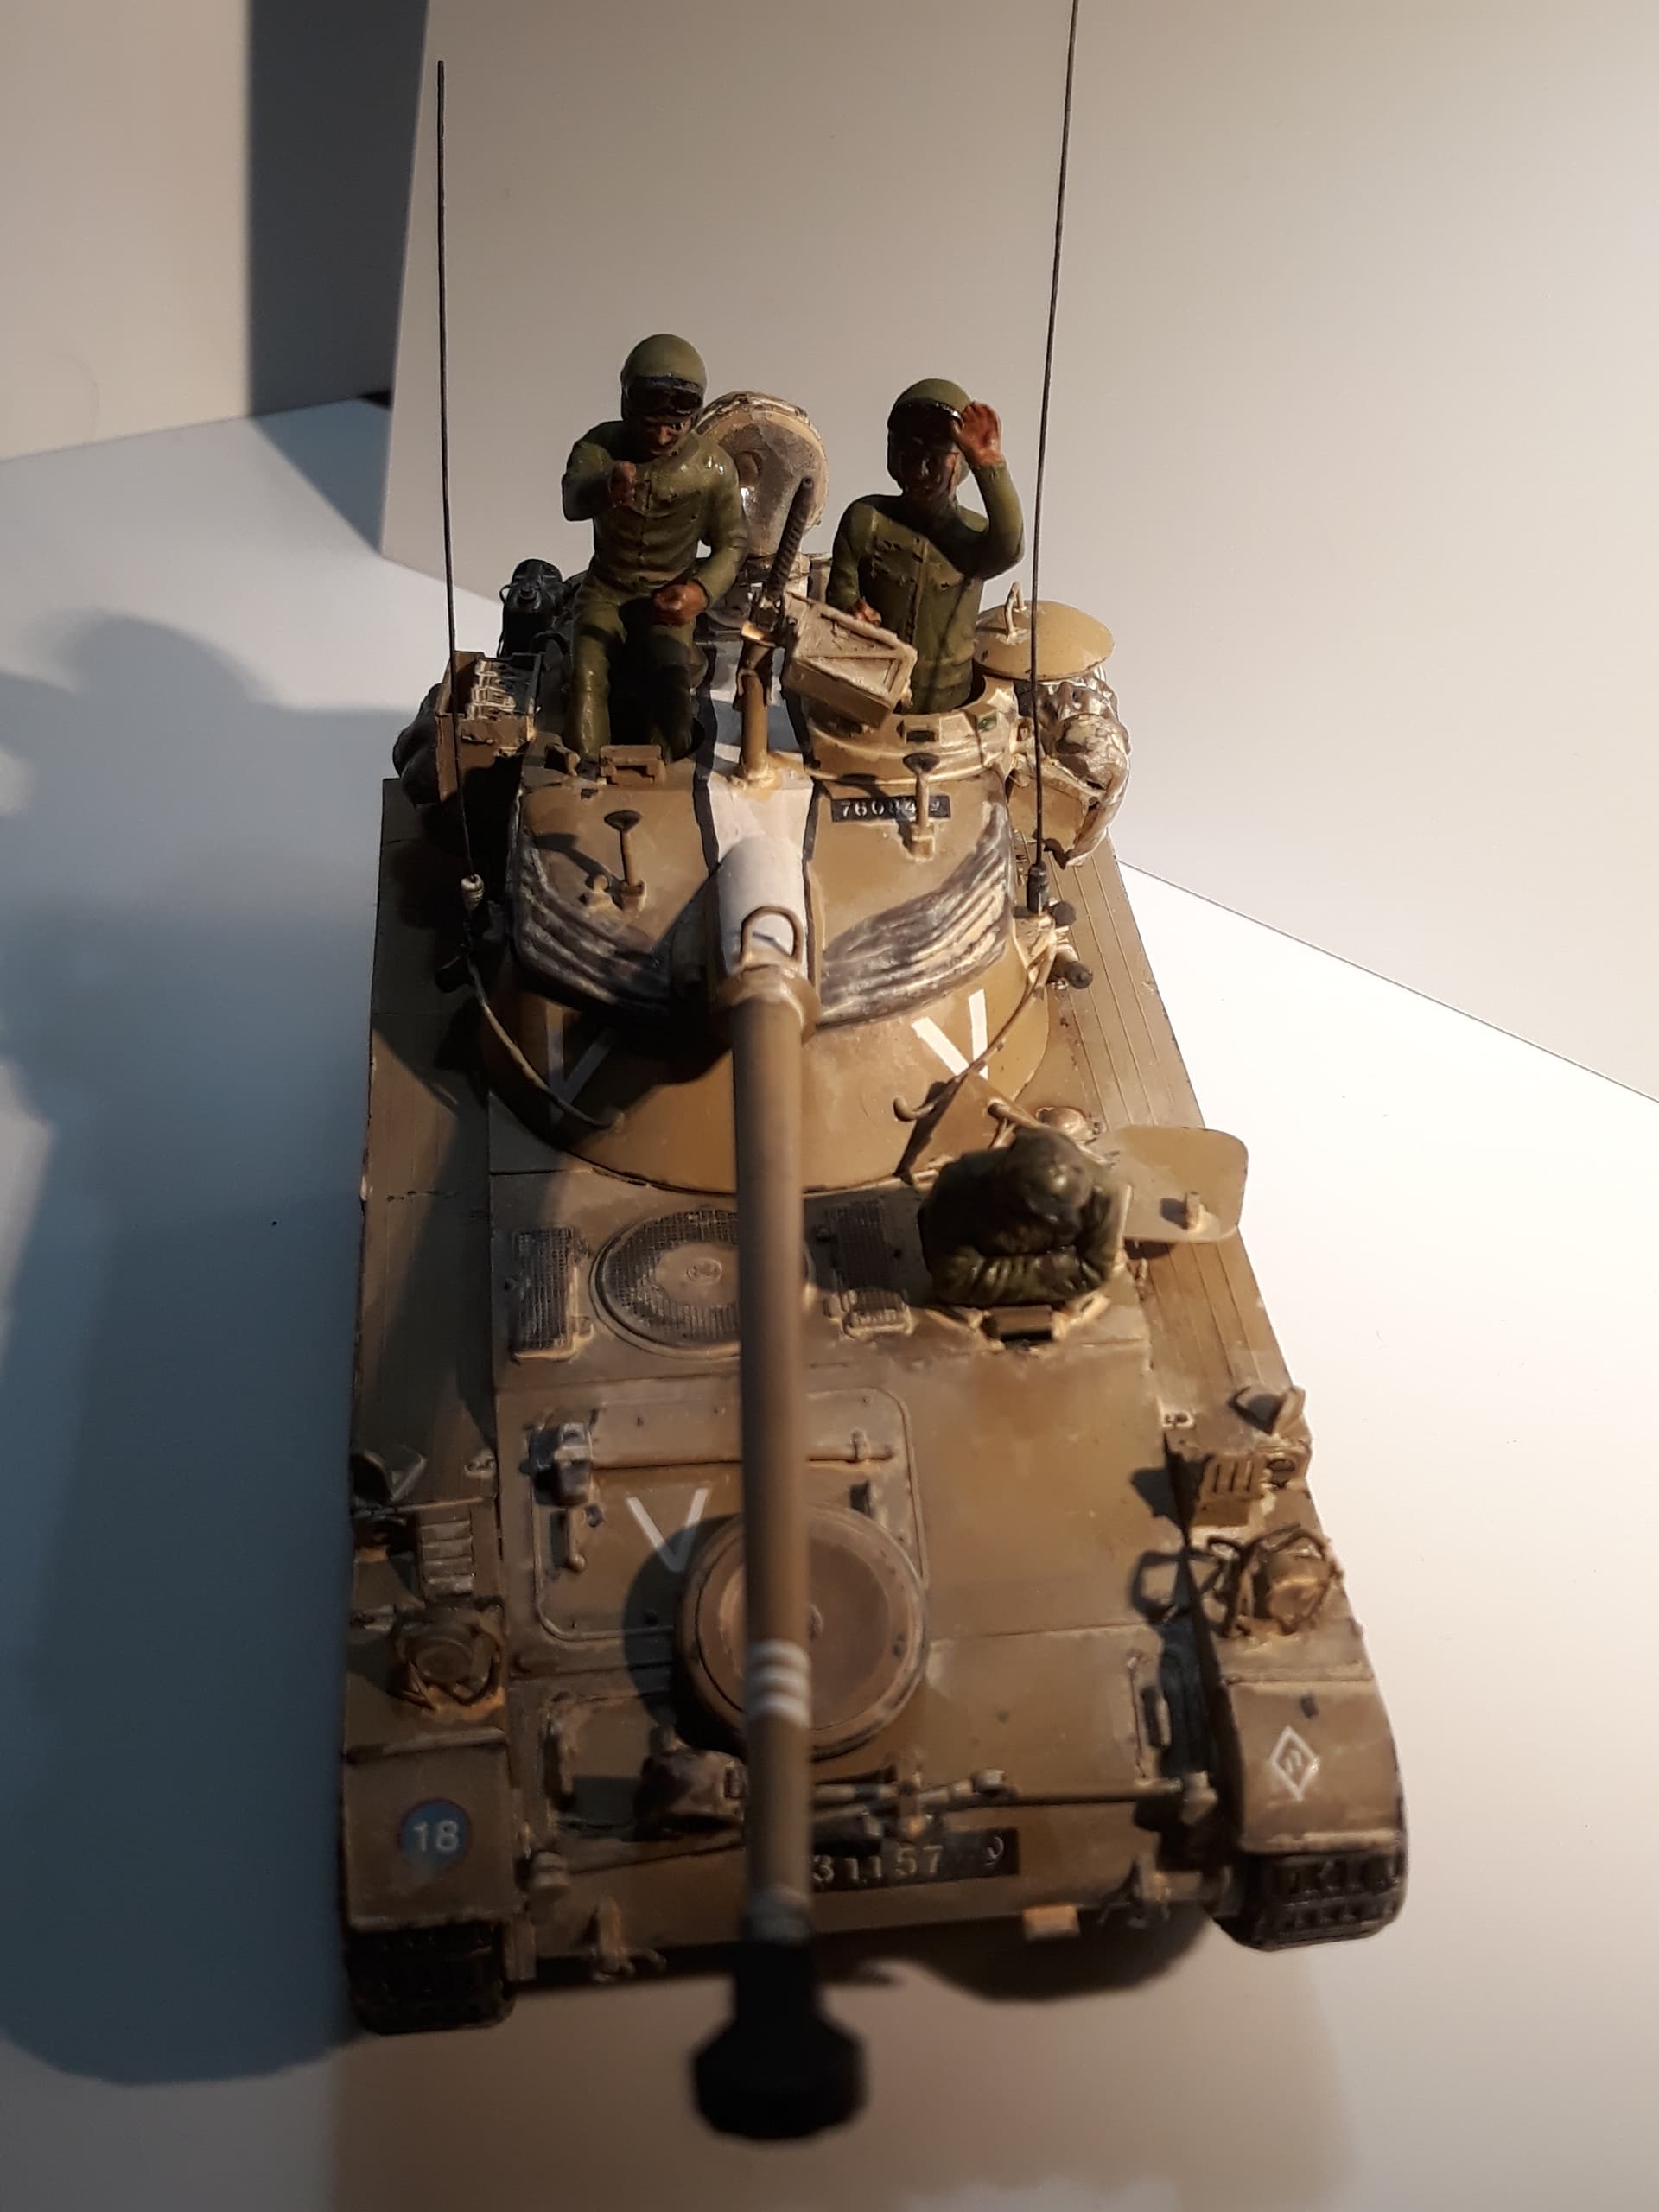
Update on my participation: crew has been added, sand and dust added, after all, this is situated in the Siniai desert. I think my AMX13 is finished.
Thanks petbat, I like the idea of using pins. The join areas are very small and the pins may help spread the load. The paint trick is one I had not thought of and will be very helpful with some limited run aircraft kits were the flying surfaces and supposed to be a simple butt joint.
I like the gear added to the outside of the vehicle. It makes it look like it was used in action.
Thank you very much, glad you like it!
Hi All,
Nice job Mark and Bert! This group build has a lot of diversity in it!
Here’s my entry for this campaign:
Tamiya’s 1/48 Dewoitine D.520, complete with a staff car! I have no idea who the manufacturer of the car is, but I’m leaning to not paint it in military green. Maybe black? Any help with the car would be helpful. I plan on doing the bird as Adjudant Chef Bouton’s mount from G.C.II/3 2nd Esc, in June of 1940.
Car is a Citroen. Maybe a Traction Avant but I’m not a car guy
That looks like a good little project. Complete diorama in a box!
The cars a Citroen. Not sure which particular model, but you have two that qualify for the campaign there.