Nice car, I like it already ![]()
1 Like
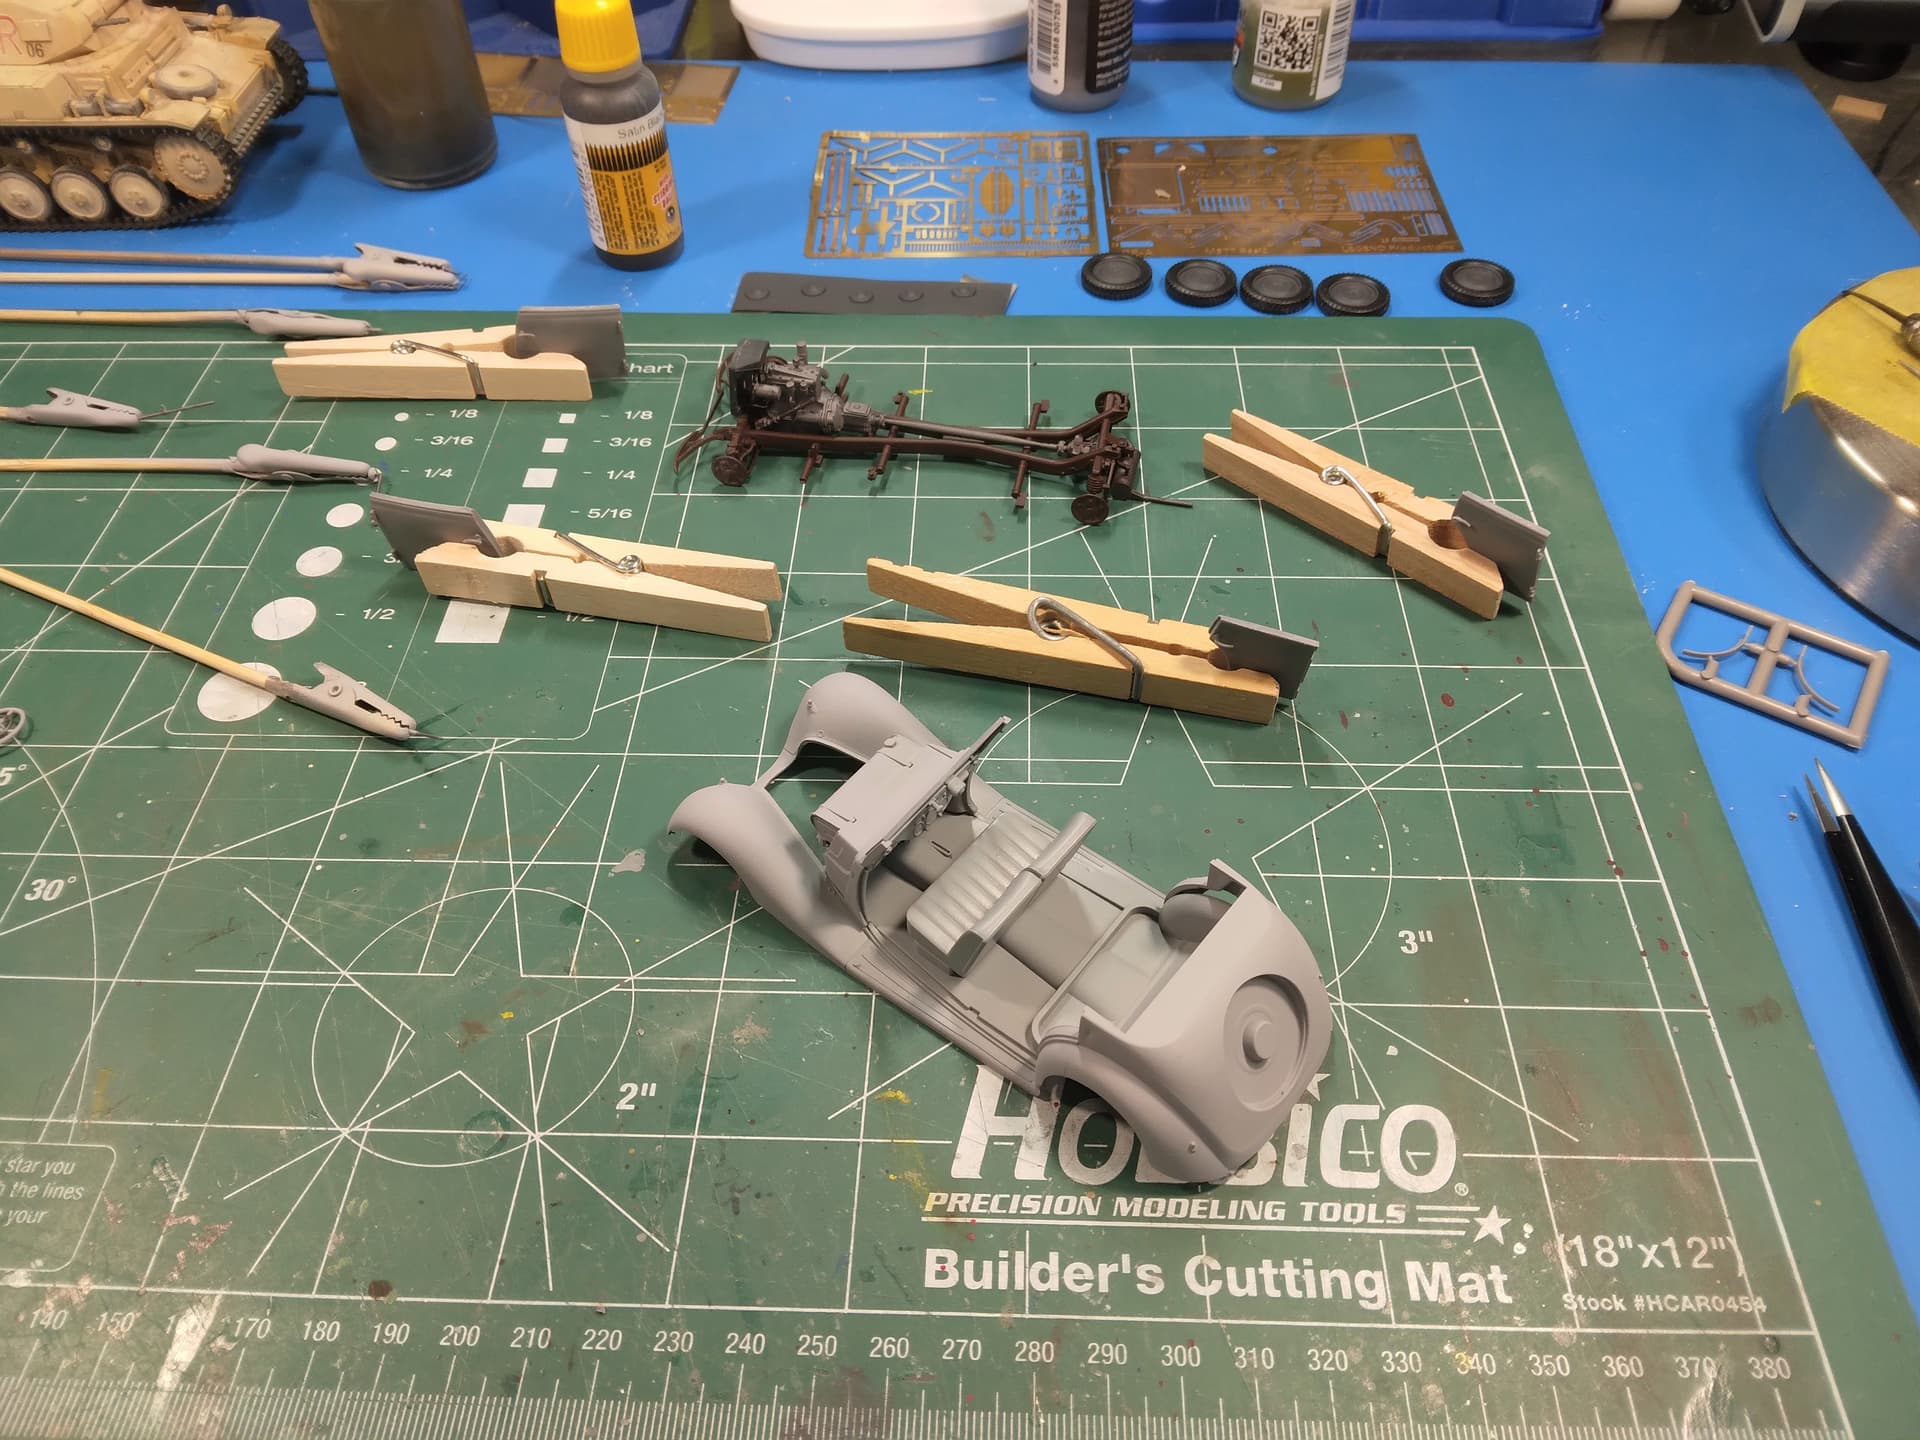
Finished the engine assembly and started on the frame.
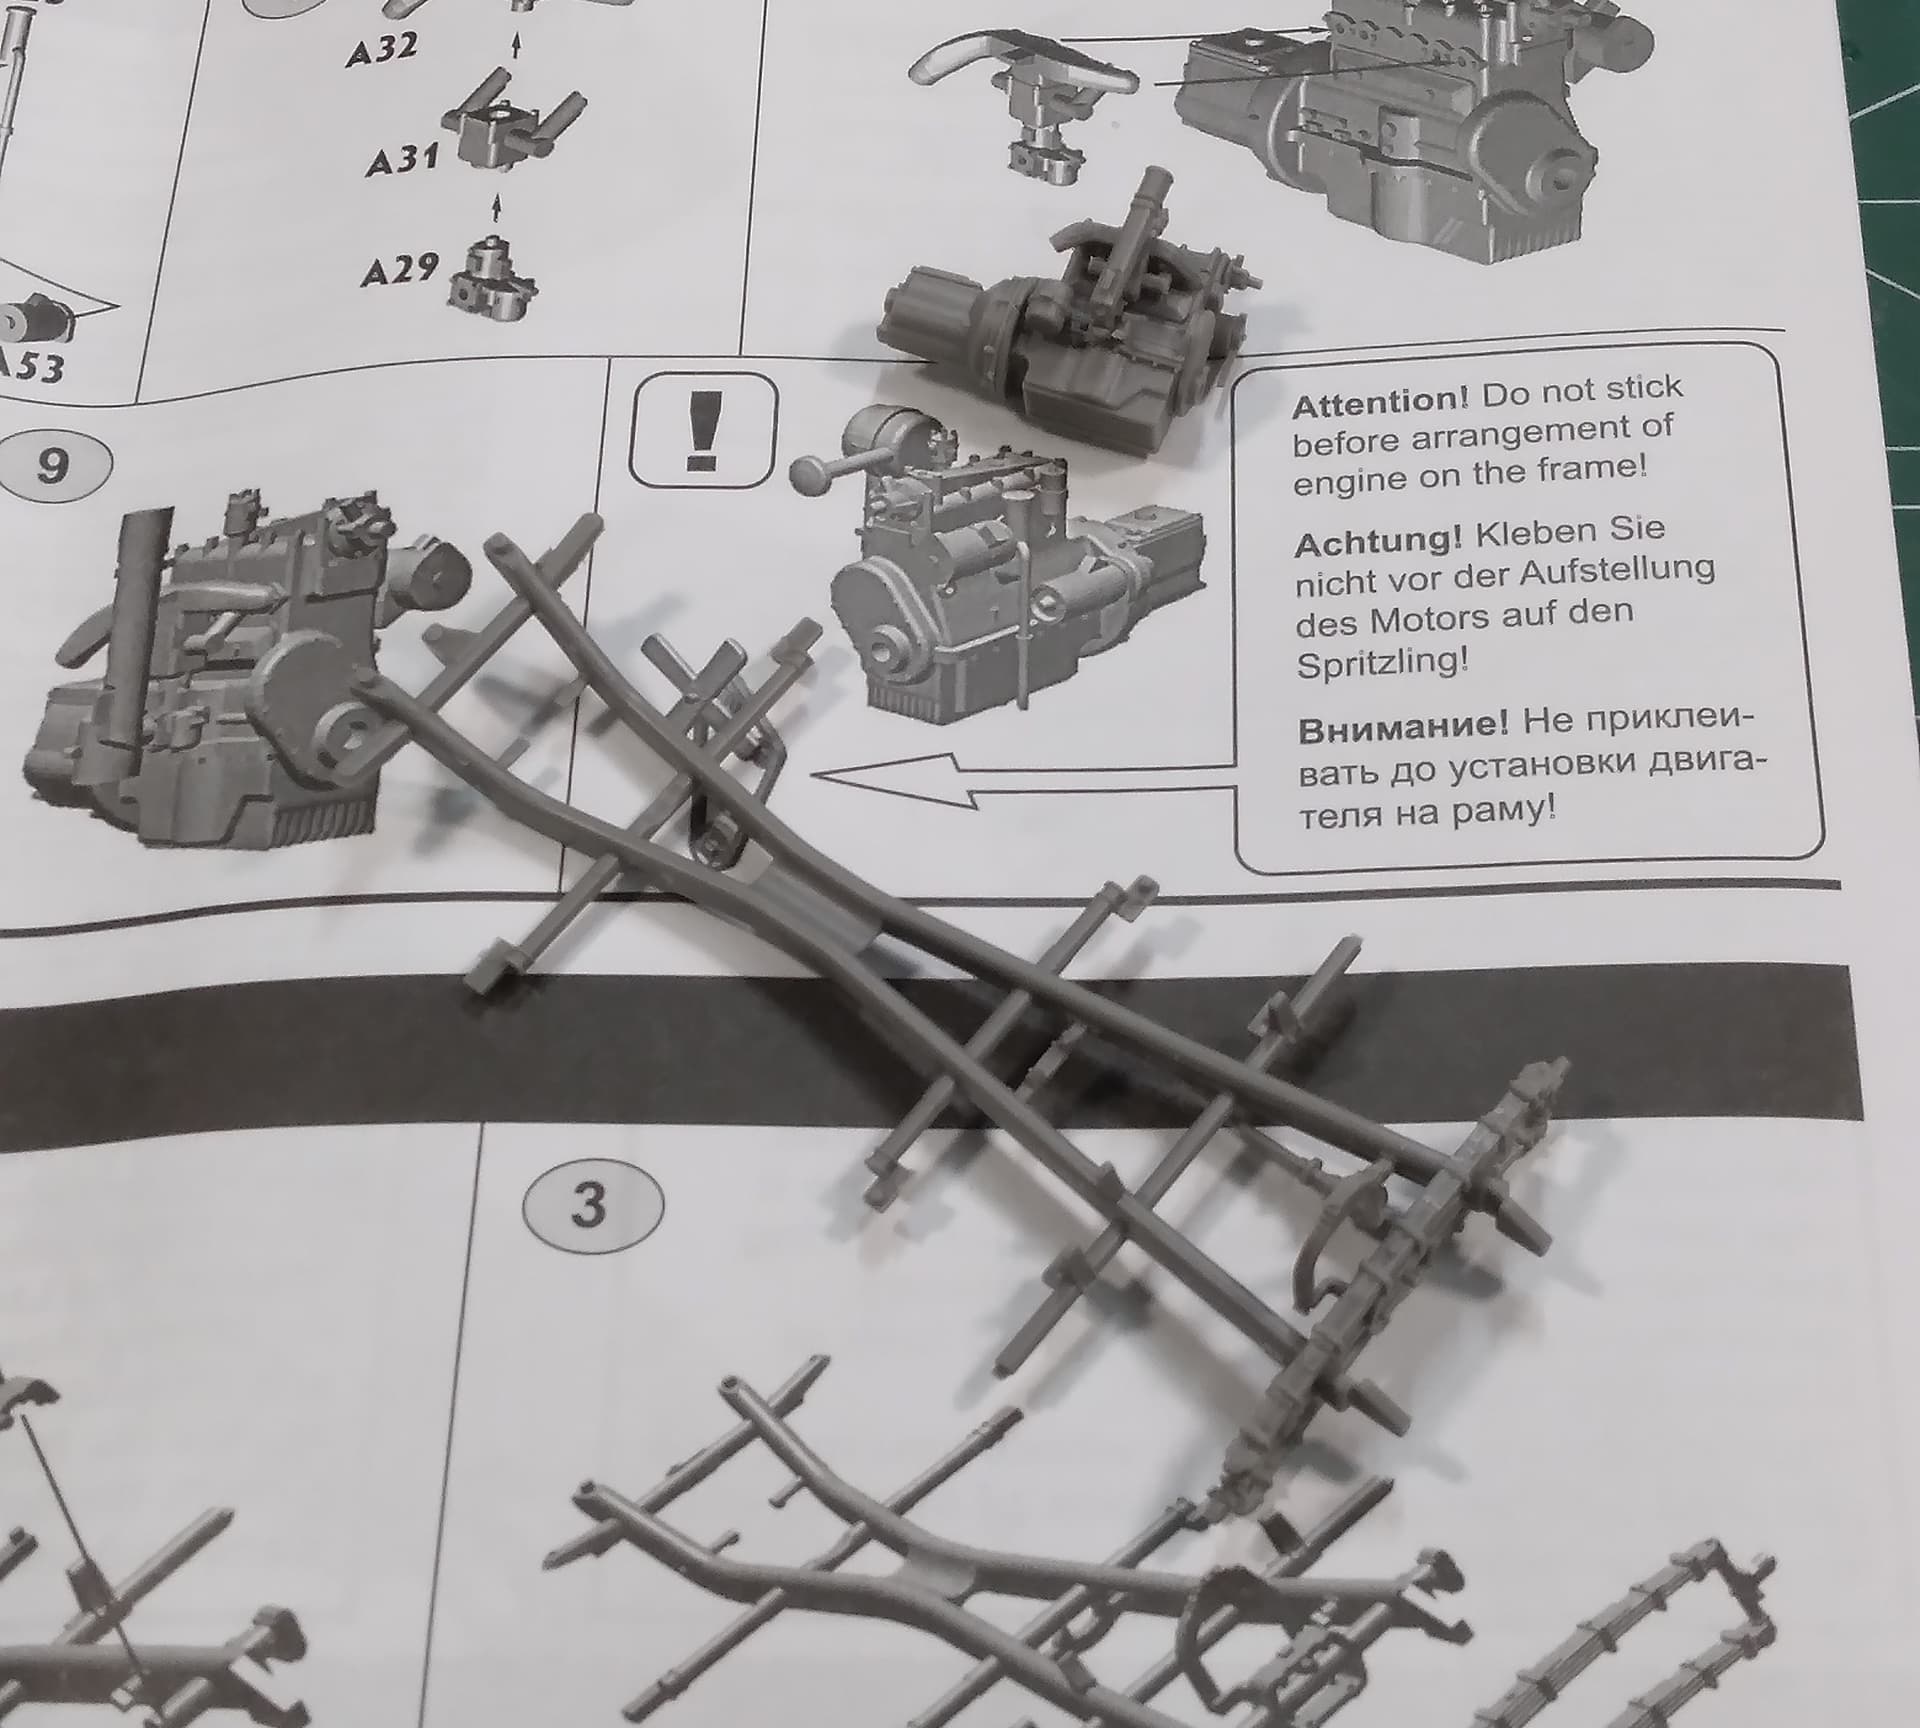
I did manage to break the fan belt assembly so I put the larger piece on (crank & fan section) without glue and carefully glued the small piece on the alternator(?). Once I put the engine into the frame, then I can add the other piece of the belt. Yea me.
Mike
3 Likes
Well it’s been awhile since I last worked on my project for this GB. After sidelining this one to concentrate on a different build, I have resumed work as of today.
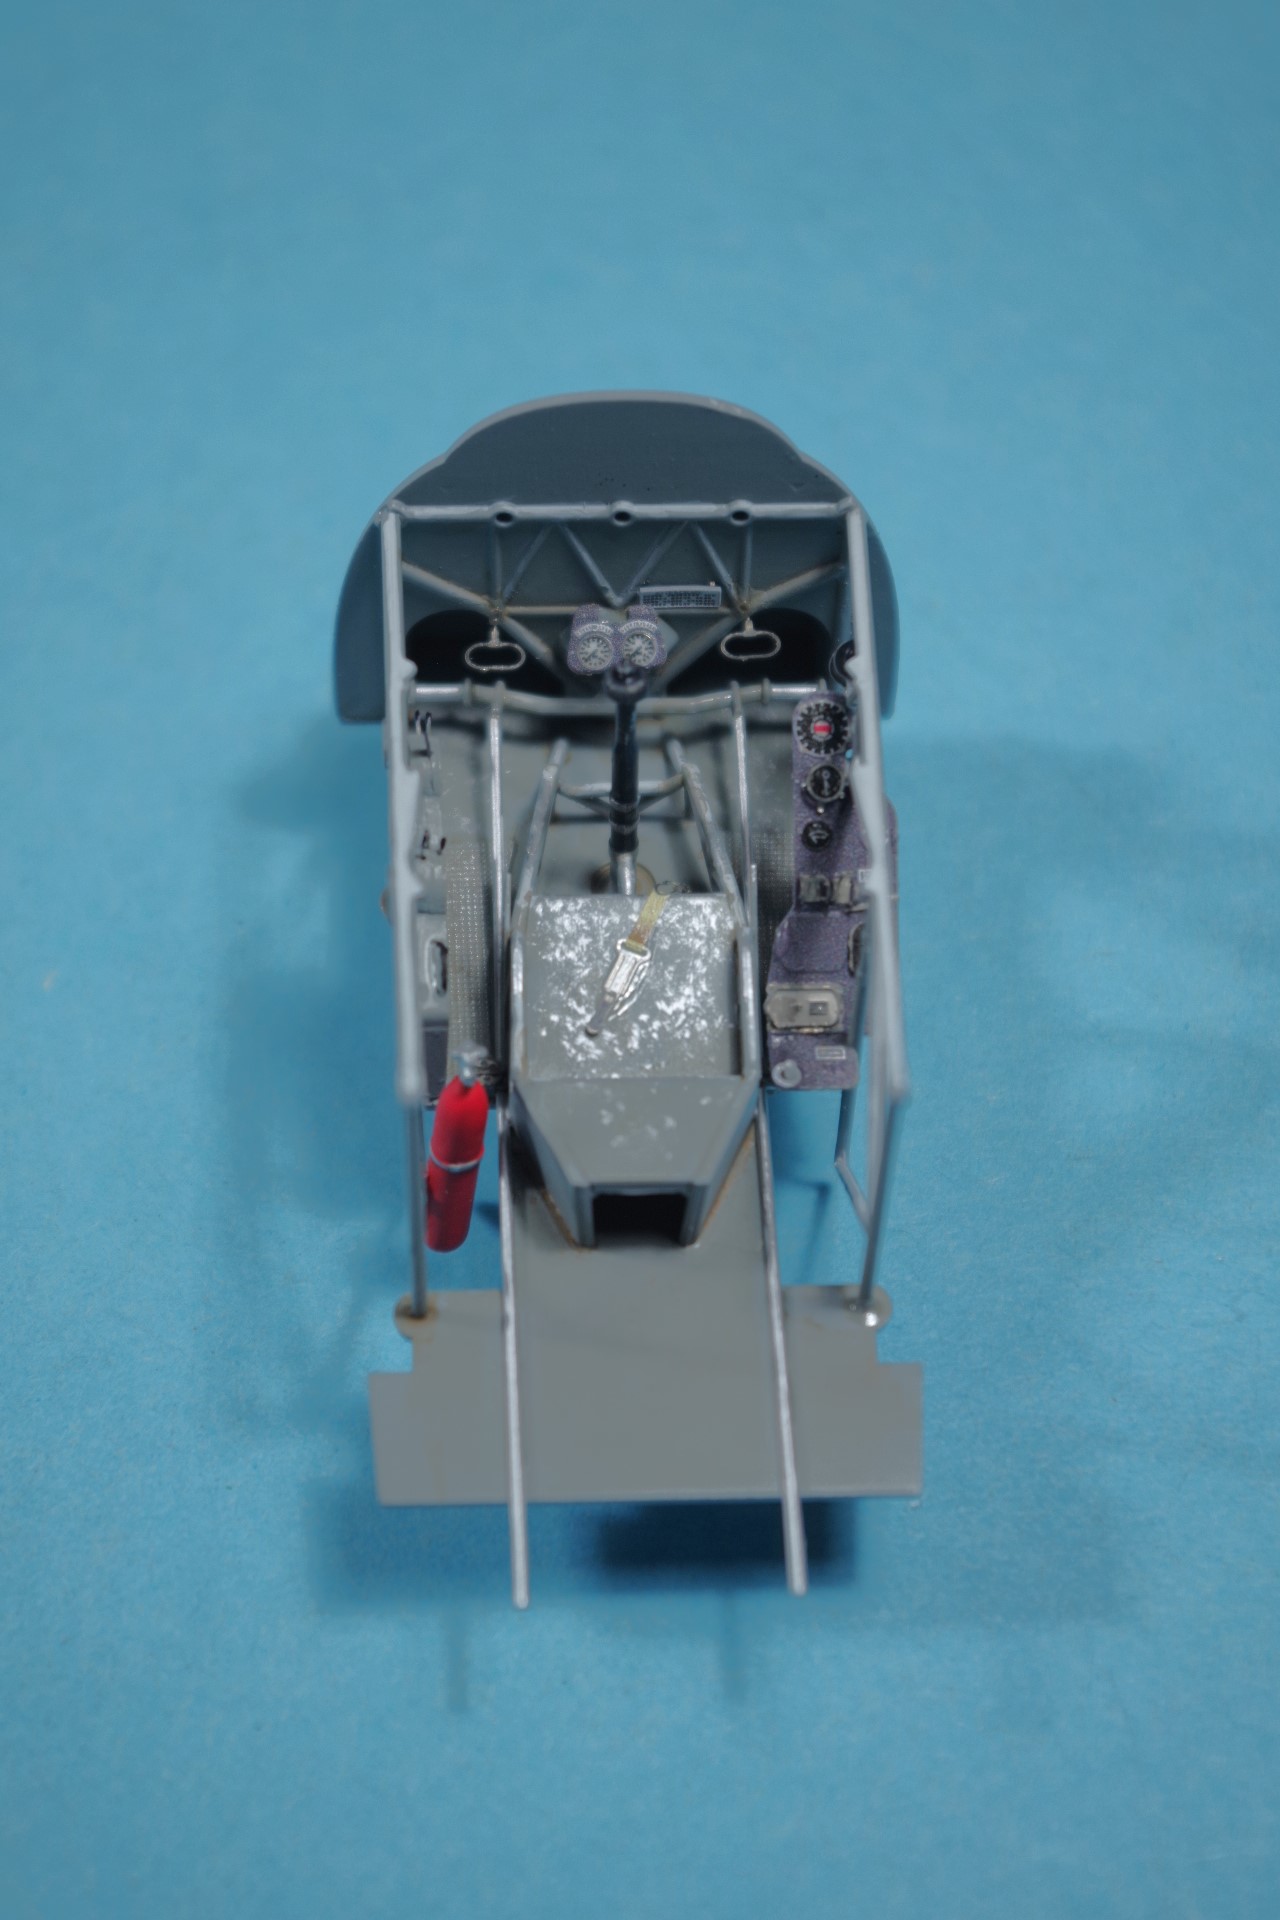
Finished up the cockpit, including adding a 3-D decal harness
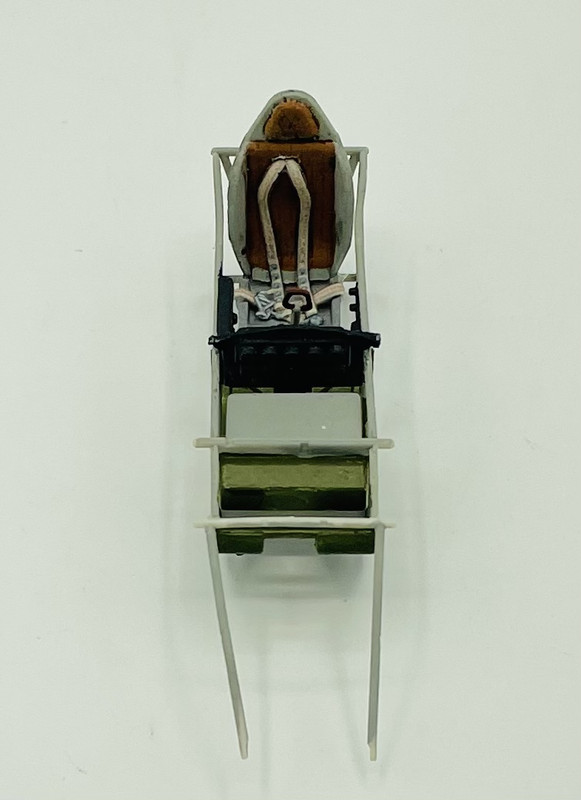

I’m not wowed by the Cutting Edge IP, but it is better than the kit decal IP.
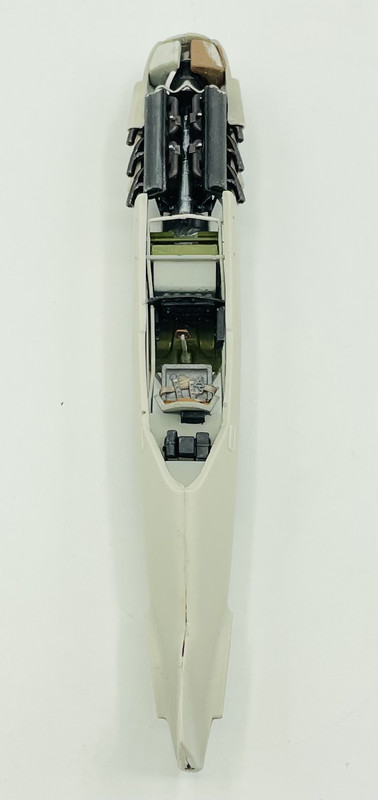
and I closed up the fuselage with the cockpit and engine in place
This will be my primary project for the next bit so more progress in a few days…
5 Likes
Looking good.
Thanks Peter. I’m happy to get this one rolling again.
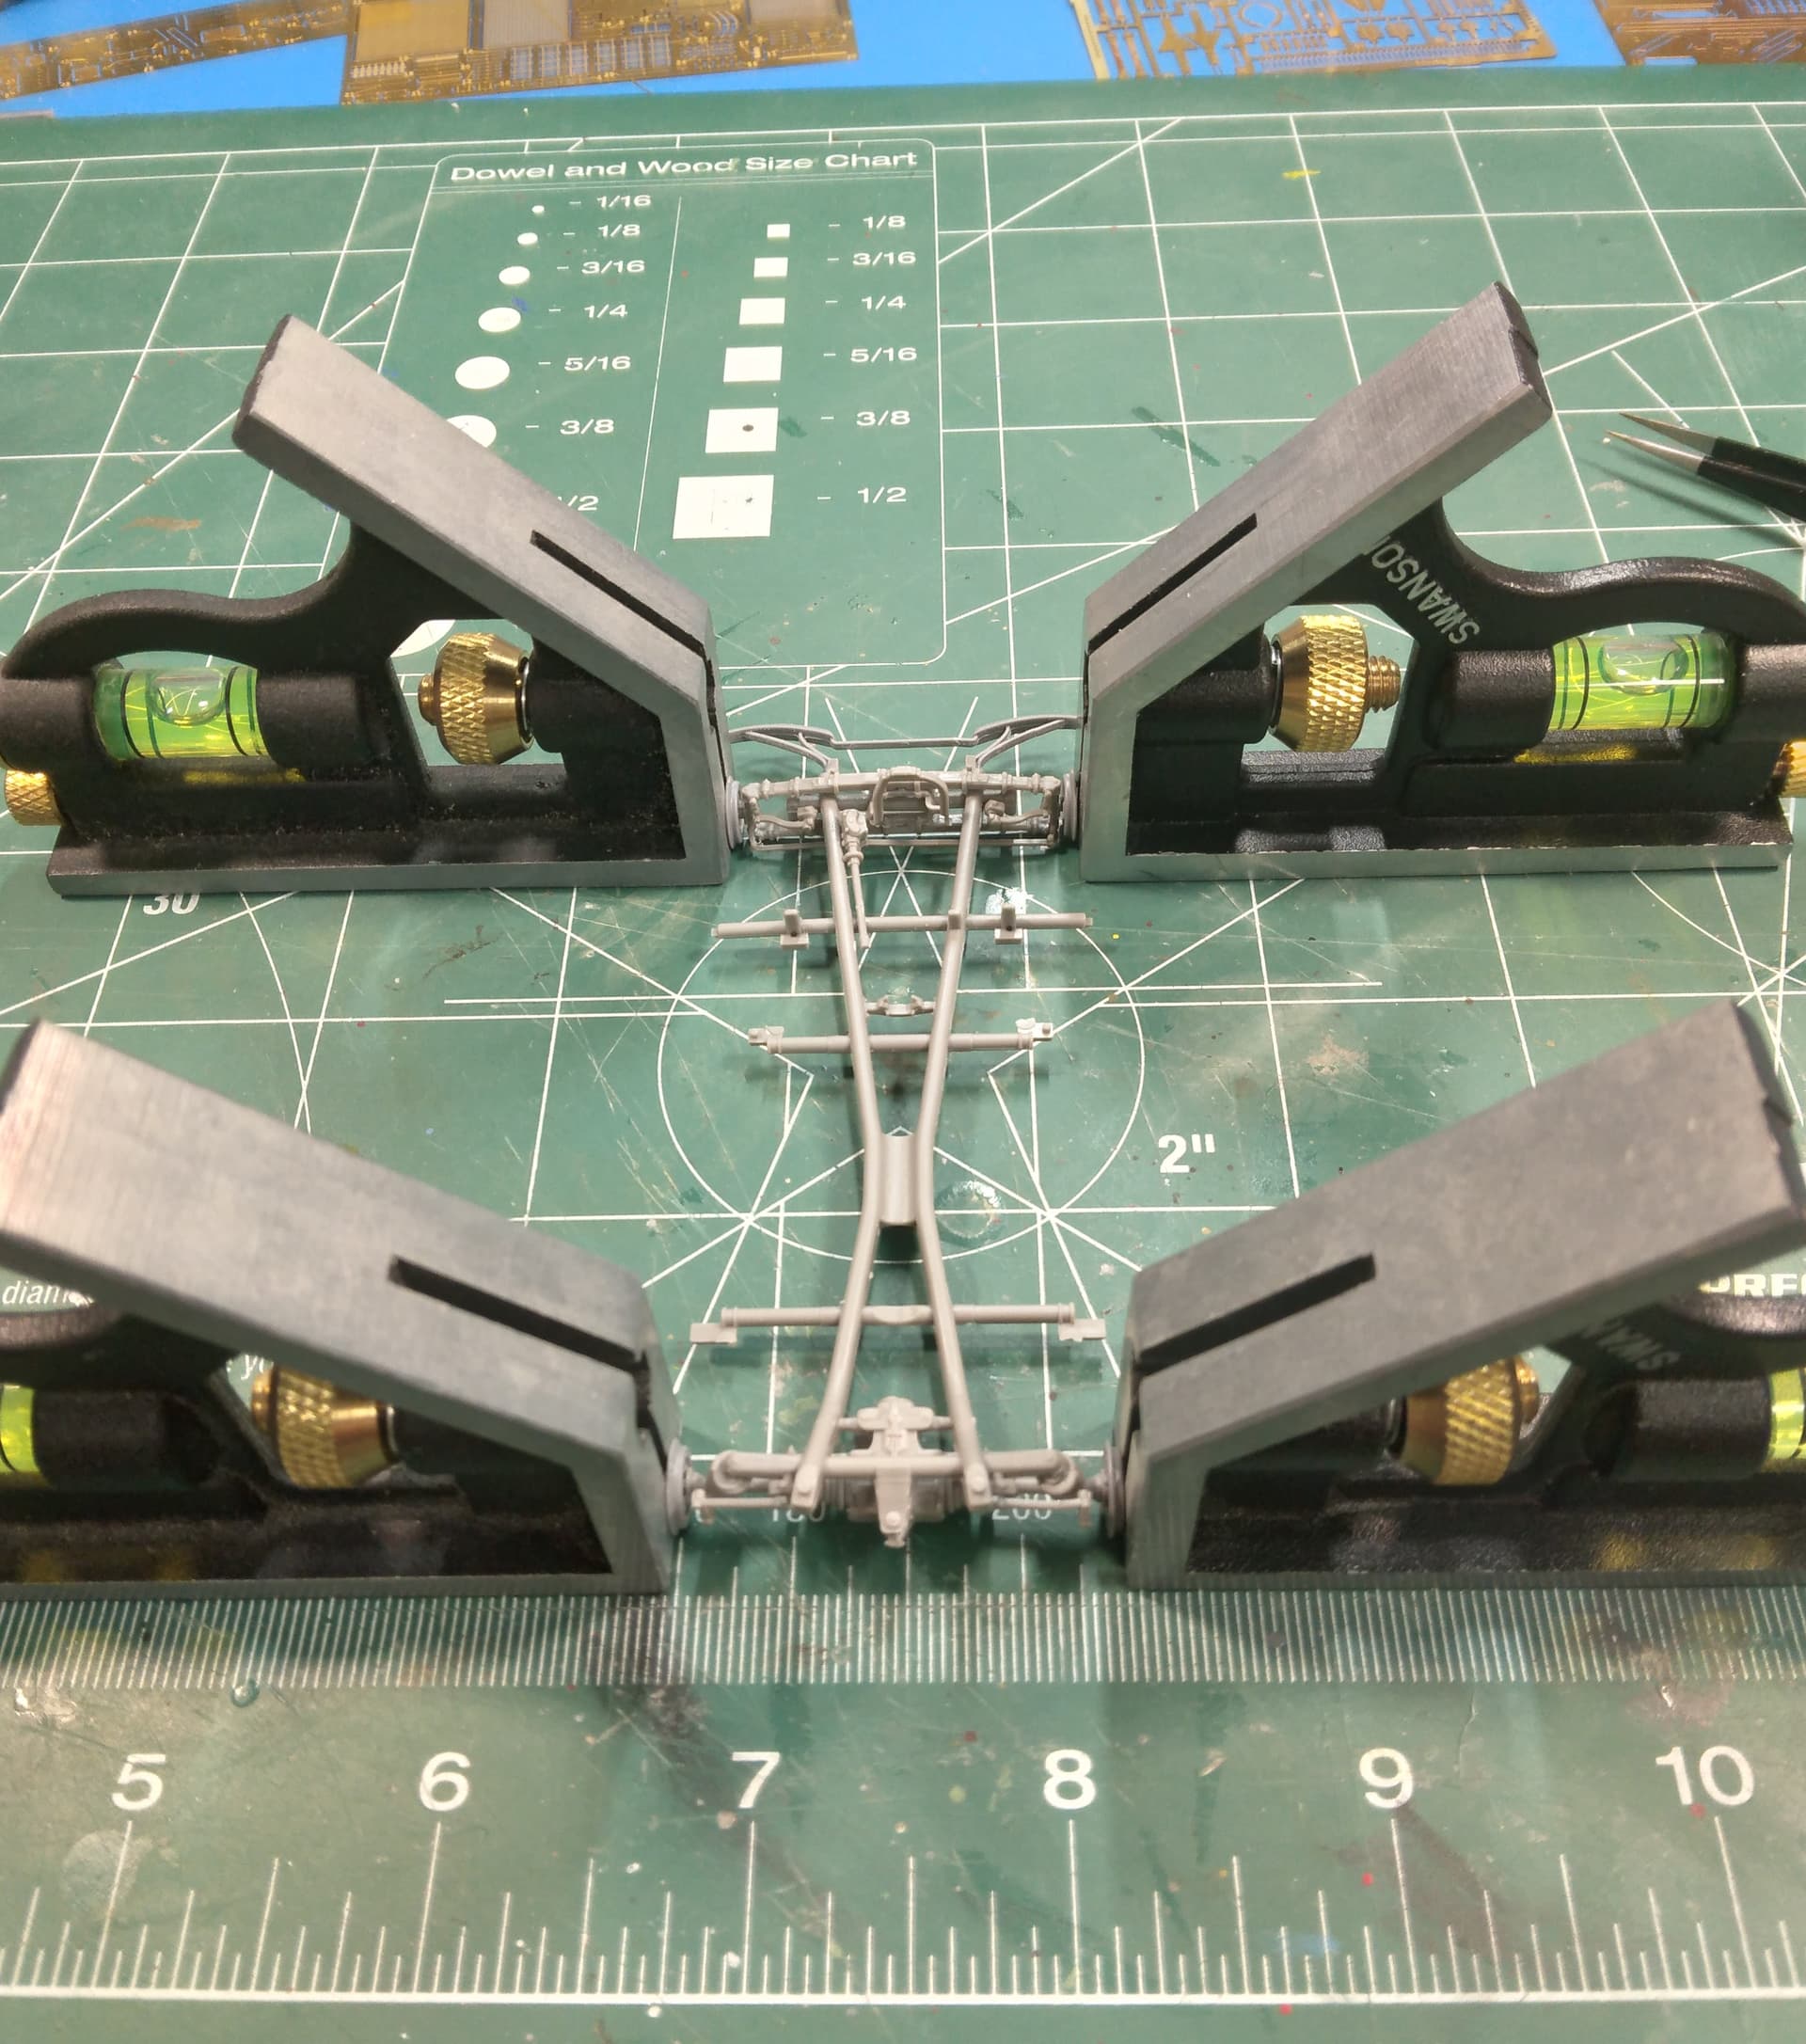
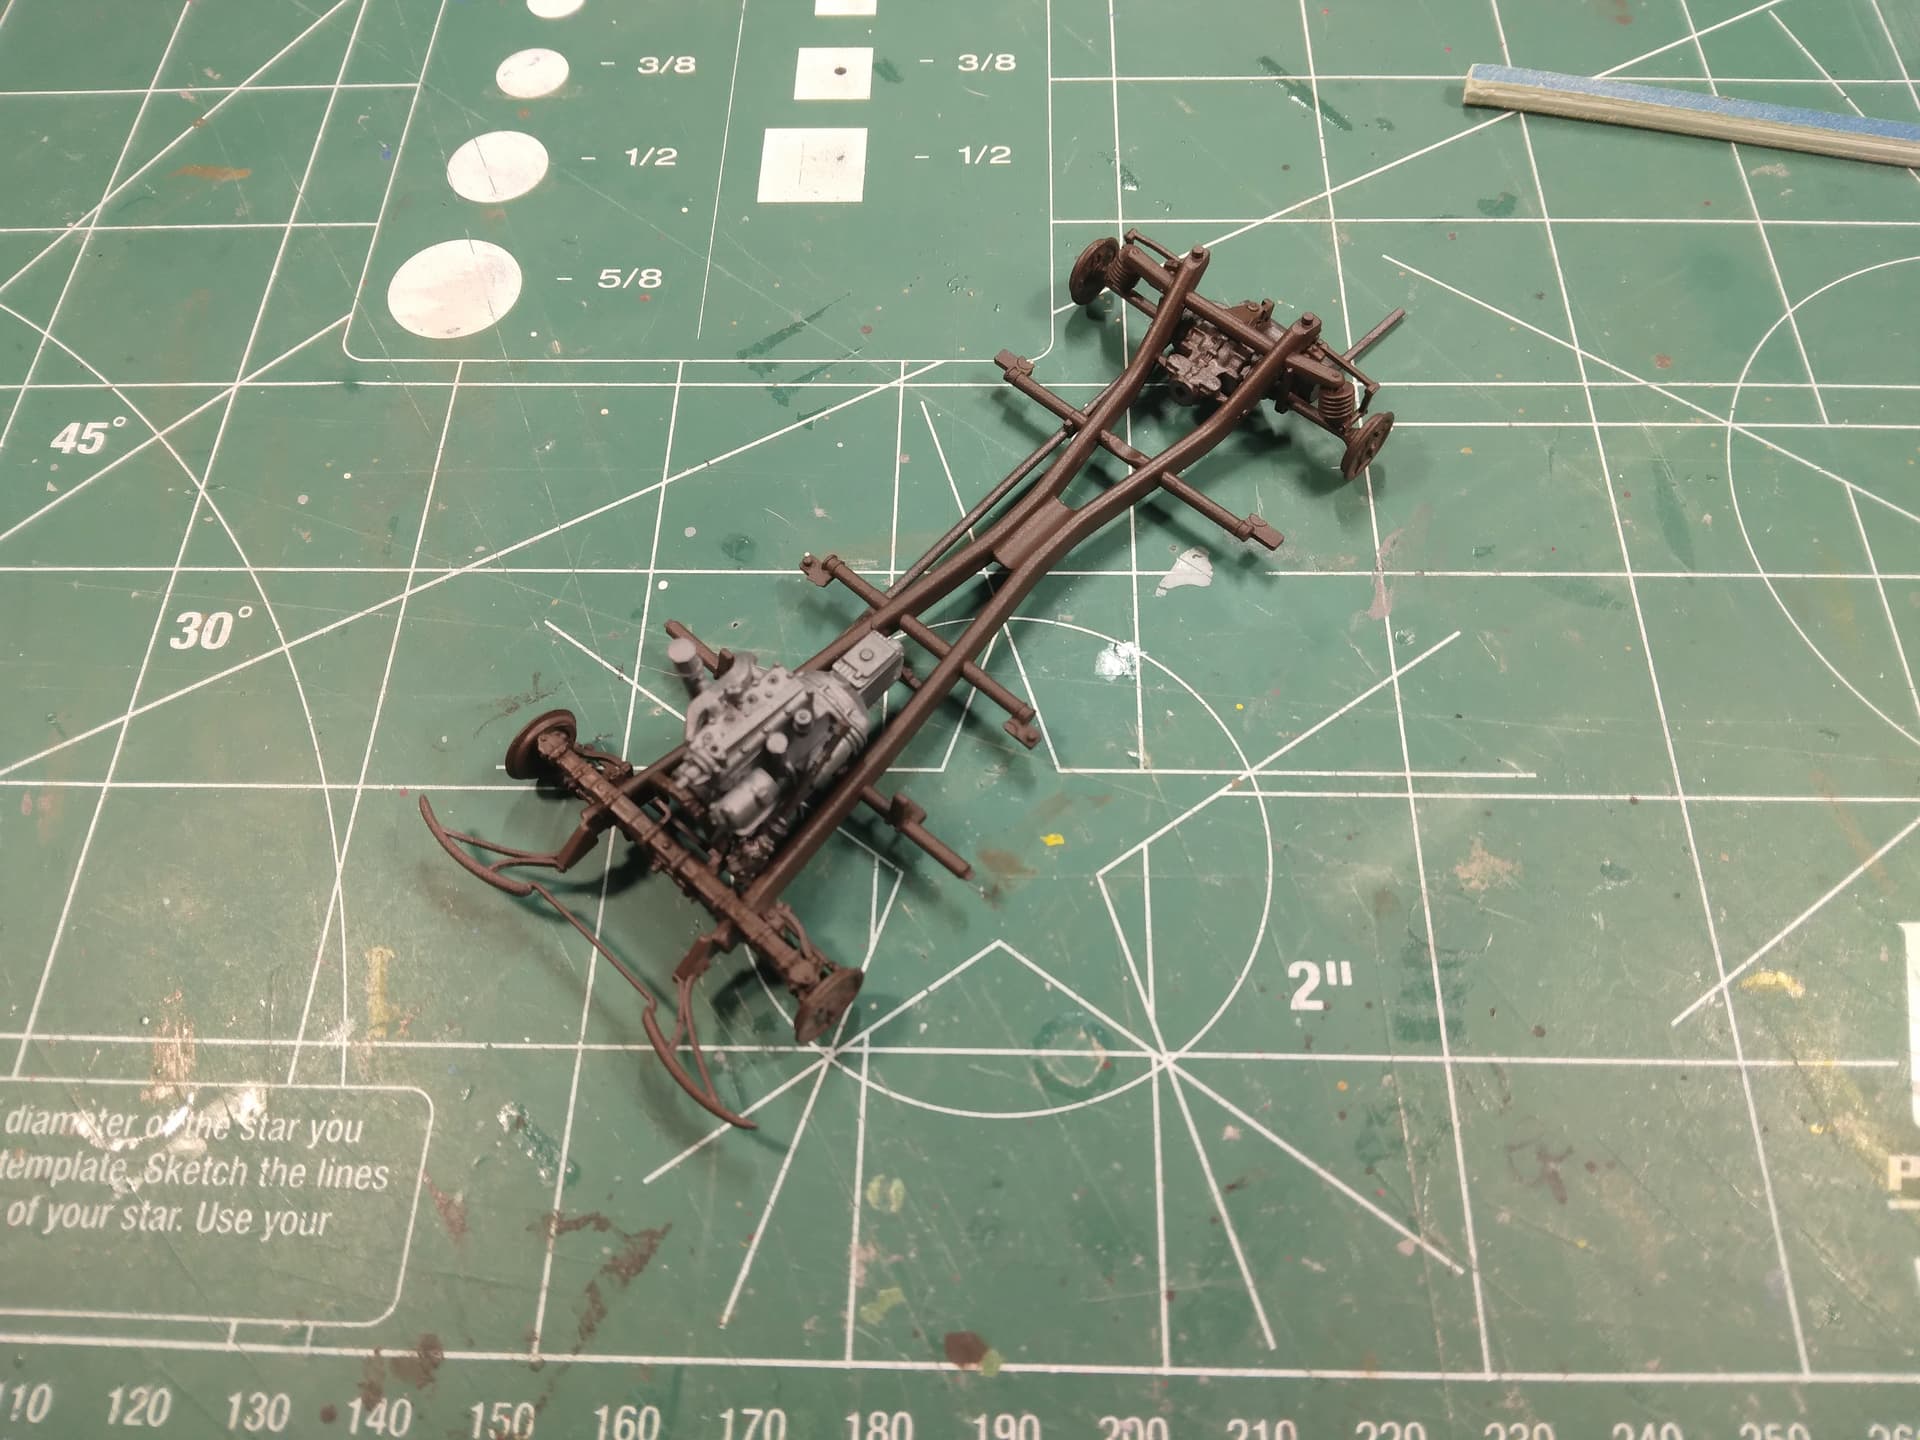
Teeeeeeny, tiny bits…Master Box is know for this. ![]() Bit more work to the front end and the rear differential is installed. I’d have gone further along but one of the diff’s braces was broken on the sprue, so I’m letting the glue set. Ugh. Teeeeeeny, tiny bits.
Bit more work to the front end and the rear differential is installed. I’d have gone further along but one of the diff’s braces was broken on the sprue, so I’m letting the glue set. Ugh. Teeeeeeny, tiny bits.
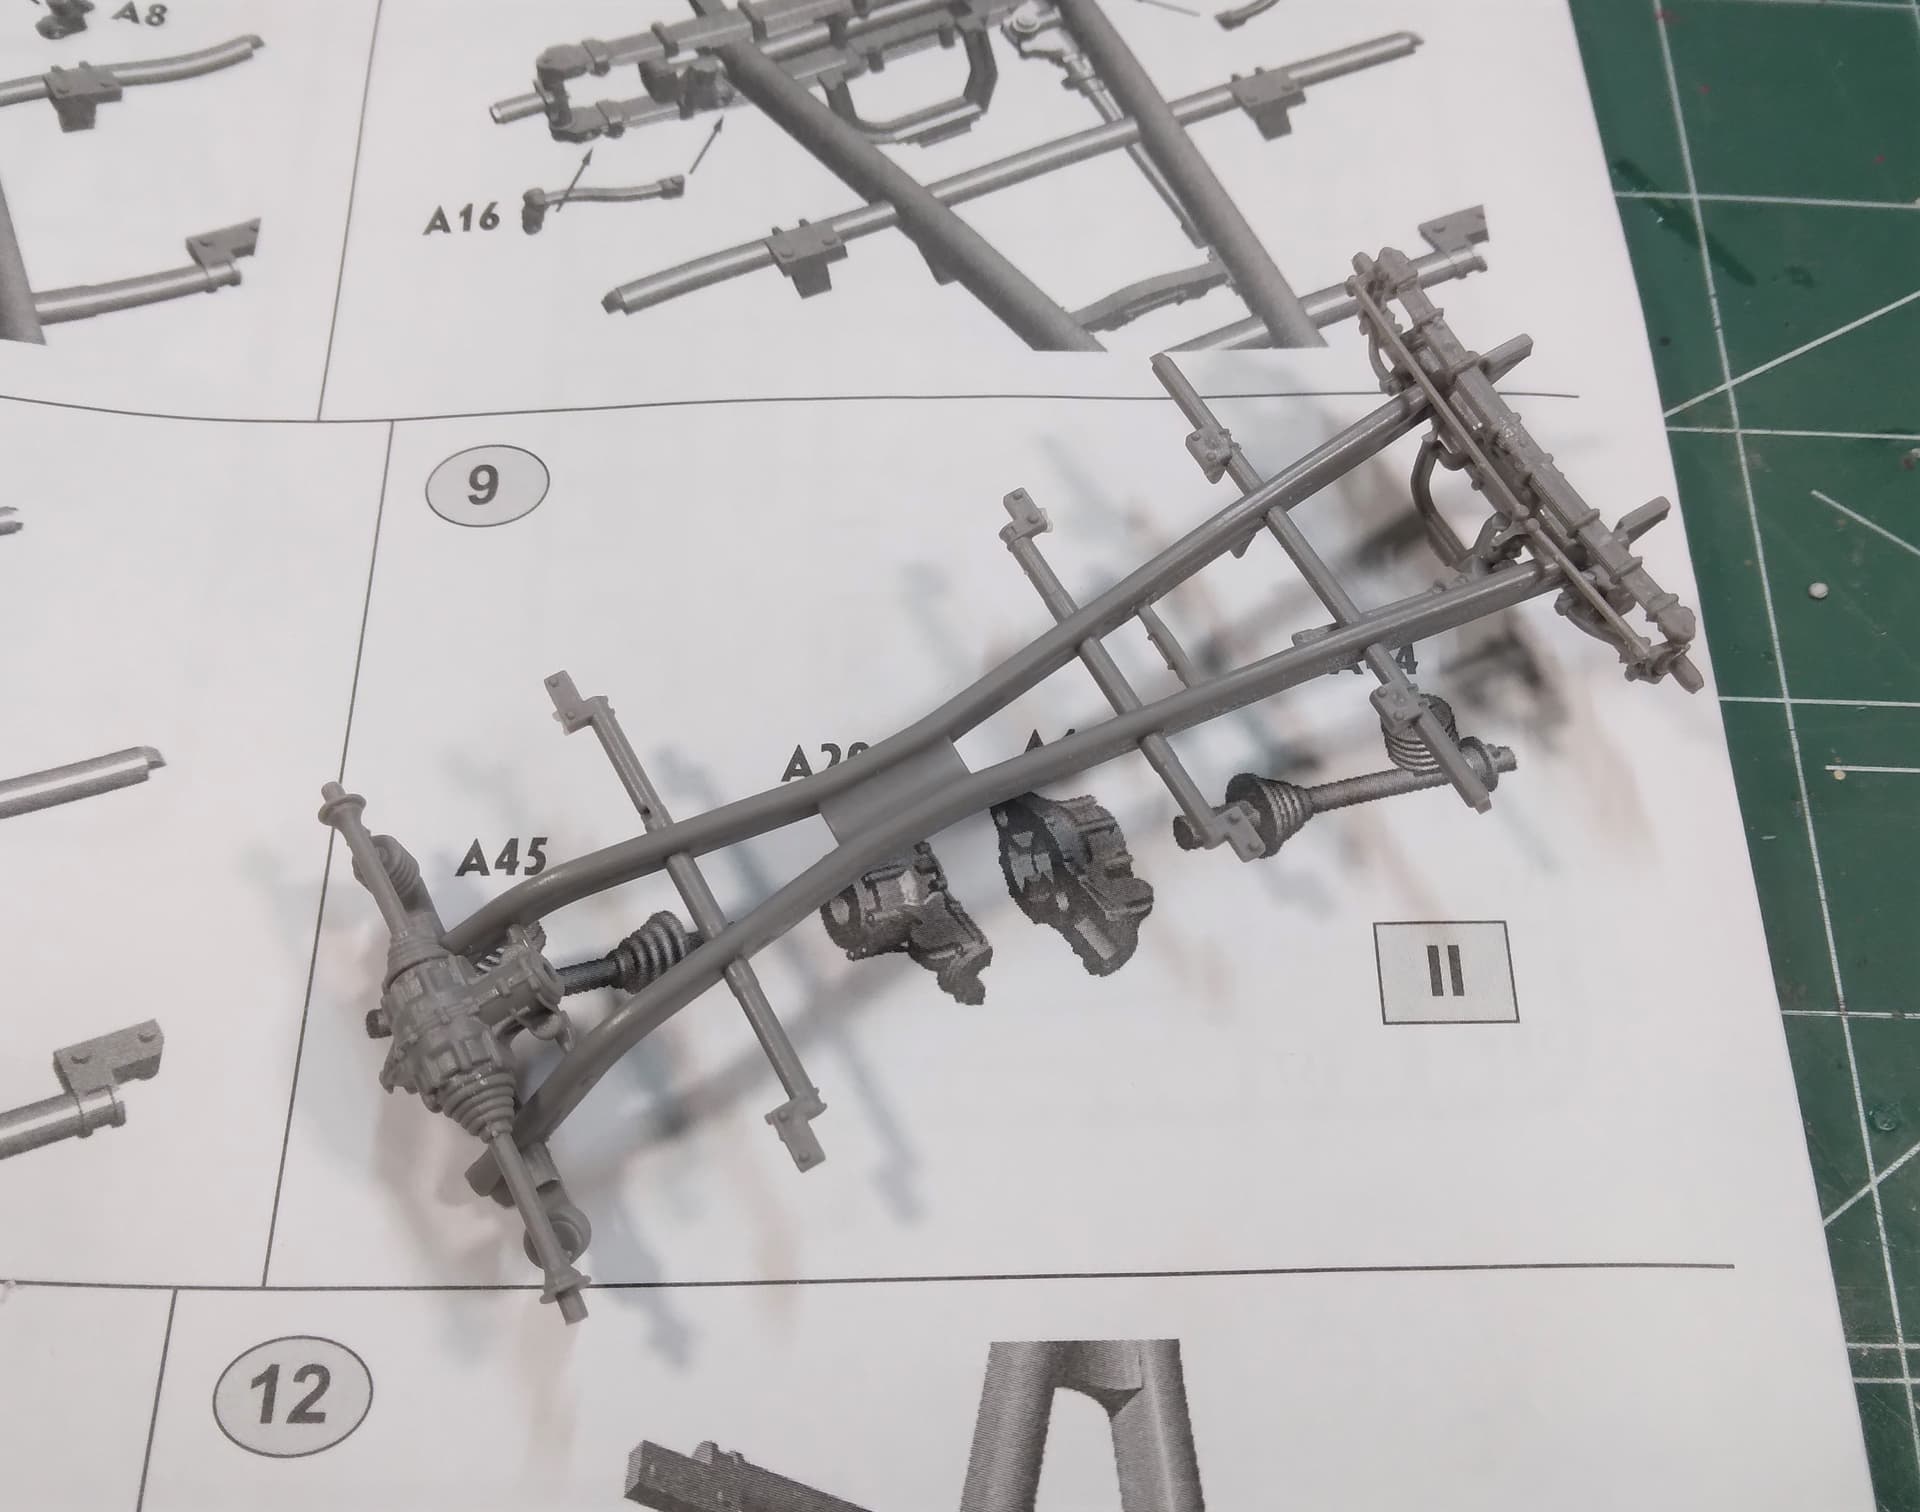
Uh, oh…just looked closer to the picture. Did I mount the front of the diff wrong? Is it supposed to be on the TOP of the brackets??? Oy, back to the shop!!
Mike ![]()
4 Likes
ICM 1/32 Fiat CR.42 nightfighter build is in full swing now:
Cockpit tub ist mostly done, just lacking the seatback, harness and some more crossbars. ICM kitparts, Eduard PE and some scratchbuild add-ons here. Also glued the winghalves and some engine parts to fill the time while paint was drying. Next major step: Closing the fuselage halves.
Enjoy
- dutik
5 Likes
5 Likes
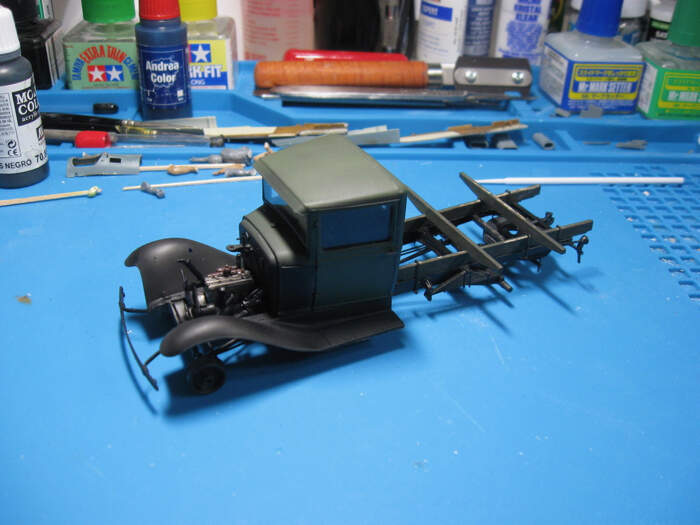
Back to the jalopy after lots of interruptions over the last couple of months. I ought to be able to finish this by year-end…
The cab fitment leaves a lot to be desired. I thought I had done well to get the front of the cab together, but I think on the next build I will have EVERY PIECE of the cab ready to glue together so I can adjust when I stick them all on. I think I should be able to use some perfect plastic putty to fill the gaps and it will look … perhaps ok?
6 Likes
Looks really good for me now! Good luck!
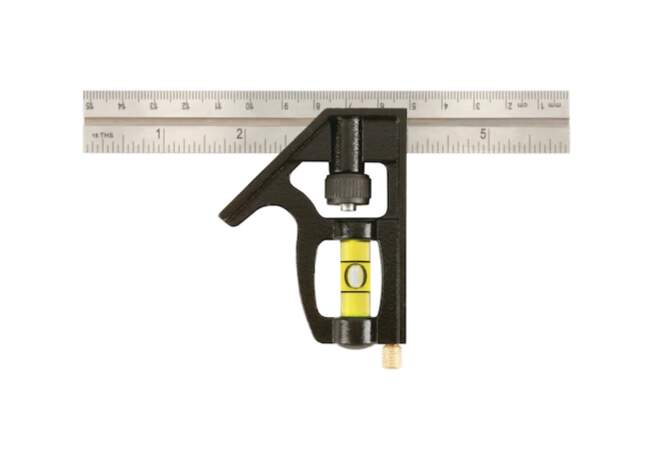
That tool looks really interesting, where can I find it? As I build not so many vehicles I did the aligning by the “Eyeball MK.I tool” ![]()
Peter,
Those “supports” I’m using are the part of a combination square with the ruler removed. Very handy tool for a lot of applications.
MIke
6 Likes
Today was adding the wings. Normally that would be no big thing, but as you can see from this photo, ICM took a complex multi part approach to get the dihedral correct.
The best sequence for assembly, or really any for that matter, is not specified on the instructions sheet. So, after test fitting, I went in this order: add the upper wing rear filets, add the leading edge/forward upper filets, add the center bottom panel, assemble the outer wing panels, then install them.
Everything fit really snug, but…. in hindsight, I should have held off installing the upper forward filets until after the outer wing portions were installed.
6 Likes
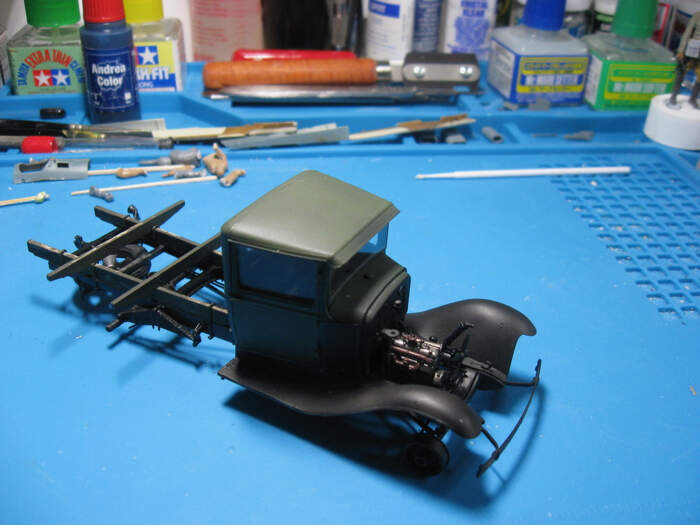
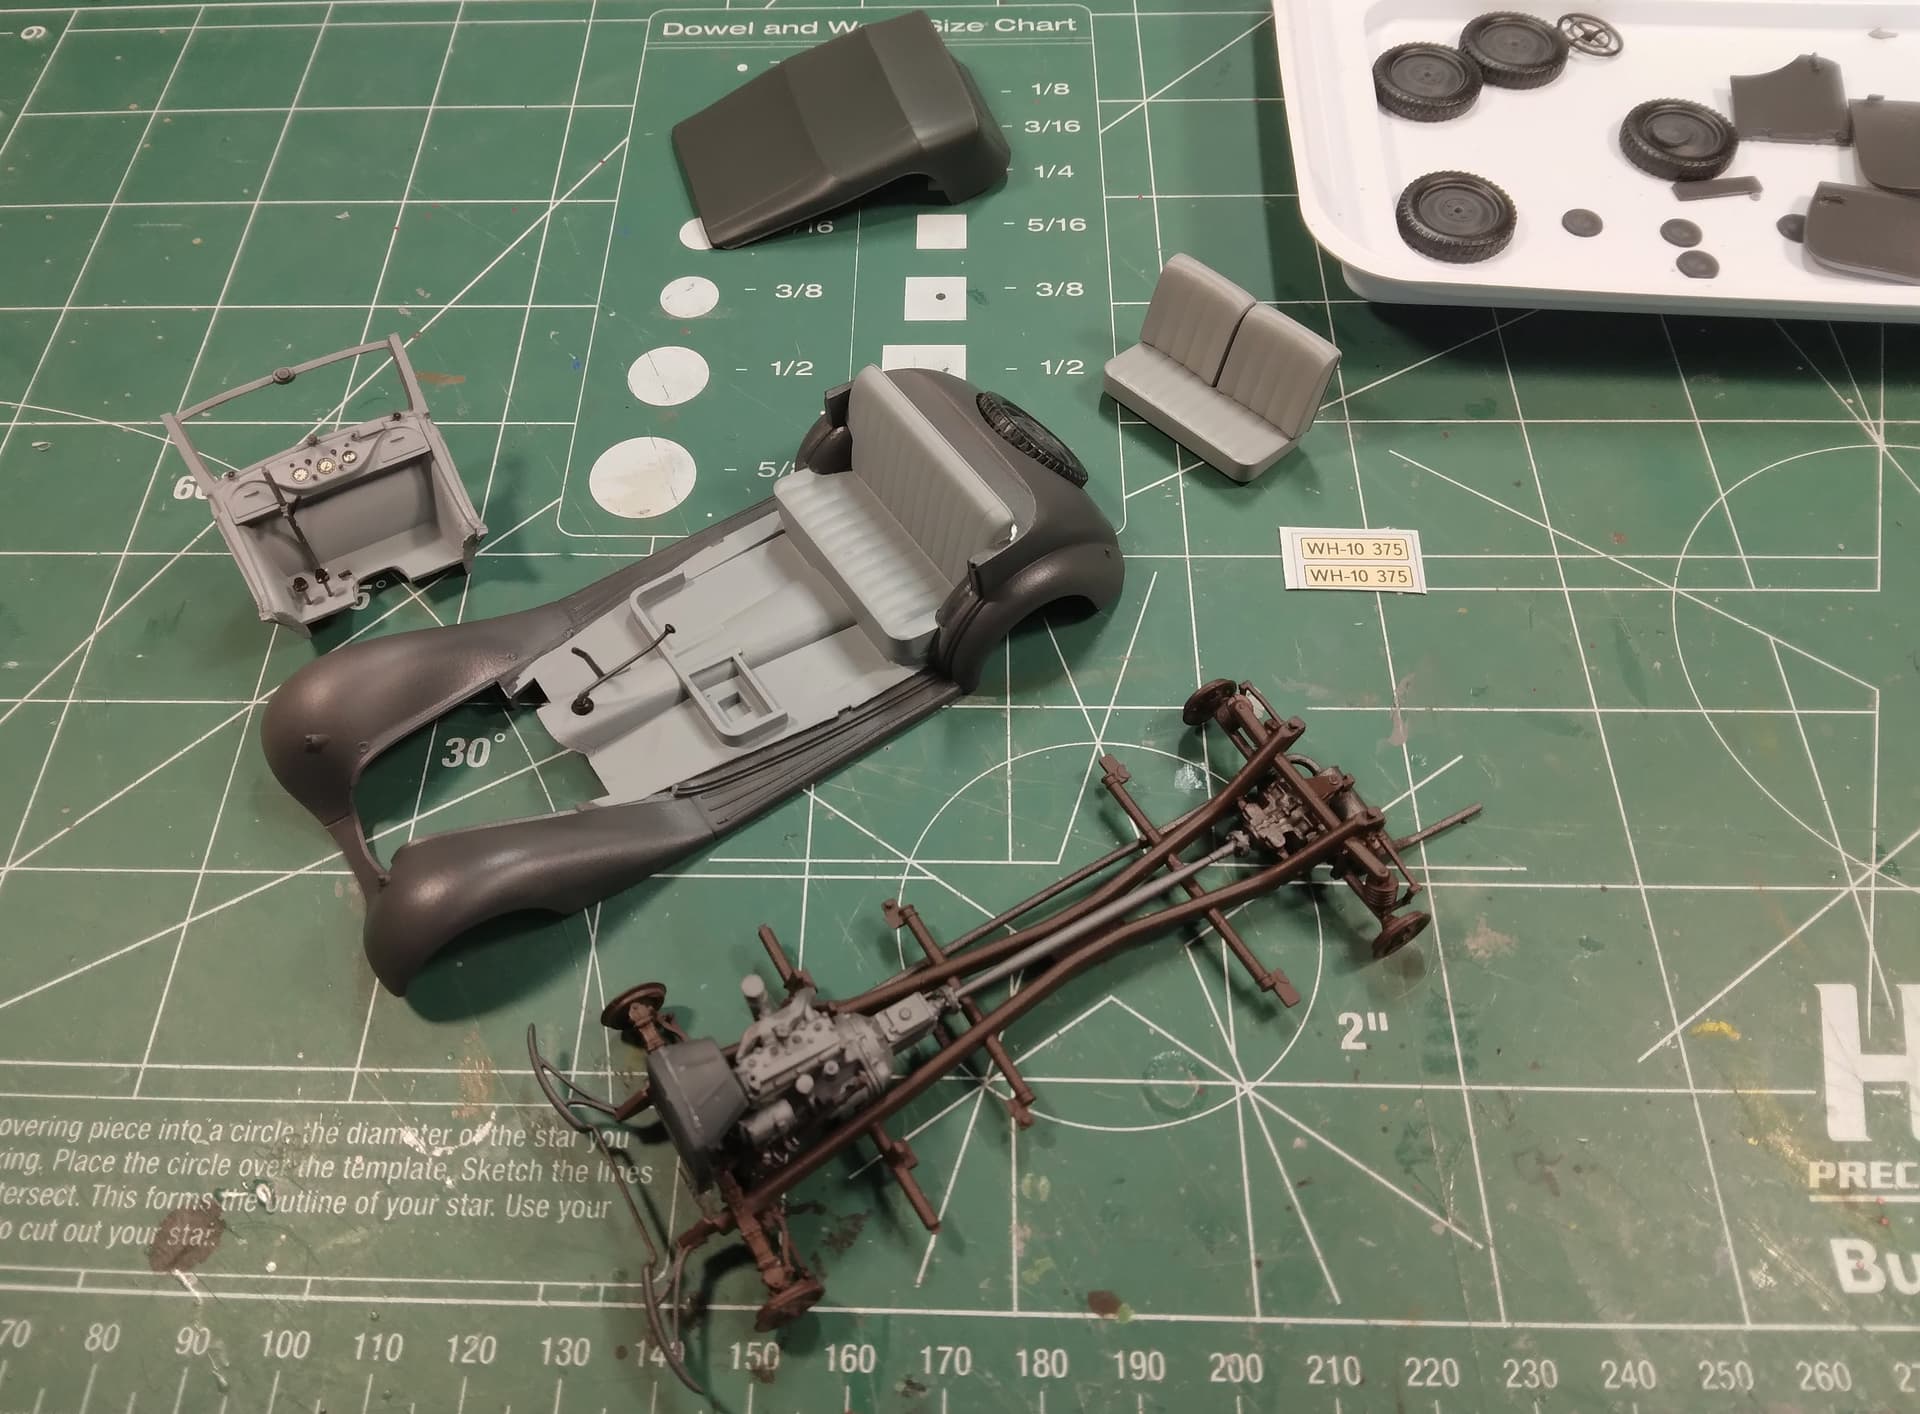
A little more to the undercarriage. Motor is in and a few more things for that area and then I can start the body.
Mike
4 Likes
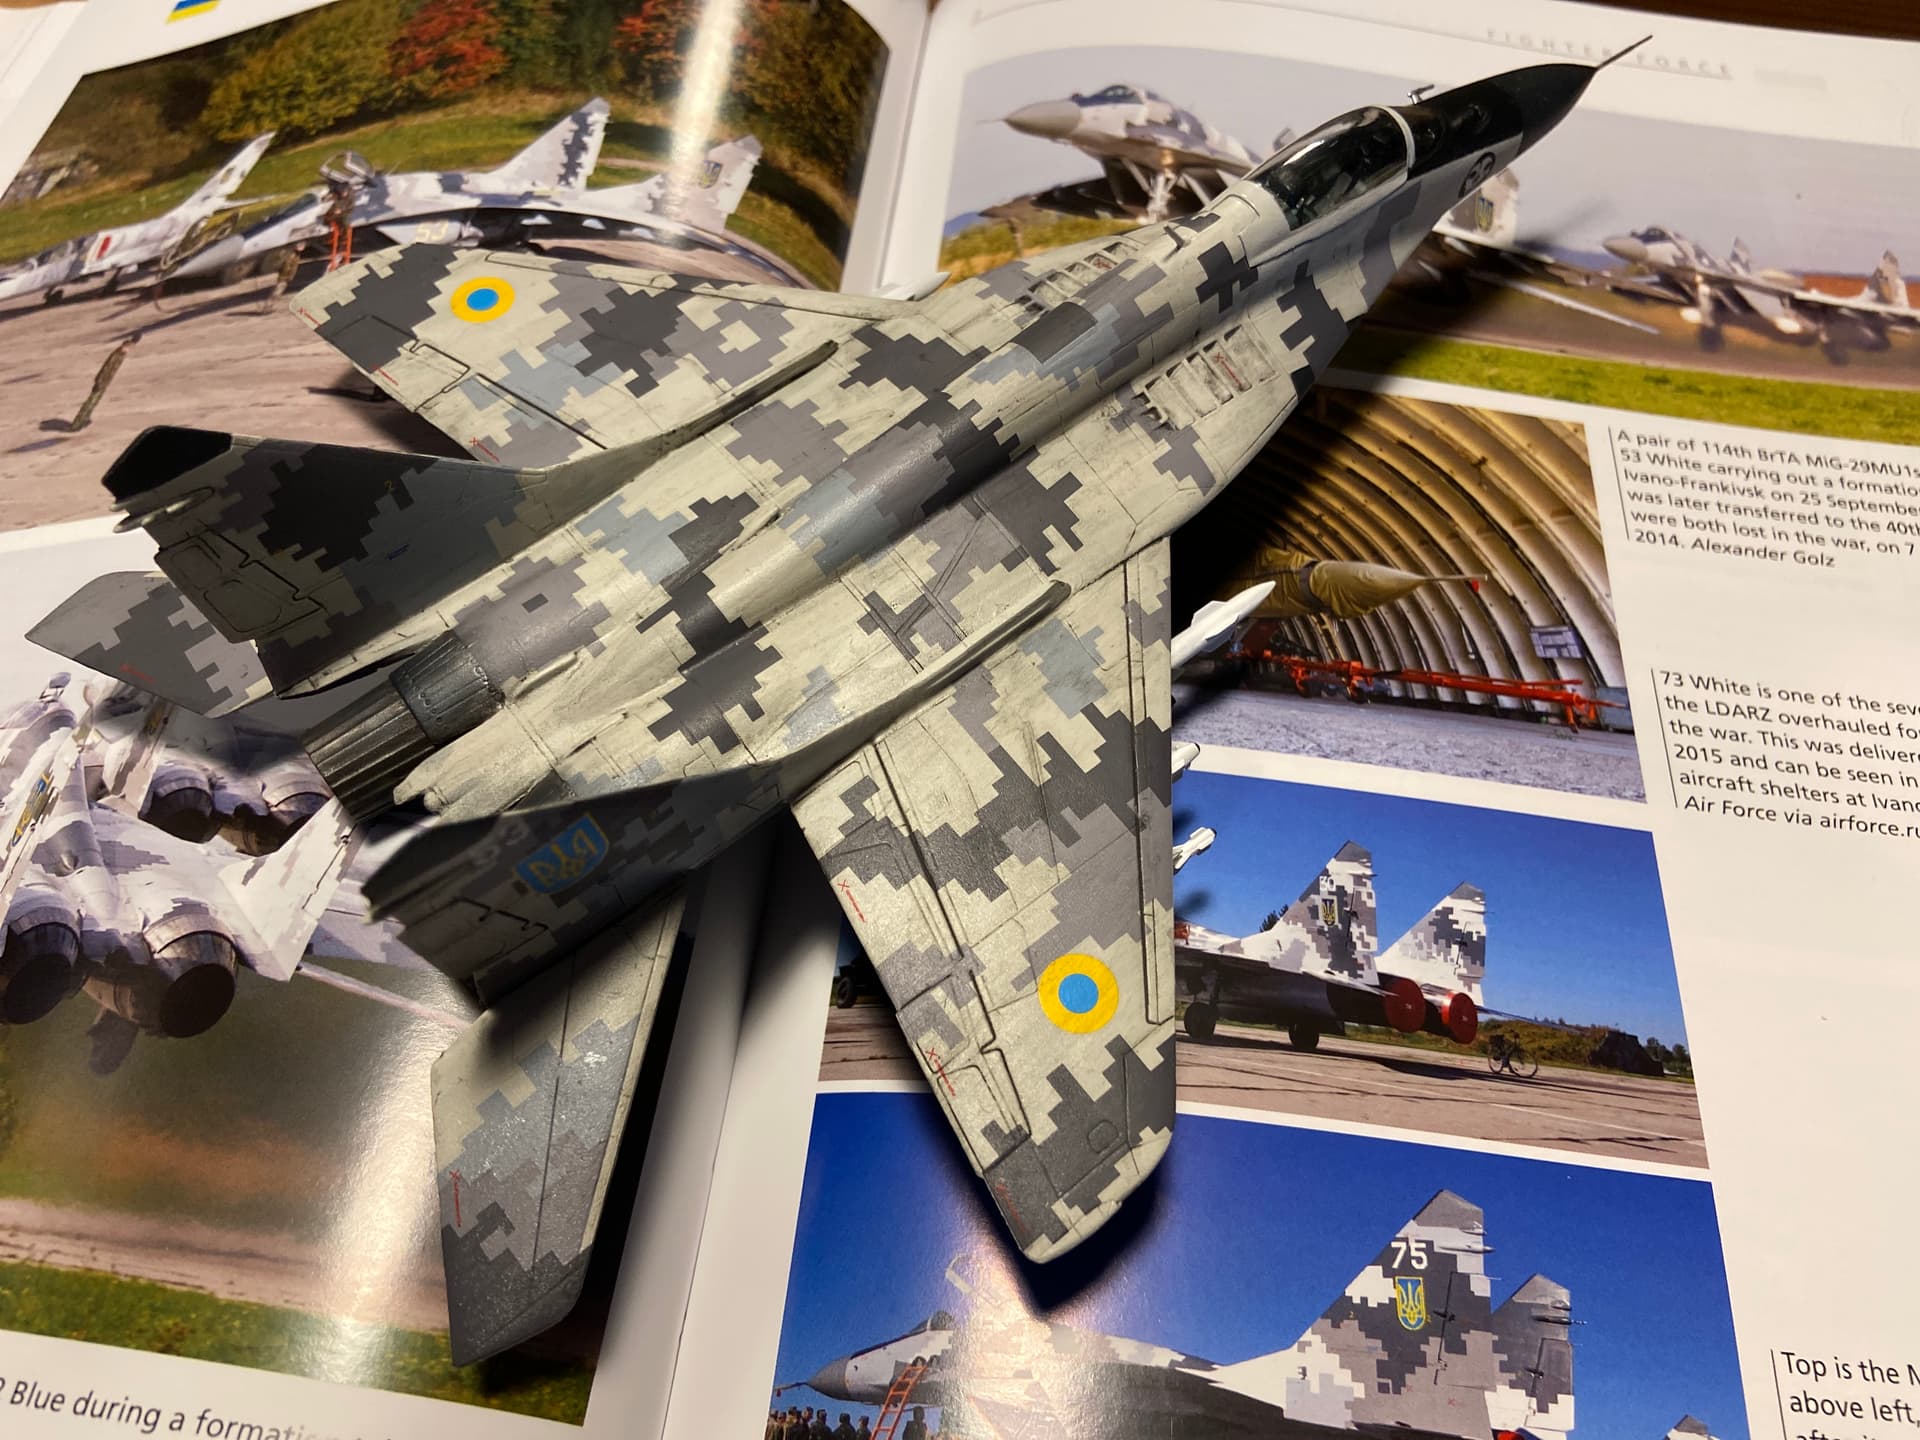
I am calling this one done. Decent kit. I probably made a few mistakes and the blue on the markings are definitely too light, but it looks great when done nonetheless ![]()
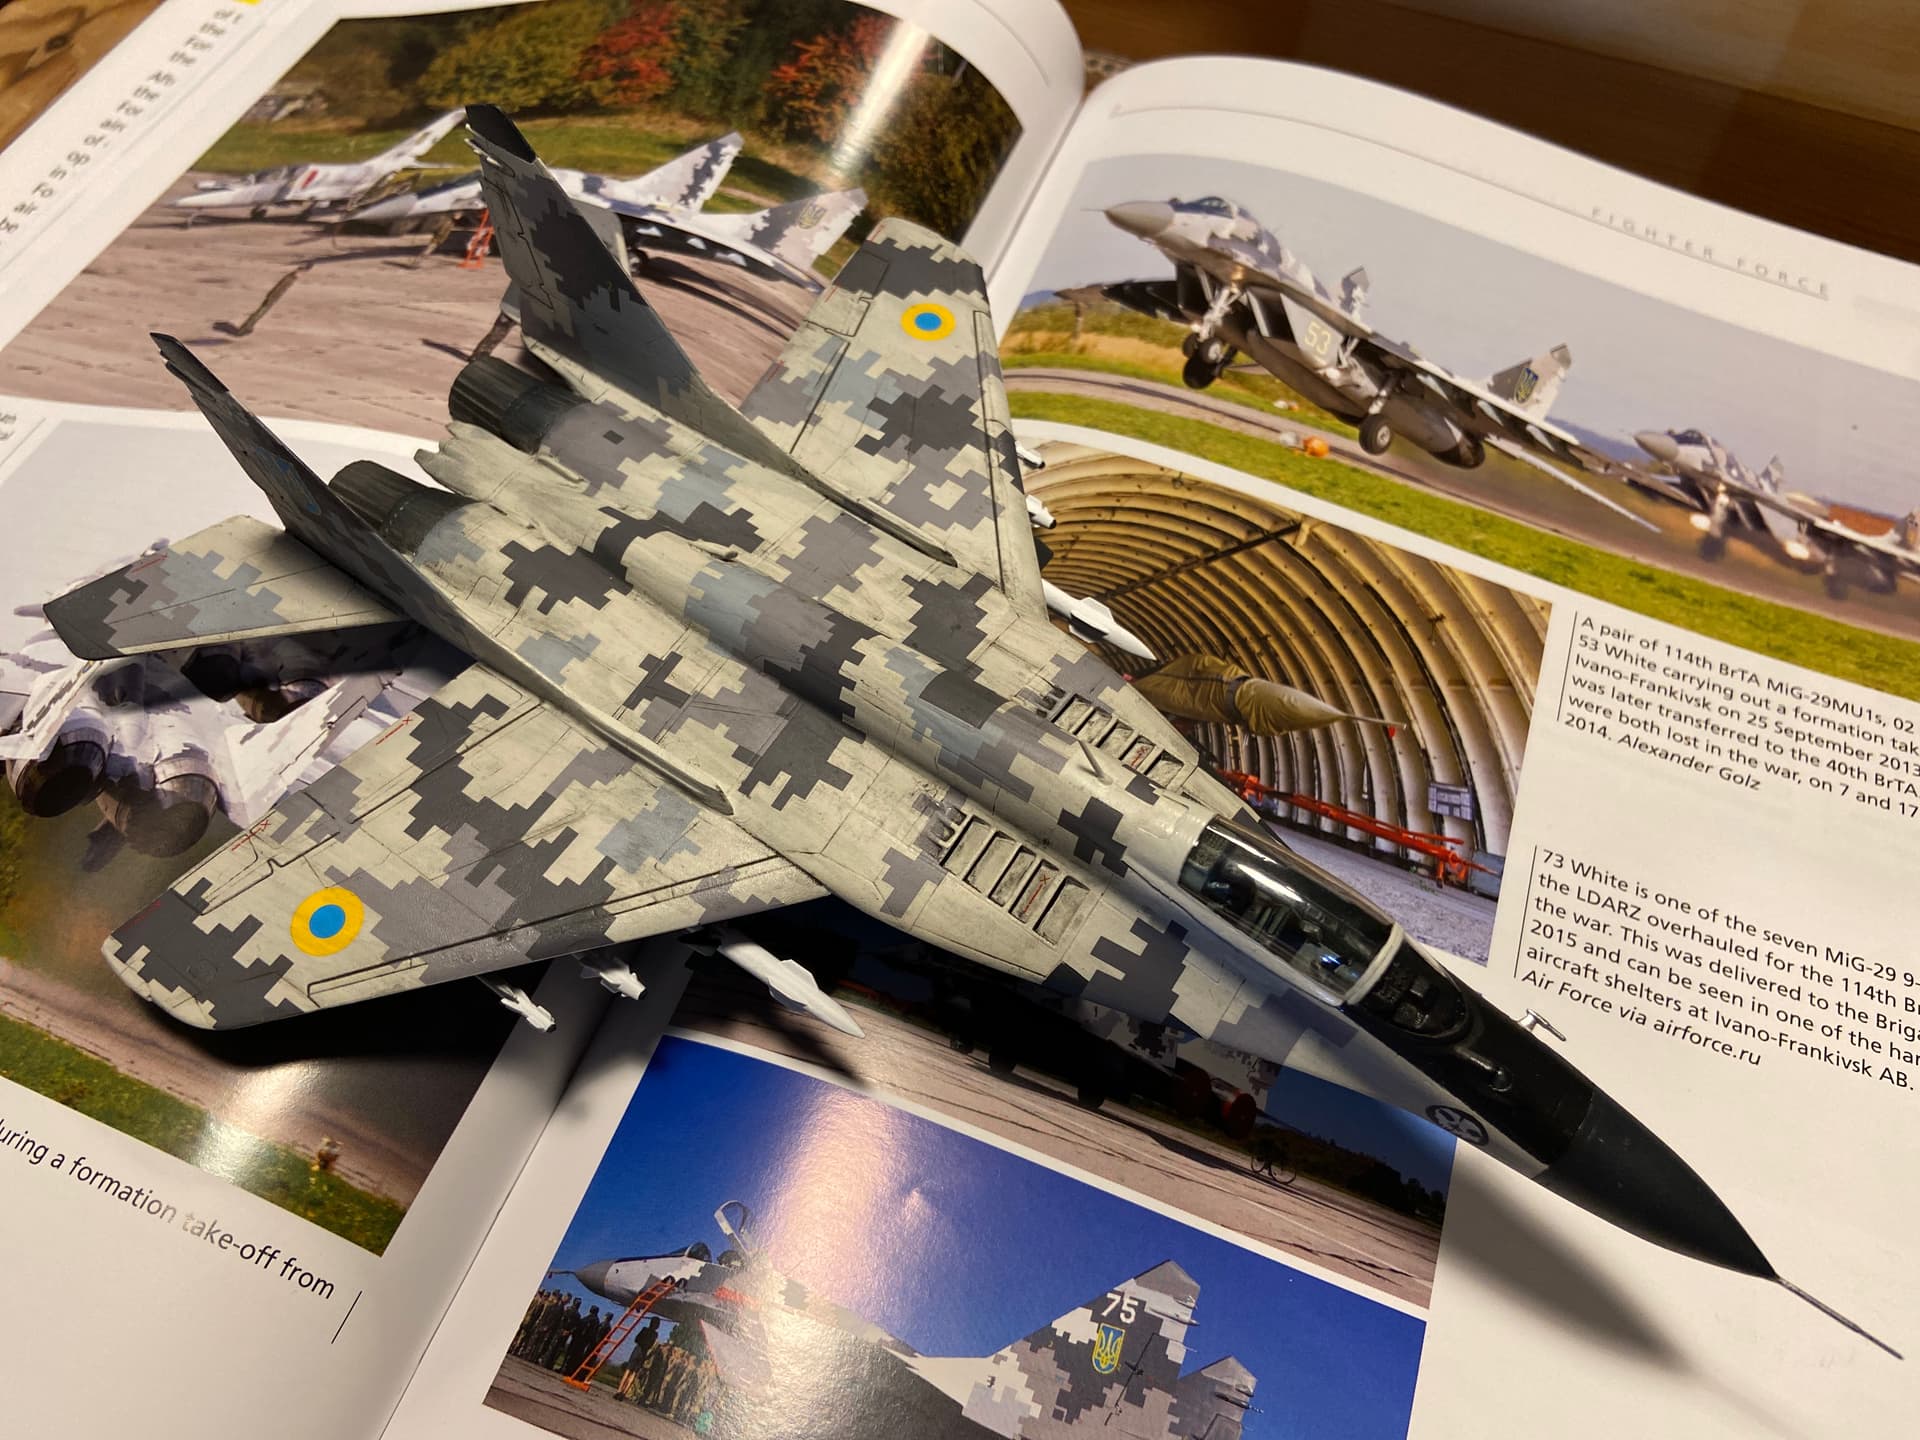

17 Likes
A Beautiful result Jesper. Great work.
1 Like
Jesper, you Fulcrum looks fabulous! Excellent build!
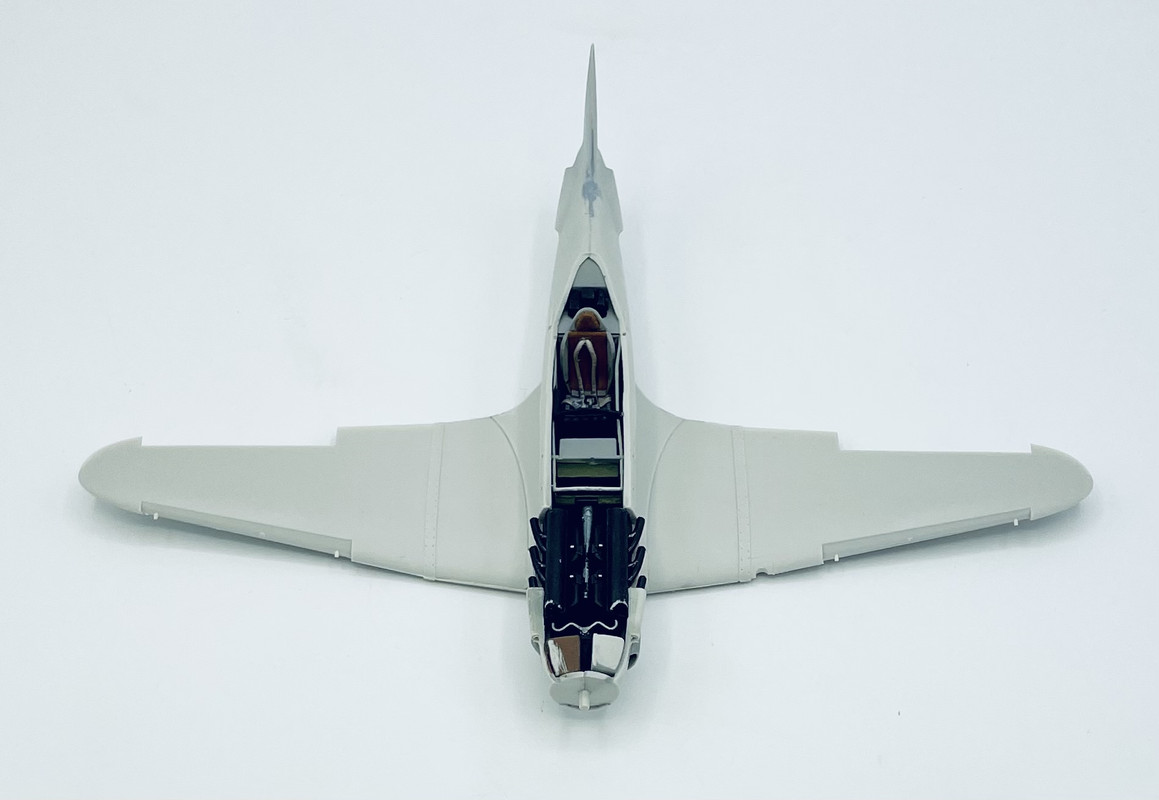
Substantial progress for me today!
I was able to get most of the basic airframe done, adding the horizontal stabilizers, rudder, ailerons, and slats. I also got the seam clean up taken care of
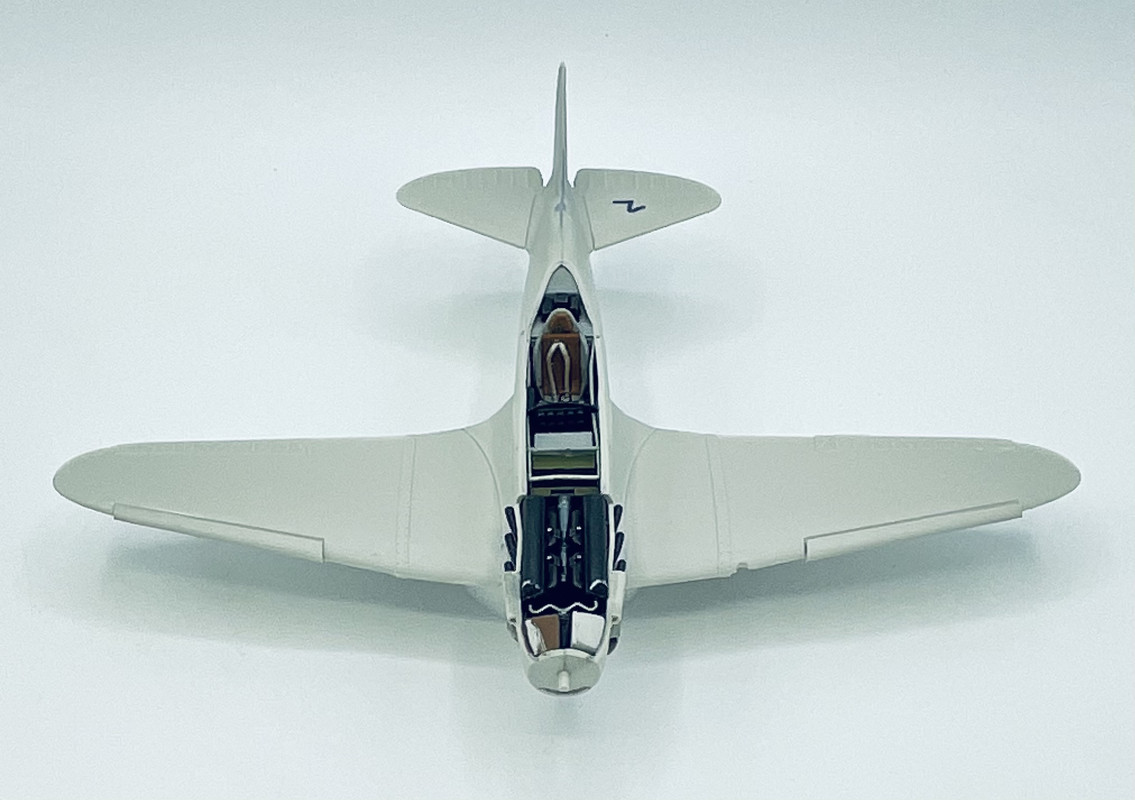
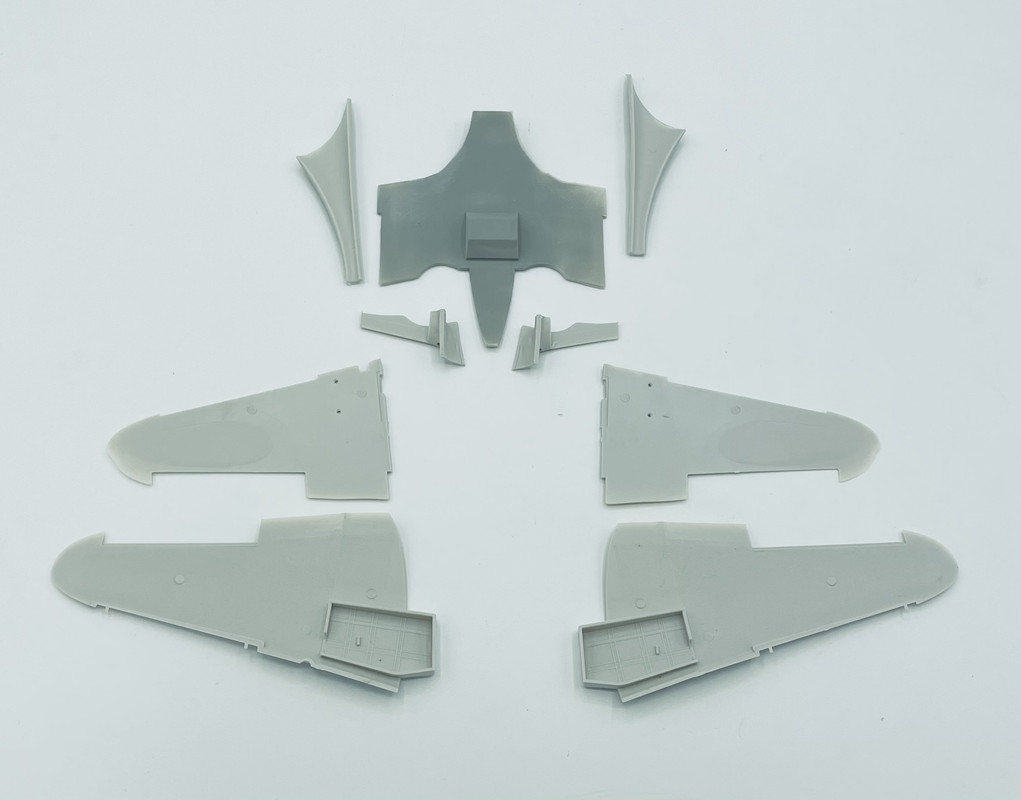
I also prepped the armament for installation, adding the blast tubes and hollowing out the muzzles.

Lastly I added some brass screen to the radiator, as I do NOT like a smooth face on those parts. They need some form of texture.

Nearing the finish line with assembly soon on this bird…
4 Likes
Great work here… If you don’t put a pic next to it, one will not know that the blue is off ![]()
1 Like
Quite a bit of paint done.
Assembly instructions really suck when it comes to placement of some of the parts. Trial and error, dry fit, dry fit, dry fit, and more dry fit!
A GREAT amount of care will be needed when aligning the front of the interior with the four doors. Basically, I need six hands. ![]()
Mike
5 Likes