Well Howdy! I have been lurking since aboot (as they say in Canada) the time the ‘big up-date’ happened, and only just now got 'round to registering. I am a mediocre-really-trying-to-improve-my-skills modeler, here in South Carolina USA, pleased to meet all y’all!
Remember I am learning here, helpful critiques appreciated.
Ok so this is not anything new to y’all, but this is my first MENG kit. I enjoy reading military history of Israel, Biblical-forward, with a special interest in modern-day Israel. I remember seeing these tanks on the news when “Peace for Galilee” happened, hence wanting to try this bad-boy. Also, I struggled thru the old Academy kit (with mine-roller) and really want a better more accurate version to replace it on my shelf…so heeeeere we go!
Instructions via Desert Publications? Also there sure are alot of trees ab-outt (as we say here in SC) 23 total
so here is the start, more to follow!
I’ve been curious about this kit for a while, but my curiosity is tamped by the price… so I’ll enjoy vicariously.
I’m also a big fan of IDF armor and most things Israeli, past and present. I did a group tour, biblical archeology oriented, about 25 years ago and the tour “guide” had me talking about all the former US and other vehicles we saw from the bus and at truck stops. The high point for me was seeing a group of three Merk 2s on exercise. Their color then was greenish gray, and I didn’t notice them until one goosed the throttle and I saw the exhaust smoke. I was only about two hundred yards away, up by the border with Lebanon. I couldn’t get to my little camera in time to get a pic…
So I broke this into two parts, as I wasn’t sure if this new system would take all this, but it appears to be okey-dokey.
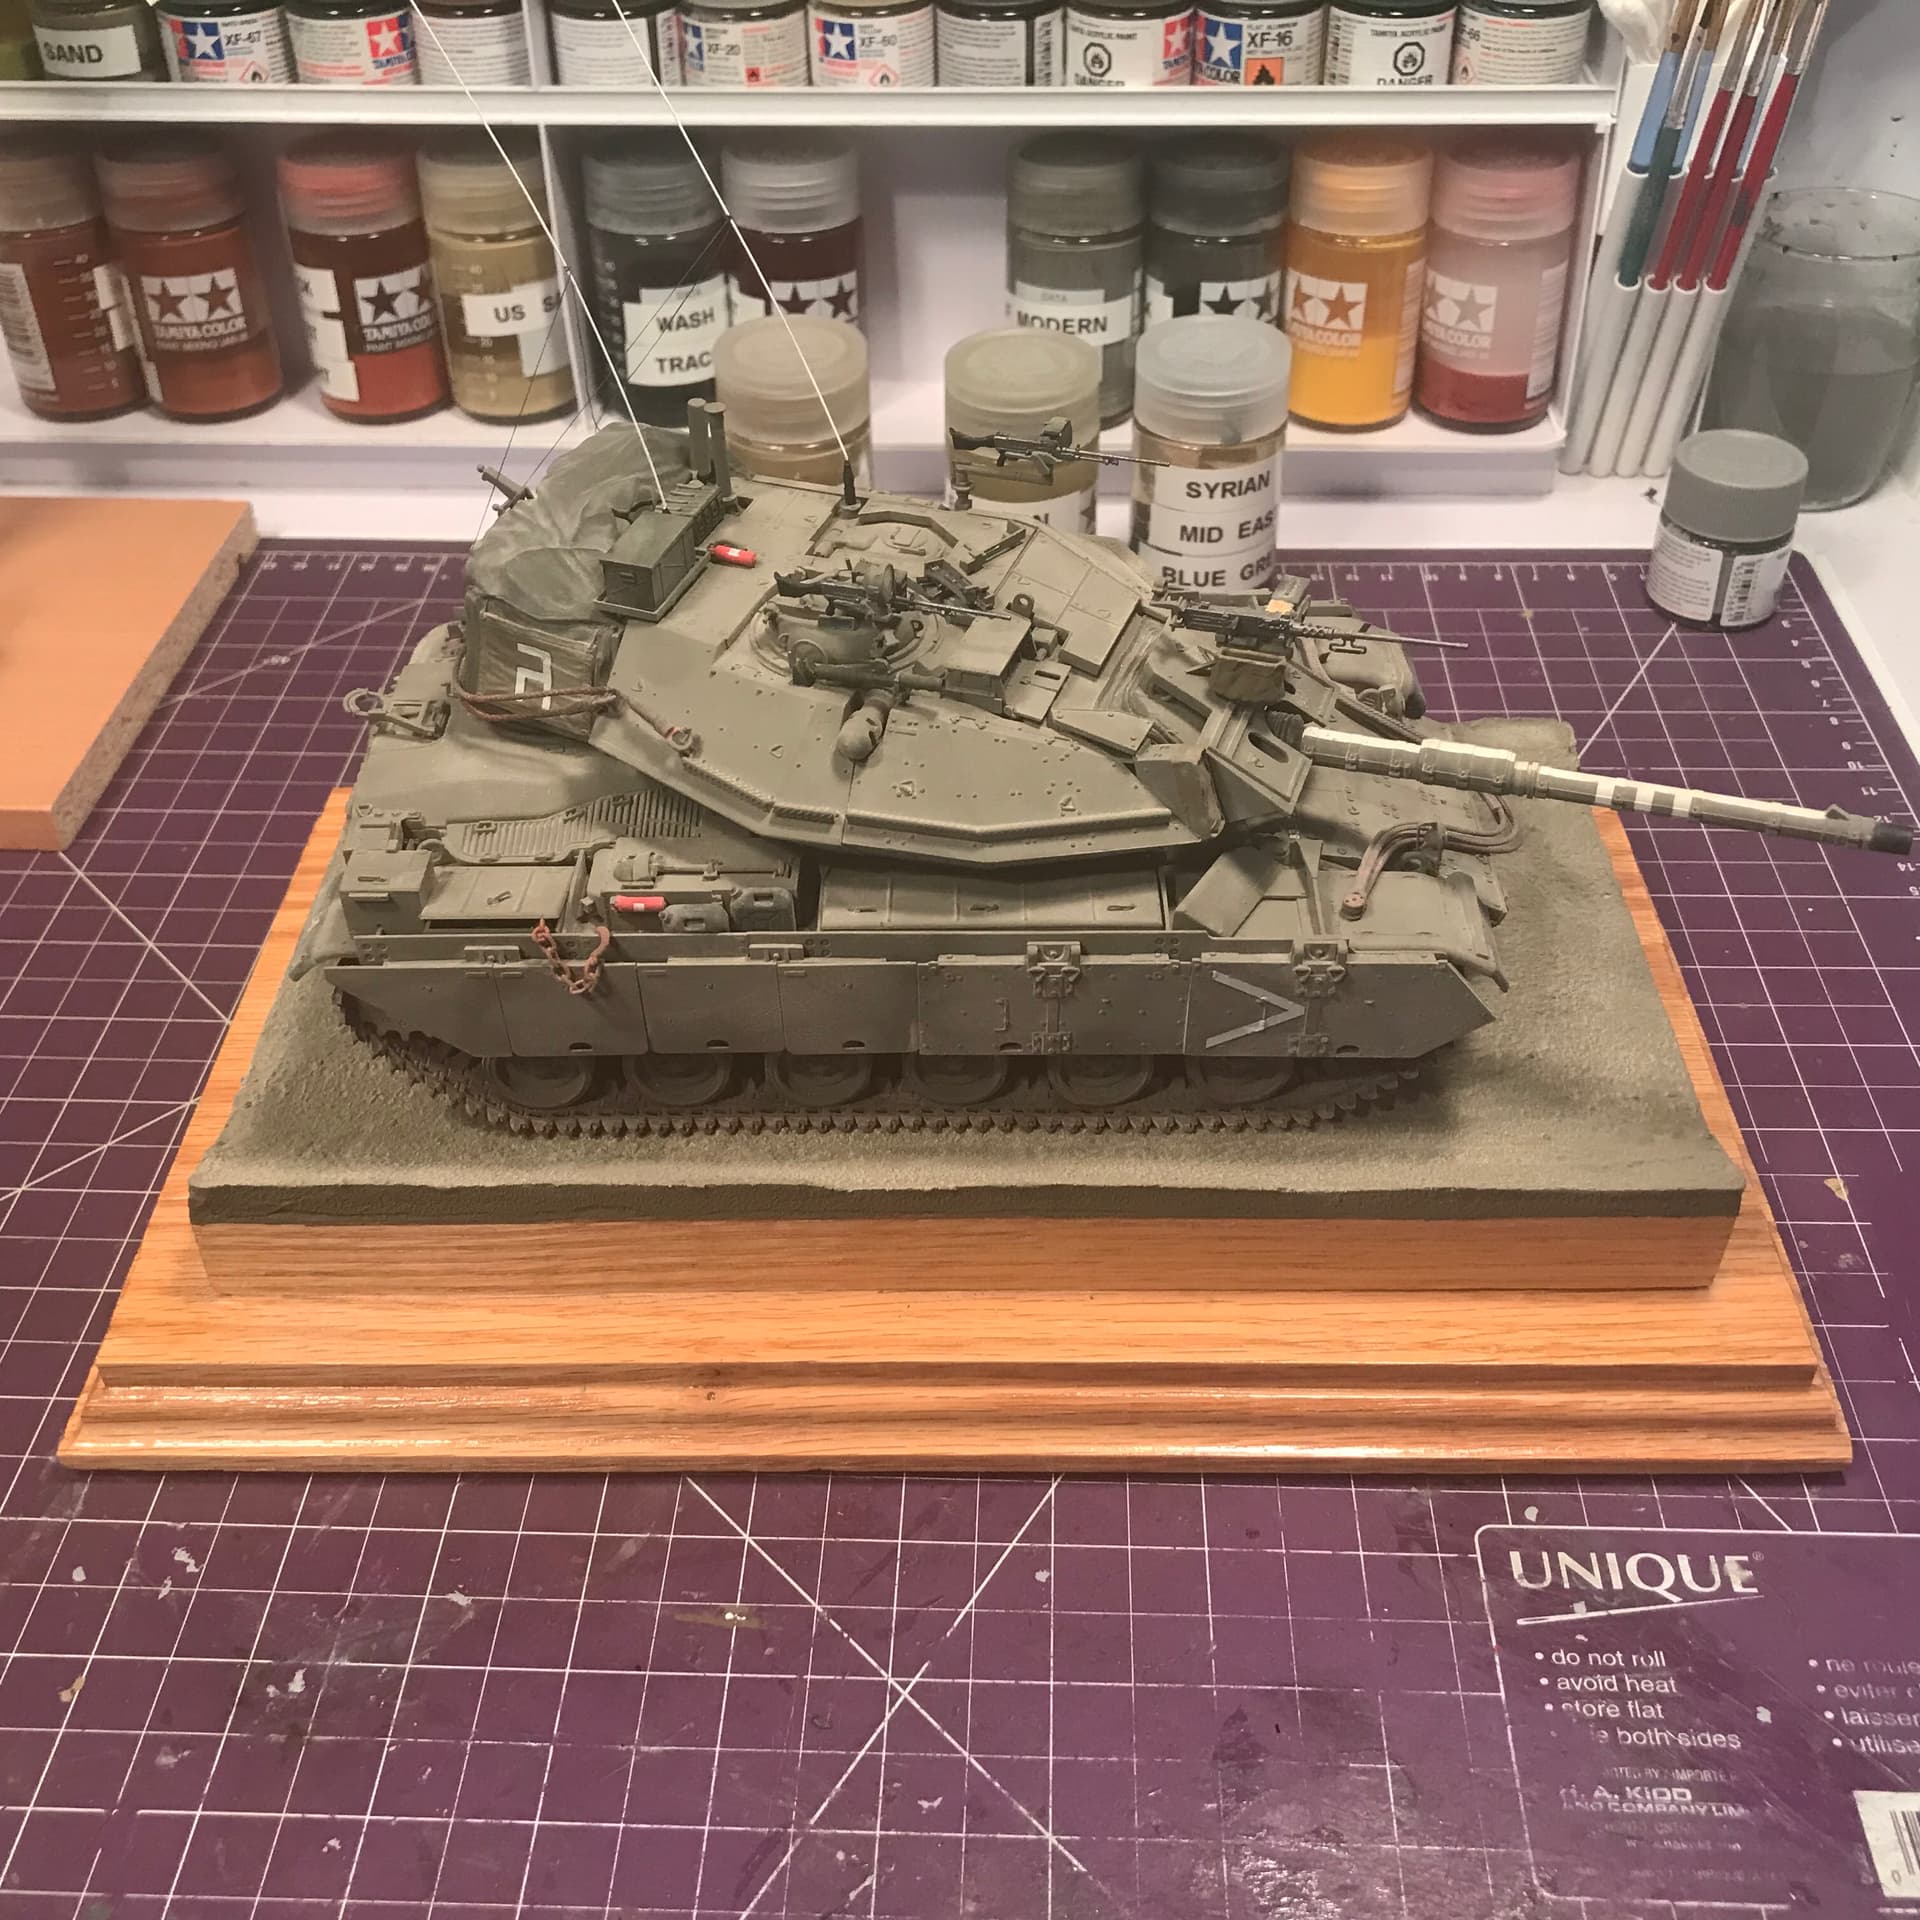
Wow did someone say detail? Unlike the Academy (admittedly a MUCH older kit) this baby sure has it! Easy to see why people pony-up for Meng. Here is the turret partially complete, just a few hours in. I still have a-ways to go, but wow the engineering and fit of this is just superb.
Note that even the mortar is properly hollowed:
Purcahsed at the AMPS show in Columbia SC earlier in 2021, In the box there was this Legend resin stowage. Not sure if this is exactly correct for this guy, but I broke out the Dremel and, via a cutoff wheel followed by a drum sander + time, came up with something rather nice
here is the before and after on the grinding. So thankful I have a respirator. Look at how much I had to remove!
Here it is simply lined up and press-fit. Still a little line in there, and may require a bit more once the turret is complete, but I rather like what I see at this point.
So this is where it sits. As it is a balmy 70+ degrees/21.1C here in SC, (it was 18F/-7.8C this time last year), my plan is to work on the lower hull & running gear, see ya then, and please say hello and from wherever you hail!!!
Do your self a favour, don’t breathe that crap in. It’ll mess your lungs up something special and the resin is known by the state of California (and everywhere else) to cause cancer (prolonged exposure, but still).
Welcome to the madness Bruce. Nice kit and very nice progress. I keep meaning to get a Dremel and always forget lol … where are those post it notes haha. Was the resin kit inside included or a lucky break ?
make sure you give the turret a good dustoff as you dont want those particles there when you prime it … looking forward to more.
The resin in the kit was a lucky break. My Dremel is actually the Harbor Freight item. Say what you want, the $22 “Chicago .5amp Rotary Tool” works fine for me
Welcome Bruce and great job so far on your Magach m60, looks like it’s coming along great. I have this kit on my wish list too, as I am a lover of all things Israeli as far as AFVs go.
Tuned in and watching. Got this kit myself a couple of months ago, impressive detail and well researched (worth the price if you consider what you needed to buy in order to builld a 6B Gal before this kit).
You doing an excellent job Bruce!! Working with a nice kit does make a world of difference. Once I get my studio put back together I’ll have you over for a paint and bull session.
I am following with interest. I have built the oldest Esci version (loved that graphic on the box!!!) and later the Academy which was lightyears superior to the Esci in details). Had no money yet to buy the Meng offering - perhaps after seeing your kit completed?
Turret purty-much complete. Again I say that I understand why people pony-up for Meng. Everything, from the part arrangements on the trees to the fact that even the smallest parts can only be installed one way really speaks to the engineering.
Still a few bits to attach here and there, but she is looking good, and that resin is the stuff, man. Note that the barrel is only press-fit as it still requires work, but she is otherwise GTG
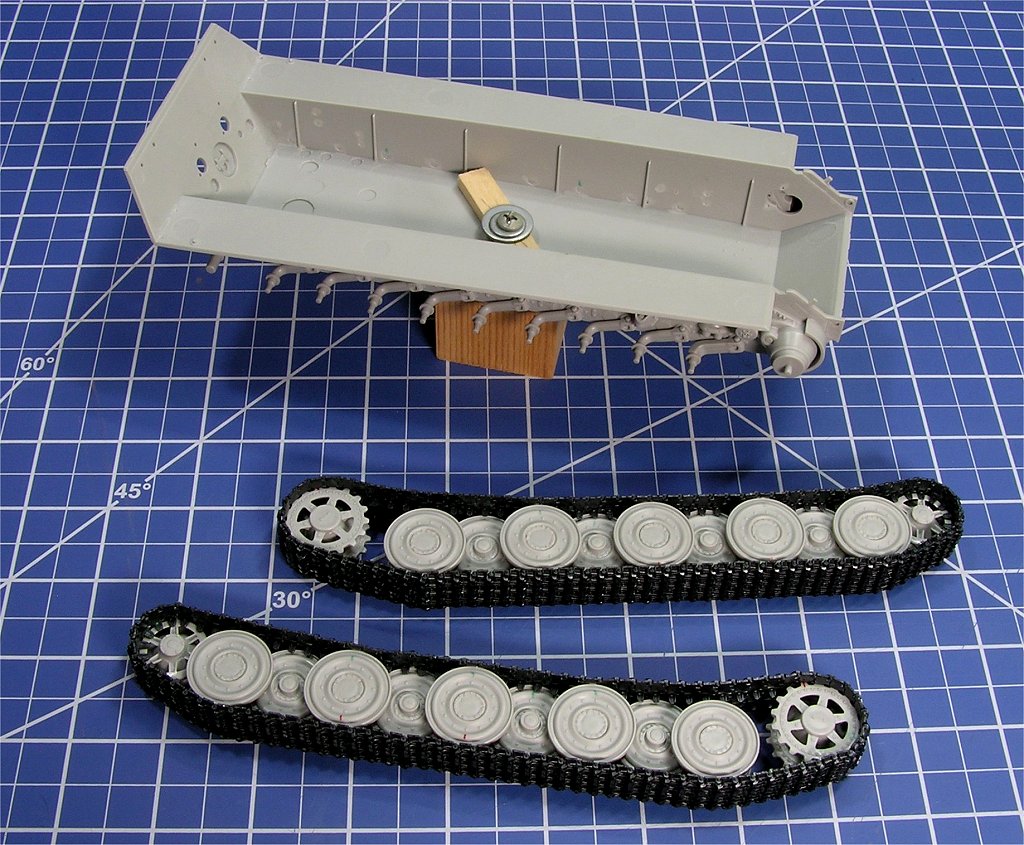
Well, I guess I got a bit too cocky, and made a mistake! I wanted to make the tracks and running gear removable, but had already attached the return rollers. So I figured I would just paint the lower hull and the tracks to make it easier. OOOF, not a good idea! The paint was the old Model Masters Enamel IDF Sand Grey, and upon further investigation, it appeared that this may not be the right color – ARGH! Also, as I am sure most of you know & I just learnt the hard way, painting means t you have to turn around and remove any paint on a surface you intend to have adhesive. So I spent the last 1.5 days, maube 10 hours total, fixing the issue. I also built up the tracks. The tracks are 101 links per side, and they require 5 cuts per link to remove from the sprue, so you’re looking at a handy 1002 cuts to get them off, less any cleanup, plus the pins (see below)
Here I did not care for the little jig that Meng provides. I found it simpler to do them three at a time. Just attach the ‘nub inside that one track, rock together, and pin as shown:
Really built up pretty easy. Next I had to then all the mounting points for the running gear, then mount/remove as needed to determine where wheels fit on the track, then get that attached. As you can see, one side, no prob, but another fell apart when I tried to remove it for pictures, so I get the fun of that repair.
I can’t fault Meng for me being a knuckle head. And in retrospect, had I followed the instructions, I would be ready for paint, so anyone thinking of doing this kit, keep that in mind. So for the next day or so it’s all about the repair and getting the upper hull on and ready for paint. Till then!
Looks like it is coming along well, even with the difficulties. Yeah, “working” track is pretty much a gimmick. I always glue the track in place after I have snapped it together. I paint it after I have the whole run assembled as well. Keep up the good work.
Don’t sweat the paint issue, just remove it as you need and reshoot it when you lay down your finial colors. As noted above, gluing all the links together while mounted on the vehicle is the easiest way to go. And once dry, over night, you can pop them off. I totally agree with @HeavyArty that workable tracks are a gimmick and a total waste of time and effort, unless your articulating the suspension and roadwheels, but you would still glue then in the end. And to advoid confusion one would NOT do this with metal tracks…obviously
Here’s a quick shot of a set of Panther tracks I did with all the links glued together…
When building I noticed that there are three different sets of Location holes to drill out for Building this kit. The third set are all labelled 7 which hopefully means I’ll be bringing out a Magach 7