Assuming you have your bows in place, your best bet is to drape tissue paper over them and then wet it with a mixture of white glue and water. You can manipulate folds into the tissue and you can also roll it back after it starts to set a little bit. Is method produces very nice results. As with most projects, I like to make everything a little larger to start and then trim to fit.
Others might want to use very thin Milliput but I prefer the tissue paper method.
Thanks for that. I’m not at the build stage yet but will follow your suggestion when I am. I had thought about a practice run using a spare Italeri M923 tarp. A lot easier than sliding material over the bows I know but- its a try out right? What I’m most concerned about is the process of folding wet tissue paper back on itself to “gather” it at the front bows.
Never tried anything like this before so a bit trepidatious…………
Follow @18bravo 's suggestion. The secret to making this work is do not use toilet tissue or paper towel. Use gift wrap tissue. It won’t fall apart when wetted and it has a finer texture. Use the white glue solution, or VMS makes a very good product called Paper Shaper. Don’t worry about the edges; trim them when dry. It’s easier than it sounds, keep making them till you get a good one.
I would suggest a different approach and material depending on your desired results. Making rolled tarps (and other storage) from two-part epoxy is a fairly straight forward job that only requires a bit of practice and experimentation.
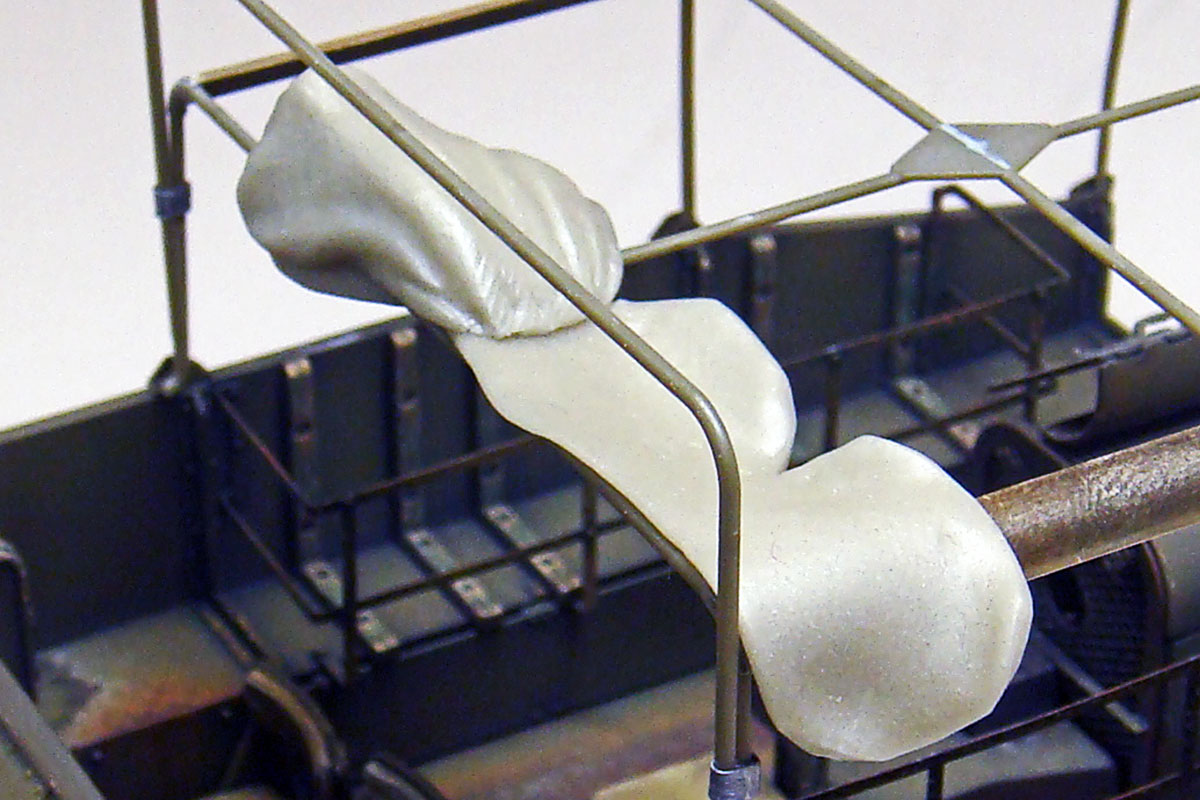
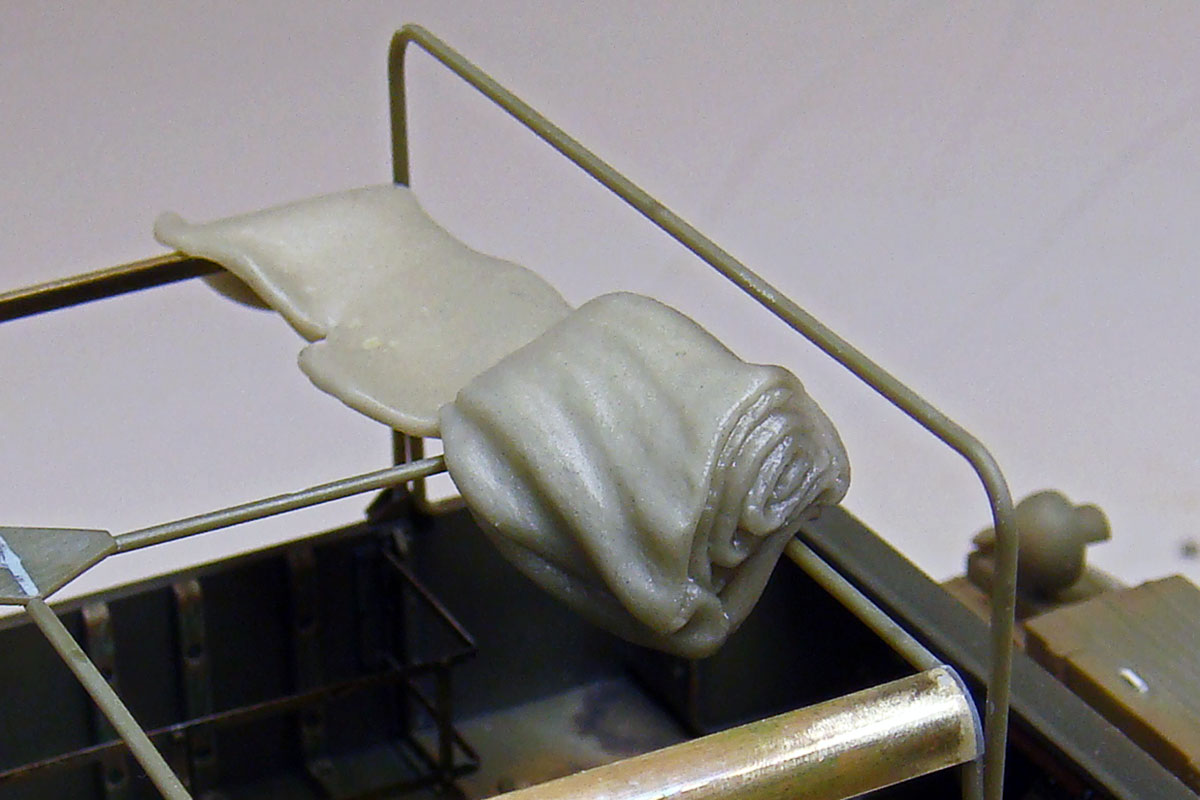
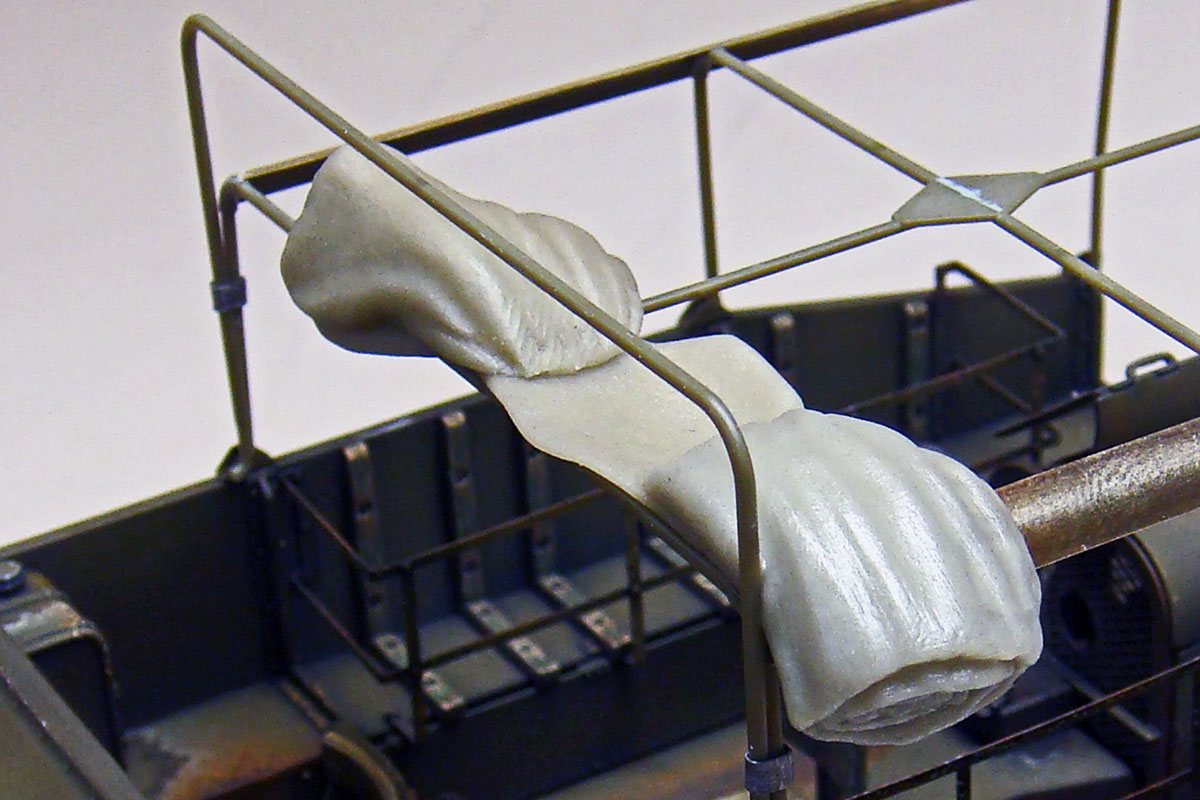
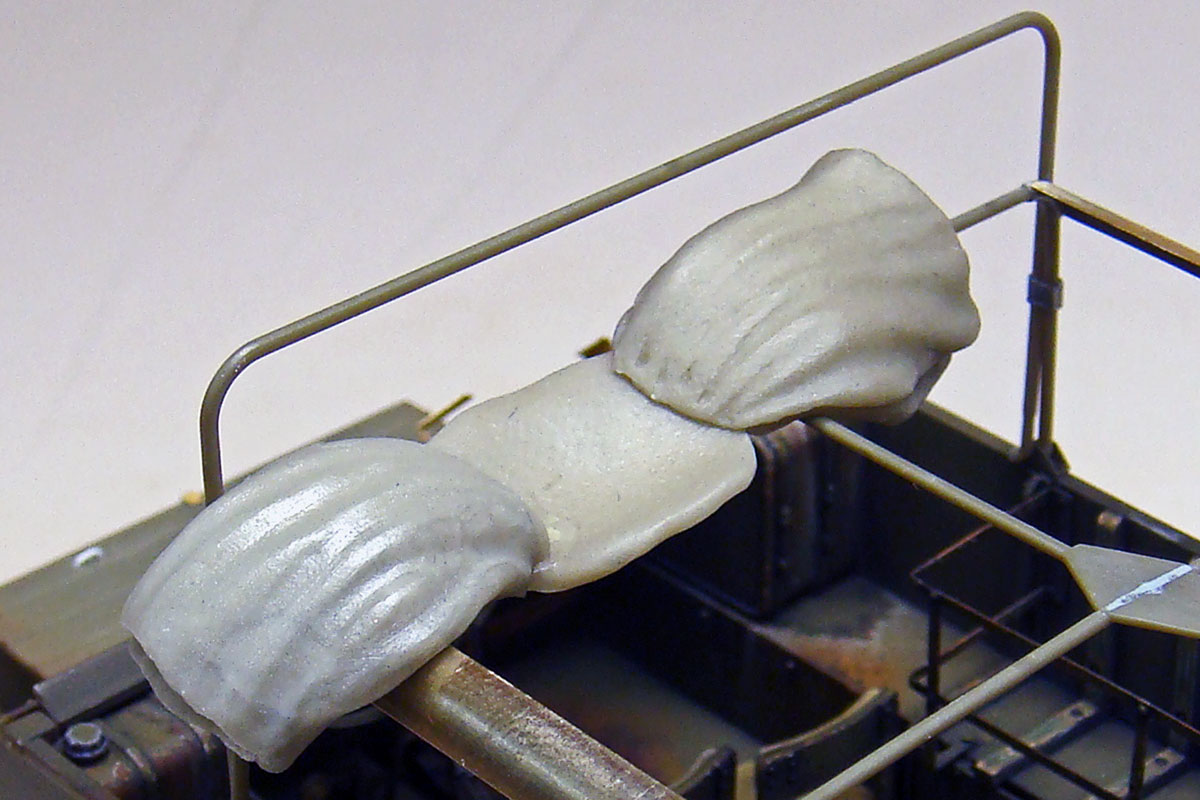
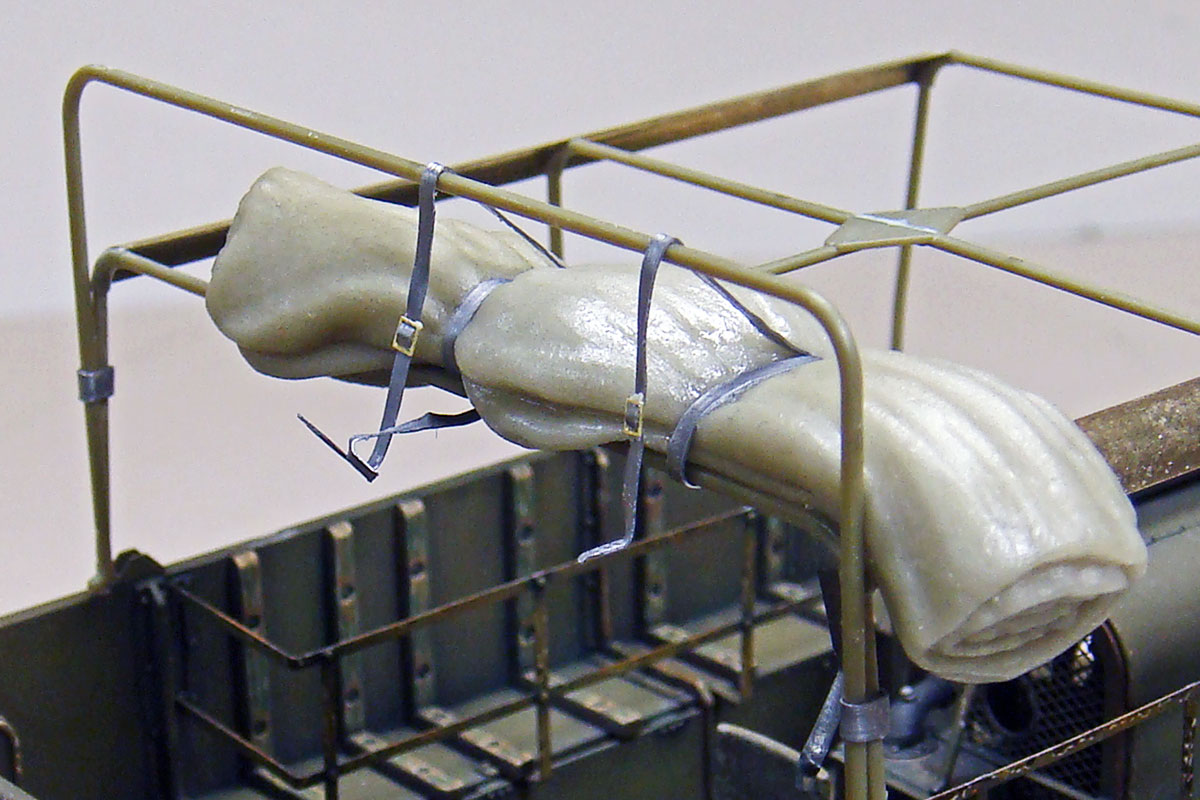
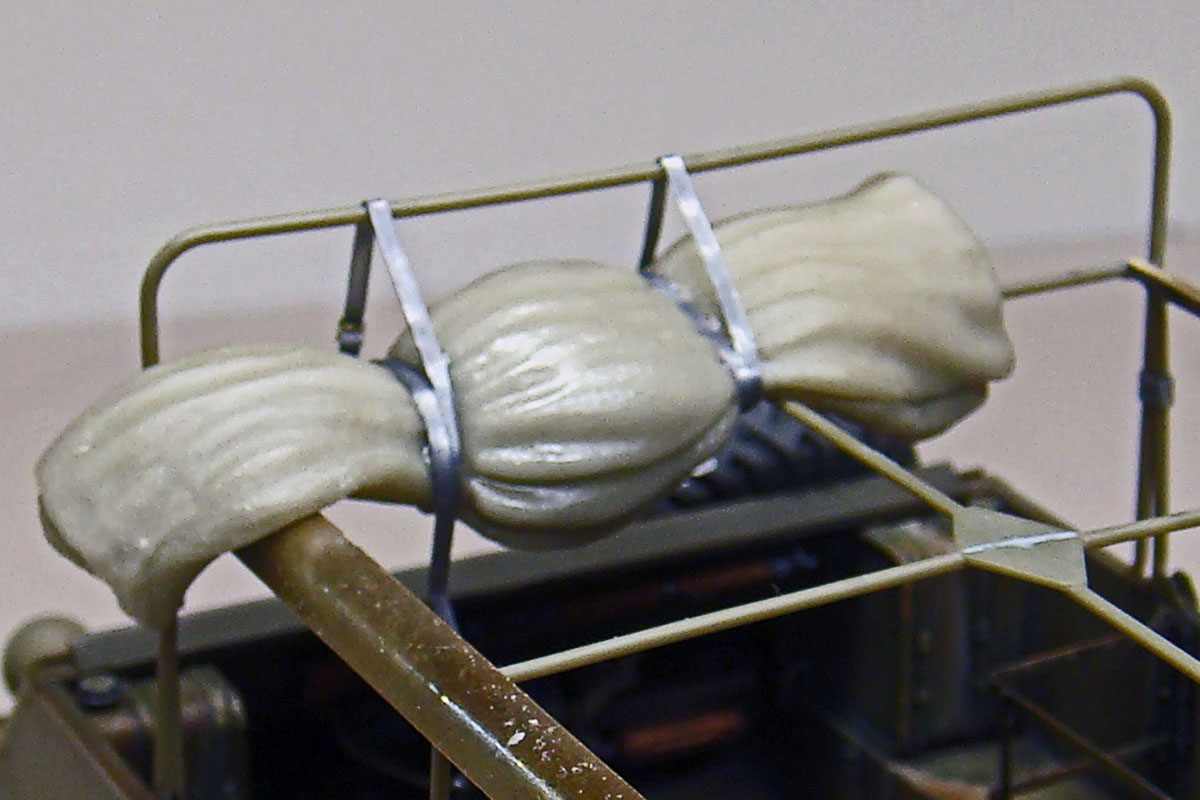
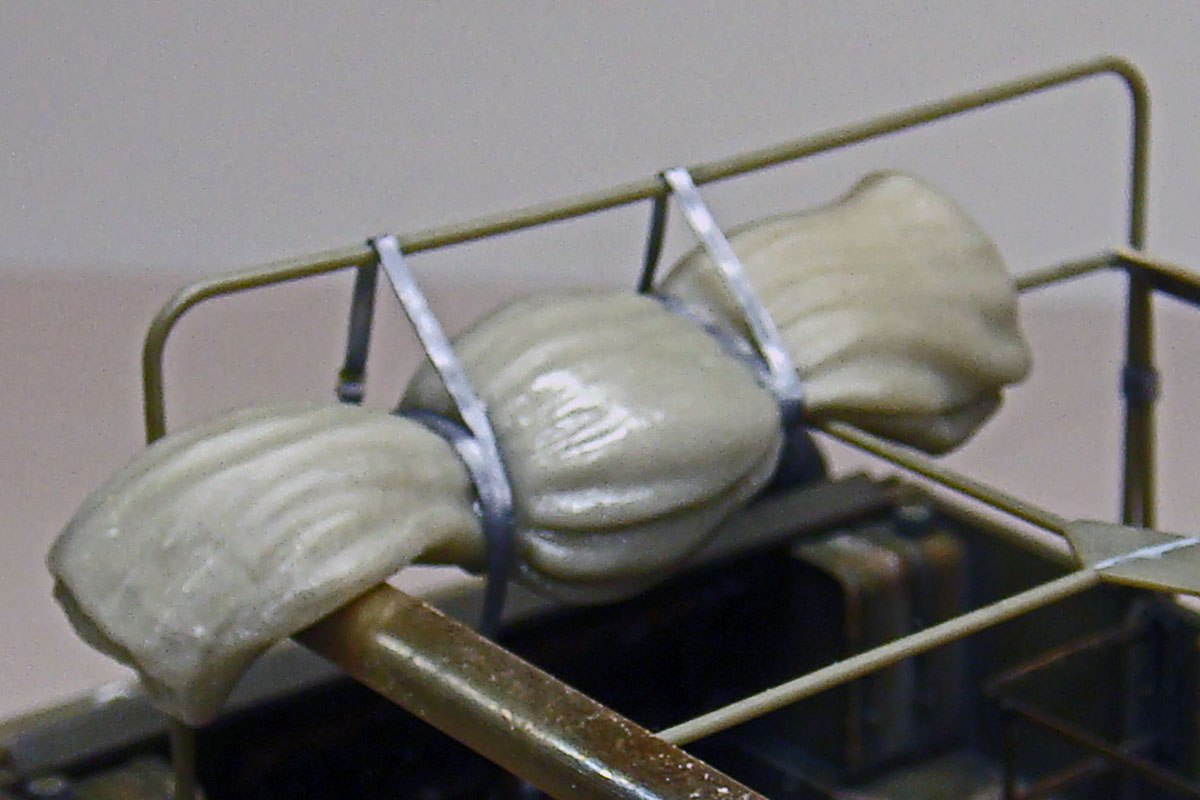
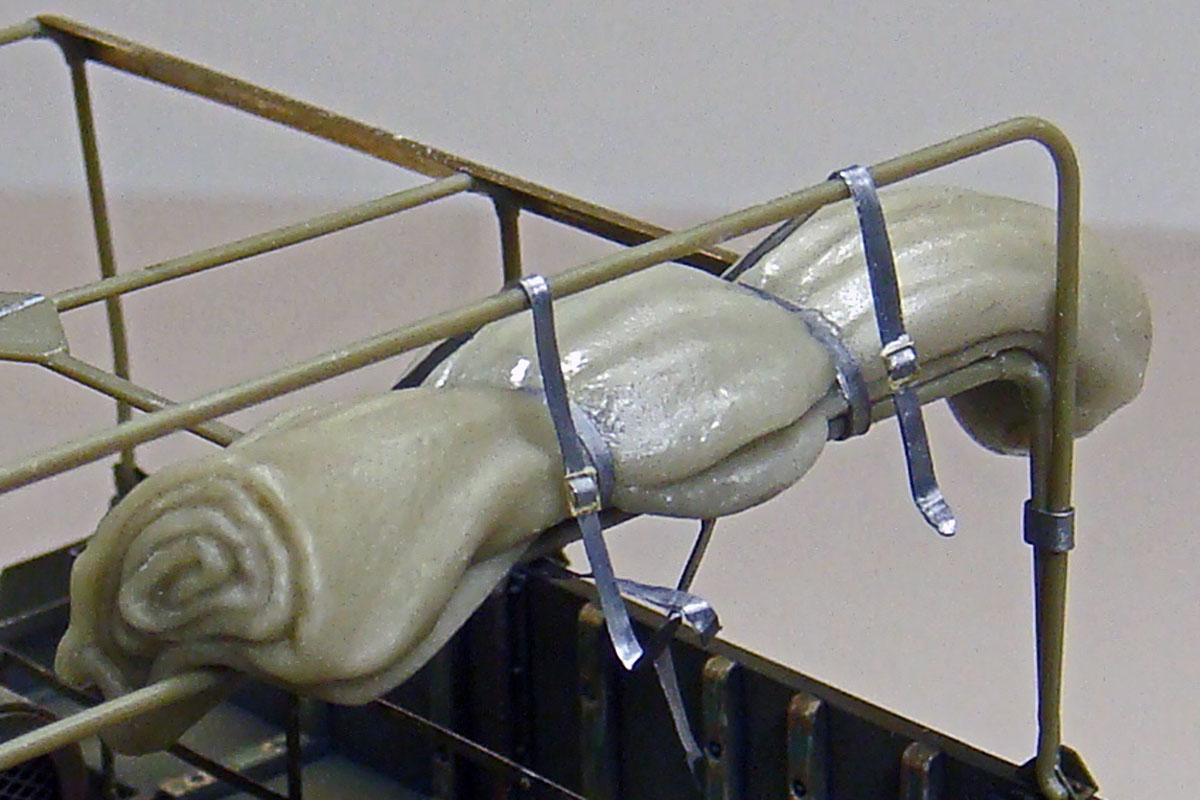
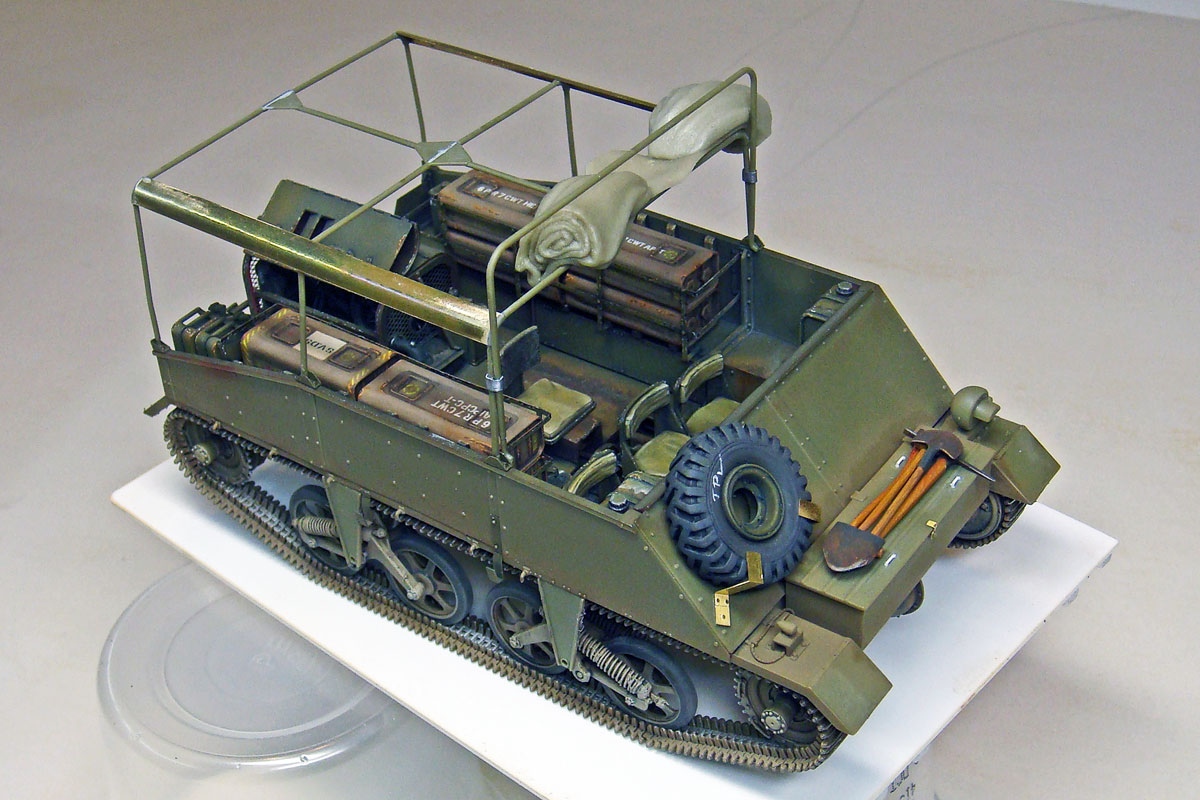
These photos are pretty self-explanatory, I think. Use a bit of talcum power on the putty as a release agent to keep the bottom piece from sticking to the model. Don’t try to make the entire tarp in one go or from one single “blob” of putty.
Here I stated with a flat, “peanut” shaped bottom layer. I molded that to the space and allowed it to harden, which then gave me a firm surface to work on with the rest of the tarp. As you can see, the ends started off as “cones” with the spiraled detail added to the ends, then the cones were placed on the “peanut” and the longitudinal wrinkles and folds added. Again, these were allowed to harden before the center “roll” was added.
I made the lead foil straps ahead of time and had them ready to add with the center “roll.” I left these long to finish wrapping later when the tarp was painted and ready for final assembly.
I you have any particular questions, I’ll be happy to try to answer them.
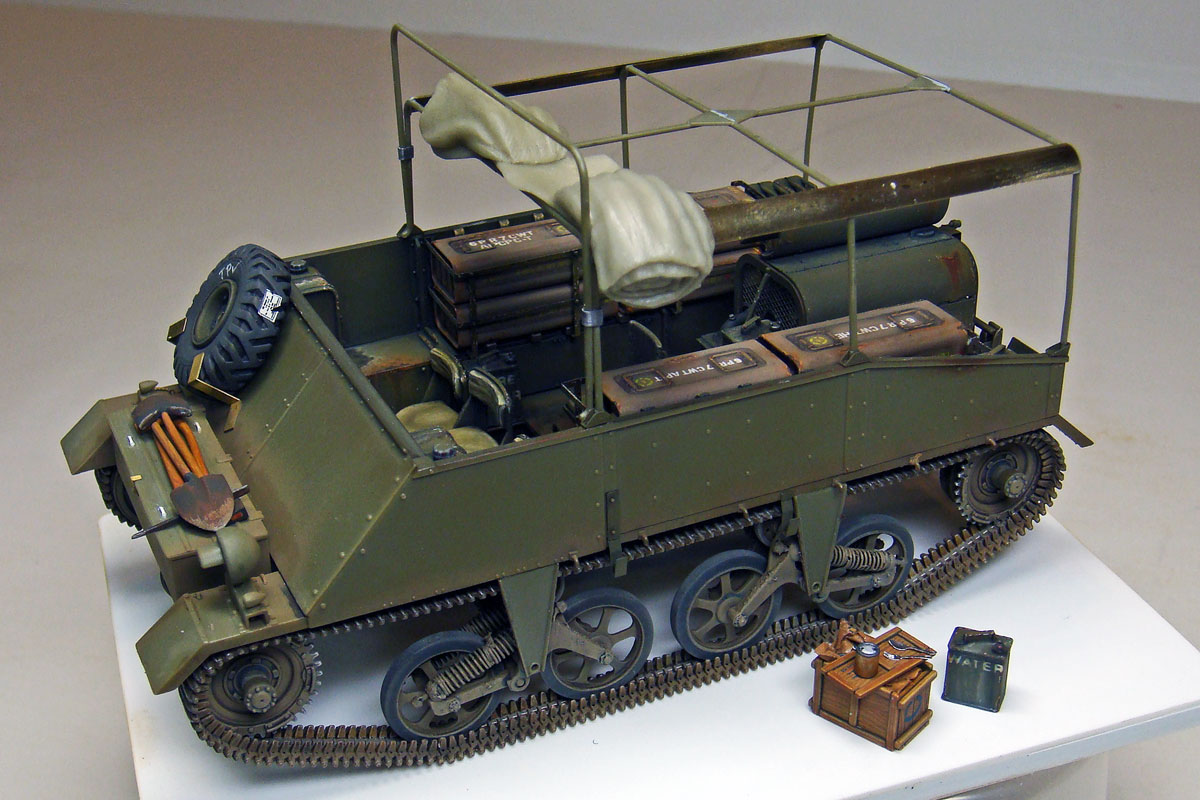
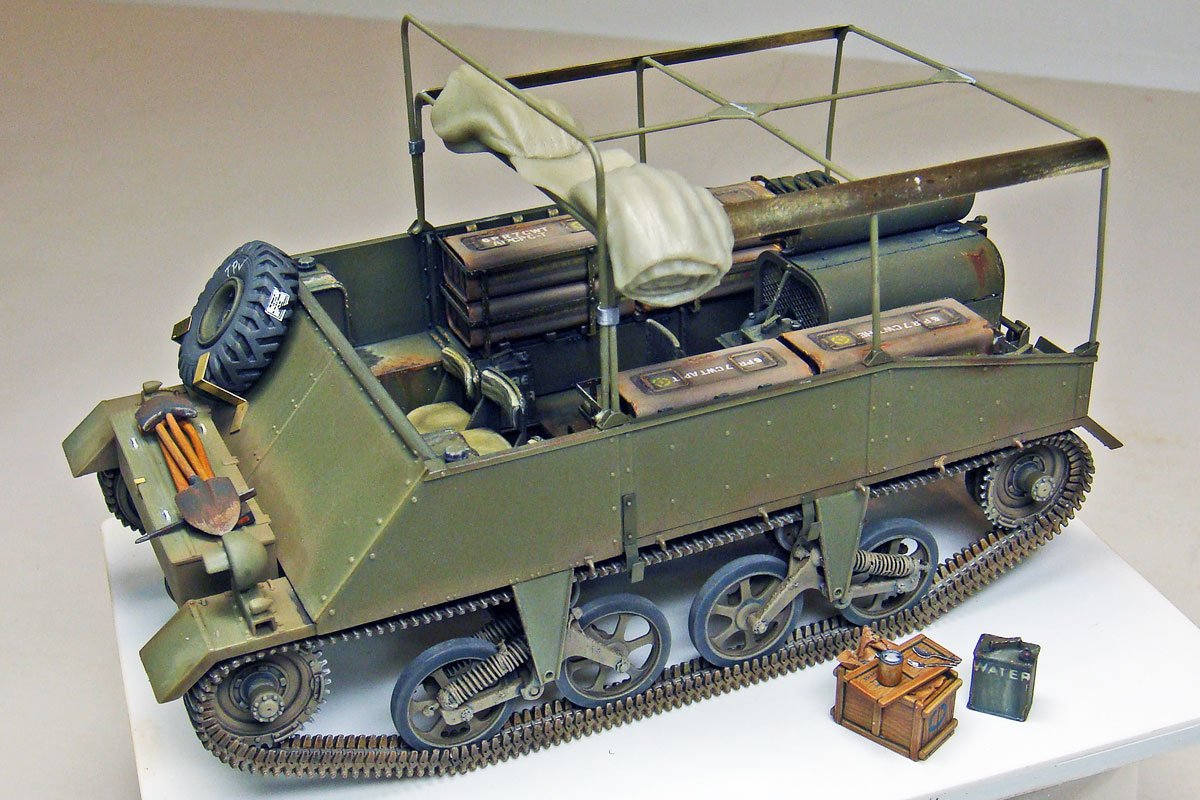
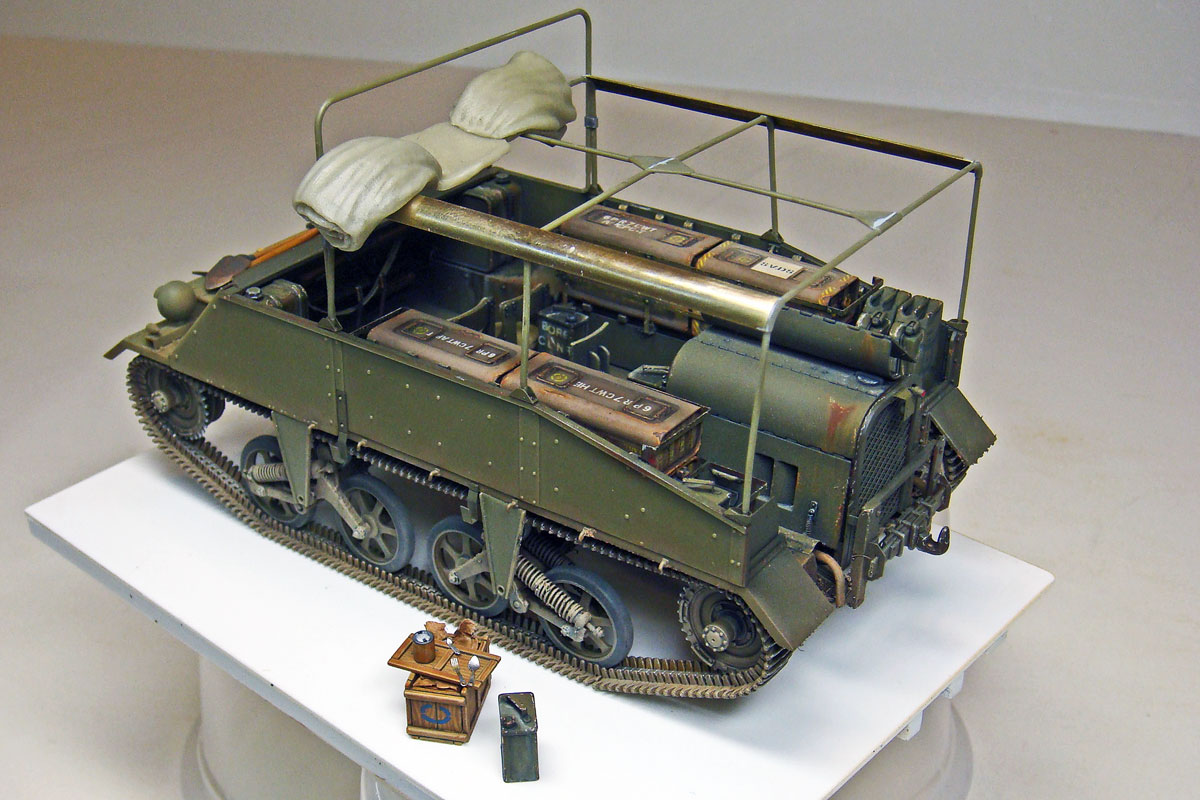
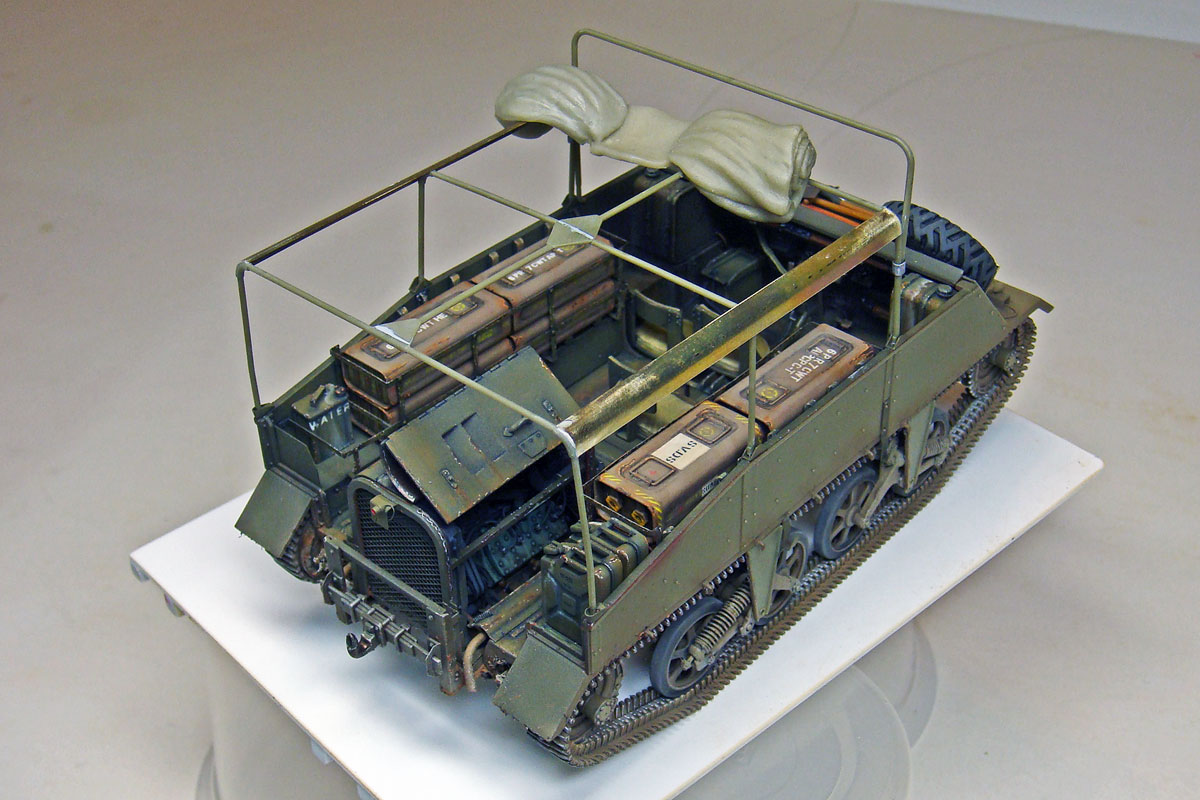
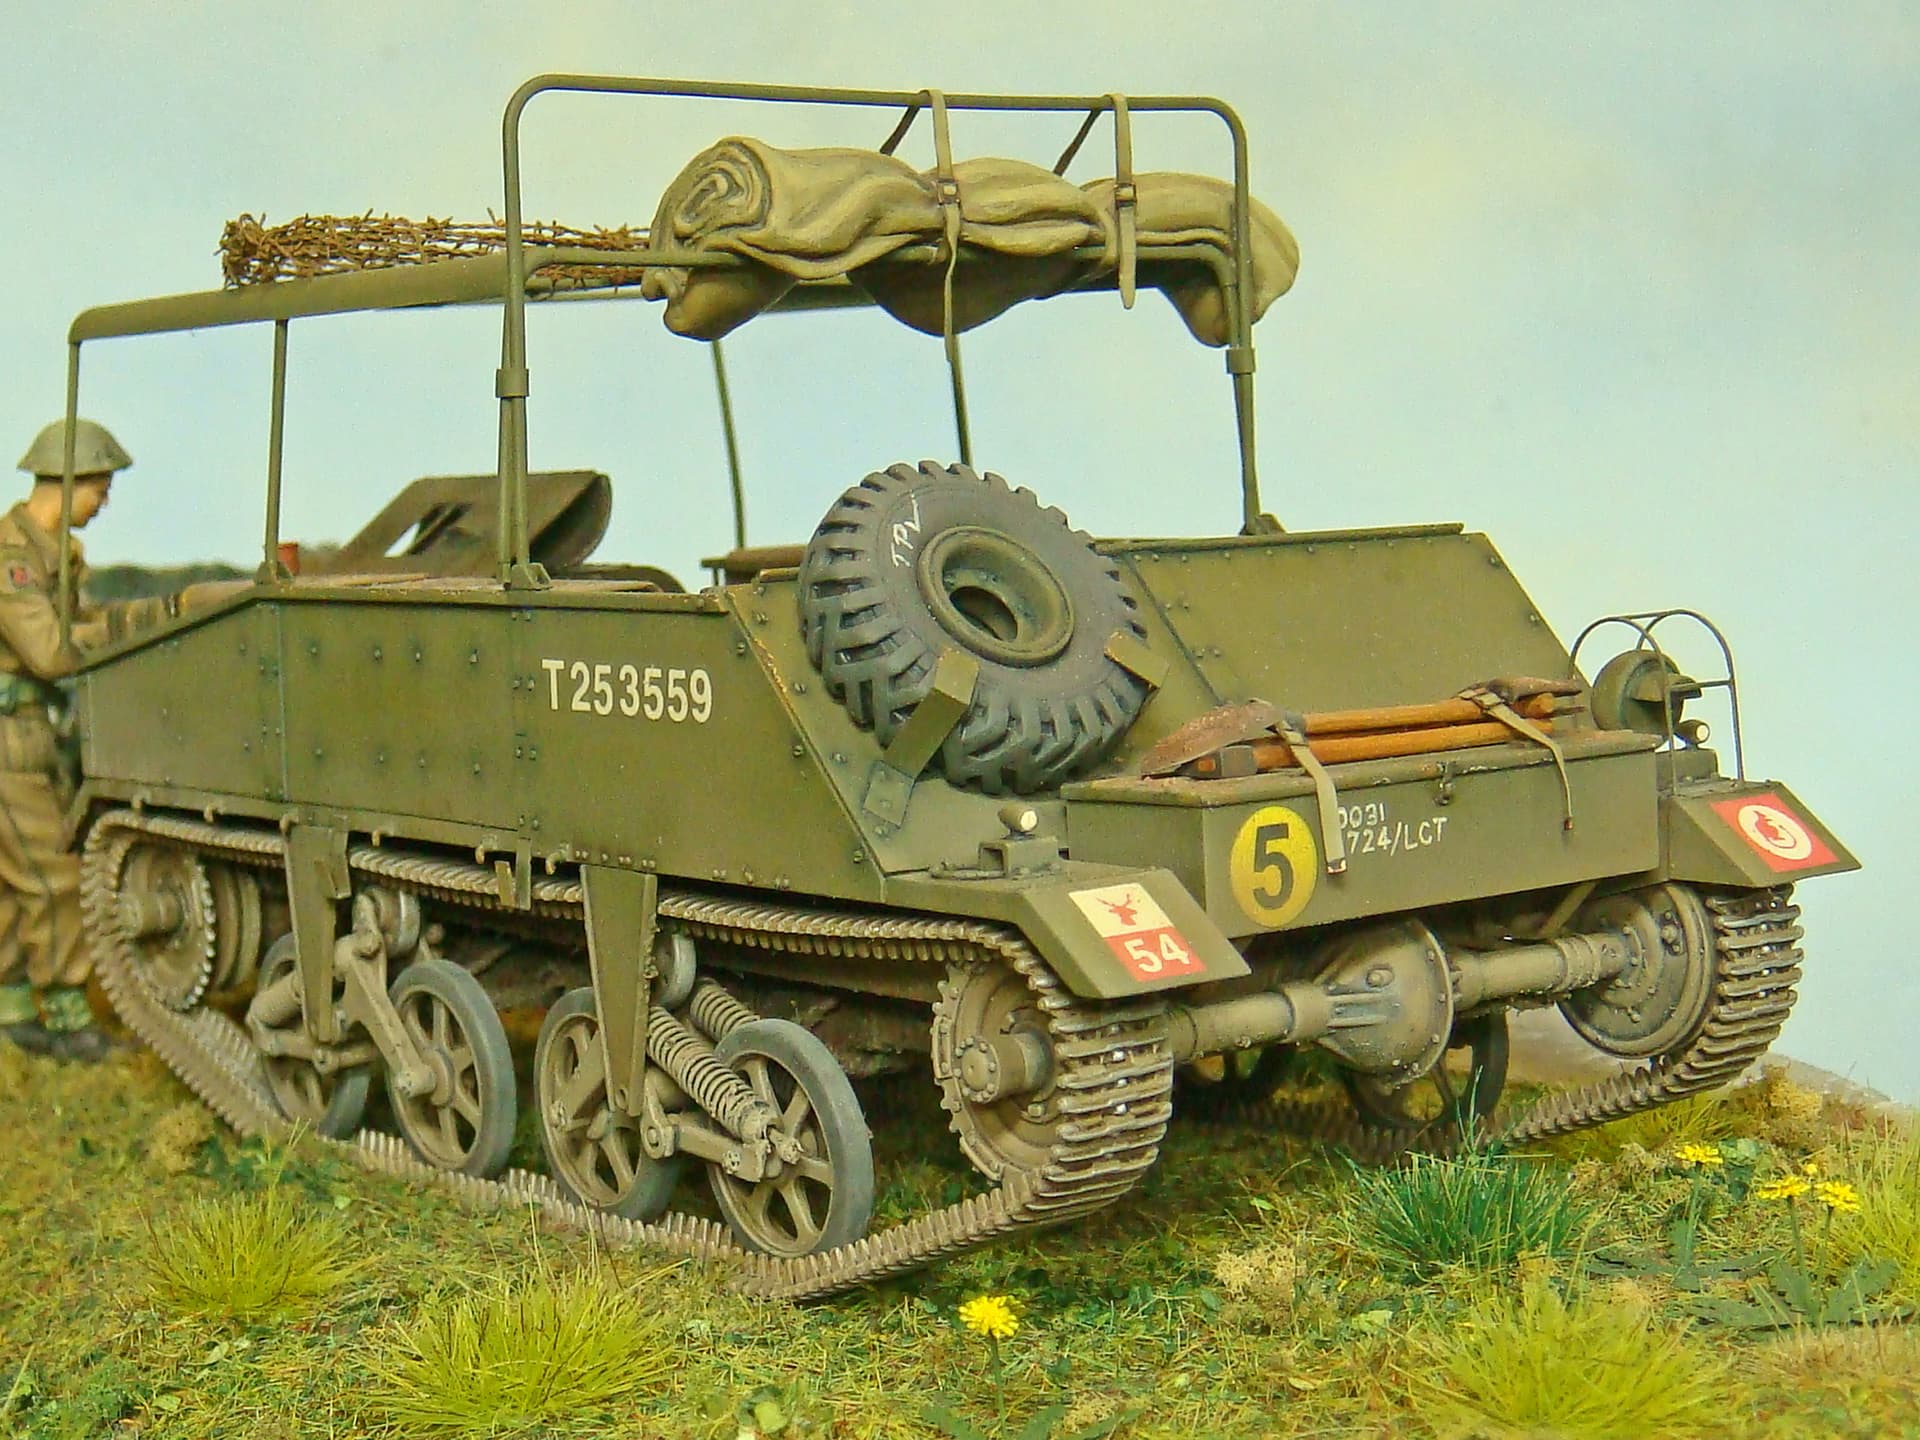
The challenge with this job was how delicate the tarp bows were. When I was planning the build, I thought the kit tarp bows with their PE sides and the diamond gusset in the center would be a lot stronger than they turned out to be.
(Part of this was self-inflicted since I wanted to keep the bows separate until final assembly to give me access to the interior of the carrier as I painted and finished the interior and stowage. Without solid connections on the bottoms of the bows, the plastic pieces were super delicate. I actually made a simple fixture to hold them for painting and finishing. If I built this Bronco kit again, I’d seriously consider replacing the kit bow parts with brass rod. Any ways, the delicate nature of the bows drove the selection of the epoxy and method that I used.)
Milliput is really good stuff. It captures fine detail excellently, but it’s kind of brittle in thin layers. I wasn’t confident that it would hold up to form the bottom layer (although it would have been fine for the larger “rolls”). Because the bows were so delicate, I needed a firm base to build the tarp on. I didn’t think Milliput was up to the job.
For this, I used Avis Apoxy Sculpt (standard gray) (along with their solvent). It has very good resiliency and for large, “mass” objects, it’s also more economical to use.
BTW, the only sculpting tools that I used were wooden toothpicks, carved and sanded to shape and dipped in CA glue, then smoothed by sanding again.
Just a thought:
Build a simple jig from styrene strips or thin cardboard as
a substitute for the bows on the kit.
Shape the tarp and then move it to the kit bows when finished.
Edit: If the jig breaks it’s not a major disaster, just make a new from cheap materials
For this build, I just decided to “bull” my way forward using the kit parts (which fit perfectly) once I got going (a bit of laziness on my part). Least I give some folks the wrong impression, once glued in place along the top edges of the carrier’s hull, the Bronco plastic kit bows are quite sturdy (as sturdy as they need to be). They don’t NEED to be replaced, but…
My choices for the build and finish sequence (adding the finished bows and tarp during the final assembly stage) as well as adding the rolled-up tarp created the issues with the strength of the kit parts. It was something that could be worked around, but I’d choose a different approach (replace the bows with brass rod) if I did this kit this way again.
I was matching some specific reference photos that suggested modifying the kit parts and the build sequence. It could be built out of the box with no problems (there are a couple of mistakes in the instructions, but that’s a whole 'nother topic for a different thread…).
I made a foam plug that fit into the vehicle and then installed the hoops onto the foam. I covered the plug with 2 part epoxy (magic Sculpt) rolled very thin. Once the putty began to set up I could manipulate it easily to add details. When it was all cured I removed the plug and refined the edges then added the open area with more thin putty, straps are either Tamiya tape and or thin lead foil.
Good luck with which ever direction you choose.
Here’s another method for making tarps: you need one paper napkin (preferably with no embossed patterns), a jar of liquid latex (stinky!), and several disposable brushes. Tape the napkin to a flat surface (not your expensive dining-room table!) and brush on coats of the latex. Let dry completely between coats - it will take several coats with a day dry-time between. When finished paint whichever color you want. When you fold it, roll it, and generally distress it, it gives the appearance of a well-used tarpaulin.
Not yet. You make a good point but Im go8ng to be looking for a US 5-ton with some loose stuff in back, tarp rolled tothe front. It’ll be towing a genset or a piece of arty or similar.