So I have some Tamiya masking tape for curves. On the nose of my mig-21 there is a metal ring that needs to stay metal. There is a nice recessed line between it and the rest of the fuselage. But I’m having a devil of a time getting the masking tape to go down on that and stay nice and neat along it. Anyone have any tricks to make that … easier? Or a tip about a different material for doing the masking?
In a case like yours I cut the Tamiya tape into a very narrow strip, say two or three millimeters wide, and apply this to the model edge you want. The narrower strip is easier to get conformed to the curved surface. Then using wider strips overlapping the edge of the narrow piece already on the model, I tape off the rest of the area to be protected and shoot some paint!
I second this method, it works well, and works for cutting tape for rescribing as well
https://www.tamiya.com/english/products/87206/index.htm
One, two or three mm wide?
https://www.scalemodellingnow.com/tbpainting-tamiya-curved-masking-tape-how-to-use-it
Hope that helps.
My trick:
Cover the nose cone completely with Tamiya tape.
Measure the diameter of the circle that needs to be made, and pushone of these round shapes over the cone

with a pencil, draw a line and use this to cut the tape.
No fiddling with 2-3 mm tape 
For your particualr case, when you have a “nice recessed line between it and the rest of the fuselage” then you can cover the compete nose with 1 centimeter tamiya tape and use that recession to guide your cutter. Usually works wonders for me
1 Like
Thanks everyone. I ended up just trying again first thing in the morning when my patience was at its max using 3mm tamiya tape for curves. After exercising some patience (and pulling up the ends and putting them back down even more slowly) it seemed to conform to a straight line. We’ll see how it turns out. I like all of these techniques. Using the recessed line to guide a cutter sounds promising - would need a brand new really sharp blade of course.
2 Likes
Also, for complex curves you can use Mr. Masking SOL on completely hard/dry paint. I’d love to see a picture of your work. Thanks for posting.
I have found with this tape that it works better if you stretch it as you go. Cheers.
Phil has a thread going for the Eduard campaign.
It sounds like you have had success? Laying the tape down slowly and eyeballing the position does work well. The Mk I eyeball is remarkably accurate. ![]()
I tried some of that “masking tape for curves” but it just made life harder so I went back to my own method, cutting thin strips myself.
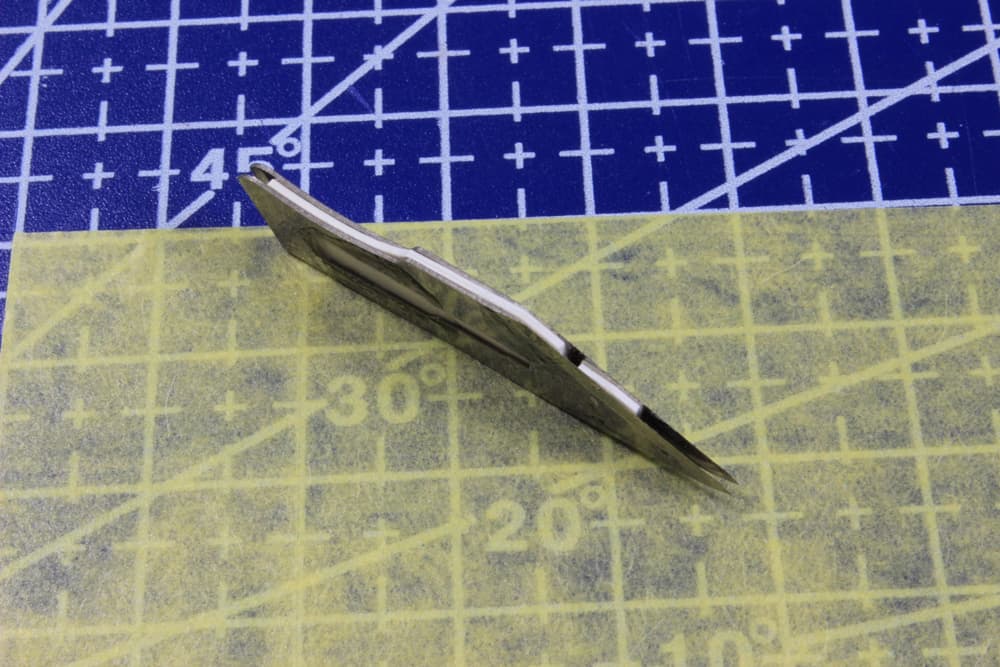
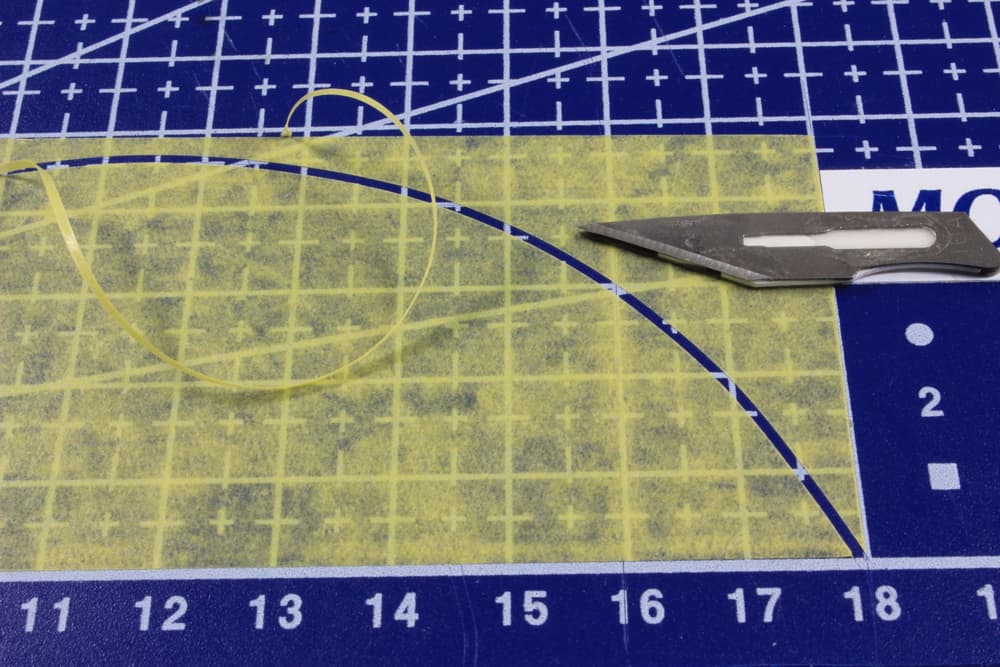
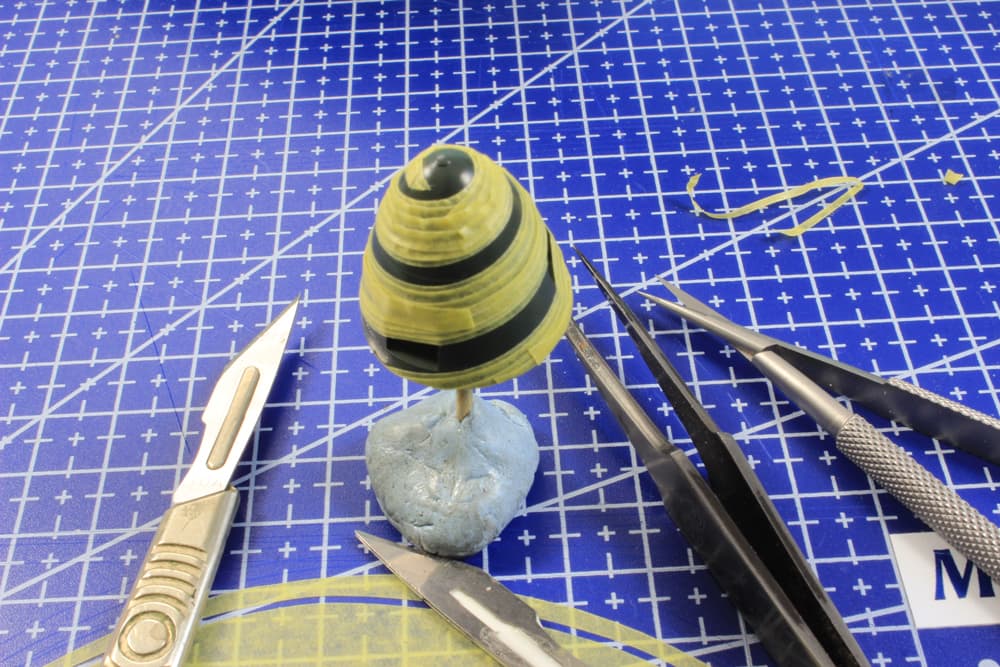
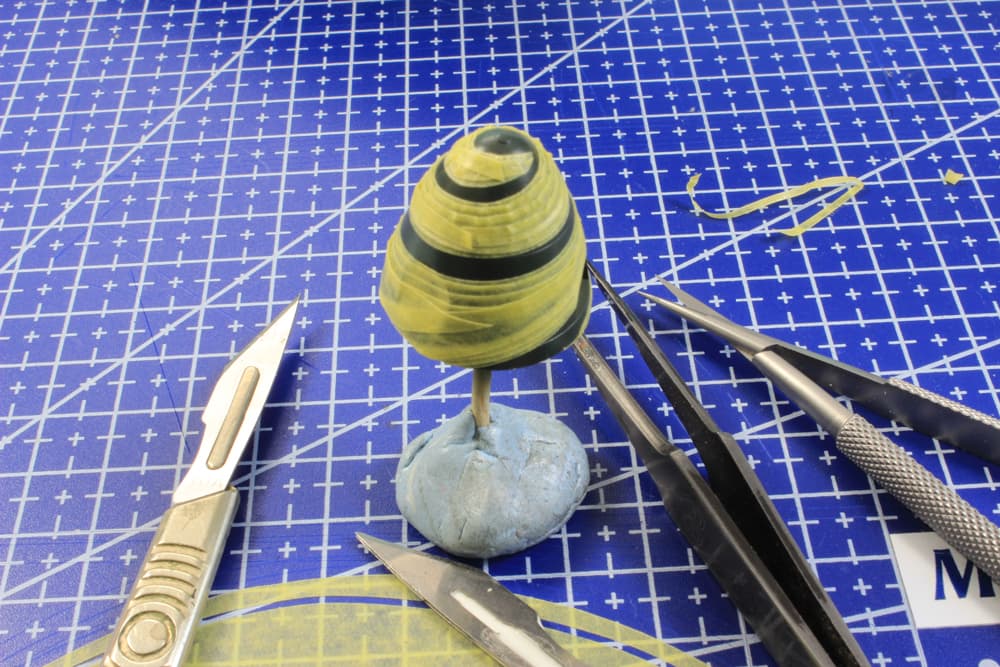
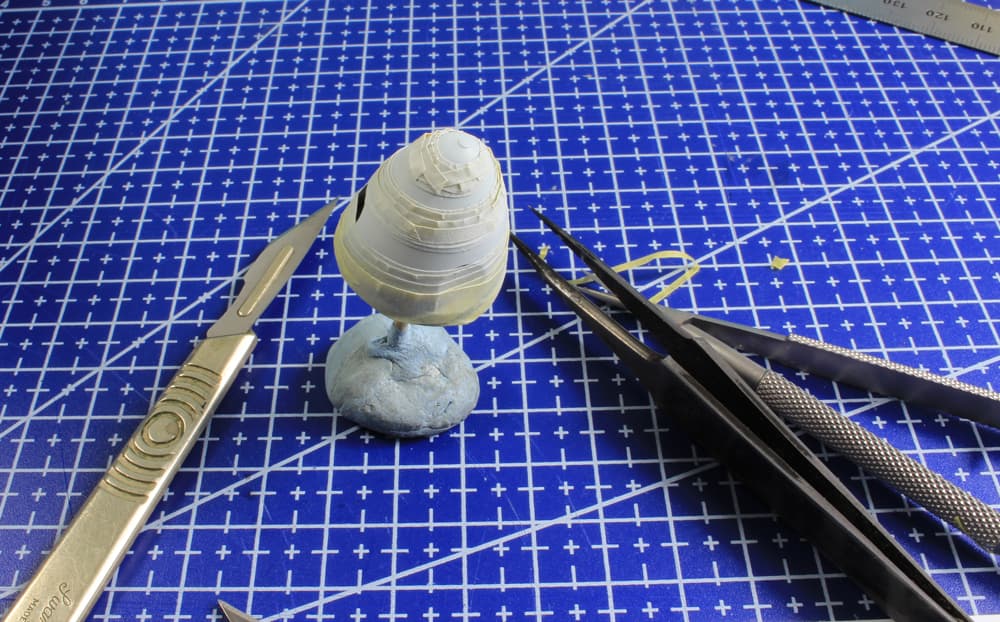
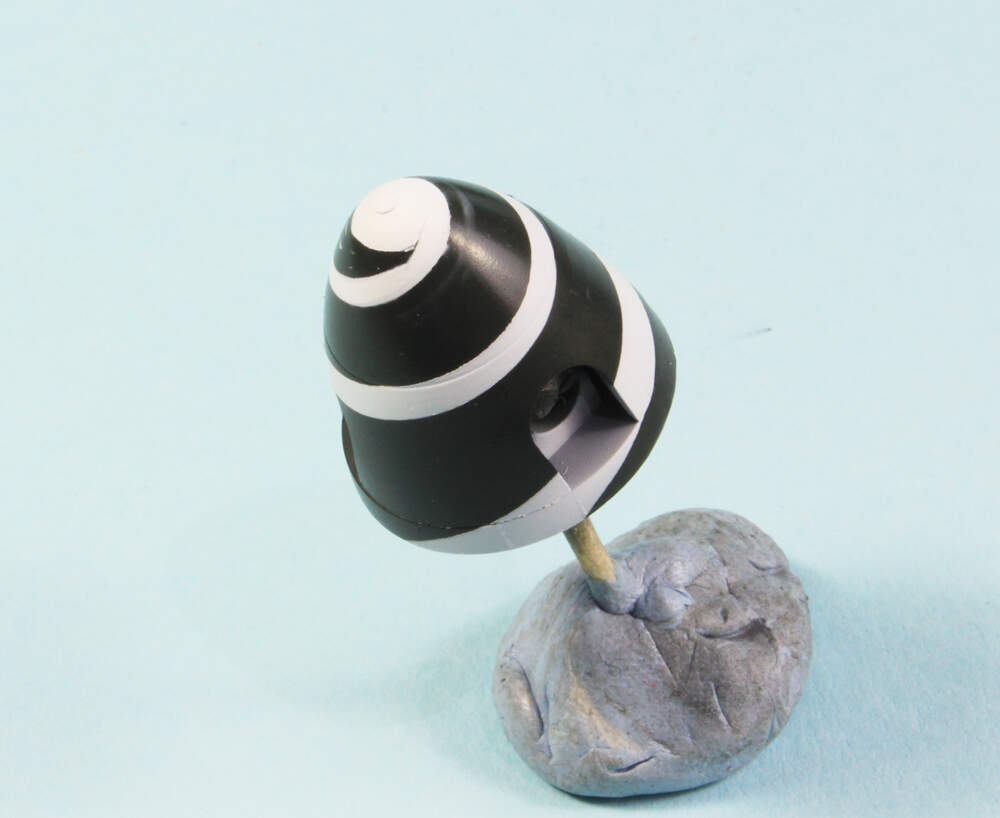
I join 2 No 11 (pointy) scalpel blades together, either with or without a spacer. The set without a spacer relies on the angle of the ground edge for separation and they produce really thin tape strips. You can add any spacer width that you like, using CA glue, to give any width. The tips need to be accurately positioned so that they are in exactly the same plain and that is easily achieved by placing each blade edge down on a perfectly flat surface (glass or similar)) and having a hard stop for the points.
The tighter the curve and particularly compound curves, such as propeller spinners, the thinner the tape should be. Use a piece on either side of the line either inside or out then mask away (inside or out) from the area to be painted slightly overlapping the thin pieces. The paired blades mean that you can cut thin strips with parallel sides. And, more interestingly, for really tight curves you can "pre-curve the tape, by cutting free hand in a curved shape, this is how I paint spirals onto spinners.

9 Likes
This is an old thread, but even so, FYI. Someone here posted their method on the old site. They used a circle cutter to make a hole the right diameter in some stiff card. They pushed that over the nose cone so it fit exactly where the demarcation was needed. A bit of masking fluid was added to the edge on the opposite side of the card to the part to be sprayed, to both hold it in place and seal the edge. Then the nose cone was painted. When dry the card was lifted off and the residual masking fluid rubbed away.
3 Likes
Brilliant, i’ve got to give it a go, nice one ![]()
1 Like