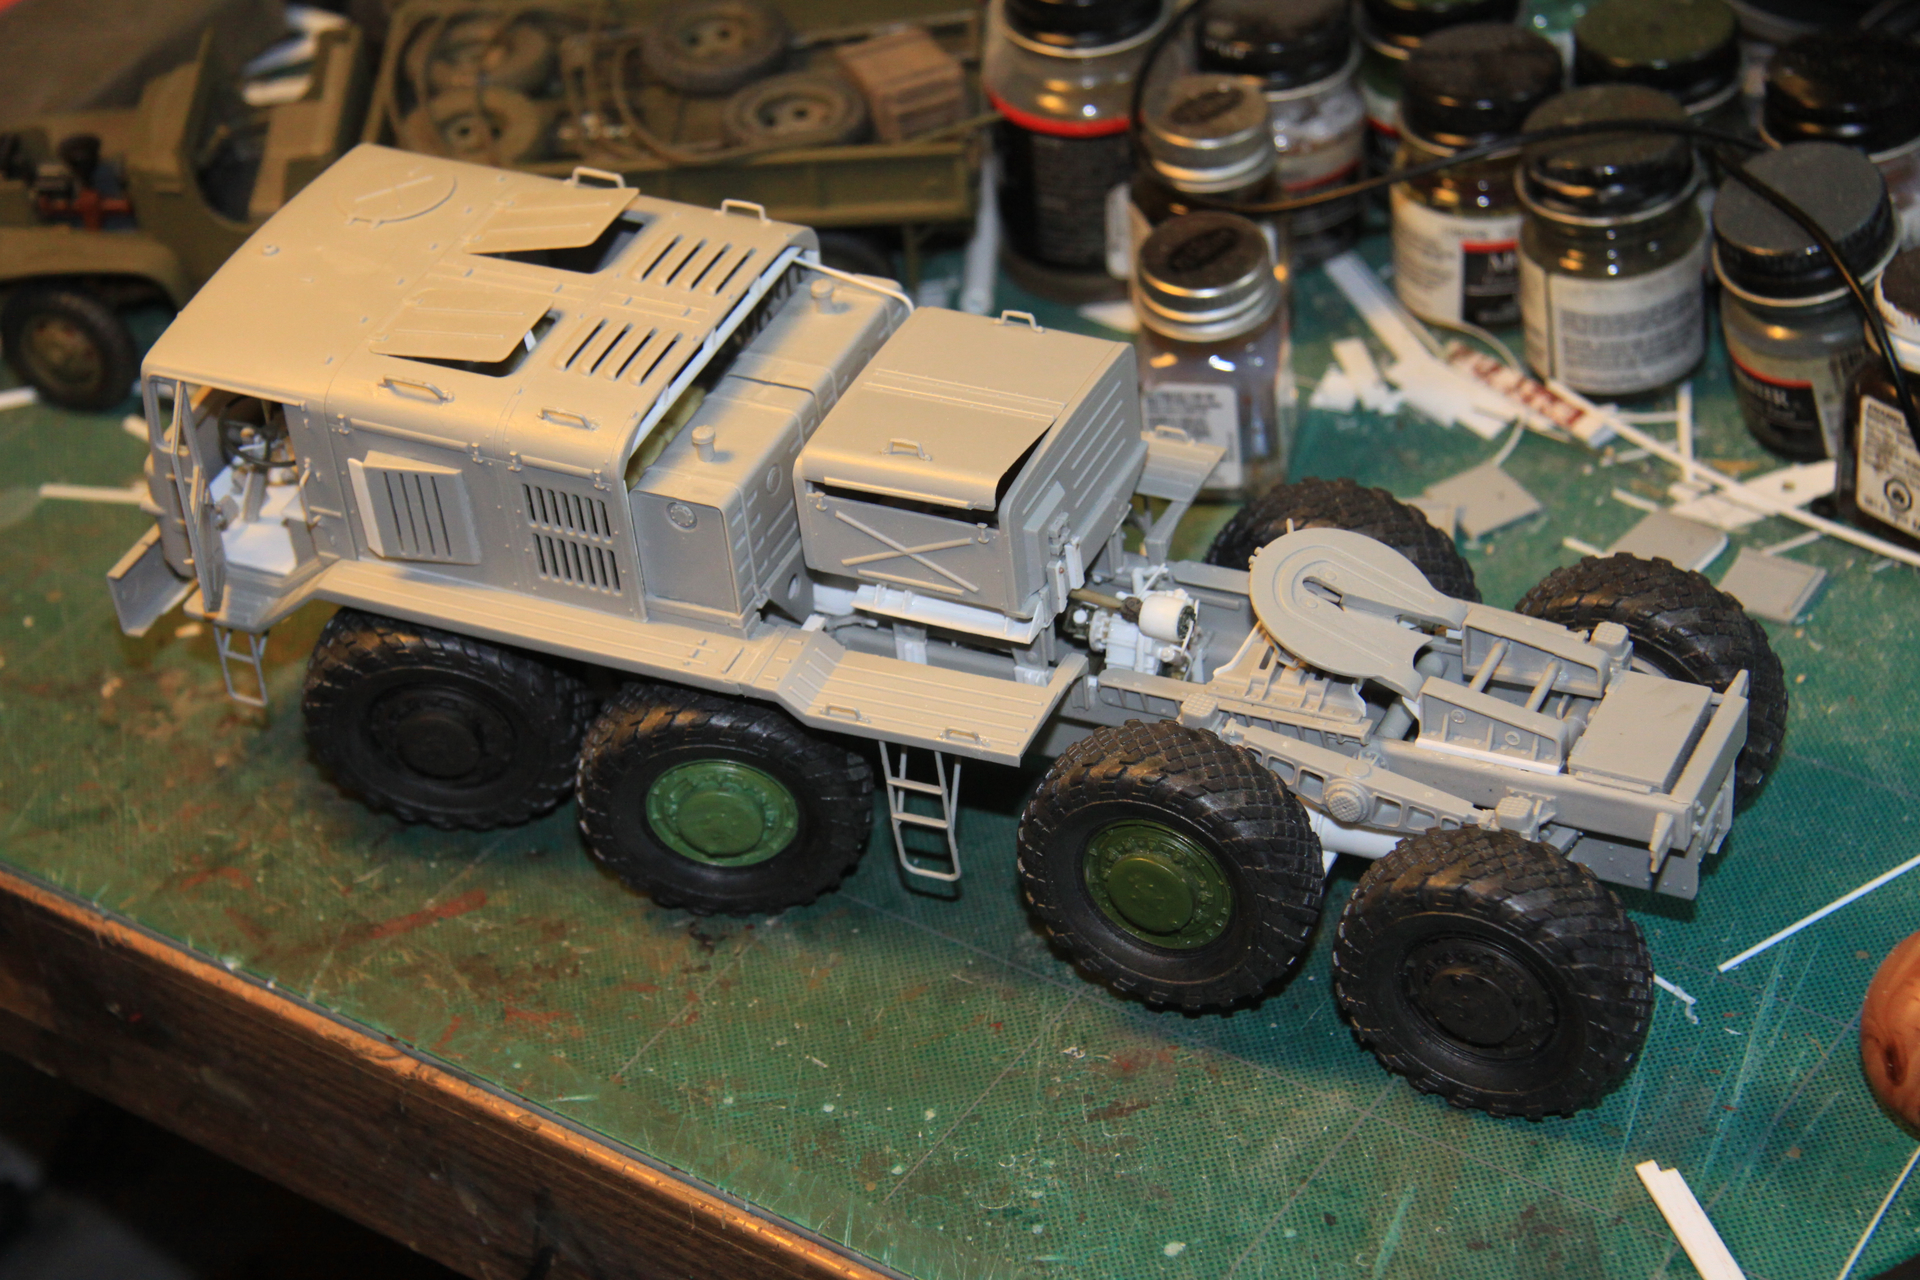
MAZ537G Intermediate type with ChMZAP 5247G trailer

I am fairly sure the earlier prototype 537 rocker arms were open like those on my model.

The plastic model offering currently for sale has certainly been done from very old molds and that would indicate that it depicts a very early production vehicle.

Here are illustrations from the original Russian TM. When building my model I was far more focused on adding just about every bit of piping detail I could discover, so I was more than happy to not add the later updated reenforcement plates to the rocker arms.

Research, research, research.


I suspect early load testing showed that those rear suspension rocker arms needed additional reinforcement.

3 Likes

I have to admit I am far more interested in the various Russian tractors:

More interested than I am in the trailers. However I did buy the MUCH MORE ACCURATE Trumpeter 7410 Semi-Tractor that includes the Trailer and am working on both of those, though it is very slow going these days.

I really like the closer spacing of those rear tractor wheels and those monster leaf springs back there.


Here is the start of the assembled trailer backbone.

4 Likes

Hello 165thspc

I’ve been waiting for your reply about the parts catalog. First of all, this isn’t meant as criticism of your work. My goal is to help you build a realistic model, just as it appeared in service. Ultimately, how you build it and what you decide is entirely up to you. I’m very familiar with the parts catalog, having worked with the original MAZ-537 for many years. I’ve always been puzzled by this drawing. I’ve never actually seen a vehicle with it. This arm certainly doesn’t apply to the MAZ-537G, as it wasn’t put into service until the late 1970s. So, it can’t really be considered a pre-production vehicle. The question also arises whether the MAZ-537G was factory-equipped with a winch. I only know of vehicles that carried the rear of a low-loader convoy without the low-loader itself. Whether it was possible to pull the two-axle low loader as standard is the next question. I’m referring to the braking system specifications of both vehicles. How you combine the vehicles is entirely up to you. You’ll have to do a lot of modifications to your partially completed low loader model to achieve a realistic one. Here are some pictures of the trailer’s gooseneck. Perhaps they’ll help you with your build.

5 Likes

Joachim

Great reference photos. I will most likely add those details when I get to them (in the distant future.)
One thing I did not understand in your comment: you mention the winch but you seem to be talking only of the trailer. Please note I built the winch to be removable so as to show the detailing I had added to the transmission. I know the winch would be vital is the tractor is working with the recovery trailer.


I want to compliment both the original Russian design Engineers and the Engineers at Trumpeter for creating an extremely rigid and solid trailer frame without the need of internal metal reinforcements.

1 Like

Joachim

On a related topic would you have any reference as to just what equipment is inside that huge metal doghouse just behind the cabs and engine of the 7410 tractor. Trumpeter fills out this area on the Scud Missile Carrier but not on the semi-tractor???

Here is the detail offered on the Scud:

So far I have only gotten as far as adding the air cleaner box and the cold starting fluid tank. I am working on the left side oil cooling fan and the NBC air cleaning system but no idea what might be on the right side or in the middle. (Judging by the filler caps on top of the dog house I suspect the middle is filled with two huge gas tanks.)

Oil fan cooler parts:

3 Likes

And yet more questions:

How does the forward engine cover fold up? Is that front section hinged separately or is it hinged to the two piece rear air intake section?


2 Likes

FYI - The MAZ 537 was built with the winch but as I say elsewhere it is removable so we can view the added driveline detail.

3 Likes

Sorry for so many MA3 questions:

4 Likes

Sir

No criticism or offense was taken. Just sharing my logic for not modifying the rocker arms.

My goal is max detail on these 8x8 monsters so ANYTHING you see that might be missing or incorrect PLEASE let me know.

Also it sounds like you might have even more reference than I. Care to share??? My current main interest is the 7410 tractor.

1 Like

p.s. Note on assembly of the big Russian trailer:

FYI - Nowhere in the Trumpeter instruction sheet does tell us to install those two triangular shelves under the goose neck. However later images in that same instruction sheet do show those shelves as being installed.

A minor hiccup.

Hello 165thspc

Regarding your question about the MAZ-7410, I’m afraid I can’t answer it. I’ve never seen these vehicles in person and haven’t dealt with them. I also have very little photographic material of this vehicle. In terms of size, these tractors with trailers wouldn’t have been usable on our roads. The question about the MAZ-537G winch referred to the last vehicle in a low-loader convoy. Its purpose was to pull disabled MAZ-537Gs onto low-loaders and attach the vehicle’s trailer. This vehicle was always at the end of the convoy. Here’s a picture of it.

I could help you with pictures of the low loader if you modify the axle suspension. I took many detailed pictures of my model to make it look realistic. Here are two pictures so you can see the difference compared to the Trumpeter kit. It’s definitely worth the effort.

The difference after the renovation

I hope the pictures are helpful.

Best regards Joachim

4 Likes

Would you care to share some of your reference on those trailer brake assemblies?

It looks like I have my work cut out for me on improving detail in that department.

Hello 165htspc

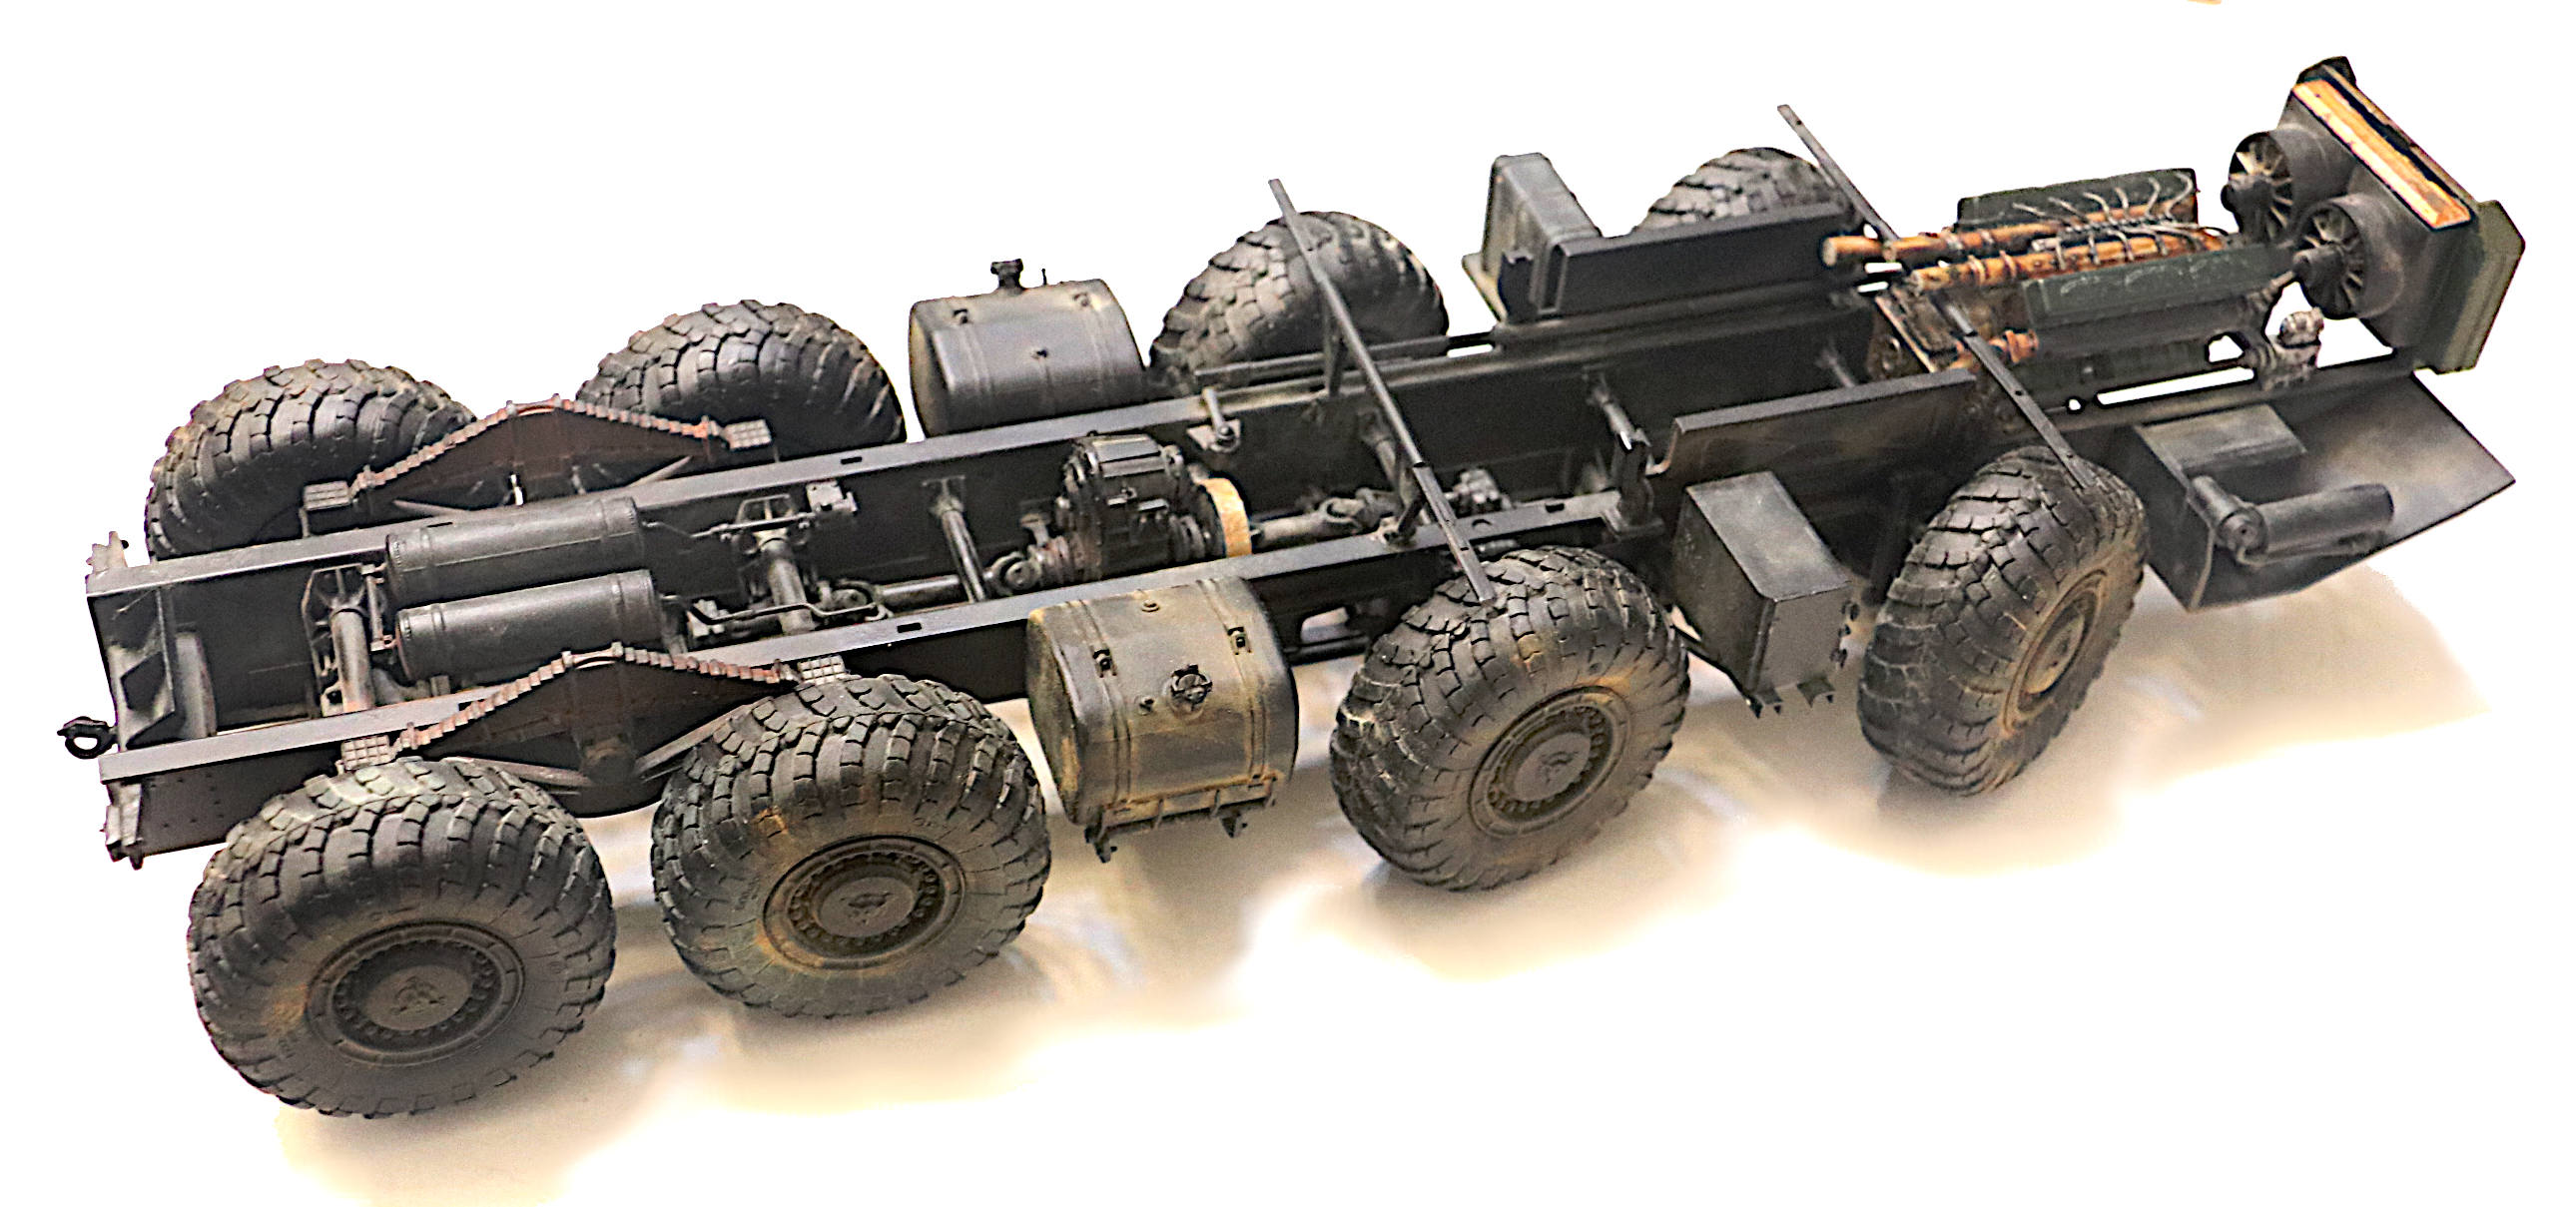
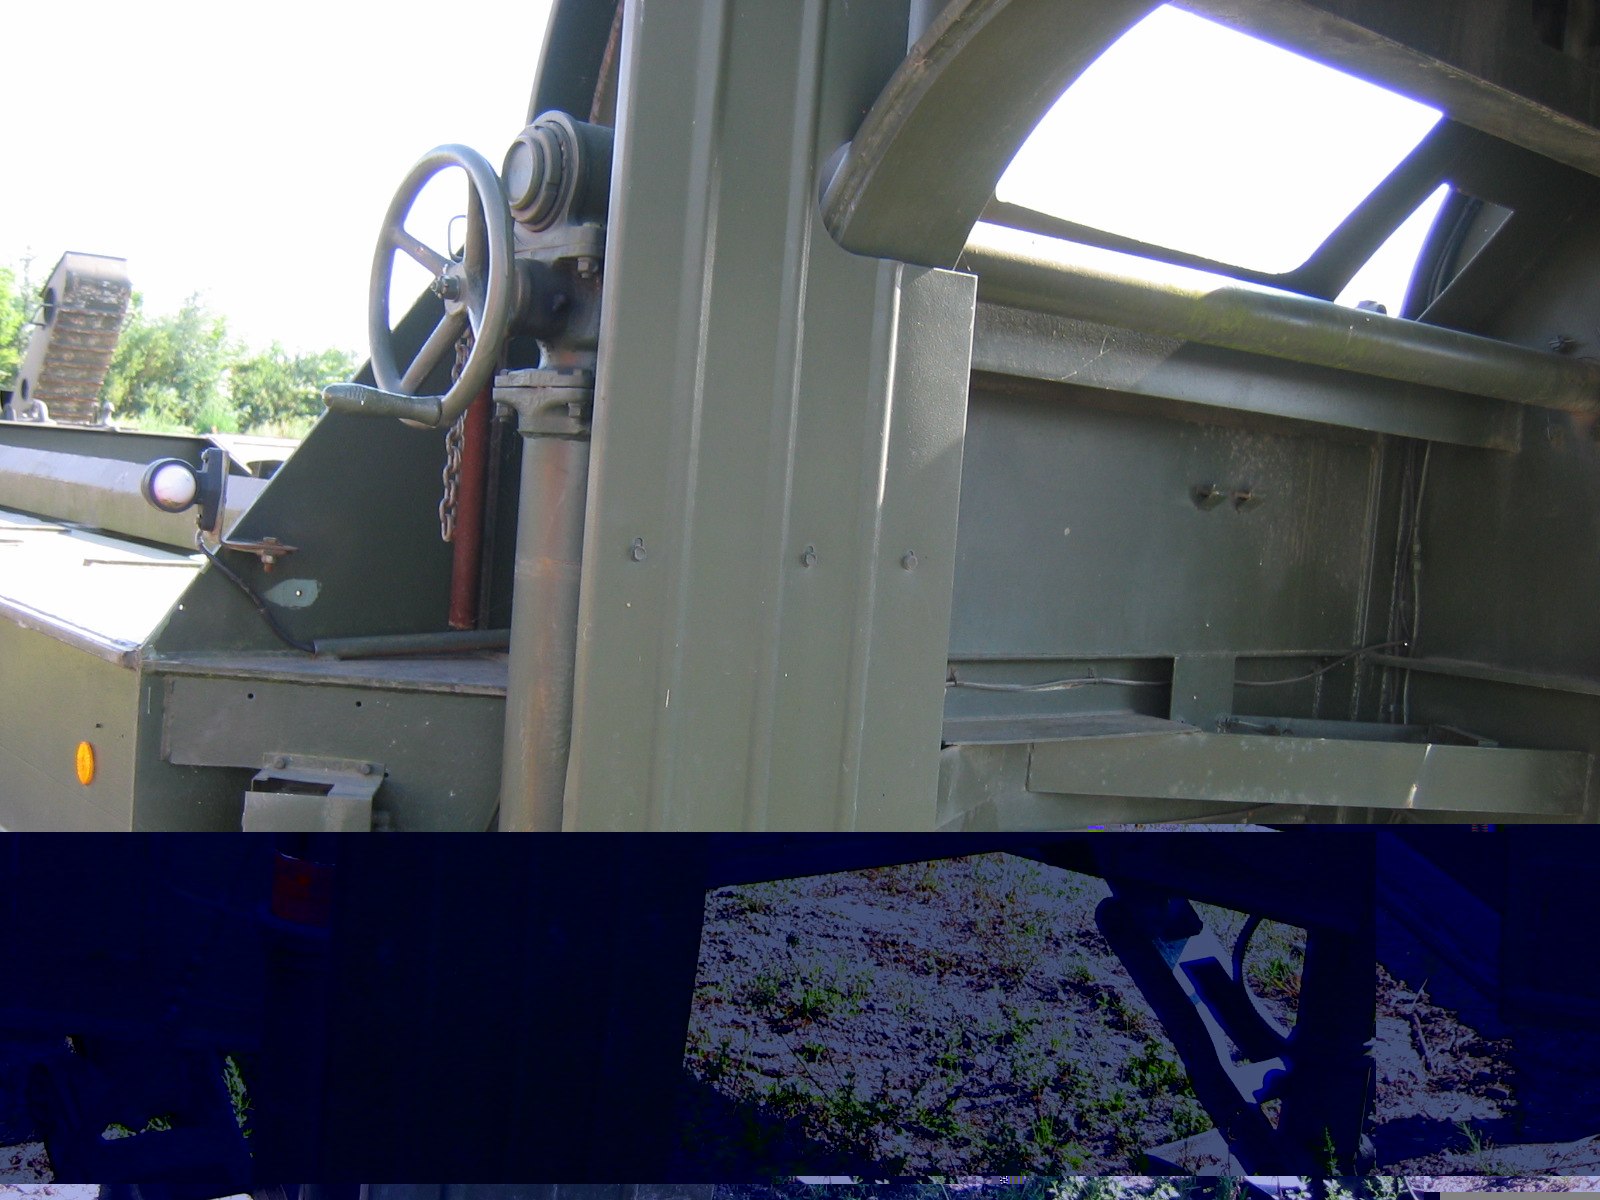
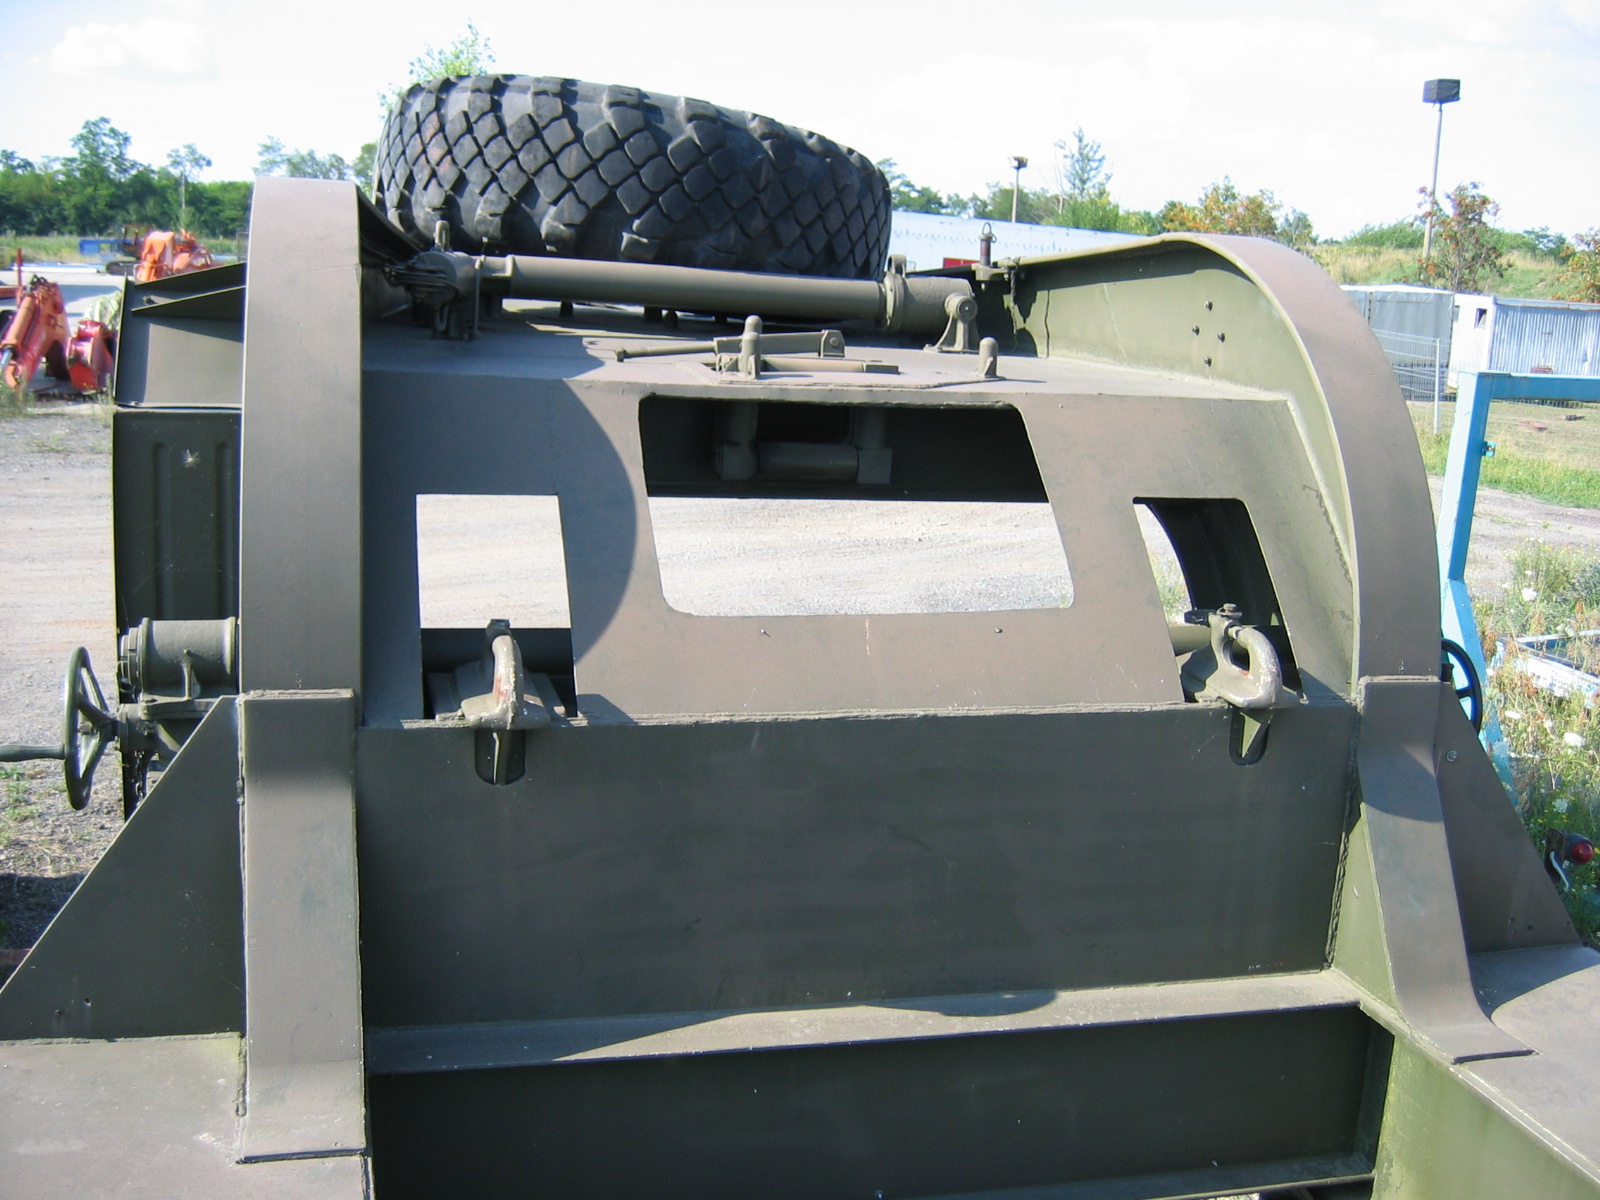
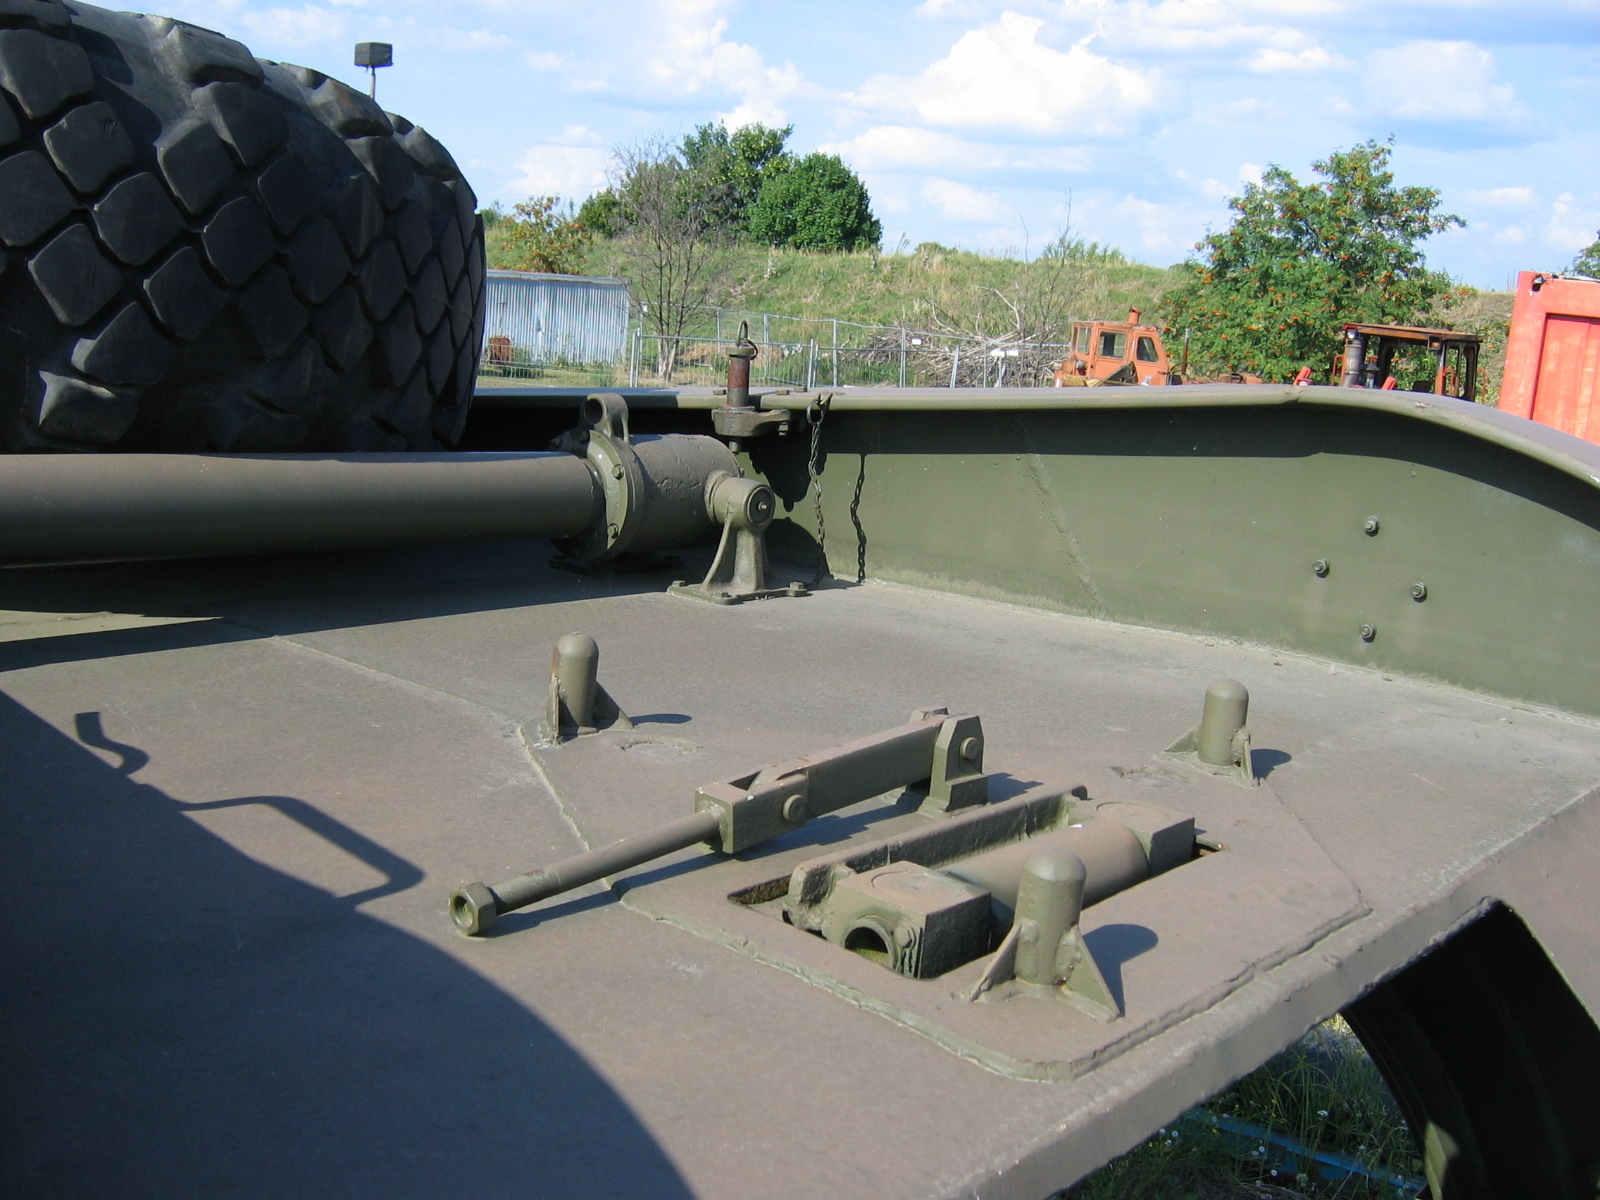
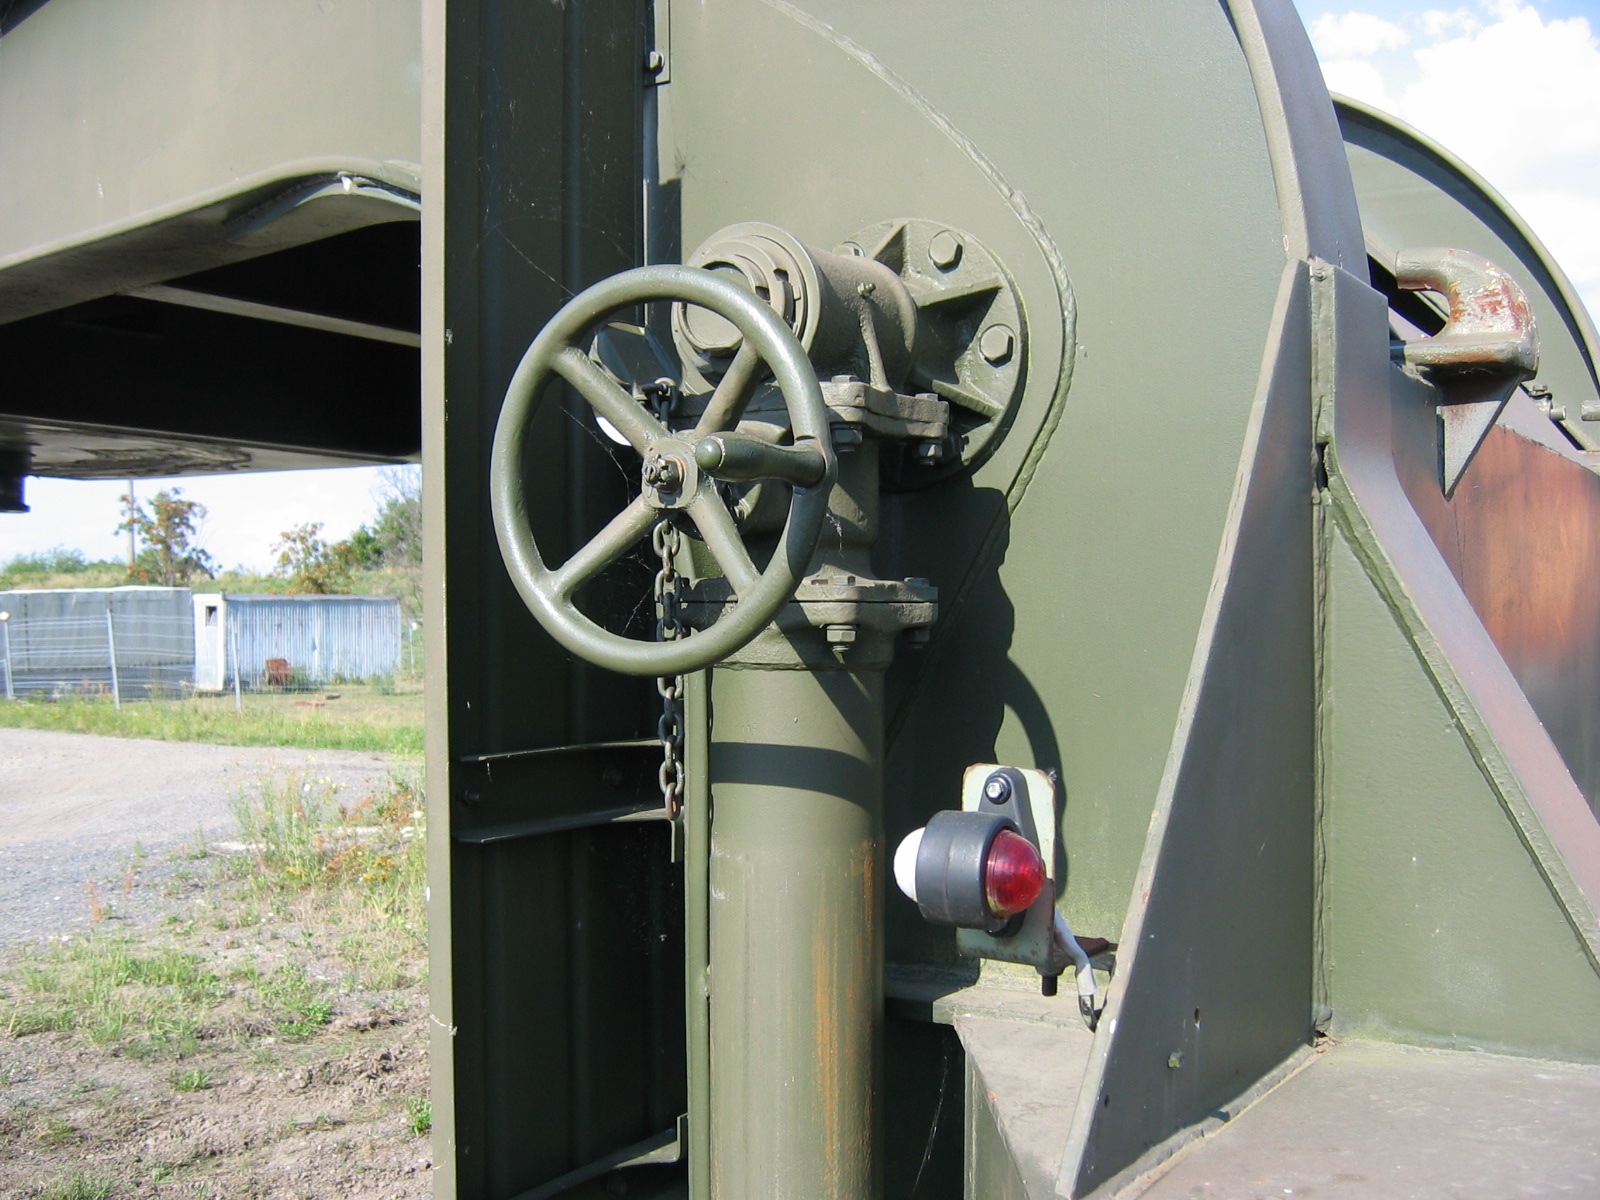
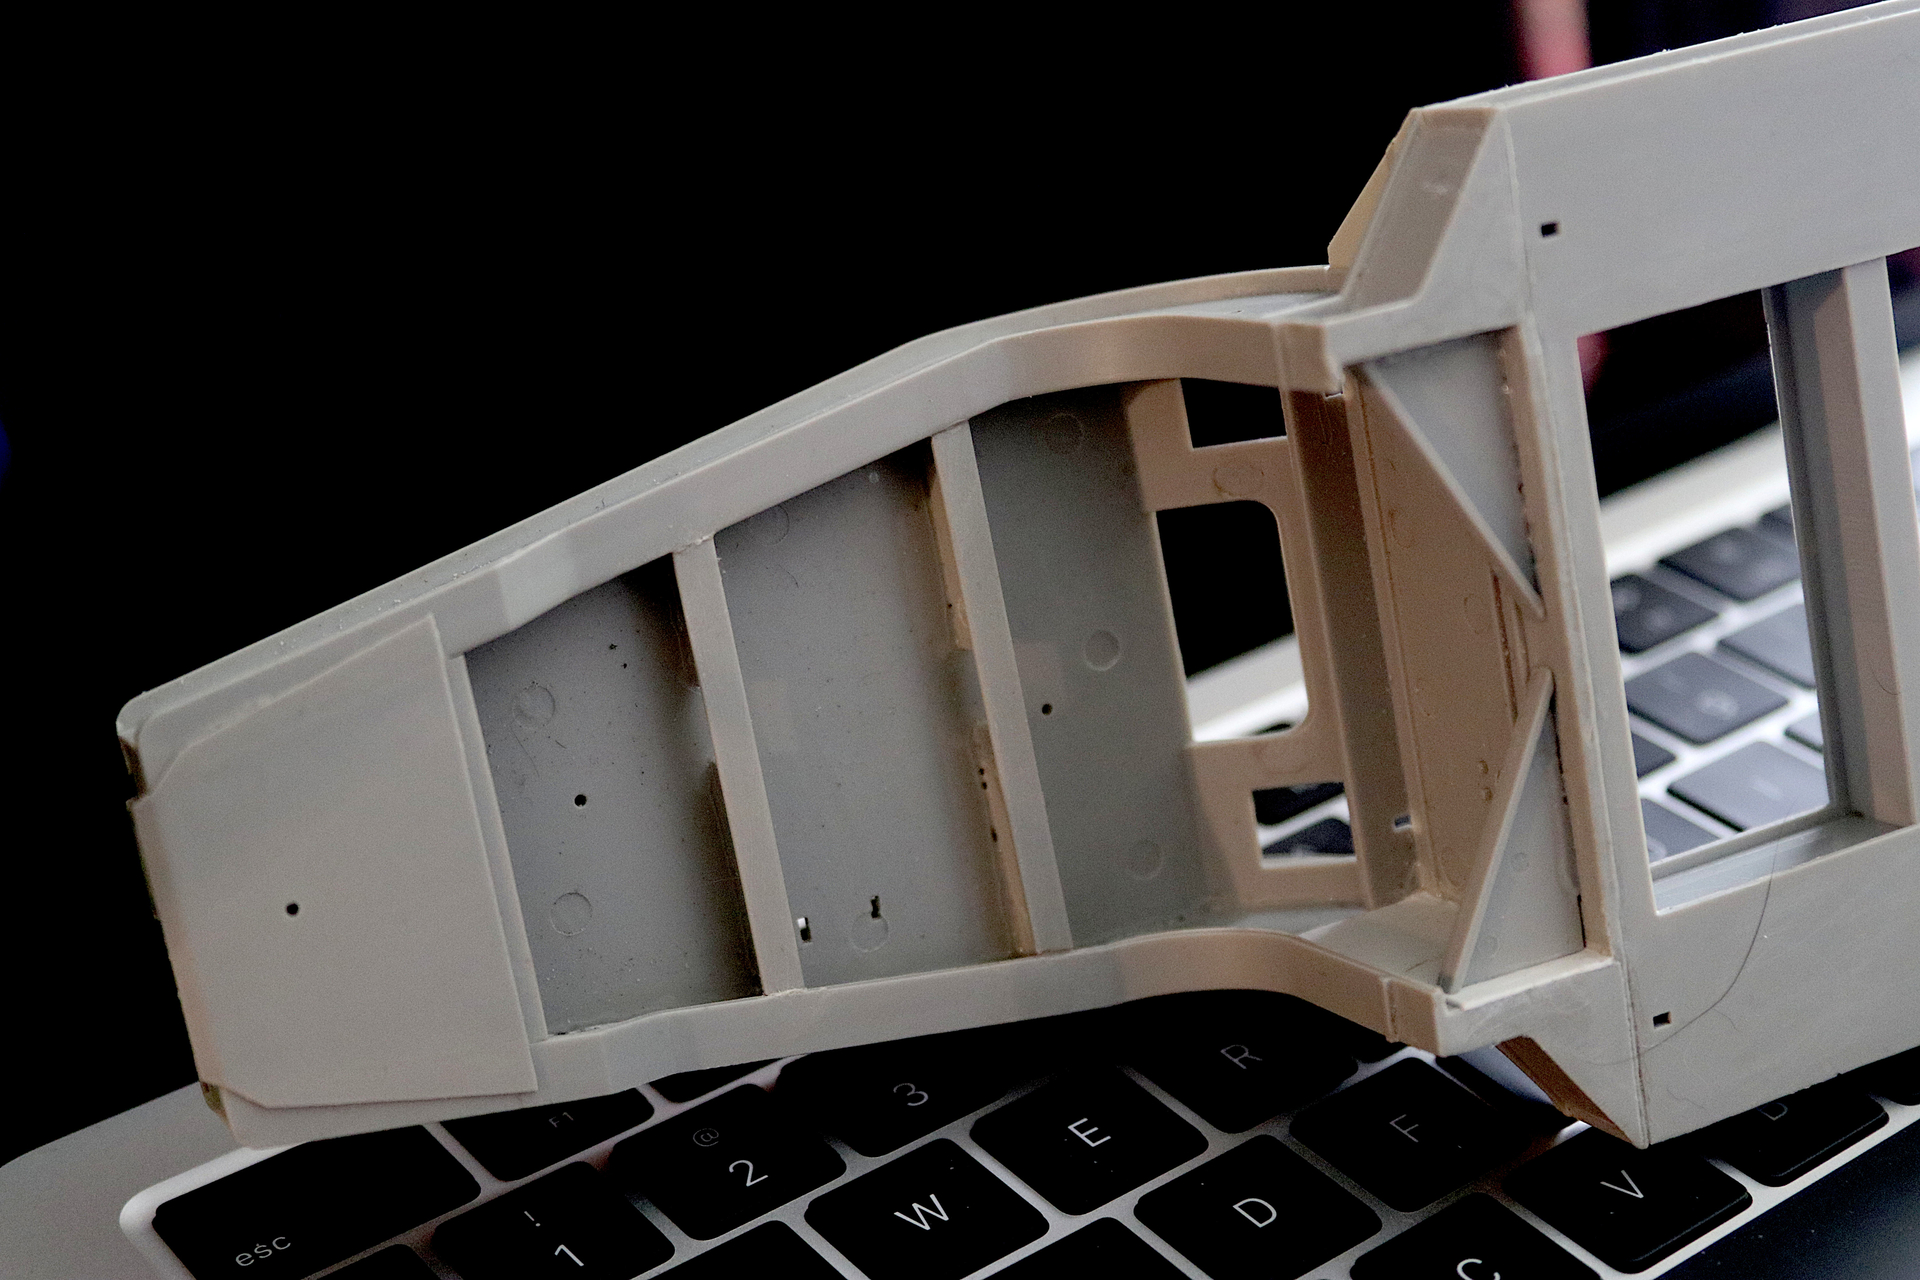
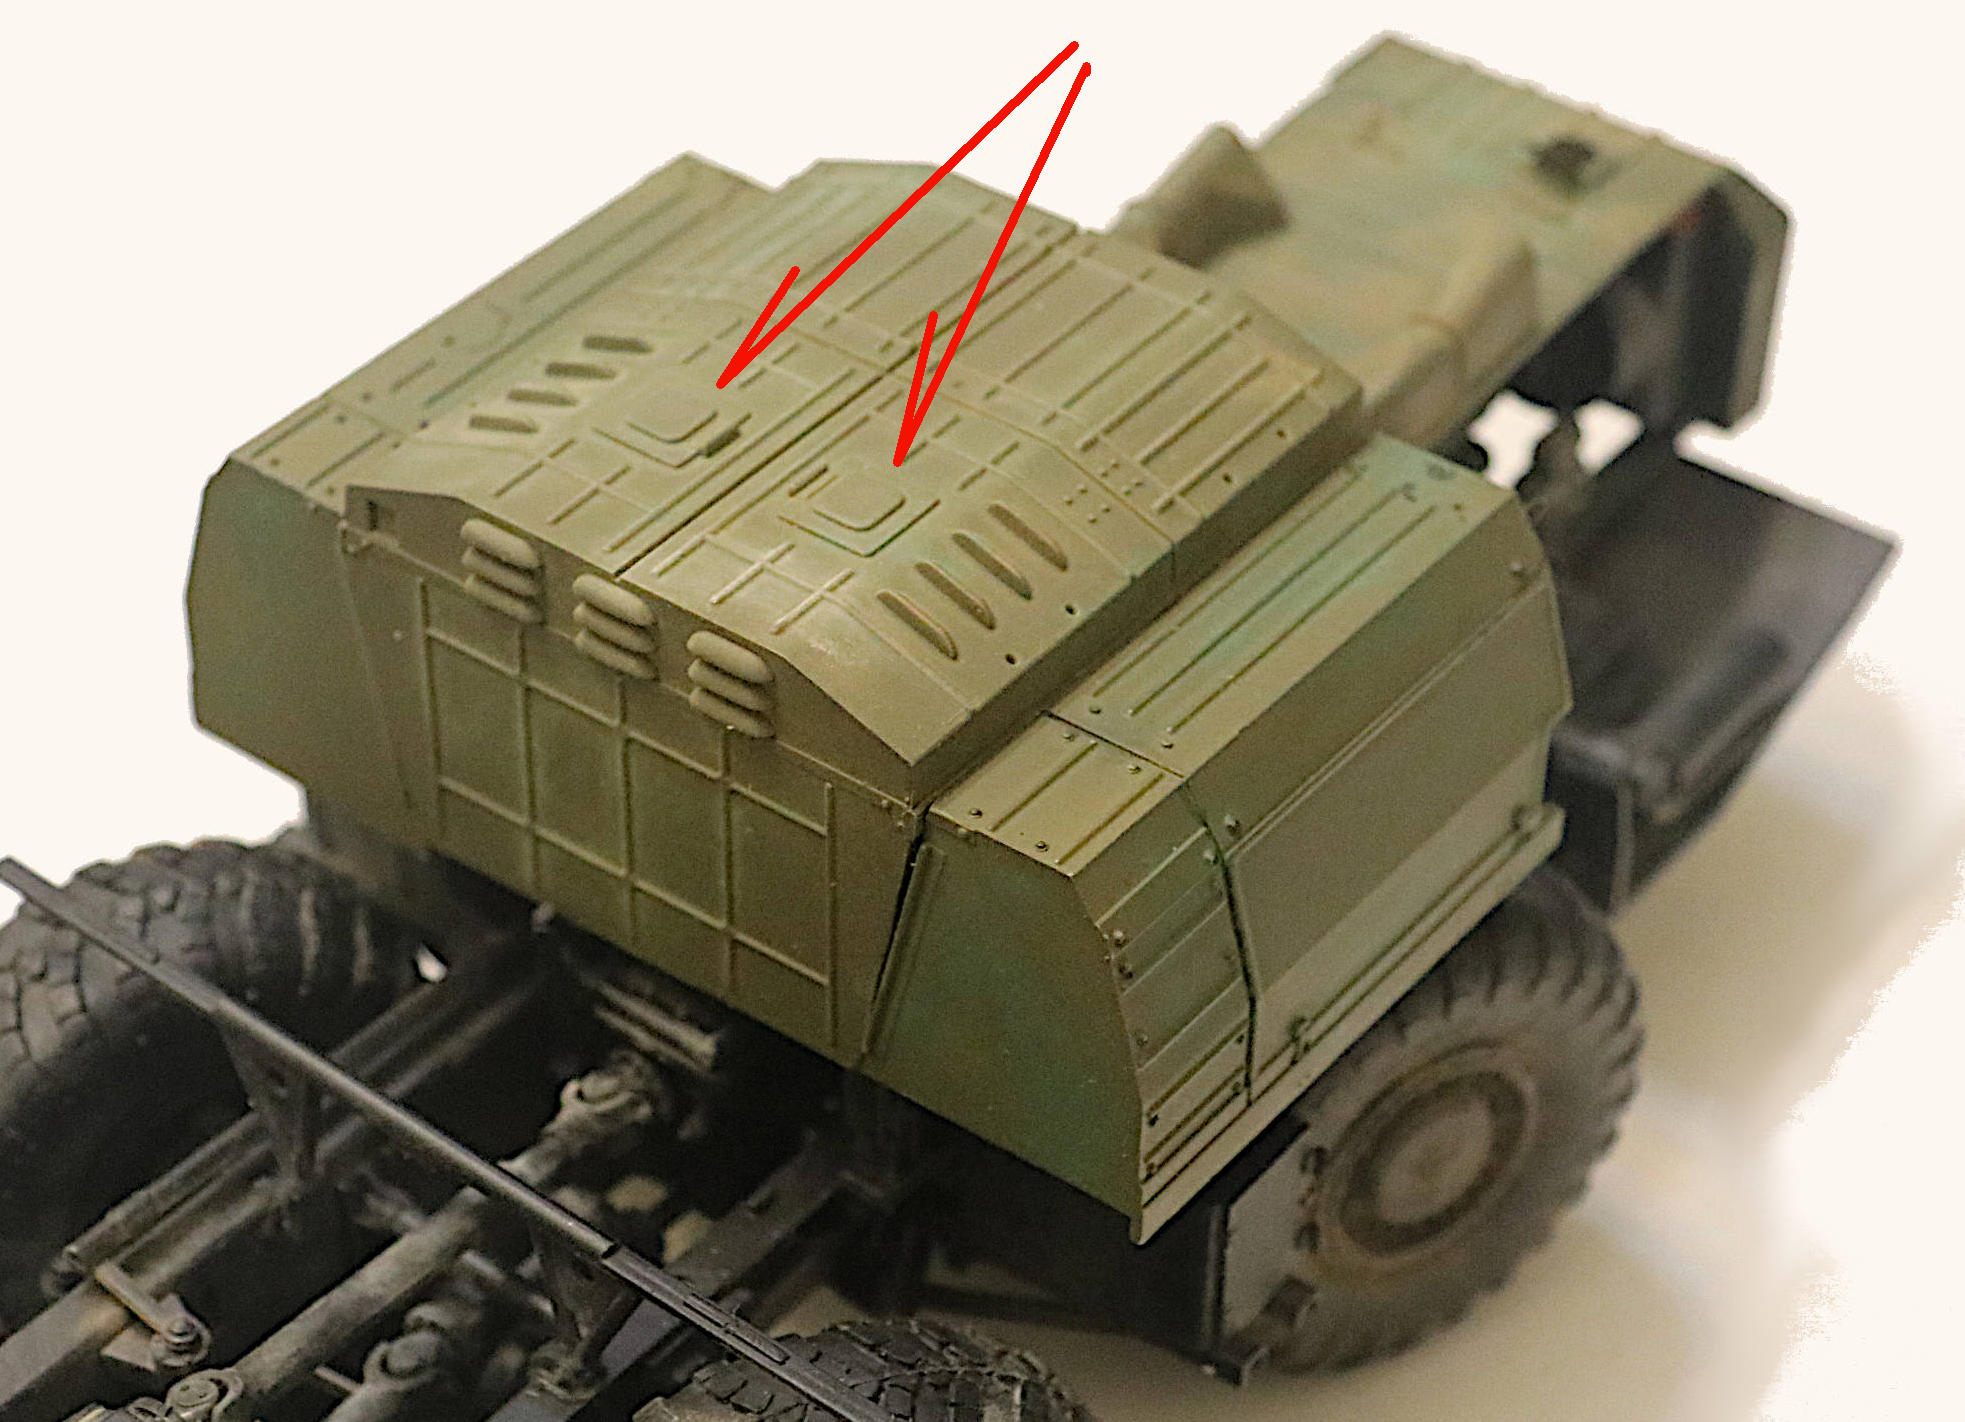
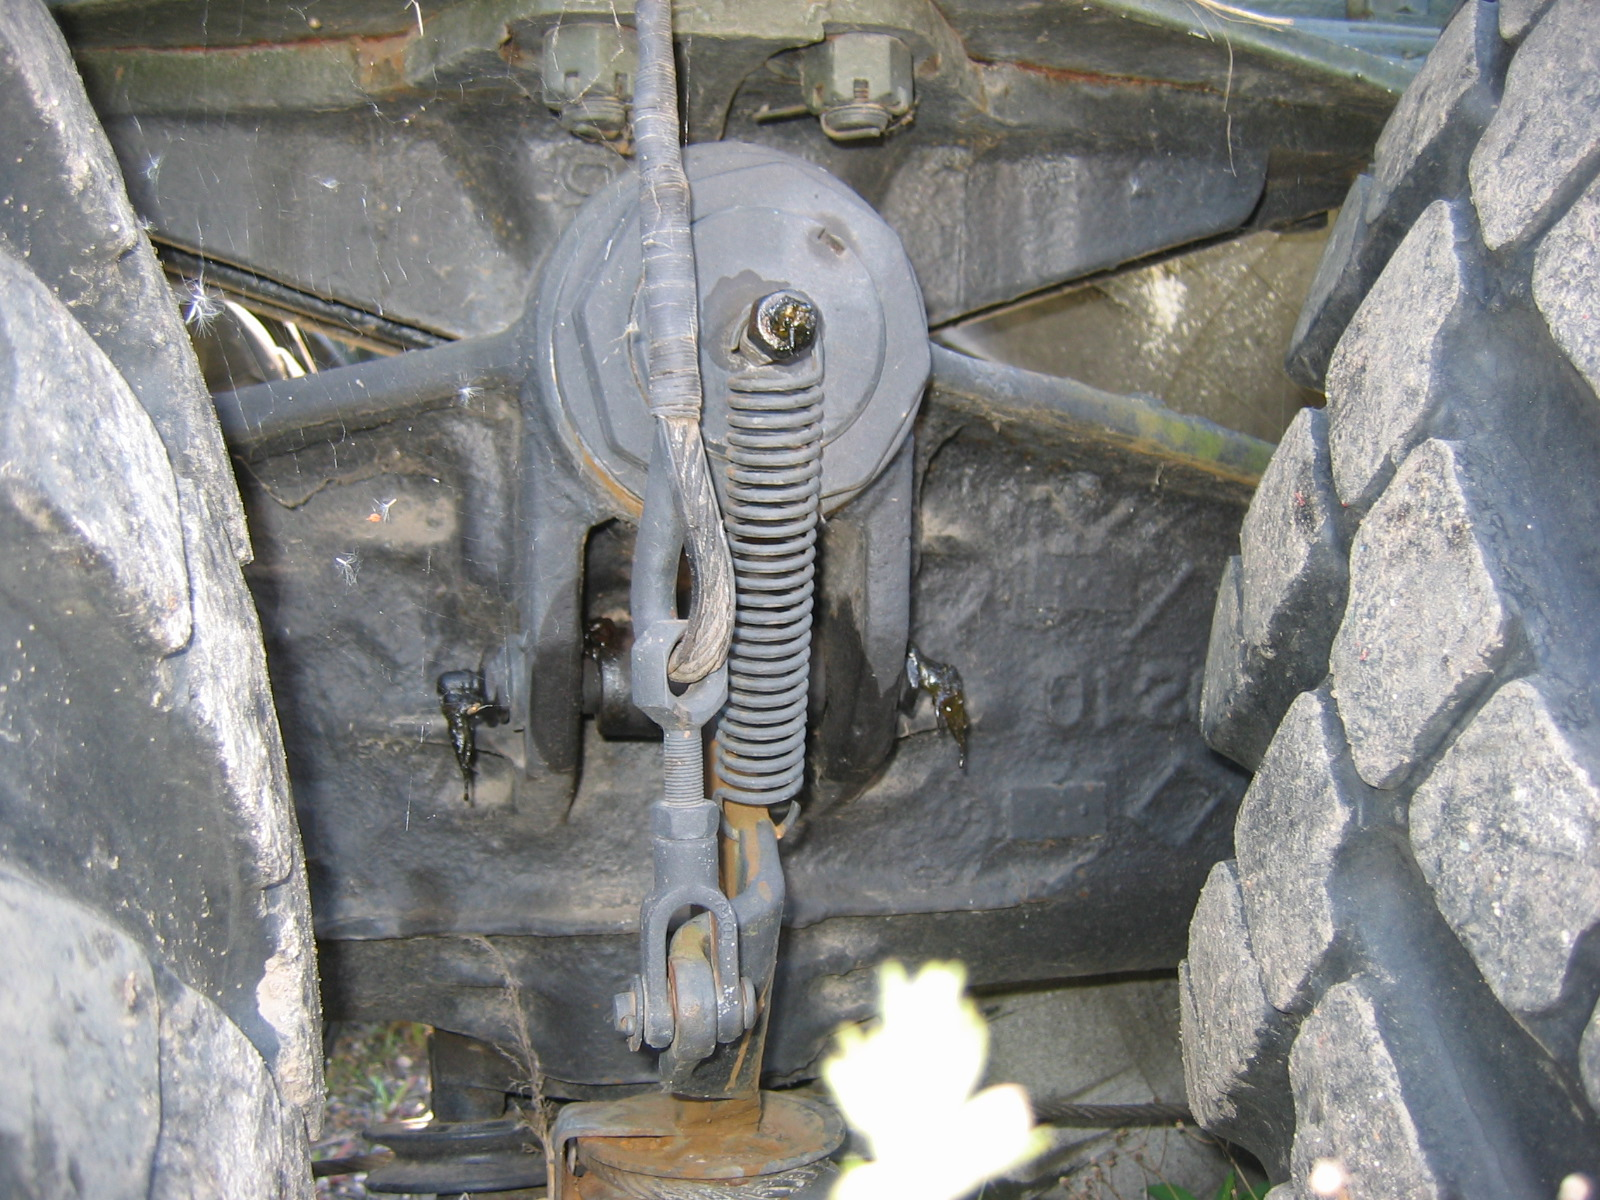
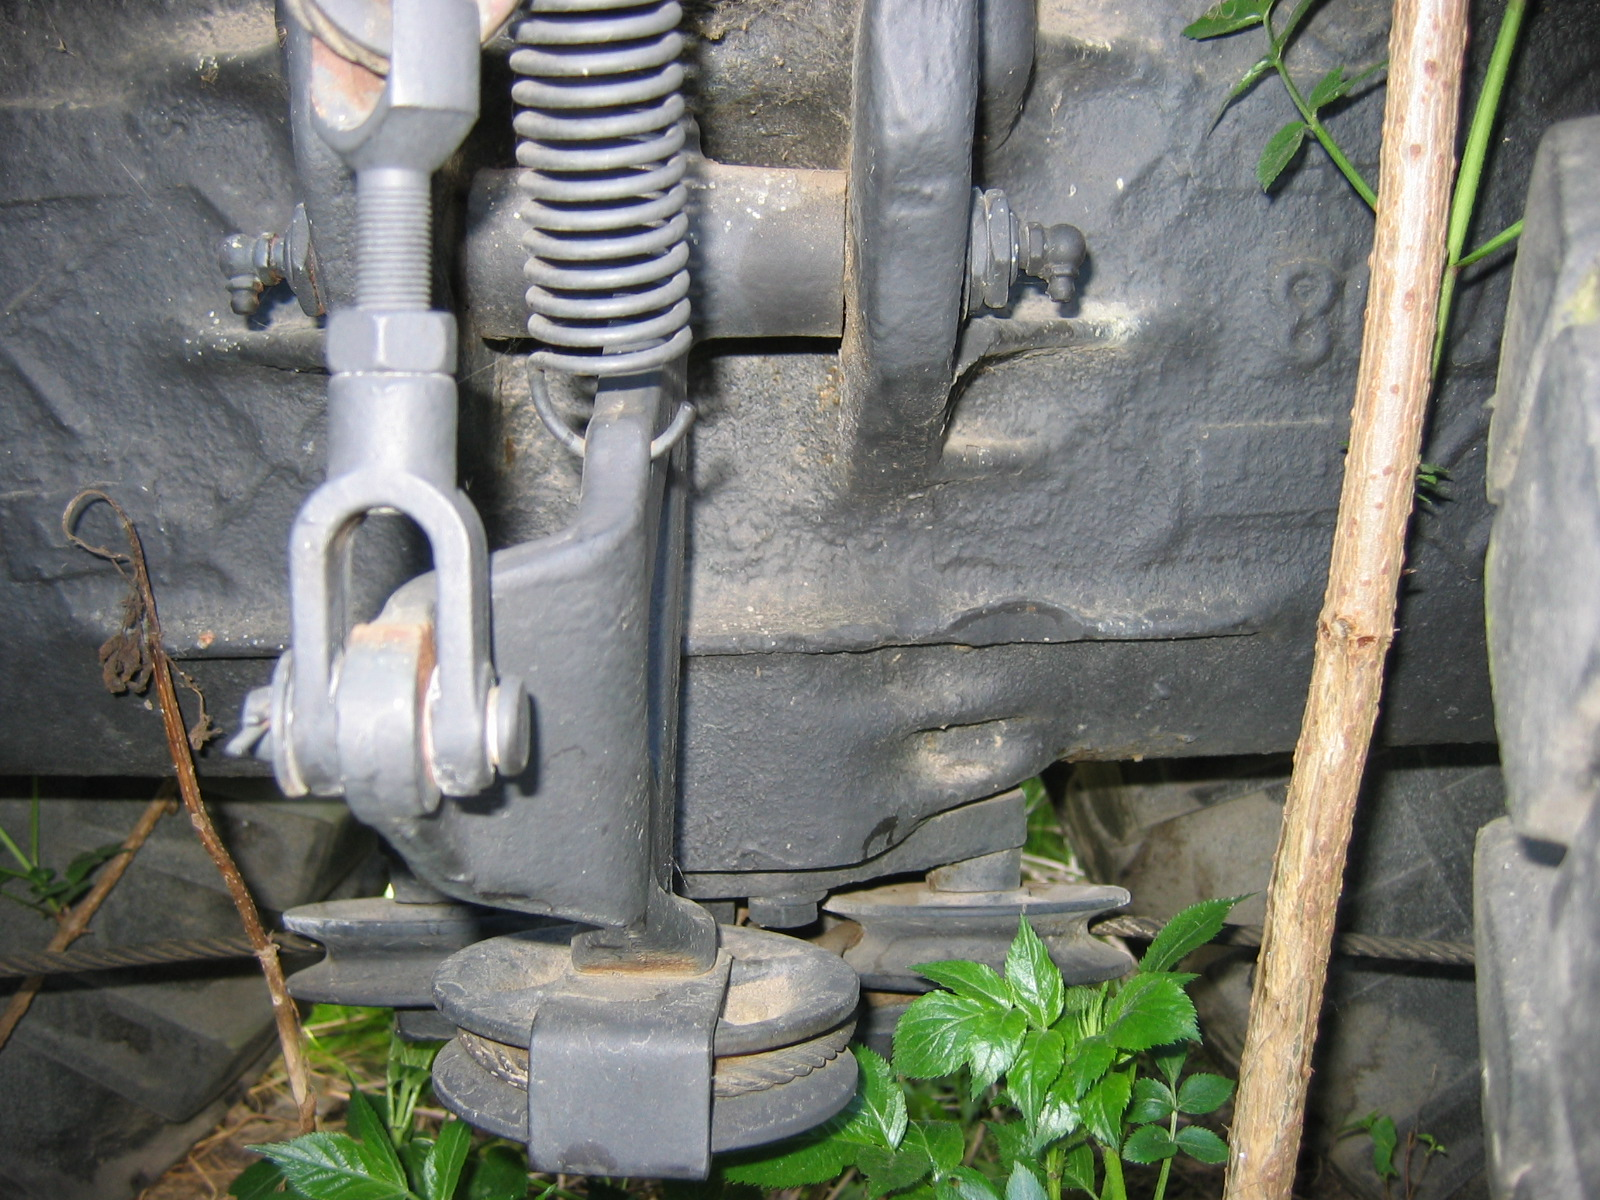
Actually, with the pictures I showed you of the original and the model, I already explained everything you would need to change. Replicating the brake system in the model isn’t really a big problem, as it’s a simple single-line brake system without additional pneumatic valves. The wheel brake cylinders (8 in total) are diaphragm cylinders in the original, but unfortunately, I’ve installed piston cylinders in the model. Tristop cylinders weren’t used on this vehicle yet; they were only introduced on the three-axle low loaders. These cylinders were also used to operate the parking brake, and the trailer was braked by spring force. On the two-axle low loader, this braking is achieved using cables and winches located between the axles on the right and left sides, operated by handwheels. I’m showing you the pictures here to help you understand better.

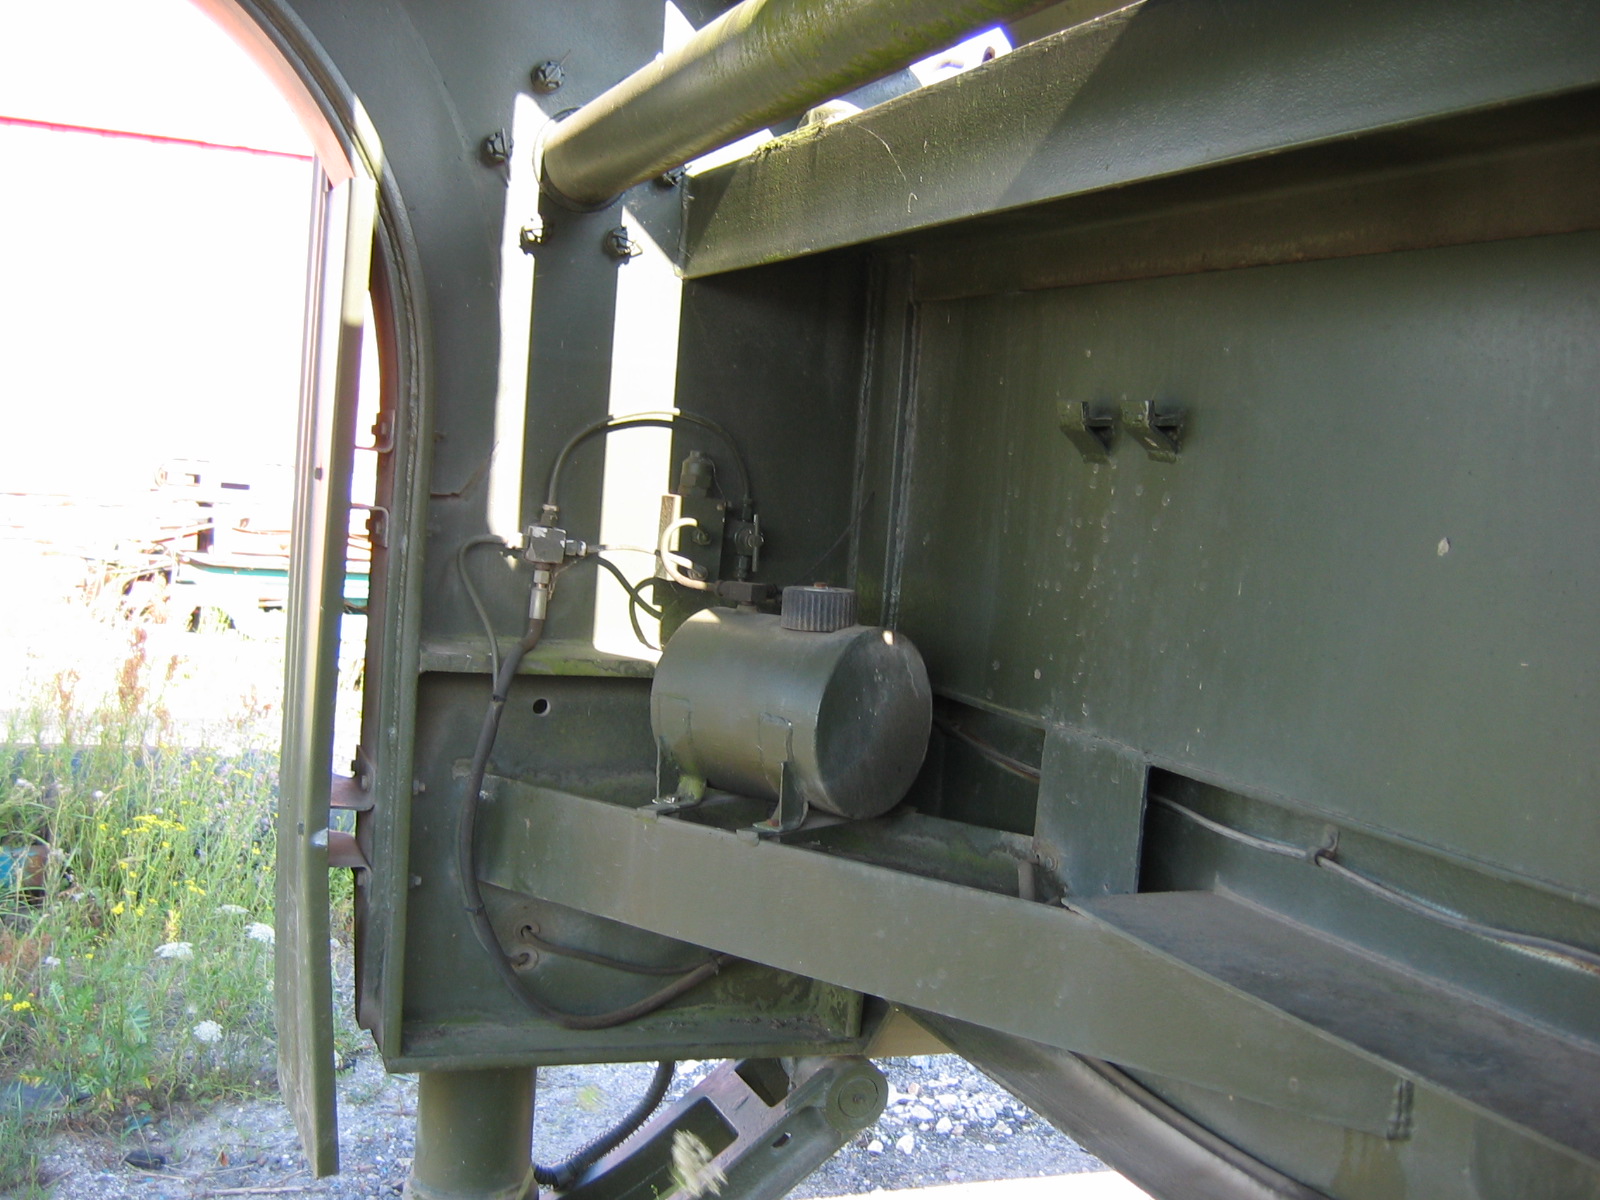
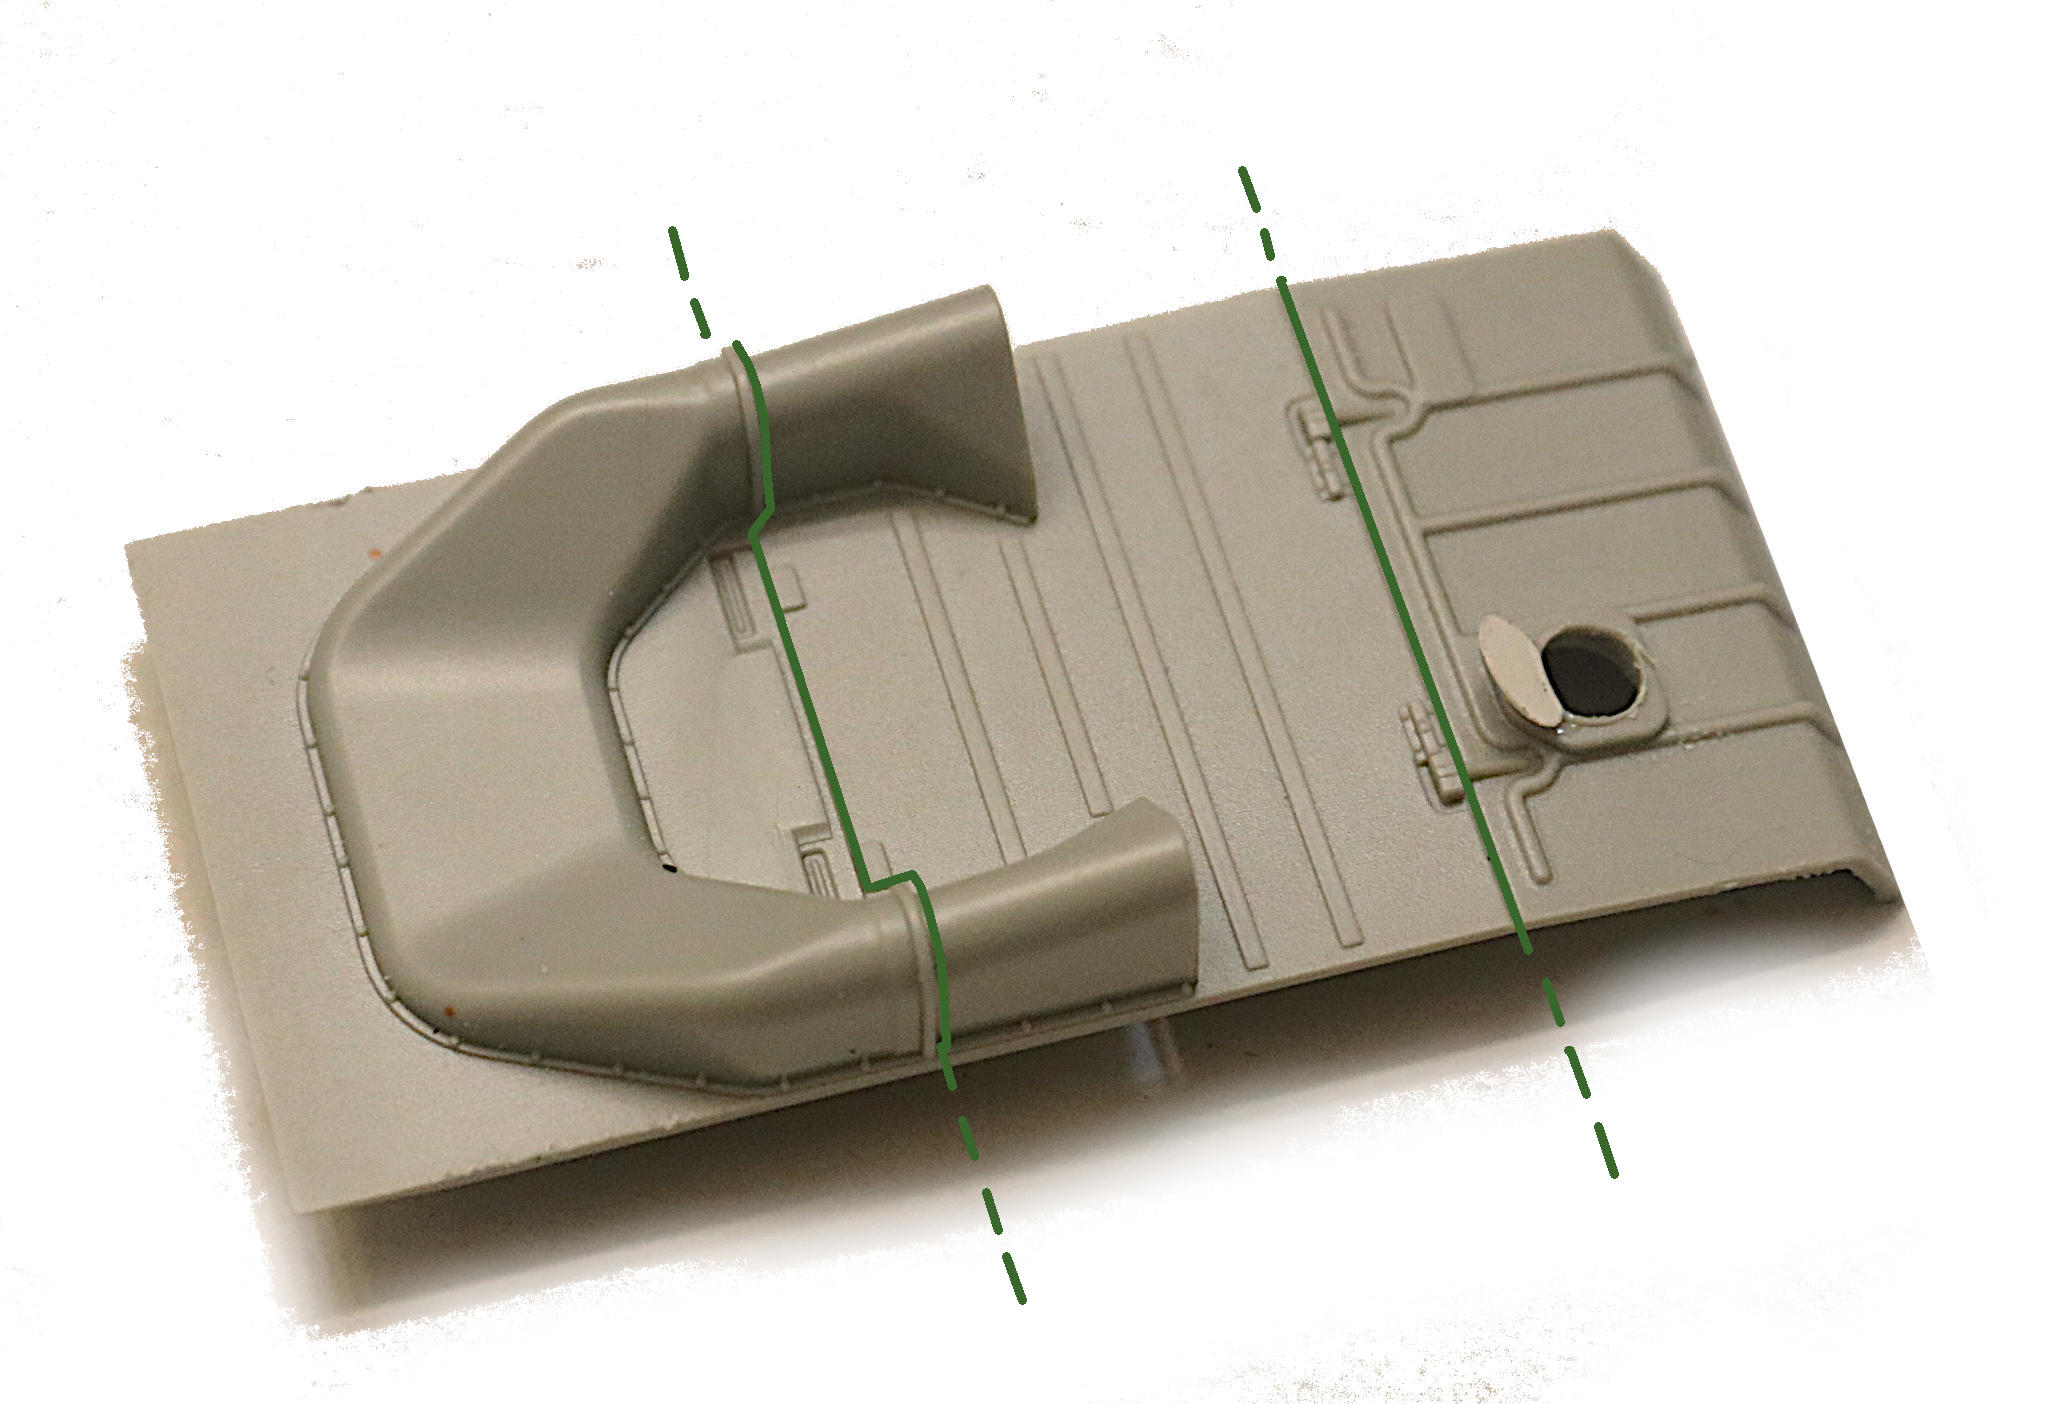
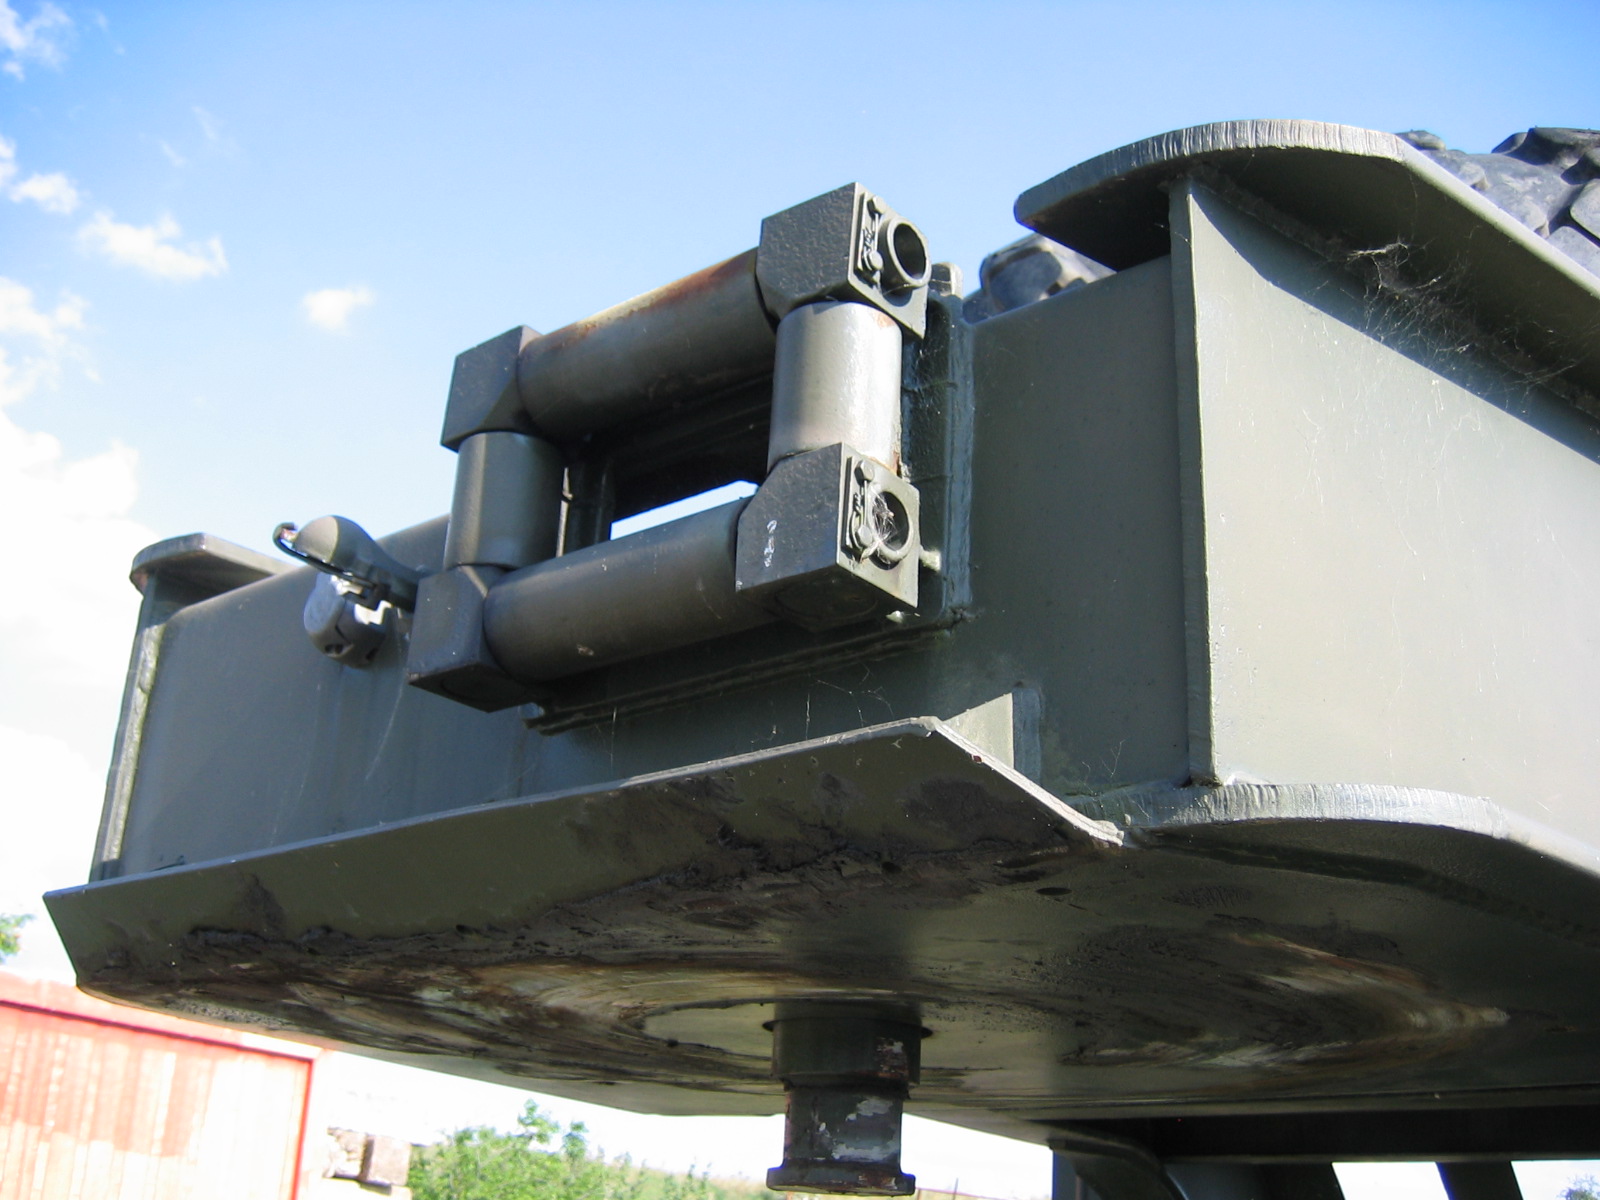
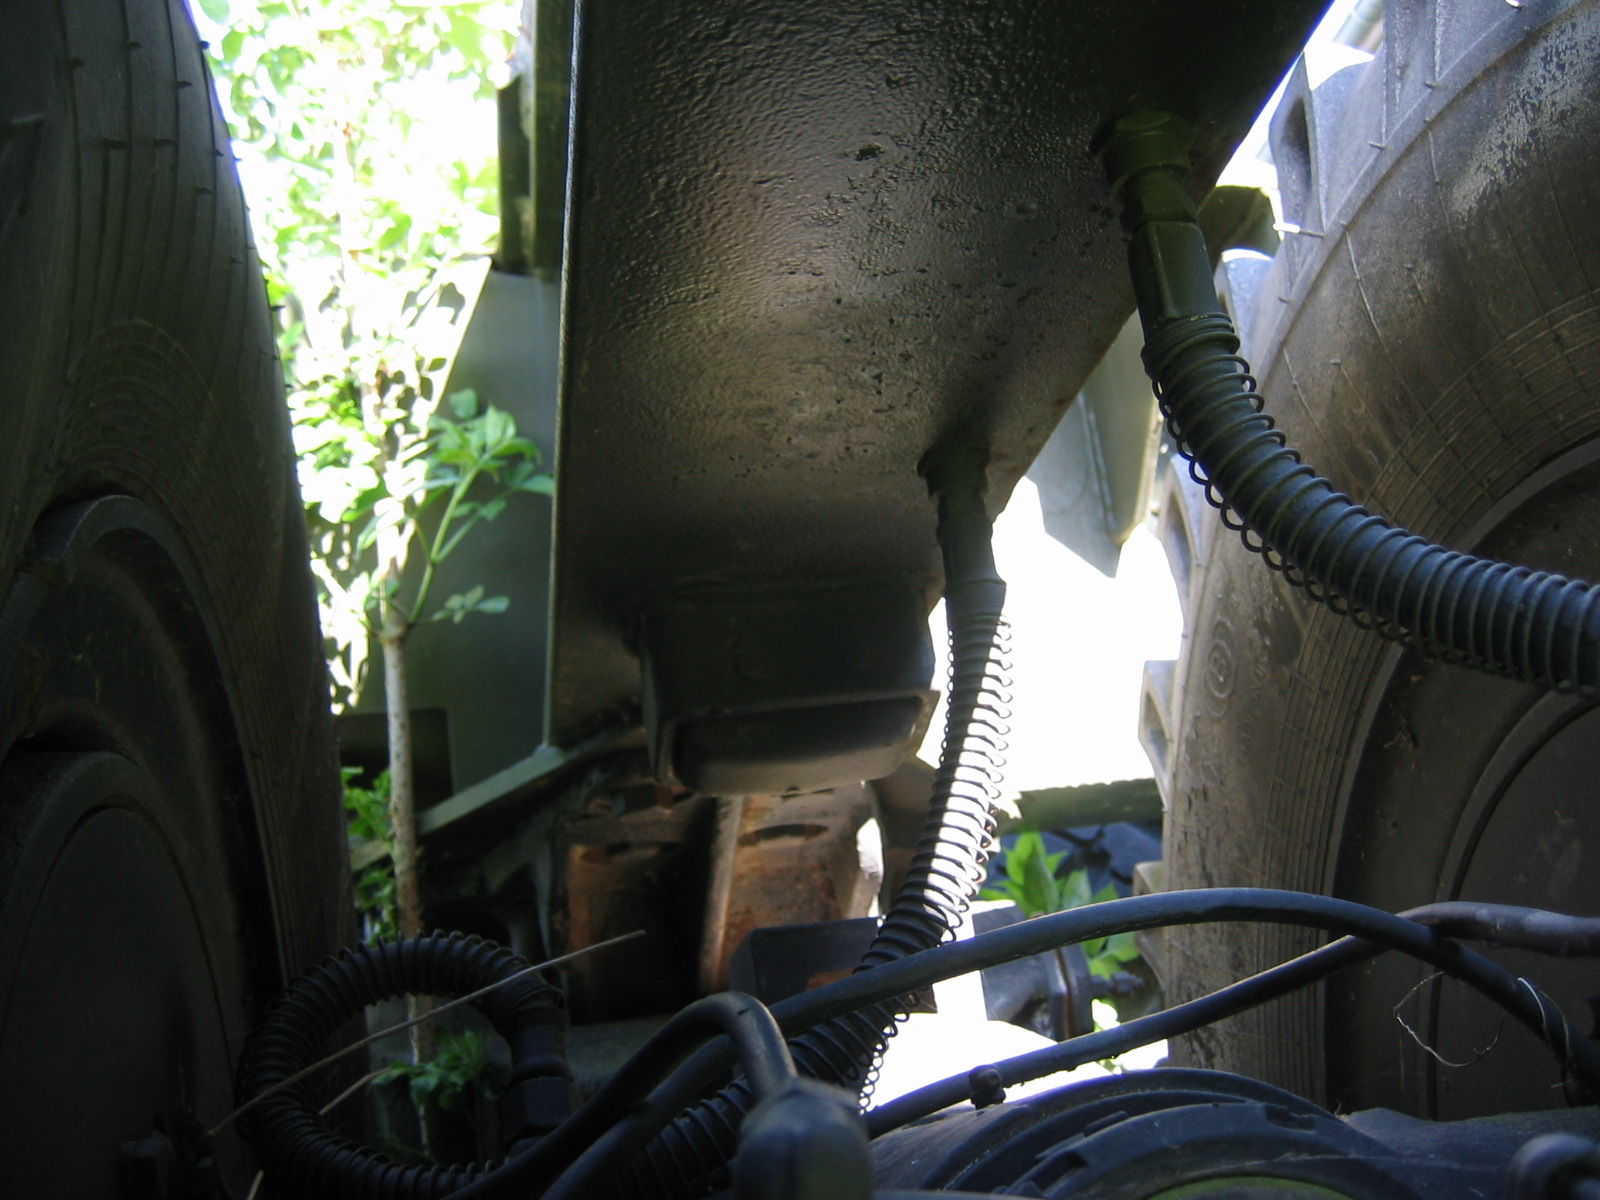
The tractor’s compressed air system is connected to the coupling head, supplying the trailer with air up to 6.0 bar. If the air pressure drops, the trailer brakes. At 0 bar, it brakes fully. The image shows the coupling head and the electrical socket for the lights.

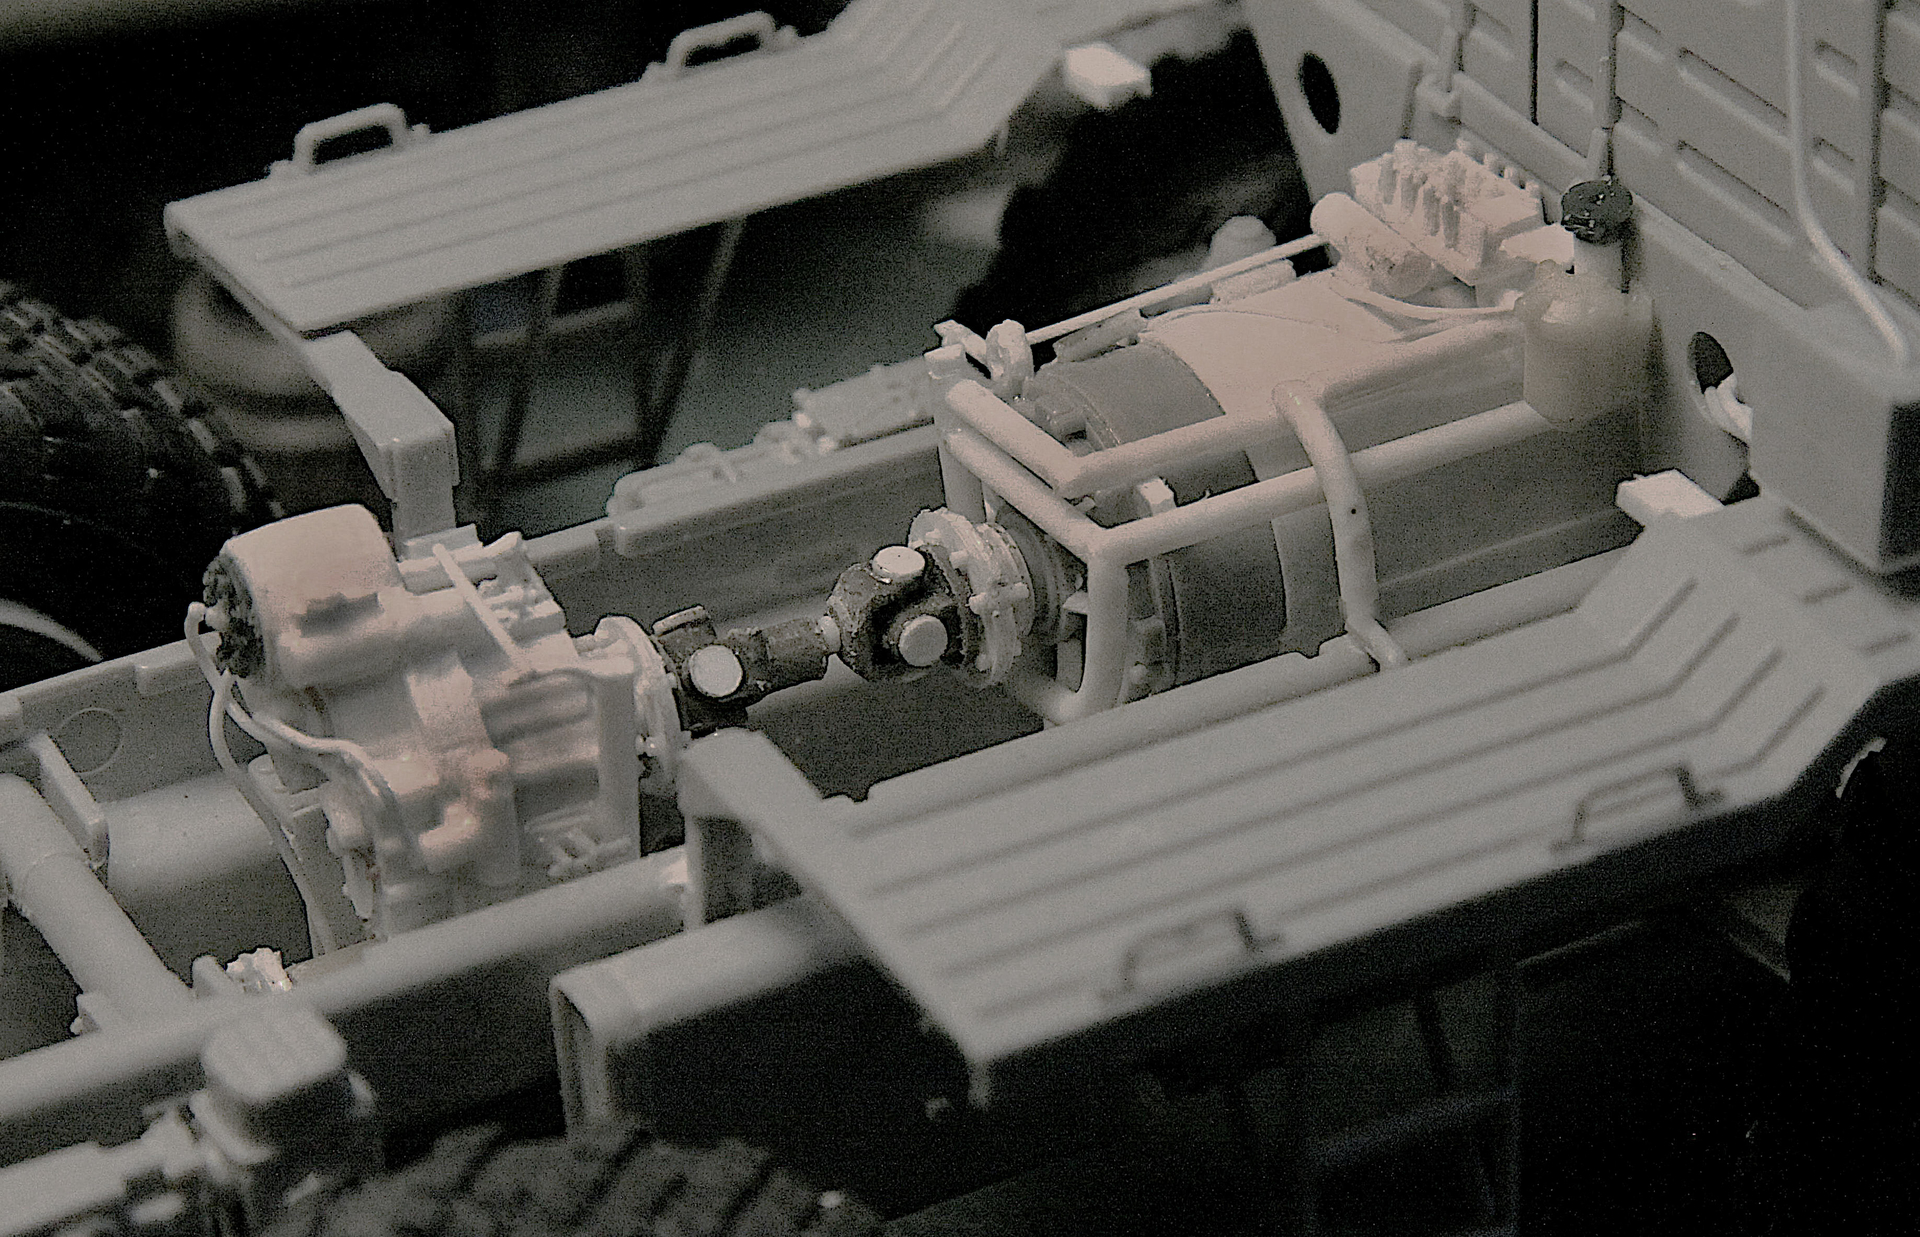
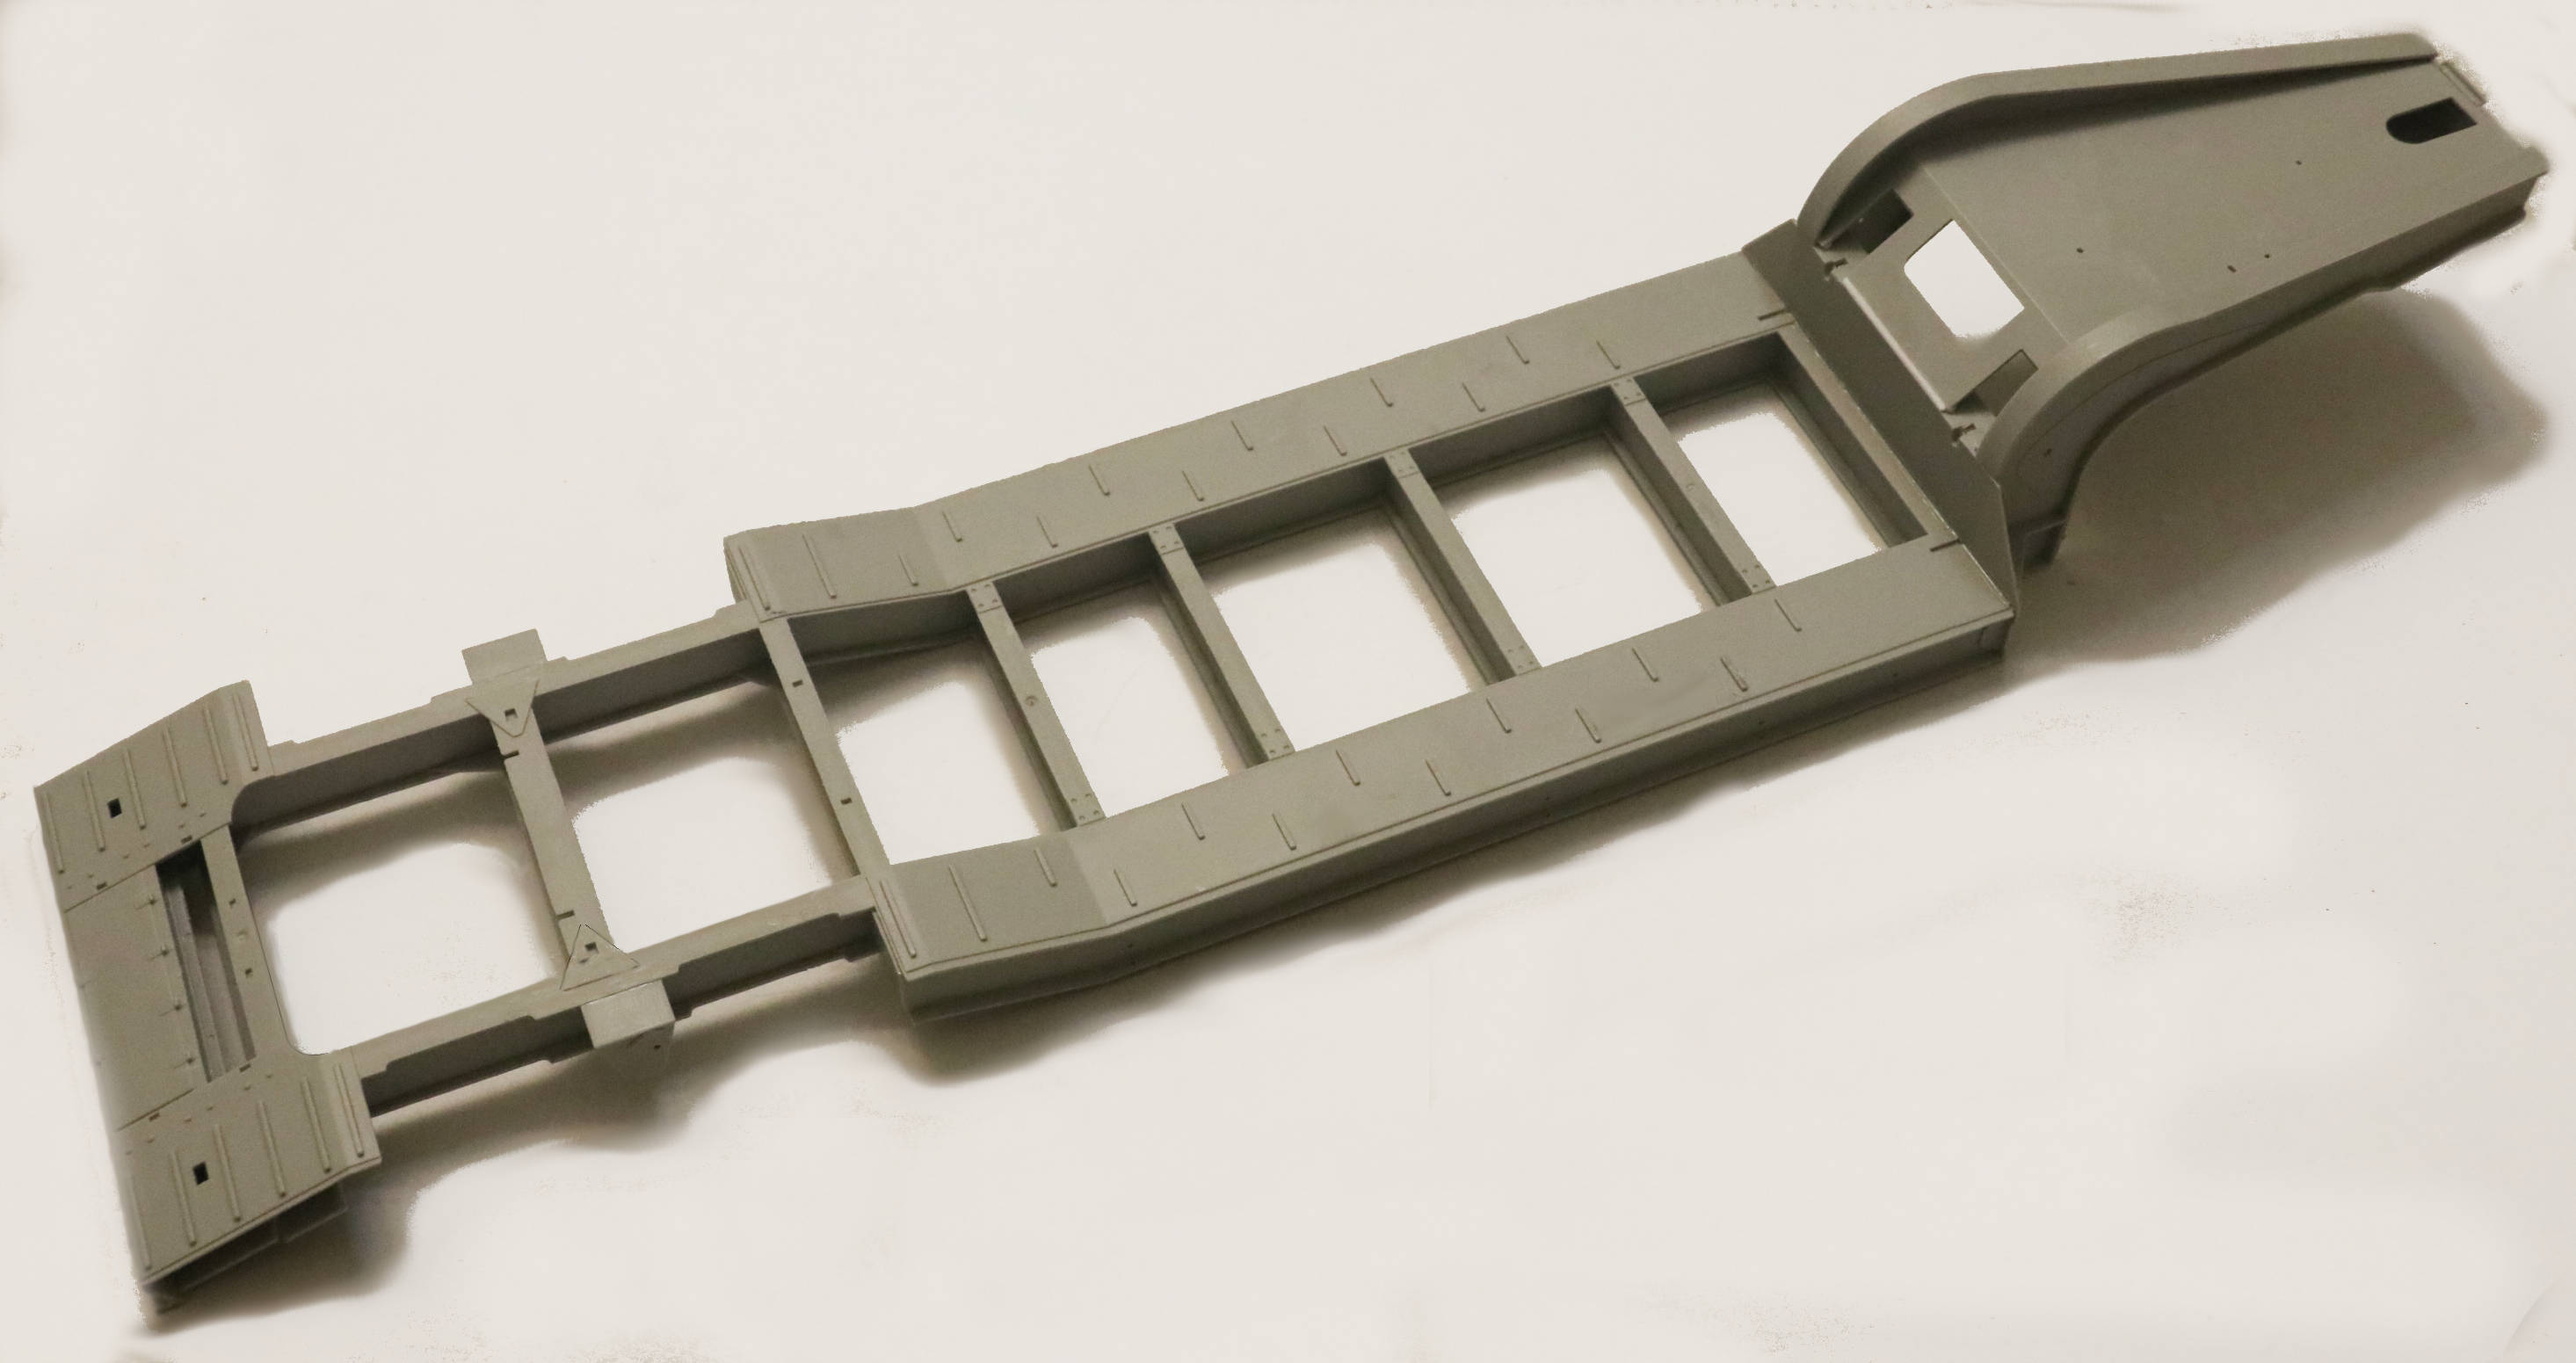
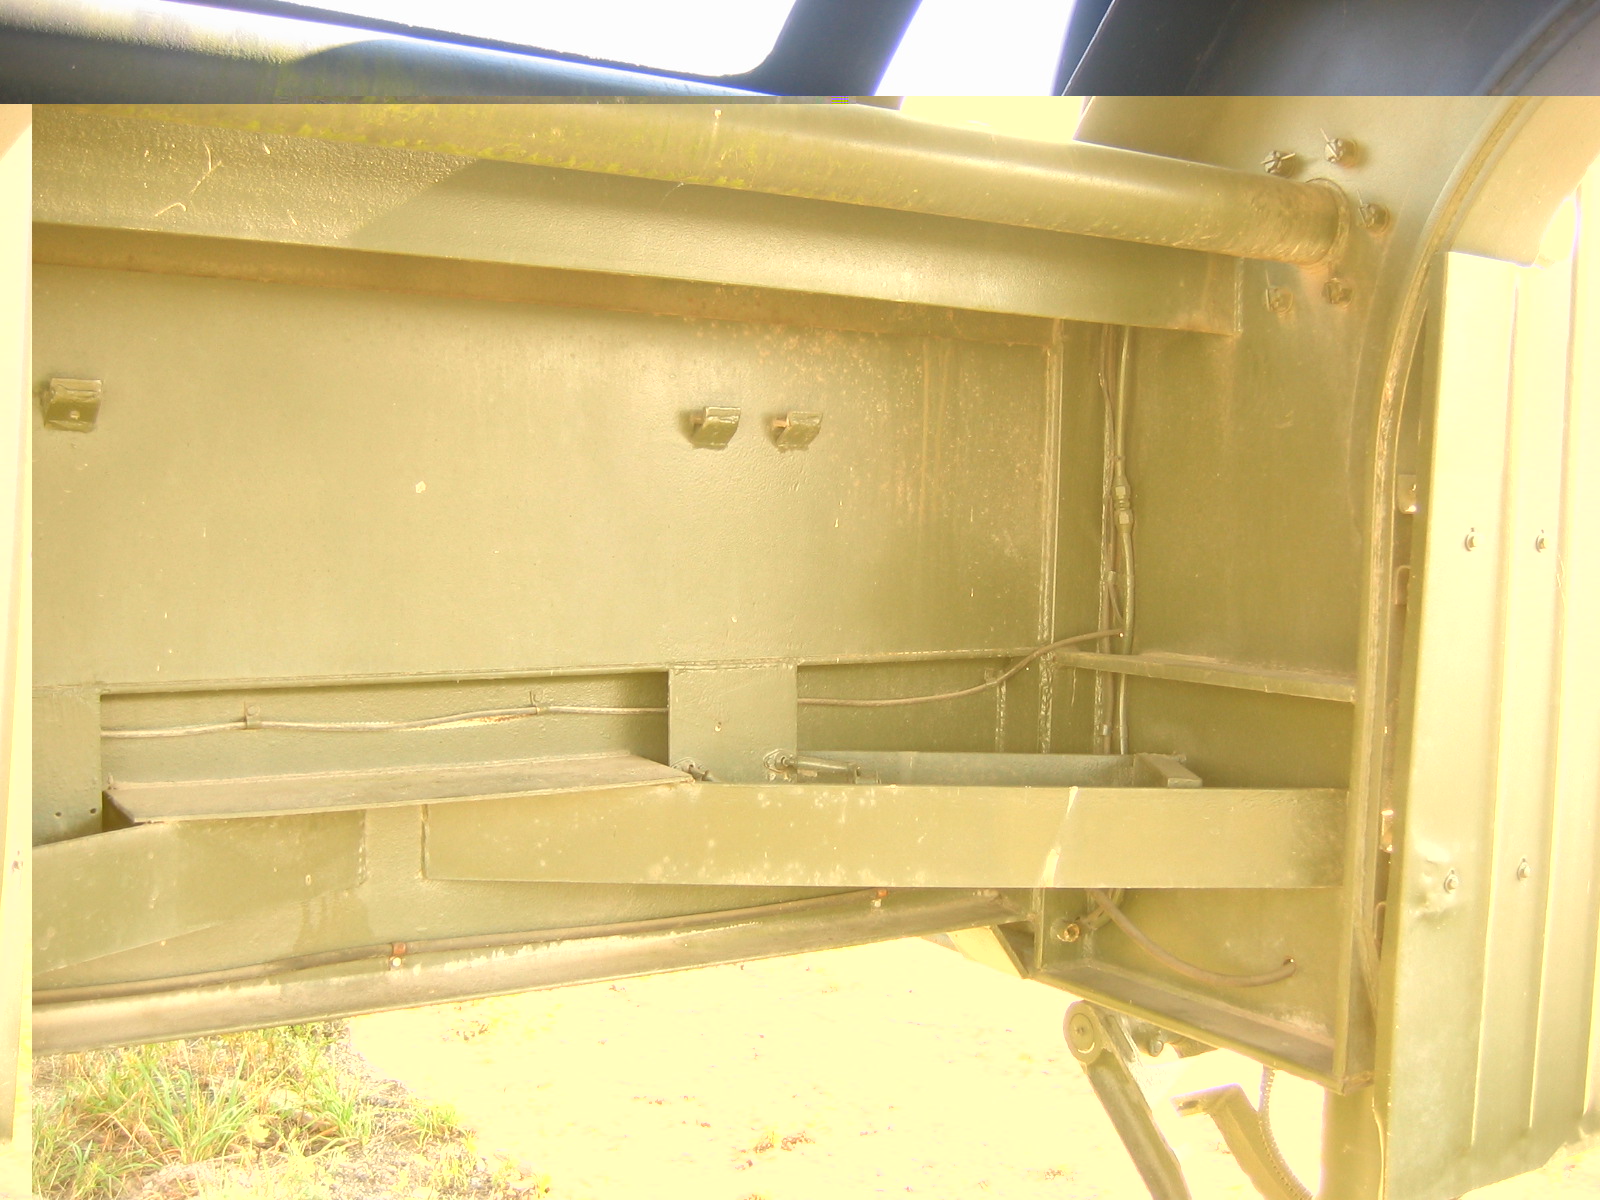
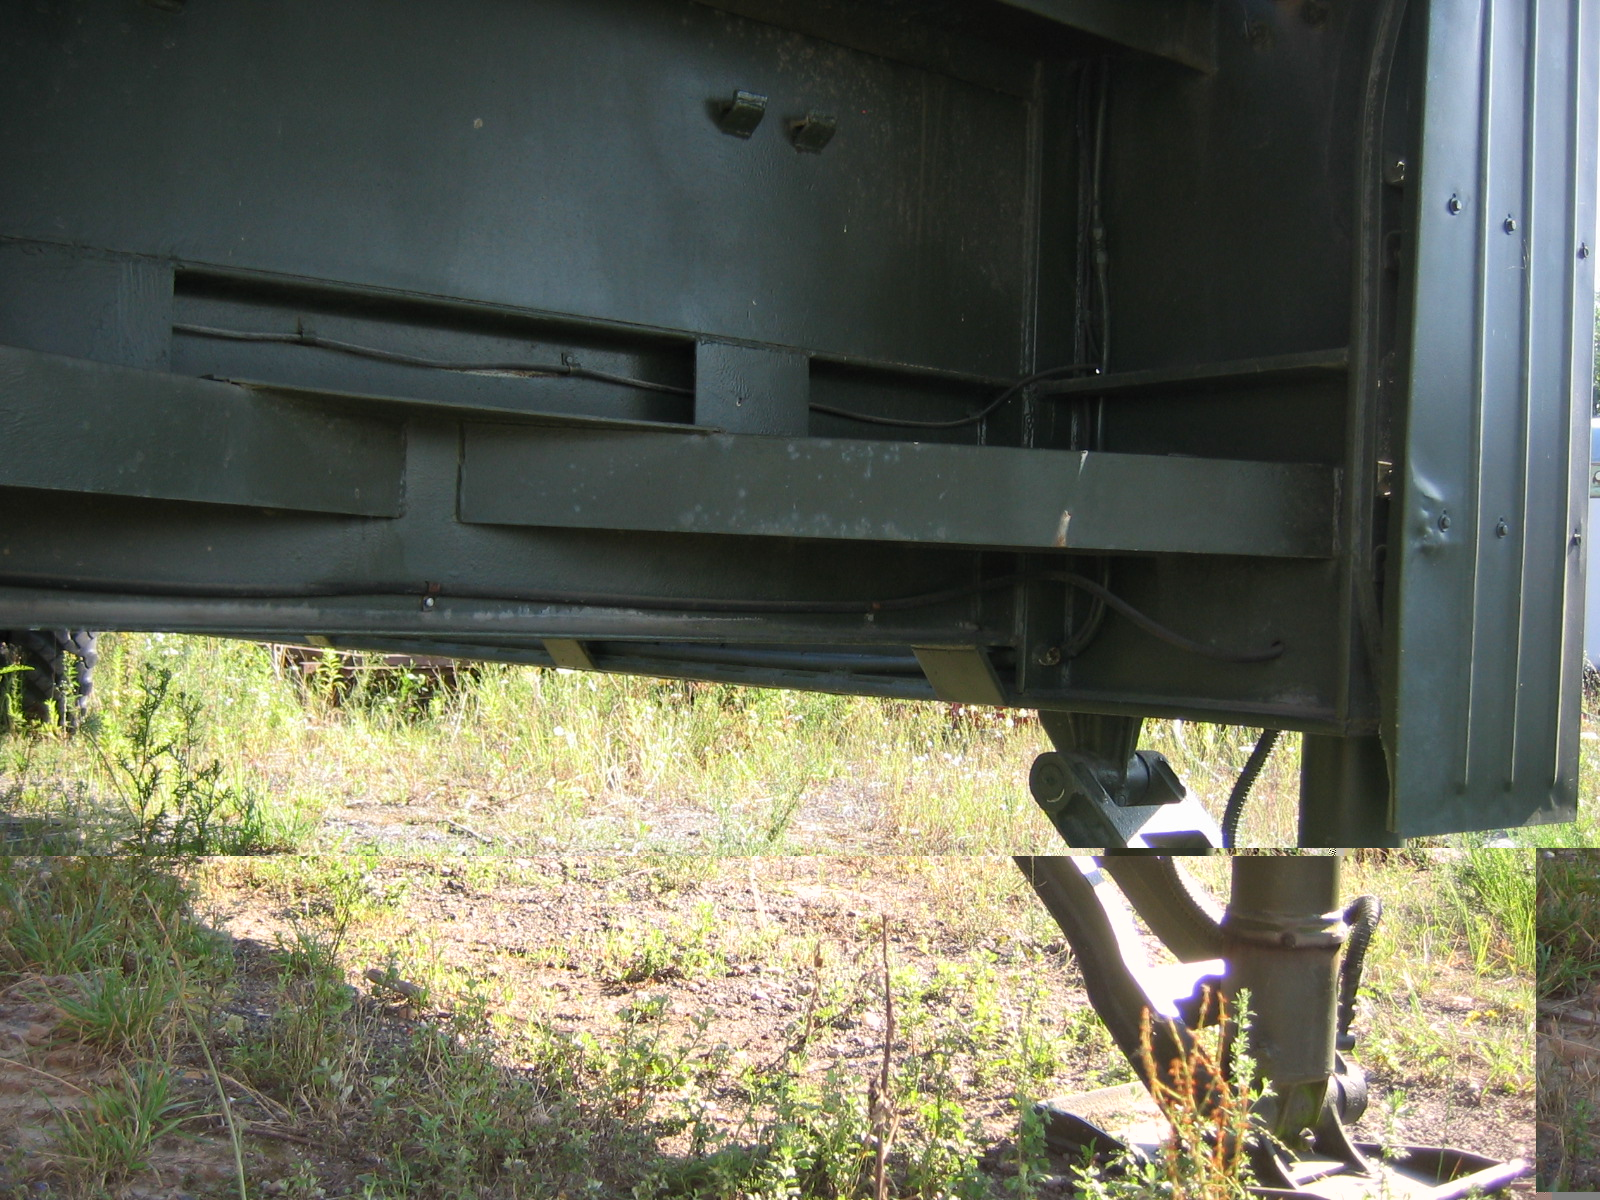
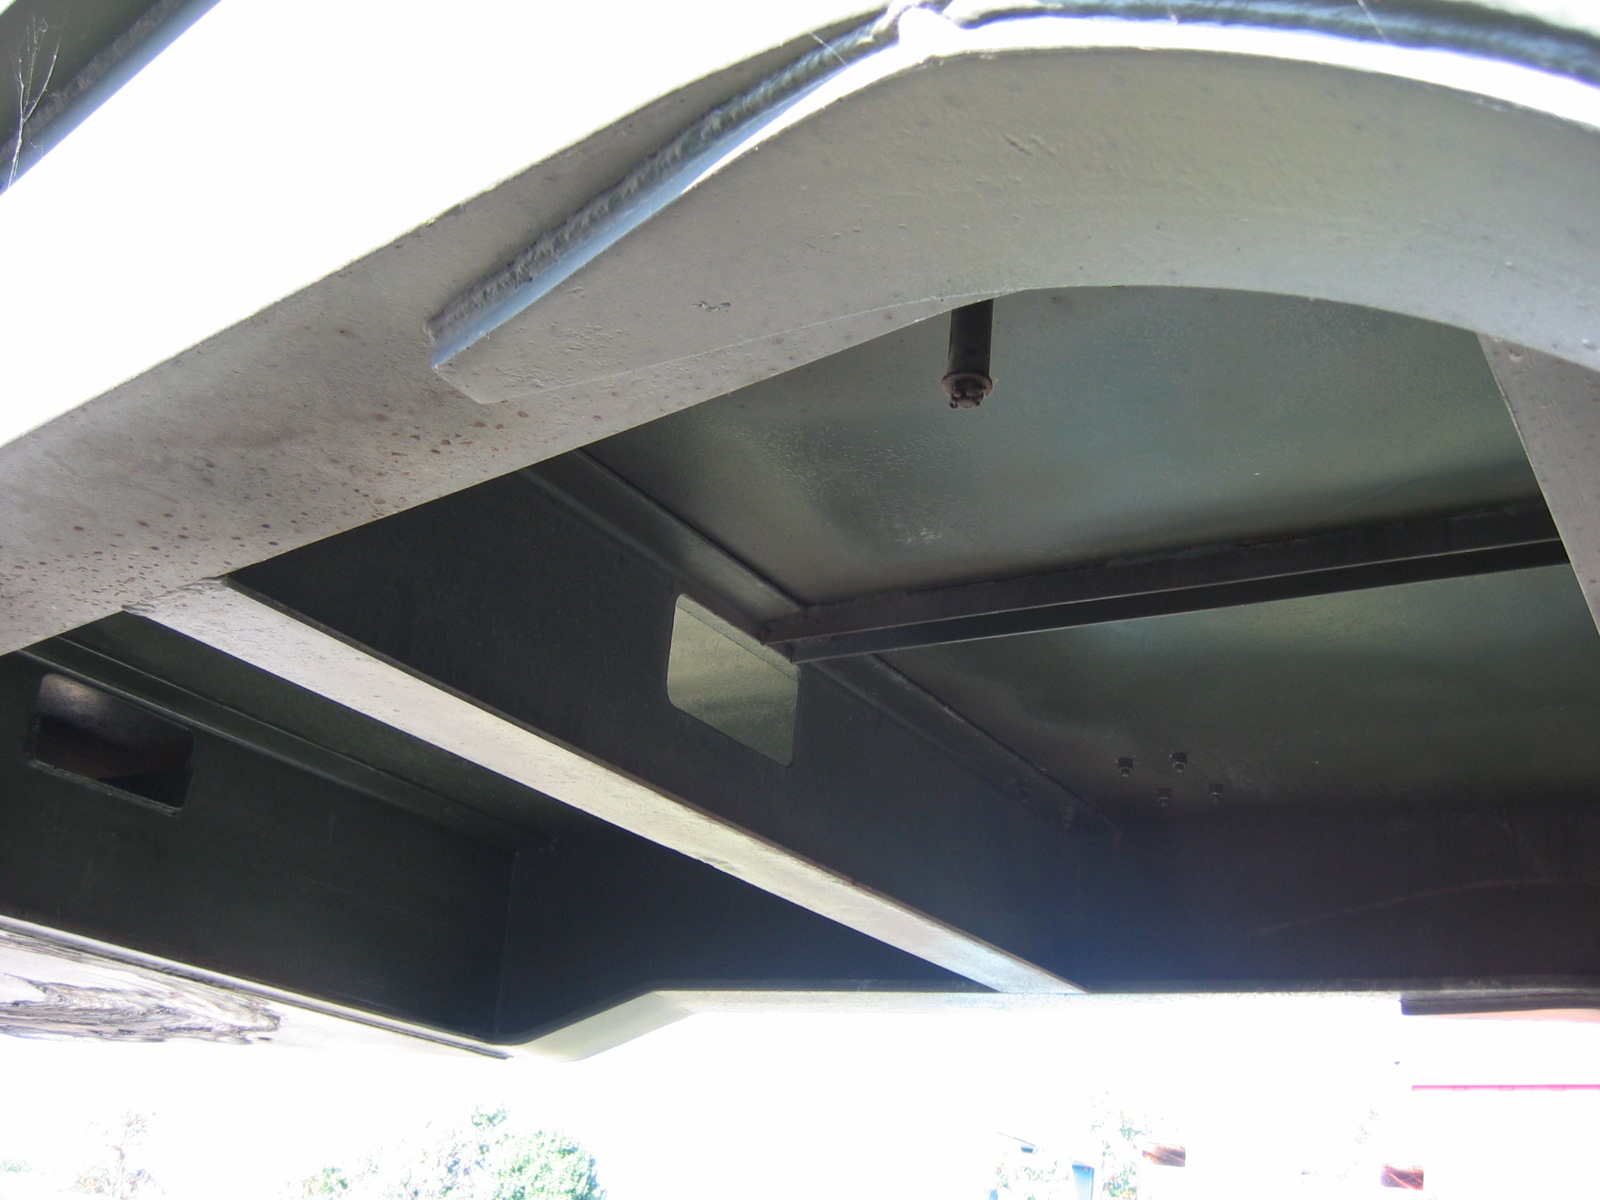
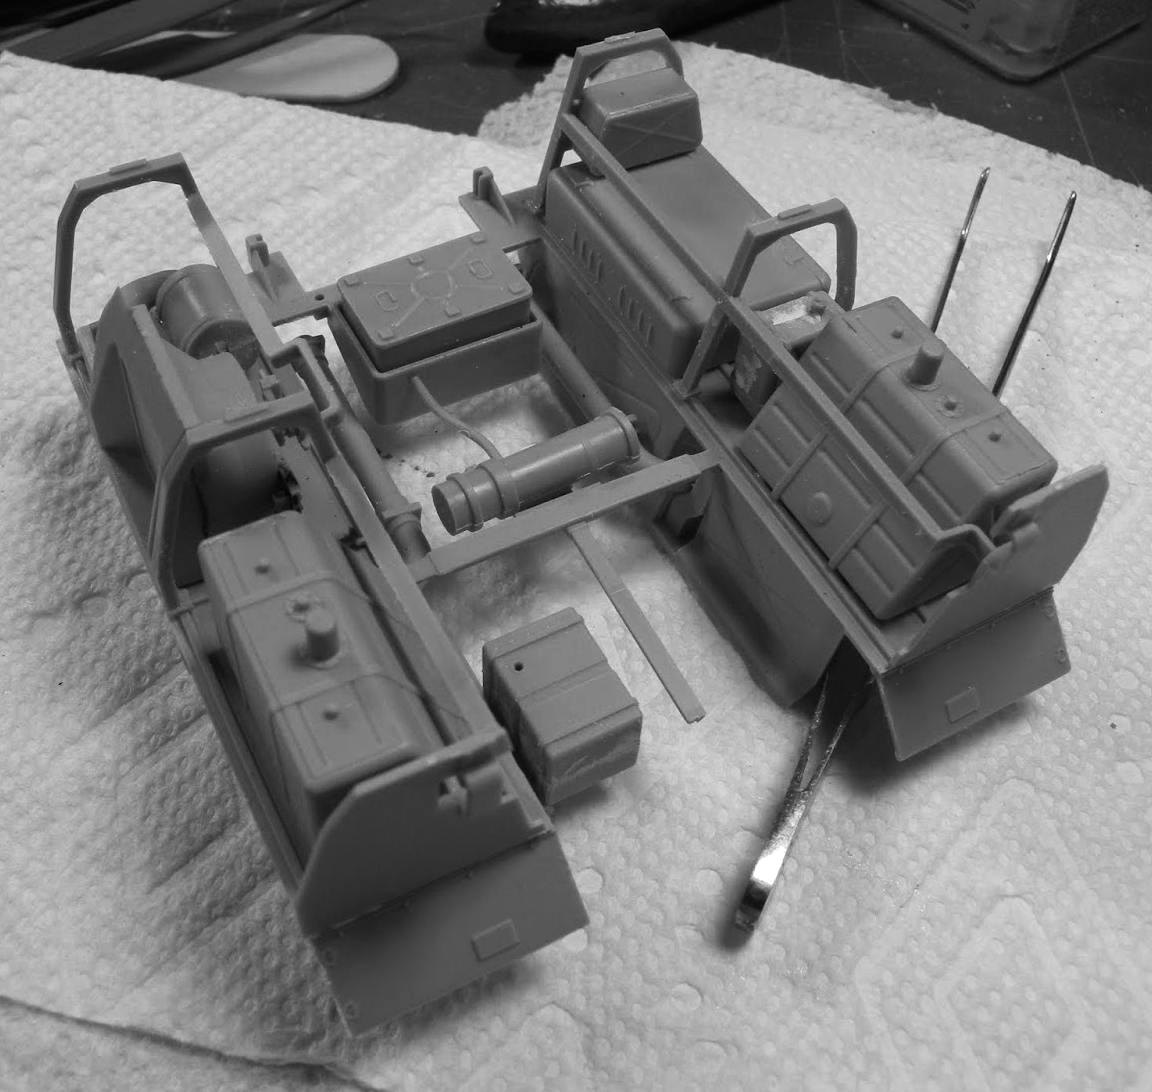
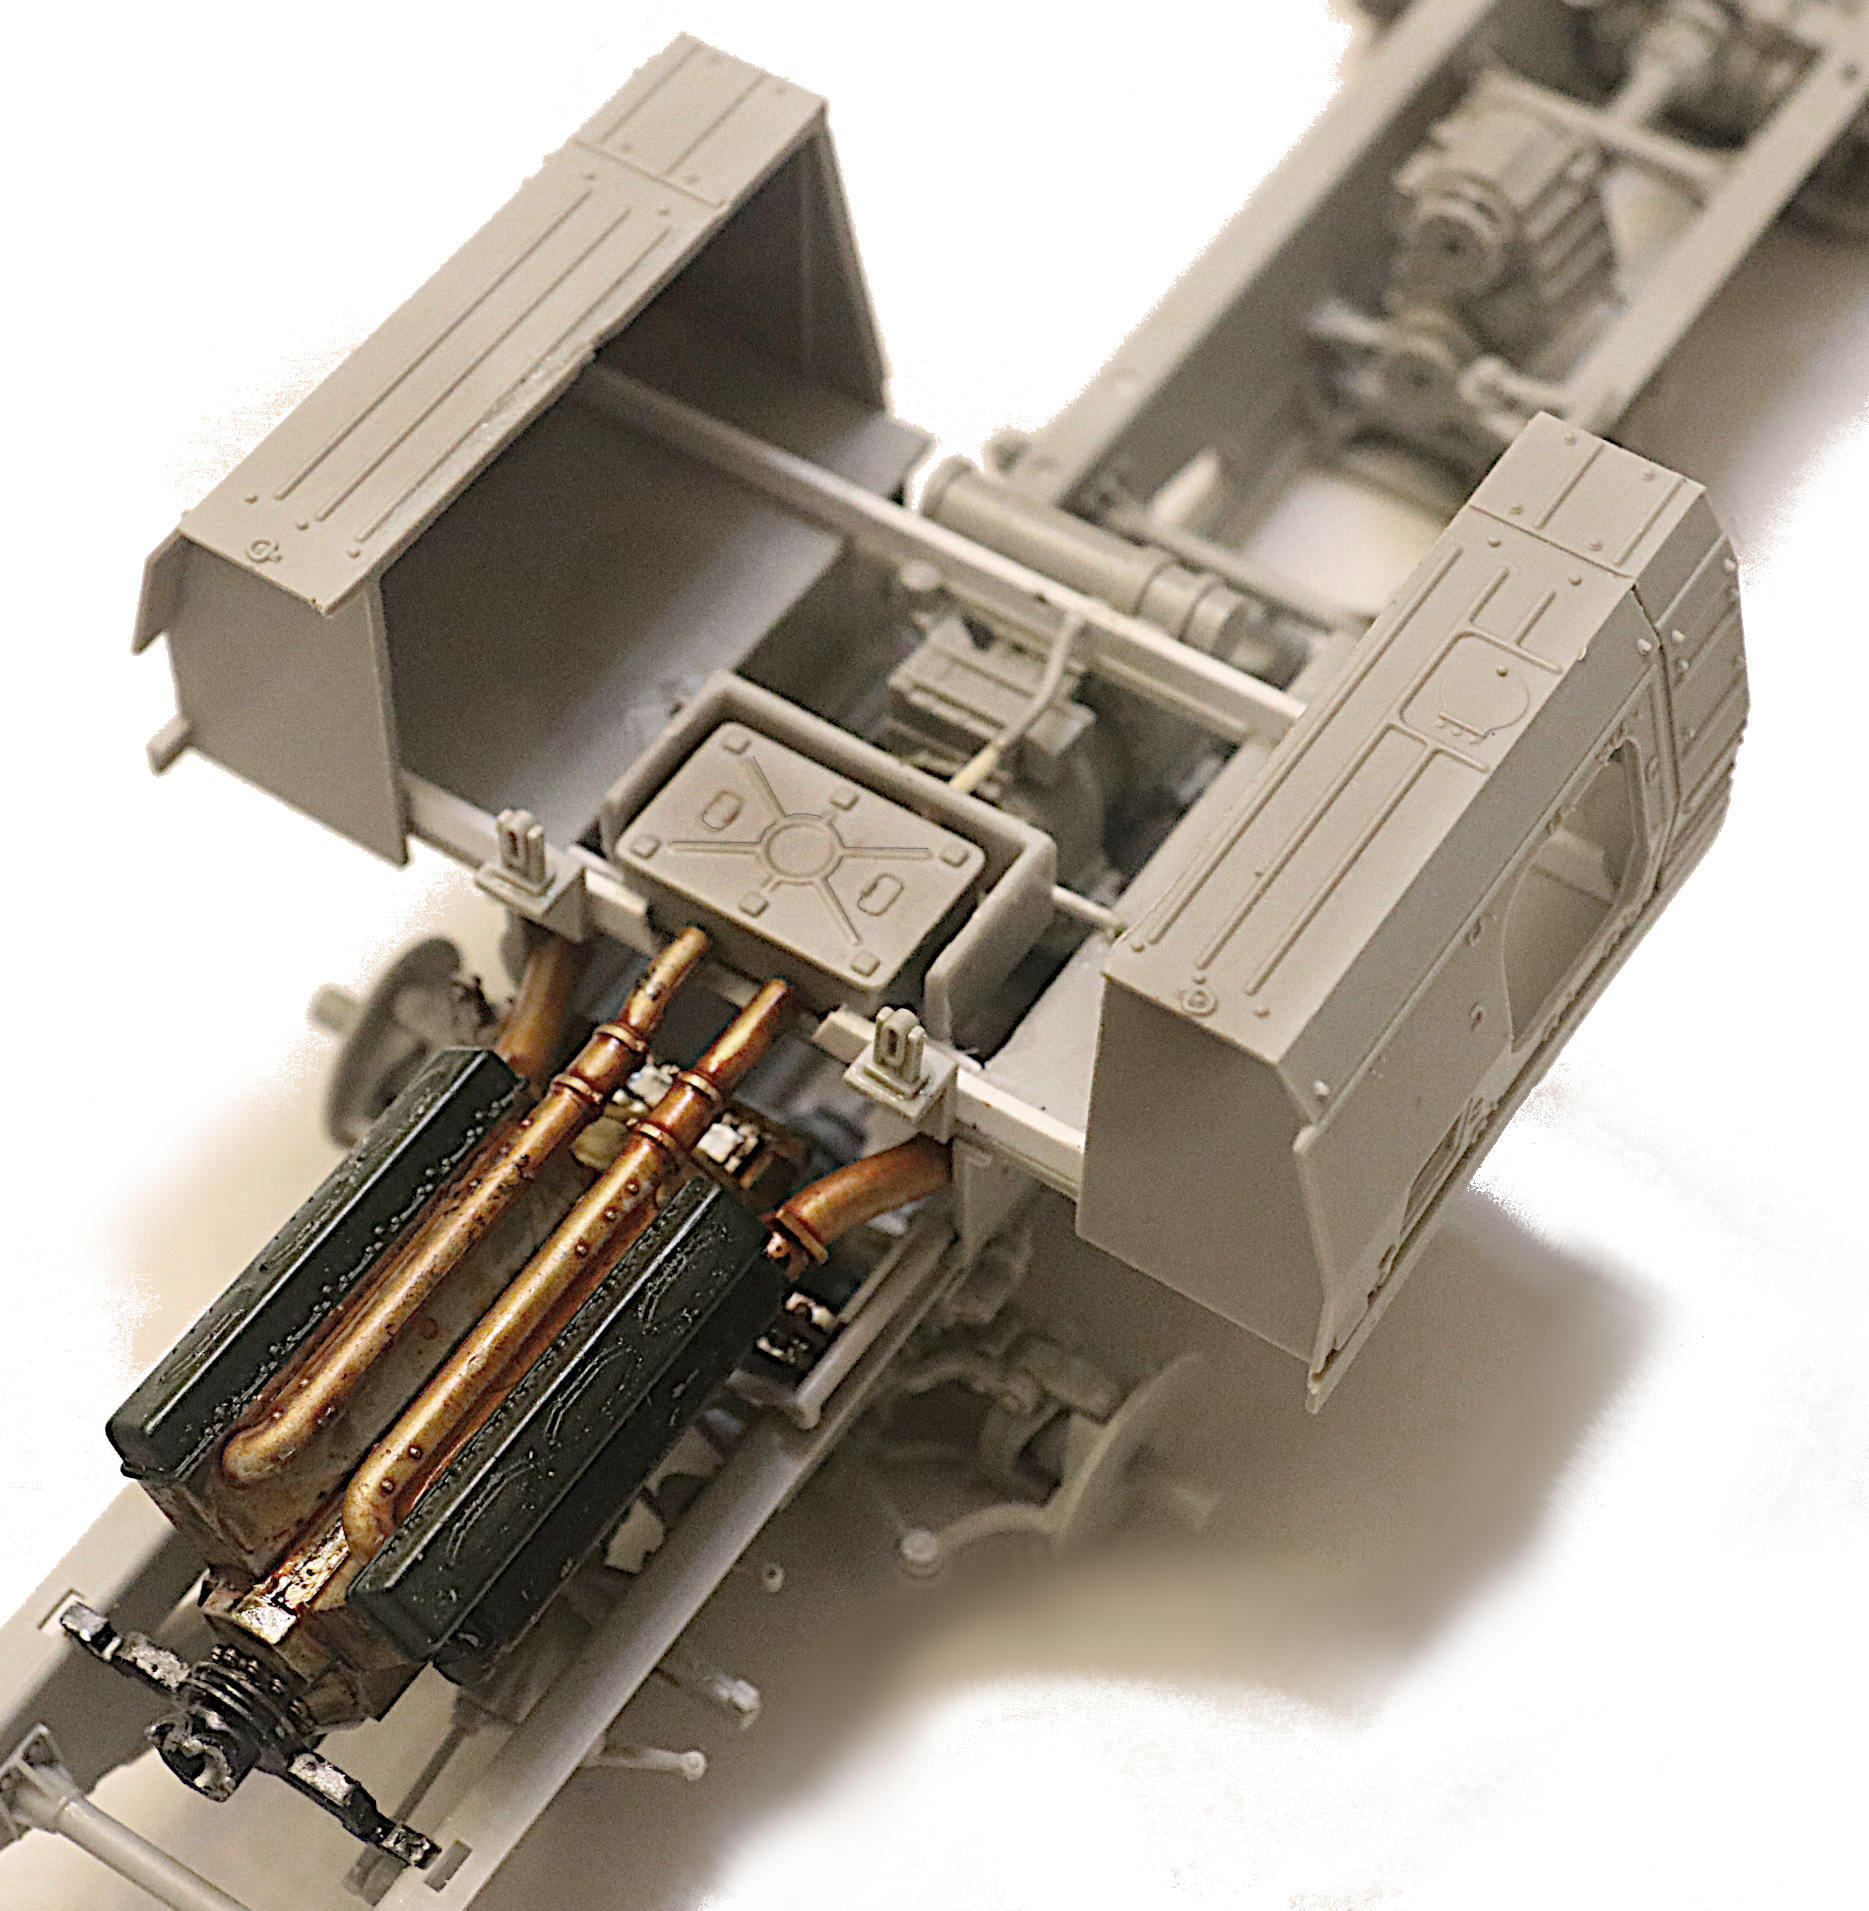
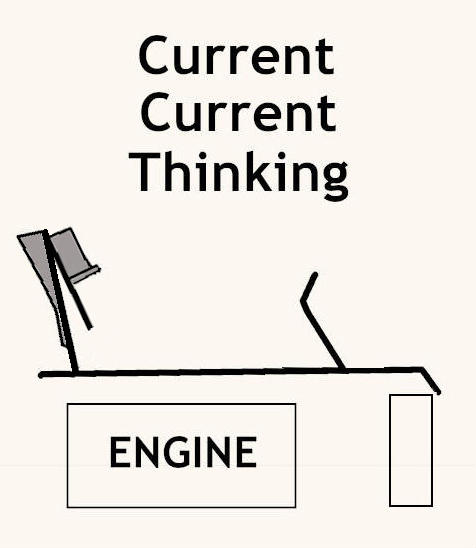
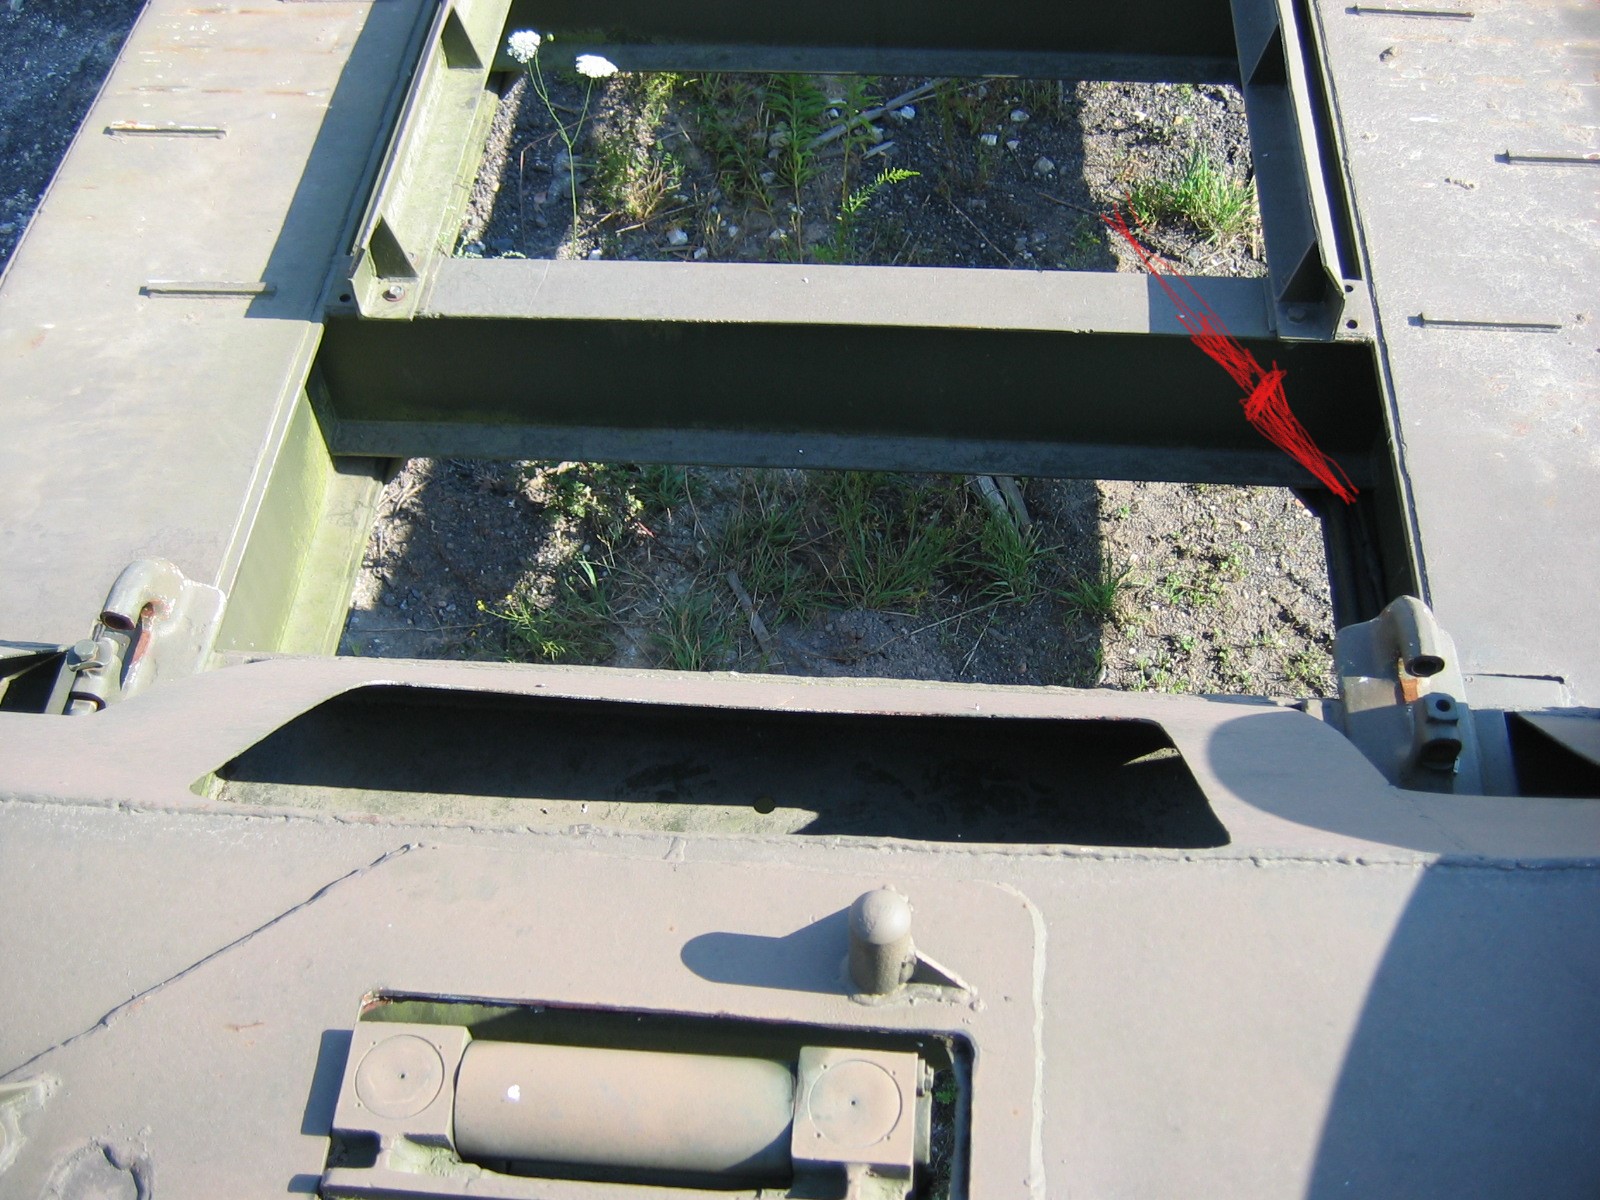
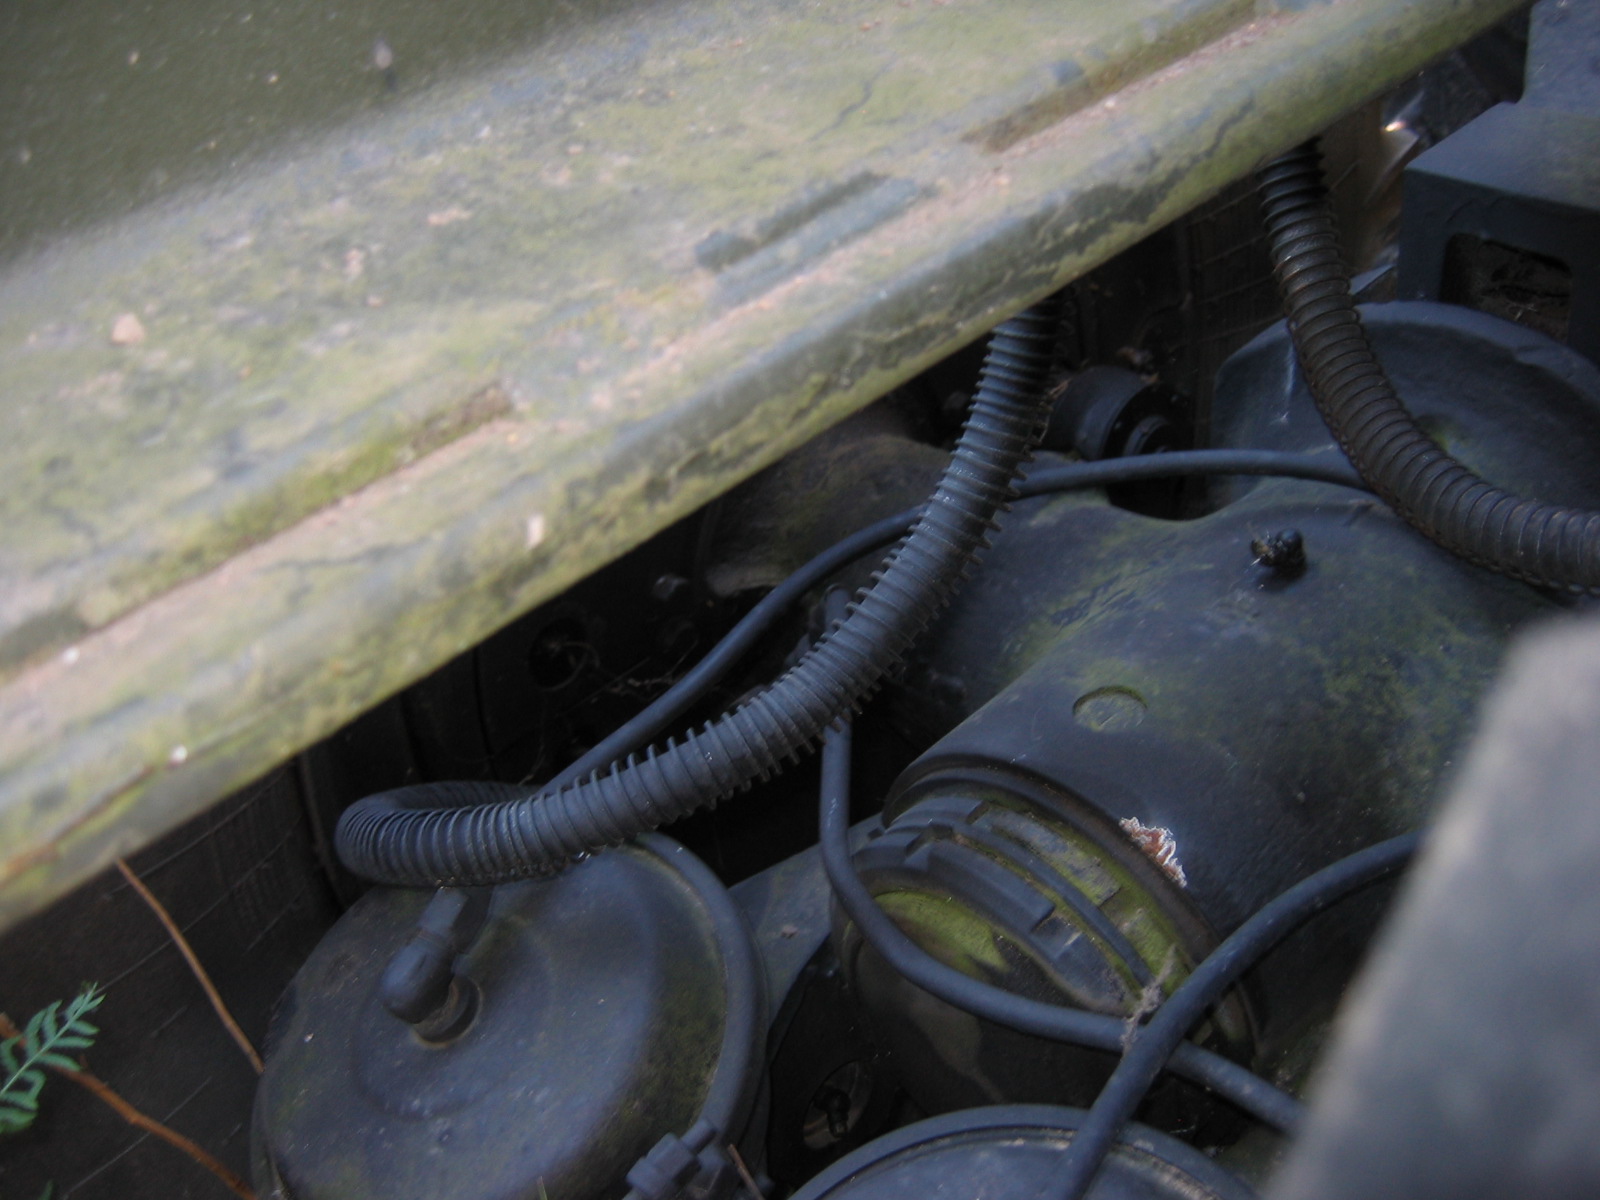
Behind the coupling head, the compressed air passes through the brake valve to the two air reservoirs, which are attached to the last crossmember in front of the axle assembly. The compressed air lines and electrical cables are routed to the rear along the left inside of the longitudinal member. There are two lines (brake line and supply line to the reservoirs). The line diameter is 15 mm, made of steel or copper. The brake valve is mounted in the gooseneck and therefore cannot be replicated, as it is not visible. Everything else is feasible.

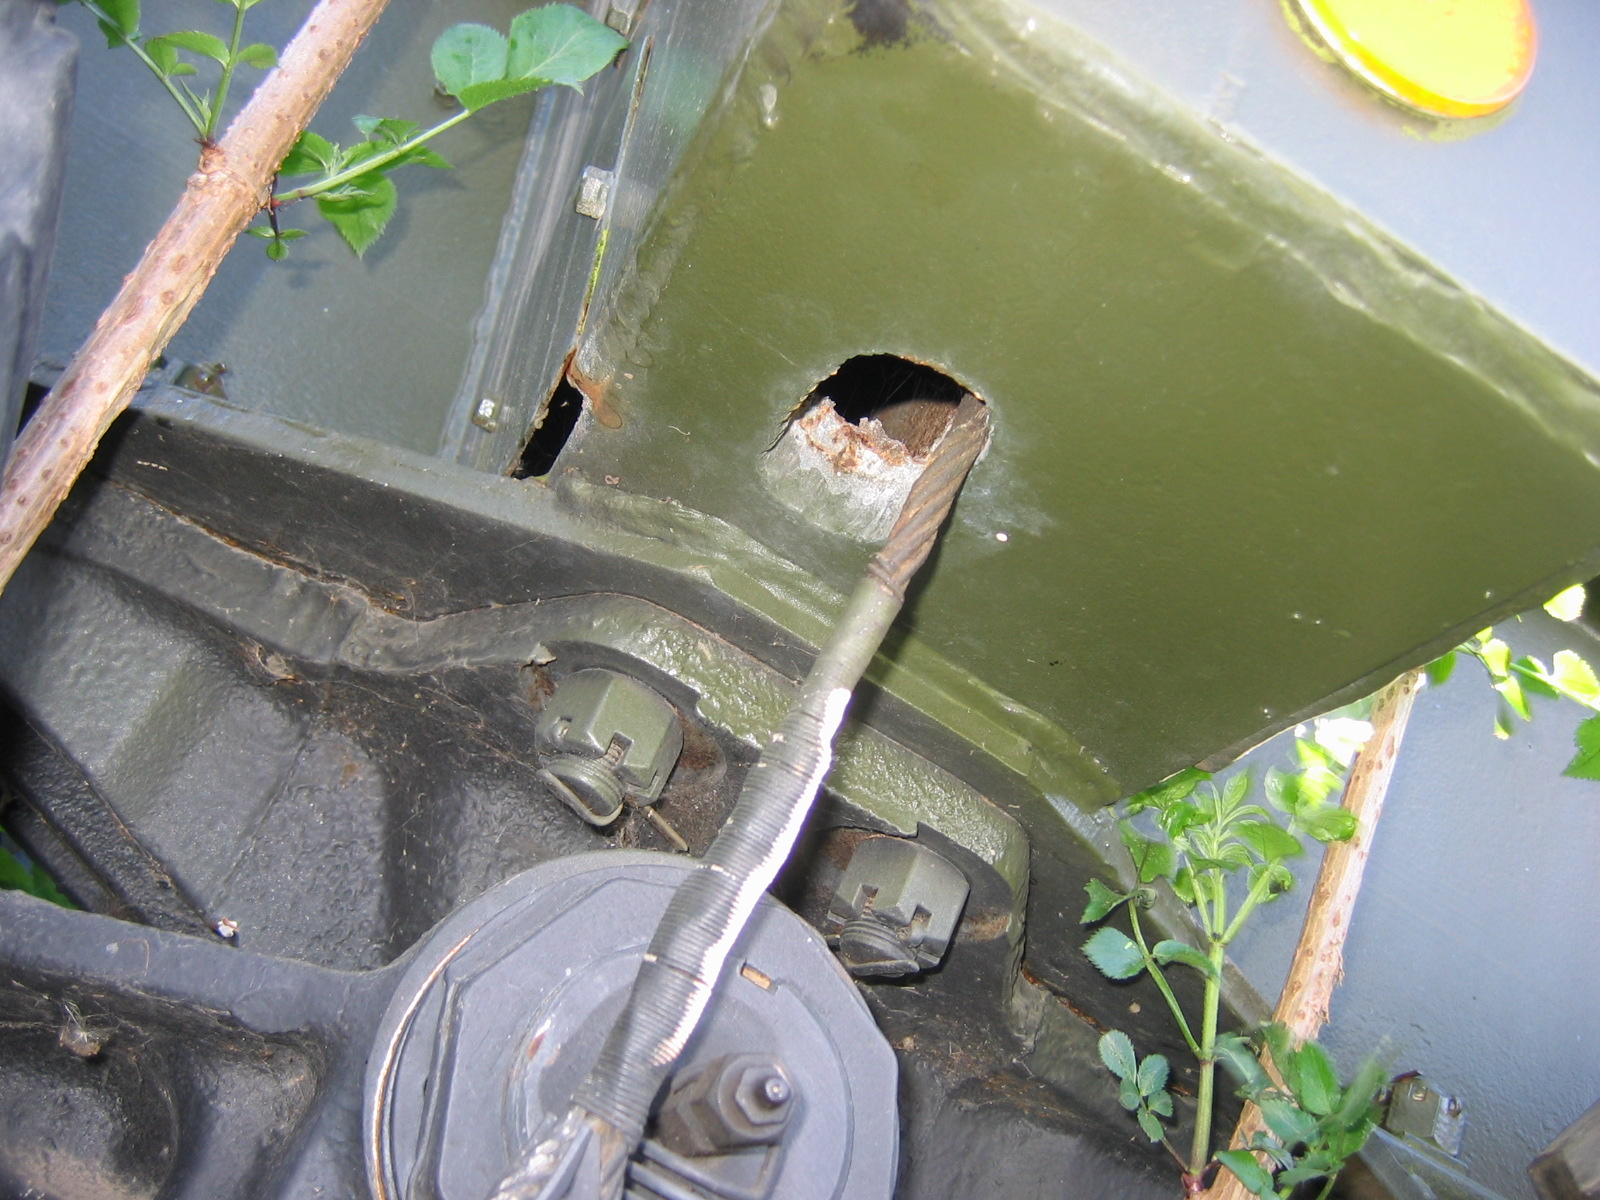
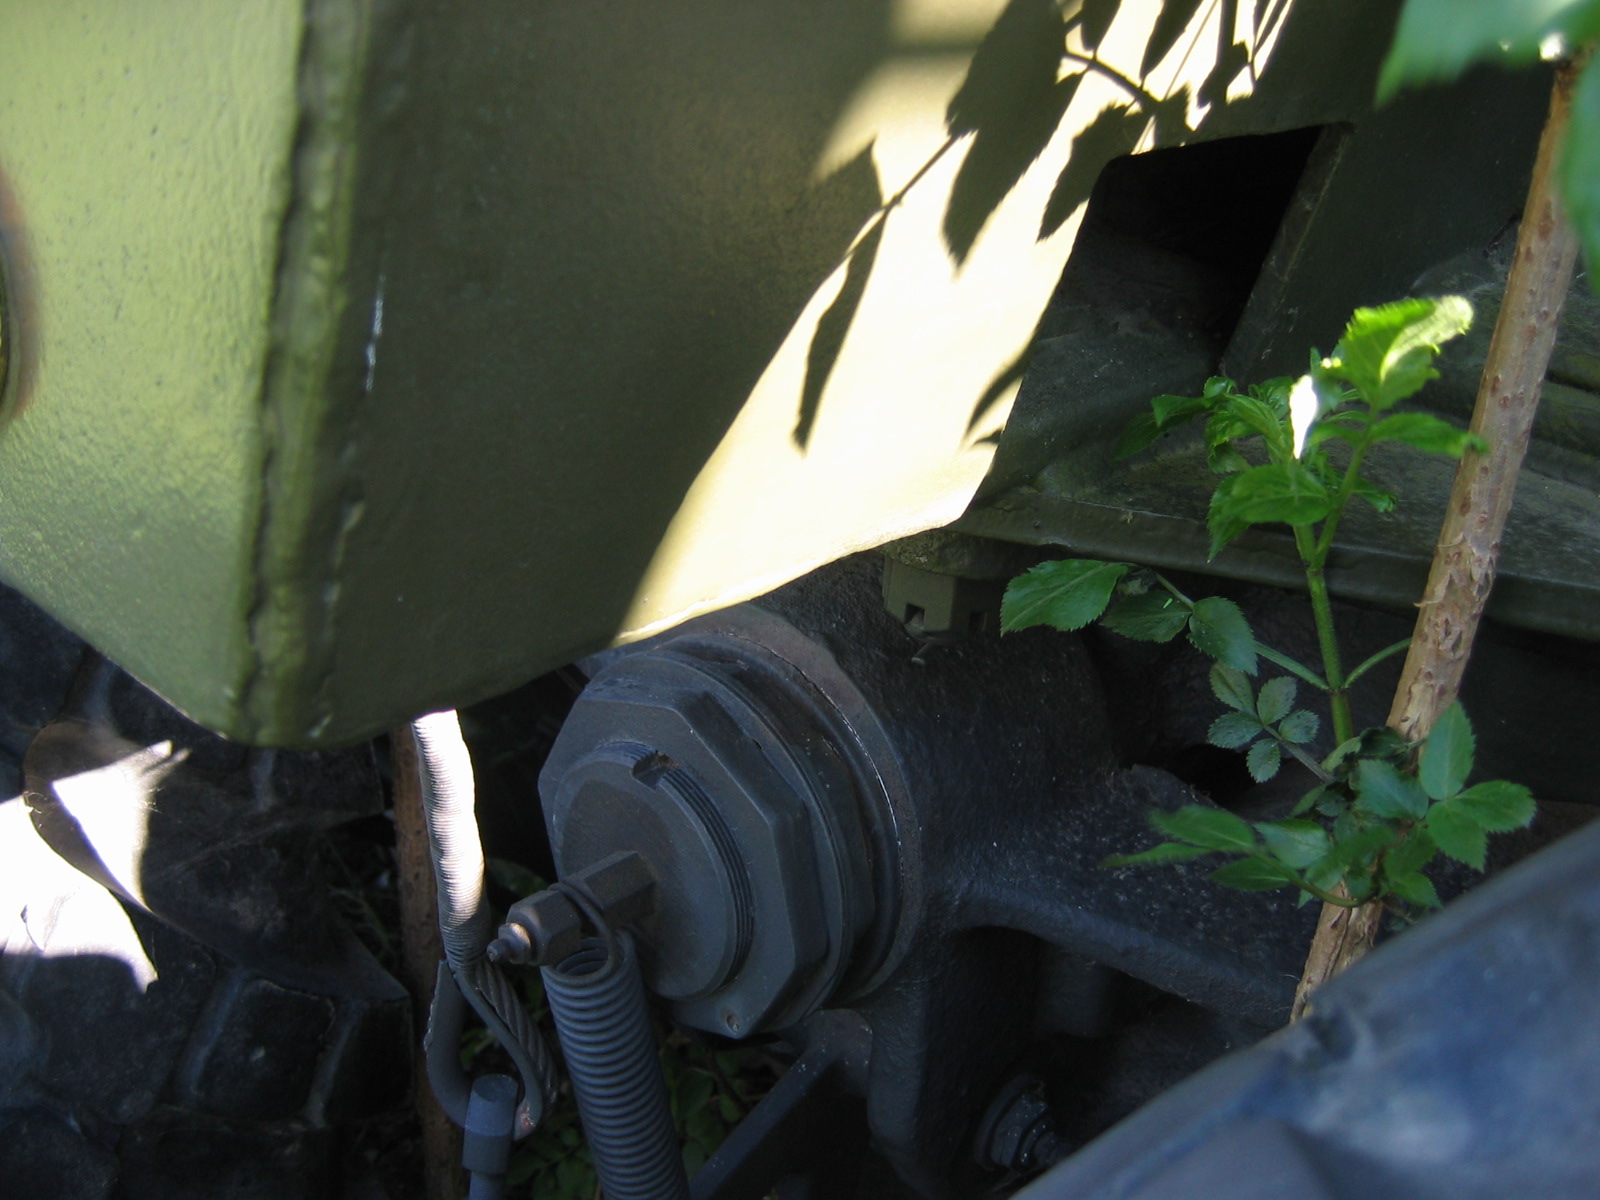
Die Anordnung der Bremszylinder des Achsaggregates, die bei einer Bremsung die benötigte Druckluft aus den beiden Druchbehältern durch das Bremsventil erhalten. Das Bremsventil schaltet bei Druckabfall der Fülleitung, bedingt durch eine Bremsung, um und der Auflieger bremst ein. Sehrgut für den Modellbauer, denn weitere Ventile gibt es am Orginal nicht. Hier sind die Bremsschläuche zu sehen und die Membranradbremszylinder.

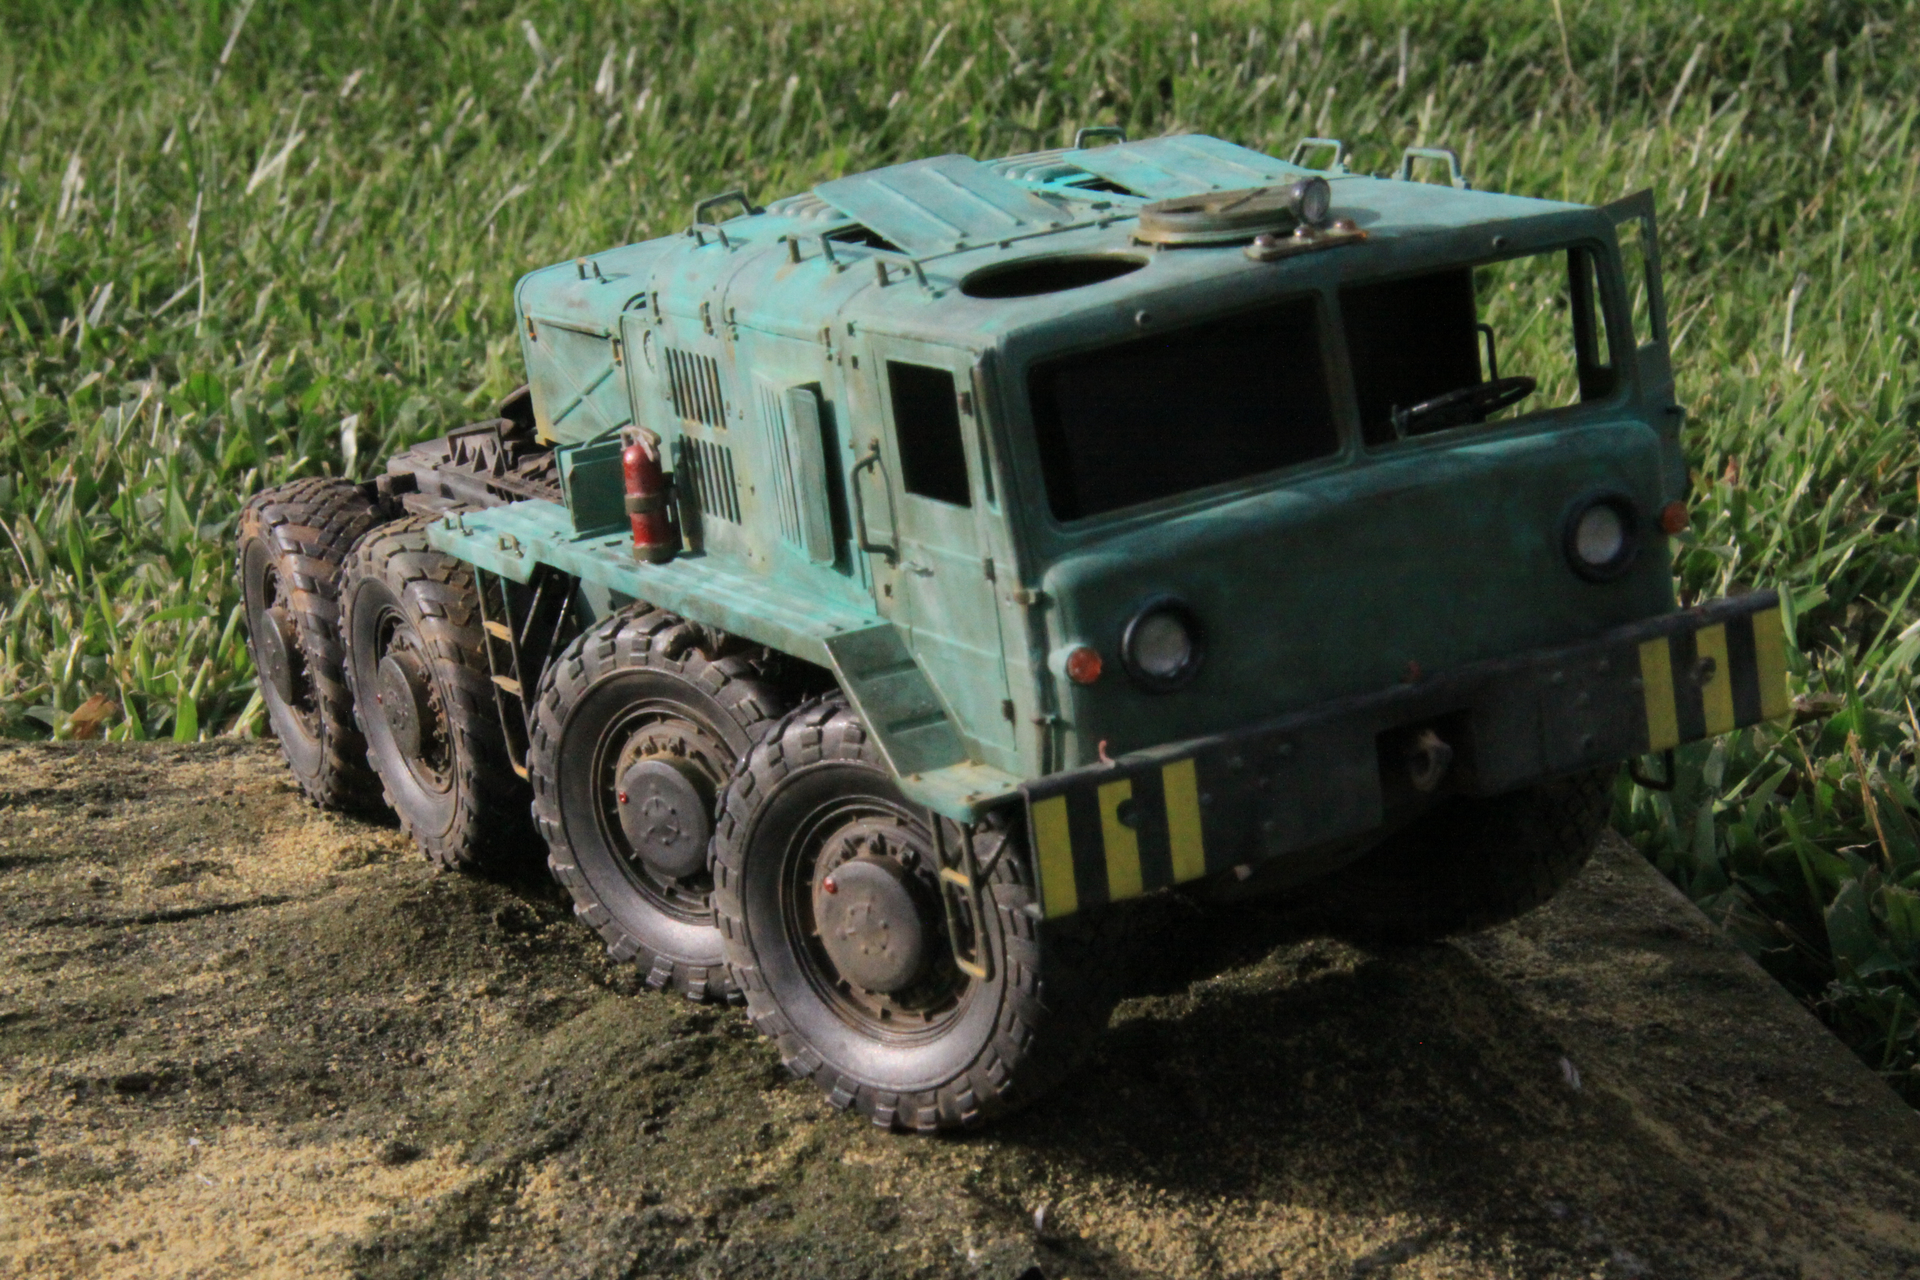
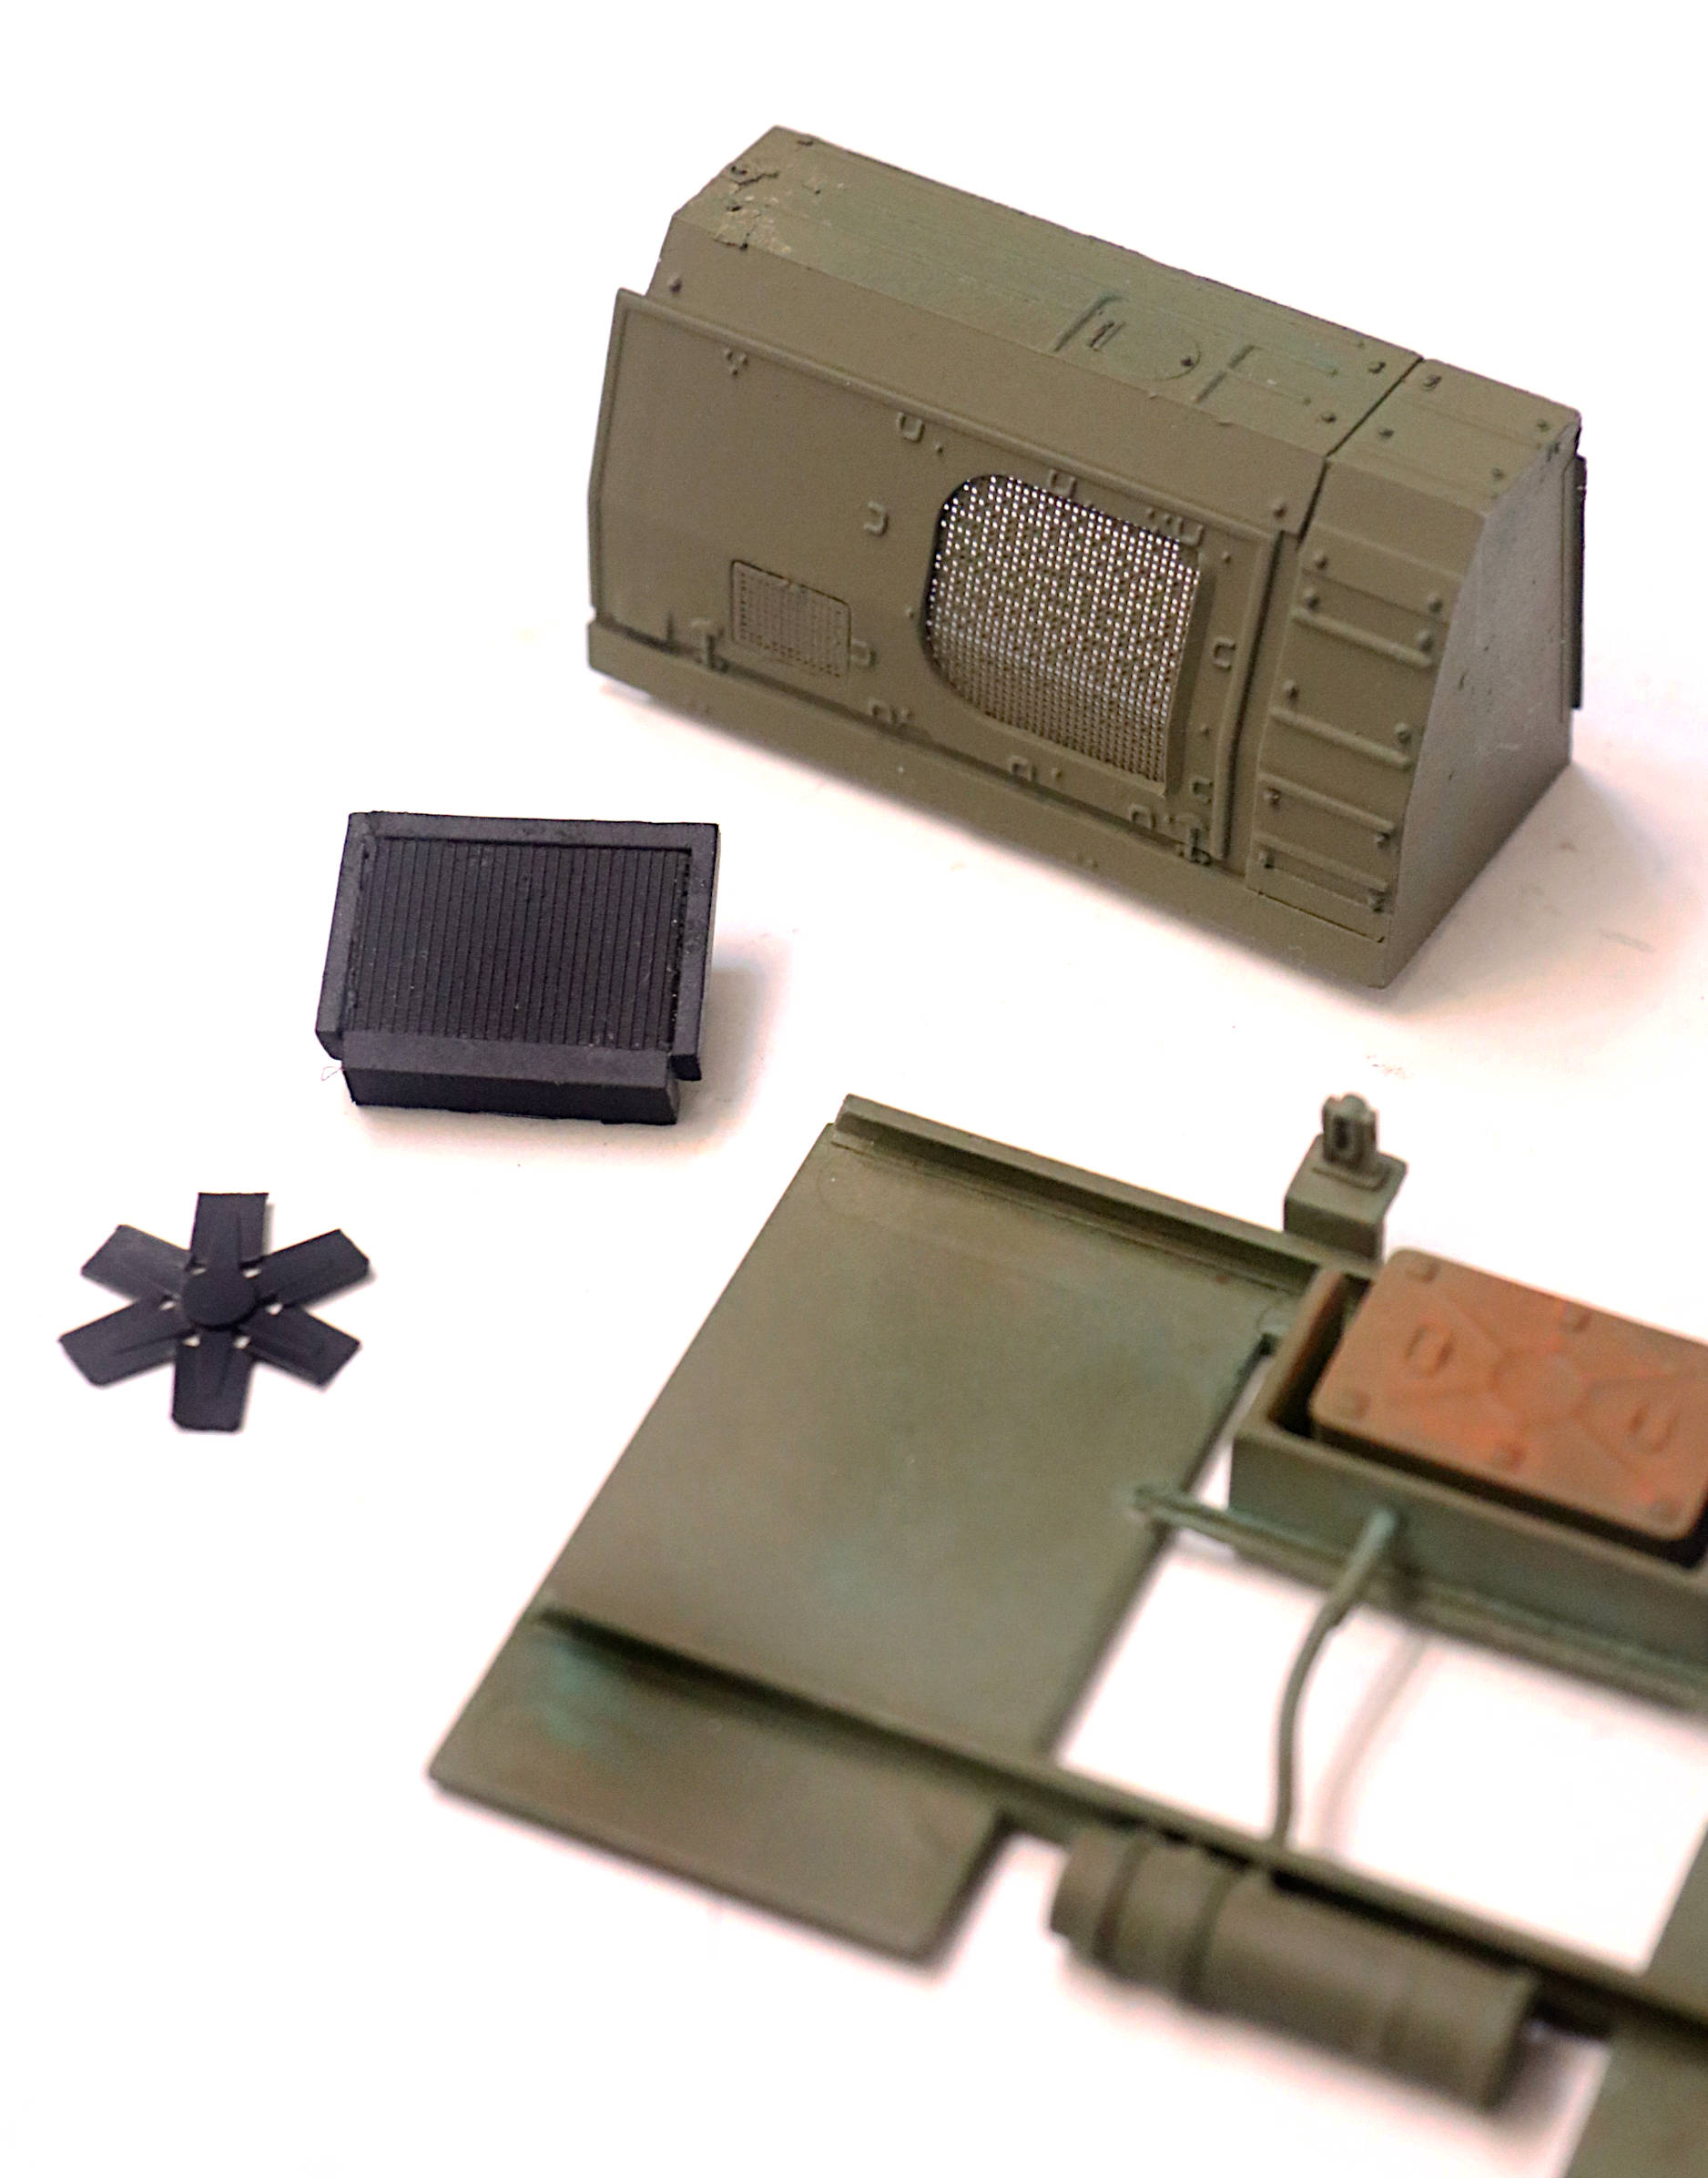
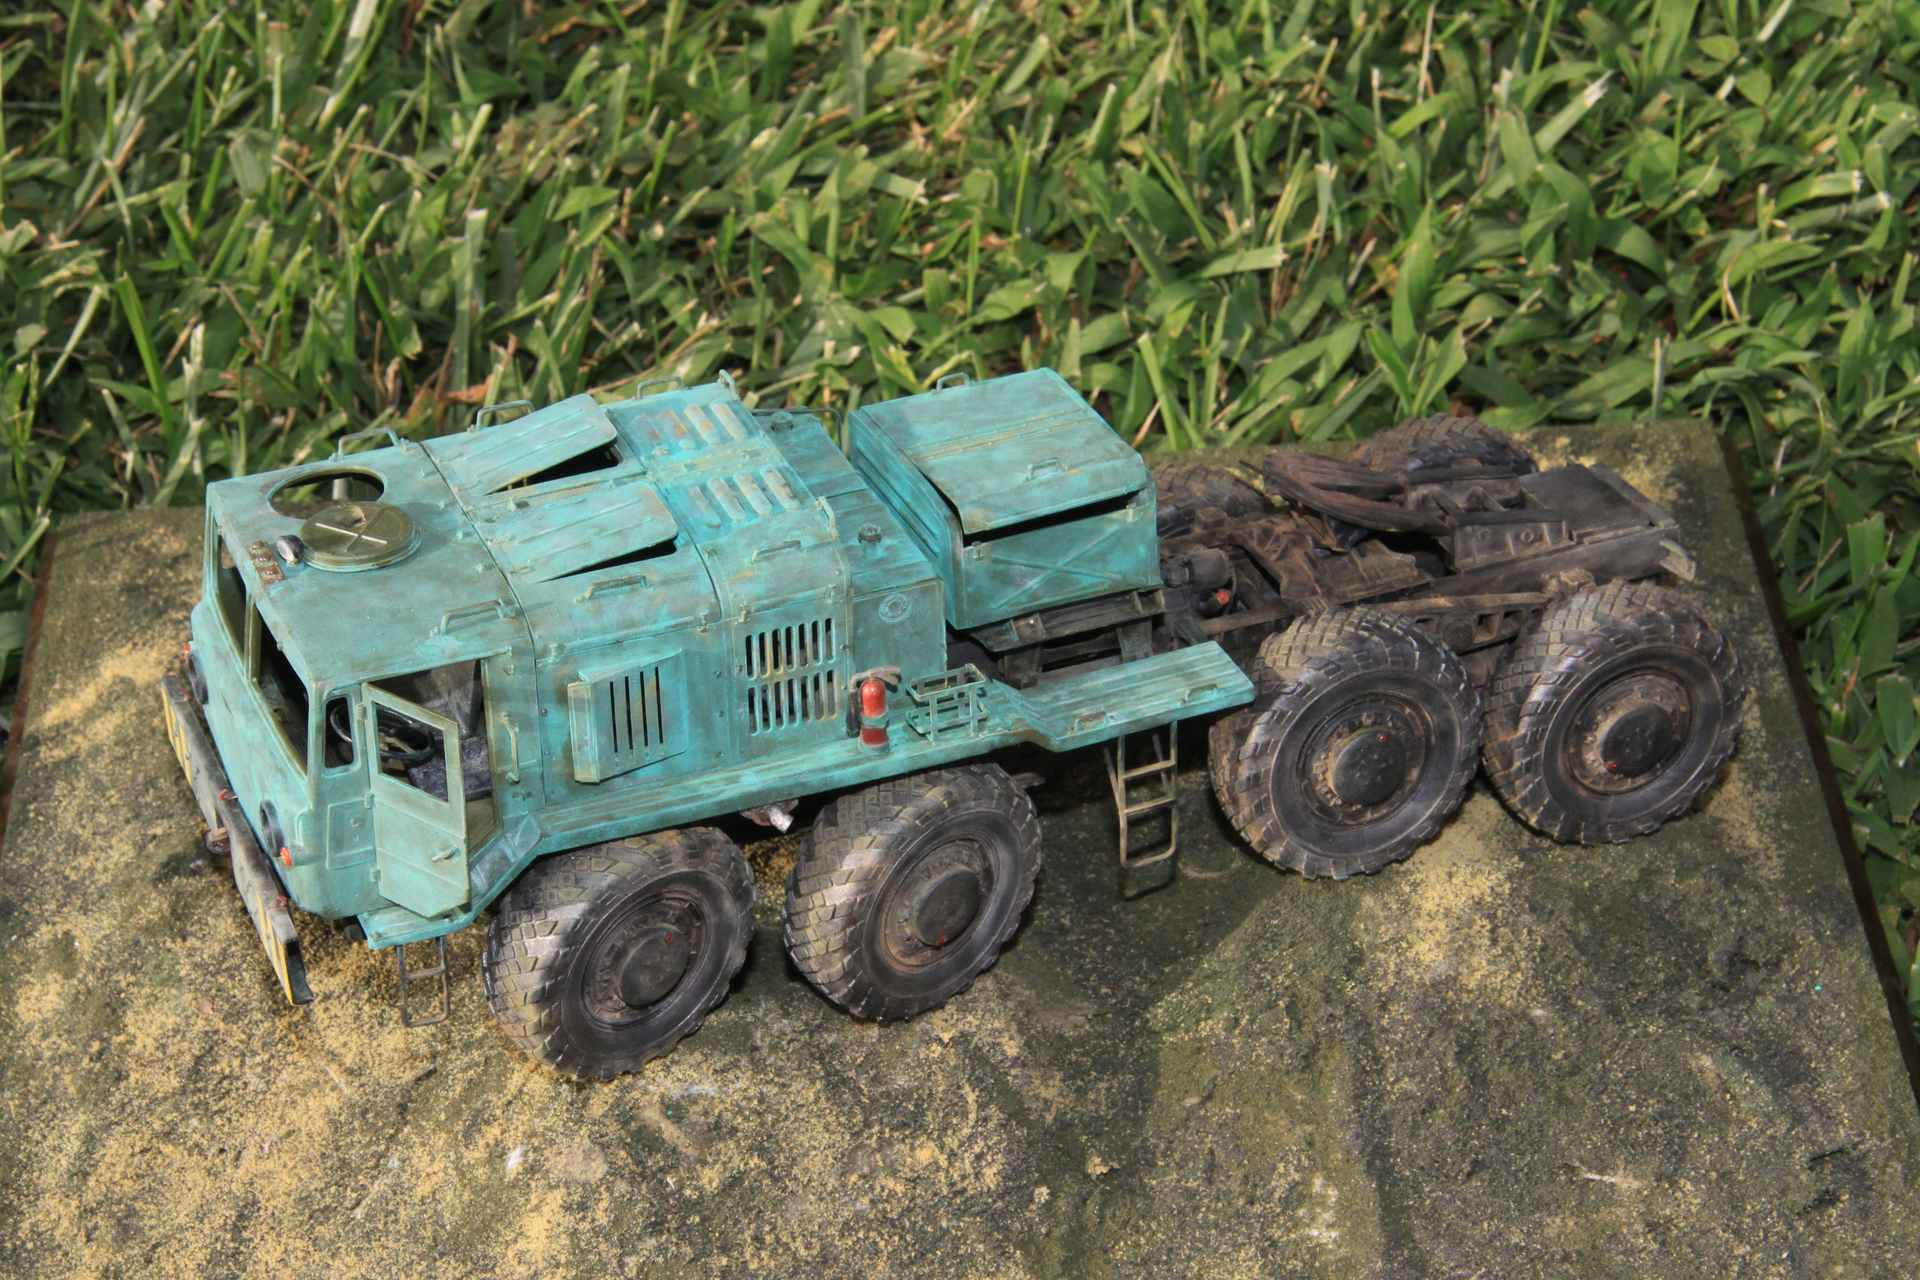
Nun das Problem Feststellbremse, was du nachbauen kannst. Im Modell habe ich es bereits gezeigt . Es ist eine sehr aufwendige Arbeit, die sich aber lohnt. Du wirst es nicht bereuen diese Ergänzung gemacht zu haben. Hier mal Bilder, wie ich Anfangs schon geschrieben habe.

Viel Freude beim Bauen und ich hoffe, das Dir dieser Beitrag weiterhilft.

Beste Grüße lkwman

5 Likes

Off topic (kinda). I have been out of the hobby for several years. Is anyone now offering the Russian “Big Bird” radar unit in 1/35th scale? I already have the smaller “Flap Lid” but I would love to see the larger unit that often pairs with the S-300 launcher.

It is available in 1/72. So if you really

want it, it is possible to use this kit as inspiration for a scratch build :innocent:

https://www.scalemates.com/kits/modelcollect-ua72049-maz-74106-air-search-radar-64n6-big-bird-s-300--942107

1 Like

Thank you Thomas. I do know it is available in 1/72nd scale, However I want it in 1/35th scale.
I want something that is well detailed and shows as much mechanical and interior detail as possible.

I was disappointed with the Trumpeter “Flap-Lid” model in that the operating shelters came with zero interior detail, not even doors that could be posed open. (I could have created an acceptable interior from available reference but the door was shut on that possibility - pun intended.) The Scud missile launcher comes with WAY more detail than the Flap-lid!

The various levels of available interior detail on all these many otherwise GREAT Trumpeter models is very frustrating!

CORRECTION:

I have now revisited the Trumpeter 30N6E “Flap-Lid” radar kit which I have not gotten into in well over a year.

In the reply above I incorrectly stated that the doors to the operators cabin were molded in the CLOSED position. This is incorrect, while there still is no interior detail offered with this kit the doors are molded SEPARATELY to be posed either open or closed.

Based on the many YouTube videos coming out of the Ukrainian conflict it should be relatively easy to build at least a rudimentary interior. With just a little bit of research it should even be possible to build an accurate interior perhaps even including proper LED lighting and control panels.

1 Like