As modellers, we frequently have drawings or photographs in which we want to measure things and convert them to the scale of the model we’re building. If you’ve got an image on your computer, there are much easier ways than holding a ruler against the screen and then punching numbers into a pocket calculator to get them to the right scale. What follows is a way to let the computer make your life easier ![]()
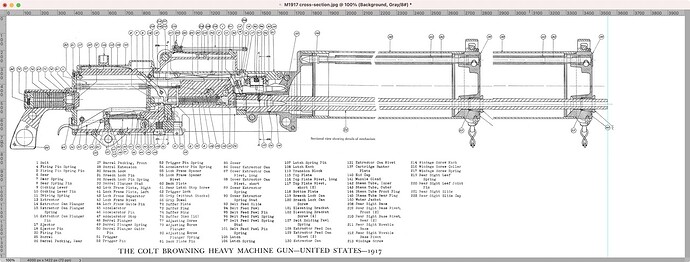
For an M2 half-track I’ve been working on, I wanted M1917 machine guns, but it only comes with M1919s. The receiver of the two is almost identical, but the M1917 is water-cooled while the M1919 is air-cooled, so the whole front end of the guns had to be changed, as did the sight on top of the receiver. I began by searching online for a good drawing of the M1917 in which I could measure dimensions (though I don’t remember where I found it) and also looked up the total length of the gun (980 mm).
That done, I opened the drawing in Adobe Photoshop:
(A note here: on the original drawing, the water jacket and barrel are shown shortened, for reasons of space. I copied the front of the weapon and pasted it at the correct length, which is why it’s in the drawing twice. I’ll explain later how I got it in the right location.)
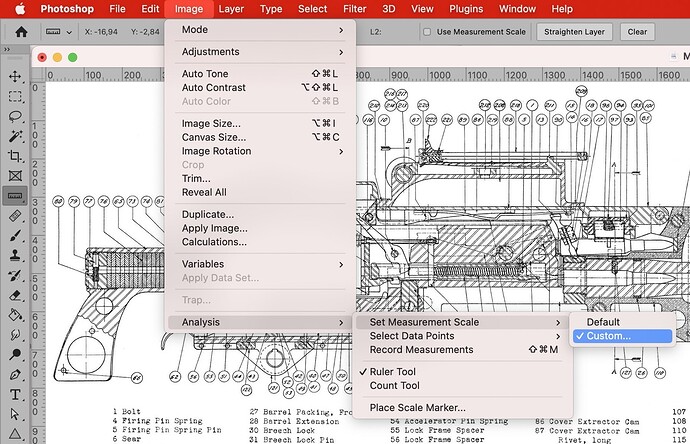
Photoshop has a measuring tool, which you can open by clicking on the little ruler icon in the toolbar — except that doesn’t help all that much because you will still need to convert the pixels it measures, to the scale you need. But there’s a much simpler way as well: click on the Image menu → Analysis → Set Measurement Scale → Custom:
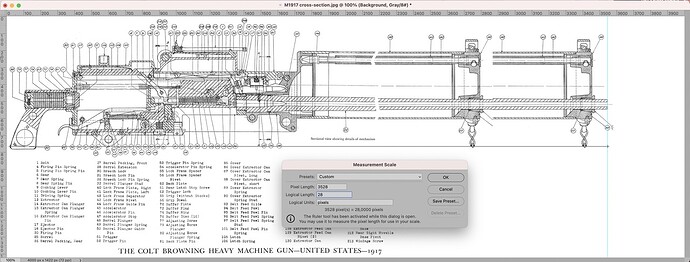
This opens a little window in front of the drawing. In this window, you can enter a number of values: Pixel Scale, Logical Length and Logical Units. For Logical Length, enter a dimension that you can measure in the image, and of which you also know the actual value for your model. In my case, I’ve entered 28 there, because the real machine gun was 980 mm long, which in 1:35 scale makes 980 mm ÷ 35 = 28 mm. For Logical Units, you can, if you want, enter the unit to which you want to convert, such as “mm”, but this is not required.
Having done this, don’t close this window yet! You can now measure the dimension in the drawing by clicking and dragging — this will draw a line with a + at both ends. When you release the mouse button, the length of the line will automatically be entered after Pixel Scale in the window. In the following screenshot, you can see that line just below the machine gun, from the end of the pistol grip to below the muzzle:
Extra tip: by pressing and holding the Shift (⇧) key, the measuring line becomes “sticky” vertically, horizontally, or at a 45° angle when you move the mouse. This will let you measure nice and straight without having to carefully align both ends of the measuring line by hand.
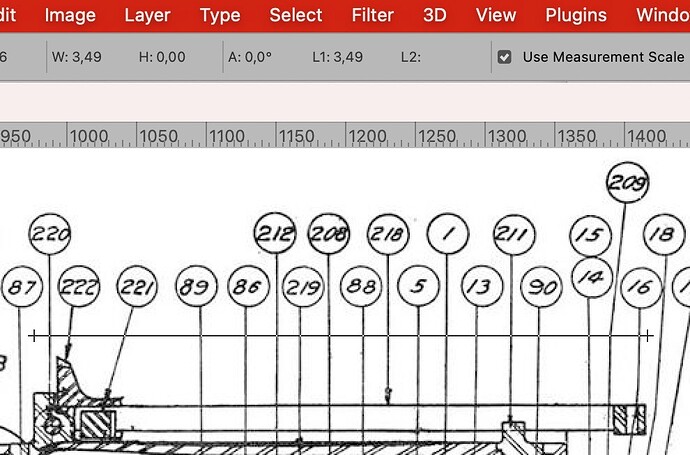
Now click the OK button and you can measure anything you want in the image. Here, for example, the length of the rear sight leaf:
Here too you can see the measuring line with a + at both ends, and above it in the grey menu bar, it says “L1” with the value 3.49 after it. In other words: the length of the measuring line is 3.49, so the sight is about 3.5 mm long. This works for everything: just click and drag with the mouse to find any dimension you want to know, and you can read it off in your model’s scale immediately. Here, too, you can keep the Shift key pressed to measure perfectly horizontally, vertically, or at a 45° angle.
Be sure to check the box marked Use Measurement Scale in the grey bar! If you don’t, you’ll measure pixels in the image rather than in the scale you need.
How I got the drawing to the correct length
I also used this tool to put the front end of the gun in the right place. I first enlarged the canvas to the right (Image menu → Canvas Size) to make sure it was big enough — just by taking a guess at how much space was needed. I then looked up that the M1917’s barrel length is 609 mm, so the length of everything behind the barrel was 980 mm − 609 mm = 371 mm. After opening the Measurement Scale window, for the Logical Length I entered 371 and measured from the back of the pistol grip to the very back end of the barrel. This ensured any other dimensions I measured, would be those of the real gun.
Next, I used the measuring tool (the ruler) to set out a horizontal line 980 mm long from the back end of the pistol grip. After that, I put a vertical guide (the pale blue line) at the end of the measuring line and then copy and paste the front of the gun, moving it so the muzzle was against the guide line.
All that remained was to open the Measurement Scale window again and set the Logical Length to 28 so that all following measurements would be in 1:35 scale.
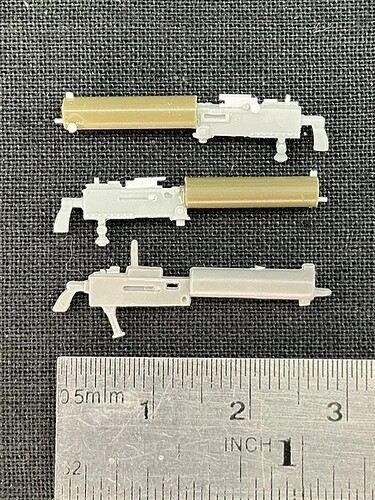
For completeness, here are the guns I converted:
The bottom one is from Master Box, to show how poorly detailed it is compared to Dragon’s M1919s.
