Well here we are another 12 months later, and this build is still sitting right beside my bench as I work through other projects. I’ve picked it up and turned it over and test fitted multiple times, but I just can’t seem to hit the right moment to push it forward.
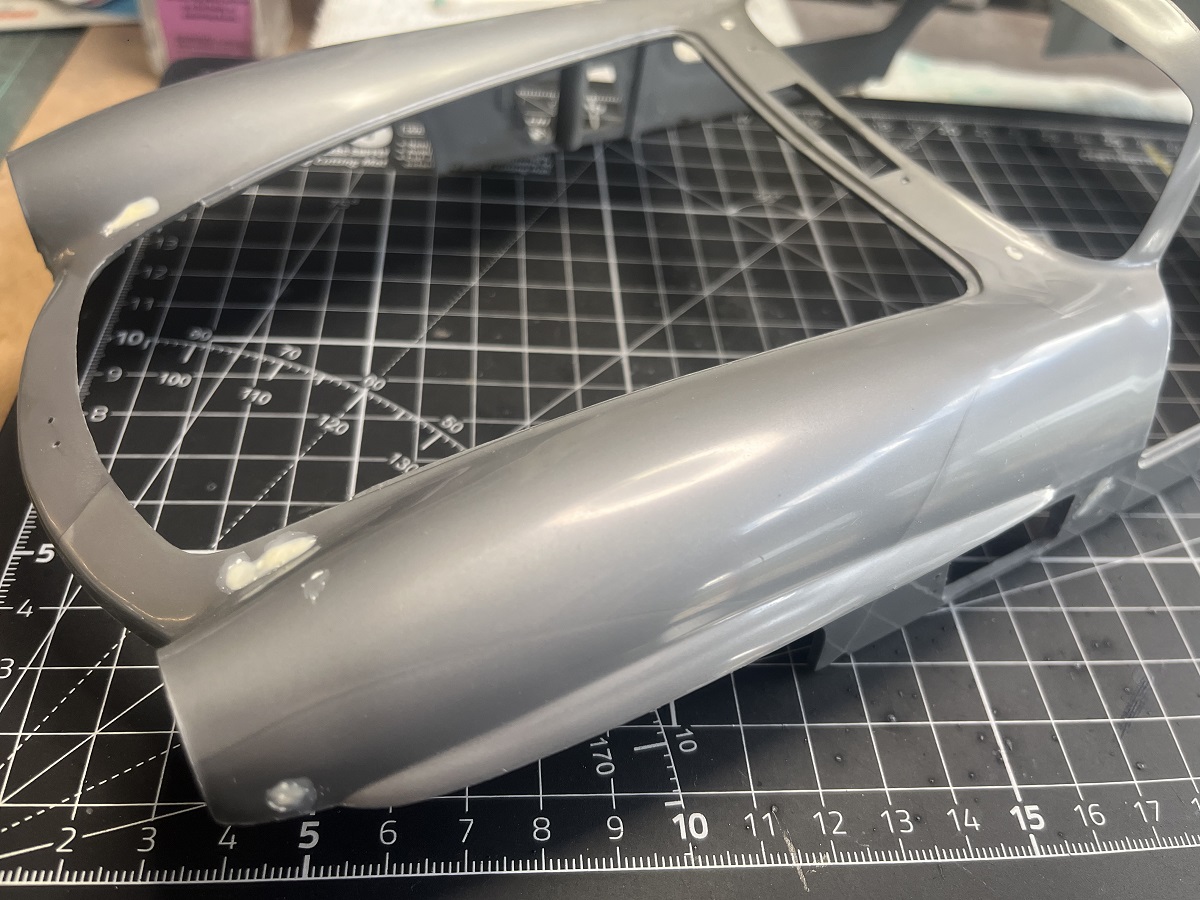
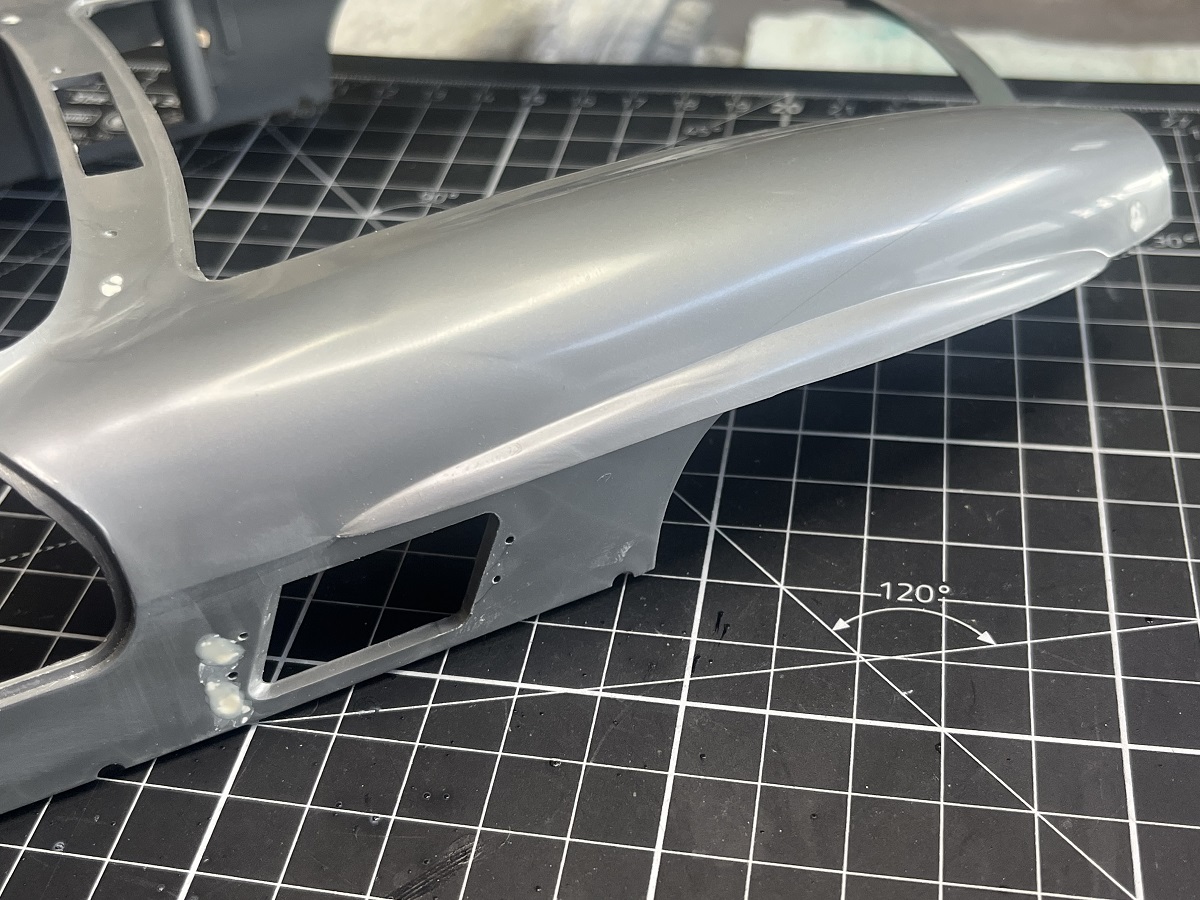
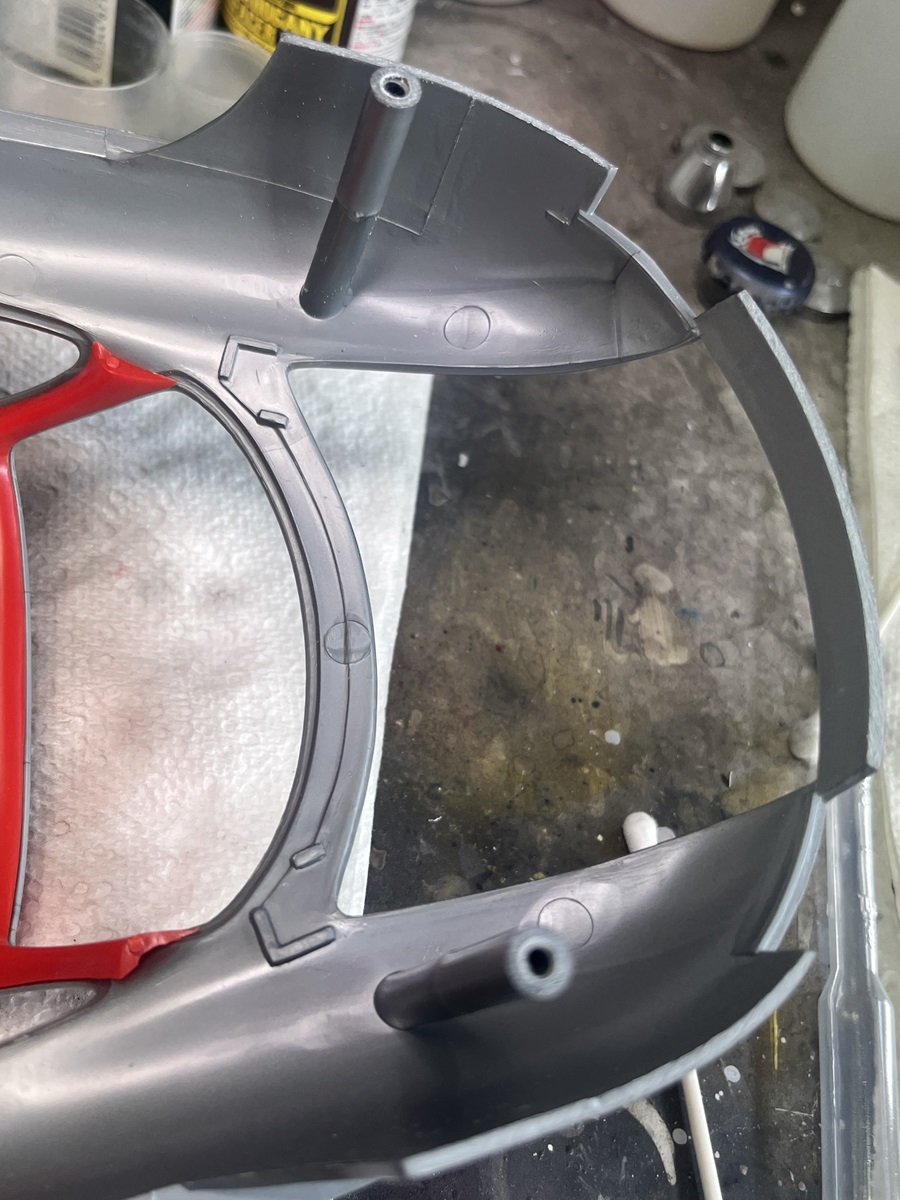
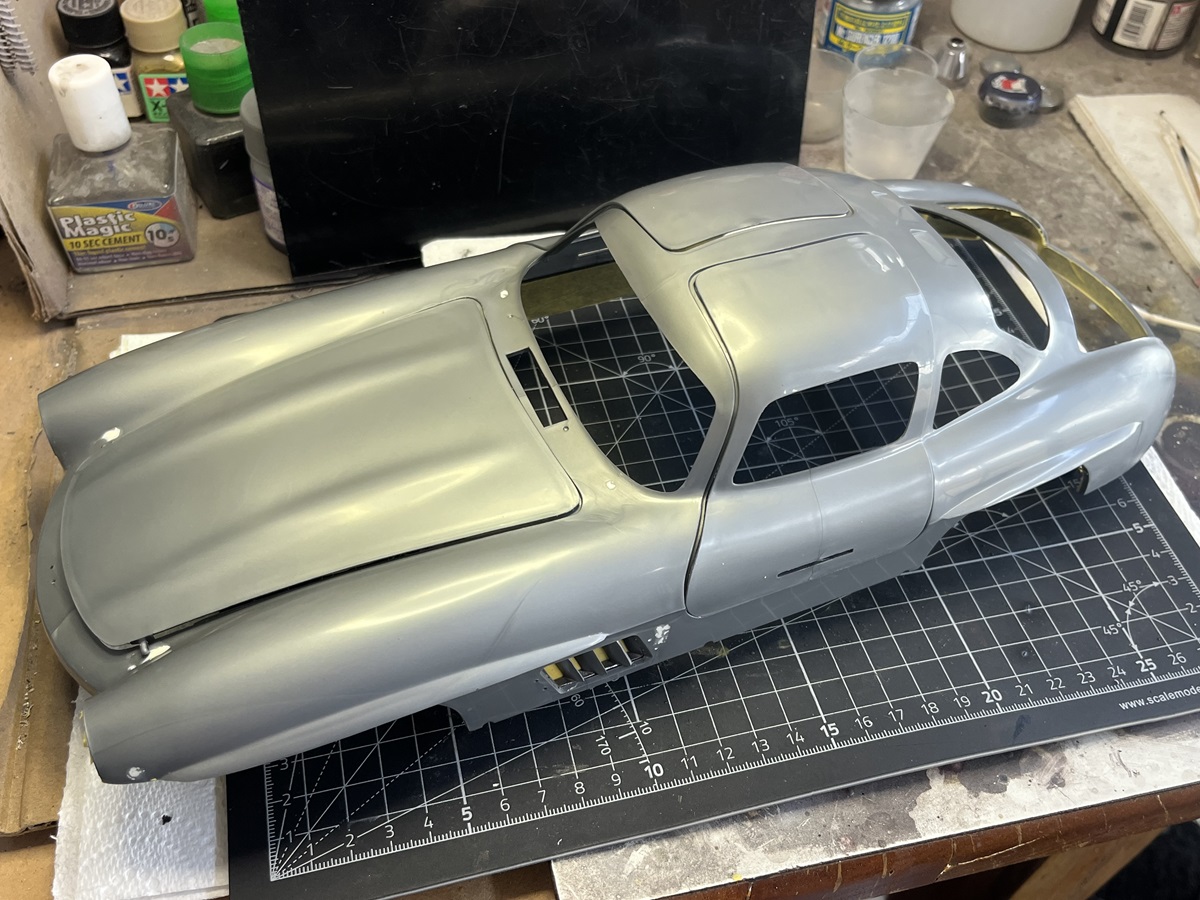
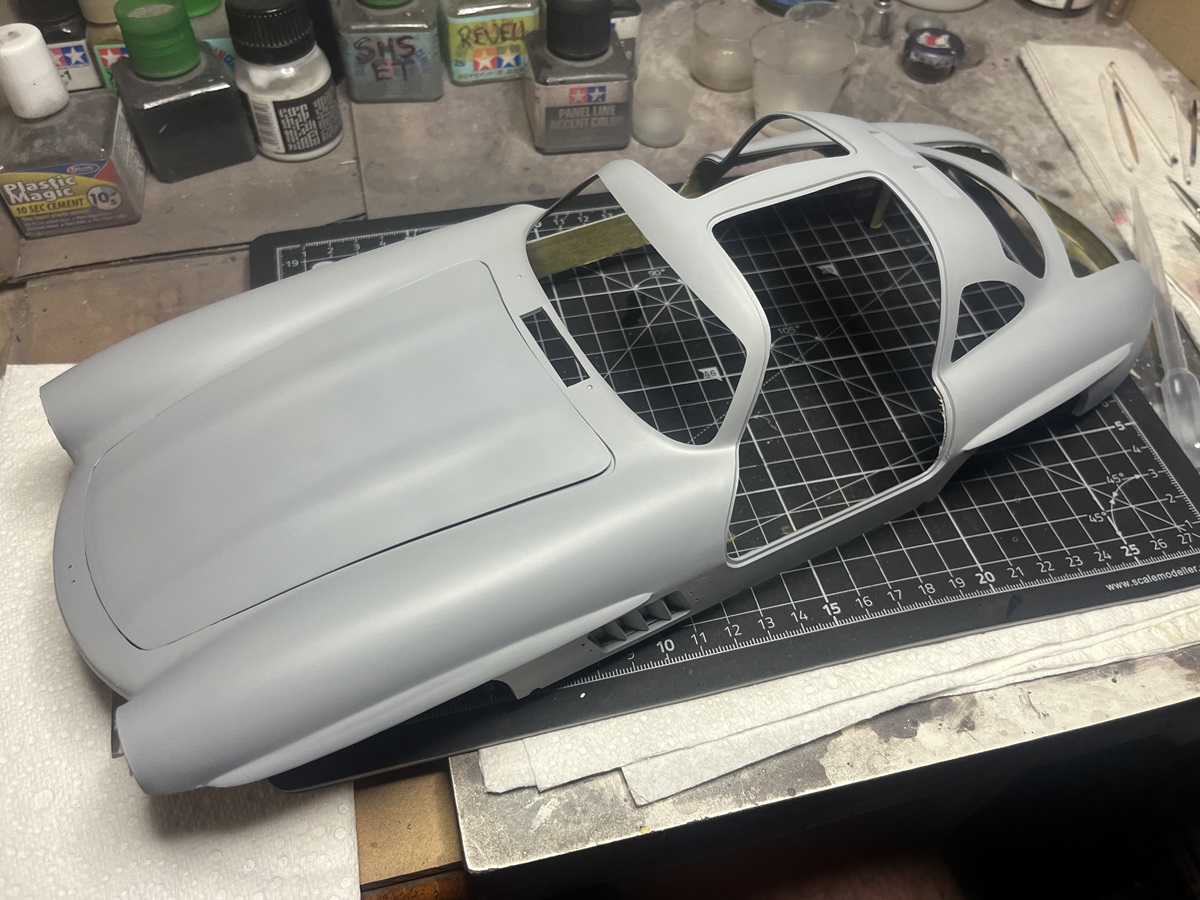
All I’ve done lately is filling and sanding sink marks and mould lines, but I’m getting closer to primer on the top half fo the body now. The bottom half is primed and I’m going over the sink marks and repriming there.
Small steps, it will get there in the end.
Cheers, D
3 Likes
nice to see this one resurrected, D 
1 Like
D,
As Russell said, it’s nice to see any progress on this build at all since it’s not a Chevy or Chevy family car 
joel
1 Like
Thanks guys!
@Joel_W , never fear, there’s always a Bowtie on or close by the bench mate!
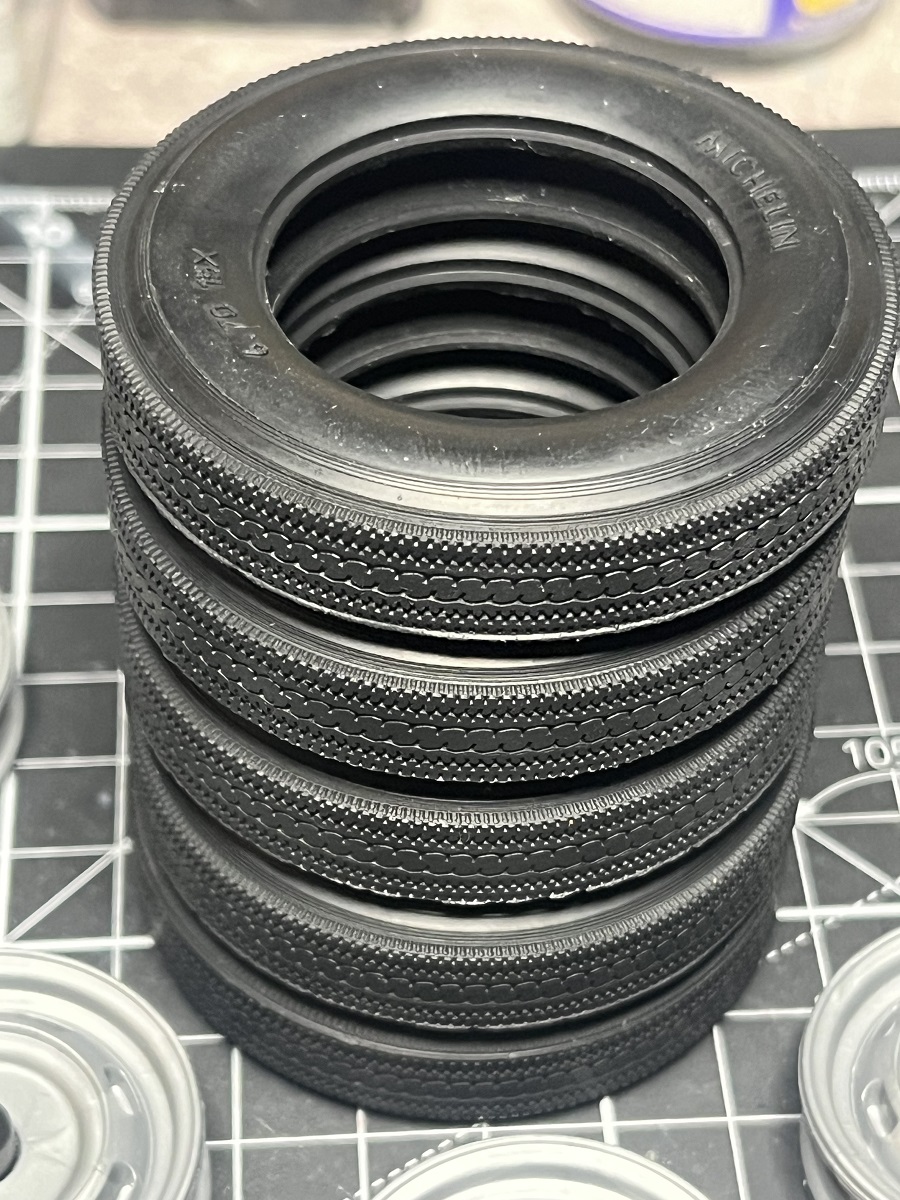
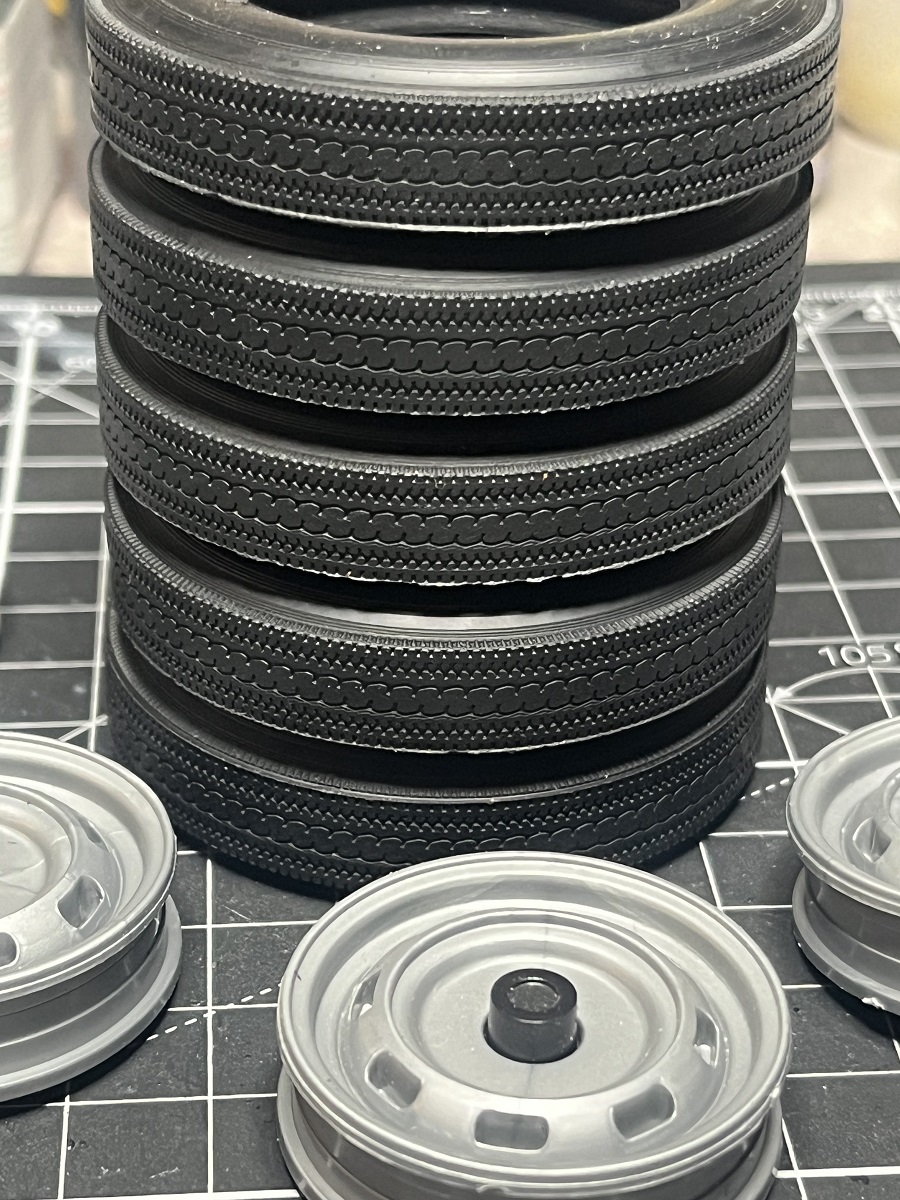
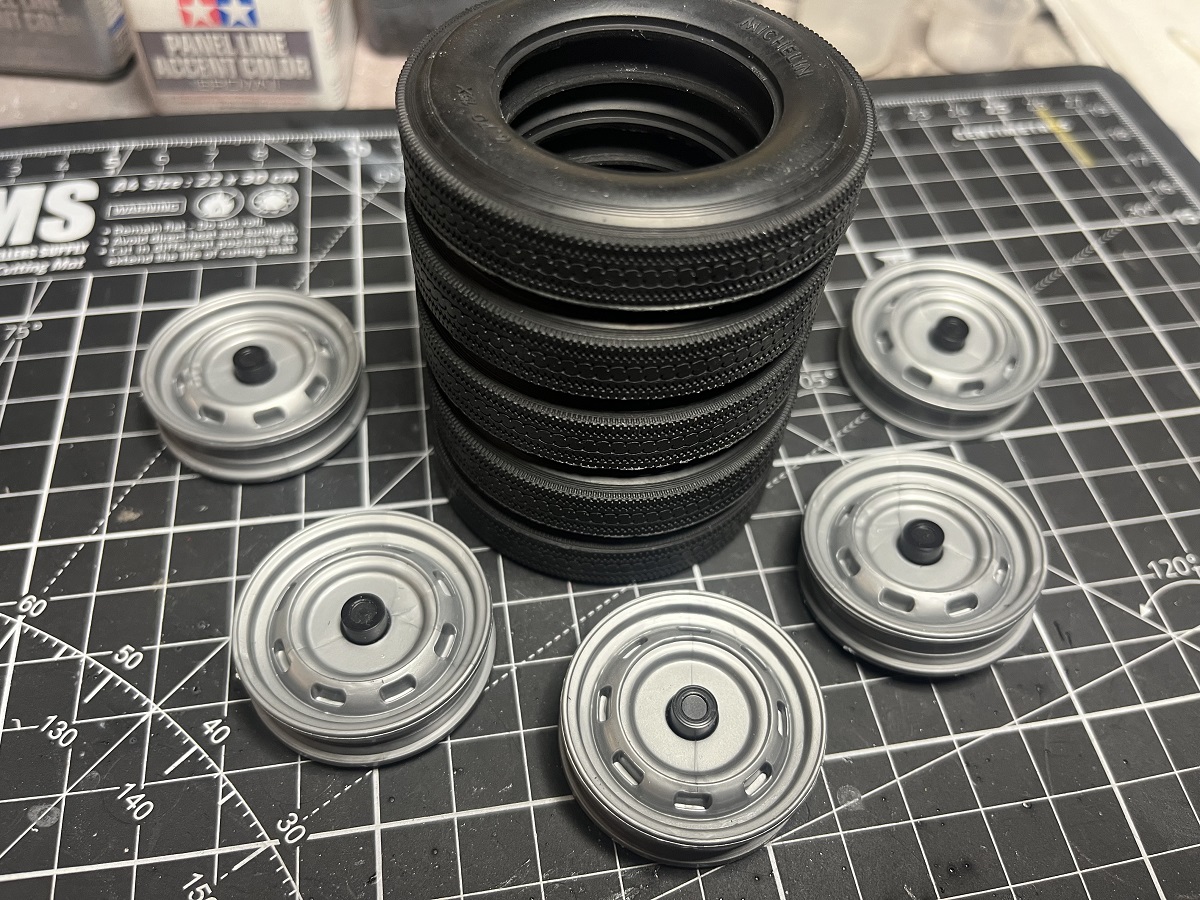
I did some work on the wheels over the last couple of days. The rims are assembled and primed, and the rubber tires cleaned up. They are quite soft so I will probably try to find some foam backing rod to fill them along the way. The tread detail is amazing!
Cheers, D
2 Likes
D,
That’s one advantage of 1/12 scale, the fantastic level of detail. The tires really look real. Same goes for the steel wheels. And don’t forget to paint the wheel nuts.
joel
2 Likes
Another update, gaining momentum here which is great!
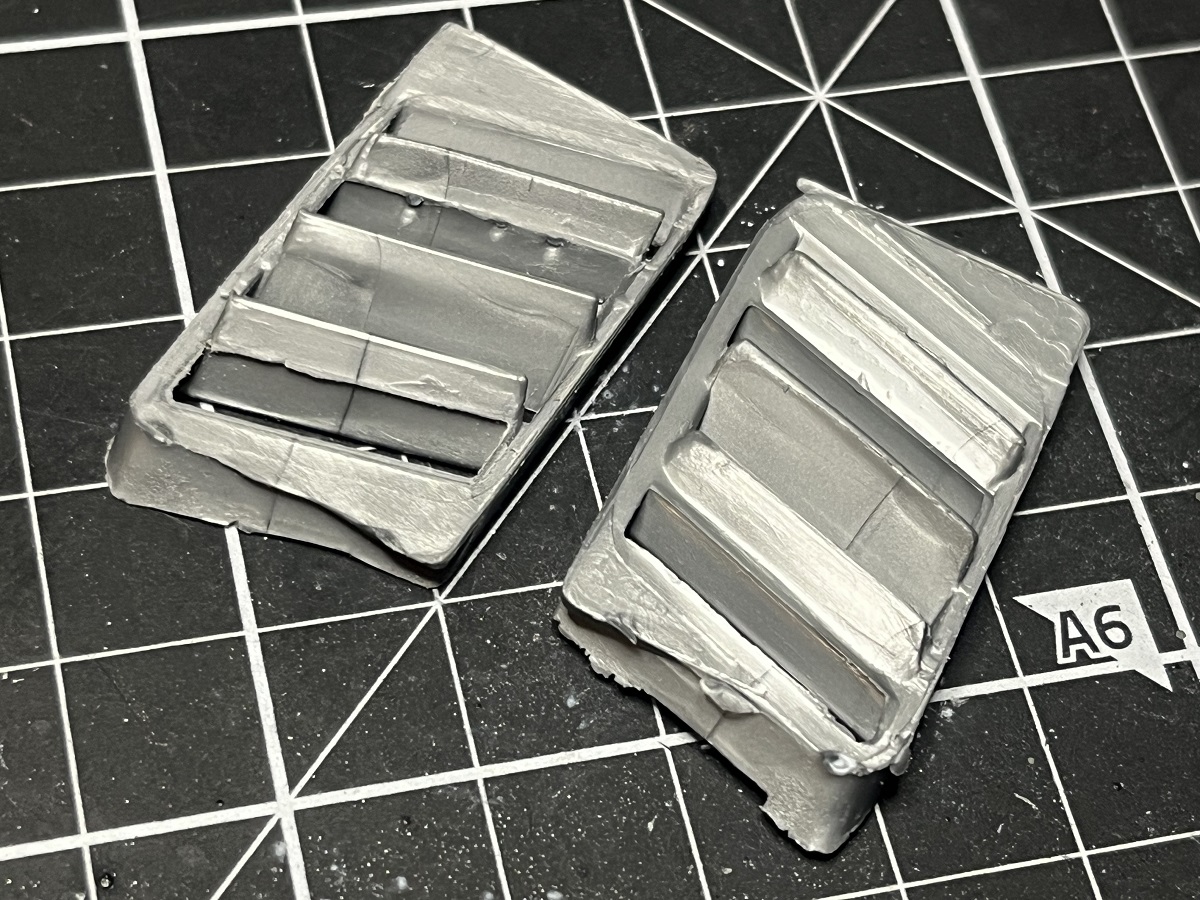
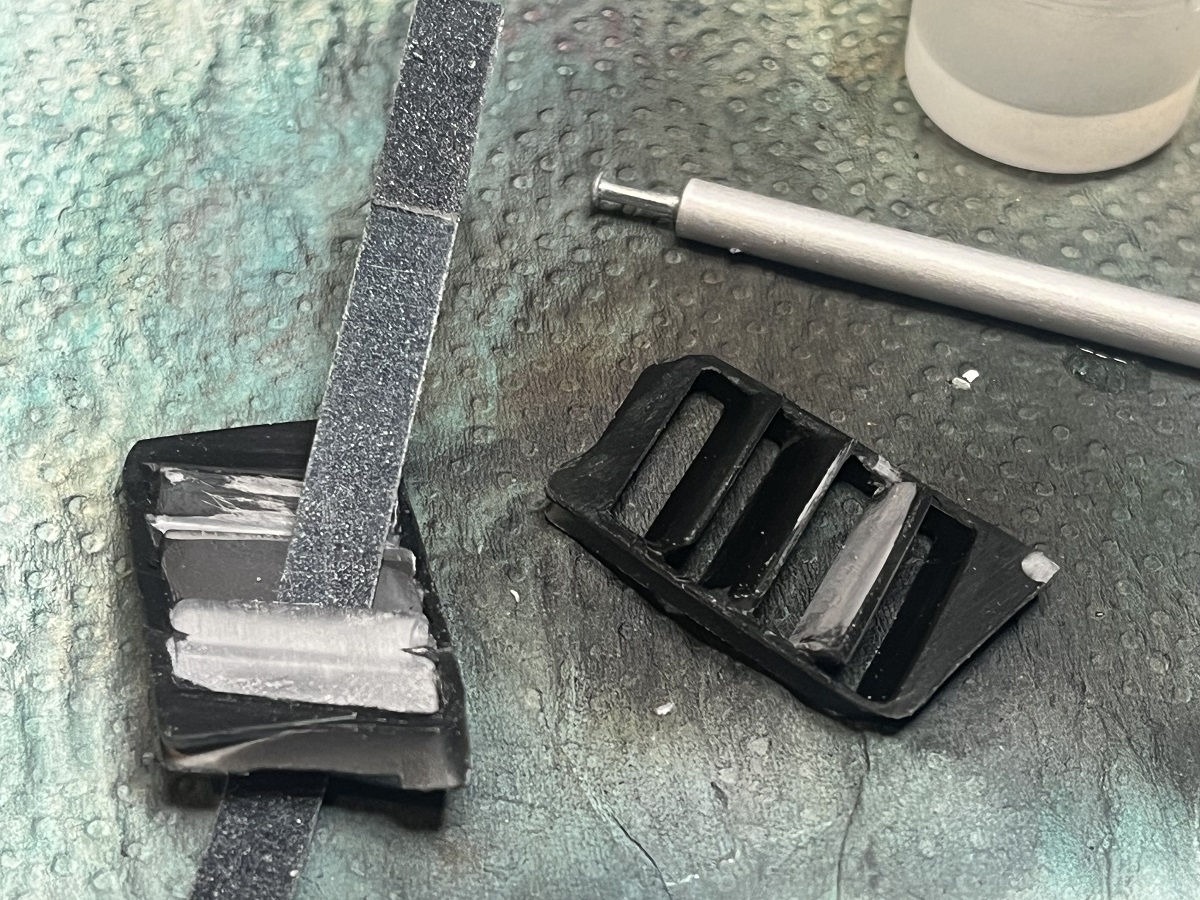
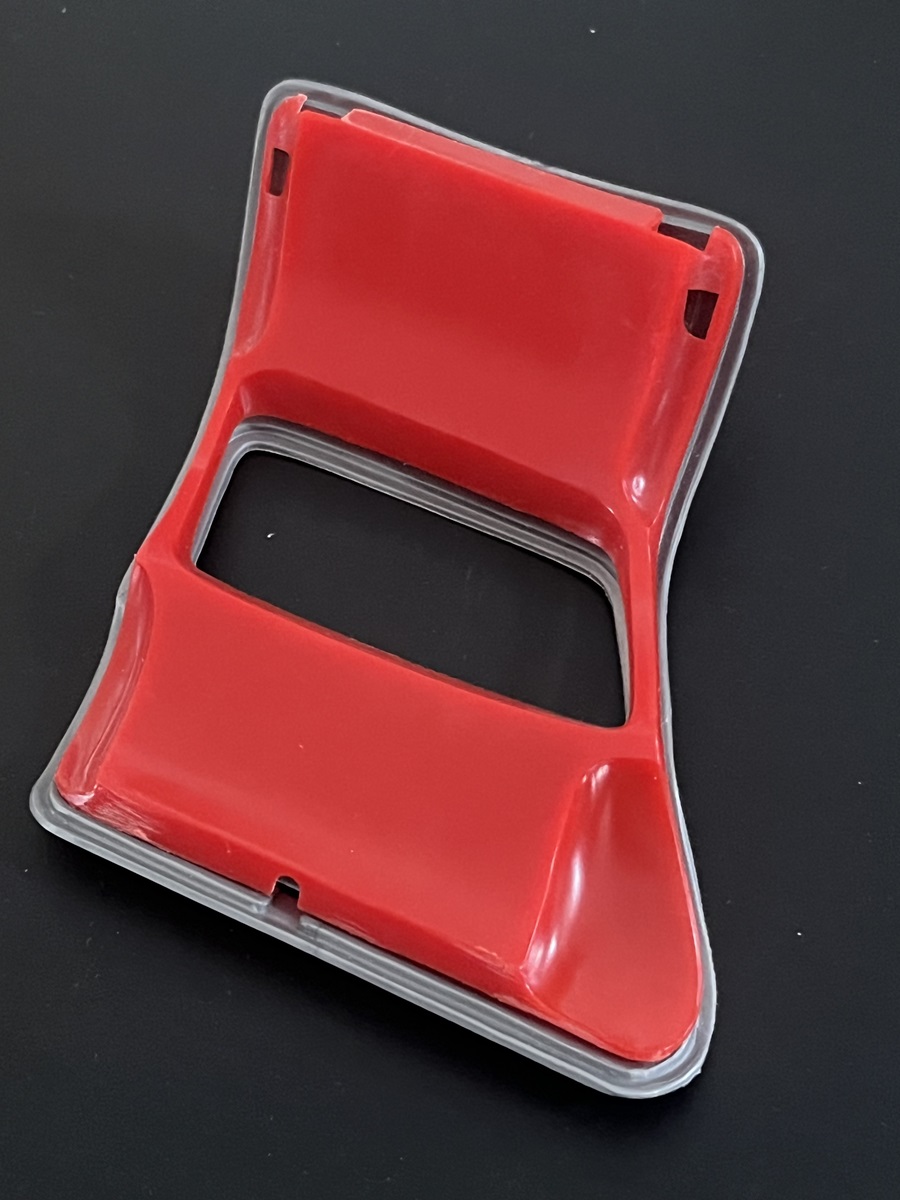
What is not so great is the quality of some of the parts, but being a Renwall mould from the 1960’s it was expected. These are the side vents from the front quarter panels. 
Lots of time spent scraping the mould lines and cleaning up the crappy finish, a couple of shots of sprue-goo in tiny sink marks, then some primer. The only way that I could sand these things was to feed the Flex-I-File between the vent blades and work it. doing that 3 times on each blade for 3 different grits was time consuming but I got there in the end.
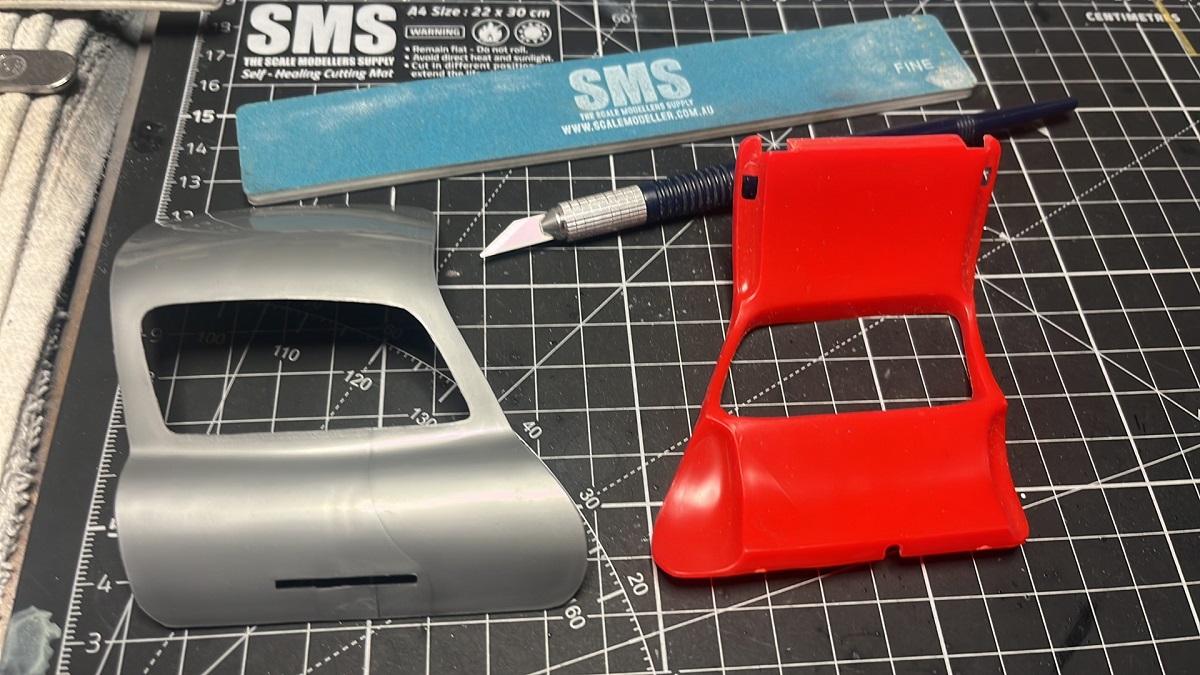
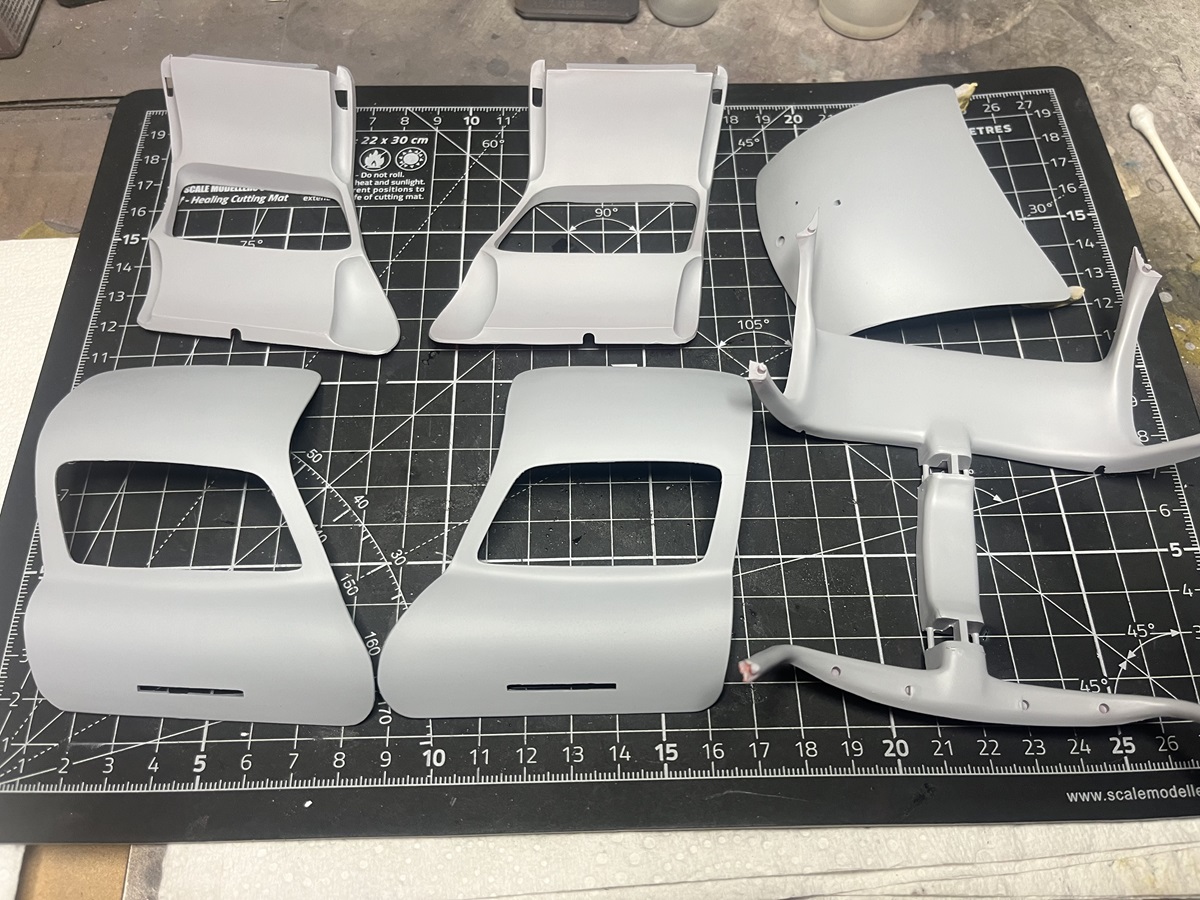
I’ve been tinkering with some of the other parts like the door inner and outer, removing flash from the edges and checking fit.
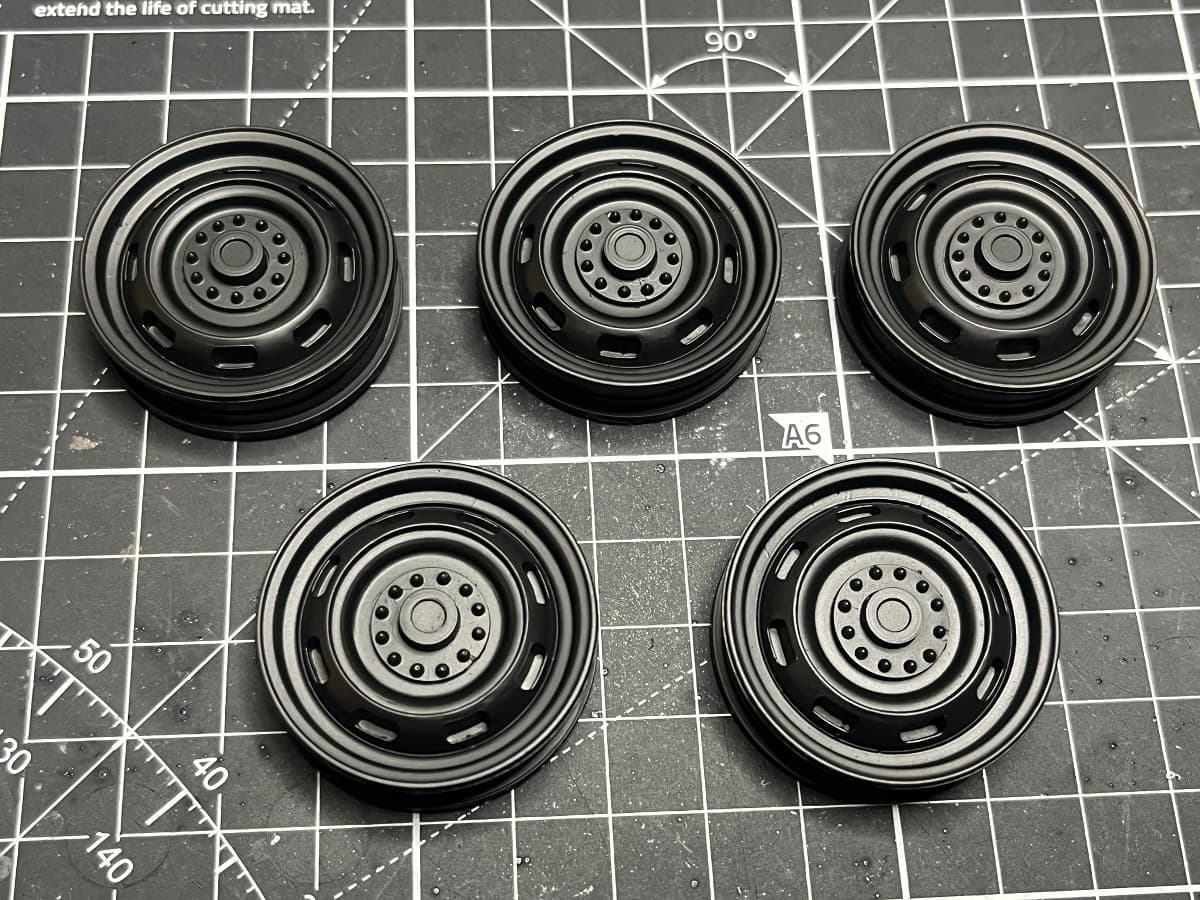
I painted the rims with SMS Super Silver, then shot them with Alclad Aqua Gloss to protect them from the rubber tyres.
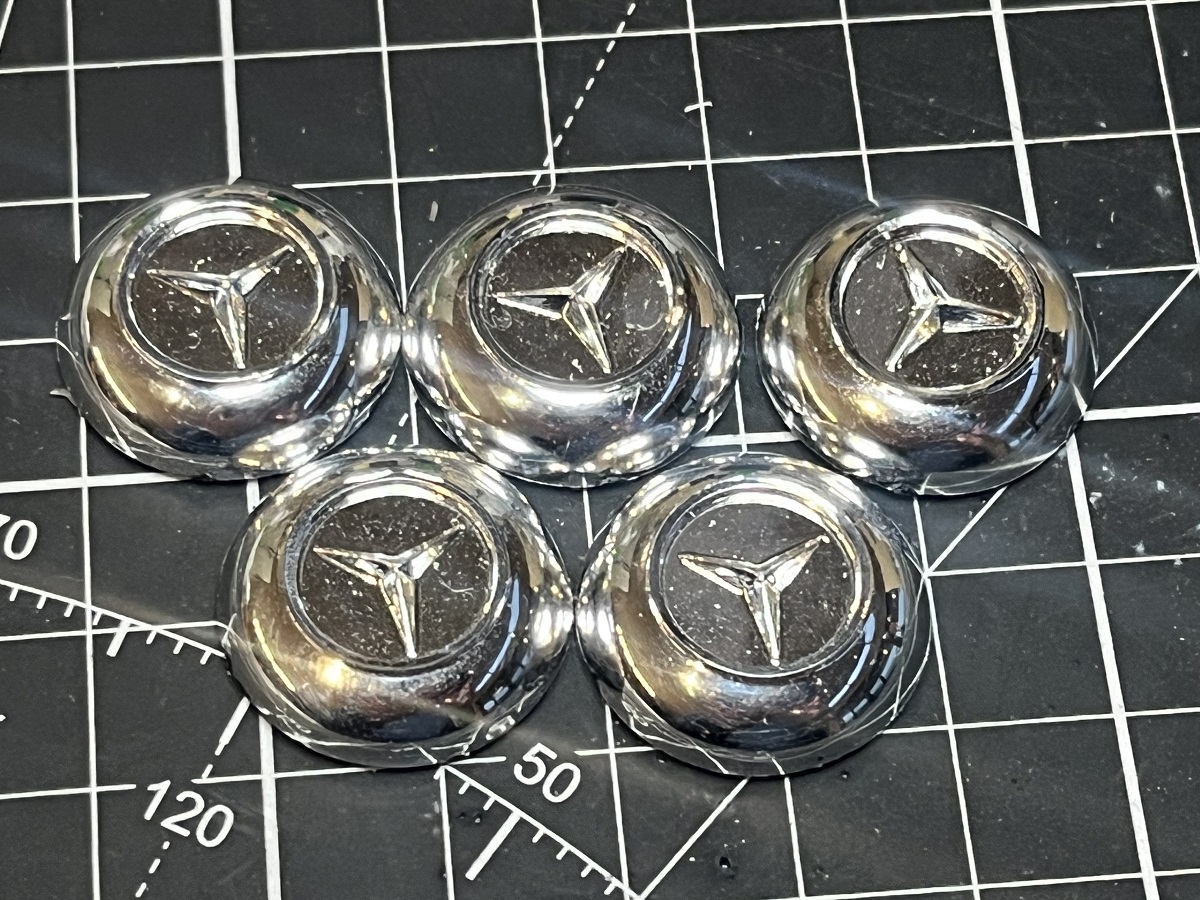
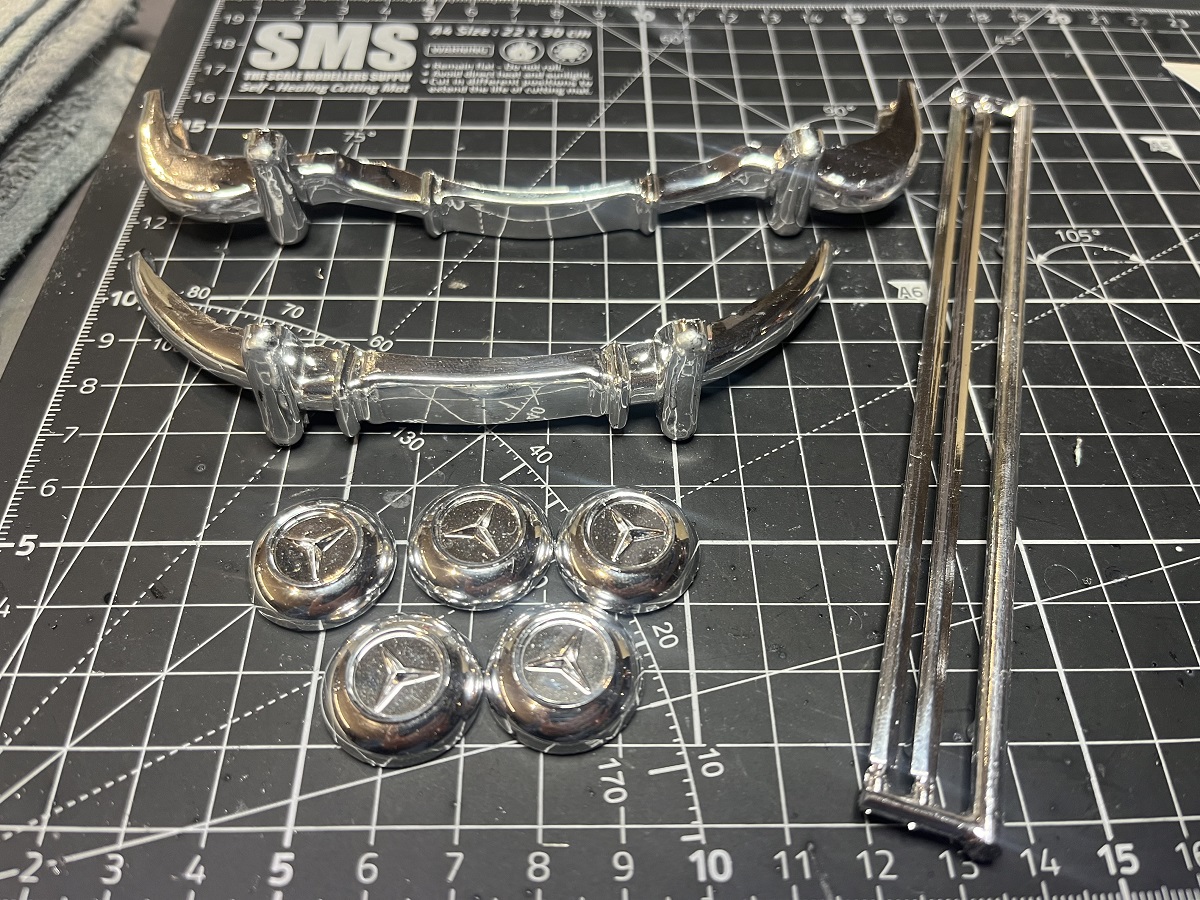
Still need to add the chrome hubcaps. Speaking of which, the chrome finish is quite nice, but because of the age of the kit it has been dinged up quite a bit, and there are huge sprue gates and mould lines on the larger parts that will be impossible to deal with, without taking off a lot of chrome. These parts will be stripped and cleaned up properly then painted up.
Cheers, D
4 Likes
Well it’s been a while but I’m back on this build, this will be my main focus to start 2024. There hasn’t been any progress on the build, but I have been doing a lot of tinkering and thinking about how to progress. The body work is ready for primer, but I need to go several steps back and work out how I want to do the doors first. I want to paint all of the panels at the same time to stay consistent, but the construction of the doors has me scratching my head a bit as to the order of proceedings 
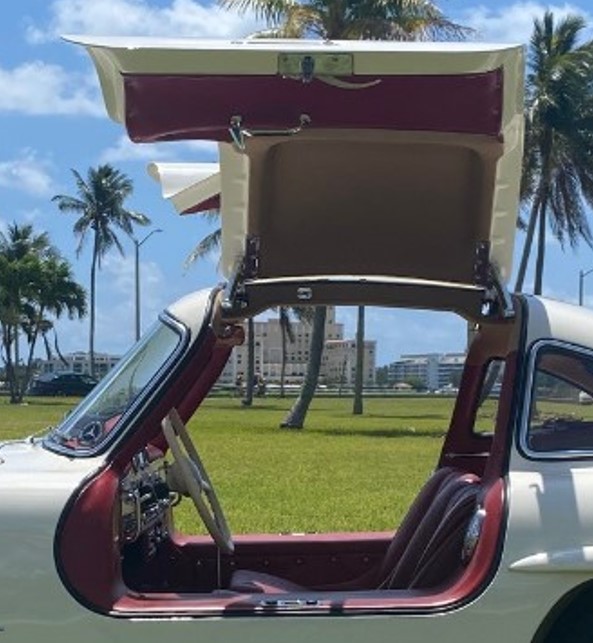
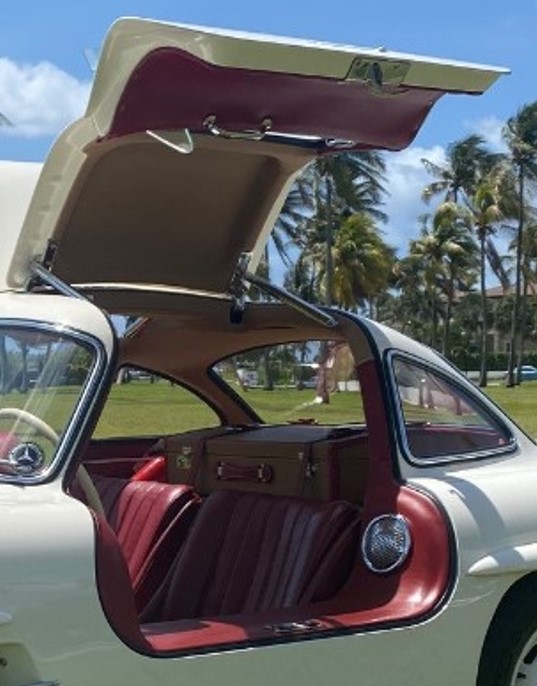
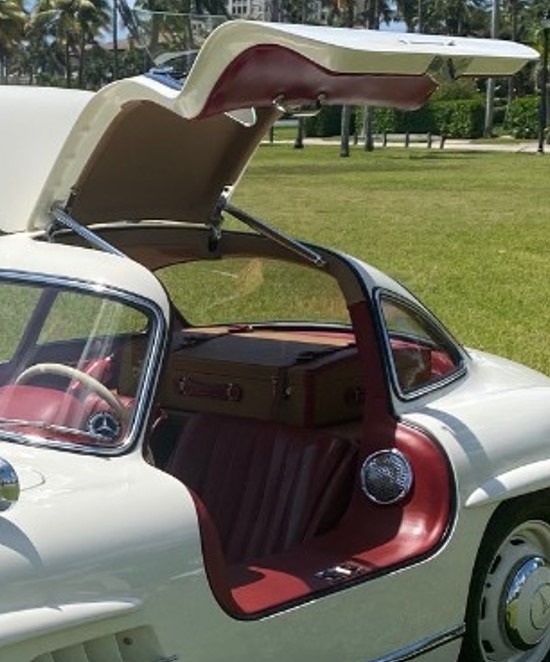
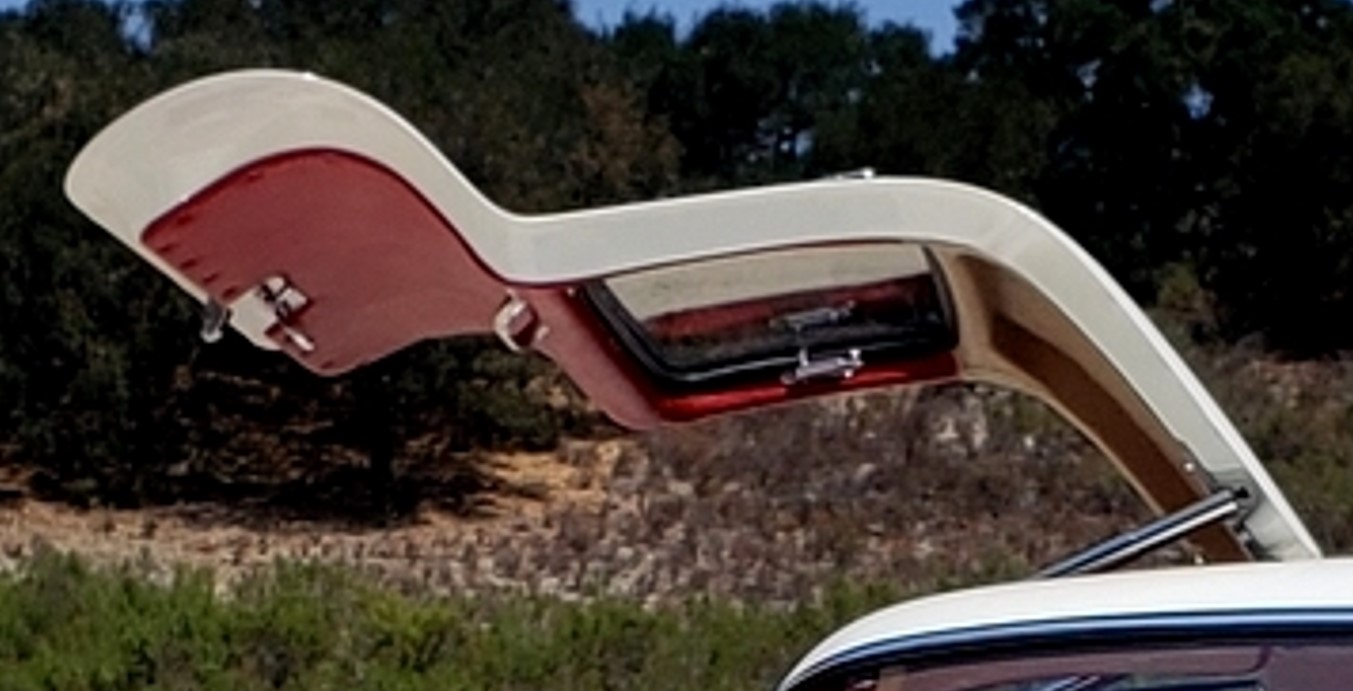
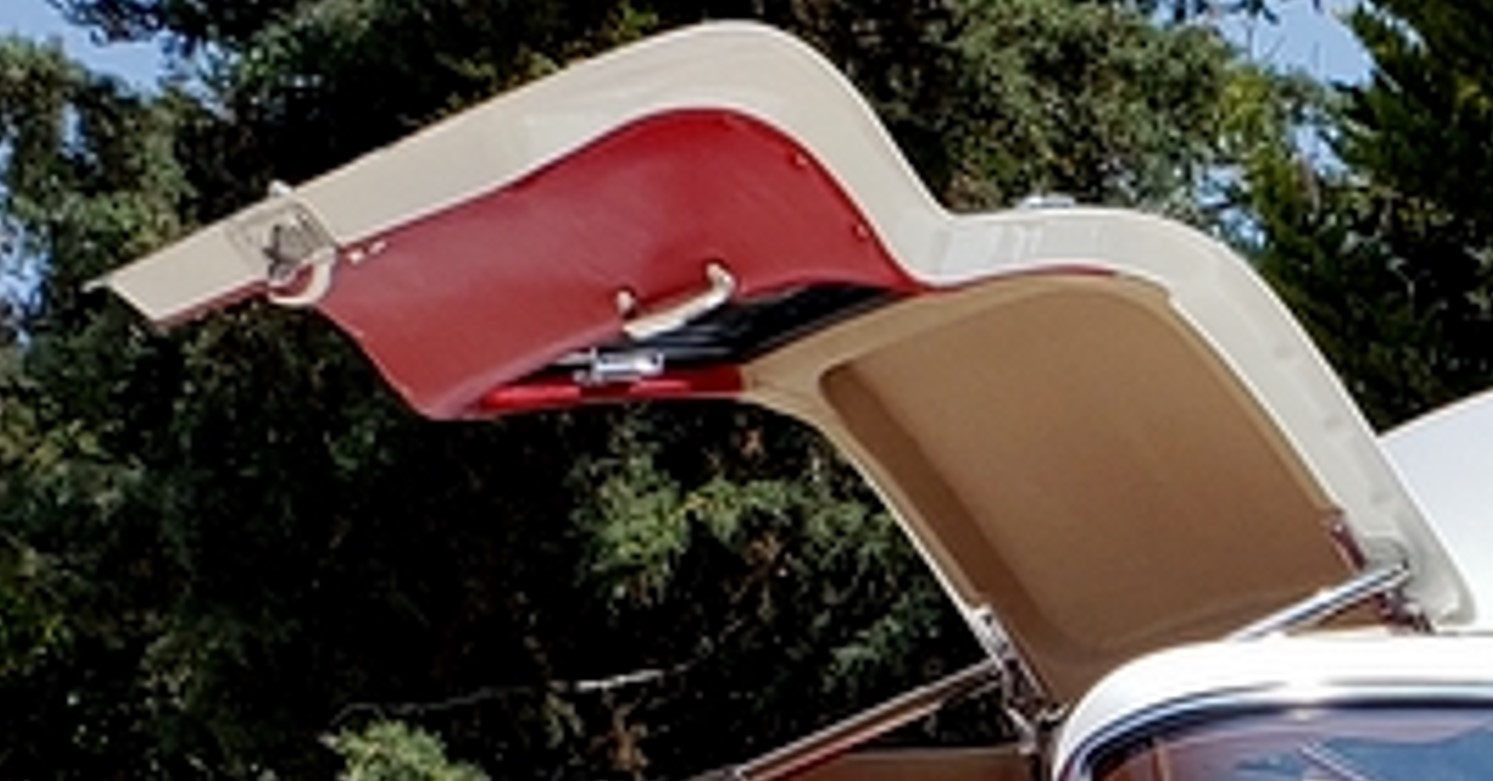
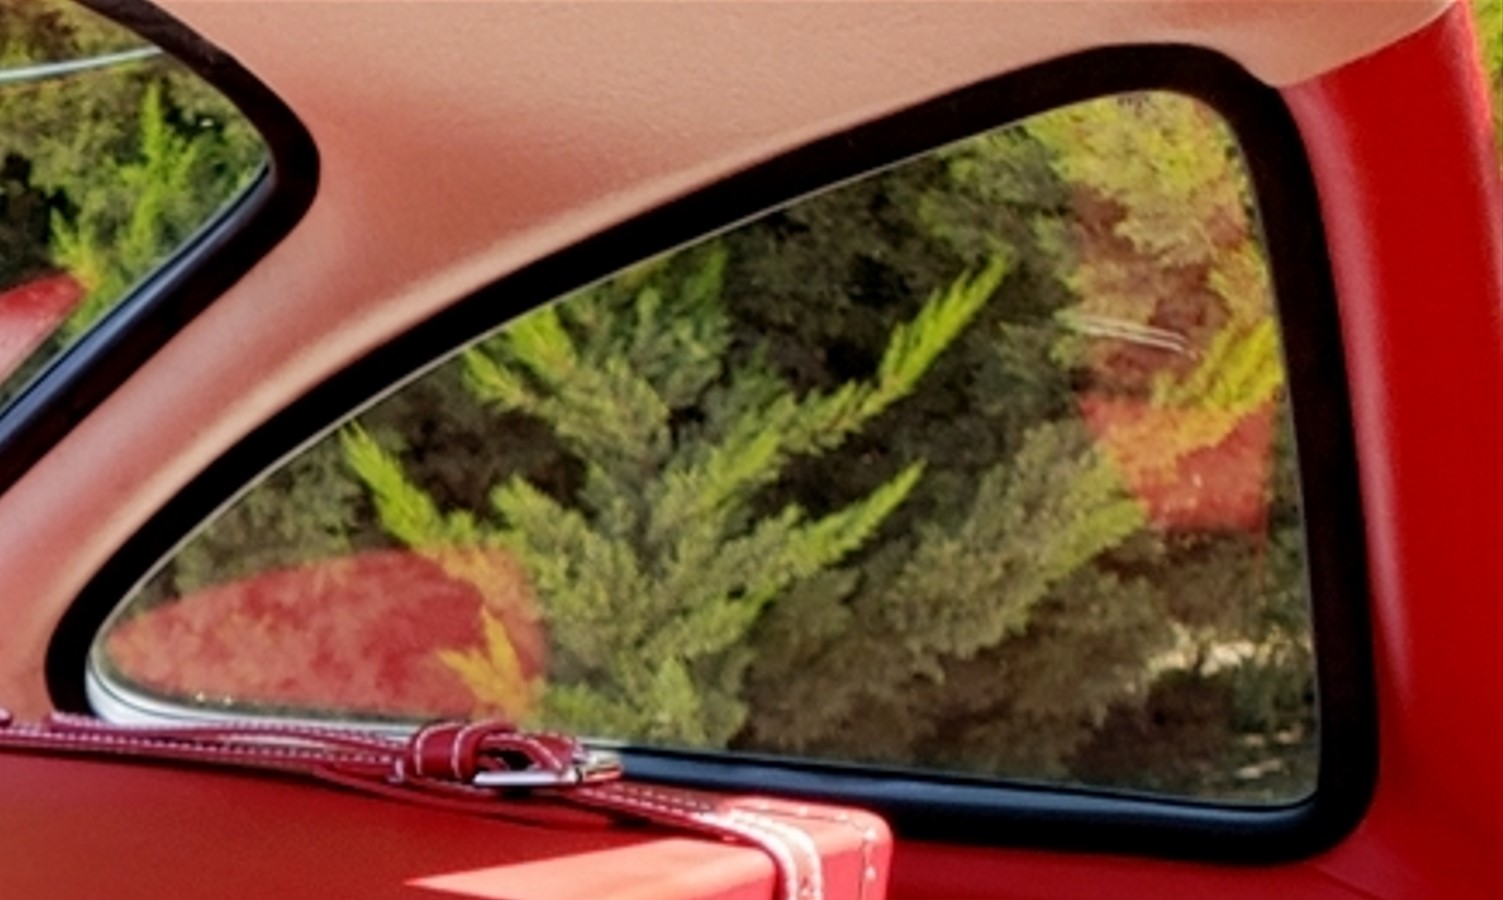
As always, please chime in with any ideas or suggestions. First, a few detail images of the real thing.
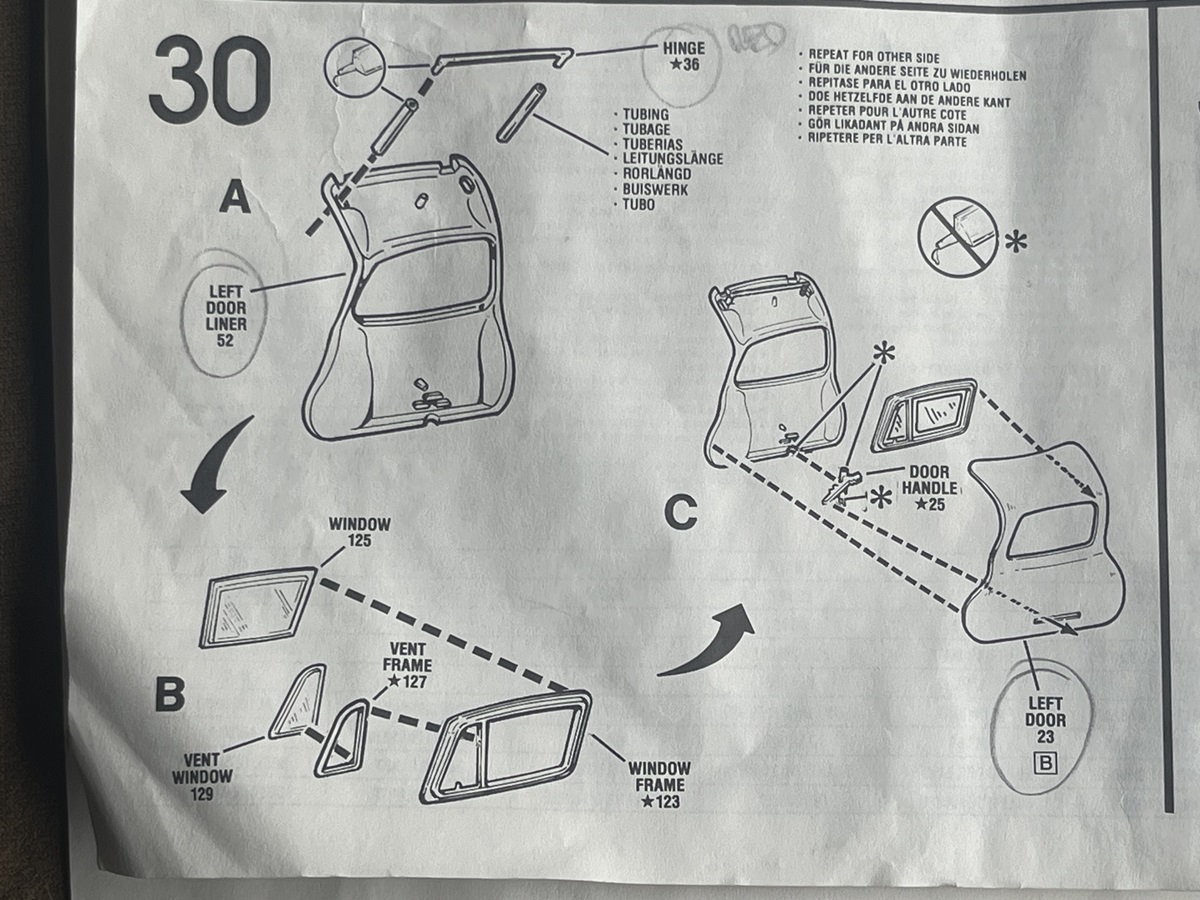
Now the kit parts and instructions.
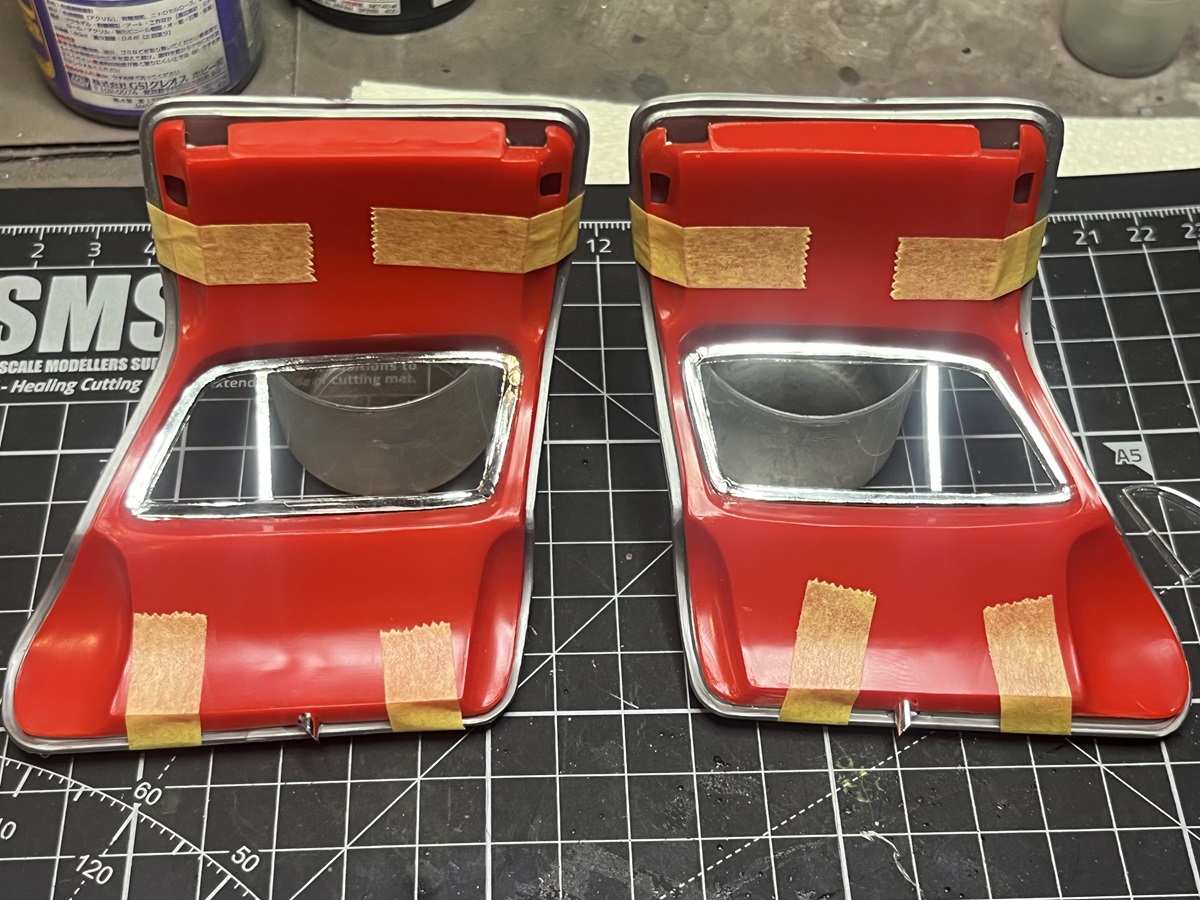
As you can see, the window frame and clear parts, along with the hardware, are sandwiched between the inner and outer main parts. The inner (red) part needs to be masked and painted 3 different colours, White edges for the metal, tan for the roof liner and red for the interior. 
I’m leaning towards assembling the door and then painting, but it will be tricky to paint around the hardware. If I paint the parts separately it will be very hard to assemble and not damage the paint work.
To start with, I will prep all of the parts and dry assemble to see how it all looks.
Merry Christmas folks!
Cheers, D 
EDIT - Things that you see but look right past, the window frame is chrome outside and black inside.  Oh well, I was planning to strip and repaint, so now I only need to paint the outside
3 Likes
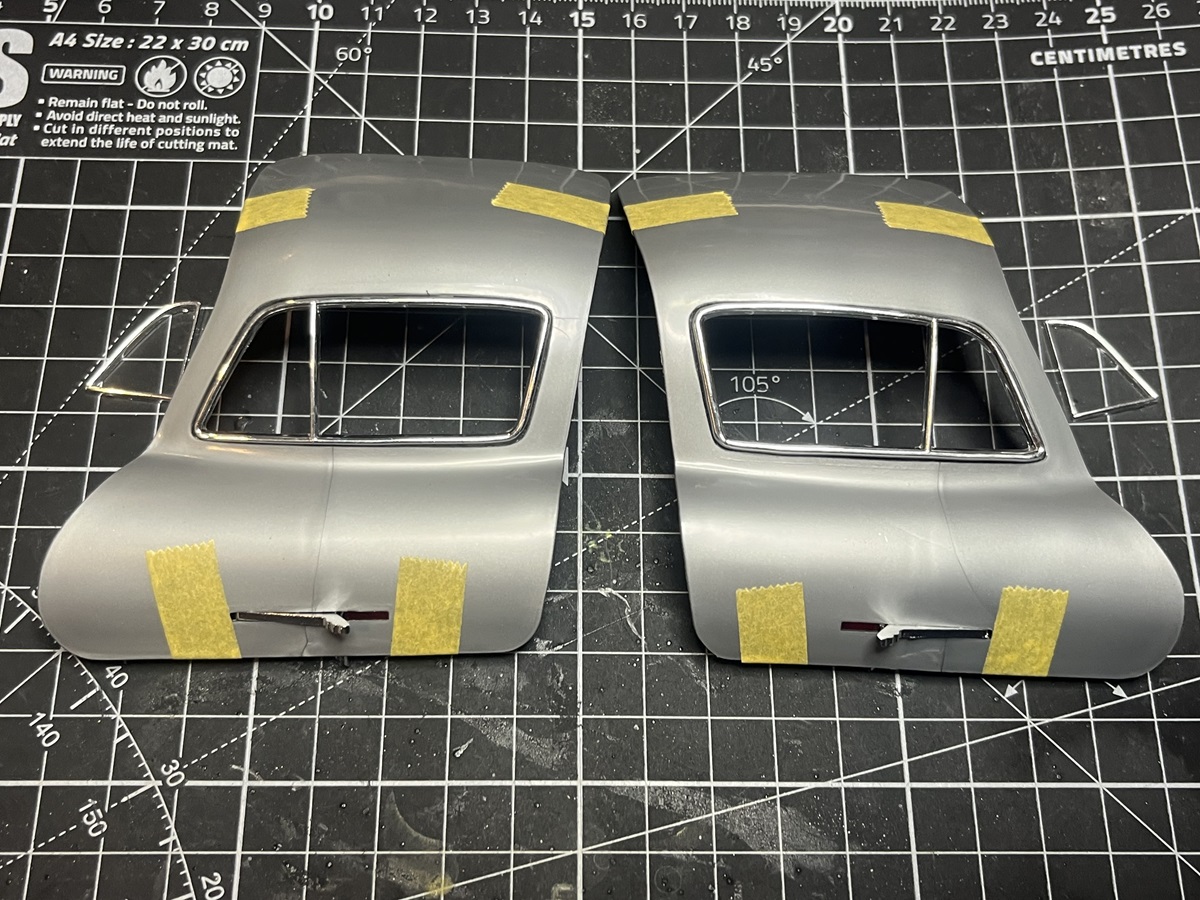
Some tinkering and test fitting today, moving towards Plan B . . . . .
Thinking now that I will paint the outer skin on the door when I paint the body, then assemble the door, mask the outside off and paint the inside.
The chrome window frame is a neat fit and held in place by the inner door panel, so I can use it as a template and cut a mask to fit before I glue the frame in place. A smaller inner frame is provided for the quarter windows and this fits very neatly into place from the outside so I can leave it until last.
Interestingly, the main door glass doesn’t roll down, if you want the breeze blowing through your hair you need to unclip and remove the glass panel before you drive. I will leave it out.
Cheers, D
5 Likes
I guess that’s better than having it permanently fixed. 
1 Like
I sympathize with you on painting path D …
I watch the pros on TV building custom cars and I am always amazed at how they can paint the body panels , doors , hood etc separately even with metallics and have it all match .
1 Like
Interesting. I would have painted the door pieces separately. Less masking and chances of leakage. I haven’t built many cars with opening doors but haven’t had a problem with exterior colour match. I am keen to see this turns out.
cheers
Michael
1 Like
Sound advice, thanks for your input Michael! I have these doors sitting on the bench beside me while I tinker with the '57 Corvette and the more I look at them the more I realise I’m over-complicating things. As you said, paint the components separate then assemble. I can paint the outer door part (inside and out) to match the body, paint the 2-tone inner panel, then just glue them together without all of the masking and bleed drama.
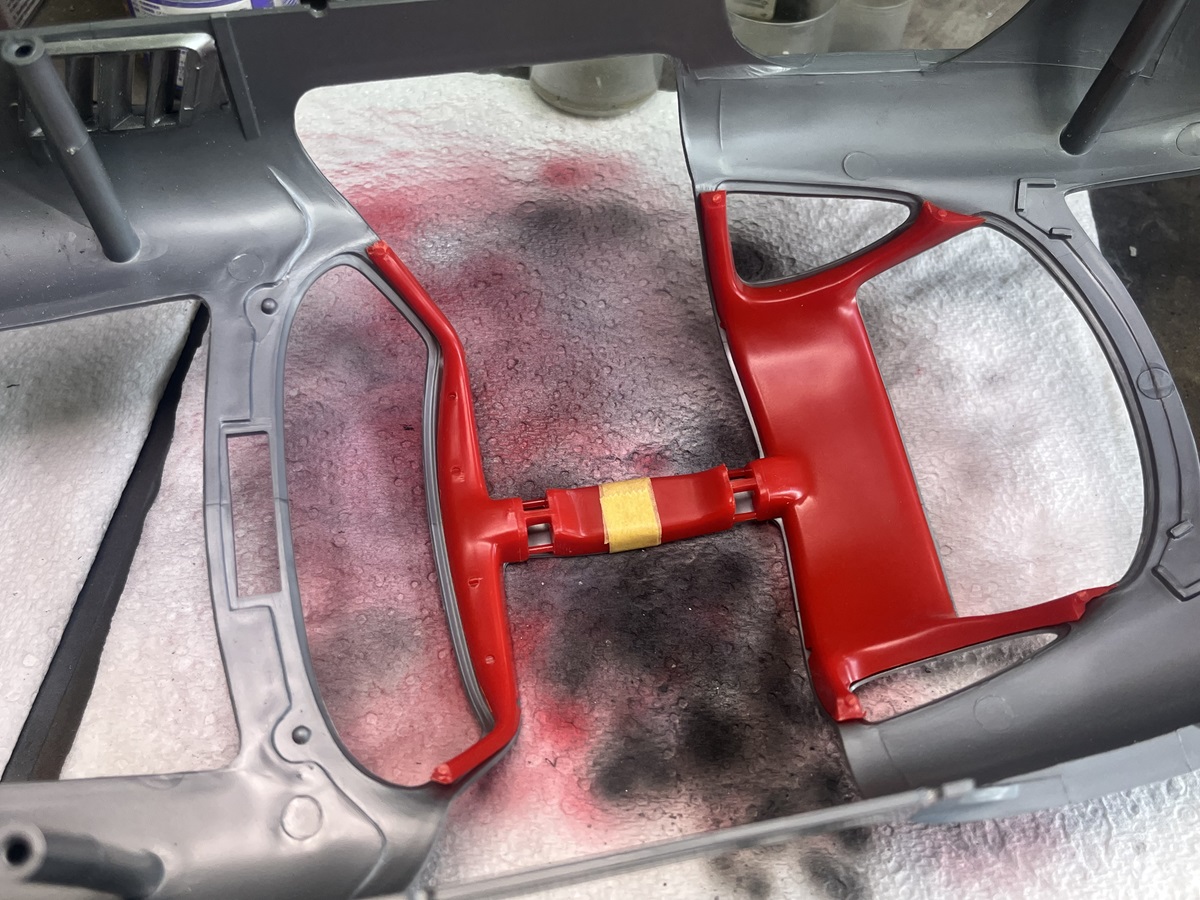
My main concern was the less-than-perfect fit of the 2 parts, there will be some small gaps in places but I can easily fill them with some white glue and touch them up after. They won’t be visible with the doors closed and barely visible when open unless you try to climb in
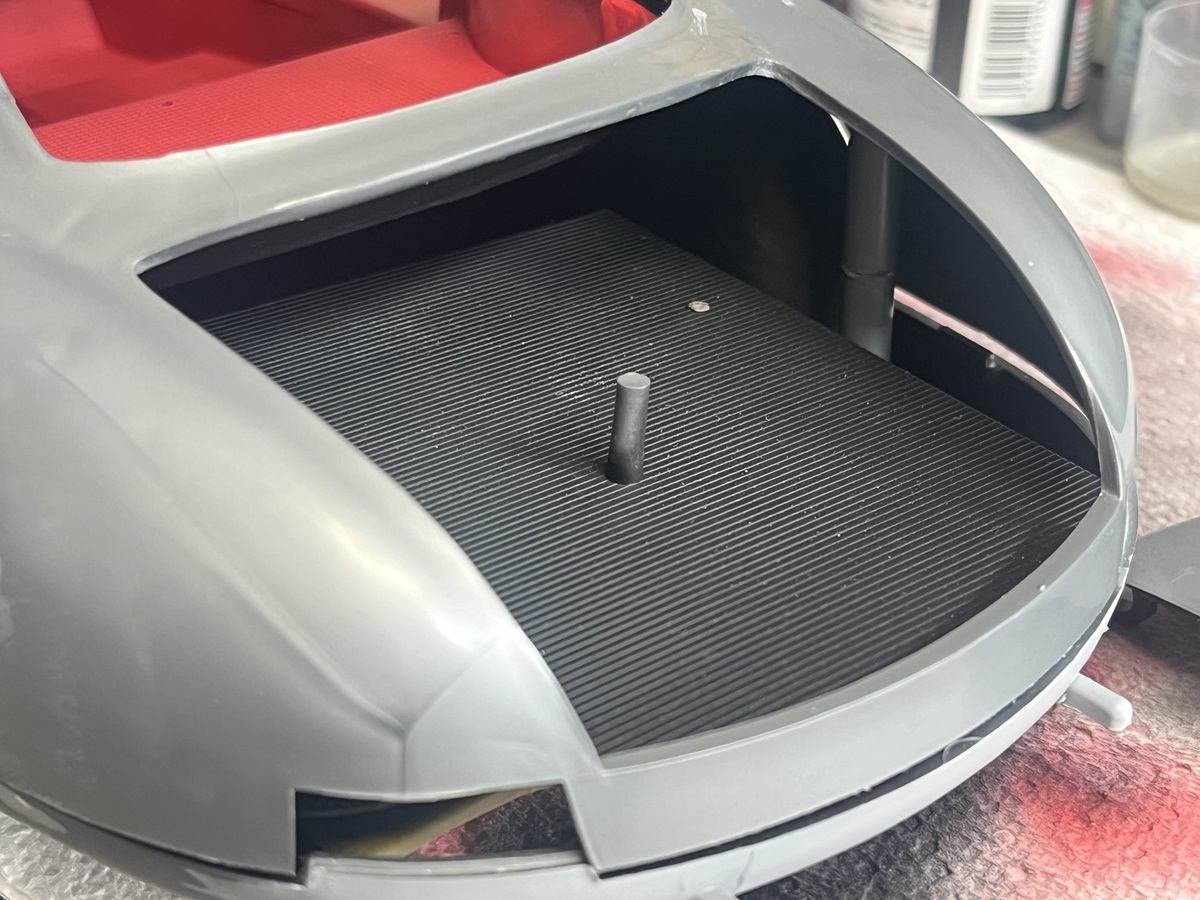
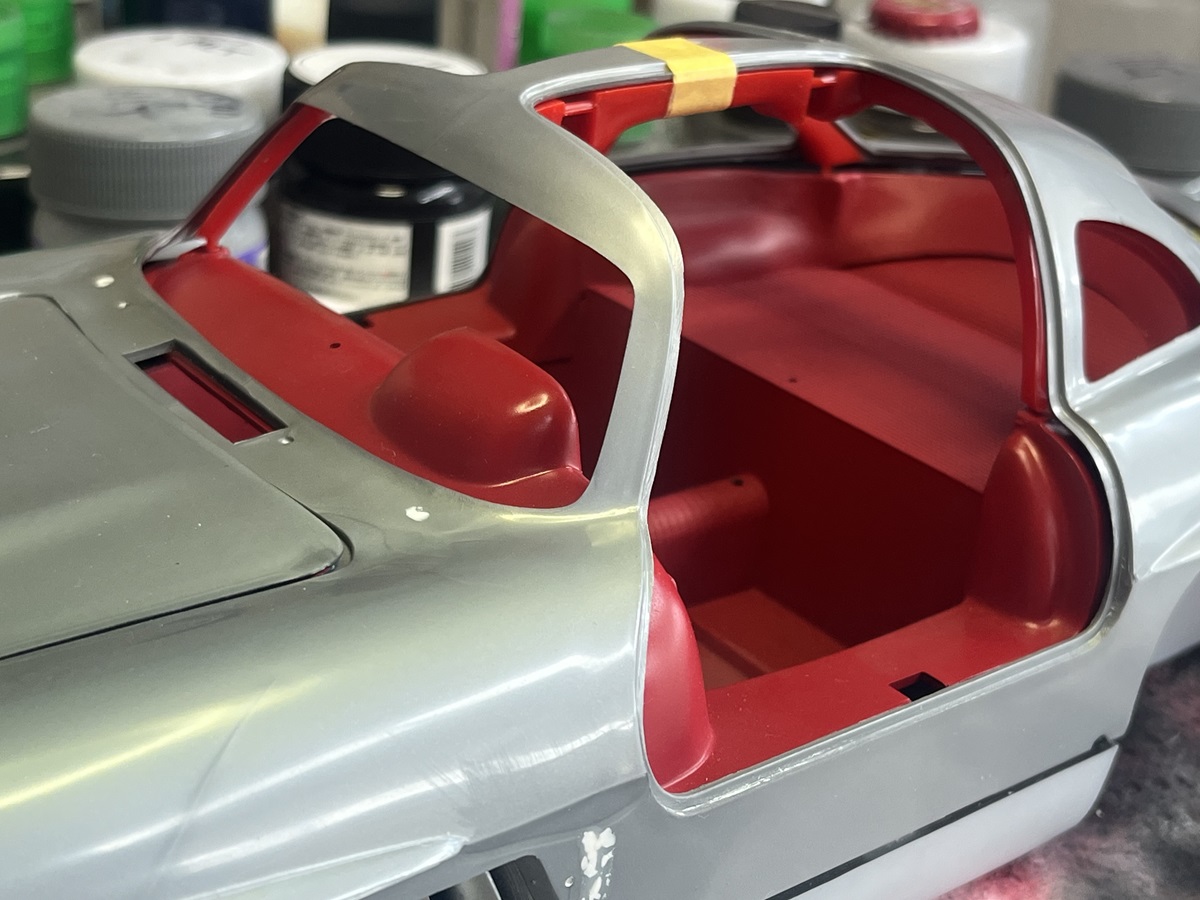
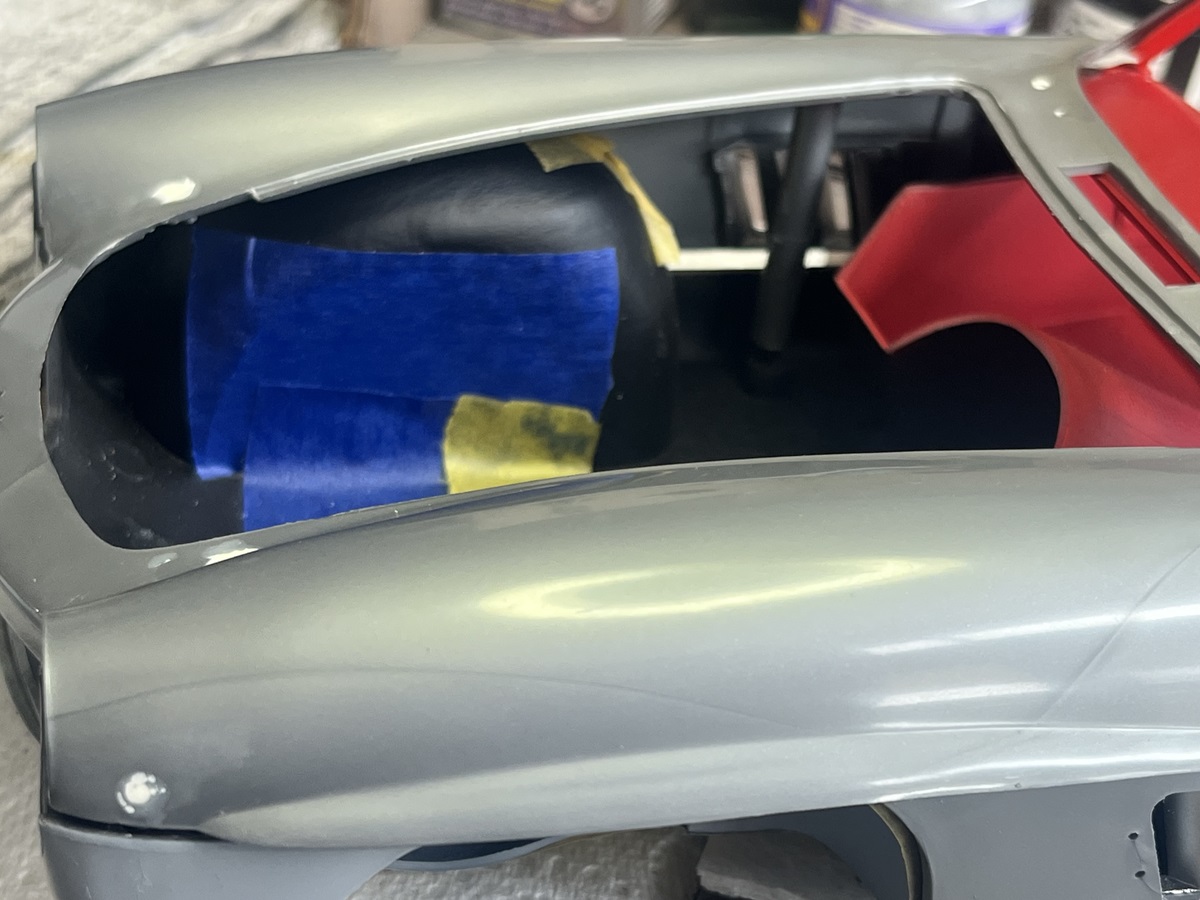
Next step is to dry-assemble the whole body and interior to see what is visible on the inside of the shell when assembled and what needs to be painted to match the exterior and interior colours.
Merry Christmas everybody!
Cheers, D
3 Likes
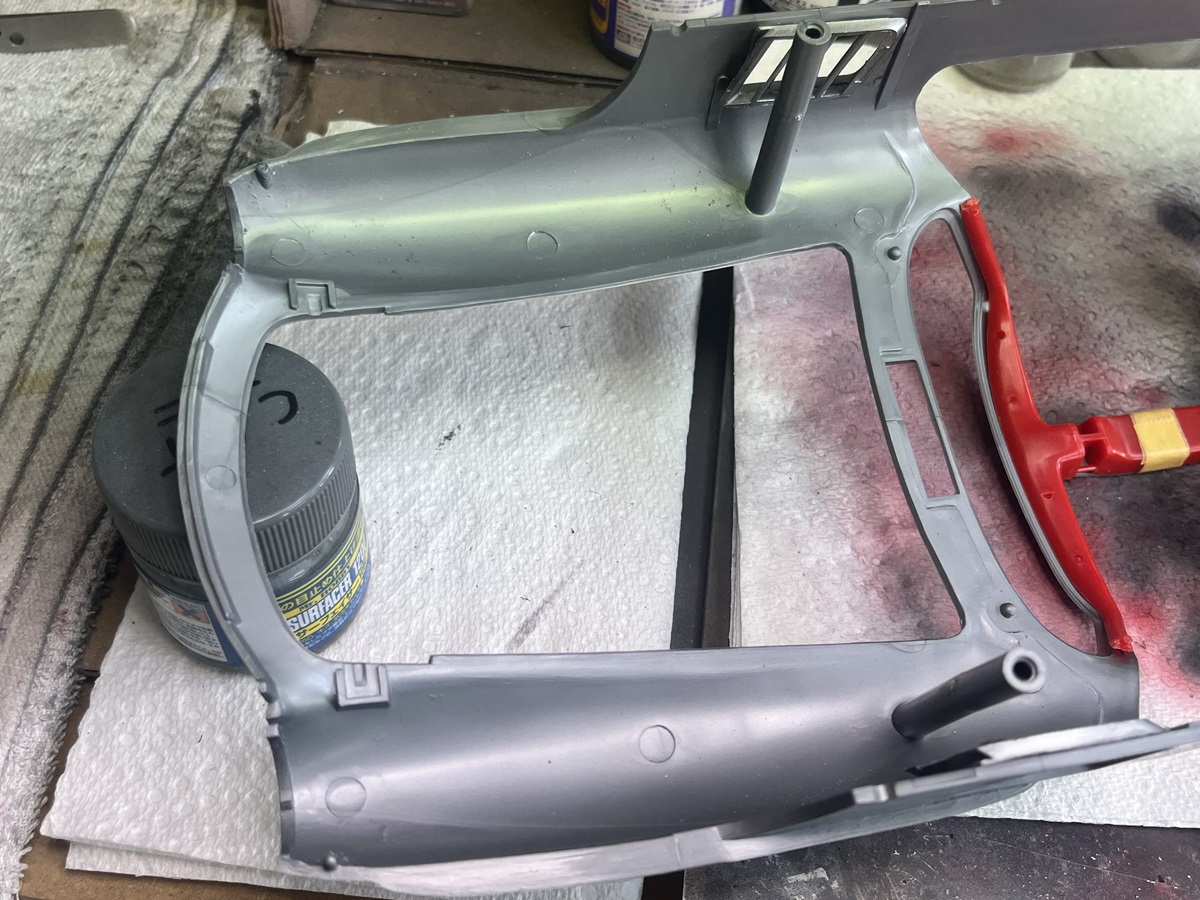
A couple of days ago I did a dry-fit of the main parts to check what areas need to be painted to match the main body colour. The fit of some of the parts is seriously bad, especially the doors, and they are beyond even trying to reshape. My expectations for a 1990 Monogram rebox of a Renwall kit from 1960 were never exceedingly high, so I am just going to push on and do the best I can. Incidentally, I was searching online for some builds of this kit and found out that Revell have re-released it a couple of years ago in a new box! Guess what . . . . . I won’t be buying one
And today, to quote Maverick and Goose . . . . . . . .
Well, I paraphrased . . . . a bit . . . . .
Cheers, D
5 Likes
Thanks!
I was about to convince myself that I wanted one of these.
Thanks for changing my mind.


1 Like
Build it with the doors open (wings lifted) to hide the shape issues?
1 Like
Both doors, hood and boot lid are all operable, I will display it with the doors open for exactly that reason!
Happy to help, my public service duty for today ticked off the list  Thanks for checking in as always Robin, much appreciated!
Cheers, D
2 Likes