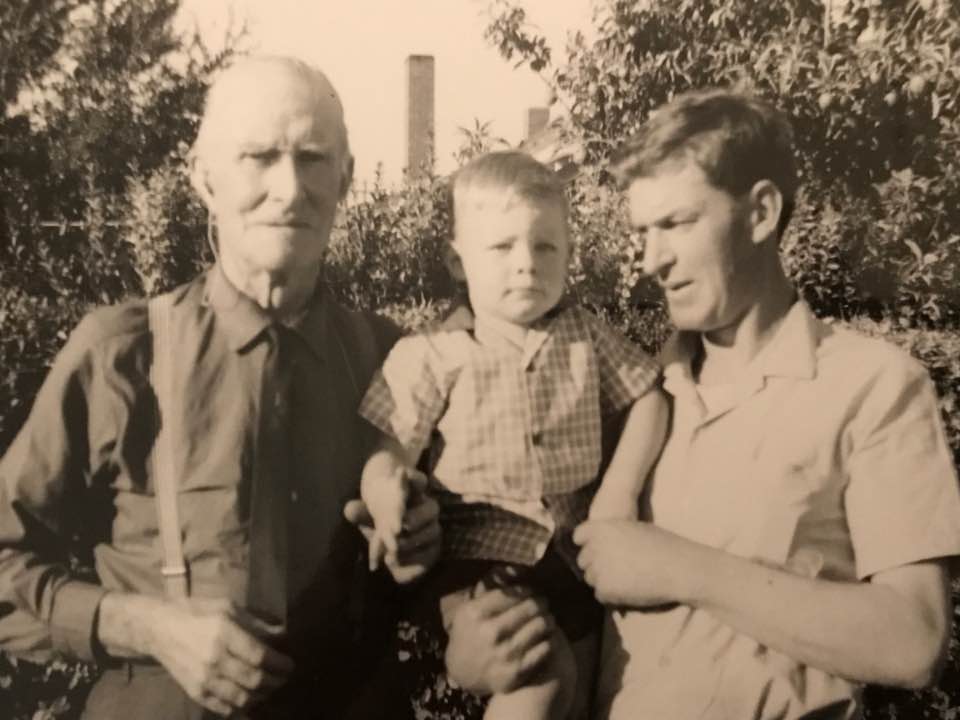
I’m sure that this build will surprise a few of you, knowing that my stash and build list is 90% Chevy, but there’s a story and a personal connection here. This will be a nostalgia and “In Memoriam” build for me.
About 45 years ago my father asked me to help him build a new model kit that he had just bought. Up until then I had just sat and watched as he built and hand-painted his truck models, occasionally I was allowed to sort out the sprues or even trim some parts off. When he put this kit on the bench and asked me to cut the seals and open it up, I was over the moon! This was the first kit that I actually played a major role in building, I was about 7 or 8 years old. I remember it was white with a red interior, the doors opened and the wheels turned and I was in heaven! Where it ended up I have no idea, lost over time as my parents moved house, divorced etc.
I have been looking around for this kit for years now (at the right price that is!), to have another go at it, and thanks to a Facebook Buy/Swap/Sell group, I found this about 12 months ago and stashed it away.
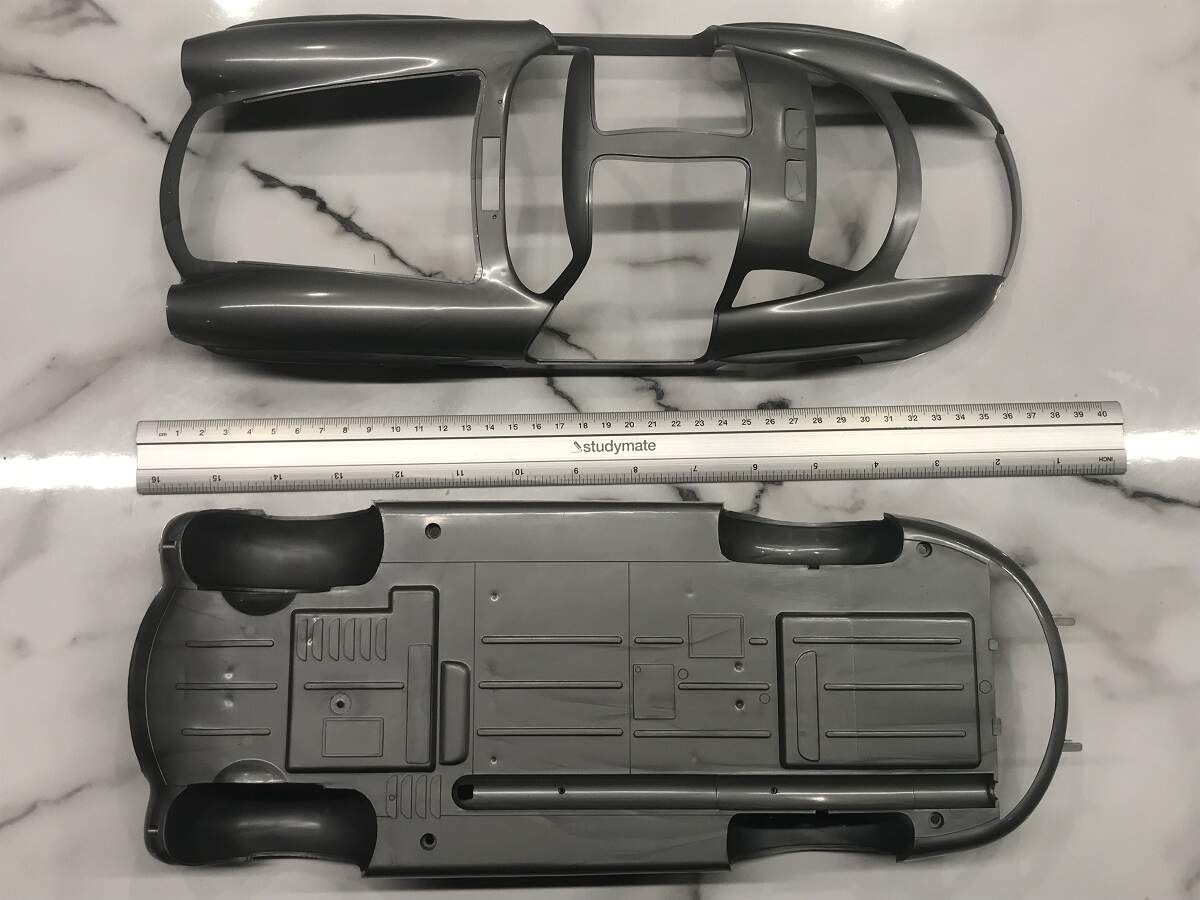
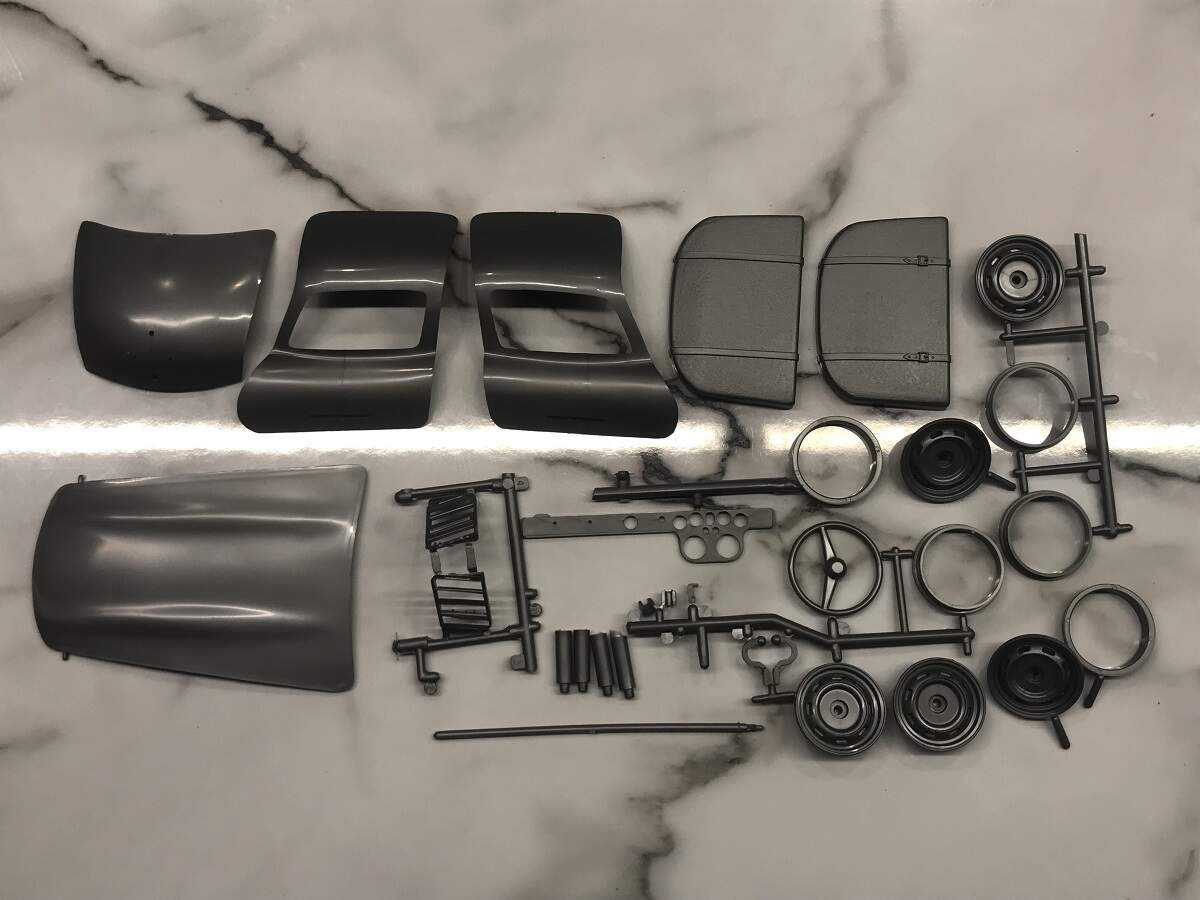
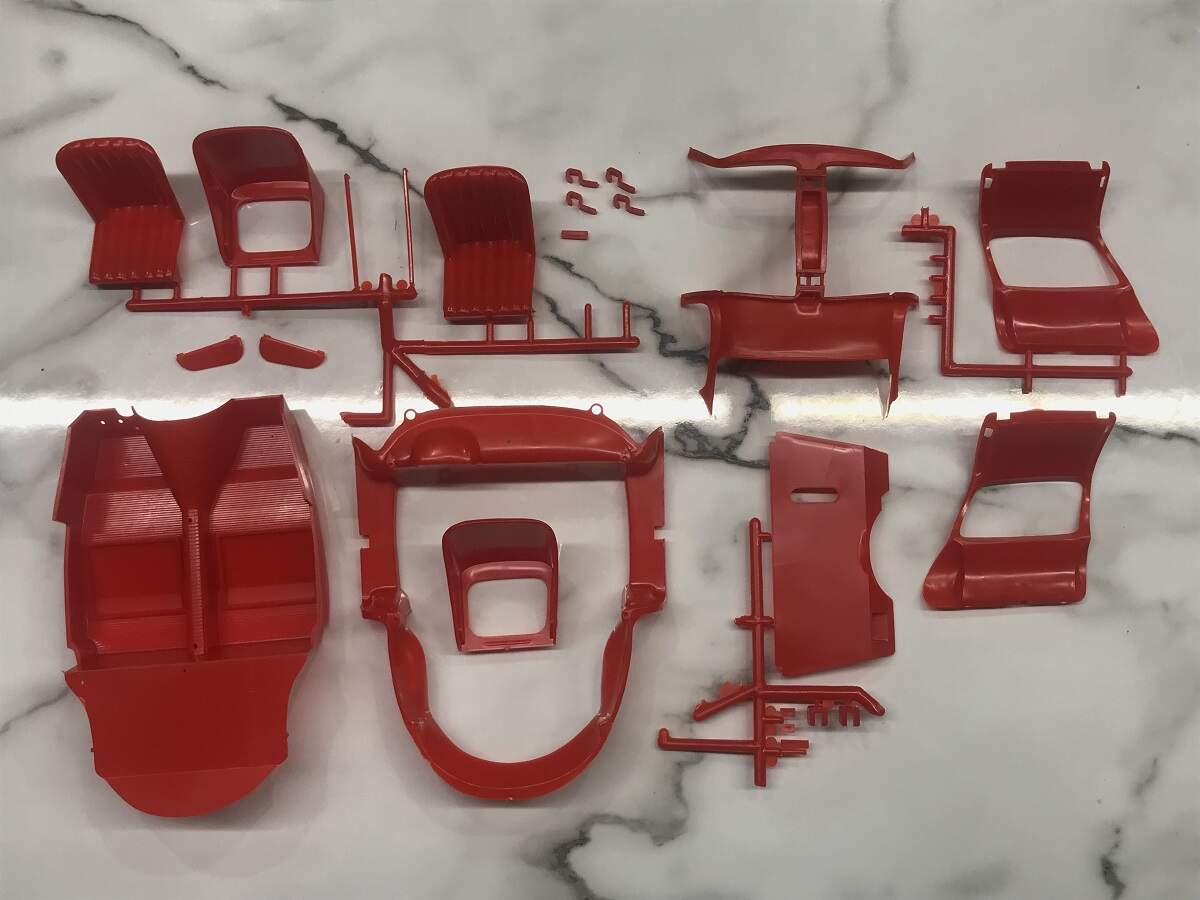
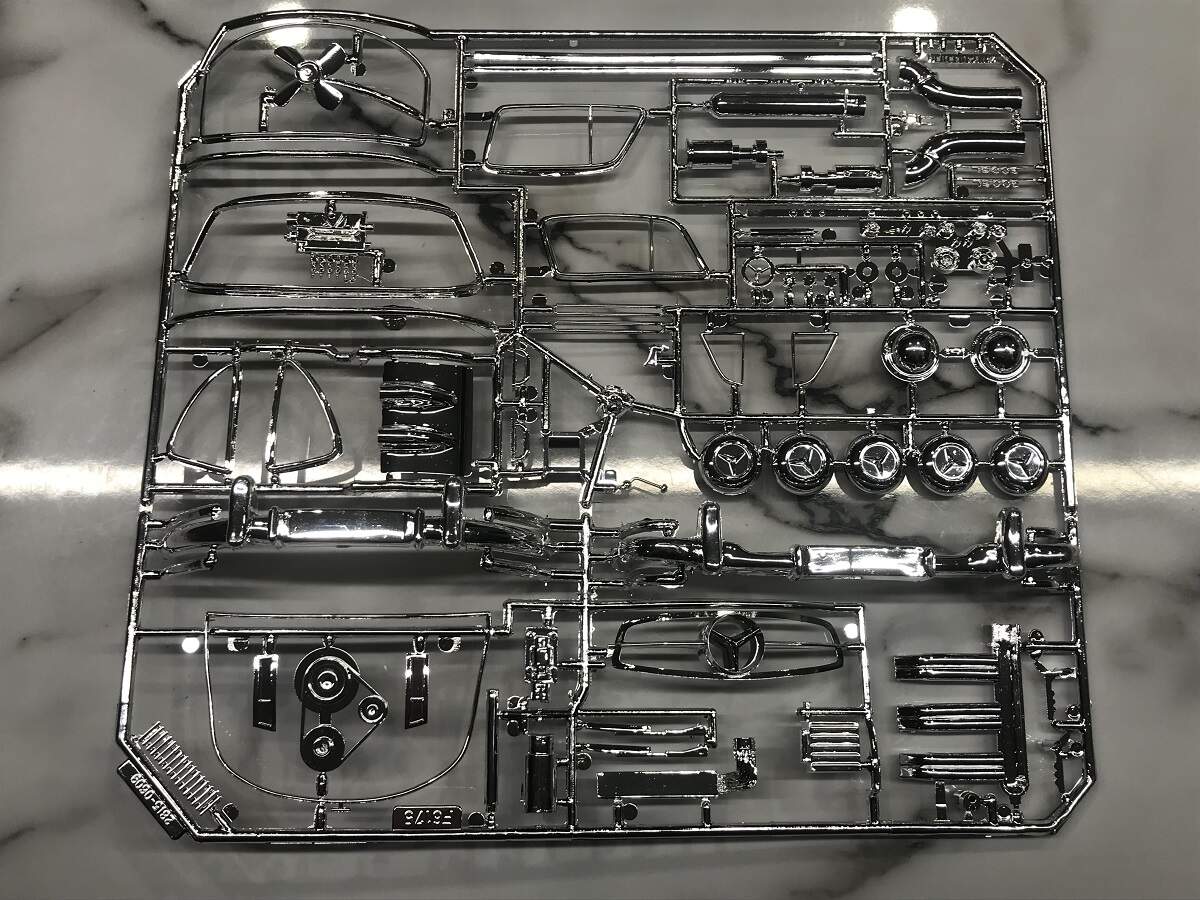
Most of the parts are off the sprues, but from what I can see it is complete, unstarted and undamaged.
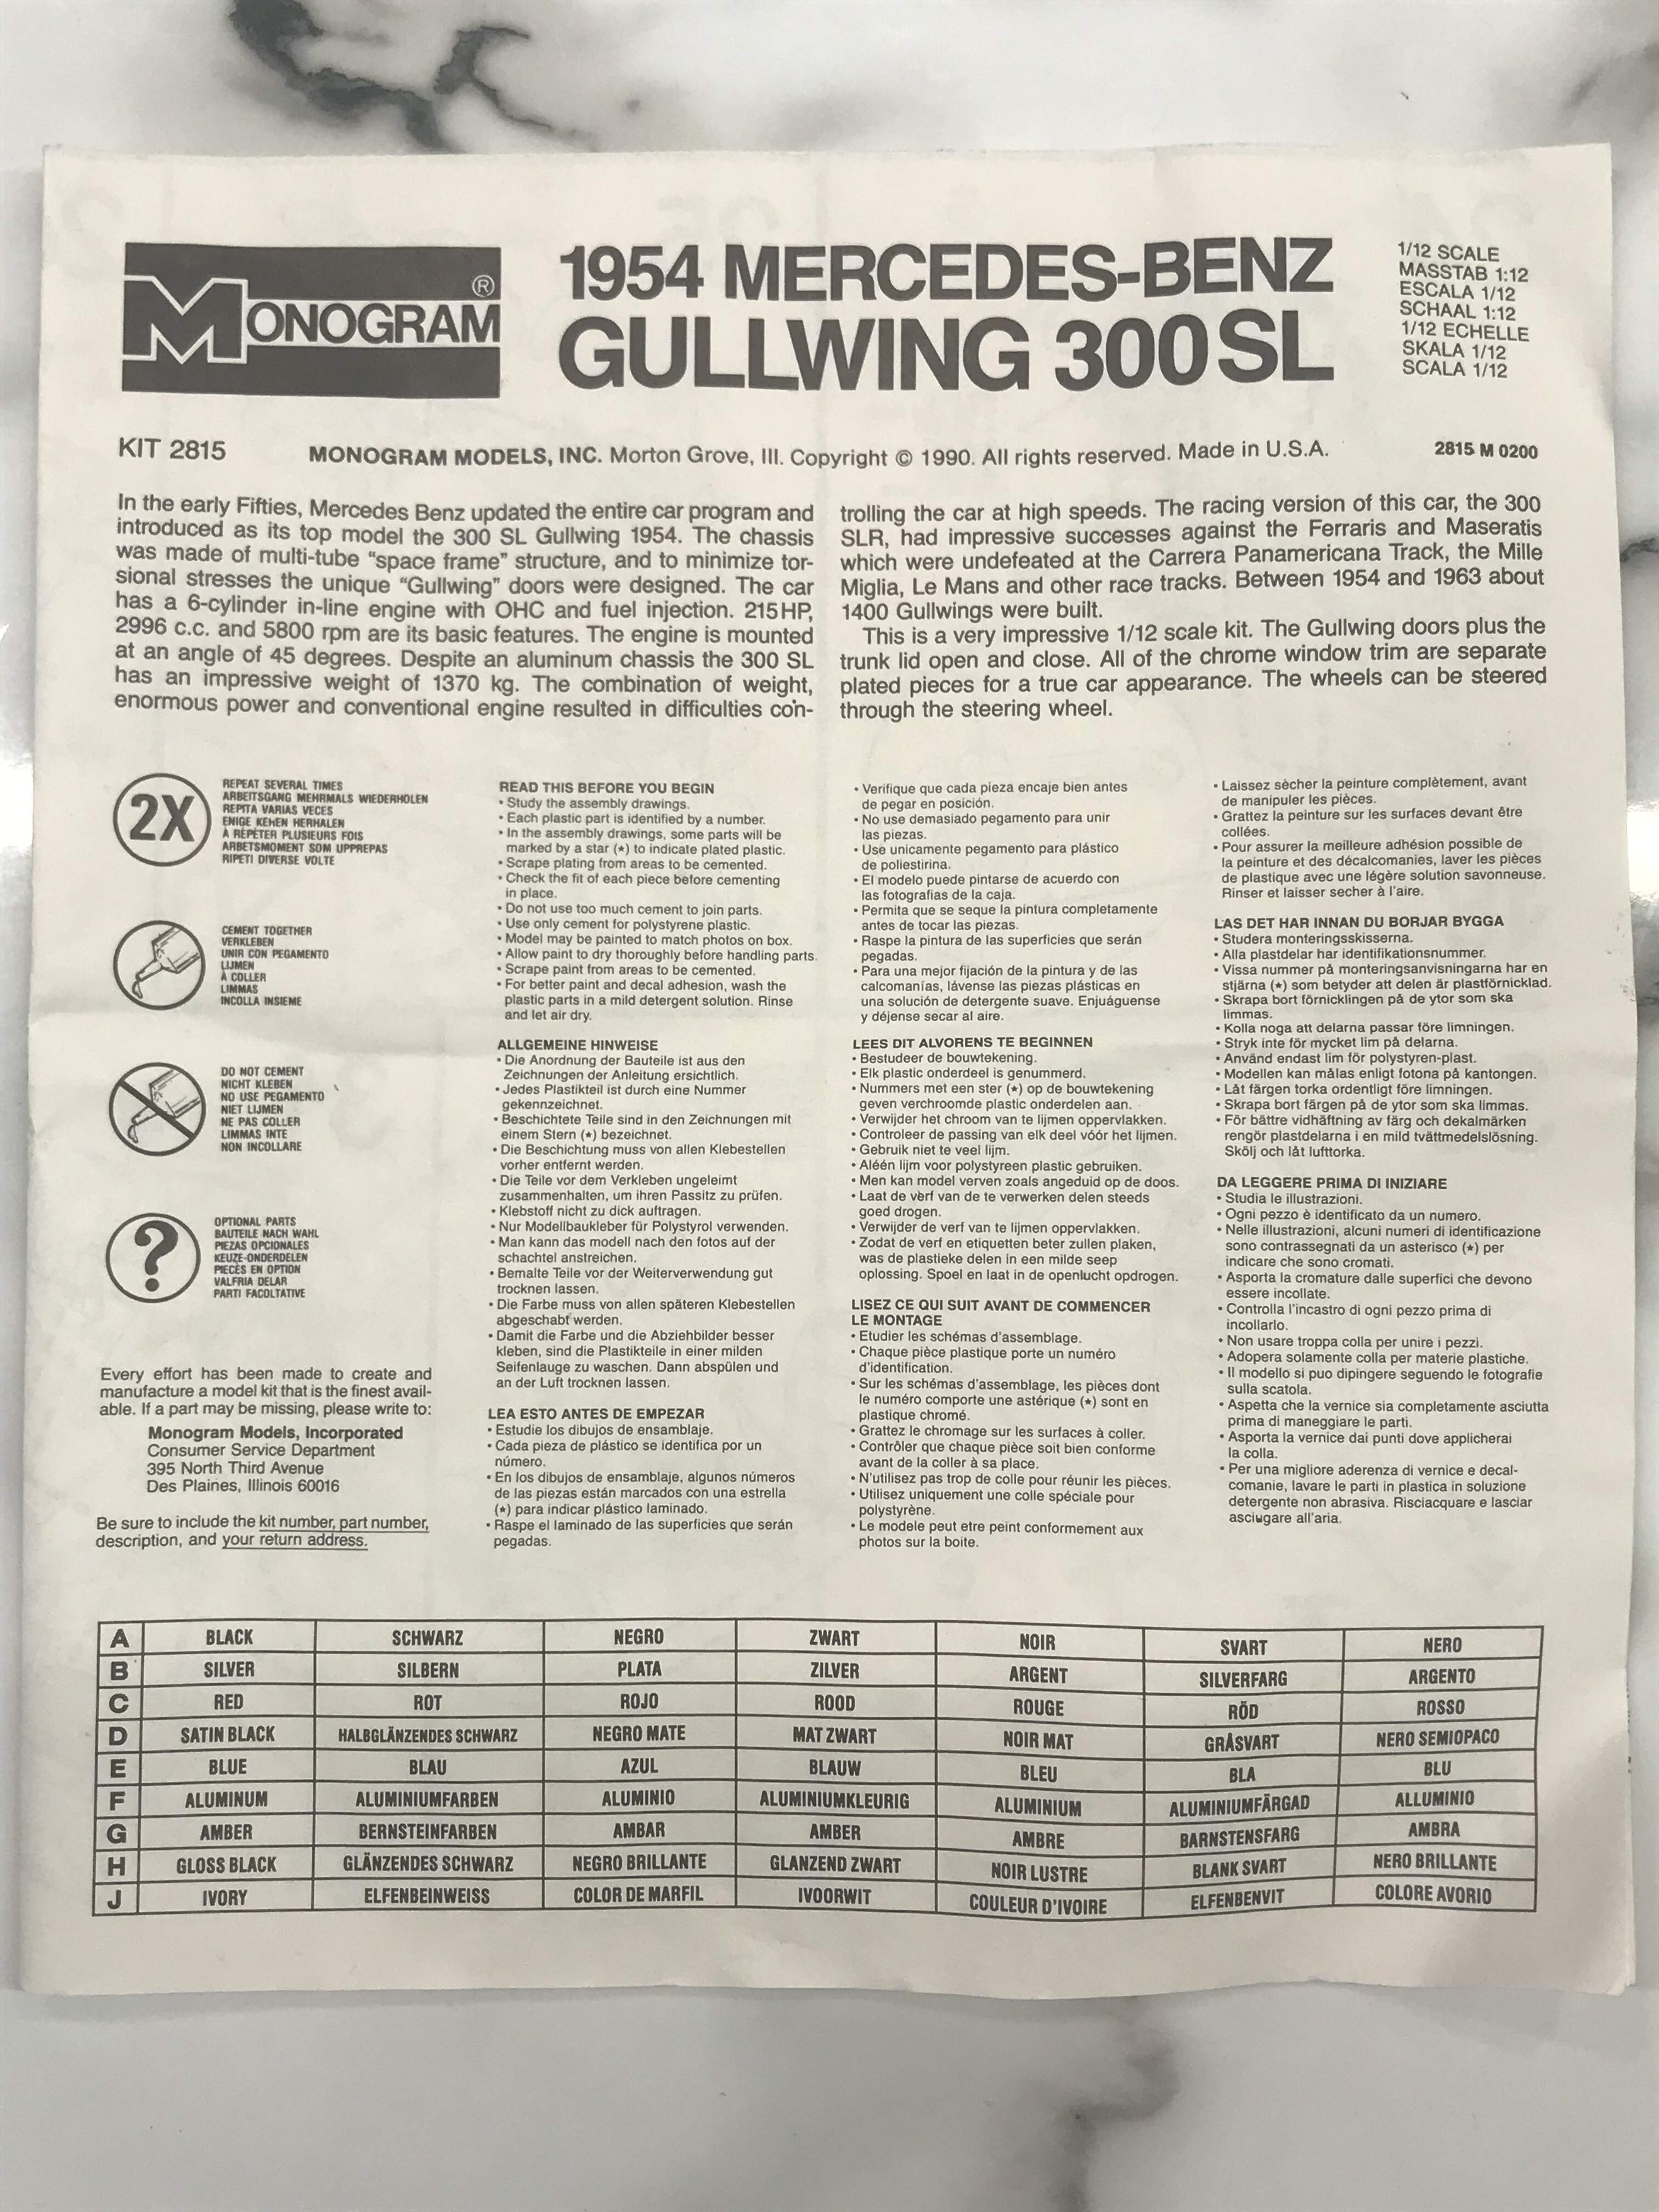
I am aware of the inaccuracies and problems, I believe that it was originally a Renwall kit from the mid-60’s, but I am just so happy to have one in the stash now.
My father passed away on September 11, 2017. The cancer finally won the battle after many years of ups and downs. My plan is to make a start on building the kit on this coming September 11, and finish it 12 months later on the fifth anniversary of his passing. All I will do in the meantime is a full inventory of parts to confirm what is there, and to see what I might be up against.
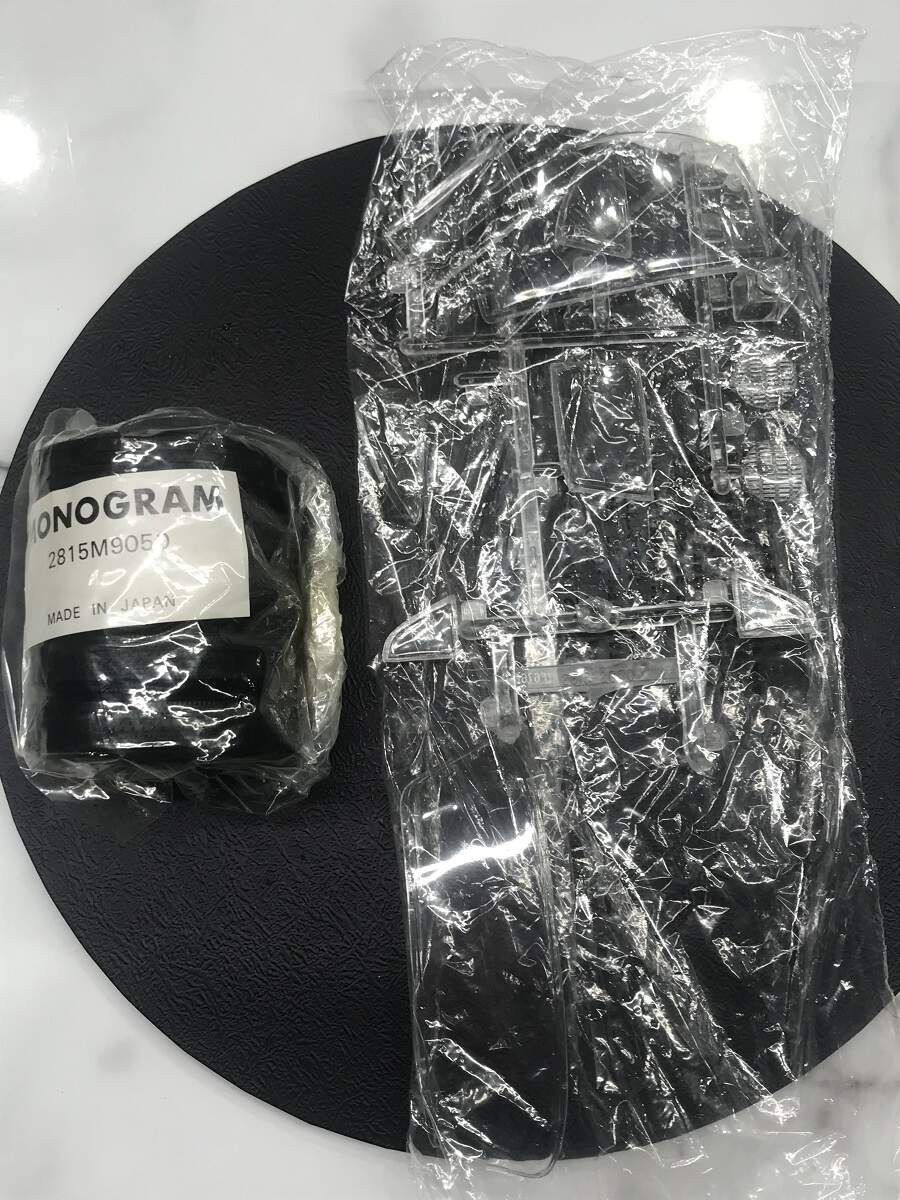
As you can see, a lot of the parts are off the sprues, but nothing major seems to be missing. The clear parts and rubber tyres are still in their original sealed bags and look to be undamaged and undeteriorated.
I will do some searching for build reviews and information online and build a picture of possible trouble spots. From what I have read already there are some major inaccuracies, especially in the engine bay, but this project is not about building a precise replica.
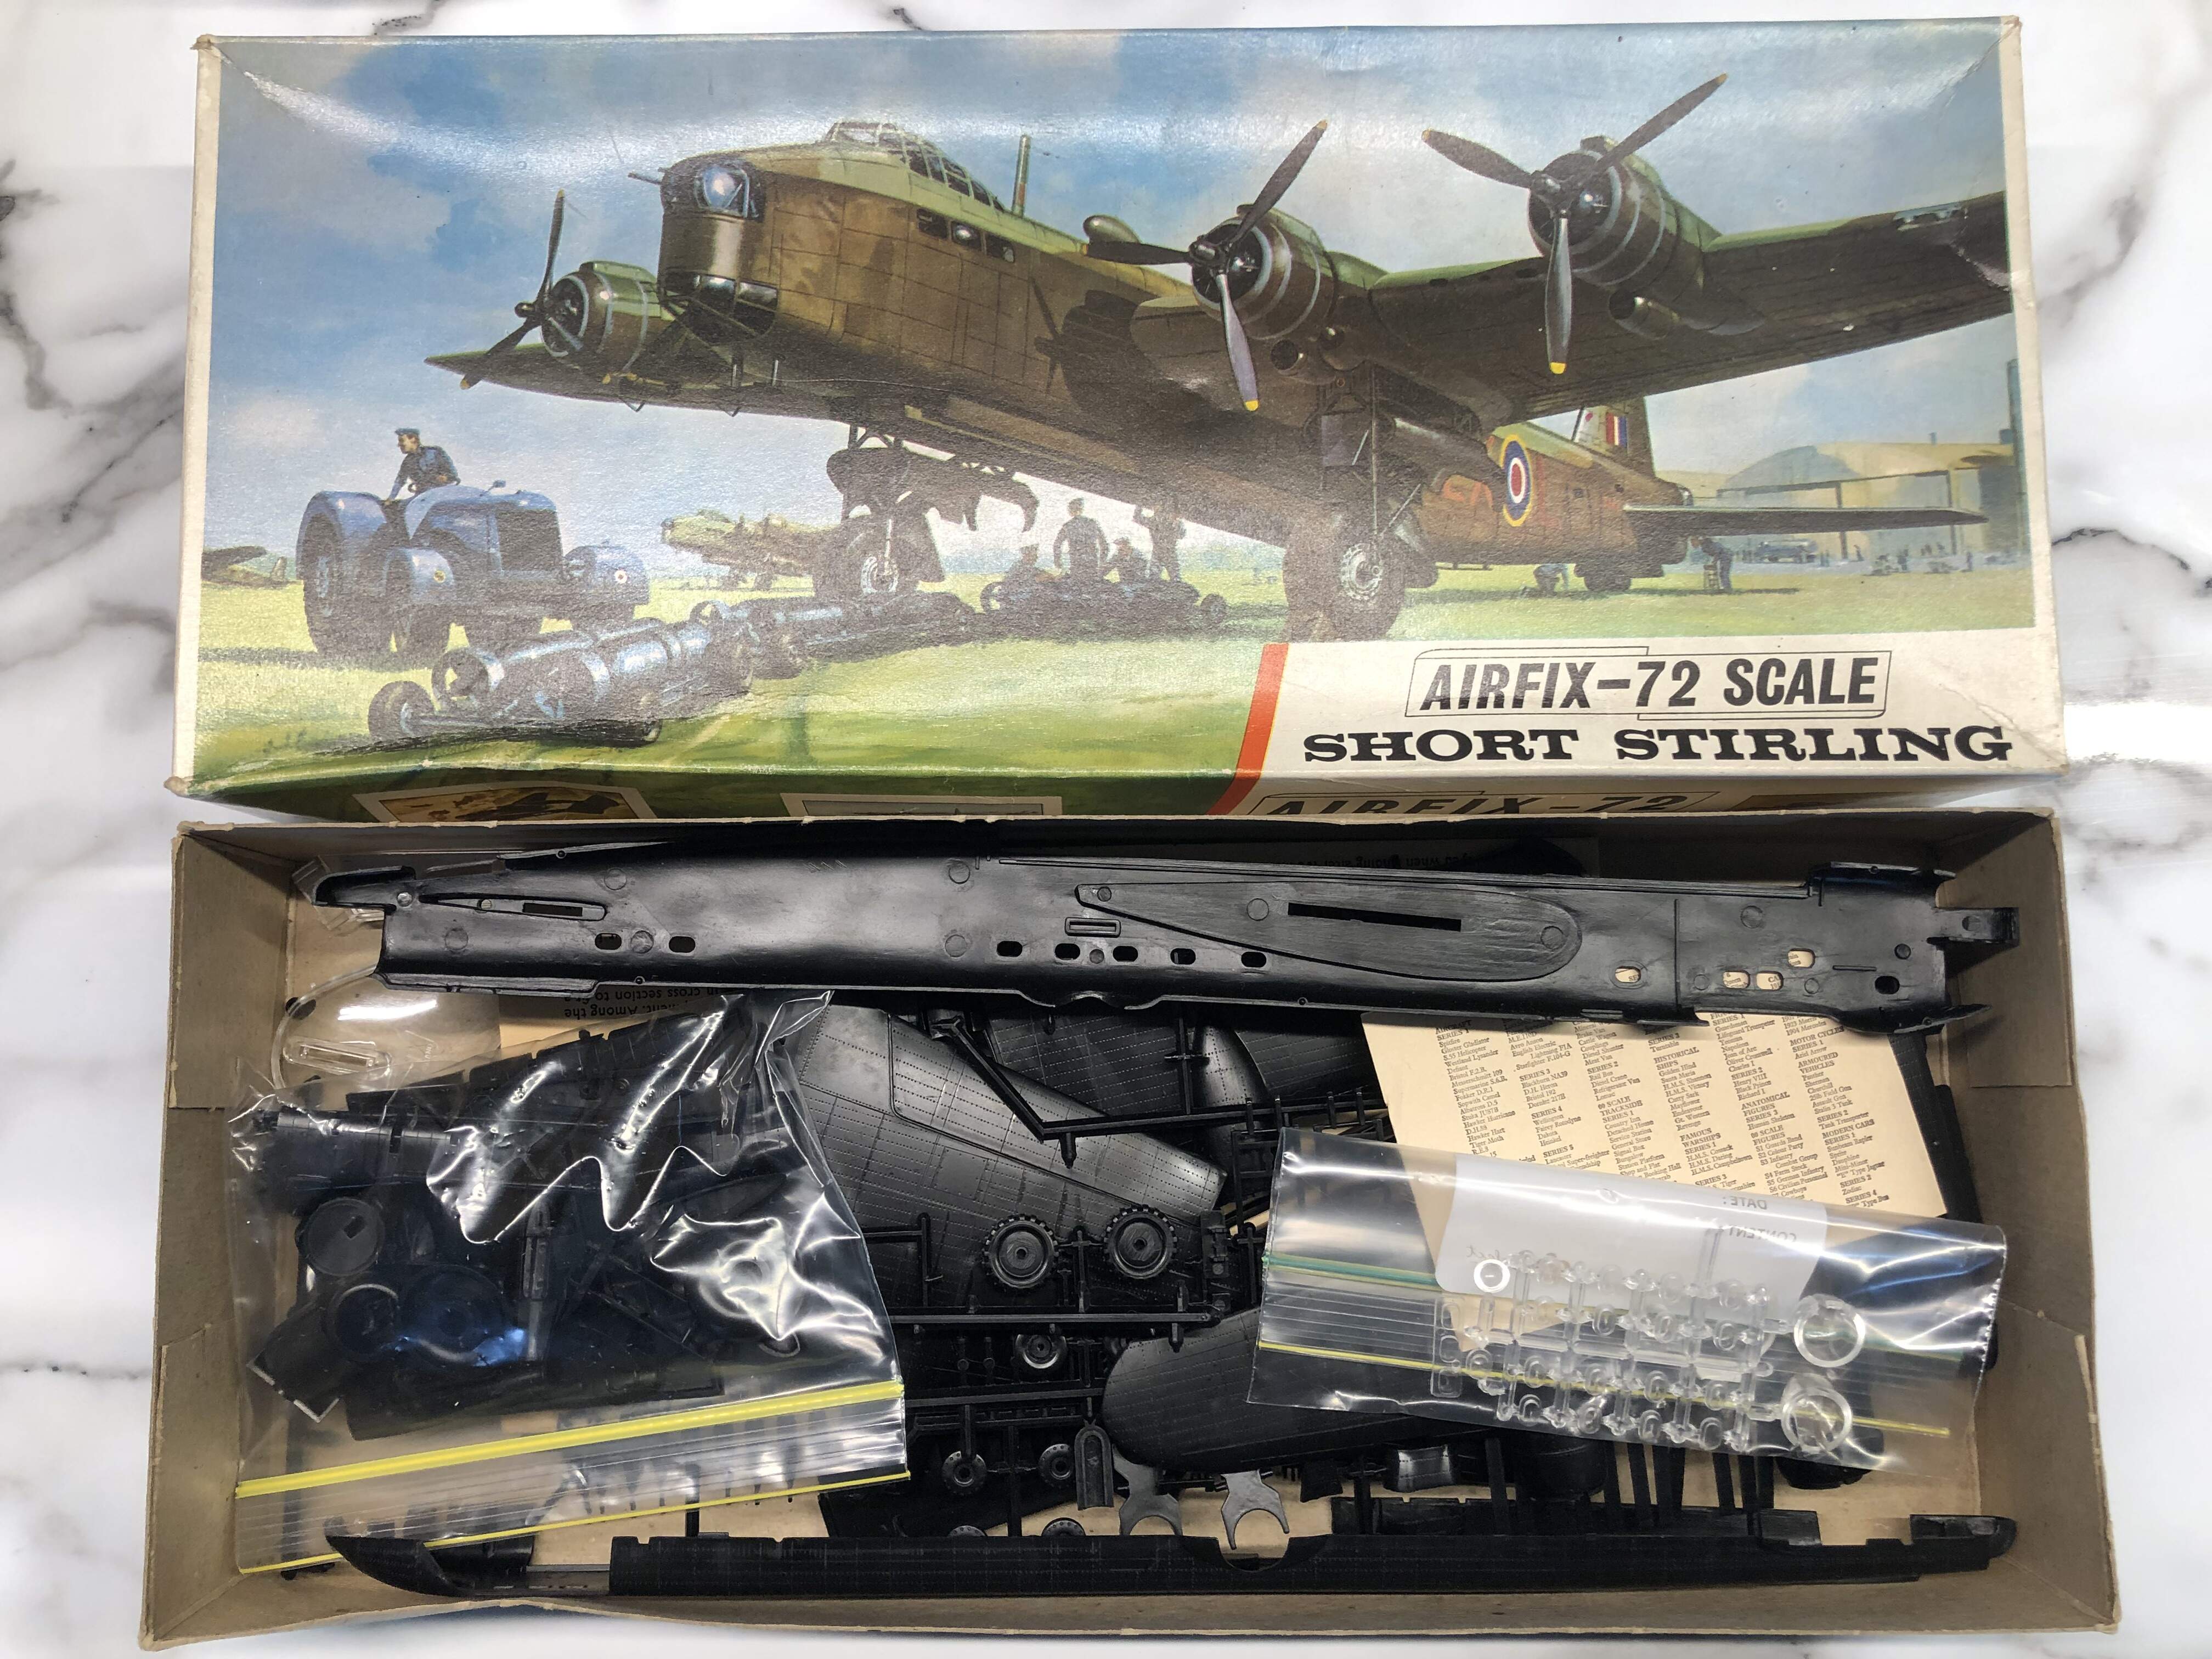
Part 2 of my nostalgia trip will be over on Aeroscale. The first kit that my father bought for me to go solo on was the Airfix Short Stirling in 1/72 scale. We went to see the original Midway movie when it was released in the mid-70’s, and that sparked an interest in WWII aircraft that hasn’t dulled to this day.
I managed to pick up a pre-loved unstarted kit in the original boxing from when I first built it, and I can’t wait to get started on both of these classics!
I will be following along. I saw a Tamiya 1/24 version for sale in the LHS and was tempted but passed but in 1/12 scale that would be an interesting project.
Michael,
While I build mostly race cars, I’ve also had my eye on the Tamiya Mercedes 300SL Gullwing right along with the Mclaren Mercedes Gullwing. Either one would make an incredible 1/12 scale kit.
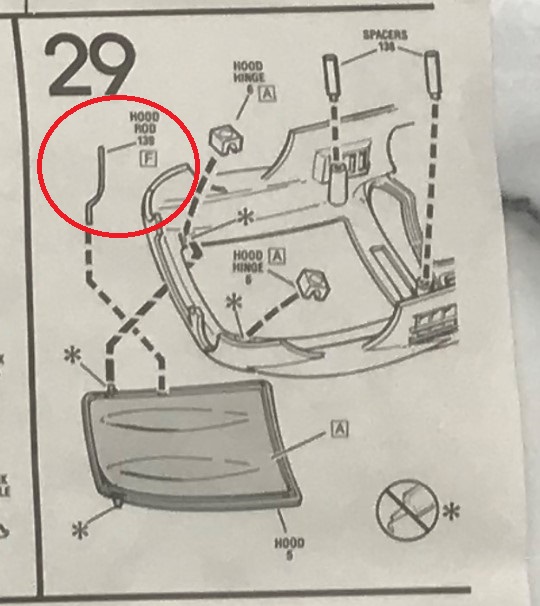
I’m fairly sure I can manage to fabricate something to keep the hood open!
Just working through the sprues and sorting the parts took me right back to when I would pull the car down off the shelf and go through the same routines, opening and closing the doors and operating the steering. All with my father watching closely to make sure I was showing due respect.
And that certainly takes me back My brother and I(Later my sister as well) would take turns to choose which model, our dad should take down, from one of the, many, cabinet shelfs. We would make up imaginary trips, we would go on, in the car and argue who was to sit where.
Well I did make a start on cleaning up and few parts ready to put some sub assemblies together, but nothing worth taking photos of yet, and my bench mojo is seriously depleted due to real life road blocks.
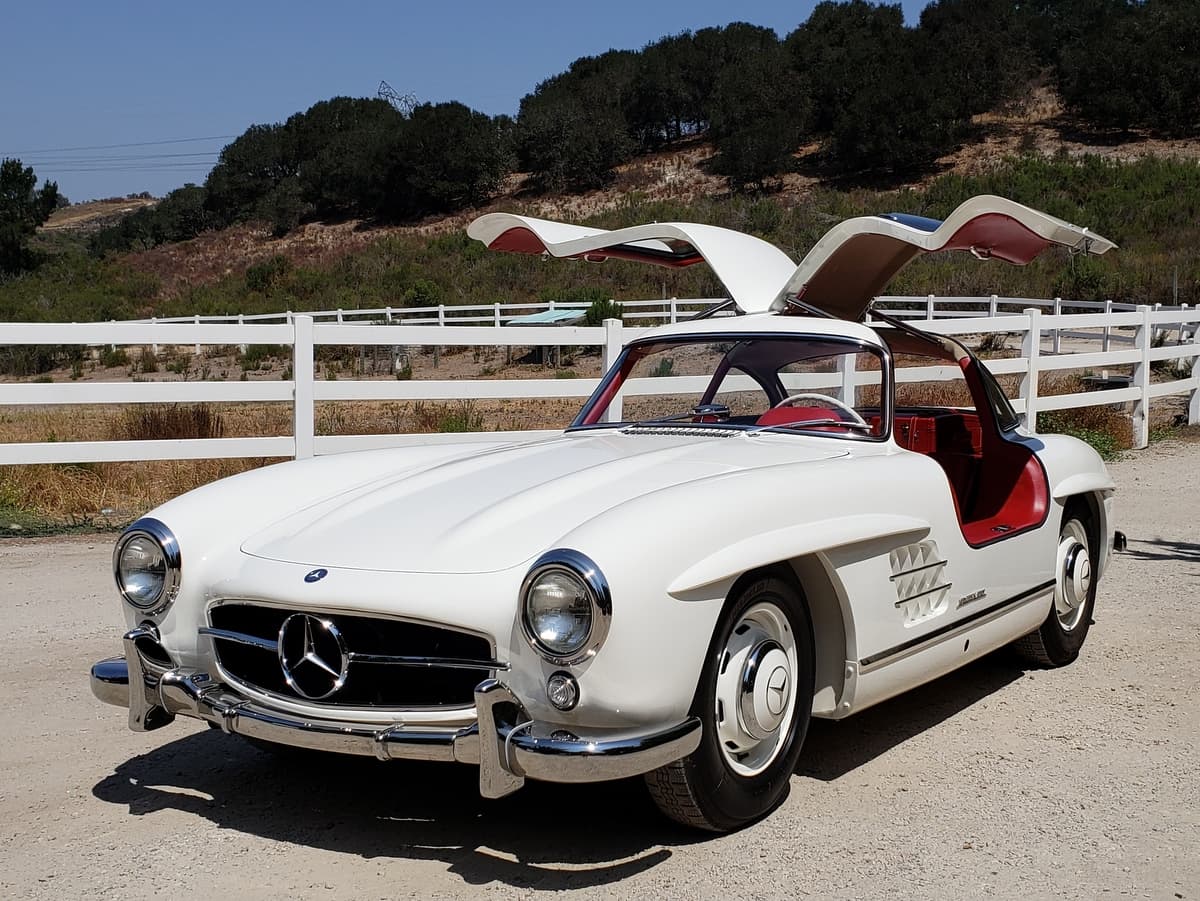
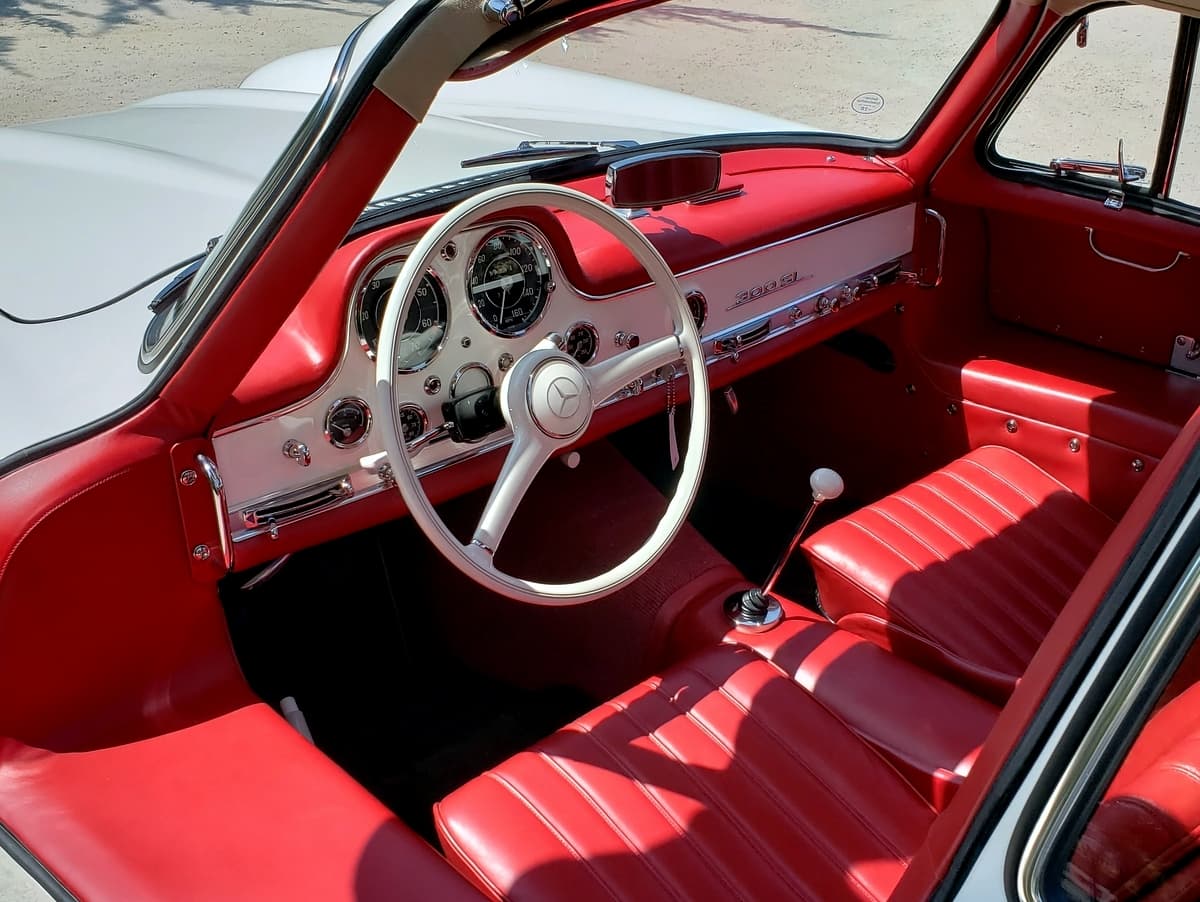
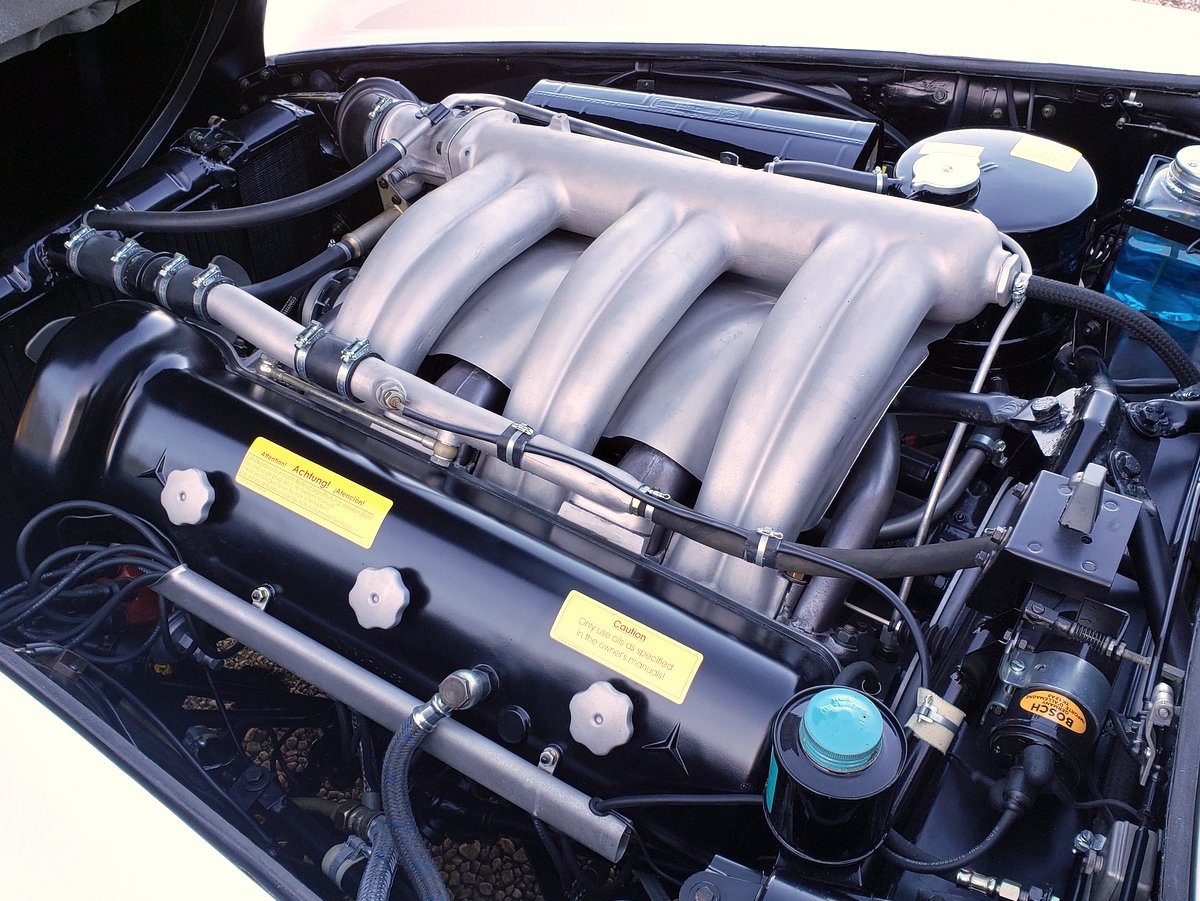
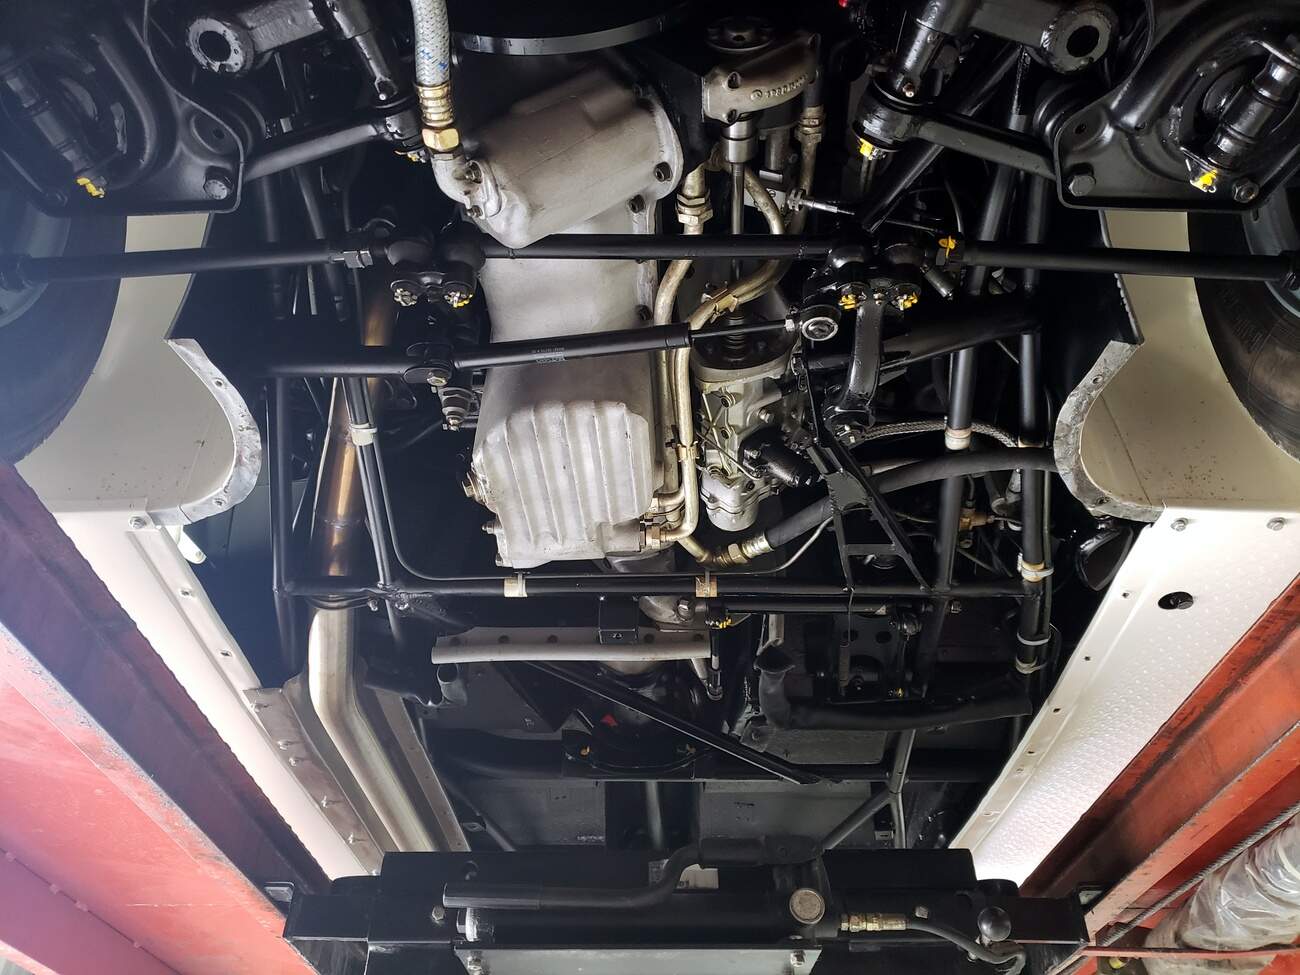
I have however found a great set of reference photos of a full ground up 300 SL restoration in the colour scheme I’m doing, so here are some highlights for inspiration.
It will keep D - life gets in the way sometimes.
If I push on when the mojo is low I think quality can suffer so I either wait or shift subjects/genres .
I spent a bit of time having a closer look at the parts tonight. It appears that the previous owner didn’t own cutters and used his Rottweiler to chew some of the parts off the sprue. Oh well, this was never going to be a show-winning build. Just handling the parts has brought back a lot of great memories and that’s why I hunted for this kit for so many years.
D,
you’re off to a darn good start especially after reading that the previous owner didn’t use any cutters to remove parts. Nothing like a real challenge.
Looking forward to following your build till she’s off the assembly line.
@Joel_W , very pleased to have you overseeing my work as always!
Some minor progress here, I have cleaned up the joins on the engine block and it’s ready for a shot of primer. I have also filled some gaps on the rear top of the seat assemblies with sprue goo and tidied them up.
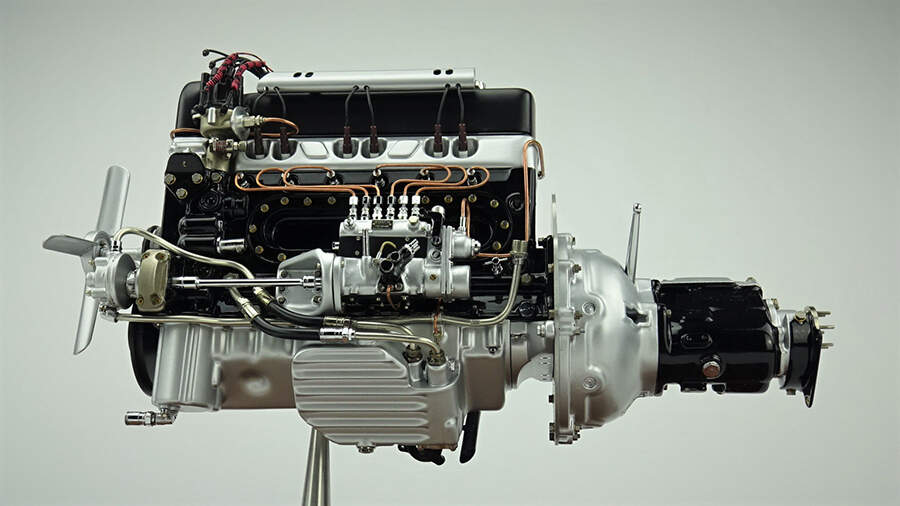
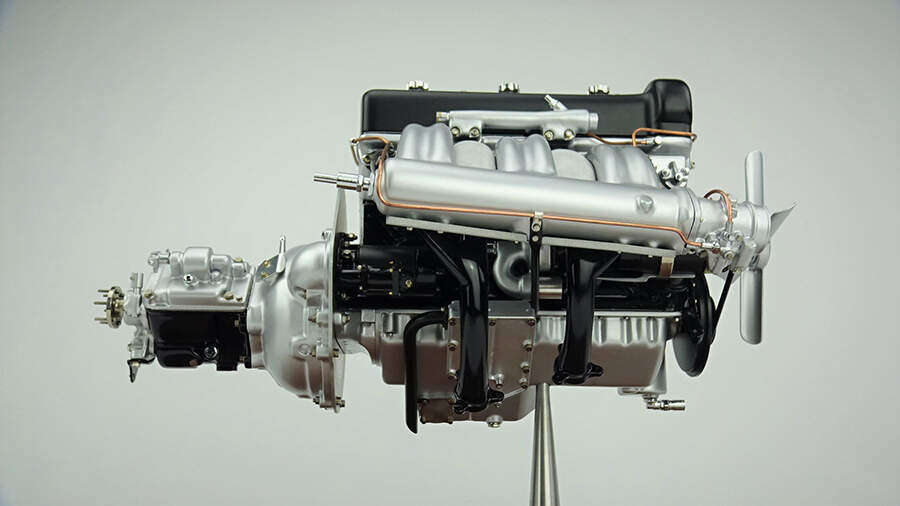
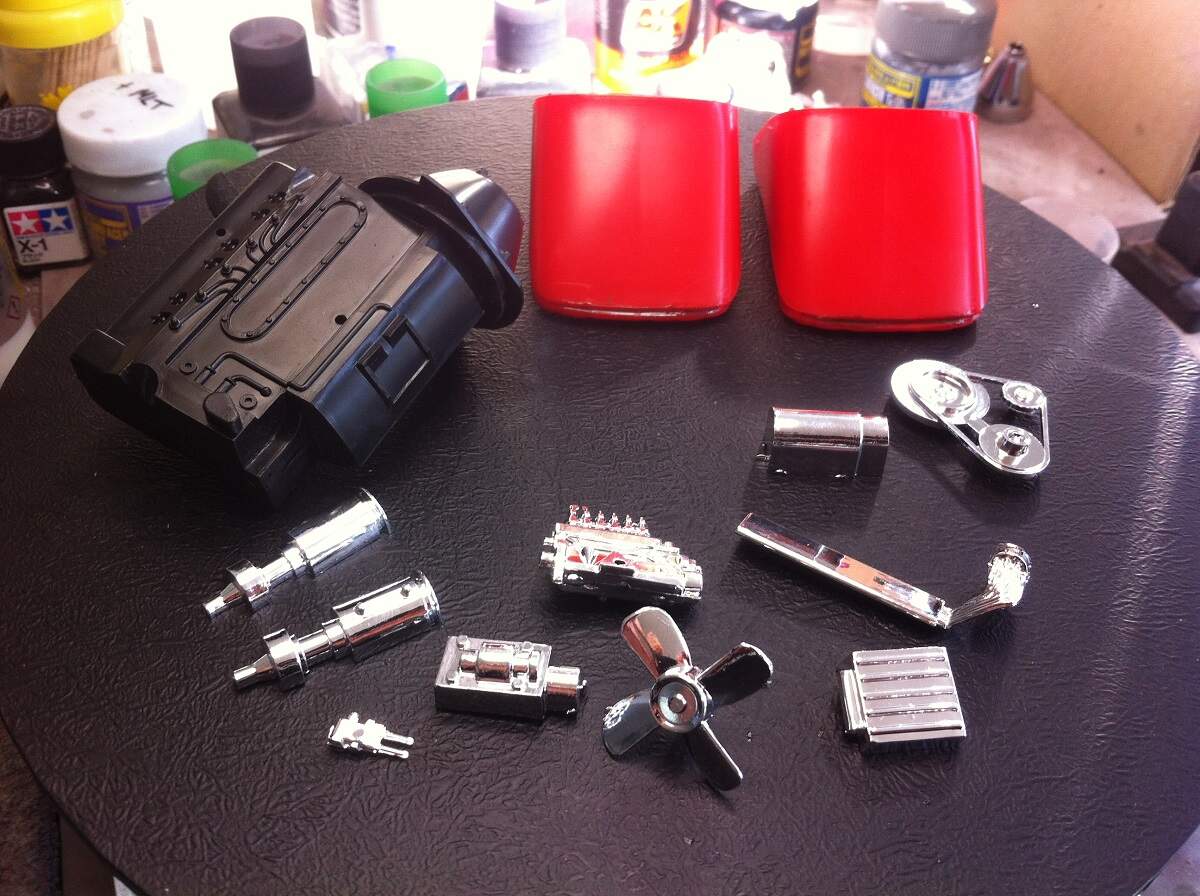
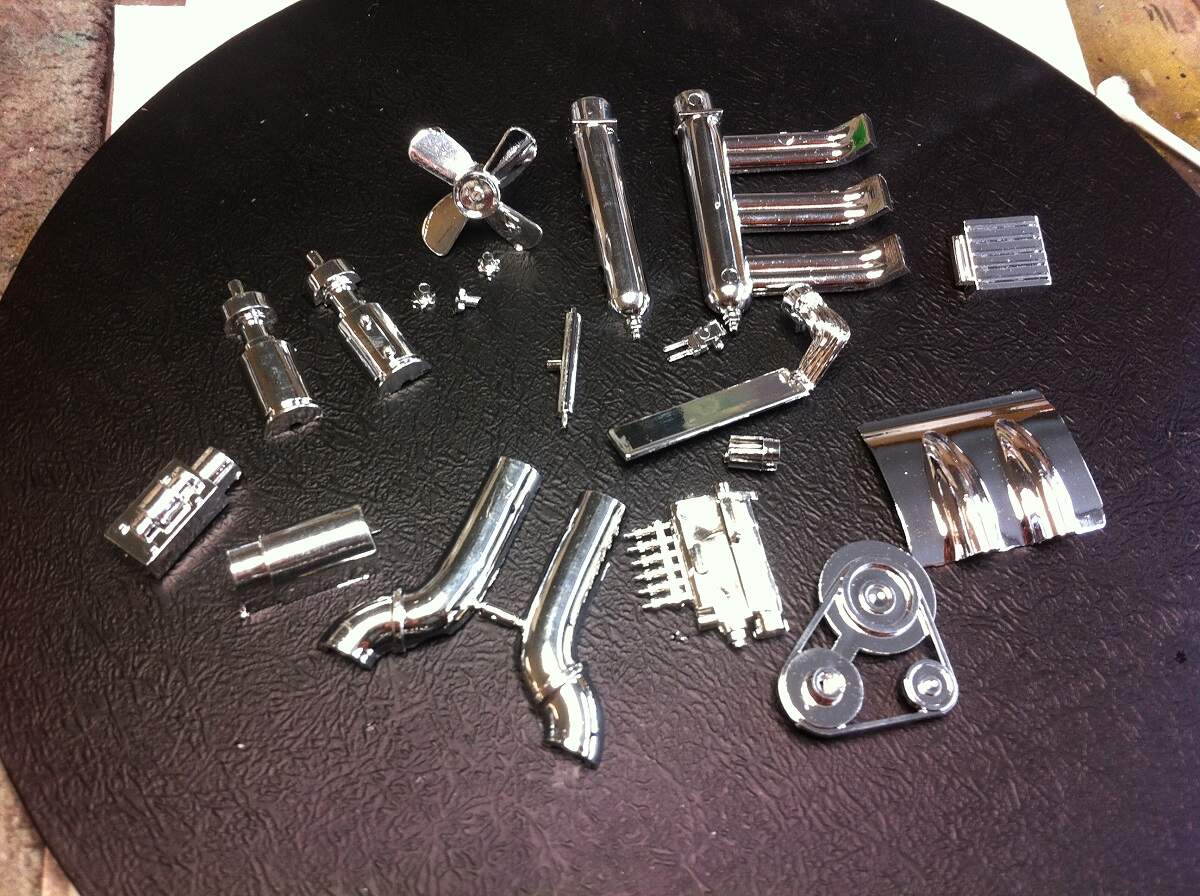
Looking at some reference shots of a rebuilt engine, there’s no chrome plating in sight. Also, there is quite a lot of flash and mould lines to be cleaned off the chromed parts, so a lot of the chrome will be removed during assembly. Decision made, they are all destined for a bath in oven cleaner!
You had me for a moment there with the first picture. I though that was a very impressive effort but if you can replicate some of that I am sure the Revell engine will stand up nicely.
D,
Count me in as well. Those pics of the refurbished engine/trans looked just like the real deal, and for once it actually turned out to be one. But I’m betting that your build will come mighty close.
Agreed, get rid of any of the chrome plated parts as you’ve noted in the real engine/trans it’s all polished Aluminum. I also concur that removing those molded on Fuel injection copper tubing and adding your own would really be a major improvement.
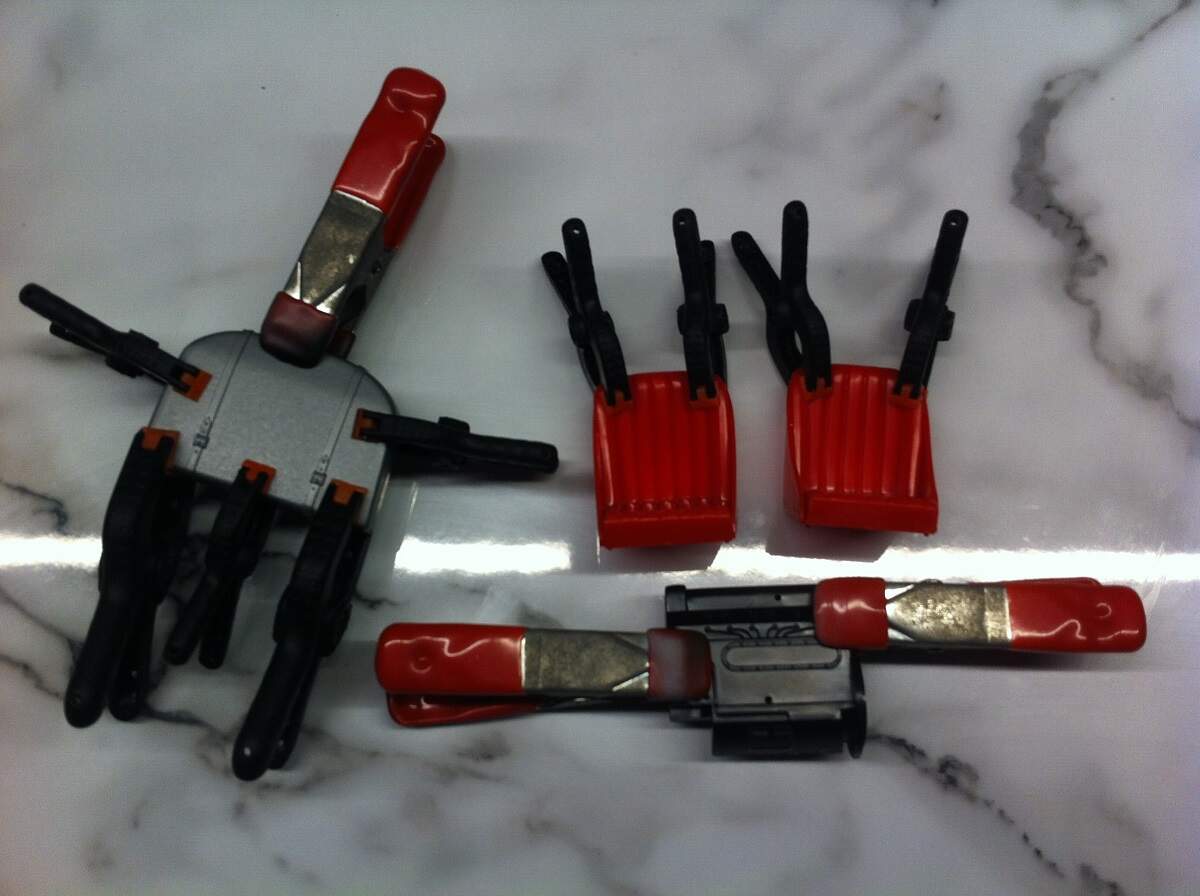
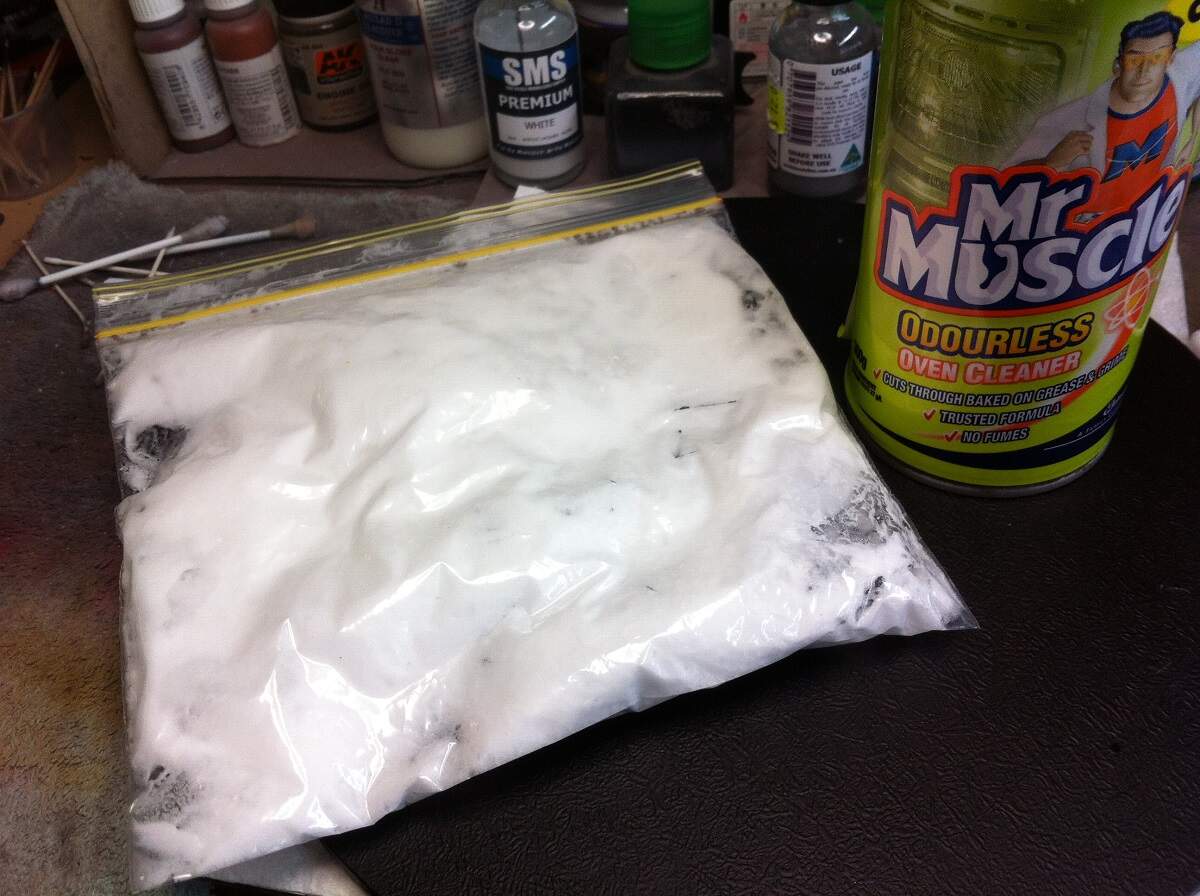
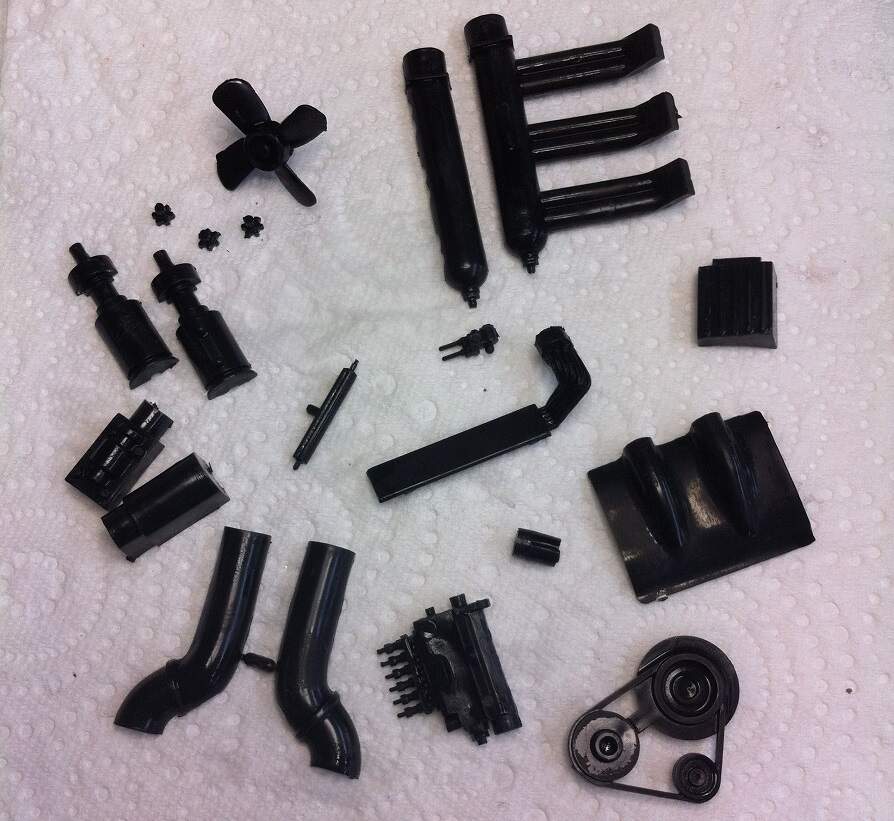
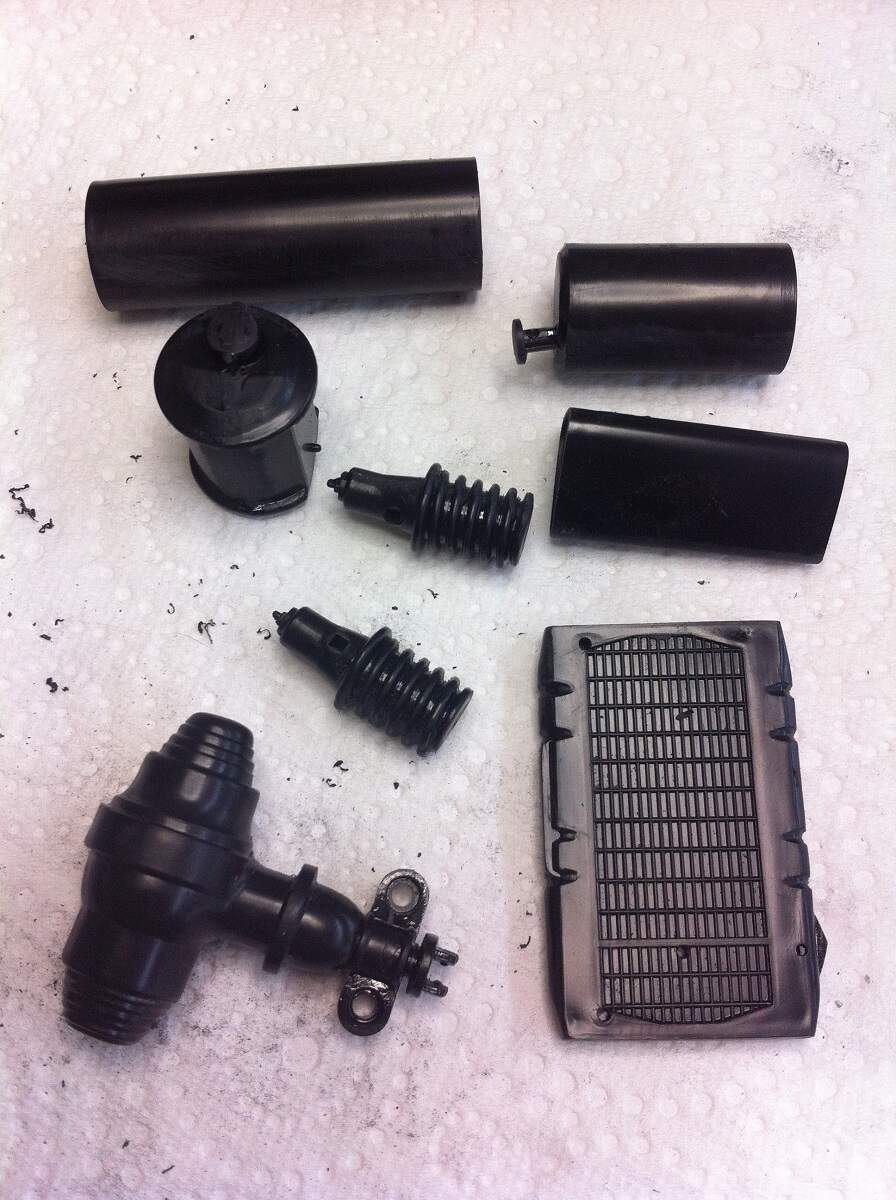
A little more tinkering on the big Merc. I got all of the chrome parts associated with the engine assembly and gave them a bath in oven cleaner for an hour or so, then a warm soapy bath and a scrub with an old toothbrush. They are now ready to be cleaned up (flash, sprue attachment points, mould lines etc.) for priming.
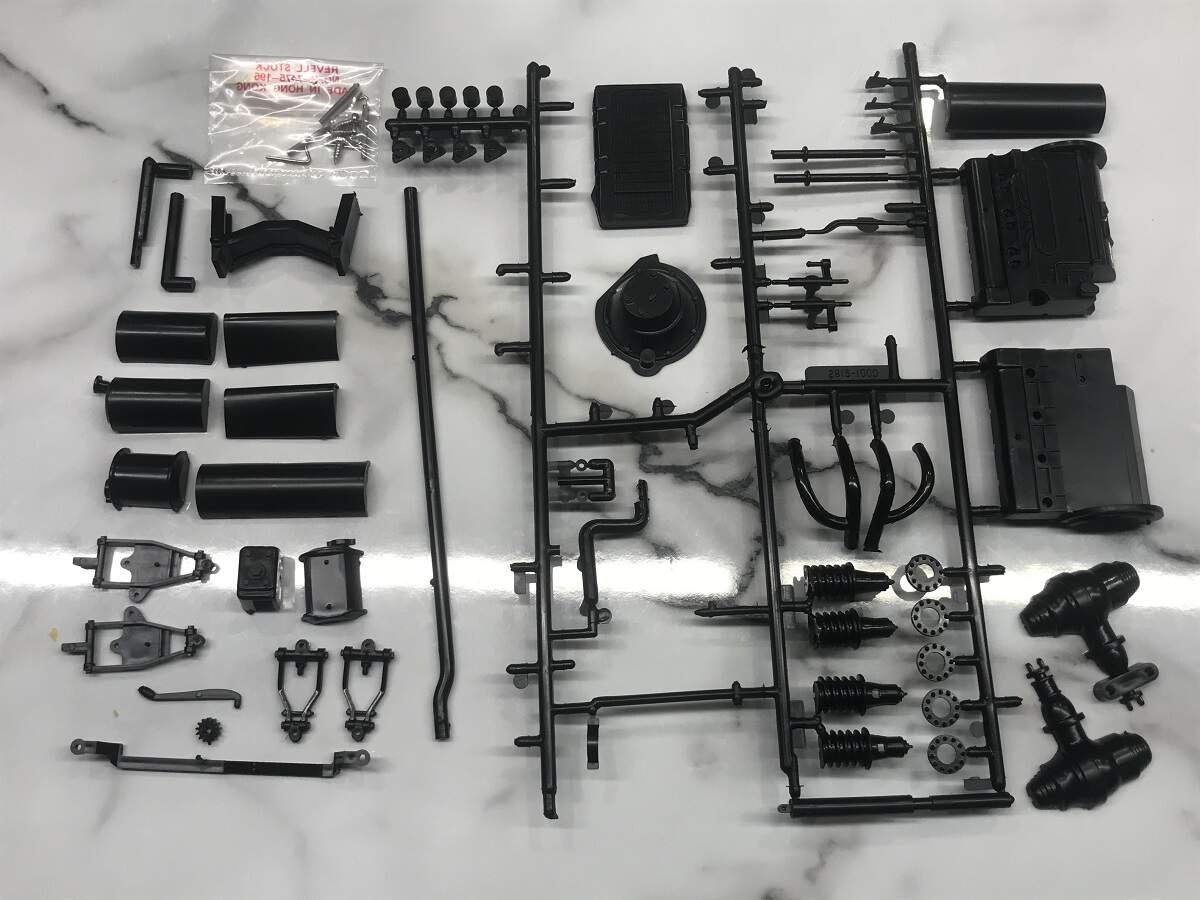
I also put together some sub assemblies and cleaned them up a bit. In here we have the front springs, radiator, water tank, oil tank, diff housing, noise absorber (primary muffler) and main rear muffler.