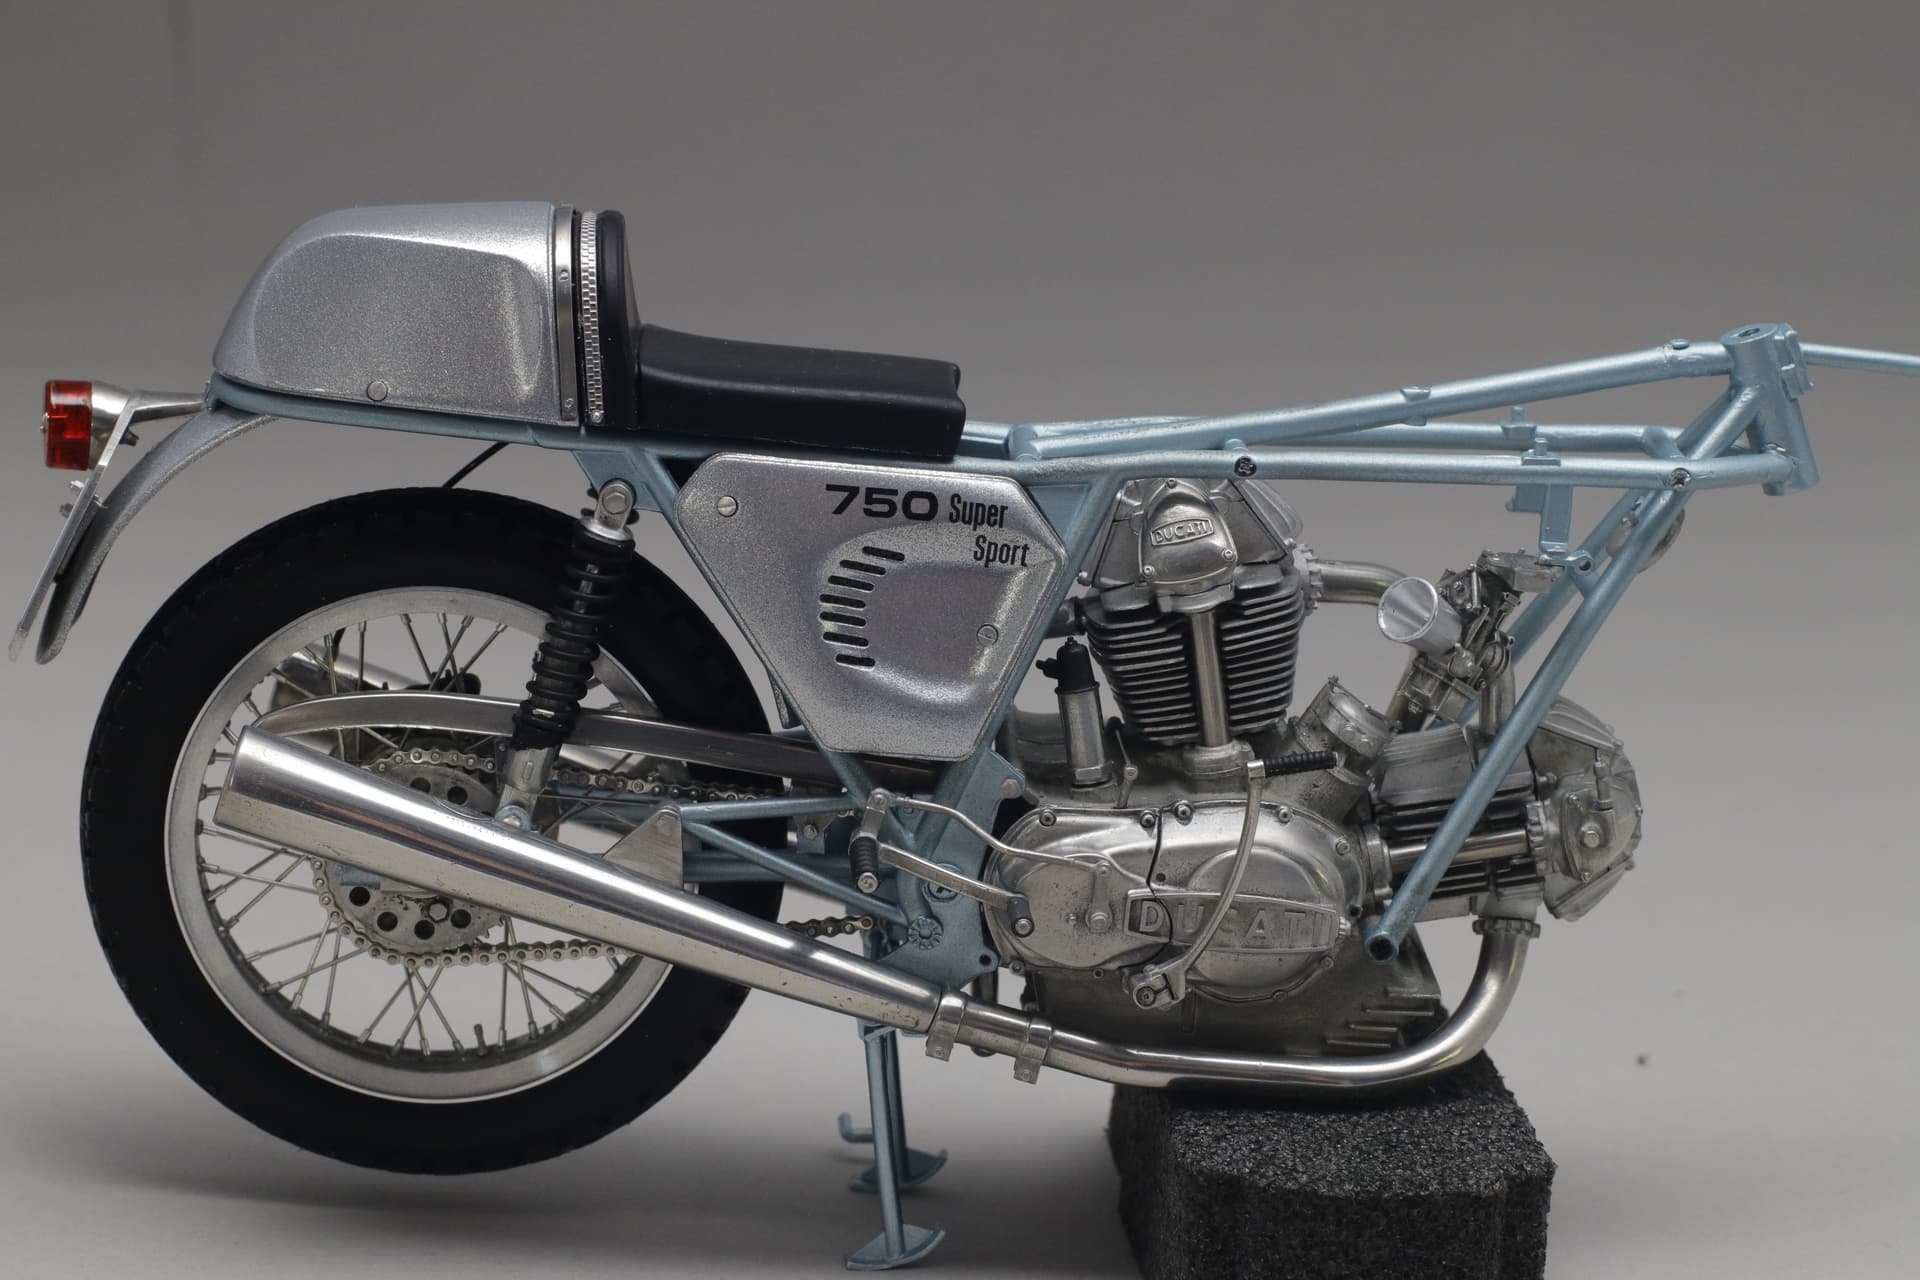
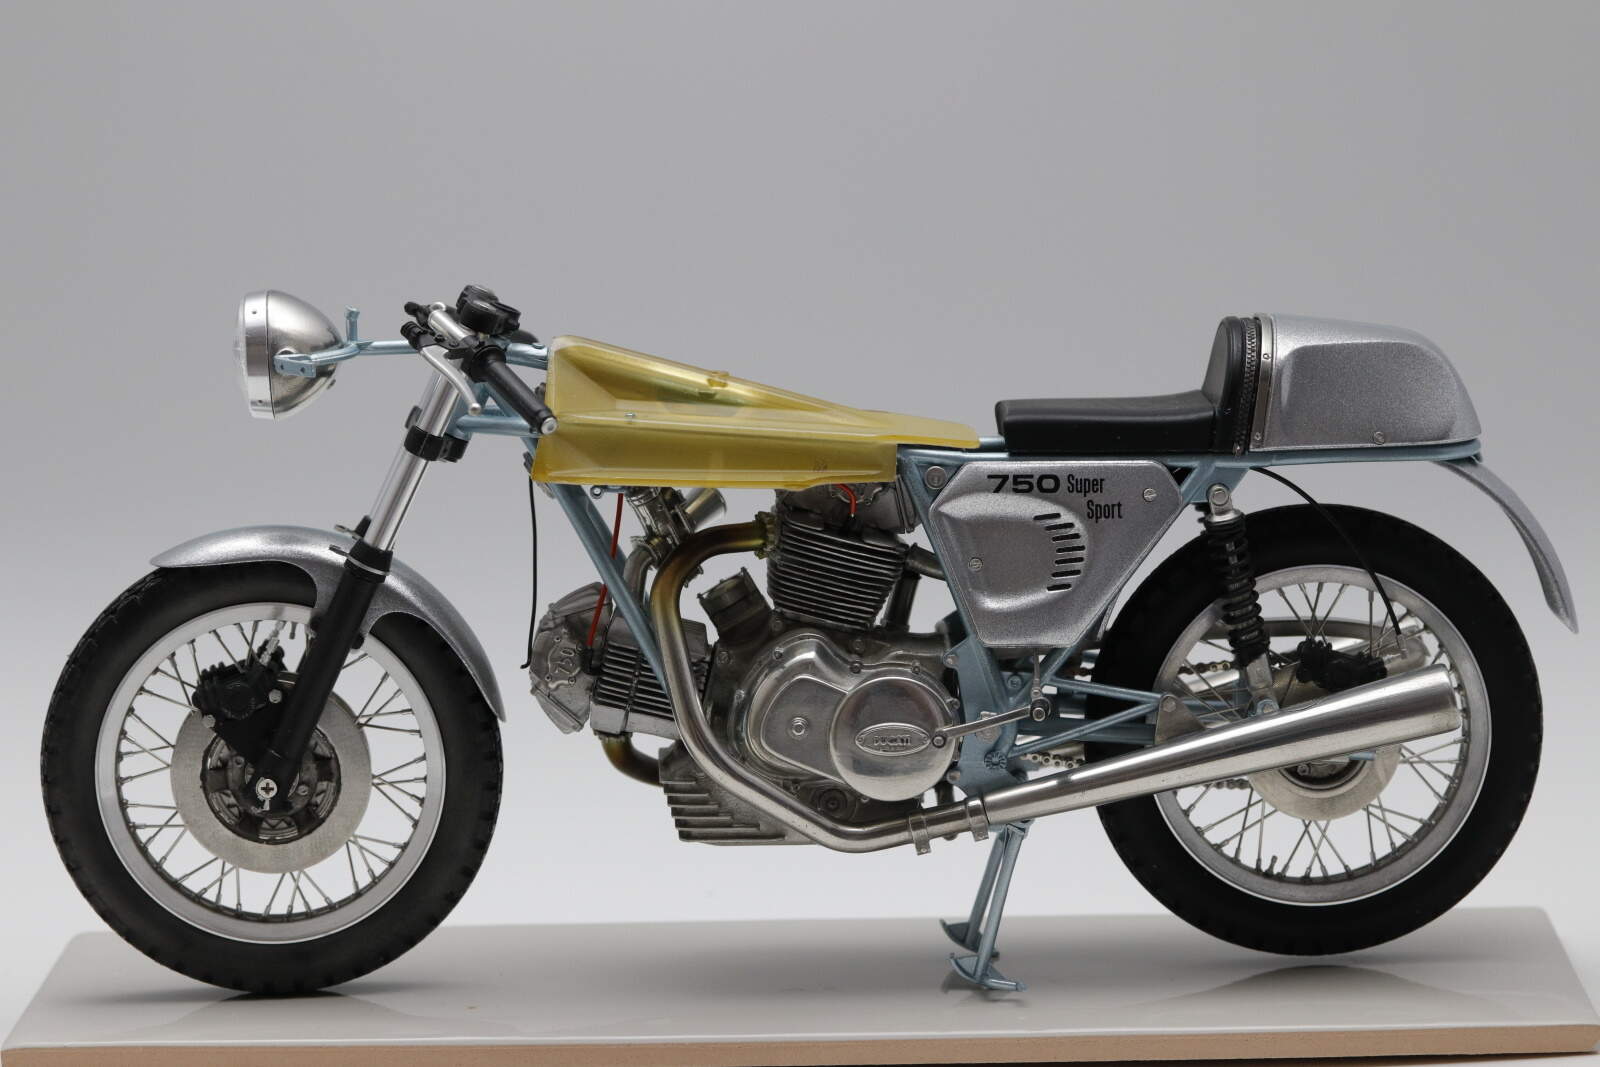
More progress. Though it looks calm on the surface this was very fiddly as we progressed to getting the seat fitted.
The seat has a zip, it was hard to glue PE to rubber, and the PE at this scale is quite solid so it needs to be in the right shape or the glue wont hold it there
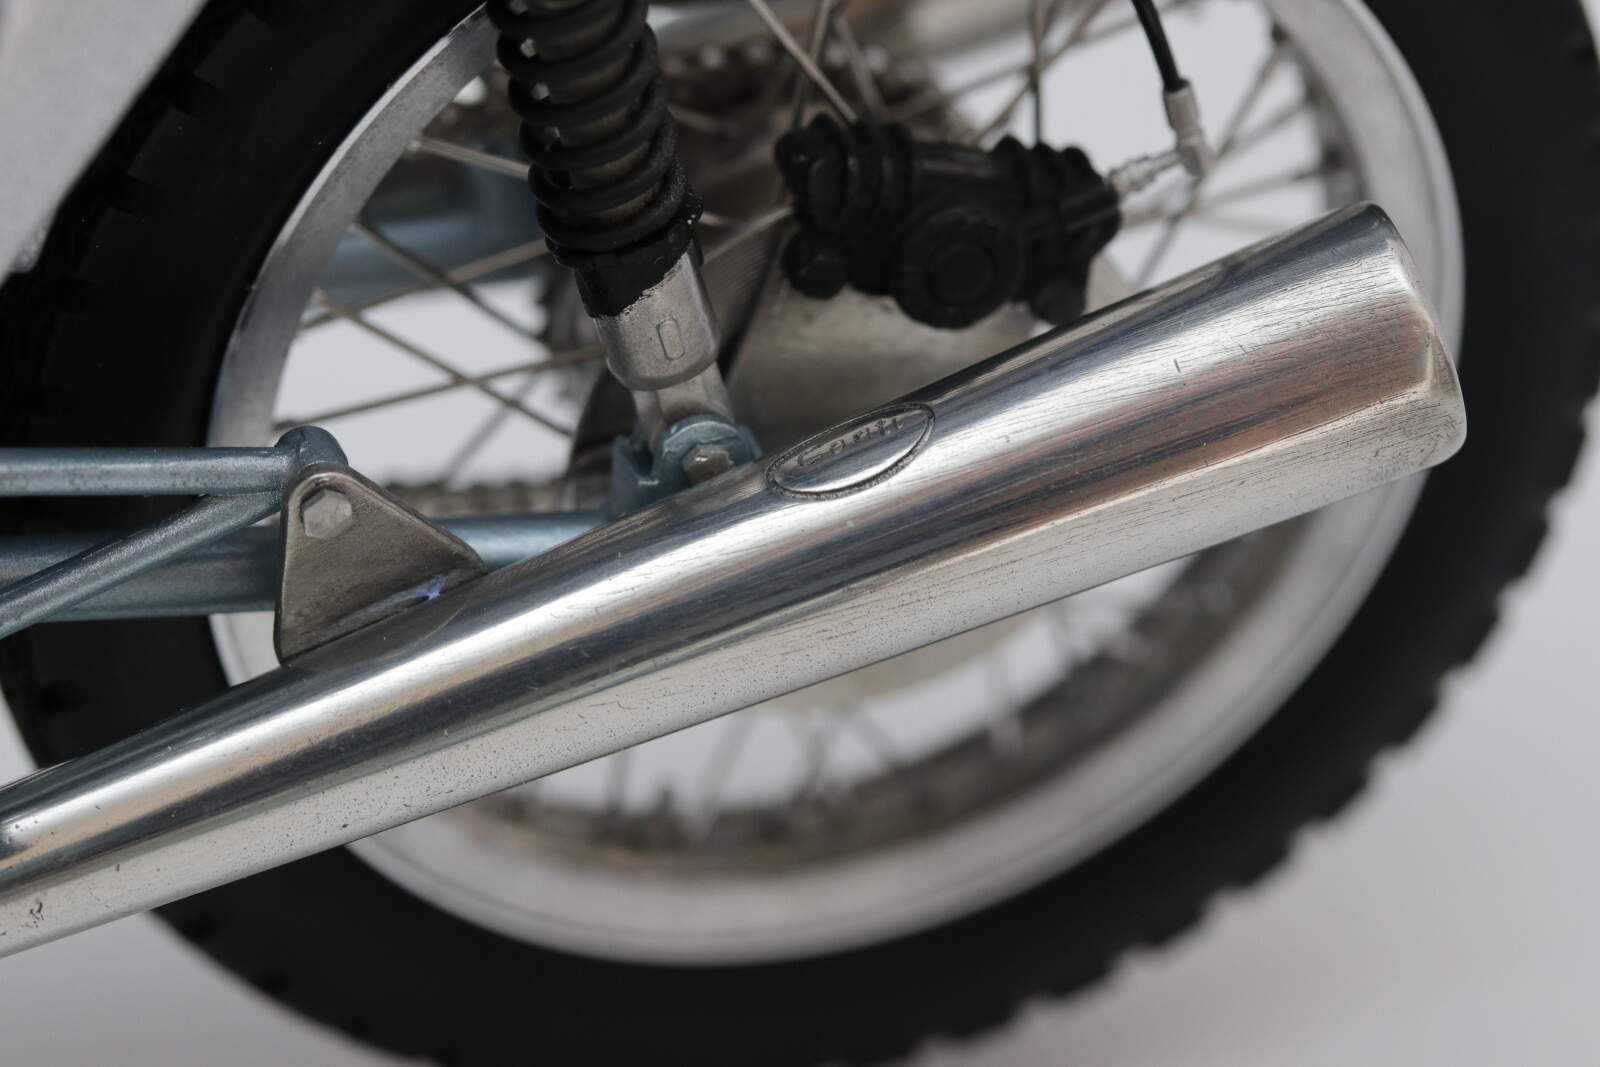
The exhausts are Conti and they have the makers label stamped on them. I take a photo of that next time.
Other side, you can just see the tab for the zip.
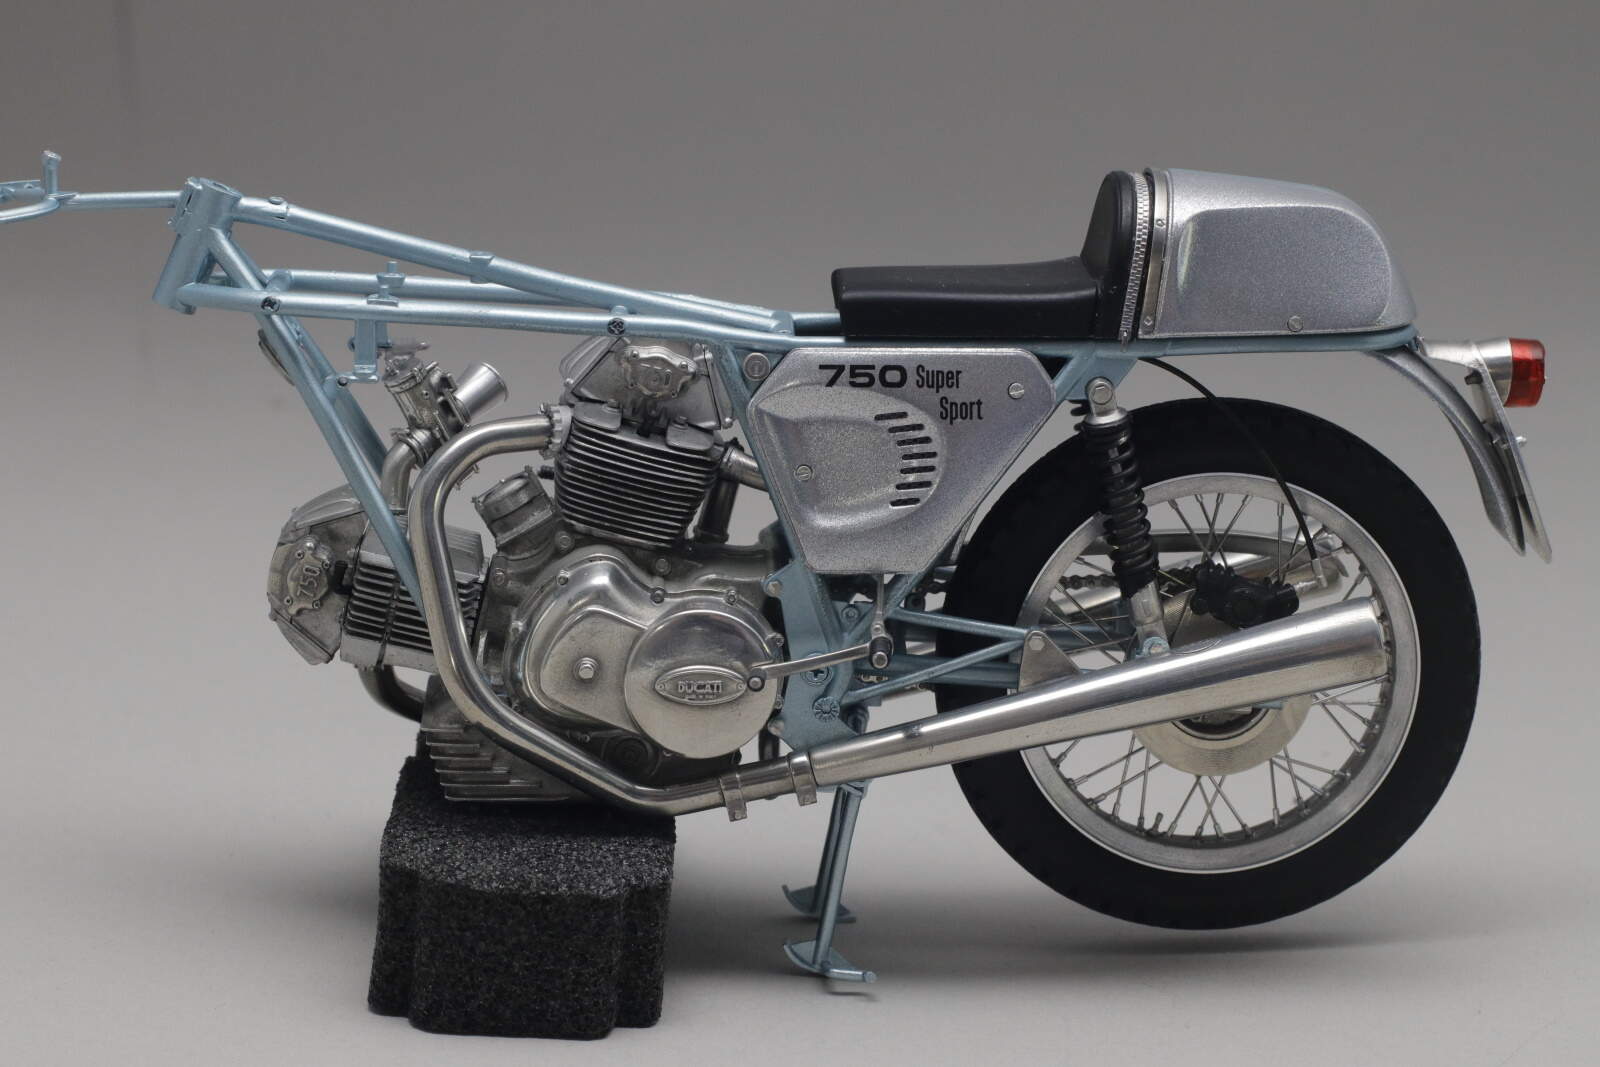
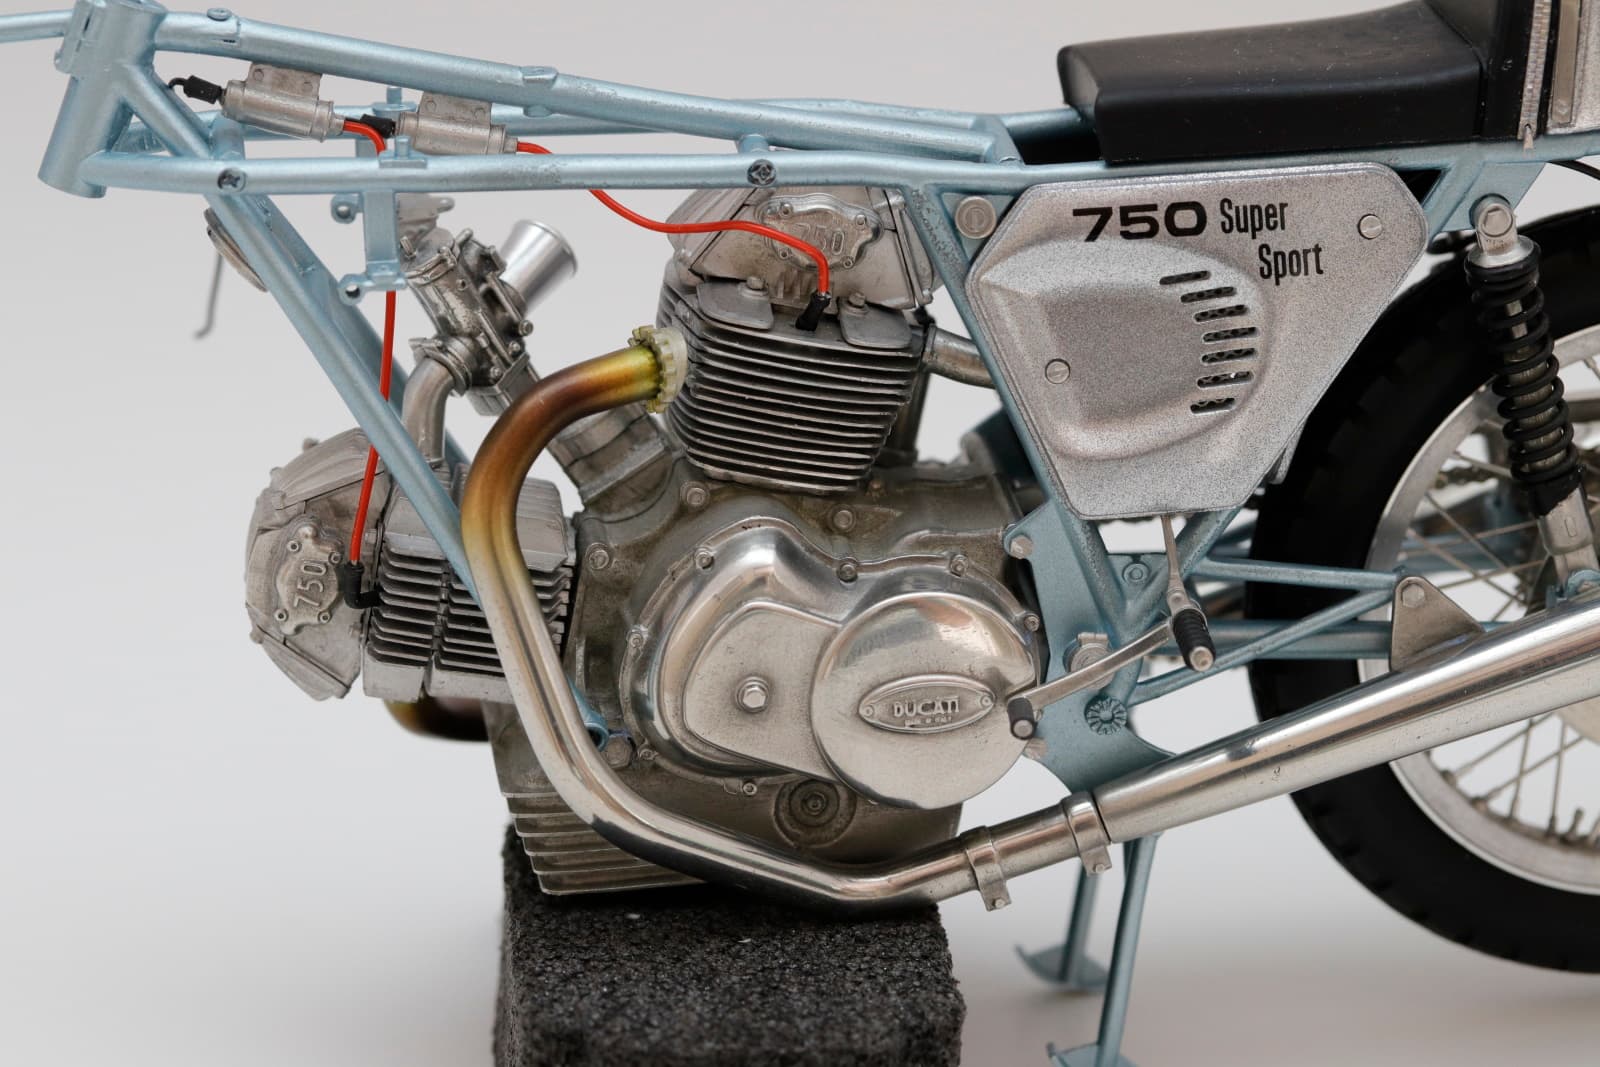
This is super work. It really does look real. Need some blueing on the exhaust downpipes near the exhaust port. Italian exhaust pipes are nearly always single skin, hence the blueing. Jap pipes are double skin, so they rot away quietly from within and don’t blue. I know what I’d rather have!
Michael,
What a fantastic build. Your skill level is producing a model that someone like me who knows absolutely nothing about bikes is having a really hard time decerning your build from the real bike.
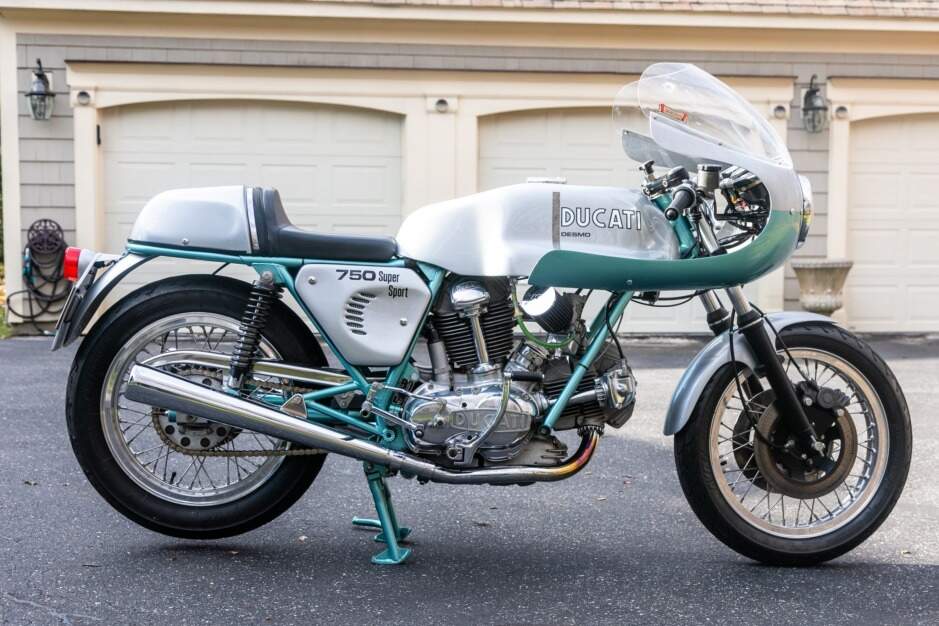
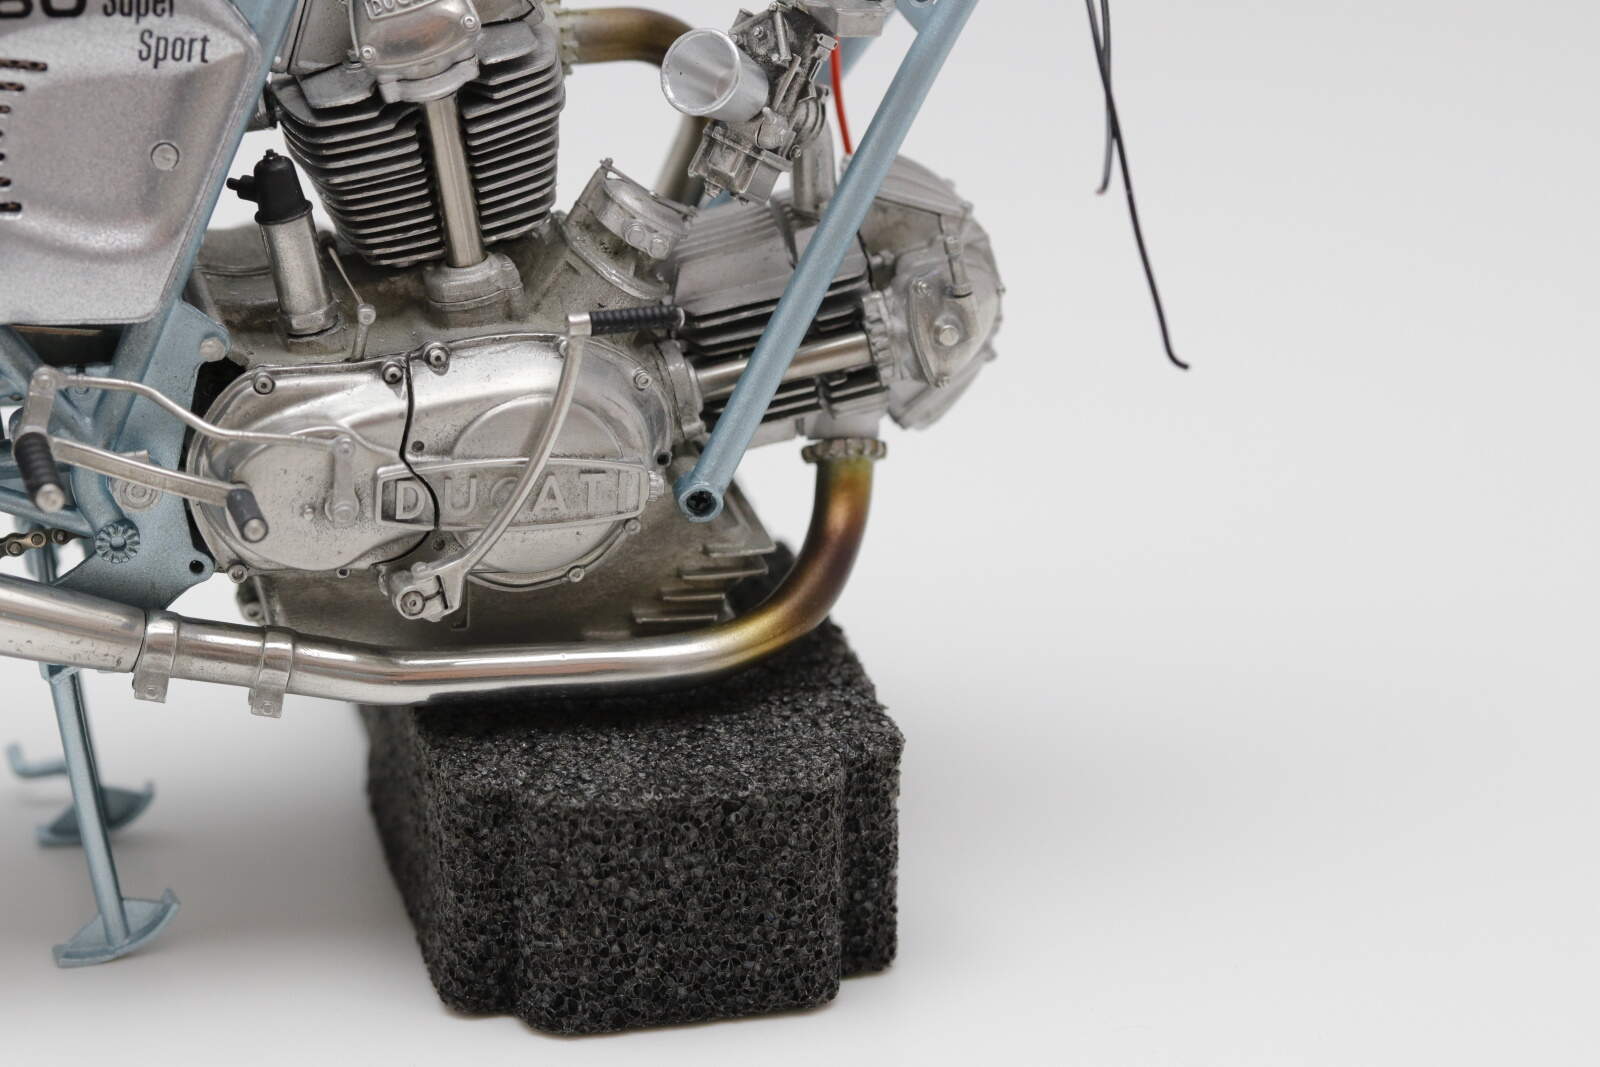
@Hohenstaufen that is true but probably should have done that before I attached the exhausts. Interestingly, I looked for a picture of the 750SS, and the exhausts were more an deep orange/red close to the cylinder head. I wonder if the type of petrol used has an impact on this. Back in the day it would have been leaded I guess.
@SF-07-18D thanks Nacho. I need to tone the zip down a bit so I will think about how to do that. @RDT1953 Richard, that slippery slope just gets steeper @Joel_W cheers Joel. The kit has not been without its foibles but they do build into a good looking Ducati. I owned a Ducati once, probably one of the bikes I least enjoyed riding which has put me off getting another though I believe they do make good bikes! This is a good representation of simpler days for bikes compared the all electronic beast I have today.
In my own experience it has had more to do with how lean your mixture is. The leaner it is, the hotter the engine runs. And heat = discoloration. That said, I’d love to see a little orange and blue discoloration myself. Nacho did a nice job of this on his MH-47 build.
Maybe you can try applying some steel with drybrush or even try with a black oil, very diluted.
And I agree with Robert, I have seen orange/blue faded exhaust and pipes in Japanese bikes (R1, CBR1000…) If they run at high rpms, pipes turn blue and orange. I mean with OEM parts, if they have Akrapovic, Arrow exhaust systems, for sure they go blue
Indeed. Most Jap(anese) thank you, bikes develop higher horsepower due to running at high RPM, whereas American bikes are usually more about higher displacement. But again, your H-D’s can run too hot. My Indian is tuned perfectly and does not suffer the effects.
But back to the modelling: I don’t know if it’s by design or accident, but those tiny flecks underneath the muffler where it meets the pipe in the last photo - perfect! Stone chips are going to create those little dings, and once they’re there, they’re there for good. At least with a little WD-40 and aluminum foil you can keep it from bleeding over the chrome.
The worn paint around the shifter on the front sprocket cover looks nice as well. I don’t know if that cover is painted in aluminum in real life on a Ducati, but on Hondas that is exactly what it ends up looking like.
I will give the exhaust staining ago but it will have to be in place
On the model itself, the kit is white metal/resin combo. Instead of painting any metal finishes I decided I would clean up the white metal to various degrees. Things like the dings on the pipes are more by good luck i.e. they’re there so I didn’t polish them out. Same with the crankcases / gearbox etc, it was just a matter of how much you cleaned them. In raw state they’re all the same but I put a lot more effort in the pipes that the cylinders for example, same with the heads vs the sump. It’s been a great experience of what you can do rather than previously I would have filled and sanded everything and cracked open the Alclads. And I highly recommend Blue Magic, the polish product Richard suggested, it takes the finish to another level.
Michael,
The pipe staining by the head would really make a huge difference. But if you’re doing a factory brand new bike, then leave it off. The bike in the picture has a fantastic paint scheme that even this old timer really likes.
Yep, that staining is exactly what I’d expect, it’s a sort of gold overlaid with purple and it happens almost immediately the engine is run. My '72 V7 Sport Guzzi has golden/brown pipes in that area, but that’s because they are stainless. The ones on the Ducati will be chrome. I’d guess the bike in the photo has been restored, they never came out of the factory that good! Italian paint and chrome of the period where proverbially bad, even on a classy item like the 750SS and the MVs. The Guzzi Le Mans with the matt black highlights was particularly bad, I knew club members who stripped their bikes and had the frame repainted within a couple of years of ownership.
A lot of factors influence the discoloration of header pipes . Wall thickness , chrome quality, exhaust temperature. Brand new pipes on my Commando turned gold almost immediately but one side before the other and the cylinder head temperature was exactly the same on both sides as measured above the exhaust port with a very accurate digital thermometer. This tells me that the pipes themselves are part of the issue . It bugged me at first but now I just live with it.
@Joel_W@Hohenstaufen@RDT1953
Alrighty then, I gave it a go. I am not particularly good at weathering so tend to stay away from it.
But here with the pipes I used some Alclad colours i had so they didn’t necessarily match maybe what I need but Alclad is $20 a bottle here… Starting with a light mist of Copper, darken in spots with Jet Exhaust then some Violet and over misted with Transparent Yellow then a light Aqua gloss to try and bring back some of the chrome finish.