Michael,
According to my wife after all these years of putting up with my two hobbies of plastic modeling and sim racing, she still can’t understand how I can truly love both, yet have echoed more “colorful” words out of pure frustration and lack of skill then anyone not associated with either hobby can understand why I continually go back for more of the same. So, believe me I can only imagine you working your way through your “descriptive” word list as you worked your magic wiring the Cosworth.
As I took your photo tour, I still marvel at how you can assemble such complicated parts such as that throttle linkage, or that multitude of electronic parts housed in the V between the cylinder heads.
I’d say that every word uttered just helped you reach the goal of one perfectly build Cosworth.
Thanks all for the kind comments. @Joel_W I was once asked in an interview how I managed stress. I did say I swore a lot. Something that has always stuck with me is the episode in “The Wire” where McNulty and Bunk were investigating a crime scene. That’s how I often managed building sections like this.
Michael,
I try to tell my wife the same thing, but she just insists that I’m just loosing my famous Willstein temper and taking out on the model which can’t fight back.
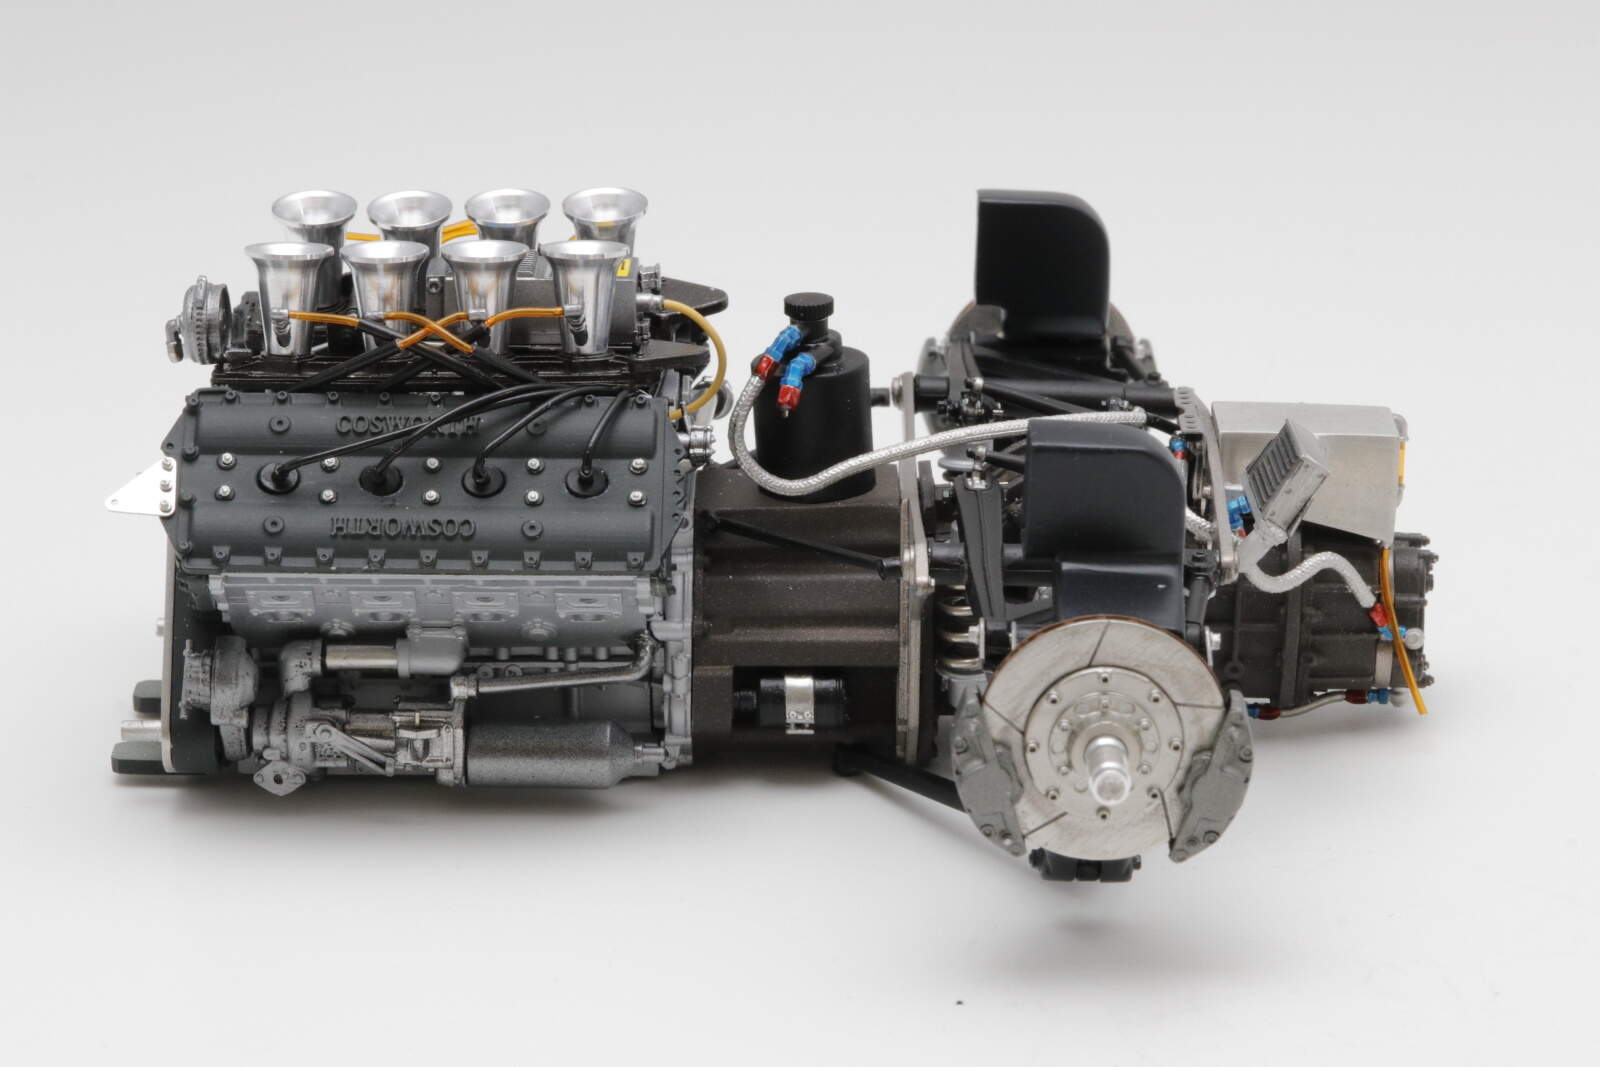
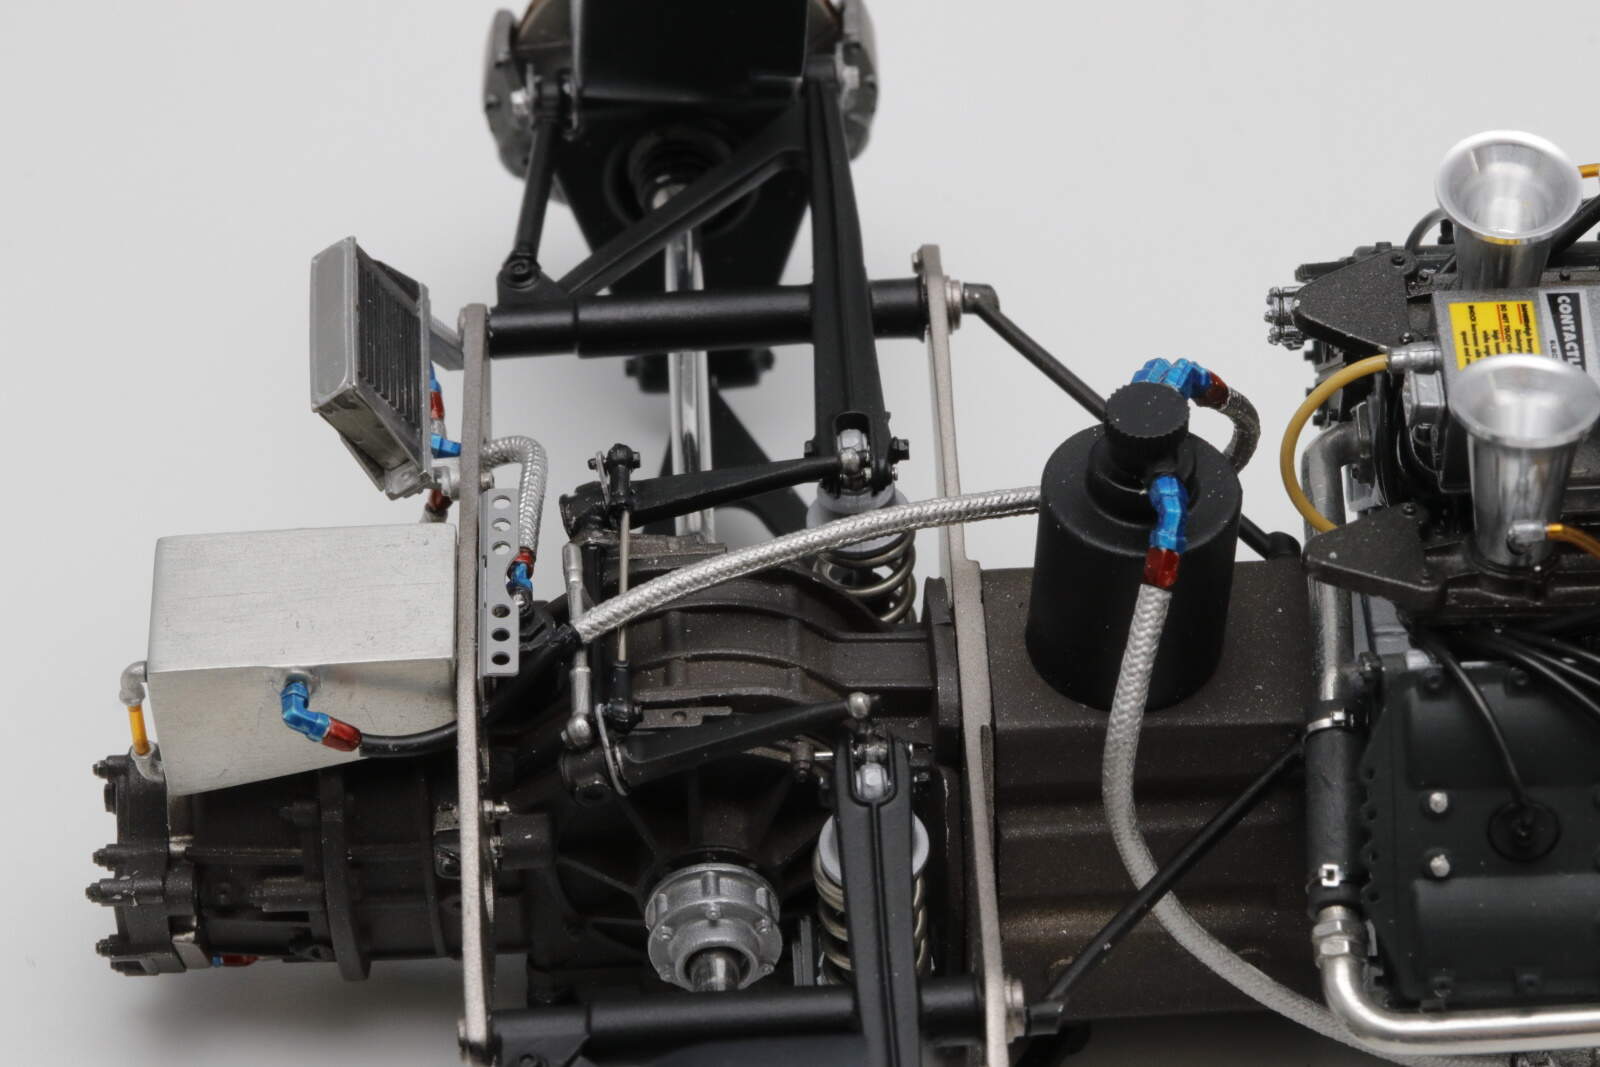
Well I had hoped for an easier task with the gearbox and suspension sadly that was not to be the case.
The fit for the main elements of the casing was pretty poor for a new kit but I got there in the end. Fortunately no children live in the house.
Once that was overcome, the rest of it went together surprising well. It is all nearly all done at that back, just missing a couple of pipes and the gear linkage.
Looks good Michael, as expected. A little disconcerting to hear about fit issues with a newly developed kit - part of the challenge of this genre. It ain’t shake and bake .
Cheers - Richard
Michael,
I’d say that the Cosworth, gearbox, and rear suspension look every bit as a MFH one should. All the colorful words and rants sure did pay off.
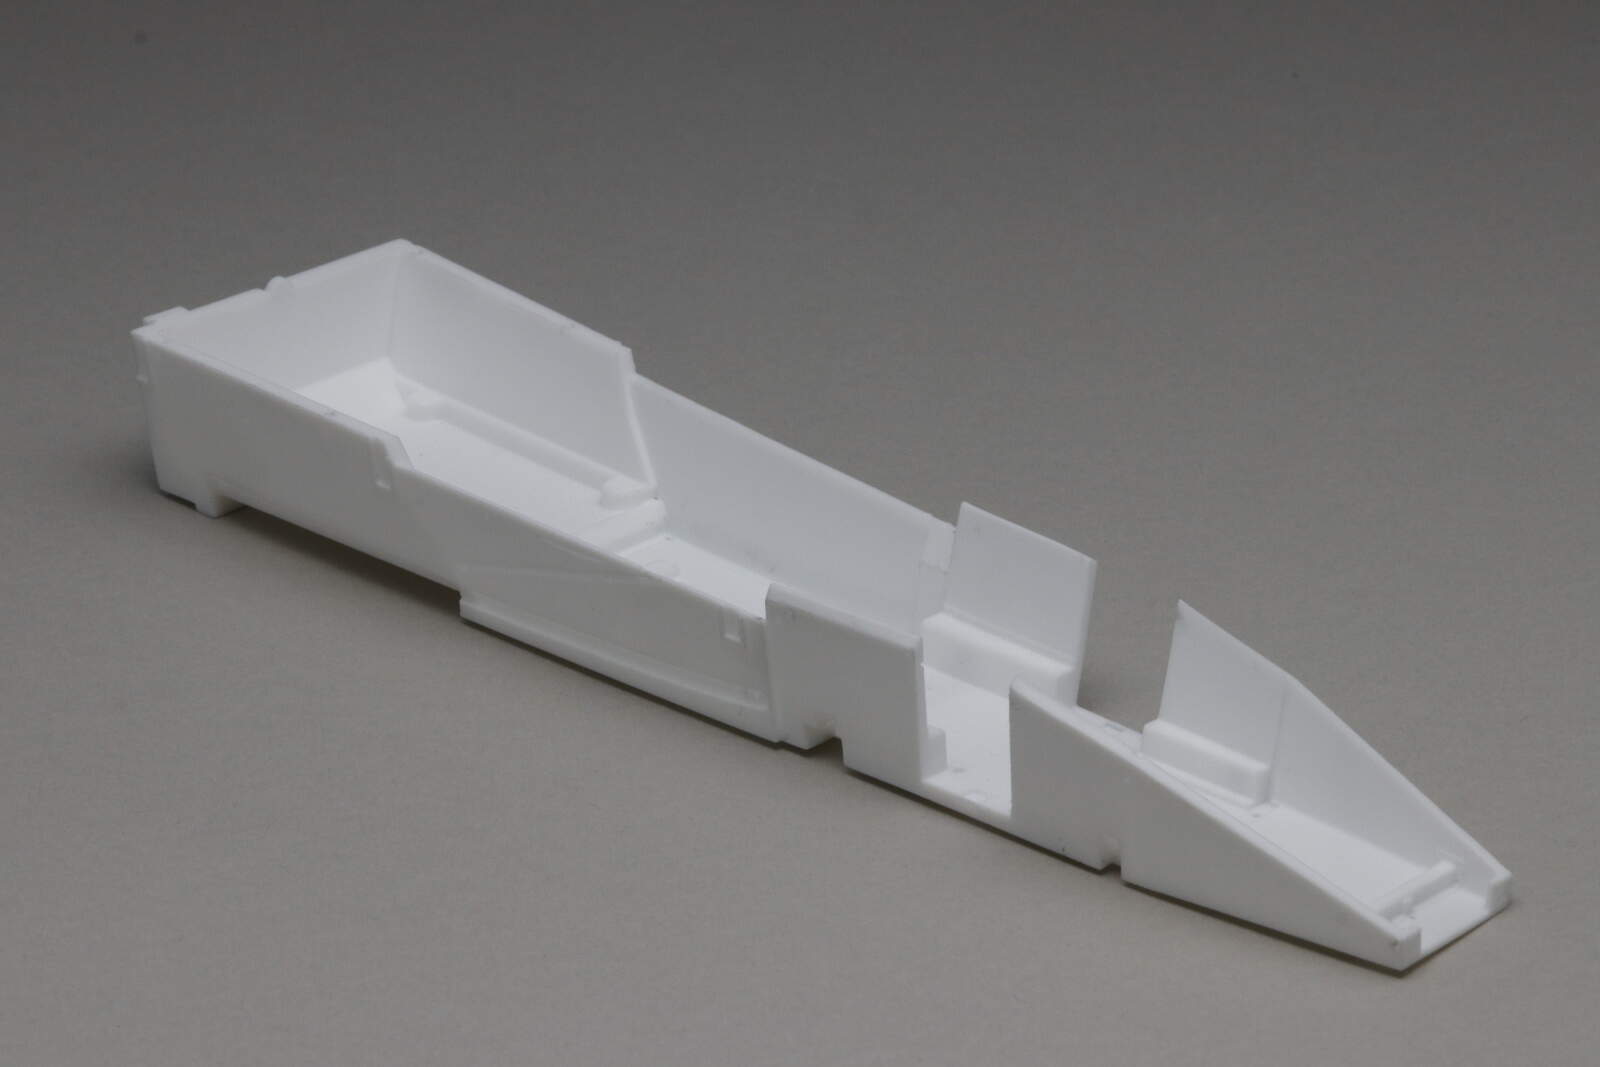
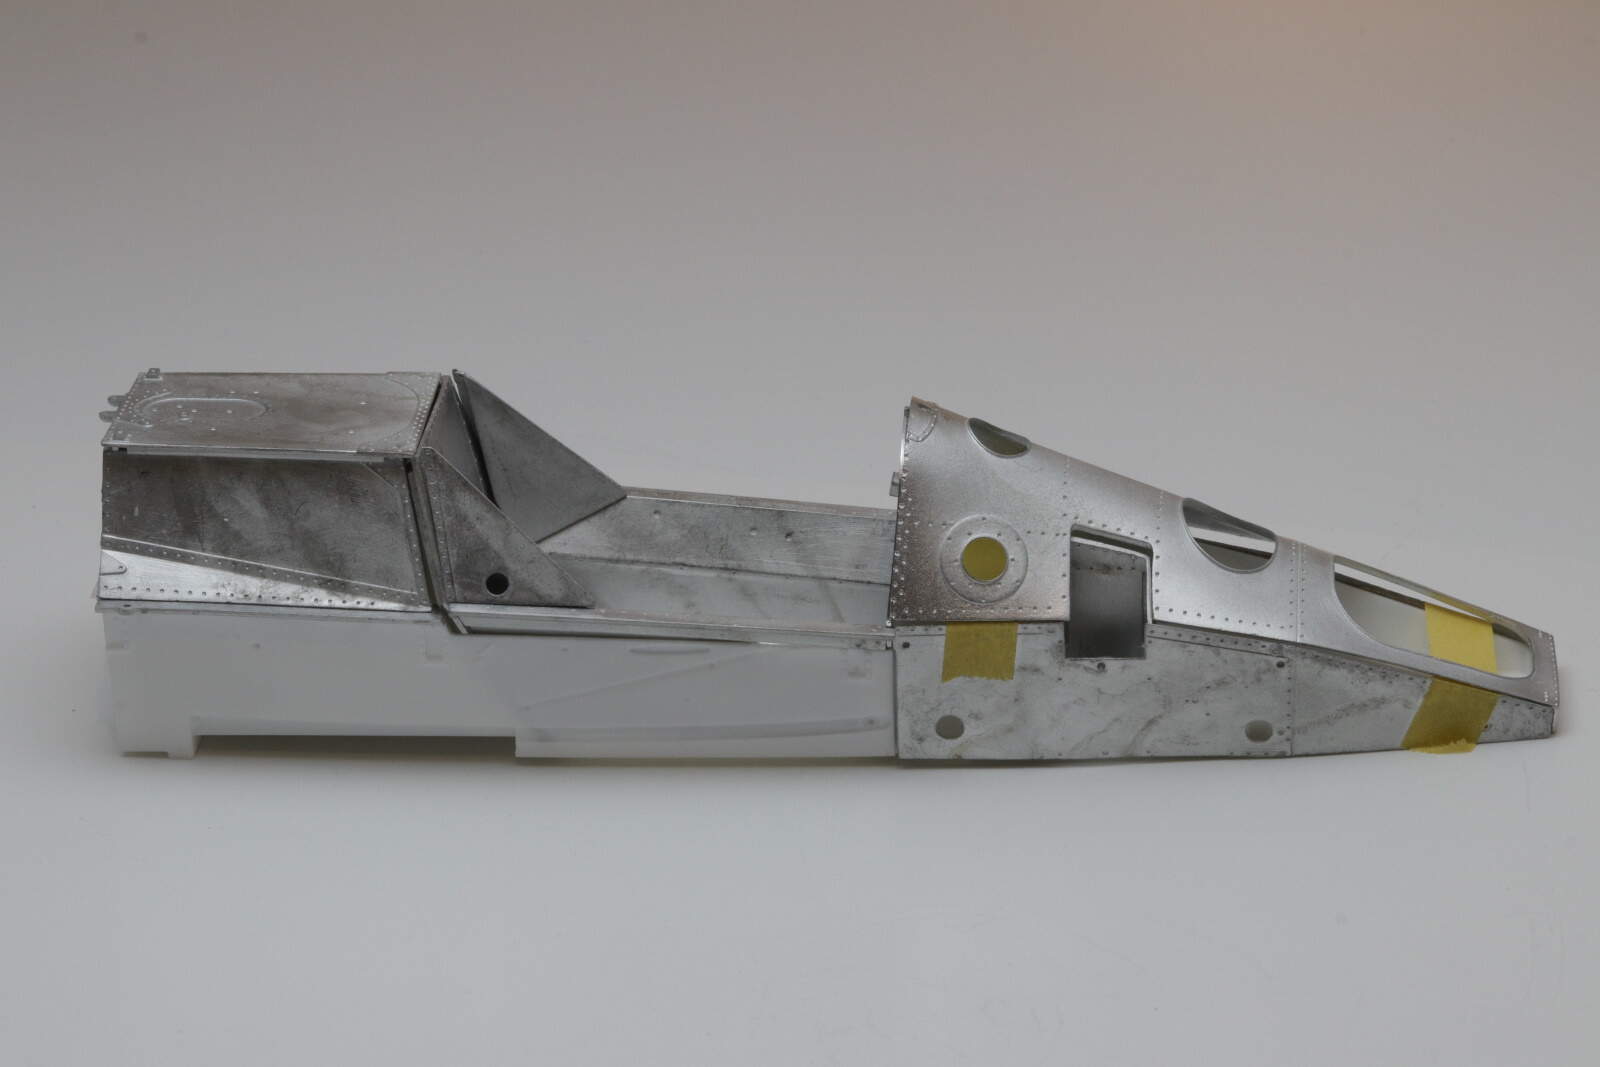
the dry fit of the tub and structures does indeed look like MFH really got them perfect. I’m assuming that they went with a resin tub so that there was no issues with the white metal parts needing a lot of work to mate up to the next piece correctly.
@RDT1953@Joel_W Thanks for the comments.
Richard, you’re right about the genre so it wasn’t too surprising, just the nature of cast metal. I wonder how long they keep going down that route given 3D printing these days, less chance for error, which leads to
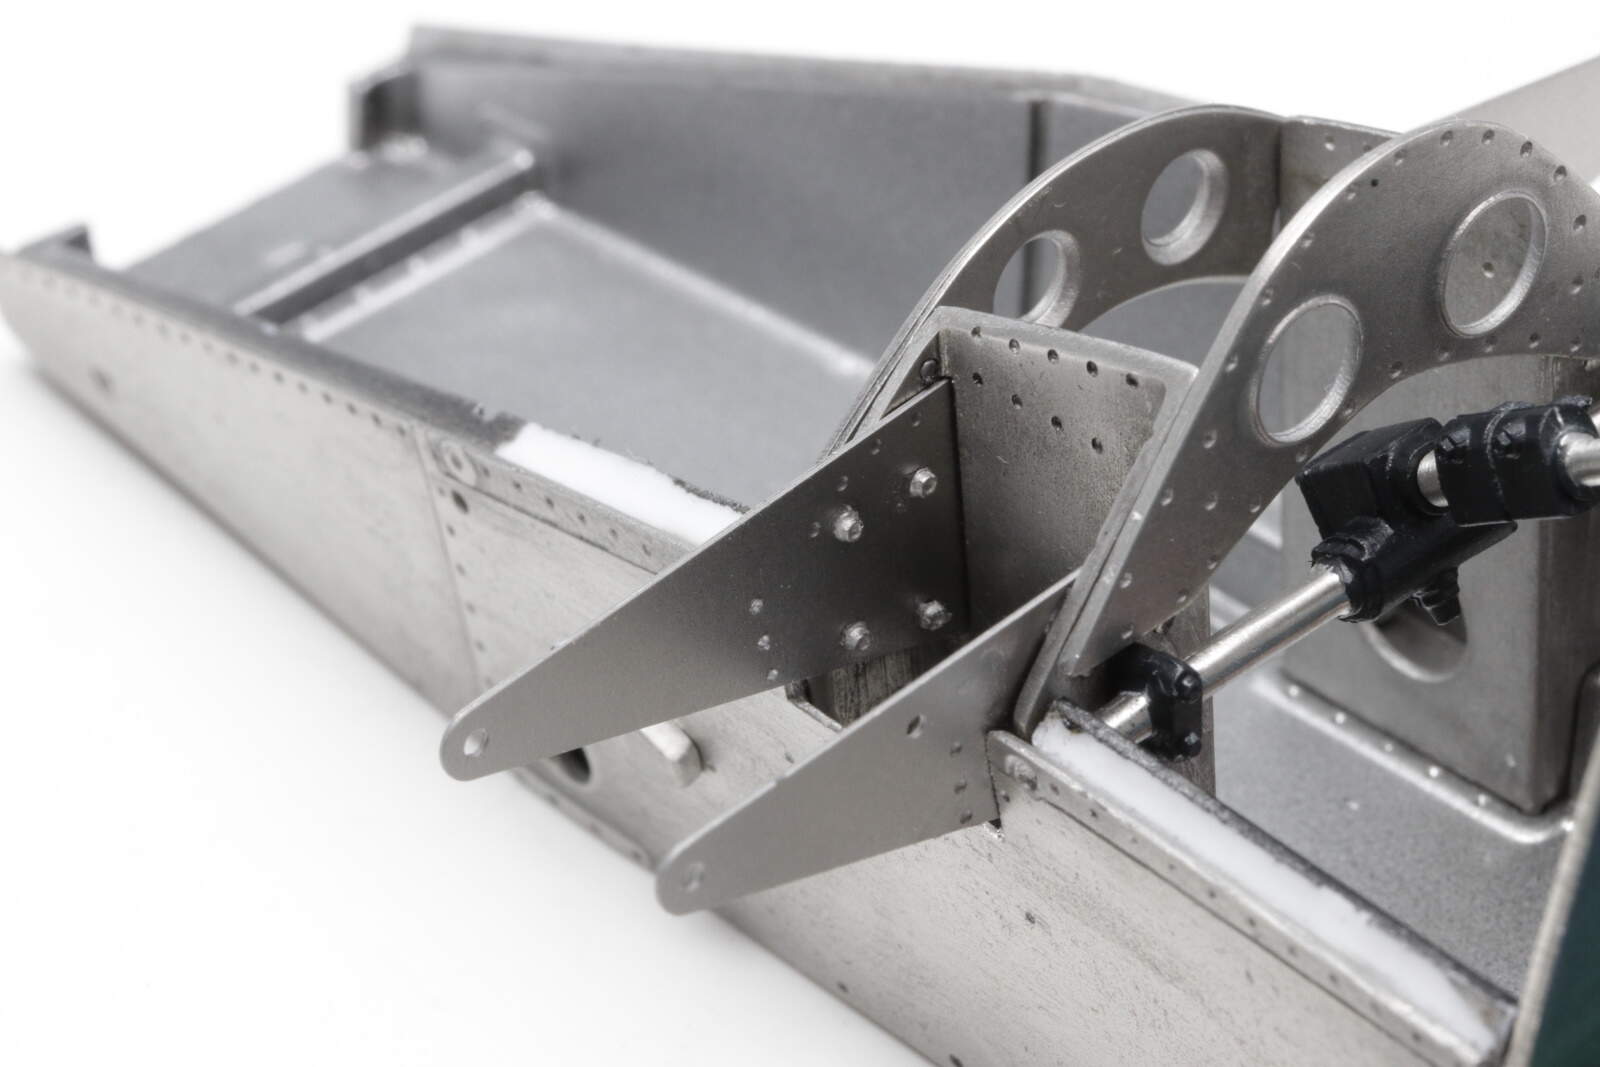
Joel on the tub. I guess this part trying to replicate the construction of the chassis as they were back then which seem to aluminium sheets bonded together using a filler between the sheets for rigidity.
Richard reminded me I hadn’t posted for a while on this, actually over 3 weeks. It’s been slow progress while I deal with other things but I have something to show it is moving forward.
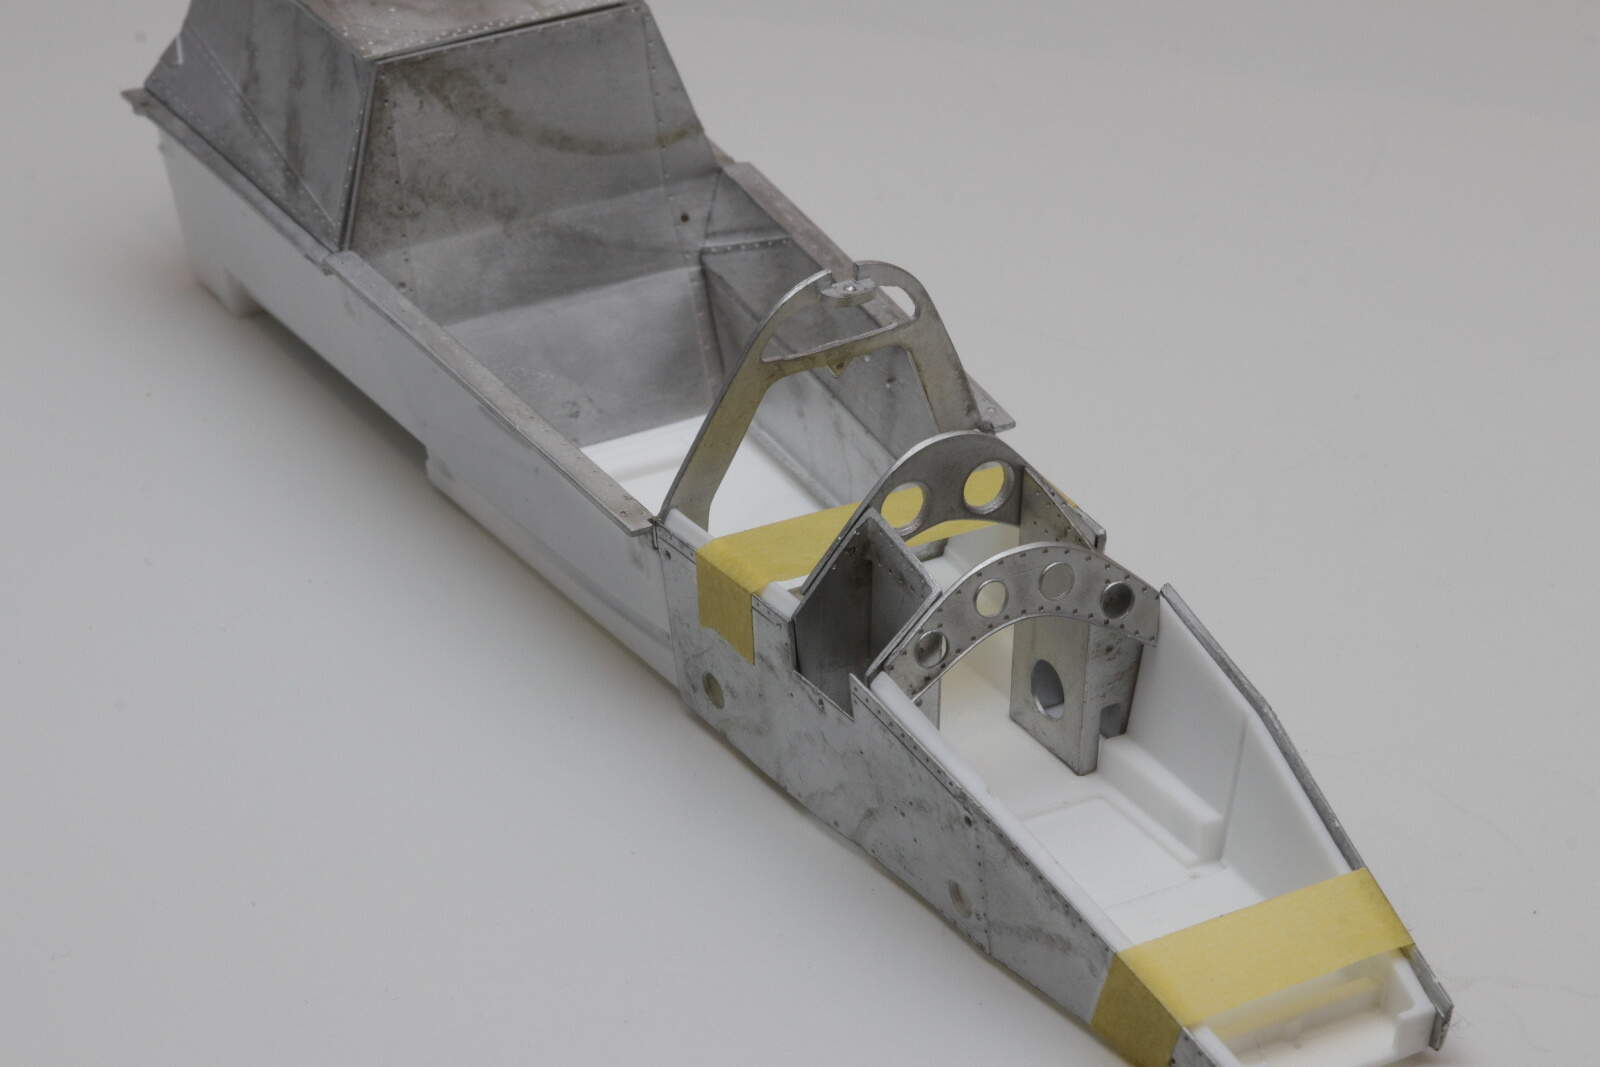
All focus on the chassis
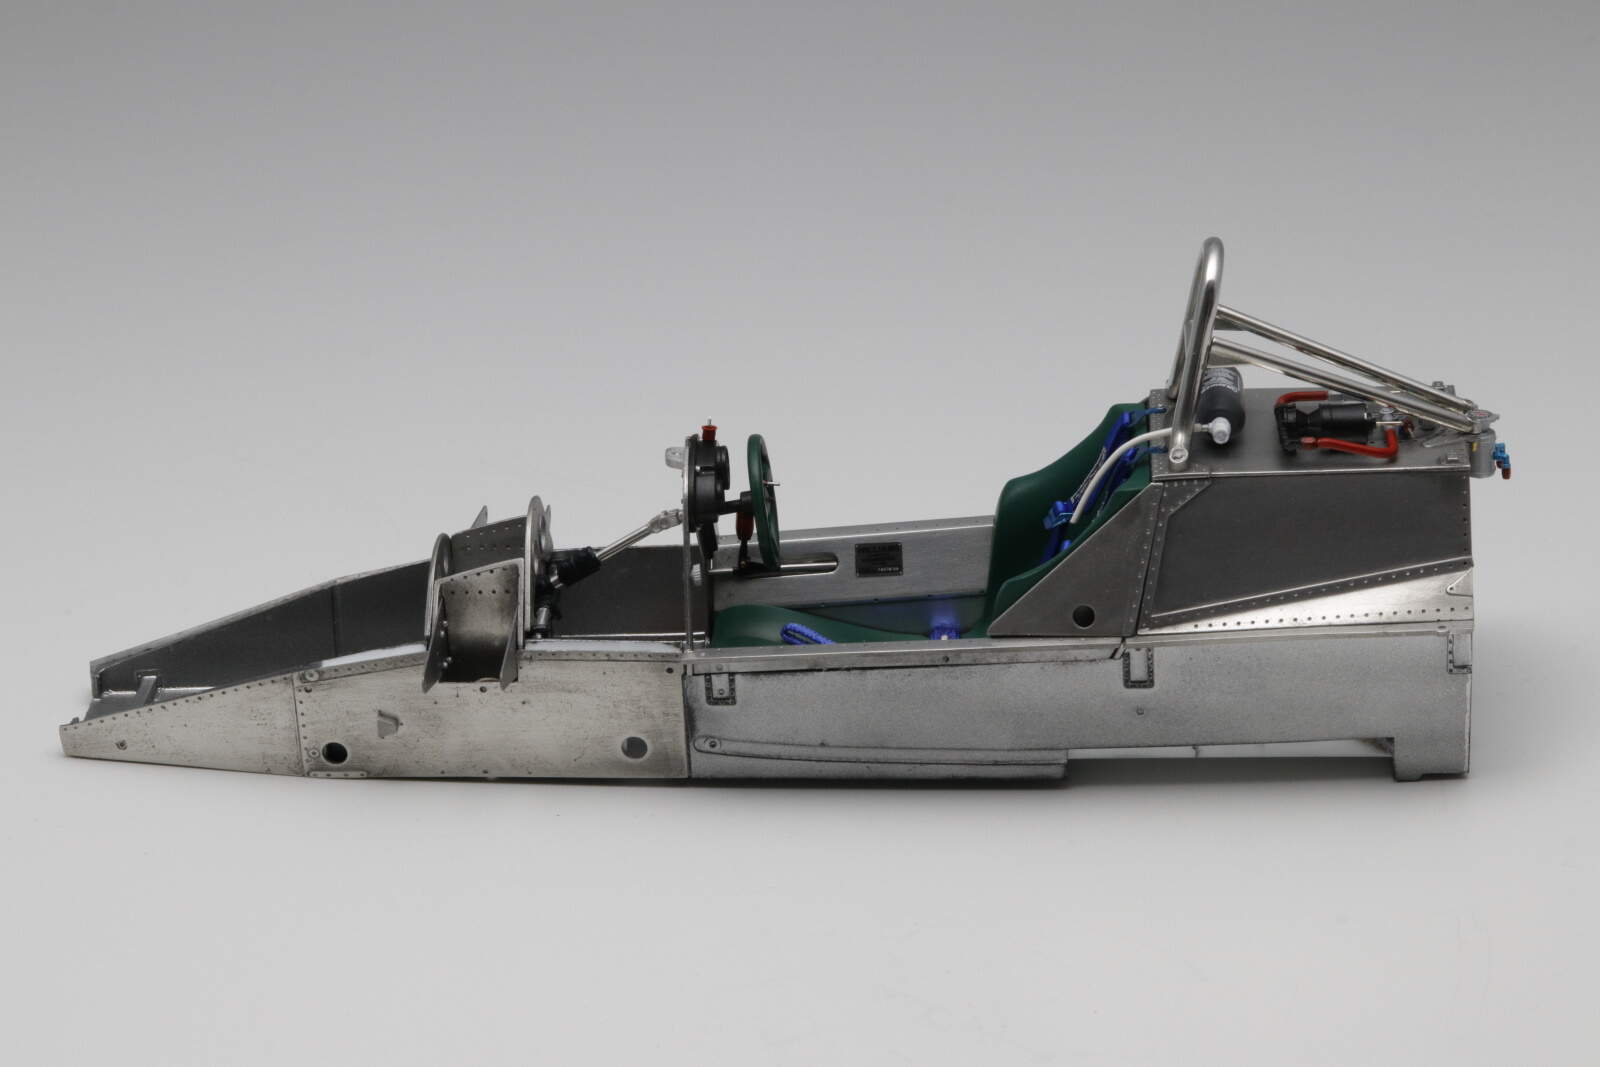
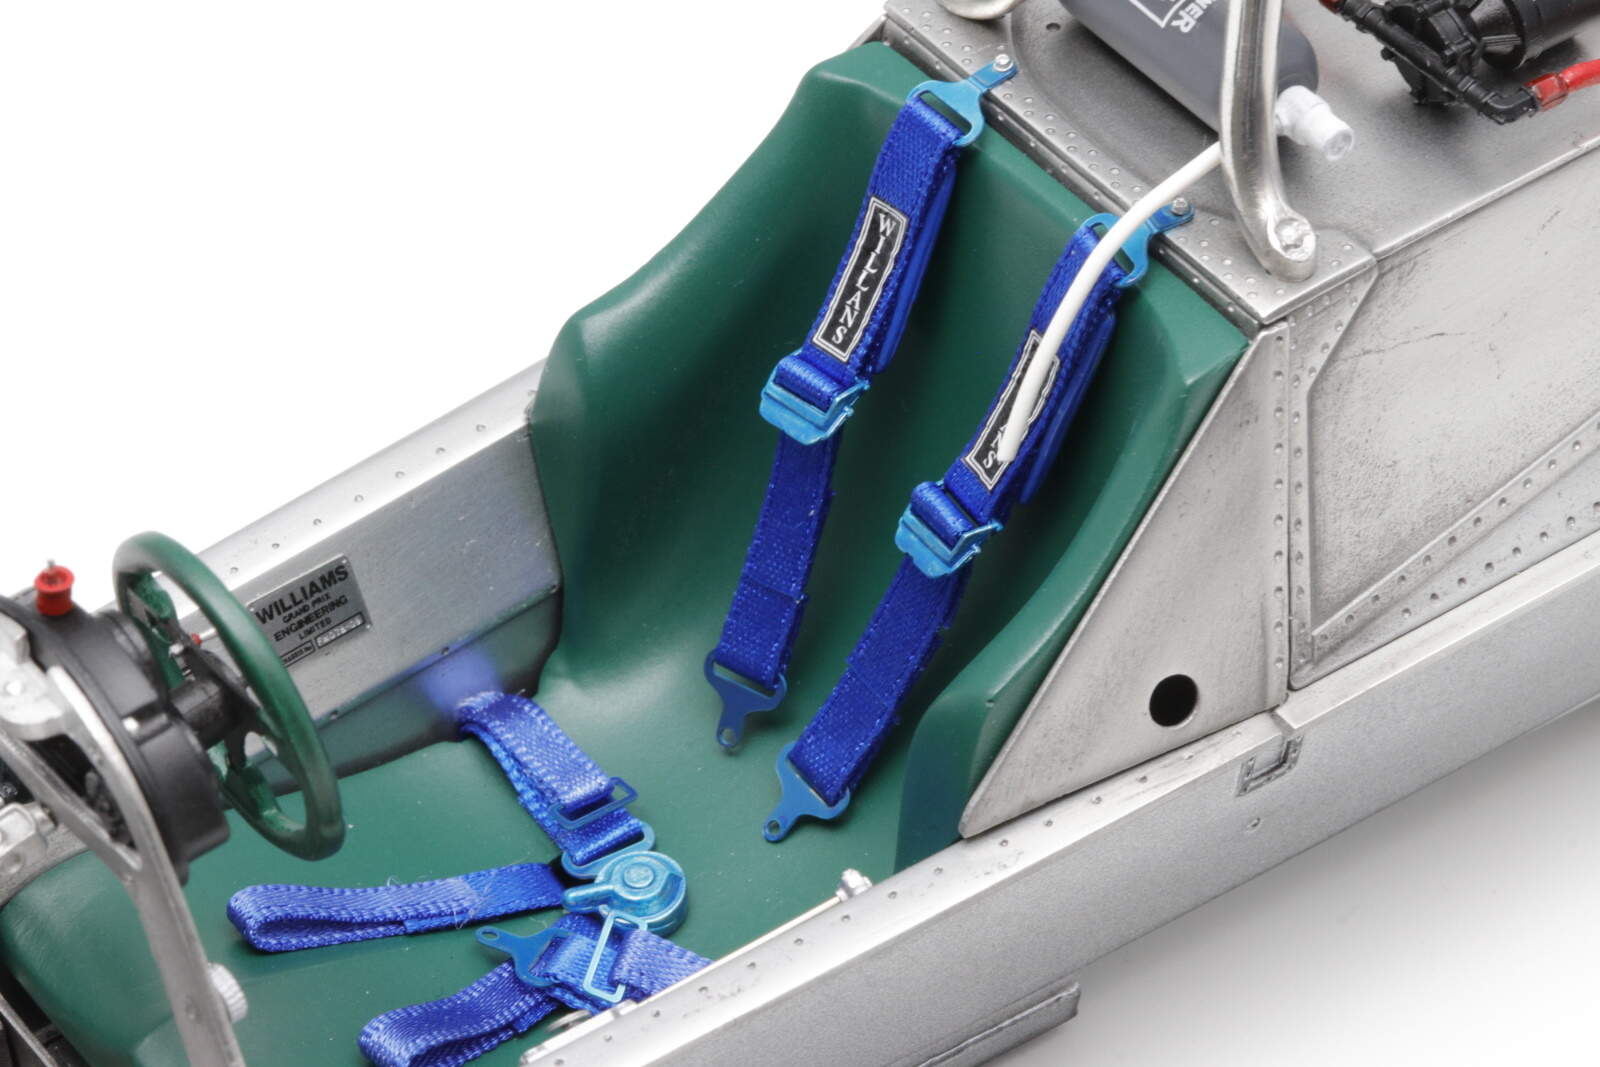
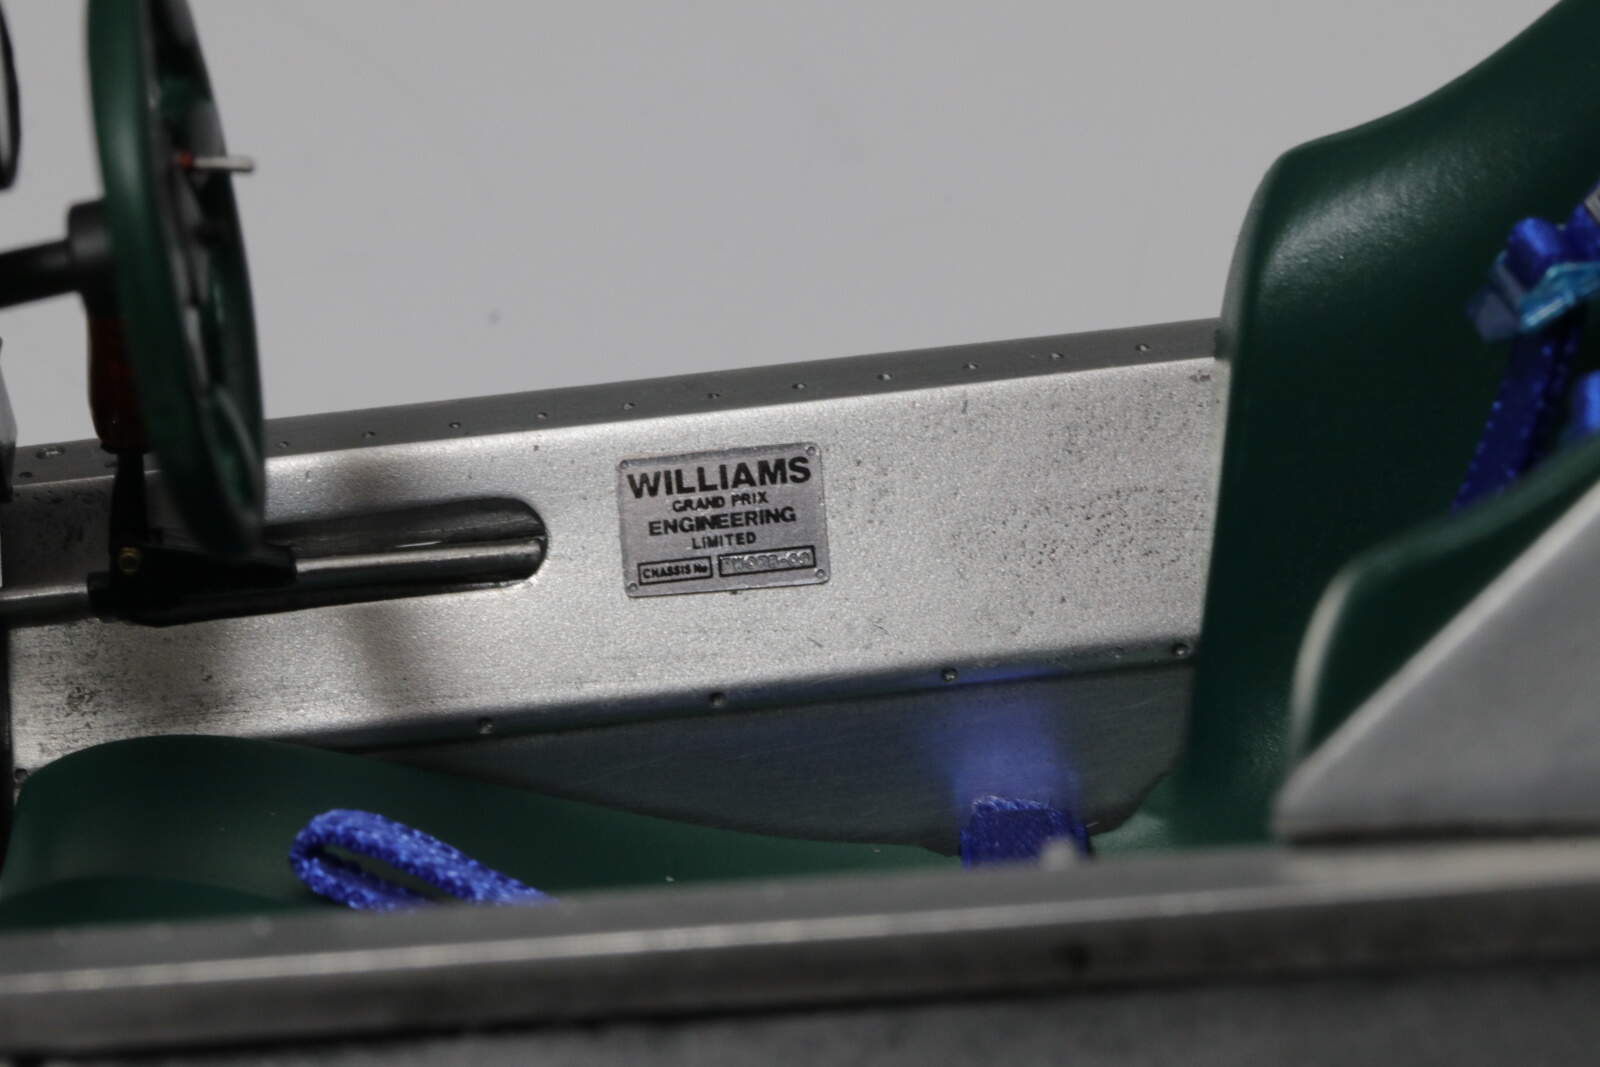
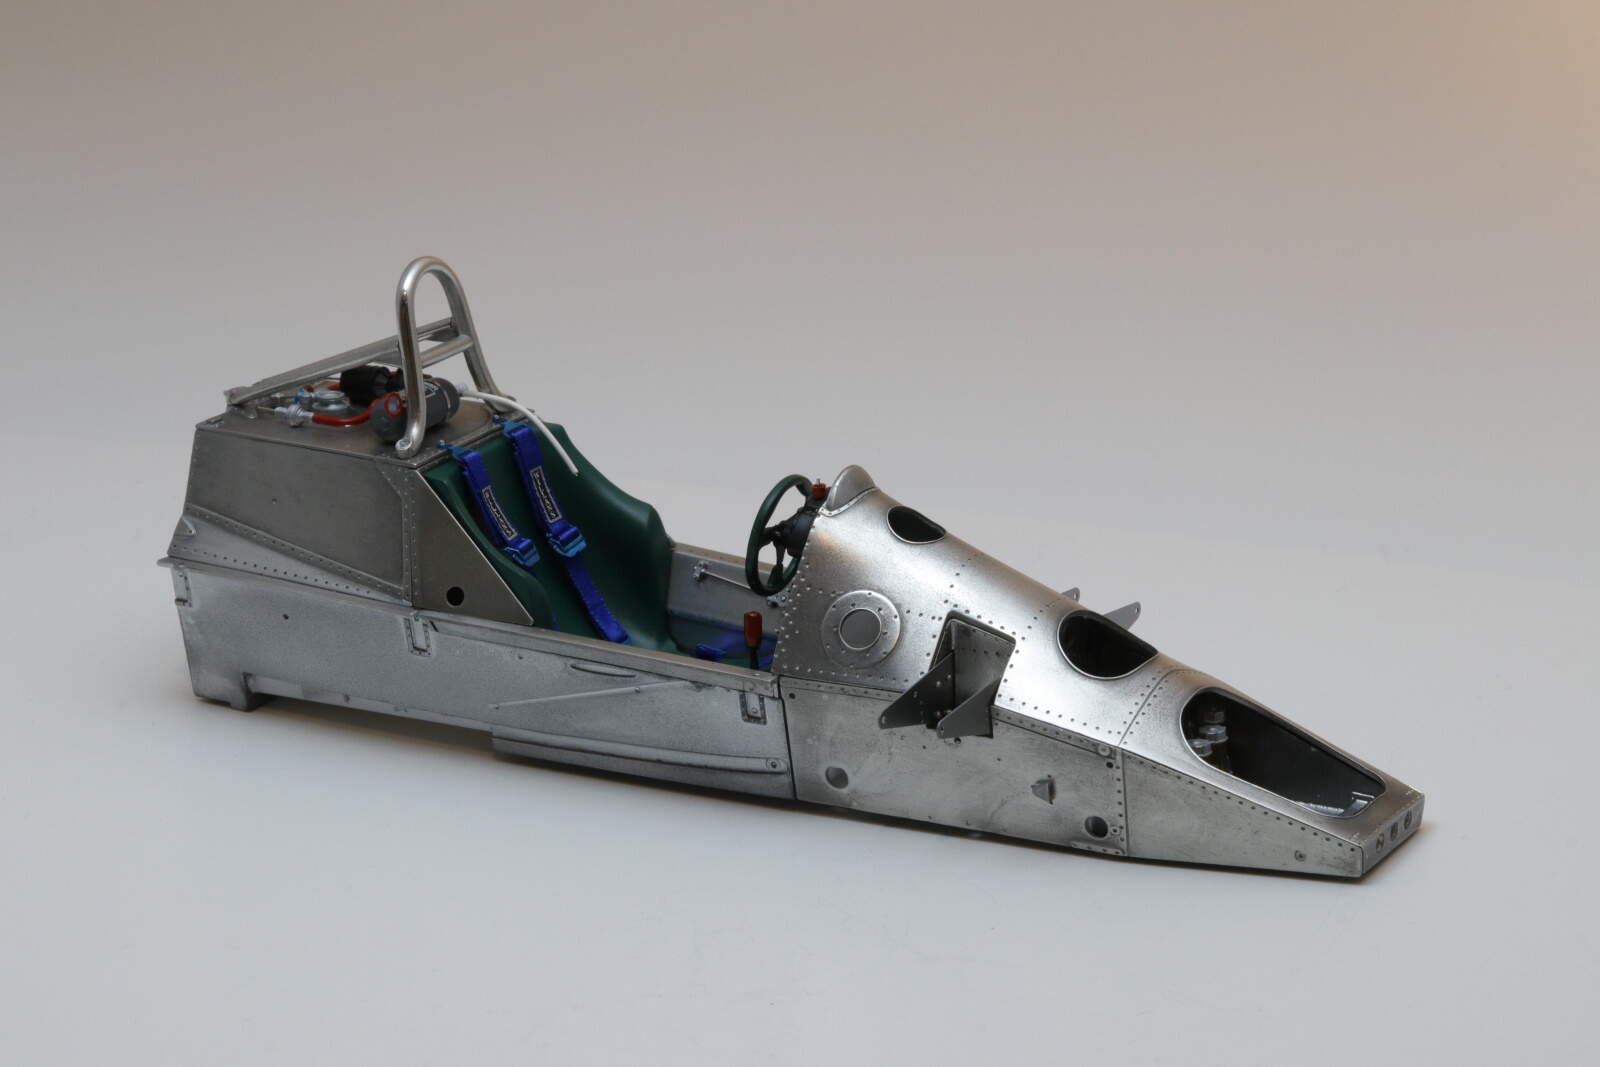
The seatbelts were their usual fiddly self. Never 100% happy with them, especially the Willans badges but there in. The seat is green to match the Saudi, Frank never missed a trick.
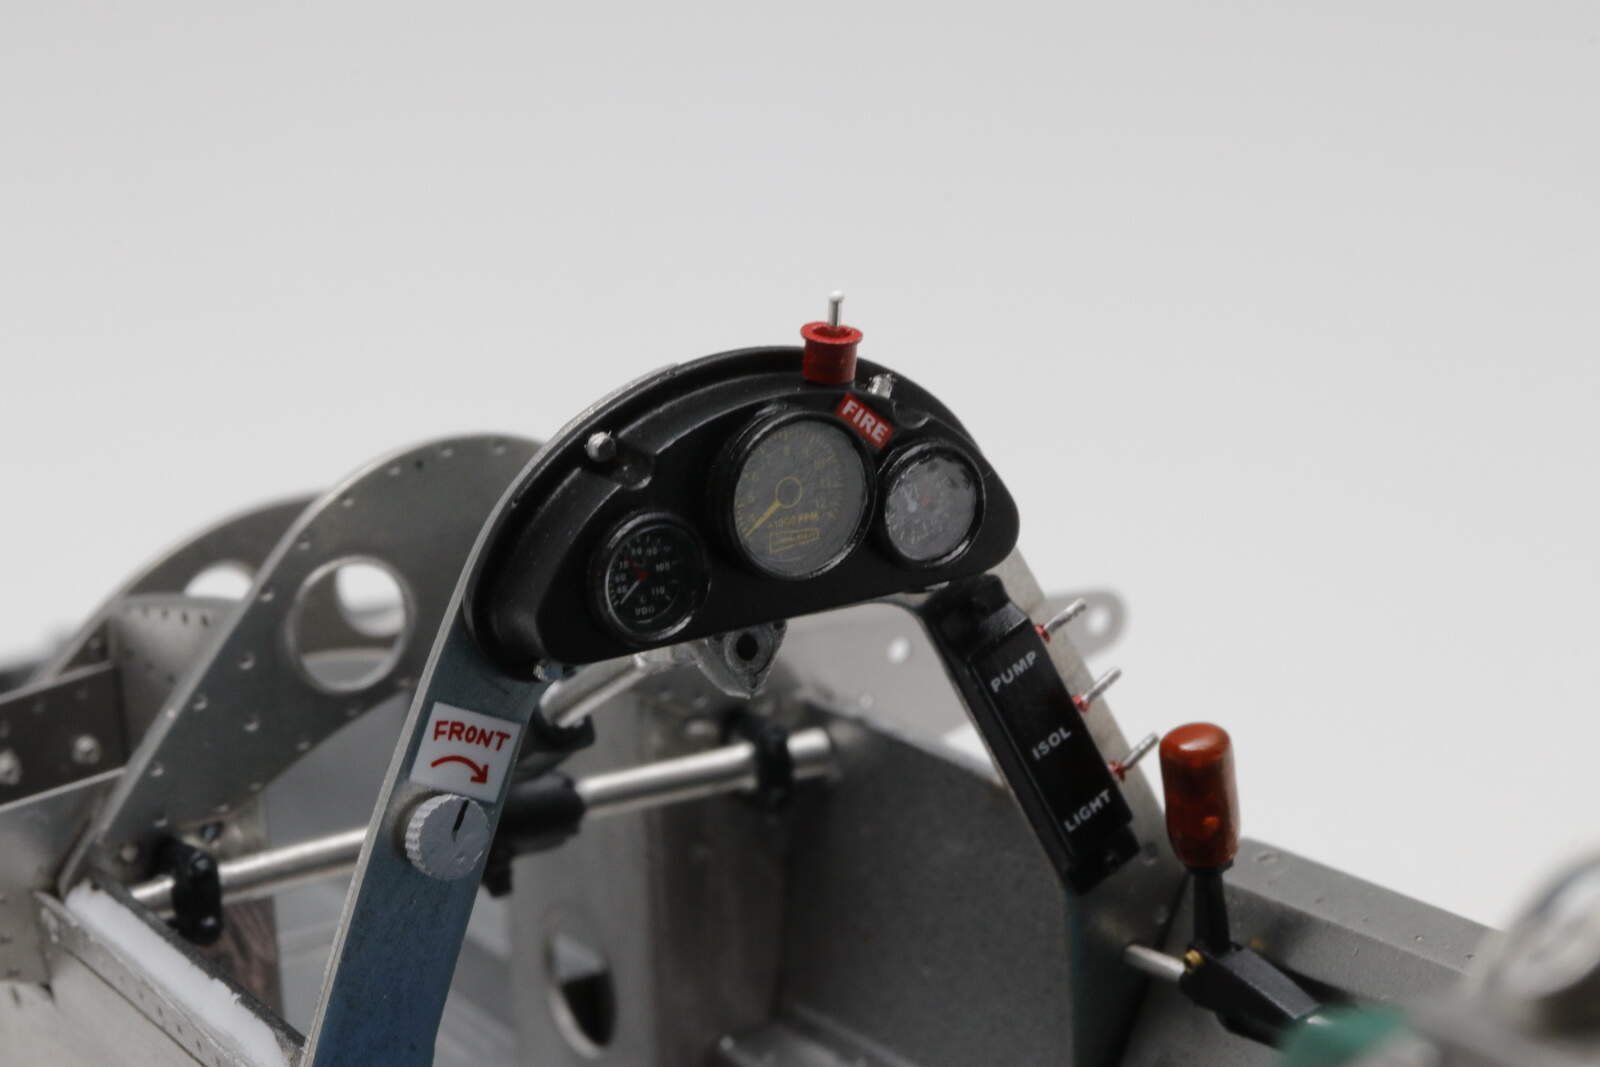
The steering wheel is green as well, slightly darken to mix it up. MFH provided a few decals for all this but no mentioned of where they went. Luckily we have Google at hand.
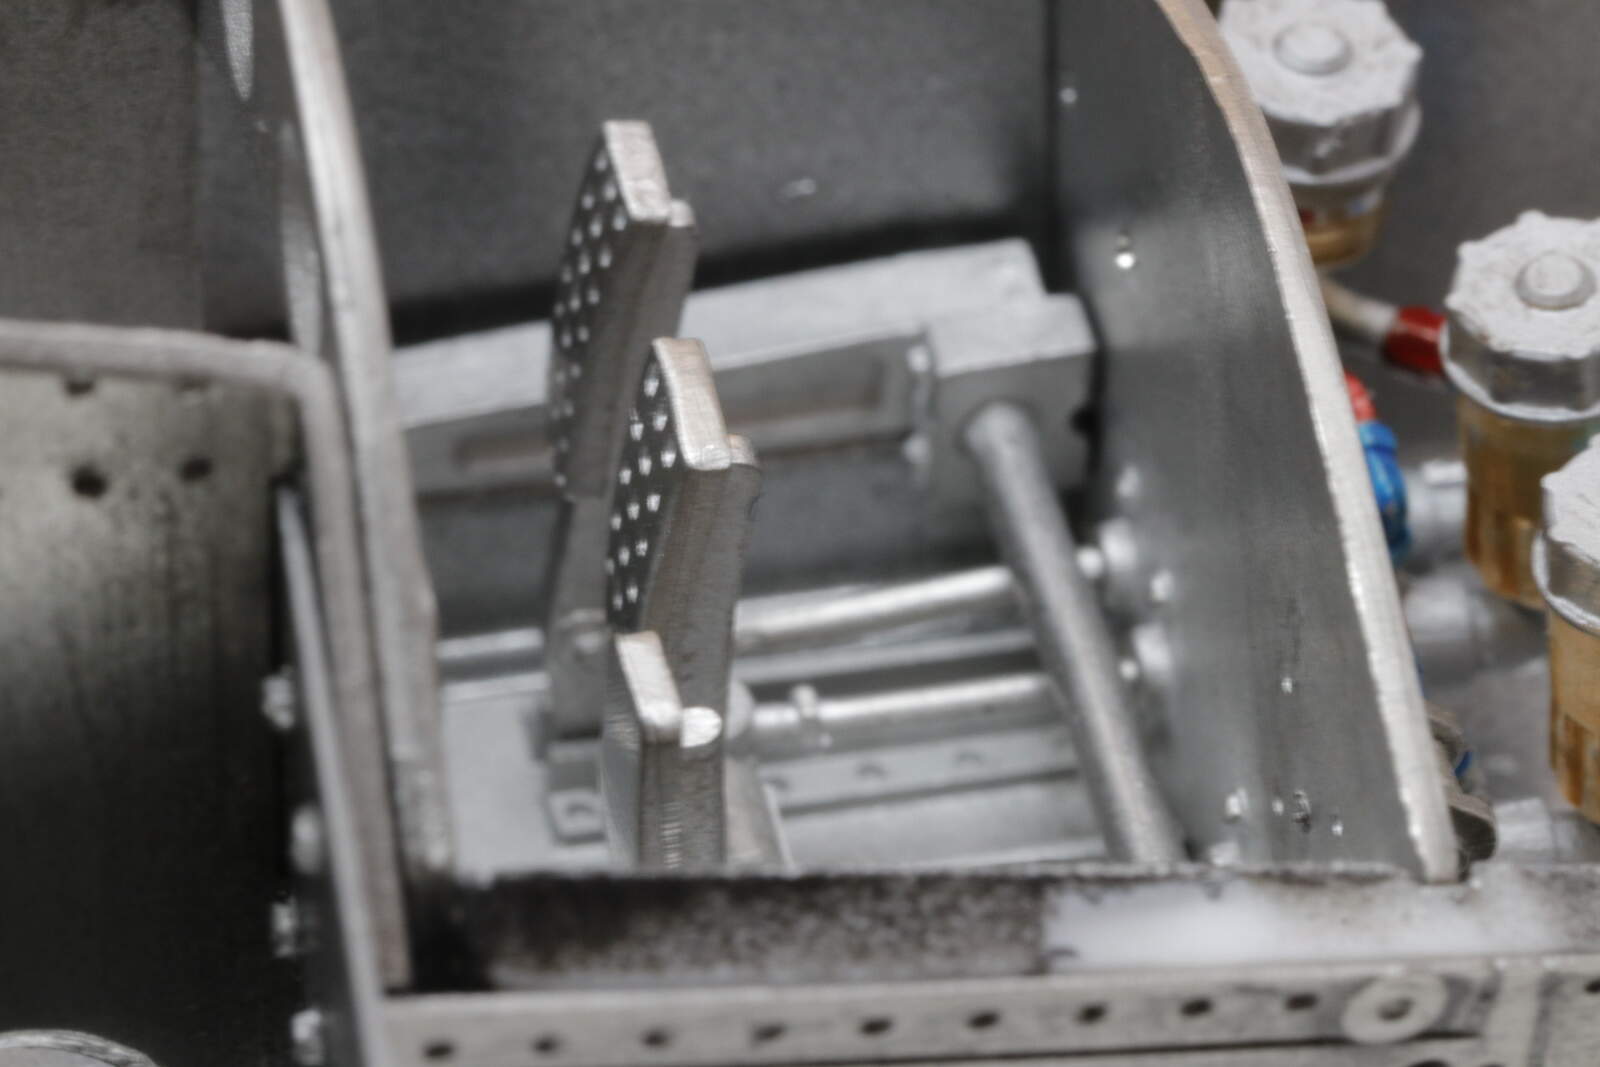
Here’s a thought. All the dimples represent rivets. MFH suggest you may want to actually use rivets for this. Rivets cost about $20 per 100. There are over a 1000 rivet holes on the chassis that would need to be drilled and filled with a rivet. Would you have done it?
Pedals and fluids just required to finish this part off. Hopefully not long for those.
Very nice Michael - I hope I didn’t rush you !
I would have to decline the rivet bit at another $ 200 on top of the kit cost .
Another anomaly of MFH kits is some tiny and easily lost parts are supplied in the exact number required ( or even short of that ) and others are given in excess.
I will say that the white metal casting quality is much more consistent on the BSA kit than on the Alfetta.
This is likely due to the molds being new.
Cheers- Richard
Michael,
Outstanding work and fabrication on the chassis. The end results are clearly worth the effort you put into it. As for the seatbelts, I find those fabric kits even more fiddley in 1/24 & 1/20 scale as those shoulder adjustment latches are a real bitch to thread. Yours look great. Just one tip that I’ve found useful for those belt maker’s decals. Use Solvaset or Micro Set on them, and they will sort of melt into the cloth nooks and crannies. So when dry they look like they were printed on as I believe most are.
And yes Sir Frank was a real stickler to the last visual touch as every other facet of his cars. the Green seats with a green wheel to compliment the Green of Air Saudi must have pleased them to no end.
As for $200 for rivets I’d vote NO WAY. For the price of these MFH kits in 1/12 scale they should have supplied them as they would have cost them nearly nothing to make. Just go with the dimples.
I’m loving your build! In fact I joined Kitmaker today just to follow it.
I’m a long time Williams fan who is not-so-slightly obsessed with the 1980 season and FW07B in particular so when I saw MFH’s kit advertised back in March, a major domestic charm offensive and stash sale resulted in me buying this kit and still staying married!
I’m really impressed with the way you’ve finished the engine/gearbox/rear suspension assembly and the monocoque looks great. May I ask, how have you painted and “weathered” the resin and metal parts of the tub to get that realistic finish?
@AussieReg@RDT1953@Joel_W OK, I take that as full support to not go full rivet detail on the chassis. Not only the cost of the rivets but I wonder how many 0.5mm drill bits I would have gone through.
You right Richard, the metal castings have improved in general. For your BSA it would all new whereas this recycles some molds for gear box and engine, both of which gave me some trouble. The chassis was pretty good since it would be unique to this car.
I did use Micro set Joel but I think in this scale it just becomes more obvious. Maybe fabric stckers would be better if they could be printed fine enough. They do look fine from standard viewing distance so I’ll get use to them.
@Phil_B Hi Phil, welcome to Automodeler glad to have you on board. Though sadly there is no cure for being a tragic Williams fan Frank had some great cars but also a set of drivers I never really warmed too. I have always liked the FW07 as one of the cleanest F1 cars ever made and they were unlucky not to win three years in a row.
On the metal finish, well it depends on the finish you want of course. To get the chrome like finish, say the roll bar, I use 1000 grit paper and then 3000 grit sanding pad, followed by Blue Magic, a metal polish that Richard introduced me to which is a fantastic product. If I want the more brushed aluminium look I spray with Alclad semi gloss clear coat. That is especially useful if you are trying to combine painted resin with a metal finish and polished metal. The chassis tub in the first picture is a combo of resin and white metal. If you just want a clean “rough” metal finish I use a fibreglass brush. In the engine area I just use a wide range of metallics to make sure is subtly of finish amongst the parts. Alclad is good but the new lacquer from Tamiya is also very good, especially there blacks. Hope that all helps and happy to provide any more details as you need especially if this your first MFH kit. This my fourth that I am enjoying and suffering in equal measure
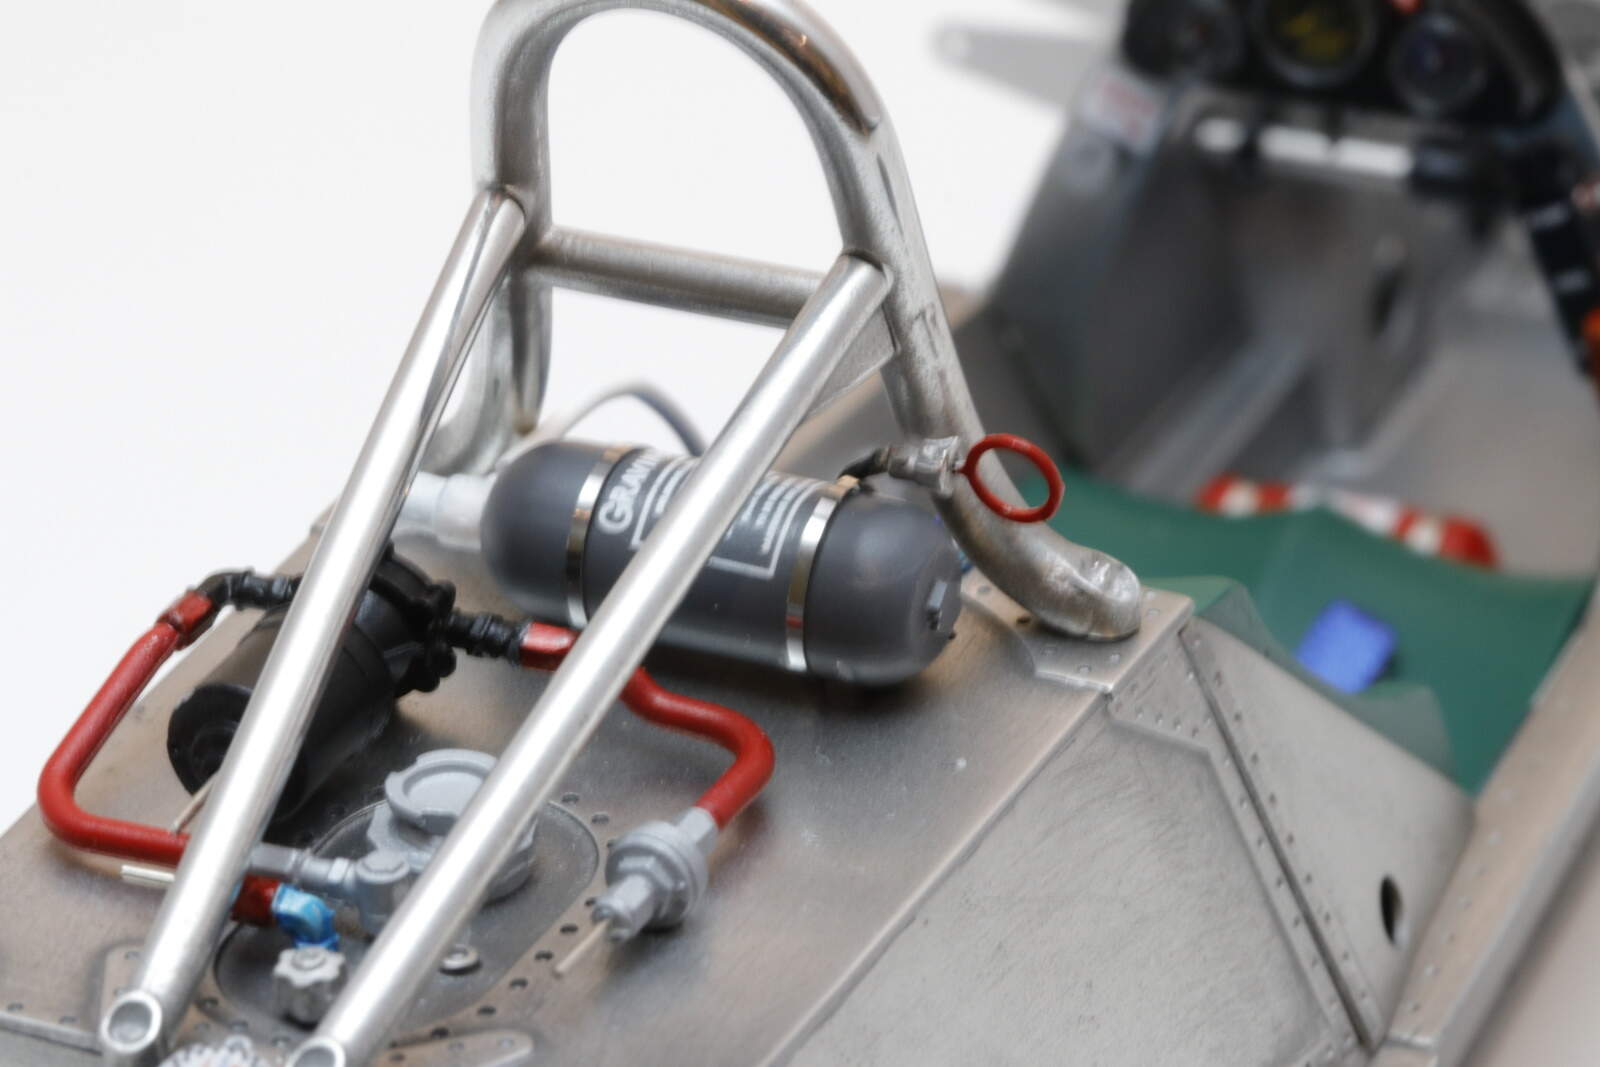
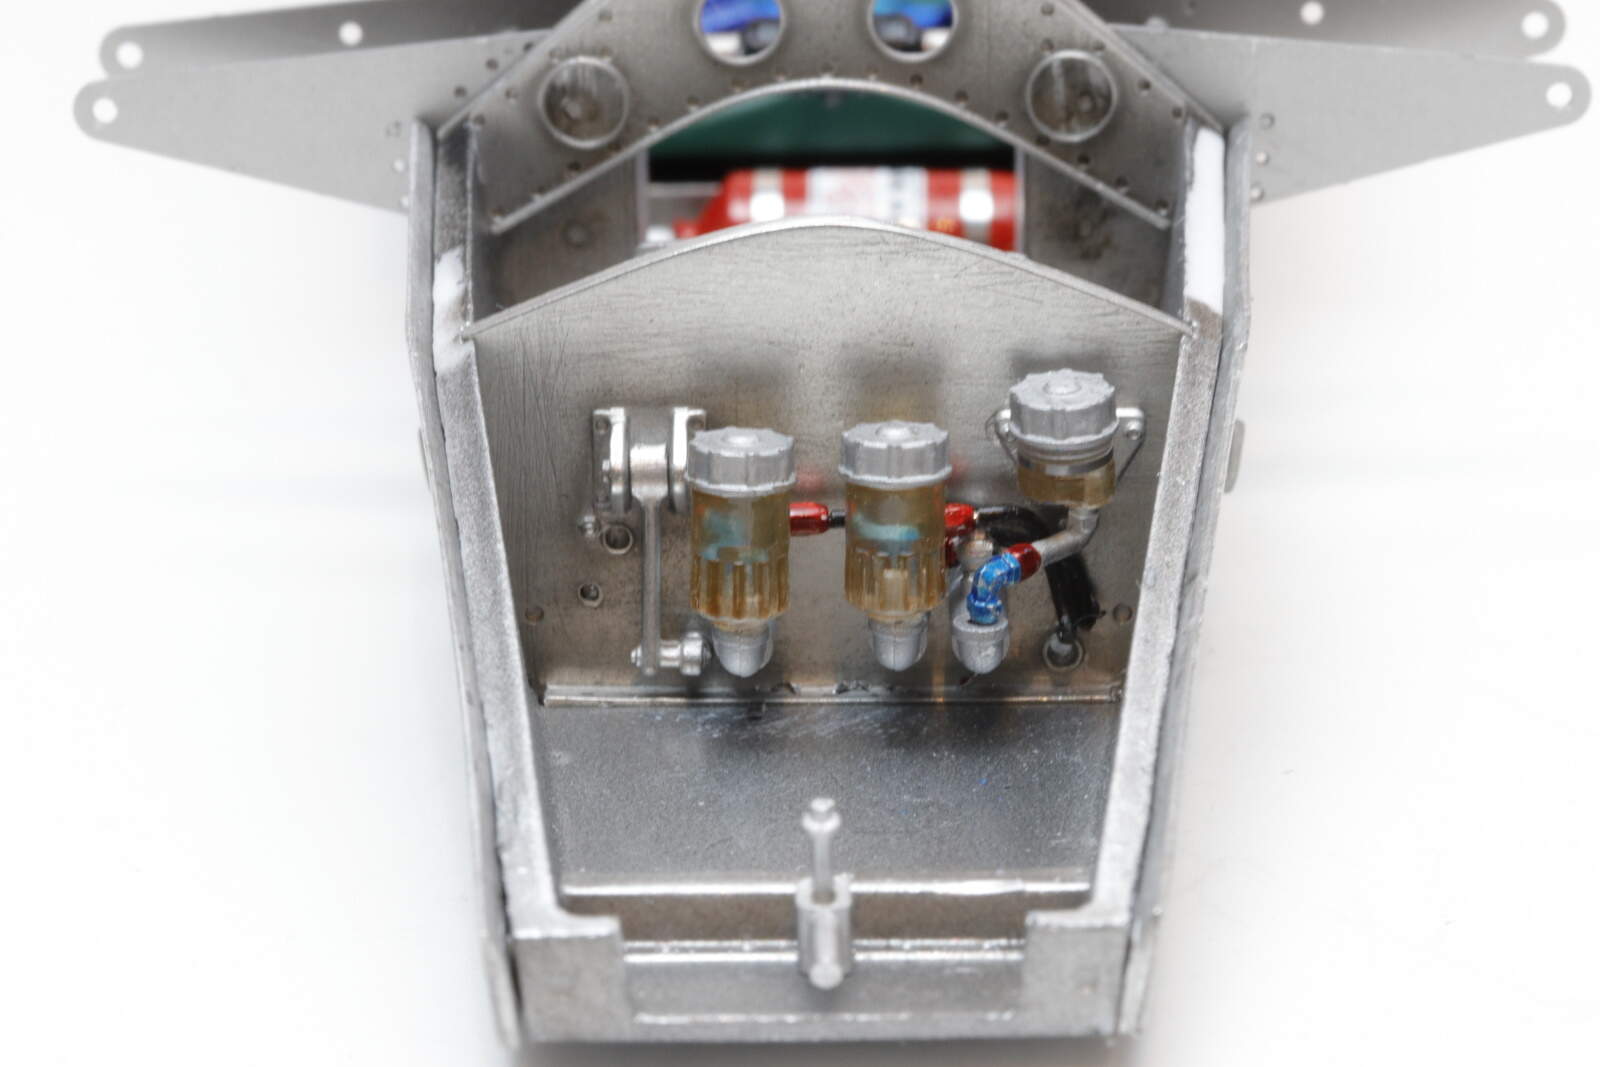
Well got the central chassis complete though not without some choice words.
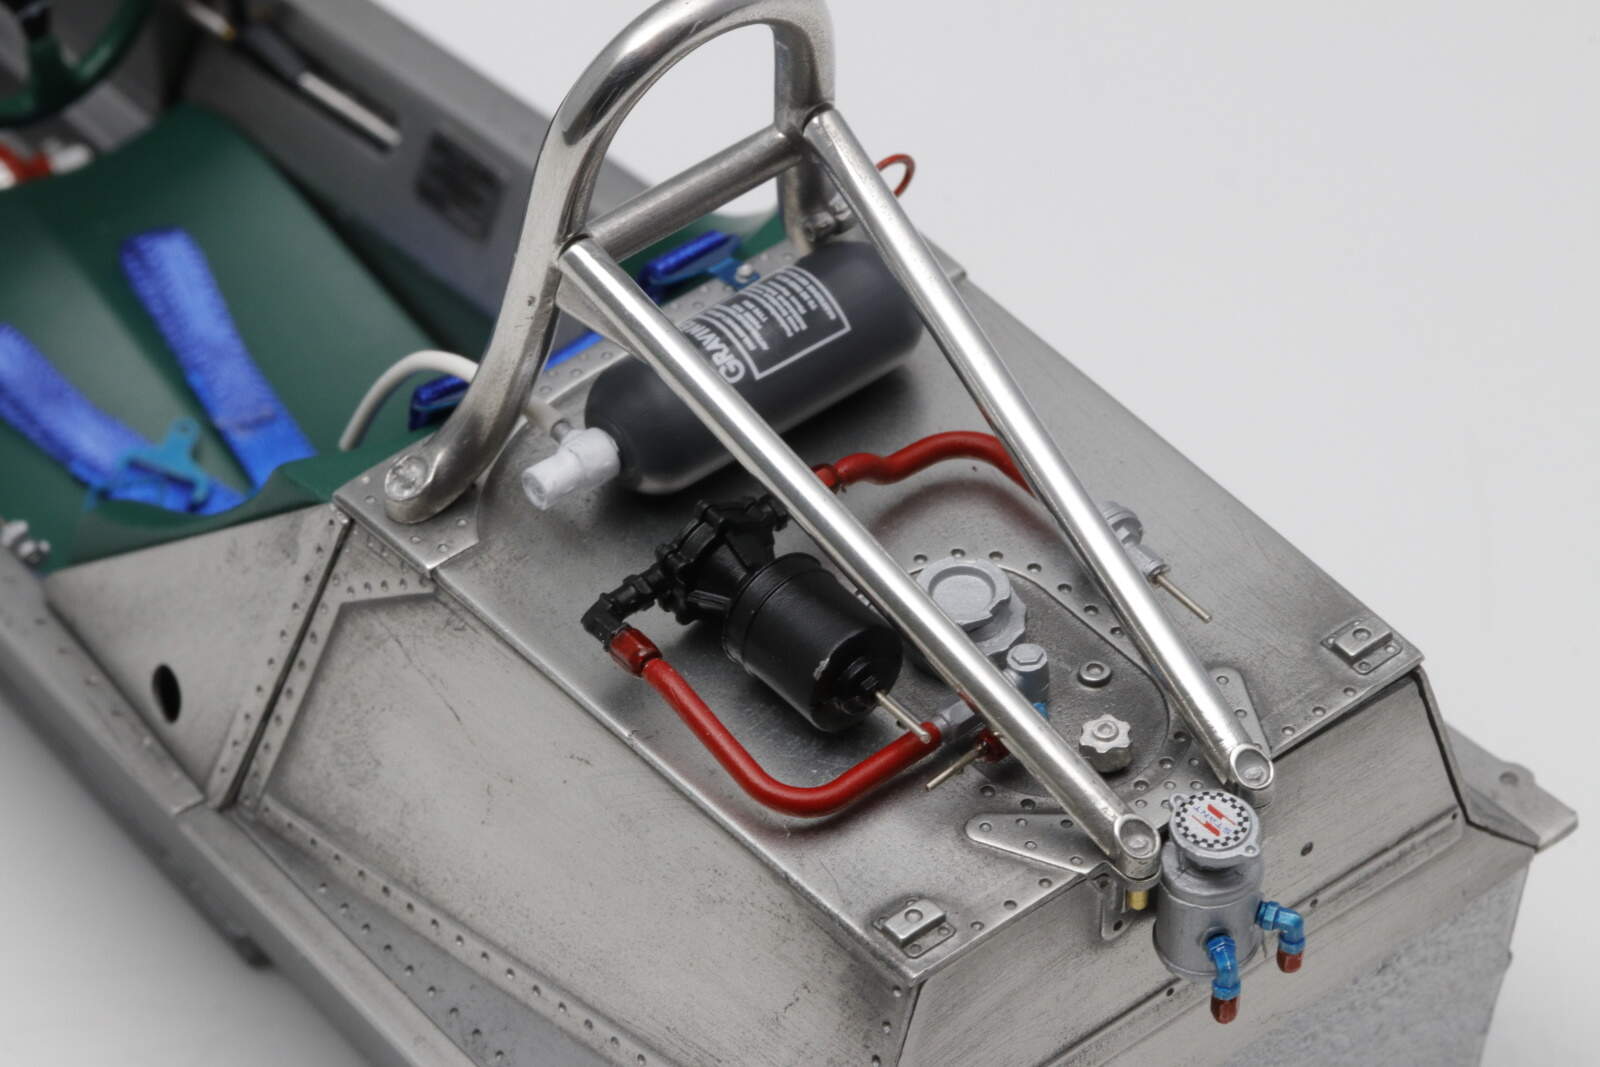
The first trouble was self inflicted. I noted I had left the metal straps holding the oxygen bottle in place off and it bacame a difficult extraction from its site below the rollbar but reinstalled safely
Michael,
The tub really came out looking just like the real deal. Nice save on the oxygen bottle straps as it still looks perfect without a damage anywhere in sight. I do really like those 3 reservoirs for the brakes and clutch especially with the fluids that we can see. The finished tub looks great with so many shuttle shades aluminum to add that extra something touch.
Thanks Michael, the current team leaves me cold since the Williams family sold the team but they had a great run.
Ever since I got in to F1 in 1981, FW07B has been one of my favourite F1 cars. I’ve built up quite a library of books and magazines on F1 at that time as well as a stack of Tamiya 1/20 FW07 kits and hundreds of photos trawled online from all over the place. When I saw MFH’s 1/12 kit I simply had to put my money where my mouth was.
I’ve never owned or built a kit like this, by MFH or anyone else, so your description really helps.
I hate to say it after seeing your beautiful work but MFH have made a couple of fairly sizeable errors but fortunately they’re not too visible. I can understand how it happened because the car was modified quite a few times during the 1980 season and again for 1981 and its not easy to tie down a specification for a particular race. Also a lot of the original cars are still around in historic racing - both FW07Bs and Cs - and that can confuse.
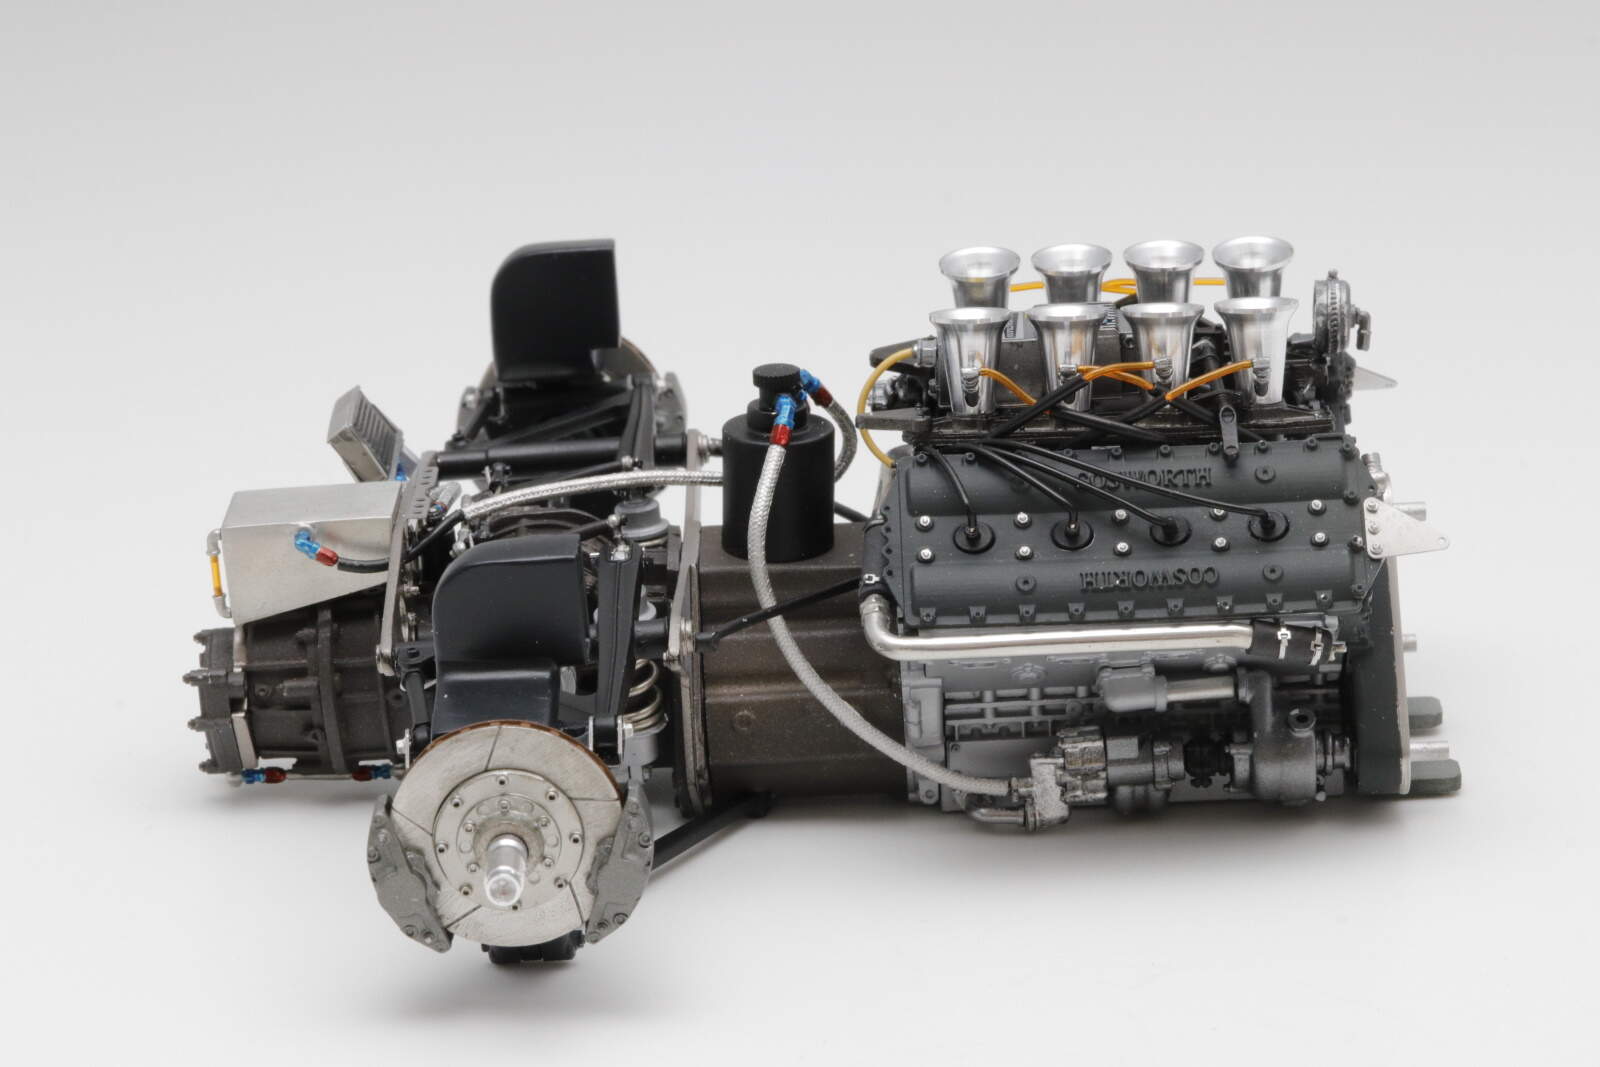
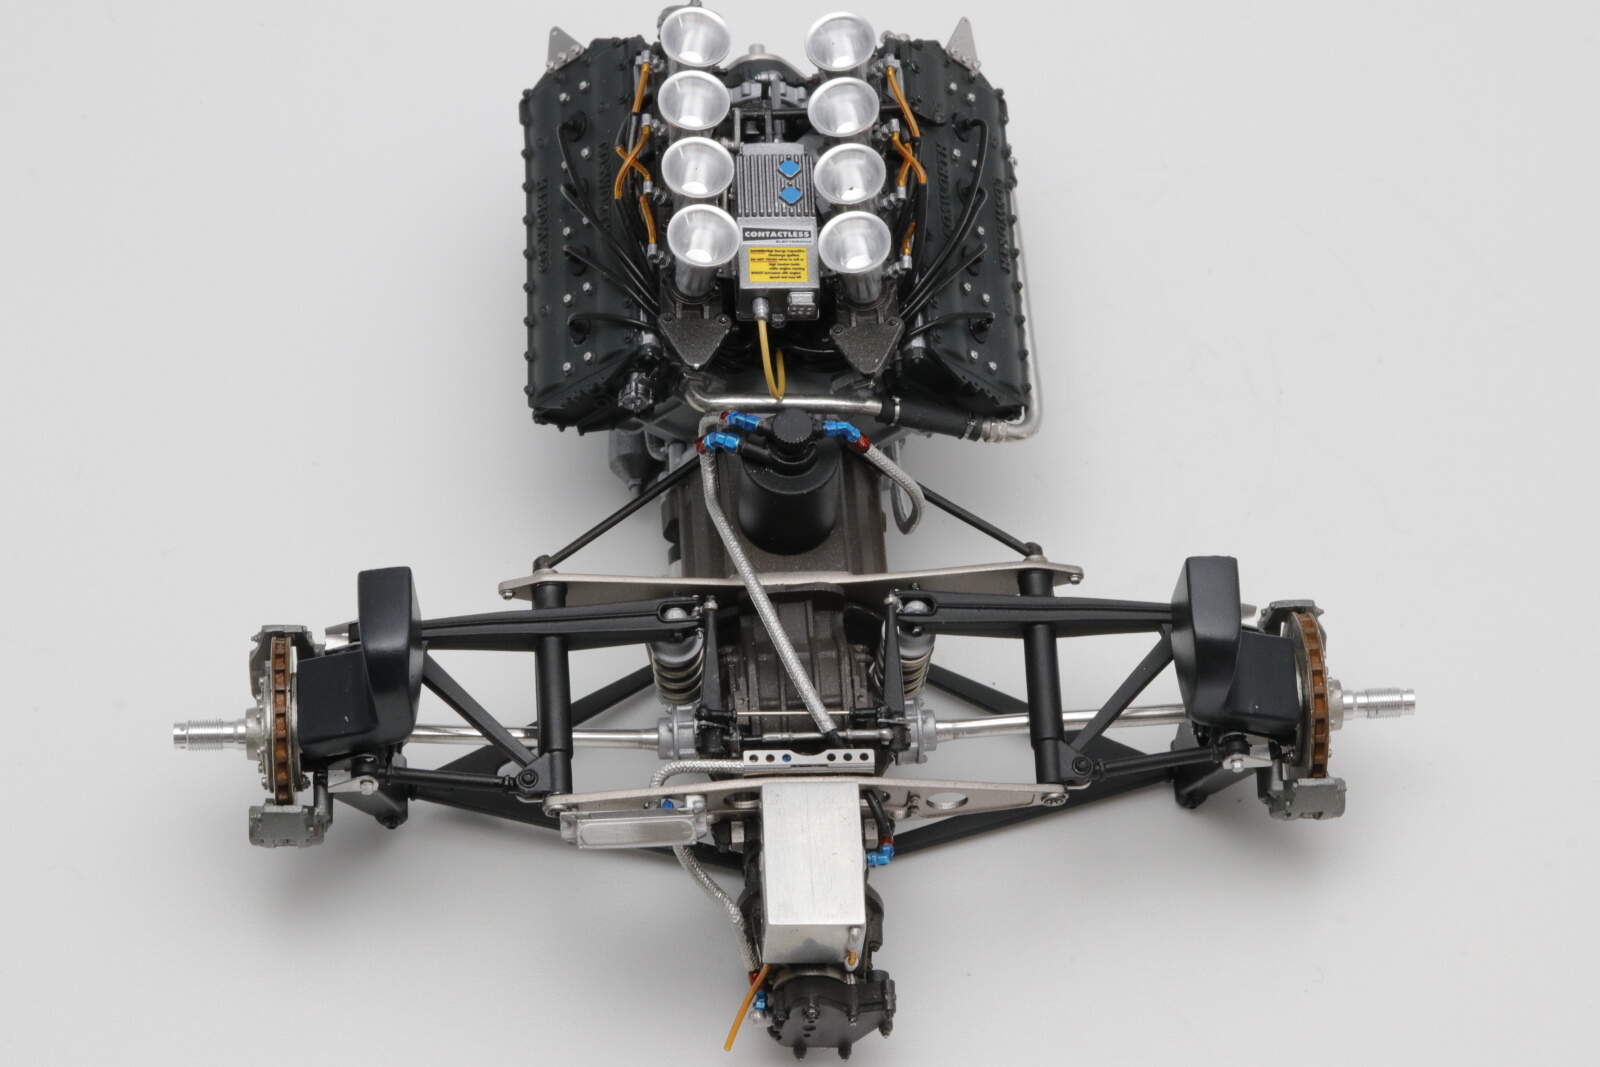
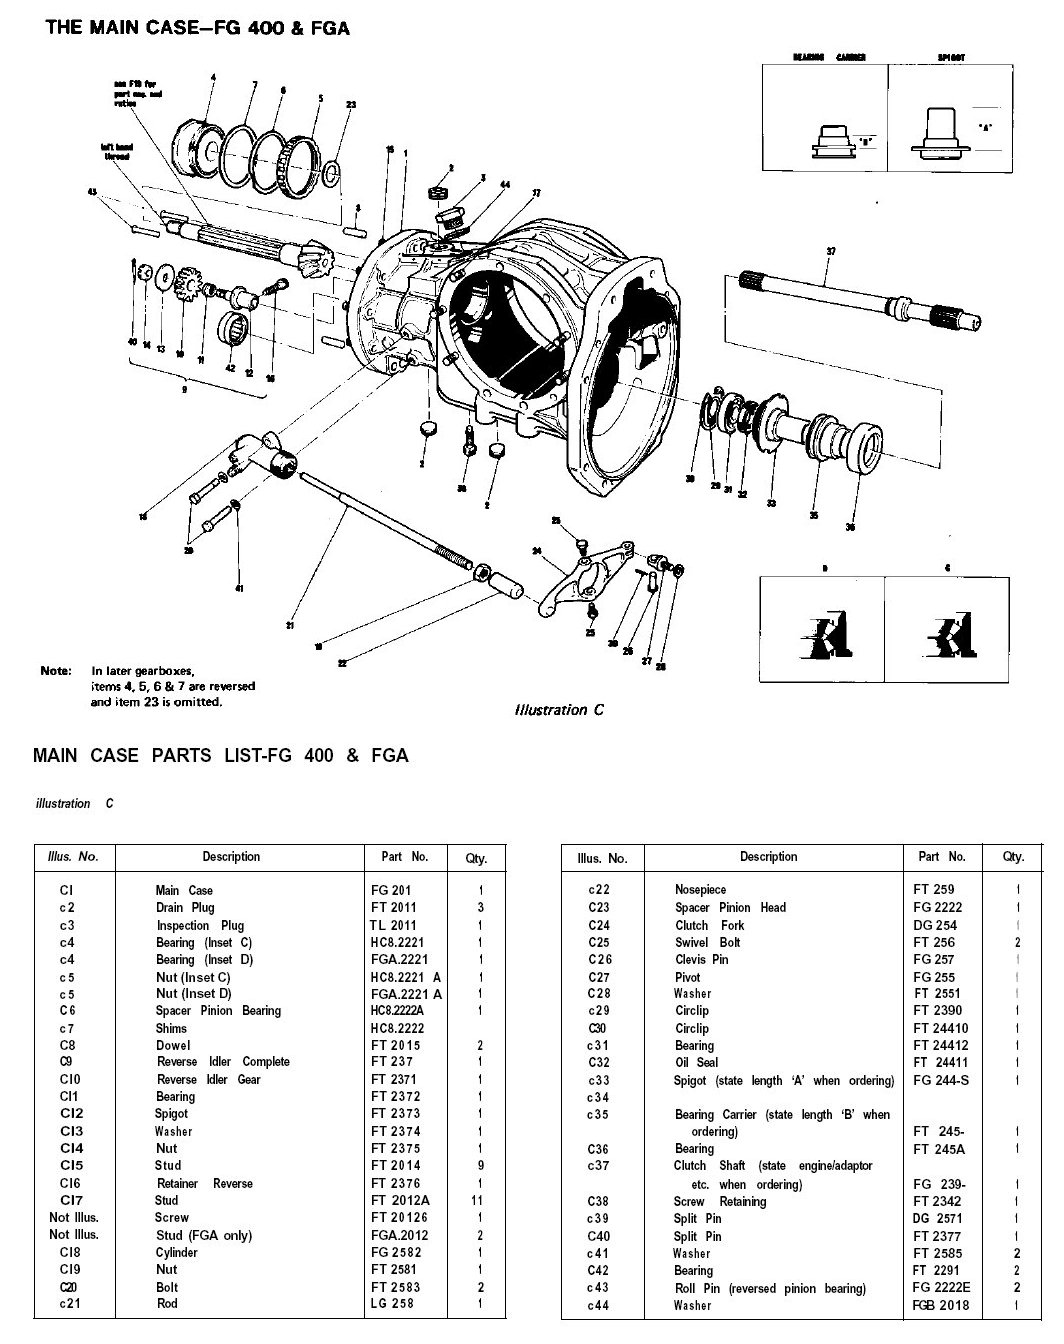
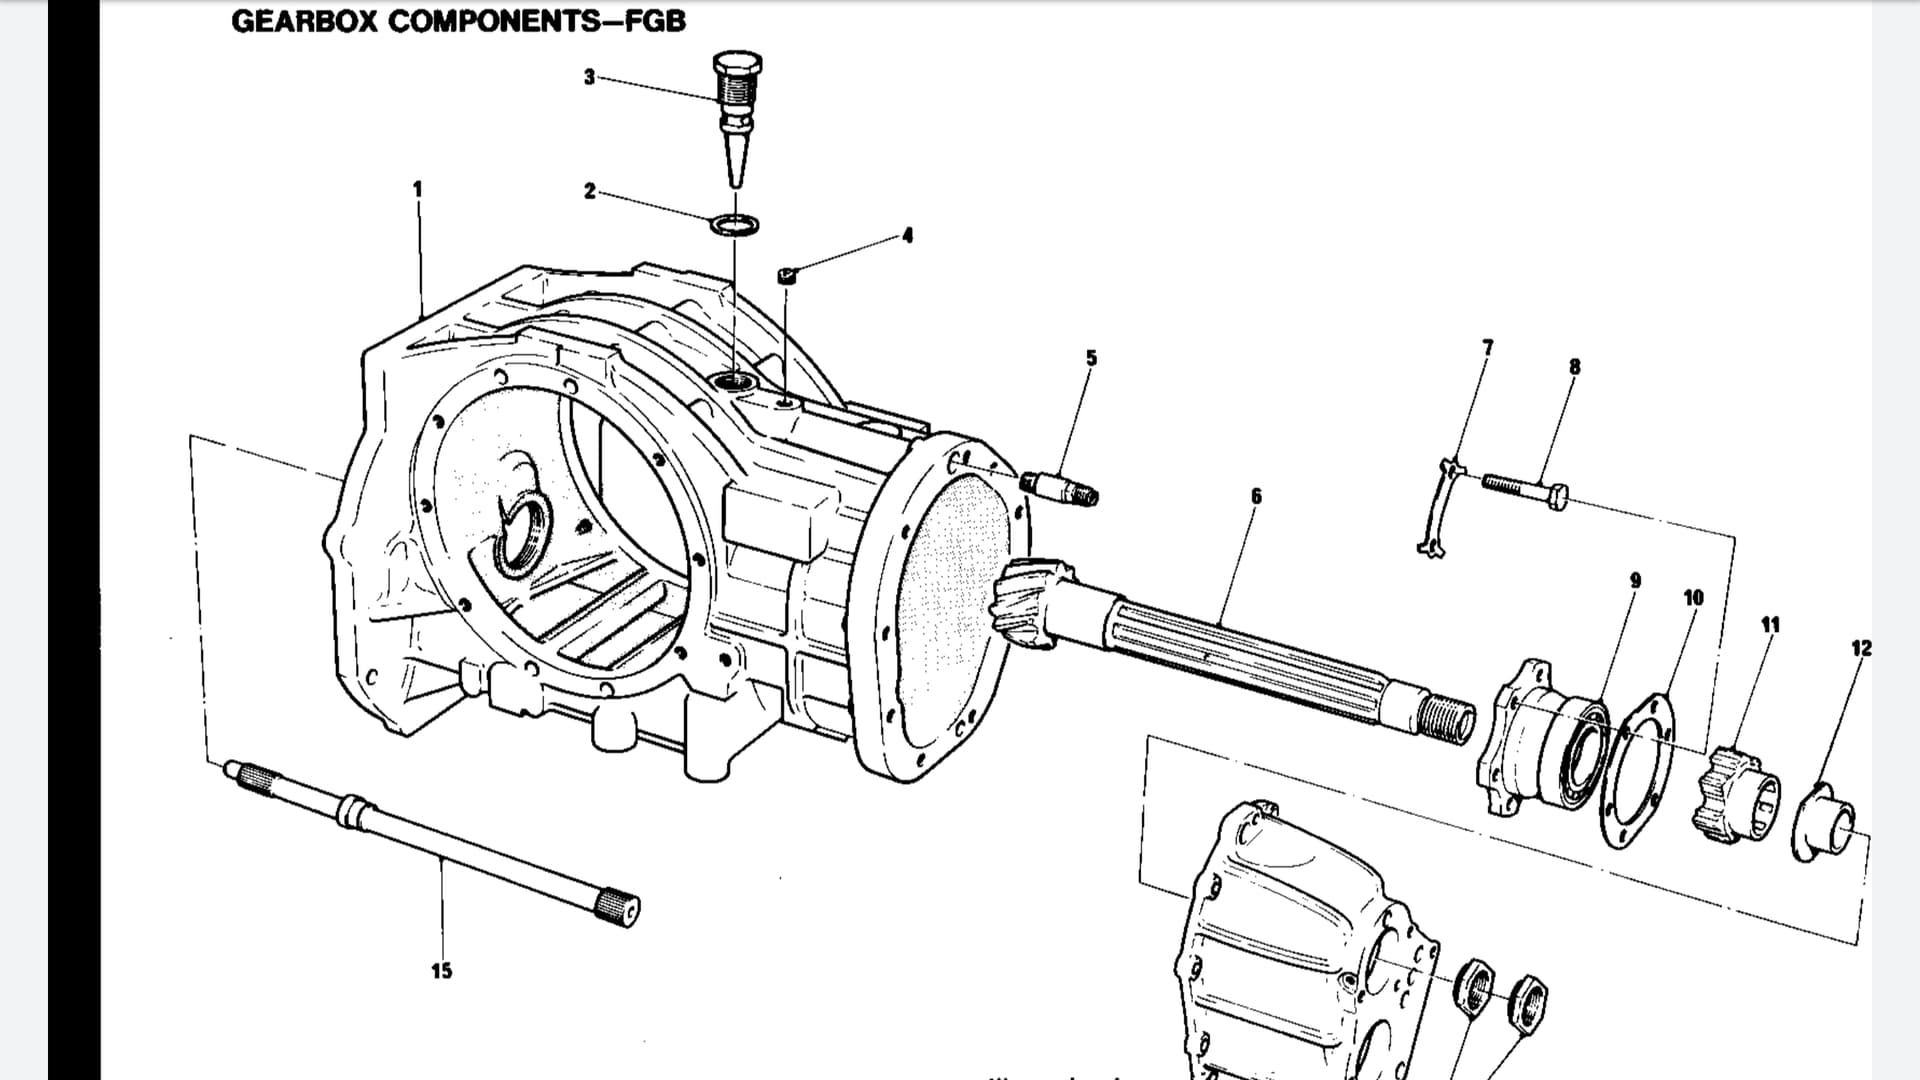
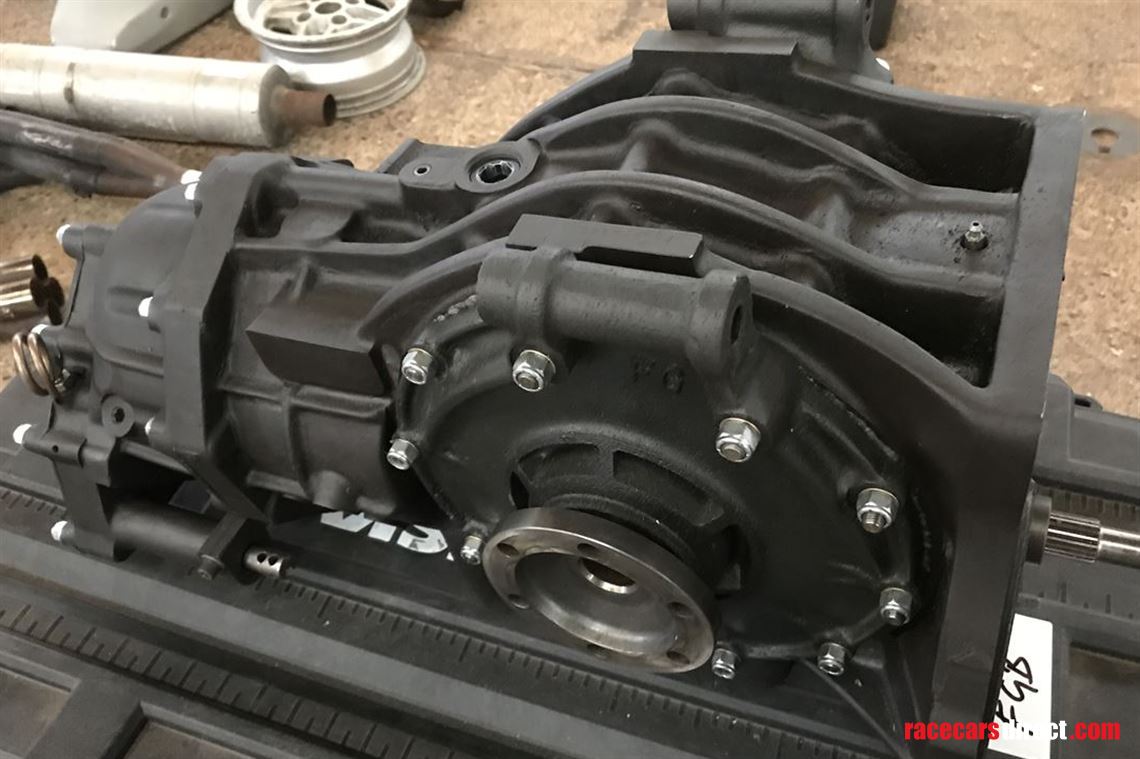
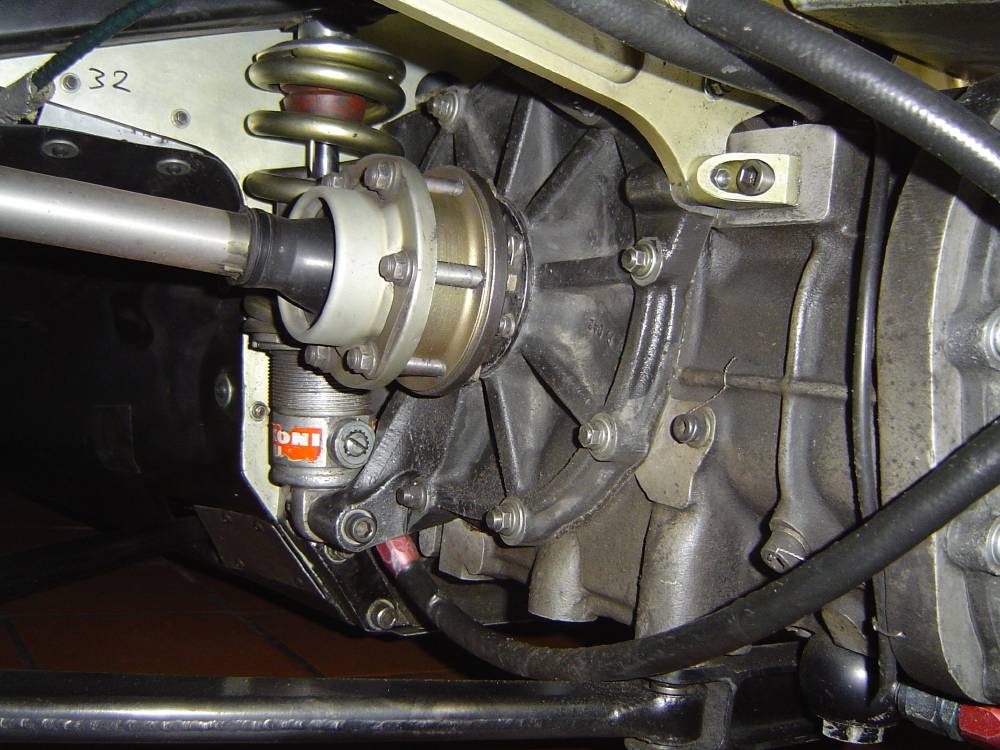
The first one applies to any race - they’ve used the wrong gearbox (just like Tamiya did in their 1/20 FW07 kit). The kit has a Hewland FGA but the car used an FGB which was the beefed-up version of the FGA to take the increased loads of ground-effect cars. This changed the shape of the casing, quite a bit - especially at the front.
Here’s the FGA as in the kit:
Tamiya’s 1/12 Renault RE20 kit has a pretty good Hewland FGB which could help with altering this kit if required.
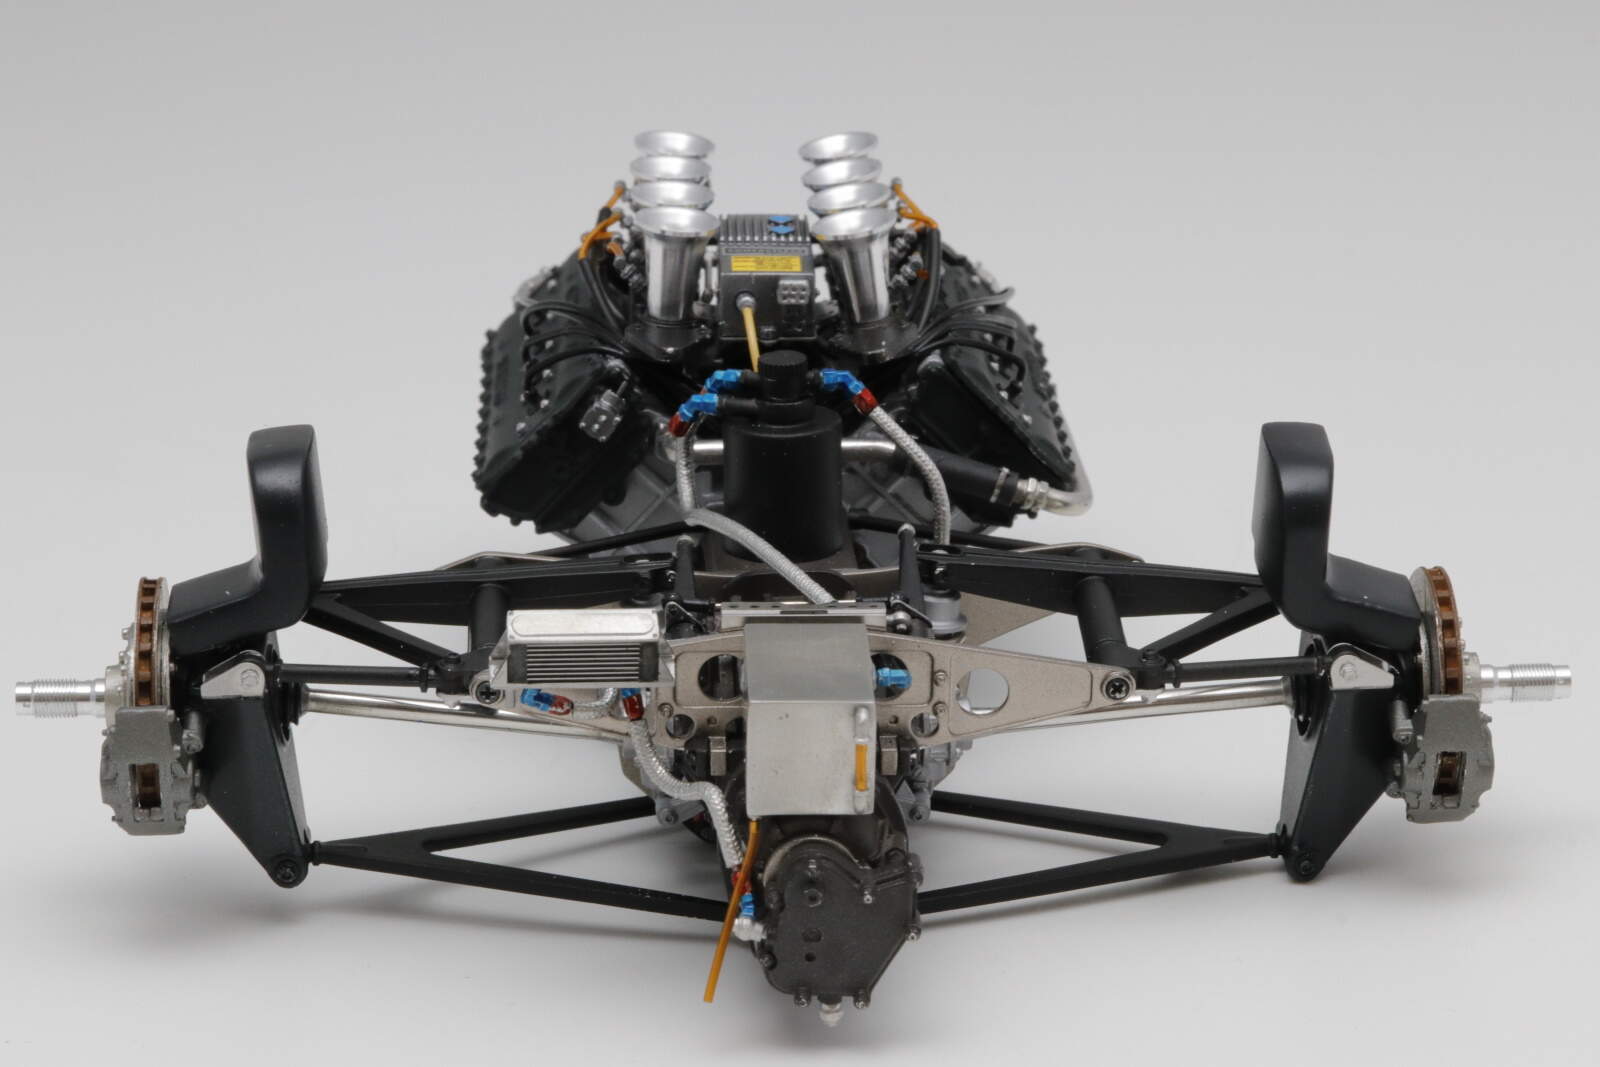
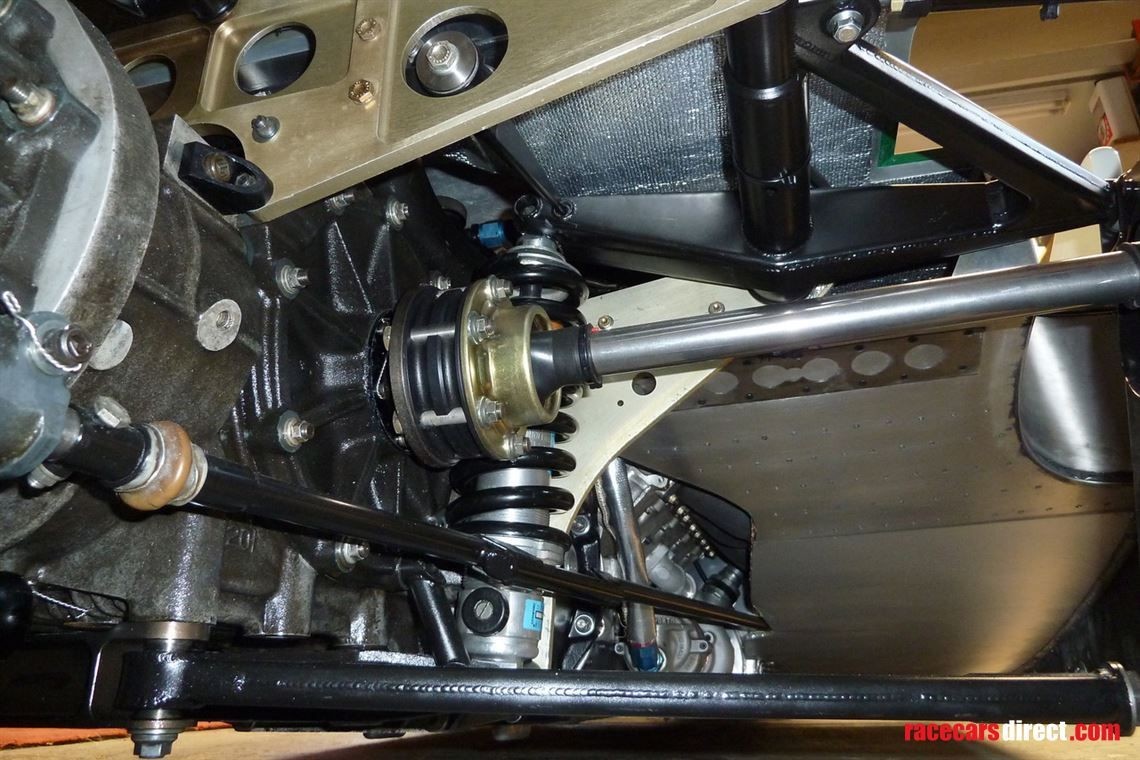
Again for any 1980 race, the rear suspension transverse plate (part M8) which supports the front of the rockers, is a hybrid of the 1980 & 1981 versions. It is like the FW07B on top but its like the 1981 FW07C underneath.
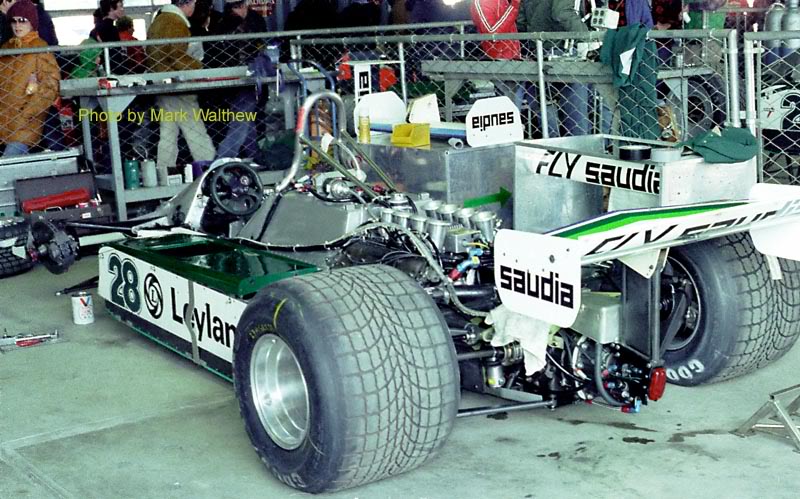
Here’s the 1980 version which is curved at the sides and picks up the bottom mount for the dampers:
(This last photo is a recent one from historic racing but it is the Montreal spec suspension and fairing).
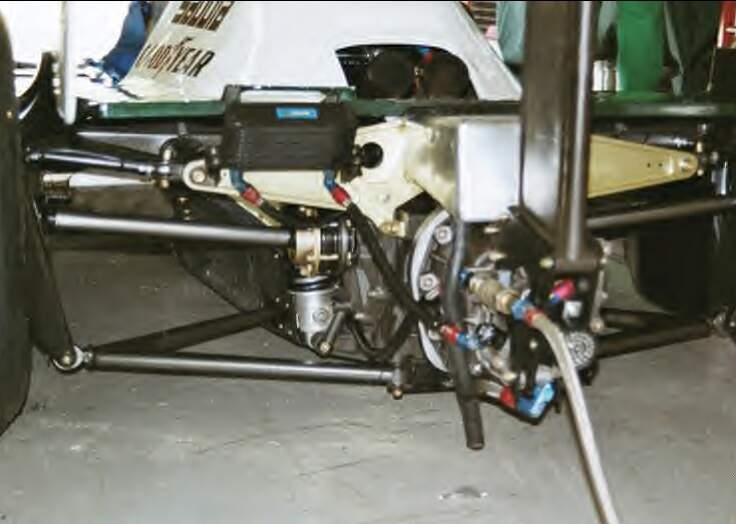
Here’s the bottom of the 1981 FW07C version which was narrower to allow better airflow. The damper mounts were moved to the gearbox sideplates for the same reason.
Unfortunately, this does mean the kit dampers, gearbox sideplates and the fairing under the engine & spacer are all the 1981 spec.
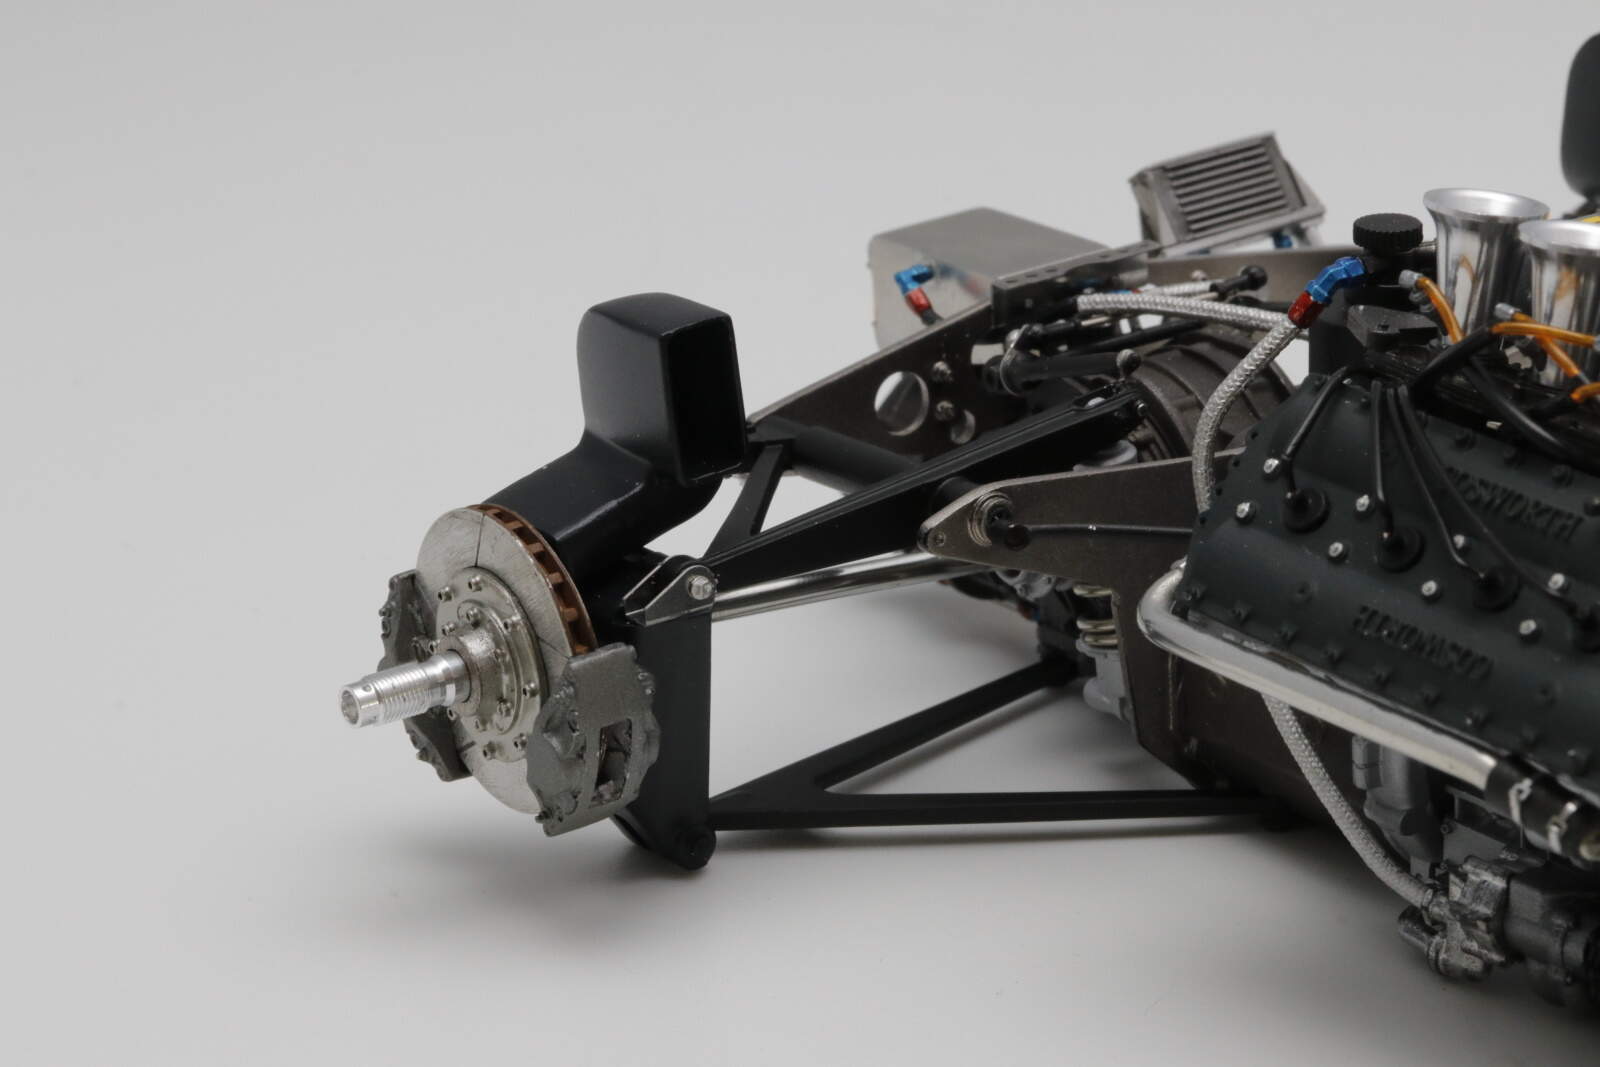
Up to the end of 1980, the dampers were mounted on a beam bolted to the bottom the gearbox and to the transverse plate as above.
This photo is of the car at Watkins Glen 1980 to the same spec as at Montreal:
There are some other smaller goofs like parts M24 & M27 are the early season oil catch tank which was deleted when the tank was moved to a new place on top of the gearbox. Kit parts M22 & M23 are correct for the late season catch tank so just use those and don’t use M24 & M27 for a Montreal car.
There is so much I love about MFH’s kit that I can totally excuse all this. No-one else was ever going to kit this car in 1/12! In the end I suppose its up to the modeller how far to go in making changes.
Michael I’m sorry to rant like this. Your build is really inspiring and I’m looking forward to the rest of it.