I am not sure, as the CAD license I have is a hobby one so I don’t technically own the files. I do also want to add other things to it as well though. I am keeping it simple for the sake of speed and would not want to sell a lazy project. I will think about it once it’s done.
I hope you will consider selling as I too can use a set. So, help the brothers out ![]()
Hello everyone,
Unfortunately, no amount of staying up late gave me enough time to finish this behemoth. On the bright side, now I have plenty of time to really do this kit justice.
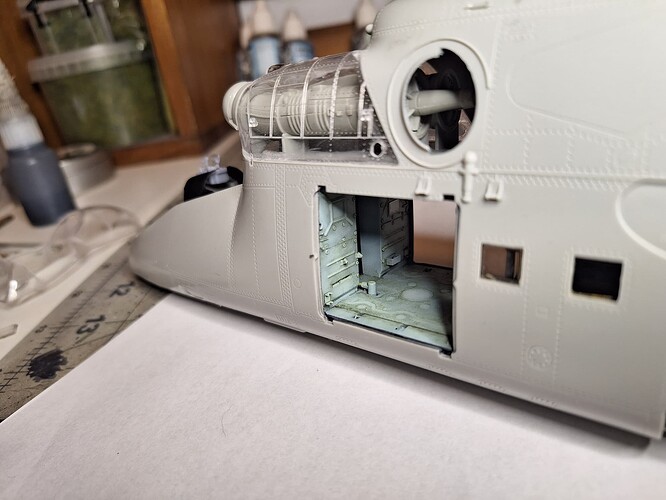
If anybody wants to know, I got as far as painting up and weathering the entire cabin and sealing the two halves. I also had almost all the extra bits such as stub wings ready to glue.
Unfortunately, I forgot to take detailed pics of the cargo cabin before it was sealed so the weathering will be very hard to see in the pictures.
And now that I have more time I will try to post more of the progress. Right now my entire focus is on the cockpit starting with the pilot seat as it requires the least amount of work.
What has been done so far:
-Added some missing floor panels
-Added rivets
-Removed all the raised instrument details for the 3D decals.
-Replaced the yoke stick with something with a better dimension
-Added the shade panels for the instruments
-Added rudder pedals
What it needs still:
-Install the sight
-Add some levers
-First aid kit
-Air vent tubes
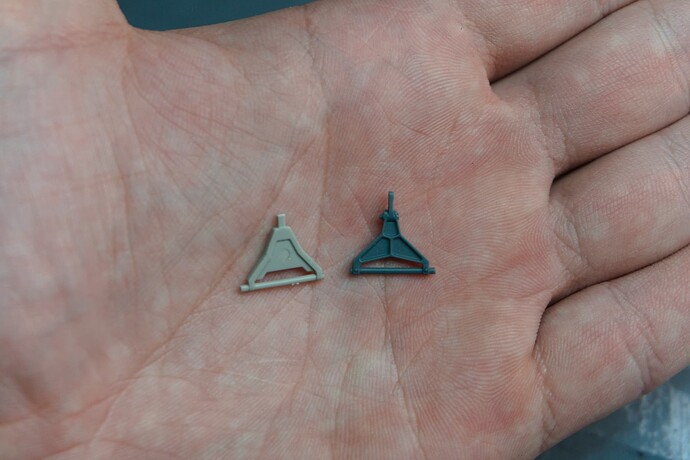
I designed and printed the new sight, Here it is compared to the kit part ( it is designed to have the 3D printed decals on the front):
The gunner seat is where the most work will happen as it is the most instrument-packed and most visible when open.
What has been done so far:
-Added the retractable rudder pedals/rods
-Added two floor panels
-Added the flight stick and guard that the kit just did not have
-started to add some tubing
-Started on the pilot/gunner divider
-Started to design the instruments such as the controls
-Slightly modified the seat with a seatbelt hole and arm rest
Still to do … too much to list.
As an added progress note, I started on the inside of the pilot door, and only added some styrene as part of the modification, much more to come.
The biggest challenge that I want to try is designing an interior for the canopy as it is extremely detailed and complex in real life, so fun challenge.
Thanks for the read!
It has been a long time since I have posted and that is because I have not done much work ![]()
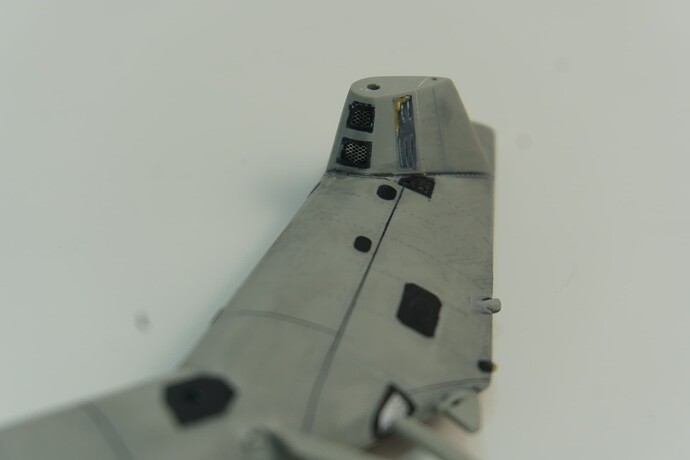
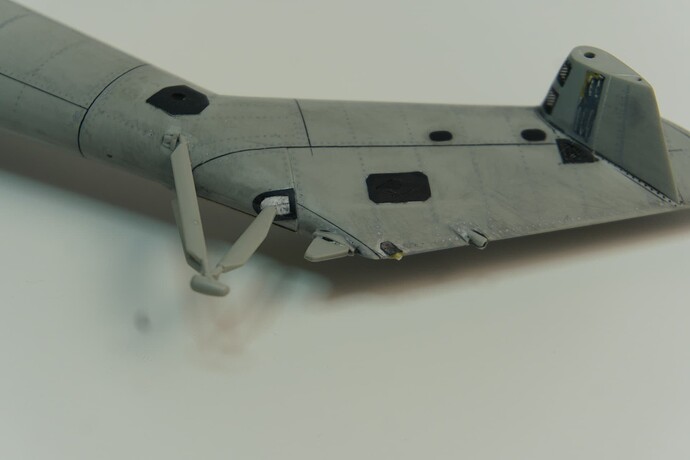
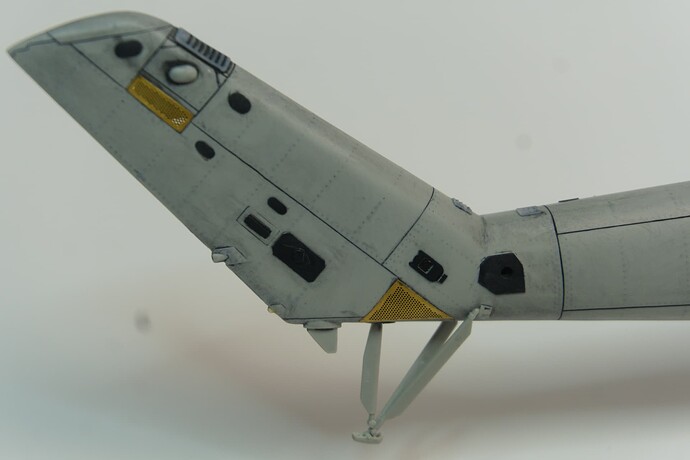
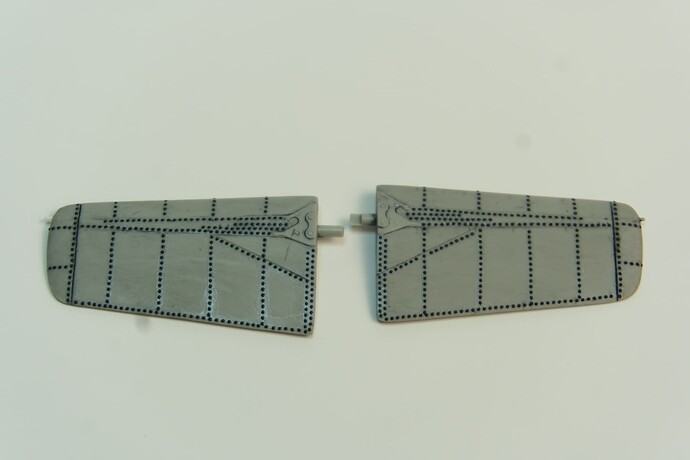
The more I work on smaller individual portions and parts the more inaccuracies and simplifications I find and this kit has been a tad taxing. So far I have been working on the tail and while smaller, fragile parts are missing, the major parts are there. I had to modify and add my own vents and, raised panels. All the black parts are very thin styrene sheets, and grey are 3D printed.
As you can see I have decided to add raised rivets as from the pictures I saw of the real thing they are quite prominent! So I have been filling in all the old rivets and sanding it down.
I still need to clean up some glue, and the black residue is from my primer which I took off after making sure all the rivet holes are properly filled.
Once all the solid parts are done I will rivet the whole thing, but for now, she lay bare. I have also done some work on the door:
Still a very large amount to do on the door but the progress is definitely good. Lots of details that you can’t see on the camera. I had to remake the glass myself unfortunately but otherwise, it was an easy-ish fix.
I am also trying a camera my sister gave me. She used it to film videos for her channel but being a professional photographer she moved on to better tech and gave me this thing. I will need her to teach me to use it better but otherwise a good step.
Critiques and comments are welcome as I am very new to aircraft!
Don’t know enough about the details for that version to know if correct or not but it your details look great. ![]()
![]()
Hello everyone just a small update post, I haven’t had much time to work on things.
I tried my hand for the first time with sculpting and the results were just about what I thought it would be: not amazing but still worth it.
The majority of my work time is still spent on filling in the rivet holes and prepping the frame.
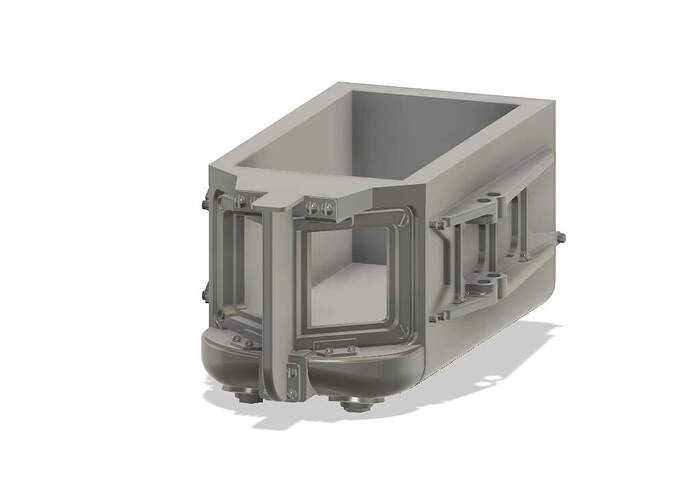
I have however been working on replacing the ATGM guidance sight and might need some help here.
This is what I have so far and I have no issues building the rest of the doors but it is the sight itself that I am having issues finding references for.
The body so far:
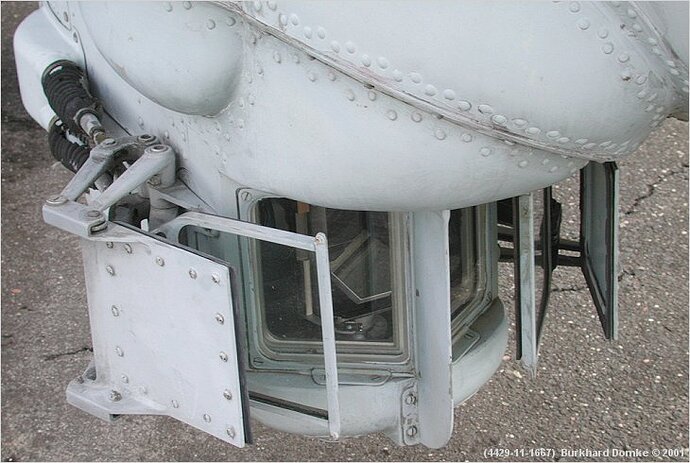
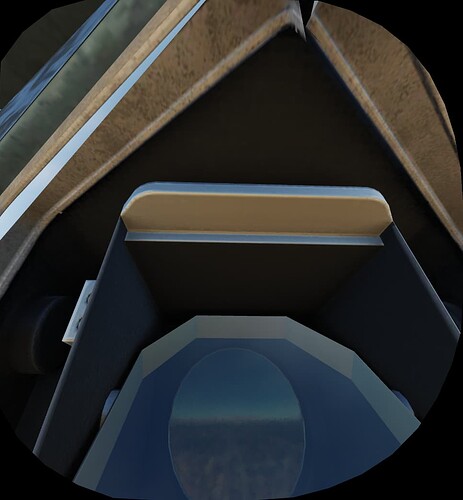
The issue I have with the camera is that I can’t tell whether the camera is pointed down and what you see of it is reflected off the angled mirror or if the camera is in the back.
I am more inclined to believe that it is facing down with an angled mirror like a periscope and the reason why is because while searching for references I found out that the sight was based on an old submarine periscope: here are some pics.

I also launched the DCS hind module and this is what is had in the sight, though this could just be like this in order to save processing power.
I even looked through Google with the russian name for this sight and nothing solid.
The sights name is: Raduga SH or, радуга ш
Your selling yourself short, it will look amazing once fully painted and weathered. ![]()
![]()
Hello everyone, just a quick update.
I finished up the design for the new raduga sight and 3d printed it. While Fitting the new housing for the camera, I finished the actual camera and its housing. I have used this technique before and Once I get back to making tanks I plan to use it again as tanks are where I first started to develop this effect. I want to try doing this with small periscopes as well to see what effects I can achieve.

![]()
![]()
![]()
![]()
![]()
![]() that is freaking awesome!
that is freaking awesome!
Please share this witchcraft technique with us.
Yeap, I think I will have to stop reading this thread as that is pure sorcery and witchcraft !!
On a serious note, this build is phenomenal … the level of detailing and scratch building is way beyond superb. Things like the seat textures and the stowage bag and the door cards with the door seal … brilliant !!!
Beautiful ! How did you go about making the mirror ?
Fantastic work
Thanks!
The whole thing on the stick is in 3 pieces.
- The main hub that holds everything is just that with black painted on the inside and silver on the outside.
-The mirror is this thin mirror-like foil that I glued on top of an angled 3d printed piece. I have no idea where I got the material as it was years ago. It was from some sort of packaging but I honestly have no clue where to get something similar.
-The actual camera unit is on top of the ring piece. It’s just a hollow ring with polarized foil from a Stryker lens kit with a piece of white paper and a black dot penciled in the middle.
Ah, I see . The reason I ask is my Abrams is waiting for its gunners primary sight and haven’t been happy with the flatness, or lack of, of any reflective material I’ve come across so far.
Hello everyone, long time no see! Thankfully I have not been fully idle.
I have been working a lot on certain parts. I have had some timesinks in my life, especially over the holidays but here is what I have been able to get done!
-
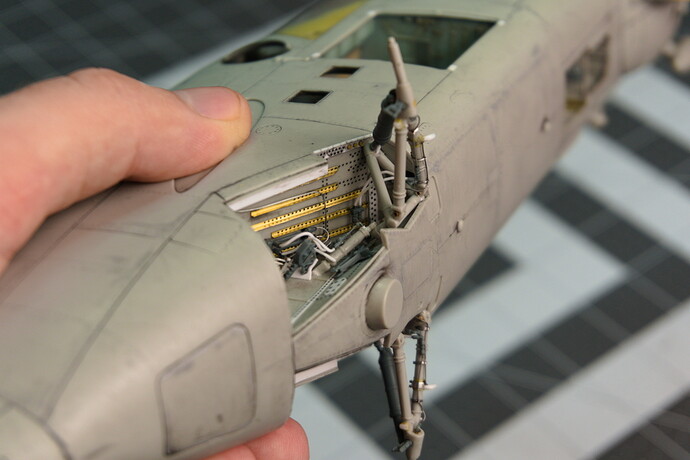
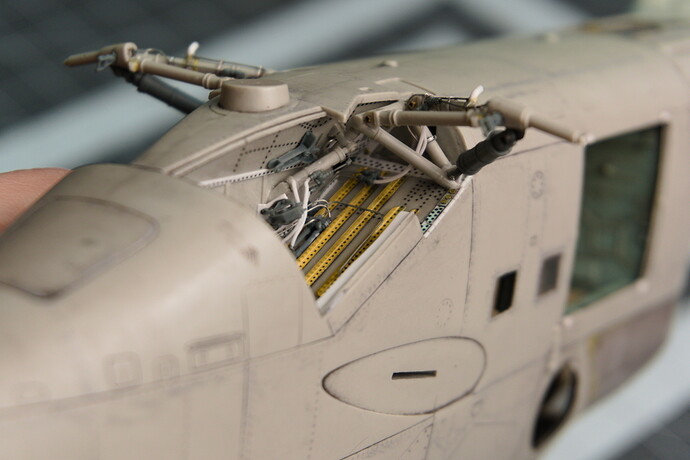
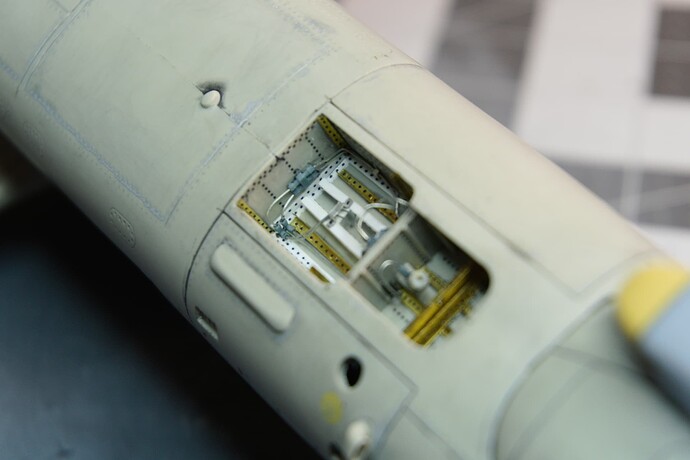
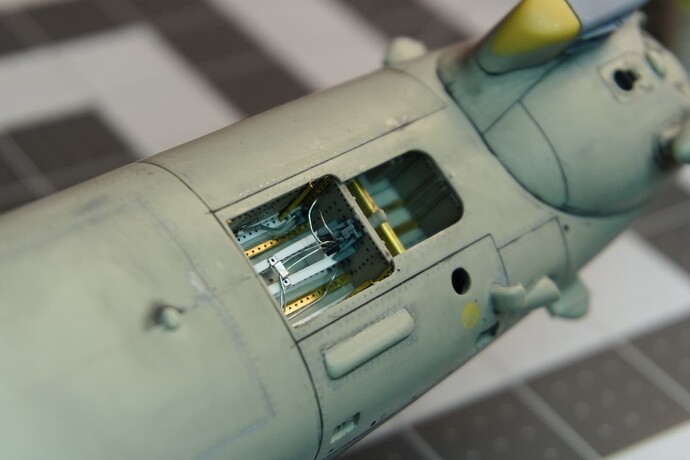
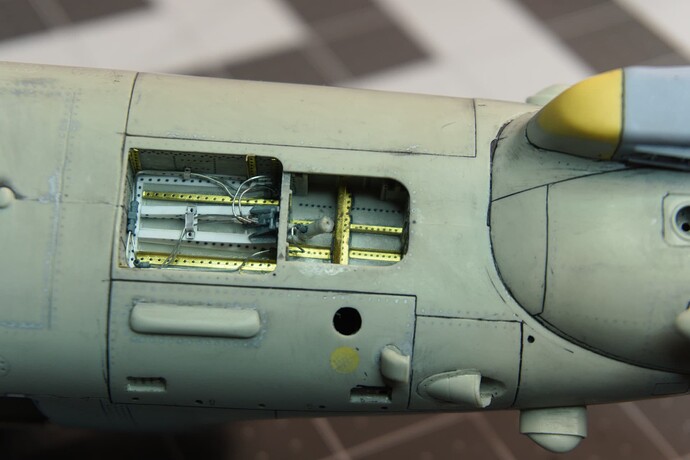
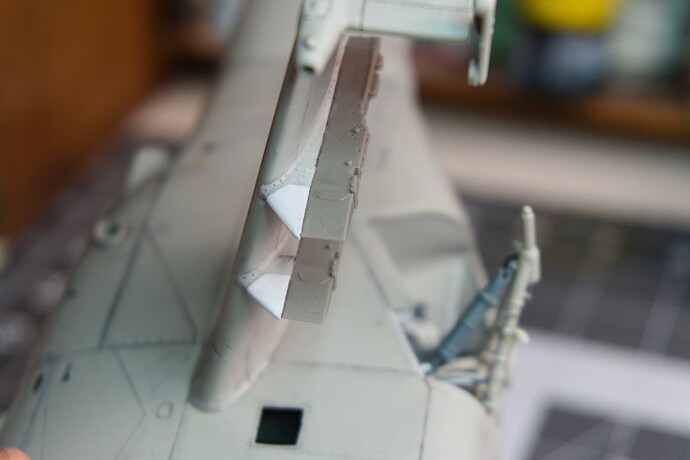
Filling and sanding down every single rivet hole on the model. I won’t show pics of that here as it doesn’t show much of a difference. The process took a very long time as I had to sand and fill twice then prime the rivet lines to see that it was all good and fix any spots before sanding it down again and polishing the body. I then had to re-scribe all the missed panel lines and details. I also had to drill out some holes and missing pipe details. There was a surprising amount of missing or wrong details I had to correct but now the body is prepped and ready for detail, however, I will be working on other parts of the model before doing the body. Mainly the stub wings and landing gear.
-
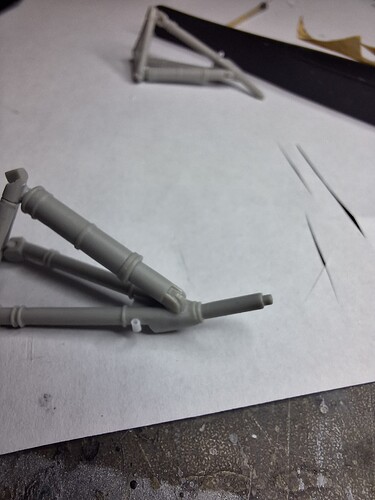
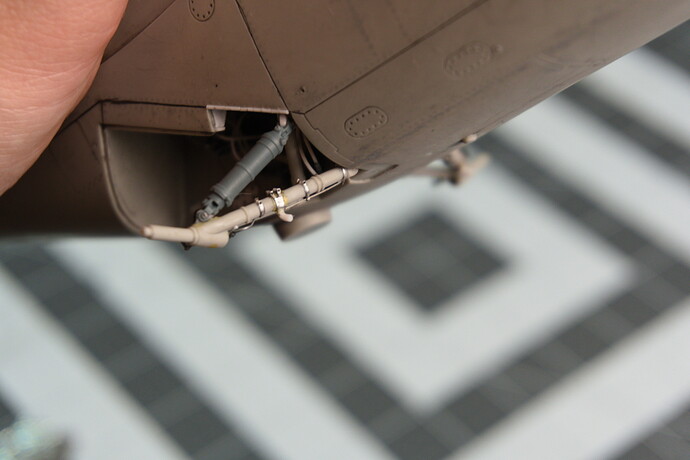
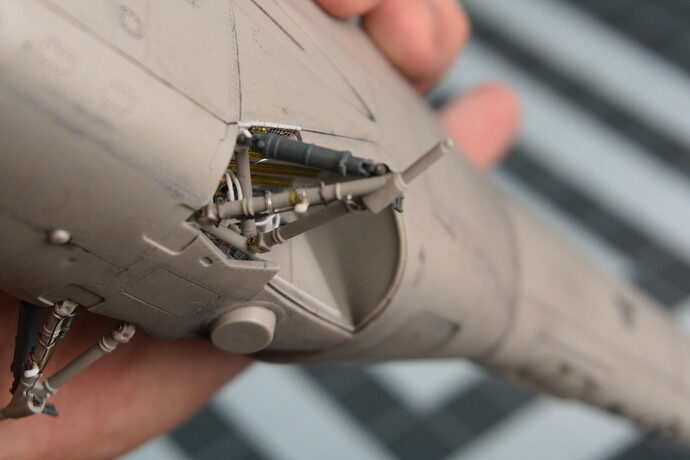
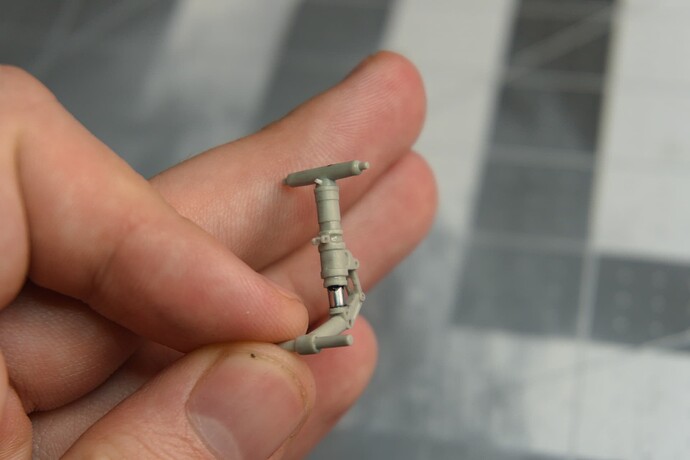
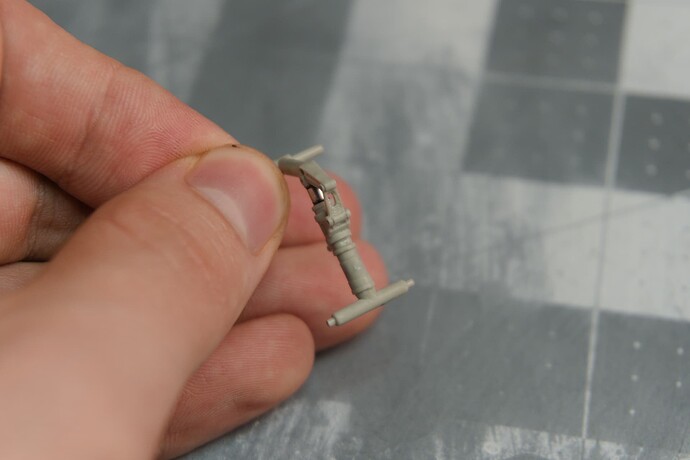
I started with the landing gear and after finding some reference pictures I kinda got a bit of dread. Sure the landing gear is mostly hidden but it is embarrassing how simplified and little detail this area of the model has. This is what the landing gear itself started as and what I have added, mainly the mount for the light, all the pipes and fittings, and lastly the brake lines and braces for them. The entire strut had to be replaced as it was just way too simplified for my preference.
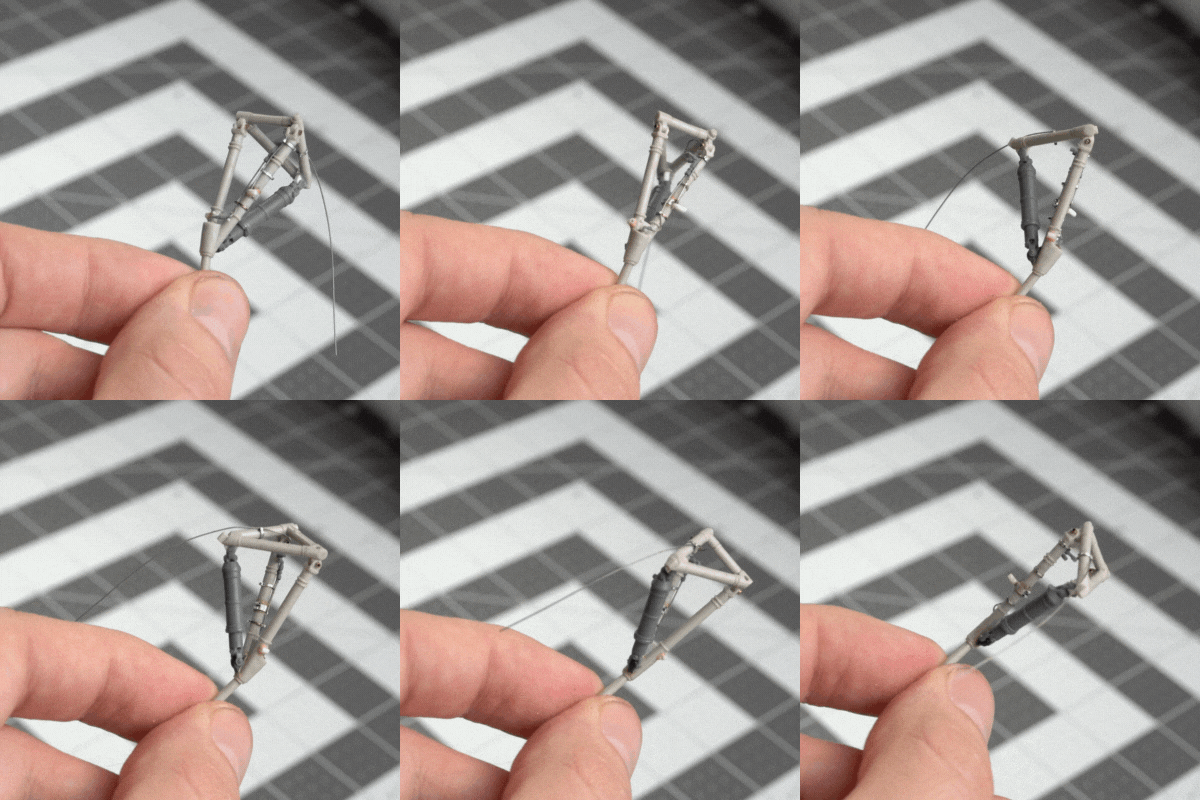
The gear covers also needed a decent amount of work to complete:
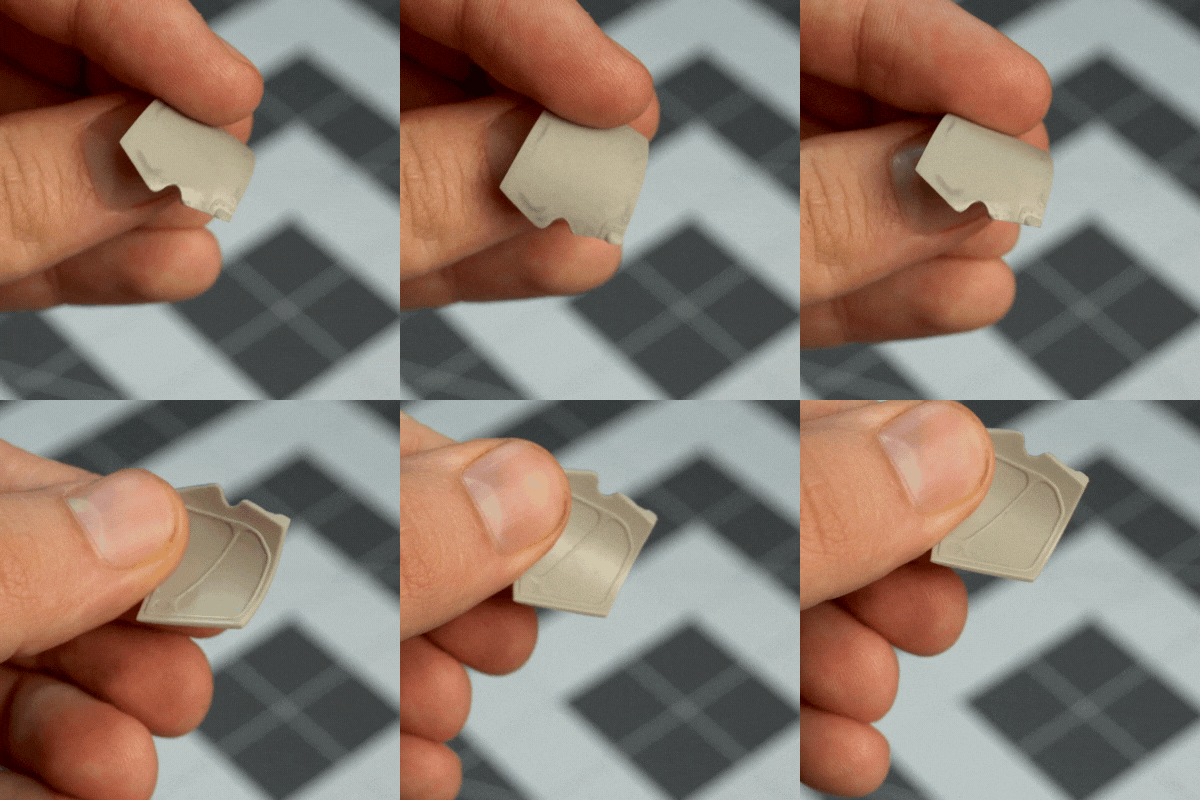
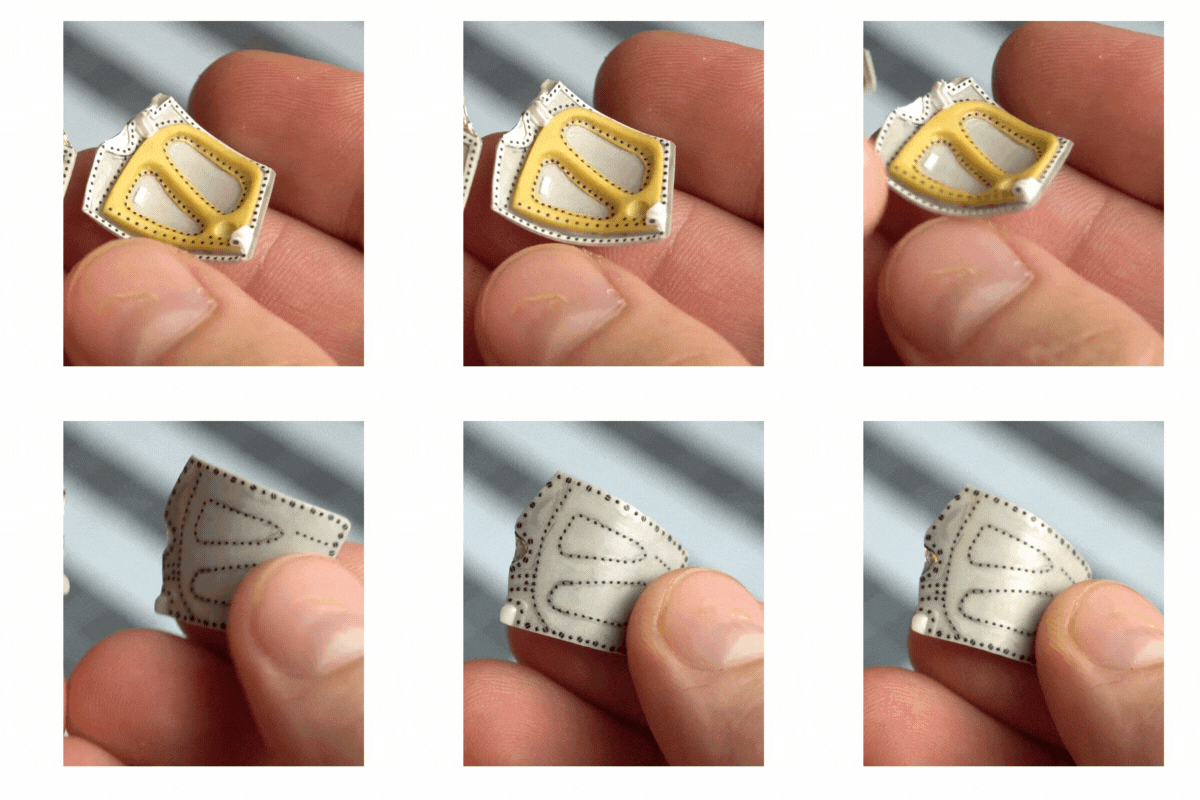
The rear part of the covers still needs the mount that holds the push-rod that opens them
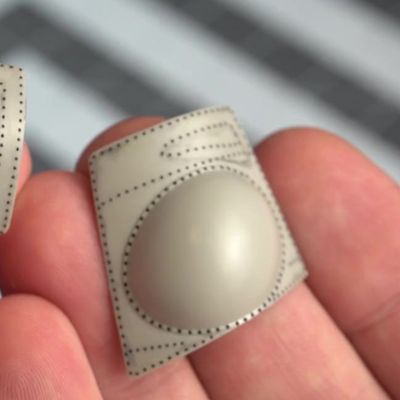
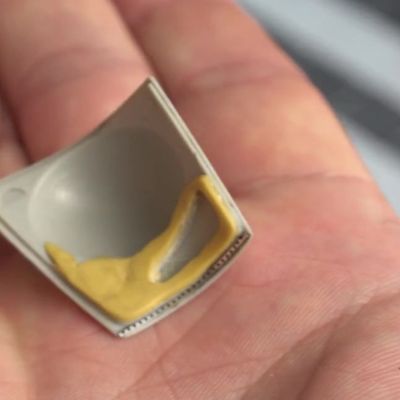
I could not find any good pictures of the plain landing gear bust since everything I have added is a different colour I think it will be easy to tell what I added/ modified.
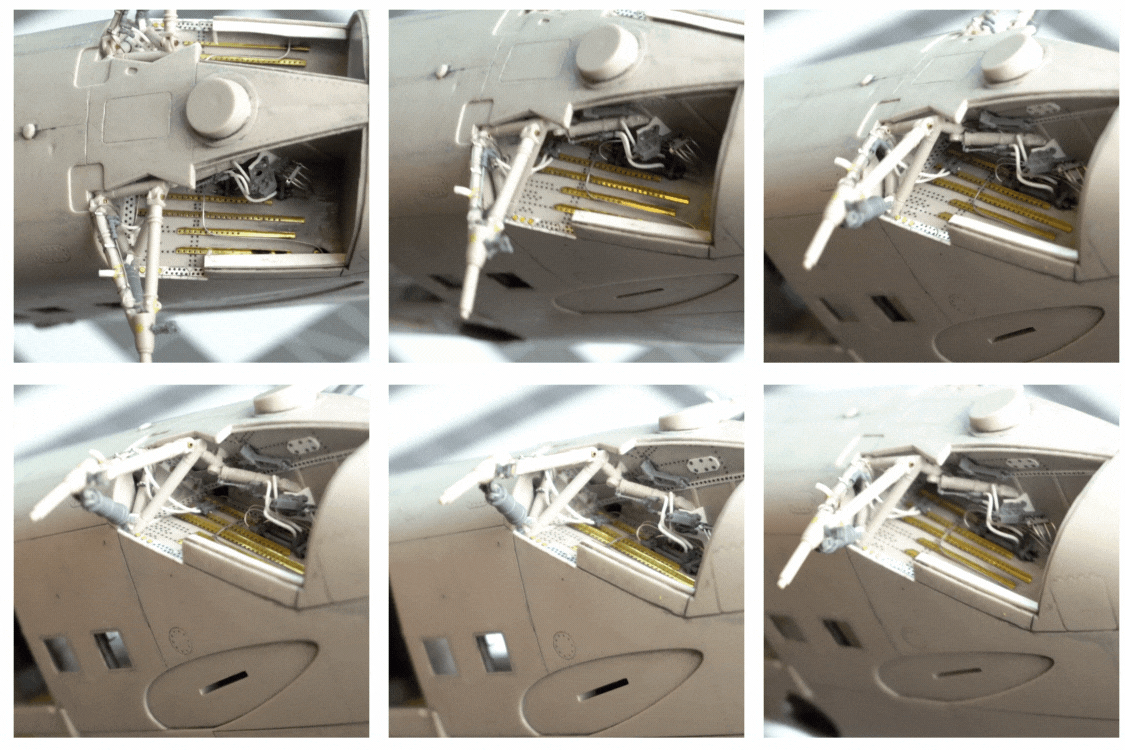
All the wiring took me a while and like I said there are still pieces missing but I will have to put them on a little later in the build process.
Here is the front of the gear:
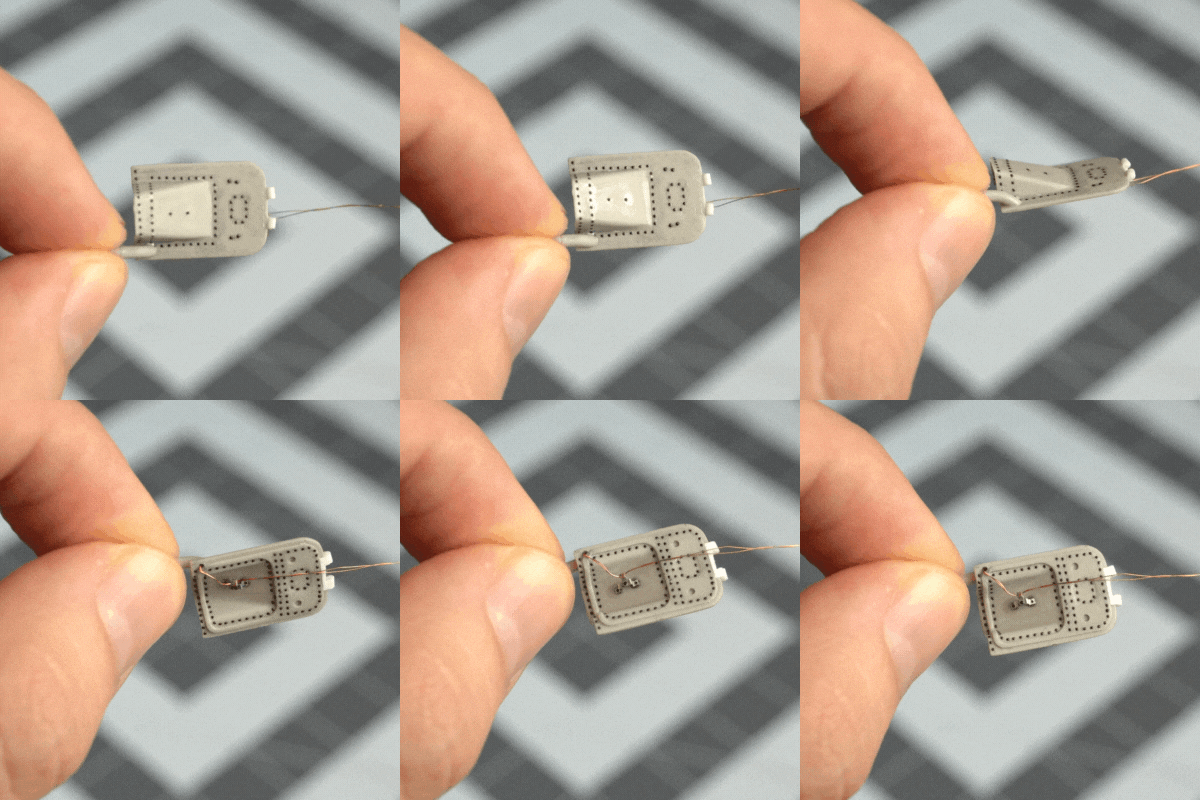
I modified the front gear as well, adding an aluminum rod to where the piston should sit, I still have to clean up the superglue with debonder but otherwise, I like the look. I also drilled out some missing features and moved the mounting loops for the front cover to the proper spot. I again can’t for the life of me find photos of the original bit it has not changed too much. One thing to note I might need to 3d print the landing gear for the front even though I do not want to. It honestly is kind of weak after the mod and I am not sure it could handle this heafty model.
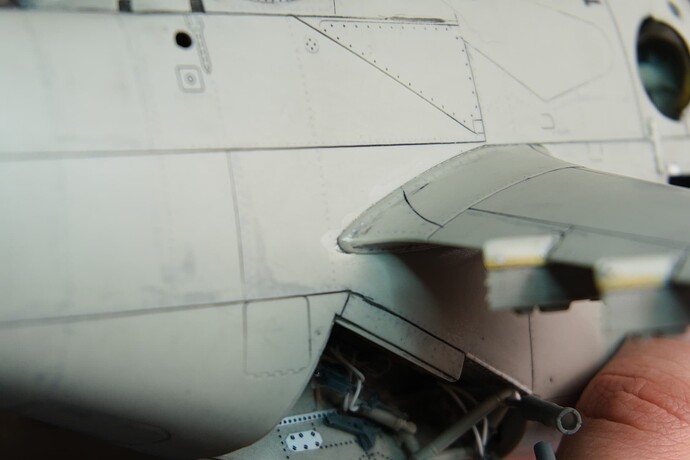
Lastly, I added the stub wings with weapon mounts from reskit. I will need to modify the root of the wing as it doesn’t fit quite right and the shape is a bit off as well.
Thanks for watching. I will try my best to get photos as I go along to show the progress a bit better but I have been forgetting since I started filing my builds. Any C&C is welcome!
Favorite helicopter of all time! This is making me want to dig my 1/48 kit out. I have way to many projects…
This looks absolutely fabulous! Keep up the great work!
Thanks! The more I work on it and the more the classic hind shape appears the more I appreciate it beauty of this beast.
Great work with the detail and rivets in the wheel well, panel doors, and LG. As for designing the 3D gear, I would not bother unless you can make one from metal or brass like Ernie Gee’s stuff at G-factor.
This monster with all that extra resin will brake that gear quick. Or, if you can design such a part to fit round a metal rod as Paul Fisher use to do. Actually, he use to insert a metal rod into the resin before it set. So, a bit different method.
Other then that, love what you are doing and I would be interested in your 3D stuff if you ever decide to help your modeling brothers out ![]()
This thing’s weight is exactly why I have not recreated it in 3D or glued it in place. The only thing is that it doesn’t carry that much weight as the rear landing gear takes the majority of it. The whole model as in real life sits on an angle that puts the majority of the weight on the rear and creates a sort of pivot point. The front just keeps the cockpit weight realistically. But I still don’t quite trust it.
I will post the designs once I am done with this thing!

