Hey, hey. I want to build more military trucks but am not very familiar with them, nor the pros and cons of available models. I am seeking recommendations for models to purchase.
My model skills are mediocre and aspirations moderate. A perfect model has the following characteristics:
- Edit: 1/35 scale
- Well engineered; everything fits; not a lot of knock out pin holes or sink marks; 8 hands not required
- Plastic; not printed or resin
- Plastic tires; no need for replacements
- Reasonable accuracy; no major dimension errors; problems are fairly easy to fix
- Any nation
- Any era
- Fairly easy to paint; one color or hard edge patterns are preferred
- Old models that fit the requirements are fine
My first truck (second completed) was an ICM Studebaker US6 U4. It pretty much met all the requirements.
My second truck (first completed) was a MiniArt GAZ-AAA. It met all the requirements accept (1). I would like to find something somewhat less complicated.
To summarize, I want to find some ‘weekend build’ type truck models. What would you recommend?
2 Likes
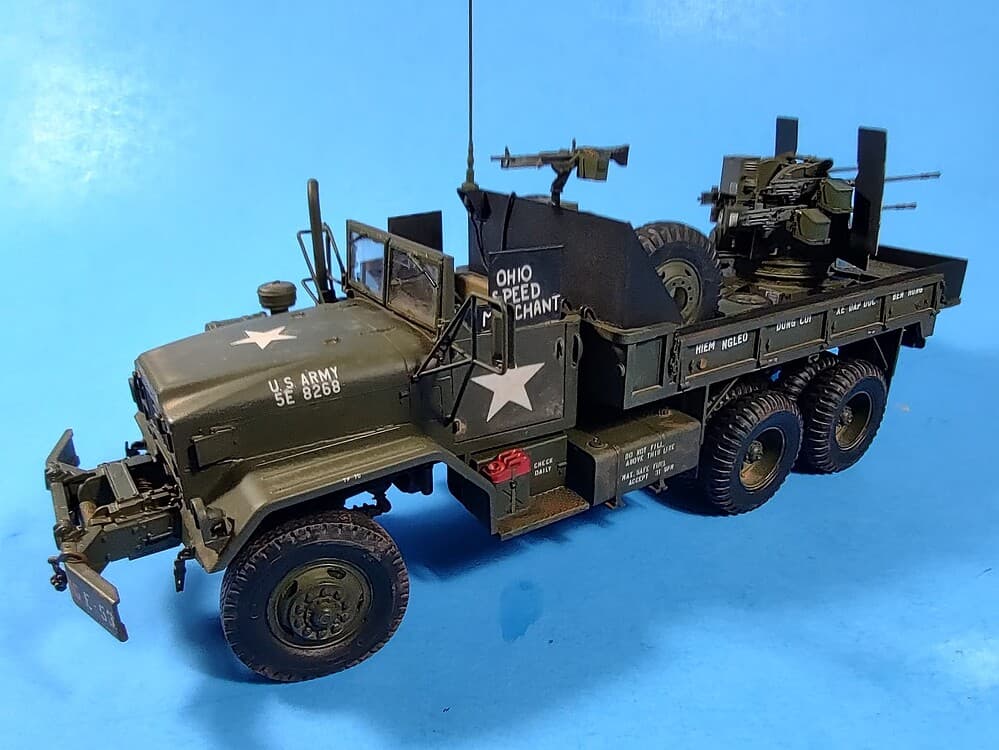
In my opinion, the best truck model on the market today is the AFV Club M54A2. It hits on all your above requirements. It is also super-detailed and falls together easily.
Slightly modified bed, added armor plates, and swapped out the wheels, the rest is from the kit. It also comes with a soft or hard top for the cab and a soft top for the bed.
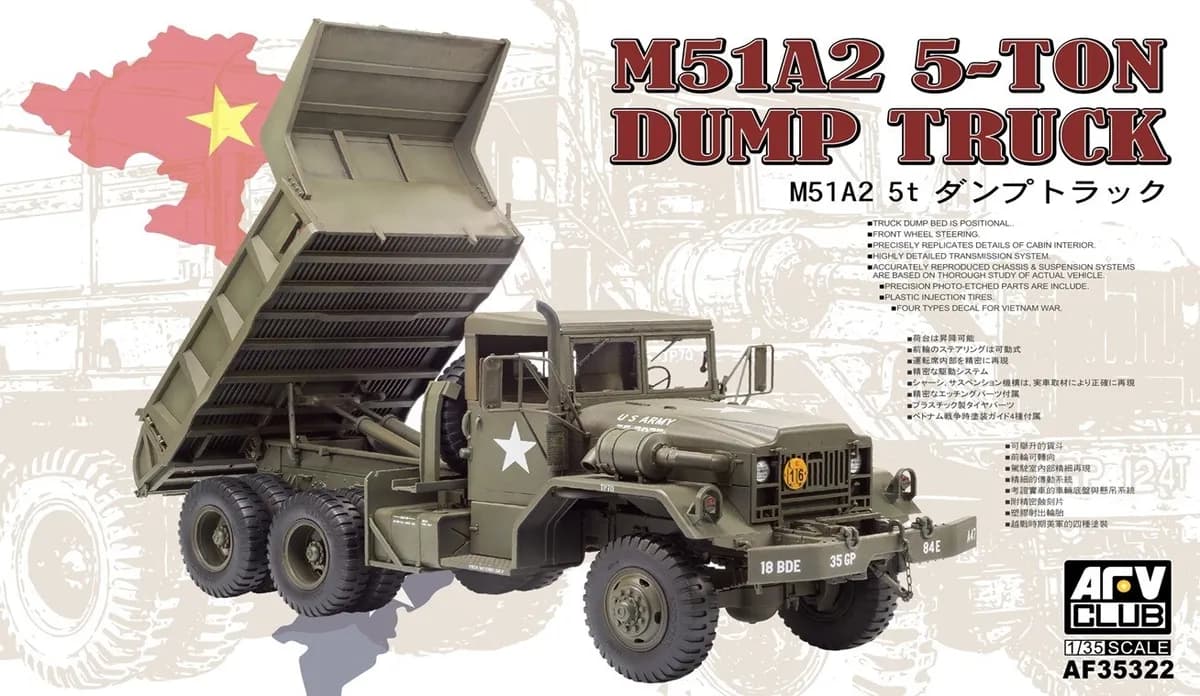
Or its brother, their M51A2 Dump Truck.
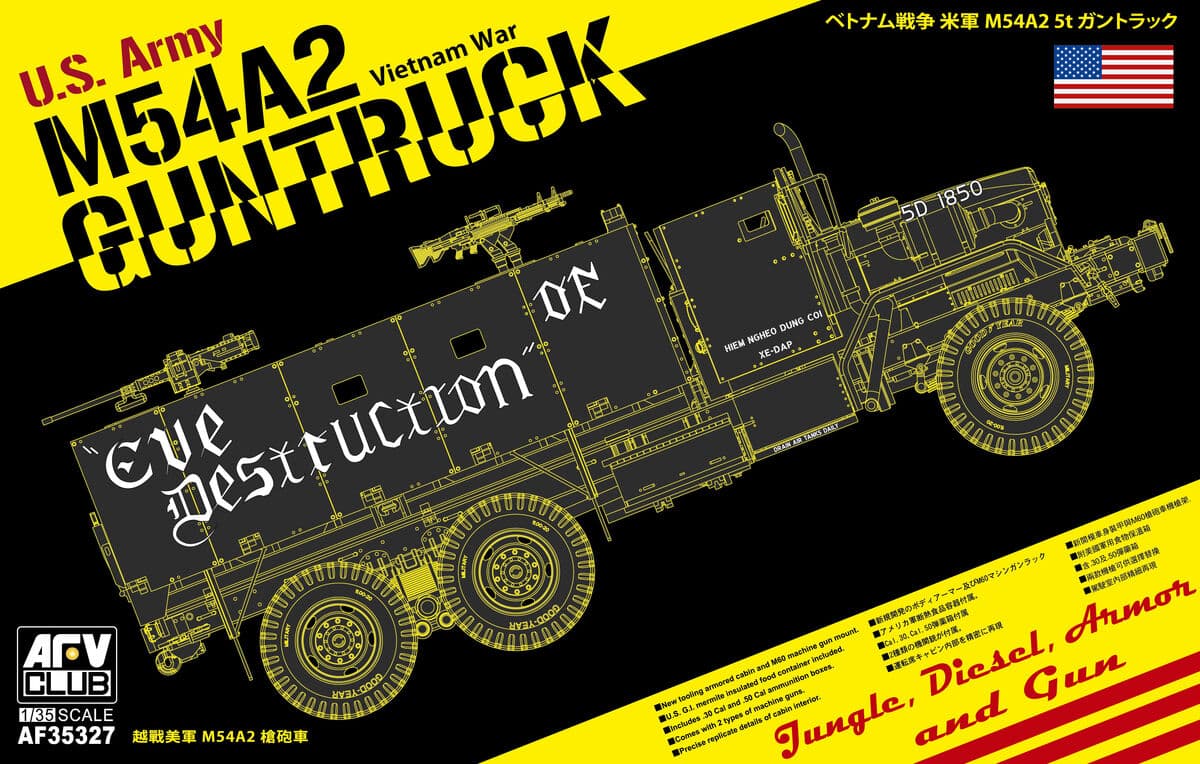
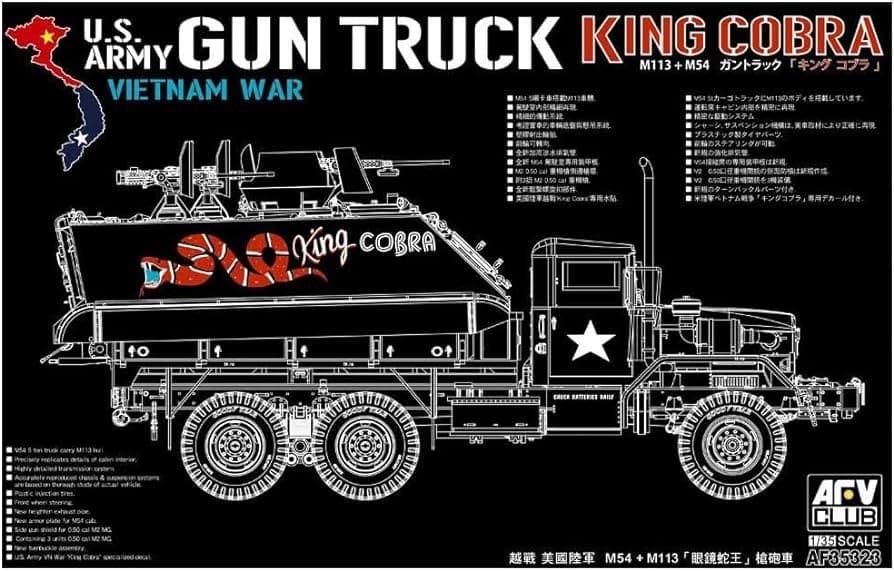
They also offer two guntrucks if you want something a little more exotic.
6 Likes
I’ll throw these into the ring…
1/35 scale:
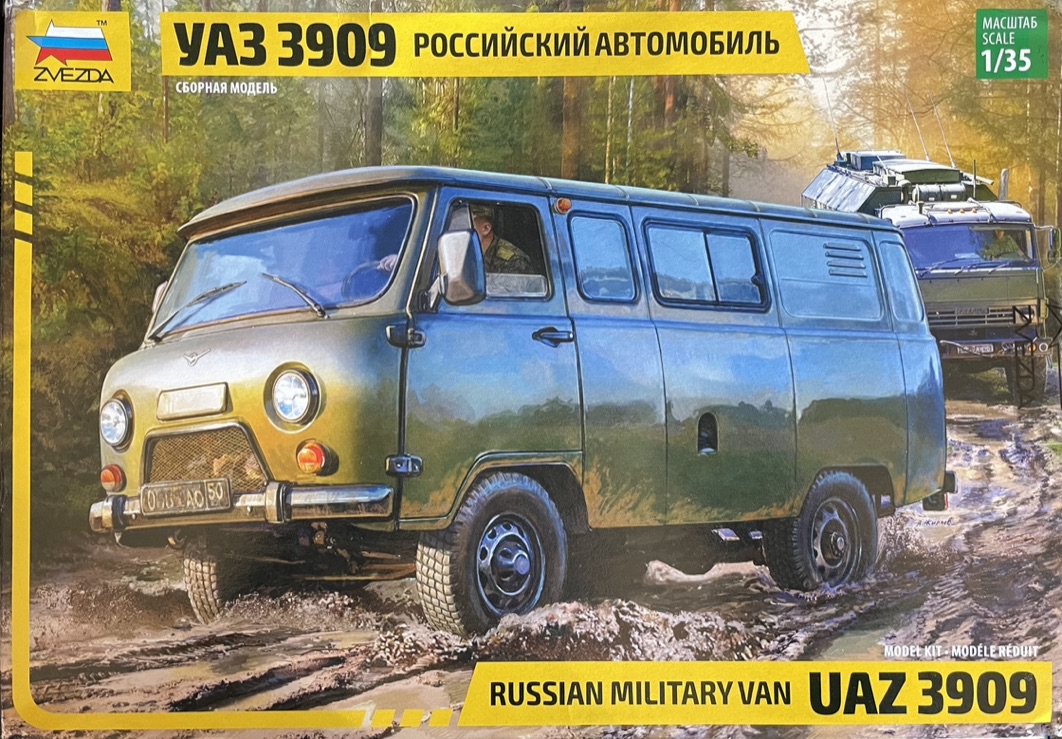
Zvezda (3644) Russian UAZ 3909 Military Van
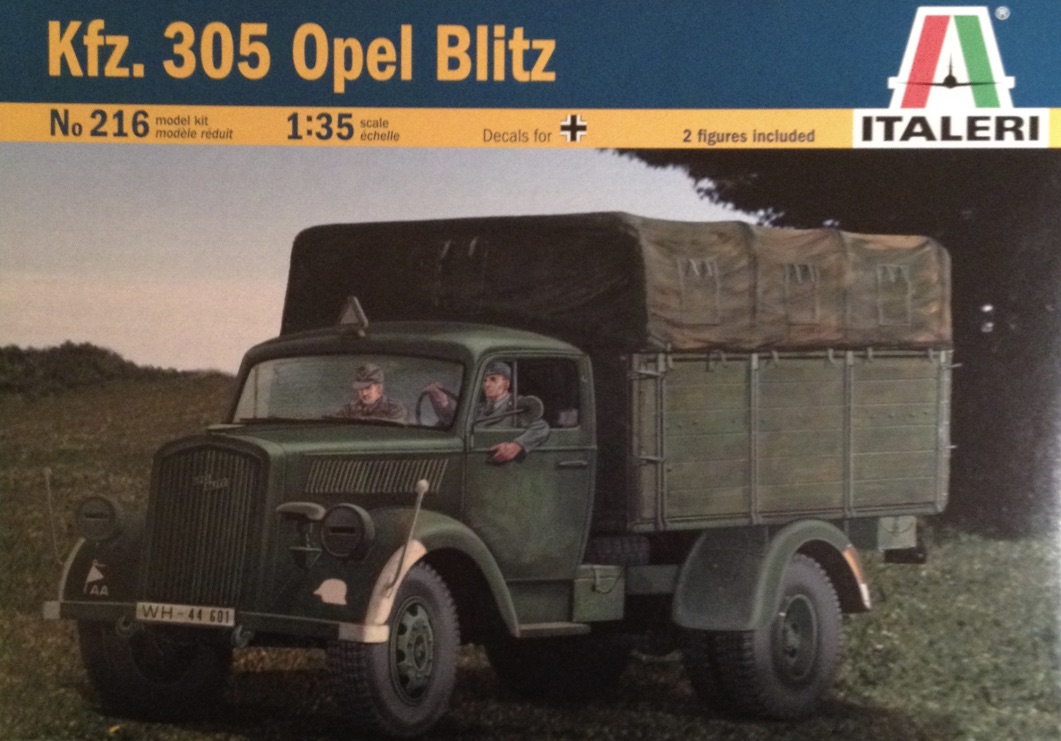
Italeri (216) Kfz.305 Opel Blitz, 3Ton 4x2 Cargo Truck
[EDIT]
Deleted 1/72 scale suggestions.
—mike 
4 Likes
If you want “easy assembly” etc, the gold standard is the Tamiya GMC cargo truck - kit 35218. It’s a true weekend build! And of course it’s all olive drab. Wheels are plastic too, so no AM needed.
7 Likes
For something different, ICM makes excellent WW1 US Liberty trucks. Very nicely detailed, easy construction. Just make sure the frame is straight.
4 Likes
EXACTLY what I was going to say! The Tamiya Jimmy is the one for you! I am a big military truck builder and I have to disagree with ALL those other recommendations above save for barkingdigger’s!
Tamiya has always had the reputation of being well engineered and for ease of assembly. Then of course it is US Army so pick your favorite shade of rattle can Olive Drab and go to town.
The Tamiya tires are plastic and very well detailed so the only painting hassle in the entire kit is putting the tire black on over the OD on those eleven tires.
Happy weekend modeling!
4 Likes
Definitely can not go wrong with Tamiya.
3 Likes
My favorite truck is the AFV Club M49A2C Deuce and a Half fueler. That’s just my opinion though there are some good ones already mentioned too!
5 Likes
@HeavyArty Thank you for suggesting these! I did not know AFV Club made anything with plastic tires. Based on some quick reading, a basic M54 will make an excellent companion for the M47, M48, M103, and T30 tanks I recently acquired. All those other version also have a lot of appeal, especially once I reach the Vietnam War.
@justsendit Thank you for your suggestions! The Russian Military van is a surprise and not familiar to me. The Vomag 8LR Lkw almost made it into my shopping cart a few weeks back. It looks a lot like a Faun. Your last suggestion also seems familiar. It almost looks modern.
@barkingdigger Thank you! That is one of two models I suspected would get recommended.
@metalhead85 That is a very interesting suggestion. Thank you! One of those would go well with the Mark I tank sitting in my closet. Having just looked at the parts, I seems relatively easy.
@165thspc Ha! Two for the Tamiya CCKW. Thank you!
@GulfWarrior That is another one that would go well with all the American tanks I recently purchased. I will do some research on replacement tires. Thank you for the suggestion!
…
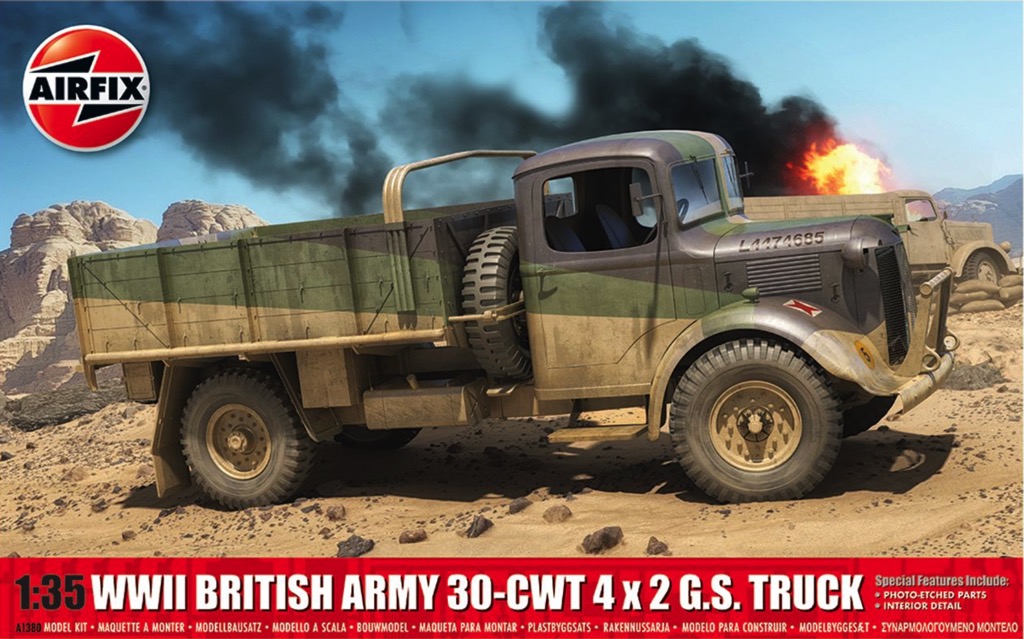
Has anyone built this one?
I like the paint scheme, it is new, and the part count looks on the low side.
2 Likes
If you can’t find reviews online for the K30 try finding reviews for the K2/Y also made by Airfix.
I think these two kits share many common parts.
https://www.scalemates.com/kits/airfix-a1375-austin-k2-y-ambulance--1325020
You can check and compare what is inside the boxes here:
Airfix 30-cwt K30 truck
Airfix K2/Y Ambulance
3 Likes
Yeah. Scalemates has the WWII British Army 30-Cwt 4x2 GS Truck listed with 5 reviews but they are all of the in box or box opening type.
With regards the ambulance, the Airfix model is significantly more simplified than the Gecko model. When I learned this a few months back, I decided to purchase the Gecko model. A little while after that, I built a MiniArt GAZ-AAA and began to rethink my priorities. At this point in time, maybe easier would be better. That put me on the road that led to this discussion.
I know the Airfix truck has some knock out pin marks inside the cab. One reviewer described them as difficult to reach. That worries me because knock out pin marks are kinda my model building bane.
Edit: There are some nasty knock out pin marks inside the cab of the Airfix truck. I took some screen shots of an unboxing video and zoomed in.
1 Like
I recently built the Gecko one- its a good kit with great detail but not what I would call ‘easy assembly’. I encountered fit problems here and there and its also filled with miniscule parts (separate upper and lower door hinges etc) and is quite a fragile thing. Though I have to say it coped with all the masking needed for the Caunter scheme- the same pattern as on the Airfix version- and it is superbly well detailed and highly accurate.
3 Likes
Knock out pin marks come in three different flavours:
- A round hole/depression
- A round peg rising above the surrounding surface
- A combination of 1 and 2, a raised semicircle and a semicircular depression
Methods:
- Invest in a punch-and-die set, punch out little circles of sheet styrene, glue in hole and sand/file smooth
- Cut off and file/sand smooth
- Cut off the raised part, file/sand, cut a punched out circle in two parts, glue in hole and file/sand smooth
An alternative to the punch-and-die set (can be expensive but the investment pays off) is to find some sprue of a suitable diameter, cut off thin discs and use these to fill the holes.
4 Likes
Yeah. I still suck at it. It is rarely as easy as you describe.
1 Like
Thank you! There are many positive reviews of the Gecko ambulance and the issue with Princess Elizabeth is still available. That is probably the wise choice.
2 Likes
Got to say, Gecko isn’t for the faint-hearted! Then again, MiniArt can be a challenge too, as they don’t seem to believe in substantial pin/hole alignment pegs for their tiny parts…
As for ejector-pin marks, I usually add a disk of suitably thick Evergreen sheet plastic (I have one of those leather-worker punches with a wheel of different sized cutters made for adding holes to leather belts - you can get them cheap) into the hole to fill it as much as possible, then put putty on top to fill it up before sanding back. It can be a challenge inside the roof of a model cab…
3 Likes
It takes practice, repeat until good at it.
Sanding: Cut of sprues at an angle and glue fine sandpaper to the cut off end.
Cheap and disposable sanding sticks for getting into those awkward corners.
Riffler files:
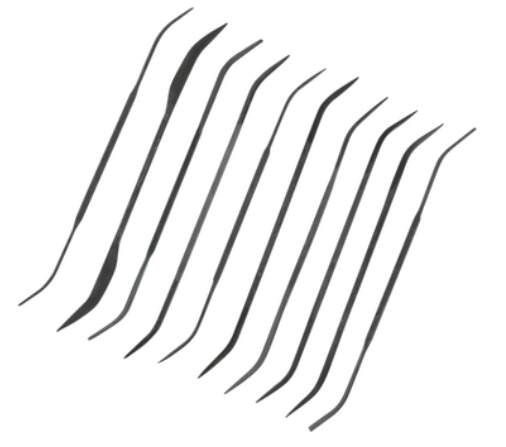
very useful.
3 Likes
I always thought the Riffler would make a great Batman villain!
3 Likes
Yeah, he is “bent” twice
The Riffler
3 Likes
As a basic skills modeler, you might find this information useful:
Basic Modeling: Mold Seam Profiles (and Ejector Pin Marks)
Dealing with the manufacturing flaws on the kit’s parts is the foundation to good model making. All kit parts will have some flaws (although these flaws might be hard to see). Generally, the kit designer and manufacturer assume that the modeler will correct these flaws, so assembly instructions are based on this assumption. That is, the parts may not even fit together (properly or otherwise) unless and until the manufacturing flaws have been addressed.
IF you have corrected all of the manufacturing flaws, you can usually safely assume that any further problem with fit is then the fault of improperly designed parts alignment keys and locator aides (holes, pins, tabs, slots, etc.).
So, the general sequence of good assembly is to address the manufacturing flaws, test fit, and then, if needed, address alignment keys and locator aides. Test fit again (and continue to adjust the fit, if needed) and then glue together.
3 Likes