Think you mean Dunkelgrau. Dunkelgelb is dark yellow.
Questions for anyone doing one of the T-54 variants. I have come to the step of doing the suspension parts (I built up the hull tub and engine first). I am building up one of the rear most swing arm assemblies and had a couple questions about what actually gets glued and what doesn’t to keep them workable.
- Does the torsion bar get glued into the swing arm? ( I think it does or the swing arm can fall out)
- Does the torsion bar get glued into the far side of the hull or is it held in place by friction? (I’m thinking it doesn’t or it wouldn’t rotate)
- Does the swing arm hinge get glued onto the peg? (I think it does but very carefully so it doesn’t get stuck in place)
I have included some pictures as well as the instructions to aid in what I am asking.
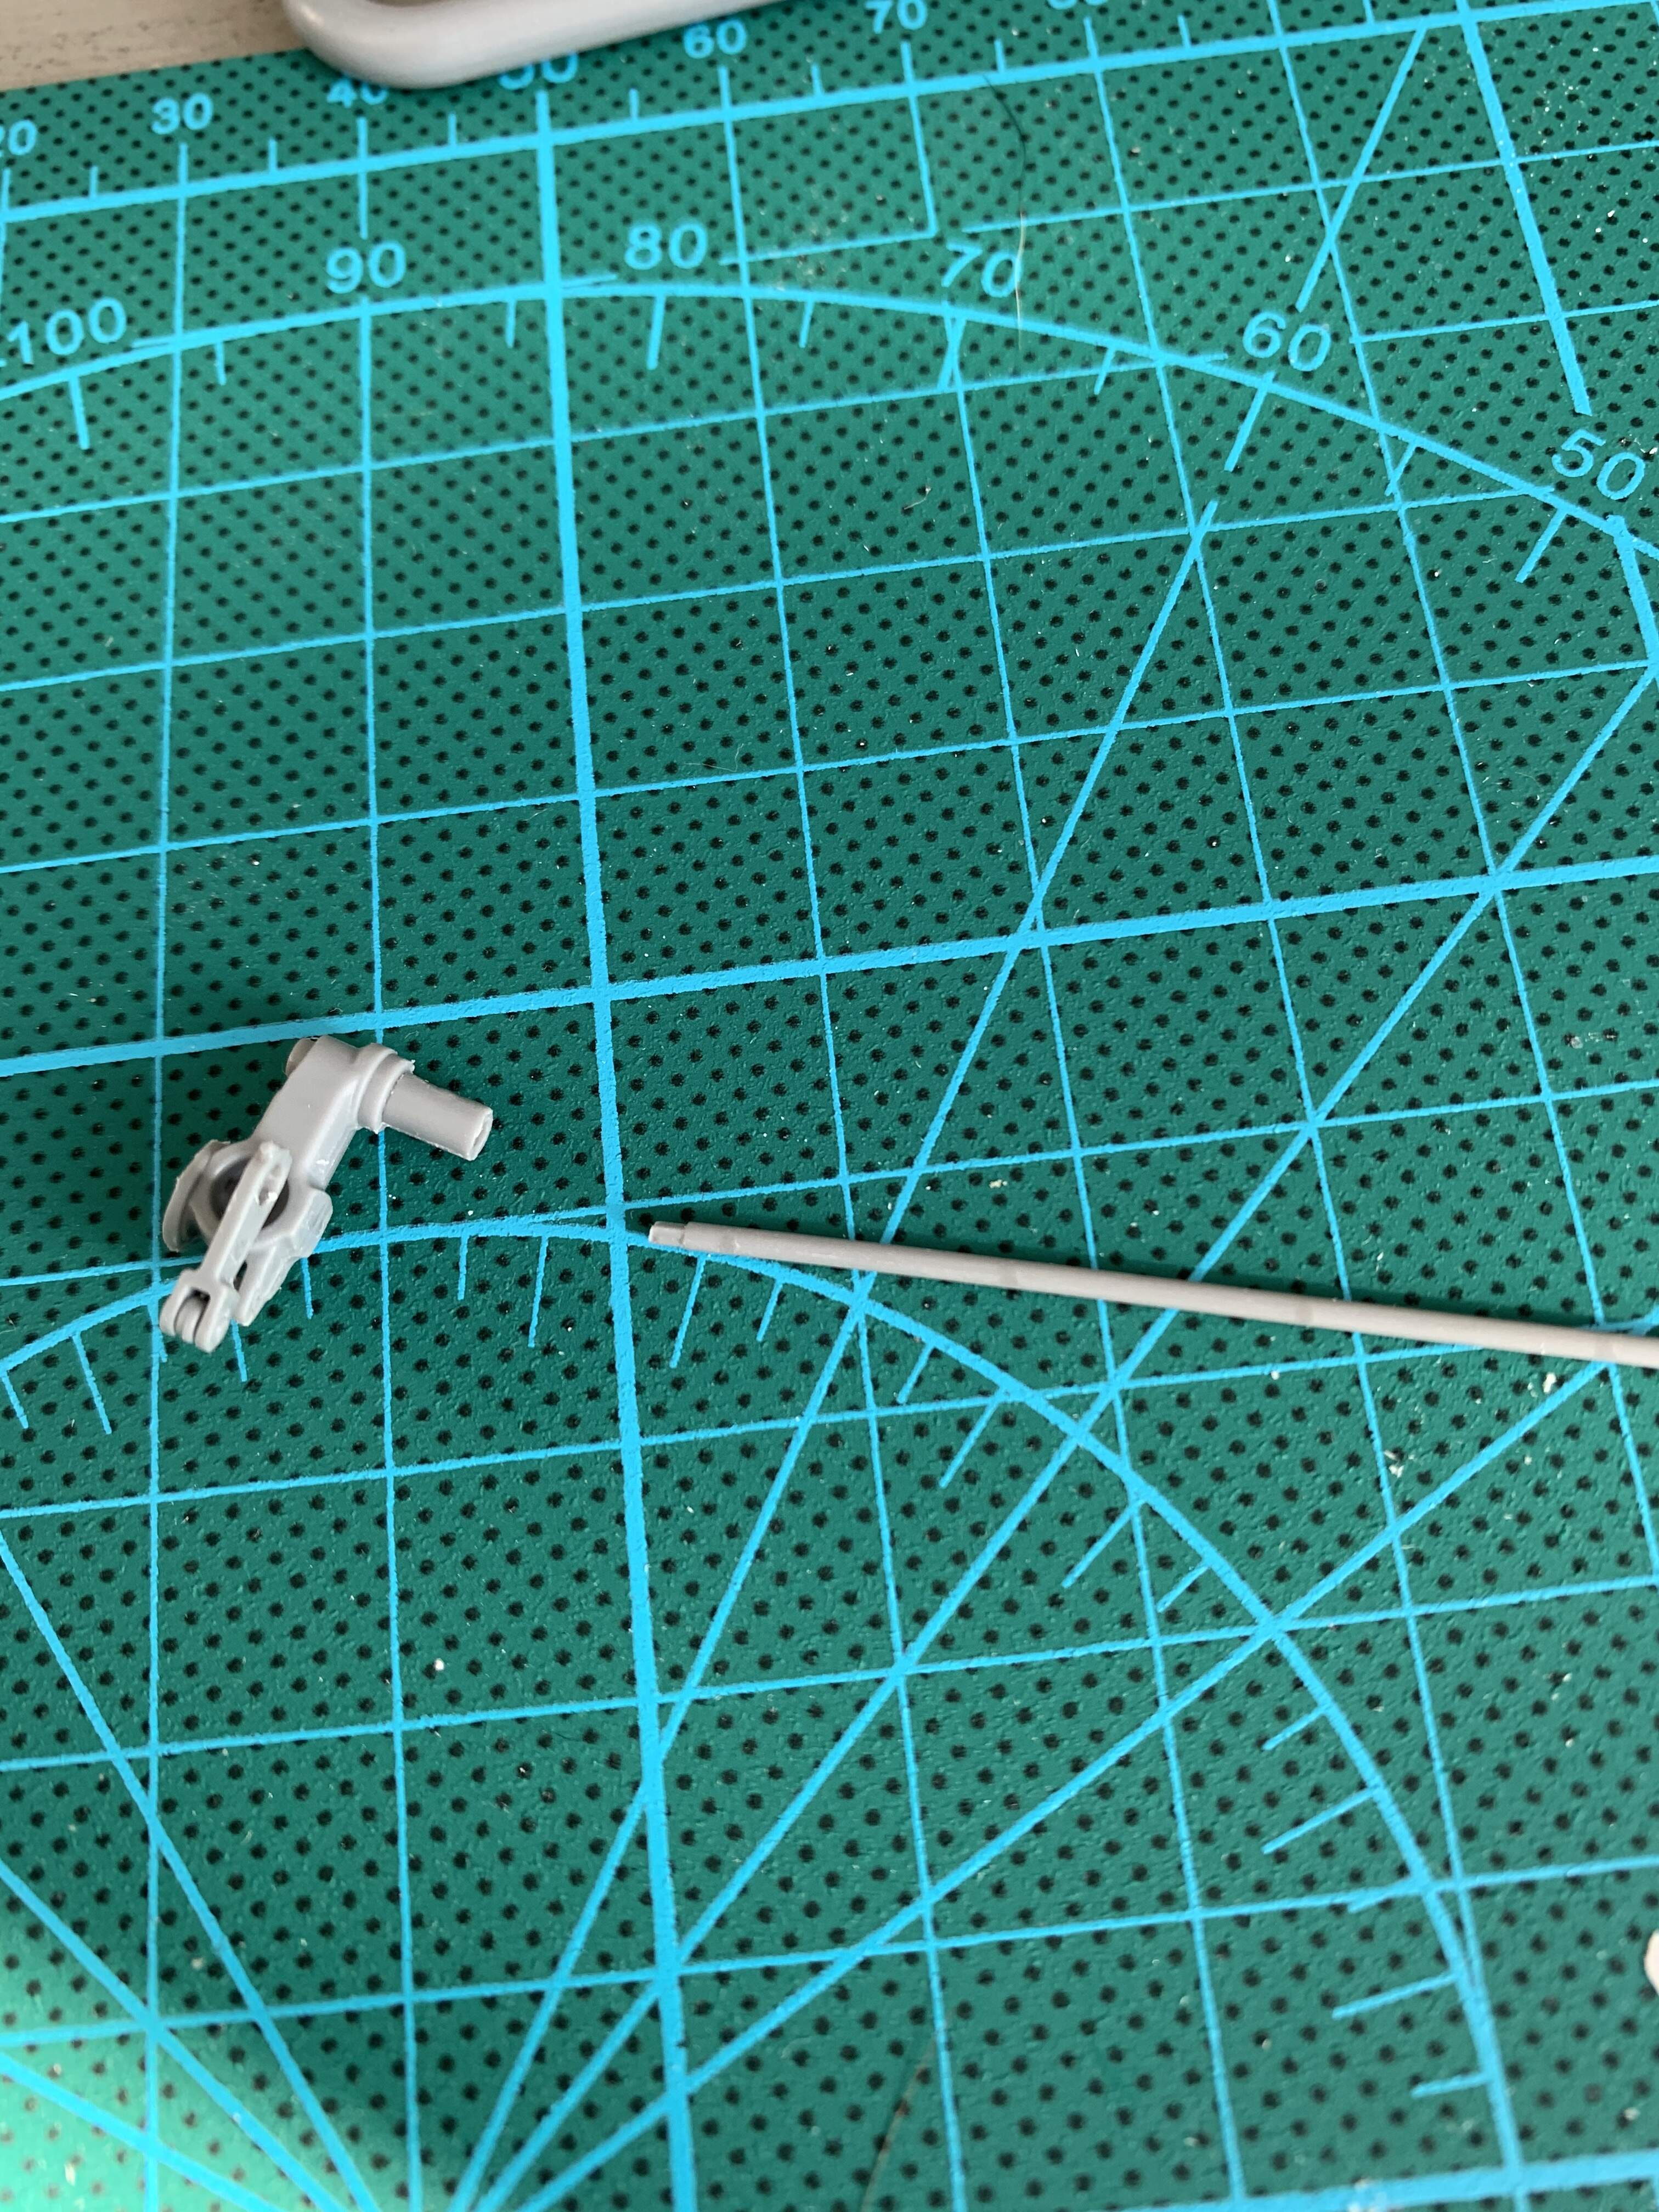


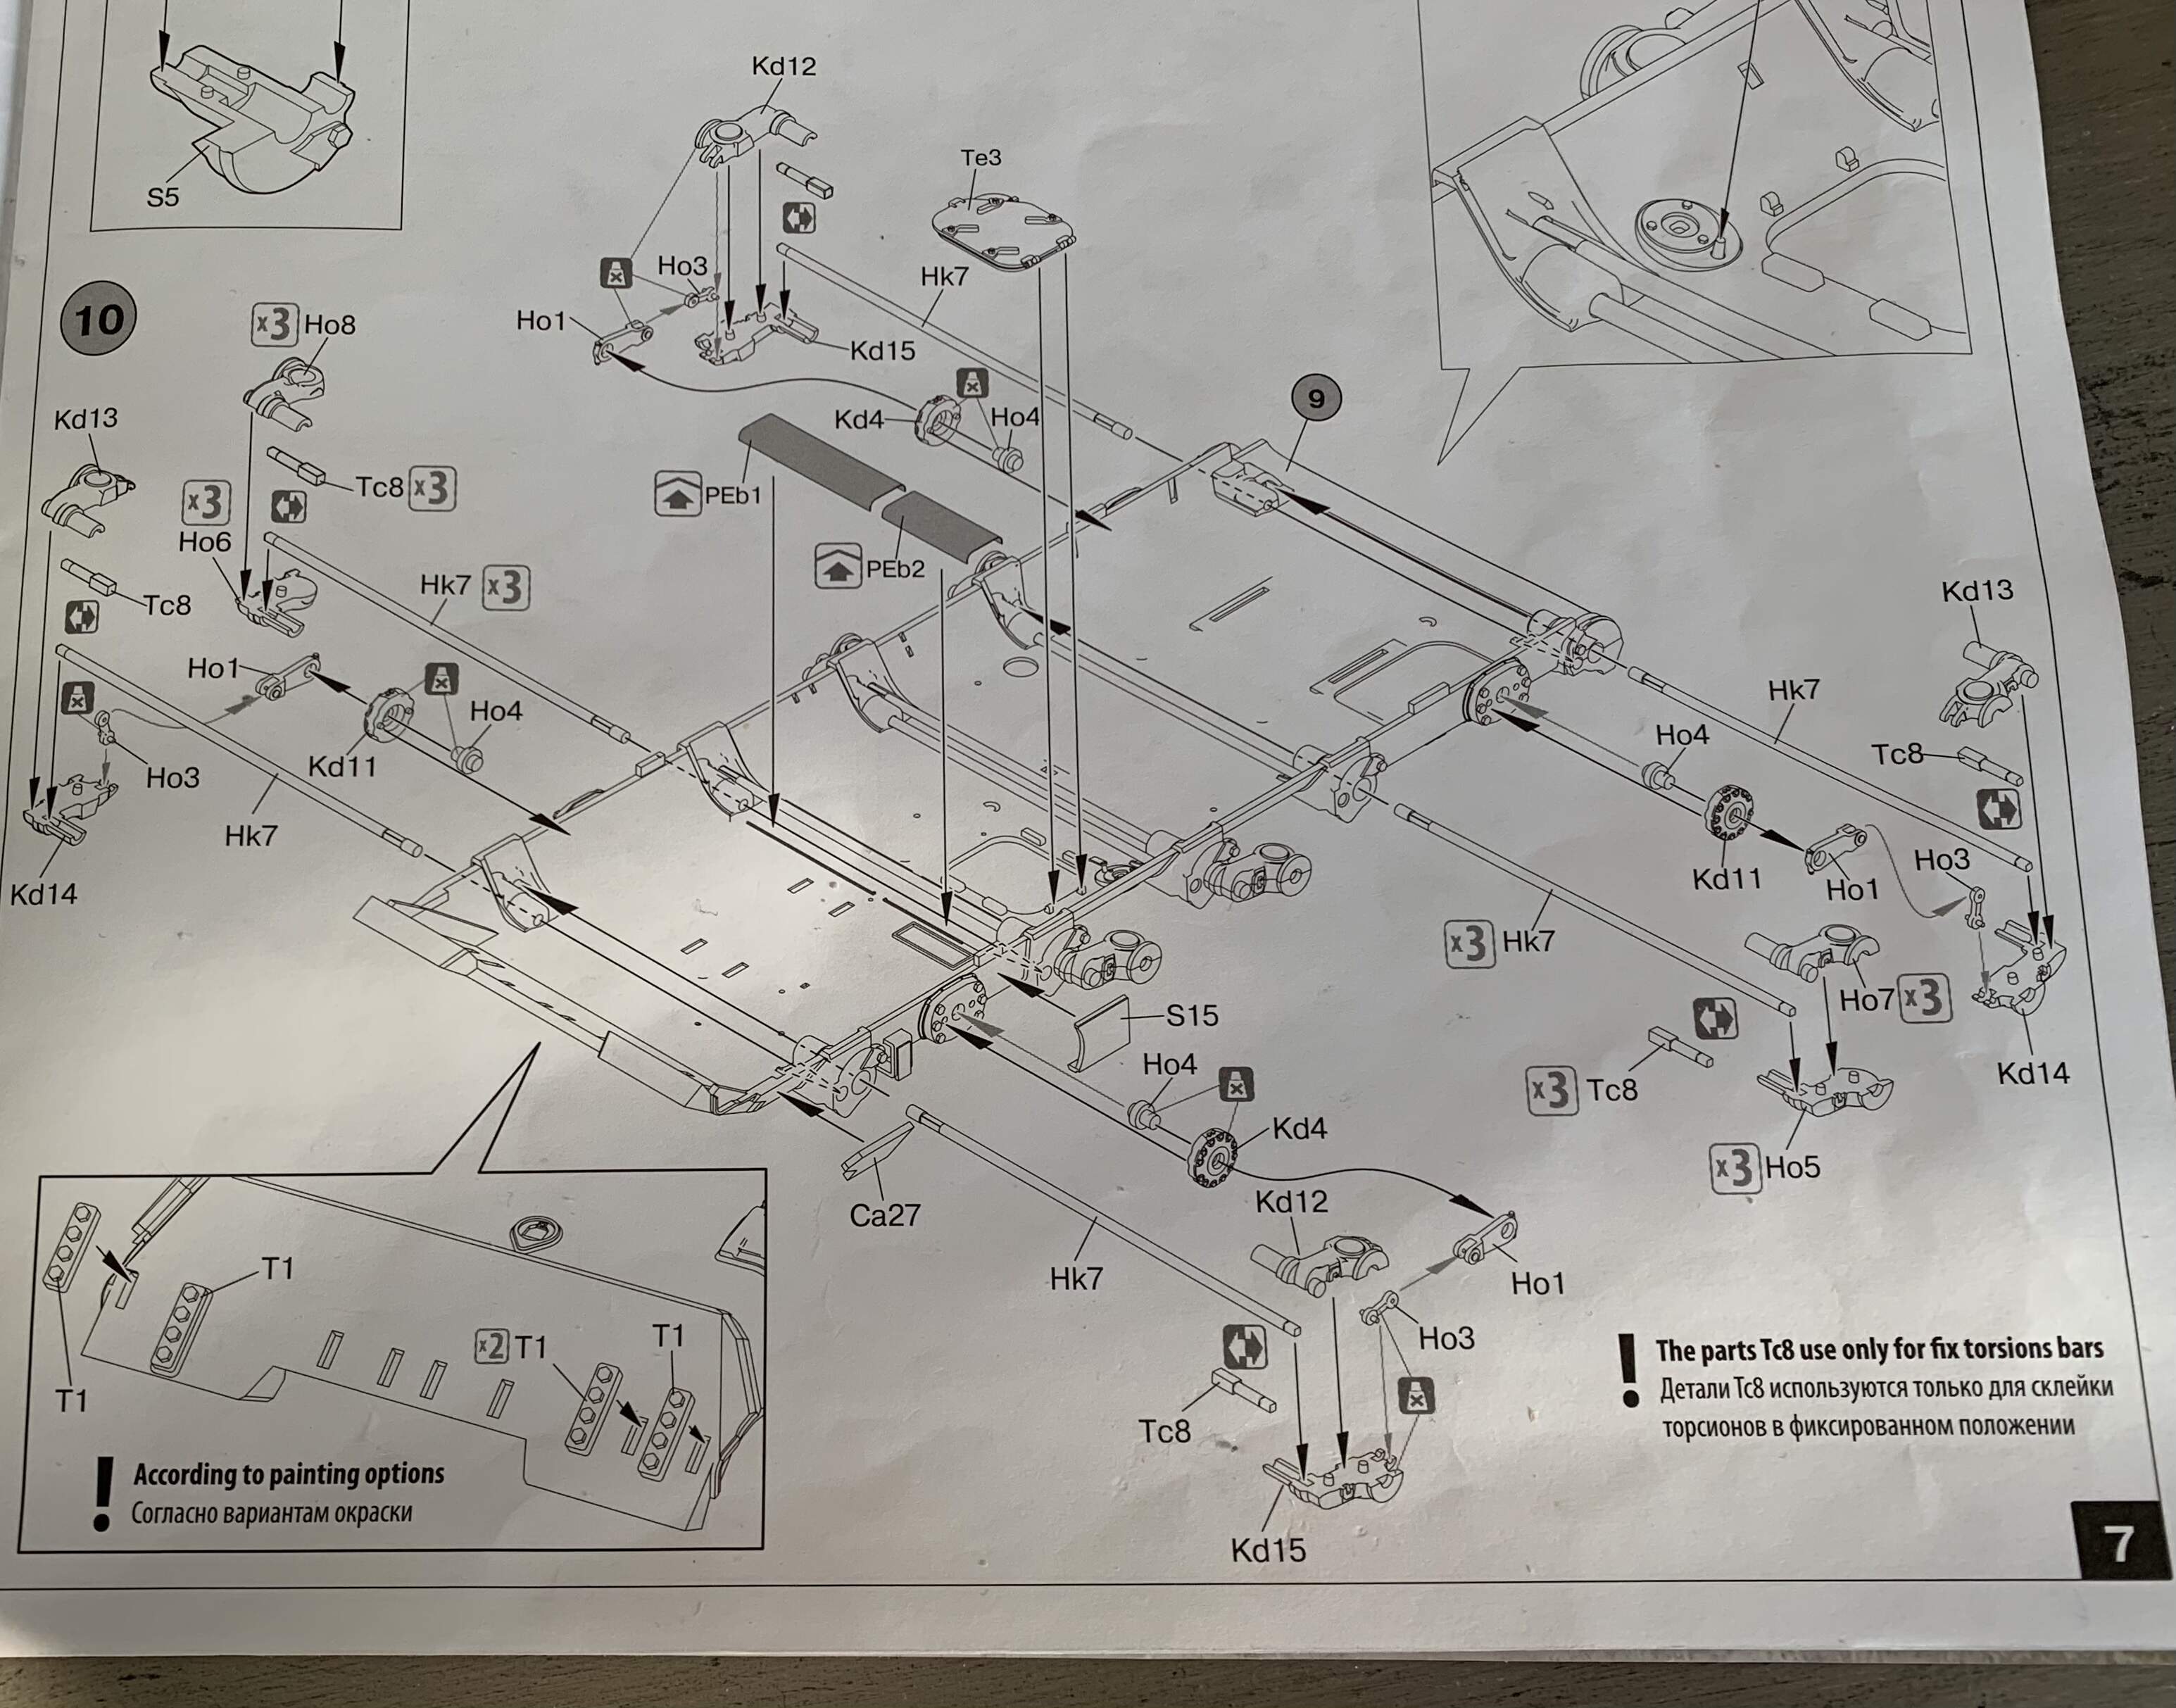
EDIT: answered my own question, the torsion bars get glued into the swing arms but that’s it. The next step a cap goes over the swing arms that keeps them retained
you are right of course…
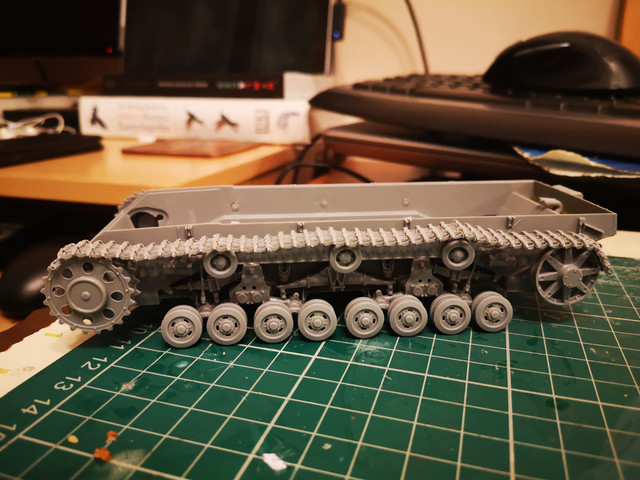
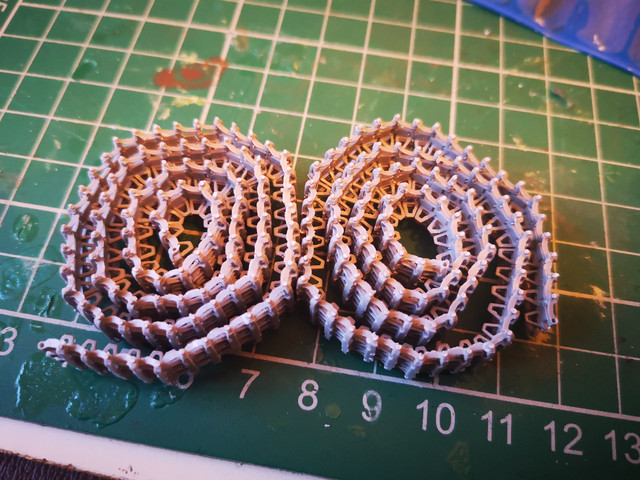
so a couple of hours tonight… just under half a track run done (and the wheels added - not going to take them off now)… some clean up (5 points per track link) but they will look nice once all done. Plan is to do bits and pieces of them as there is no glue - ideal for lunchtime. No jig so finding it easier to do one link at a time - isn’t too slow and found a run of 4/5/6 too fiddly to get the pins in
3 Likes
Excellent model, and your assembly is very precise.
Omar
1 Like
@phil2015 Hey Phil, I was just wondering if this meets that requirement or not?
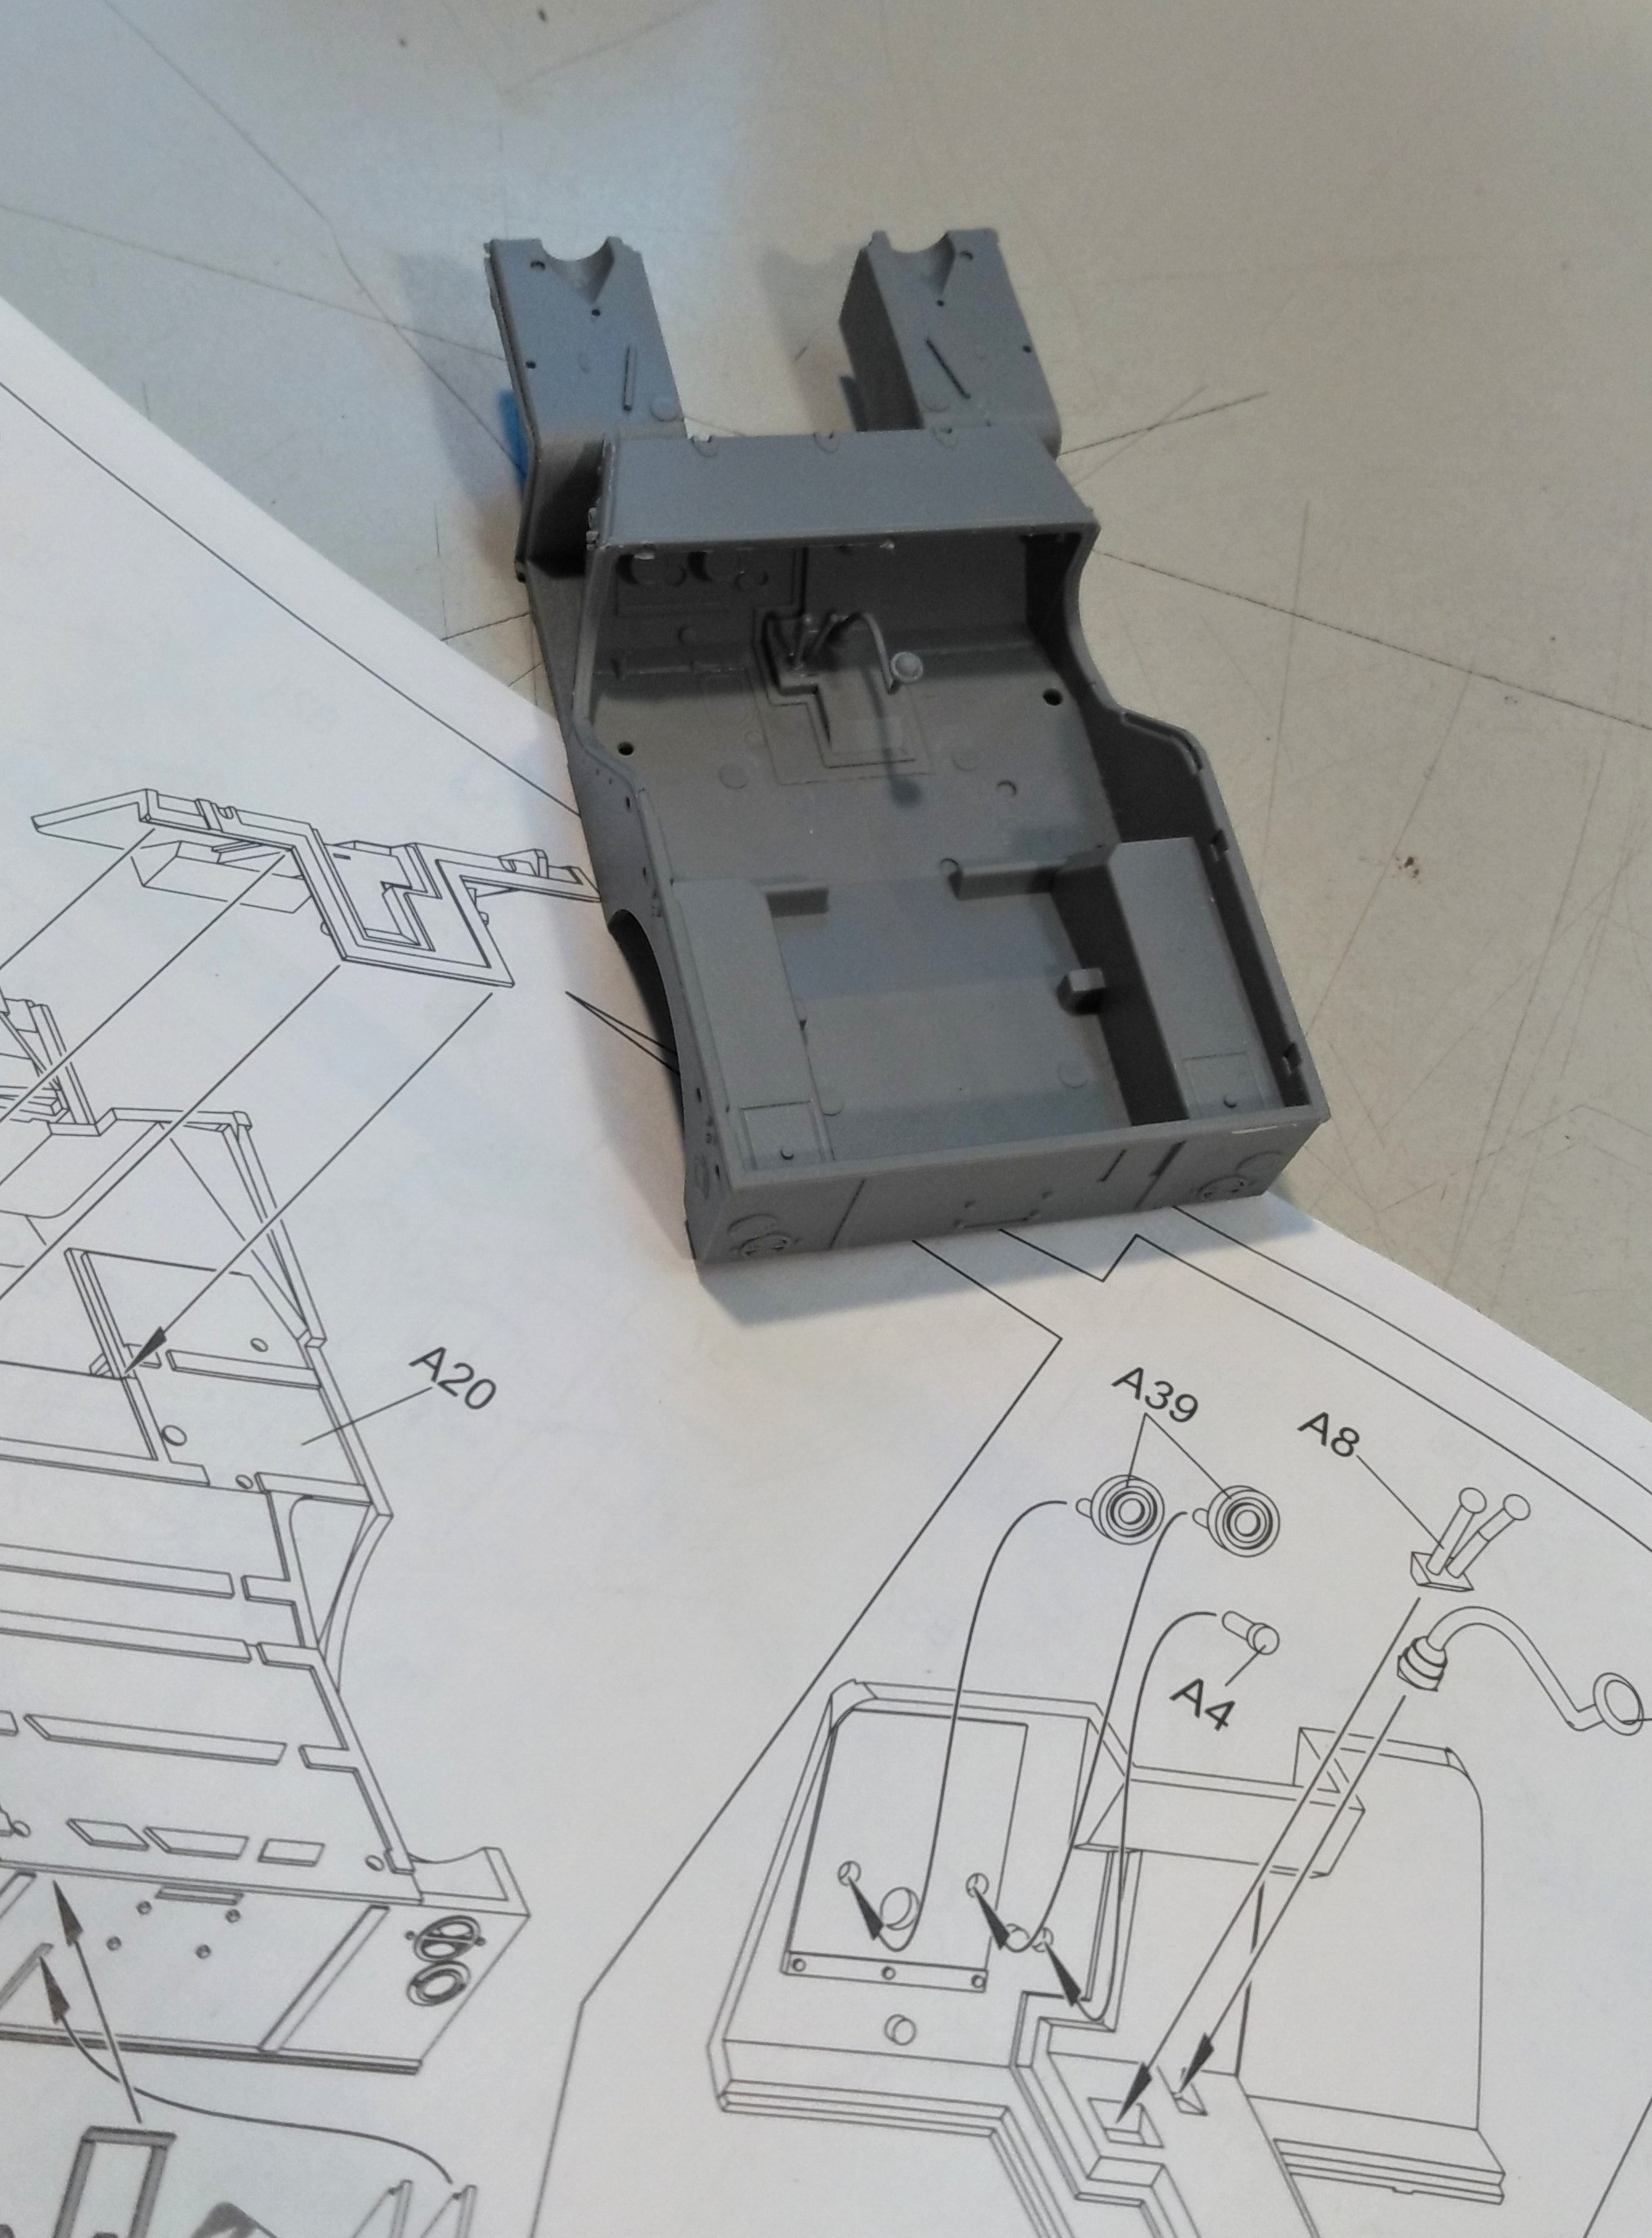
I’ve assembled the engine and glued it to the frame, so step 1 complete and step 2 just started.
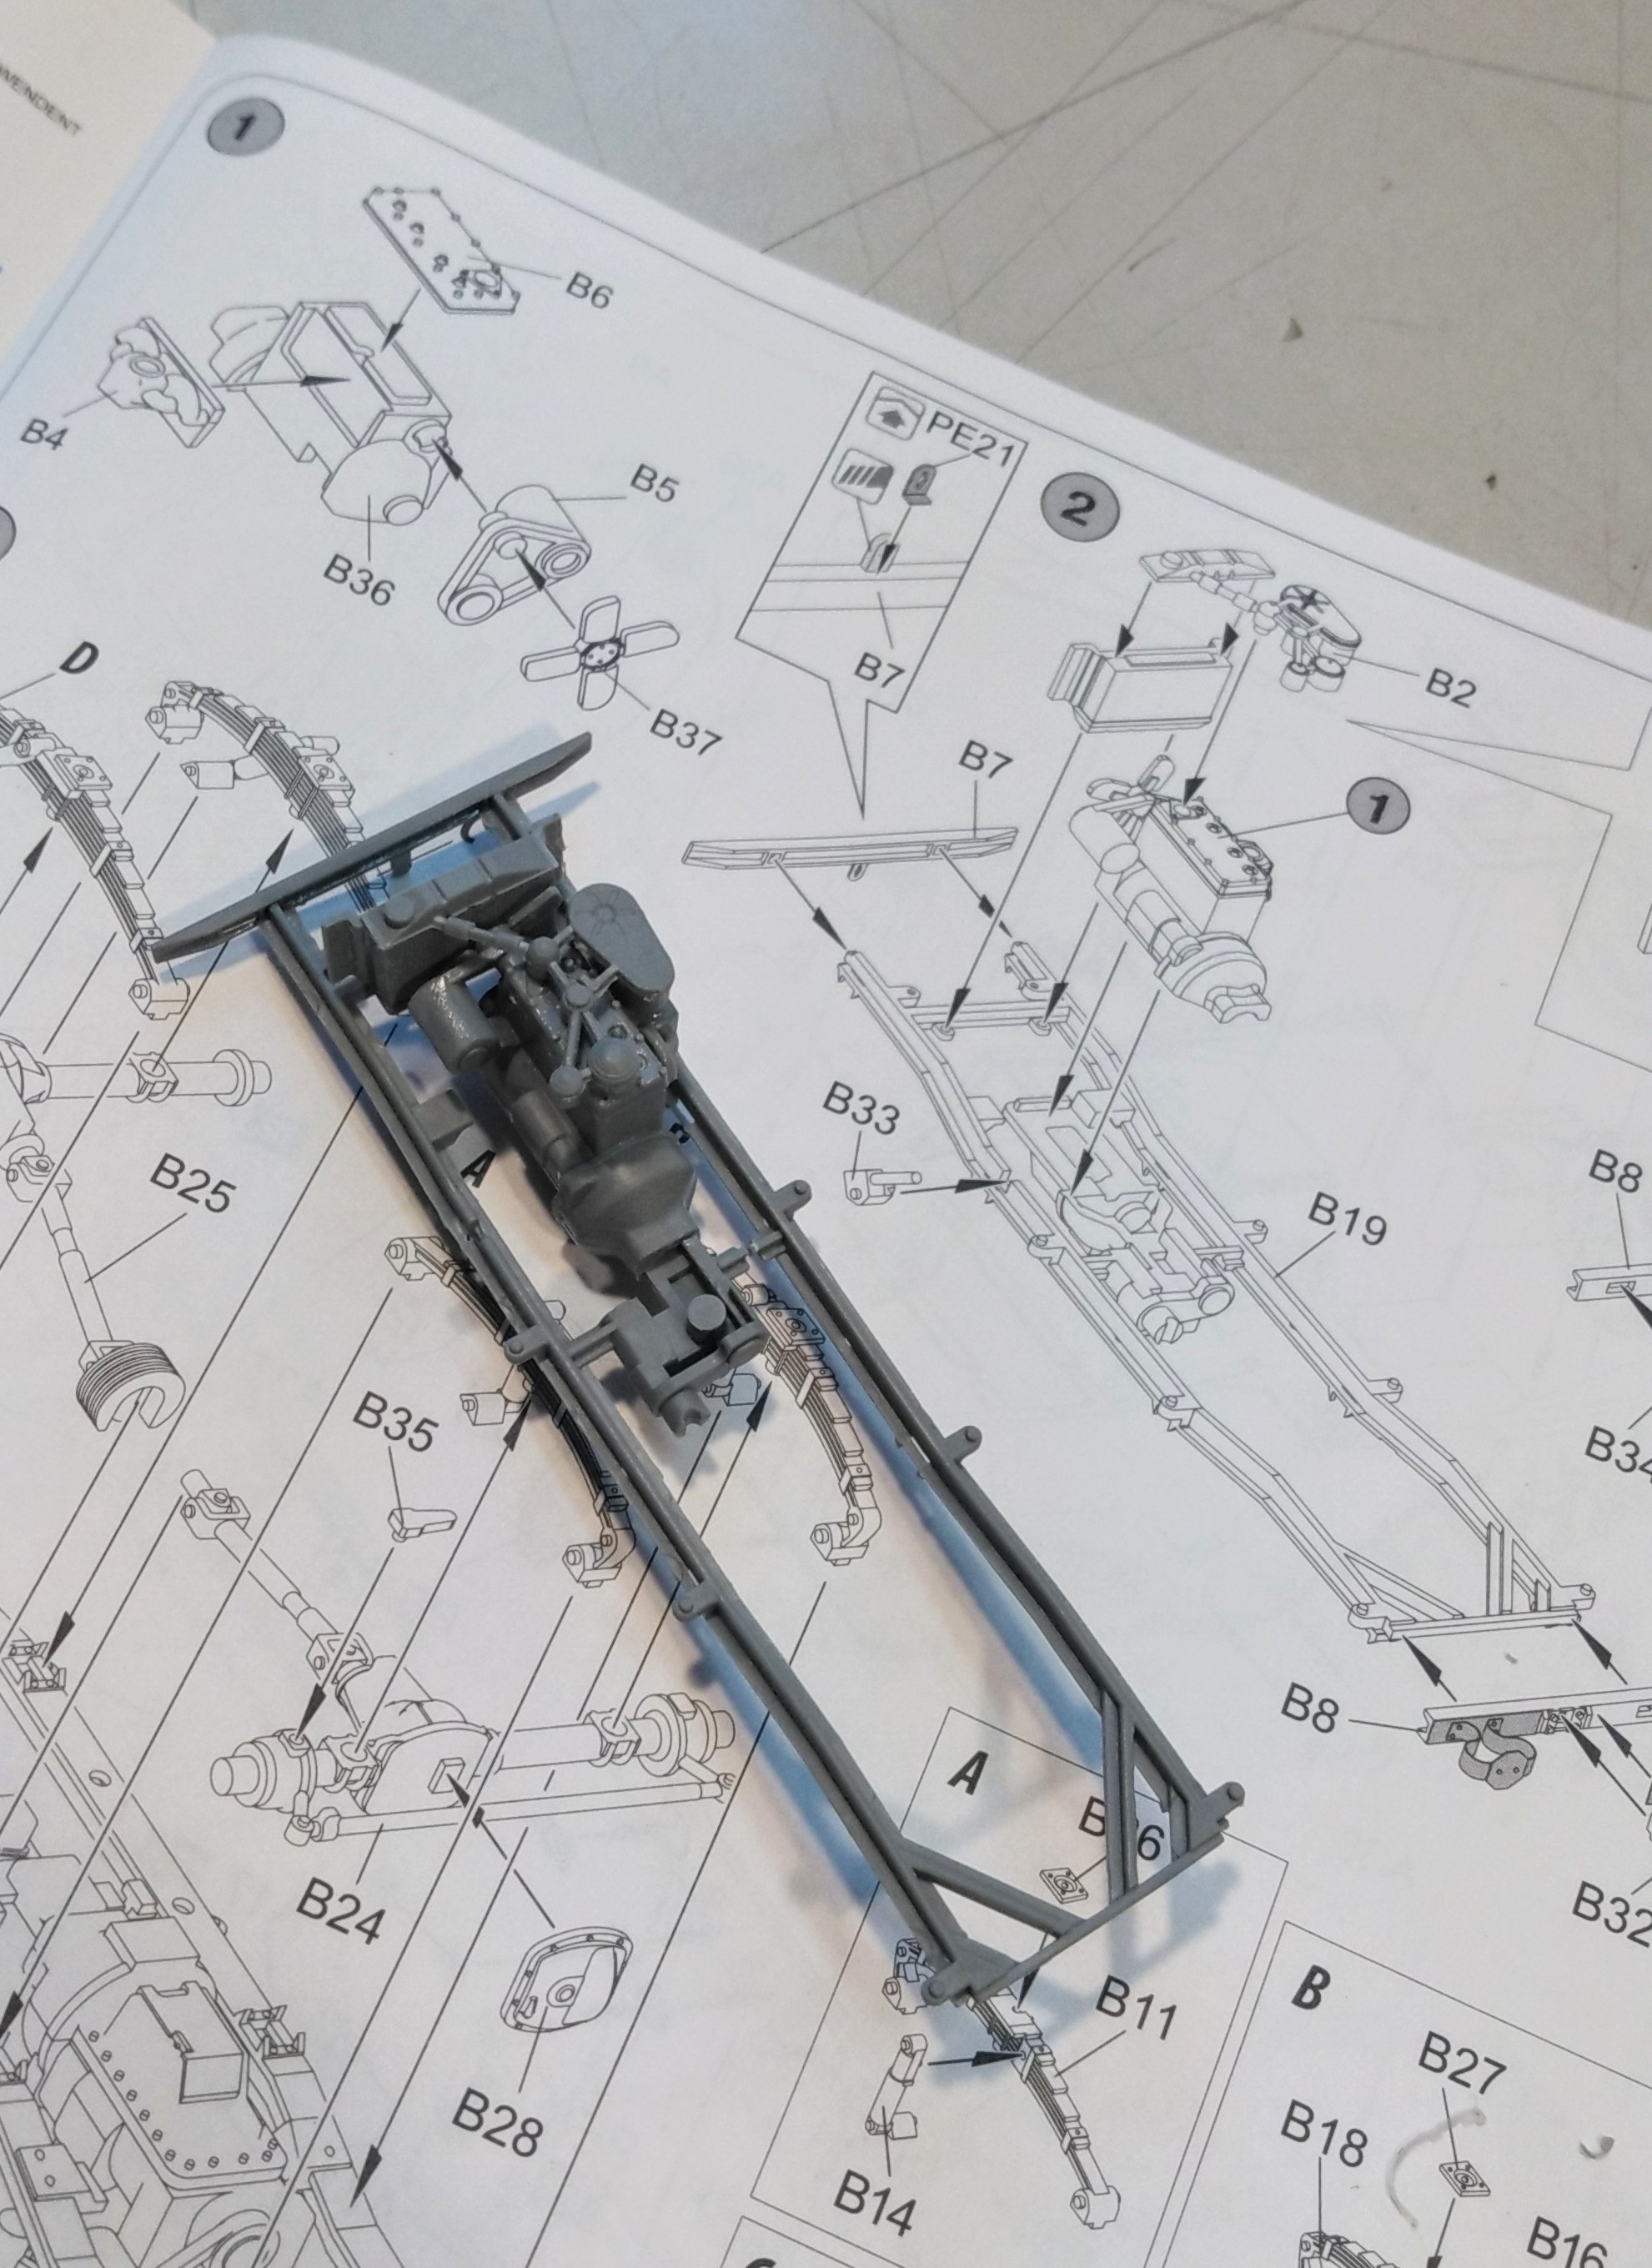
I’ve also glued in the firewall with a few shift levers on it.
I this is fine I’m in. If not, no worries.
Thanks
Sure. You’re not far along on it. I can’t wait to see it completed - I’ve been thinking about that kit myself.
There is some amazing work going on here, I’m really loving seeing how those interior kits are coming together, I took one look at the Grant in my stash and decided I’m not brave enough to tackle that just yet!
So, thanks to a 4 on 4 off shift pattern I have managed to make good progress on the Valentine! I spent some time with the putty and sanding sticks to sort out the poor alignment of the turret sides, which I think has payed off, then I moved on to do some painting, I wanted to get the camo pattern sorted out before I get stuck in to dealing with the tracks, which I plan on building up gradually over a few days because individual links can be a little on the tedious side! So here is where I am at now, any and all feedback is massively appreciated!
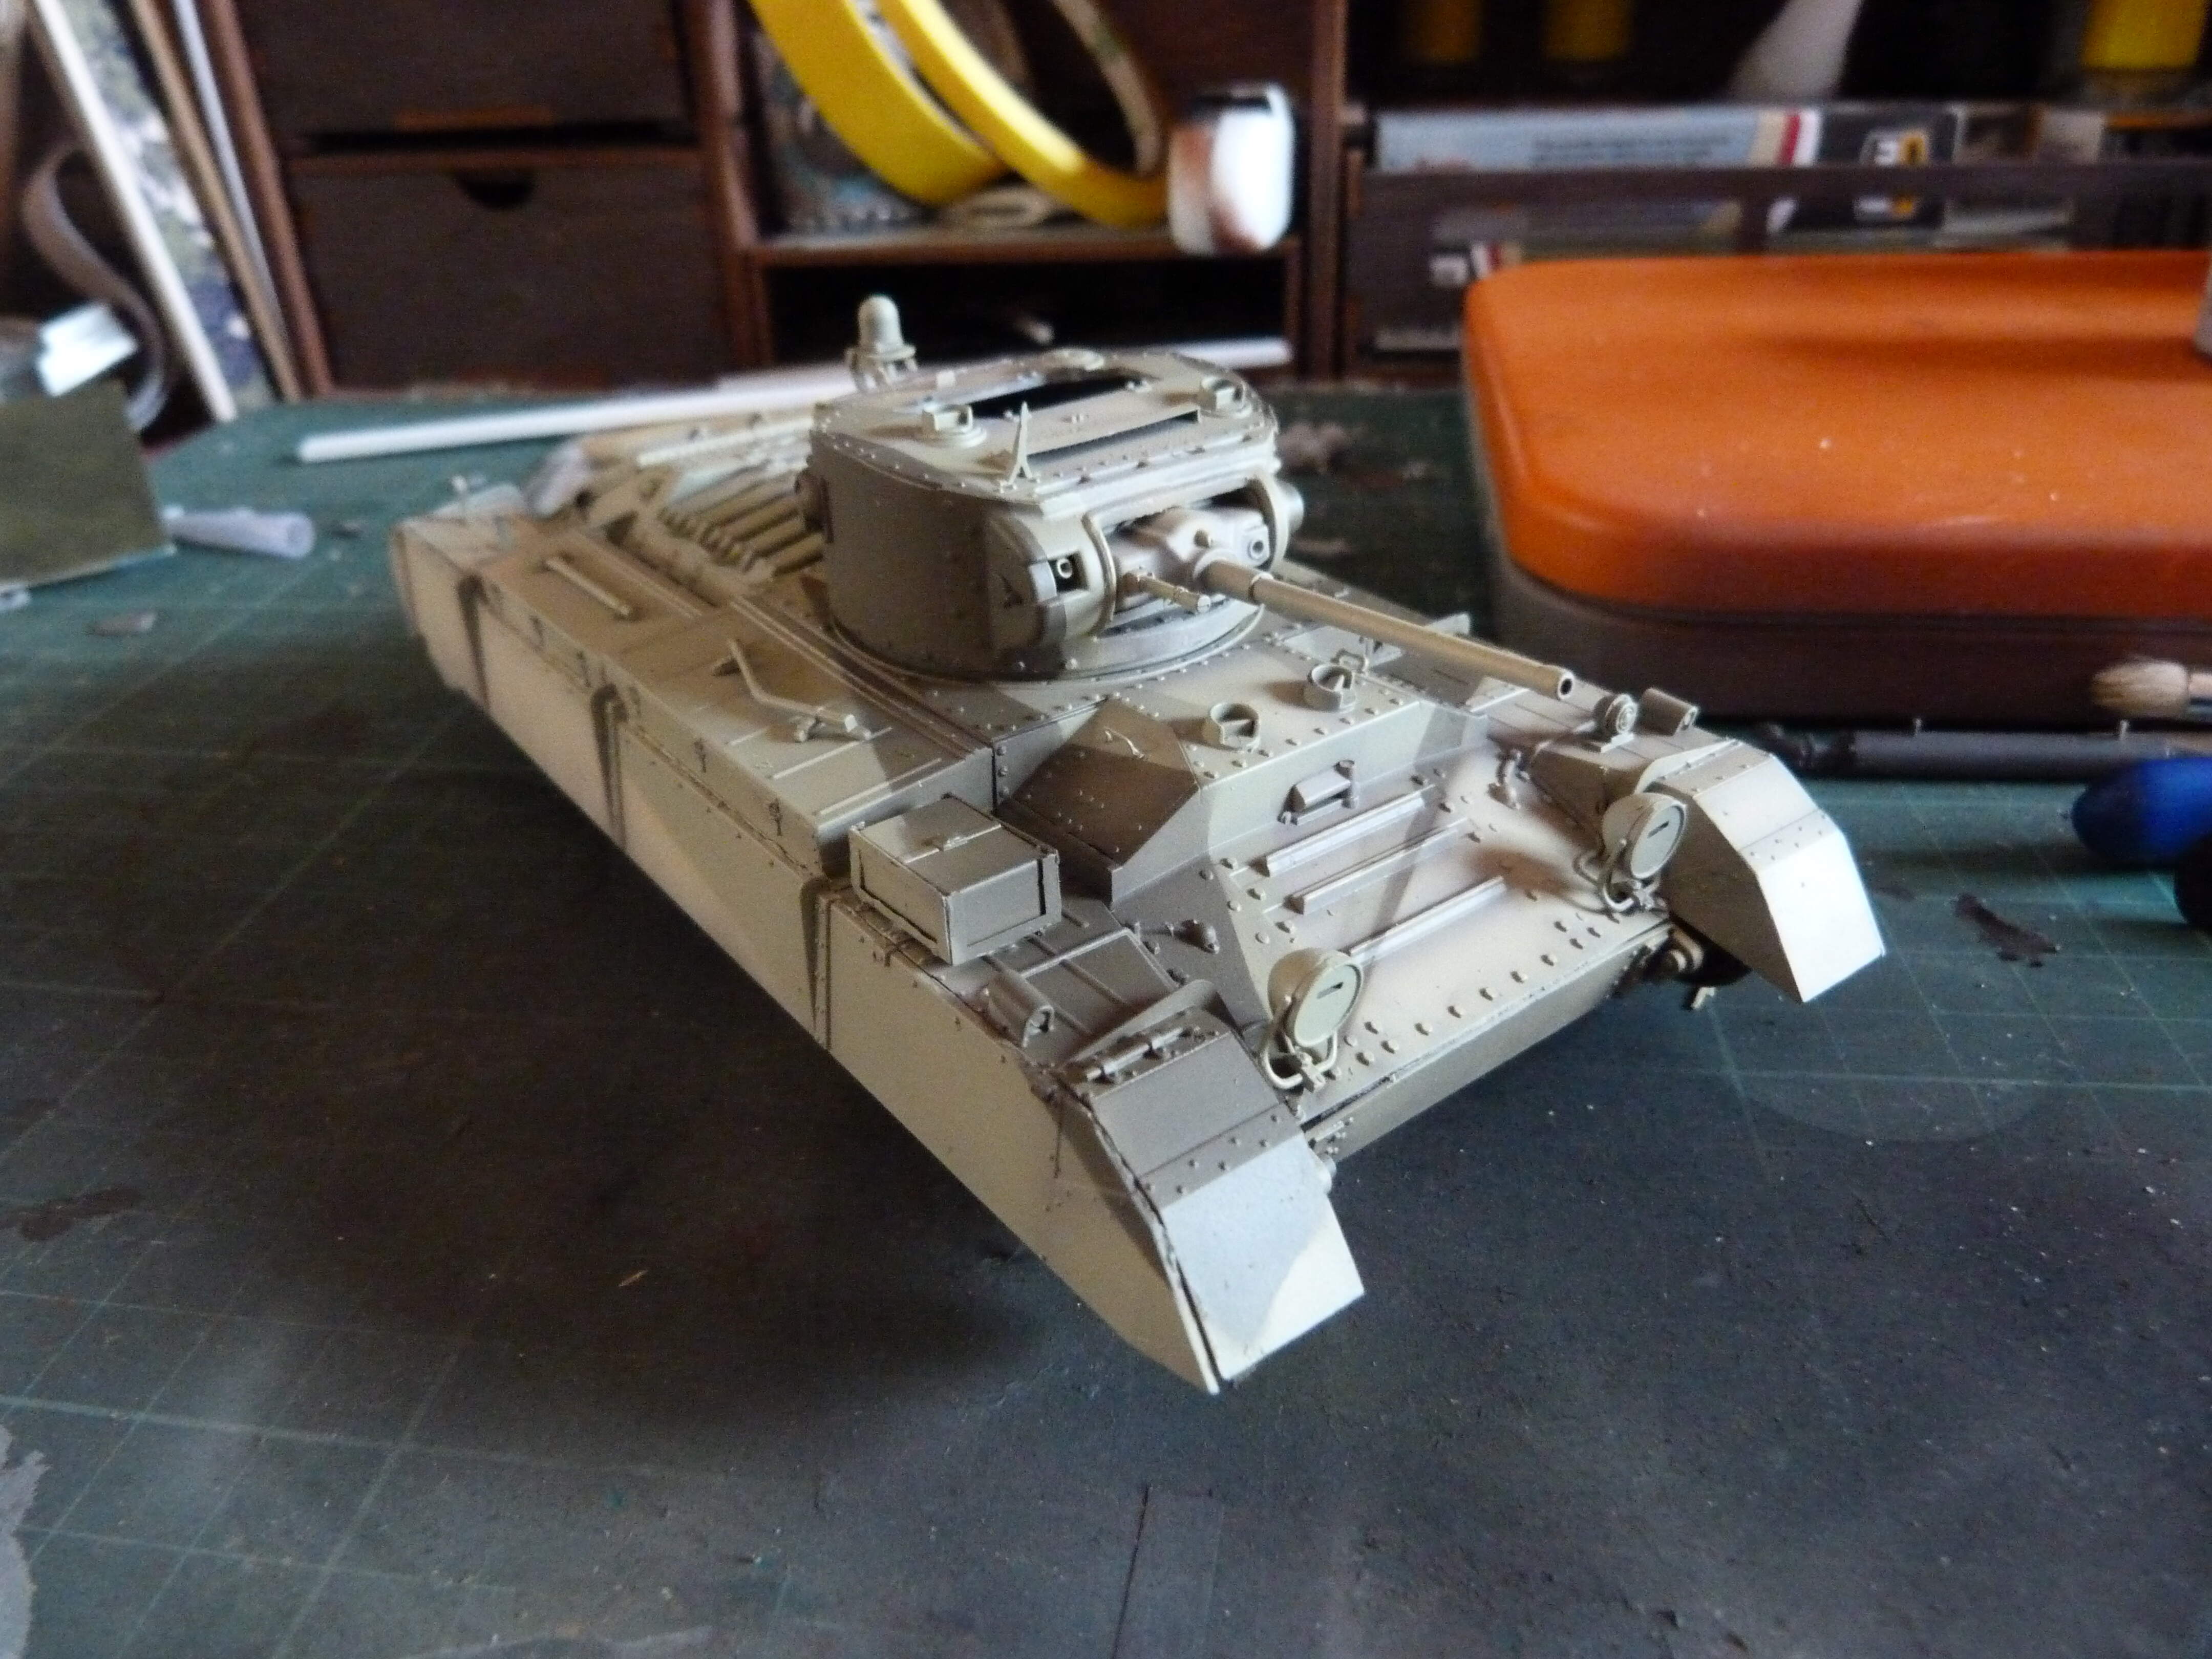

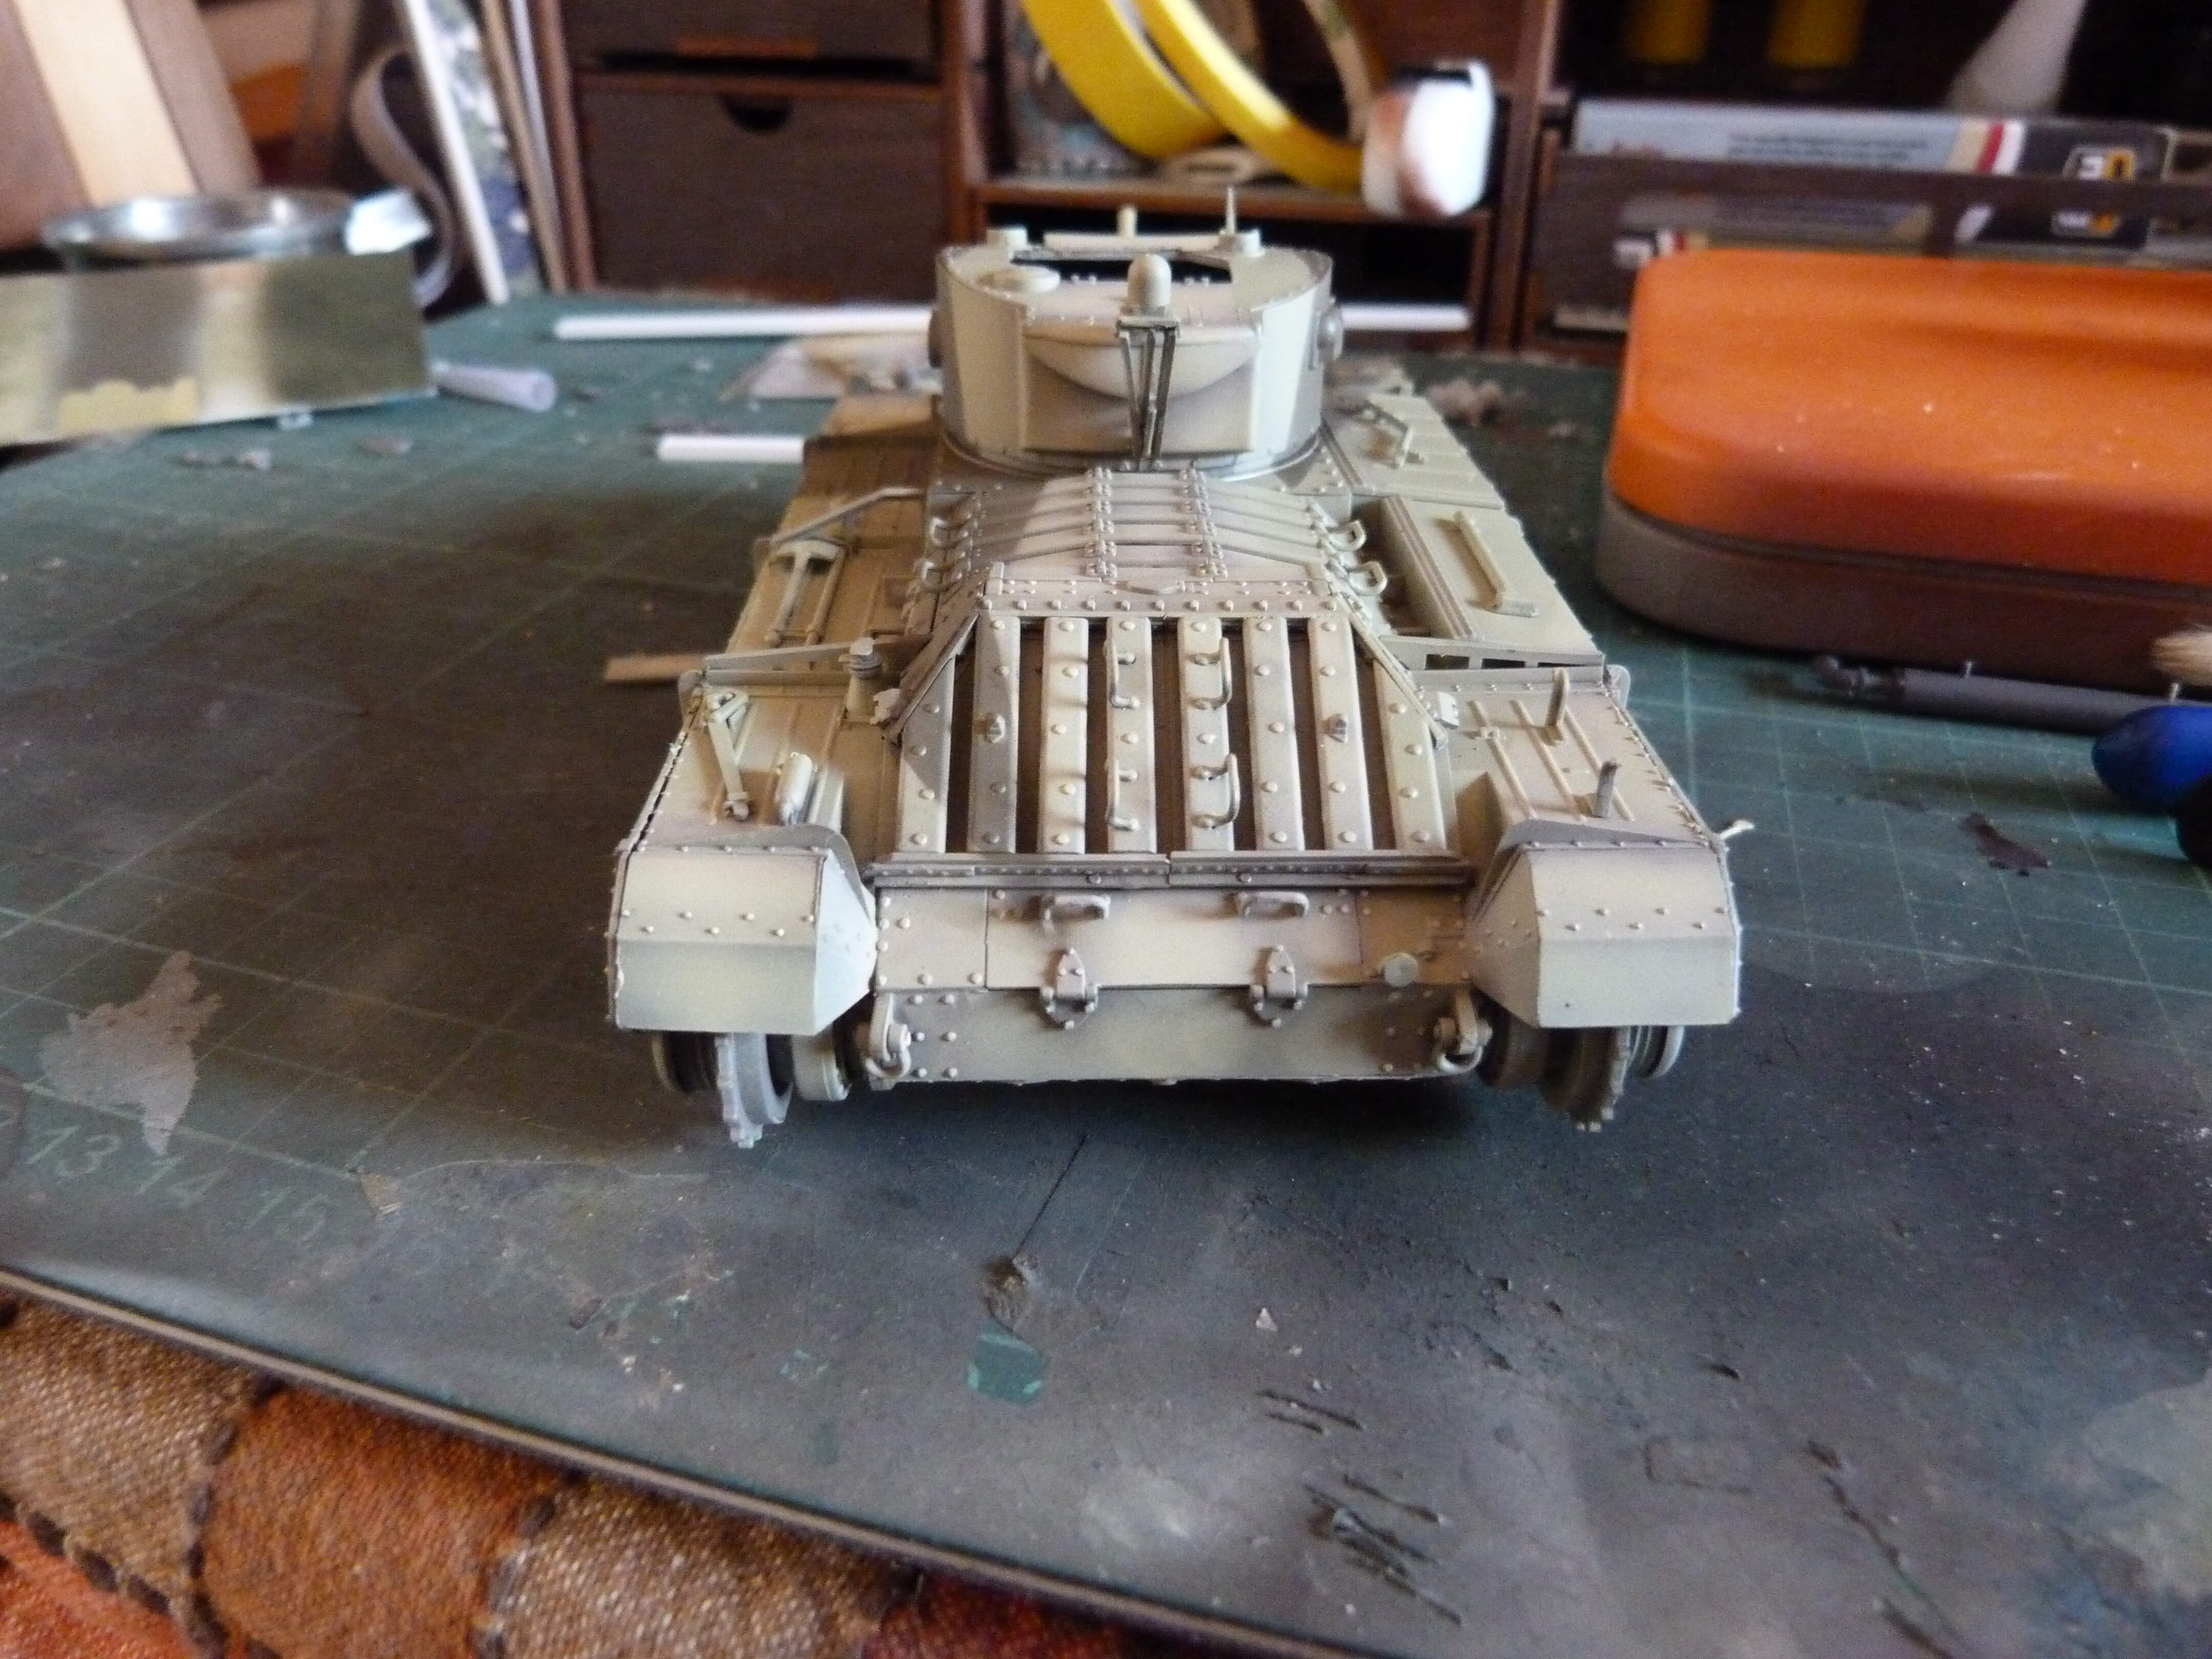
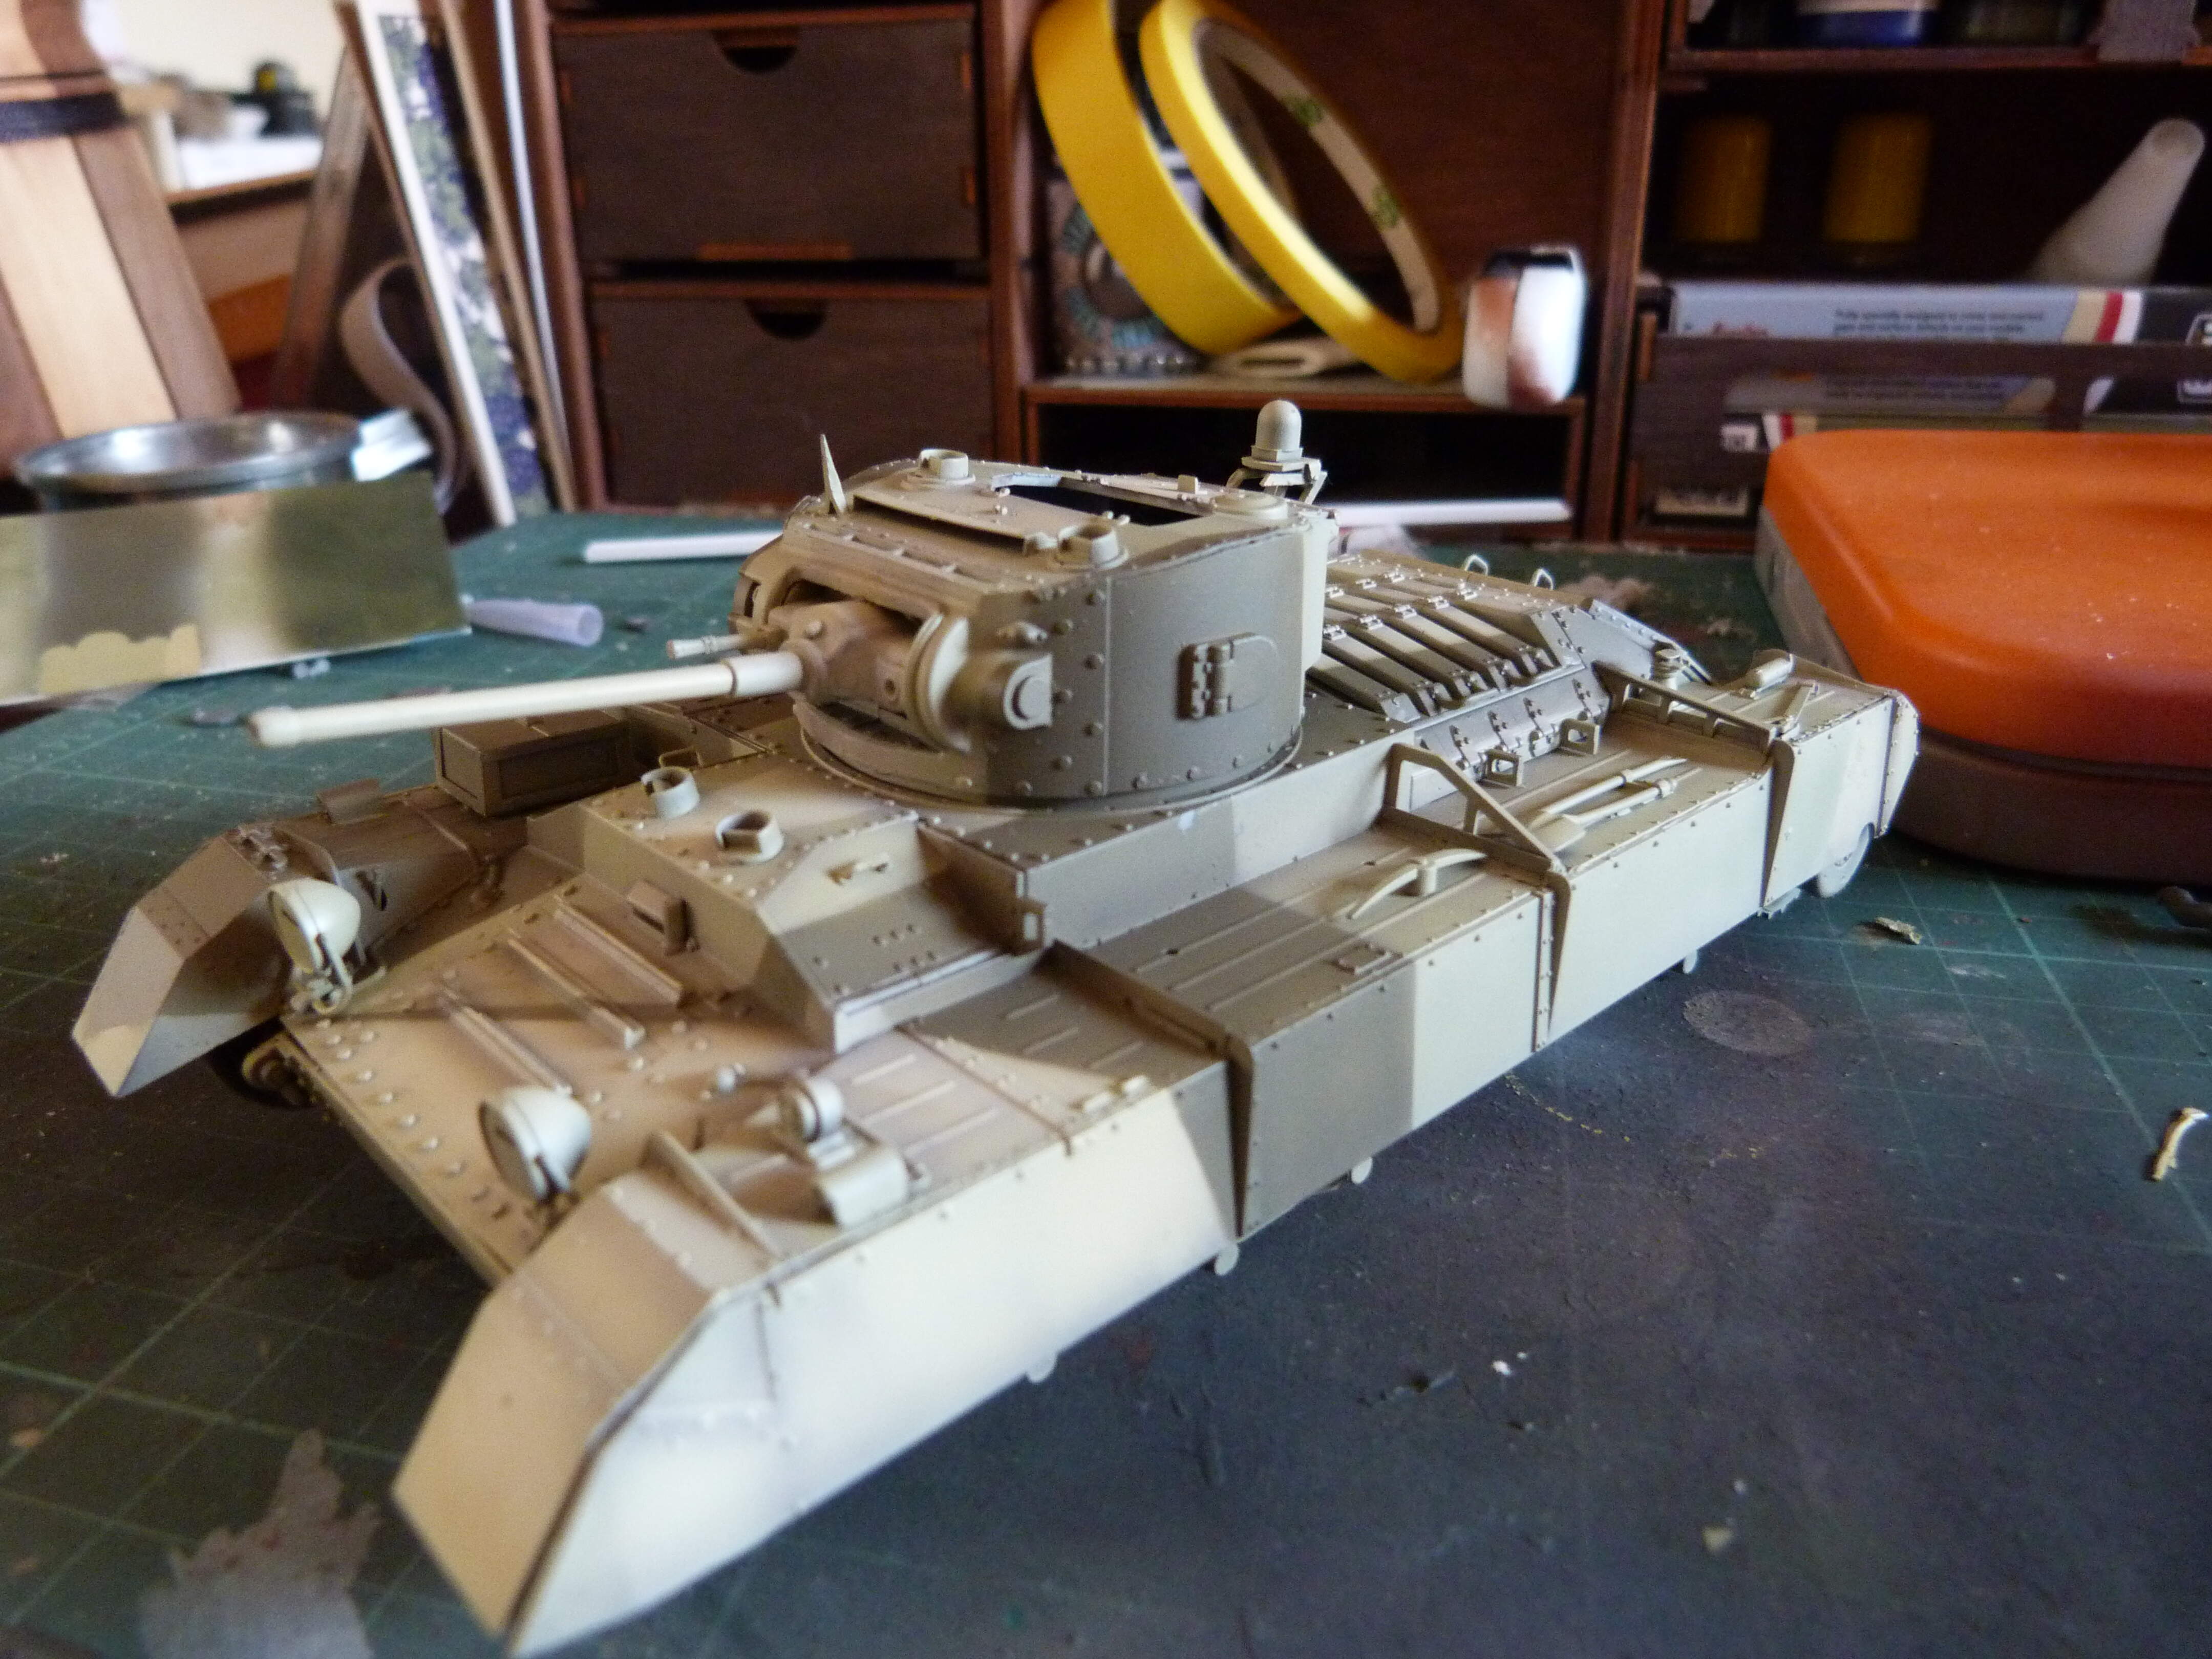
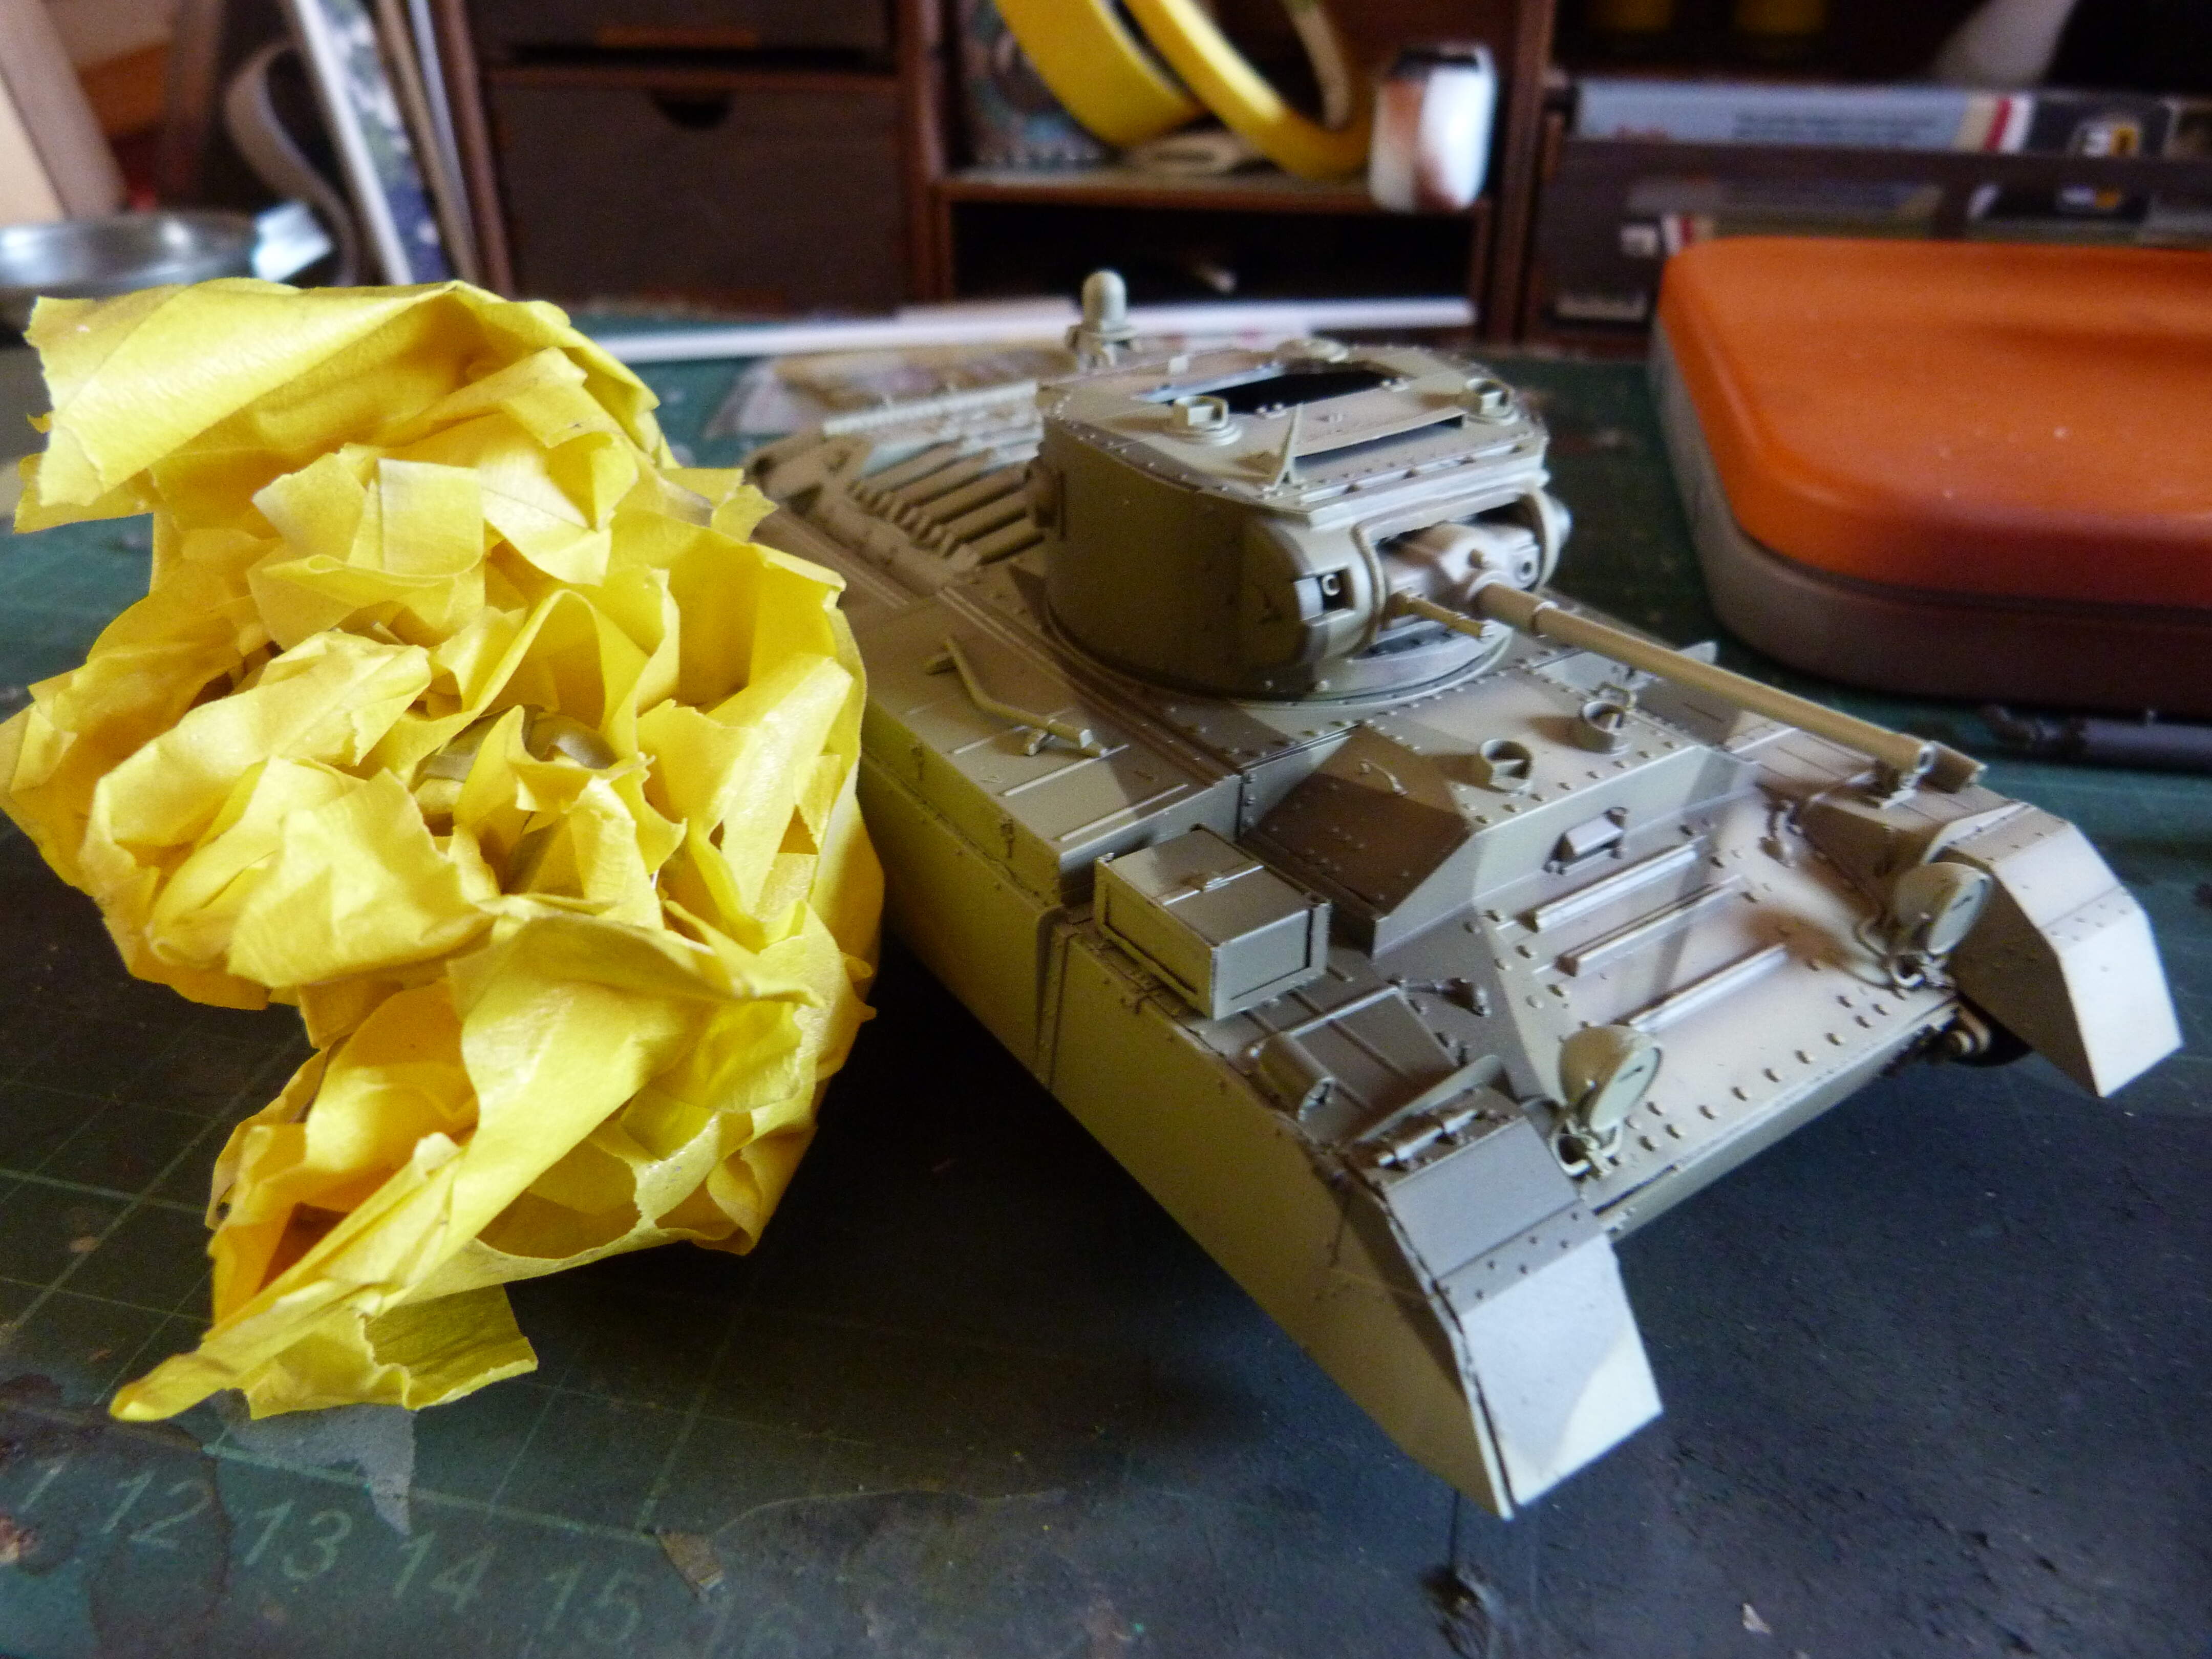
That’s it, all painted using lifecolor acrylics, I used one of those ammo mig shaders to introduce some darker bits in the portland stone base colour around panel lines and in recesses, then misted some more of the base colour over the top to make it slightly more subtle, then I used a ridiculous amount of masking tape to block in the camoflage pattern in silver grey and slate respectively. I have since done a bit of fading by adding a pale blue colour to the disruptive colours because according to Dick Taylor’s book ‘Warpaint volume 2’ (brilliant reference book for anyone interested in painting british armour, strongly recommend grabbing a copy if you can find one) the silver grey and slate faded to a more blue tone which is probably where the idea of the caunter scheme using blue as a disruptive colour came from! Turns out living alone is great if you want some solid build time, shame its a bit on the lonely side, anyway, I have rambled on long enough! As stated before any and all feedback is much appreciated, cant wait to see where all you builds go next!
10 Likes
That looks great!
At the moment I have experiencing some problems with uploading photos via Postimage.
Since I am not familiar with other methods of uploading advice is more than welcome.
I’m not familiar with Postimage. If that’s what this forum uses and it’s not working, this advice will be unhelpful.
When you go to post, there is a bar across the top of the reply window with a bubble on the left, then a B and then and italicized I. Four over from those is a rectangle with an arrow pointing up. I click on that and it invites me to upload from my computer with a menu for selecting files. I do that, click on the file, and it uploads it. Is that not working for you?

Very nicely done with that. And hats off for doing in situ… Really nice looking.
Hello all,
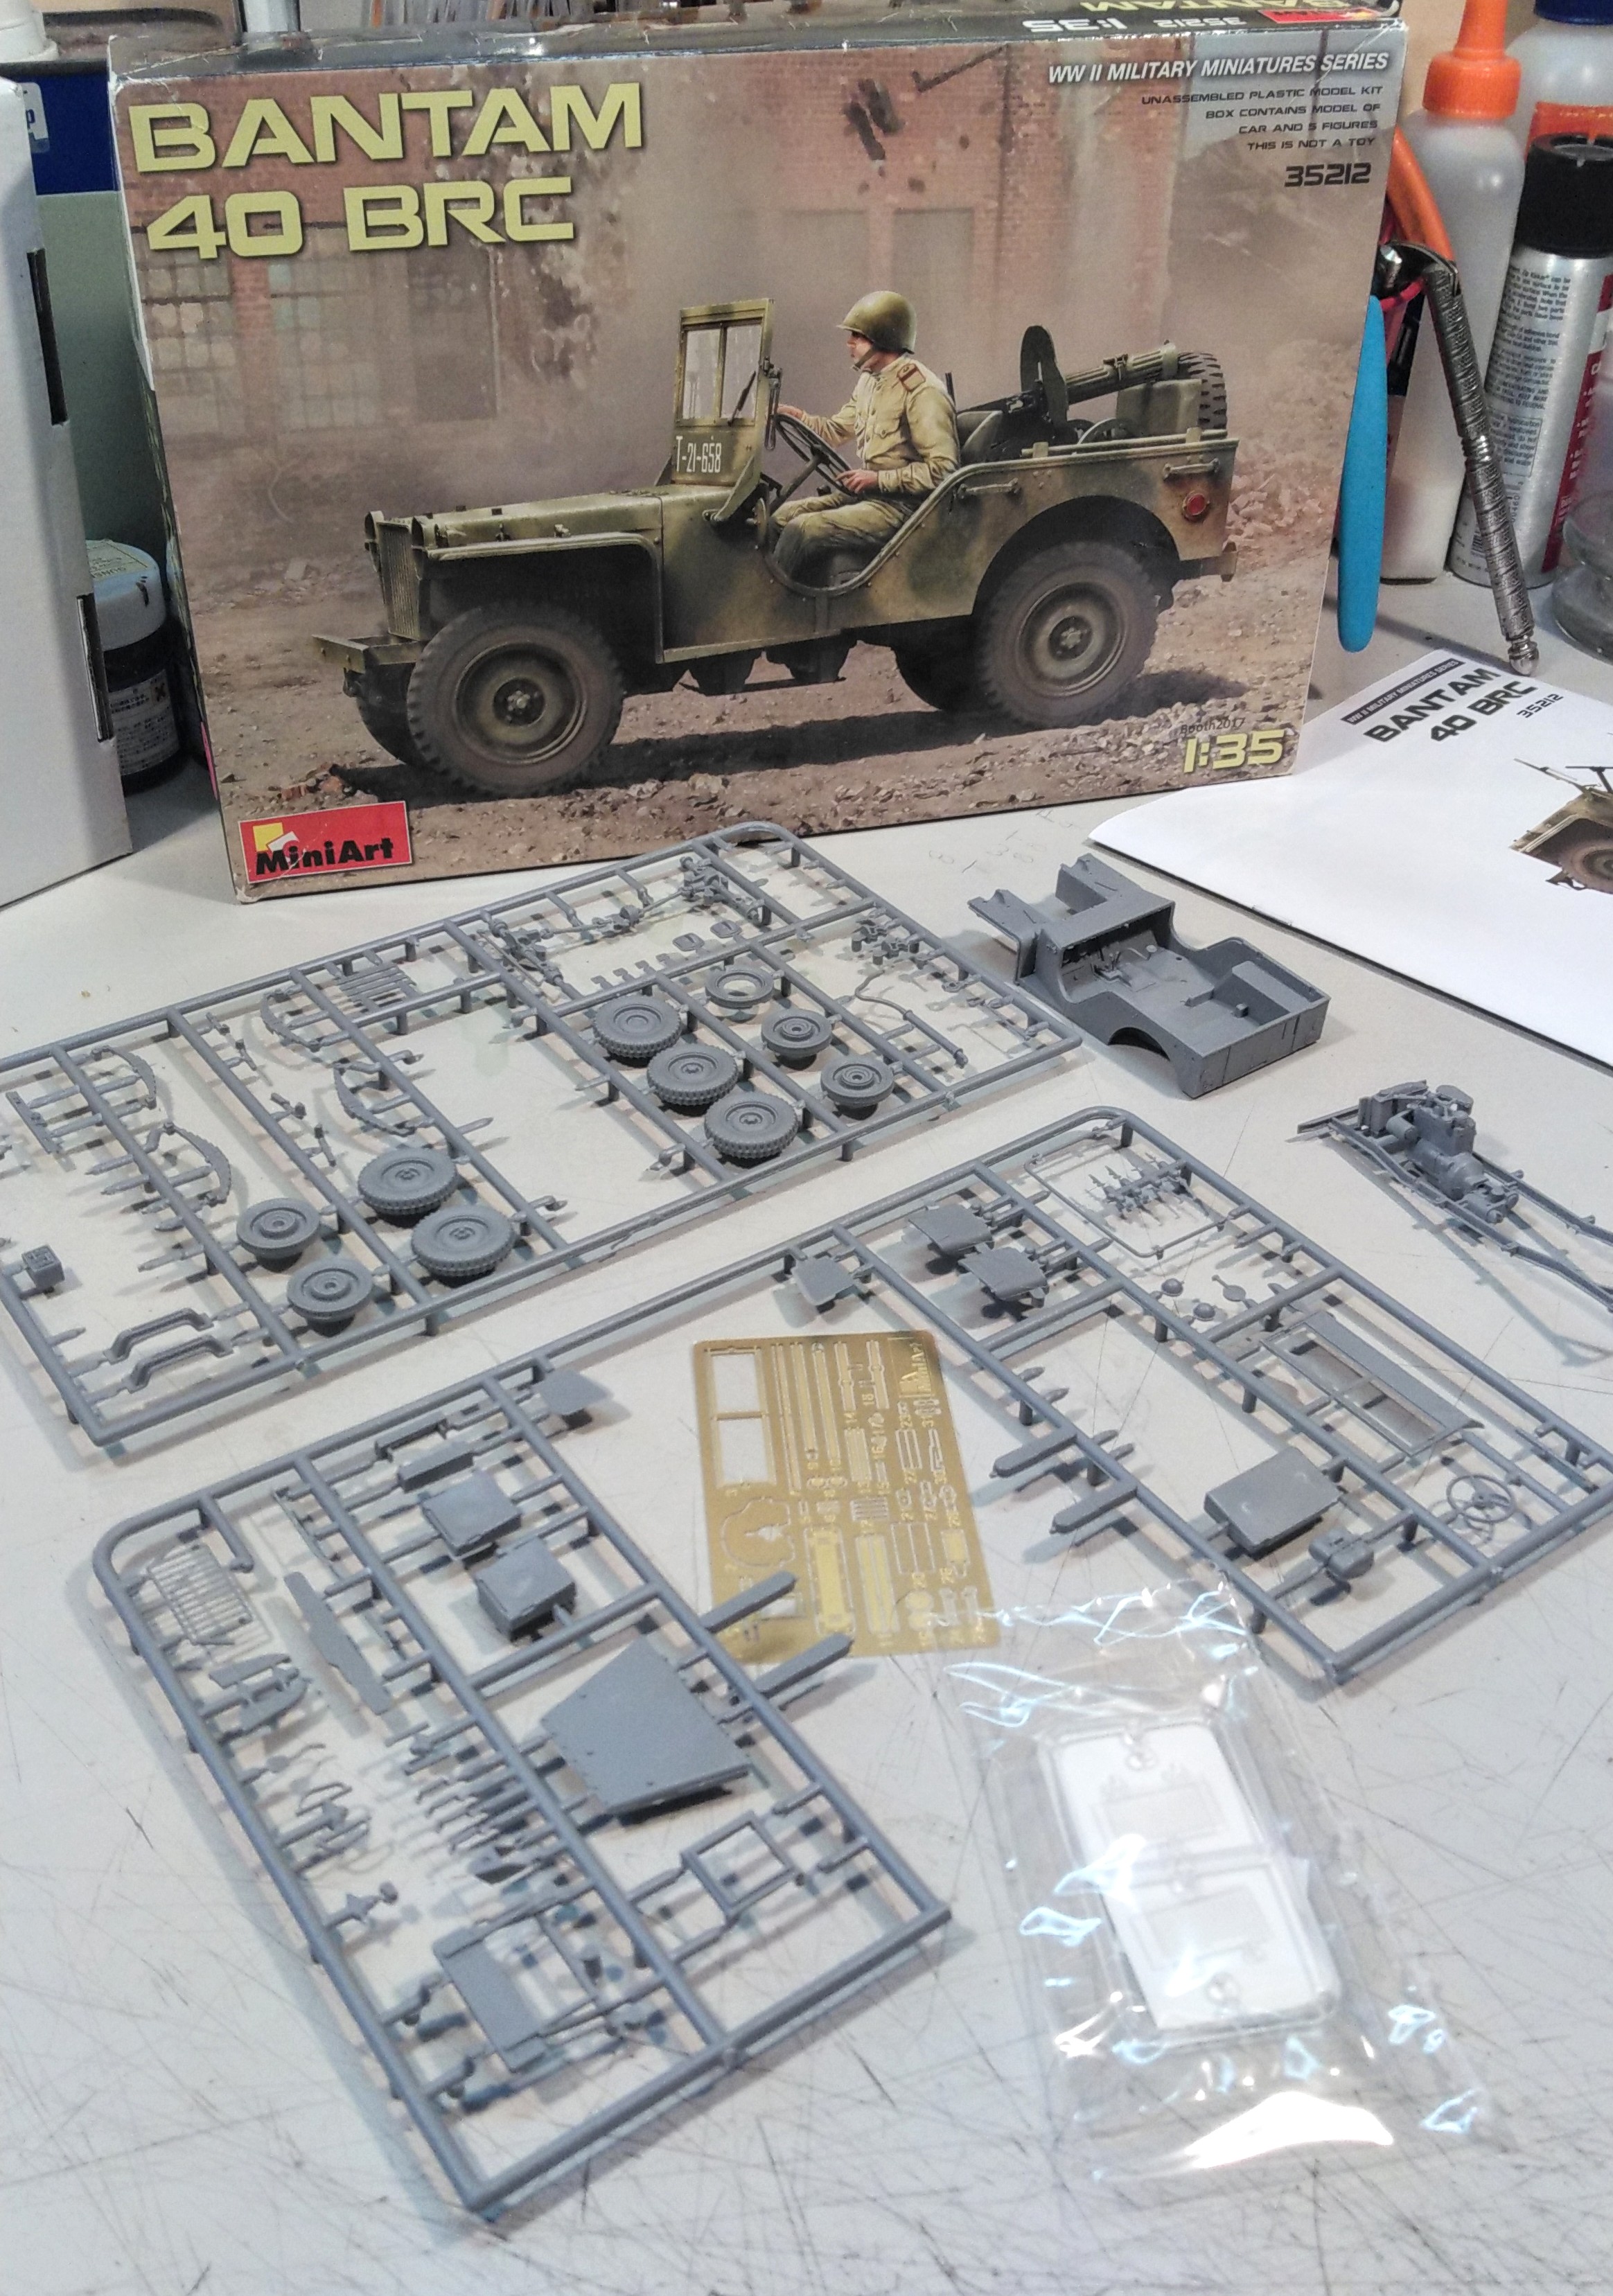
The builds are looking great everyone! I was wondering if its too late to join this campaign, as I have had a MiniArt Soviet 2T truck sitting in the drawer for a couple of years.
Regards,
Vlad,
1 Like
Vlad, it doesn’t finish until Dec 31 2021 … So you have ample time to get it done 
3 Likes
Well in that case I am formally asking to join the campaign, and here is the model to be built:
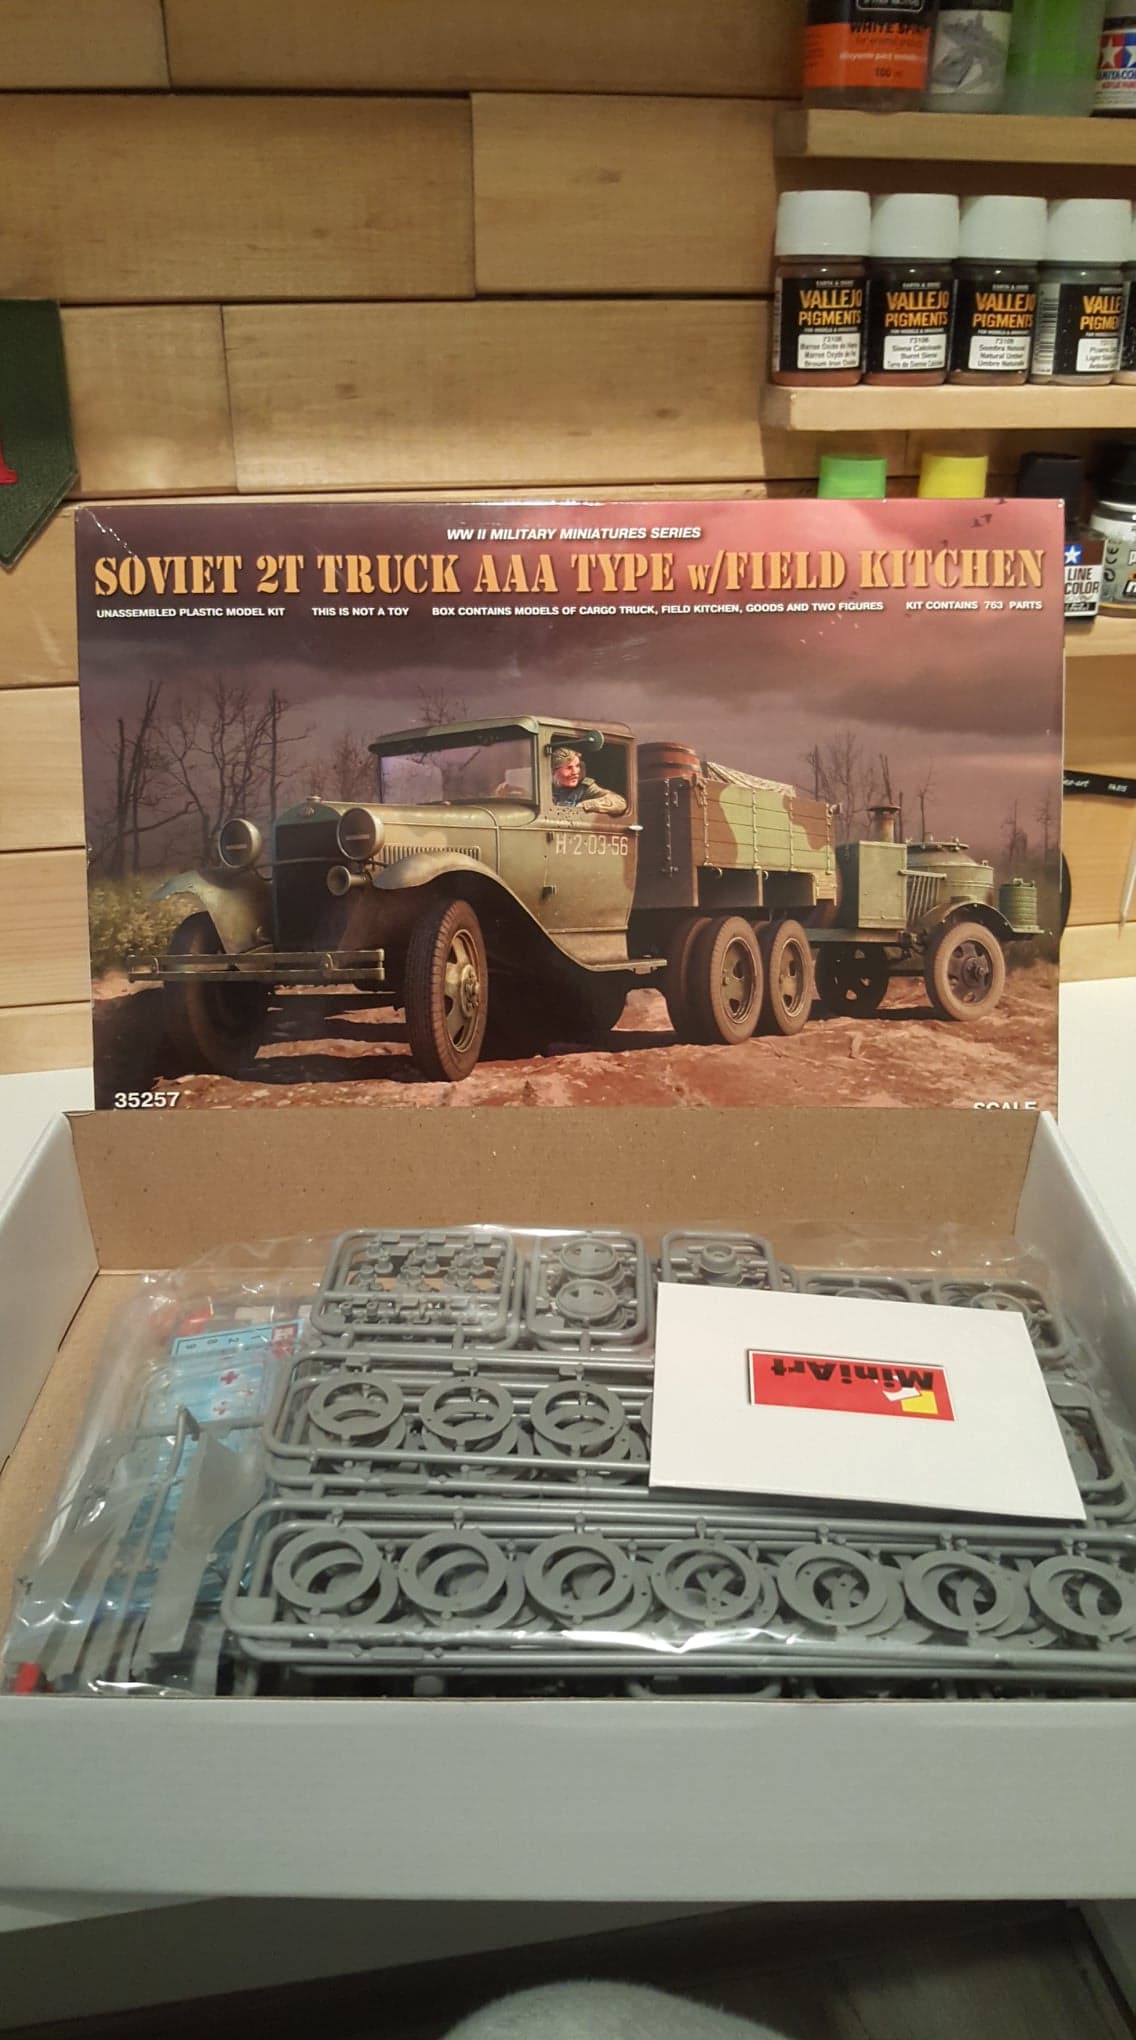
It looks like it might be one of the more complicated trucks I have ever built 
4 Likes
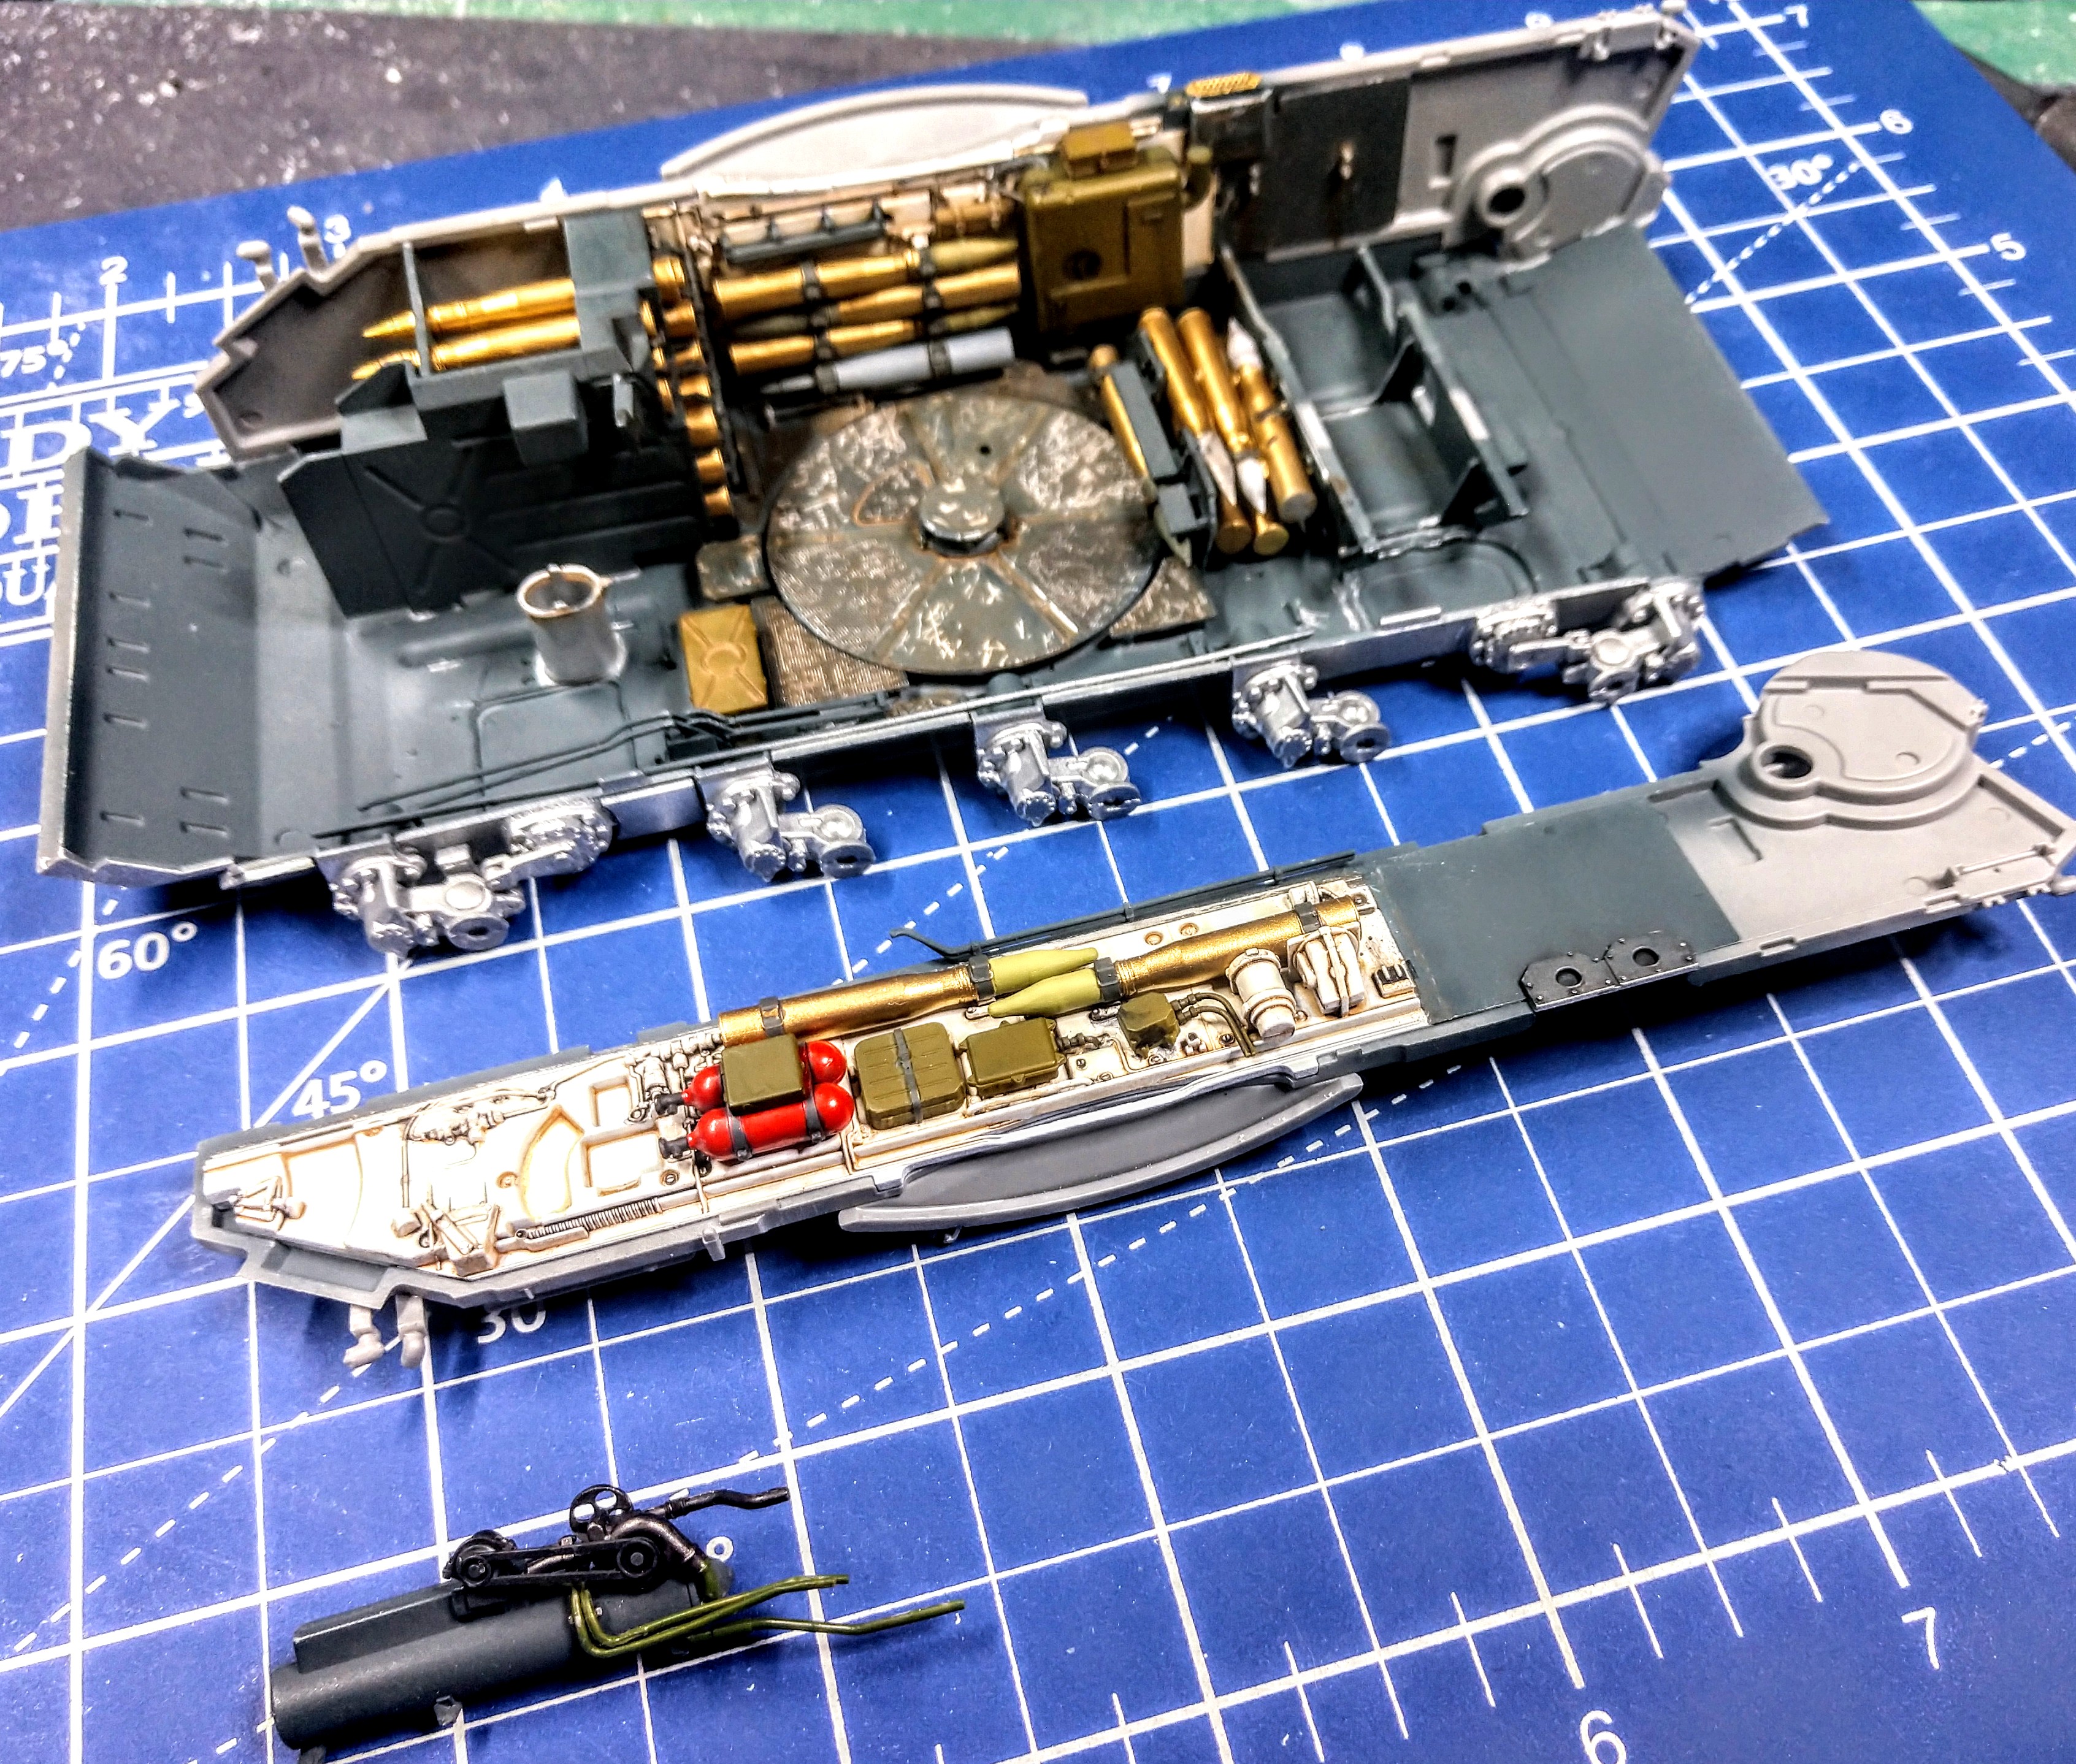
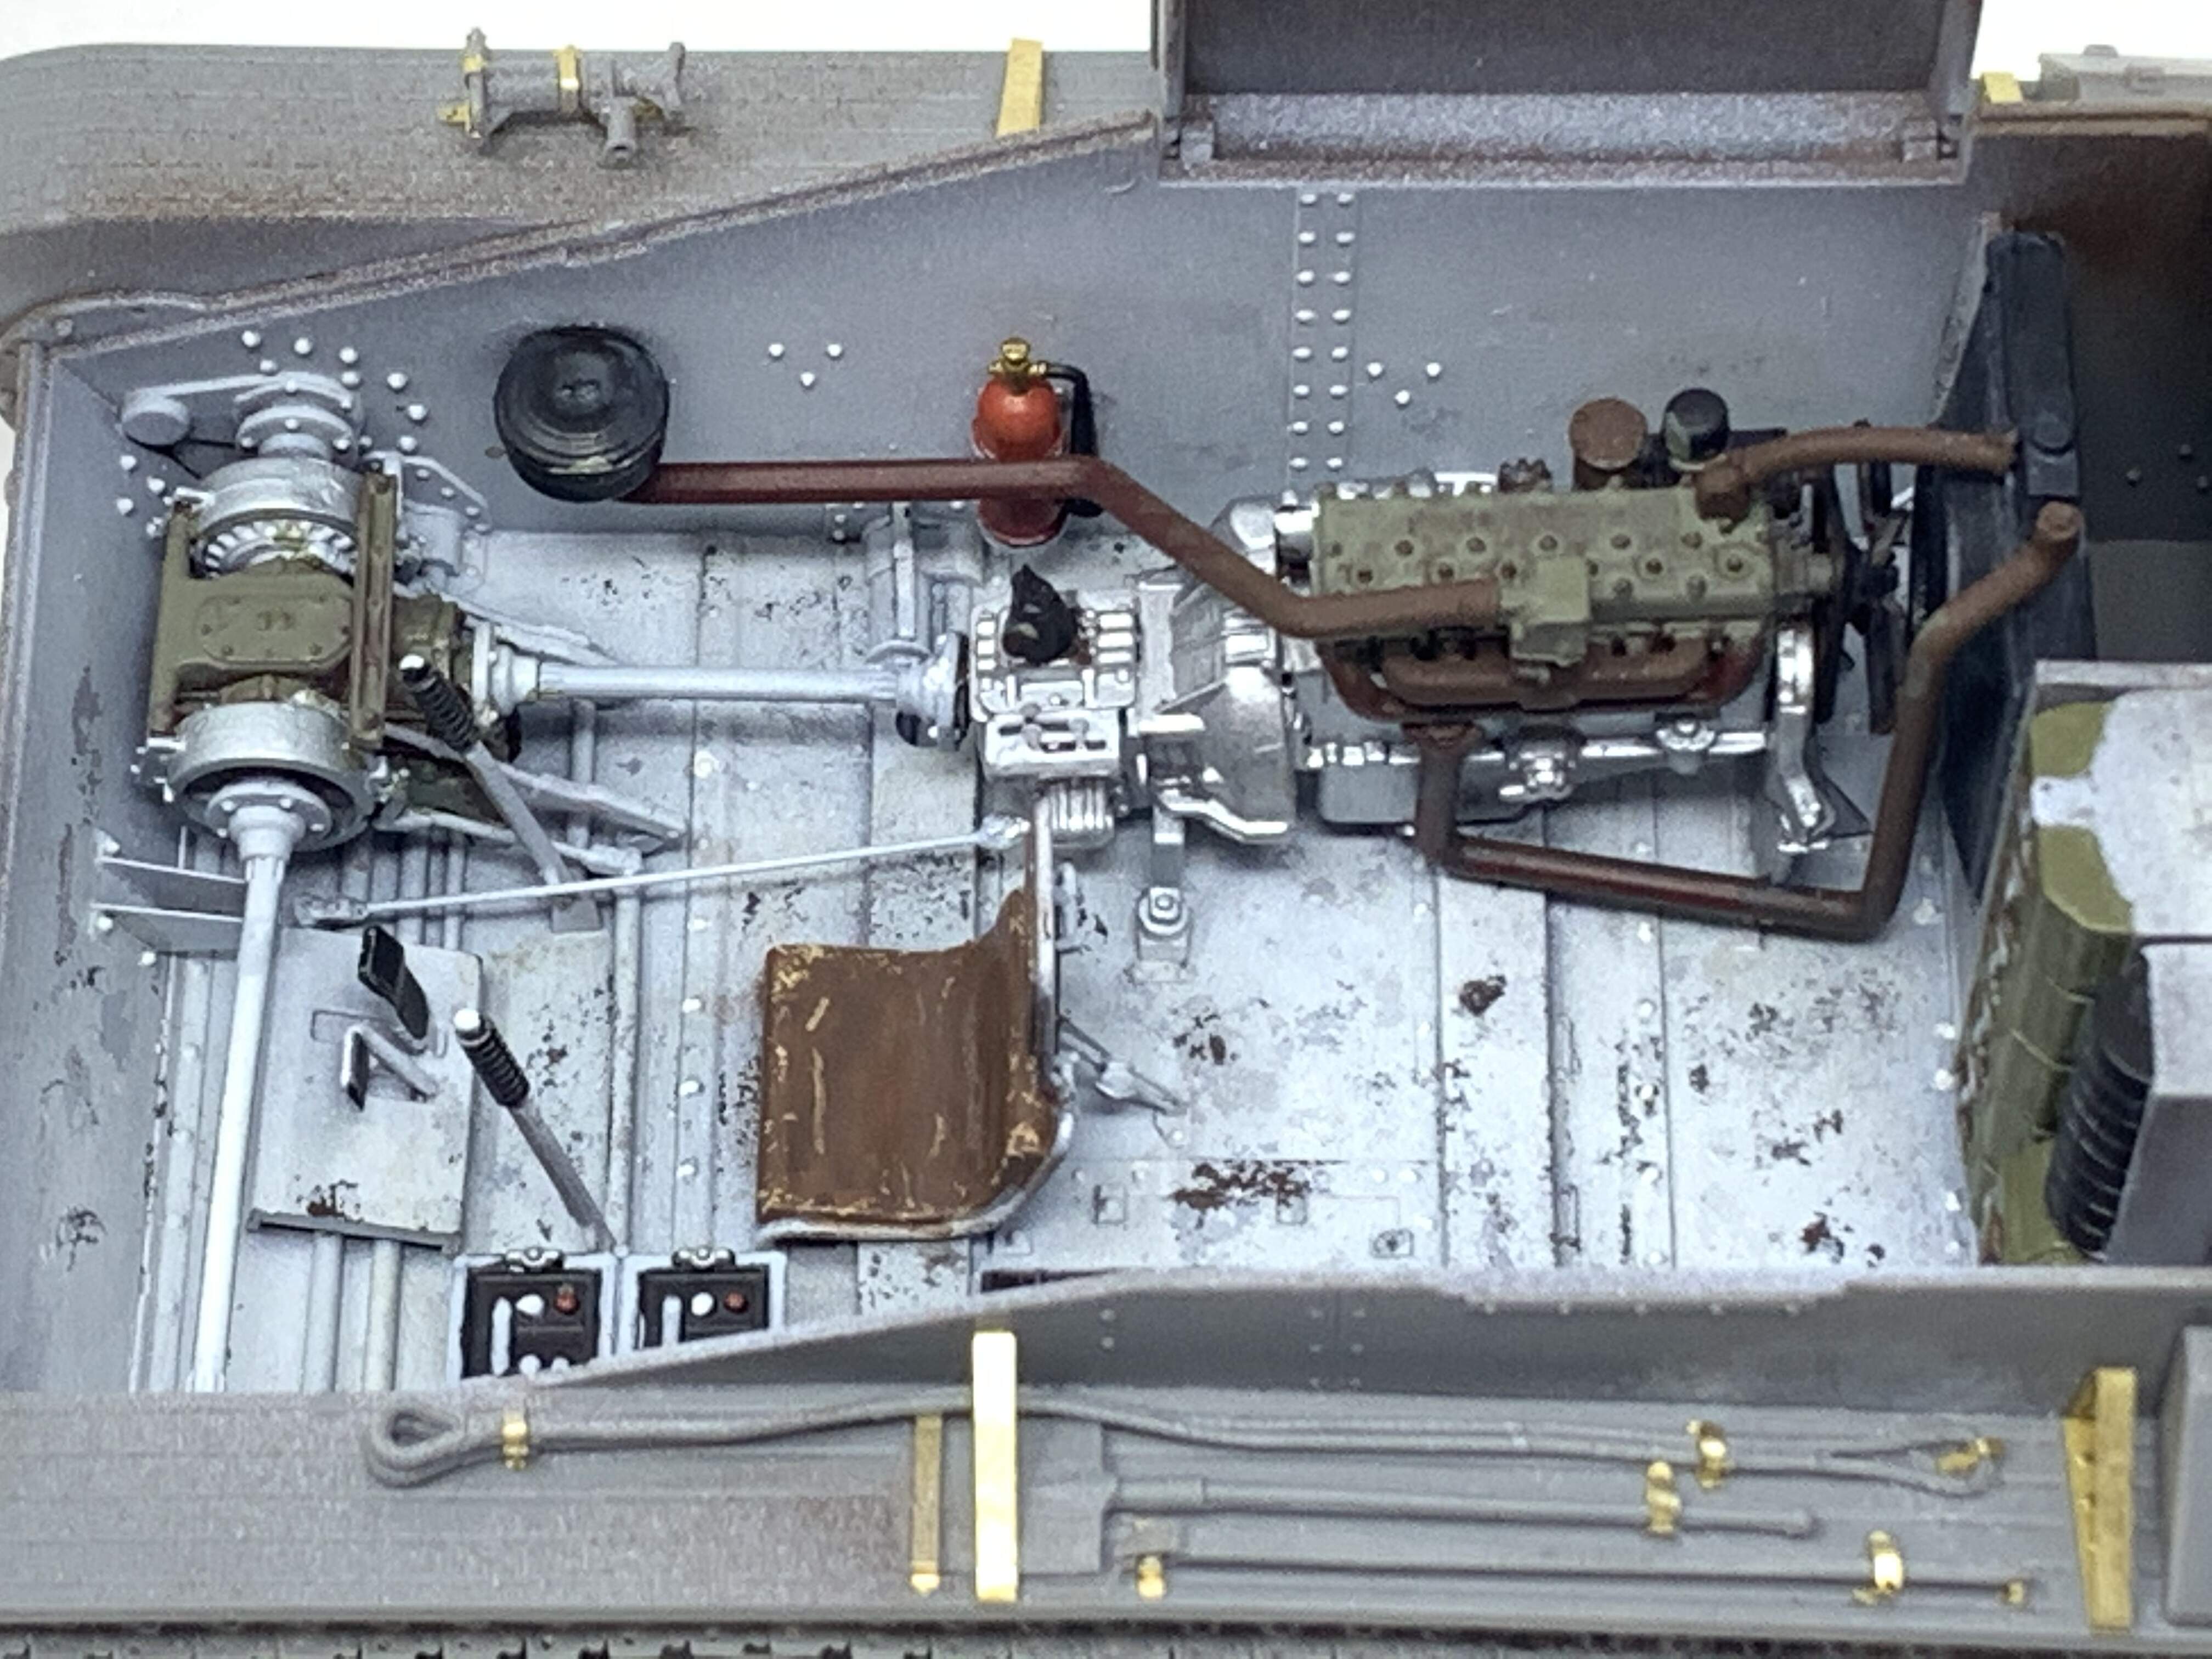
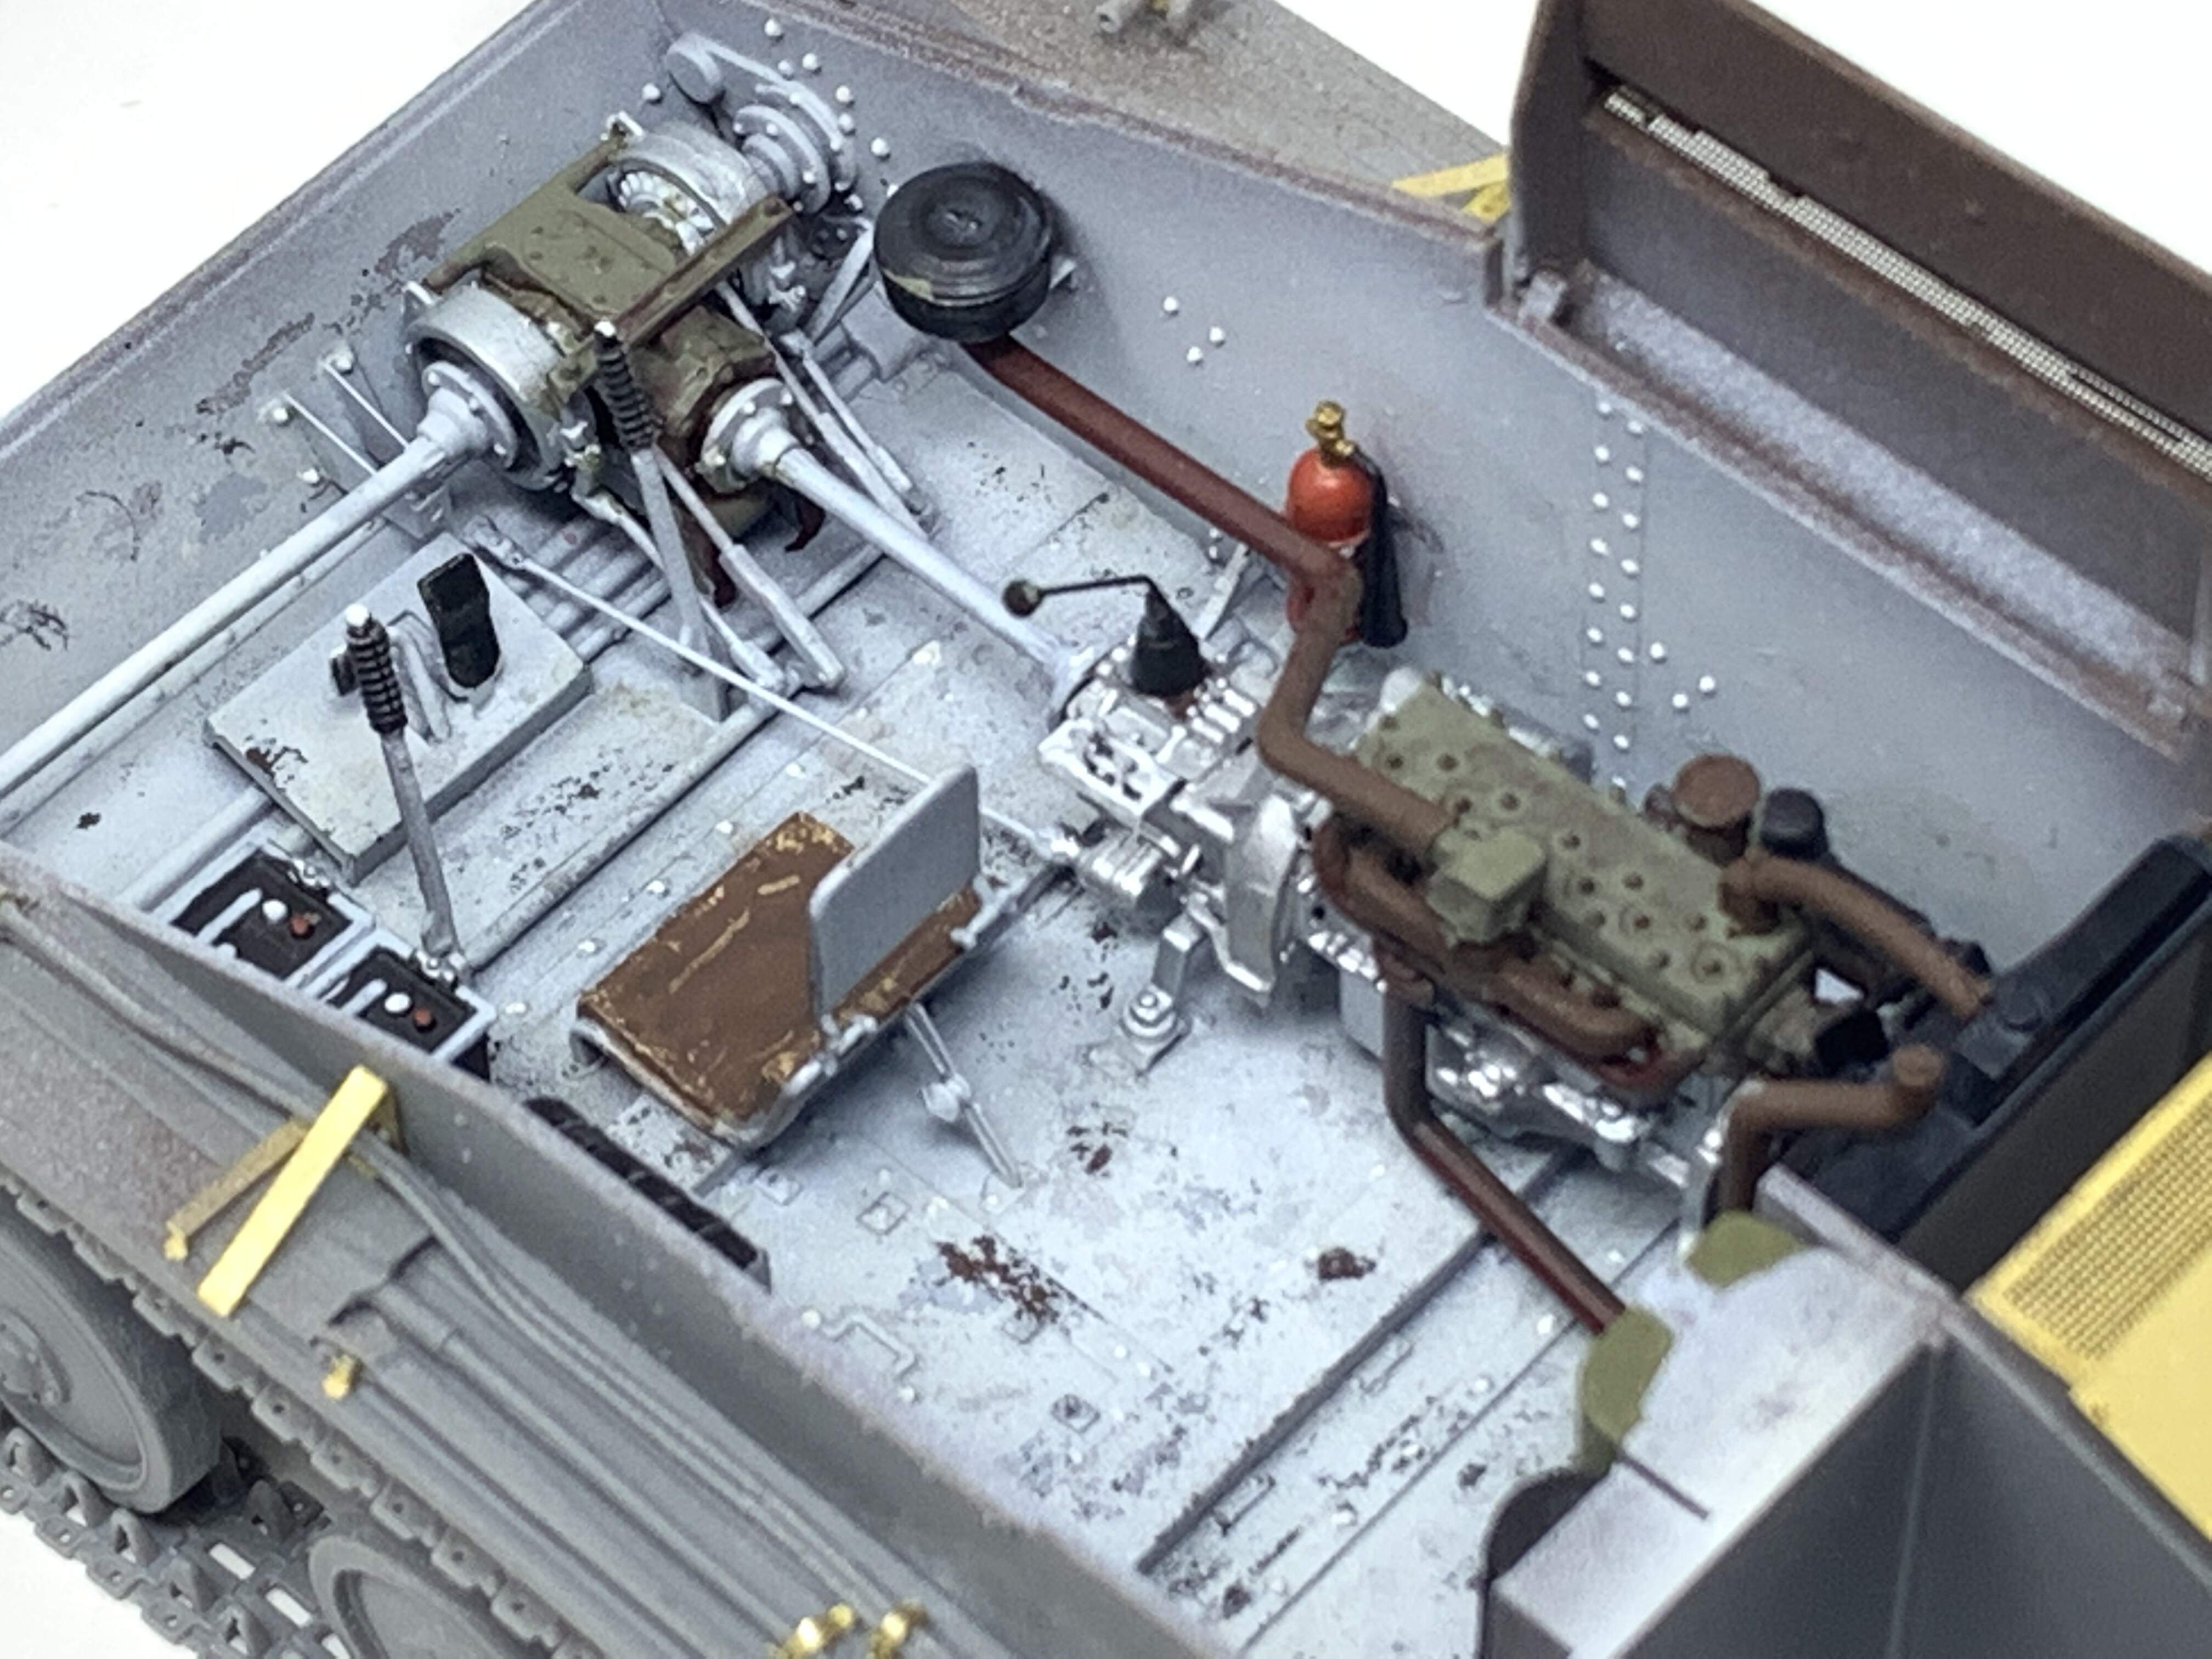
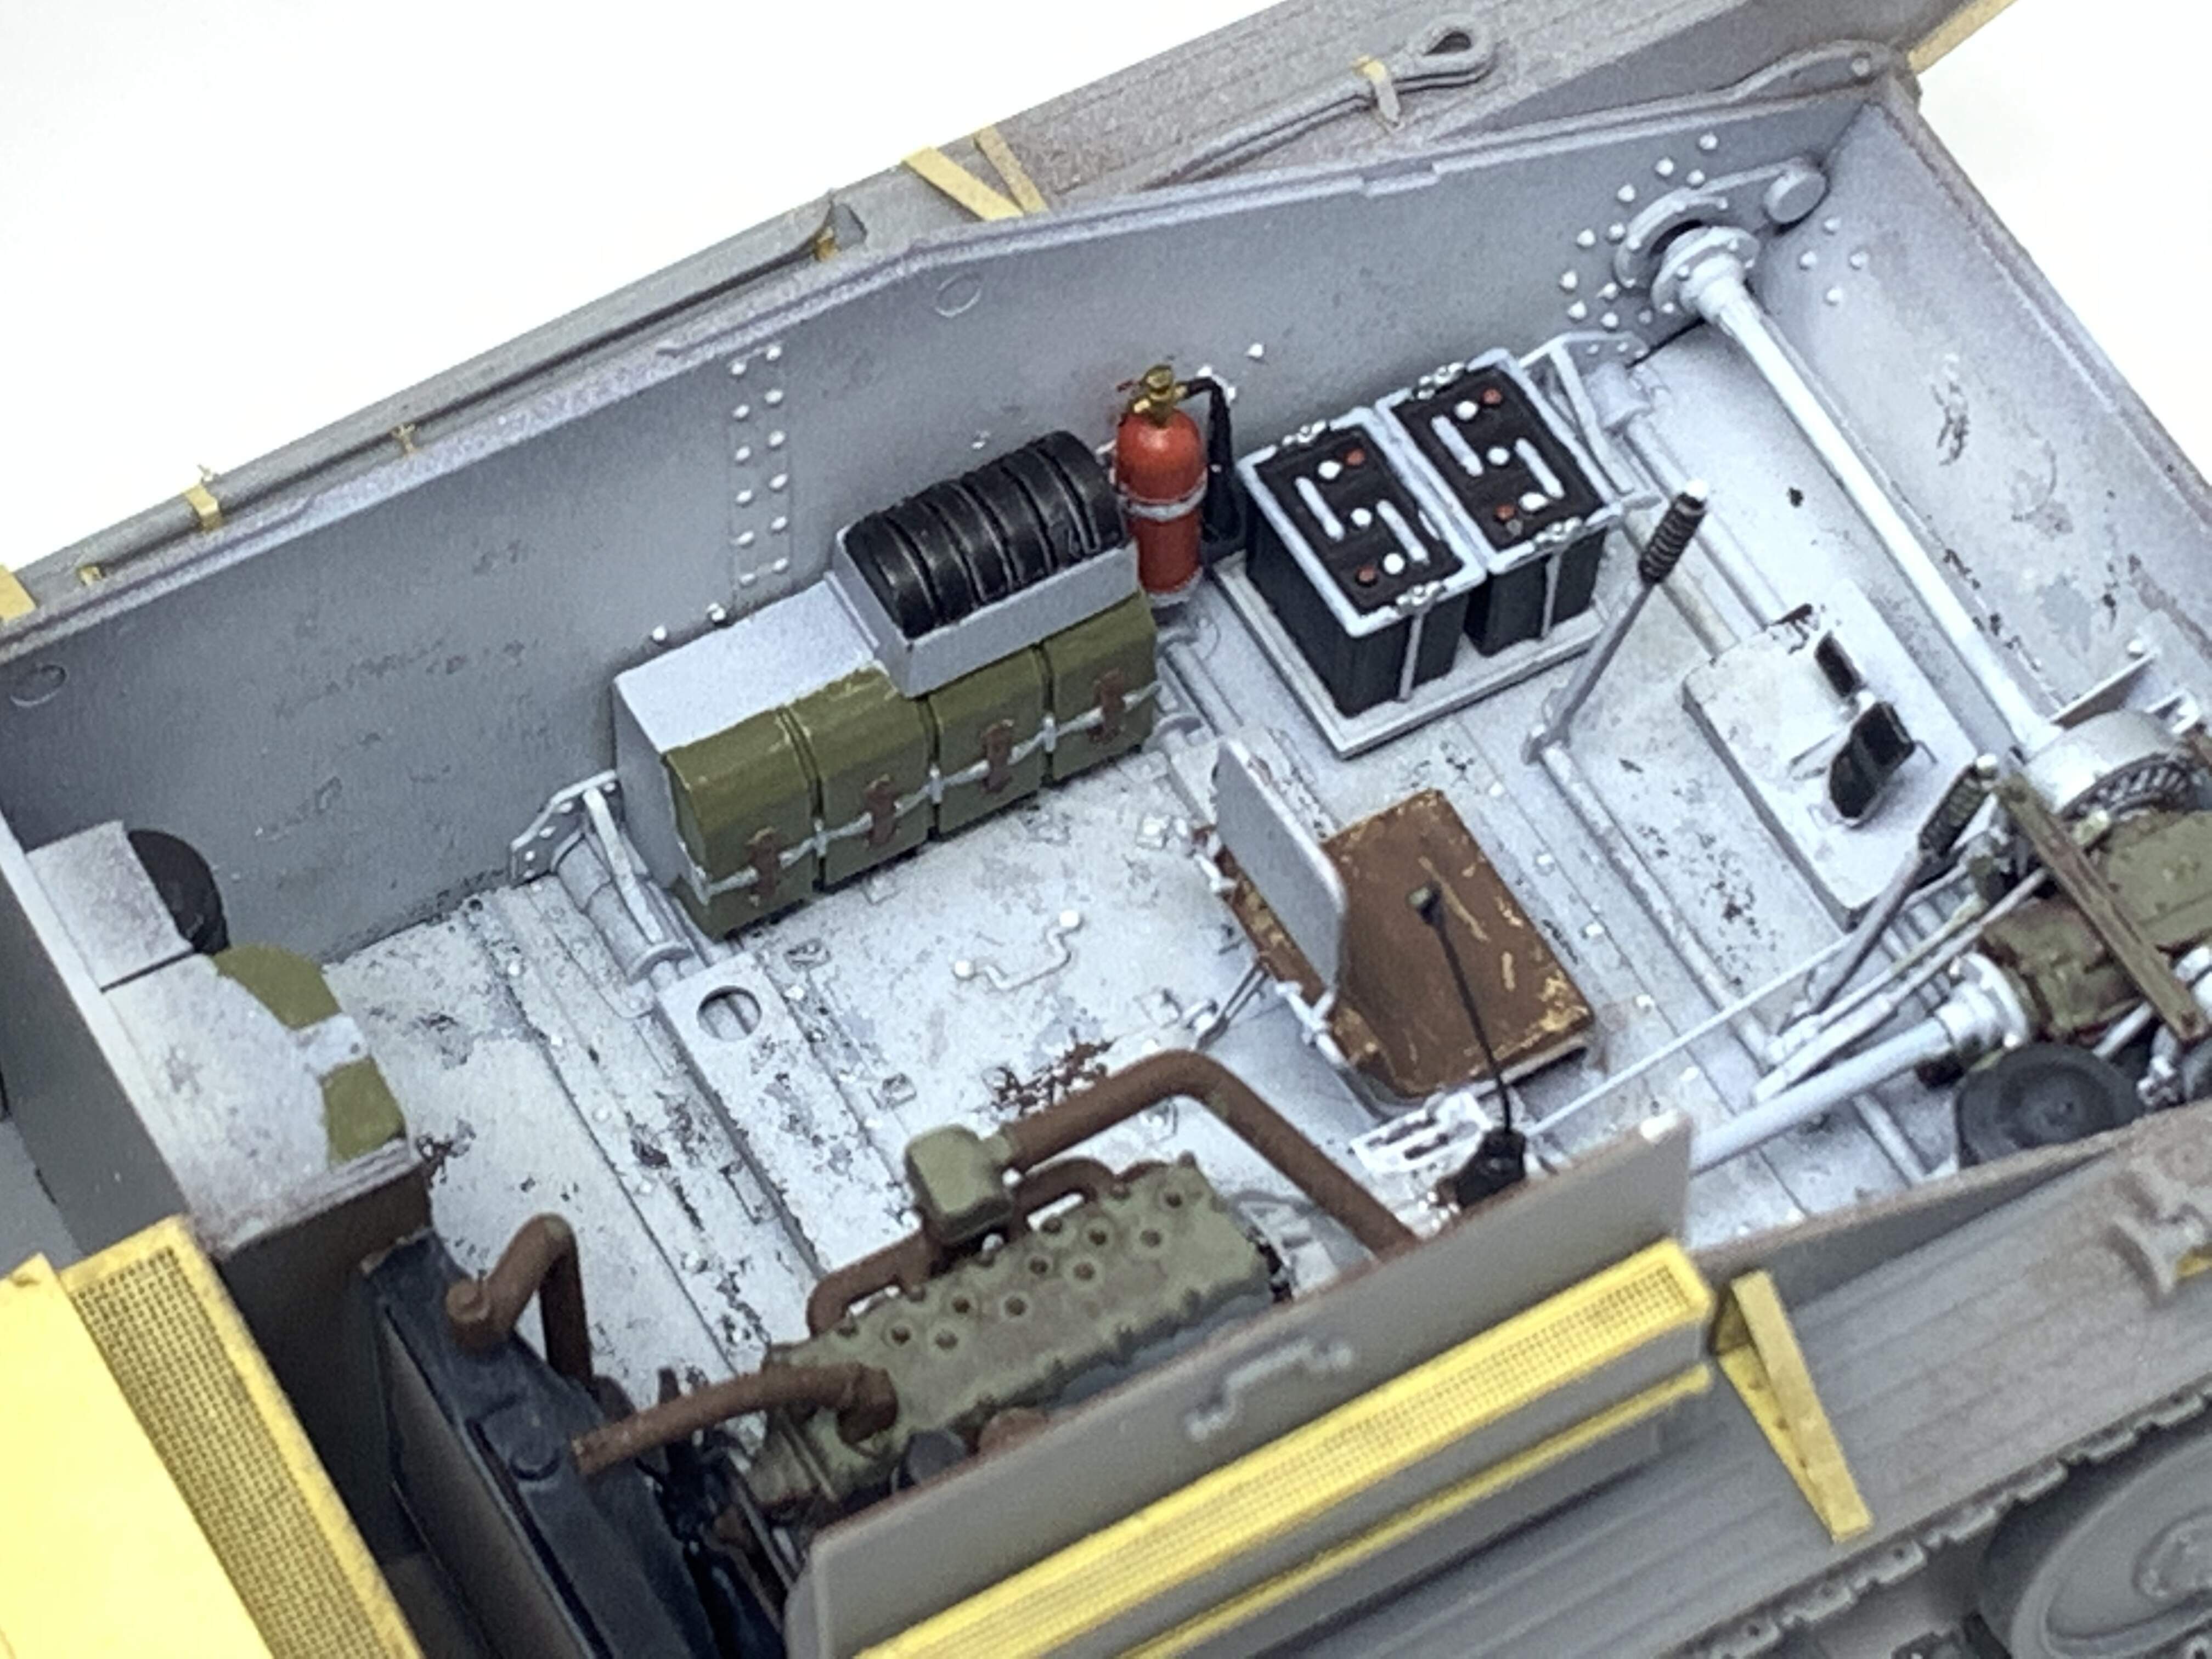
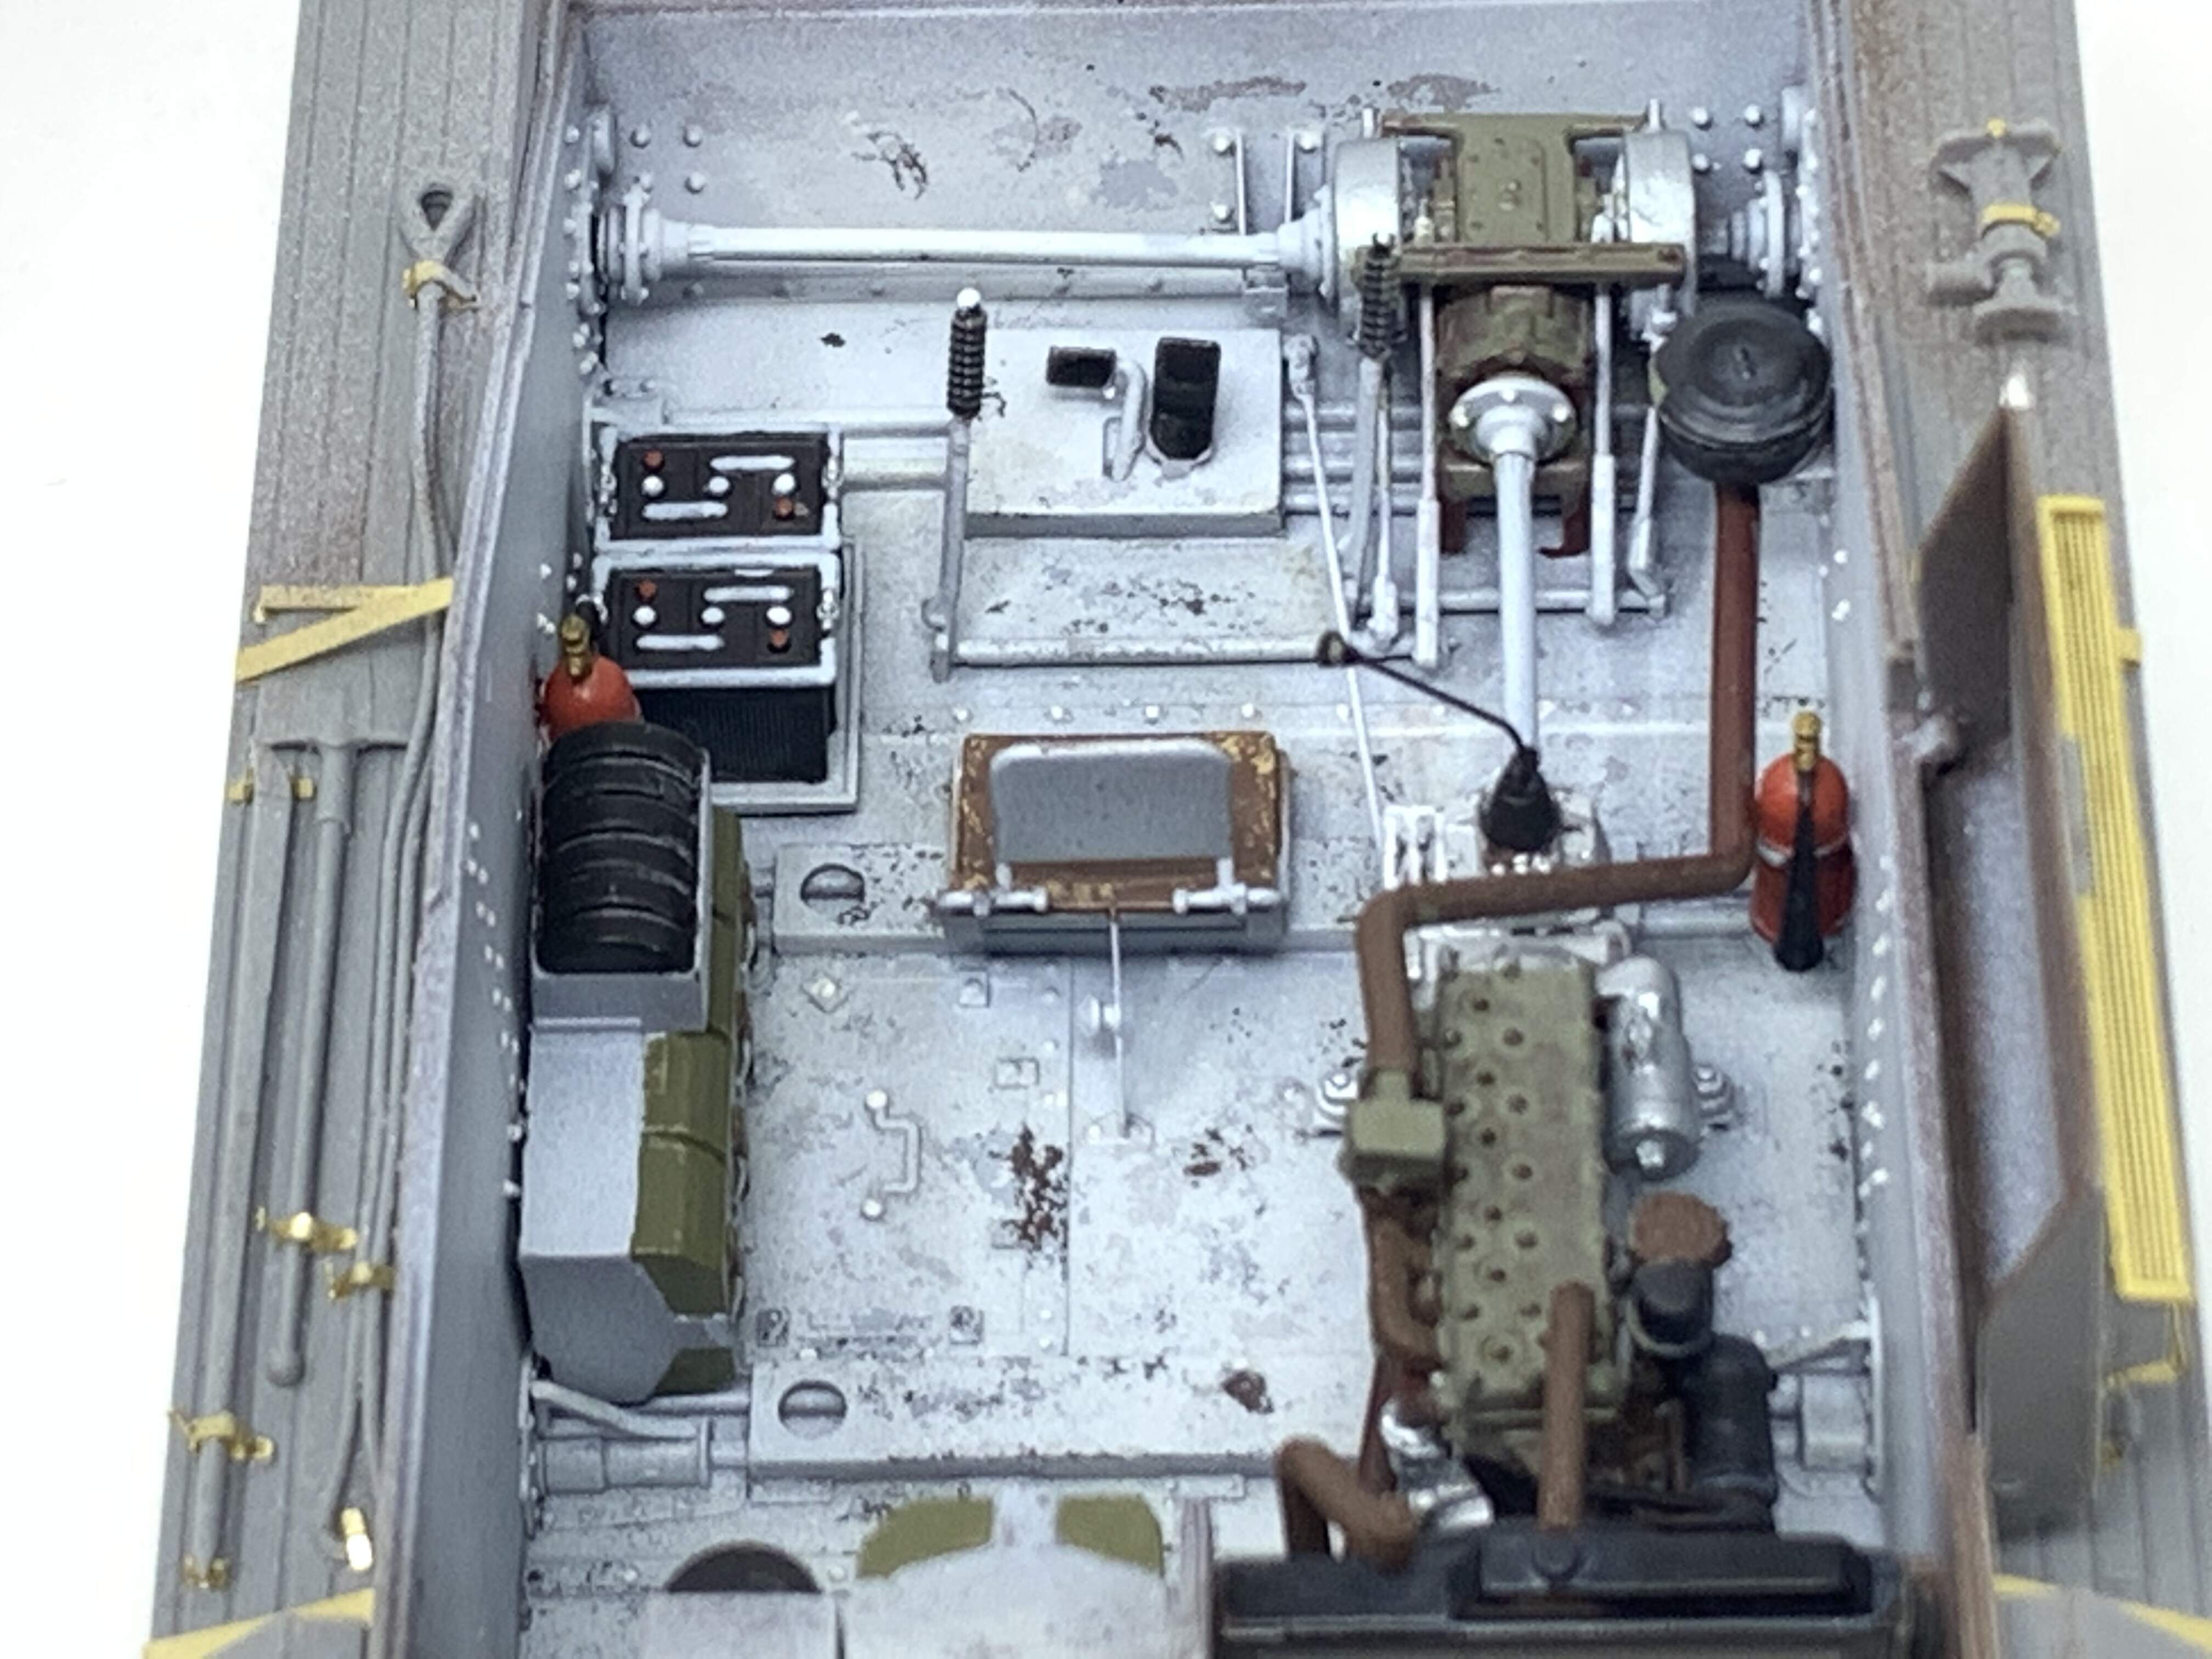
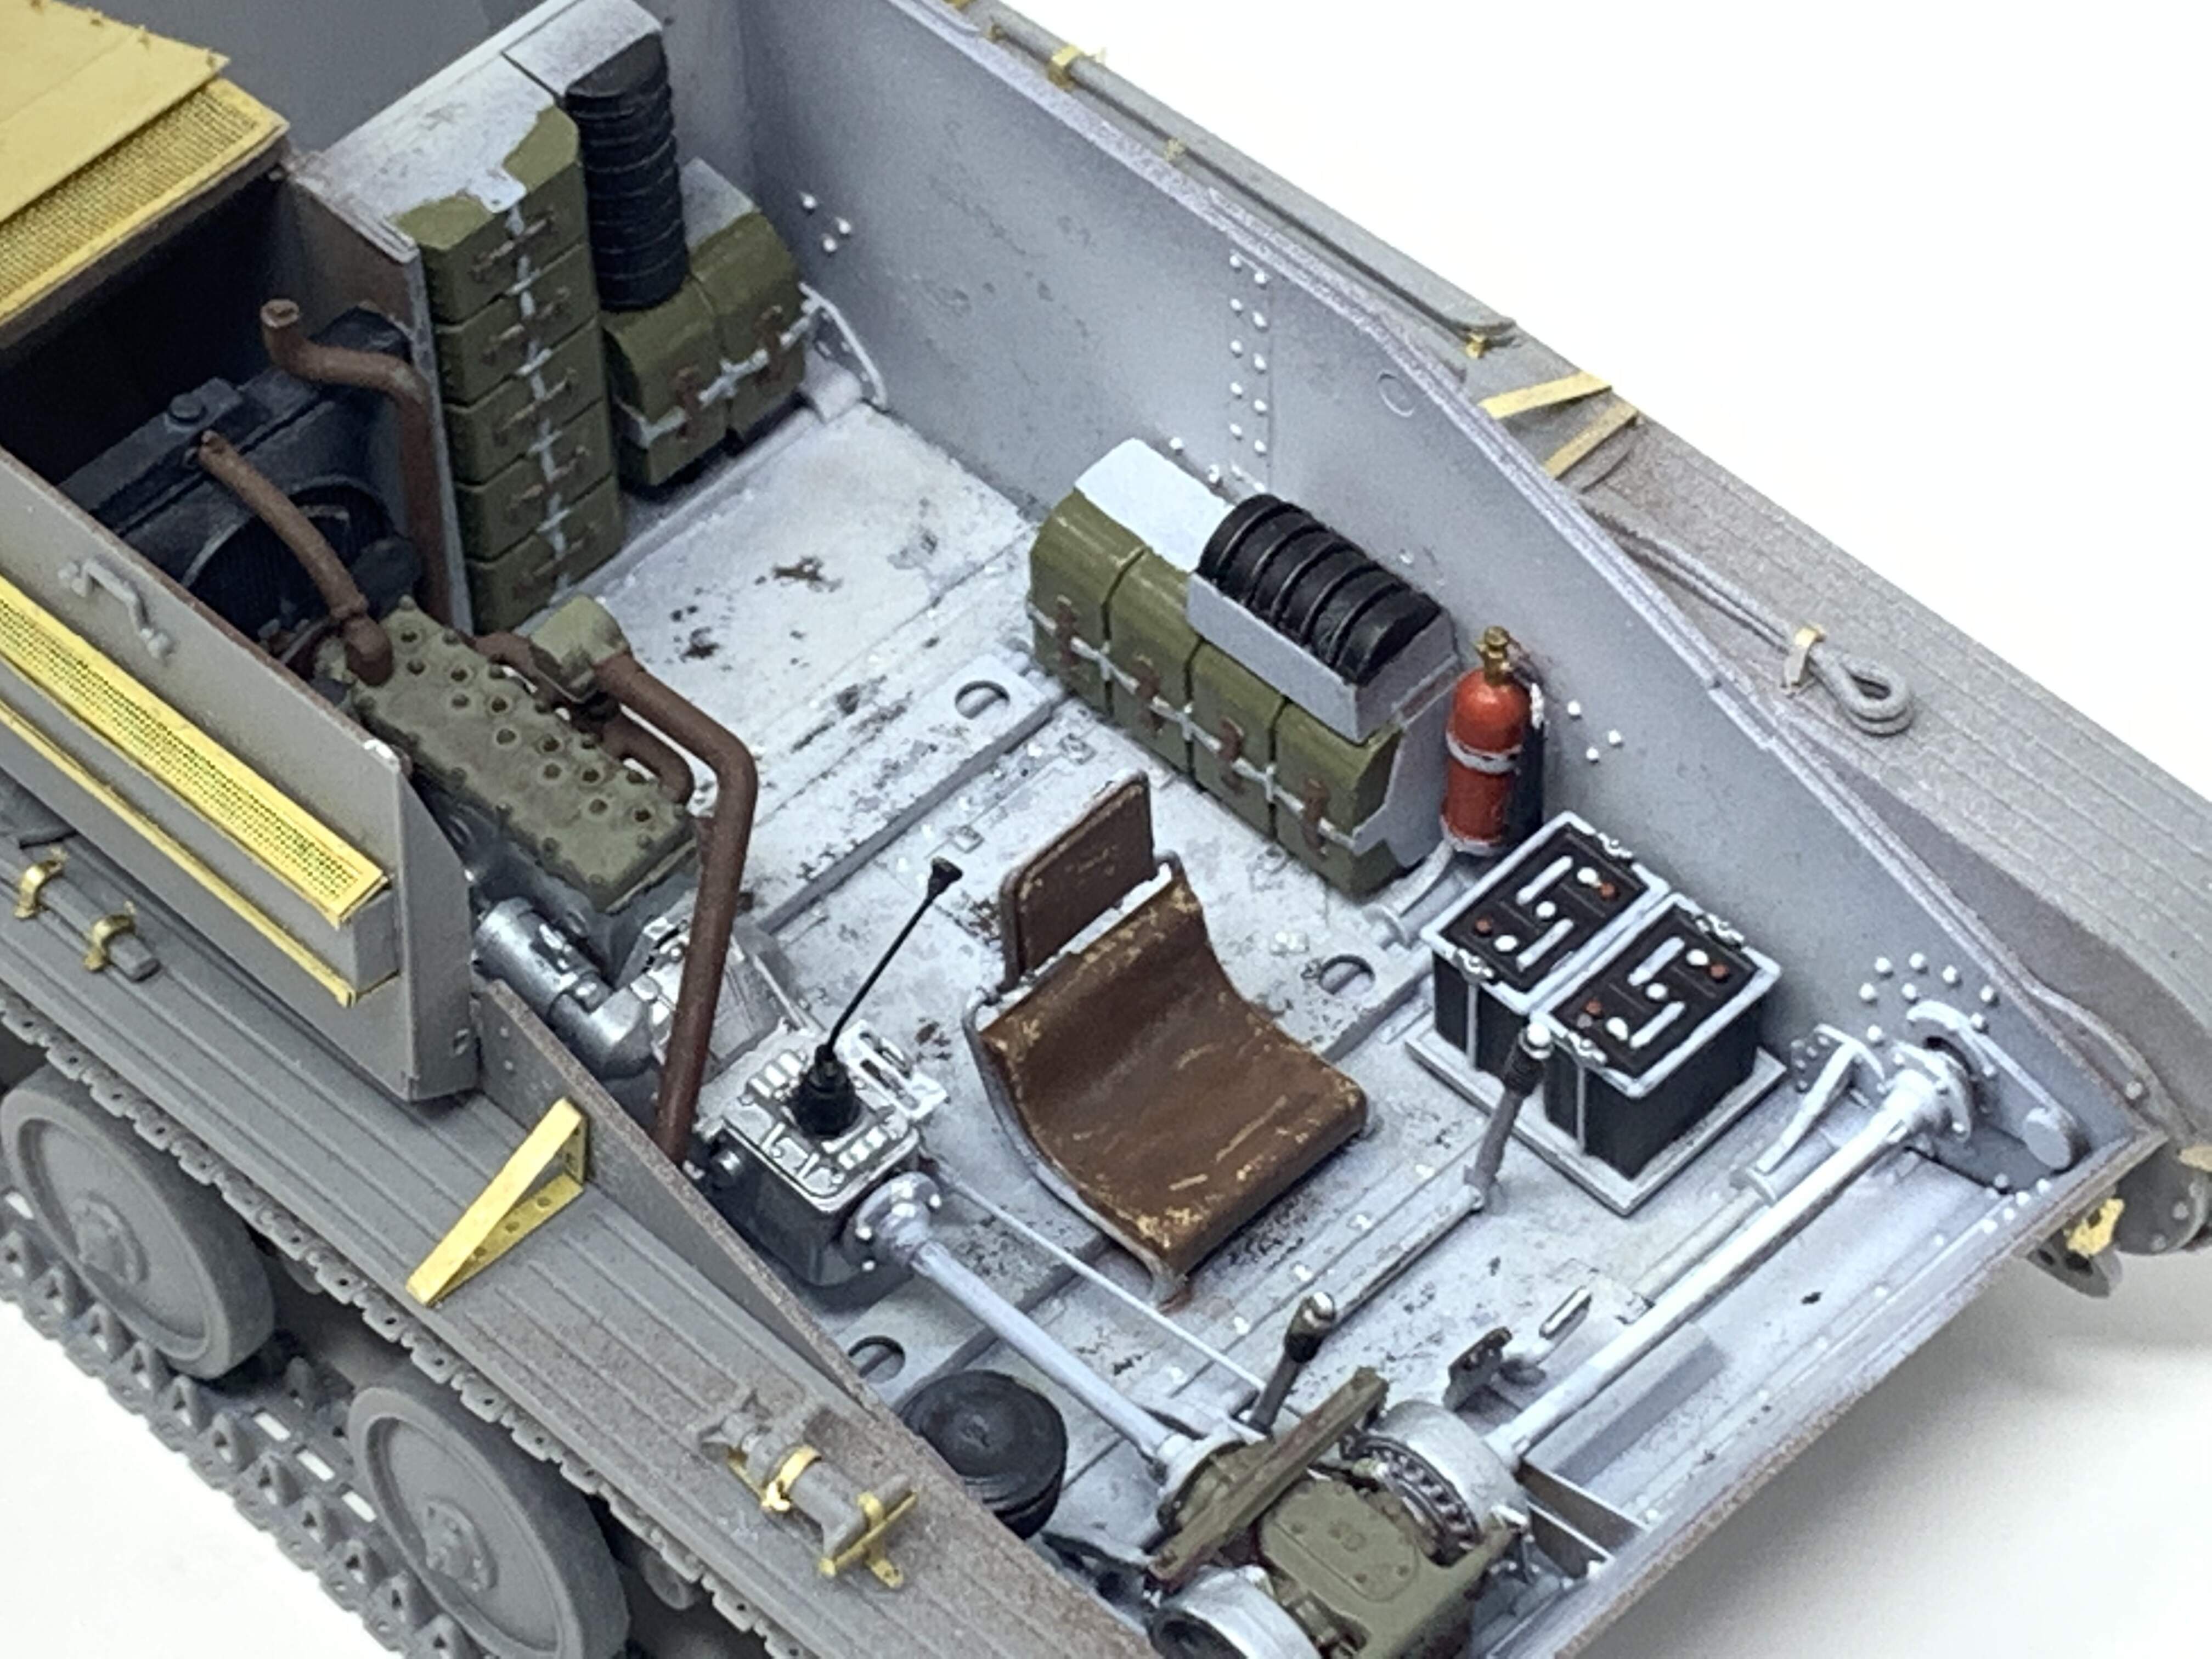
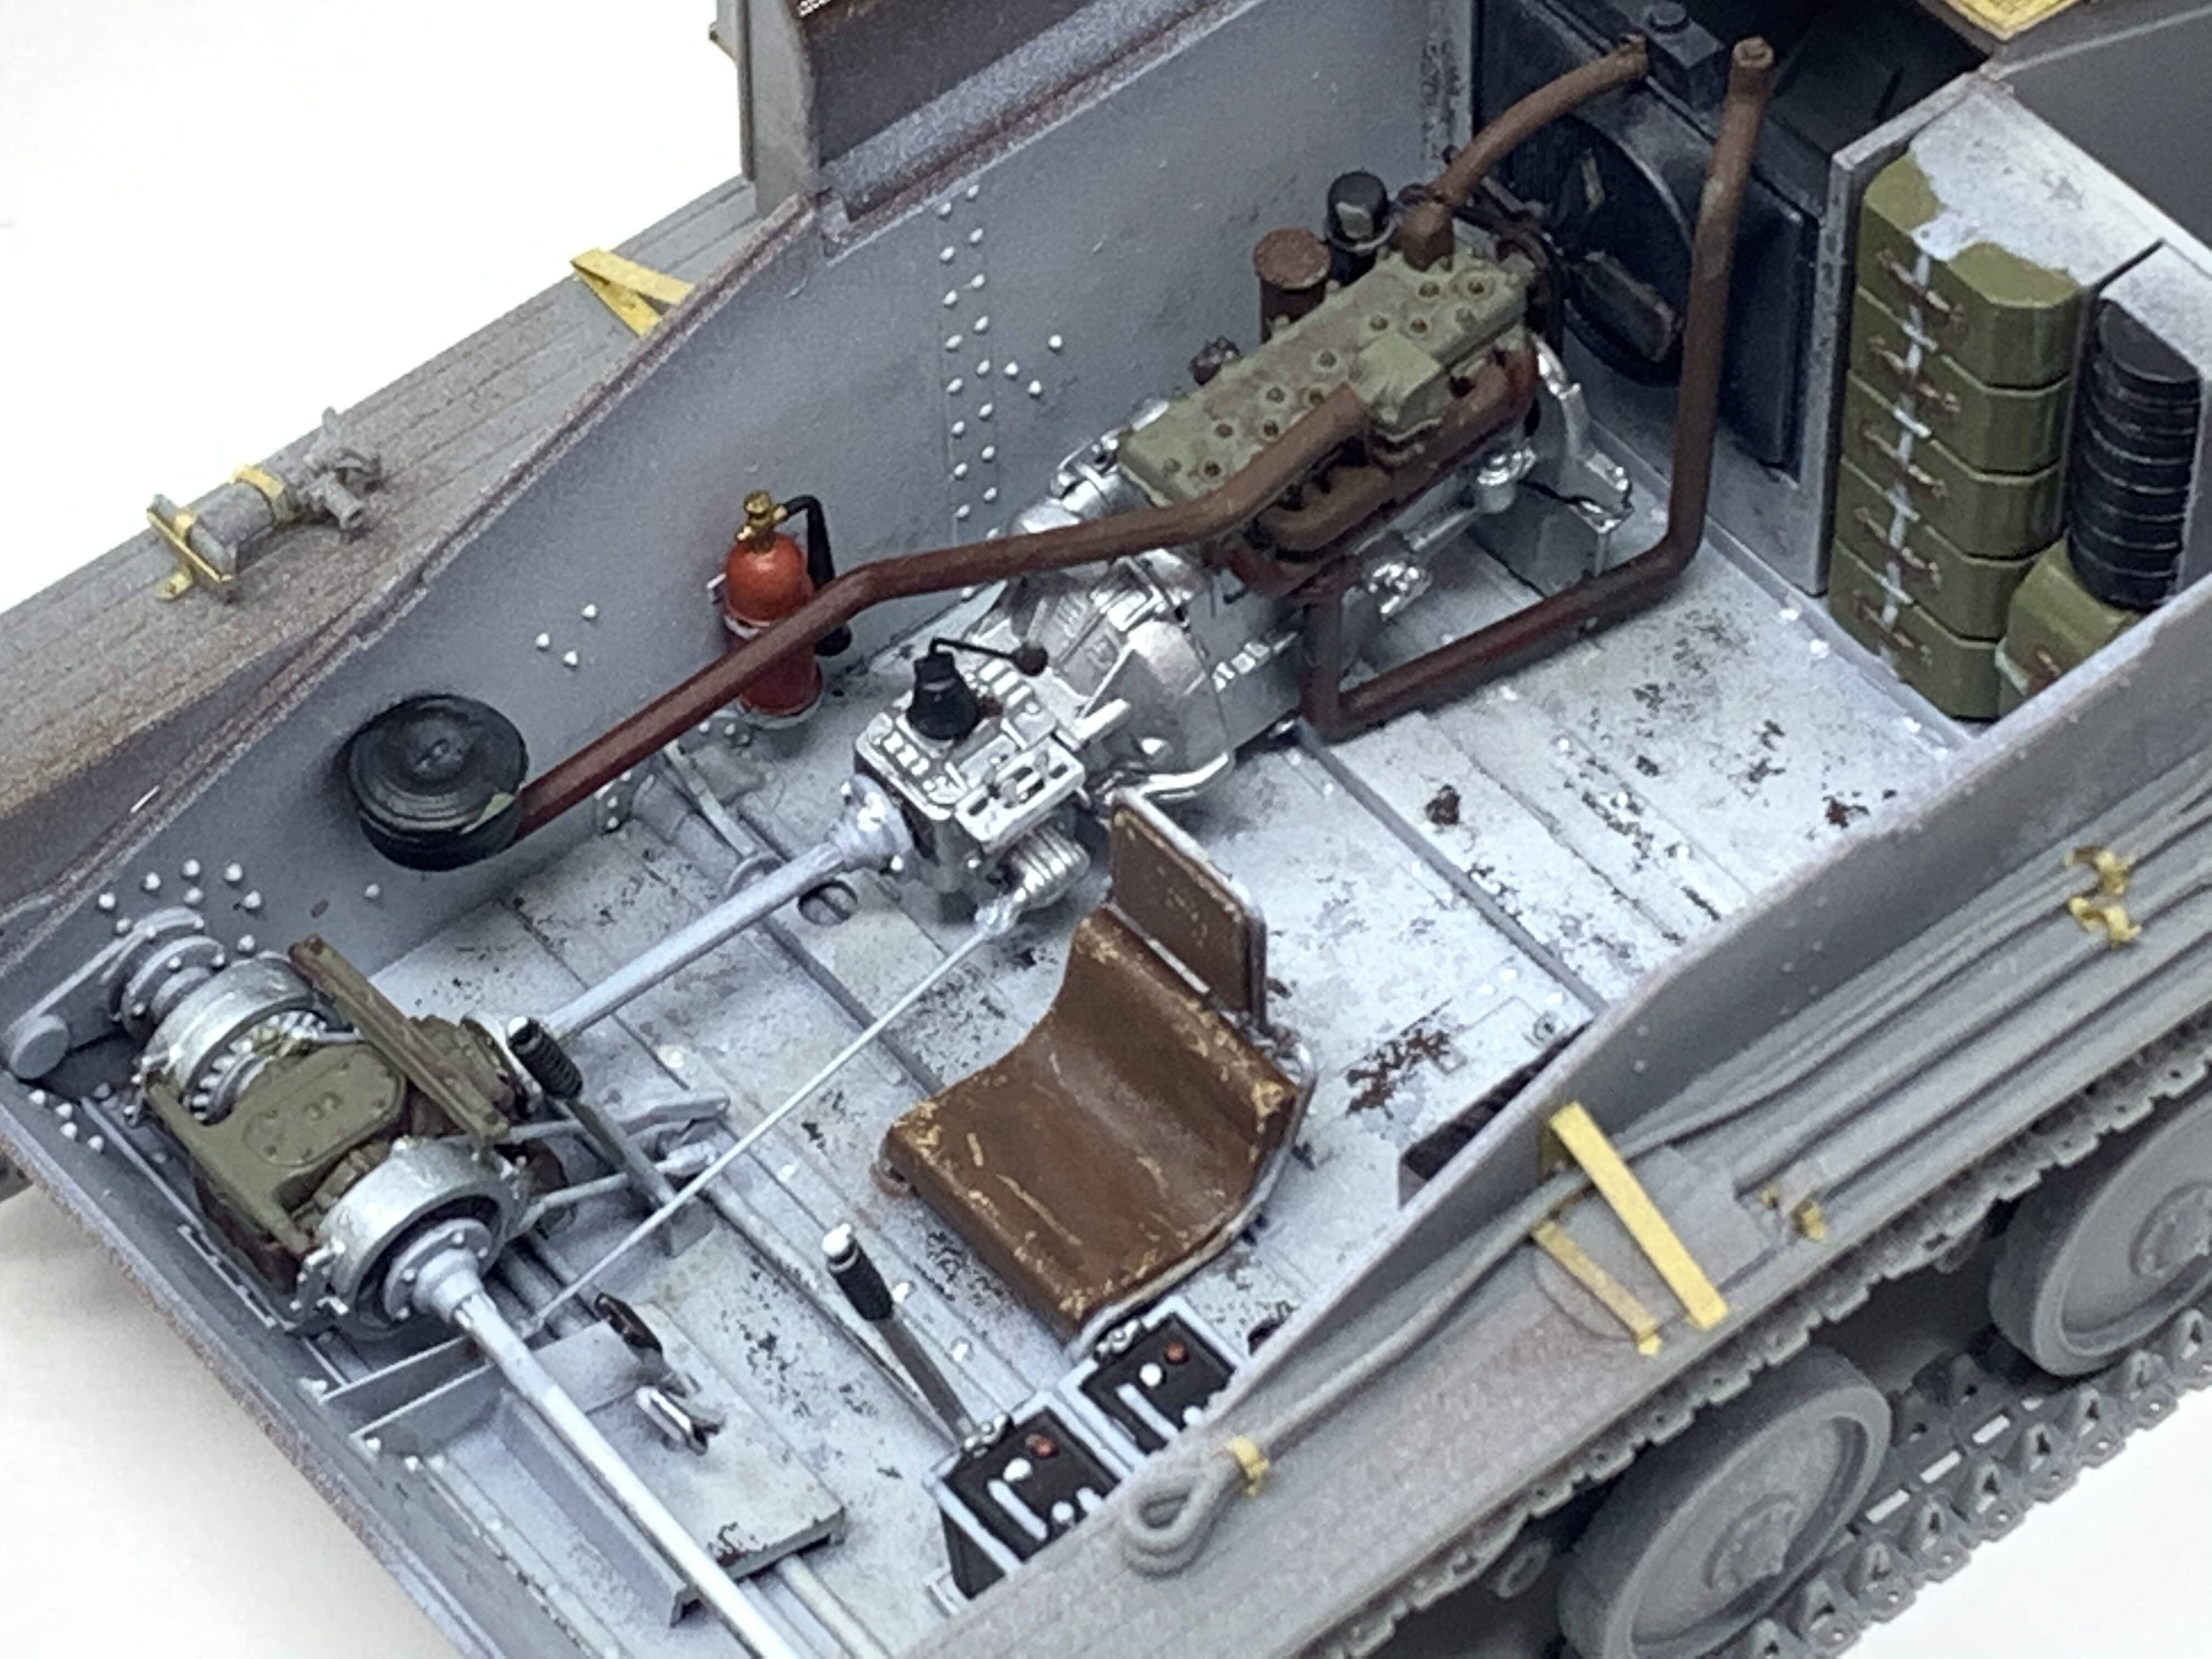
Wow! That’s just downright pretty! It hurts though to put that much time and effort into an interior detail and not be able to see it when the hull gets buttoned up.  Well, WE know it’s there, lookin’ sharp my friend, nice job!
Cajun 
2 Likes
@SabreSquadron: that is looking awesome. You glued it all together before painting? It’s even more impressive then!
@VladPanzer: (love your handle by the way) Yes, it will be great to see that truck. It’s another mini-art kit I’ve thought about too. I’m glad we’re seeing a wide range of types of subjects.
2 Likes
Thanks everyone! Actually, they were not all glued in place when I painted the base colors. The engine, fire extinguishers, batteries and ammo cases to the left of the driver were painted separately. They have now been glued in place as they appear on the photos. I will be weathering them as is.
an afternoons industry sees 96 links per side… both sides done… just another 40 links to do for the frontal armour but they can wait…

6 Likes