Personally I don’t think it is bad. Overall it looks very nice. I would say one thing about the bare metal look in some areas where it looks like there will be a lot showing… How long would bare metal stay shiny… Even after a short space of time, and probably more in the instance of combat used vehicles, the bare shiny metal will tarnish and even begin to rust quickly. In sunny hotter climates the metal will tarnish and take on that cold dark iron metal look. I would of thought the only worn metal area that would stay or have an element of shine would be the running gear and hatch areas etc.
But as I said… Overall, I think you have done a great job so far 
1 Like
Looks great Simon.
Hopefully you will never have to do it again, but when you need to overpaint a dark colour with white, paint the area a light grey primer first. The grey covers and hides the dark colour much better and the white over grey does not need to be so thick.
2 Likes
@Johnnych01 - firstly thanks man! I’m glad you like it, I have given some thought to the shiny bits, I will dull them down as I go with the weathering and any areas that still look too shiny after the dust and dirt are done will get some extra attention once I have found enough good colour photos to use as reference, I’m hoping a good Google search will do the trick!
@petbat - I thought about that after coat 7-ish I think? I was kicking myself! 
2 Likes
@GibbonSpanner I’m a sucker for British WWII armour and particularly their deserts camo schemes. Think you can get away with ‘over weathering’ desert WWII armour, but think it looks great anyway.
Hand painting chipping is just a practiced skill. I try and do some on every build within reason and slowly improving.
Really need to get back on my build. Other stuff been keeping me away from the bench for a bit.
1 Like
![]()
![]()
![]()
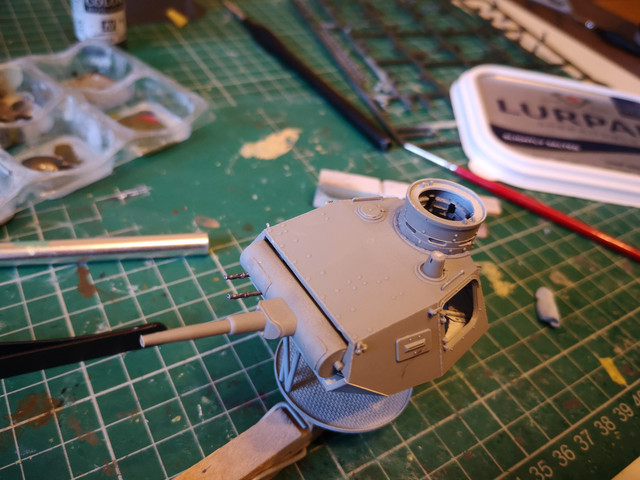
Pz III turret coming on…quick bit of white, detail painting and grey scuffs… as you can’t see a great deal I probably wont do too much more (if anything) on the interior, maybe some dust and muck around the bottom of the supports and box on the floor

7 Likes
So, I got to the point in my multi-kit Panzer III build where I finally started in on the MiniArt kit in the pile (Feb 21):

I am here with the Dragons since starting the end of January (1/28):

Where I am with the MiniArt as of today:
6 Likes
Just about 99% done. I need to add the pintle top (both kits will be permanently attached to each other by the pintle) and do some touch-ups. Fiddley for sure, both of 'em, but that’s MiniArt for ya. Regardless, I’ve enjoyed the builds.
Weathering will eventually be done but that’ll rather depend on what I put them on. I think the part I’ll like the most is playing with worn wood colors - seat, backrest, and footboards with worn-through paint.
A question for the pro’s: I want to wear the paint on the metal parts too - should I just use Gun Metal (chipping) or? Some grease/oil on the hubs for sure and light “smoke-staining” on the muzzle brake (very light).
7 Likes
Really nice
Phil,
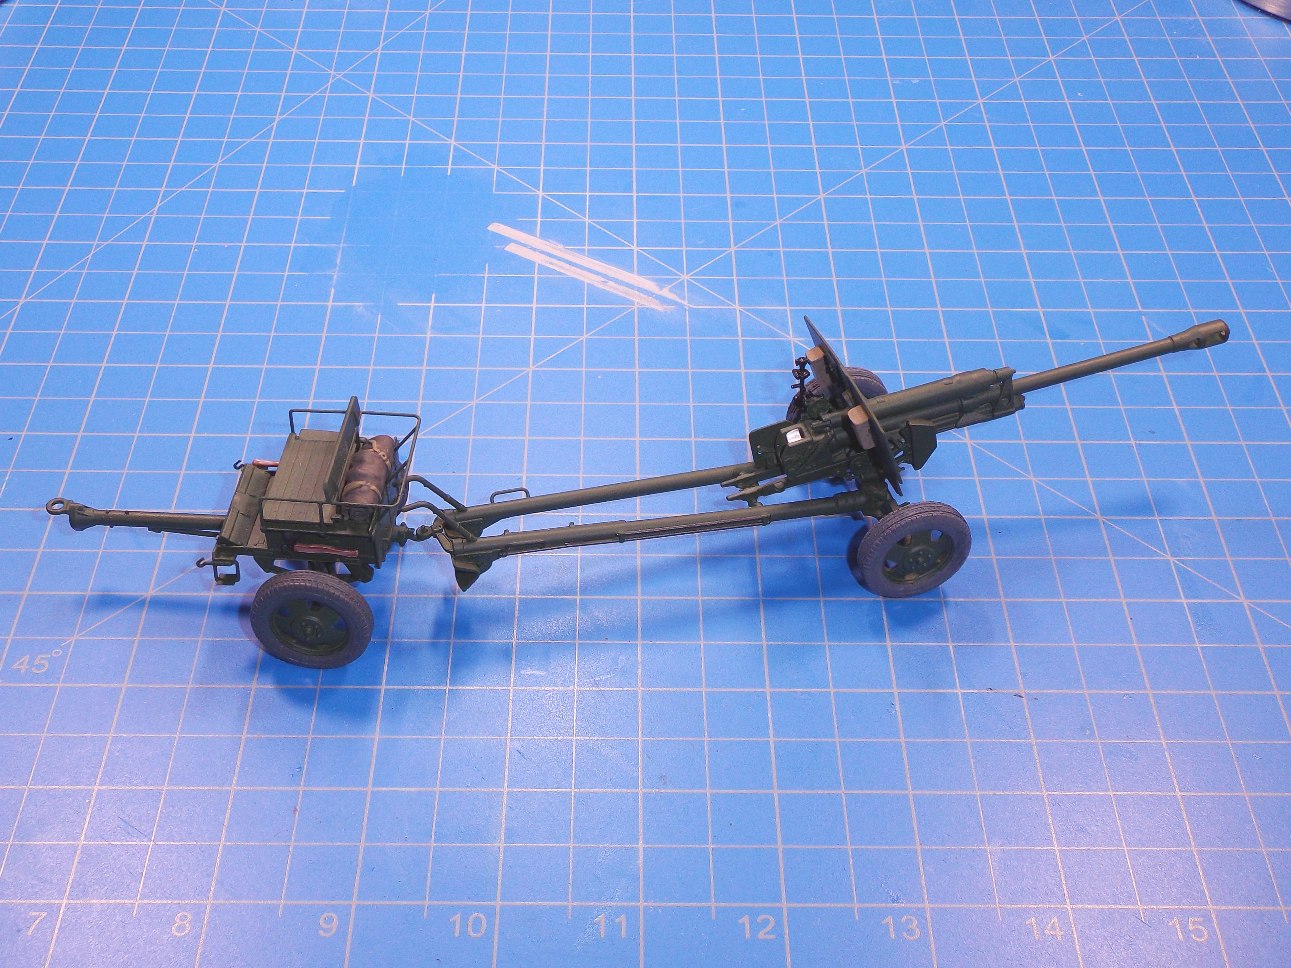
The limber kit comes with the necessary parts to hook it up to horse-tack.
Mike
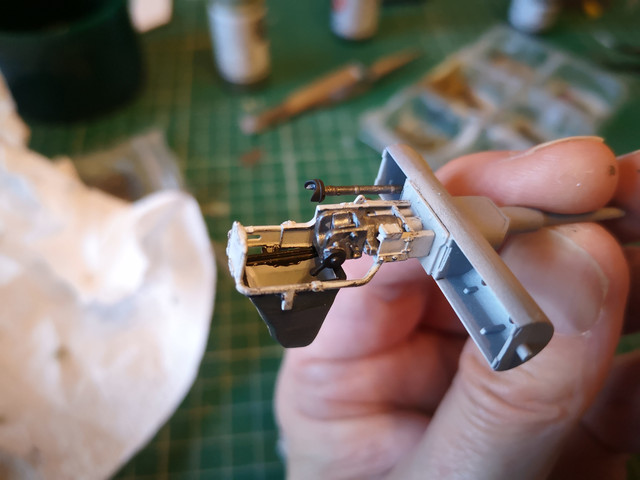
I can report some progress. I’m kinda doing this backwards - started with the turret. The turret is essentially done. There is a loader’s machine gun to attach and the seat for the gunner that attaches to the bottom of the gun mount. Both are painted and ready to attach but the lower part of the turret will need delicate handling from then on.
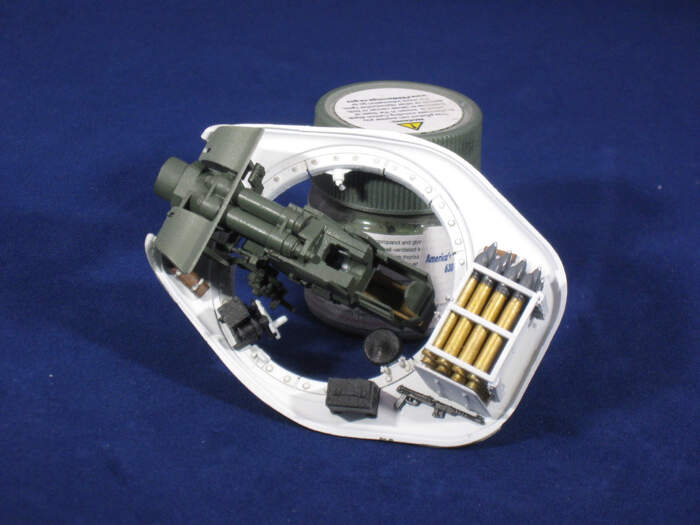
So that is the bottom half of the turret.
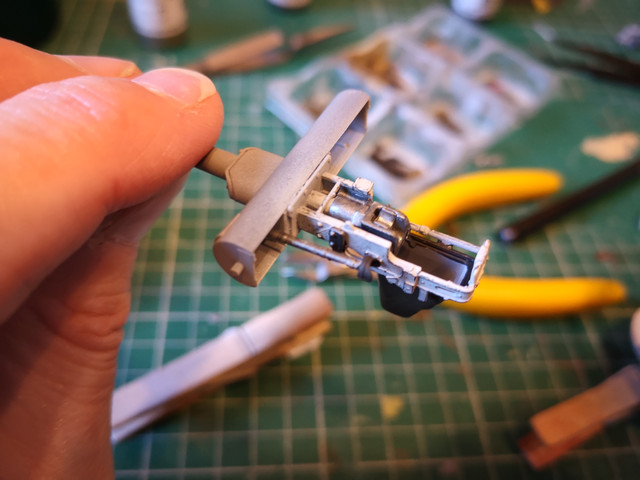
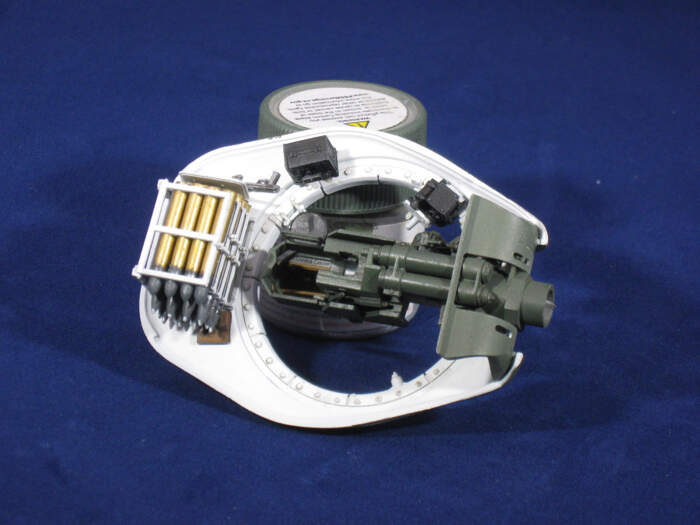
And here is the top half:

The cupola is painted and needs to be attached.
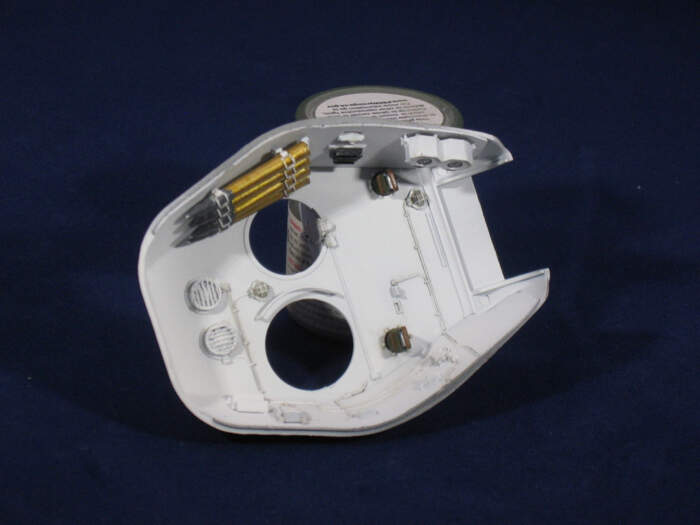
I still haven’t figured out how I intend to display this. The way the turret is done, once you glue the top half and the bottom half together, you’re not going to see all that nice interior stuff so I’m reluctant to do so.
The kit is a blast. The keen eyed might detect two things I didn’t get quite right. One of them was just because I didn’t pay close enough attention to the instructions, the other I think a couple of things need to be assembled in a different order.
This has taken a lot of elapsed time but it wasn’t much actual time. I spend a lot of time figuring out which things to attach before painting, and which things to paint before attaching, and then once it’s all painted and ready to put together a fair bit of time between steps making sure glue is dry. Then some final touch-up was required where I used plastic glue to attach parts that were already painted and it distorted the paint.
But it’s a great kit so far and I’m finding it fascinating. I thought I would do the engine next but I seem to find myself working on the crew compartment.
7 Likes
@phil2015 Whatever you do, don’t save the tracks for last.
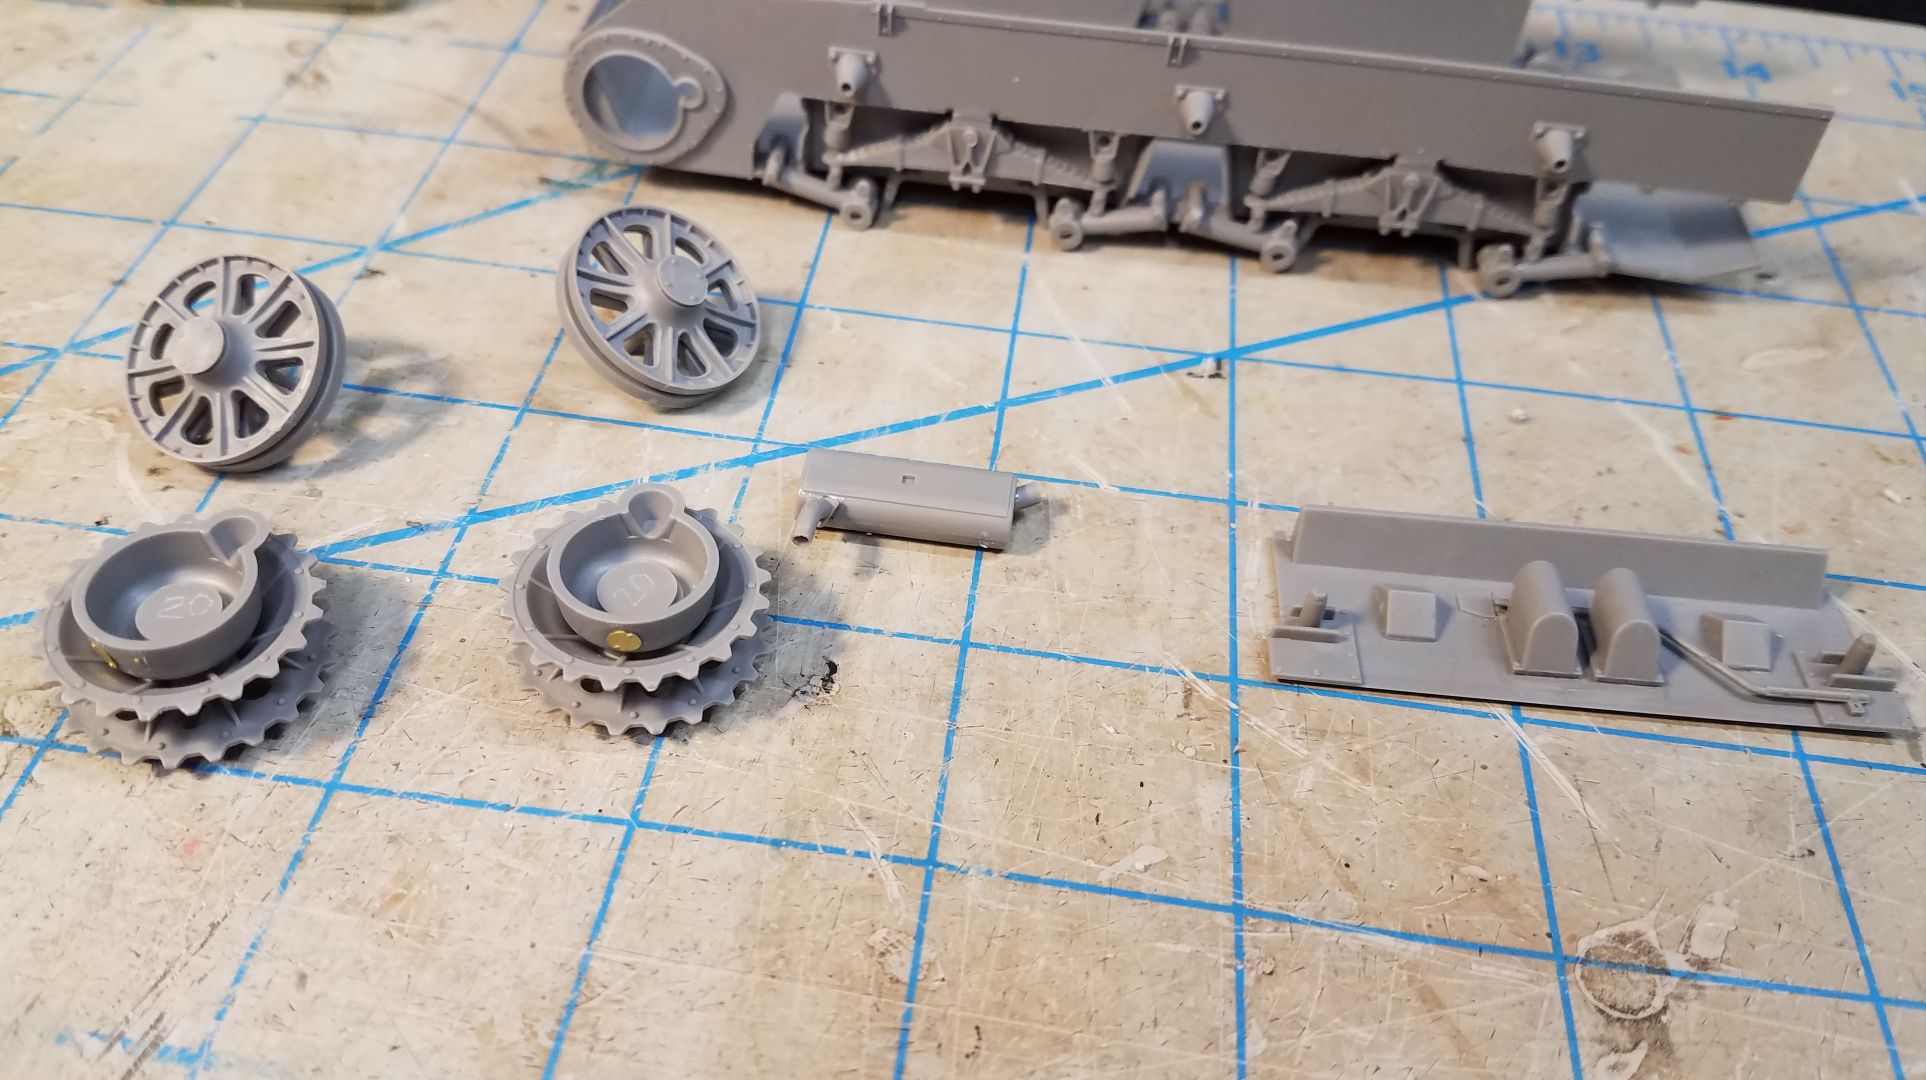
Ok, so i have started building the T-60. The plastic seems a little soft, but not too bad. A little minor flash around some areas.
Taking it slow.
2 Likes
all these nice interior kits… I need to finish off a few more yet before I start one of mine (not in time for the campaign tho)
Campaign is running for a year afaik. So you might be able to join later on this year.
1 Like
…and I complain about cleaning up the road wheels for a single Panzer IV build… I wonder about your sanity doing so many 3’s at once…
1 Like
The secret is to NOT worry about one’s sanity while doing so many at once.
3 Likes
might start in the campaign window…
1 Like
Amazing result, good job.
Omar
question- did you use the Tamiya oil drums/jerry cans set for those drums and jerry cans?
it looked vaguely familiar.
Cheers!
L