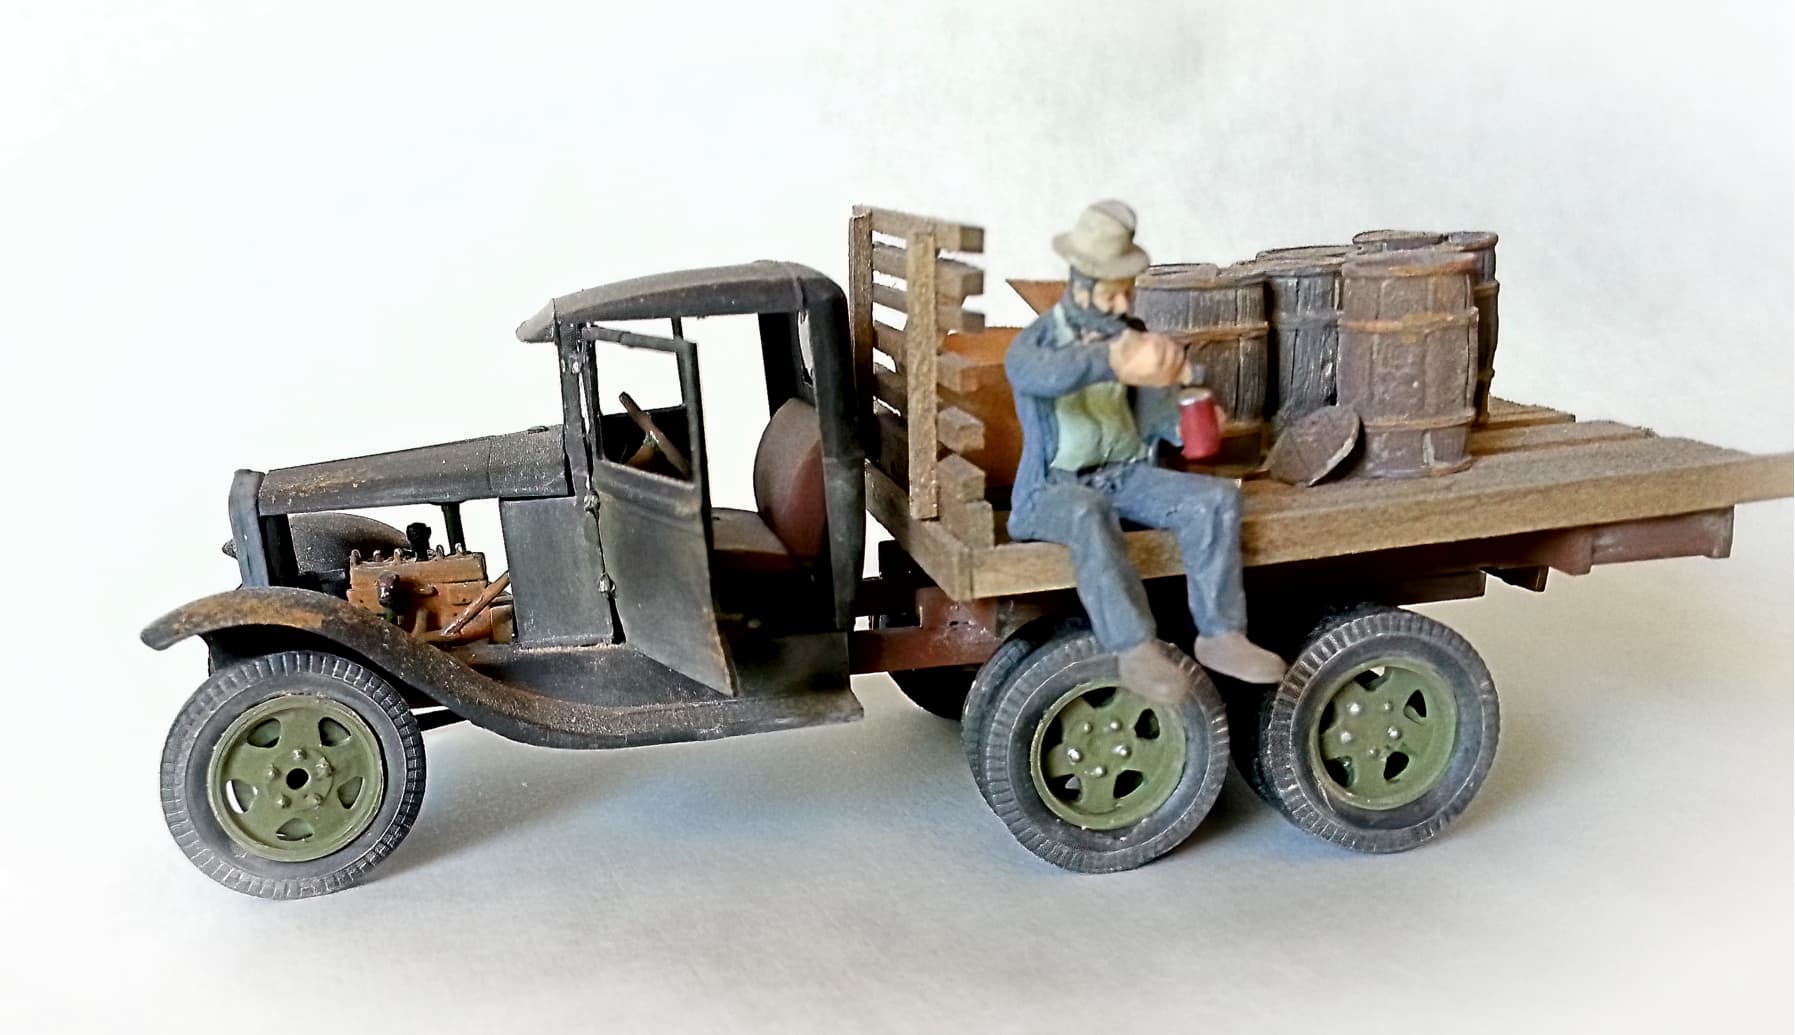
Something a bit different.
I’ve been a model railroader for way too long. Much of it American narrow gauge. Currently have a On30 layout.
Anyway I’ve spent the last year ‘playing’ with 1/35 AFV. Then the thought hit me about building some 1/35 narrow gauge stuff. So I purchased a MiniArt railtruck. Kit #35265.
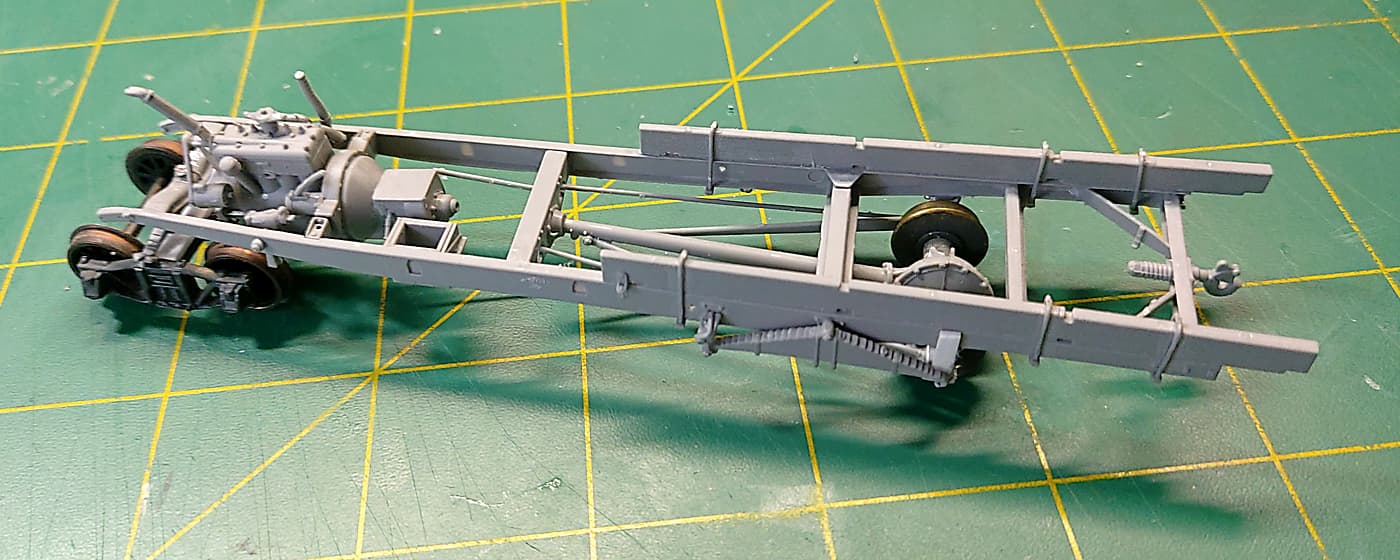
First job was to regauge it to use HO/On30 track. Works out at approx 2ft gauge in 1/35 scale.
I used an old HO truck with spoke wheels for the front. The rear needed some way of driving the rail truck. So I split the rear diff from the kit and slid it over a HO axle. So in theory all is ‘believable’!!
I sort of re engineered the brake rods etc etc so they looked ‘right’. (Spring hangers are temporary).
Any plans to perhaps chop the cab roof to bring the vehicle more into the 1/48 scale realm? Or are you going to stay with the 1/35th (Military Scale RR) and just call it 2 foot gauge? If this is to be a stand alone diorama then that plan is right on target!
165thspc I doubt it could be re-scaled for 1/48. If you do a search on the internet you can find 1/48 versions of the Gaz/Ford A model. I’ve made several of them and they are great kit. Unfortunately they come from Russia and the current situation may complicate getting them.
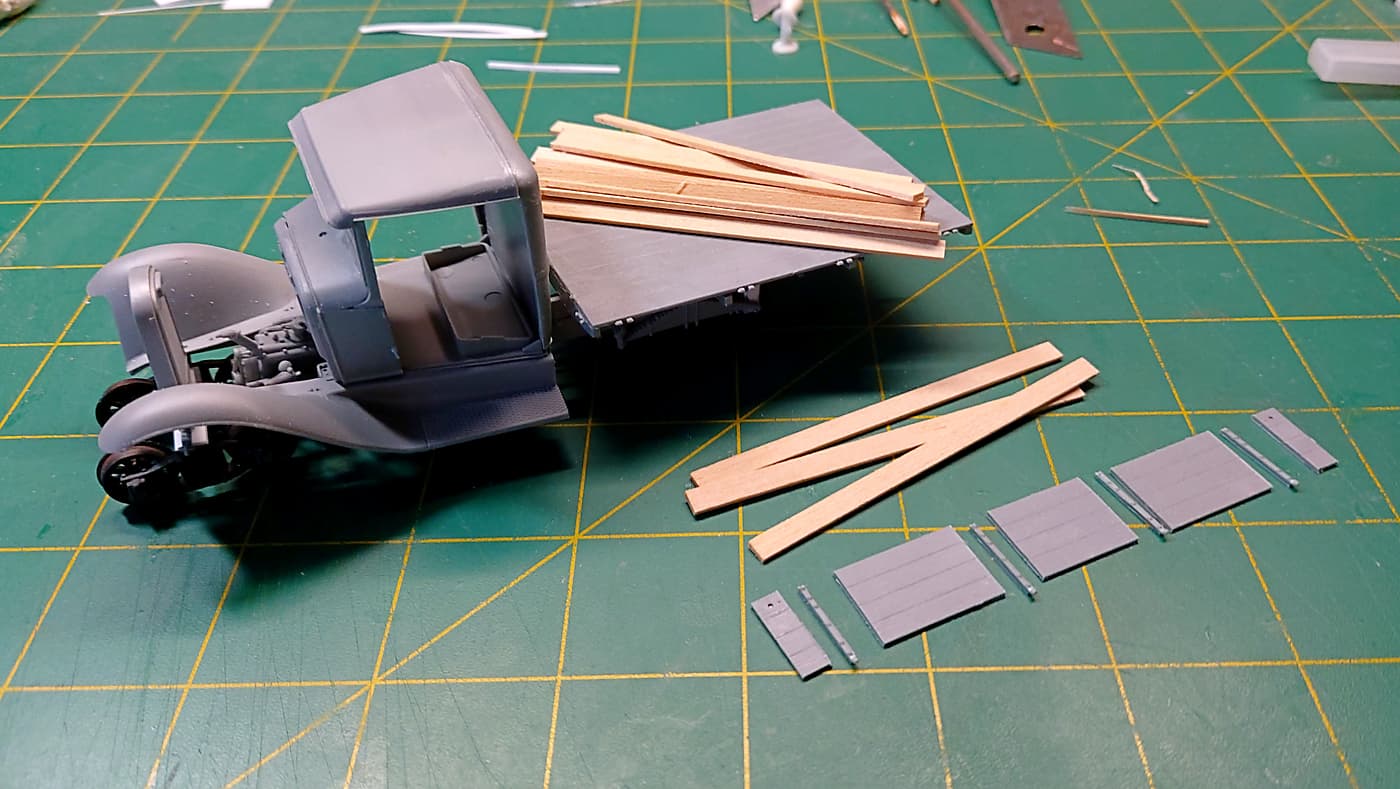
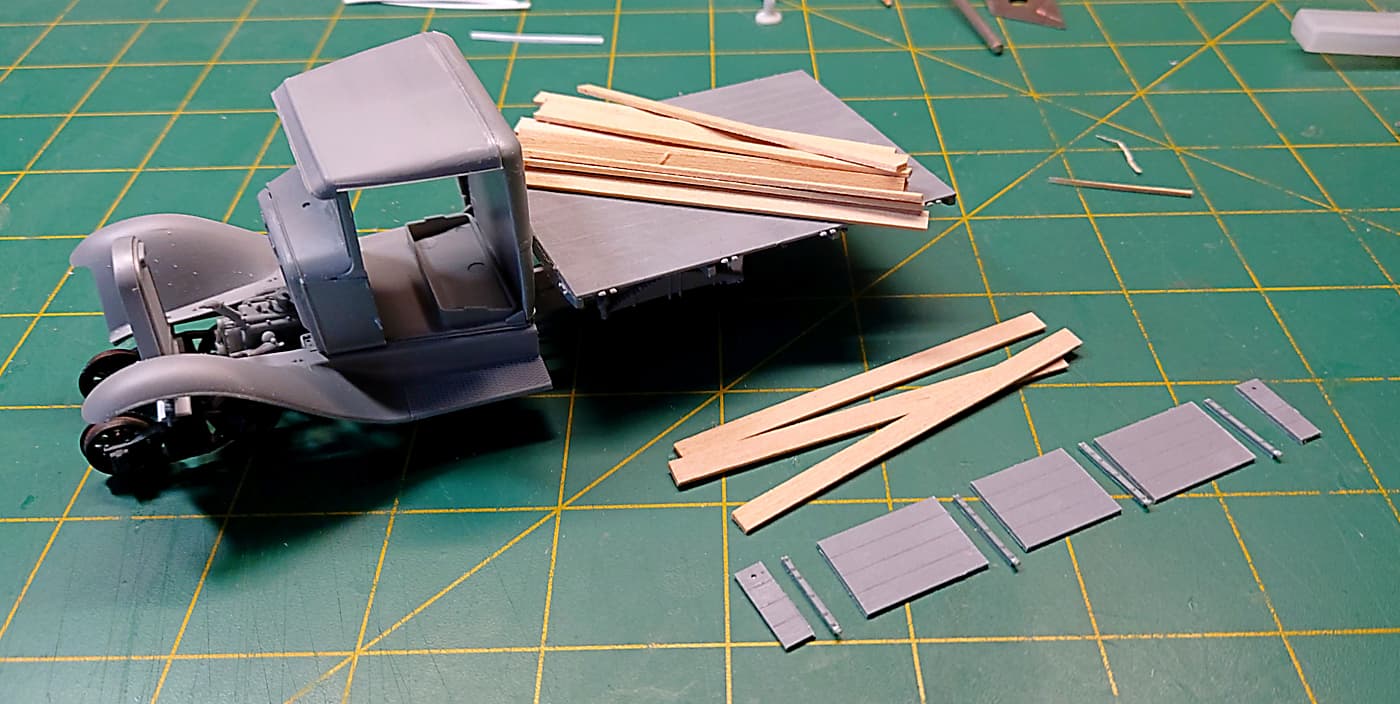
Mean while I’ve moved onto the back of the railtruck. I was going to make a whole new deck but figured it will be covered so I took the easy route and used the kit tray. The below image shows my timber sides cut from basswood. I cut up the kit sides to get the metal side supports. I tried making them from styrene but figured cutting out the kit supports would be easier. The timber sides will be stained before I attach the side brackets.
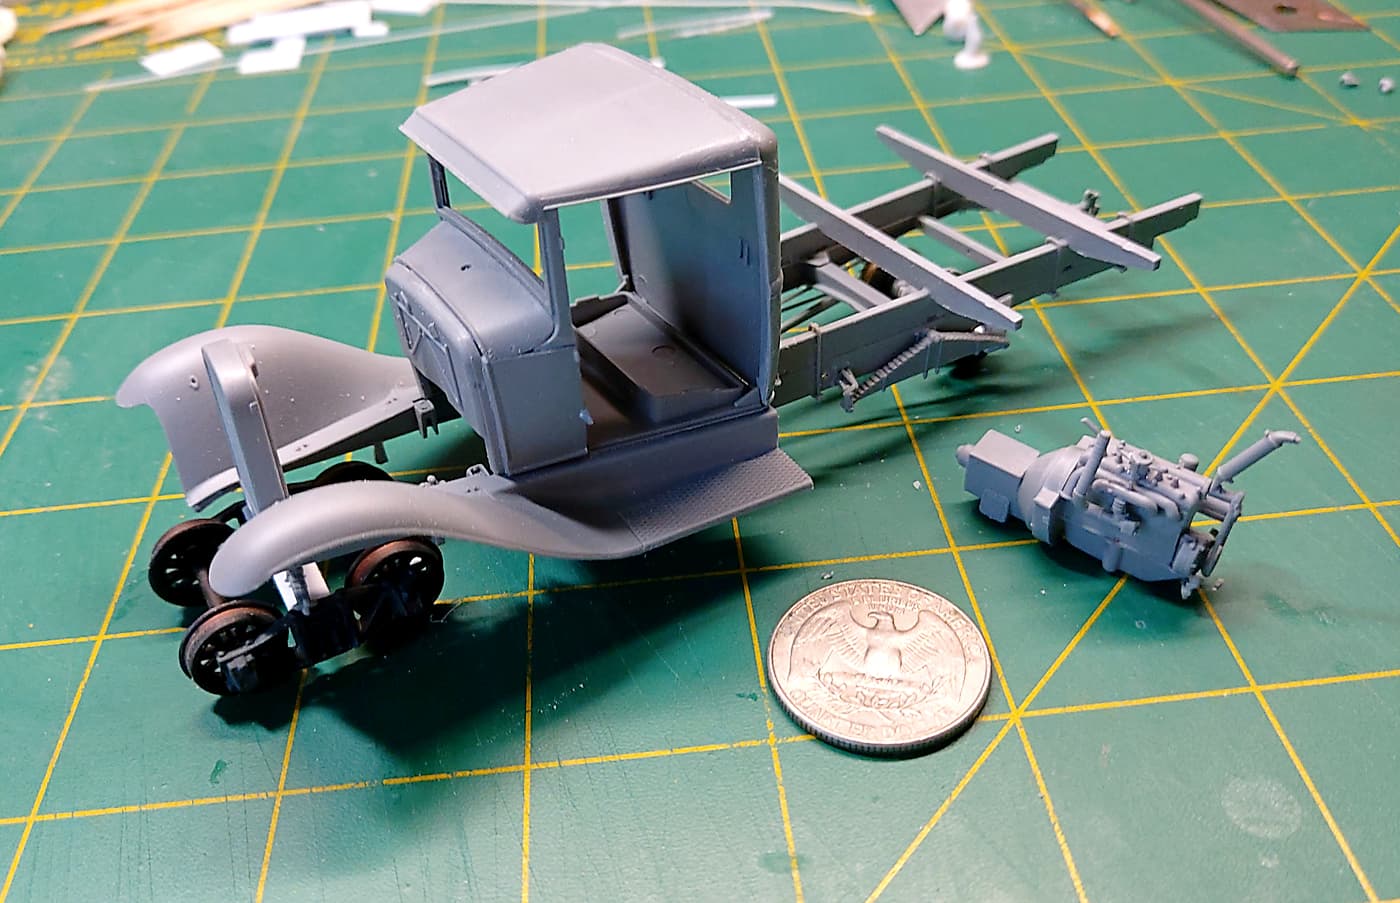
Note - everything is dry fitted and the engine has fallen down. So don’t come back and remind me.
GAZ/Model A is available as a Tamiya 1/48th kit so no worry about sourcing the kit. 2ft gauge prototypically is too narrow for converted motor vehicles but I you like it, go for it.
At this point I know you don’t want to hear this but there are some very nice ready made tracks available in S Gauge/Scale. Do not know what that scales out to (Narrow Gauge Wise) in 1/35th.
Re-gauging your rear wheels to S would probably not be a problem, but finding as nice a front truck as you have there but in S would probably be neigh on impossible. However since this is a to be a static model butchering up that front truck to a wider gauge would probably be doable.
I have sh*t load of HO and On30 stuff. Mechanisims and all. Im on a mission to see if 1/35 scale 2ft gauge is sane or not. I know it can be done. But will it work if i motorise stuff? We will see.
All else fails it will be fun!!!
Some progress images. I’m all over the place on this build. Just winging it!
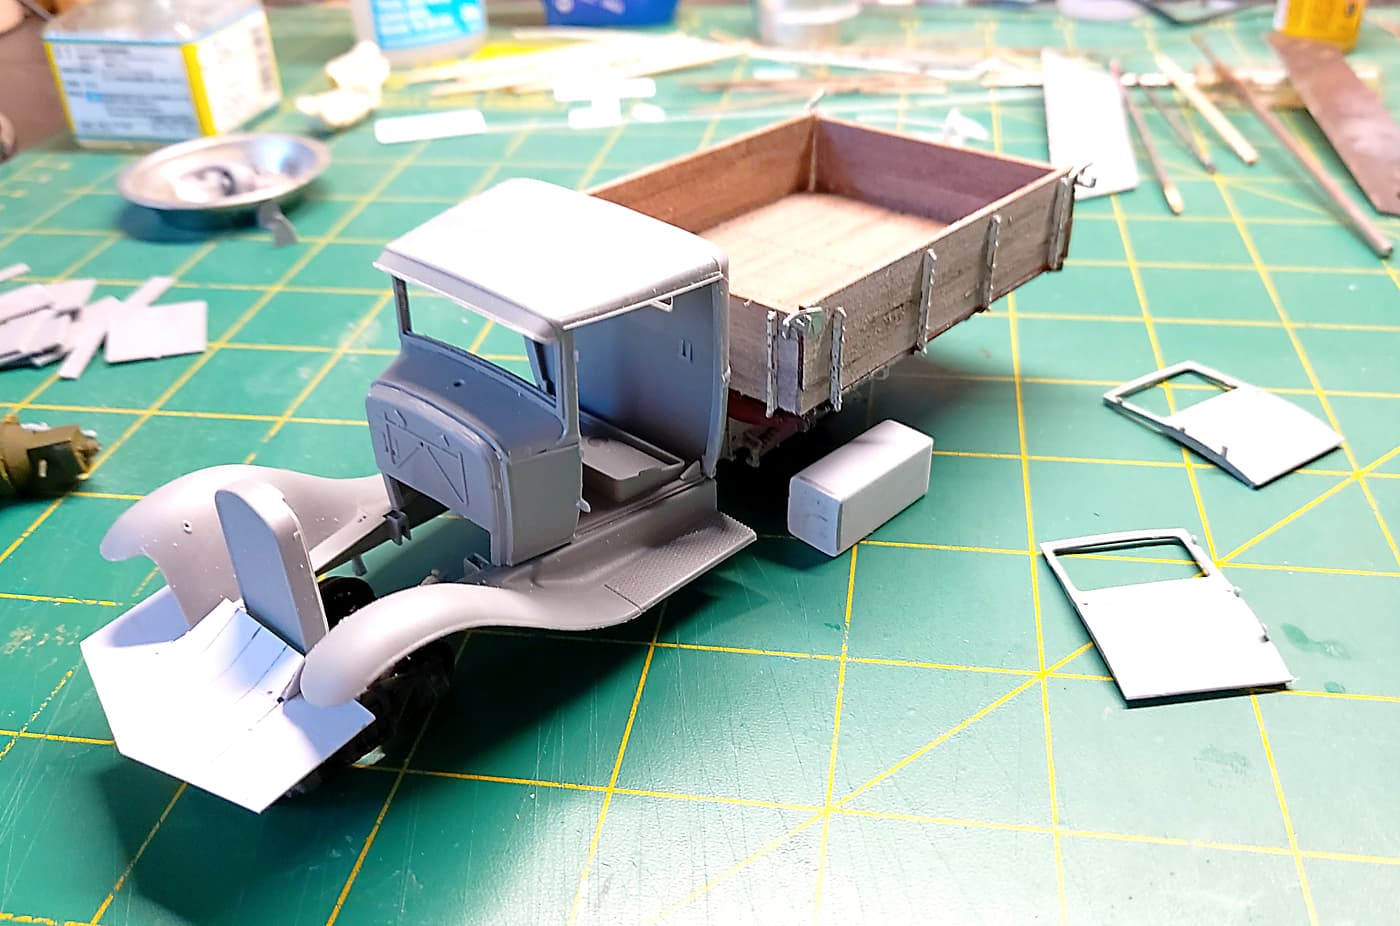
I like building with wood. So the wooden sides and deck had to go.
The deck I simply cut a sheet to size, scribed it and glued it over the original deck.
For the sides I needed the original side supports. I started by making my own. Then sanity hit home! So I cut the originals up to get just the supports.
Glued individual planks together to make the sides and ends. Then glued on the side supports. The timber was stained with a brown/black wash. I wanted a old white worn out look for the sides. So I applied a thin white wash over the top.
I’m now getting ready to prime and paint then assembly. I’m going to wire the engine so some procrastinating first.
Slow days.
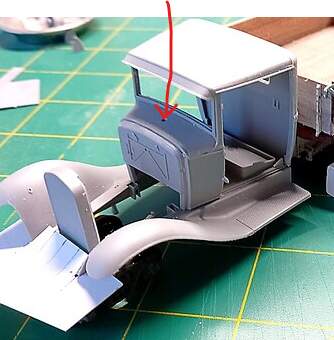
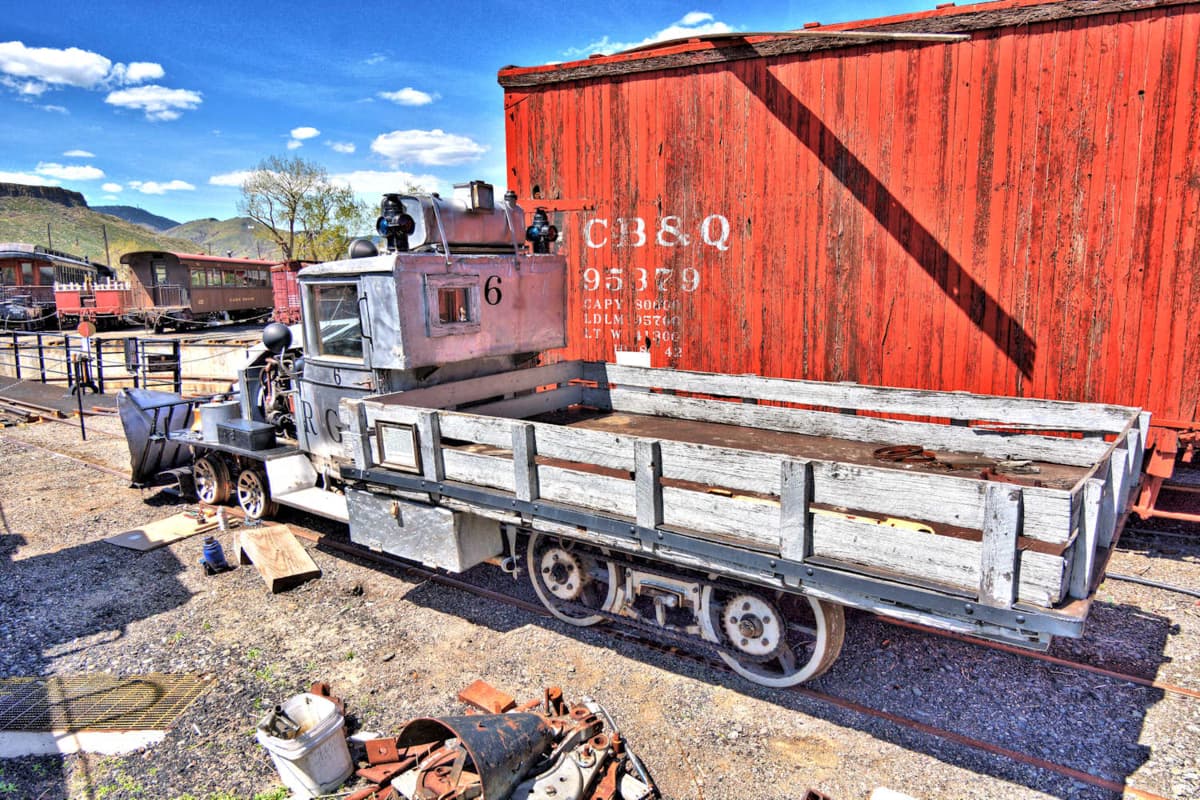
I have assembled the rear tray. Next is the front cow catcher. I’ve mocked up a card base for the moment while I procrastinate if it’s ok or not.
Note to anyone building one of these MiniArt kits. This is my second one. Neither has a fuel tank. Maybe they are solar powered!!! Anyway you can see my fuel tank made from styrene waiting a suitable mounting place.
This text sounds auto-translated:
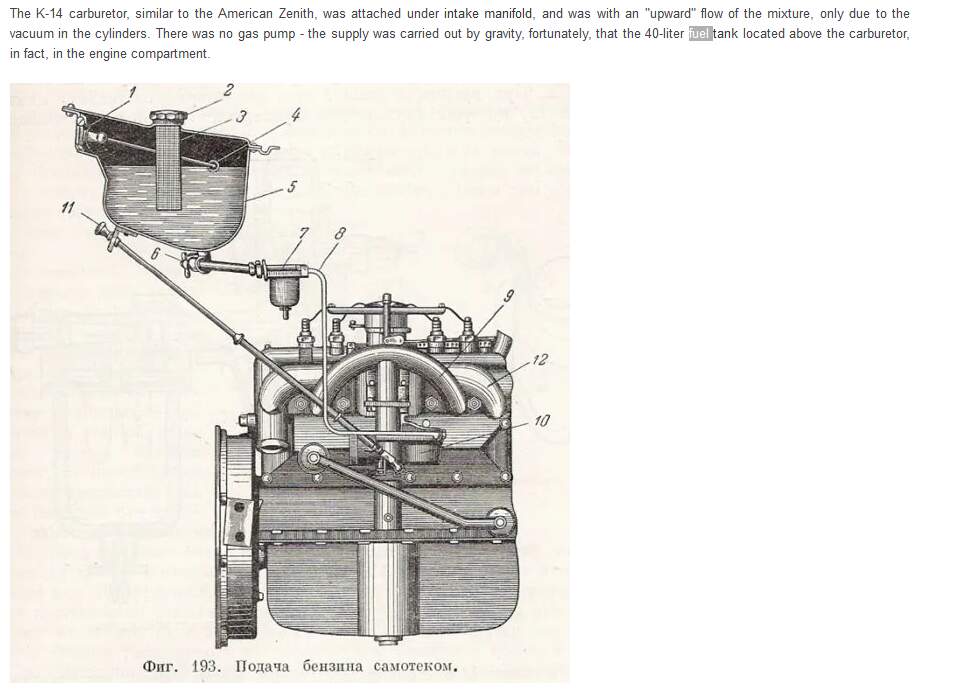
" In 1935, in anticipation of the start of production of the GAZ-M1 passenger car (1936), the engine was somewhat modernized. The increased compression ratio to 4.6 made it possible to increase power to 50 hp. at 2800 rpm, and a torque of up to 17 kgm at 1450 rpm. A fuel pump appeared on this engine (at the Emka, the gas tank was located under the rear overhang), a new ignition distributor with a centrifugal advance automatic device, as well as an output from the oil line to the pressure gauge in the cab of a passenger car.
But, as mentioned above, the lorry did not receive an increased power engine immediately. Yes, and the “modernization” was good for itself (as indicated by the letter “M”), if the truck engine did not receive an updated kit attachments! And their drivers were still left without oil pressure control, and with the only possible manual adjustment of the ignition timing. A gas pump would be, like an emka, a GAZ-MM lorry, and a gas tank under the body, of a larger volume - with a regular 40-liter capacity, you won’t run into much. But it was not supposed to: get along, chauffeur, with what you have, you are not the first!"
If you were to go looking for the fuel tank on a ZiS-5 you need to look under the drivers seat,
he’s sitting on the tank.
I wonder if the GAZ-AA or AAA ever had it moved there …
Absolutely. Someone decided that a bigger fuel tank was needed.
About the location though …
Could it occupy the front end of the load bed? Sitting on some supports
to enable gravity feed to the carburator while still being just below the cab rear window?
Nobody knows if you add a fuel pump or not but fi someone does and El Cheapo conversion
in the local workshop and isn’t able to get a fuel pump then gravity feed is the only option
Now how about a roof mount for that gas tank you built? That would certainly enhance the gravity feed and keep the tank out of harm’s way if mounted in the loadbox.
If we consider that tight tunnel and bridge clearances might be a problem on your railroad then maybe a bracketed mounting just above the rear window on the back of the cab? The tank could just peek over the curved roofline of the cab in back giving lots of added visual interest to the model, plus this solution would be something a bit more unusual!
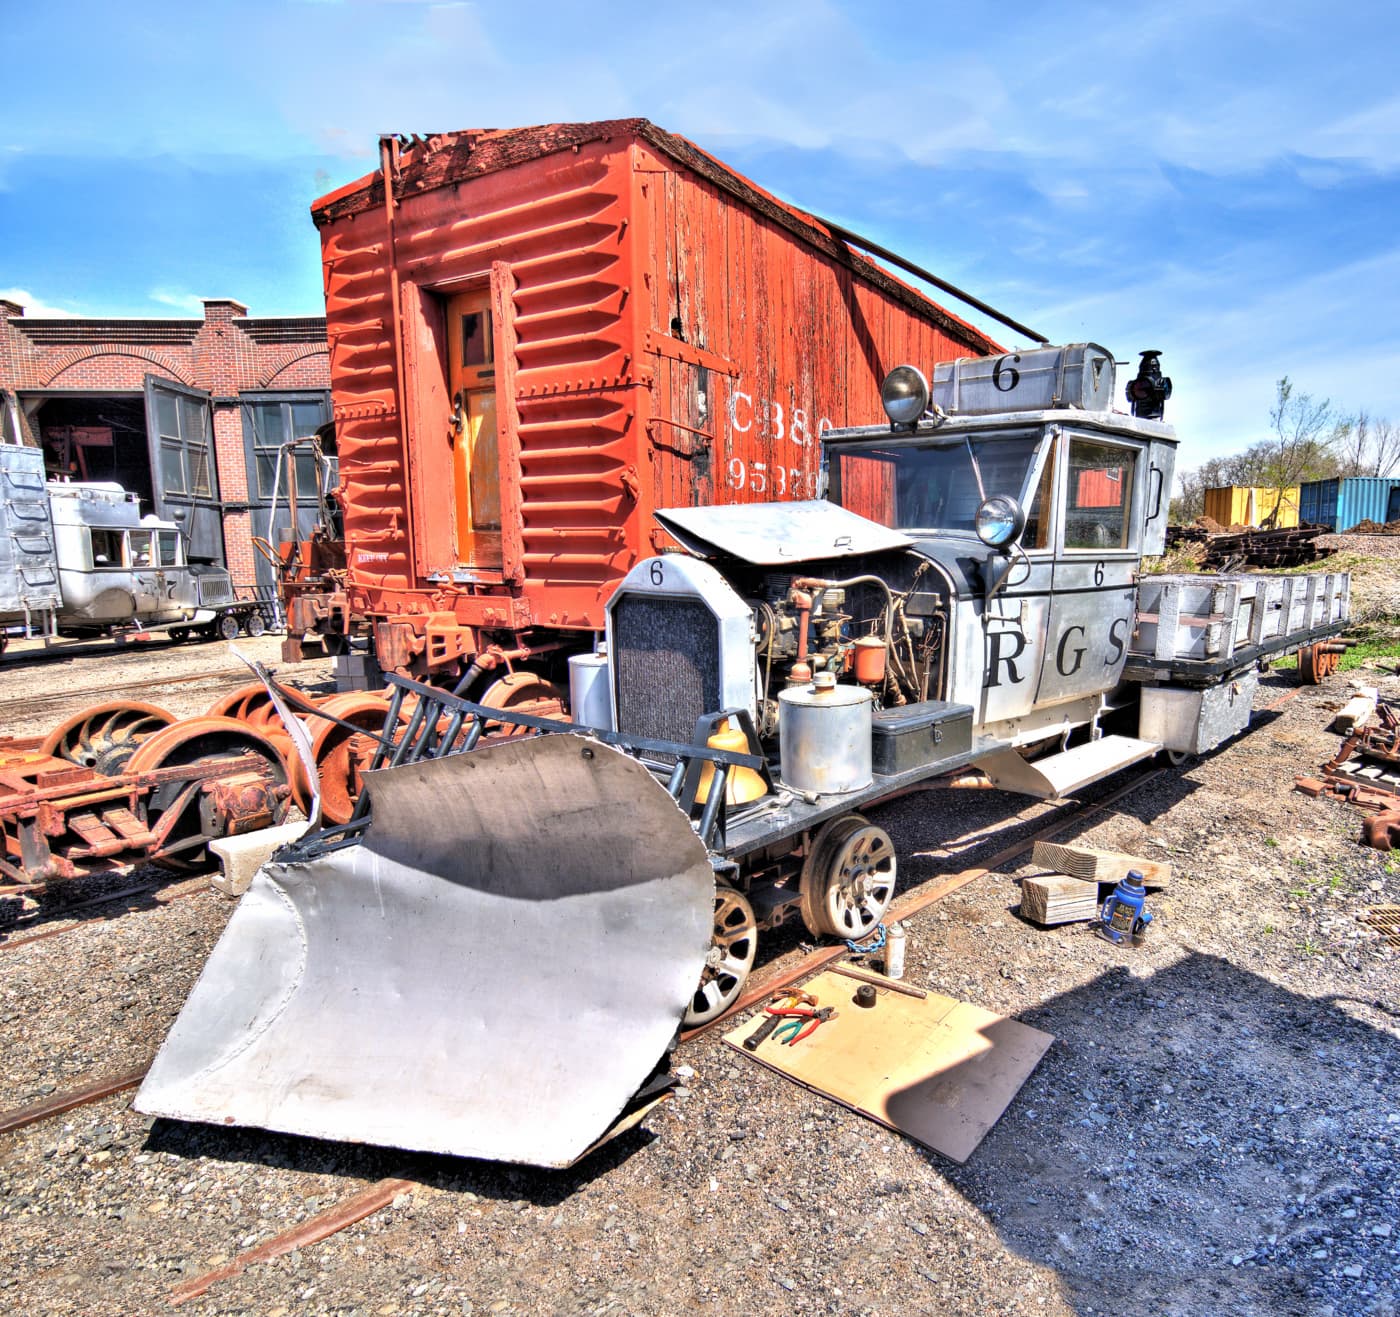
Here’s another couple of images. I’m not following this religiously but rather as inspiration.
Note the back of the cab. Note also the tool box under the rear behind the cab. On the opposite side the tool box is replaced by a fuel tank. I have 60000+ images on several hard drives. I know there is a fuel tank there but but the only image I have at hand is the ‘rendered’ one. Near enough!! (FWIW I did a lot of work in the USA as a freelance photographer. I sold a lot of ‘artistic’ images of various subjects including railroad subjects. Many images have been distributed around the world. Museum prints, magazines and calendars. Yes I’m famous. Or is it infamous?)
Myself I would definitely say that is a gas tank on top of the cab roof.
Those early engines did not have any form of a fuel pump and required a gravity feed. Also the modern smallish electric booster fuel pumps often added to restored military vehicles had not been invented yet.
There are stories of old cars having to sometimes back up a steep hill because going up in forward would interrupt the fuel flow.