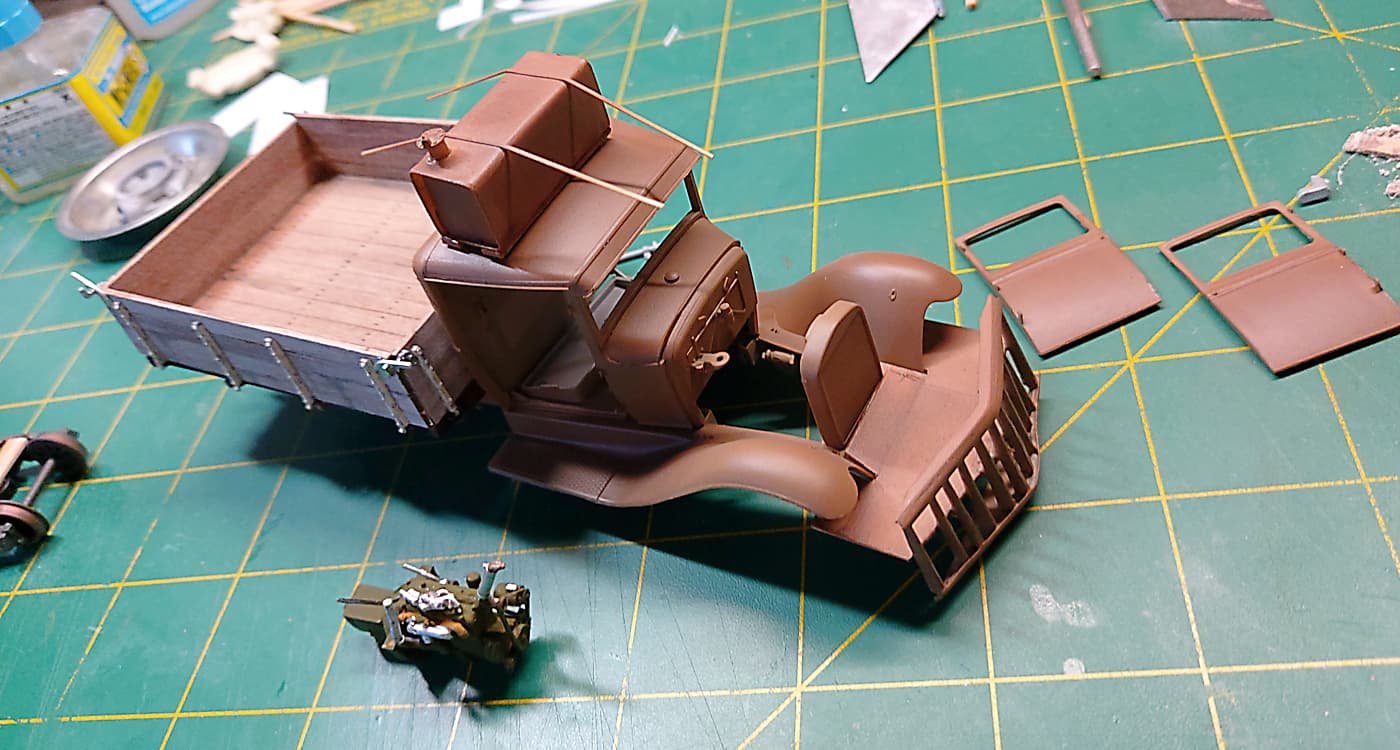
#6 started life as a Buick. 6 cylinder gas engine. The actual body you see is from a Pierce Arrow. (1936), The ‘new’ body was put on in 1942. At the same time the engine from the Pierce Arrow was installed. The second gas tank on the roof was installed in 1949. So you can see it’s not what it seems!!
1 Like
Great (and very precise) historical reference!
Still the point remains, the second, rooftop gas tank does add greatly to the visual interest of the model.
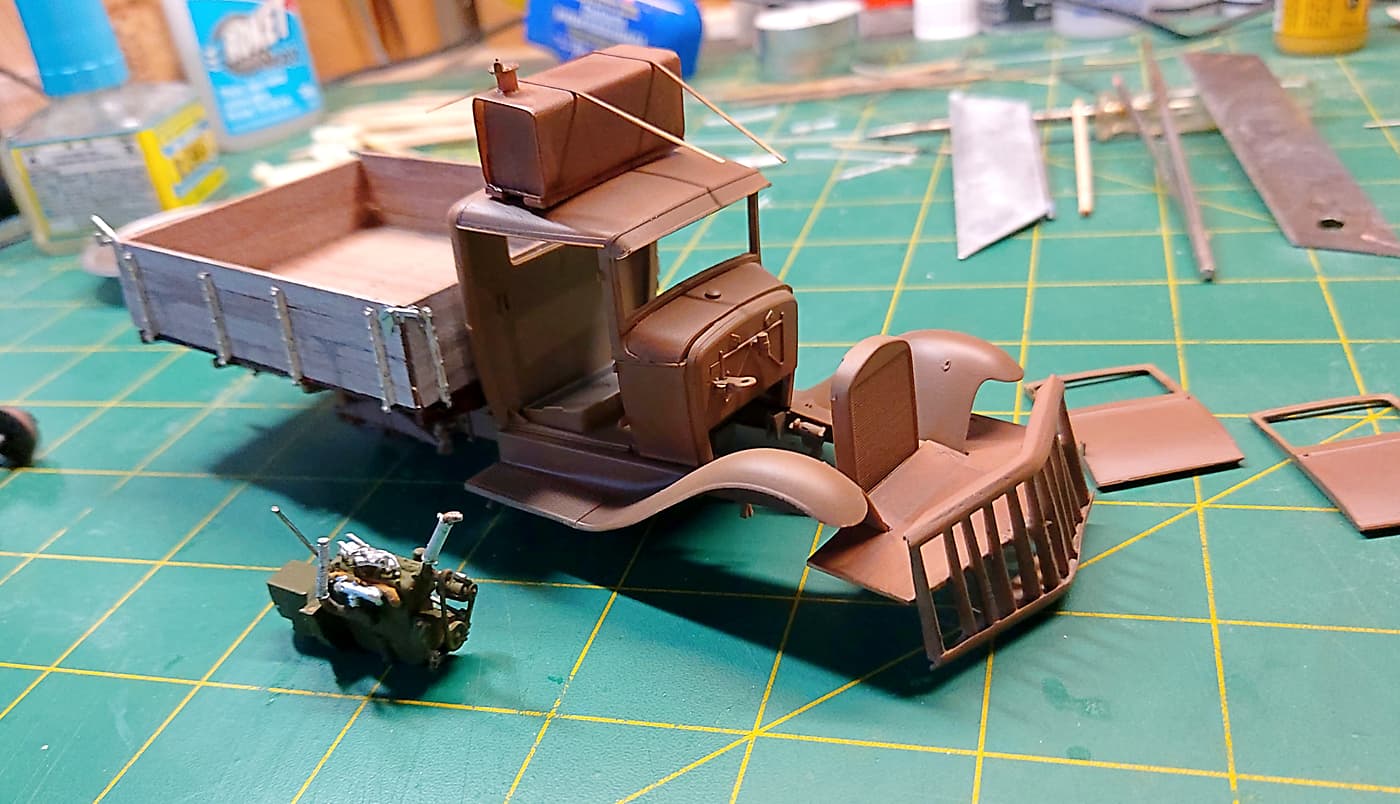
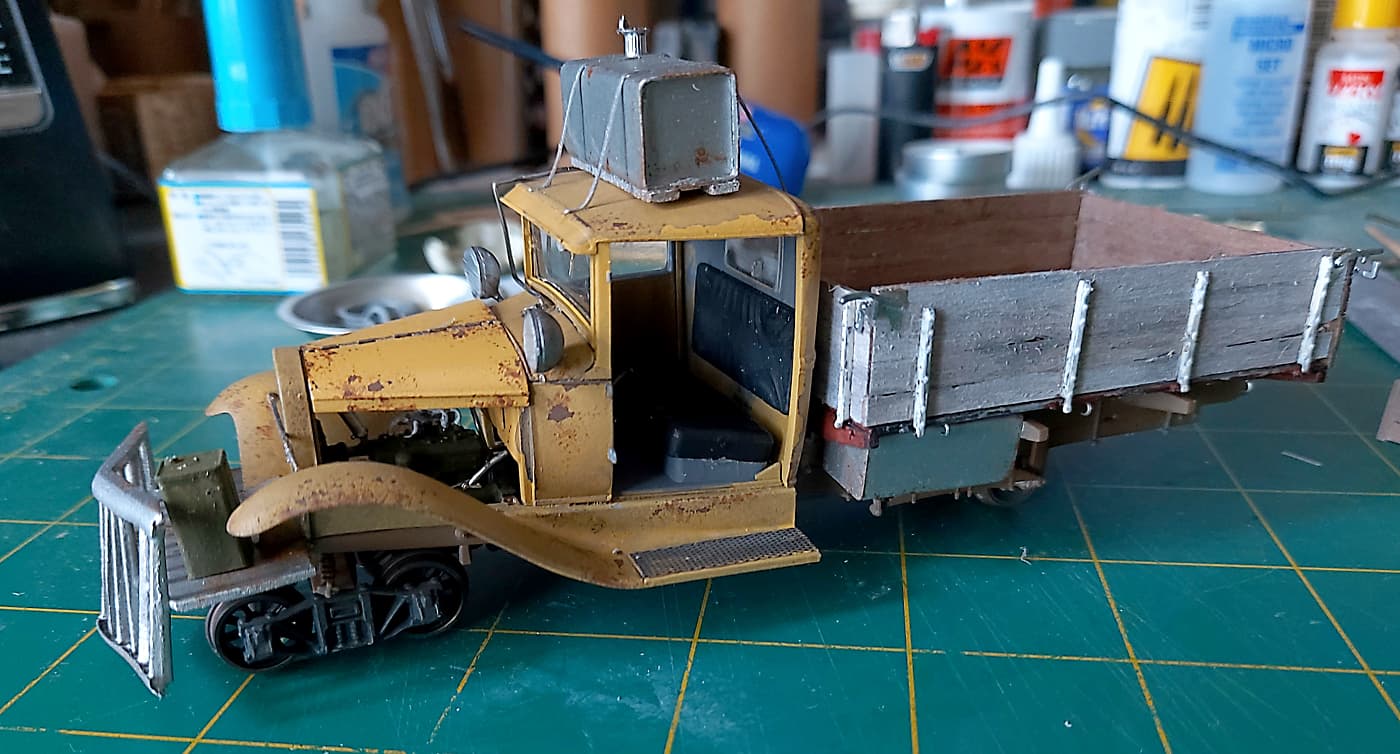
OK not much happening. I build a cab roof top fuel tank. A wooden tool box. A bit of wiring on the engine. Built the cow catcher. And managed to lay down some primer. (Mig Ammo. I’ve had bad experience with this primer but today i didn’t want it to get the better of me. So I tried it again. Went on just fine but subject to very careful thinning. No thinner and lots of tip drying and clogging. More than 40% thinner and it goes on too ‘wet’. So I found about a 20% thinner to 80% primer worked best for me).
Obviously the roof top fuel tank is just dry fitted. The straps will hold it down. The cow catcher is a bit rough but it still has some fine tuning to do on it.
5 Likes
This is really looking good! Really coming together!
I seriously recommend the Tamiya Fine Surface Gray Primer in the rattle can.
No airbrush clean up, no thinning, self leveling and very forgiving. It creates a beautiful fine surface. The Red Oxide Primer is equally as good! However, stay away from their White Primer. I have had problems with that product.
Your kitbash looks the business! I like the rooftop tank, but only because I won’t be driving it - I know it’s based on a real thing, but having that much gasoline above your head feels like a Darwin Award in the making… ![]()
2 Likes
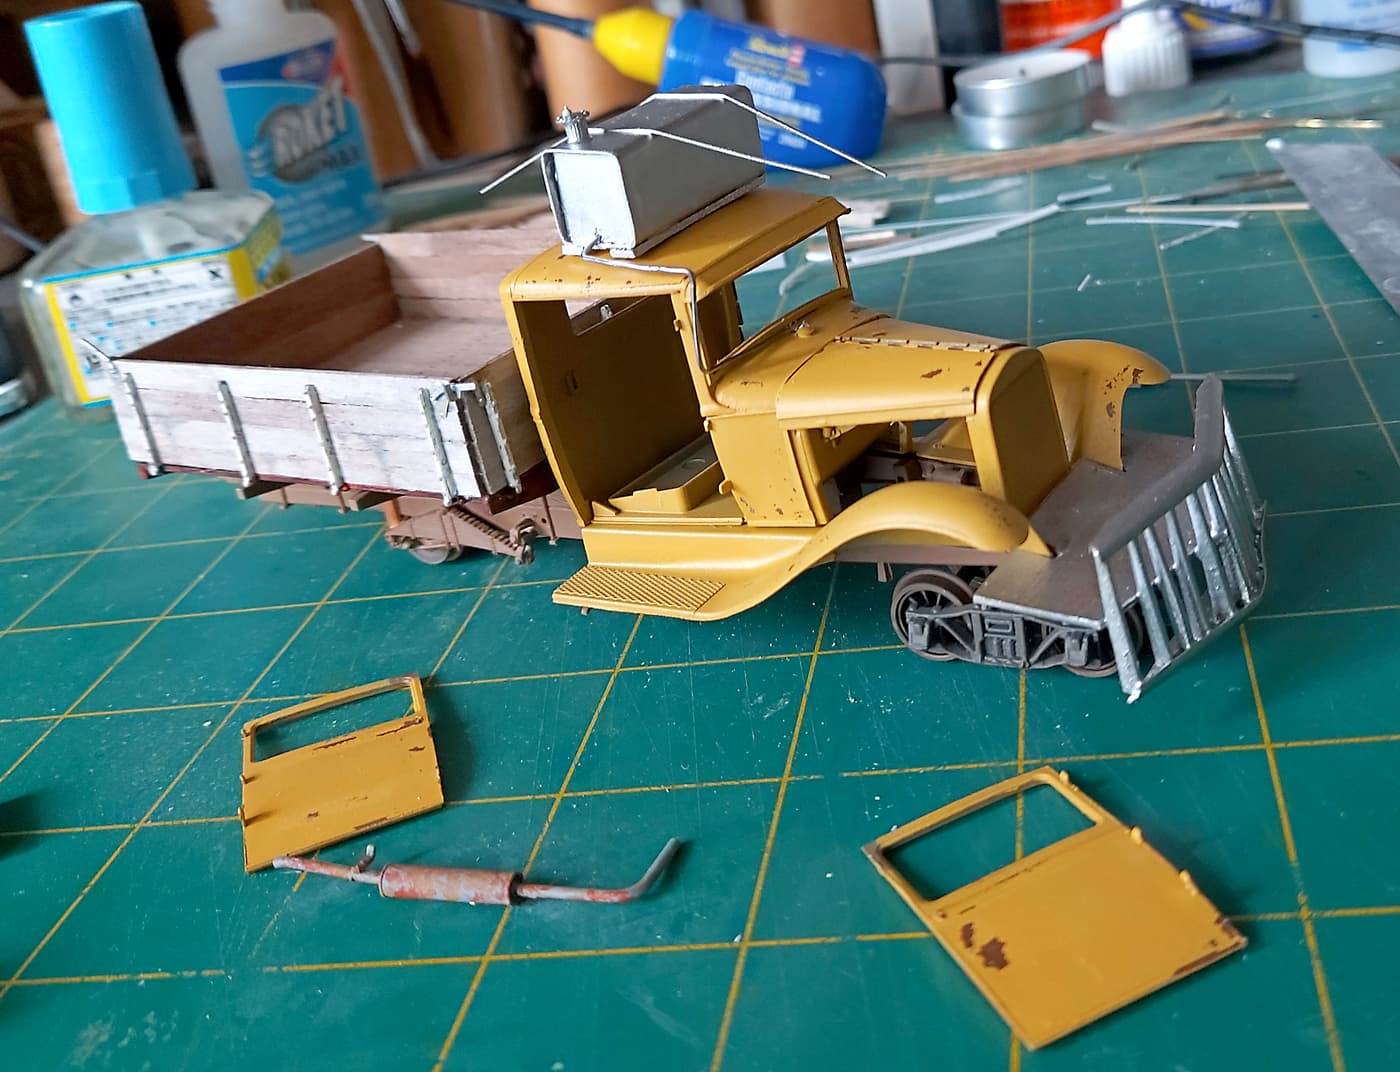
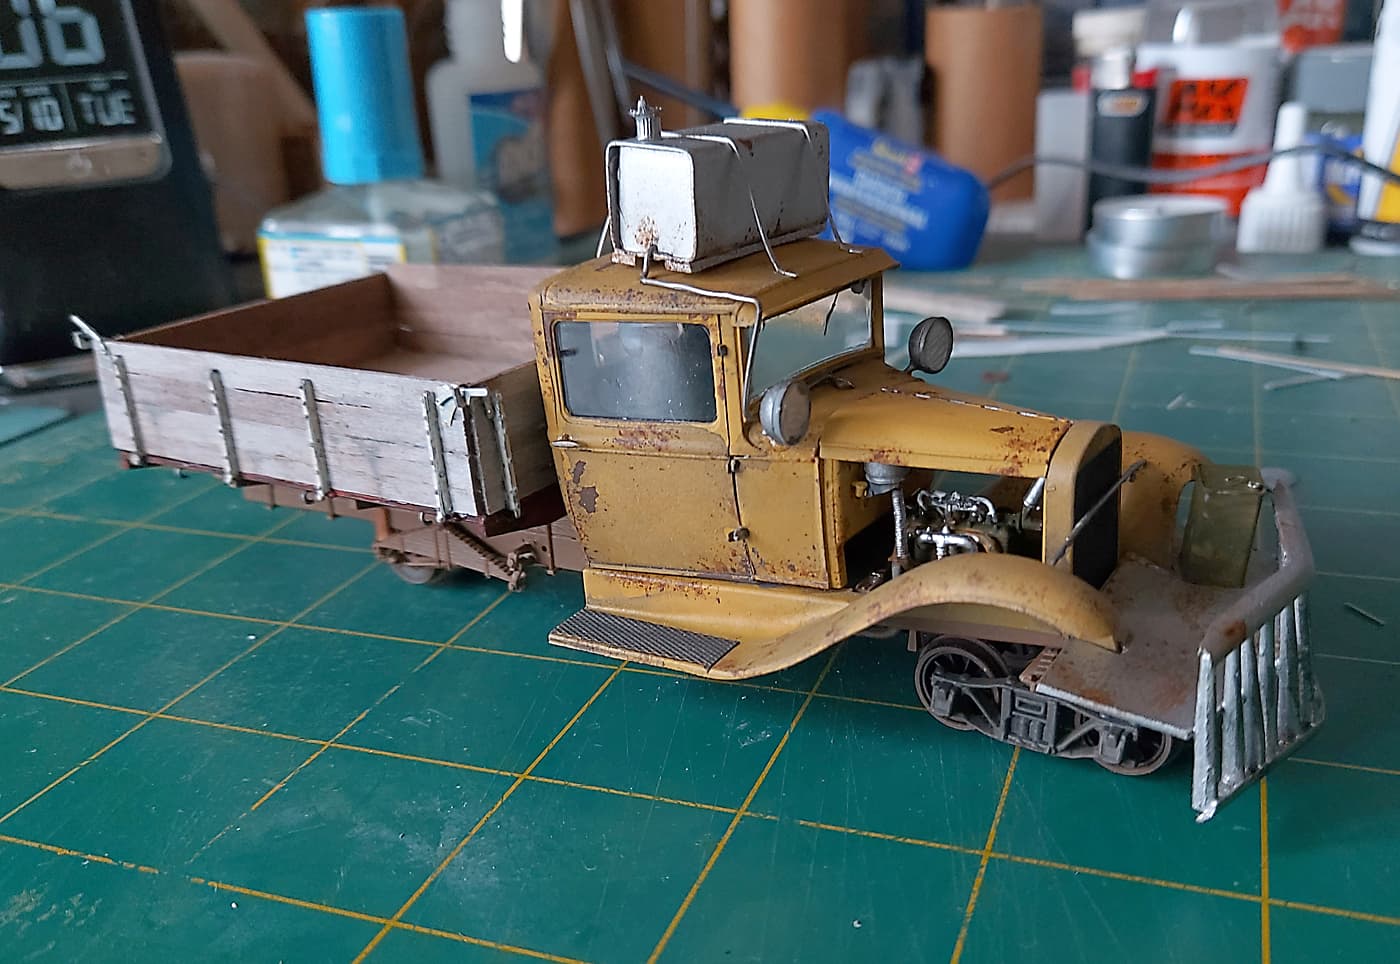
Some paint.
A layer of hairspray. Then the cat yellow. Why cat yellow? No idea I just thought it would look the part!!
We had about 95-98% humidity yesterday and I shouldn’t have been spraying. But the yellow took many coats and the hairspray chipping had the potential to take off large chips. So no more chipping just a bit of sponge work. A clear coat and then the assembly. The fuel tank is airbrushed Mig Ammo steel. Sprayed like a dream straight out of the bottle.
I like to dry fit along the way to visualize how the model and my brain are connected. If at all. ![]()
4 Likes
That’s impressive painting, especially as 98% humidity is nearly painting in the swimming pool…
A few hours later! A dry fit thank god because the back ain’t straight!!
Engines in. Some more detail to do.
Fuels tanks, tool boxes, headlights etc etc all still to do.
The white patch on the top of the door window is a glue brush that got toooooo close to the window. That’s coming out if I can get it out. Otherwise it will be subjected to some heavy weathering.
FWIW. I toned down the yellow top coast with a wash. I felt the yellow was, er, ah, er well too yellow.
5 Likes
Looking rail-ly good. If you can’t repair the glue on the ‘glass’, replacement with acetate or something similar could work
You could always smear some dust or spilled gasoline over that glue damage to make a feature of it?..
The weathering looks great!
barkingdigger that’s exactly what I had in mind. Fuel spills down the window.
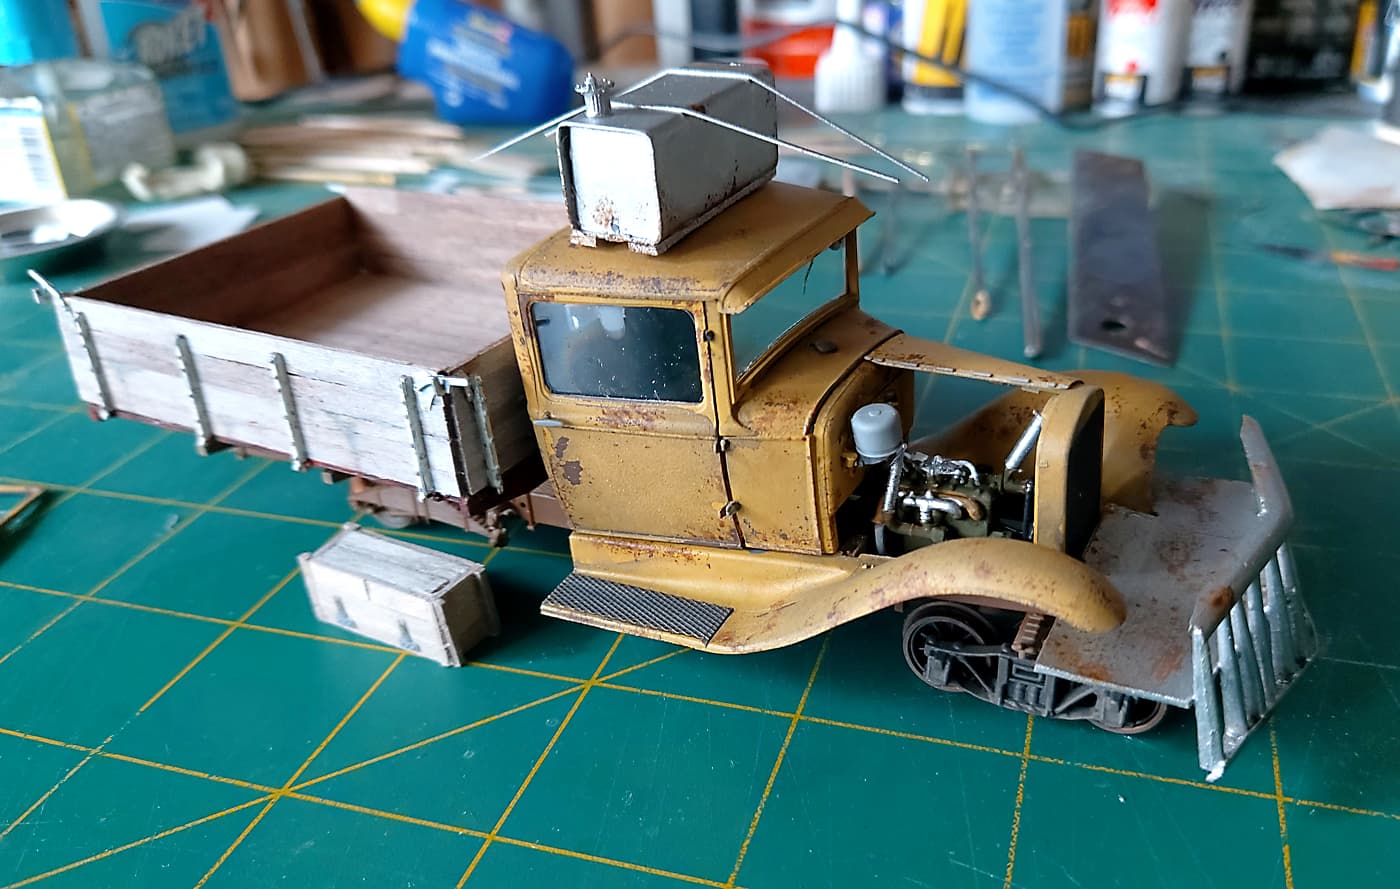
Headlights on. Relocated to a higher position.
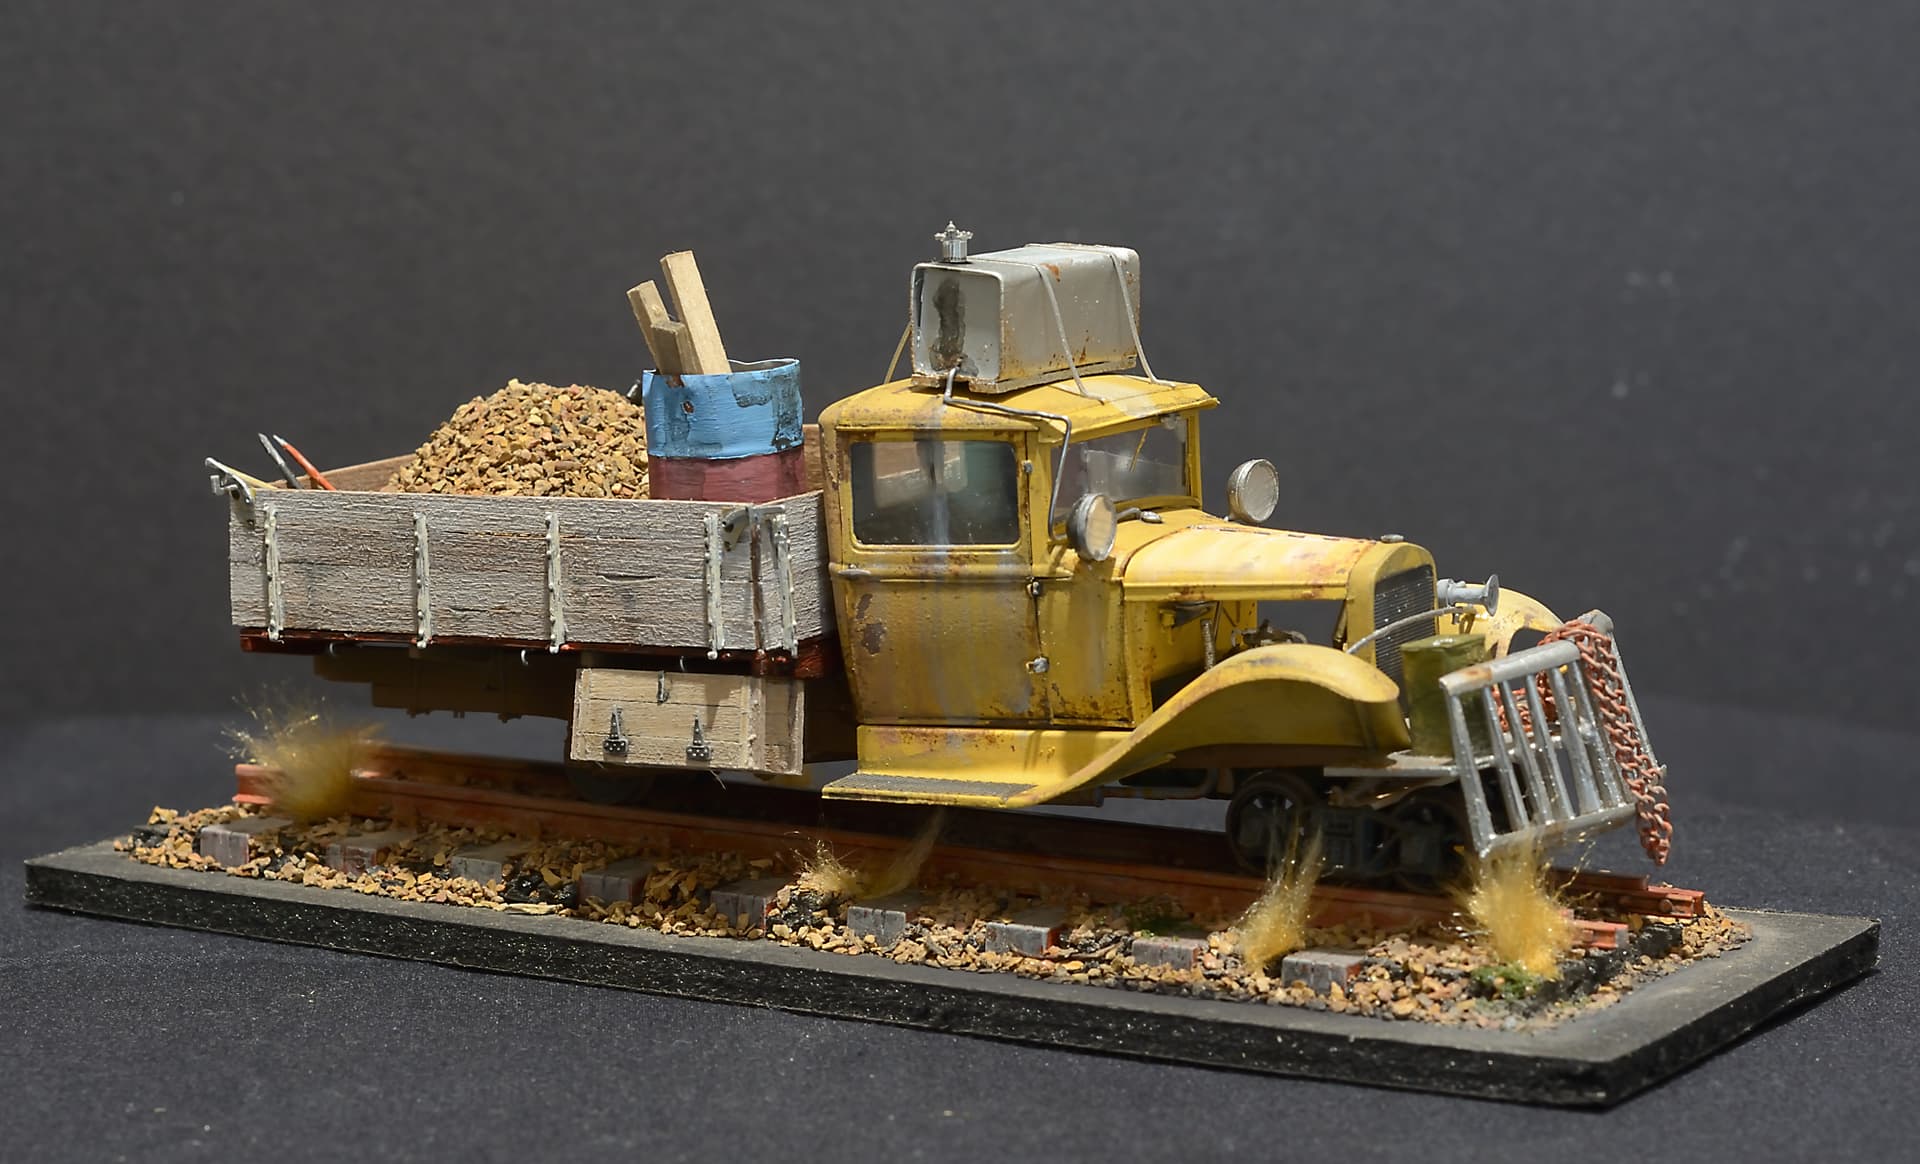
Second and third fuel tanks on. One below the rear tray and one on the roof. Roof tanks still needs some bolts through the tie down straps. The fuel line is a bit rough but that’s maybe how they made it!!
Catcher still dry fitted. Oil drums etc were store on it.
Drivers door is still off because I want some ‘junk’ inside.
Some more weathering with oils and I’ll call it done. Oh and junk in the back tray.
Excuse the crappy image. I’m being lazy and just using my phone camera.
3 Likes
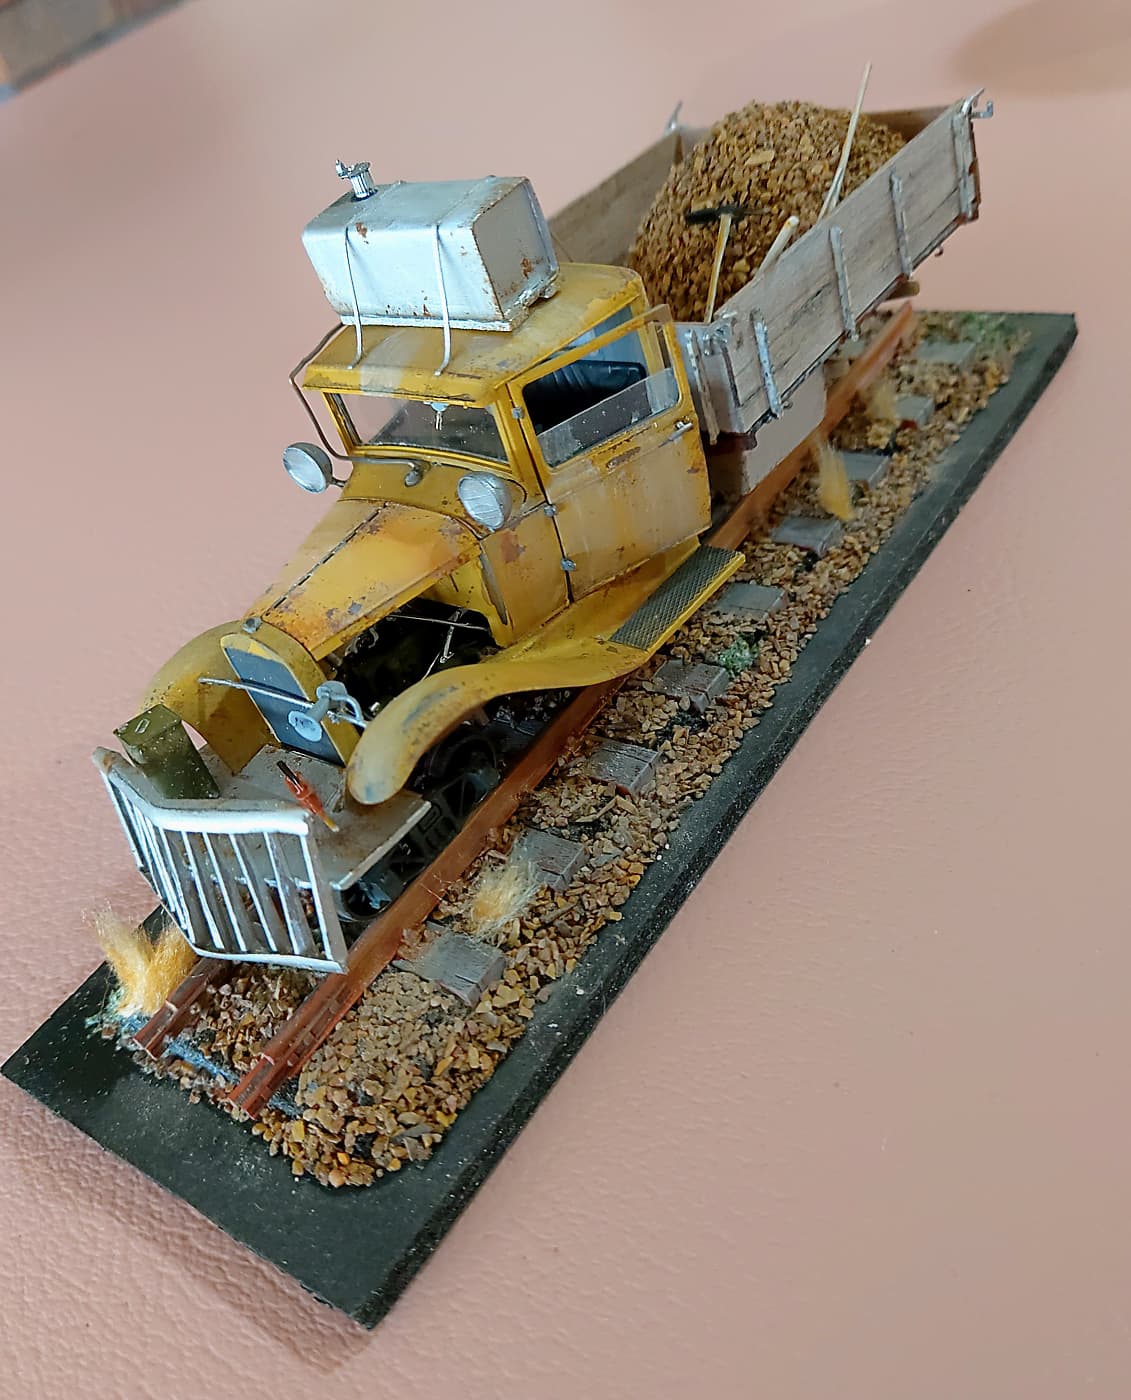
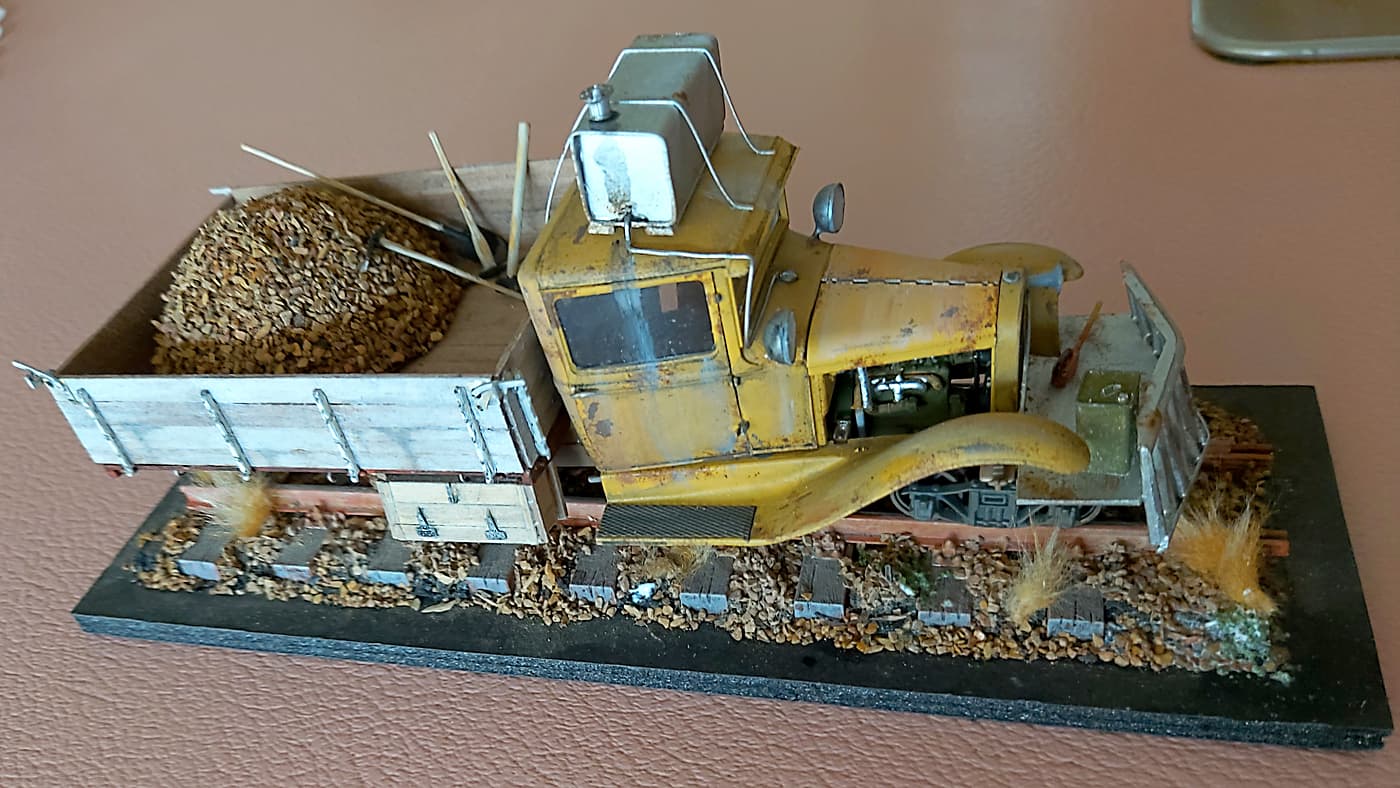
Ok I’m calling it done. Almost!! A bit of tidying up. Some more details in the back.
Overall I’m happy with the results. I could have done more detail on the engine. I forgot the fuel line for the fuel tank under the rear tray. Next time!! The thing is I’m not a detail nut. I aim to capture a ‘feeling’ rather than an accurate model. I wanted a backwoods, beat up rail car. I think I achieved my goal. I always appreciate feedback. Good or bad.
These images are out of my phone camera. When I get off my butt I’ll do some ‘proper’ images.
8 Likes
Looks great and grimy. The ‘fuel spill’ solved the blemish on the ‘glass’ I see
1 Like
Nice work - love the feel of the whole thing and enjoyed following along . How about some “eye level “ side / front / back shots ?
Thanks for sharing.
RT
Wow, well pending “proper” shots two words: ffffffairly brilliant ![]()
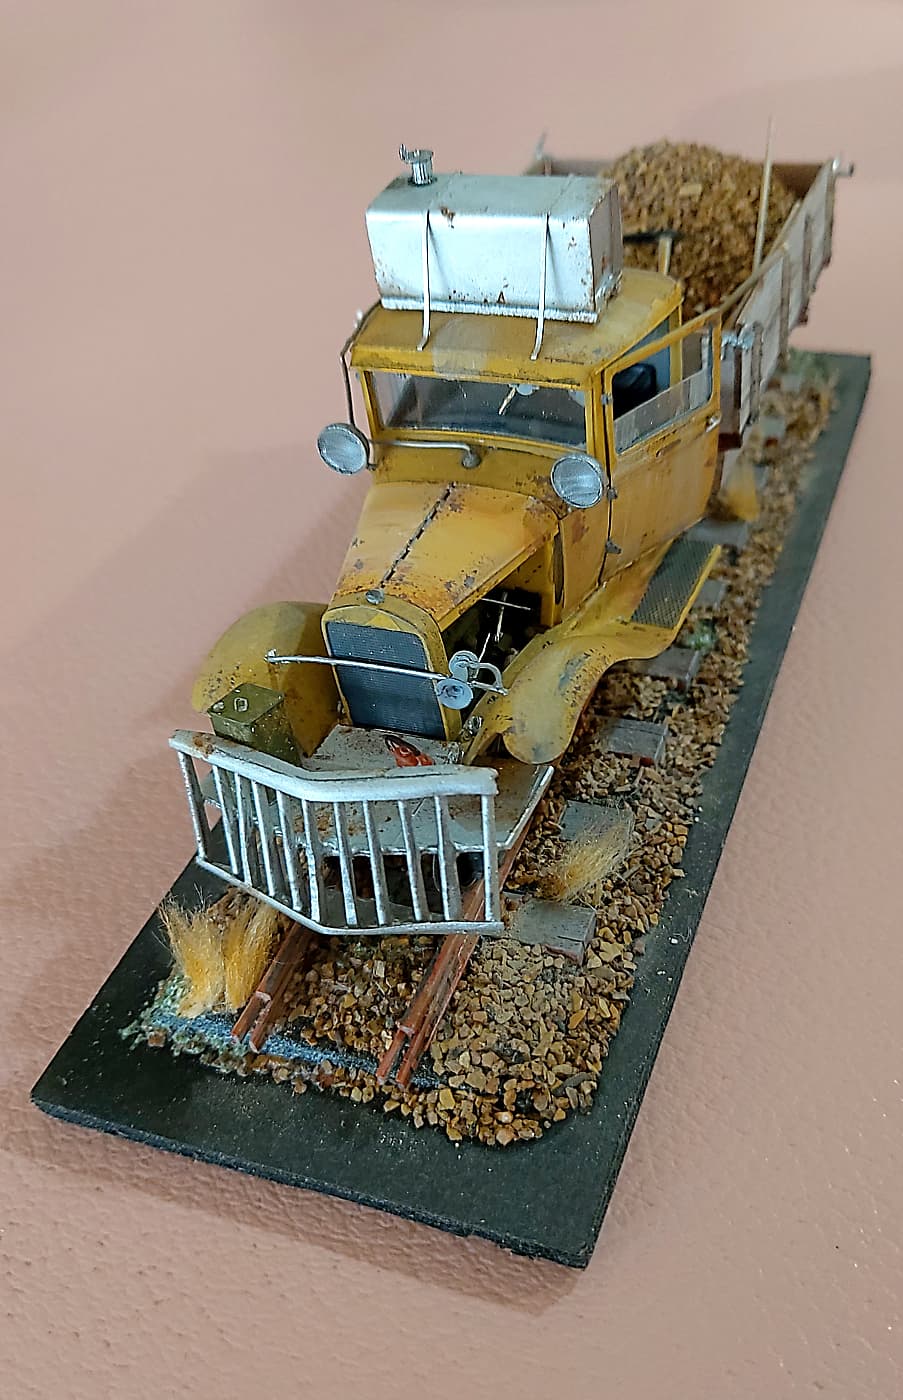
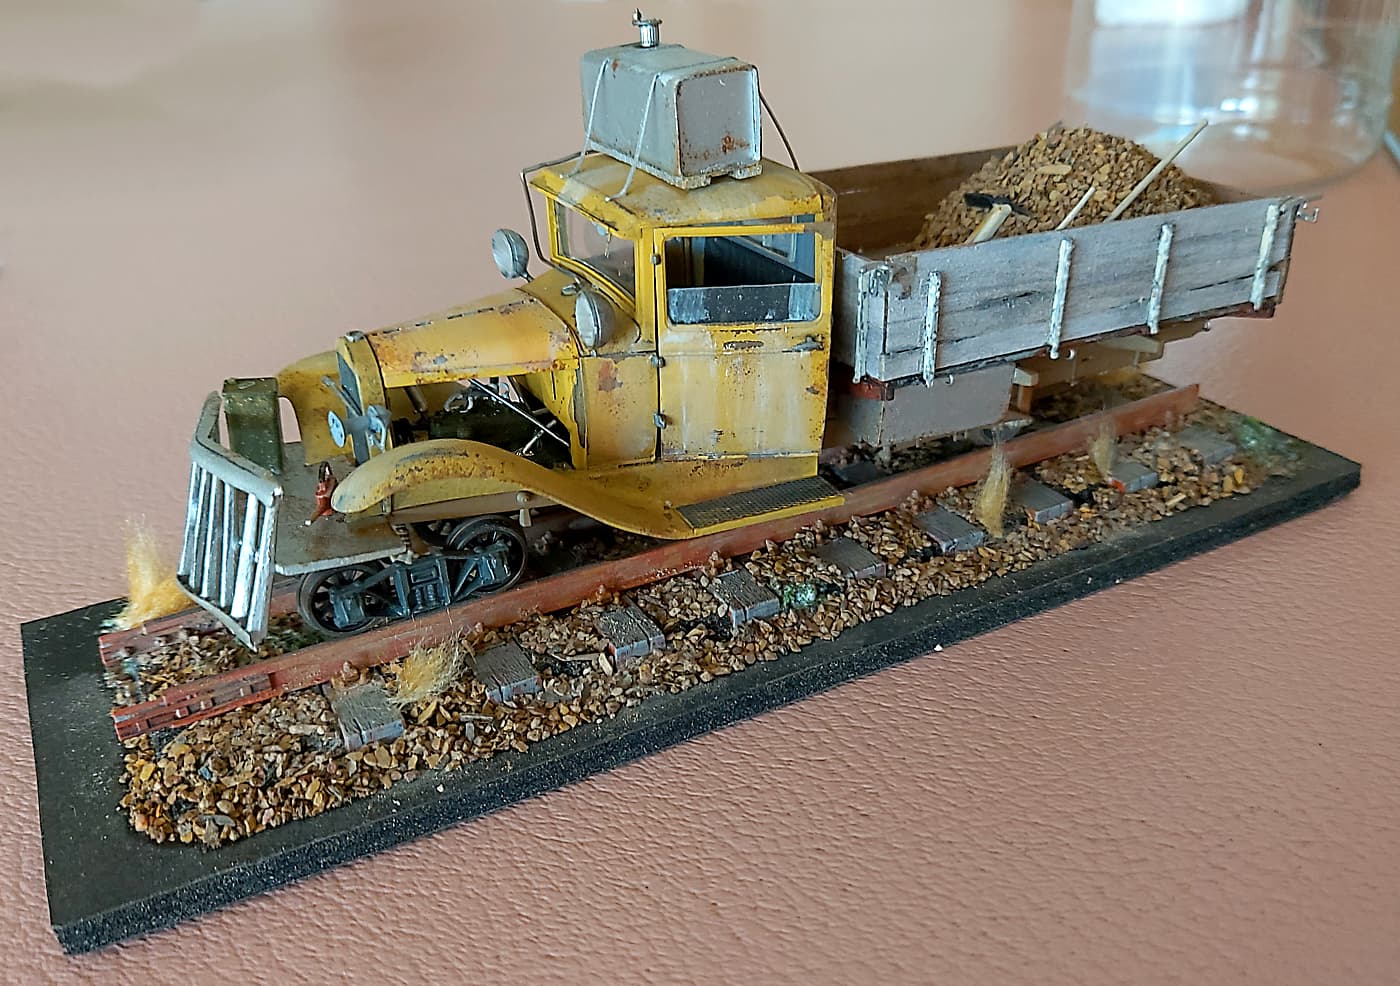
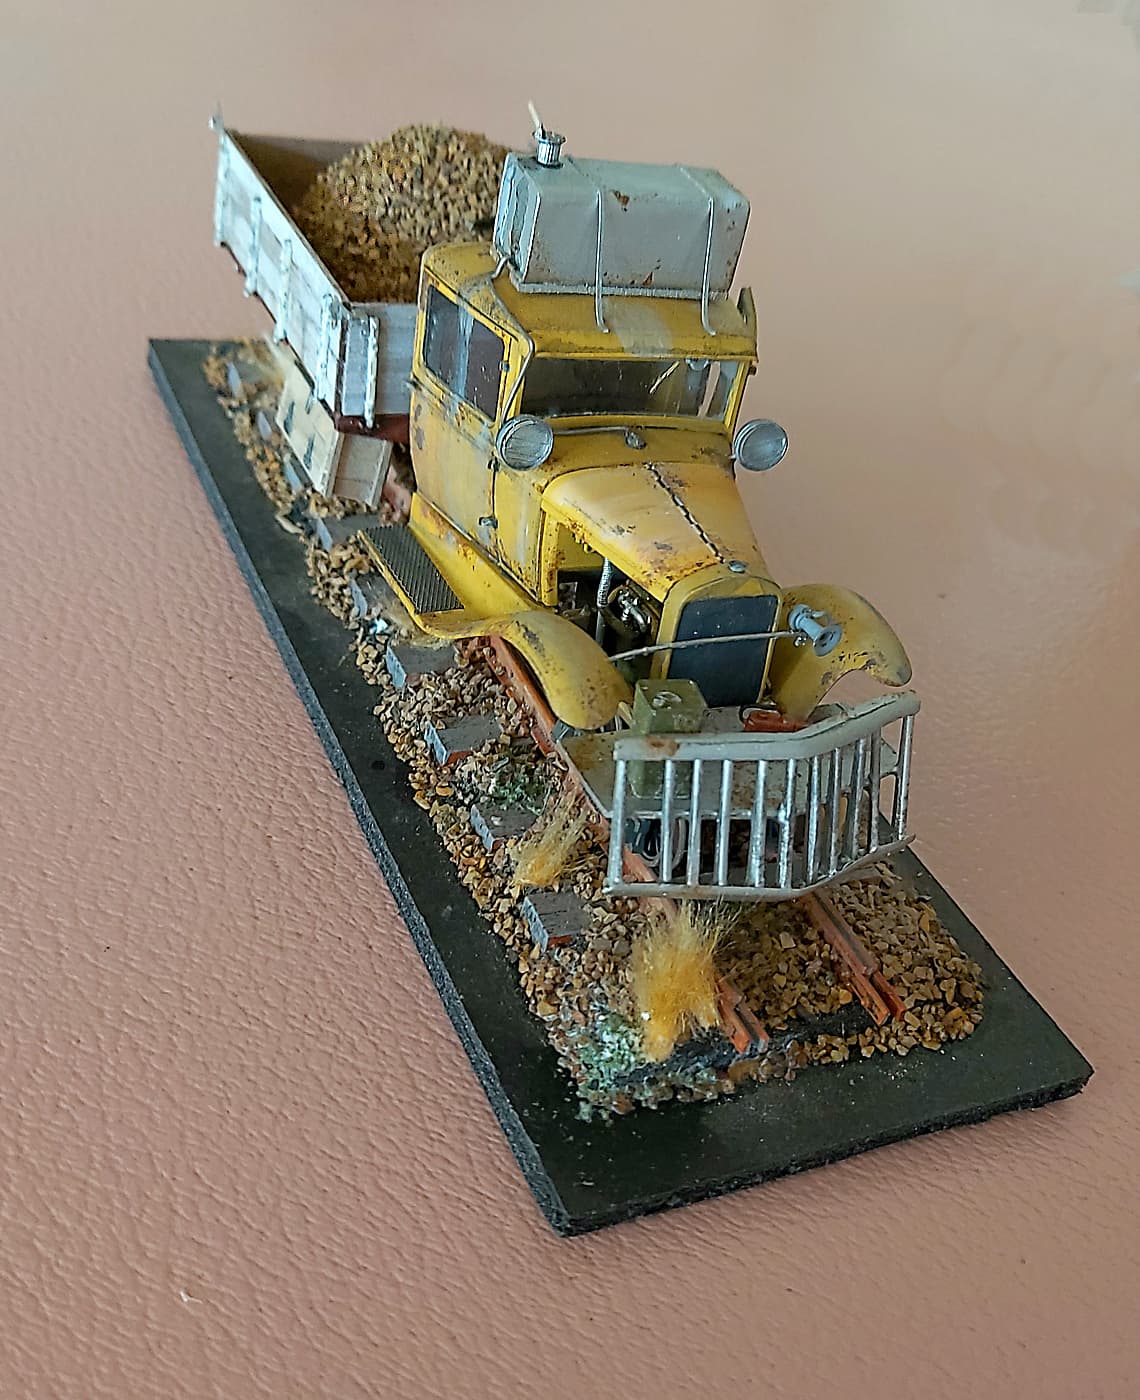
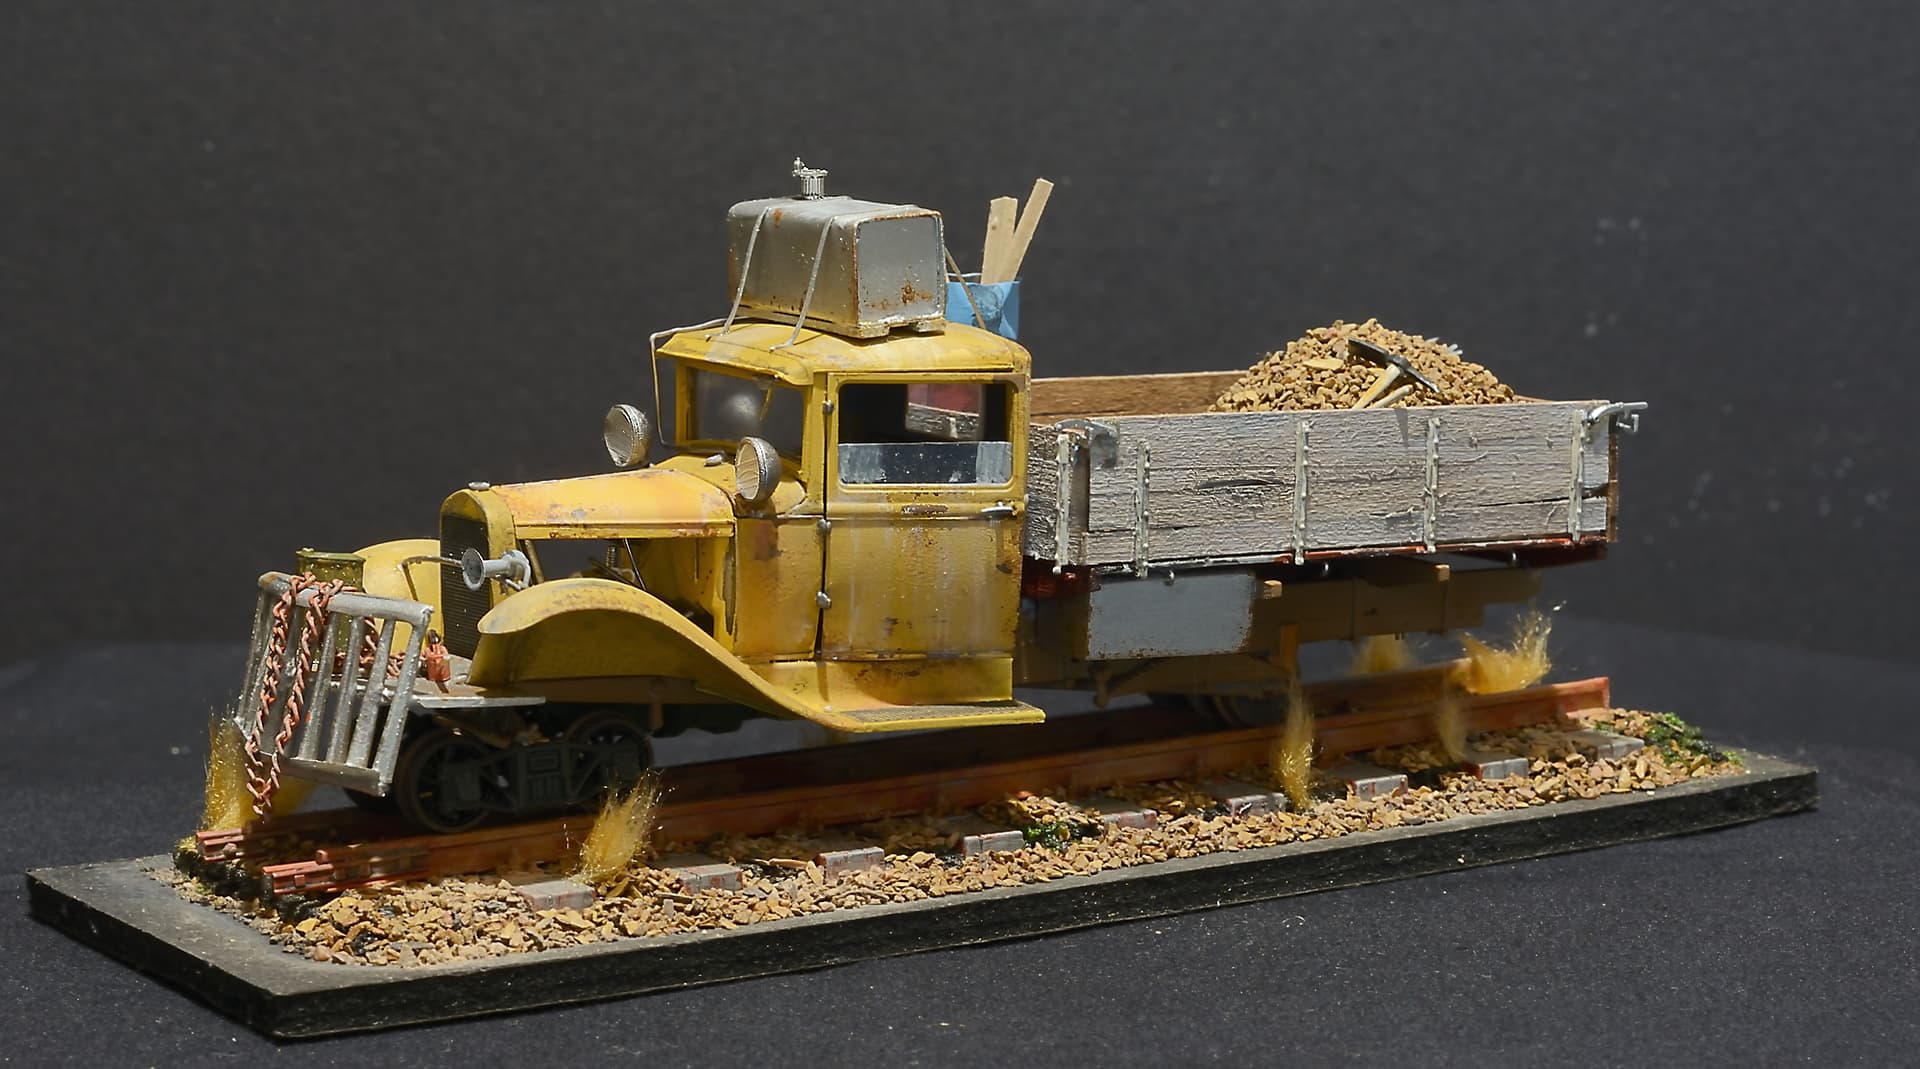
OK here’s my ‘proper’ shots. I’m having a brain failure at the moment so here’s the best I can do today. Ever have one of those days where you do really dumb things? Yup that’s what today was like. I spent an hour taking images only to find I had the camera settings wrong. ![]()
Anyway thanks for following along.
3 Likes
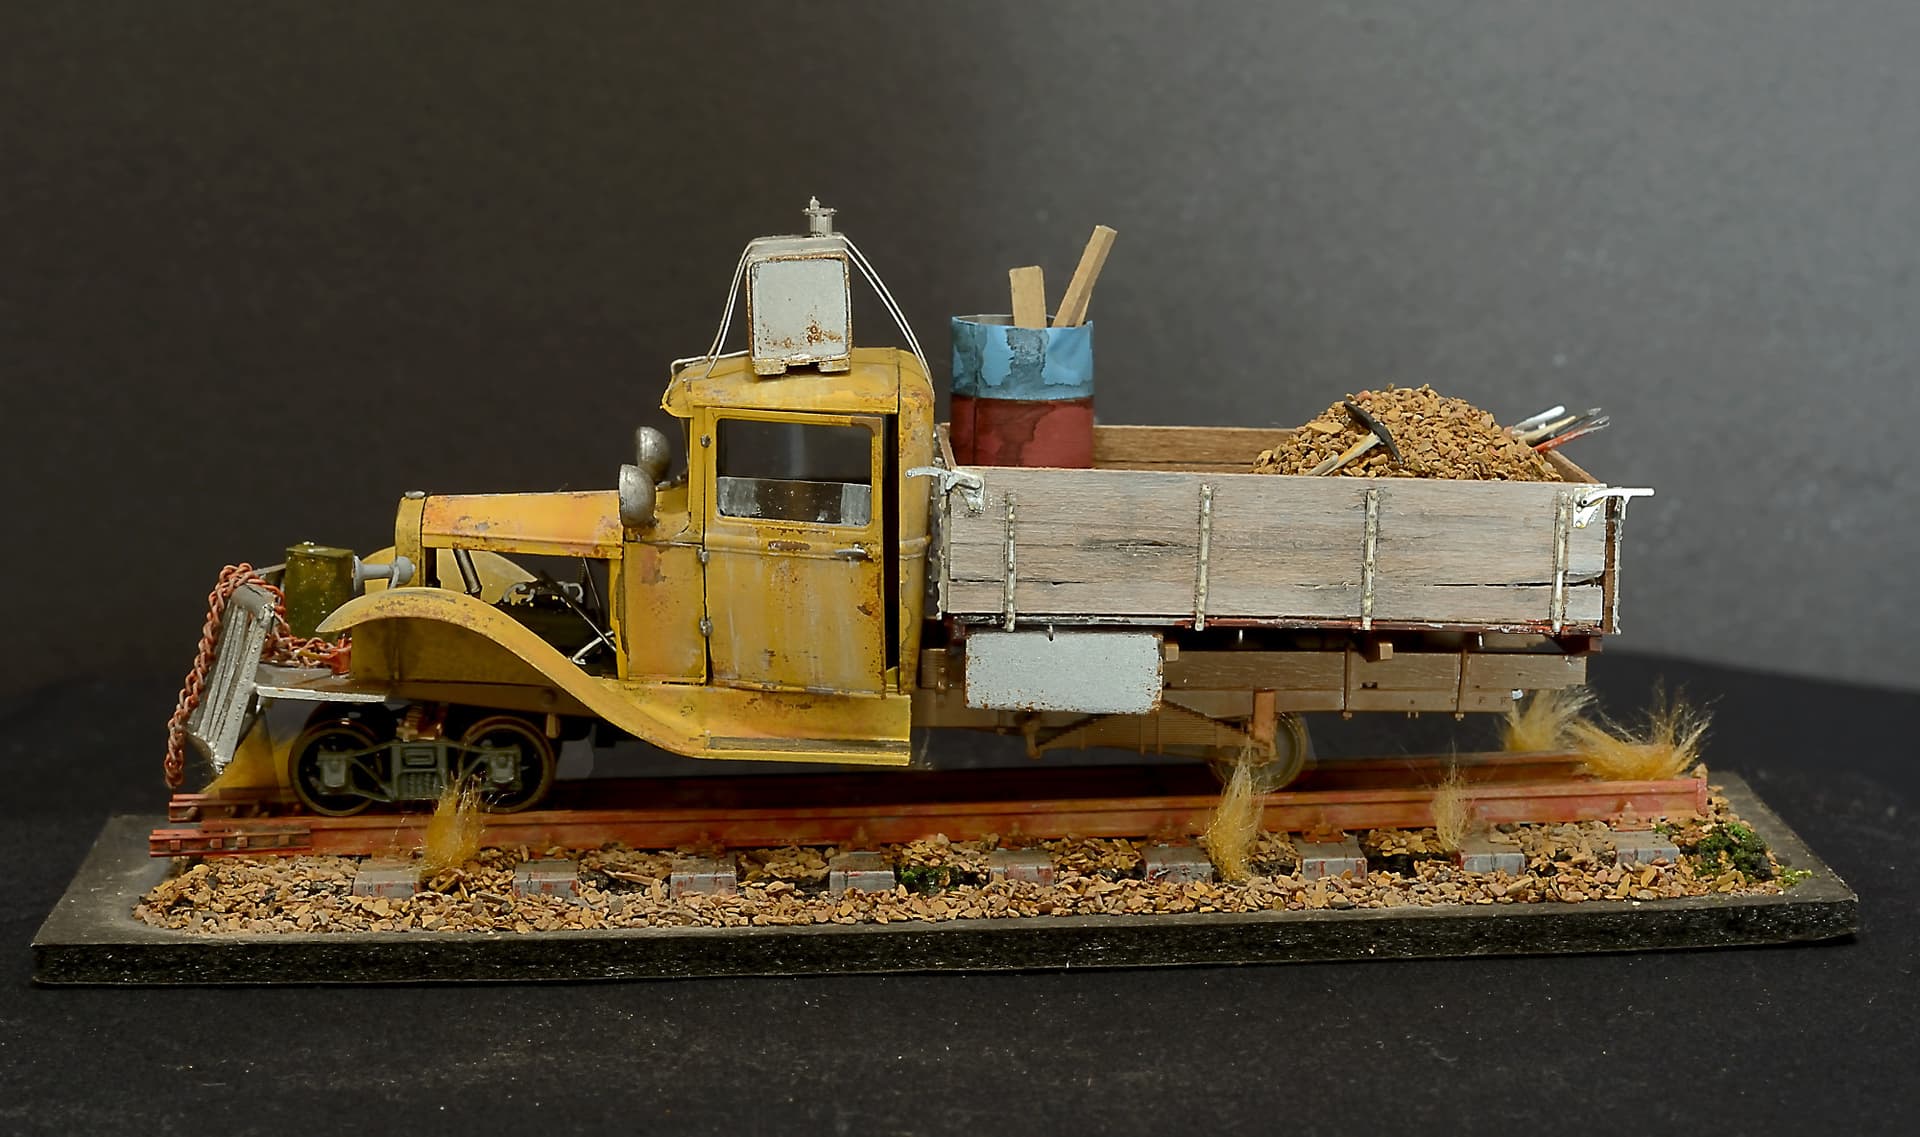
The darkness/shadow underneath hides the wheels and the rear wheels are also hidden by the box and tank which makes the whole thing look like it is hovering using some anti-gravitational device.

1 Like
Robin it is hovering! Ill take more photos just to prove it. ![]()
1 Like
Here you go Robin. I took about 100 images. Long time since I had the camera out so I’m a bit rusty. Model photos aren’t one of my strong points!! I know all the theory. But sometimes the cobwebs prevent the brain from working as it should.
And yes there is a tilt towards the back. And that 1 tonn of gravel in the back explains it. The truth is I glued the tray on wrong and before I realised it the glue had set. But why talk about my mistakes?
6 Likes