This is all very useful for those of us who haven’t built it yet- thanks for the heads up about the hull pieces.
3 Likes
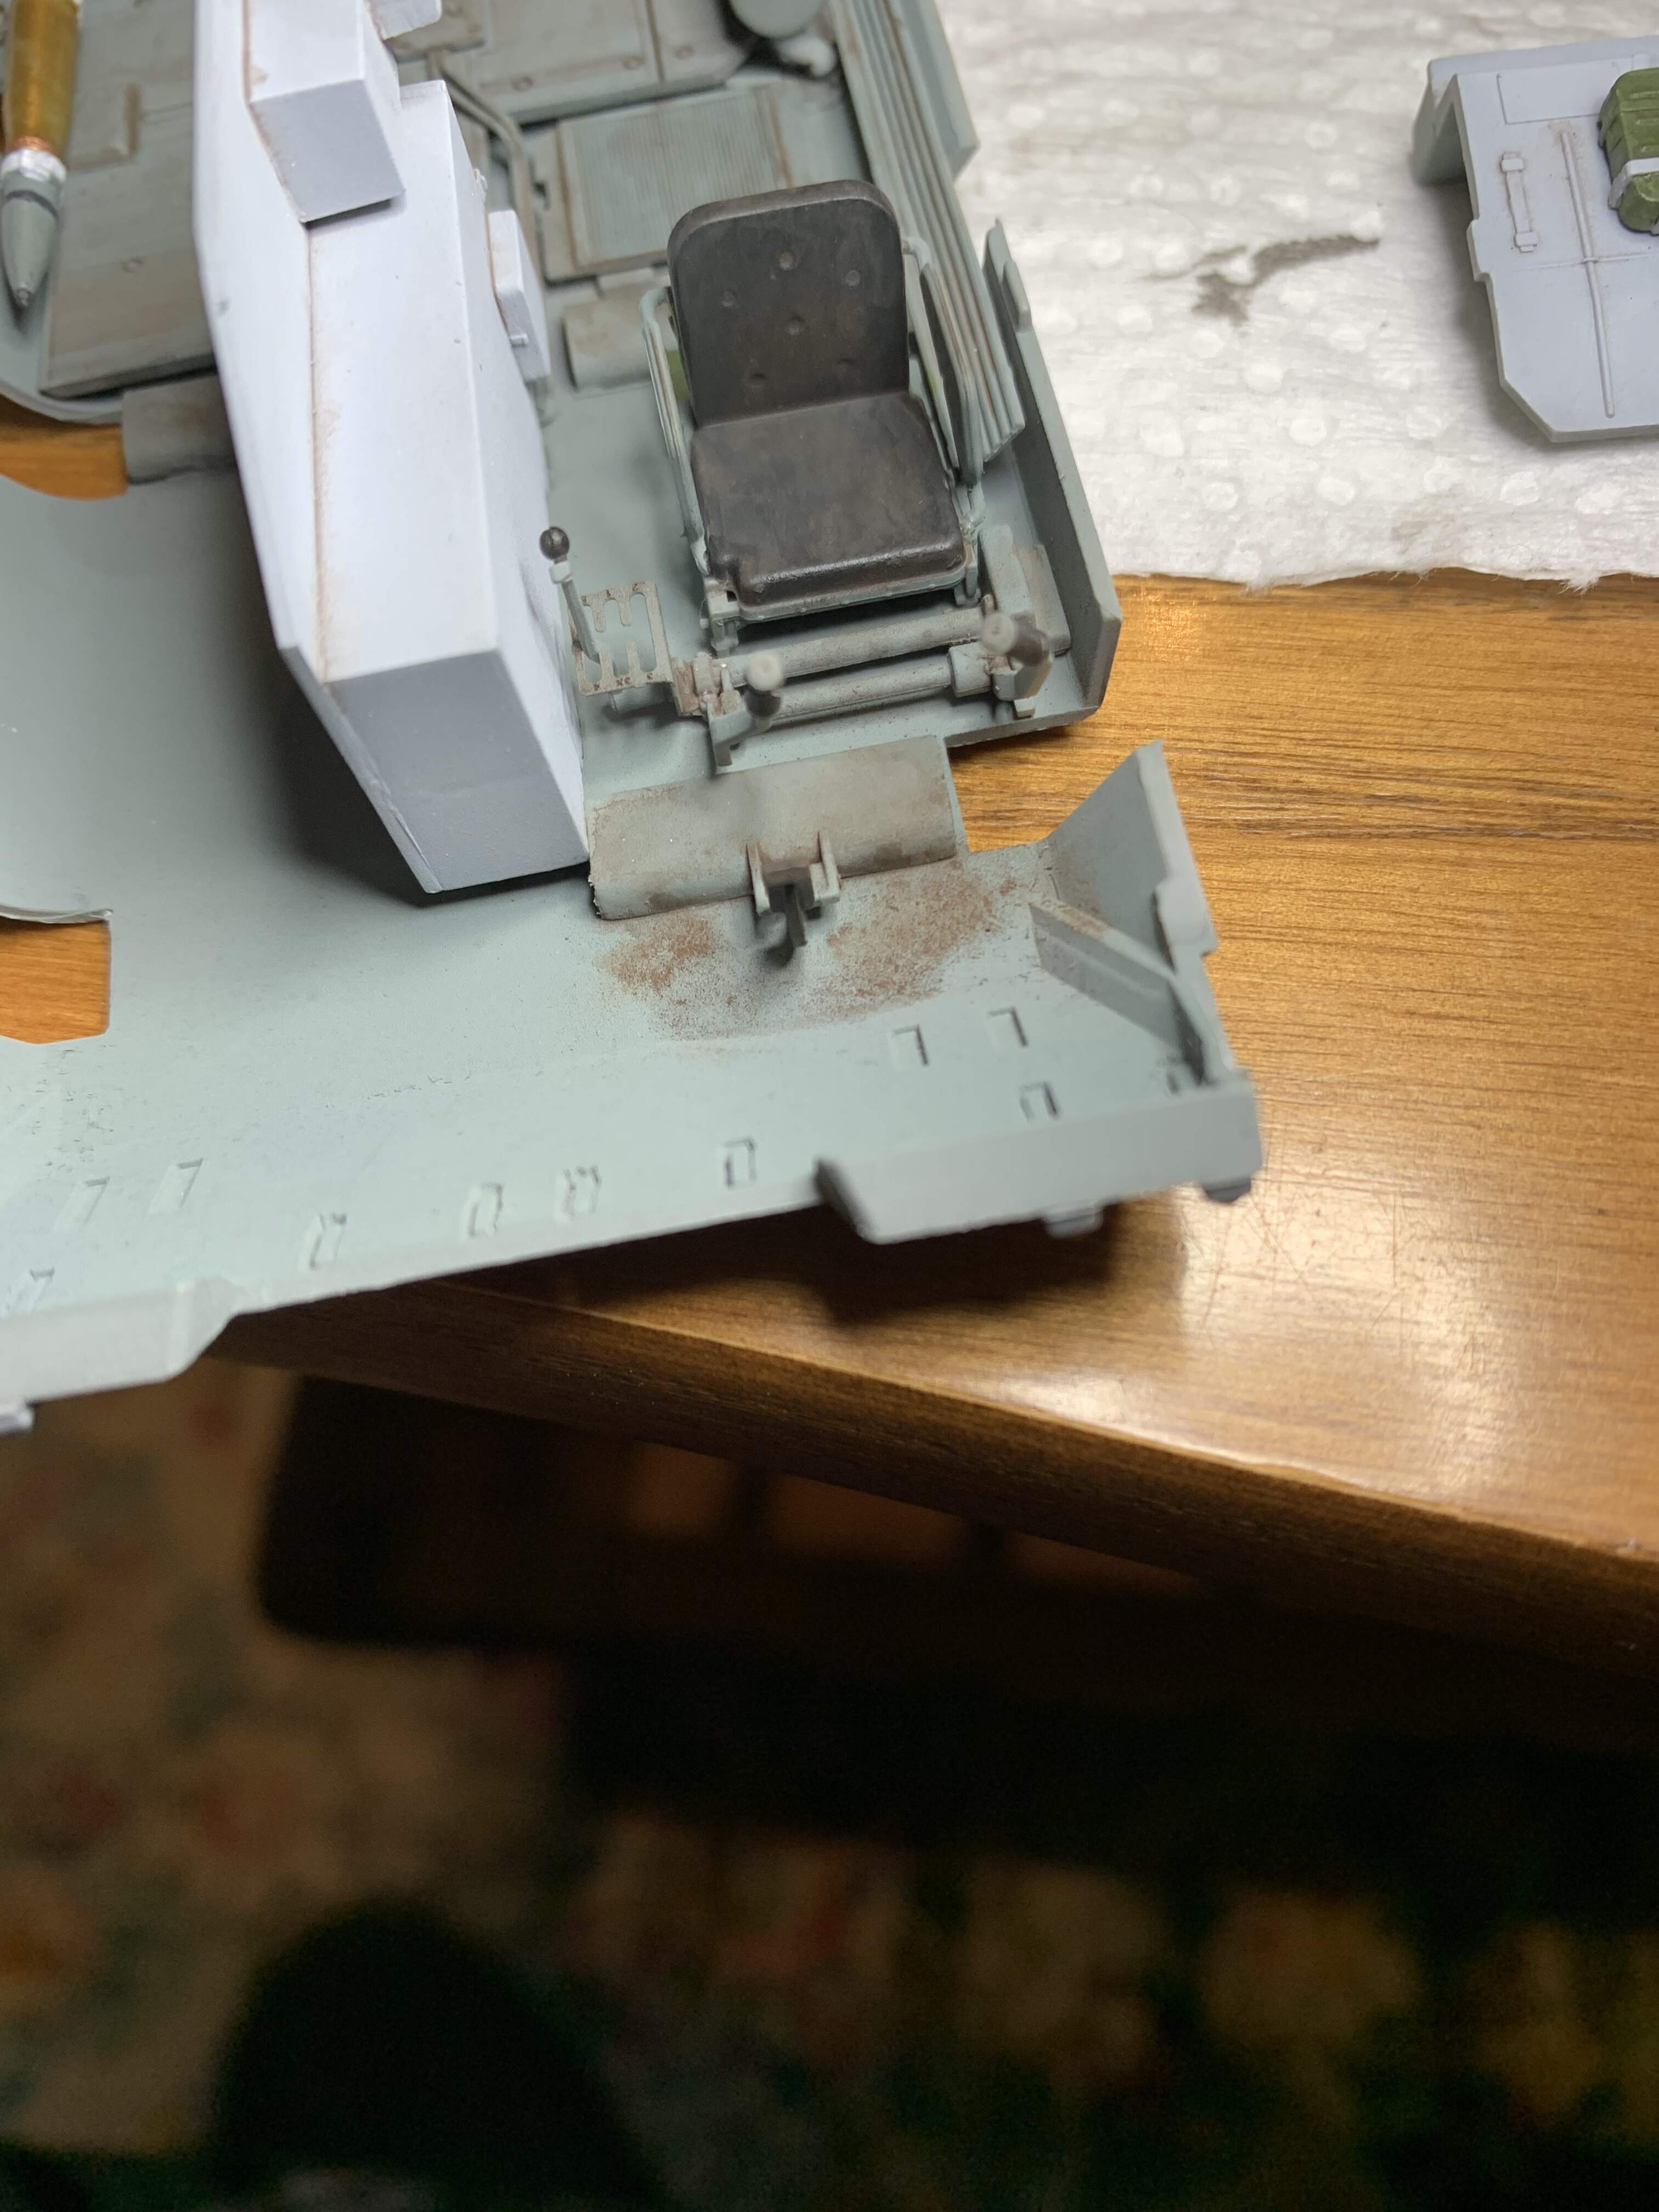
Just had a long battle with the drivers chair. The instructions tell you to glue the PE pieces that support the frame to the back rest, and then glue the back rest to the seat while fiddling with the frame. This requires you to hold 4 pieces in place while using superglue to secure the joints. I opted to make the frame first, and then glue the back rest in place. This means the Pe pieces at least for me aren’t in the 100% correct place on the back rest but I think I can fix this tomorrow. It saved me a lot of frustration
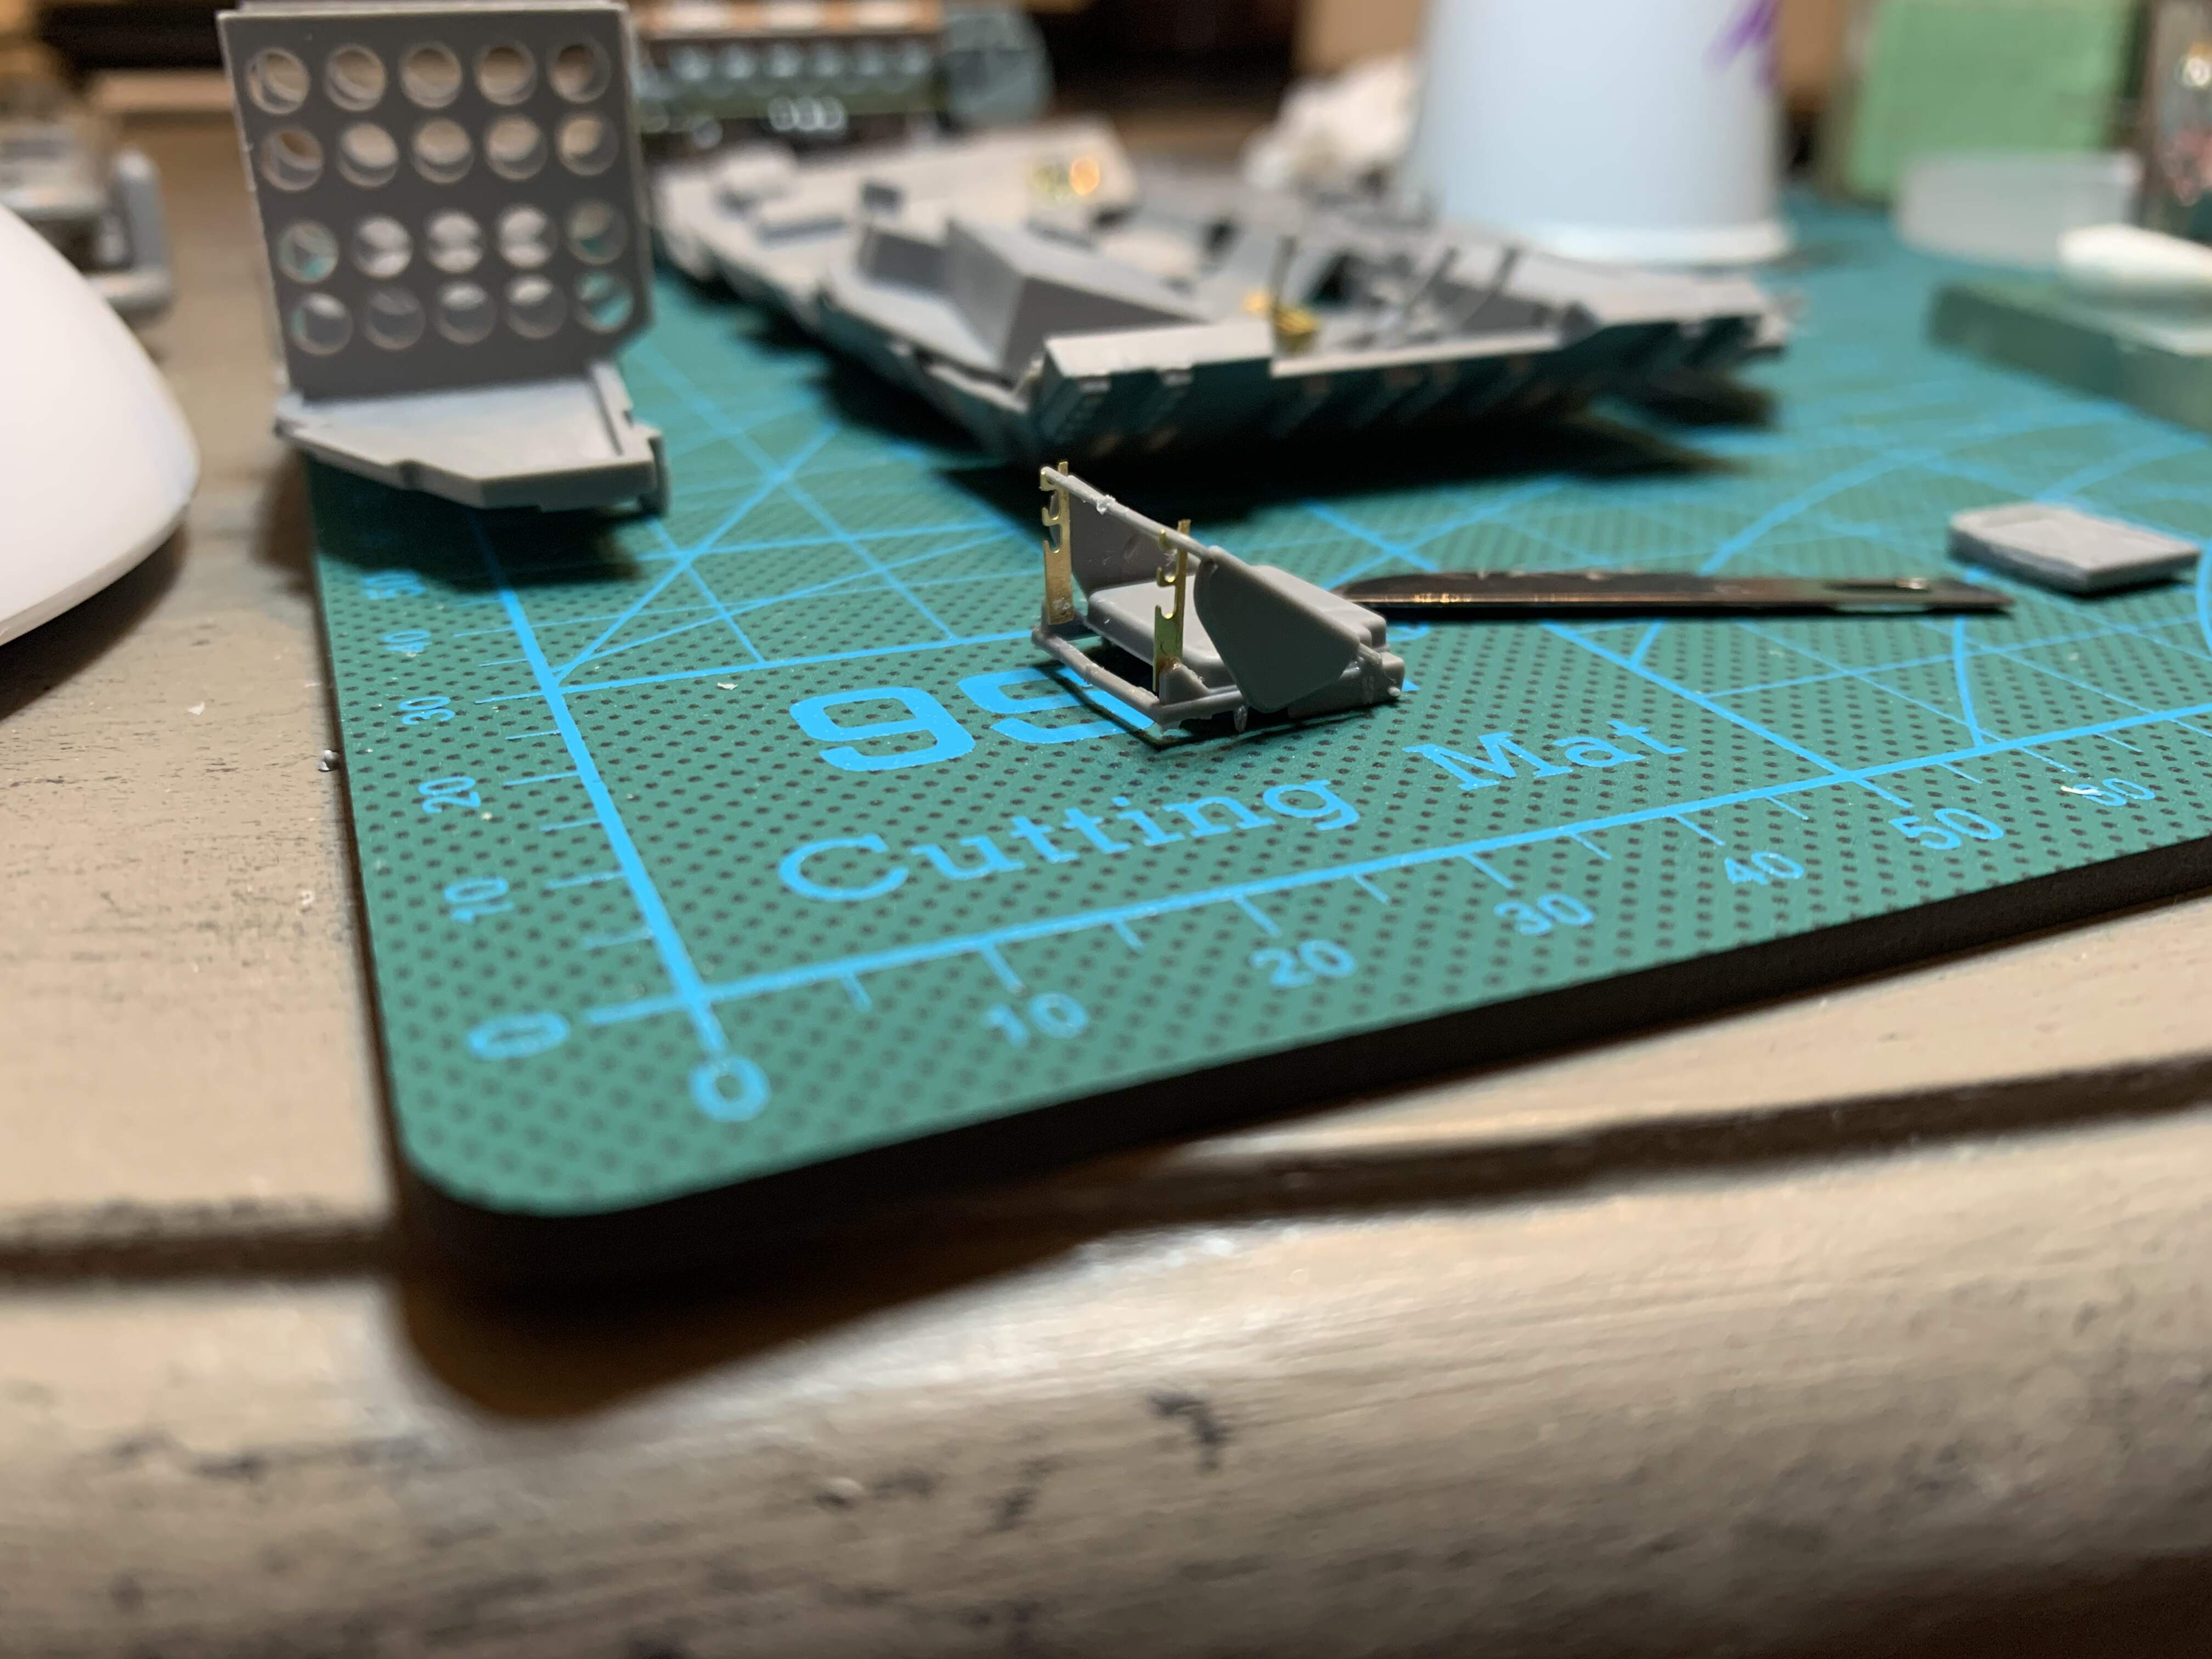
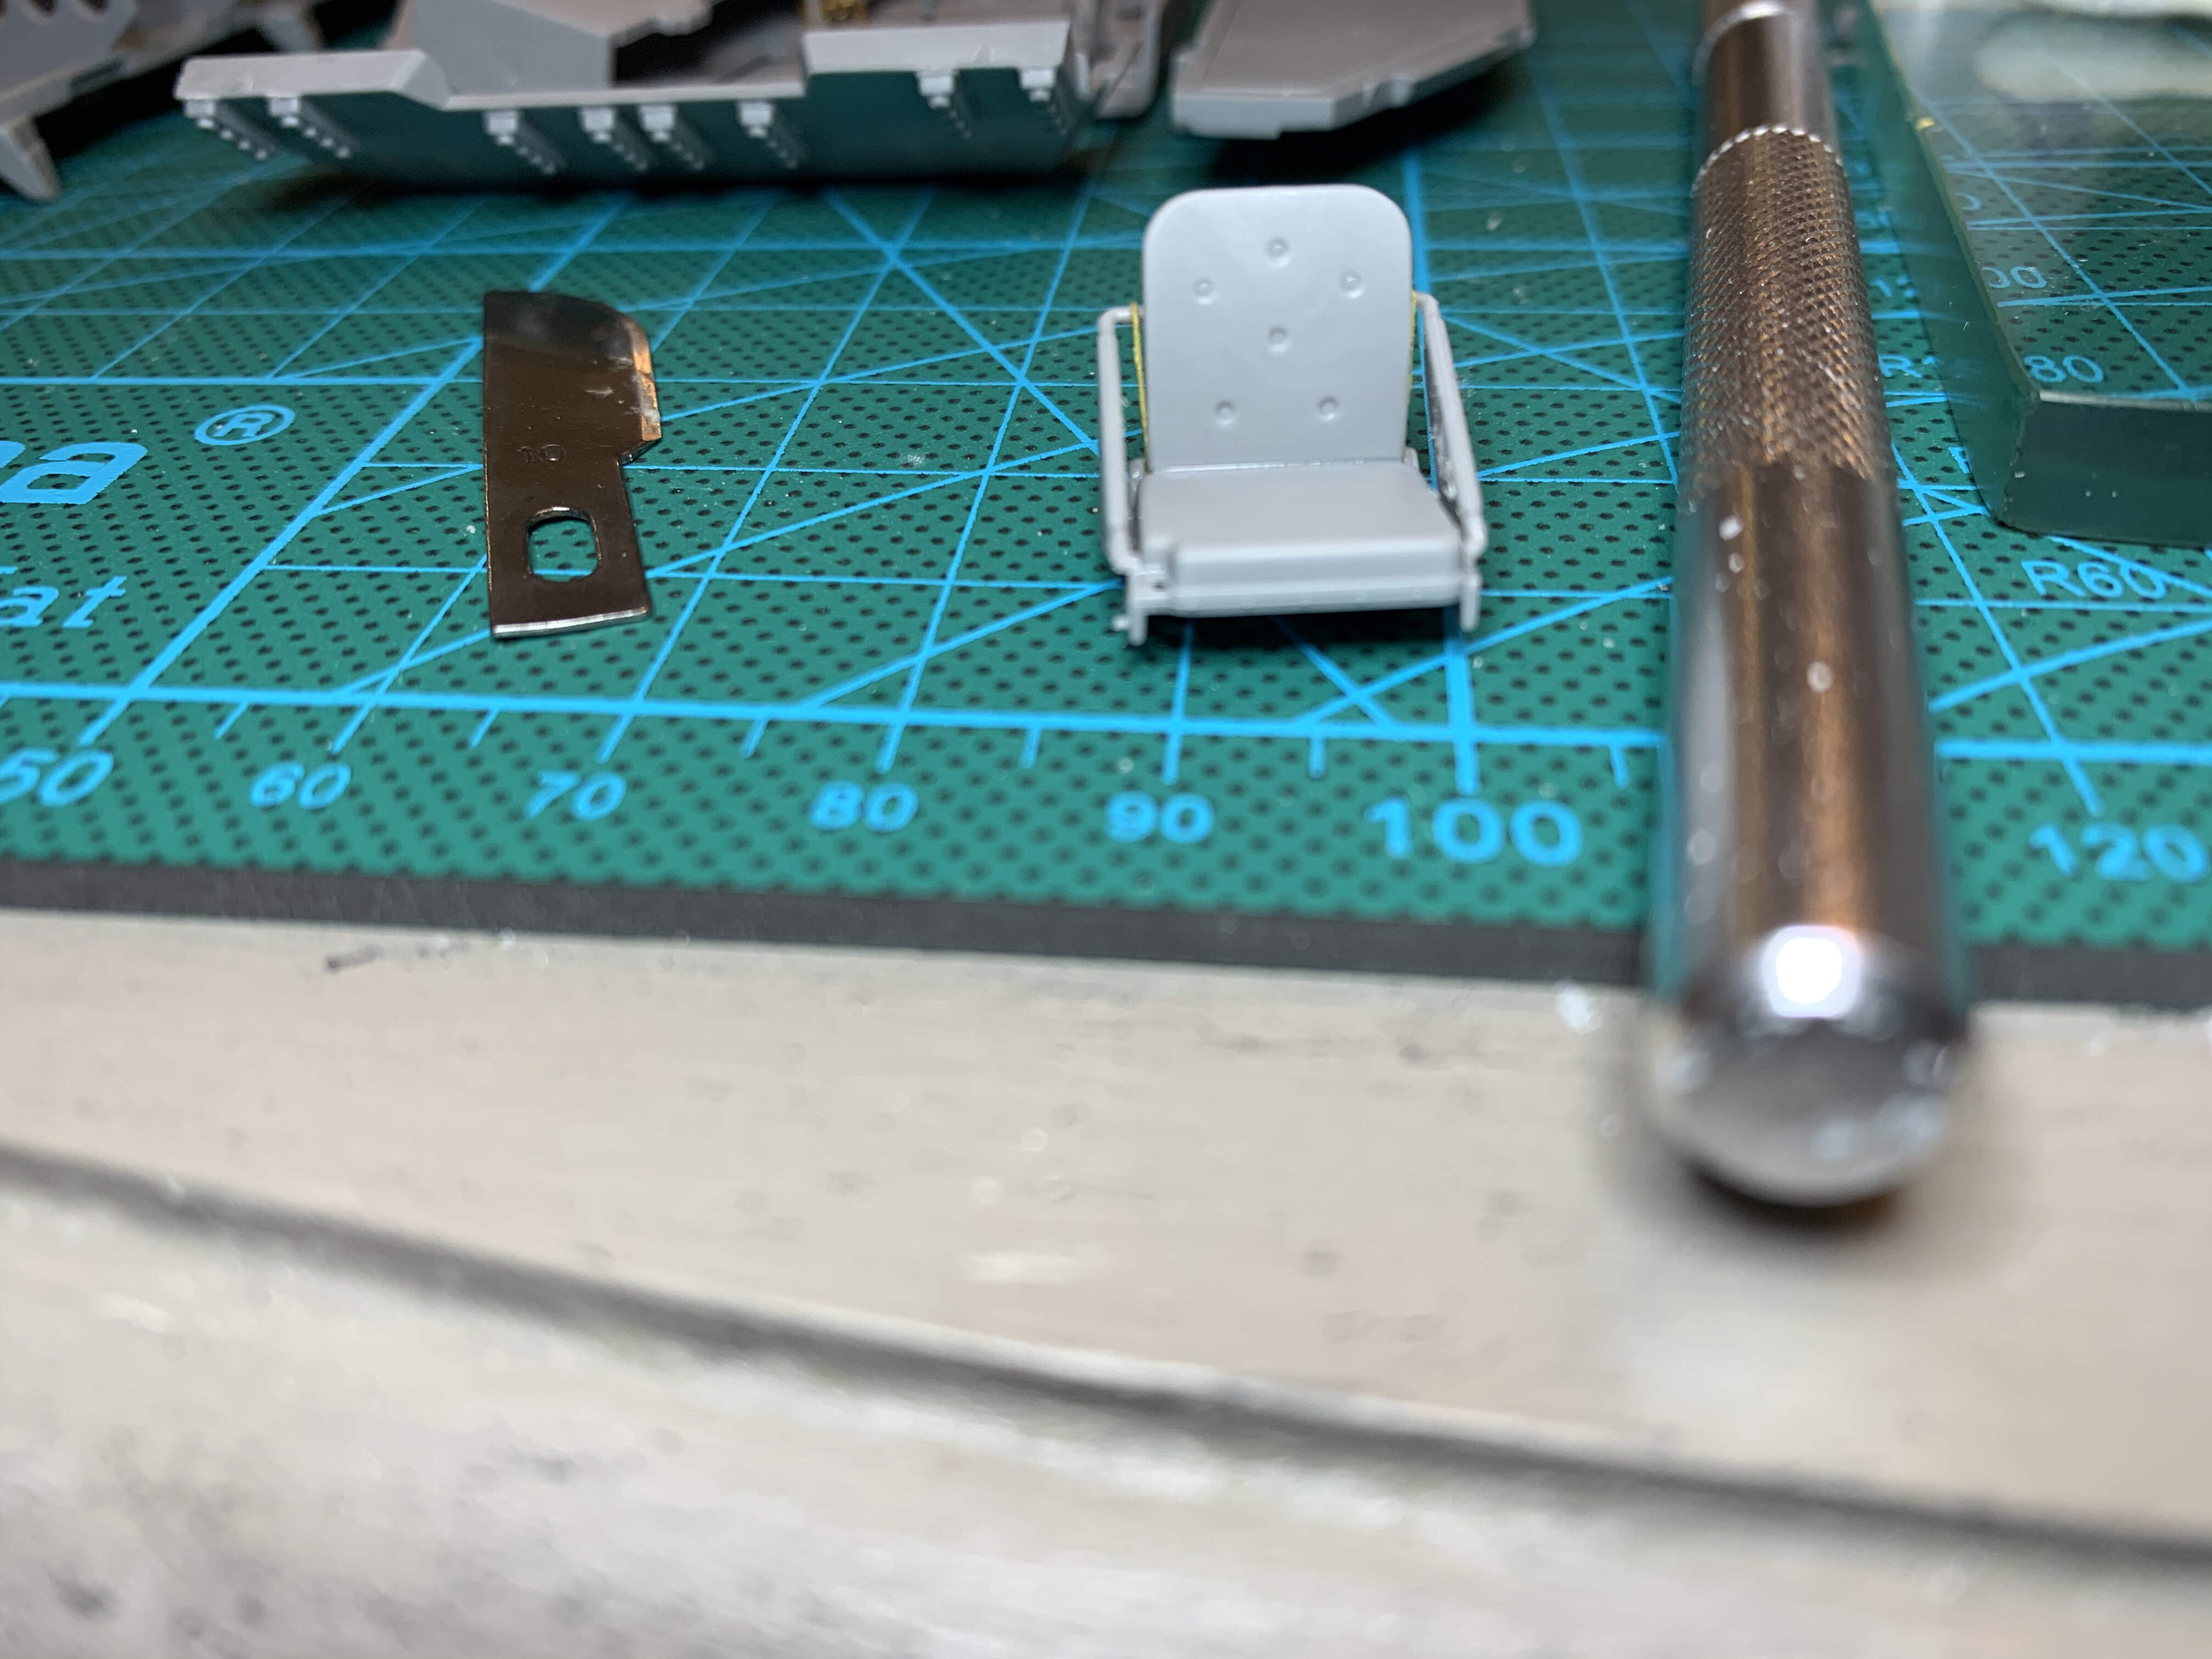
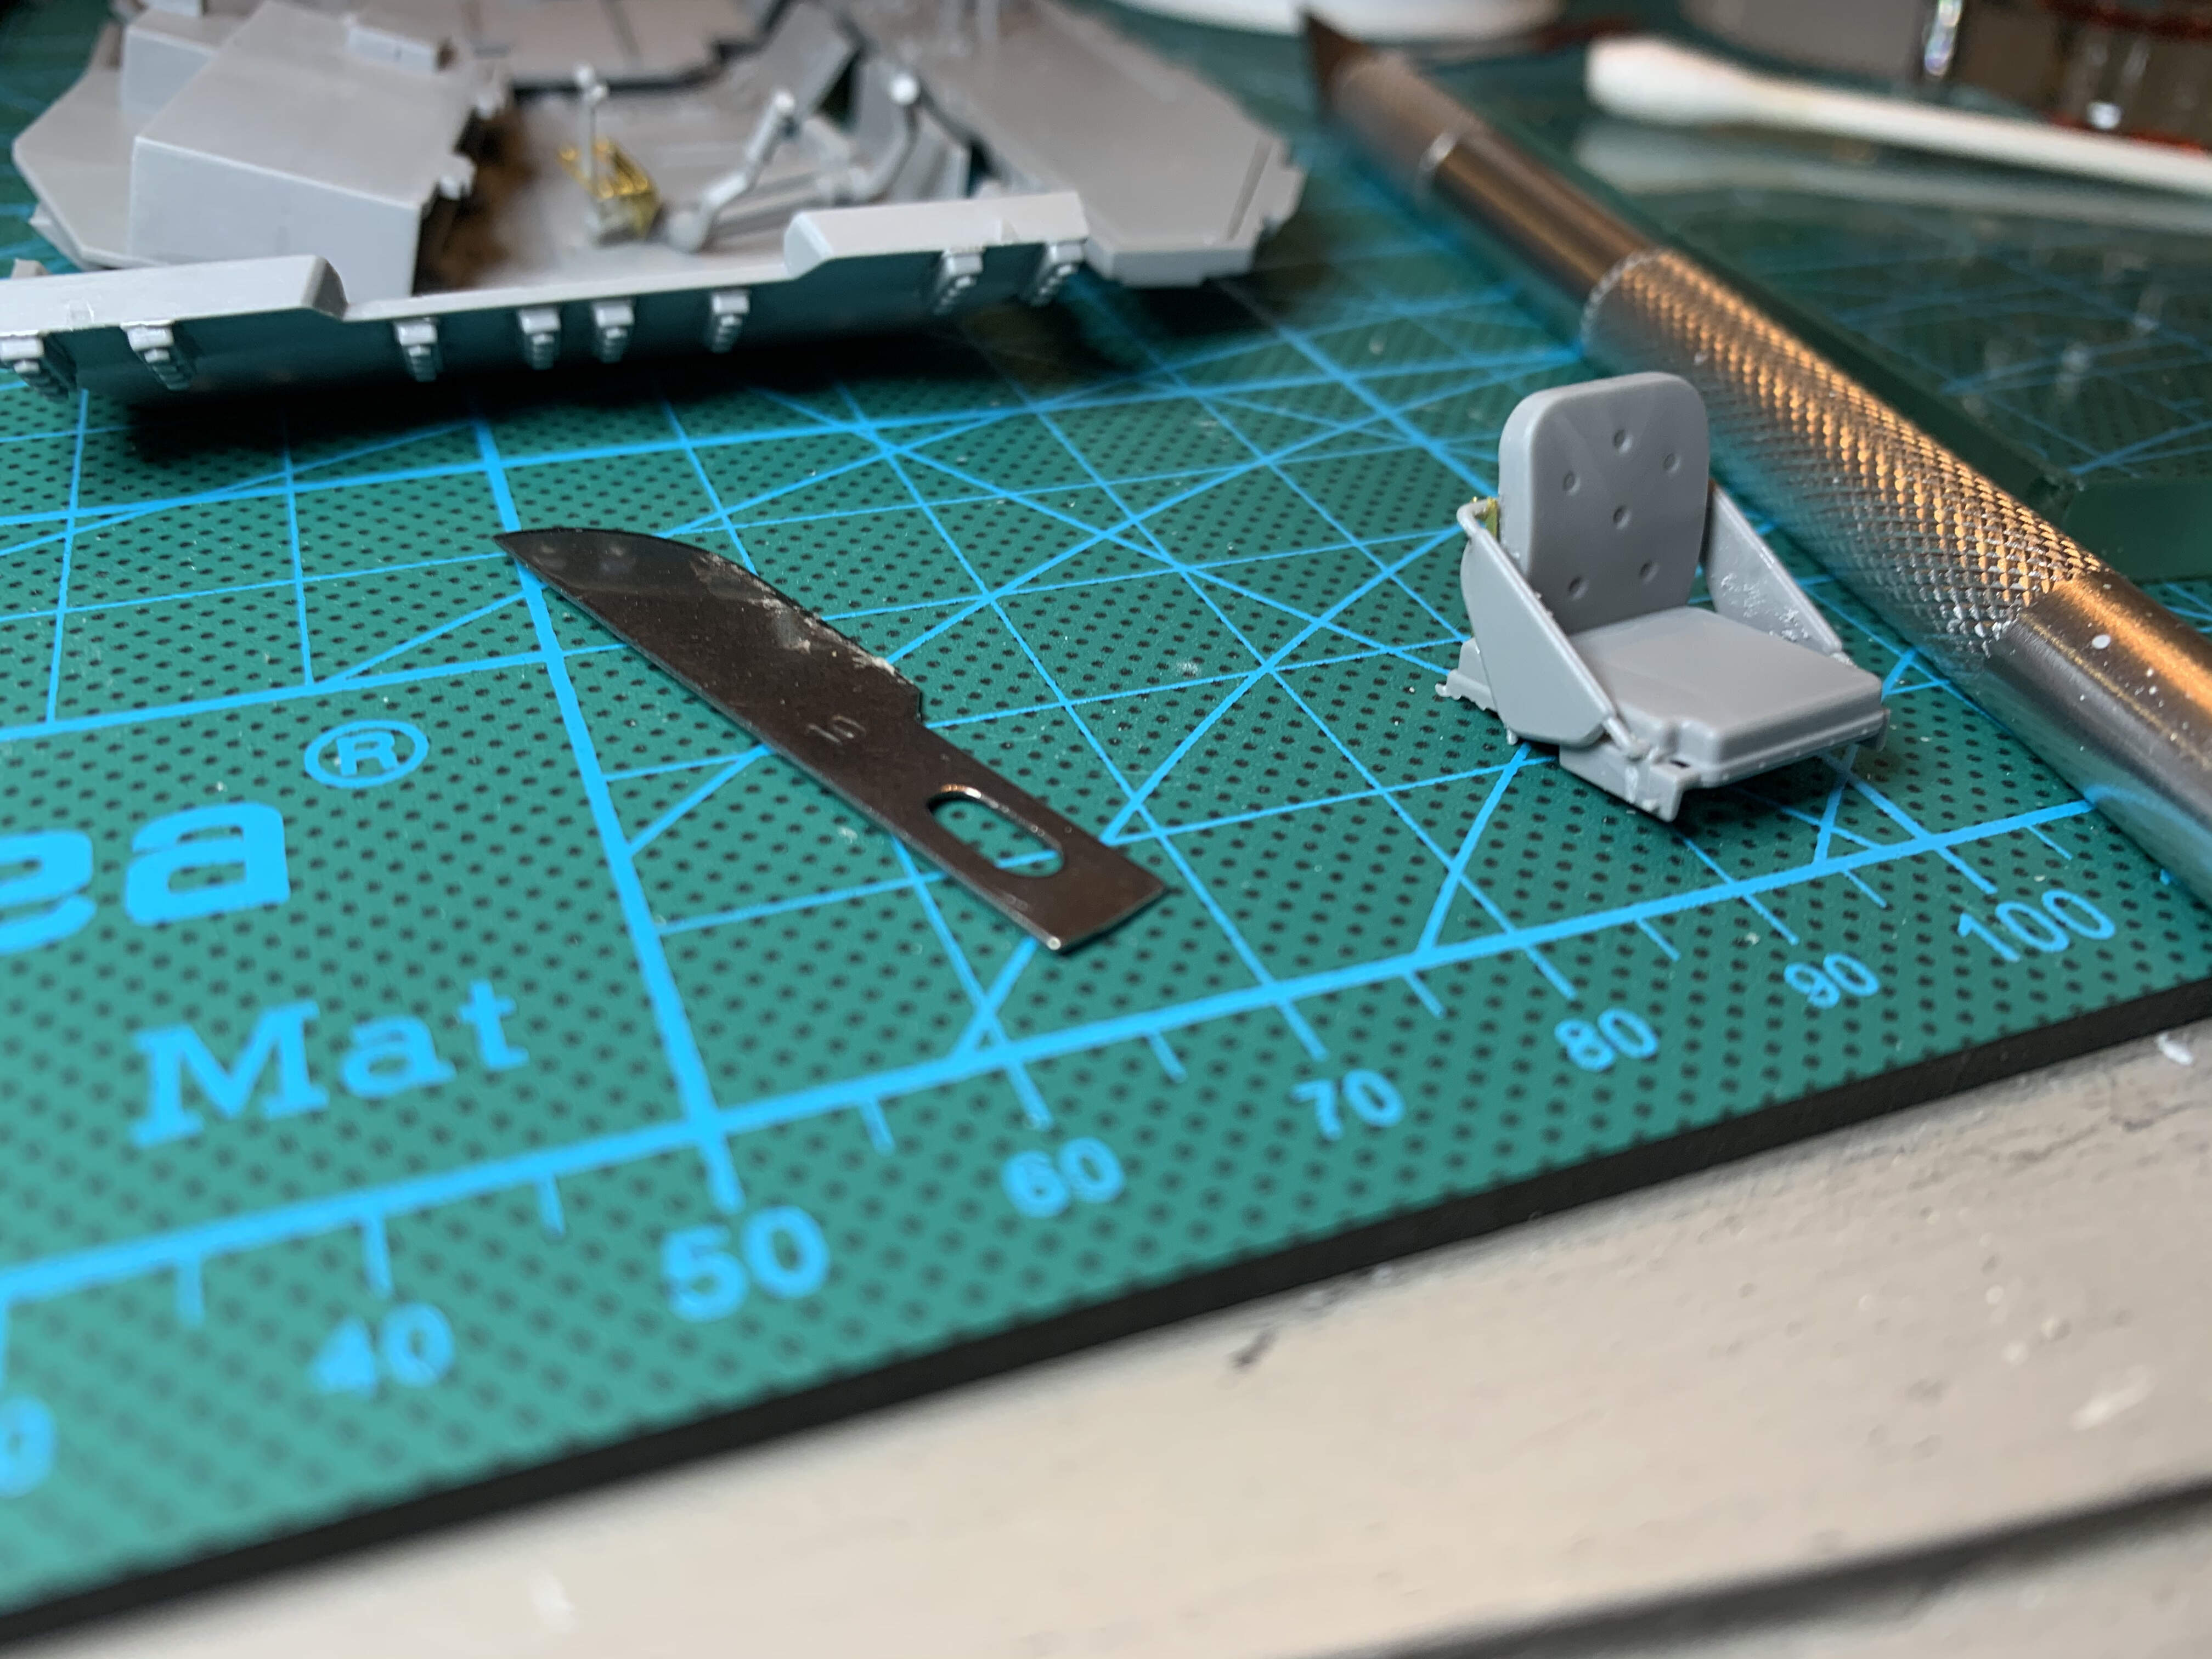
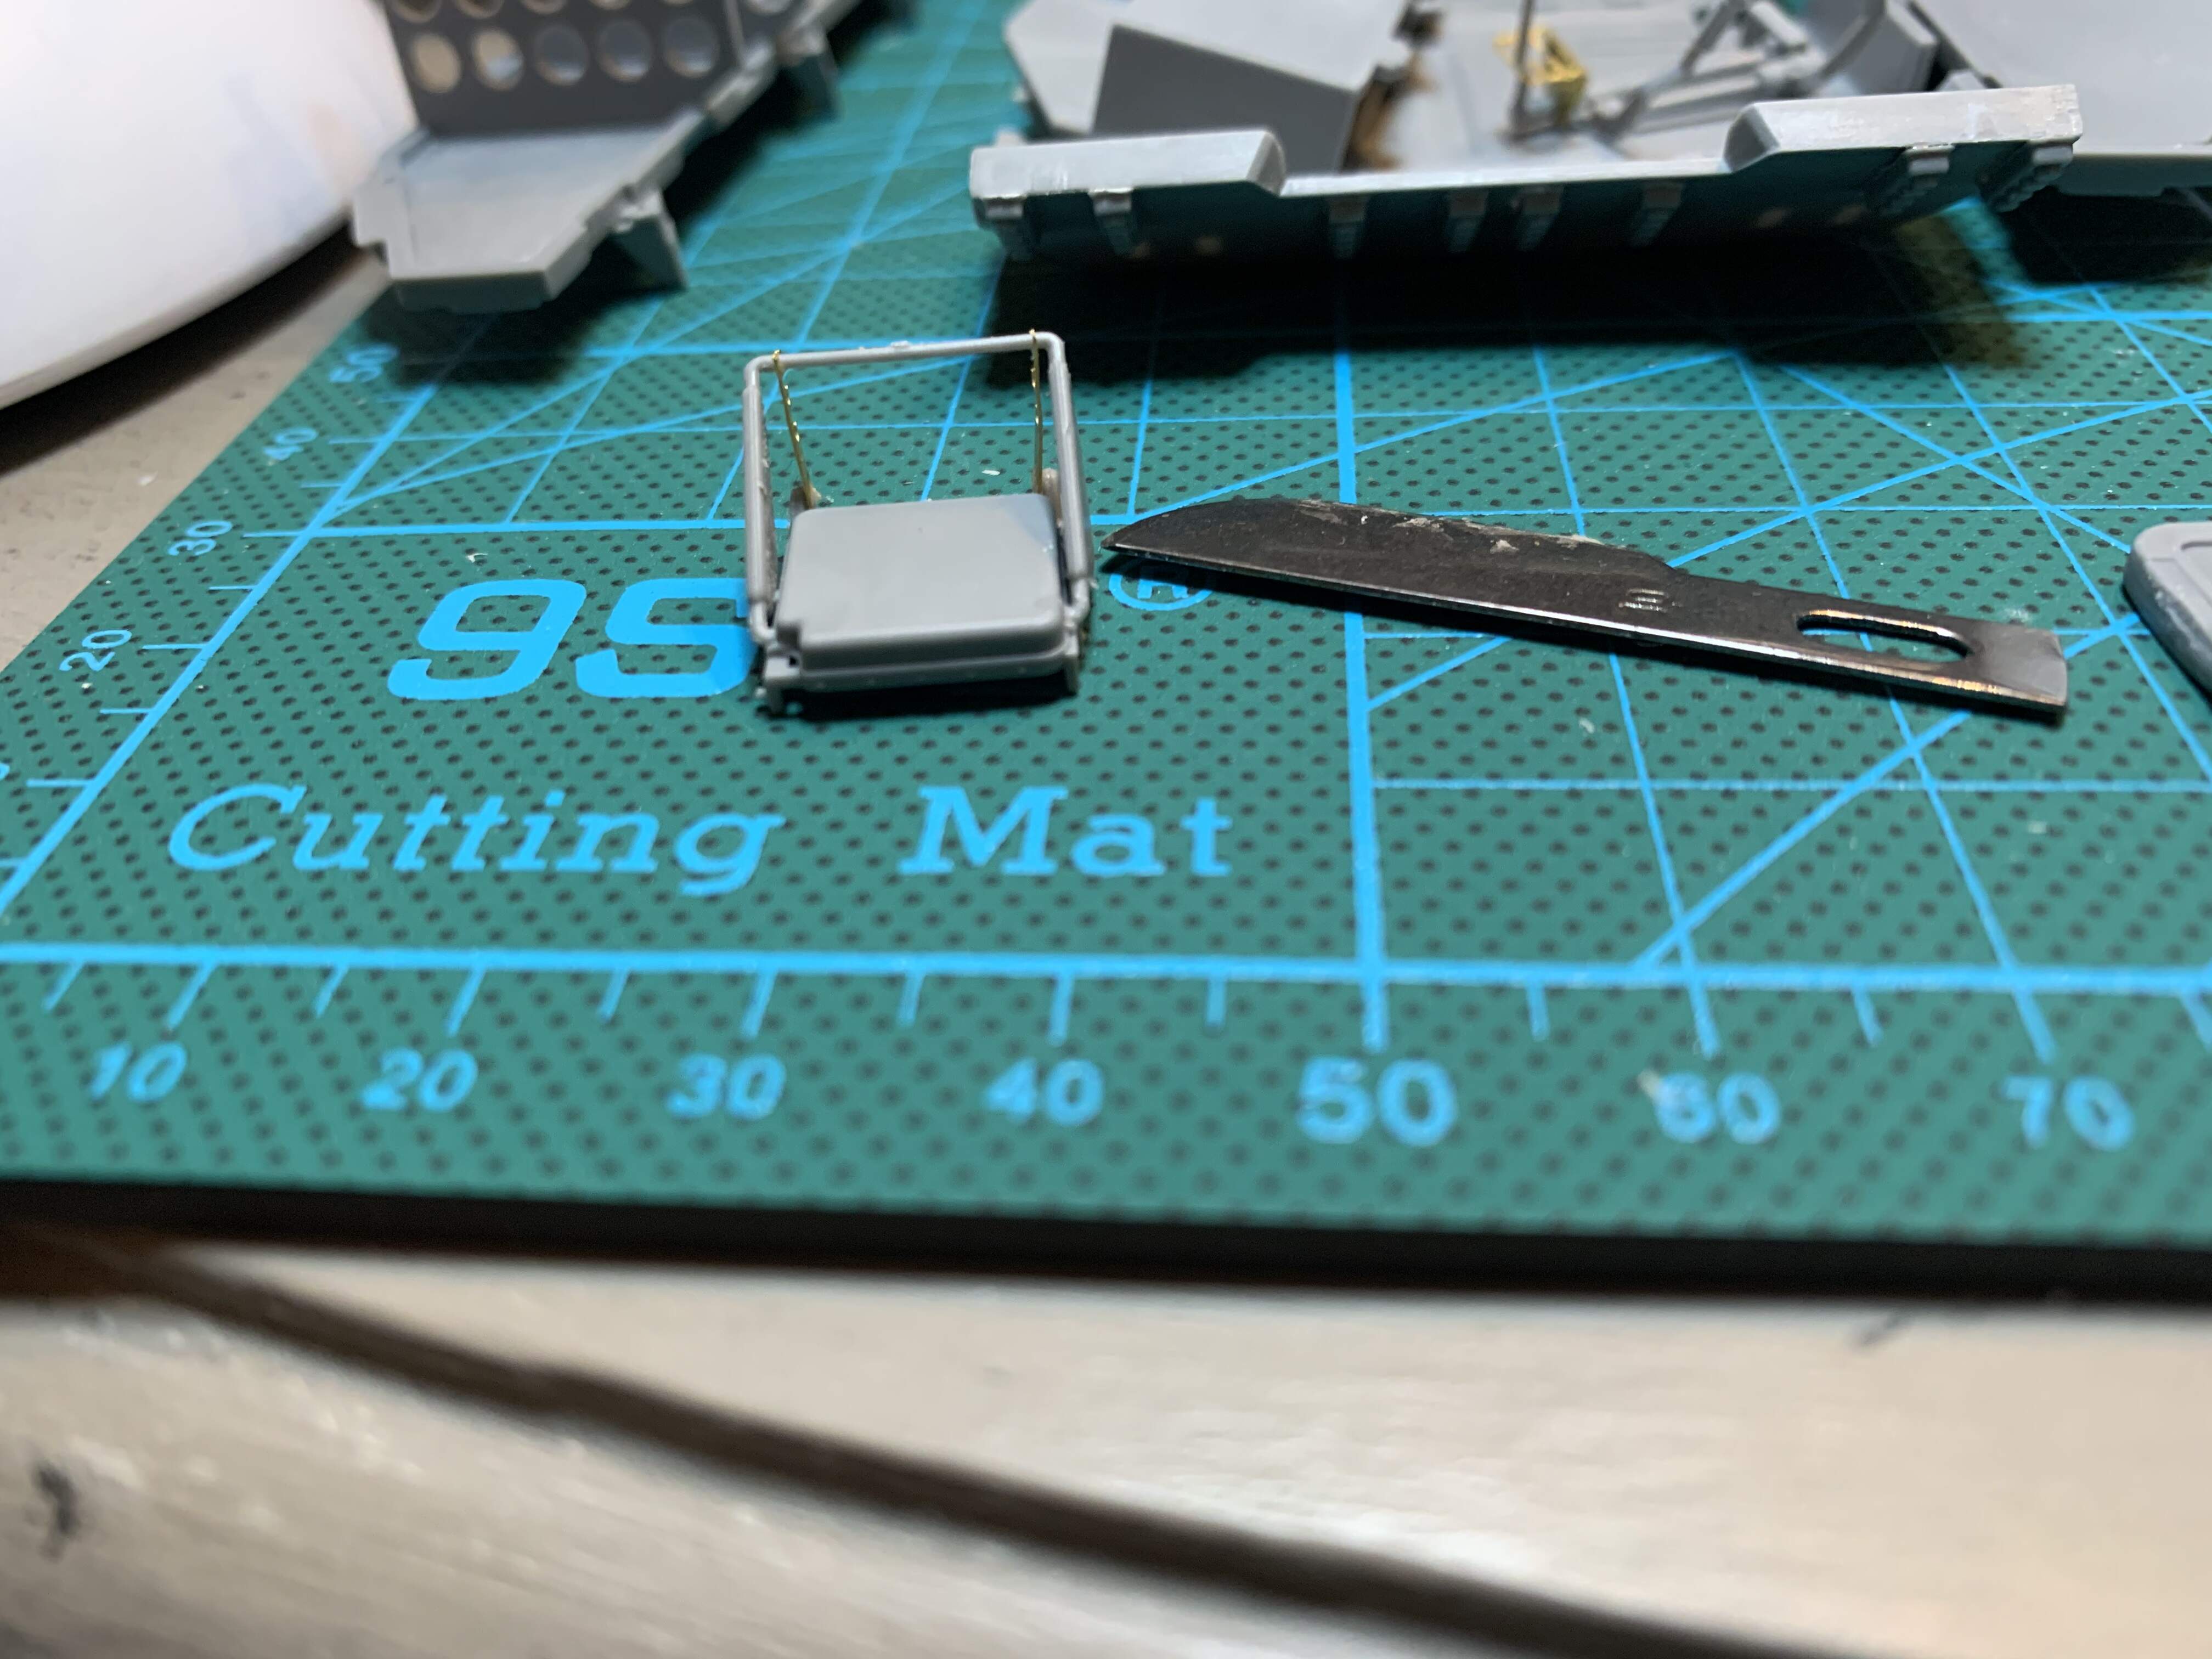
EDIT:
CHAIR ARMS ARE ON UPSIDE DOWN HERE. THEY HAVE SINCE BEEN CORRECTED IF ANYONE STUMBLES UPON THIS LATER
3 Likes
Alright a bit more work down on the lower hull, fairly slow I know but this weekend I should get some good time and finish the lower hull.
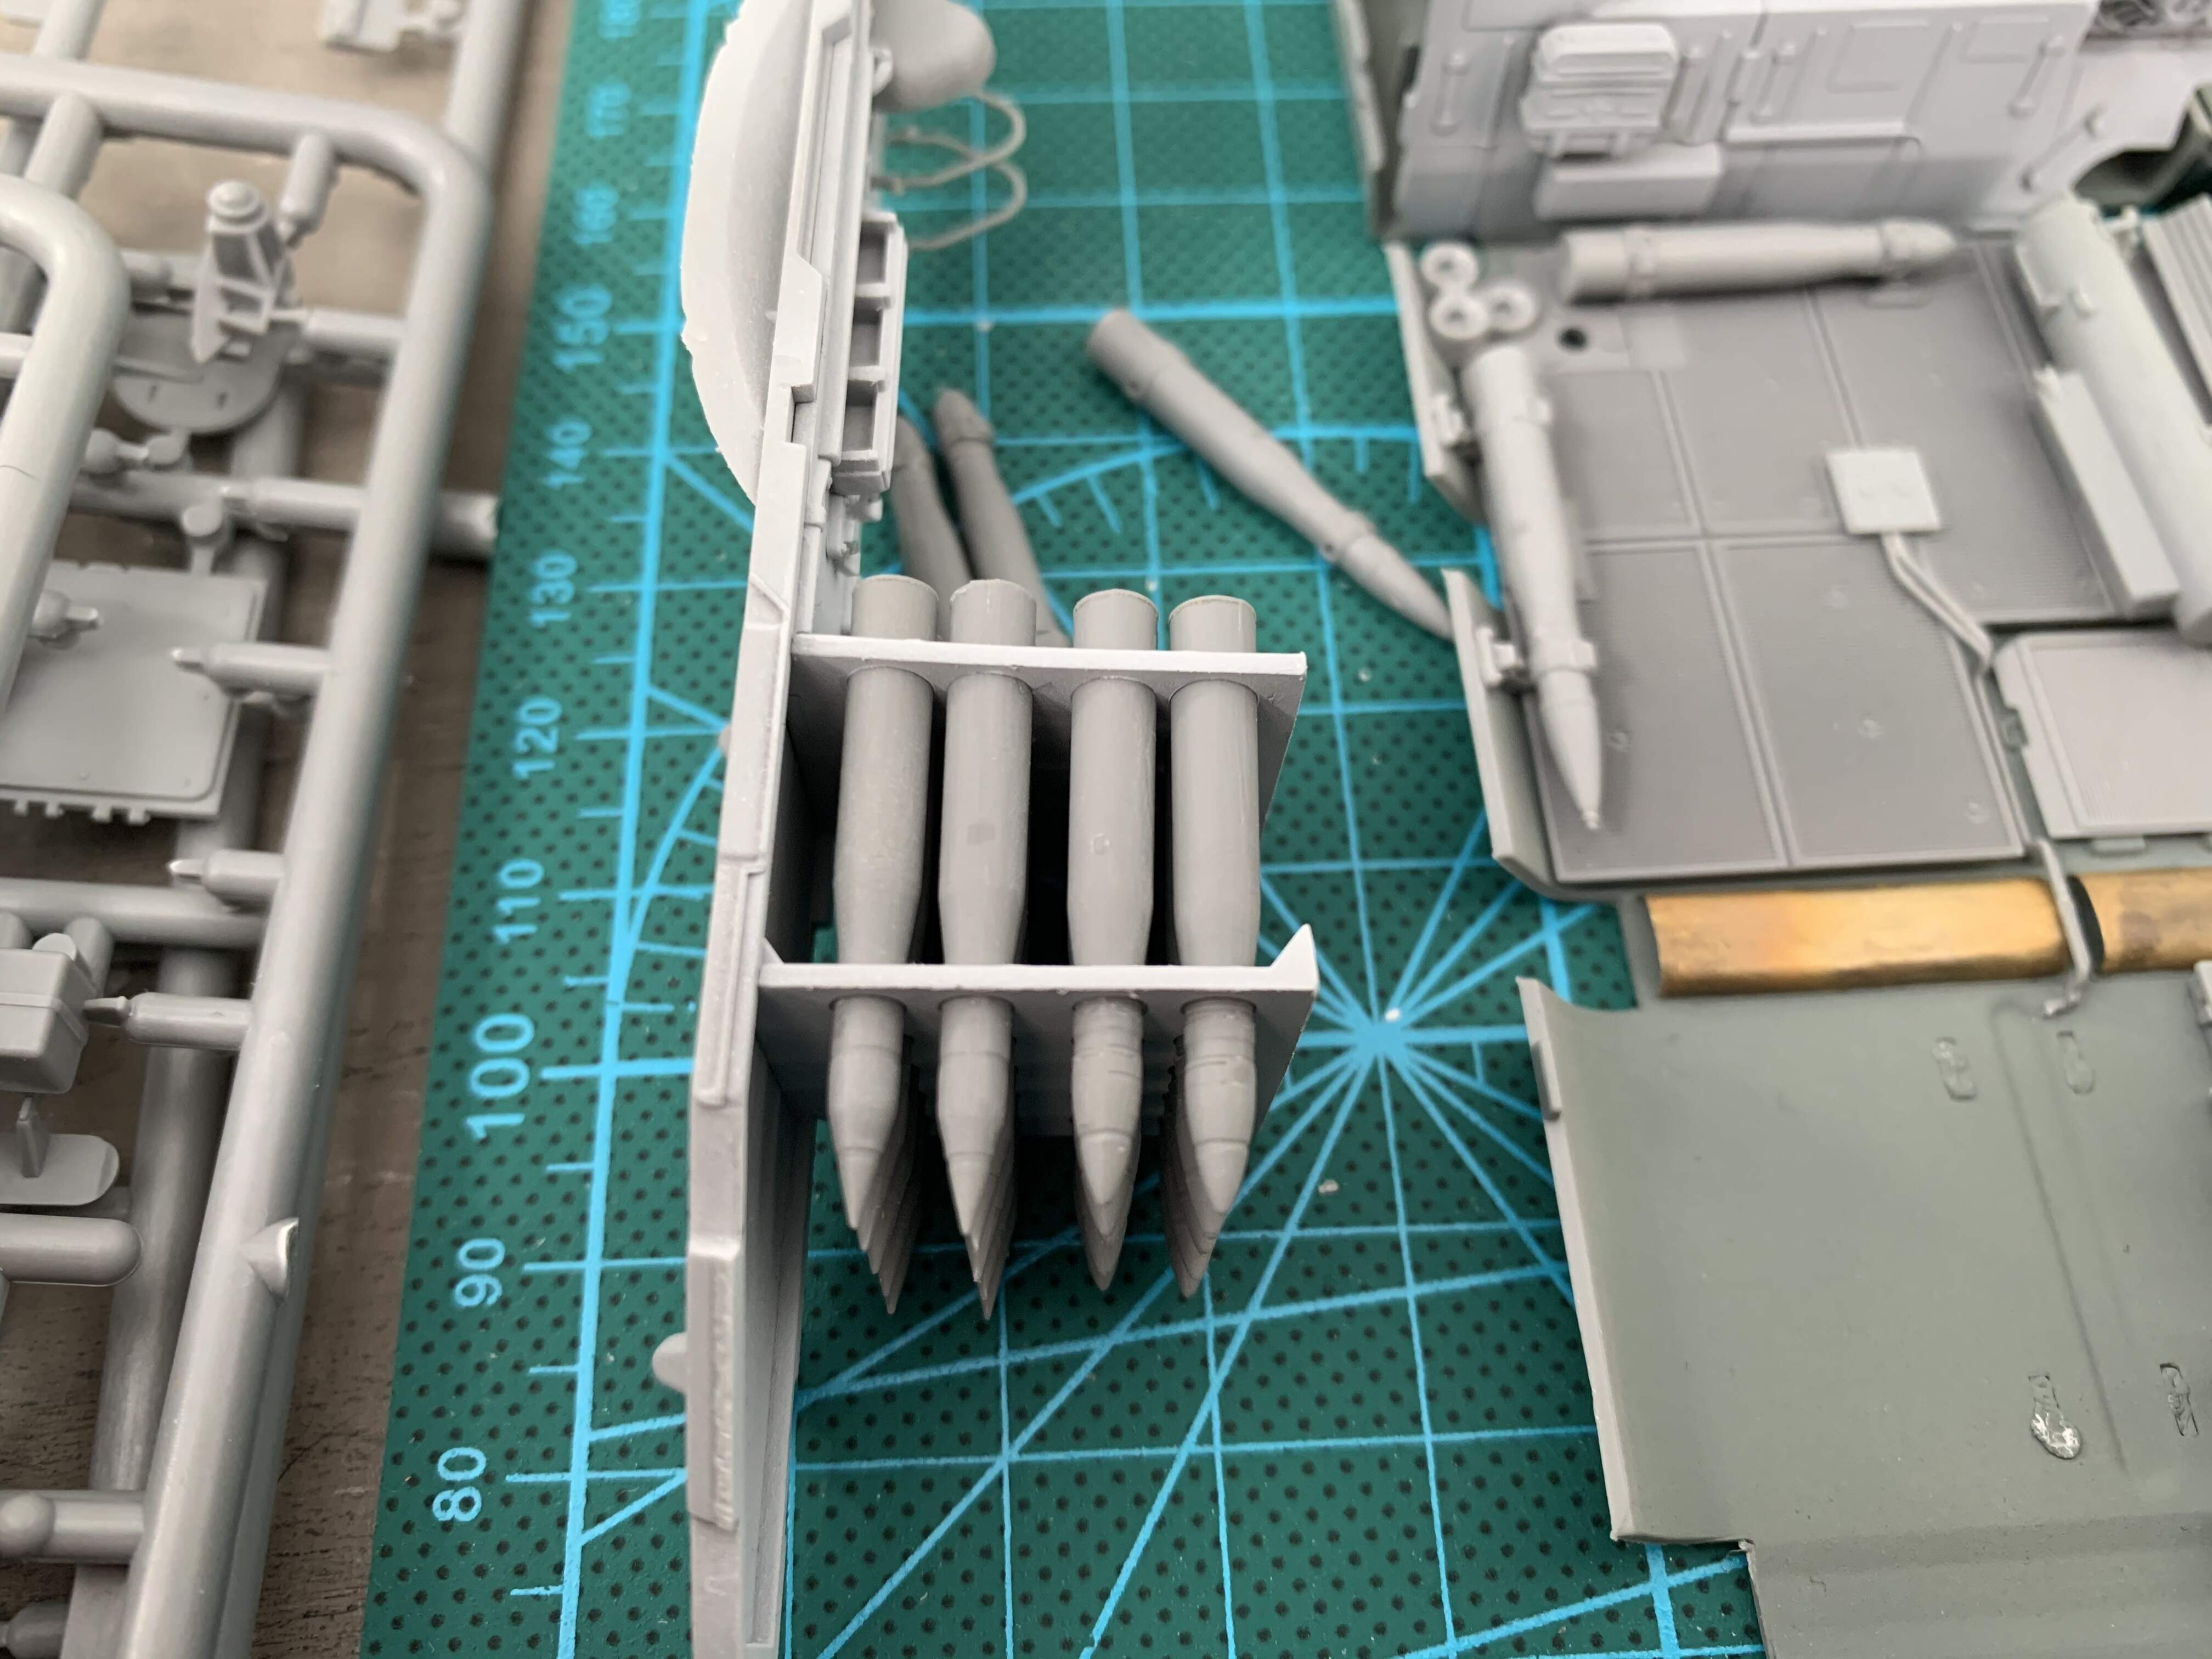
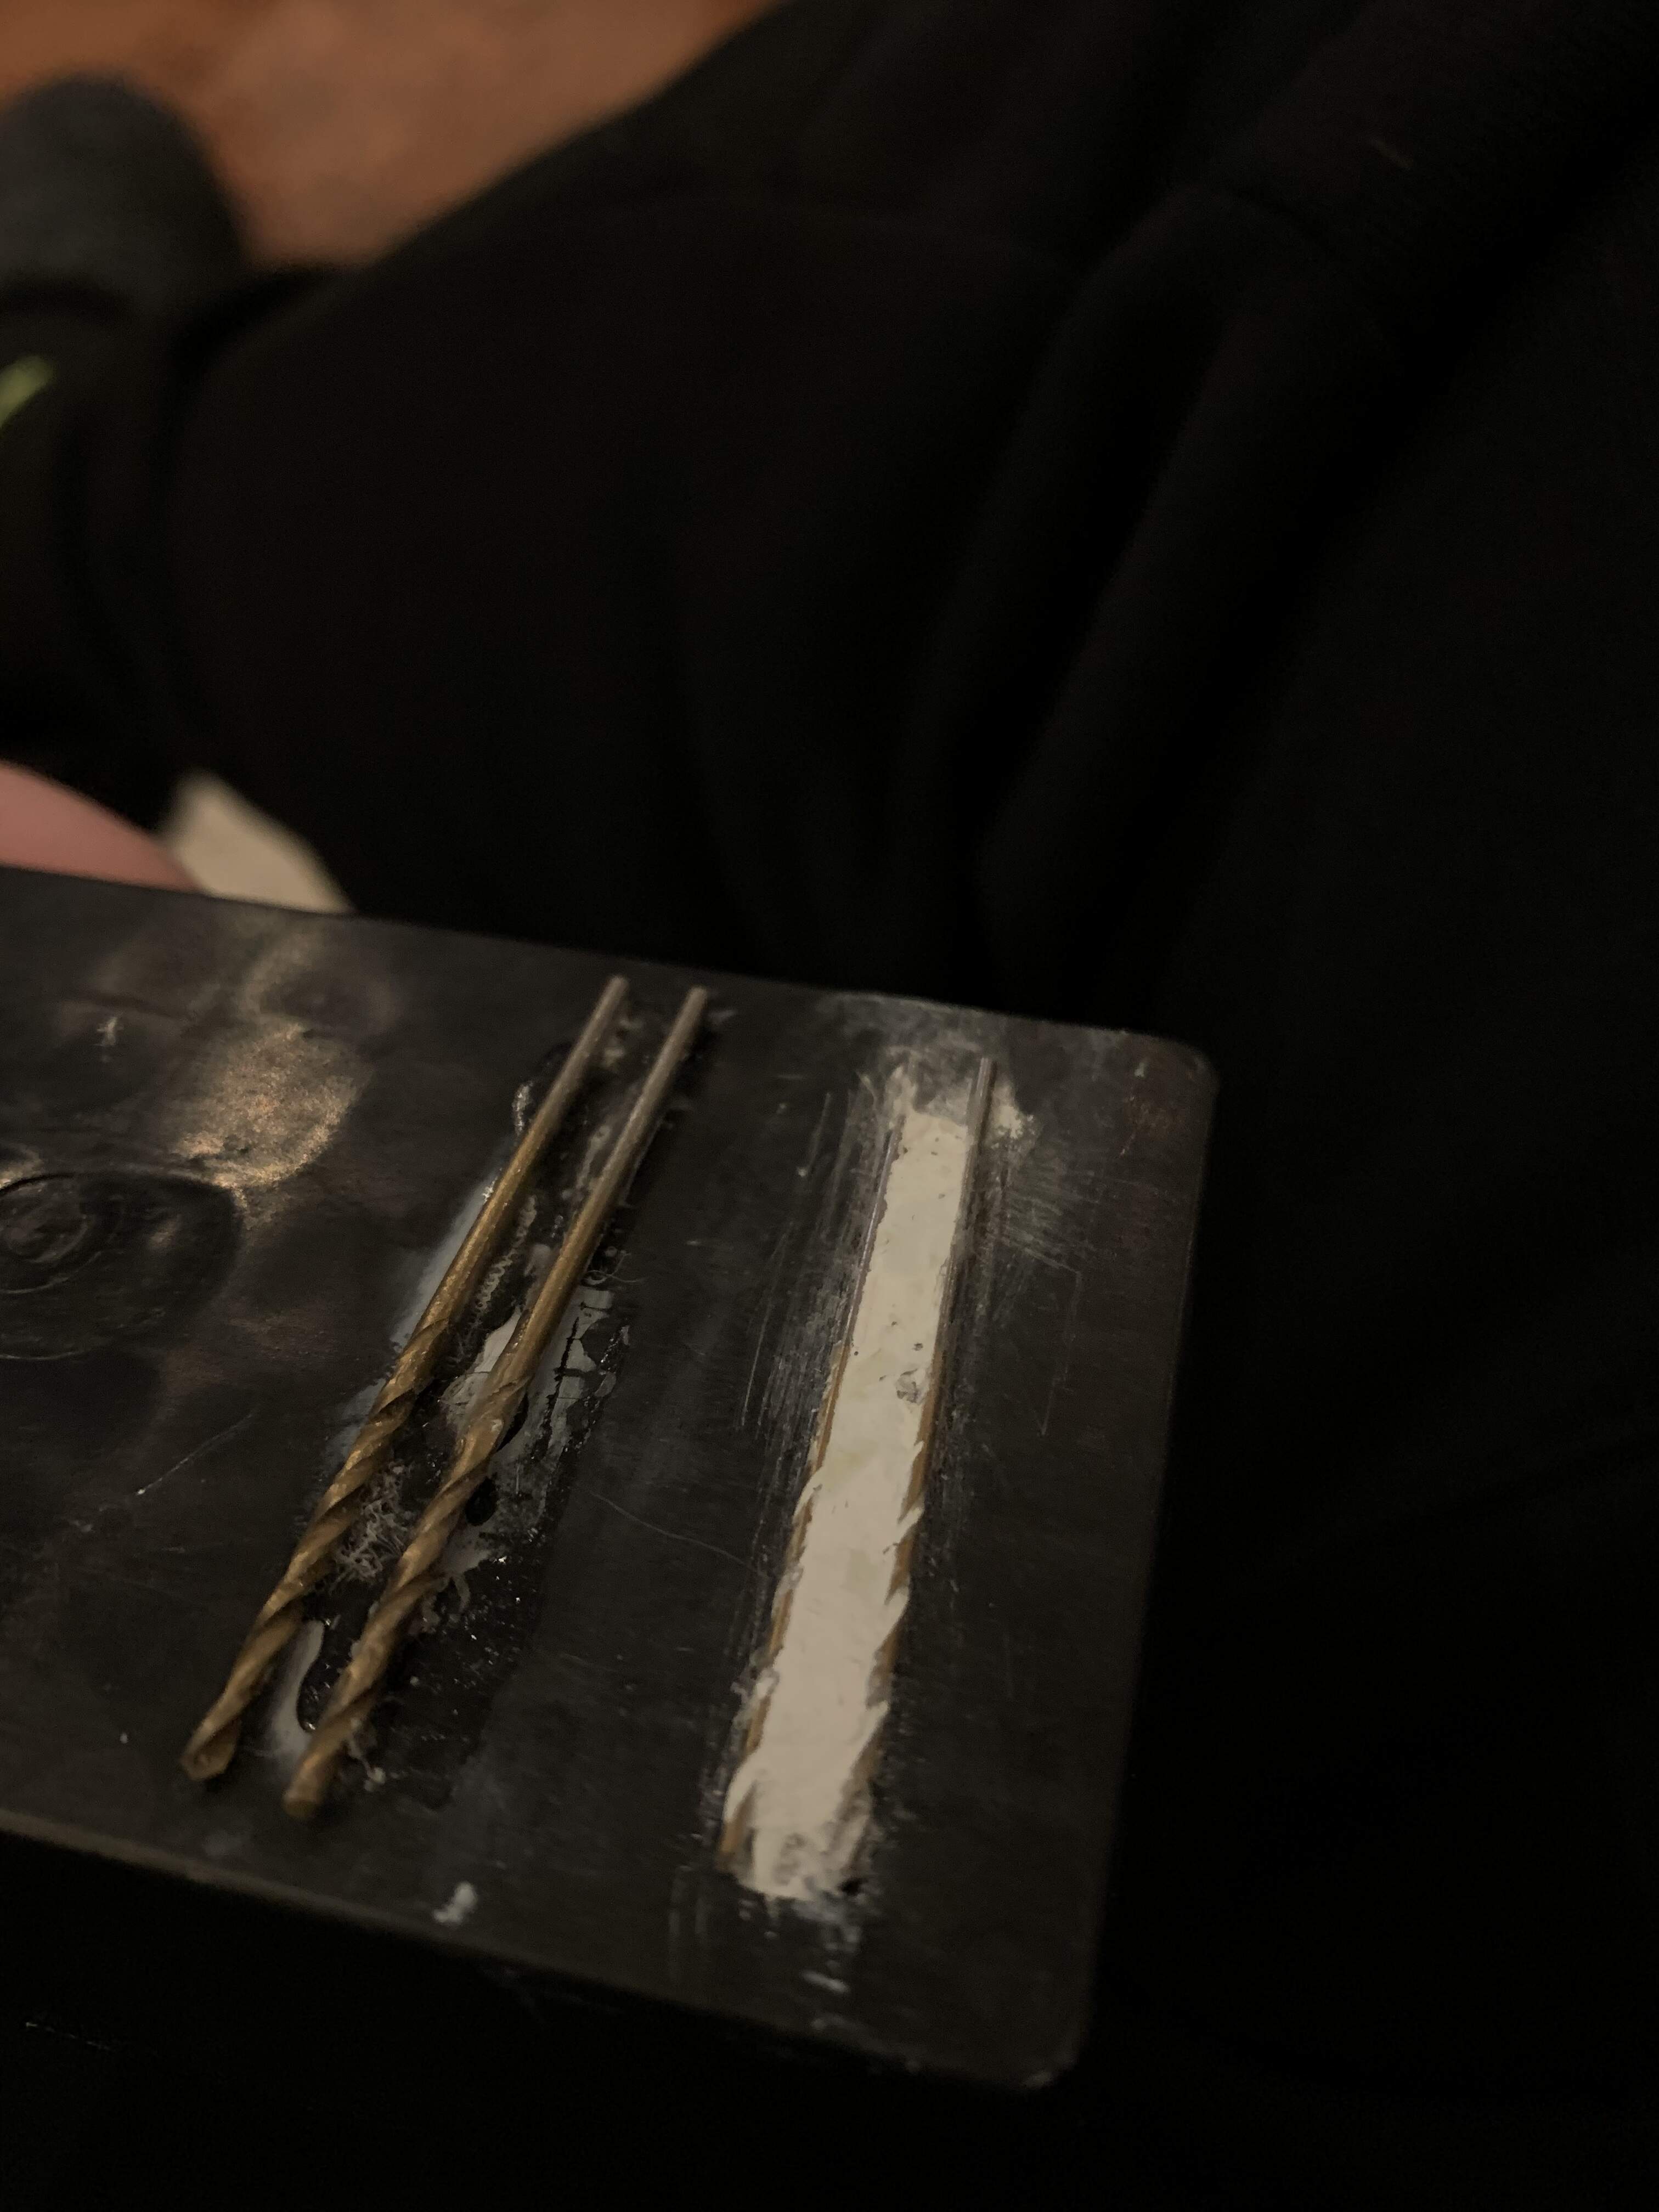
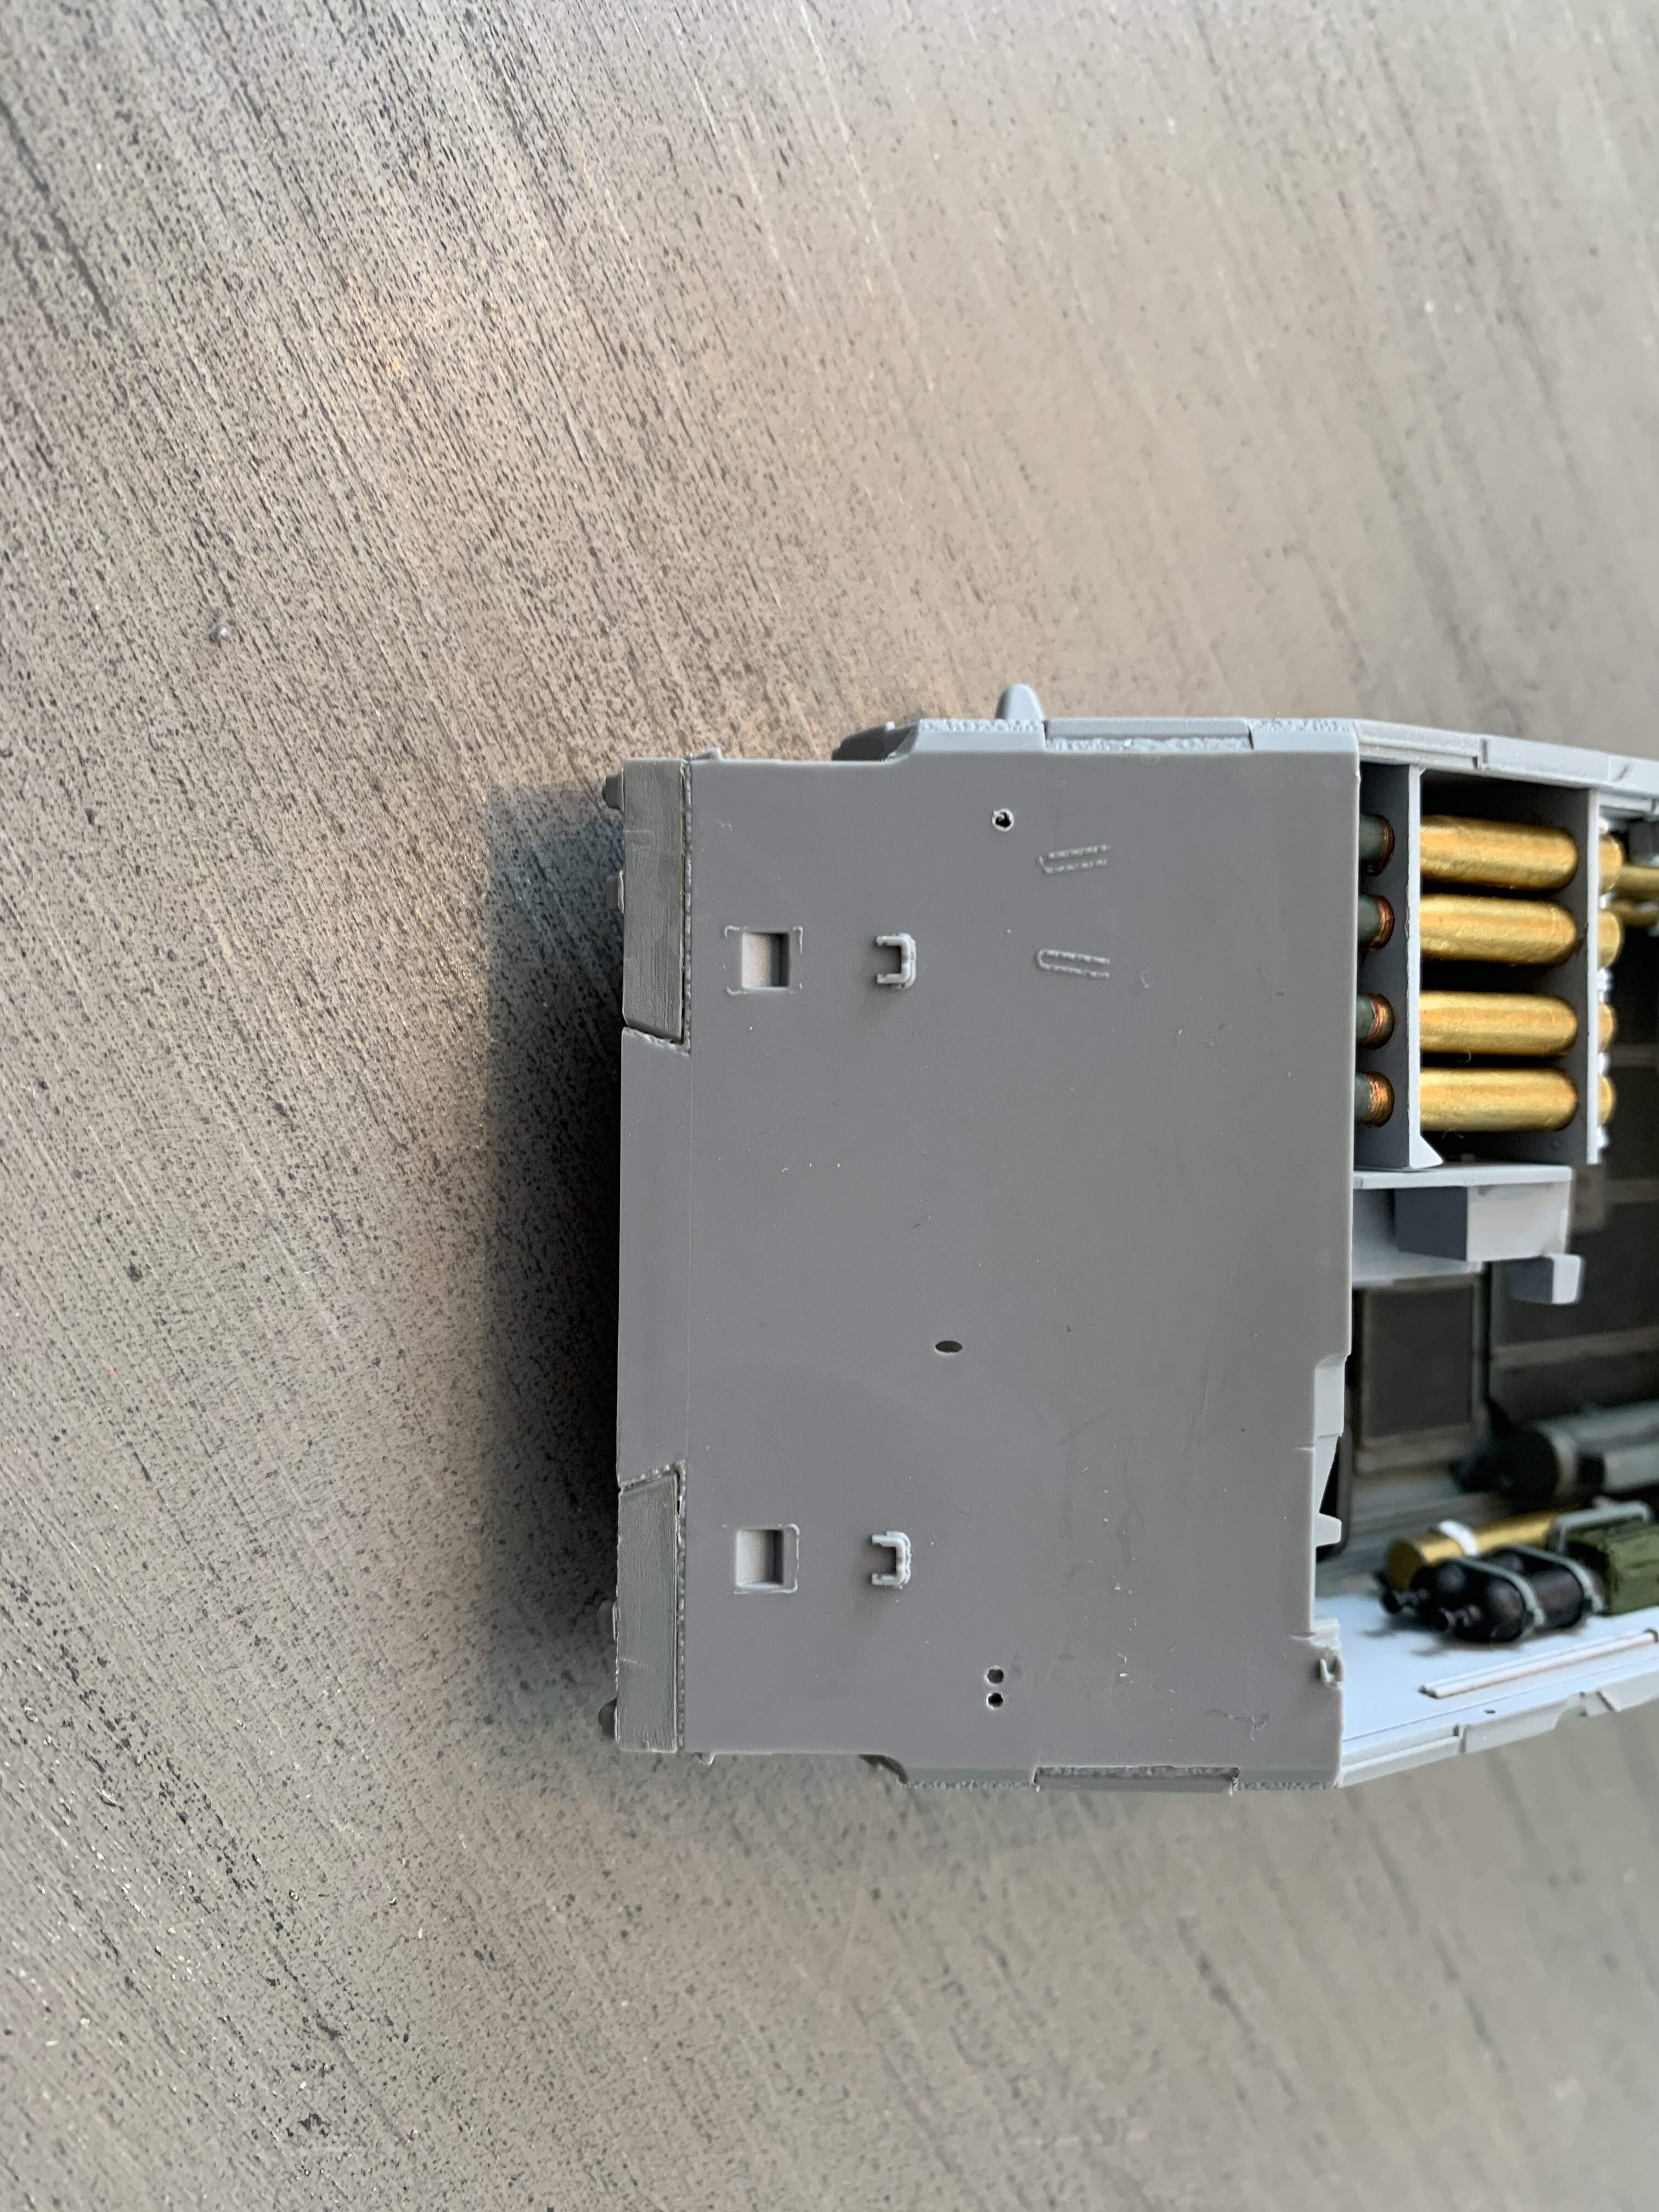
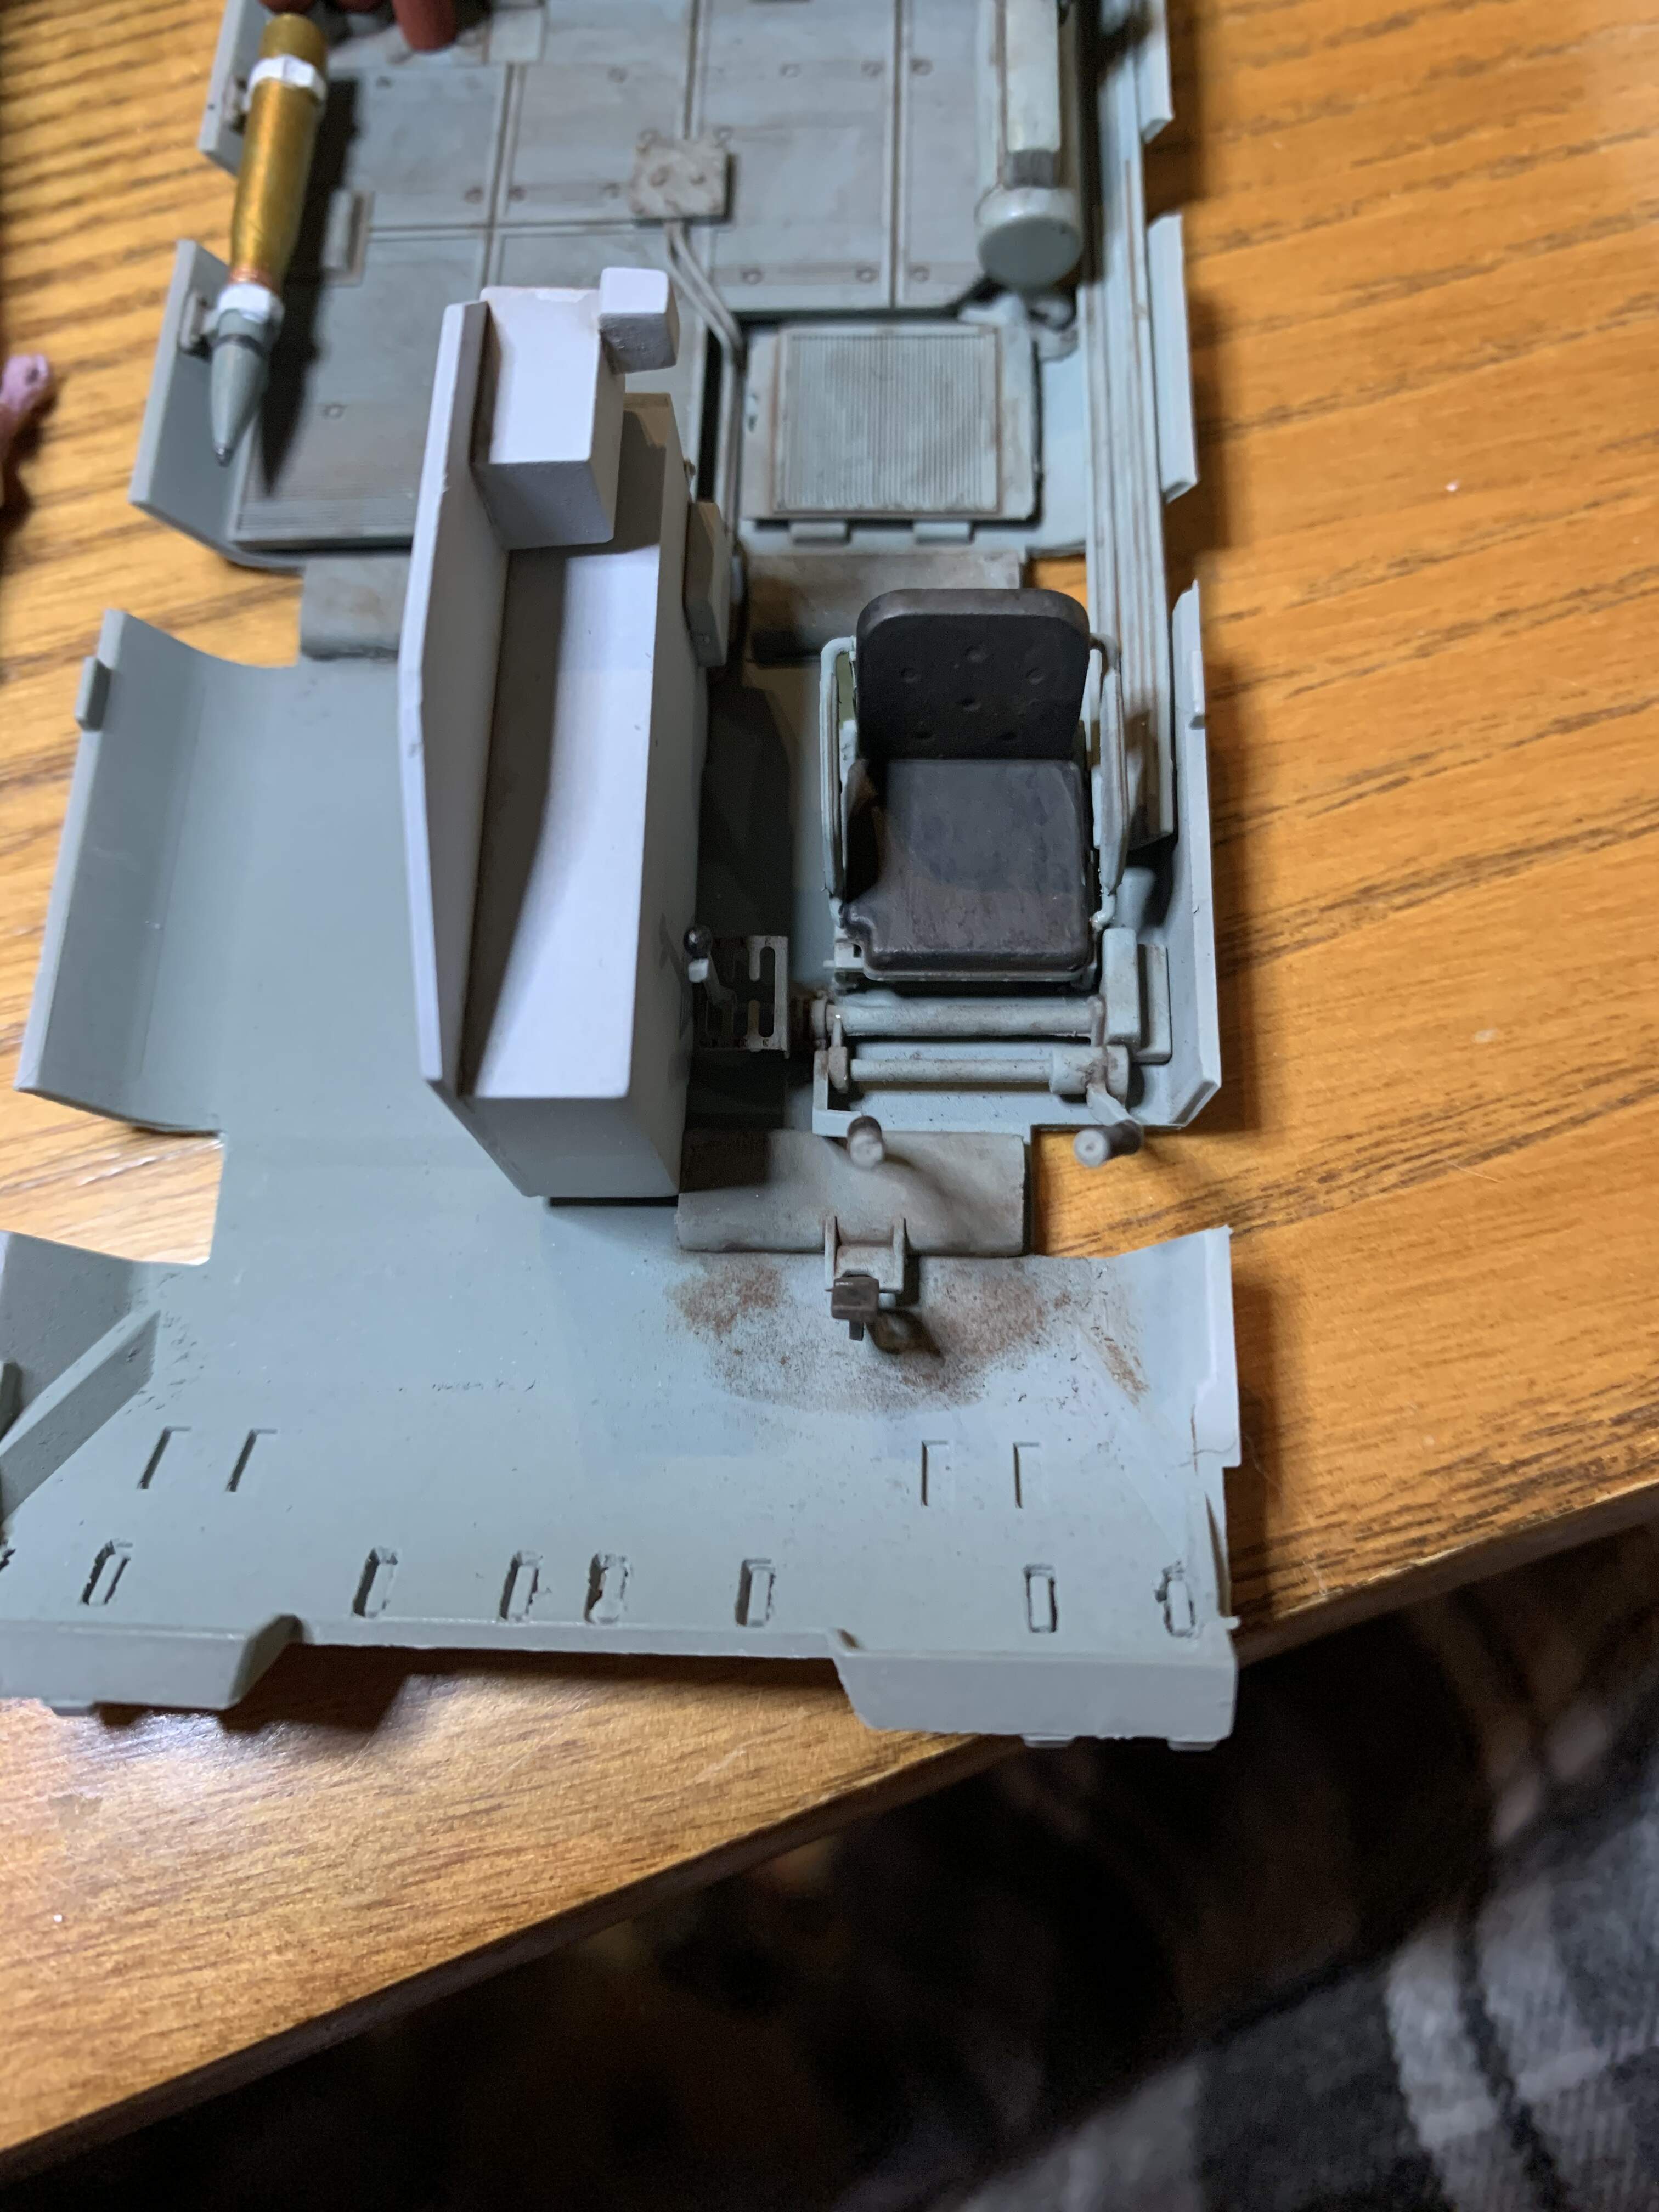
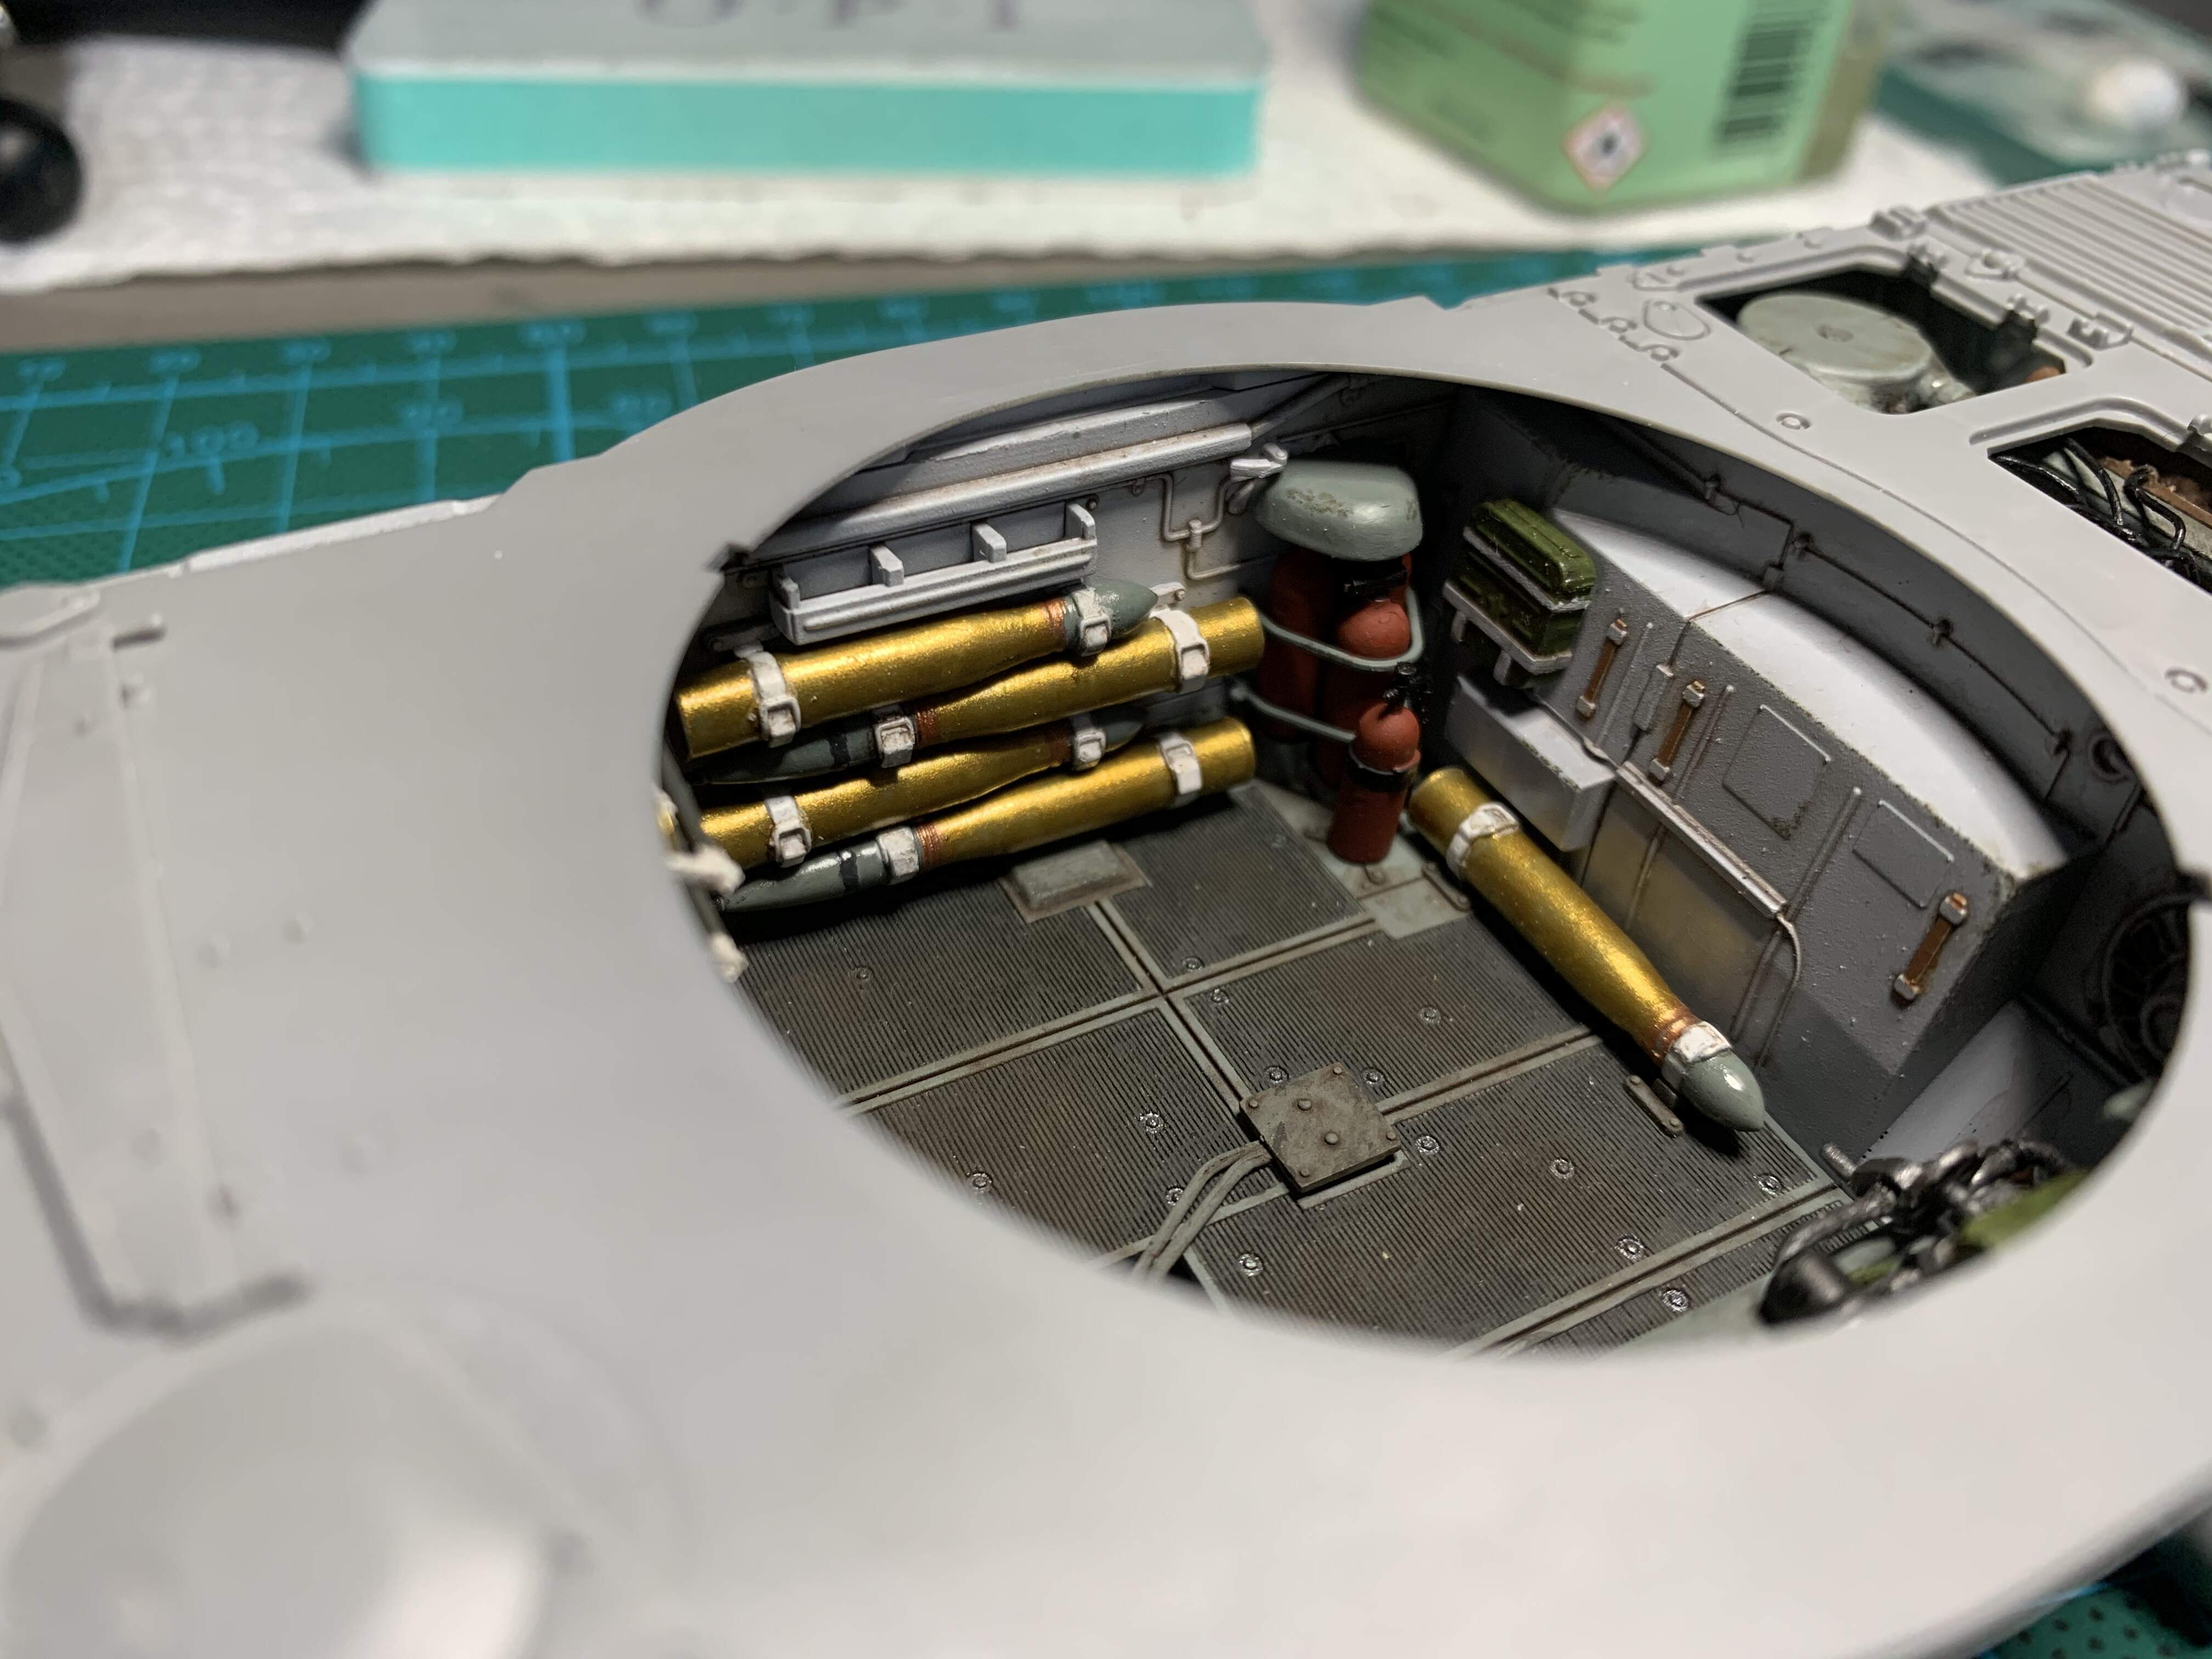
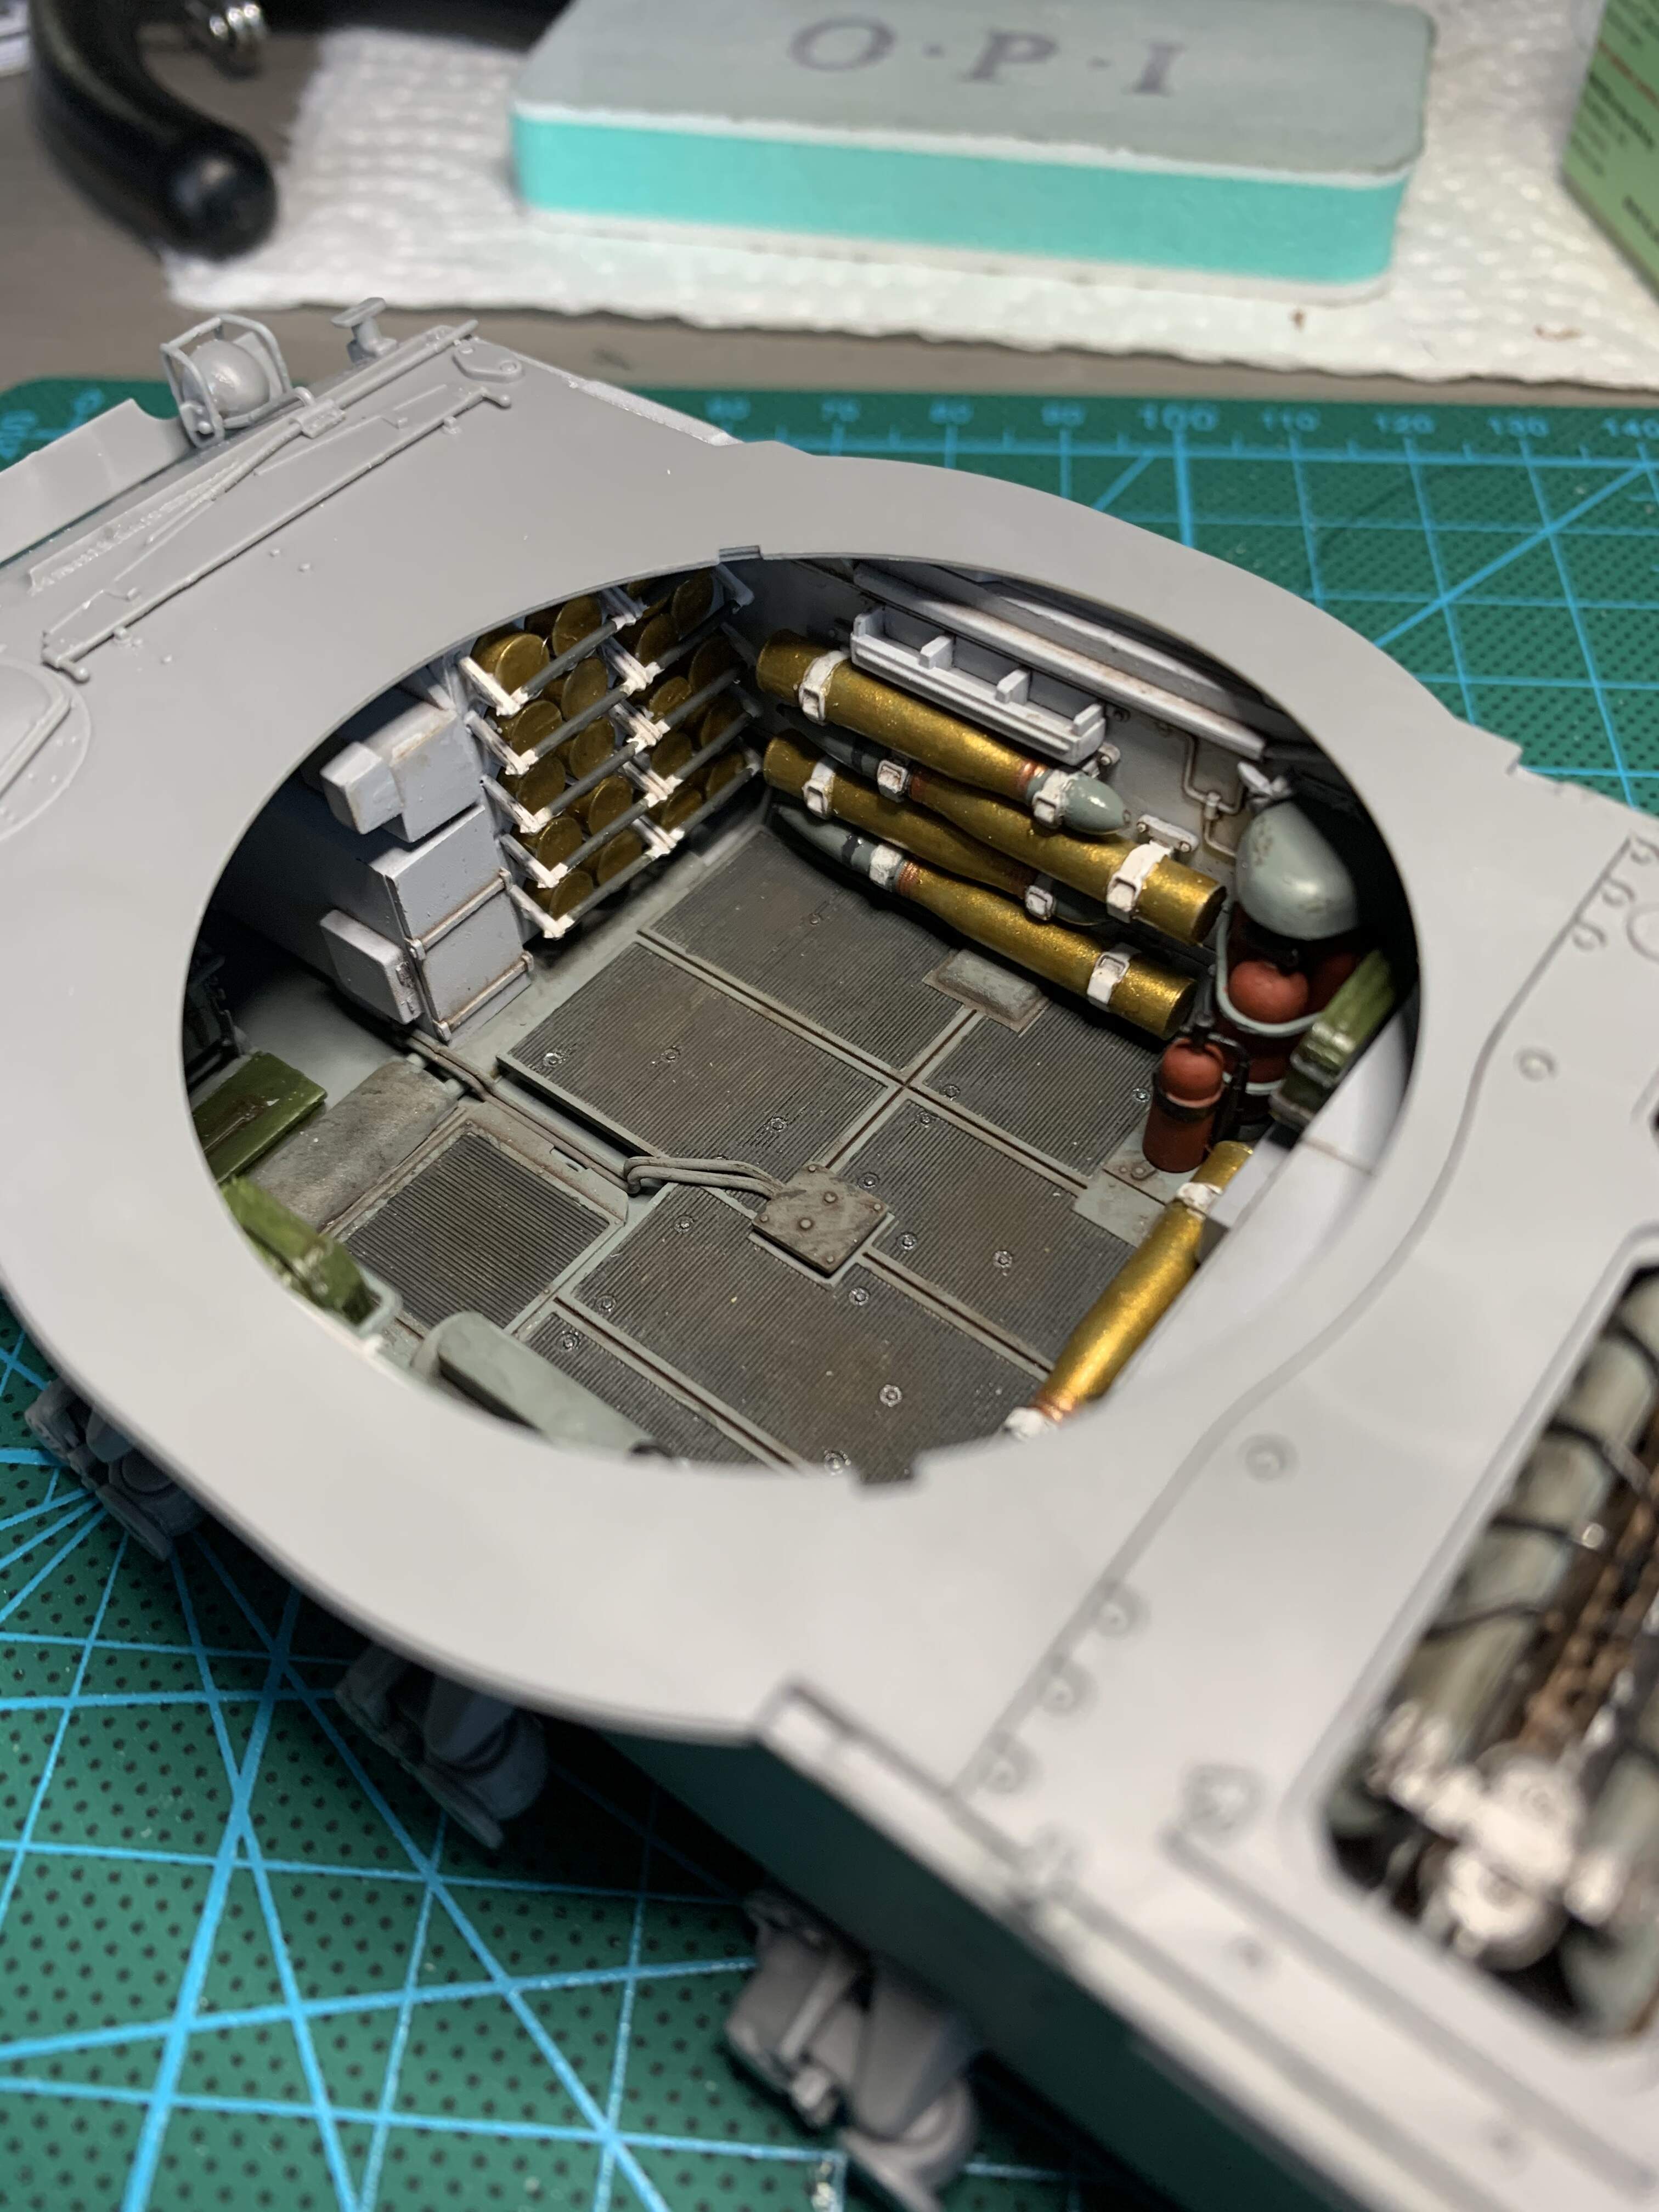
I’ve painted the floor and sides then added everything to the floor that is blue-grey and I’ll add another coat to the floor. I cut out all of the shells for the ammo rack and the ones strapped to the sides. These were not fun to clean up, the mold lines aren’t bad per se but they run over fine detail and are hard to remove. Lastly I added the photo etch guards that go over the torsion bars. These are a bit of a bear. I made the bending jig shown out of two cheap drill bits and milliput that helped immensely. Annealing also helped a fair bit.
5 Likes
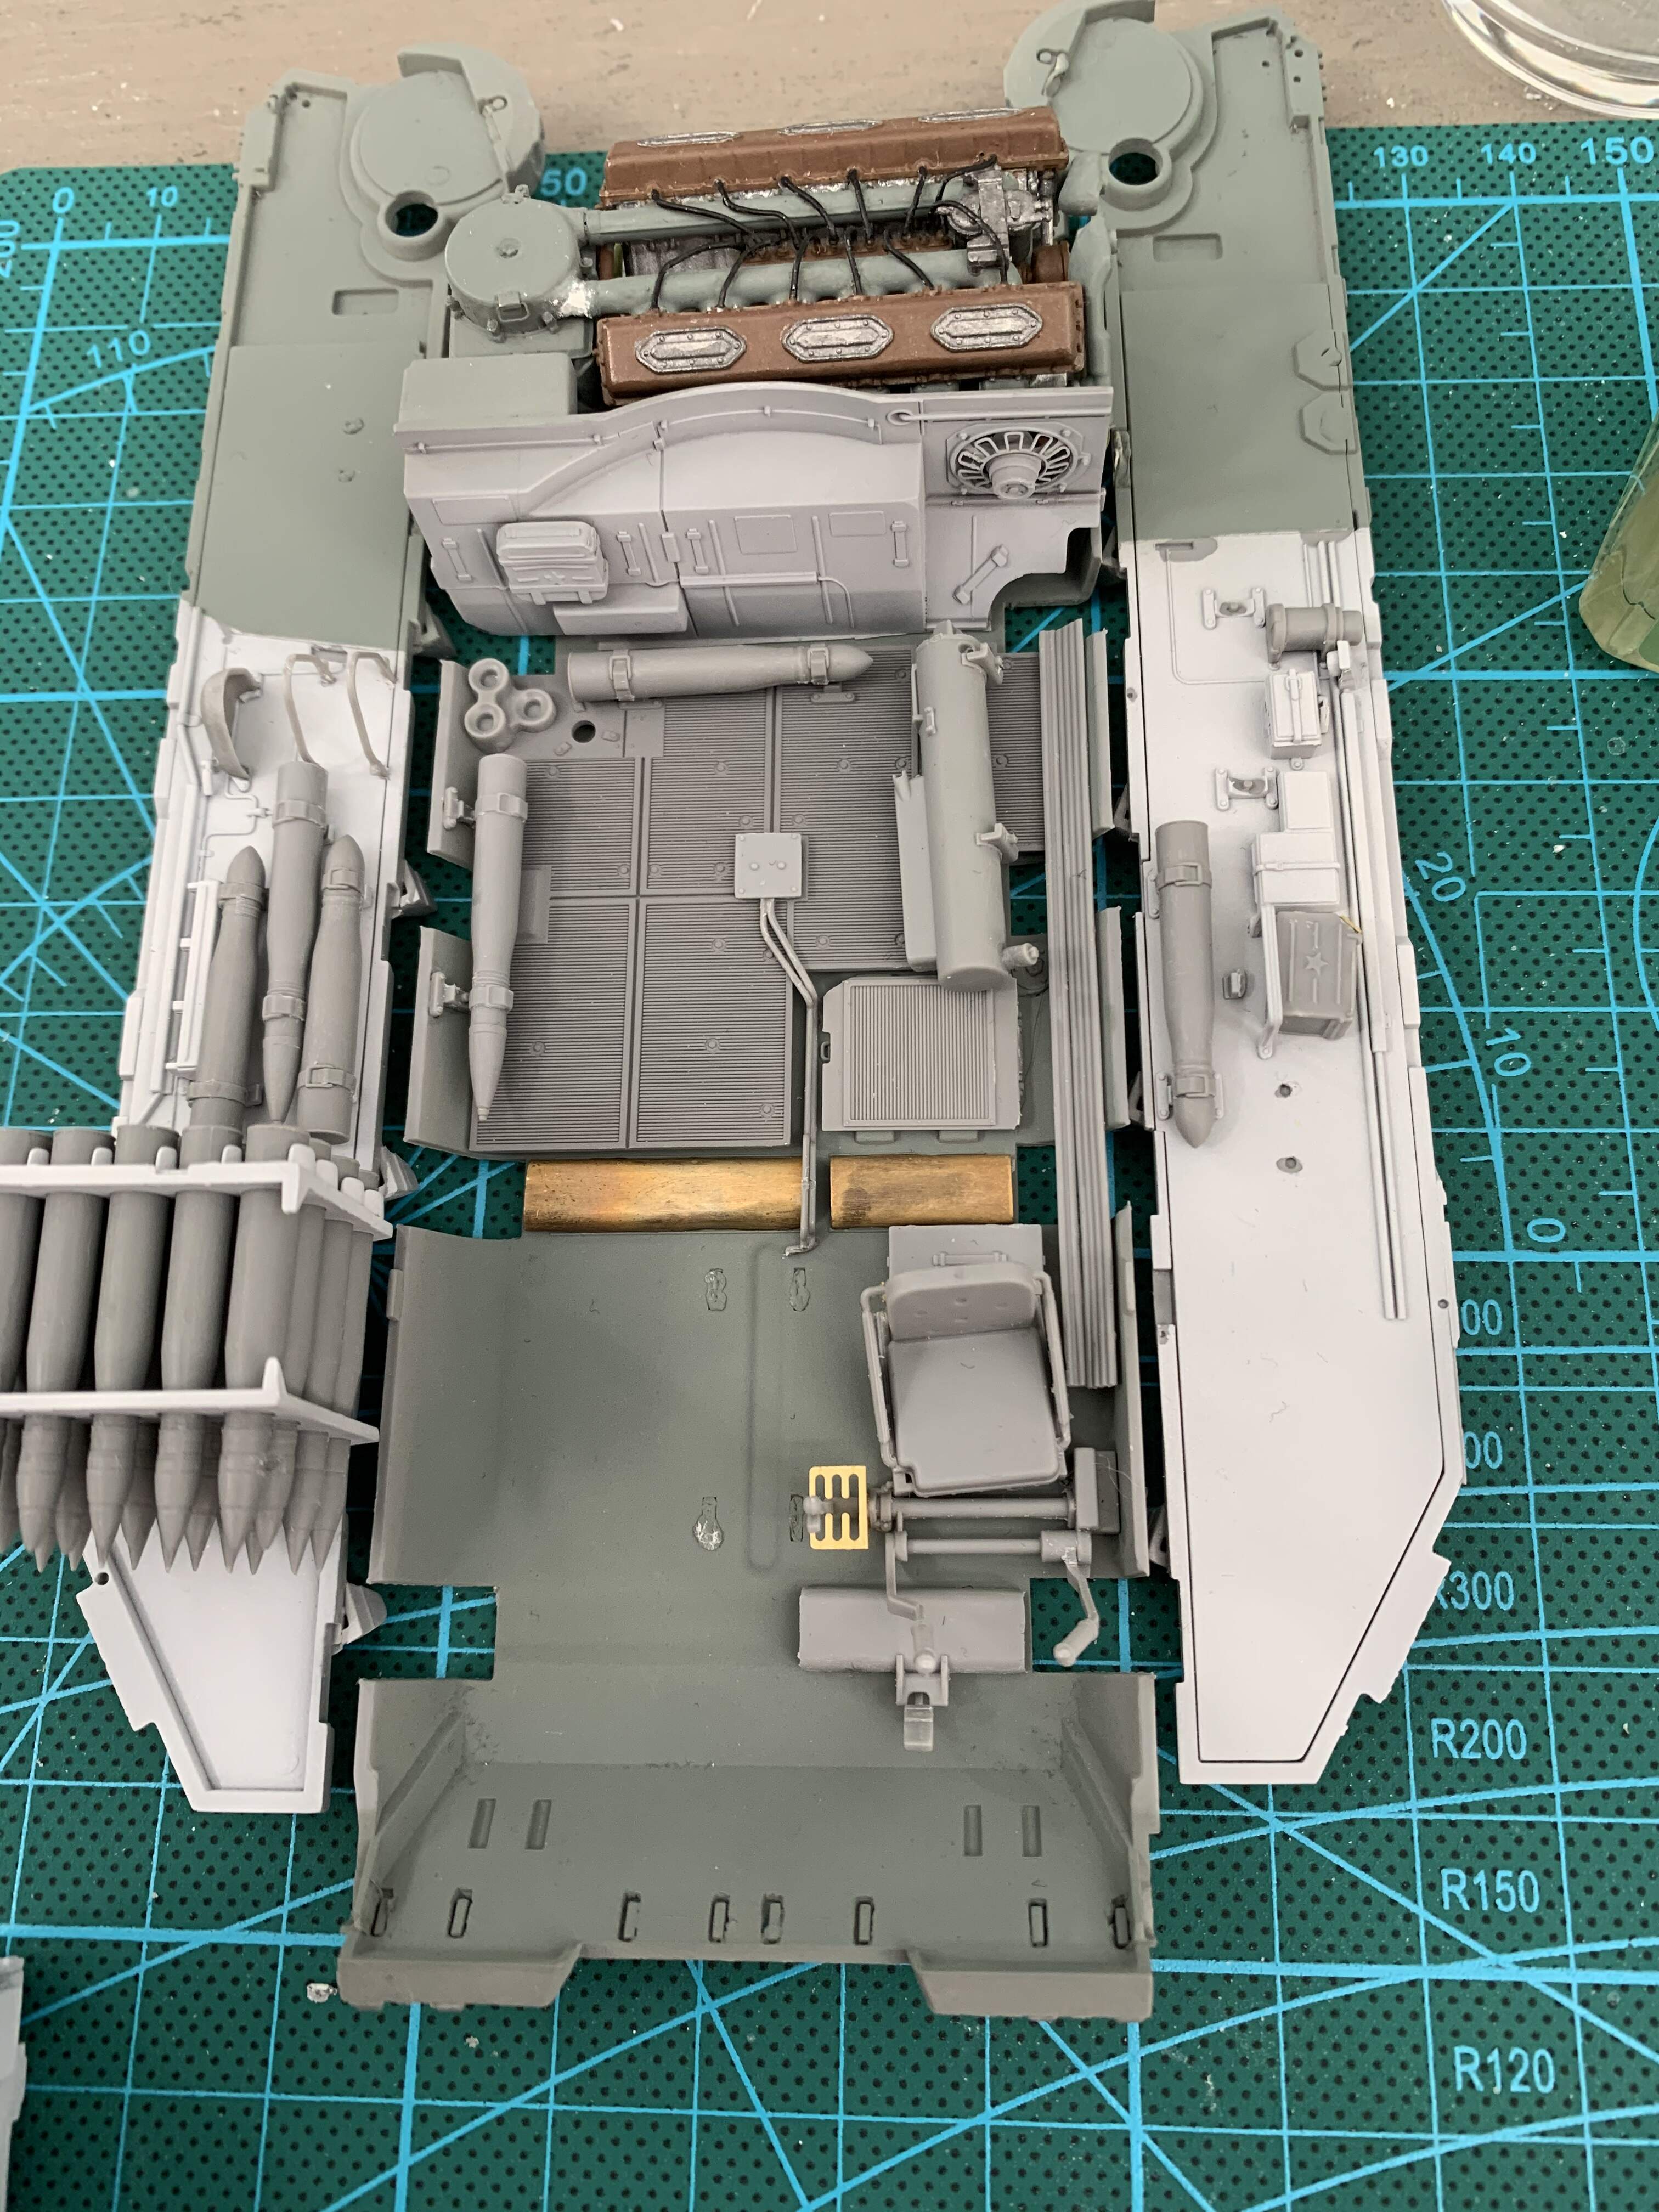
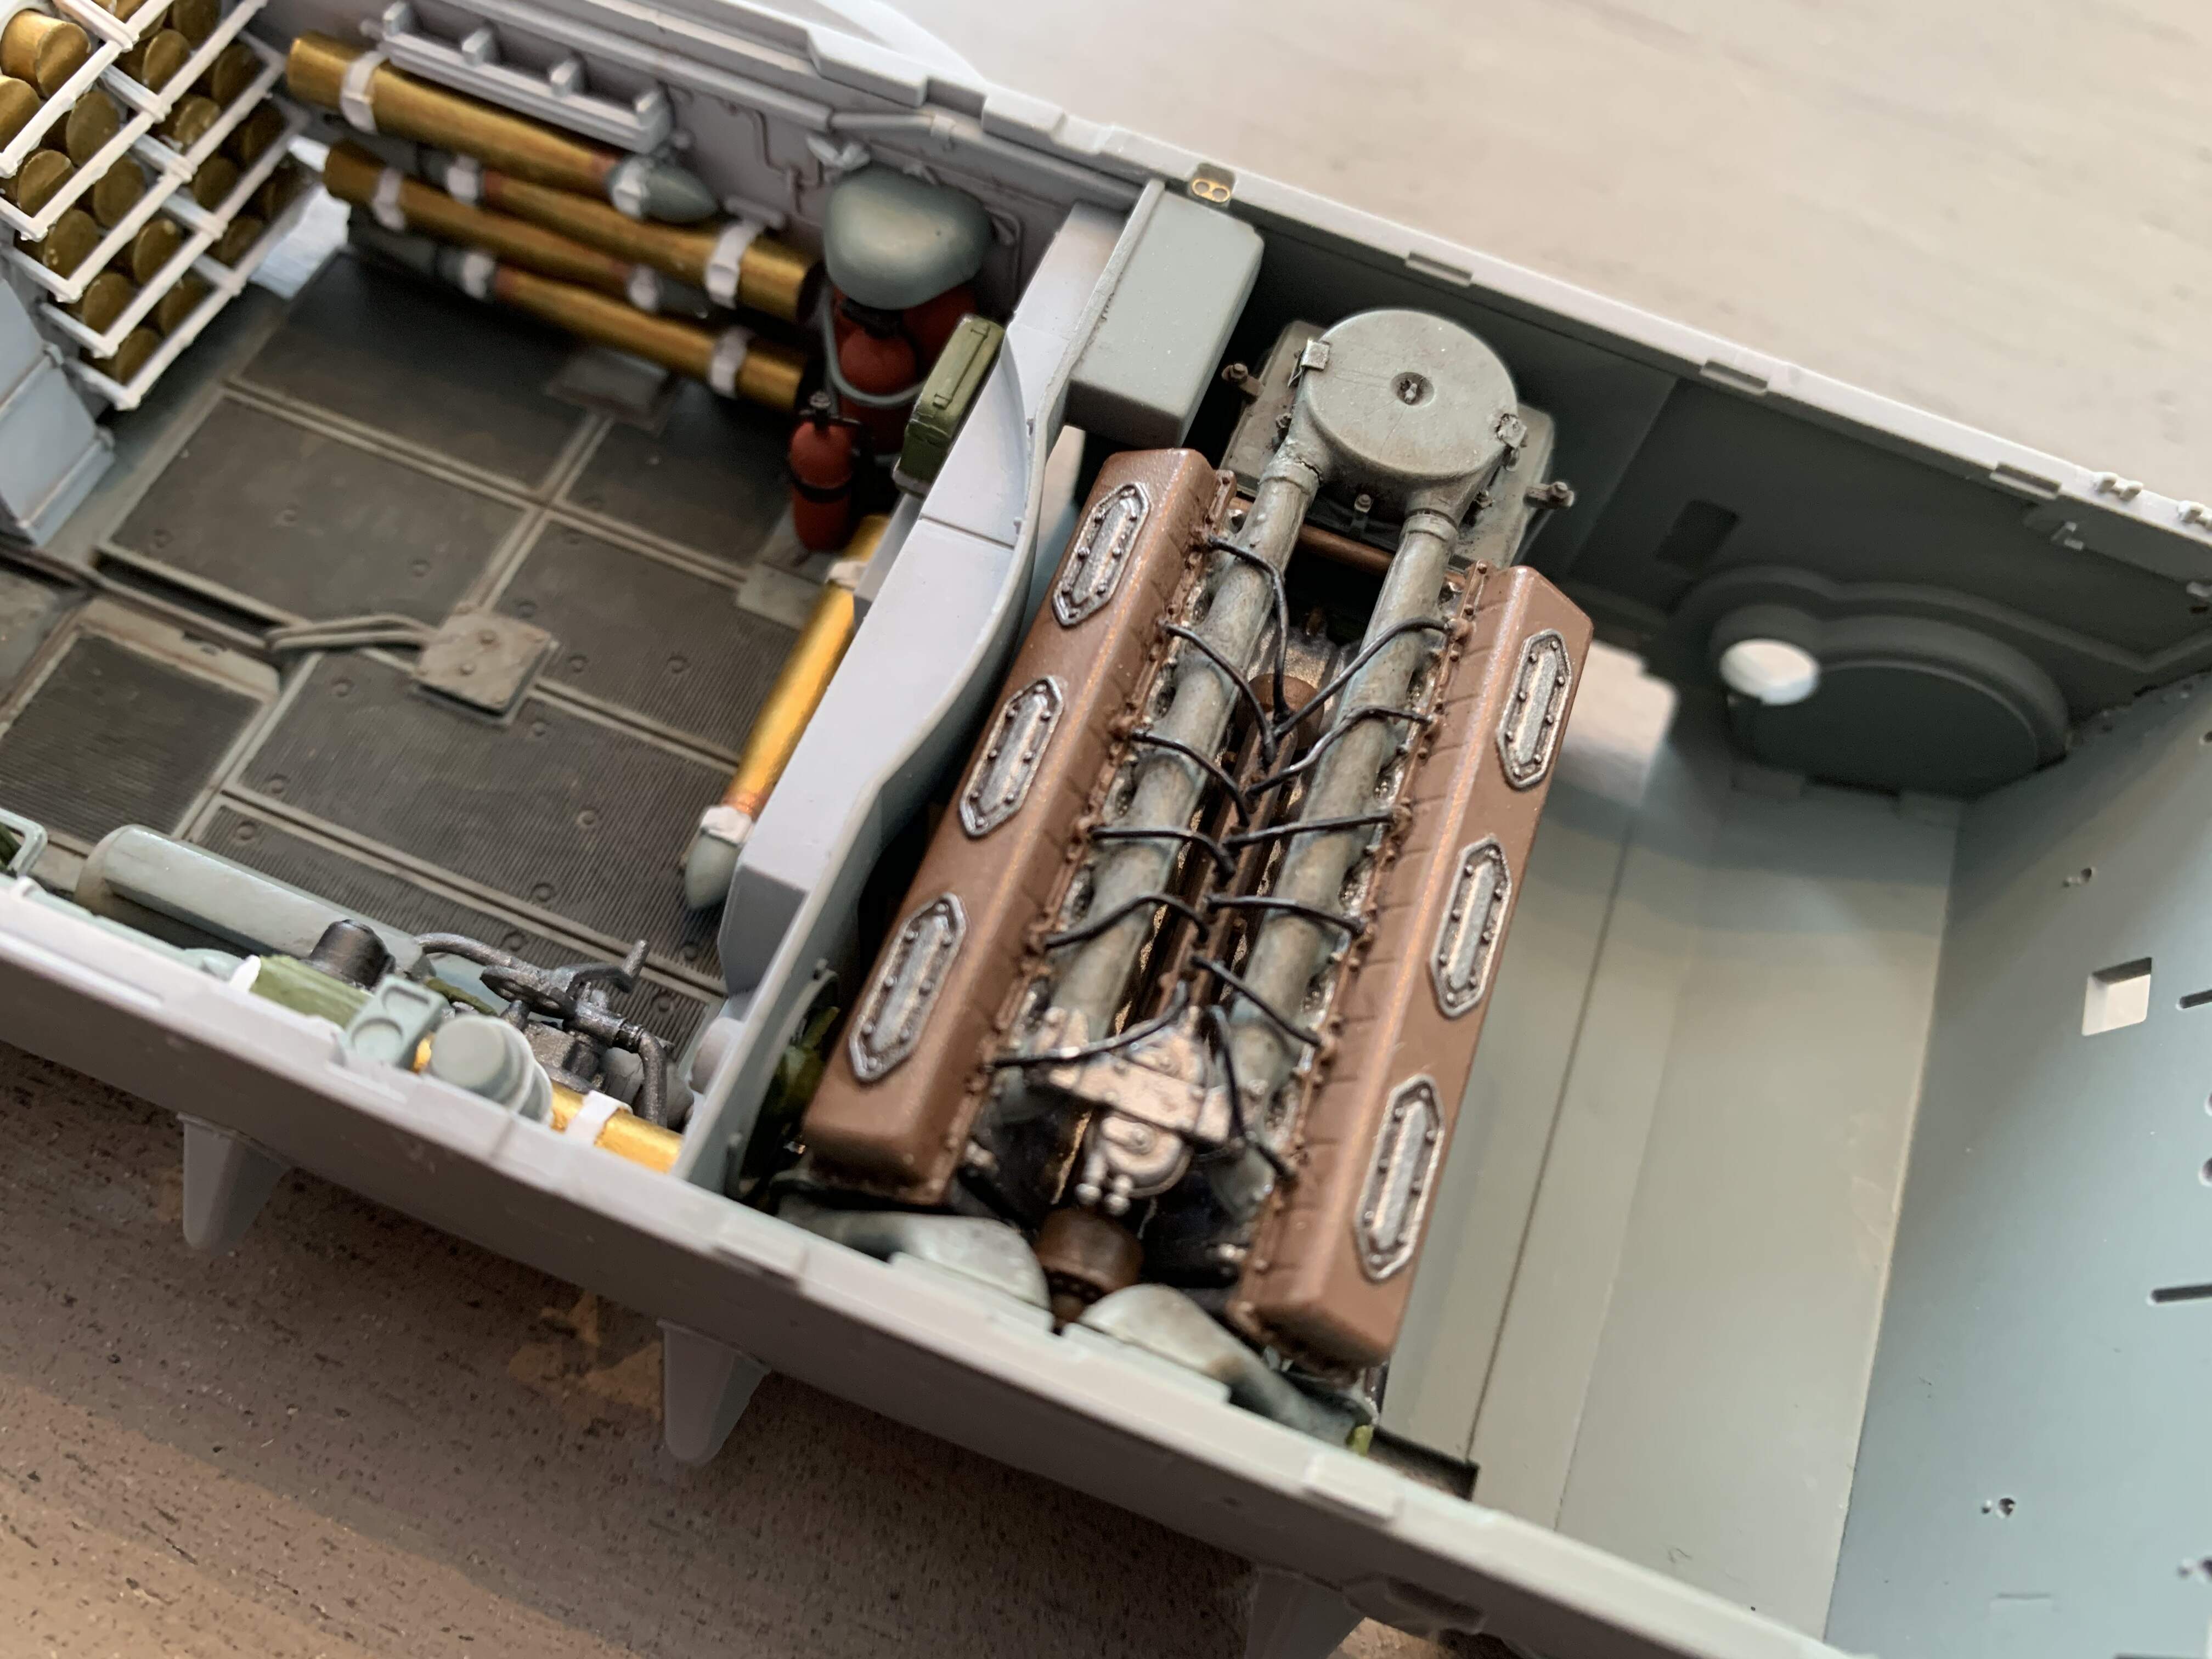
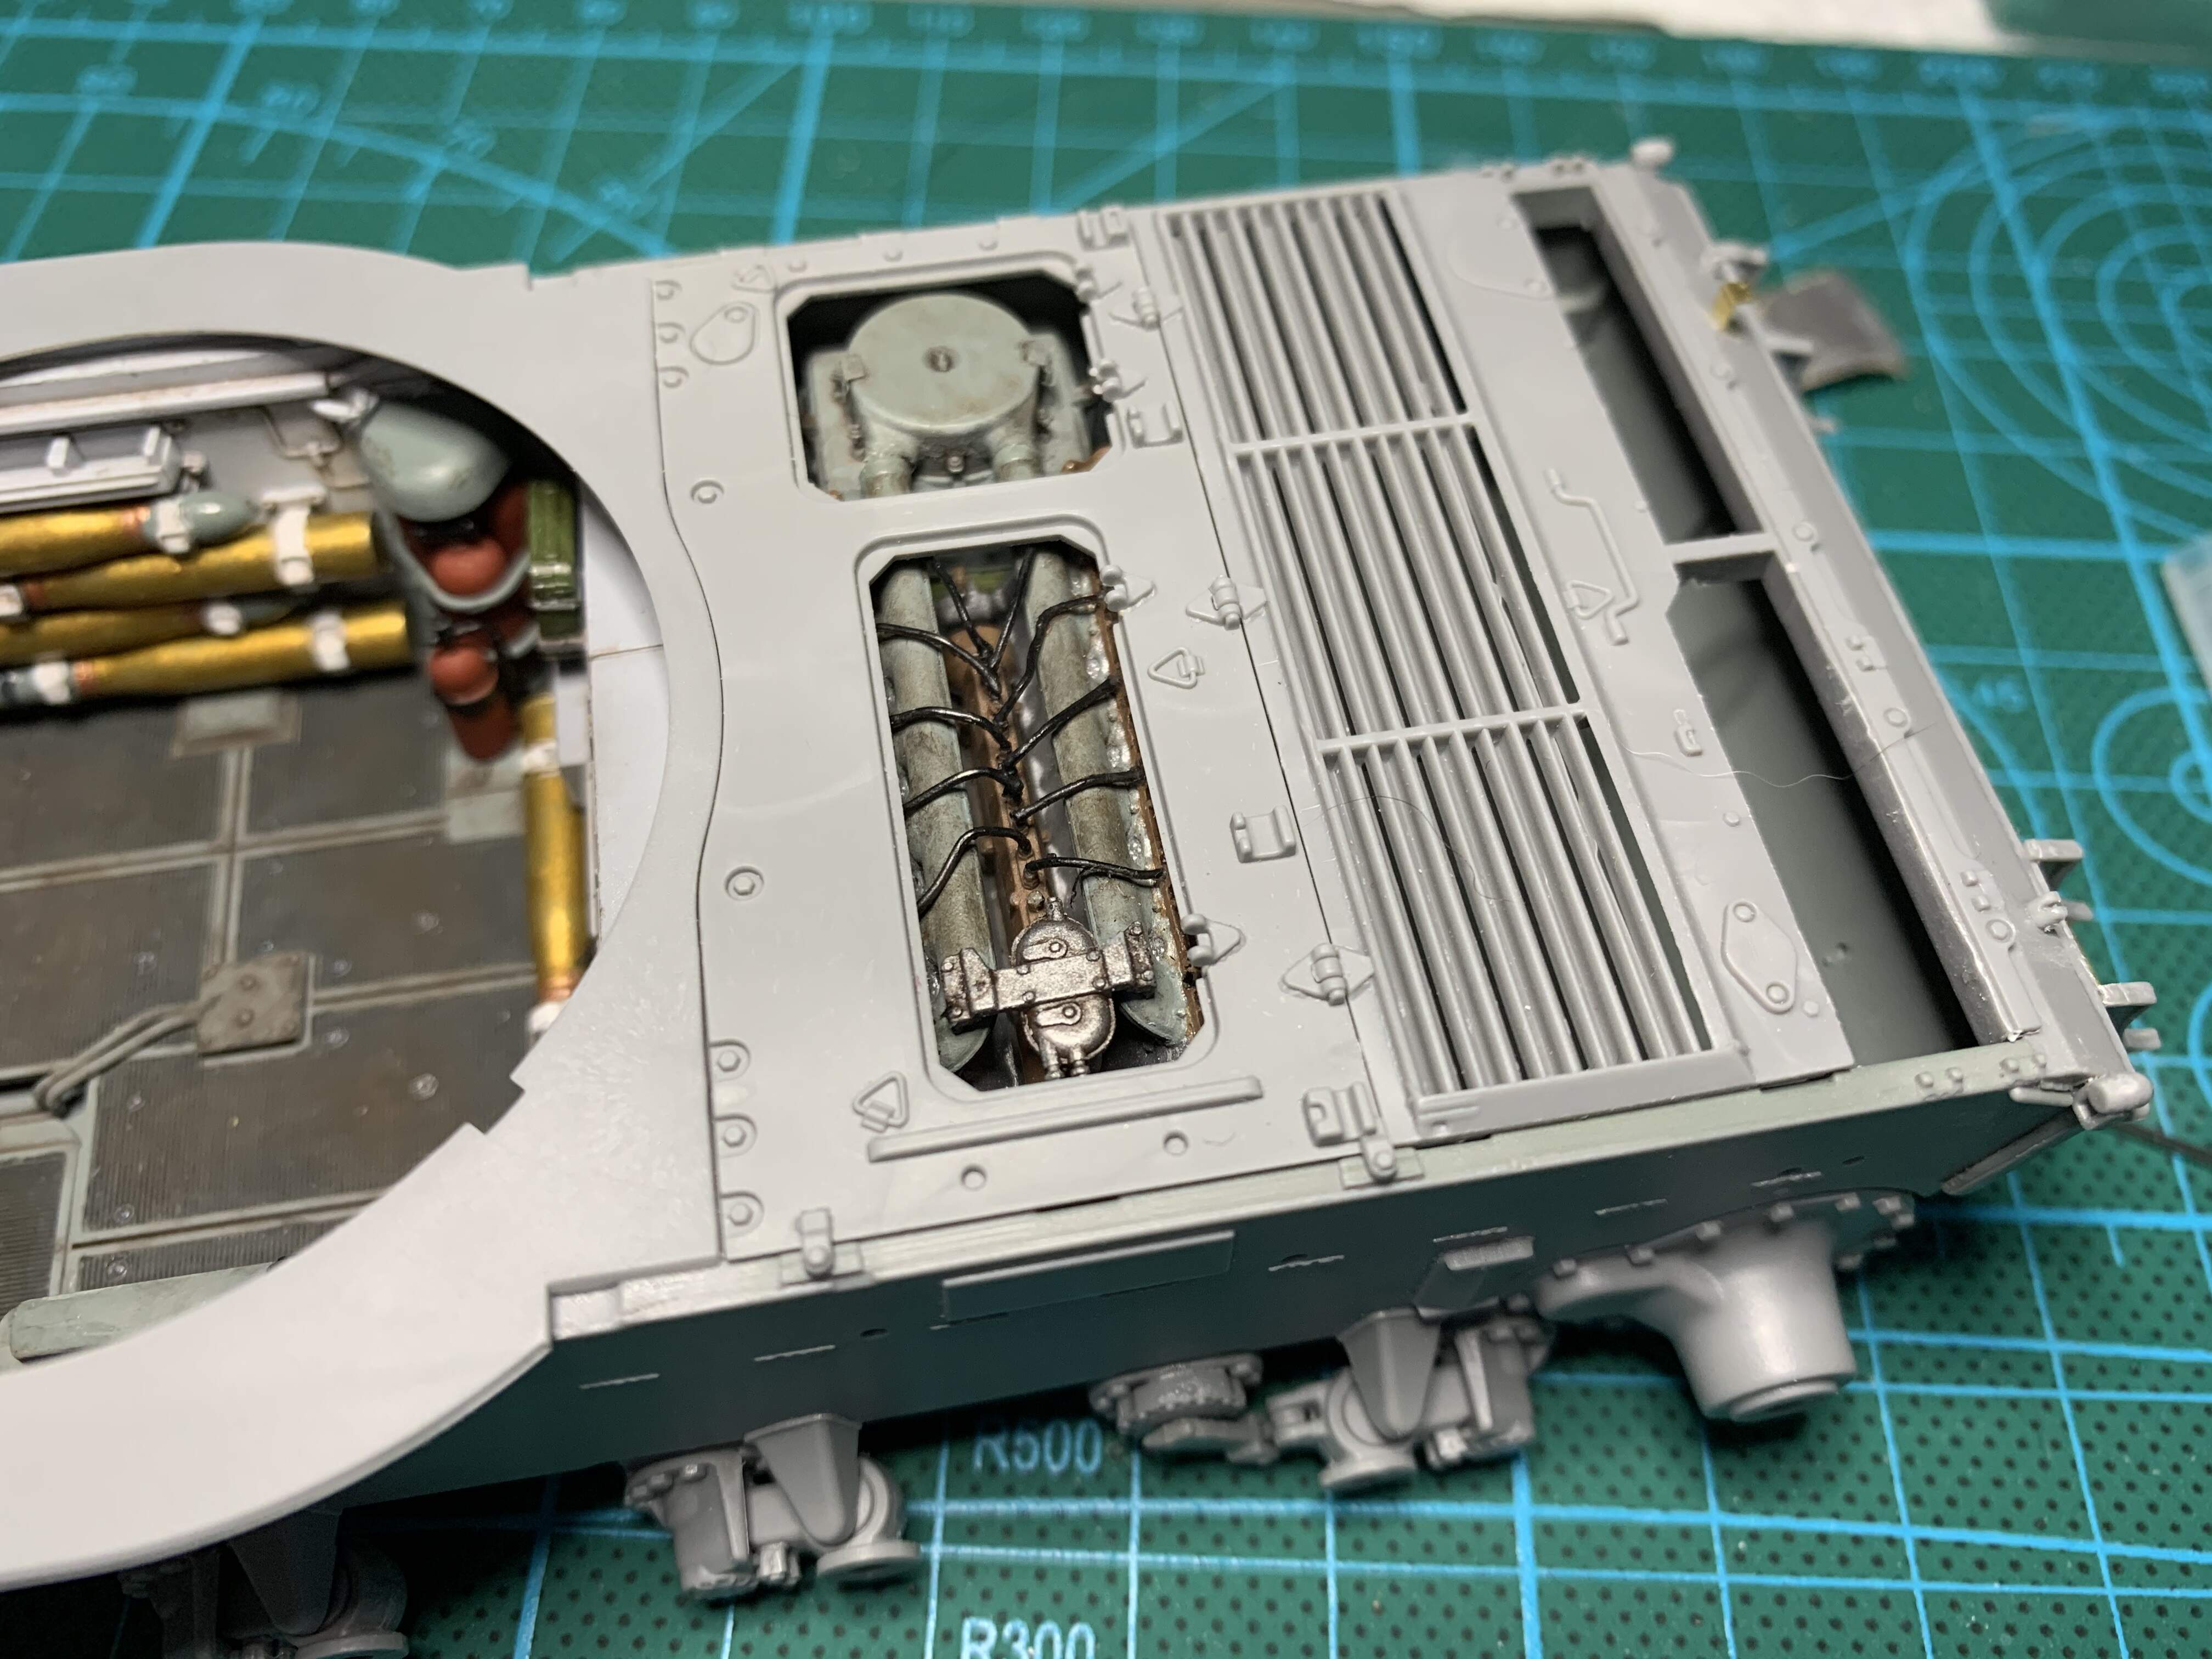
Painted all of the interior bits, she is really starting to come to life.

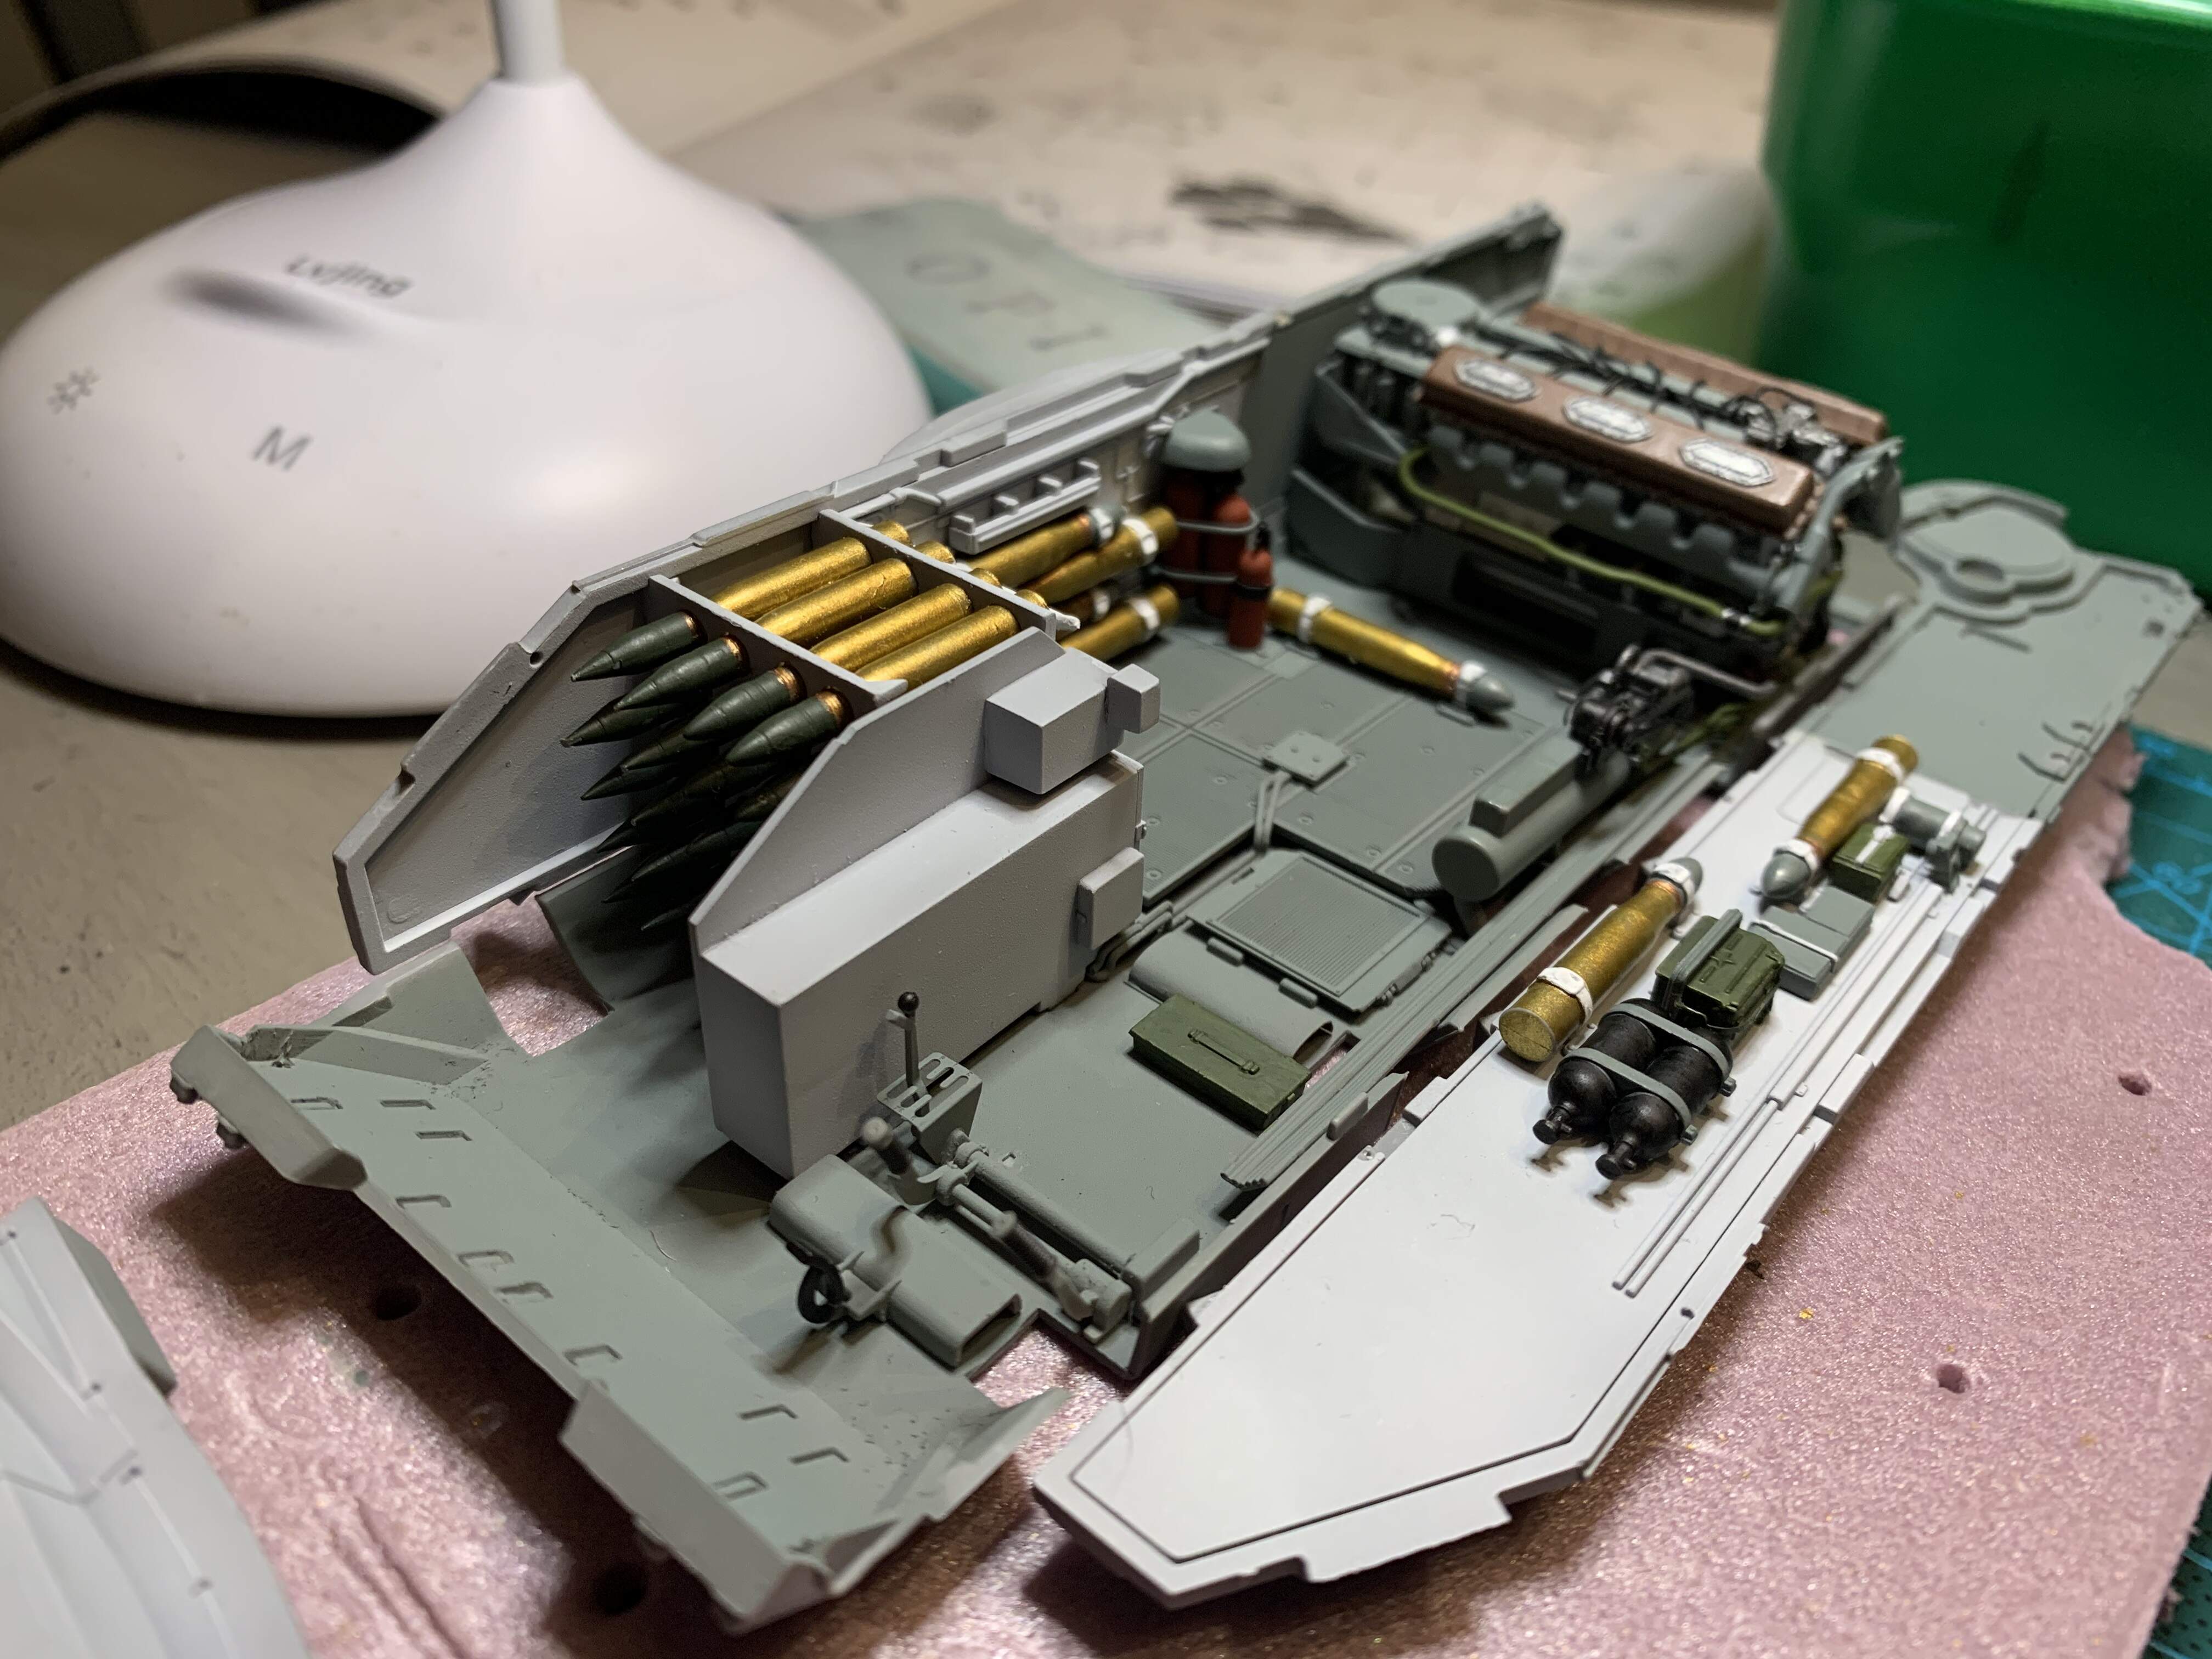
Next up is weathering the interior and engine bay. Mostly adding grime, and chips to areas that would be walked over a lot. One question I had in mind is if someone knows what color T-54 tanks were under their paint. Did they get a primer? Or would bare steel be more appropriate for where the paint has worn through?
4 Likes
Excellent engine, are you thinking of leaving the covers open to display it?
1 Like
Thanks man!
Yes I have a scene in mind. In the 1956 Hungarian uprising a British Embassy officer and his Hungarian attaché drove around the city and inspected knocked out T-54’s. They even got a look at one captured by the Hungarians more or less intact. I plan on showing that one, with Hungarian freedom fighters and the British embassy officer inspecting it. Allowing me to leave most of the hatches open.
I am just trying to source figures that would fit the bill.
1 Like
That looks really good so far
Looking great.
Thanks all! This is definitely the most challenging build I’ve worked on. I’m really enjoying it. So much so that I am a glutton for punishment and bought two more kits with at least partial interiors. 
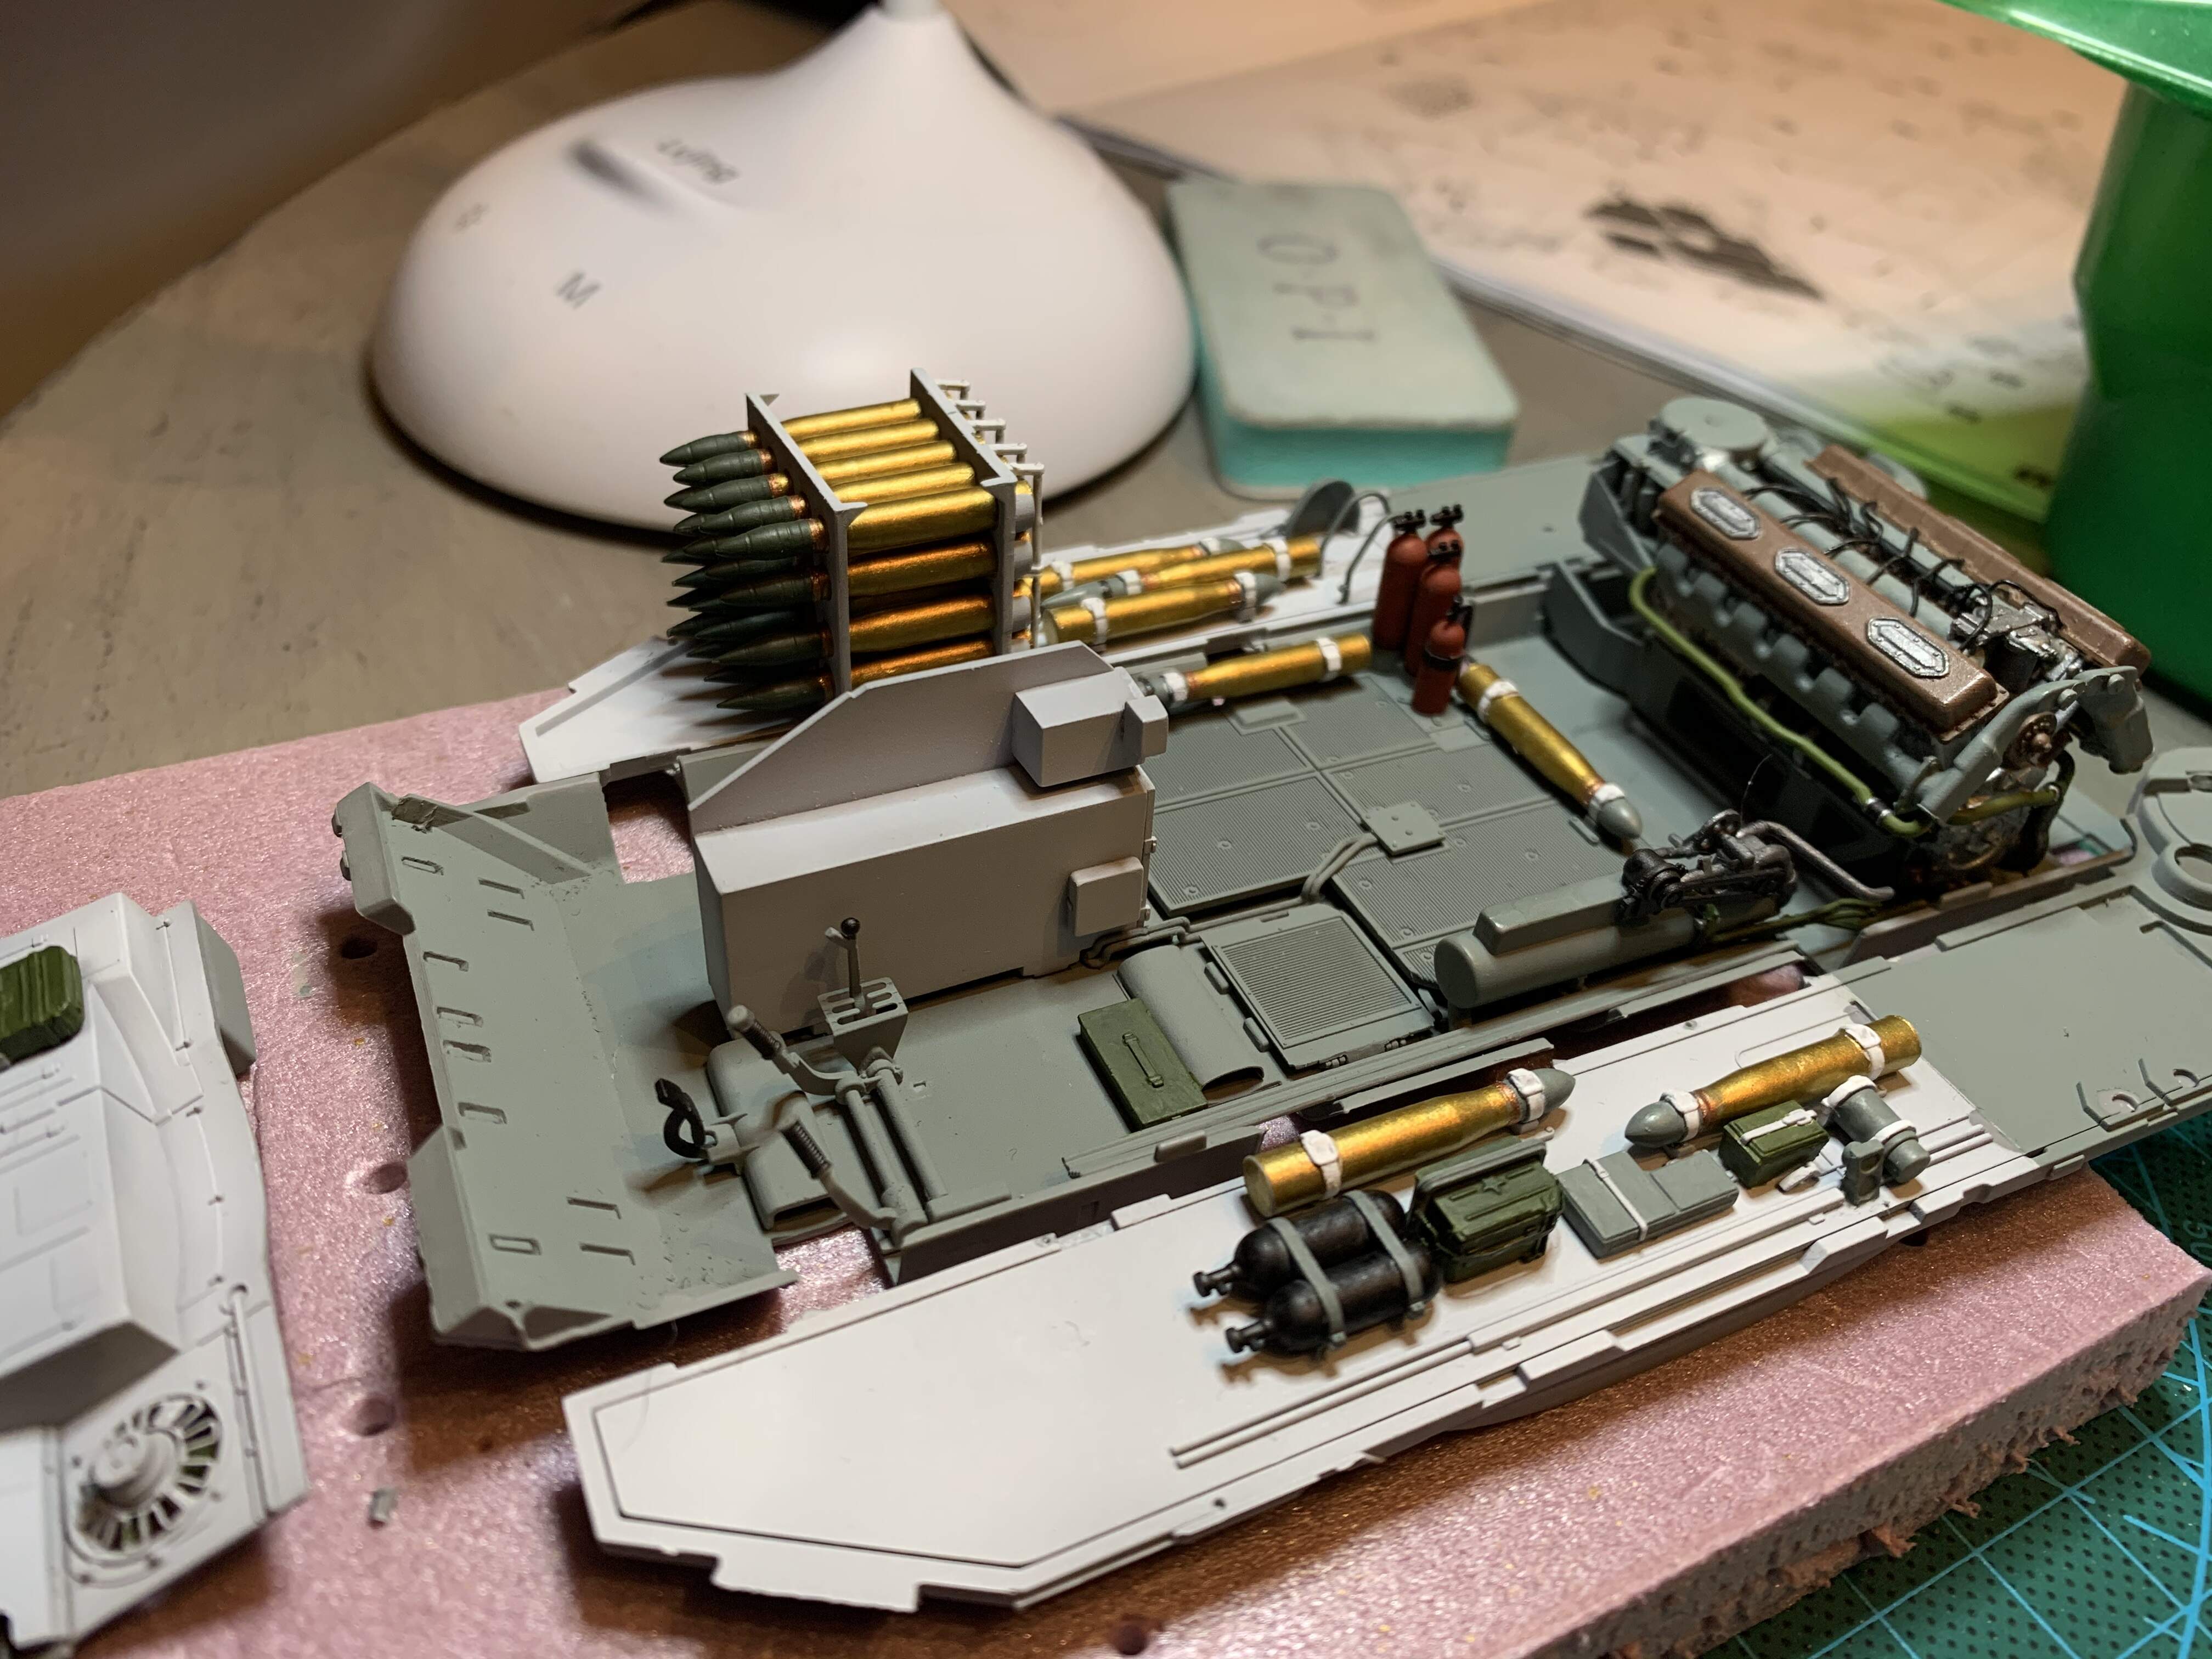
Glad I finally picked up a proper brass color after trying to make other colours fit for so long. Much happier with the results
1 Like
Thats looking really good Mead! I cant wait to see it with some weathering.
What brass color did you buy? I picked up the Lifecolor “Shell Case” set and found them to be the best acrylic metallics I’ve ever owned. Super fine and very rich pigments.
I picked up Vallejo 70.801 Brass. Before I was using Tamiya titantium gold and adding in a tiny bit of copper, but I found that for one the pigments were a bit large, and two the color was really hard to nail, too much copper and it was too orange, too much gold and it was too yellow.
That looks really great. Can’t wait to see how you get on with the weathering as I’ll be starting on some weathering with the turret of my t-34 soon.
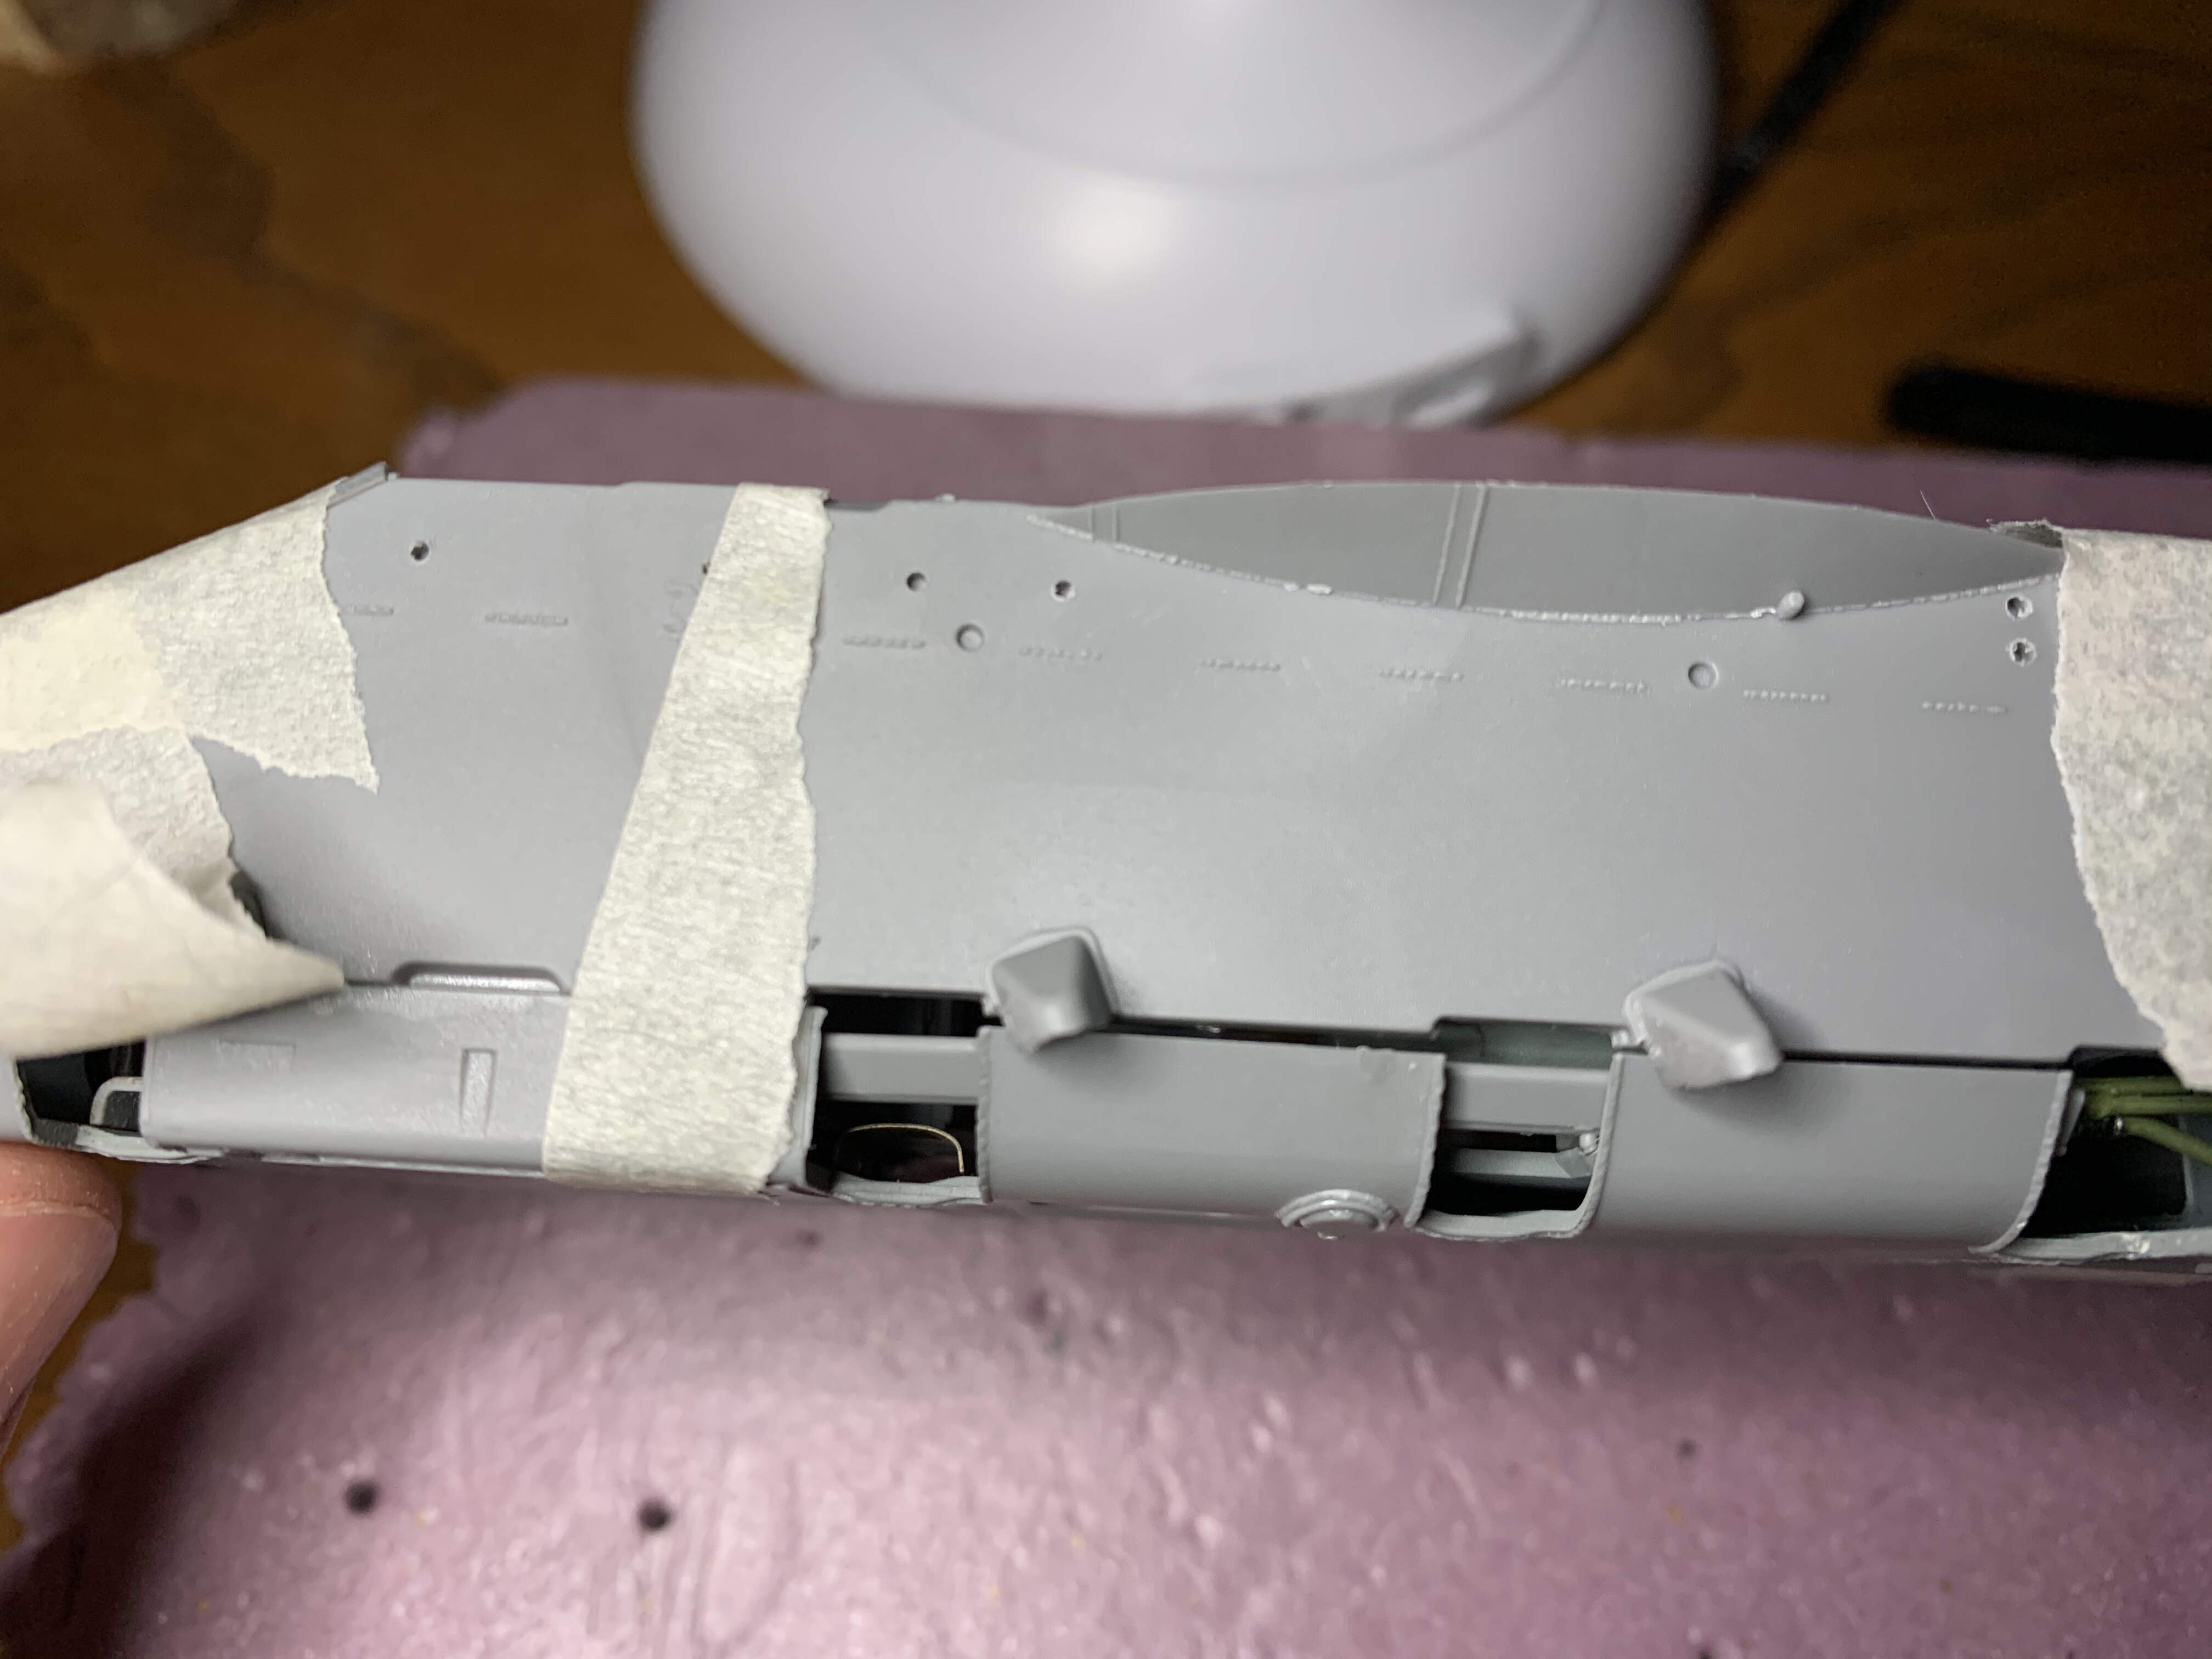
Alright got quite a bit done since my last update. I primed and painted the two rear pieces of the hull tub, the front plate, and glued the hull tub together. I also added some weathering and generally dirtying to the hull tub, but I think this need to be enhanced a bit to make some of the details pop.
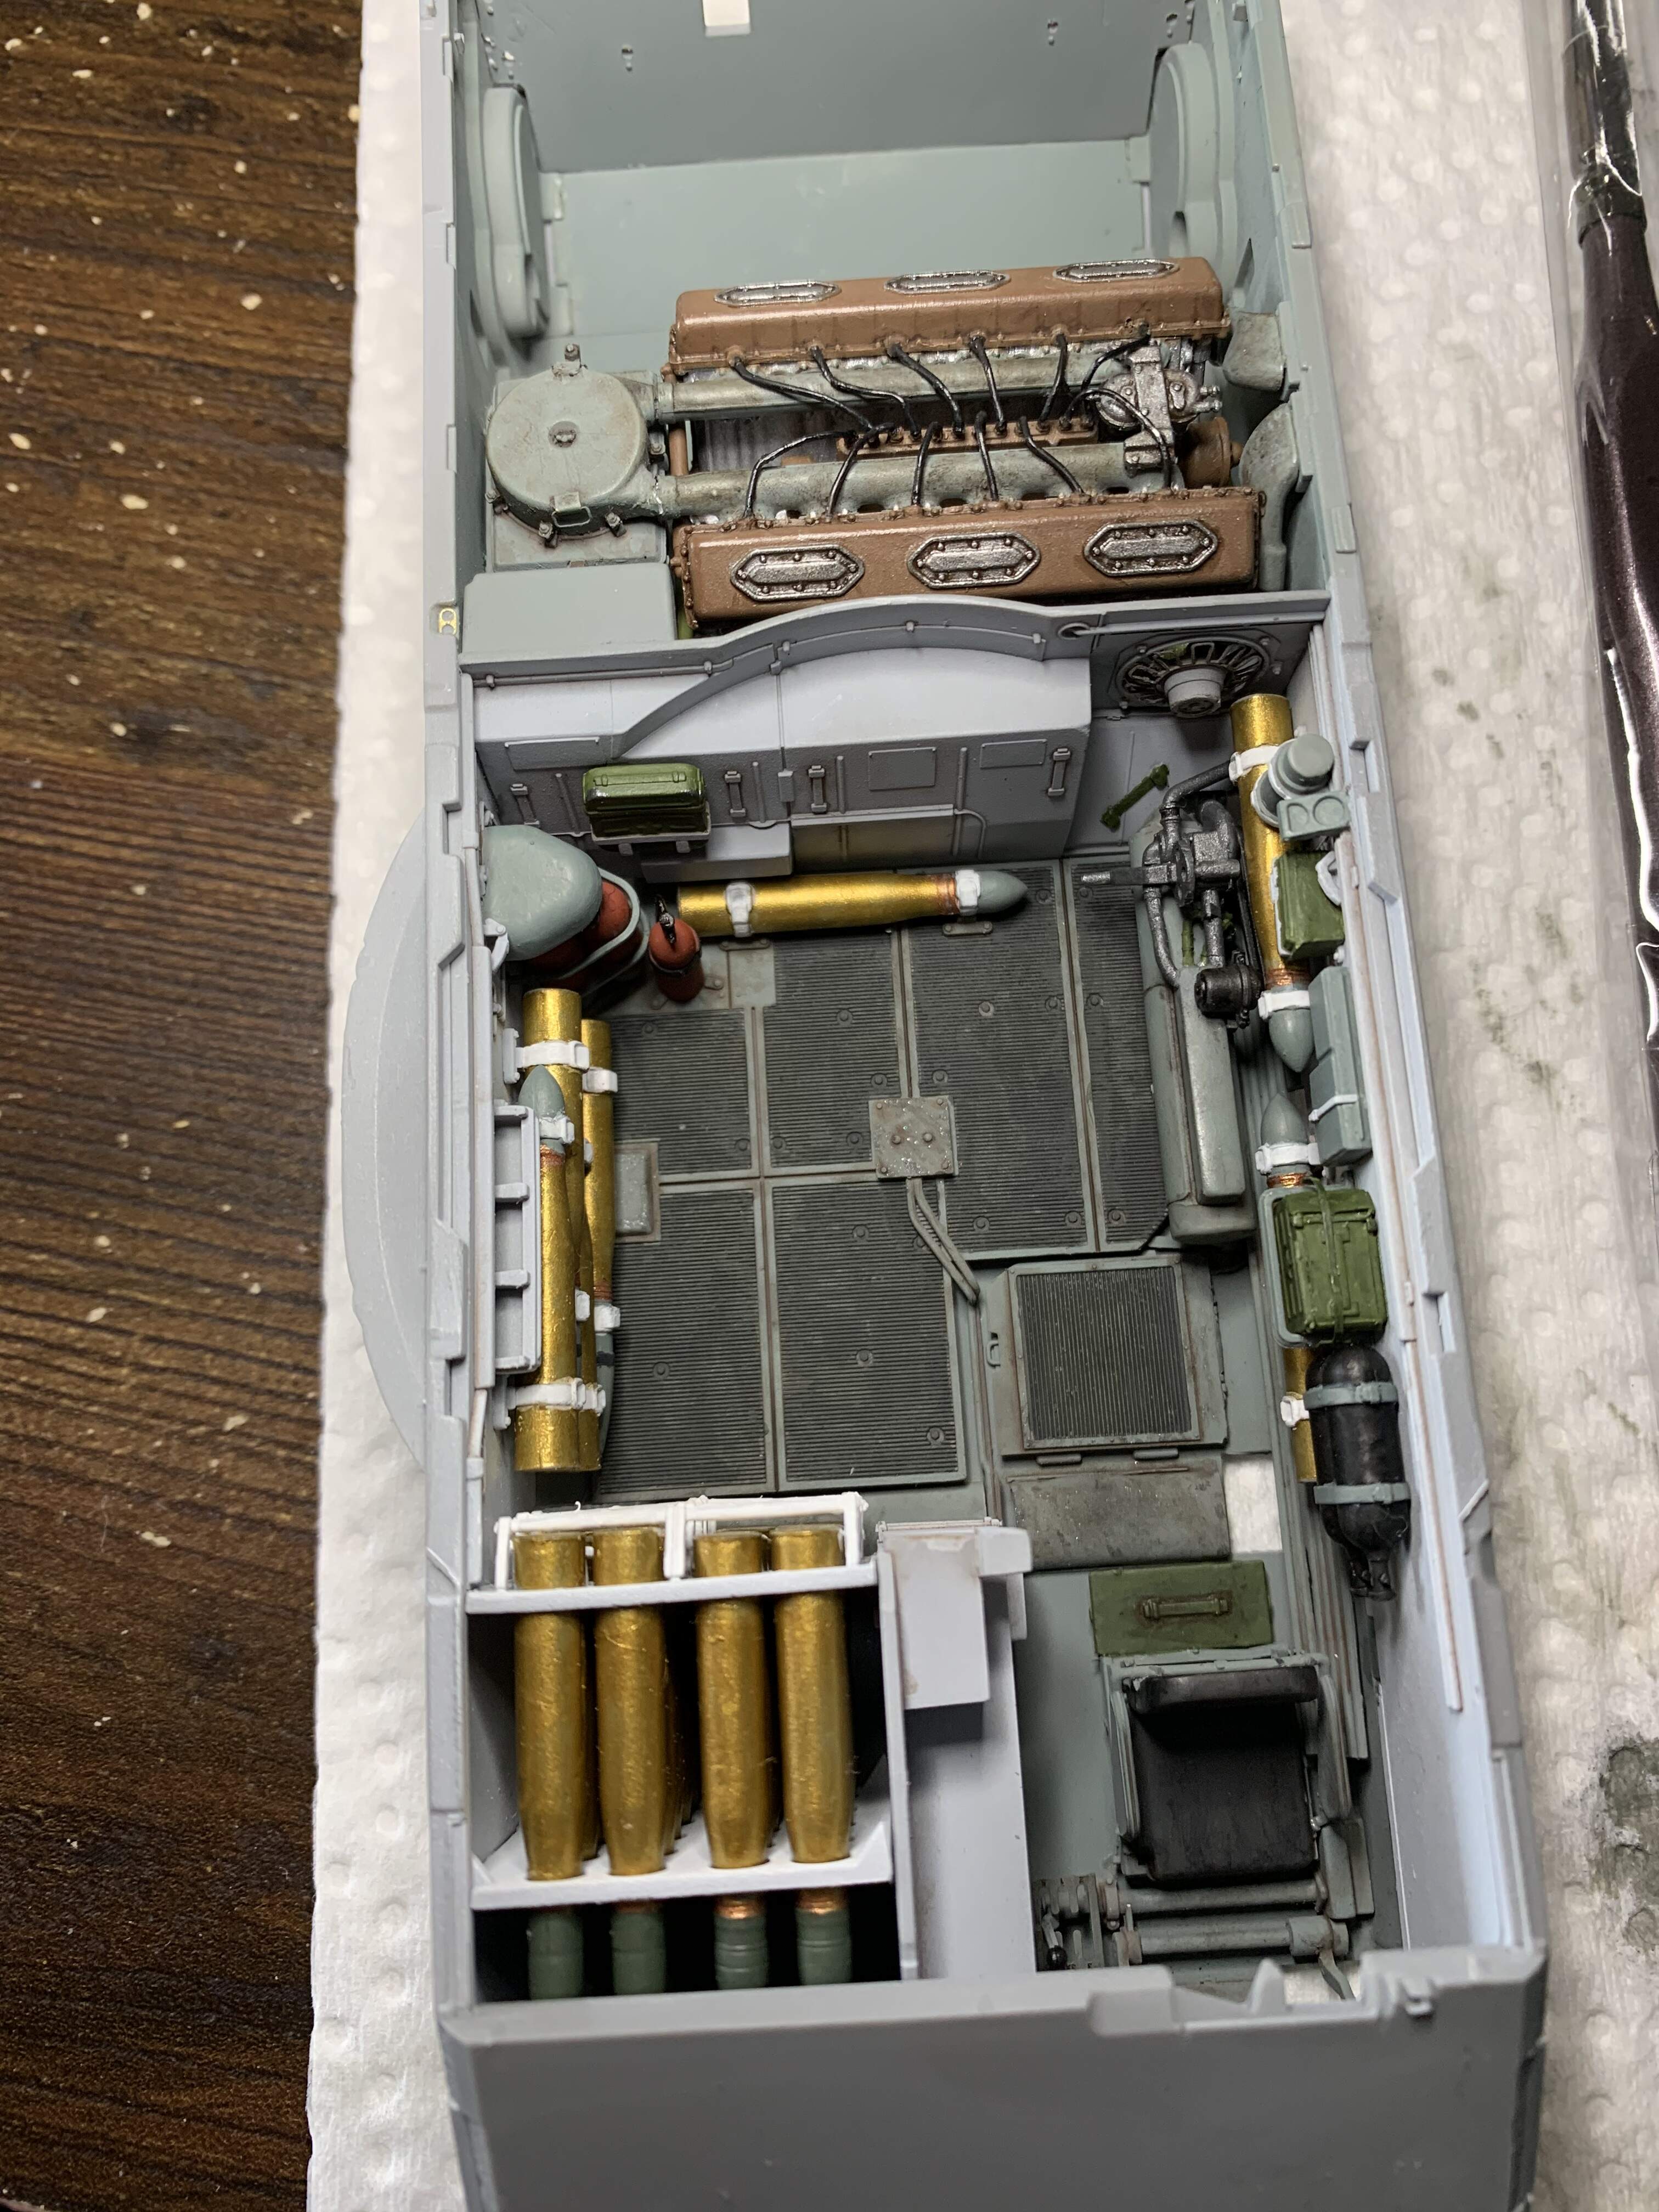

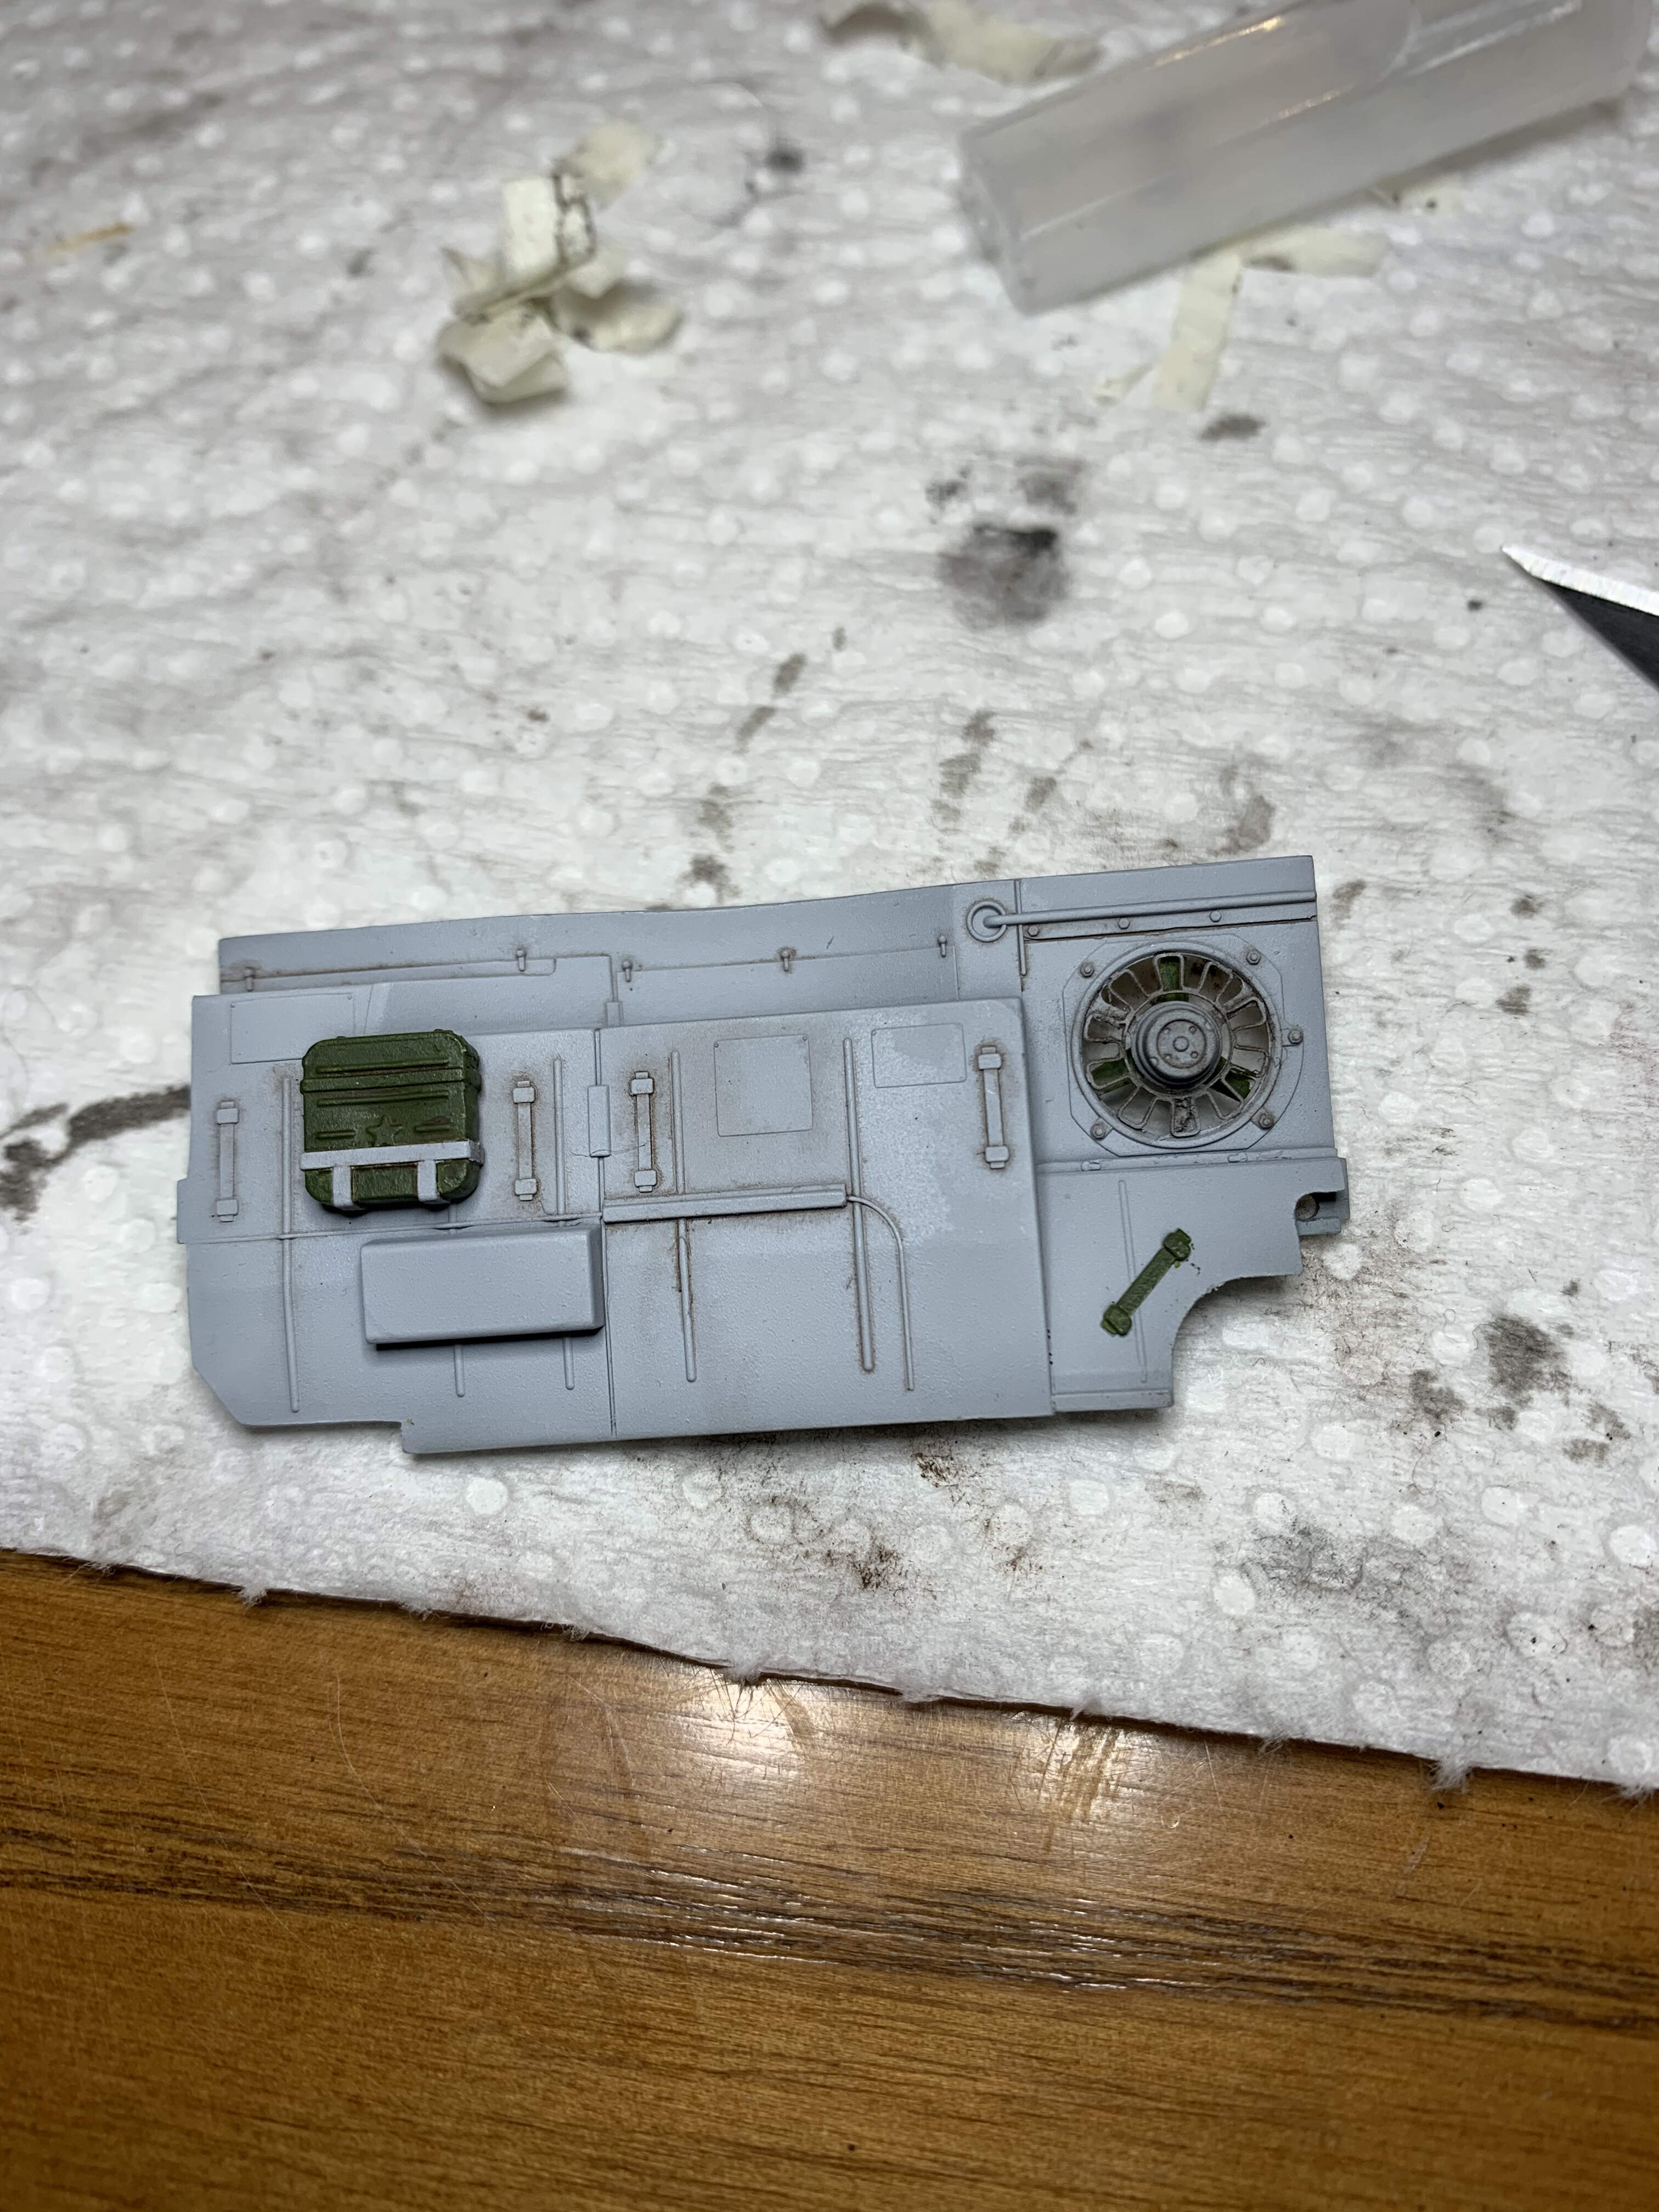
At this stage I should point out two things. One the textured/ribbed parts on the floor to the hull are actually rubber mats (thanks to @SdAufKla) for pointing this out. The instructions don’t call out the color of them being black (they just shade them different) and expect you to know they are black. I’ve gone back and fixed this and they make the hull look much better. Now jsut to touch up the bolt heads that connect the rubber to the steel.
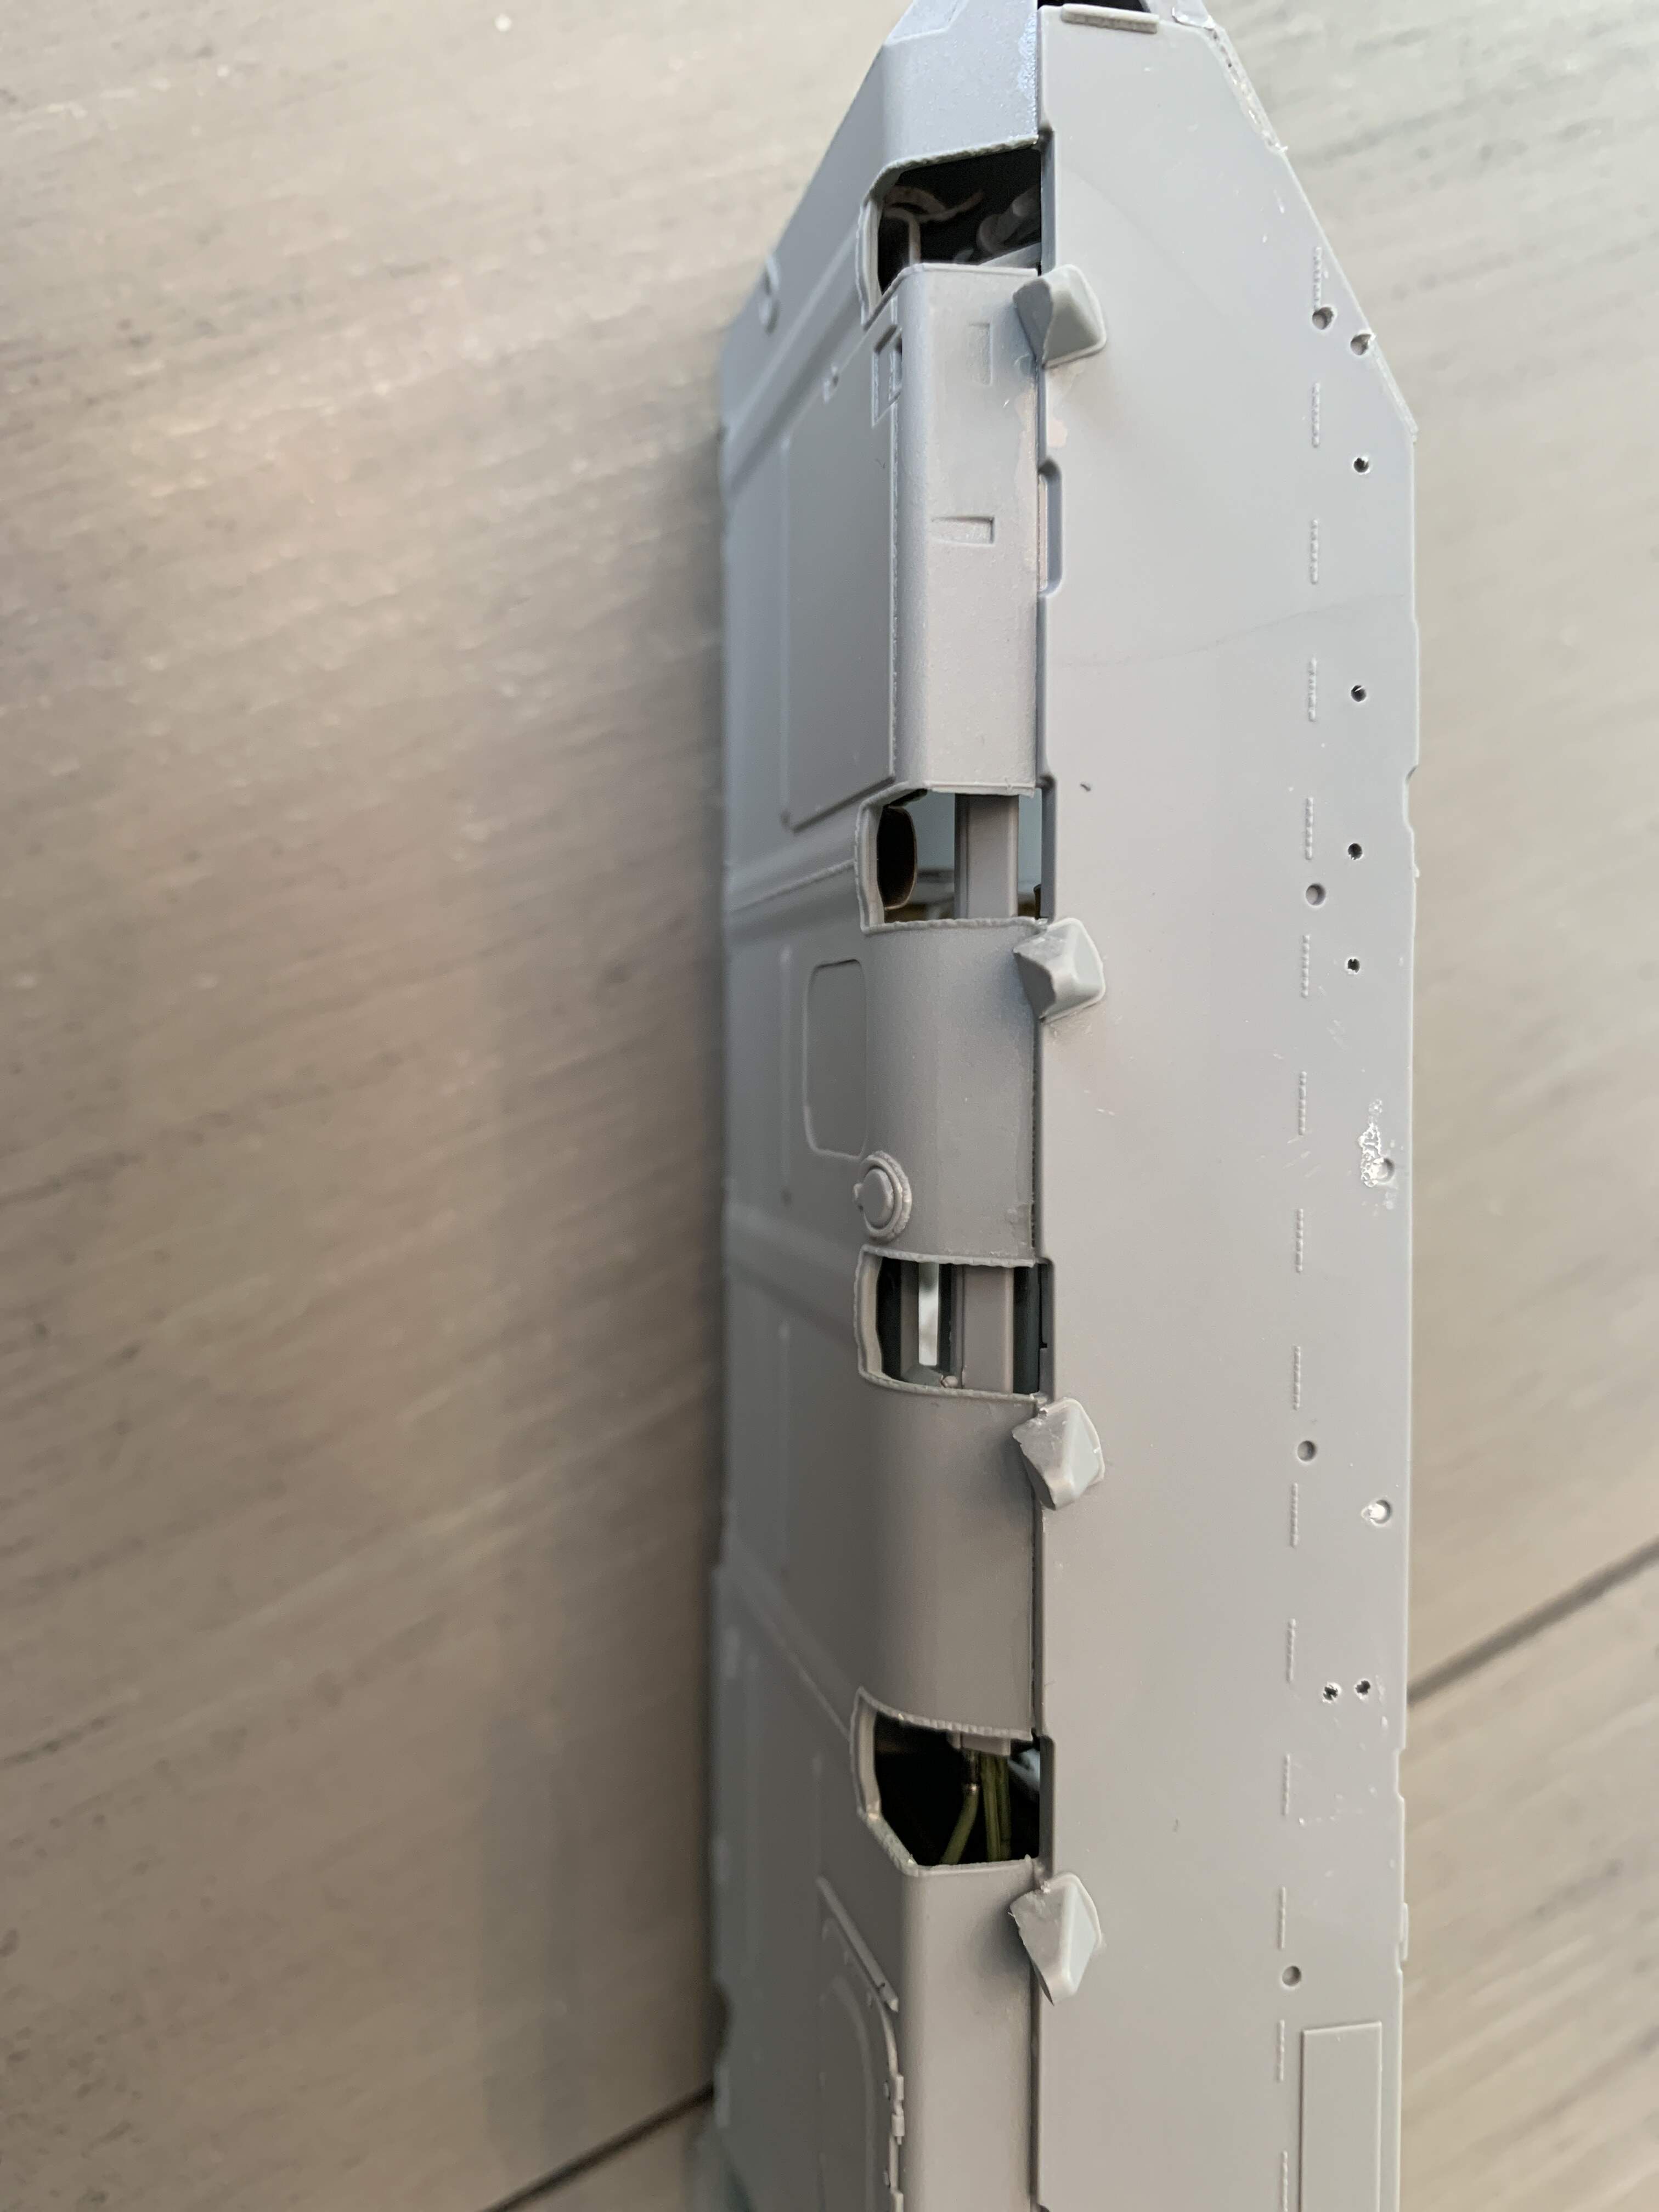
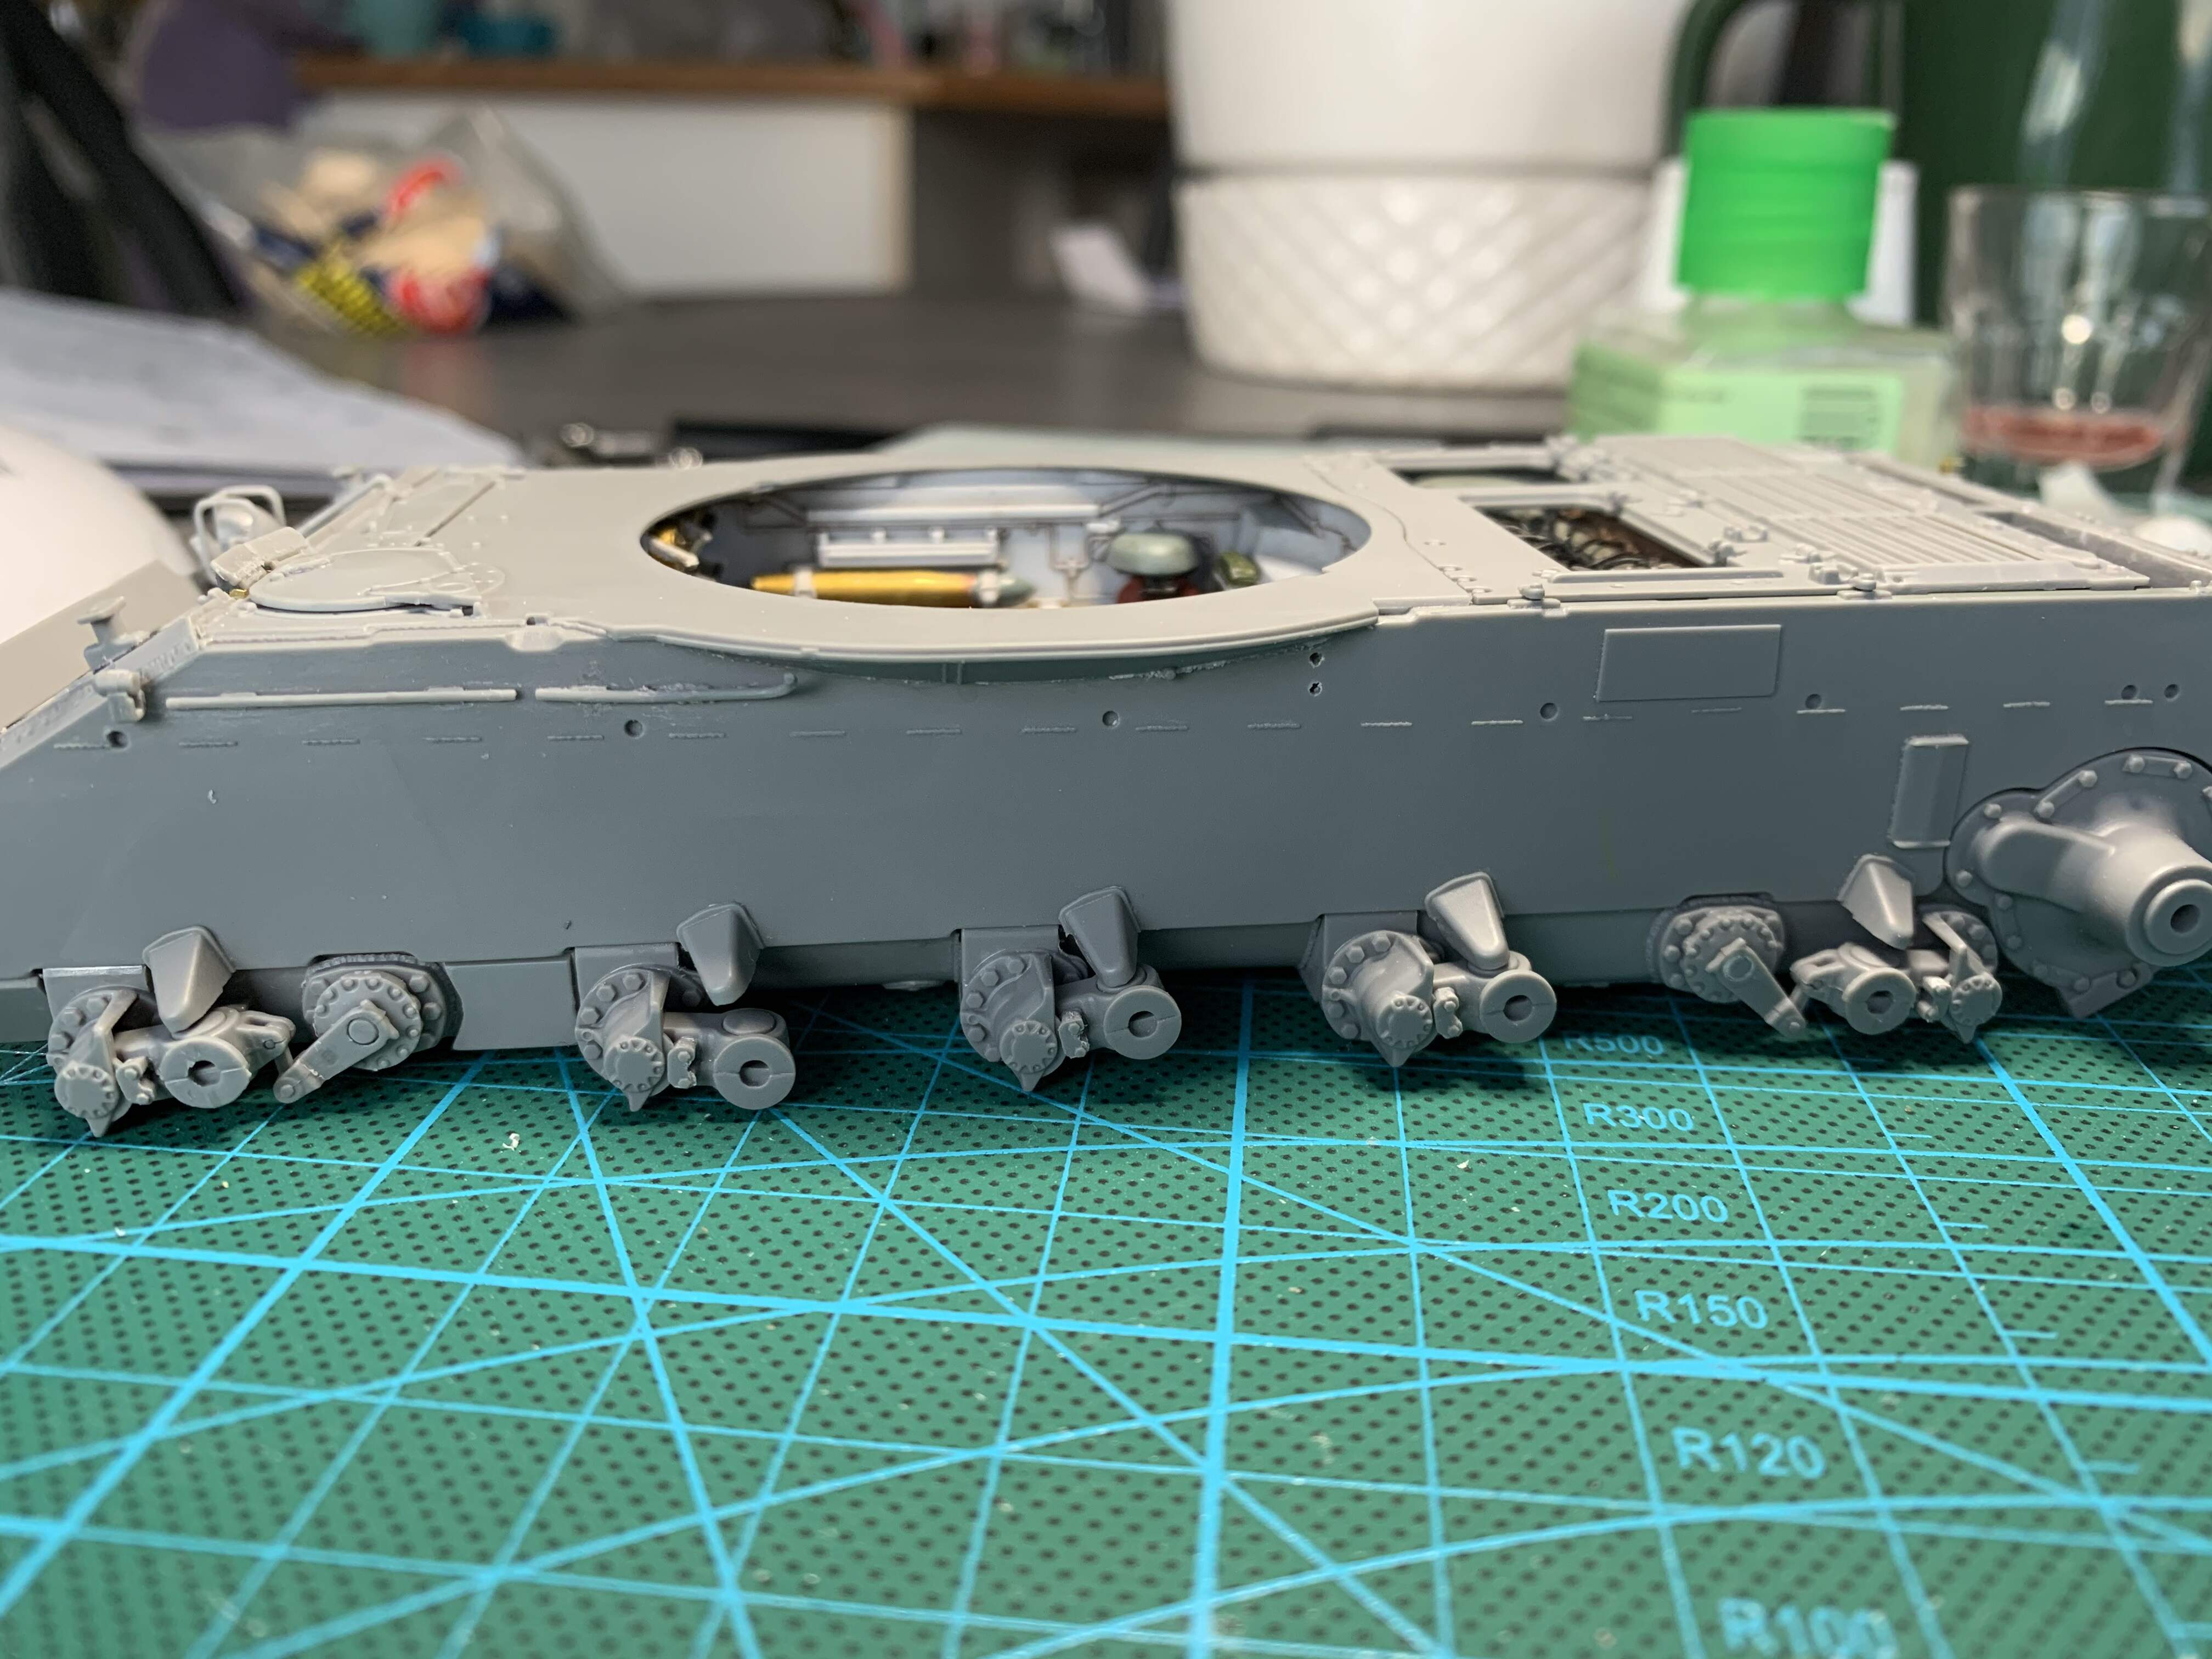
Second I highly recommend building the hull tub as I did first before doing the torsion bars and swing arms. As I pointed out earlier, the hull tub had some flex that made it hard to position these. The fully constructed hull tub is super sturdy and has no flex and I think it’ll give me a better base for doing the suspension. Of note when I was constructing the hull tub you can see the flex in the floor that is now gone since I’ve glued it all together. I think this will make it much easier to do the suspension
Before taping and gluing hull:
After:
8 Likes
Looking great!
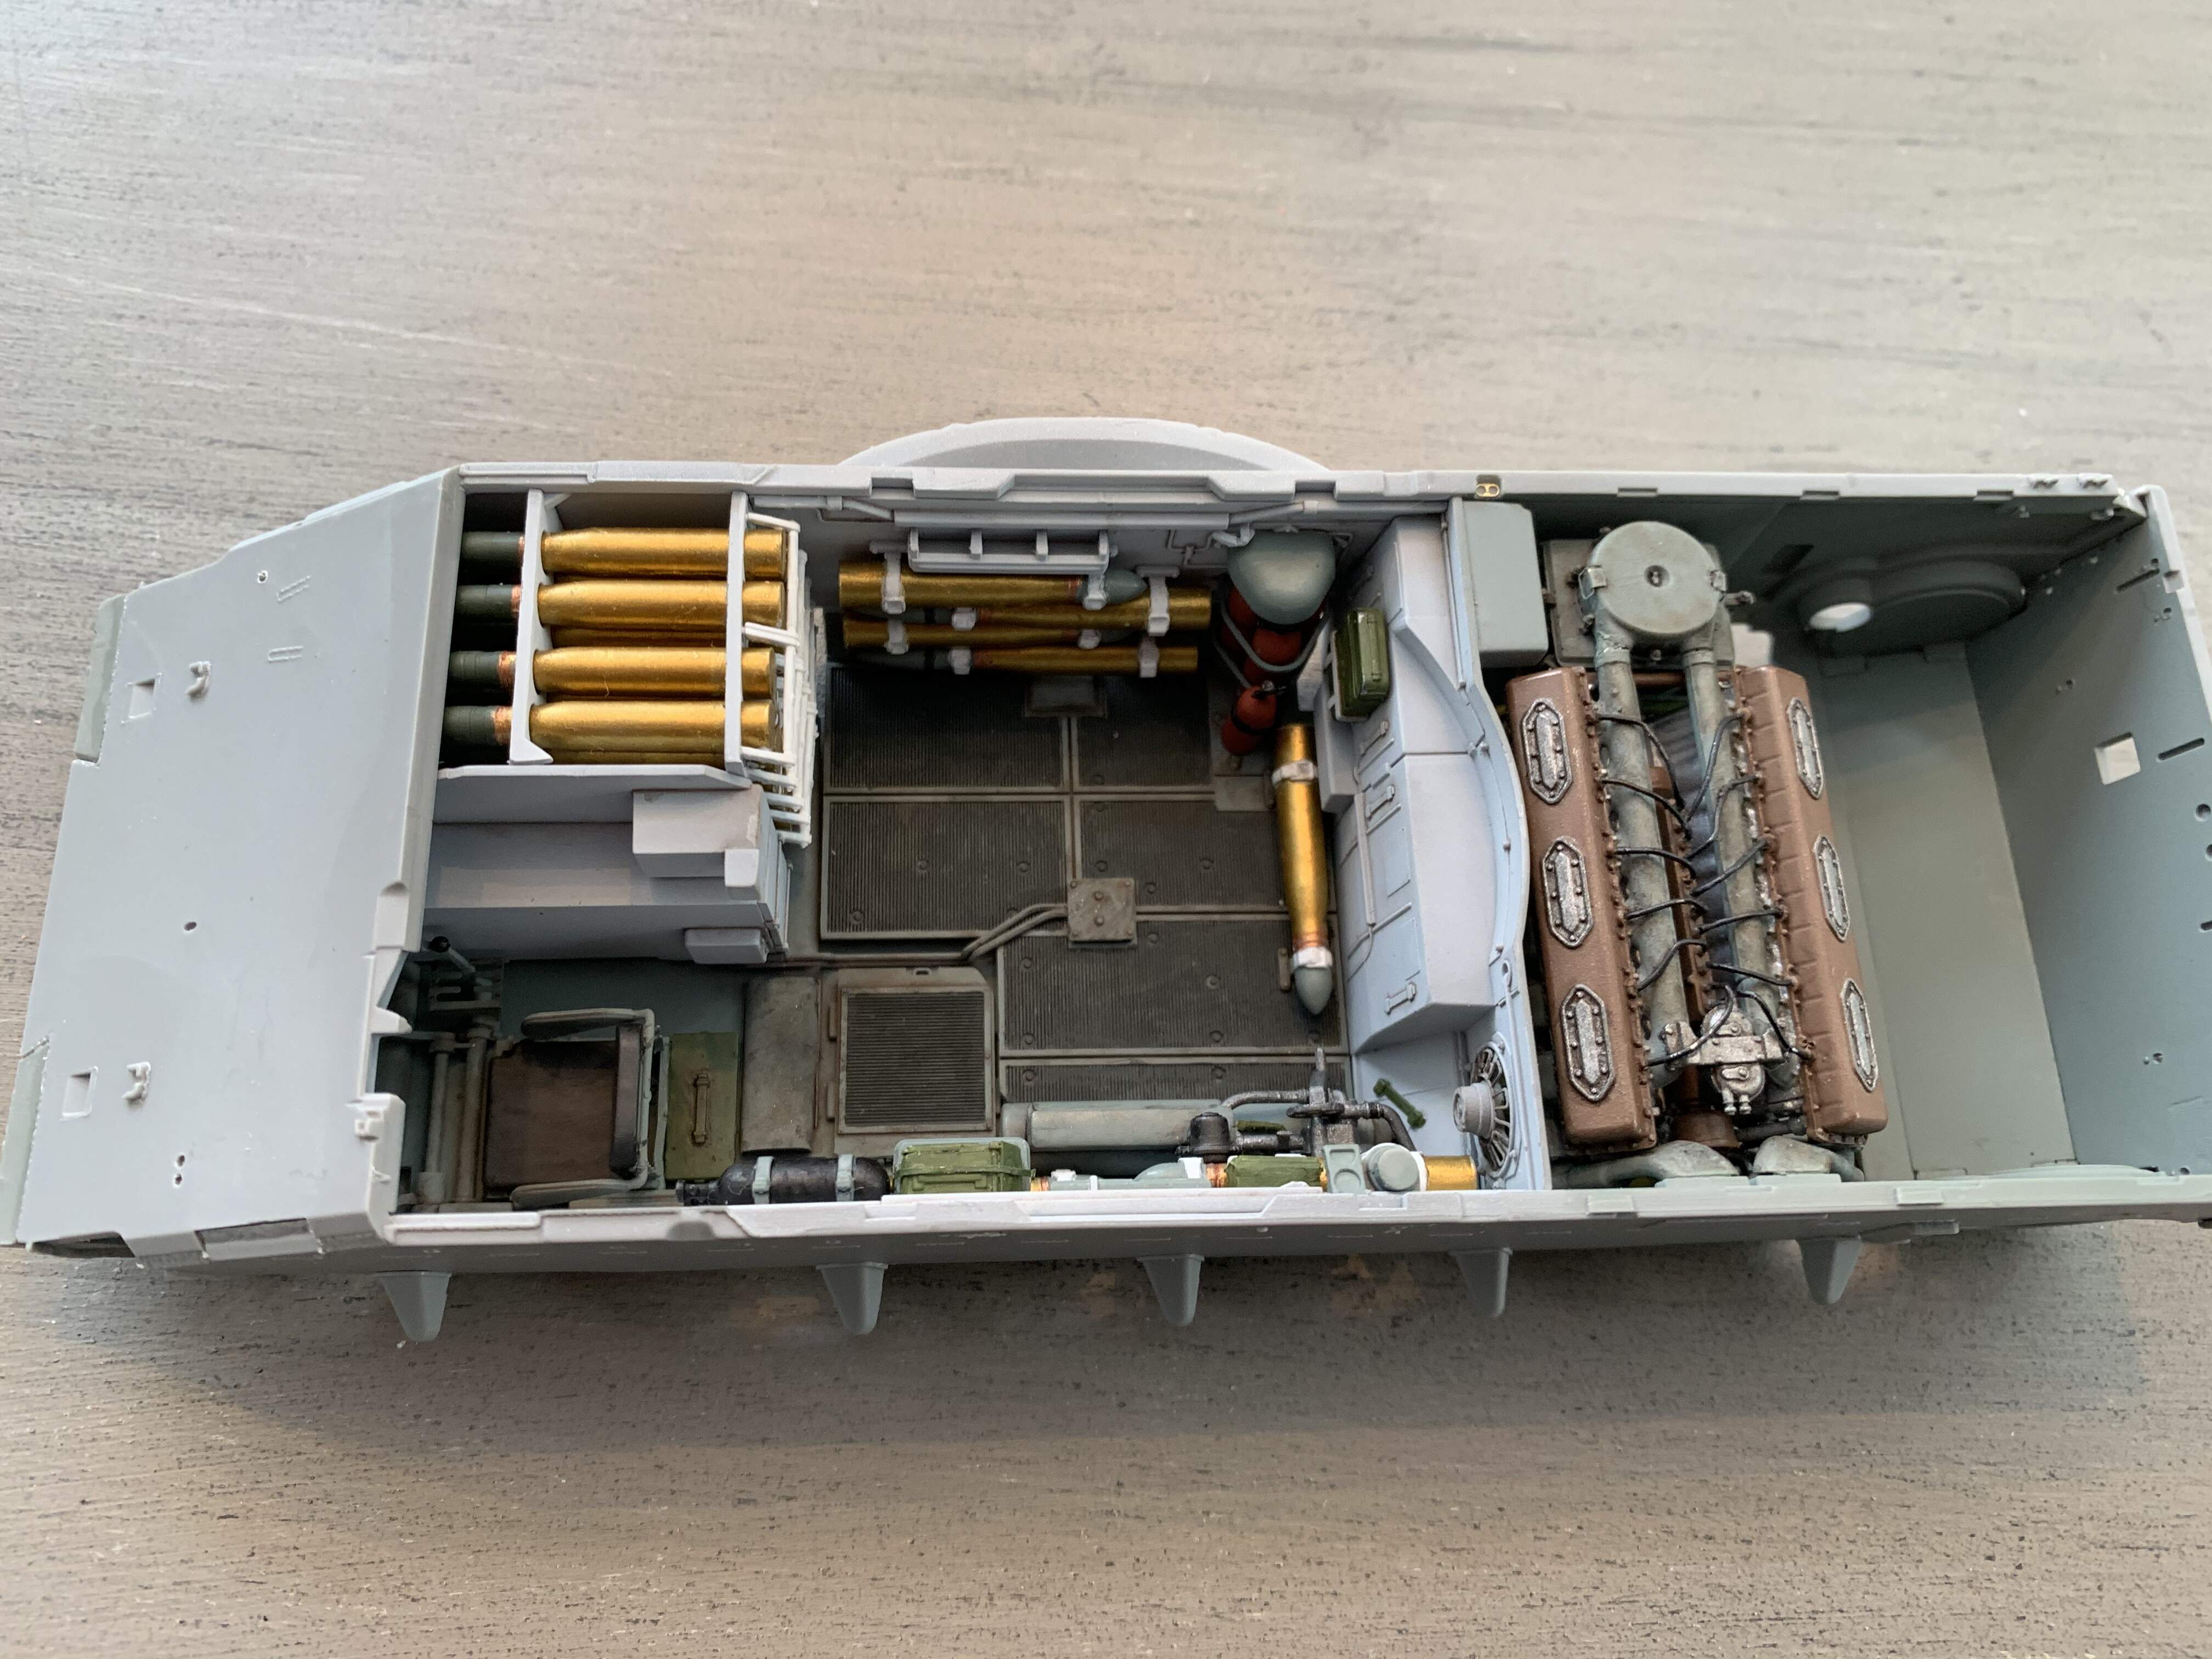
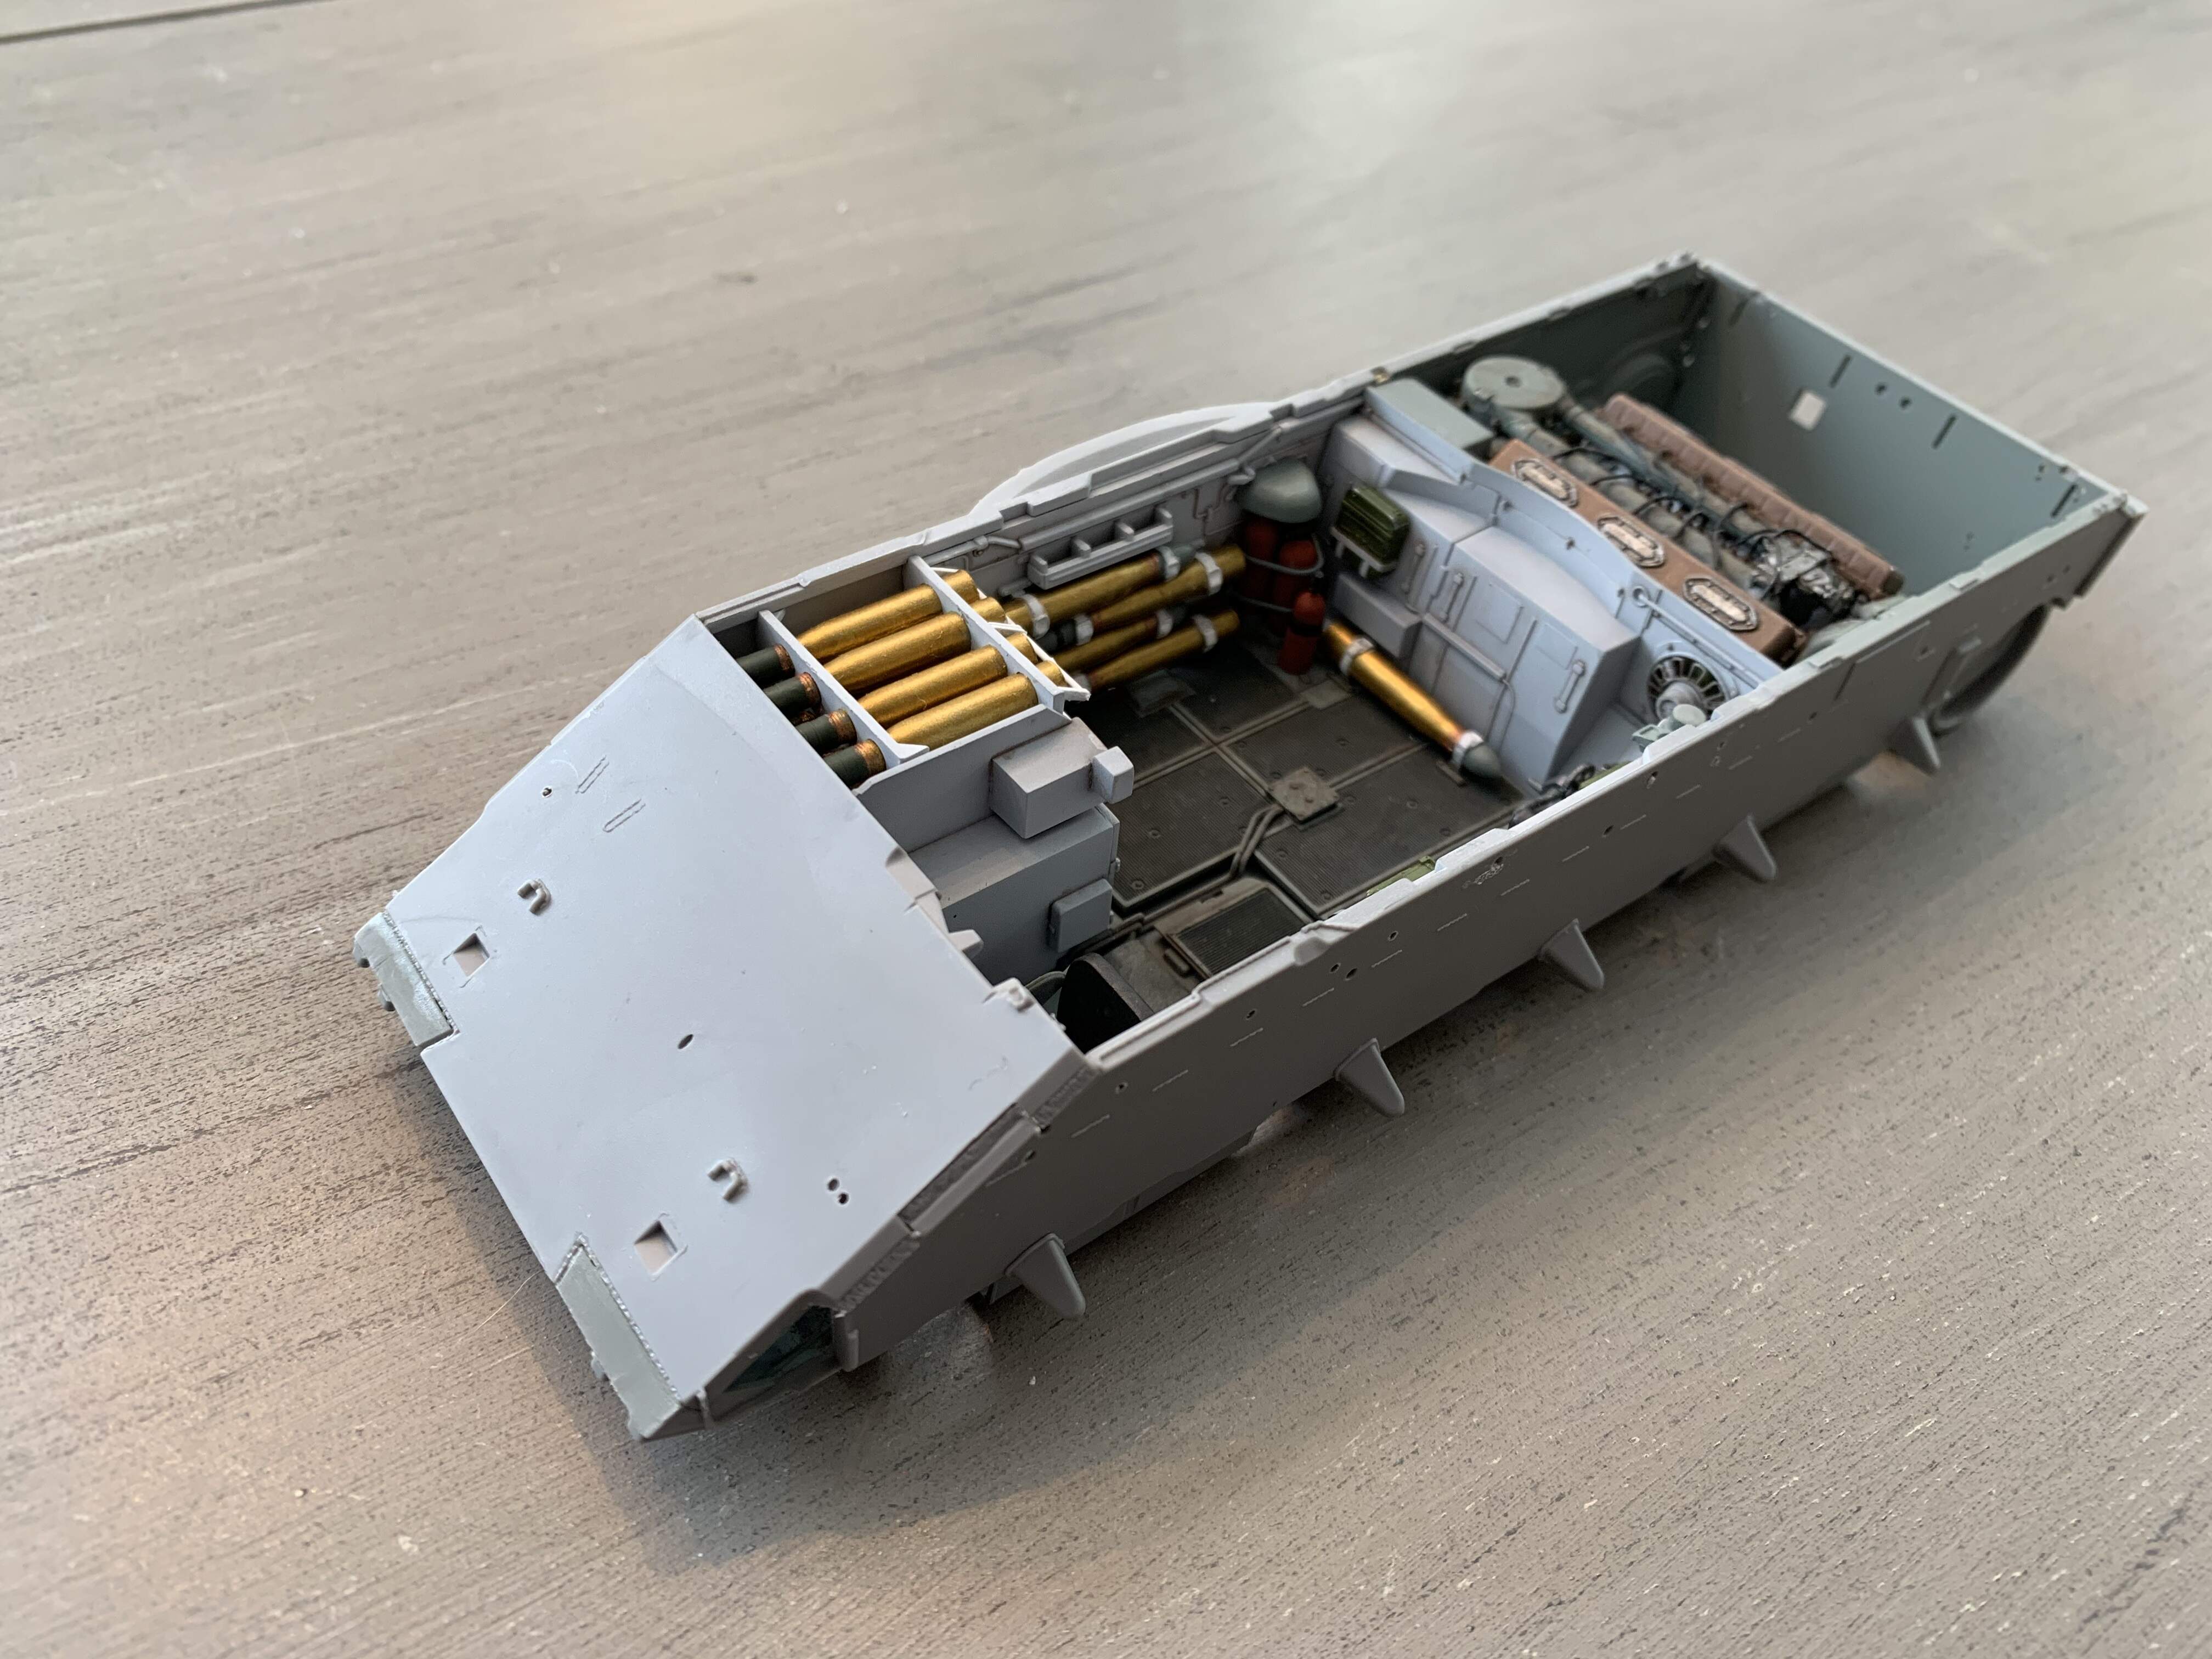
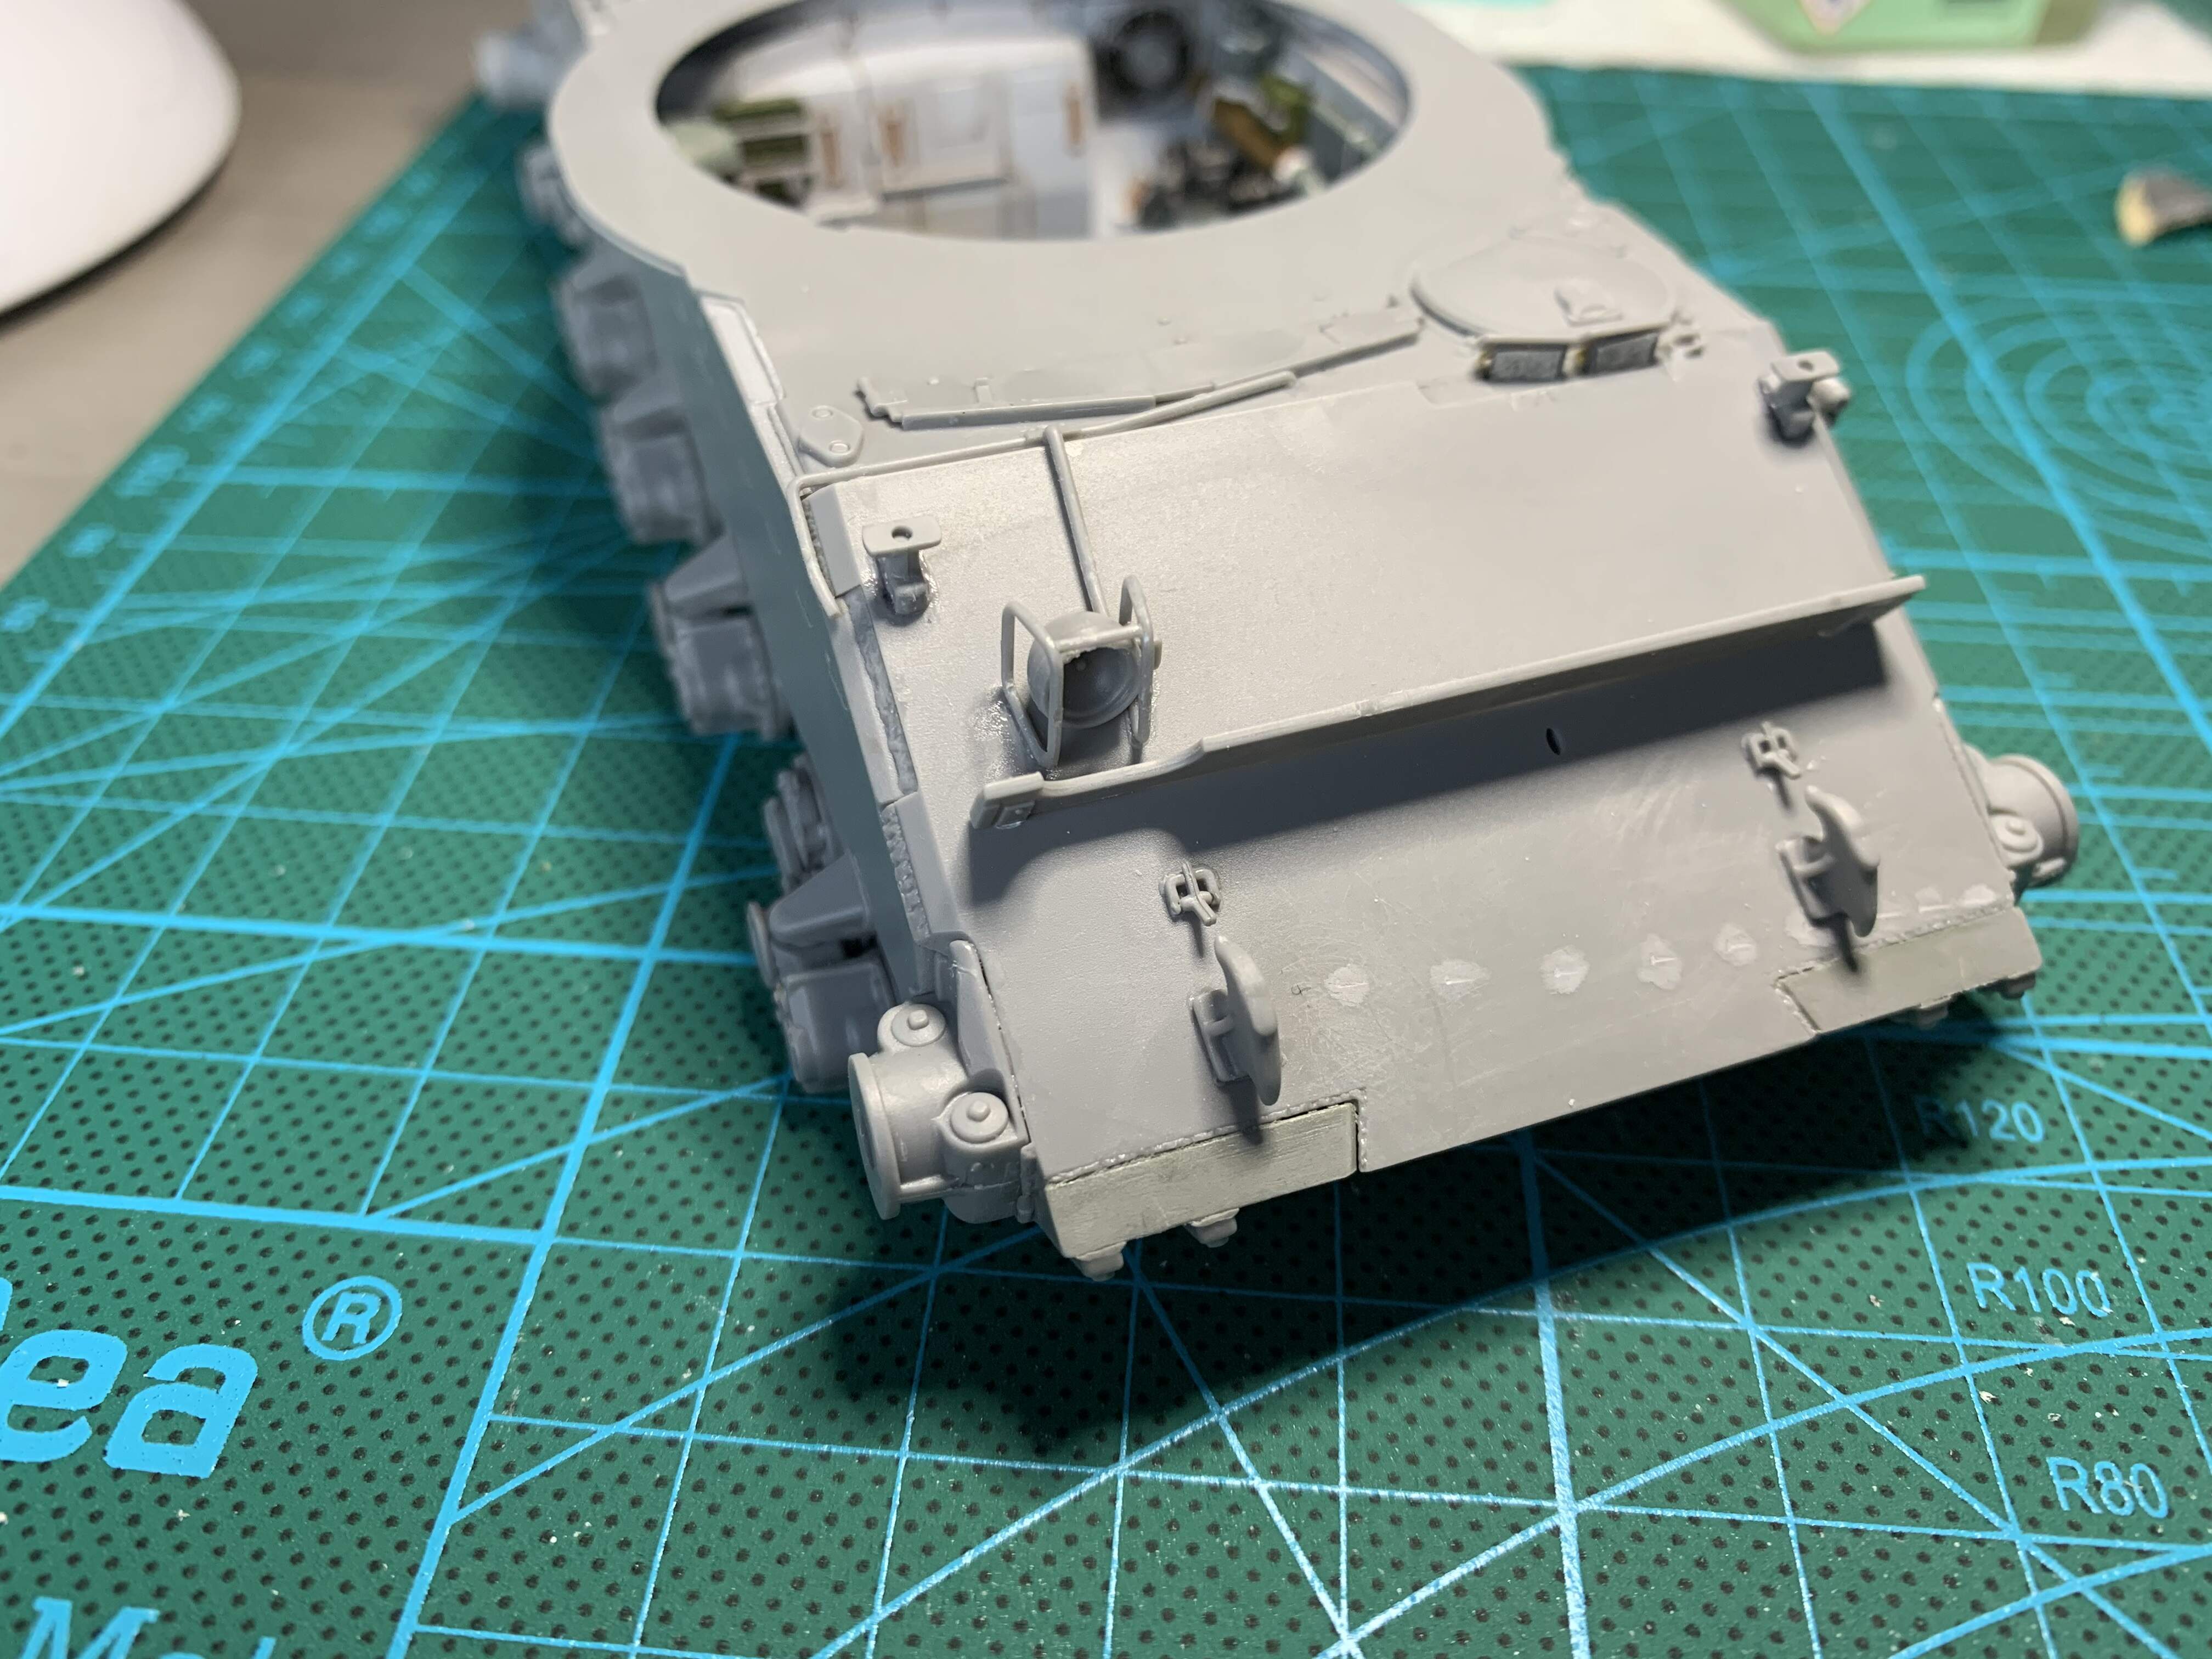
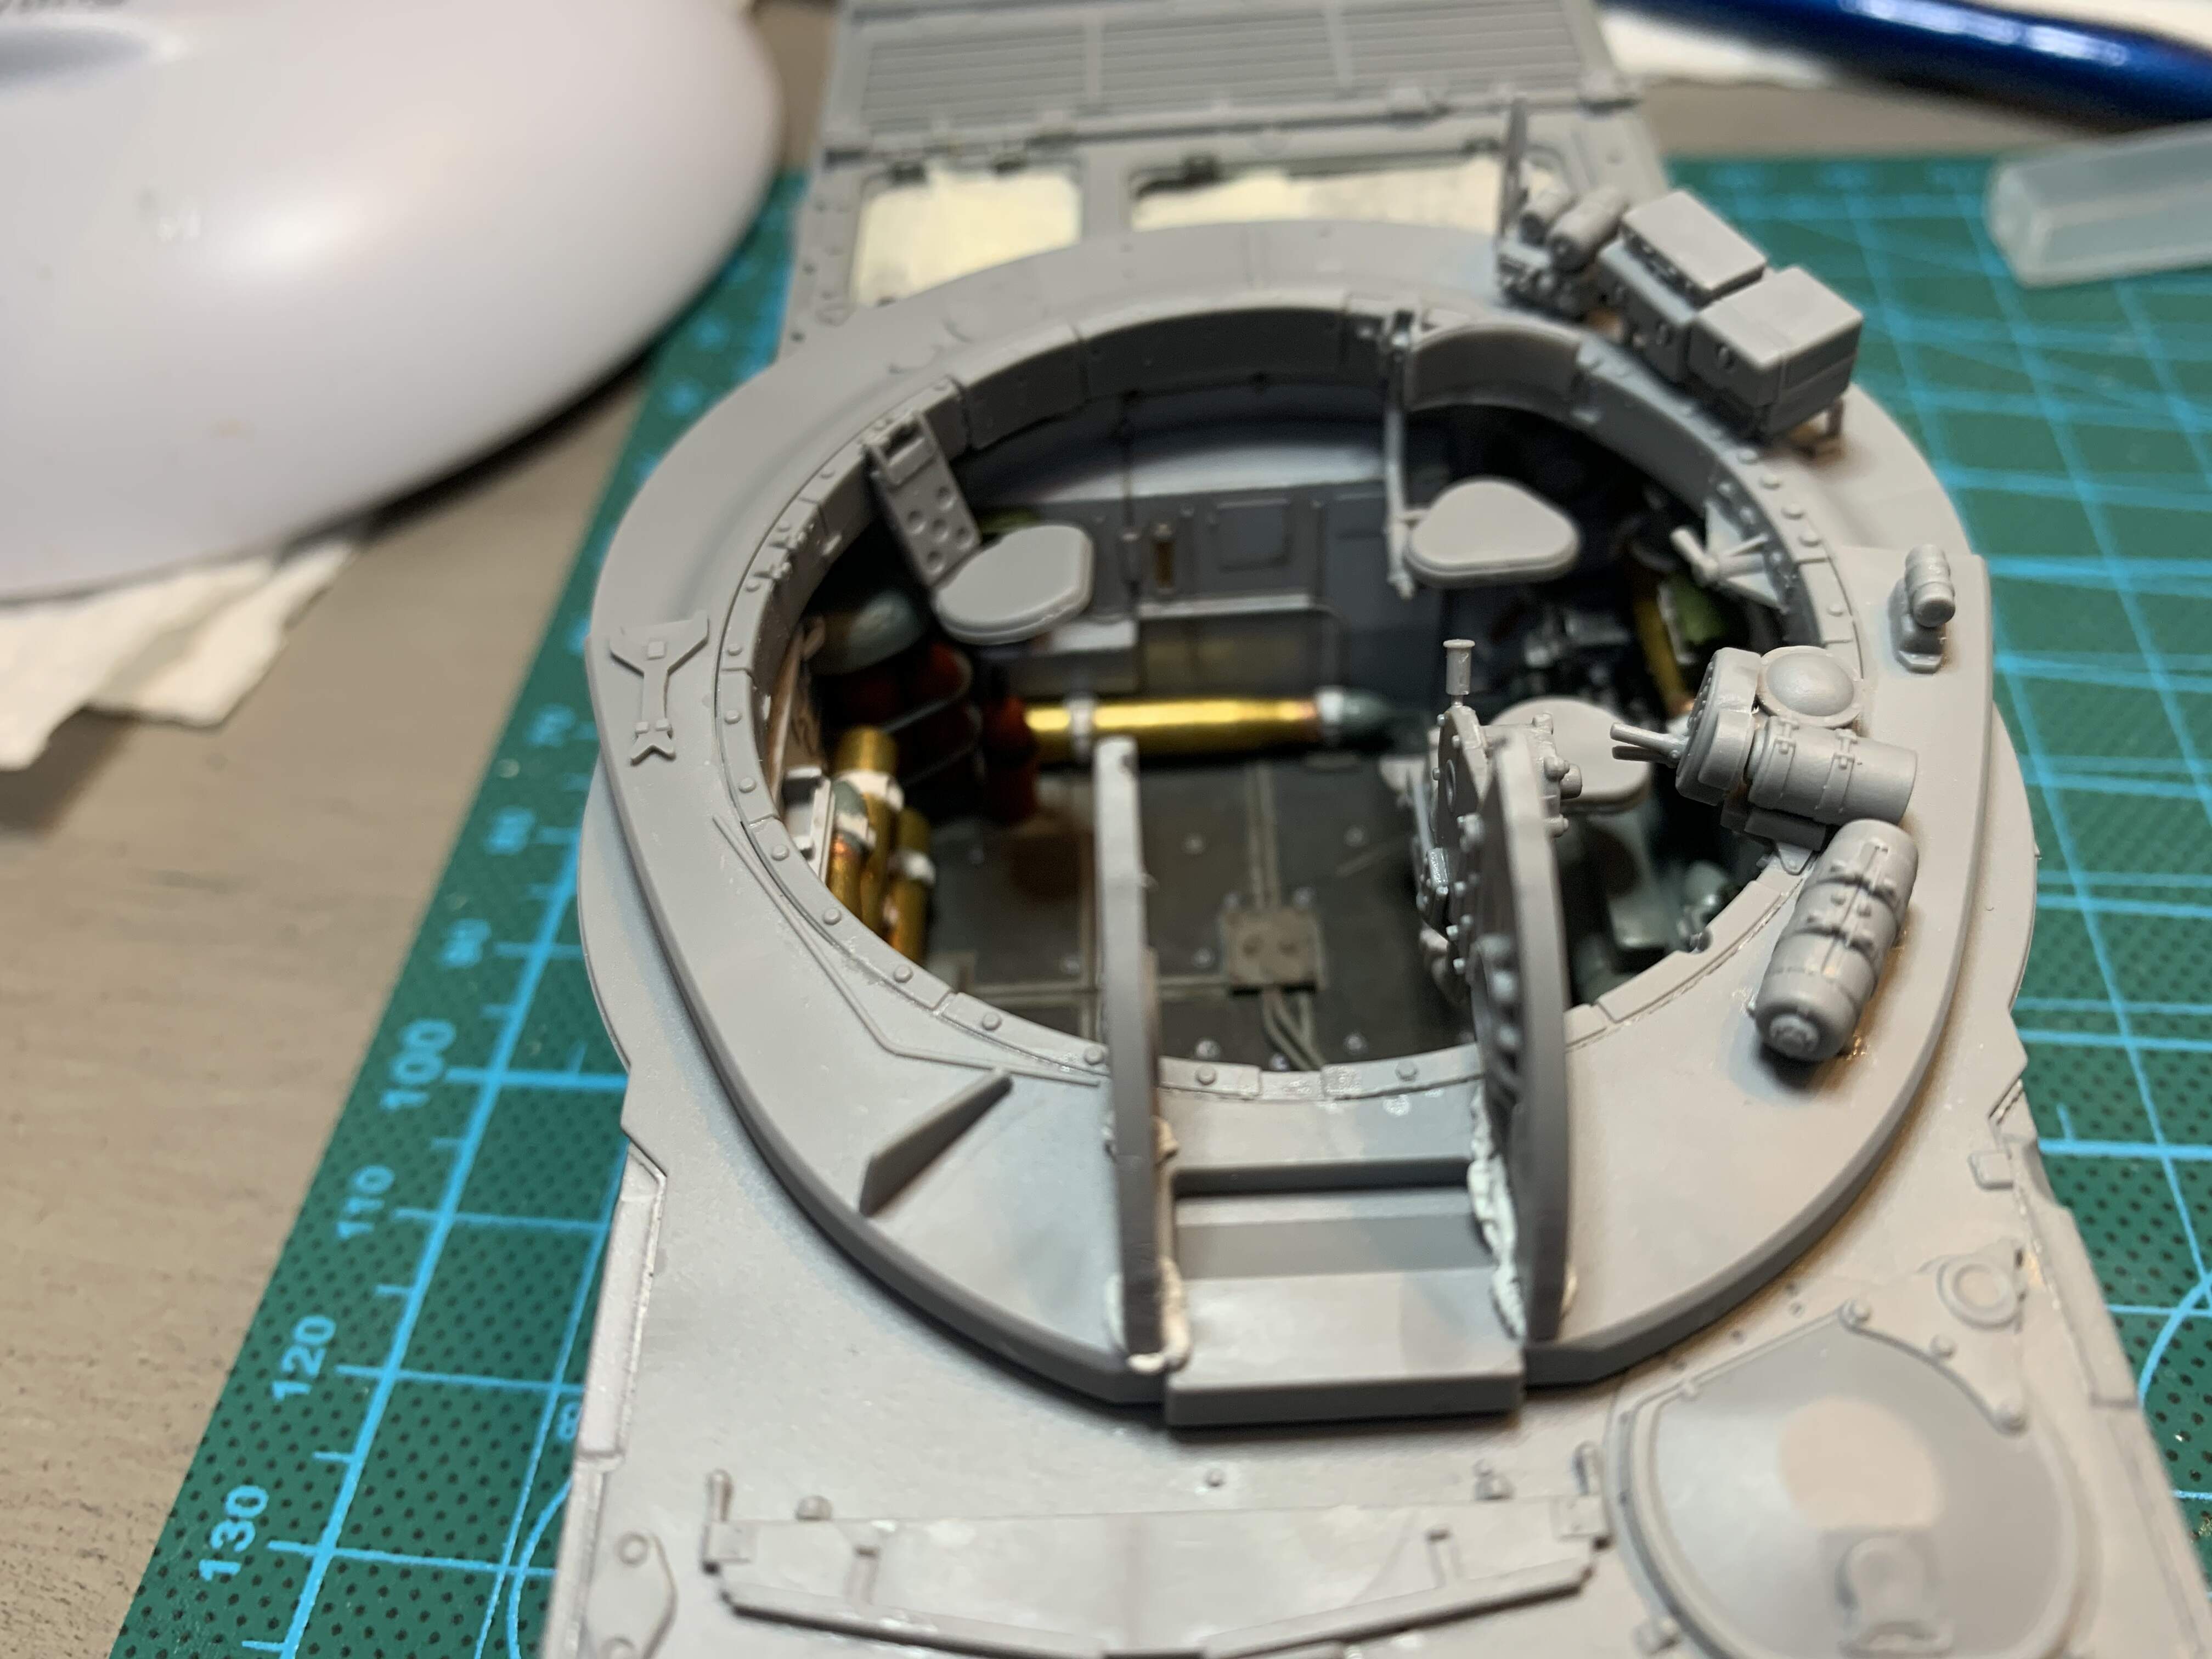
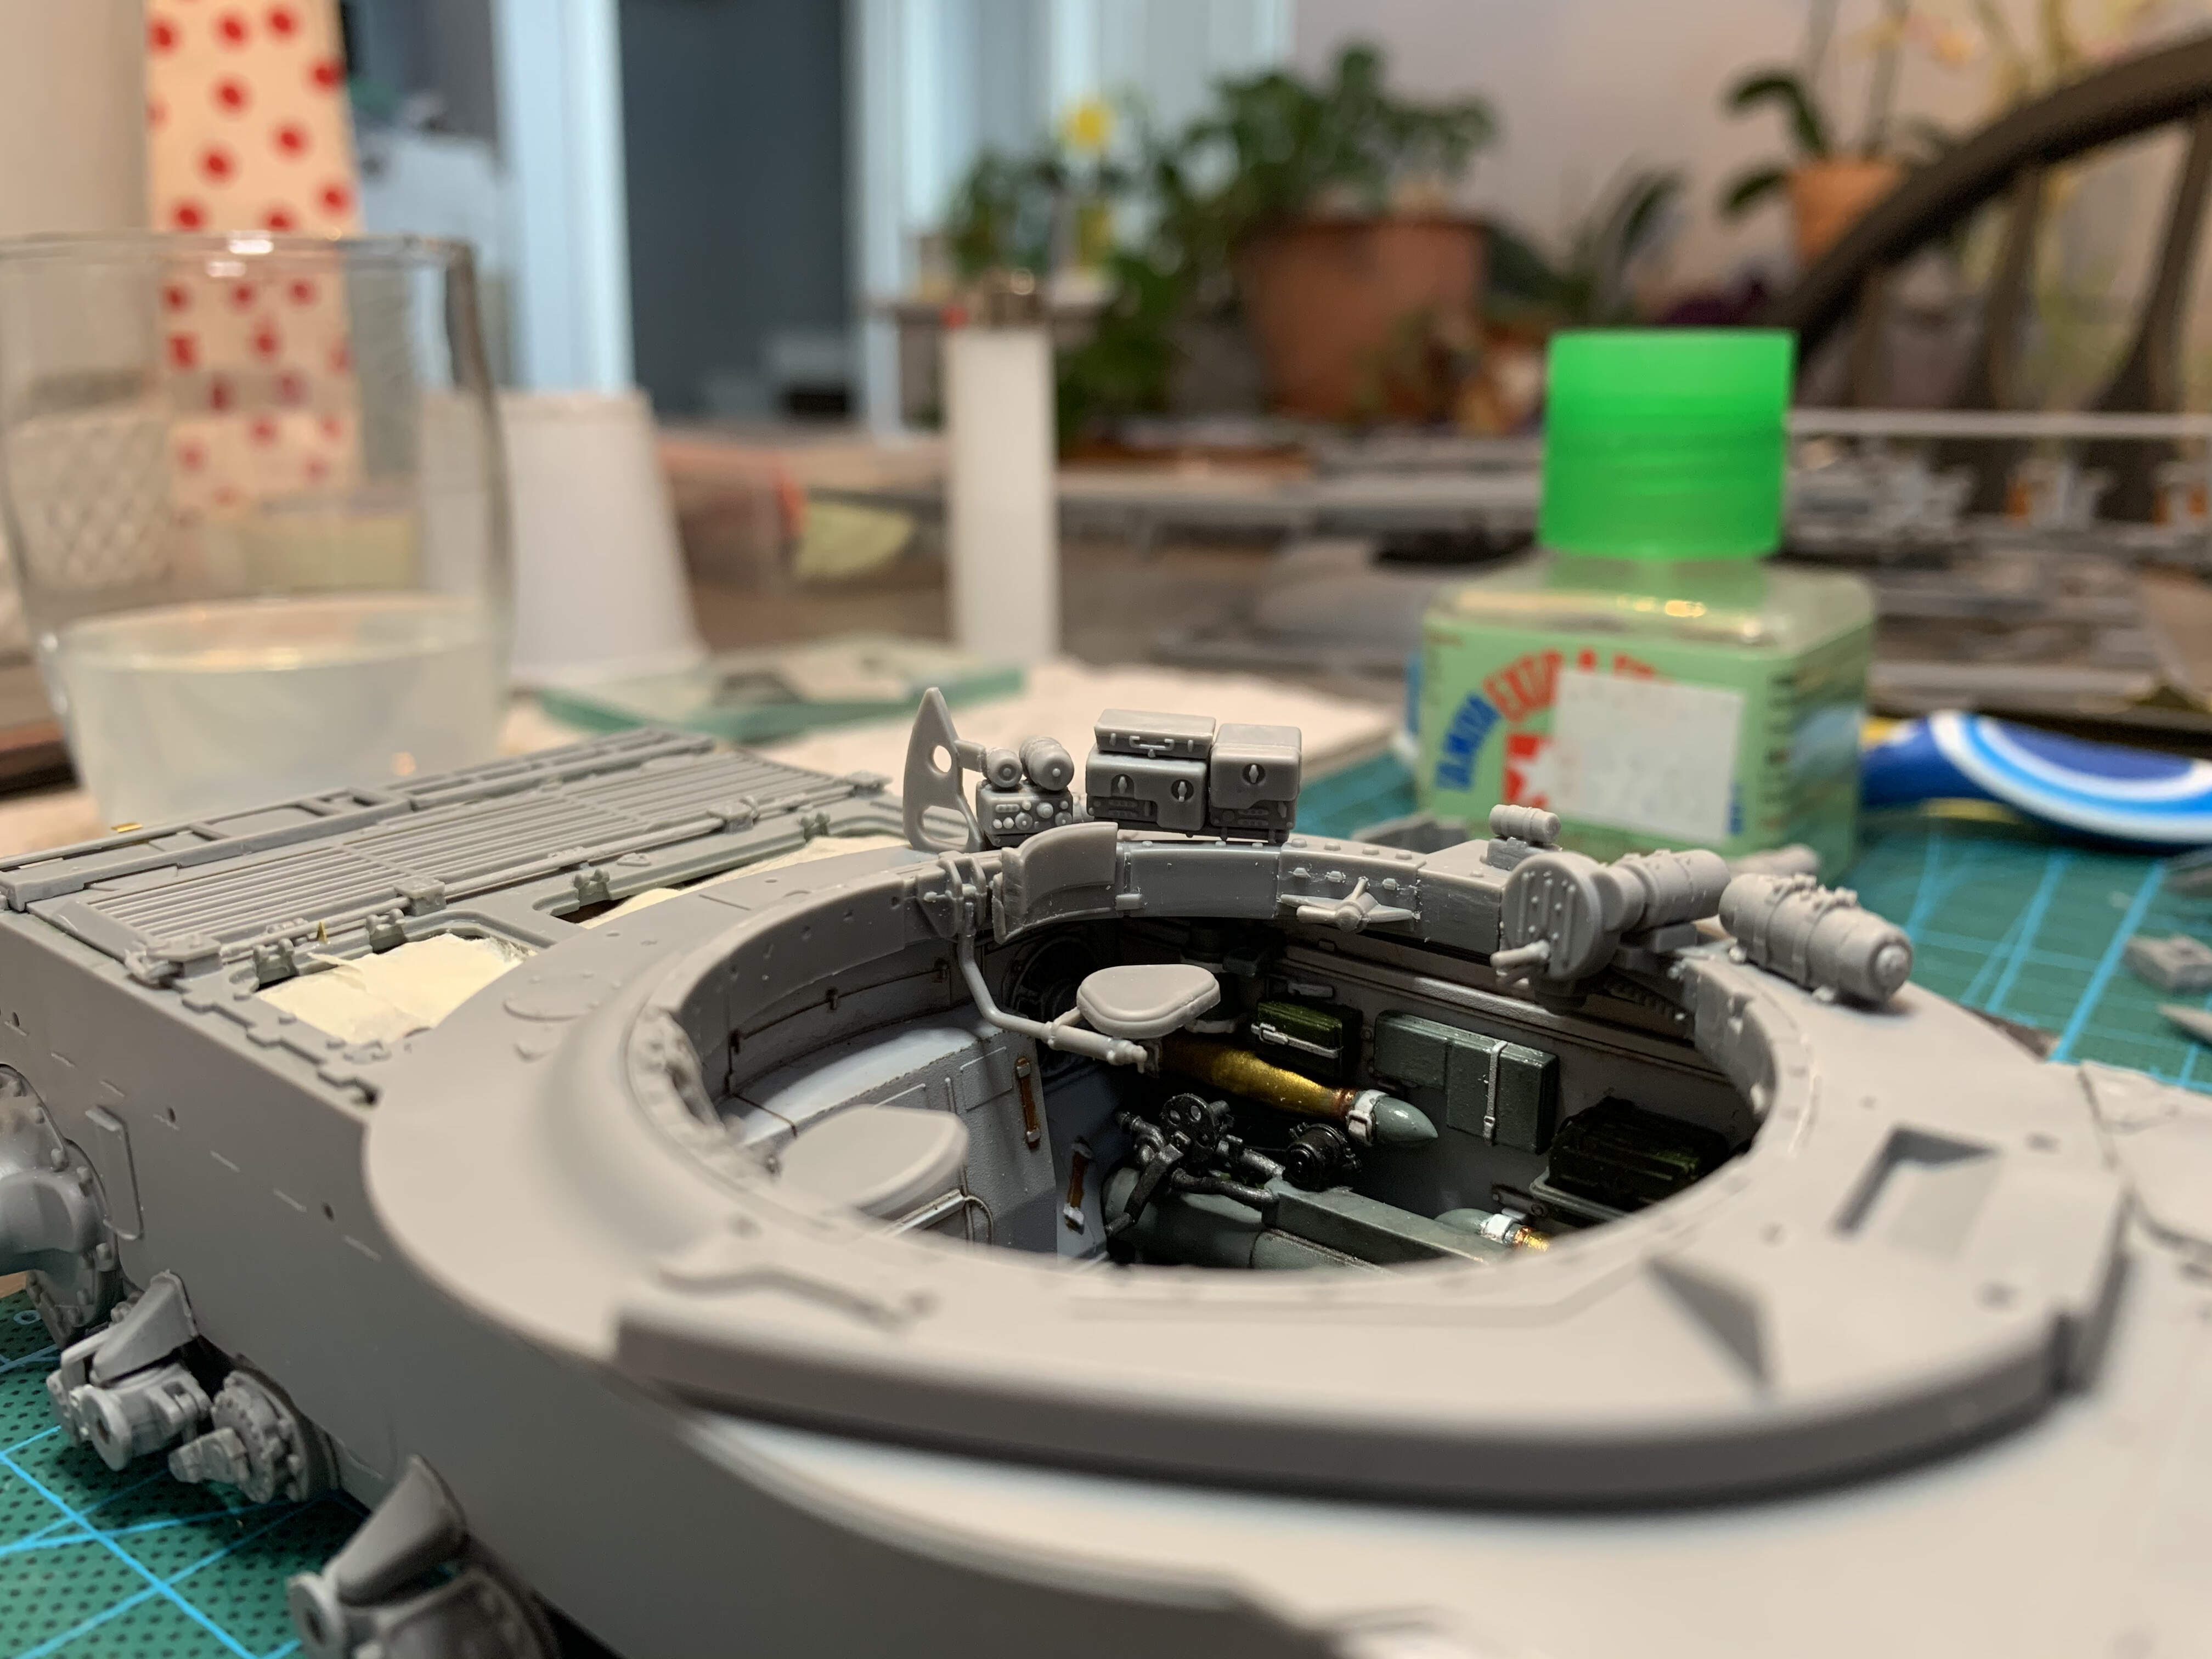
Got some more work done. Weathered the interior a bit more, added the top plate, drivers hatch and periscopes, torsion bars and swing arms, and all the fiddly bits to the rear, front and side hulls. A lot of slow work cleaning up small plastic and tiny PE. Just about to close up the engine compartment but will leave off the hatches covering the engine for now since they’ll be left open. Probably going to take a break at this stage so I don’t get burnt out and spend some time on my Flak panzer build. Next up is the fenders with lots of fiddly PE.
7 Likes
Looks great!
Cant wait to see the Flak panzer… 
Probably starting on it tomrrow. Was waiting on some parts from sprue bros which should be here tomorrow
1 Like
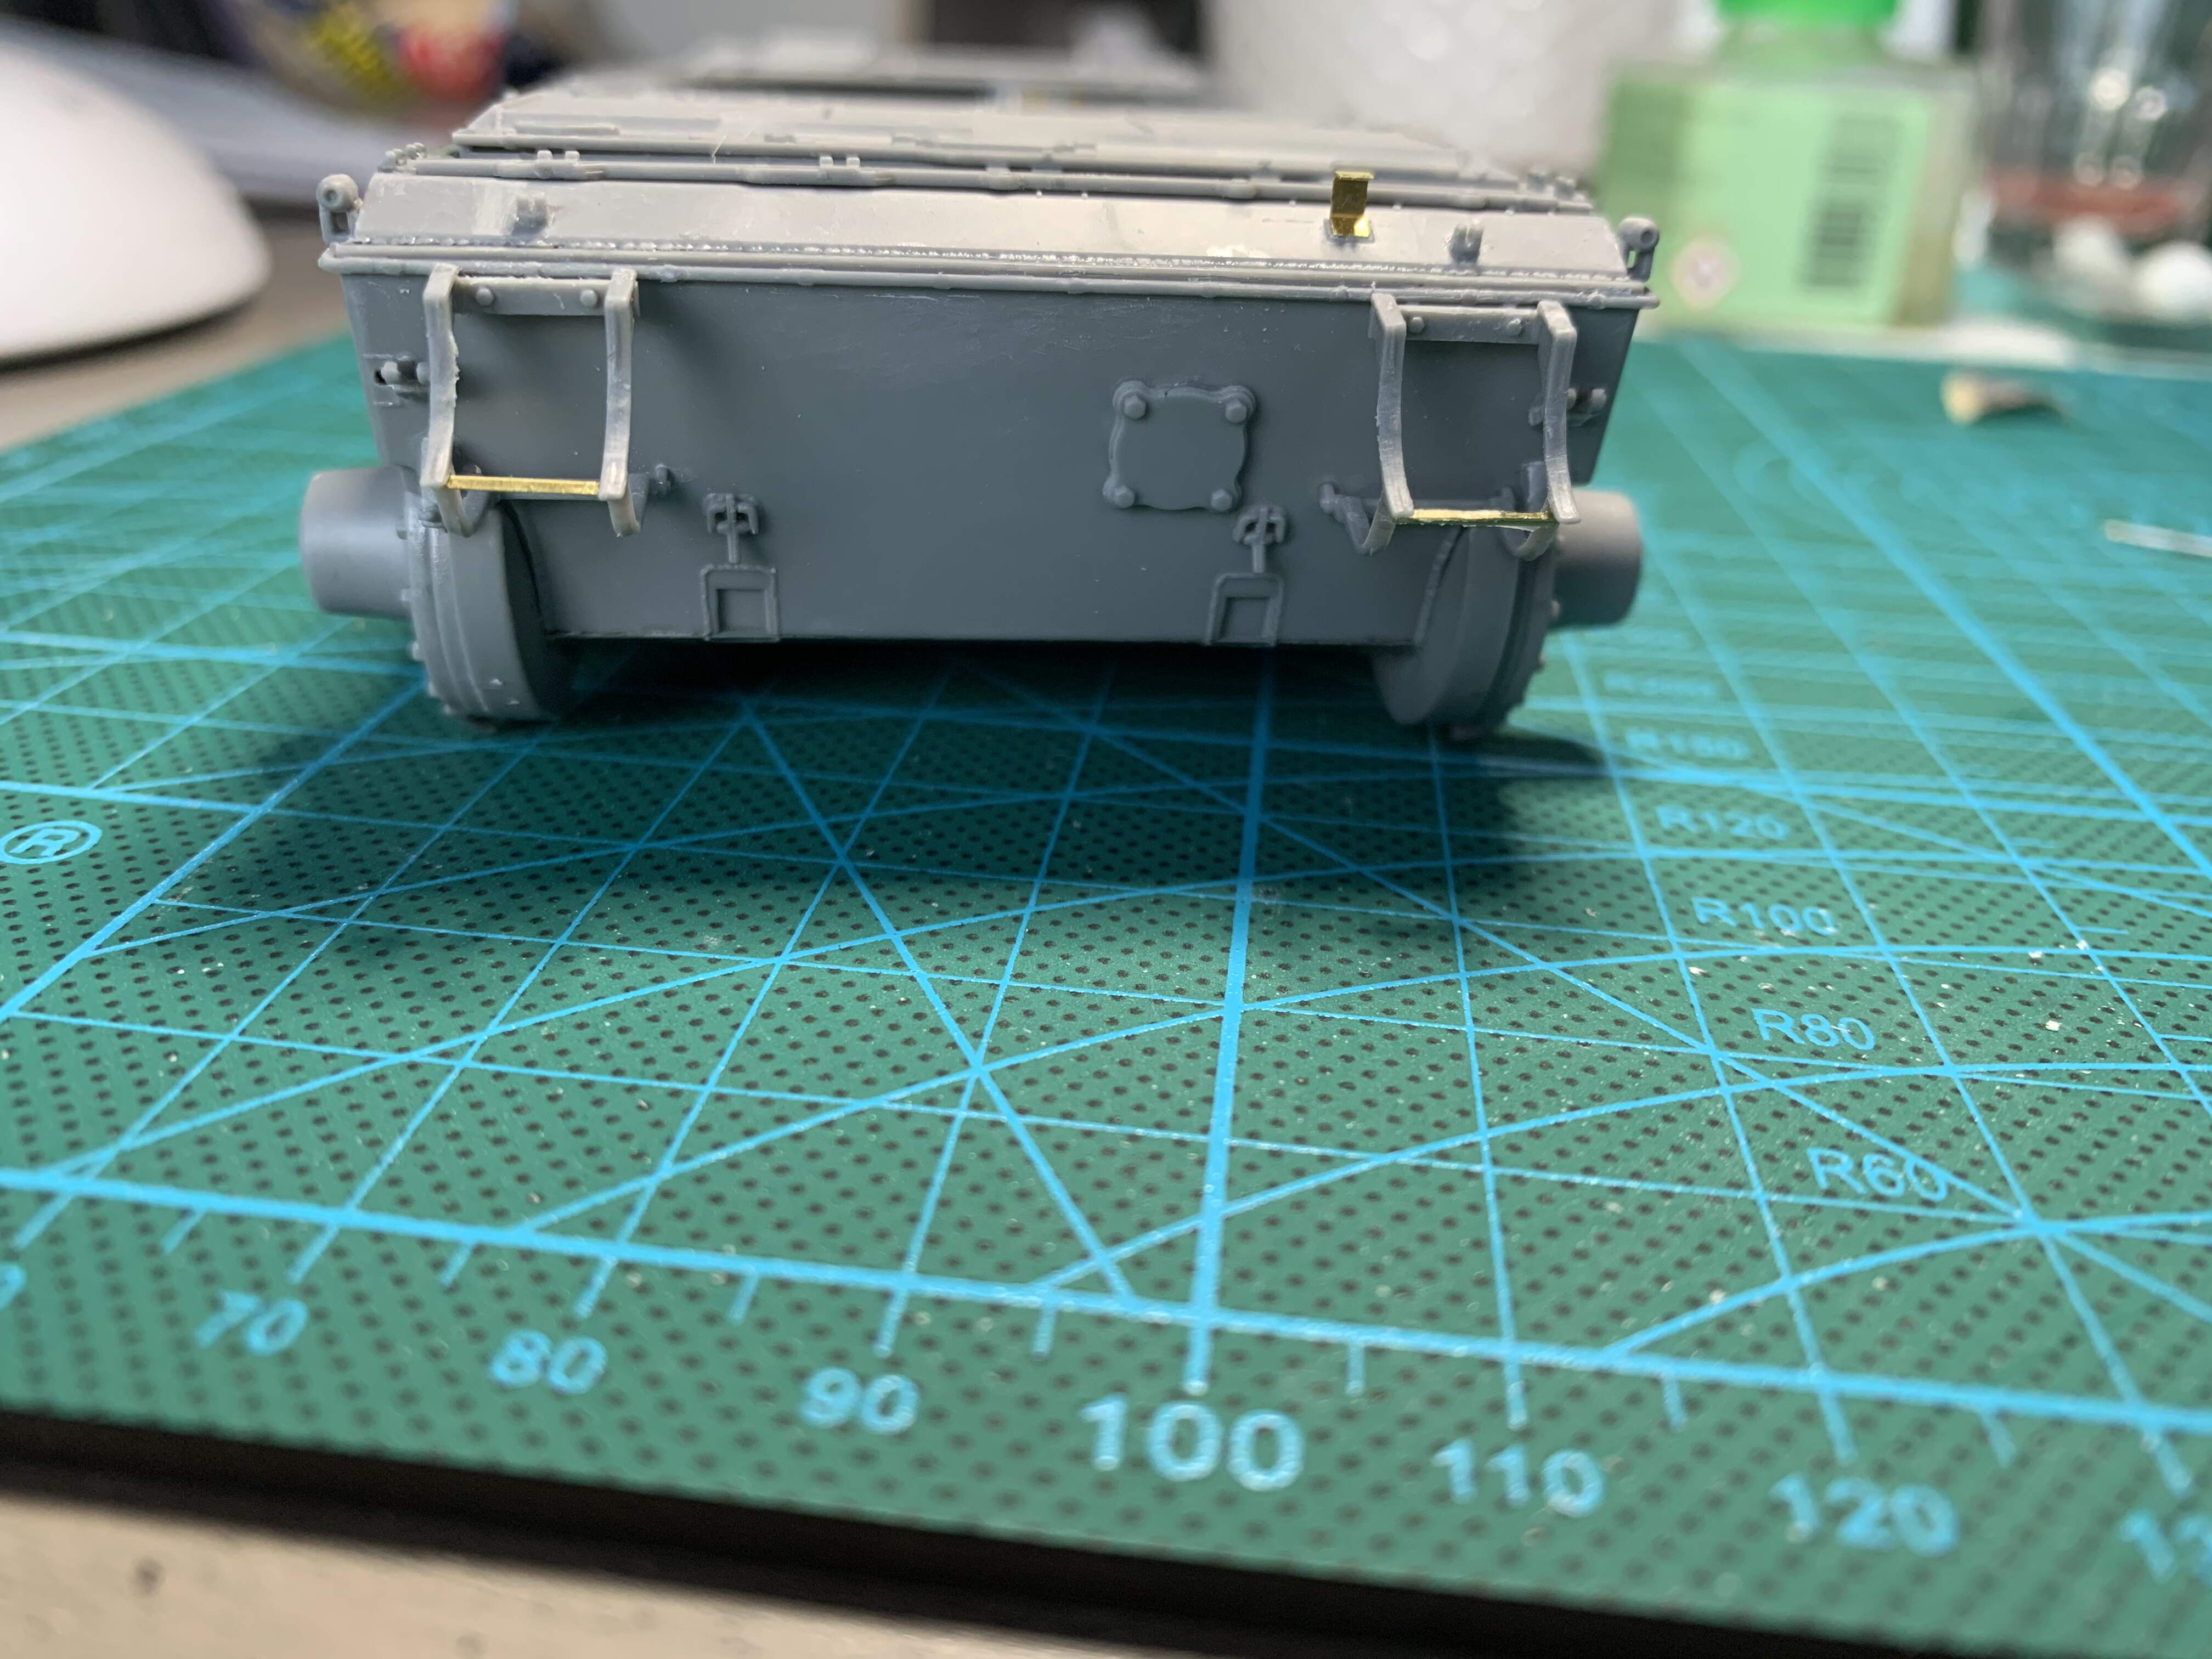
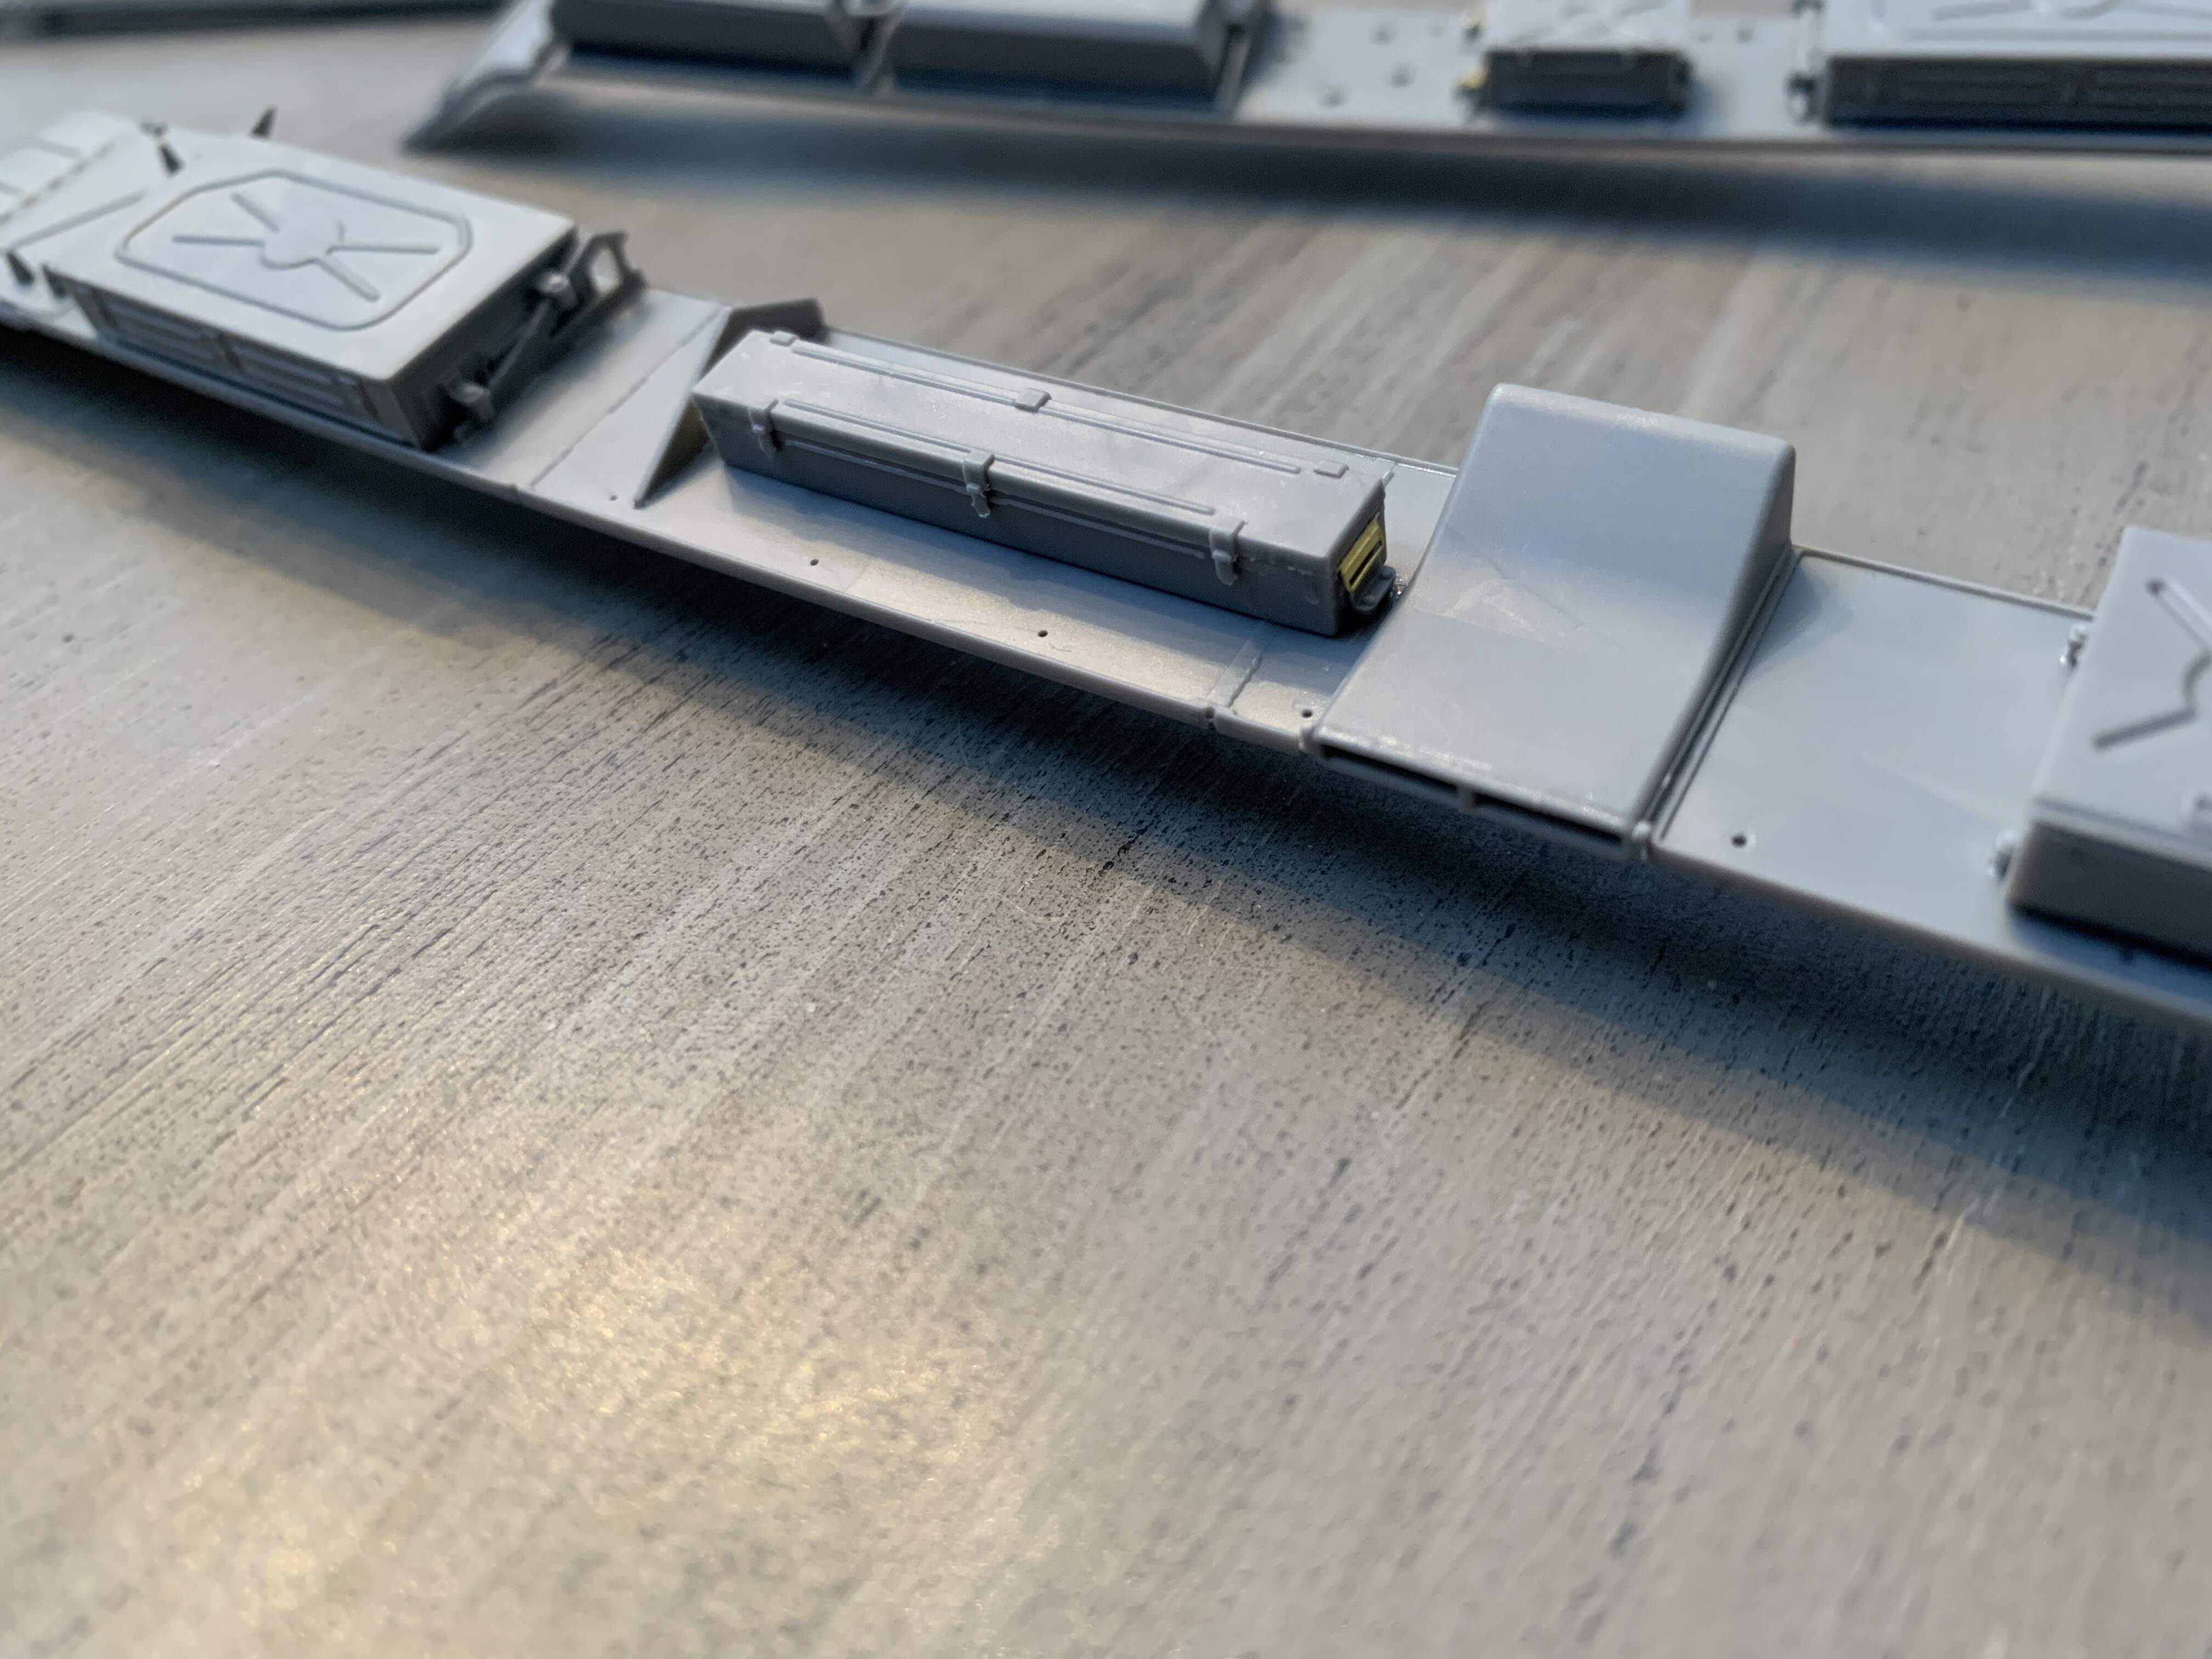
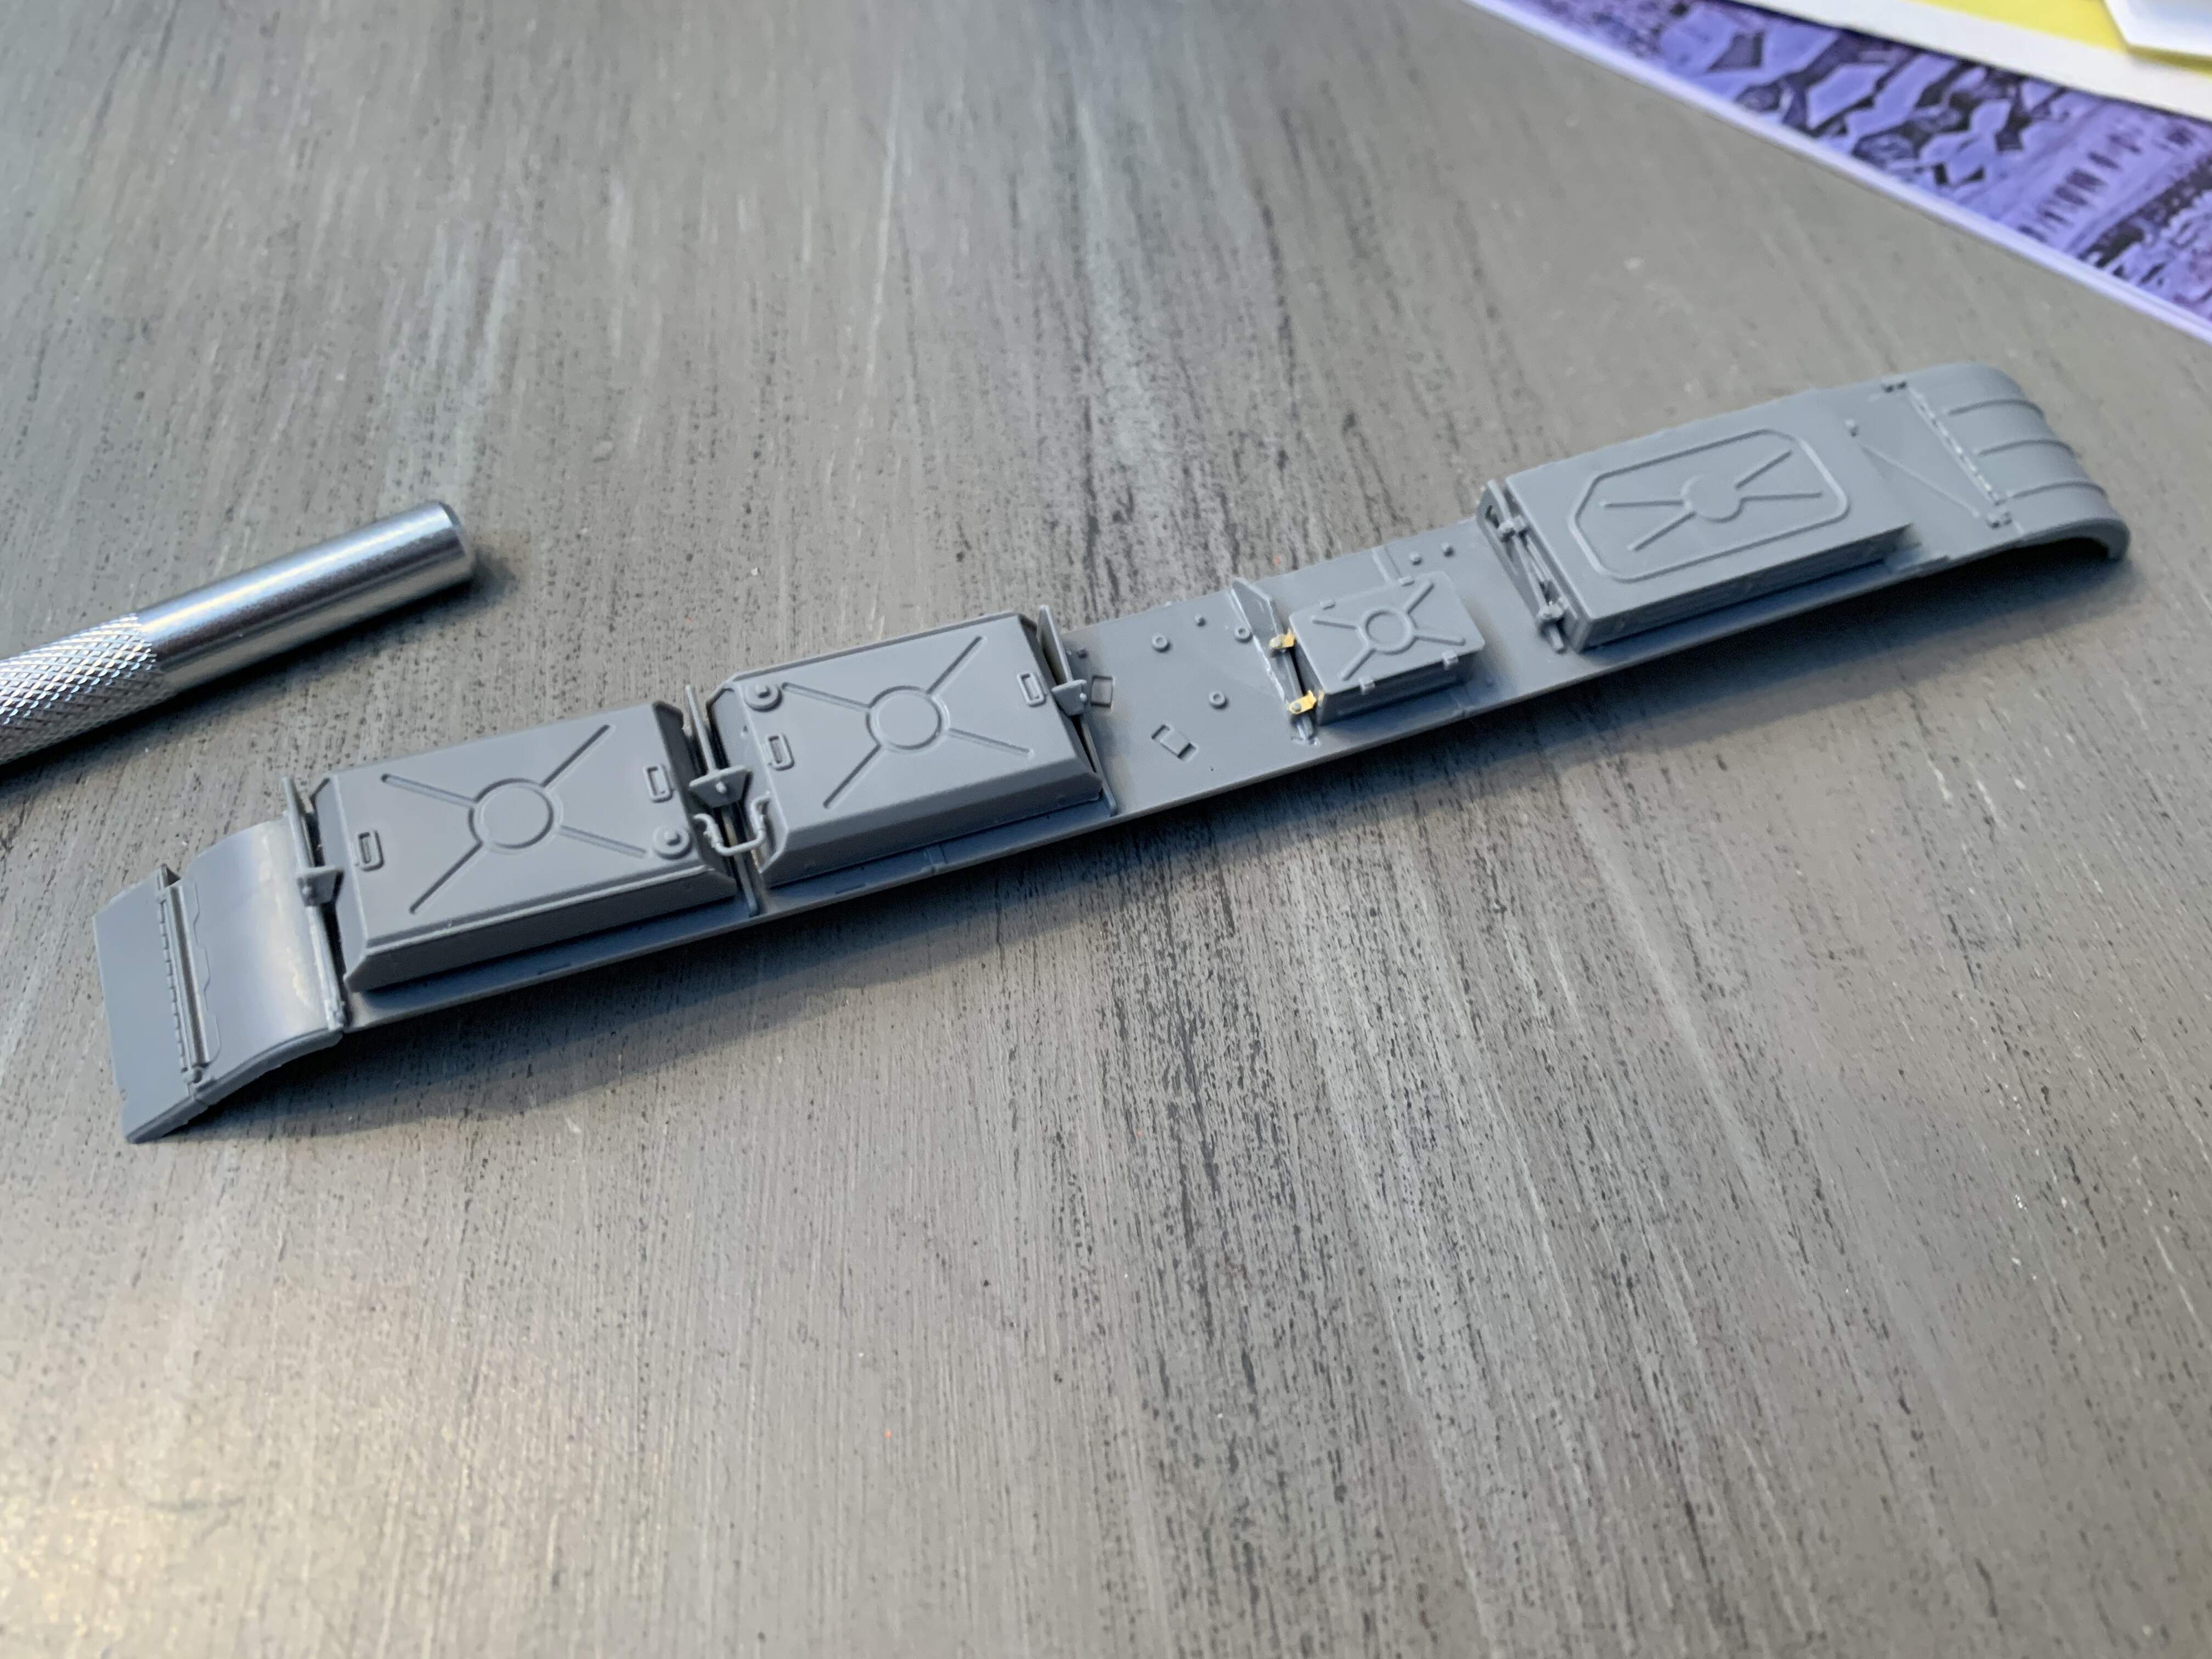
Been a while since I posted here. Was working on my flak panzer and was off sick for a while. I’ve made a good dent in the remaining steps. I got the fenders mostly done, a bit of PE I can add now that my gator grip is here, and a bit of clean up of mold seams. This was probably the first challenge I’ve gotten out of this kit. One of the issues I had here was a lot of the support brackets for the fender to hull attachment around the fuel tanks don’t have locating holes but rather a narrow slit that holds the bracket. The fit is good but making sure the brackets dry square can be a challenge as the slit doesn’t hold them very well. To circumvent this I had the hull nearby and whether I attached a bracket I test fitted the fender, got the bracket in the right locating hole on the hull so it was square and let it set up for a bit.


Next up was the turret. I’ve mostly built up all of the pieces for the lower turret ring but have kept them separate for painting, most things in the photo are just test fit with blue tac. It was here that problem 2 arose. The fit of the breech ring is pretty bad with major gaps to fill. Some of which are hard to reach for sanding. I tackled this by filling them with stretched sprue and carefully filing/sanding flush. Aside from this the gun and turret detail is superb.
Before:
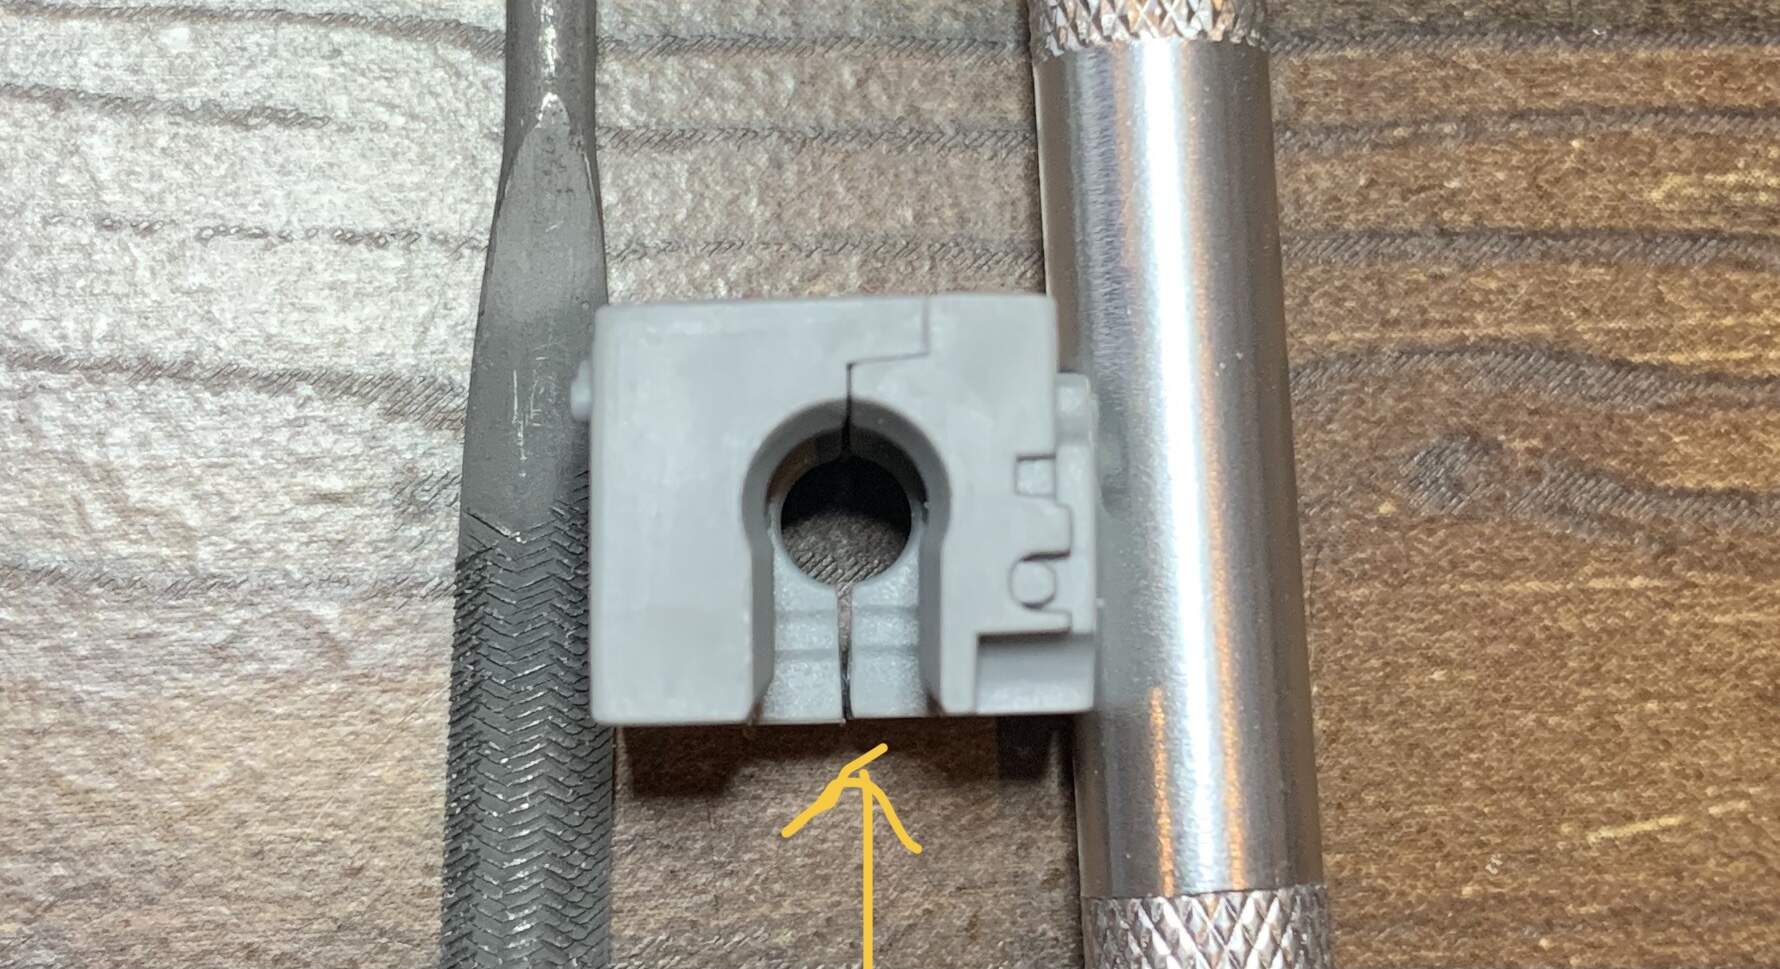
After:
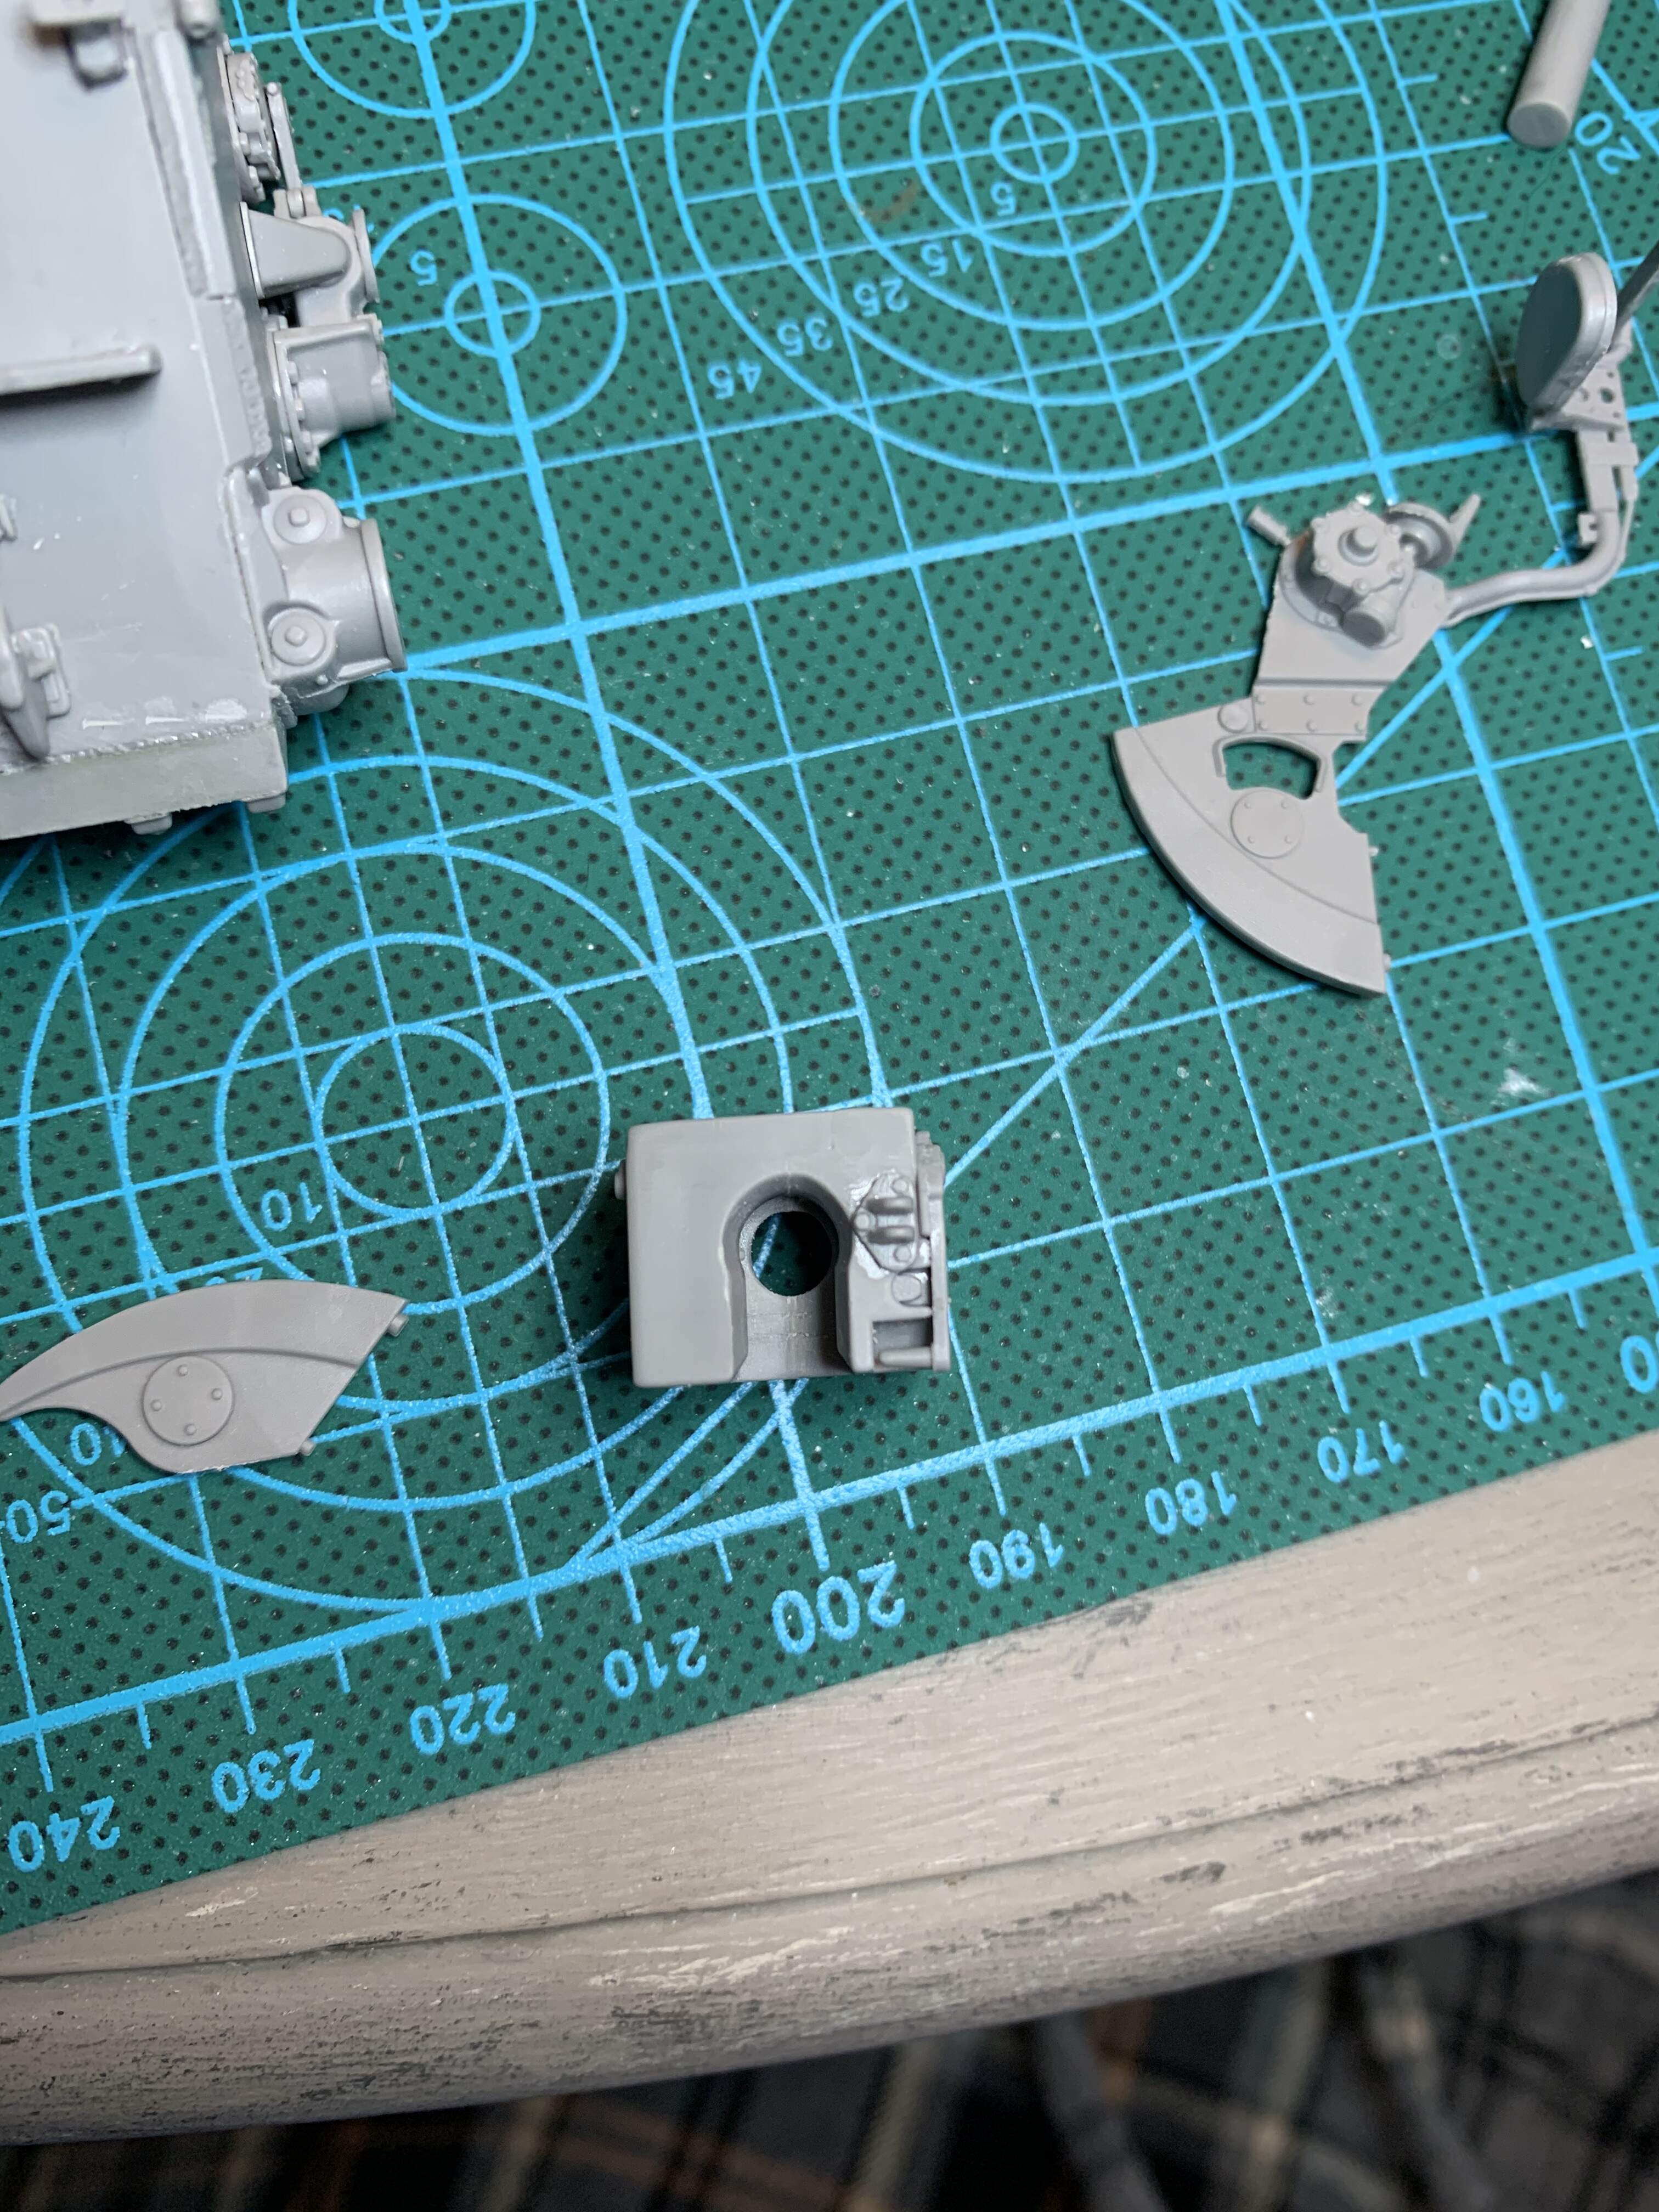
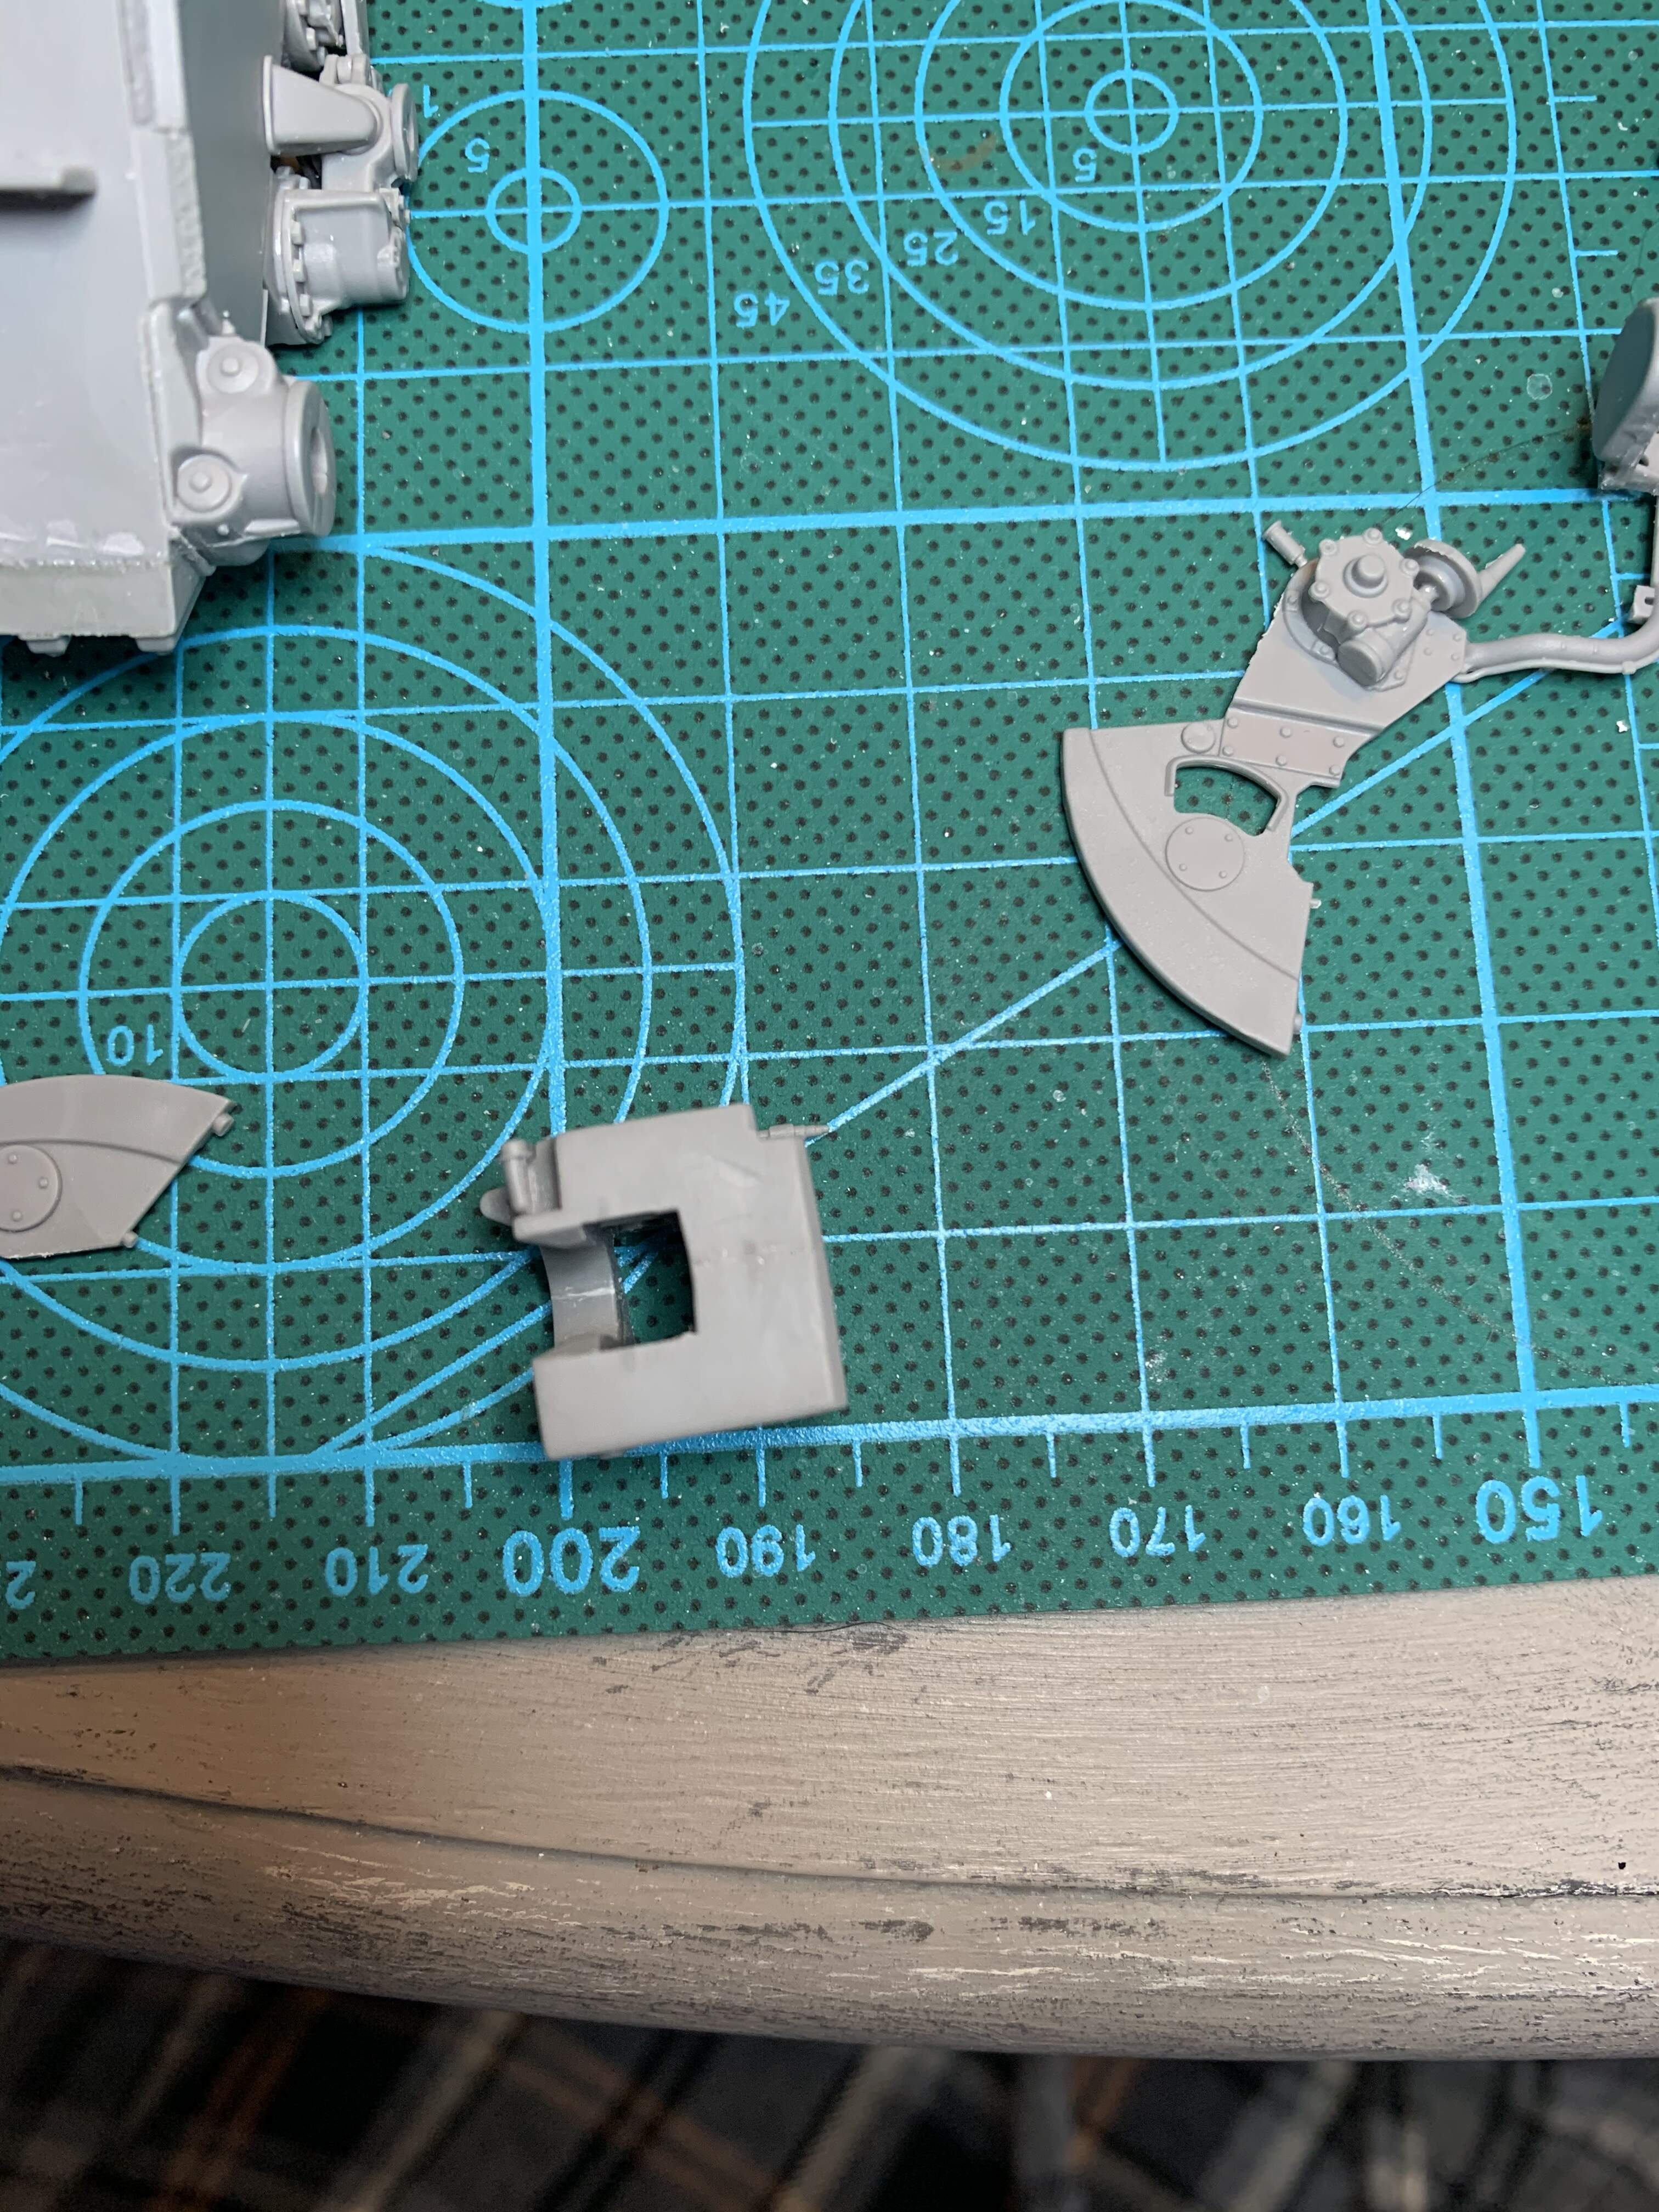
Rest of turret
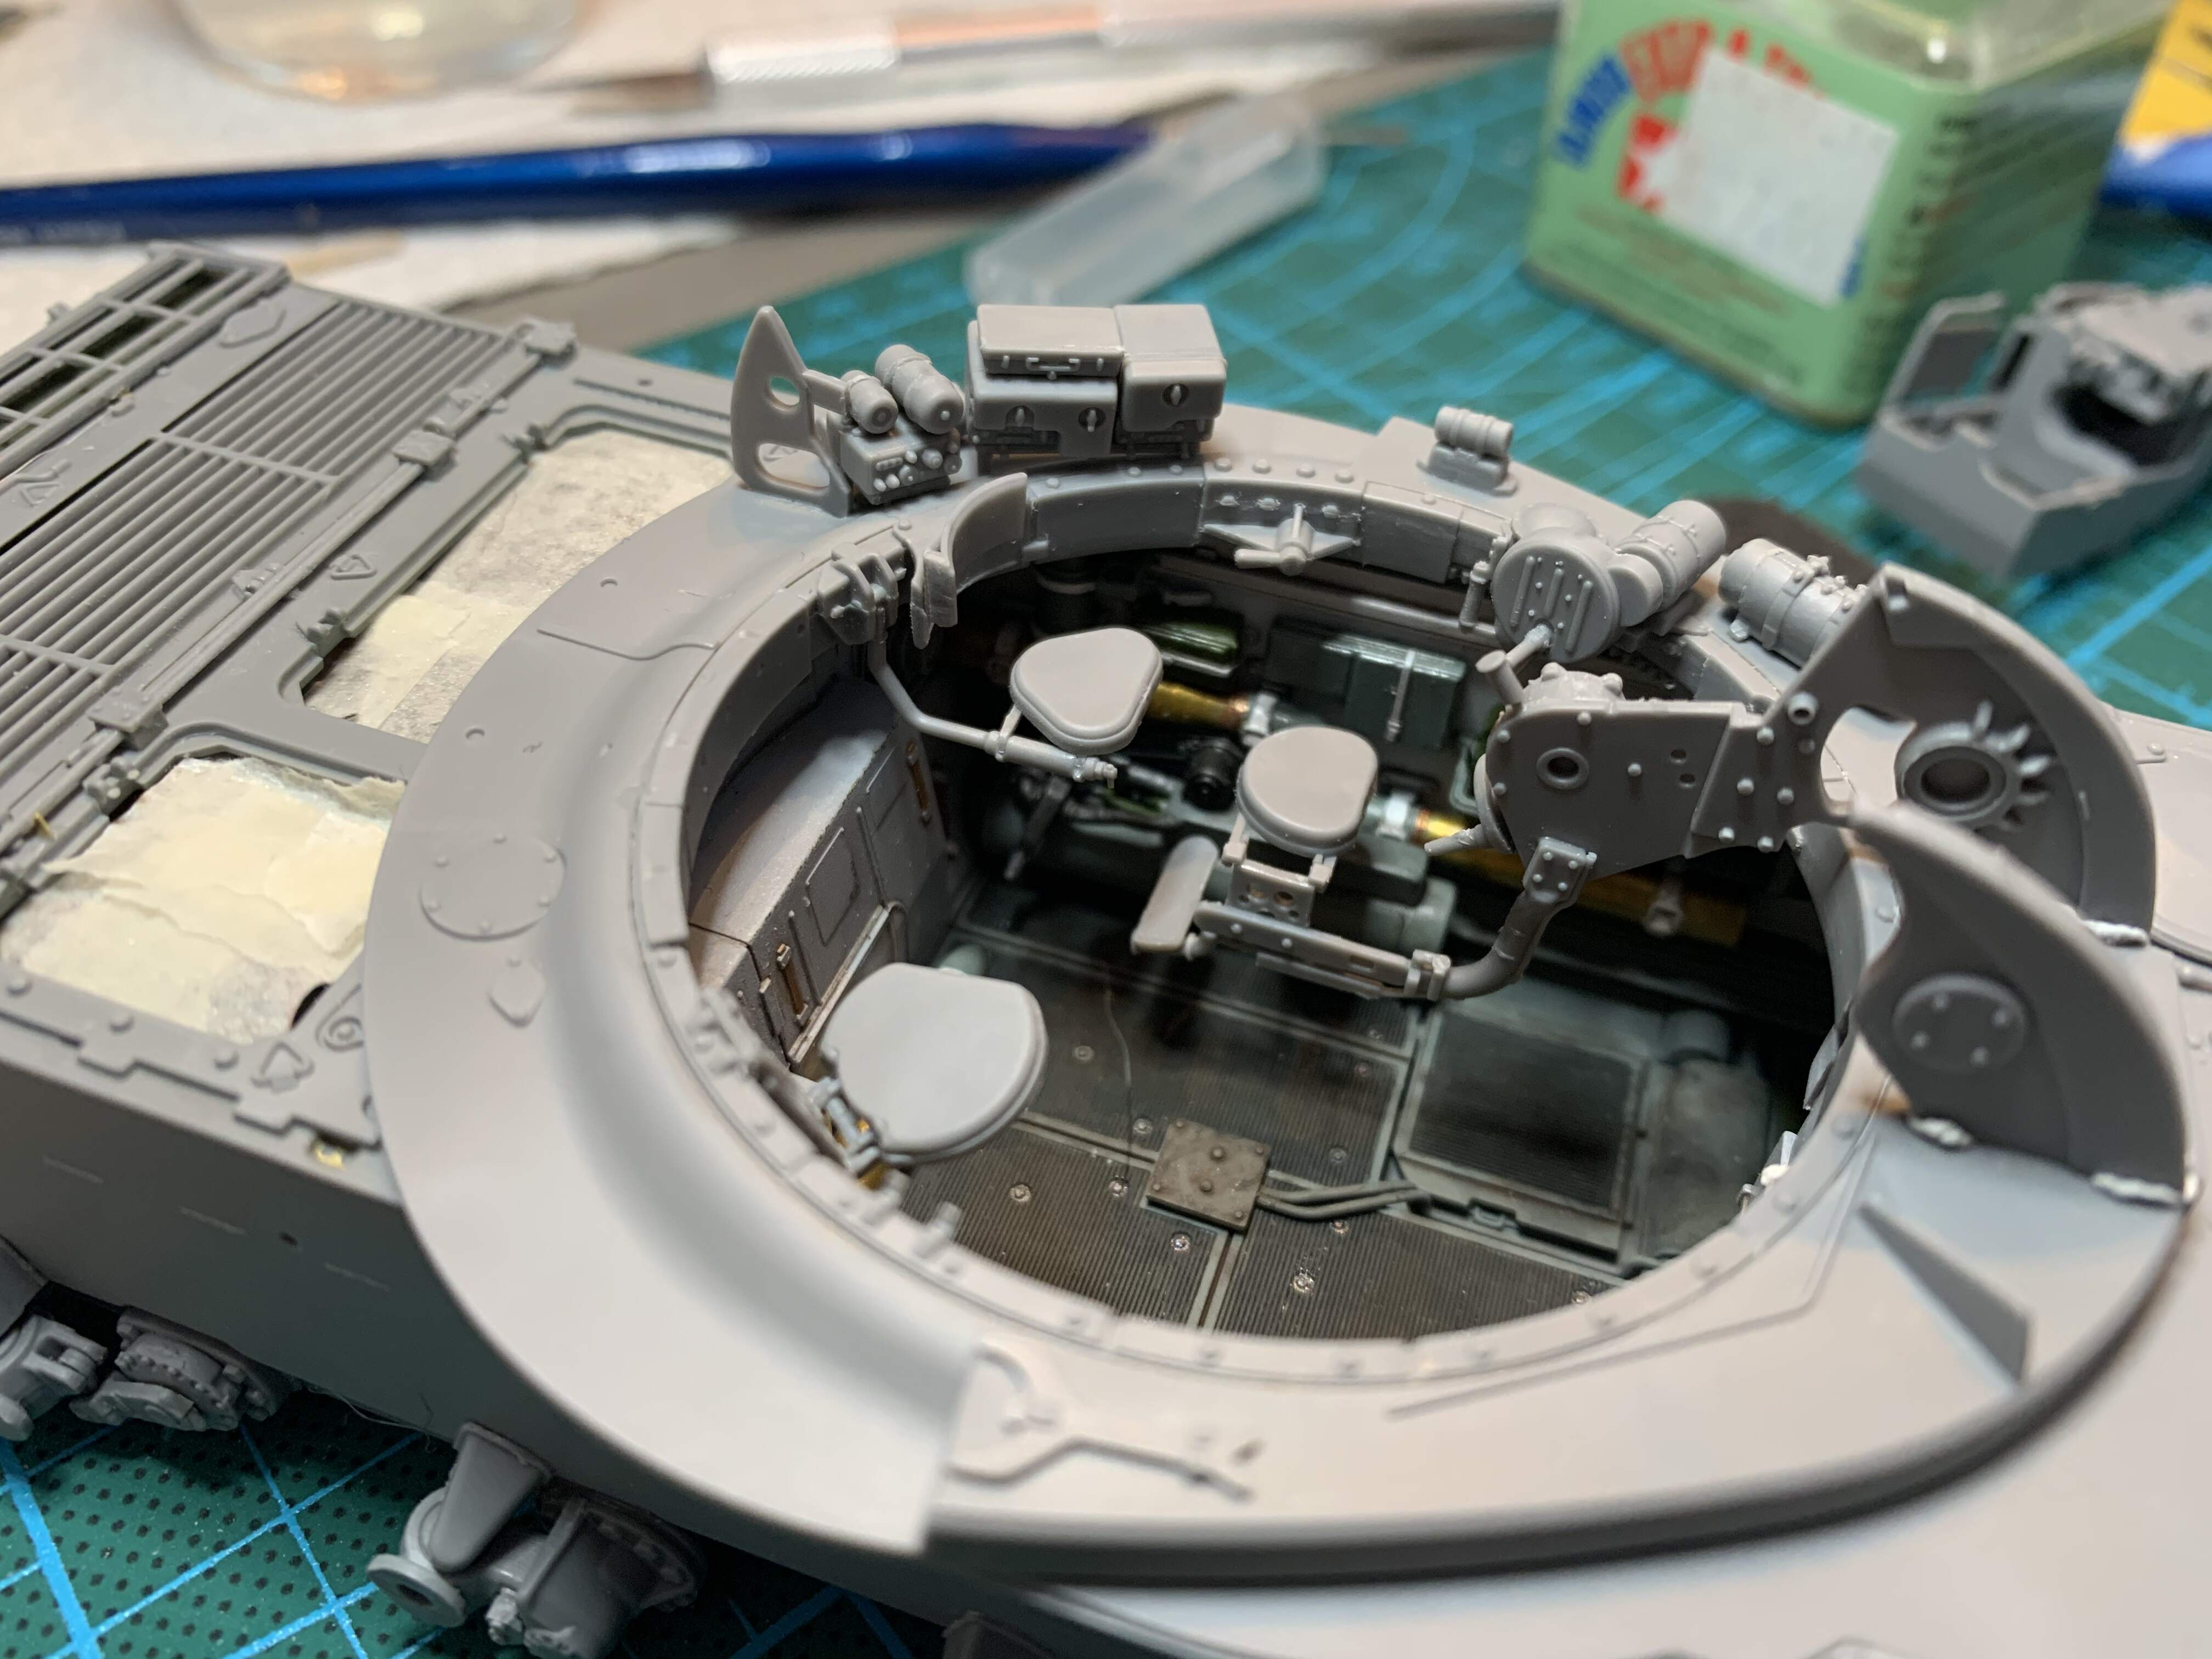
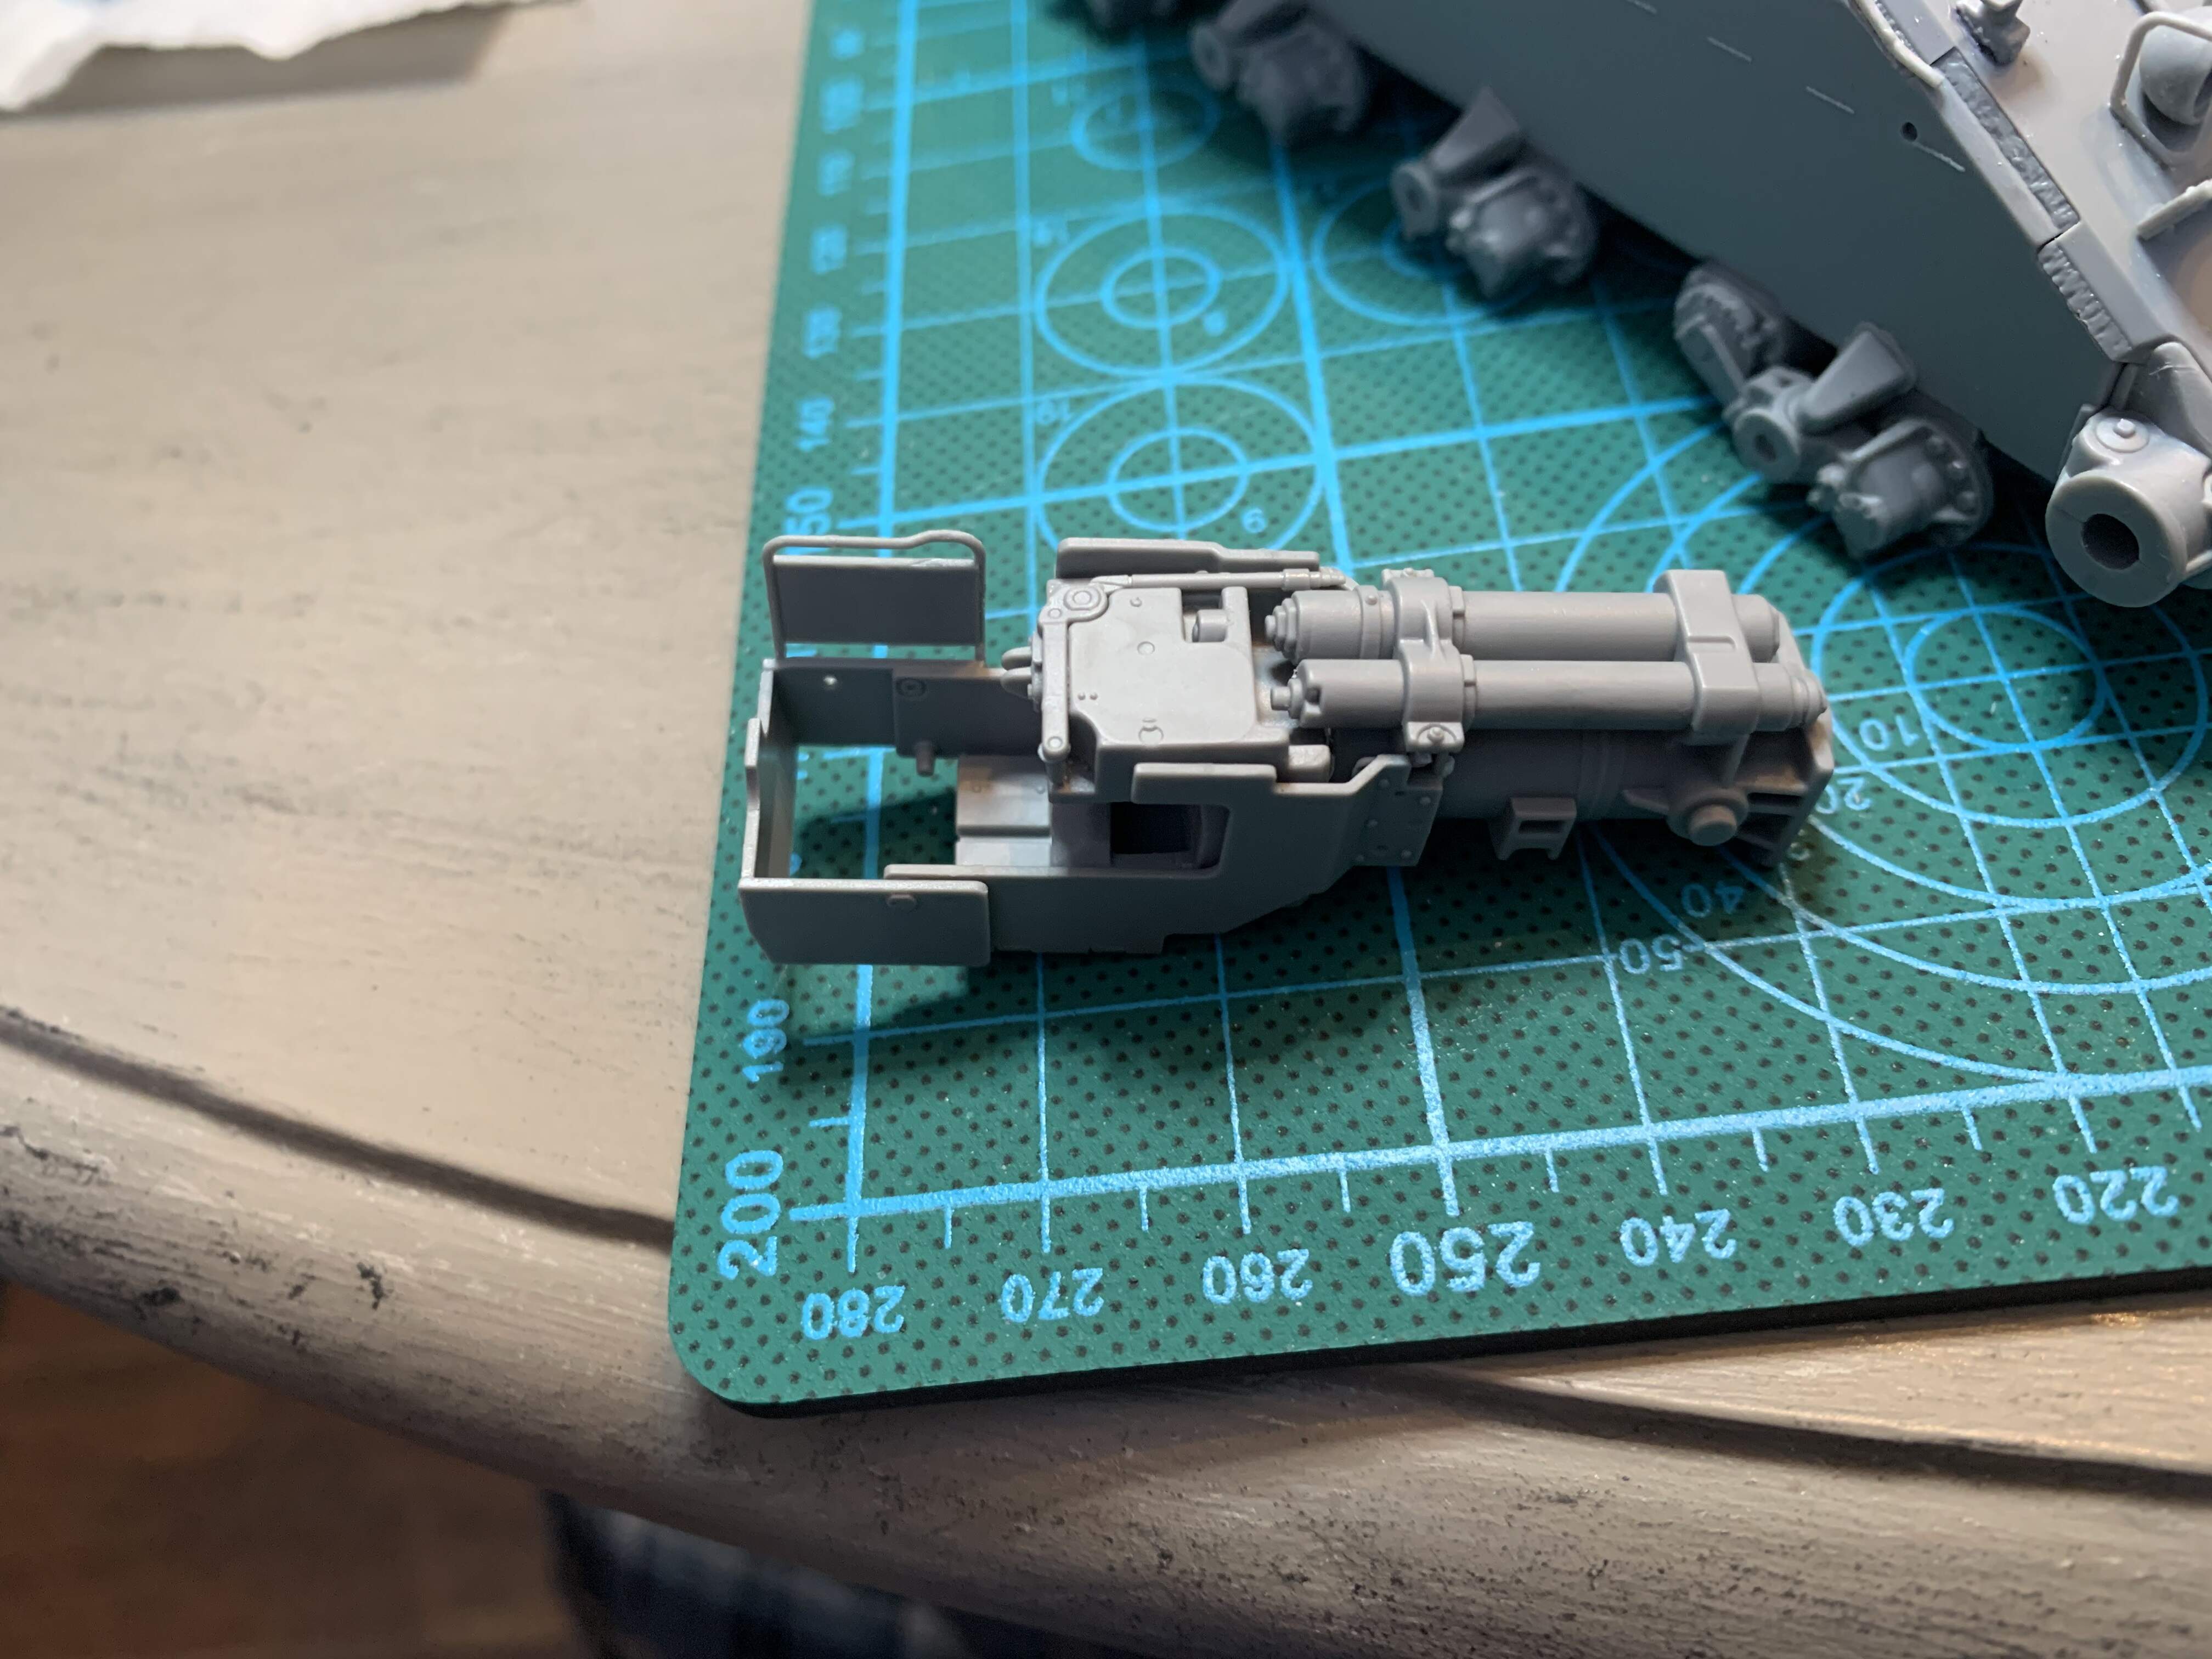
Up next is the turret top half, gunners sight, and coaxial mg
6 Likes
Really nice work!
Cant wait to see the rest of the interior come together.
1 Like